GLOBAL AIRWORKS COCKPIT DOOR SURVEILLANCE SYSTEM … · AIRCRAFT MAINTENANCE MANUAL SUPPLEMENT...
33
MANUAL UPDATE GLOBAL AIRWORKS COCKPIT DOOR SURVEILLANCE SYSTEM (CDSS) INSTALLATION BOEING 737-300/-400/-500/-600/-700/-800/-900 AIRCRAFT MAINTENANCE MANUAL SUPPLEMENT DOC. NO.: AMM230096 REVISION C JAN 22, 2014
Transcript of GLOBAL AIRWORKS COCKPIT DOOR SURVEILLANCE SYSTEM … · AIRCRAFT MAINTENANCE MANUAL SUPPLEMENT...

MANUAL UPDATE
GLOBAL AIRWORKS COCKPIT DOOR SURVEILLANCE SYSTEM (CDSS) INSTALLATION
BOEING
737-300/-400/-500/-600/-700/-800/-900
AIRCRAFT MAINTENANCE MANUAL SUPPLEMENT
DOC. NO.: AMM230096
REVISION C JAN 22, 2014

B737-300/-400/-500/-600/-700/-800/-900 AIRCRAFT MAINTENANCE MANUAL SUPPLEMENT
AMM230096
REVISION RECORDPage 1
Jan 22/2014
REVISION RECORD Retain this record in front of the manual. Upon receipt of a revision, insert the revised pages in the manual; enter the revision number, date filed, and initial.
REVISION NUMBER REVISION DATE DATE FILED BY
Init ial Release Sep 02, 2004 Sep 02, 2004 Global AirWorks
Revision A Nov 08, 2004 Nov 08, 2004 Global AirWorks
Revision B Jun 21, 2010 Jun 21, 2010 Global AirWorks
Revision C Jan 22, 2014 Jan 22, 2014 Global AirWorks

B737-300/-400/-500/-600/-700/-800/-900 AIRCRAFT MAINTENANCE MANUAL SUPPLEMENT
AMM230096
SERVICE BULLETIN LISTPage 1
Jan 22/2014
SERVICE BULLETIN LIST
SERVICE BULLETIN DATE TITLE
DATE OF INCORPORATION
INTO MANUAL

B737-300/-400/-500/-600/-700/-800/-900 AIRCRAFT MAINTENANCE MANUAL SUPPLEMENT
AMM230096
LIST OF EFFECTIVE PAGESPage 1
Jan 22/2014
LIST OF EFFECTIVE PAGES
Subject Page Date Subject Page Date
Title Page --- Jan 22/14 23-76-00 801 Jan 22/14 802 Jan 22/14 Revision 1 Jan 22/14 803 Jan 22/14 Record 804 Jan 22/14 805 Jan 22/14 Service Bulletin List 1 Jan 22/14 806 Jan 22/14 807 Jan 22/14 List of Effective 1 Jan 22/14 Pages Table of Contents 1 Jan 22/14 Introduction 1 Jan 22/14 23-76-00 1 Jan 22/14 2 Jan 22/14 3 Jan 22/14 4 Jan 22/14 5 Jan 22/14 6 Jan 22/14 7 Jan 22/14 8 Jan 22/14 9 Jan 22/14 10 Jan 22/14 11 Jan 22/14 12 Jan 22/14 23-76-00 101 Jan 22/14 102 Jan 22/14 103 Jan 22/14 104 Jan 22/14 105 Jan 22/14 23-76-00 201 Jan 22/14 23-76-00 301 Jan 22/14 23-76-00 701 Jan 22/14

B737-300/-400/-500/-600/-700/-800/-900 AIRCRAFT MAINTENANCE MANUAL SUPPLEMENT
AMM230096
TABLE OF CONTENTSPage 1
Jan 22/2014
TABLE OF CONTENTS
Subject Page
Introduction .................................................................................................. 1 23-76-00
1. Description and Operation................................................................. 1
2. Removal/Installation.......................................................................... 101
3. Adjustment/Test ................................................................................ 201
4. Troubleshooting ................................................................................ 301
5. Cleaning ............................................................................................ 701
6. Inspection / Check ............................................................................ 801
B737-300/-400/-500/-600/-700/-800/-900 AIRCRAFT MAINTENANCE MANUAL SUPPLEMENT
AMM230096
INTRODUCTIONPage 1
Jan 22/2014
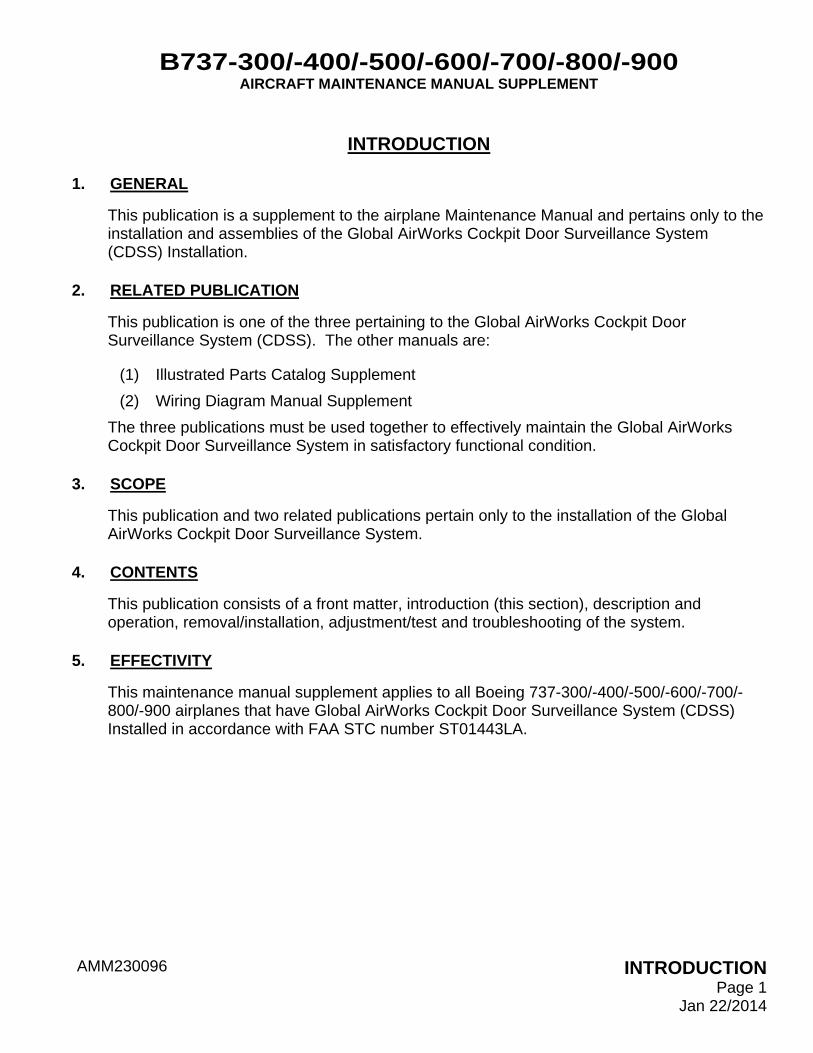
INTRODUCTION
1. GENERAL
This publication is a supplement to the airplane Maintenance Manual and pertains only to the installation and assemblies of the Global AirWorks Cockpit Door Surveillance System (CDSS) Installation.
2. RELATED PUBLICATION
This publication is one of the three pertaining to the Global AirWorks Cockpit Door Surveillance System (CDSS). The other manuals are:
(1) Illustrated Parts Catalog Supplement (2) Wiring Diagram Manual Supplement
The three publications must be used together to effectively maintain the Global AirWorks Cockpit Door Surveillance System in satisfactory functional condition.
3. SCOPE
This publication and two related publications pertain only to the installation of the Global AirWorks Cockpit Door Surveillance System.
4. CONTENTS
This publication consists of a front matter, introduction (this section), description and operation, removal/installation, adjustment/test and troubleshooting of the system.
5. EFFECTIVITY
This maintenance manual supplement applies to all Boeing 737-300/-400/-500/-600/-700/-800/-900 airplanes that have Global AirWorks Cockpit Door Surveillance System (CDSS) Installed in accordance with FAA STC number ST01443LA.

B737-300/-400/-500/-600/-700/-800/-900 AIRCRAFT MAINTENANCE MANUAL SUPPLEMENT
AMM230096
23-76-00Page 1
Jan 22/2014
GLOBAL AIRWORKS CDSS SYSTEM – DESCRIPTION AND OPERATION
1. General Description (Ref. Fig 1)
A. The CDSS System allows the pilot and copilot to view video images of the area outside the cockpit door through a video monitor mounted on the cockpit P5 AFT overhead panel. Power to the CDSS System is controlled from an On-Off push-button switch also located on the AFT overhead panel.
B. Viewing camera selection is performed by touching the monitor screen to activate a selection menu and then touching the screen icon corresponding to the desired camera. The monitor screen goes blank after a pre-defined time period. Monitor brightness is controlled by repeatedly touching the desired brightness control icon on the screen. The CDSS System consists of the following components: (1) One 5.0 inch LCD monitor located on the cockpit P5 AFT overhead panel. (2) Three viewing cameras located outside the cockpit compartment. (3) One System Control Unit (SCU) located above the ceiling panel at STA 390.0
between stringers S-L2 and S-L3. (4) One system power On-Off switch located on the P5 AFT overhead panel. (5) One Fault Relay is added to the On-Off switch assembly located on the P5
overhead panel. (6) One 4.0 Amp circuit breaker labeled “CDSS” located on the P6-3 circuit breaker
panel. (7) One Cabin Ready switch located on the existing FWD cabin overhead EXIT sign
panel. (8) Six cable assemblies installed to interface controller, cameras, monitors, and
power. C. The CDSS monitor is mounted in the operational and visual field of view of the pilot.
The monitor is touch screen controlled to allow the pilot to select the viewing camera, one camera at a time. The monitor can display the location of the cameras.
D. The three cameras are mounted outside the flight crew compartment. One camera views down and aft and the others view sideways. The cameras have wide viewing angle.
E. The system is powered from the 28 VDC non-essential bus with an estimated current consumption of 4.0 amps. The On-Off switch allows the flight crew to turn on and off power to the CDSS system. The Fault Relay provides a “FAULT” indication to the On-Off switch for the SCU.
F. The Cabin Ready switch is located on the existing FWD cabin overhead EXIT sign panel. It is used by the flight attendant to inform the pilot that the cabin is ready for take-off or landing.

B737-300/-400/-500/-600/-700/-800/-900 AIRCRAFT MAINTENANCE MANUAL SUPPLEMENT
AMM230096
23-76-00Page 2
Jan 22/2014
CDSS System Simplified Schematic Diagram Figure 1

B737-300/-400/-500/-600/-700/-800/-900 AIRCRAFT MAINTENANCE MANUAL SUPPLEMENT
AMM230096
23-76-00Page 3
Jan 22/2014
2. General System Operation
A. To turn on power to the CDSS System, press and release the On-Off lighted switch located on the overhead panel. No legend on the switch is illuminated. To turn off the CDSS system, press and release the On-Off (non-illuminated) switch on the overhead panel. The legend "OFF” is then white illuminated. If the SCU detects a failure, a “FAULT” indication (amber illumination) will appear on the dark On-Off switch.
B. When the CDSS system is powered on, pilot will have 2 options to select the system operation mode: MANUAL or AUTO thru the touch screen LCD monitor. Manual mode allows the pilot to choose one camera at a time and AUTO mode shows all the cameras automatically.
C. LCD Monitor (Ref. Fig 2.1, 2.2 )
(1) The LCD monitor is powered by 12V DC input from the system control unit.
(2) To turn on the Monitor touch the screen once in any area. The monitor will turn on and the on-screen menu will be seen.
(3) There are two modes in which the system switcher can work: Automatic and Manual. Touch the “MANUAL” icon then select “SWITCHER” to choose the mode.
(4) Select AUTO mode allows the user to determine how long you want each camera to remain on the screen. Use the buttons “+” or “-" to increase or decrease the time. The time selected will show in the window to the left of the "+" button. The indicated number is in seconds. NOTE: Touch “AUTO” then touch “BACK” and the number shown on the
screen indicates the camera being shown and it will change as the other cameras are AUTO selected.
(5) Select MANUAL mode by touch the button “MANUAL” allows the pilot to manually determine which camera he would like to see.
D. Viewing Cameras (Ref. Fig 3)
(1) The three viewing cameras are powered by 12V DC input from the system control unit.
(2) When the CDSS system is on, the three viewing cameras start working immediately.
E. System Control Unit (SCU) (Ref. Fig 4)
(1) The System Control Unit (SCU) is located above the ceiling panel at STA 390.0 between stringers S-L2 and S-L3 and powered by the system On-Off switch 28V DC input from the cockpit overhead panel.

B737-300/-400/-500/-600/-700/-800/-900 AIRCRAFT MAINTENANCE MANUAL SUPPLEMENT
AMM230096
23-76-00Page 4
Jan 22/2014
(2) The SCU is responsible for feeding the power to the cameras and monitors and the video signal transferring from cameras to monitors.
F. System On-Off Switch (Ref. Fig 5)
(1) The system On-Off switch is located in the cockpit overhead panel. It allows the flight crew to enable/disable the whole CDSS system power.
G. Fault Relay (Ref. Fig 5)
(1) The fault relay is located in the cockpit overhead panel and is powered by the SCU Keyline connector.
(2) The FAULT relay provides an indication to the On-Off switch for the SCU. H. Circuit Breaker (Ref. Fig 6)
(1) One 4.0 Amp circuit breaker C9901 located in the P6-3 circuit breaker panel controls the power supply to the system.
I. Cabin Ready Switch (Ref. Fig 7)
(1) The Cabin Ready switch is located on the existing FWD cabin overhead EXIT sign panel.
(2) The cabin ready switch is a push-button switch and will be green illuminated after the flight attendant press and release it. The red legend “CABIN READY” will be shown on the monitor inside the cockpit to inform the pilot that the cabin is ready for take-off or landing.
(3) By touching anywhere on the screen, the pilot confirms the cabin ready signal from the cabin and the cabin ready switch will then extinguish.

B737-300/-400/-500/-600/-700/-800/-900 AIRCRAFT MAINTENANCE MANUAL SUPPLEMENT
AMM230096
23-76-00Page 5
Jan 22/2014
A
Monitor Display Instl Kit, CDSS System
Figure 2.1

B737-300/-400/-500/-600/-700/-800/-900 AIRCRAFT MAINTENANCE MANUAL SUPPLEMENT
AMM230096
23-76-00Page 6
Jan 22/2014
A
PANELMONITOR MOUNTING
MONITOR
(EXISTING PANEL)
VIEW LOOKING UP AT P5 AFT OVERHEAD PANEL
Monitor Display Instl Kit, CDSS System
Figure 2.2

B737-300/-400/-500/-600/-700/-800/-900 AIRCRAFT MAINTENANCE MANUAL SUPPLEMENT
AMM230096
23-76-00Page 7
Jan 22/2014
CAMERA NO. 1A
CAMERA NO. 3
CAMERA NO. 2 FOR 737-600/700/800/900
CAMERA NO. 2 FOR 737-400
MOUNTING DOUBLER
CAMERA
A
(CEILING PANEL)
Camera Instl Kit, CDSS System
Figure 3

B737-300/-400/-500/-600/-700/-800/-900 AIRCRAFT MAINTENANCE MANUAL SUPPLEMENT
AMM230096
23-76-00Page 8
Jan 22/2014
A
A
SYSTEM CONTROL UNIT
DOUBLER ASSY
GROUNDINGPLATE
S-L2
S-L3
System Control Unit Instl Kit, CDSS System
Figure 4

B737-300/-400/-500/-600/-700/-800/-900 AIRCRAFT MAINTENANCE MANUAL SUPPLEMENT
AMM230096
23-76-00Page 9
Jan 22/2014
A
A
(AFT OVERHEAD P5 PANEL)
CDSS
ON-OFF SWITCH
On-Off Switch MOD Kit, CDSS System
Figure 5

B737-300/-400/-500/-600/-700/-800/-900 AIRCRAFT MAINTENANCE MANUAL SUPPLEMENT
AMM230096
23-76-00Page 10
Jan 22/2014
A
A
(P6-3 PANEL)
CDSS CIRCUIT BREAKER
Circuit Breaker MOD Kit, CDSS System
Figure 6
For 737-400 Only

B737-300/-400/-500/-600/-700/-800/-900 AIRCRAFT MAINTENANCE MANUAL SUPPLEMENT
AMM230096
23-76-00Page 11
Jan 22/2014
A
A
(P6-3 PANEL)
CDSS CIRCUIT BREAKER
Circuit Breaker MOD Kit, CDSS System
Figure 6A
For 737-600/700/800/900 Only

B737-300/-400/-500/-600/-700/-800/-900 AIRCRAFT MAINTENANCE MANUAL SUPPLEMENT
AMM230096
23-76-00Page 12
Jan 22/2014
A
A
EXCABIN READY SWITCH
Cabin Ready Switch MOD Kit, CDSS System
Figure 7

B737-300/-400/-500/-600/-700/-800/-900 AIRCRAFT MAINTENANCE MANUAL SUPPLEMENT
AMM230096
23-76-00Page 101
Jan 22/2014
GLOBAL AIRWORKS CDSS SYSTEM – REMOVAL/INSTALLATION
CAUTION
Insure all electrical power is removed from the Aircraft prior to removal/installation of any electrical equipment. Failure to remove electrical power can result in damage to equipment and injury to maintenance crew.
1. General
A. This section details maintenance instructions of removal and installation for the following components:
(1) LCD Monitor
(2) Viewing Cameras
(3) System Control Unit
(4) System On-Off Switch
(5) Fault Relay
(6) Cabin Ready Switch B. This section also details the procedures of the CDSS Deactivation. C. Refer to Global AirWorks CDSS System – Adjustment/Test page 201 when
performing the CDSS system test.
2. LCD Monitor (Ref. Fig 101 & 102)
A. Removal
(1) Open the circuit breaker C9901 at the P6-3 circuit breaker panel and attach “DO – NOT – CLOSE” tag.
(2) Gain access to the cockpit P5 AFT overhead panel where the monitor is located.
(3) Disengage the D-Zus fasteners securing the monitor panel assembly.
(4) Remove and retain the four screws and washers securing the monitor to the monitor panel assembly.

B737-300/-400/-500/-600/-700/-800/-900 AIRCRAFT MAINTENANCE MANUAL SUPPLEMENT
AMM230096
23-76-00Page 102
Jan 22/2014
(5) Disconnect the electrical cable from the monitor connector form the monitor cable assembly.
(6) Remove the monitor assembly. B. Installation
(1) Verify the circuit breaker C9901 at the P6-3 circuit breaker panel is open and tagged.
(2) Install monitor assembly to the mounting panel assembly using the hardware retained from the removal procedure.
(3) Install the electrical cable connector to the monitor cable assembly connector.
(4) Install the monitor panel assembly back to its original location using the D-Zus fasteners.
(5) Perform the CDSS system test (ref. 23-76-00 Adjustment/Test).
3. Viewing Cameras (Ref. Fig 103)
A. Removal
(1) Open the circuit breaker C9901 at P6-3 circuit breaker panel and attach “DO – NOT – CLOSE” tag.
(2) Remove the ceiling panel where the camera is installed.
(3) Disconnect and secure cable connector from the camera.
(4) Support the camera to remove and retain the four (4) screws and washers securing the camera to the Mounting Doubler and ceiling panel.
B. Installation
(1) Verify the circuit breaker C9901 at P6-3 circuit breaker panel is open and tagged.
(2) Position and secure the camera to the ceiling panel and Mounting Doubler using the hardware retained from the removal procedure.
(3) Install the electrical cable connector to the camera.
(4) Install the ceiling panel.
(5) Perform the CDSS system test (ref. 23-76-00 Adjustment/Test).

B737-300/-400/-500/-600/-700/-800/-900 AIRCRAFT MAINTENANCE MANUAL SUPPLEMENT
AMM230096
23-76-00Page 103
Jan 22/2014
4. System Control Unit (Ref. Fig 4)
A. Removal
(1) Open the circuit breaker C9901 at the P6-3 circuit breaker panel and attach “DO – NOT – CLOSE” tag.
(2) Gain access to the STA 390.0 above the ceiling panel where the system control unit is located. It is mounted to the stringer between S-L2 and S-L3.
(3) Disconnect all electrical cable connectors from the control unit.
(4) Remove and retain four (4) screws and washers securing the system control unit to the mounting plate assembly.
(5) Store grounding plates.
(6) Remove the system control unit. B. Installation
(1) Verify the circuit breaker C9901 at the P6-3 circuit breaker panel is open and tagged.
(2) Install the system control unit and the grounding plates to the mounting plate assembly using the screws and washers retained from the removal procedure.
(3) Install all electrical cable connectors to the system control unit.
(4) Perform the CDSS system test (ref. 23-76-00 Adjustment/Test).
5. On-Off Switch (Ref. Fig 5)
A. Removal
(1) Open the circuit breaker C9901 at the P6-3 circuit breaker panel and attach “DO – NOT – CLOSE” tag.
(2) Gain access to the cockpit P5 AFT overhead panel where the On-Off switch is located.
(3) Disengage the D-Zus fasteners securing the ON/OFF panel assembly.
(4) Disconnect the electrical cable connector from the On-Off switch.
(5) Pull out the ON/OFF switch panel assembly.

B737-300/-400/-500/-600/-700/-800/-900 AIRCRAFT MAINTENANCE MANUAL SUPPLEMENT
AMM230096
23-76-00Page 104
Jan 22/2014
B. Installation
(1) Verify the circuit breaker C9901 at the P6-3 circuit breaker panel is open and tagged.
(2) Locate the On-Off switch panel assembly to the existing panel.
(3) Connect the cable connector to the On-Off switch connector.
(4) Install the existing panel back to its original location using the D-Zus fasteners retained from the removal procedure.
(5) Perform the CDSS system test (ref. 23-76-00 Adjustment/Test).
6. Fault Relay (Ref. Fig 105)
A. Removal
(1) Open the circuit breaker C9901 at the P6-3 circuit breaker panel and attach “DO – NOT – CLOSE” tag.
(2) Gain access to the cockpit P5 overhead panel where the On-Off switch is located.
(3) Disengage the D-Zus fasteners securing the ON/OFF panel assembly.
(4) Remove the existing panel.
(5) Remove and retain the two (2) nuts and washers securing the fault relay to the relay socket.
(6) Disconnect the fault relay from the cable assembly relay socket. B. Installation
(1) Verify the circuit breaker C9901 at the P6-3 circuit breaker panel is open and tagged.
(2) Connect the fault relay to the cable assembly relay socket using the two (2) nuts and washers retained from the removal procedure.
(3) Install the electrical cable assembly to the fault relay.
(4) Install the existing panel back to the original location using the D-Zus fasteners retained from the removal procedure.
(5) Perform the CDSS system test (ref. 23-76-00 Adjustment/Test).

B737-300/-400/-500/-600/-700/-800/-900 AIRCRAFT MAINTENANCE MANUAL SUPPLEMENT
AMM230096
23-76-00Page 105
Jan 22/2014
7. Cabin Ready Switch (Ref. Fig 106)
A. Removal
(1) Open the circuit breaker C9901 at the P6-3 circuit breaker panel and attach “DO – NOT – CLOSE” tag.
(2) Gain access to the existing exit sign panel at STA 332.63. where cabin ready switch is located
(3) Remove and retain the existing exit sign panel.
(4) Remove and retain the screw securing the Doubler plate to the existing panel
(5) Remove the button and switch body from the Doubler. B. Installation
(1) Verify the circuit breaker C9901 at the P6-3 circuit breaker panel is open and tagged.
(2) Install the switch body to the Doubler
(3) Install the Doubler plate and body switch back to its original location using the screw retained from the removal procedure
(4) Perform the CDSS system test (ref. 23-76-00 Adjustment/Test).
8. CDSS Deactivation
A. Pull CDSS PWR C9901 (at the P6-3 panel) and secure with red safety collar. B. Mark C/B Panel at same location with gray INOP label. C. Cover CDSS ON/OFF switch on pilot’s O/H (P5) panel with gray INOP label.
NOTE: DO NOT PLACE LABEL ON SCREEN. D. Place gray INOP label on the top edge of the monitor. E. Return aircraft to serviceable condition.

B737-300/-400/-500/-600/-700/-800/-900 AIRCRAFT MAINTENANCE MANUAL SUPPLEMENT
AMM230096
23-76-00Page 201
Jan 22/2014
GLOBAL AIRWORKS CDSS SYSTEM – ADJUSTMENT/TEST
1. General
A. This procedure is for testing the functionality of the Global AirWorks CDSS system installation.
2. CDSS System Test
A. Preparation for test
(1) Make sure the circuit breaker C9901 at the P6-3 circuit breaker panel is closed.
(2) The functional test should be done with the aircraft powered. The CDSS System is independent of other systems operation and is basically a standalone system.
B. CDSS System Operation Test
(1) Verify the legend “OFF” On the On-Off switch is white illuminated before applying power to the CDSS system.
(2) Apply power to the CDSS system by pressing the On-Off switch on the Overhead Panel.
(3) Verify that the On-Off switch does not illuminate.
(4) Turn on the monitor
(5) Select AUTO and Manual mode respectively to see if the picture is showing correctly and clearly.
NOTE: For the detail operation procedure of the monitor, refer to Global AirWorks CDSS System – Description and Operation.
(6) If the amber FAULT light illuminates, reset the On-Off switch to re-power the CDSS system. The amber light should extinguish. Otherwise, refer to the Global AirWorks CDSS System – Troubleshooting within this manual

B737-300/-400/-500/-600/-700/-800/-900 AIRCRAFT MAINTENANCE MANUAL SUPPLEMENT
AMM230096
23-76-00Page 301
Jan 22/2014
GLOBAL AIRWORKS CDSS SYSTEM – TROUBLESHOOTING
1. General
A. The following troubleshooting is provided for quick reference. It should be noted that not all failure causes may be listed.
DISCREPANCY PROBABLE CAUSES
No white OFF light on when the system is off
a. Defective On-Off switch.
b. Defective cable wiring.
c. Circuit breaker open/defective.
d. Defective system control unit.
e. Defective fault relay.
The On-Off switch is not dark when the system is on
a. Defective On-Off switch.
b. Defective system control unit.
c. Defective cable wiring.
d. Defective fault relay.
The amber FAULT light is on a. Defective monitor (e.g. backlight failure, monitor disconnected, touch screen failure)
b. Defective system control unit
c. Defective cameras
d. Defective On-Off switch
e. Defective cable wiring
B. In order to maintain the best performance of the CDSS system, it is recommended to replace the defective system components immediately after the defective component is determined.

B737-300/-400/-500/-600/-700/-800/-900 AIRCRAFT MAINTENANCE MANUAL SUPPLEMENT
AMM230096
23-76-00Page 701
Jan 22/2014
GLOBAL AIRWORKS CDSS SYSTEM – CLEANING
1. General
A. This section provides the general cleaning procedures to monitor screen surface and camera lens and cover.
2. Prepare the following items for cleaning process
A. Regular camera lens cleaning tissue or lint-free cloth. B. Industrial cleaner/solvent for cleaning the plastic panel proposes.
3. Cleaning procedures
A. If the camera lens and/or the monitor screen surface become dirty, gently blow on the lens to remove the dust and dirt, then wipe the lens and/or monitor screen surface with a camera lens tissue or lint-free cloth.
NOTE: Since the camera lens is protected by an outside clear plastic cover, the camera lens itself needs less maintenance than the outside cover. When the outside cover becomes dirty, follow step A, above, and use the industrial cleaner/solvent to clean the cover. Refer to AMM 23-76-00 page 102, section 3 for the camera removal procedures to remove the camera cover as needed.
CAUTION: Do not immerse the camera in water. Water will damage the electronic components.
CAUTION: Do not clean the camera with household cleaners or chemicals.

B737-300/-400/-500/-600/-700/-800/-900 AIRCRAFT MAINTENANCE MANUAL SUPPLEMENT
AMM230096
23-76-00Page 801
Jan 22/2014
GLOBAL AIRWORKS CDSS SYSTEM – INSPECTION / CHECK
1. General
A. This section provides the general inspection / check procedures to Global AirWorks CDSS System.
2. Items for Inspection / Check
A. Global AirWorks CDSS System consists of the following items which need to do Inspection / check regularly. The sample inspections of all components are shown on from page 802 to 807.
1. LCD Monitor 2. Camera 3. System Control Unit (SCU) 4. System On-Off Switch 5. Circuit Breaker 6. Cabin Ready Switch
3. Inspection / Check Schedule
The components of Global AirWorks CDSS System should do Inspection / Check on the following schedule.
Table 801
Activity Interval Cleaning Video Camera Housing Viewing Window Every 6 months
Installation Inspection CDSS Monitors Every 24 months
Installation Inspection CDSS Camera Every 24 months
Installation Inspection CDSS SCU Every 24 months
Installation Inspection CDSS On-Off Switch Every 24 months
Installation Inspection CDSS Circuit Breaker Every 24 months
Installation Inspection CDSS Cabin Ready Switch Every 24 months
Installation Inspection System Operational Test Every 12 months

B737-300/-400/-500/-600/-700/-800/-900 AIRCRAFT MAINTENANCE MANUAL SUPPLEMENT
AMM230096
23-76-00Page 802
Jan 22/2014
A
PANELMONITOR MOUNTING
MONITOR
(EXISTING PANEL)
VIEW LOOKING UP AT P5 AFT OVERHEAD PANEL
Table 802 Sample Inspection for Monitor Display Installation Kit, CDSS System
SUPPLEMENTAL STRUCTURAL INSPECTION REQUIREMENTS DESCRIPTION CDSS System Cockpit Monitor Display Installation Kit MODEL - SERIES Boeing 737-300/-400/-500/-600/-700/-800/-900 EFFECTIVITY
TASK DESCRIPTION INSPECTION METHOD INSPECTORS INITIALS Inspect Aircraft structure where component is attached Visual/Structural Inspect installation support(s) and mounting for component Visual/Structural Inspect Component Itself Visual/Structural Inspect component wire routing Visual
Note: (1) Perform inspection with an adequate light source to enhance visibility. The inspection area must be accessible and clean. Normal inspection aids, such as inspection mirrors, etc. are to be used as required.
(2) Cracked structure found during any inspection should be repaired prior to further flight, in accordance with the Boeing 737 Structural Repair Manuals.

B737-300/-400/-500/-600/-700/-800/-900 AIRCRAFT MAINTENANCE MANUAL SUPPLEMENT
AMM230096
23-76-00Page 803
Jan 22/2014
MOUNTING DOUBLER
CAMERA
A
CAMERA NO. 1A
(CEILING PANEL)
CAMERA NO. 3
CAMERA NO. 2 FOR 737-600/700/800/900
CAMERA NO. 2 FOR 737-400
Table 803 Sample Inspection for Camera Installation Kit, CDSS System
SUPPLEMENTAL STRUCTURAL INSPECTION REQUIREMENTS DESCRIPTION CDSS System Camera Installation Kit MODEL - SERIES Boeing 737-300/-400/-500/-600/-700/-800/-900 EFFECTIVITY
TASK DESCRIPTION INSPECTION METHOD INSPECTORS INITIALS Inspect Aircraft structure where component is attached Visual/Structural Inspect installation support(s) and mounting for component Visual/Structural Inspect Component Itself Visual/Structural Inspect component wire routing Visual
Note: (1) Perform inspection with an adequate light source to enhance visibility. The inspection area must be accessible and clean. Normal inspection aids, such as inspection mirrors, etc. are to be used as required.
(2) Cracked structure found during any inspection should be repaired prior to further flight, in accordance with the Boeing 737 Structural Repair Manuals.

B737-300/-400/-500/-600/-700/-800/-900 AIRCRAFT MAINTENANCE MANUAL SUPPLEMENT
AMM230096
23-76-00Page 804
Jan 22/2014
A
A
SYSTEM CONTROL UNIT
DOUBLER ASSY
GROUNDINGPLATE
S-L2
S-L3
Table 804 Sample Inspection for System Control Unit Installation Kit, CDSS System
SUPPLEMENTAL STRUCTURAL INSPECTION REQUIREMENTS DESCRIPTION CDSS System Control Unit Installation Kit MODEL - SERIES Boeing 737-300/-400/-500/-600/-700/-800/-900 EFFECTIVITY
TASK DESCRIPTION INSPECTION METHOD INSPECTORS INITIALS Inspect Aircraft structure where component is attached Visual/Structural Inspect installation support(s) and mounting for component Visual/Structural Inspect Component Itself Visual/Structural Inspect component wire routing Visual
Note: (1) Perform inspection with an adequate light source to enhance visibility. The inspection area must be accessible and clean. Normal inspection aids, such as inspection mirrors, etc. are to be used as required.
(2) Cracked structure found during any inspection should be repaired prior to further flight, in accordance with the Boeing 737 Structural Repair Manuals.

B737-300/-400/-500/-600/-700/-800/-900 AIRCRAFT MAINTENANCE MANUAL SUPPLEMENT
AMM230096
23-76-00Page 805
Jan 22/2014
A
A
(AFT OVERHEAD P5 PANEL)
CDSS
ON-OFF SWITCH
Table 805 Sample Inspection for On-Off Switch MOD Kit, CDSS System
SUPPLEMENTAL STRUCTURAL INSPECTION REQUIREMENTS DESCRIPTION CDSS System On-Off Switch Mod Kit MODEL - SERIES Boeing 737-300/-400/-500/-600/-700/-800/-900 EFFECTIVITY
TASK DESCRIPTION INSPECTION METHOD INSPECTORS INITIALS Inspect Aircraft structure where component is attached Visual/Structural Inspect installation support(s) and mounting for component Visual/Structural Inspect Component Itself Visual/Structural Inspect component wire routing Visual
Note: (1) Perform inspection with an adequate light source to enhance visibility. The inspection area must be accessible and clean. Normal inspection aids, such as inspection mirrors, etc. are to be used as required.
(2) Cracked structure found during any inspection should be repaired prior to further flight, in accordance with the Boeing 737 Structural Repair Manuals.

B737-300/-400/-500/-600/-700/-800/-900 AIRCRAFT MAINTENANCE MANUAL SUPPLEMENT
AMM230096
23-76-00Page 806
Jan 22/2014
A
A (P6-3 PA
CDSS CIRCUIT BREAKER
(for 737-300/400/500 only)
A(P6-3
CDSS CIRCUIT BREAKER
(for 737-600/700/800/900 only)
Table 806 Sample Inspection for Circuit Breaker MOD Kit, CDSS System
SUPPLEMENTAL STRUCTURAL INSPECTION REQUIREMENTS DESCRIPTION CDSS System Circuit Breaker Mod Kit MODEL - SERIES Boeing 737-300/-400/-500/-600/-700/-800/-900 EFFECTIVITY
TASK DESCRIPTION INSPECTION METHOD INSPECTORS INITIALS Inspect Aircraft structure where component is attached Visual/Structural Inspect installation support(s) and mounting for component Visual/Structural Inspect Component Itself Visual/Structural Inspect component wire routing Visual
Note: (1) Perform inspection with an adequate light source to enhance visibility. The inspection area must be accessible and clean. Normal inspection aids, such as inspection mirrors, etc. are to be used as required.
(2) Cracked structure found during any inspection should be repaired prior to further flight, in accordance with the Boeing 737 Structural Repair Manuals.
P6-3 PANEL P6-3 PANEL

B737-300/-400/-500/-600/-700/-800/-900 AIRCRAFT MAINTENANCE MANUAL SUPPLEMENT
AMM230096
23-76-00Page 807
Jan 22/2014
A
A
EXCABIN READY SWITCH
Table 807 Sample Inspection for CABIN READY MOD Kit, CDSS System
SUPPLEMENTAL STRUCTURAL INSPECTION REQUIREMENTS DESCRIPTION CDSS System Cabin Ready Mod Kit MODEL - SERIES Boeing 737-300/-400/-500/-600/-700/-800/-900 EFFECTIVITY
TASK DESCRIPTION INSPECTION METHOD INSPECTORS INITIALS Inspect Aircraft structure where component is attached Visual/Structural Inspect installation support(s) and mounting for component Visual/Structural Inspect Component Itself Visual/Structural Inspect component wire routing Visual
Note: (1) Perform inspection with an adequate light source to enhance visibility. The inspection area must be accessible and clean. Normal inspection aids, such as inspection mirrors, etc. are to be used as required.
(2) Cracked structure found during any inspection should be repaired prior to further flight, in accordance with the Boeing 737 Structural Repair Manuals.