Git, GitHub, and Version Control - Quantitative …...Git, GitHub, and Version Control Jesse Perla,...
18
Git, GitHub, and Version Control Jesse Perla, Thomas J. Sargent and John Stachurski May 14, 2020 1 Contents • Setup 2 • Basic Objects 3 • Individual Workflow 4 • Collaborative Work 5 • Collaboration via Pull Request 6 • Additional Resources and Troubleshooting 7 • Exercises 8 Co-authored with Arnav Sood An essential part of modern software engineering is using version control. We use version control because • Not all iterations on a file are perfect, and you may want to revert changes. • We want to be able to see who has changed what and how. • We want a uniform version scheme to do this between people and machines. • Concurrent editing on code is necessary for collaboration. • Version control is an essential part of creating reproducible research. In this lecture, we’ll discuss how to use Git and GitHub. 2 Setup 1. Make sure you create an account on GitHub.com. • If you are a student, be sure to use the GitHub Student Developer Pack. • Otherwise, see if you qualify for a free Non-Profit/Academic Plan. • These come with things like unlimited private repositories, testing support, etc. 1. Install git and the GitHub Desktop application. 2. Install git. 3. Install the GitHub Desktop application. 1
Transcript of Git, GitHub, and Version Control - Quantitative …...Git, GitHub, and Version Control Jesse Perla,...

Git, GitHub, and Version Control
Jesse Perla, Thomas J. Sargent and John Stachurski
May 14, 2020
1 Contents
• Setup 2• Basic Objects 3• Individual Workflow 4• Collaborative Work 5• Collaboration via Pull Request 6• Additional Resources and Troubleshooting 7• Exercises 8
Co-authored with Arnav Sood
An essential part of modern software engineering is using version control.
We use version control because
• Not all iterations on a file are perfect, and you may want to revert changes.• We want to be able to see who has changed what and how.• We want a uniform version scheme to do this between people and machines.• Concurrent editing on code is necessary for collaboration.• Version control is an essential part of creating reproducible research.
In this lecture, we’ll discuss how to use Git and GitHub.
2 Setup
1. Make sure you create an account on GitHub.com.
• If you are a student, be sure to use the GitHub Student Developer Pack.• Otherwise, see if you qualify for a free Non-Profit/Academic Plan.• These come with things like unlimited private repositories, testing support, etc.
1. Install git and the GitHub Desktop application.
2. Install git.
3. Install the GitHub Desktop application.
1
4. Optionally (but strongly recommended): On Windows, change the default line-endingby:
5. Opening a Windows/Powershell console, or the “Git Bash” installed in the previousstep.
6. Running the following
git config --global core.eol lfgit config --global core.autocrlf false
2.1 Git vs. GitHub vs. GitHub Desktop
To understand the relationship
• Git is an infrastructure for versioning and merging files (it is not specific to GitHub anddoes not even require an online server).
• GitHub provides an online service to coordinate working with Git repositories, and addssome additional features for managing projects.
• GitHub Desktop is just one of many GUI-based clients to make Git and GitHub easierto use.
Later, you may find yourself using alternatives
• GitHub is the market leader for open source projects and Julia, but there are other op-tions, e.g. GitLab and Bitbucket.
• Instead of the GitHub Desktop, you may directly use the Git command line, GitKraken,or use the Git functionality built into editors such as Atom or VS Code.
Since these lecture notes are intended to provide a minimal path to using the technologies,here we will conflate the workflow of these distinct products.
3 Basic Objects
3.1 Repositories
The fundamental object in GitHub is a repository (or “repo”) – this is the master directoryfor a project.
One example of a repo is the QuantEcon Expectations.jl package.
On the machine, a repo is a normal directory, along with a subdirectory called .git whichcontains the history of changes.
3.2 Commits
GitHub stores history as a sequence of changes to text, called commits.
Here is an example of a commit, which revises the style guide in a QuantEcon repo.
In particular, commits have the following features
• An ID (formally, an “SHA-1 hash”)• Content (i.e., a before and after state)
2
• Metadata (author, timestamp, commit message, etc.)
Note: It’s crucial to remember that what’s stored in a commit is only the actual changes youmake to text.
This is a key reason why git can store long and complicated histories without consuming mas-sive amounts of memory.
3.3 Common Files
In addition, each GitHub repository typically comes with a few standard text files
• A .gitignore file, which lists files/extensions/directories that GitHub shouldn’t tryto track (e.g., LaTeX compilation byproducts).
• A README.md file, which is a Markdown file which GitHub puts on the repository web-site.
• A LICENSE.txt file, which describes the terms under which the repository’s contentsare made available.
For an example of all three, see the Expectations.jl repo.
Of these, the README.md is the most important, as GitHub will display it as Markdownwhen accessing the repository online.
4 Individual Workflow
In this section, we’ll describe how to use GitHub to version your own projects.
Much of this will carry over to the collaborative section.
4.1 Creating a Repository
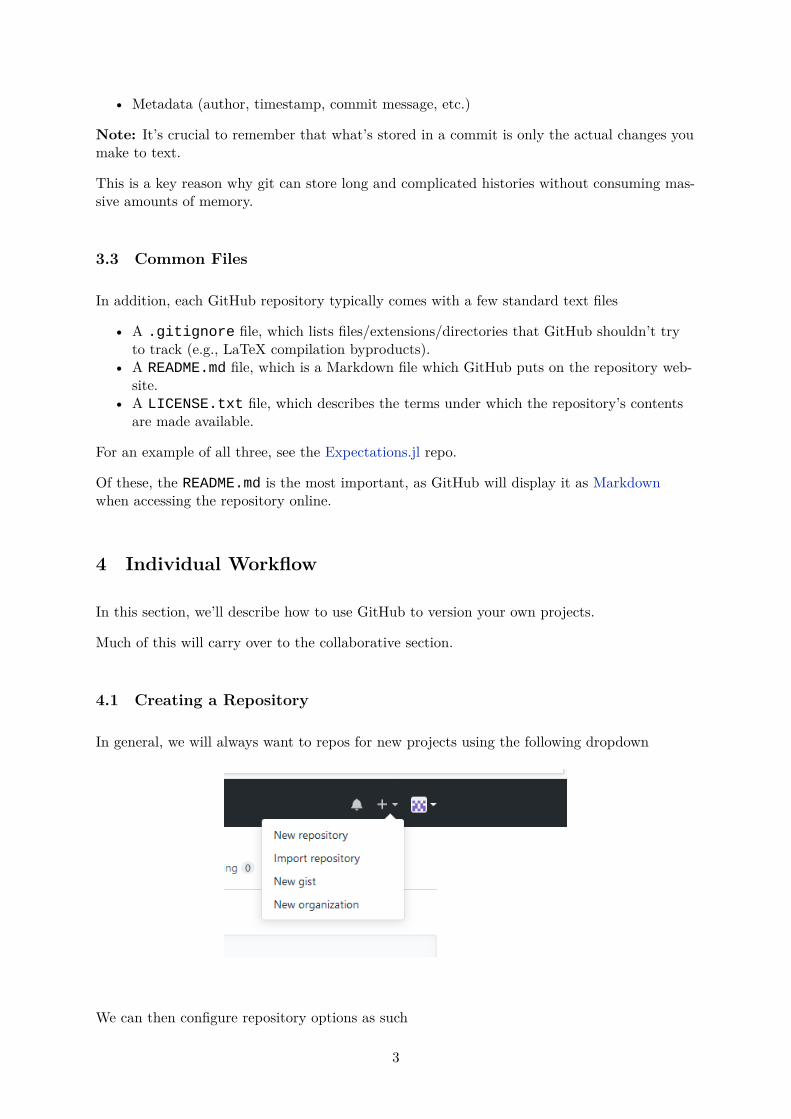
In general, we will always want to repos for new projects using the following dropdown
We can then configure repository options as such
3
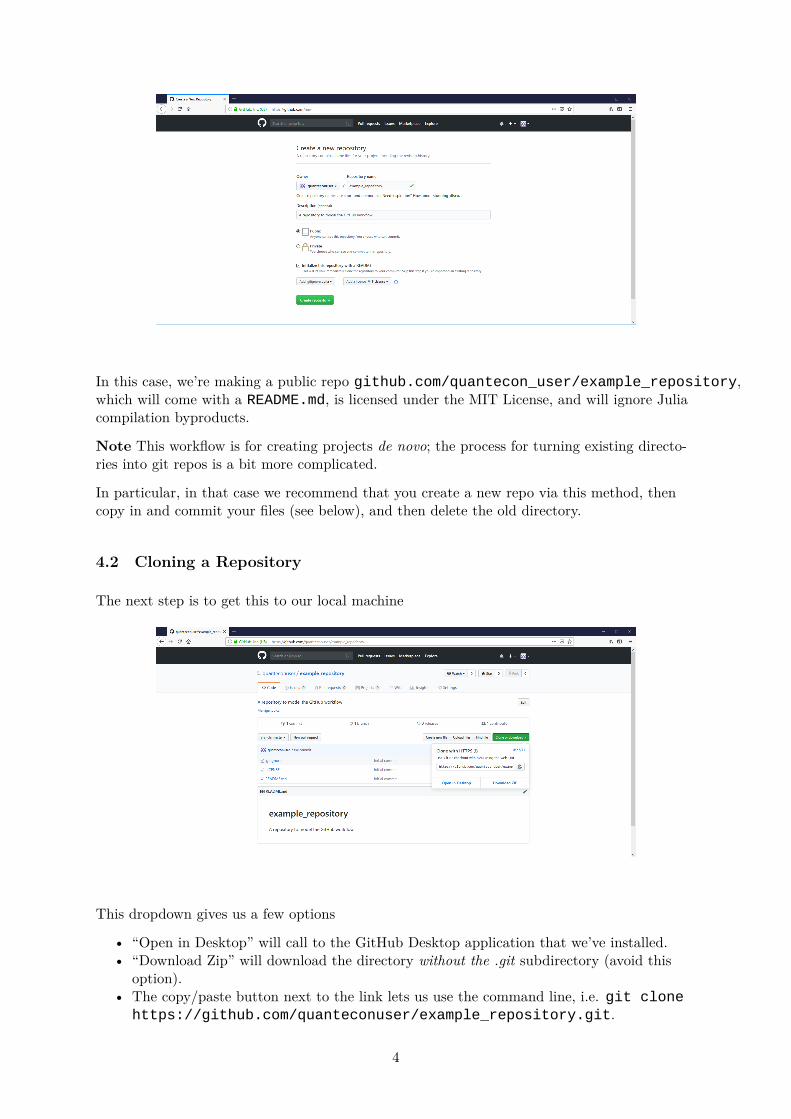
In this case, we’re making a public repo github.com/quantecon_user/example_repository,which will come with a README.md, is licensed under the MIT License, and will ignore Juliacompilation byproducts.
Note This workflow is for creating projects de novo; the process for turning existing directo-ries into git repos is a bit more complicated.
In particular, in that case we recommend that you create a new repo via this method, thencopy in and commit your files (see below), and then delete the old directory.
4.2 Cloning a Repository
The next step is to get this to our local machine
This dropdown gives us a few options
• “Open in Desktop” will call to the GitHub Desktop application that we’ve installed.• “Download Zip” will download the directory without the .git subdirectory (avoid this
option).• The copy/paste button next to the link lets us use the command line, i.e. git clone
https://github.com/quanteconuser/example_repository.git.
4
4.3 Making and Managing Changes
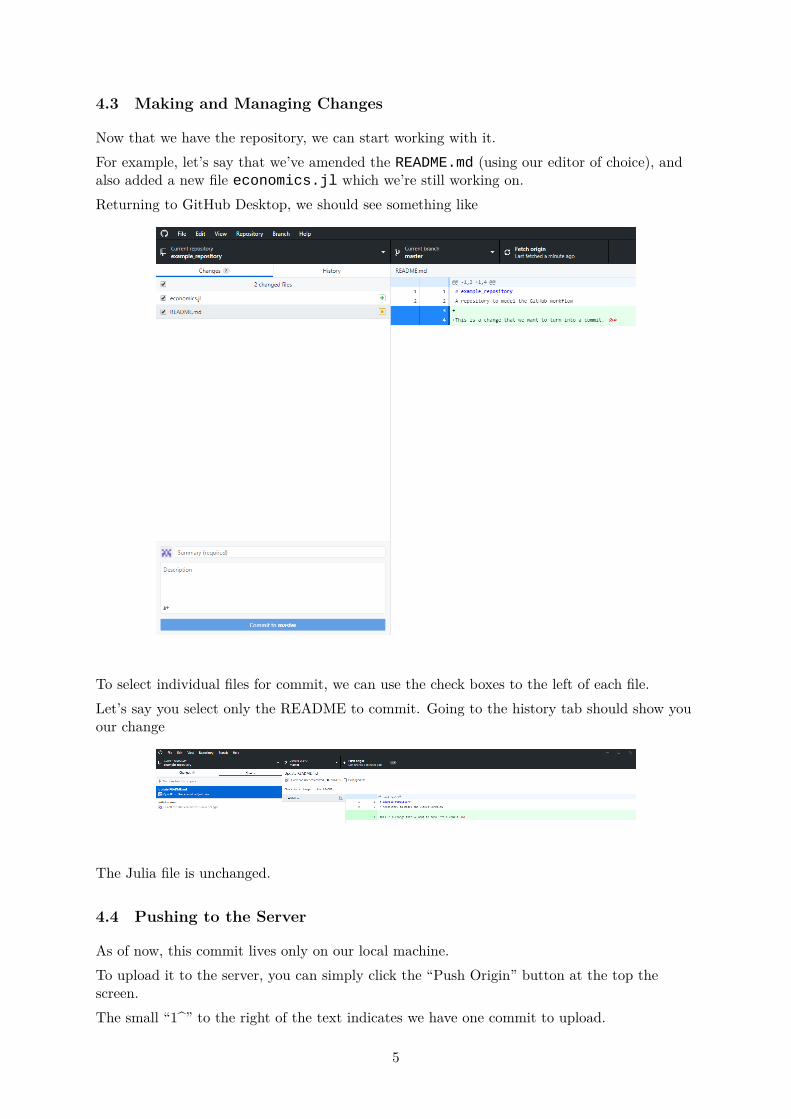
Now that we have the repository, we can start working with it.For example, let’s say that we’ve amended the README.md (using our editor of choice), andalso added a new file economics.jl which we’re still working on.Returning to GitHub Desktop, we should see something like
To select individual files for commit, we can use the check boxes to the left of each file.Let’s say you select only the README to commit. Going to the history tab should show youour change
The Julia file is unchanged.
4.4 Pushing to the Server
As of now, this commit lives only on our local machine.To upload it to the server, you can simply click the “Push Origin” button at the top thescreen.The small “1^” to the right of the text indicates we have one commit to upload.
5
4.5 Reading and Reverting History
As mentioned, one of the key features of GitHub is the ability to scan through history.
By clicking the “commits” tab on the repo front page, we see this page (as an example).
Clicking an individual commit gives us the difference view, (e.g., example commit).
Sometimes, however, we want to not only inspect what happened before, but reverse the com-mit.
• If you haven’t made the commit yet, just right-click the file in the “changes” tab and hit“discard changes” to reset the file to the last known commit.
• If you have made the commit but haven’t pushed to the server yet, go to the “history”tab as above, right click the commit and click “revert this commit.” This will create theinverse commit, shown below.
4.6 Working across Machines
Generally, you want to work on the same project but across multiple machines (e.g., a homelaptop and a lab workstation).
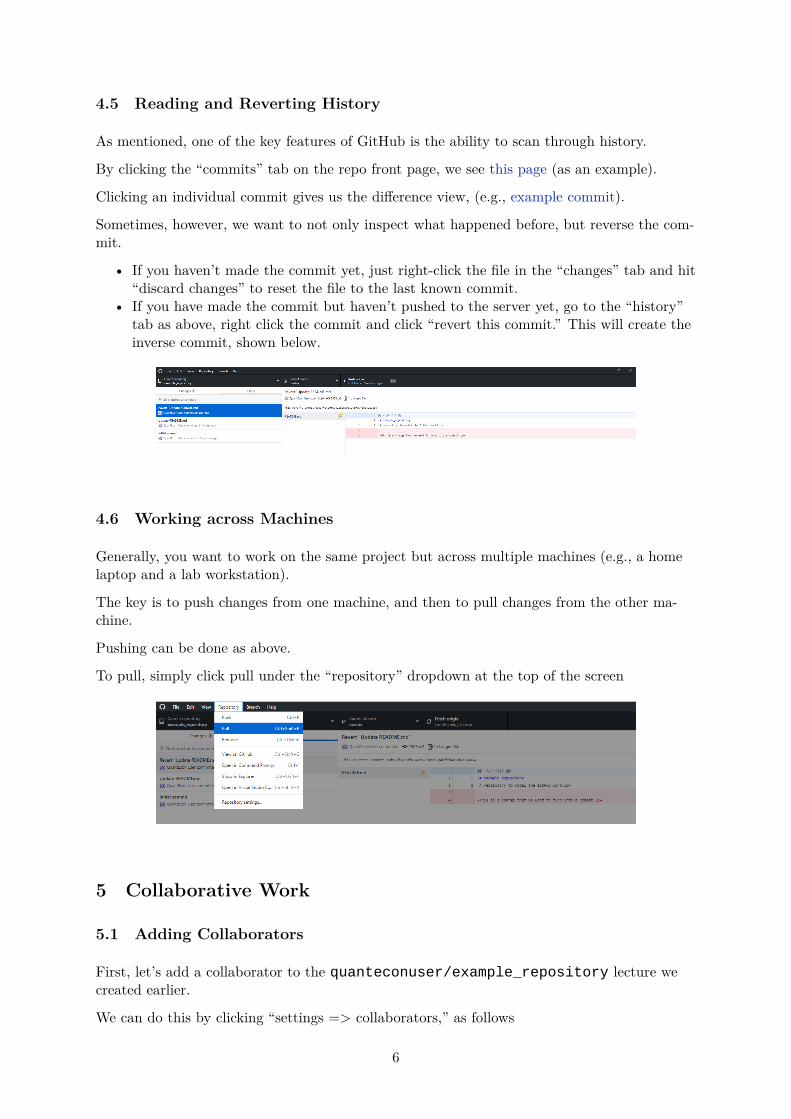
The key is to push changes from one machine, and then to pull changes from the other ma-chine.
Pushing can be done as above.
To pull, simply click pull under the “repository” dropdown at the top of the screen
5 Collaborative Work
5.1 Adding Collaborators
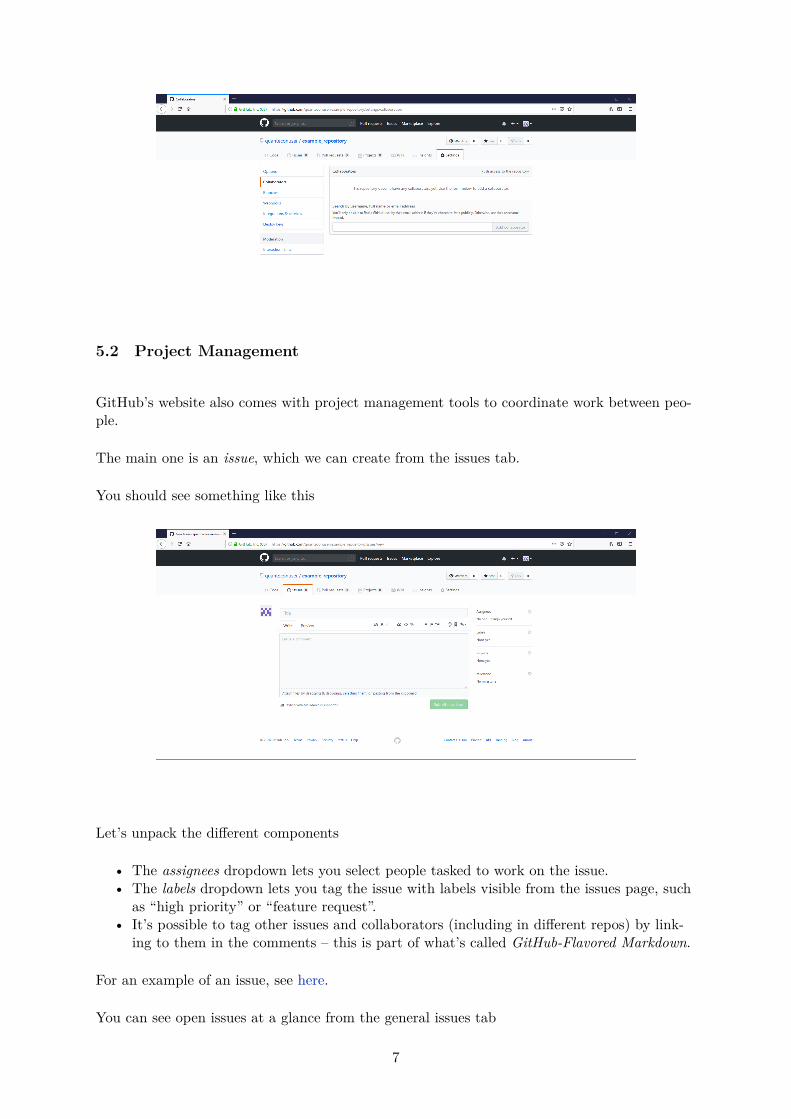
First, let’s add a collaborator to the quanteconuser/example_repository lecture wecreated earlier.
We can do this by clicking “settings => collaborators,” as follows
6
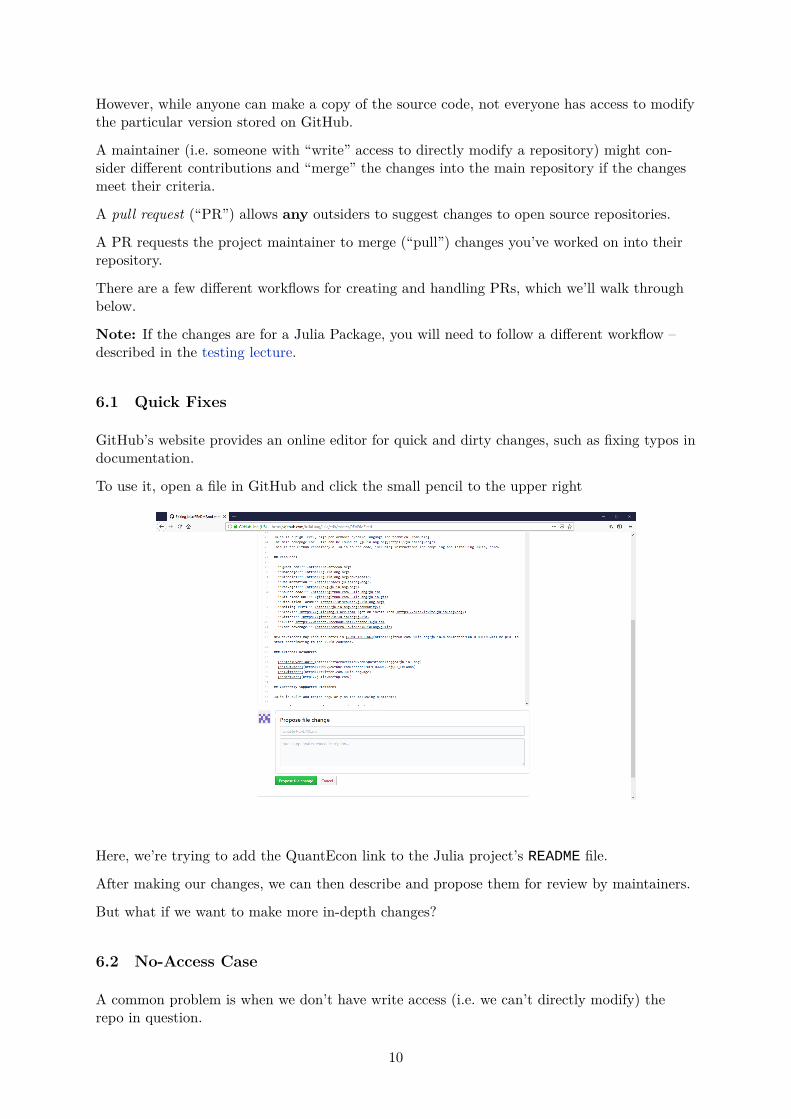
5.2 Project Management
GitHub’s website also comes with project management tools to coordinate work between peo-ple.
The main one is an issue, which we can create from the issues tab.
You should see something like this
Let’s unpack the different components
• The assignees dropdown lets you select people tasked to work on the issue.• The labels dropdown lets you tag the issue with labels visible from the issues page, such
as “high priority” or “feature request”.• It’s possible to tag other issues and collaborators (including in different repos) by link-
ing to them in the comments – this is part of what’s called GitHub-Flavored Markdown.
For an example of an issue, see here.
You can see open issues at a glance from the general issues tab
7

The checkboxes are common in GitHub to manage project tasks.
5.3 Reviewing Code
There are a few different ways to review people’s code in GitHub
• Whenever people push to a project you’re working on, you’ll receive an email notifica-tion.
• You can also review individual line items or commits by opening commits in the differ-ence view as above.
5.4 Merge Conflicts
Any project management tool needs to figure out how to reconcile conflicting changes be-tween people.
In GitHub, this event is called a “merge conflict,” and occurs whenever people make conflict-ing changes to the same line of code.
Note that this means that two people touching the same file is OK, so long as the differencesare compatible.
A common use case is when we try to push changes to the server, but someone else haspushed conflicting changes.
GitHub will give us the following window
8

• The warning symbol next to the file indicates the existence of a merge conflict.• The viewer tries to show us the discrepancy (I changed the word repository to repo, but
someone else tried to change it to “repo” with quotes).
To fix the conflict, we can go into a text editor (such as Atom)
Let’s say we click the first “use me” (to indicate that my changes should win out), and thensave the file.
Returning to GitHub Desktop gives us a pre-formed commit to accept
Clicking “commit to master” will let us push and pull from the server as normal.
6 Collaboration via Pull Request
One of the defining features of GitHub is that it is the dominant platform for open sourcecode, which anyone can access and use.
9
However, while anyone can make a copy of the source code, not everyone has access to modifythe particular version stored on GitHub.
A maintainer (i.e. someone with “write” access to directly modify a repository) might con-sider different contributions and “merge” the changes into the main repository if the changesmeet their criteria.
A pull request (“PR”) allows any outsiders to suggest changes to open source repositories.
A PR requests the project maintainer to merge (“pull”) changes you’ve worked on into theirrepository.
There are a few different workflows for creating and handling PRs, which we’ll walk throughbelow.
Note: If the changes are for a Julia Package, you will need to follow a different workflow –described in the testing lecture.
6.1 Quick Fixes
GitHub’s website provides an online editor for quick and dirty changes, such as fixing typos indocumentation.
To use it, open a file in GitHub and click the small pencil to the upper right
Here, we’re trying to add the QuantEcon link to the Julia project’s README file.
After making our changes, we can then describe and propose them for review by maintainers.
But what if we want to make more in-depth changes?
6.2 No-Access Case
A common problem is when we don’t have write access (i.e. we can’t directly modify) therepo in question.
10

In that case, click the “Fork” button that lives in the top-right of every repo’s main page
This will copy the repo into your own GitHub account.
For example, this repo is a fork of our original git setup.
Clone this fork to our desktop and work with it in exactly the same way as we would a repowe own (as the fork is in your account, you now have write access).
That is, click the “clone” button on our fork
You’ll see a new repo with the same name but different URL in your GitHub Desktop repolist, along with a special icon to indicate that it’s a fork
Commit some changes by selecting the files and writing a commit message
11
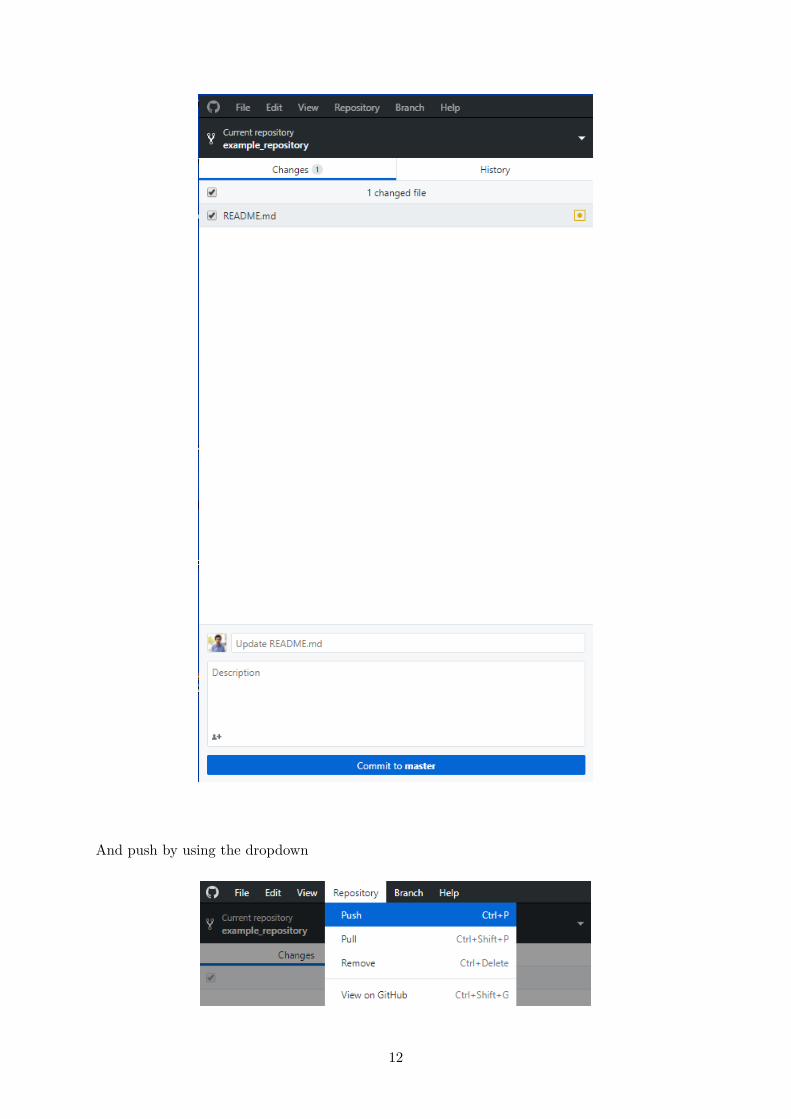
And push by using the dropdown
12
Below, for example, we’ve committed and pushed some changes to the fork that we want toupstream into the main repo
We should make sure that these changes are on the server (which we can get to by going tothe fork and clicking “commits”)
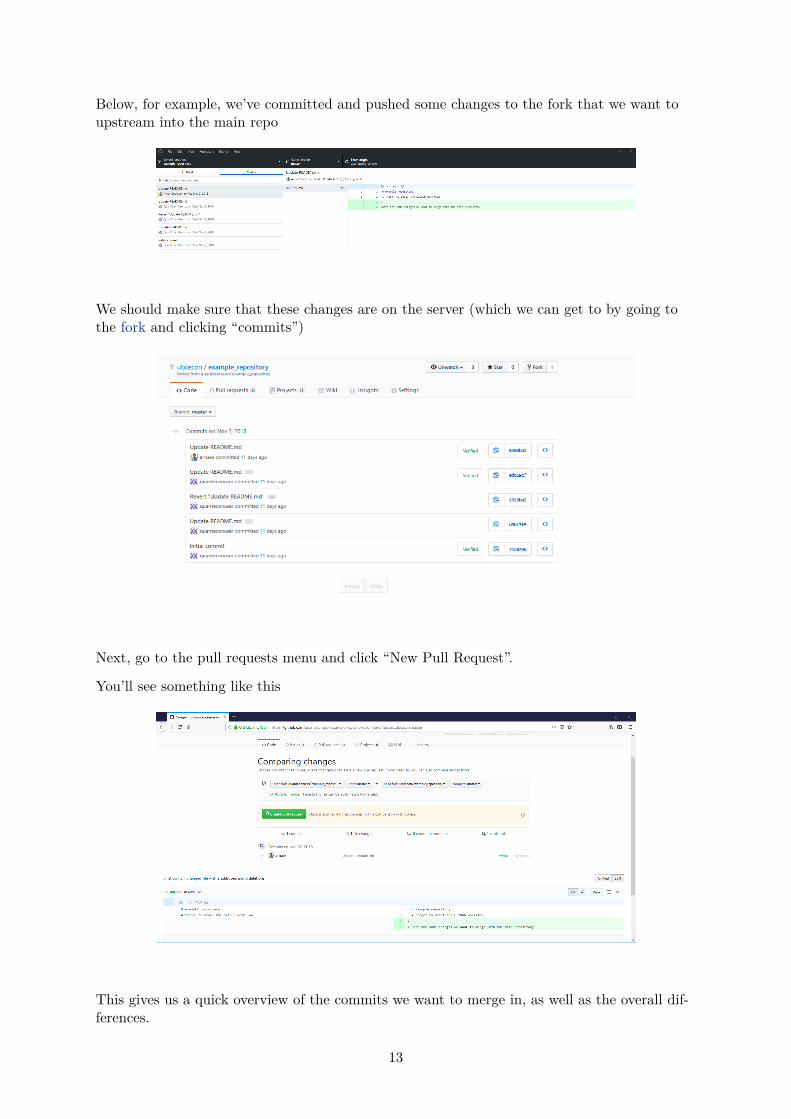
Next, go to the pull requests menu and click “New Pull Request”.
You’ll see something like this
This gives us a quick overview of the commits we want to merge in, as well as the overall dif-ferences.
13
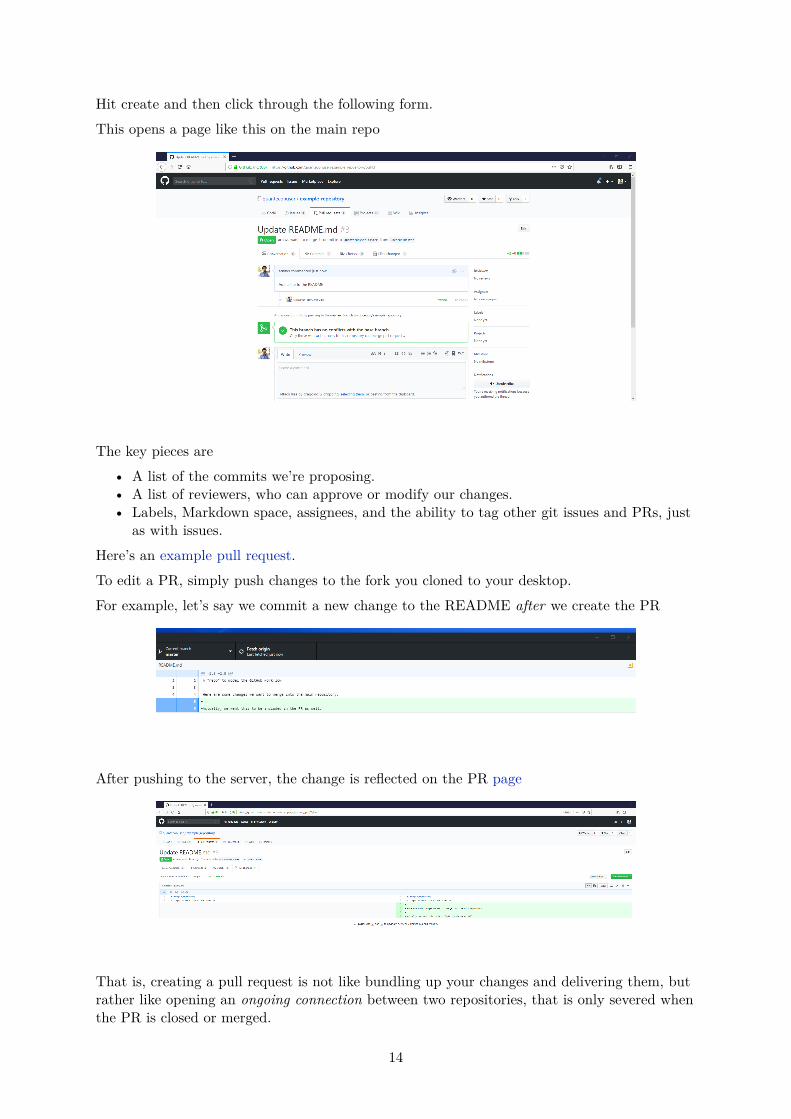
Hit create and then click through the following form.This opens a page like this on the main repo
The key pieces are• A list of the commits we’re proposing.• A list of reviewers, who can approve or modify our changes.• Labels, Markdown space, assignees, and the ability to tag other git issues and PRs, just
as with issues.Here’s an example pull request.To edit a PR, simply push changes to the fork you cloned to your desktop.For example, let’s say we commit a new change to the README after we create the PR
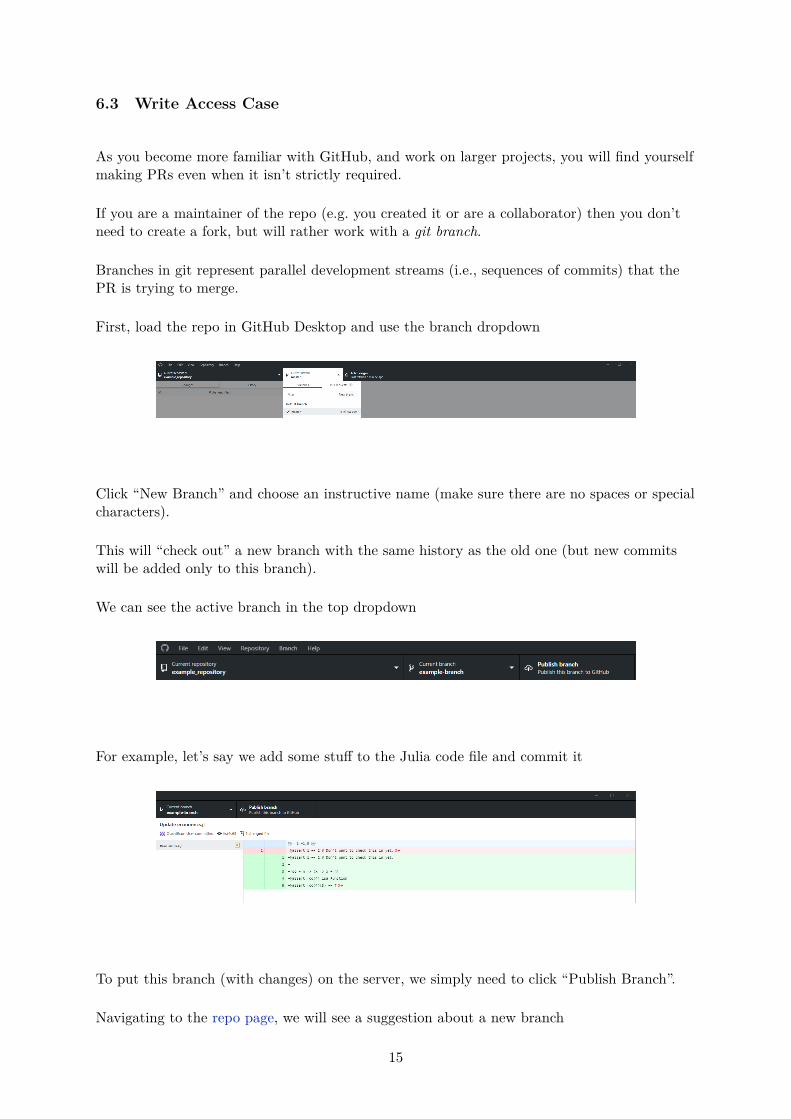
After pushing to the server, the change is reflected on the PR page
That is, creating a pull request is not like bundling up your changes and delivering them, butrather like opening an ongoing connection between two repositories, that is only severed whenthe PR is closed or merged.
14
6.3 Write Access Case
As you become more familiar with GitHub, and work on larger projects, you will find yourselfmaking PRs even when it isn’t strictly required.
If you are a maintainer of the repo (e.g. you created it or are a collaborator) then you don’tneed to create a fork, but will rather work with a git branch.
Branches in git represent parallel development streams (i.e., sequences of commits) that thePR is trying to merge.
First, load the repo in GitHub Desktop and use the branch dropdown
Click “New Branch” and choose an instructive name (make sure there are no spaces or specialcharacters).
This will “check out” a new branch with the same history as the old one (but new commitswill be added only to this branch).
We can see the active branch in the top dropdown
For example, let’s say we add some stuff to the Julia code file and commit it
To put this branch (with changes) on the server, we simply need to click “Publish Branch”.
Navigating to the repo page, we will see a suggestion about a new branch
15

At which point the process of creating a PR is identical to the previous case.
6.4 Julia Package Case
One special case is when the repo in question is actually a Julia project or package.
We cover that (along with package workflow in general) in the testing lecture.
7 Additional Resources and Troubleshooting
You may want to go beyond the scope of this tutorial when working with GitHub.
For example, perhaps you run into a bug, or you’re working with a setup that doesn’t haveGitHub Desktop installed.
Here are some resources to help
• Kate Hudson’s excellent git flight rules, which is a near-exhaustive list of situations youcould encounter, and command-line fixes.
• The GitHub Learning Lab, an interactive sandbox environment for git.• The docs for forking on GitHub Desktop and the GitHub Website.
7.1 Command-Line Basics
Git also comes with a set of command-line tools.
They’re optional, but many people like using them.
Furthermore, in some environments (e.g. JupyterHub installations) you may only have accessto the command line.
• On Windows, downloading git will have installed a program called git bash, whichinstalls these tools along with a general Linux-style shell.
• On Linux/MacOS, these tools are integrated into your usual terminal.
16
To open the terminal in a directory, either right click and hit “open git bash” (in Windows),or use Linux commands like cd and ls to navigate.
See here for a short introduction to the command line.
As above, you can clone by grabbing the repo URL (say, GitHub’s site-policy repo) and run-ning git clone https://github.com/github/site-policy.git.
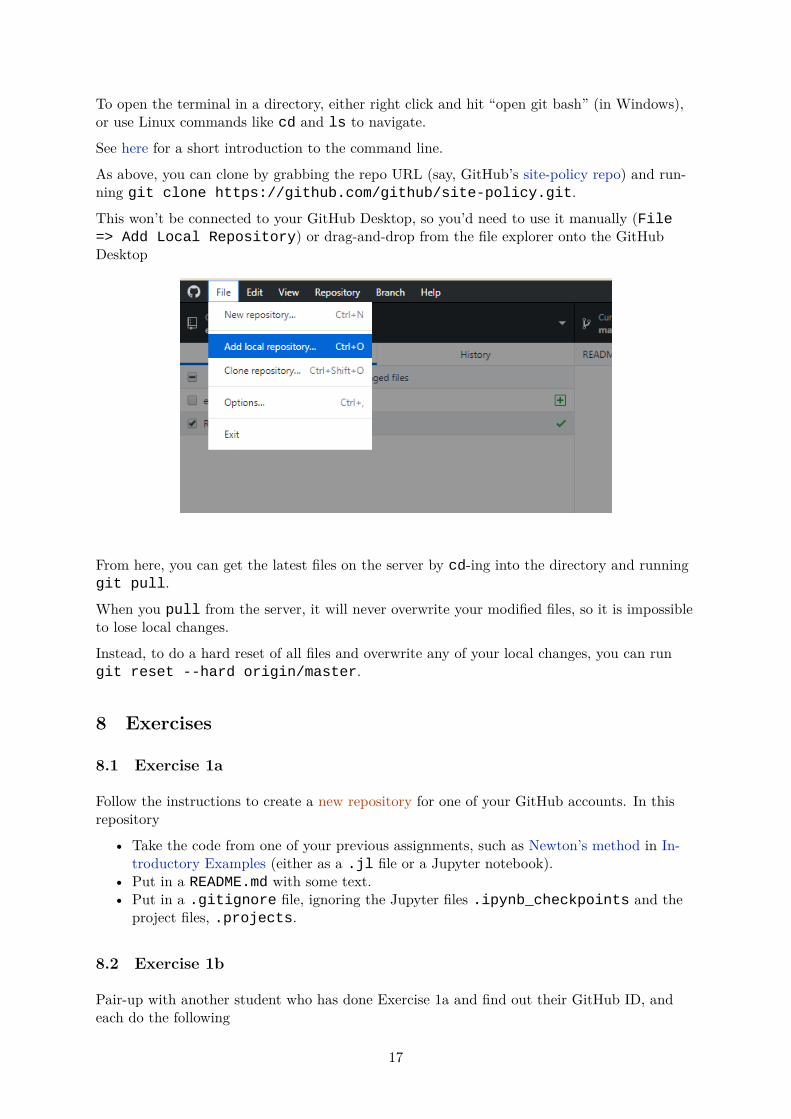
This won’t be connected to your GitHub Desktop, so you’d need to use it manually (File=> Add Local Repository) or drag-and-drop from the file explorer onto the GitHubDesktop
From here, you can get the latest files on the server by cd-ing into the directory and runninggit pull.
When you pull from the server, it will never overwrite your modified files, so it is impossibleto lose local changes.
Instead, to do a hard reset of all files and overwrite any of your local changes, you can rungit reset --hard origin/master.
8 Exercises
8.1 Exercise 1a
Follow the instructions to create a new repository for one of your GitHub accounts. In thisrepository
• Take the code from one of your previous assignments, such as Newton’s method in In-troductory Examples (either as a .jl file or a Jupyter notebook).
• Put in a README.md with some text.• Put in a .gitignore file, ignoring the Jupyter files .ipynb_checkpoints and the
project files, .projects.
8.2 Exercise 1b
Pair-up with another student who has done Exercise 1a and find out their GitHub ID, andeach do the following
17
• Add the GitHub ID as a collaborators on your repository.• Clone the repositories to your local desktop.• Assign each other an issue.• Submit a commit from GitHub Desktop which references the issue by number.• Comment on the commits.• Ensure you can run their code without any modifications.
8.3 Exercise 1c
Pair-wise with the results of Exercise 1b examine a merge-conflict by editing the README.mdfile for your repository that you have both setup as collaborators.
Start by ensuring there are multiple lines in the file so that some changes may have conflicts,and some may not.
• Clone the repository to your local desktops.• Modify different lines of code in the file and both commit and push to the server (prior
to pulling from each other)–and see how it merges things “automatically”.• Modify the same line of code in the file, and deal with the merge conflict.
8.4 Exercise 2a
Just using GitHub’s web interface, submit a Pull Request for a simple change of documenta-tion to a public repository.
The easiest may be to submit a PR for a typo in the source repository for these notes, i.e.https://github.com/QuantEcon/lecture-source-jl.
Note: The source for that repository is in .rst files, but you should be able to find spellingmistakes/etc. without much effort.
8.5 Exercise 2b
Following the instructions for forking and cloning a public repository to your local desktop,submit a Pull Request to a public repository.
Again, you could submit it for a typo in the source repository for these notes, i.e.https://github.com/QuantEcon/lecture-source-jl, but you are also encouragedto instead look for a small change that could help the documentation in another repository.
If you are ambitious, then go to the Exercise Solutions for one of the Exercises in these lec-ture notes and submit a PR for your own modified version (if you think it is an improve-ment!).
18