Getting Started with Kiln-Fired Glass
9
Getting Started with Kiln-Fired Glass Guide to Materials and Procedures Beautiful fused glass projects are easy and fun!
Transcript of Getting Started with Kiln-Fired Glass

Getting Startedwith Kiln-Fired GlassGuide to Materials and Procedures
Beautiful fused glass projects are easy and fun!

2 3
What is Glass Fusing?At its simplest, glass fusing is a process in which compatible glass is assembled and then melted/fused together in a kiln using a specific firing schedule. There are only a few basic requirements to set you on your path to becoming a Fused Glass Artist: a kiln, a supply of “compatible” glass, a few tools and a creative urge.
In this guide to glass fusing, you will learn about basic tools, stages of kilnforming, firing schedules, best practices for successful project creation and get tips to help you off to a great start on your fusing journey.
AssemblyA project generally begins with a uniform base layer of glass, with a glass design layer on top of that — which may include glass accents, focal elements, and often a border treatment.
First or Flat FiringAfter assembly, the project is placed in the kiln and slowly taken from room temperature up to 1300-1500 degrees (Fahrenheit). The project can be “full fused” which leaves a smooth top surface, but interesting effects can be created by stopping the fusing process earlier, allowing more texture to remain in the piece. (More information about the different fusing levels can be found in the “Firing Programs” section.)
After the initial firing, the project can be a tile, sun-catcher, coaster, piece of decorative art OR you can choose to fire again — or ”slump” it — into a three-dimensional shape.
SlumpingOnce your design is fused into a single flat unit, the project can be returned to the kiln and heated just to its softening point (about 1225º F), causing it to sag over or into a mold. This transforms the flat project into a functional or artistic 3-D piece, such as a bowl, tray, platter, or vase.
CompatibilityAll glass used in the same project must work together. Glass expands when it is heated and contracts as it cools. Because glass from different manufacturers will have a specific rate at which it expands and contracts, (called the Coefficient of Expansion or C.O.E.), you must choose glass products that all have the same COE. Additionally, these products should be “tested compatible” by their manufacturer, as not all glass is formulated for kiln-forming (such as non-fusible Ring Mottle glass made for the stained glass market).
Oceanside Compatible™ glass is formulated and tested to provide a full line of tested compatible products for kilnforming. You can trust all products that bear the Oceanside Compatible logo to “fit” together. Any glass labeled as authentic System 96® is equally safe to use with Oceanside Compatible products, as the two are made using the same formulas. KEY POINT: Do not add glass to your projects with a different COE and expect success. Project breakage will likely result.
Kiln NotesAny kiln with a programmable controller can be used to fuse glass.If you have a ceramic kiln, set it to display temperature in degrees, not “cone.” If you also fire ceramics, do not fire glass and ceramics in the same kiln at the same time — glass fires at lower temperatures. Dedicated shelves for glass firings, are also recommended.
Many of the newer glass kilns manufactured today even offer a library of pre-programmed settings and advanced displays. We strongly encourage all fusers to learn how to manually enter kiln programs.
Whatever kiln you’ve chosen, be sure to keep your manual handy as you prepare to fire it. (You should be able to download a PDF if you don’t have a physical copy.) We have supplied general instructions regarding kiln programming in this booklet, but your kiln manufacturer should be able to help you answer any specific questions you may have about your model. They can also assist you in understanding any specifics regarding kiln maintenance.
One layer of design glass on top of a clear square base
Third and fourth layers of design glass are added
All elements are fused together in “Flat Firing”
Flat piece is set on top of bisque mold to slump
Finished dish

4 5
Glass Tools Nippers— A bit like “scissors” for glass, the nippers chew up glass with ease, creating a characteristic curvy break that’s artistic and versatile. Aim flying nips into a container, and always wear safety glasses.
Glass Cutter — The cutter’s wheel creates a “score” as it’s guided across the glass surface. When pressure is applied to both sides of this score, the glass will break. Toyo® makes many cutter grip styles from which to choose. Running Pliers — These specially designed pliers put pressure on both sides of the glass cutter’s score, encouraging a “run” (crack) along the line of the score. Often the glass will break all the way along the score with just gentle pressure from this tool.
Breaking (or Grozier) Pliers — These sturdy pliers act like metal fingers, to grab, pull, and break the glass along the glass cutter’s score line. Especially useful for small pieces, or to nibble off pointy spots.
Safety EquipmentSafety Glasses — Always wear eye protection when cutting or nipping glass, or when next to someone nipping or cutting glass.
Gloves — Most glass artists prefer not to wear gloves while actually cutting glass, but we highly recommend wearing a pair of rubber-dipped gloves when you are restocking supplies, moving larger sheets, organizing glass in your work space, or cleaning up glass shards.
Masks — When working with Frit (particularly Powder Frit), mixing kiln wash powder, or sweeping up glass (and any ensuing dust) it is recommended that you wear a Niosh approved face mask to filter out any fine particulate matter.
Related Glass/Fusing Supplies Cutter Oil — Specially formulated lightweight oil for glass use, such as Glass Accessories International (GAI) Cutting Oil, lubricates the cutter’s score line and prolongs the life of the cutting wheel. Our recommended application process: keep a small cup or jar with an oil-soaked piece of sponge or folded paper towel at the bottom, and roll your cutter wheel back and forth across it every few strokes. (This method also cleans glass dust from the wheel.)
Kiln-Friendly AdhesivesKlyr-Fire (or similar)Use this viscous, slow-drying adhesive for holding Frit in place, or adhering tiny pieces too small to glue individually. Apply with a cotton swab, brush, or dab from a squirt bottle. It burns away during firing.
Elmer’s GlueUse just a pinpoint of glue, applied with a toothpick, to hold pieces in place as you transfer your project to a kiln shelf. Too much will char.
Papyros® Kiln Shelf Paper — Provides a superior layer of protection between the glass and kiln shelf. Prevents sticking and helps avoid formation of large air bubbles beneath the glass.
Slumping Molds — Generally speaking, slump INTO molds to create bowls, dishes and other shallow forms, including shorter walled bowls. For prep, see “Preparing Molds for Slumping” section.
Draping Molds — Slump OVER to create vases, candle holders and other interesting shapes. For prep, see “Preparing Molds for Slumping” section.
Kiln Shelf Primer and Application Brush — Keeps glass from sticking to shelves and molds. Primo Primer™ offers excellent results. Boron nitride sprays, such as MO-RE® and ZYP® can also be used to protect molds (particular good for Frit casting, damming mold walls, and stainless steel molds).
Shop Vac with Small-Particle or HEPA Filter — Highly recommended for all glass cleanup chores. Captures tiny glass splinters and harmful dust residue after firings.
Brushes — Small brushes are great for brushing Frit into place or out of spaces it doesn’t belong. A table brush and dustpan area also recommended for table-top clean up.
New to Fusing Resources There’s an entire section on our website for those who are just getting started in glass fusing. For a quick demonstration of how to cut glass, please see the Basic Glass Cutting video in the “New to Fusing” section of OceansideCompatible.com. (A still from the video is shown at left.)

6 7
Making a Fused Glass ProjectProjects are assembled by stacking glass pieces in layers. The bottom layer is often a single glass circle or square, commonly referred to as a base, or base layer. Other glass pieces are placed on top of this to create a design that covers the entire base fairly evenly. (In fusing, an even, 2-layer design ensures a state of equilibrium during the firing process that results in a more stable finished piece — see Volume and Shape Control Concepts below for more information.) Some detail or accents can be added in a third layer.
IMPORTANT: Each layer adds thickness to the finished project. The most successful projects are built with a fairly uniform thickness of at least 2 layers. Volume and Shape Control ConceptsDistortion of a project’s shape (perimeter) during firing can lead to some surprises, or it can contribute to a well-executed design.
It’s important to understand that glass, as it gets to a full fuse temperature range, will naturally seek to become a circular “puddle” about 1/4-inch (6mm) thick. If it’s thicker than that to begin with (more than 2-layers of glass), it will spread out. If it’s thinner, it will draw in, ever seeking that 1/4-inch thickness equilibrium. Understanding this inclination is important to creating a thoughtful design and predicting fired results.
Glass Used in Fusing Oceanside Compatible™ offers the following glass forms for glass fusing:
Sheet Glass — Sheets of glass formulated especially for the fusing arts. Sheets can be cut or nipped to desired dimensions. Rods — These are cylindrical lengths of glass about the thickness of a pencil. Nip off 1/4" or smaller bits to create circles or “dots.” Nip longer lengths for borders or bold design elements, but consider your overall glass volume when doing so.
Noodles — These are thin, flat glass strands— very much like dry fettuccine pasta. Available in many opal and transparent colors. Noodles can be broken or nipped to desired length.
Stringers — These are delicate, spaghetti-like strands of glass. Available in many opal and transparent colors. Stringers can be broken to desired length with fingers, nippers, or by snapping off while holding with pliers. Stringers are thin enough that they can be softened with a candle flame and curved or bent as well. Frit — Highly versatile, crushed glass pieces, in five particle sizes ranging from powder (F1) to pieces large enough for mosaic work (F7). Available in a wide range of both opal and transparent colors. Frit can be used to create formed shapes (Pate de Verre), add interesting accents, texture effects, or to create a look similar to painting. An adhesive, such as Klyr-fire (can be mixed with water) is helpful to keep frit in place.
A Note About Other ProductsThere are many other fun products you can use in fusing. Dichroic glass is sheet glass with a dazzling, color-shifting metallic coating applied to the surface. Mica powders can be used to add a beautiful sheen to your work. Cane are glass rods, often with colorful twisting patterns. Murrini/Milifiore are glass cane with embedded detail or patterns that you can nip to use in your glass designs. You can also find laser-cut glass shapes (that you would not be able to cut by hand) — and so much more. Keep exploring, just remember that all glass items need to be compatible.
Left: Strictly for the sake of demonstration, we created a single-thick square of glass with smaller square stacks in each corner. Right: After Full Fusing, the thin areas draw in; the thicker areas push out as the uneven layers seek equilibrium.
Above: Mountain Meadow design was created using Frit.
Above: Curved Stringer and Rod Dot flower tile made using Red Reactive products. Learn more about Reactive products on our website.
Above: colorful cane with twisting patterns. Below: Nipped Millifiore.
Above: This simple “Basket Weave” project is a good illustration of how you can use volume principles in a design. Notice how the square openings between the glass strips (where there is less glass volume) draw inward and become round holes after firing. Also notice the scalloping in the perimeter caused by thicker and thinner areas of glass volume.
Above: Tile made from glass Noodles in a weave pattern.

8 9
Further ExplorationFor thicker projects (more than 2 layers) you may want to consider damming options to keep design elements in place and the project perimeter from distorting. To learn more about damming, please see our Project Guide, Dammed Waves or take a class from a local instructor.
Step 1: Planning Your Design
Follow a Project GuideEspecially in the beginning, you may want to choose from the many “tested and true” Project Guides available on the Oceanside Compatible™ website to create specific projects. You’ll be learning techniques, discovering your firing preferences, and improving your skills — while creating projects that have been proven successful. (See Resources pg.15)
Free Style Design If you want to try something original, start with a glass base, then begin to decorate it with various shapes and sizes of smaller glass pieces. If your design will not create a fairly even second layer, it’s best to begin with a 2-layer Base — especially important if you’re making a ‘full-fused’ dish that will be functional. (See Volume and Shape Control Concepts on pg. 7.)
Important Note If you plan to slump your project, begin by choosing the mold first. This will determine the shape and dimensions of your project. (Make sure your assembled project is no larger than about 1/8” outside the perimeter of the mold.)
Step 2: Assembling Your ProjectClean the GlassFingerprint smudges and oil from cutting can remain permanently on glass surfaces after firing. To prevent this, clean your project’s glass pieces with soap and water, or use Sprayway (ammonia-free) glass cleaner and a lint-free cloth. Always check for stickers on your glass and remove all traces of the sticker adhesive before using the glass in a project that will be fired.
Glue SparinglyGlue glass pieces onto your project only as necessary to prevent shifting as you transfer it into the kiln. We recommend the following: Elmer’s Glue: Apply PINPOINTS with a toothpick. (Too much will char.) Klyr-fire*: Allows lots of working time and always burns off. Apply with a cotton swab, brush, or squeeze bottle. * Or similar product formulated specifically for glass fusing.
Support Your ProjectYou may need to move your project several times before it is fired. If your project will not have a uniform base layer, assemble it on a prepared kiln shelf or a flat, unglazed ceramic tile that will go directly into the kiln.
Prevent StickingYou must always prepare the kiln shelf (or tile) to keep glass from sticking to it. You can use kiln wash or Papyros® Kiln Shelf Paper to prevent sticking. We recommend using Papyros as the buffer between glass and the ceramic surface as it not only prevents sticking but helps avoid bubbles under your project and is much easier to use. Size the Papyros to extend at least a 1/2-inch beyond the edges of your project, to allow for the possible expansion of the glass.
Once your project is ready to fire, place it in your kiln as centrally as possible. Always leave at least 1/2” cushion all around each project (between projects and from the edge of the shelf) to allow for expansion of the glass.
Project Guide Retro WarpGlass Cutting: Gentle CurvesFiring: Full Fuse, Slump
At full fuse, Clear glass placed on top of an Opal will push into, and displace, the Opal glass underneath it. What’s left behind are transparent pools wherein shadows become an element of the overall design. In this piece, the Clear was cut to echo the shape of the opal glass resulting in a very clean and modern look.
1. Begin with an 8" x 8" square of 211-76S-F Chocolate Opal, a 7" x 7" square of 226-72S-F Lemongrass Opal, and a 5" x 5" square of 100S-F Clear glass.
2. Trace the wavy lines of the (page 2) Cutting Guide onto the Lemongrass using a sheet of carbon paper in between the Guide and the glass. Score and break the pieces. (Tip: For easier cleaning, score all lines, then wipe off the carbon marks before breaking.)
3. Place the Lemongrass pieces on top of the Chocolate Base, leaving an even amount of space between all sections as shown.
4. Place the Clear square on top of the smaller Cutting Guide (page 3) and trace the wavy lines using a Sharpie pen. Score and break out the pieces.
5. Place the Clear pieces in the center of each corresponding Lemongrass shape. Full fuse then slump into Creative Paradise “Folded Square” mold #GM111.
Page 1 of 3
www.OceansideCompatible.com© Copyright Oceanside Glass & Tile® 2020
Finished project in “Dammed Waves” Project Guide
Top: Project assembled and ready for first (flat) firing. Bottom: Completed dish after fusing and slumping.
VariationThe version above was made almost the
same way as the main project except that
intentional gaps were left between the
largest circles in Step 2. These were filled
with Coarse Moss Green Frit (F5-5262-96)
in Step 3. The piece was slumped using a
Round Wave/Ruffle mold.
Project Guide A Ring of PosiesGlass Cutting: NippingFiring: Full Fuse, Slump
1. Begin with an 8-inch Clear circle and
a color palette that has both Opal and
Transparent versions of each color, plus a
Green Opal and 200S-F White Opal.
2. Nip rough circles in varying sizes from your
“posy” colors, plus Green leaf shapes and lay
them next to one another (puzzle-like) until
the whole Base is covered. Be sure to extend
the design all the way to the outer edge,
using little triangular pieces to fill in between
the circles around the rim as needed. Affix all
pieces to the Base with pinpoints of glue.
3. Once the Base is covered, sprinkle Fine
Clear Frit into the gaps between pieces. This
insures a solid 2-layer (stable) design. Use a
brush to sweep off the extra Frit.
2
This bright, fun piece is made using a pair of glass nippers and a simple stacking technique!
Materials We UsedPAPYROS® Kiln Shelf PaperGlass: 8-inch 100S-F Clear circle, 161S-F Yellow
Transparent, 533-3S-F Deep Aqua Transparent
200S-F White Opal, 267-72S-F Sunflower Opal,
233-74S-F Turquoise Blue Opal, 226-74S-F
Amazon Green OpalFrit: F2-00-96 Clear (Fine)
Firing Schedule We UsedSeg. Ramp (ºF per Hour)
Goal Temp (º F) Hold Time (Minutes)
1250
25020
2250
105030
3150
115030
4250
137020
5300
146515
69999
95060
7150
80010
8300
1000
4. Now build up each circle with gradually
smaller circles. Alternate the Opal and
Transparent versions of colors and use lots
of White to make the design visually “pop.”
Full Fuse and Slump as desired. We used
an 8-inch Rim Plate mold.
www.OceansideCompatible.com© Copyright Oceanside Glass & Tile® 2020
Layer 1
Layer 2
All 3 layers assembled inside damming mold

10 11
Step 3: Programming Your Kiln“Ramp and Hold”To avoid internal stress, glass needs time to equalize its internal temperature as it heats and cools. To accomplish this, a firing program uses a stair-step approach of ramping (up or down) and then pausing at certain important stages in the fusing cycle to allow all parts of the glass to attain the desired temperature. This is known as a Ramp and Hold firing program.
Entering a Ramp & Hold program into your controller, may seem challenging but is actually quite easy. Consult your kiln manual if needed, but don’t be intimidated! Once entered, you need only recall it from (your kiln’s) memory for future use.
A Ramp & Hold program is made up of several segments. Once started, your kiln will execute each segment, in sequence, until the firing program is complete. Our basic firing schedules (for projects 3/8” thick or less) have six segments, each with three parts: the Ramp, the Goal Temperature, and the Hold Time (see chart below). More complex schedules may use more than six segments. As you explore and grow in your fusing, you may find that you adjust your schedule for each project you make!
Ramp Goal Temp Hold TimeThe rate, in degrees per hour, that kiln temp will rise or fall during each segment.
The temperature the kiln will seek to reach during each segment.
The number of minutes the kiln will stay at the Goal Temp, once it is reached.
Once you have a basic understanding of required steps of a firing schedule, such as heating ramps, time holds, strain and anneal points, as well as how to add time in key segments for “bubble squeezing” (to reduce trapping air bubbles in between layers of glass that are heated together too quickly) you can then add your favorite programs to your kiln’s program library. For more information about firing, visit OceansideCompatible.com.
TACK FUSE Glass pieces are fused together with little change beyond softening or rounding of edge.
Segment Ramp (ºF per Hour)
Goal Temp (ºF)
Hold Time (Minutes)
1 250 1050 302 250 1250 203 300 1350-1370** 104 9999* 950 605 200 800 106 300 100 0
*as fast as possible **see Forming Stage Ranges on pg. 12
CONTOUR FUSE Glass pieces are fused together, edges are soft and rounded, project surface retains a degree of dimension.
Segment Ramp (ºF per Hour)
Goal Temp (ºF)
Hold Time (Minutes)
1 250 1050 302 250 1250 203 300 1400-1450** 54 9999* 950 605 200 800 106 300 100 0
*as fast as possible **see Forming Stage Ranges on pg. 12
FULL FUSE Glass pieces are completely conjoined into a single uniform layer, top surface is smooth and void of dimension or relief.
Segment Ramp (ºF per Hour)
Goal Temp (ºF)
Hold Time (Minutes)
1 250 1050 302 250 1250 203 300 1460-1470** 104 9999* 950 605 200 800 10
6 300 100 0 *as fast as possible **see Forming Stage Ranges on pg. 12
THE PROGRAMS THAT FOLLOW ARE DESIGNED FOR PROJECTS UP TO ABOUT 3/8" THICK. THEY ARE INTENDED AS A BASIC PLACE TO START. FOR MORE FIRING OPTIONS, VISIT OceansideCompatible.com
BASIC Firing Programs
Bubbles? There are methods to both encourage them and prevent them! Above: These bubbles were intentional.

12 13
Resist the Temptation to PeekGlass is sensitive to temperature changes, and cooling from the goal tempera-ture is carefully regulated by the firing programs. While the glass is cooling, it is going through its critical annealing phase, in which the glass adjusts to its new form. Opening the kiln before the firing schedule is complete can result in project breakage!
After the firing cycle is complete, leave the kiln lid closed. Use the peephole if you must, for a brief peek. Otherwise, be patient, and don’t open until the inter-nal temperature is below 100°F.
Slumping (Optional Step 4)Most glass projects can be fired a second time to form a functional or artistic three-dimensional shape. In this firing, you will re-heat the previously fused, flat project to the point of softening, and it will “slump” into and take the shape of the mold you’ve selected. Or, you may choose to place the project on top of a mold (usually stainless steel) and let it slump over.
Planning Your Design to FitTo create a piece that you plan to slump INTO a mold, make sure your assembled project is no larger than about 1/8" outside the perimeter of the mold.
To create a piece intended for slumping OVER a mold, make sure the project is not so large that it will sag completely down and flatten onto the kiln shelf. Keep in mind that the piece may stretch a bit as it softens, so leave some extra space.
Tack, Contour, or Full Fuse The shaded areas in the fusing schedule charts are what determine the fusing level; Tack, Contour, or Full fuse. The more total heat (both temperature and time) at this “forming stage,” the greater change in the shape and appearance of the glass during firing. The differences in the three levels are described below.
• Tack Fuse: Projects are joined together with little change beyond the softening or rounding of glass edges. Use this schedule when trying to preserve the maximum amount of detail in a project. (For decorative use — not recommended for functional dishes.)
• Contour Fuse: The glass edges are soft and rounded, yet the project surface retains a degree of dimension. Use a Contour Fuse when layers need to be more fully combined, but detail is still desired.
• Full Fuse: Works best on two-layer projects containing an even amount of glass on each layer. These will melt together completely and have a smooth surface, while still retaining the perimeter shape of the piece.
We recommend starting with the basic firing programs outlined here. As you become familiar with the results at these three fusing levels, you will likely want to explore adjusting the process times and temperatures. Please see the Oceanside Compatible™ website for more complete firing information: www.OceansideCompatible.com.
When in Doubt, Tack or Contour Fuse Projects can easily be returned to the kiln and re-fired for a more “melted” result. Obviously, the opposite is not true!
Left: A demonstration tile of a single-thick square of glass with smaller square stacks placed unevenly, then Full Fused. The perimeter of the piece becomes distorted because of the uneven distribution of glass. The piece will be very fragile.
Full Fuse is Not Recommended for Single-Layer Projects!
Forming Stage Ranges(Illustrations represent a cross-section view of 2 layers of glass.)
Tack Fuse Contour Fuse Full Fuse
1350-1370º F 1400-1450º F 1460º-1470º F
The piece above was made into a vase by slumping a square project over a stainless steel cup-shaped mold. Note also the dimension in the nipped fern design — fired using a Tack fuse.
The “Magic Carpet” at left is a great example of how a lower fusing schedule (Tack or Contour) can better preserve interesting detail of a piece. At a full fuse, this piece would not have been nearly as charming. The fringe is made from glass Stringers, and the small circles are made from nipped Murrini.
14 15
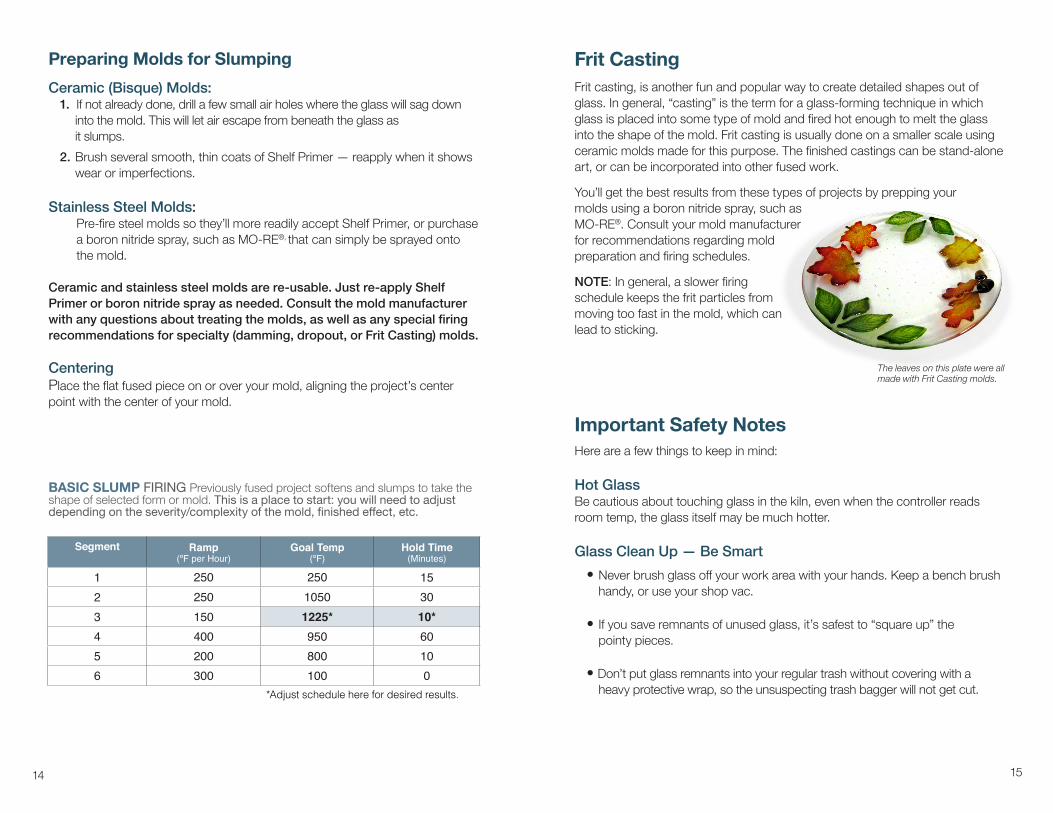
Frit CastingFrit casting, is another fun and popular way to create detailed shapes out of glass. In general, “casting” is the term for a glass-forming technique in which glass is placed into some type of mold and fired hot enough to melt the glass into the shape of the mold. Frit casting is usually done on a smaller scale using ceramic molds made for this purpose. The finished castings can be stand-alone art, or can be incorporated into other fused work.
You’ll get the best results from these types of projects by prepping your molds using a boron nitride spray, such as MO-RE®. Consult your mold manufacturer for recommendations regarding mold preparation and firing schedules.
NOTE: In general, a slower firing schedule keeps the frit particles from moving too fast in the mold, which can lead to sticking.
Important Safety NotesHere are a few things to keep in mind:
Hot GlassBe cautious about touching glass in the kiln, even when the controller reads room temp, the glass itself may be much hotter.
Glass Clean Up — Be Smart• Never brush glass off your work area with your hands. Keep a bench brush
handy, or use your shop vac.
• If you save remnants of unused glass, it’s safest to “square up” the pointy pieces.
• Don’t put glass remnants into your regular trash without covering with a heavy protective wrap, so the unsuspecting trash bagger will not get cut.
Preparing Molds for Slumping Ceramic (Bisque) Molds:
1. If not already done, drill a few small air holes where the glass will sag down into the mold. This will let air escape from beneath the glass as it slumps.
2. Brush several smooth, thin coats of Shelf Primer — reapply when it shows wear or imperfections.
Stainless Steel Molds: Pre-fire steel molds so they’ll more readily accept Shelf Primer, or purchase a boron nitride spray, such as MO-RE®, that can simply be sprayed onto the mold.
Ceramic and stainless steel molds are re-usable. Just re-apply ShelfPrimer or boron nitride spray as needed. Consult the mold manufacturer with any questions about treating the molds, as well as any special firing recommendations for specialty (damming, dropout, or Frit Casting) molds.
CenteringPlace the flat fused piece on or over your mold, aligning the project’s center point with the center of your mold.
BASIC SLUMP FIRING Previously fused project softens and slumps to take the shape of selected form or mold. This is a place to start: you will need to adjust depending on the severity/complexity of the mold, finished effect, etc.
Segment Ramp (ºF per Hour)
Goal Temp (ºF)
Hold Time (Minutes)
1 250 250 152 250 1050 303 150 1225* 10*4 400 950 605 200 800 106 300 100 0
*Adjust schedule here for desired results.
The leaves on this plate were all made with Frit Casting molds.

www.OceansideCompatible.com A Great Place to Find Helpful ResourcesOceansideCompatible.com has supply information, tutorials, and other resources to further your glass fusing experience. Be sure to look into class opportunities in your community to advance your skills and learn new techniques. You may also want to consider attending Glass Craft and Bead Expo, the largest US glass show held annually in Las Vegas.
Oceanside Compatible™ Project GuidesProject Guides make fusing as easy as it gets. Each sheet provides step-by-step instructions on project creation, including specific techniques to expand your general fusing knowledge.
Basic Glass Cutting VideoIf you need help learning to use glass tools, please see the instructional materials on our website.
Oceanside Compatible Firing Schedules & TroubleshootingFind basic and advanced firing schedules and information regarding the firing process. We also supply basic project construction best practices and other pointers so you can easily create successful projects.
Oceanside Compatible Glass SuppliersFind authorized suppliers of Oceanside Compatible products on OceansideCompatible.com. Our suppliers are your best resource to purchase supplies, take classes, connect with like-minded glass people.
Fusing/Slumping MoldsThere are many makers and suppliers of molds for kiln fired glass work — Creative Paradise® (makers of the Patty Gray Damming Molds™), Slumpy’s®, Colour DeVerre®, to name a few. Your local supplier may offer molds or you can check online for the sources mentioned above.
Fusing Tech SupportYou may email us with technical questions specific to Oceanside Compatible products at the following email address. Please remember to include as many details as possible, including photos, firing schedules used, glass production date, etc. if inquiring about a fused piece after firing.
© Copyright Oceanside Glass & Tile® 2020