Getting Started with CyberSource Essentials
28
CyberSource Corporation HQ | P.O. Box 8999 | San Francisco, CA 94128-8999 | Phone: 800-530-9095 Getting Started with CyberSource Essentials February 2017
Transcript of Getting Started with CyberSource Essentials
Getting Startedwith CyberSource Essentials
February 2017
CyberSource Corporation HQ | P.O. Box 8999 | San Francisco, CA 94128-8999 | Phone: 800-530-9095

CyberSource Contact InformationFor technical support questions, go to the Home page in the Business Center to see the contact information appropriate for your account.
Visit the Business Center, your central location for managing your online payment transactions, at https://businesscenter.cybersource.com.
For general information about our company, products, and services, go to http://www.cybersource.com.
For sales questions about any CyberSource Service, email [email protected] or call 650-432-7350 or 888-330-2300 (toll free in the United States).
Copyright© 2017 CyberSource Corporation. All rights reserved. CyberSource Corporation ("CyberSource") furnishes this document and the software described in this document under the applicable agreement between the reader of this document ("You") and CyberSource ("Agreement"). You may use this document and/or software only in accordance with the terms of the Agreement. Except as expressly set forth in the Agreement, the information contained in this document is subject to change without notice and therefore should not be interpreted in any way as a guarantee or warranty by CyberSource. CyberSource assumes no responsibility or liability for any errors that may appear in this document. The copyrighted software that accompanies this document is licensed to You for use only in strict accordance with the Agreement. You should read the Agreement carefully before using the software. Except as permitted by the Agreement, You may not reproduce any part of this document, store this document in a retrieval system, or transmit this document, in any form or by any means, electronic, mechanical, recording, or otherwise, without the prior written consent of CyberSource.
Restricted Rights LegendsFor Government or defense agencies. Use, duplication, or disclosure by the Government or defense agencies is subject to restrictions as set forth the Rights in Technical Data and Computer Software clause at DFARS 252.227-7013 and in similar clauses in the FAR and NASA FAR Supplement.
For civilian agencies. Use, reproduction, or disclosure is subject to restrictions set forth in subparagraphs (a) through (d) of the Commercial Computer Software Restricted Rights clause at 52.227-19 and the limitations set forth in CyberSource Corporation's standard commercial agreement for this software. Unpublished rights reserved under the copyright laws of the United States.
TrademarksAuthorize.Net, eCheck.Net, and The Power of Payment are registered trademarks of CyberSource Corporation.
CyberSource, CyberSource Payment Manager, CyberSource Risk Manager, CyberSource Decision Manager, and CyberSource Connect are trademarks and/or service marks of CyberSource Corporation.
All other brands and product names are trademarks or registered trademarks of their respective owners.
2

CO
NTE
NTS
Contents
Recent Revisions to This Document 5
About This Guide 6Audience and Purpose 6Conventions 6
Note and Important Statements 6Text and Command Conventions 6
Related Documents 7Customer Support 7
Chapter 1 Payment Processing with CyberSource 8Understanding the Payment Industry 8
Chapter 2 Getting Started 9Steps for Getting Started 9
Simple Order API Clients 11Third-Party Shopping Carts 11Simple Order API 11
Contact Information 14Submitting an eTicket 14
Chapter 3 Simple Order API Basics 16Choosing a Client 16
Choosing an API Version 16Name-Value Pairs or XML 17
Name-Value Pairs 17XML 17Correlating XML Elements and Name-Value Pair Field Names 17Numbered Elements 18
Constructing and Sending Requests 19
Getting Started with CyberSource Essentials | February 2017 3

Contents
MultiByte Characters and Special Characters 20Data Types 20Using Items or a Grand Total in a Request 20
Items 21Grand Total 22
Coupons 22How Coupons are Processed 22Coupon Constraints 23Including a Coupon in the Request 23
Requesting a Follow-On Service 23Request IDs and Request Tokens 23Alternative Payment Methods and Processors 24Working with Request Tokens 24
Merchants Who Have Not Implemented Request Tokens 25Merchants Who Have Implemented Request Tokens 25
Sending Requests 26Handling Replies 26
Decisions 27Reason Codes 27Missing or Invalid Fields 28Request IDs 28
Getting Started with CyberSource Essentials | February 2017 4
REV
ISIO
NS
Recent Revisions to This Document
Release ChangesJanuary 2017 Added Ingenico ePayments information. See:
"Requesting a Follow-On Service," page 23. "Working with Request Tokens," page 24. "Request IDs and Request Tokens," page 23.
May 2016 Added URLs for supported payment methods and integration methods. See page 8.
April 2013 This revision contains only editorial changes and no technical updates.
February 2013 Added a note about using separate keys in the Test and Live environments. See step 6 of "Steps for Getting Started," page 9.
August 2012 This revision contains only editorial changes and no technical updates.
July 2011 Removed the stored_value product code from "Items," page 21.
Getting Started with CyberSource Essentials | February 2017 5

ABO
UT
GU
IDE
About This Guide
Audience and PurposeThis guide is written for application developers who want to use the CyberSource to integrate CyberSource services into their order management system. It describes the basic steps you must complete in order to get started with the Simple Order API.
Implementing the CyberSource services requires software development skills. You must use the request and reply fields to integrate the services into your existing order management system.
Conventions
Note and Important Statements
Text and Command Conventions
Note
A Note contains helpful suggestions or references to material not contained in the document.
Important
An Important statement contains information essential to successfully completing a task or learning a concept.
Convention UsageBold Field and service names in text; for example:
Include the ics_applications field.
Items that you are instructed to act upon; for example: Click Save.
Getting Started with CyberSource Essentials | February 2017 6

About This Guide
Related Documents Credit Card Services User Guide
Electronic Check Services User Guide
Getting Started with CyberSource Essentials
Refer to the Support Center for complete CyberSource technical documentation: http://www.cybersource.com/support_center/support_documentation
Customer SupportFor support information about any CyberSource service, visit the Support Center at:
http://www.cybersource.com/support
Screen text XML elements.
Code examples and samples.
Text that you enter in an API environment; for example:Set the ccAuthService_run field to true.
Convention Usage
Getting Started with CyberSource Essentials | February 2017 7

Getting Started with CyberSource Essentials | February 2017
HAP
TER
C
1
Payment Processing with CyberSourceCyberSource Essentials is a payment solution that enables you to manage your payment transactions. CyberSource supports multiple payment methods and integration methods.
Supported payment methods:
http://www.cybersource.com/developers/documentation/small_business_essentials/
Supported integration methods:
http://www.cybersource.com/developers/integration_methods/
Understanding the Payment IndustryIn the e-commerce industry, multiple organizations work together to make online transactions possible. The following table describes some of the most important types of organizations in this industry.
Table 1 Types of Organizations in the Payment Industry
Type of Organization DescriptionMerchant A person or company that sells goods or services.
Merchant (acquiring) bank A bank that provides businesses with accounts to accept credit card or check payments.
Card association Organizations, such as Visa, Mastercard, and Discover, that have business relationships with the banks that issue your customers’ cards.
Payment processor An organization that processes payment requests, such as credit card authorizations and settlements, and routes them to the appropriate card associations according to their guidelines. Your merchant bank’s processor relationship determines which payment processor you use.
Payment gateway An organization, such as CyberSource, that enables merchants to securely send order information to and receive it from payment processors in the appropriate format.
8

Getting Started with CyberSource Essentials | February 2017
HAP
TER
C
2
Getting StartedSteps for Getting StartedThe steps for getting started depend on how you want CyberSource to receive your customers’ order information. If you choose the simplest connection method, the Virtual Terminal, you can get started within minutes. With other connection methods, such as the Hosted Order Page or the API clients, the steps for getting started take more time to complete. The following steps show you all of the options that you can choose.
To get started with CyberSource Essentials:
Step 1 Log in to the Test Business Center at https://ebctest.cybersource.com
Shortly after registering with CyberSource, you receive two confirmation emails. One email contains your unique CyberSource merchant ID (username) and the other provides your temporary password for the CyberSource Business Center. For most users, your CyberSource merchant ID and username are the same. The first time you log in to the Business Center, you are prompted to create a permanent password. If you don’t receive these emails, contact Customer Support for further assistance.
Step 2 Submit your billing and payment processor information.
The first time you log in to the Business Center, if prompted, submit your billing information. You may also need to submit details about your payment processor account. If CyberSource already has your payment processor information, you can proceed to Step 3.
For more information on how to submit your payment processor information, see the Business Center User Guide.
If you encounter permission problems when submitting your payment processor information, send it to CyberSource by submitting an eTicket.
Step 3 Get familiar with the Business Center.
Becoming familiar with the Business Center is crucial to managing your business payments efficiently. The CyberSource Business Center is a powerful and secure web
9

Chapter 2 Getting Started
portal designed to help you manage your customers’ orders. It also includes the Virtual Terminal, which enables you to manually enter customers’ orders.
The CyberSource web site provides a series of short, self-pace tutorials about authorizing and capturing payments, issuing credits, and other important tasks in the Business Center:
http://www.cybersource.com/support_center/implementation/downloads/tutorials/
While using the Business Center, you can get additional information by clicking the Page help link in the upper right area on each page. For more information on navigating the Business Center, see the Business Center User Guide.
Step 4 Choose Business Center settings.
The Business Center offers you several options to process your order information, reduce fraud, and customize your merchant account. You can adjust settings for the Virtual Terminal, Hosted Order Page, Subscriptions, as well as Smart Authorization (SmartAuth) to help reduce risks of fraud losses. In the Business Center, click on the Virtual Terminal, Tools & Settings, or Account Management tab to open the different settings pages.
The Business Center User Guide includes a chapter on configuring your Business Center settings.
Step 5 Choose a method for connecting to CyberSource.
After you select a connection method, you can review the documentation that explains how to use and test it.
Step 6 Generate security keys.
To ensure that you transmit information to CyberSource securely, and for CyberSource to identify your transactions as belonging to you, you must generate security keys (unless you opt to use only the Virtual Terminal; a security key is not needed for transactions processed with the Virtual Terminal).
Note
Initially, your Business Center account is in test mode, which enables you to become familiar with the Business Center settings and features by running test transactions. After you are familiar with the Business Center, you can request to go live, which enables you to begin processing transactions and orders for real currency. Even after your account is live, you can continue using the Test Business Center to run test transactions.
Important
You must generate two transaction security keys—one for the CyberSource production environment and one for the test environment. For information about generating and using security keys, see Creating and Using Security Keys (PDF | HTML).
Getting Started with CyberSource Essentials | February 2017 10
Chapter 2 Getting Started
Simple Order API Clientsa In the Business Center, choose Account Management.
b Choose Transaction Security Keys.
c Follow the instructions on the Transaction Security Keys page in order to generate and manage your API key.
Third-Party Shopping CartsFor third-party shopping carts with CyberSource services, contact your shopping cart provider to find out whether you need the .p12 security key or certificate files generated by the ECert application and for additional instructions on how to integrate them with the shopping cart.
a For the.p12 security key file, refer to the instructions above and download the key for Simple Order API clients.
b For certificate files generated by the ECert application, download and run the ECert application for your operating system from the Update to ECert Application page:
http://apps.cybersource.com/cgi-bin/pages/additional.cgi?kit=Update_to_ECert_Application
Step 7 Implement and test your connection method.
Simple Order APIa Download and install an API client based on your platform and level of programming
experience. The clients can be found on the Support Center.
b Run the samples included in the API to ensure that a connection can be established. Doing so will help you understand how the client works. After you are comfortable with the client samples, add code to integrate the API with your web store or call center that sends information to CyberSource.
c To ensure that you can to communicate order information to CyberSource, send test orders to the CyberSource test server.
CyberSource strongly recommends that you test your connection method. You can request test transactions including authorizations, captures, and credits. You can use your own credit card or test credit card numbers provided in the following table with any future expiration date.
Getting Started with CyberSource Essentials | February 2017 11

Chapter 2 Getting Started
Step 8 Go live.
Be sure to test your connection method thoroughly. After you successfully test your account and are ready to process real orders, you can take your account live.
In the Business Center, choose the Account Management tab and click Merchant Information. At the bottom of the Account Information page, click Go Live. In addition, make sure that you configure your API, HOP, SOP, or shopping cart settings to connect with the CyberSource production server. Even after you take your account live, you can continue testing your account in the Test Business Center:
https://ebctest.cybersource.com.
After your account is live, CyberSource recommends that you submit a real transaction for 1.00 USD for each card type you will be accepting. This ensures that your payment processor information is correct and that you receive funding into the expected bank account.
Step 9 Manage your orders.
After you begin processing orders, you might need to review your orders. For example, you might need to view all the orders processed on a specific day, check order details, or verify whether orders were approved or declined. With the Transaction Search feature of the Business Center, you can:
Capture authorizations Review, credit, or void sales Create subscriptions from your customer orders
The search feature provides results for transactions that occurred in the past 6 months, and the data results can be exported.
Step 10 Track and reconcile your orders.
Table 2 Test Credit Card Numbers
Credit Card Type Test Account Number1
Visa 4111 1111 1111 1111
Mastercard 5555 5555 5555 4444
American Express 3782 8224 6310 005
Discover 6011 1111 1111 1117
JCB 3566 1111 1111 1113
Diners Club 3800 000000 0006
1 remove spaces when sending to CyberSource.
Getting Started with CyberSource Essentials | February 2017 12

Chapter 2 Getting Started
The following table describes the values that you can use to track and reconcile your orders.
Step 11 Access reports.The Business Center offers a Transaction Search feature. In addition, CyberSource generates predefined and on-demand reports to help you manage your orders. The Capture Detail Report, for example, can help you reconcile the deposits you receive in your merchant account.
Table 3 Values for Tracking and Reconciling Orders
Value DescriptionRequest ID The request ID is a unique identifier that CyberSource assigns to
each request and returns in each reply message. You can use the request ID to do the following:
Identify a transaction in a CyberSource report
Search for a transaction in the Business Center
Discuss a specific request with Customer Support
Link a follow-on request to a primary request
For specific field names, see the user guide for the payment method you are using.
Merchant Reference Code The merchant reference code is an order tracking number that you generate and send in your requests so that you can track orders as they move through the phases of processing with CyberSource.
CyberSource recommends that you use a unique merchant reference codefor each order and use the same merchant reference codefor all the requests associated with the order. This enables you to efficiently track the order in the CyberSource reports and on the Transaction Search pages on the Business Center.
For specific field names, see the user guide for the payment method you are using.
Reconciliation ID For most CyberSource services, the reply message includes a unique reconciliation IDthat is assigned by CyberSource. For most payment processors, you can use this value to reconcile the transactions in your CyberSource reports with the transactions in your processor reports.
For details, such as specific field names and information about processors that do not support reconciliation, see the user guide for the payment method you are using.
Additional Tracking Values A few services provide additional tracking values. See the order tracking information in the user guide for the payment method you are using.
Getting Started with CyberSource Essentials | February 2017 13

Chapter 2 Getting Started
The following table lists the reports that are the most useful for reconciliation.
CyberSource recommends that you periodically download and save your reports for future reference. Your reports remain available for 16 months in the Business Center. For information about the formats of the reports and instructions for downloading them, see the Business Center Reporting User Guide.
Contact InformationIf you have a question regarding CyberSource services, please review previously asked questions in the Knowledge base by clicking the Support Center link in the upper-left side of the Business Center. To have a CyberSource Customer Support representative answer your question, submit an eTicket.
Submitting an eTicketTo request assistance from Customer Support, you can submit an eTicket.
To submit an eTicket:
Step 1 Log in to the CyberSource Business Center.
Step 2 Click Support Center near the top-left side of the page.
The Support Center appears.
Step 3 Click Create eTicket:
Table 4 Reports to Use for Reconciling Orders
Report DescriptionCapture Detail Report Provides information about your credit card transactions.
Payment Events Report Provides information about events that occurred on the previous day for electronic check and PayPal transactions you submitted.
Note
To ensure that you receive communications from CyberSource, add CyberSource to the approved list in your email system. Emails coming from CyberSource end with @cybersource.com. By placing CyberSource on your approved list, it should help ensure that CyberSource emails do not get filtered out as spam.
Getting Started with CyberSource Essentials | February 2017 14

Chapter 2 Getting Started
Step 4 Enter the following information on the Create eTicket screen:
First Name: the first name of the person submitting the eTicket.
Last Name: the last name of the person submitting the eTicket.
Phone Number: the daytime phone number of the person submitting the eTicket.
Email Address: the email address of the person submitting the eTicket.
Sensitive: if you check this box, only the user submitting this eTicket and the Administrator on this account can to view this information.
Issue Type: choose the most appropriate issue.
Summary: enter a summary of the problem or request.
Description: enter a detailed description of the problem or request.
Step 5 Click Next.
Important
Do not include personally identifiable information in your eTicket such as credit card numbers, card verification codes (CVV/CVC/CID), Social Security Numbers, or passwords.
Getting Started with CyberSource Essentials | February 2017 15
Getting Started with CyberSource Essentials | February 2017
HAP
TER
C
3
Simple Order API BasicsThe CyberSource Simple Order API enables you to access CyberSource services using name-value pairs, XML, or SOAP toolkit. This document describes the name-value pairs and XML interfaces. For information about the SOAP interface, see the SOAP Toolkits for Web Services Developer Guide.
Choosing a ClientThe Simple Order API clients include the following components:
Client libraries for communicating with CyberSource services
Security libraries that digitally sign the messages
Sample code that shows how to digitally sign the messages and use the client libraries
SOAP proxy classes
The Simple Order API clients are available in various combinations of programming languages (ASP/COM, C/C++, Java, .NET, PHP, Perl), platforms (Windows, Solaris, Linux), and interfaces (name-value pairs, XML, SOAP). Choose a client SDK from the Simple Order API Clients page. After downloading an SDK, CyberSource recommends that you read the accompanying documentation, install the client, and test the client.
Choosing an API VersionCyberSource updates the Simple Order API regularly with new API fields and new functionality. With each update, the API version number increases. For the latest version of the API, see the XML schema:
https://ics2ws.ic3.com/commerce/1.x/transactionProcessor/
CyberSource recommends that you use the latest version of the Simple Order API to take advantage of the full functionality of CyberSource services. See the Simple Order API Release Notes for information about updates to the API.
16
Chapter 3 Simple Order API Basics
When you configure your Simple Order API client, you must indicate which version of the API to use. The documentation for your client explains how to do it.
Name-Value Pairs or XMLThe name-value pair interface is based on the XML schema. Most of the CyberSource documentation uses name-value pairs when discussing the Simple Order API. If you are using XML, you can easily translate the name-value pairs to the corresponding XML elements as described in "Correlating XML Elements and Name-Value Pair Field Names," page 17.
Name-Value PairsWhen you use name-value pairs, a request includes the required name-value pairs for the services that you are requesting. Your Simple Order API client digitally signs and sends your request. Then you parse the reply message, which consists of name-value pairs.
XMLWhen you use XML, a request includes the required XML elements and attributes for the services that you are requesting. Your Simple Order API client digitally signs and sends your request. Then you parse the XML reply message.
Correlating XML Elements and Name-Value Pair Field Names XML element names and name-value pair field names are related in the following ways: Each name-value pair field name matches the corresponding XML element name.
The XML schema shows hierarchy with an underscore ( _ ) separating the name of the parent element from the name of the child element.
Note
In addition to separating the names of the parent elements from the names of the child elements, underscores can be included in the names of parent elements and child elements.
Getting Started with CyberSource Essentials | February 2017 17
Chapter 3 Simple Order API Basics
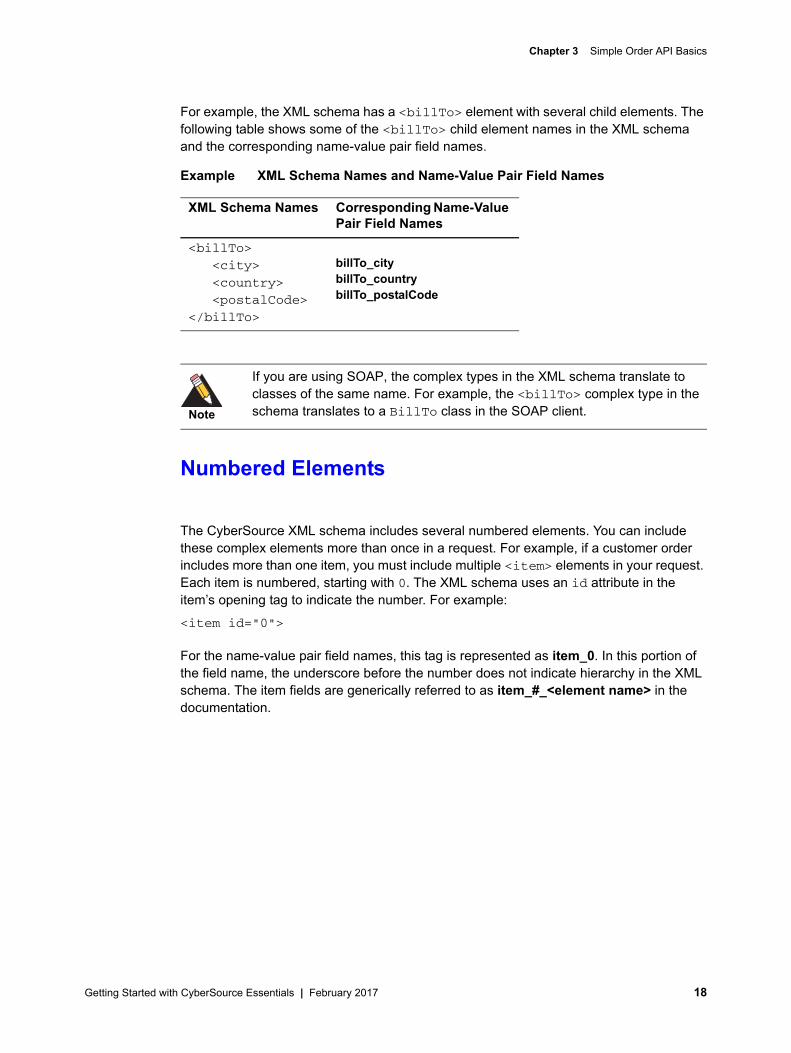
For example, the XML schema has a <billTo> element with several child elements. The following table shows some of the <billTo> child element names in the XML schema and the corresponding name-value pair field names.
Numbered Elements
The CyberSource XML schema includes several numbered elements. You can include these complex elements more than once in a request. For example, if a customer order includes more than one item, you must include multiple <item> elements in your request. Each item is numbered, starting with 0. The XML schema uses an id attribute in the item’s opening tag to indicate the number. For example:<item id="0">
For the name-value pair field names, this tag is represented as item_0. In this portion of the field name, the underscore before the number does not indicate hierarchy in the XML schema. The item fields are generically referred to as item_#_<element name> in the documentation.
Example XML Schema Names and Name-Value Pair Field Names
XML Schema Names Corresponding Name-Value Pair Field Names
<billTo><city><country><postalCode>
</billTo>
billTo_citybillTo_countrybillTo_postalCode
Note
If you are using SOAP, the complex types in the XML schema translate to classes of the same name. For example, the <billTo> complex type in the schema translates to a BillTo class in the SOAP client.
Getting Started with CyberSource Essentials | February 2017 18

Chapter 3 Simple Order API Basics
Below is an example of the numbered <item> element and the corresponding name-value pair field names. If you are using SOAP, the client contains a corresponding Item class.
Constructing and Sending RequestsA request for a CyberSource service includes general information and information specific to the service that you are requesting. General information includes information about: You, the merchant The customer and the form of payment
The items that the customer is buying
To indicate which service you are requesting, set the run attribute for the service to true. For example, to request the credit card authorization service, set the run attribute for the service as shown in the following table.
Example Numbered XML Schema Element Names and Name-Value Pair Field Names
XML Schema ElementNames
Corresponding Name-Value Pair Field Names
<item id="0"><unitPrice><quantity>
</item>
item_0_unitPriceitem_0_quantity
<item id="1"><unitPrice><quantity>
</item>
item_1_unitPriceitem_1_quantity
Important
When a request is in XML format and includes an <item> element, the element must include an id attribute. For example: <item id="0">.
Example Setting the run Attribute for the Credit Card Authorization Service
Name-Value Pair: ccAuthService_run=true
XML: <ccAuthService run="true">...</ccAuthService>
Getting Started with CyberSource Essentials | February 2017 19
Chapter 3 Simple Order API Basics
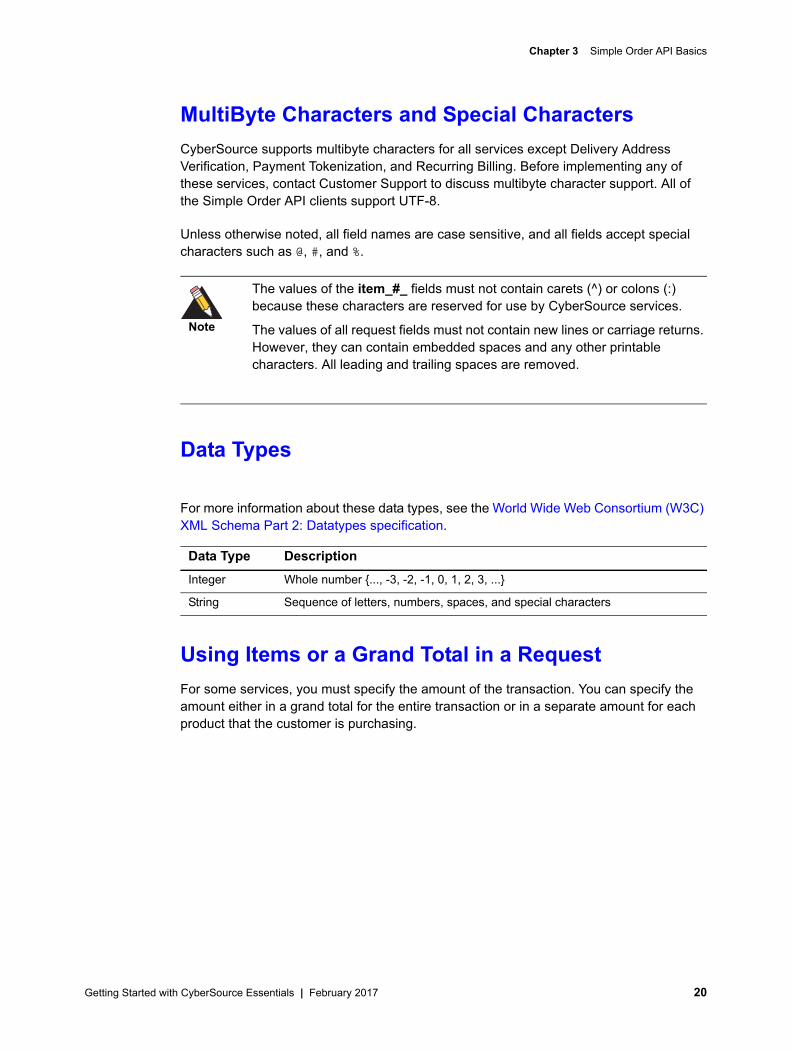
MultiByte Characters and Special CharactersCyberSource supports multibyte characters for all services except Delivery Address Verification, Payment Tokenization, and Recurring Billing. Before implementing any of these services, contact Customer Support to discuss multibyte character support. All of the Simple Order API clients support UTF-8.
Unless otherwise noted, all field names are case sensitive, and all fields accept special characters such as @, #, and %.
Data Types
For more information about these data types, see the World Wide Web Consortium (W3C) XML Schema Part 2: Datatypes specification.
Using Items or a Grand Total in a RequestFor some services, you must specify the amount of the transaction. You can specify the amount either in a grand total for the entire transaction or in a separate amount for each product that the customer is purchasing.
Note
The values of the item_#_ fields must not contain carets (^) or colons (:) because these characters are reserved for use by CyberSource services.
The values of all request fields must not contain new lines or carriage returns. However, they can contain embedded spaces and any other printable characters. All leading and trailing spaces are removed.
Data Type DescriptionInteger Whole number {..., -3, -2, -1, 0, 1, 2, 3, ...}
String Sequence of letters, numbers, spaces, and special characters
Getting Started with CyberSource Essentials | February 2017 20

Chapter 3 Simple Order API Basics
ItemsItems are the products that your customers purchase from you. When you send a request for a service that requires an amount, you can send item-specific information, such as the quantity of each item ordered and the unit price for each item. The items are referred to as item_0, item_1, item_2, and so on. CyberSource uses the information you provide for each item to calculate the grand total for the order.
Required Item-Level Fields
The value that you use for the item_#_productCode field determines which fields are required. If you omit the item_#_productCode field, its value defaults to default. If the value of the item_#_productCode field is one of the values in the bulleted list below, then the only required field is item_#_unitPrice: default
a value related to shipping and handling
If you do not set the item_#_quantity field, it defaults to 1.
If you do not set the item_#_productCode field to one of the values in the previous list, the following fields are required: item_#_unitPrice item_#_quantity
item_#_productName item_#_productSKU
The item_#_taxAmount field is always optional.
Specifying Tax
To include tax for an item, use the item_#_taxAmount field. This value is the total tax for the entire quantity of that item. In other words, its value is not multiplied by the value of item_#_quantity.
The grand total for this transaction is (10.00 * 5) + 4.00 = 54.00.
Important
The values for the item_#_ fields must not contain carets (^) or colons (:) because these characters are reserved for use by CyberSource services.
Example Specifying Tax
item_0_unitPrice=10.00item_0_quantity=5item_0_taxAmount=4.00
Getting Started with CyberSource Essentials | February 2017 21

Chapter 3 Simple Order API Basics
Specifying Freight Charges
To include a shipping and handling charge for the order, you must include an additional item with the item_#_productCode field set to one of the following values: shipping_only
handling_only
shipping_and_handling
The grand total for this transaction is (10.00 * 5) + 4.00 + (4.95 * 1) = 58.95.
Grand TotalInstead of using an itemized total, you can send a grand total for the order in the purchaseTotals_grandTotalAmount field. If you provide item-level information in addition to the grand total, CyberSource uses the grand total amount for the order total; CyberSource does not use the item-level information to calculate the order total. The item-level information is displayed on the Transaction Details page on the Business Center.
Coupons
You can offer your customers virtual coupons at your web store. CyberSource defines a coupon as a non-taxable, fixed amount deducted from an order total. Some examples of coupons you might offer are: Register now and get $100 off your purchase! Spring clearance! Get $10 off any order!
Thank you for ordering again within 30 days! We’re taking $5 off your order!
How Coupons are ProcessedThis sequence summarizes how CyberSource processes a request that includes a coupon:
1 All items are totaled and then the coupon amounts are deducted, resulting in an order subtotal.
Example Specifying Freight Charges
item_0_unitPrice=10.00item_0_quantity=5item_0_taxAmount=4.00item_1_unitPrice=4.95item_1_quantity=1item_1_productCode=shipping_only
Getting Started with CyberSource Essentials | February 2017 22

Chapter 3 Simple Order API Basics
2 The order subtotal and order tax total are added to get an order grand total.
3 The order grand total is used by the services in your request.
For example, if you requested an electronic check debit in the request with the coupon, the electronic check debit service uses the order grand total as the amount to charge.
Coupon ConstraintsYou cannot use coupons to do the following:
Apply a discount to a specific item in a multi-item order Apply a discount to a specific item before tax is calculated
Apply a percentage discount
The total coupon amount cannot be greater than the order grand total. Calculate your order totals before you send your requests to CyberSource so that you do not send orders with negative subtotals. CyberSource returns an error for orders with negative subtotals.
Including a Coupon in the RequestTo request a coupon with an order, include in the request an item with the product code set to coupon. For example, if your request contains two items, item_0 and item_1, request a coupon by adding item_2. The following example shows how to specify a 10 USD coupon. The quantity, productName, and productSKU fields are required.
Requesting a Follow-On Service
Request IDs and Request Tokens
item_2_unitPrice=10.00
item_2_quantity=1
item_2_productCode=coupon
item_2_productName=Spring Clearance
item_2_productSKU=349209
Important
Request tokens are required in follow-on request messages only for PayPal Express Checkout, China Processing, the Ingenico ePayments processor and the Atos processor. If you are using other payment methods and processors, you are not required to include request tokens in your request messages.
Getting Started with CyberSource Essentials | February 2017 23

Chapter 3 Simple Order API Basics
Request IDs and request tokens are identifiers that CyberSource returns in the reply messages for all services. You need to store these values because you will need them when you send a request for a follow-on service. For the request ID, the field name depends on the names of the primary service and follow-on service.
Alternative Payment Methods and ProcessorsFor PayPal Express Checkout, China Processing, the Ingenico ePayments processor, and the Atos processor, a request for a follow-on service must include a request ID and a request token. Save the request ID from the reply for the primary service and send this value in the follow-on request.
Working with Request Tokens
The request token is a unique identifier that CyberSource assigns to each request and returns to you in each reply. This field is an encoded string that does not contain any confidential information, such as account numbers or card verification numbers. For China Processing and Atos, you need to store this value, which is a string that can contain up to 256 characters. Depending on how you process follow-on requests, you might need to retrieve the request token value and include it in your follow-on service requests:
If you process primary requests with an API, but process follow-on requests through the Business Center, you do not need to provide the request token data.
If you process primary and follow-on requests with an API, you need to retrieve the request token from the primary reply message and include it in the follow-on request message:
Primary reply: requestTokenrequest_token=AA4JUrWguaMUGwxSWVdPS5IMFollow-on request: orderRequestTokenorder_request_token=AA4JUrWguaMUGwxSWVdPS5IM
Important
Although the name of the request token field that you receive is the same in each reply, the value for each field is different. Therefore, you must save each request token that you receive.
Important
Request tokens are required in follow-on request messages only for PayPal Express Checkout, China Processing, the Ingenico ePayments processor, and the Atos processor. If you are using other payment methods and processors, you are not required to include request tokens in your request messages.
Getting Started with CyberSource Essentials | February 2017 24

Chapter 3 Simple Order API Basics
Merchants Who Have Not Implemented Request TokensIf you were a CyberSource merchant before July 2008 and never implemented request tokens, you have a choice:
You can implement the request token as described in this document. You can let CyberSource store the request token data for you and retrieve it for you as
necessary when you send follow-on requests.
Merchants Who Have Implemented Request TokensIf you were a CyberSource merchant before July 2008 and implemented request tokens, your implementation uses a different field name for the request token that is sent to each follow-on service. With the new implementation, you use the orderRequestTokenord field for all follow-on services. This approach makes it easier to manage the request token values. It also reduces the likelihood of submitting a duplicate request by accidentally sending in the wrong request token value. You have a choice:
You can continue to use your current implementation at this time. It is still supported, but CyberSource recommends that you update your implementation to use the orderRequestToken field.
You can update your implementation to store the latest request token for a transaction in one database field to return with all follow-on services for the transaction:
You can update your implementation without changing your database. Store the latest request token for a transaction in all of your existing request token database fields so that any follow-on request for the transaction returns the latest request token value:
Note
The following figure uses the request field names for the credit card services. If you are using a different set of services, substitute the request field names for the services you are using.
Getting Started with CyberSource Essentials | February 2017 25

Chapter 3 Simple Order API Basics
Sending RequestsFor live transactions, send requests to the location of the XML schema:
https://ics2ws.ic3.com/commerce/1.x/transactionProcessor
For test transactions, send requests to:https://ics2wstest.ic3.com/commerce/1.x/transactionProcessor
Handling RepliesAfter receiving a request from you, CyberSource responds with a reply message containing the results of the request that must be integrated into your system and any other system that uses it. CyberSource recommends storing the data.
If you are using XML, you need to use an XML parser that supports namespaces because XML replies from CyberSource contain the namespace prefix c:.
Write an error handler to interpret the information in the reply message. Do not show the reply information directly to your customers. Instead, present an appropriate response that provides customers with the results of their transactions.
Important
Because CyberSource can add reply fields and reason codes at any time, do the following: Parse the reply data according to the names of the fields instead of their
order in the reply. For more information about parsing reply fields, see the documentation for your client.
Program your error handler to use the decision field to determine the result if it receives a reason code that it does not recognize.
Getting Started with CyberSource Essentials | February 2017 26
Chapter 3 Simple Order API Basics
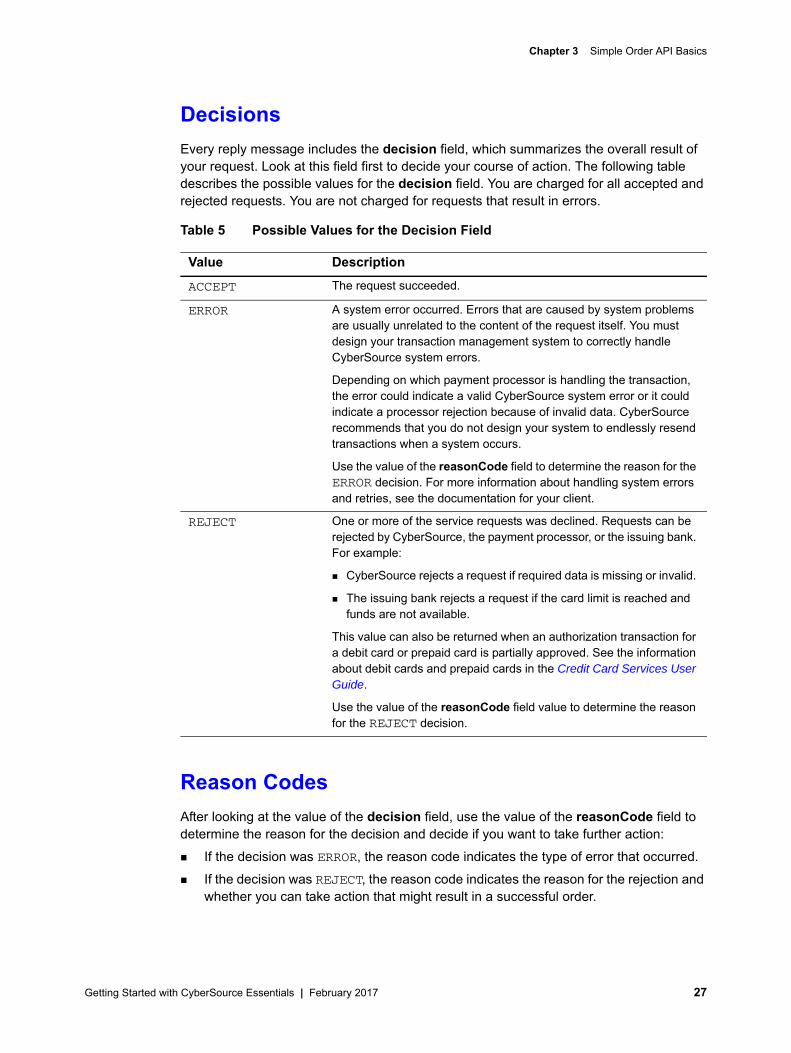
DecisionsEvery reply message includes the decision field, which summarizes the overall result of your request. Look at this field first to decide your course of action. The following table describes the possible values for the decision field. You are charged for all accepted and rejected requests. You are not charged for requests that result in errors.
Reason CodesAfter looking at the value of the decision field, use the value of the reasonCode field to determine the reason for the decision and decide if you want to take further action: If the decision was ERROR, the reason code indicates the type of error that occurred. If the decision was REJECT, the reason code indicates the reason for the rejection and
whether you can take action that might result in a successful order.
Table 5 Possible Values for the Decision Field
Value Description
ACCEPT The request succeeded.
ERROR A system error occurred. Errors that are caused by system problems are usually unrelated to the content of the request itself. You must design your transaction management system to correctly handle CyberSource system errors.
Depending on which payment processor is handling the transaction, the error could indicate a valid CyberSource system error or it could indicate a processor rejection because of invalid data. CyberSource recommends that you do not design your system to endlessly resend transactions when a system occurs.
Use the value of the reasonCode field to determine the reason for the ERROR decision. For more information about handling system errors and retries, see the documentation for your client.
REJECT One or more of the service requests was declined. Requests can be rejected by CyberSource, the payment processor, or the issuing bank. For example:
CyberSource rejects a request if required data is missing or invalid.
The issuing bank rejects a request if the card limit is reached and funds are not available.
This value can also be returned when an authorization transaction for a debit card or prepaid card is partially approved. See the information about debit cards and prepaid cards in the Credit Card Services User Guide.
Use the value of the reasonCode field value to determine the reason for the REJECT decision.
Getting Started with CyberSource Essentials | February 2017 27

Chapter 3 Simple Order API Basics
The <service>_reasonCode fields indicate the result of each service that you requested. For example, if you request a credit card authorization, the reply message includes the ccAuthReply_reasonCode field.
Missing or Invalid FieldsYou are responsible for ensuring that the data you send to CyberSource is complete (no missing fields) and correct (no invalid data). Verify the data entered on your web sites and point-of-sale applications before sending the information to CyberSource.
If you send a request with missing or invalid information, the reply message includes the appropriate reason codes and one or more reply fields, invalidField_0...N or missingField_0…N, which list the fields you need to correct. The nature of the missing or invalid information determines the number and the content of the reply fields. For example, if three required fields are missing from your request, the reply includes at least one and up to three fields named missingField_0, missingField_1, and missingField_2. You need to correct these fields and resubmit the request.
Because the API behavior pertaining to these reply fields is always subject to change, do not use these fields to communicate with customers.
Request IDsCyberSource returns a request ID in the reply for every service. You must store this value because you will need it when you send a request for a follow-on service as described in "Requesting a Follow-On Service," page 26.
Note
CyberSource reserves the right to add new reason codes at any time. If your error handler receives a reason code that it does not recognize, it should use the decision field to determine the result.
Note
For XML, the <missingField> and <invalidField> elements are not numbered. Instead, the reply includes multiple <missingField> or <invalidField> elements.
If you are using SOAP, the reply includes an array of the missing fields and an array of the invalid fields.
Important
Although the name of the request ID field is the same in each reply, the value for the field is different in each reply. Therefore, you must save each request ID that you receive.
Getting Started with CyberSource Essentials | February 2017 28