U n i t 1 L e s s o n 1 : I n t r o d u c t i o n t o A u ...

Informatica® MDM - Customer 36010.2 HotFix 3
Installation and Configuration Guide

Informatica MDM - Customer 360 Installation and Configuration Guide10.2 HotFix 3June 2018
© Copyright Informatica LLC 2016, 2018
This software and documentation are provided only under a separate license agreement containing restrictions on use and disclosure. No part of this document may be reproduced or transmitted in any form, by any means (electronic, photocopying, recording or otherwise) without prior consent of Informatica LLC.
U.S. GOVERNMENT RIGHTS Programs, software, databases, and related documentation and technical data delivered to U.S. Government customers are "commercial computer software" or "commercial technical data" pursuant to the applicable Federal Acquisition Regulation and agency-specific supplemental regulations. As such, the use, duplication, disclosure, modification, and adaptation is subject to the restrictions and license terms set forth in the applicable Government contract, and, to the extent applicable by the terms of the Government contract, the additional rights set forth in FAR 52.227-19, Commercial Computer Software License.
Informatica, the Informatica logo, and ActiveVOS are trademarks or registered trademarks of Informatica LLC in the United States and many jurisdictions throughout the world. A current list of Informatica trademarks is available on the web at https://www.informatica.com/trademarks.html. Other company and product names may be trade names or trademarks of their respective owners.
The information in this documentation is subject to change without notice. If you find any problems in this documentation, report them to us at [email protected].
Informatica products are warranted according to the terms and conditions of the agreements under which they are provided. INFORMATICA PROVIDES THE INFORMATION IN THIS DOCUMENT "AS IS" WITHOUT WARRANTY OF ANY KIND, EXPRESS OR IMPLIED, INCLUDING WITHOUT ANY WARRANTIES OF MERCHANTABILITY, FITNESS FOR A PARTICULAR PURPOSE AND ANY WARRANTY OR CONDITION OF NON-INFRINGEMENT.
Publication Date: 2018-06-08

Table of Contents
Preface . . . . . . . . . . . . . . . . . . . . . . . . . . . . . . . . . . . . . . . . . . . . . . . . . . . . . . . . . . . . . . . . . . . . . . 6Informatica Resources. . . . . . . . . . . . . . . . . . . . . . . . . . . . . . . . . . . . . . . . . . . . . . . . . . . 6
Informatica Network. . . . . . . . . . . . . . . . . . . . . . . . . . . . . . . . . . . . . . . . . . . . . . . . . 6
Informatica Knowledge Base. . . . . . . . . . . . . . . . . . . . . . . . . . . . . . . . . . . . . . . . . . . . 6
Informatica Documentation. . . . . . . . . . . . . . . . . . . . . . . . . . . . . . . . . . . . . . . . . . . . . 6
Informatica Product Availability Matrixes. . . . . . . . . . . . . . . . . . . . . . . . . . . . . . . . . . . . 7
Informatica Velocity. . . . . . . . . . . . . . . . . . . . . . . . . . . . . . . . . . . . . . . . . . . . . . . . . . 7
Informatica Marketplace. . . . . . . . . . . . . . . . . . . . . . . . . . . . . . . . . . . . . . . . . . . . . . . 7
Informatica Global Customer Support. . . . . . . . . . . . . . . . . . . . . . . . . . . . . . . . . . . . . . 7
Chapter 1: Introduction to Informatica - MDM Customer 360. . . . . . . . . . . . . . . . . . 8Overview of Informatica MDM - Customer 360. . . . . . . . . . . . . . . . . . . . . . . . . . . . . . . . . . . . 8
Architecture. . . . . . . . . . . . . . . . . . . . . . . . . . . . . . . . . . . . . . . . . . . . . . . . . . . . . . . . . . 9
Customer Data Management. . . . . . . . . . . . . . . . . . . . . . . . . . . . . . . . . . . . . . . . . . . . 9
Informatica MDM Multidomain Edition. . . . . . . . . . . . . . . . . . . . . . . . . . . . . . . . . . . . . . 9
Informatica MDM - Product 360. . . . . . . . . . . . . . . . . . . . . . . . . . . . . . . . . . . . . . . . . 10
User Roles. . . . . . . . . . . . . . . . . . . . . . . . . . . . . . . . . . . . . . . . . . . . . . . . . . . . . . . . . . 10
Dun and Bradstreet Data Enrichment . . . . . . . . . . . . . . . . . . . . . . . . . . . . . . . . . . . . . . . . . 11
Data as a Service Validation. . . . . . . . . . . . . . . . . . . . . . . . . . . . . . . . . . . . . . . . . . . . . . . 11
Chapter 2: Before You Install. . . . . . . . . . . . . . . . . . . . . . . . . . . . . . . . . . . . . . . . . . . . . . . . 12Read the Release Notes. . . . . . . . . . . . . . . . . . . . . . . . . . . . . . . . . . . . . . . . . . . . . . . . . 12
Software Requirements. . . . . . . . . . . . . . . . . . . . . . . . . . . . . . . . . . . . . . . . . . . . . . . . . . 13
Extracting the Customer 360 Application Archive File. . . . . . . . . . . . . . . . . . . . . . . . . . . . . . . 13
DaaS Linkage-Related Property Files. . . . . . . . . . . . . . . . . . . . . . . . . . . . . . . . . . . . . . 14
Creating the Operational Reference Store. . . . . . . . . . . . . . . . . . . . . . . . . . . . . . . . . . . . . . 14
Importing the MDM Metadata. . . . . . . . . . . . . . . . . . . . . . . . . . . . . . . . . . . . . . . . . . . . . . 15
Registering the Operational Reference Store. . . . . . . . . . . . . . . . . . . . . . . . . . . . . . . . . . . . 15
Importing the Application Metadata from a Change List. . . . . . . . . . . . . . . . . . . . . . . . . . . . . 15
Inserting Reference Data. . . . . . . . . . . . . . . . . . . . . . . . . . . . . . . . . . . . . . . . . . . . . . . . . 16
Importing and Deploying the Customer 360 Application. . . . . . . . . . . . . . . . . . . . . . . . . . . . . 16
Informatica Data as a Service. . . . . . . . . . . . . . . . . . . . . . . . . . . . . . . . . . . . . . . . . . . . . . 17
Specifying the Mandatory Parameters for DaaS Validation. . . . . . . . . . . . . . . . . . . . . . . . 18
Configuring Message Queue in the MDM Hub. . . . . . . . . . . . . . . . . . . . . . . . . . . . . . . . . . . . 18
Configuring JMS Queue and JMS Connection Factory. . . . . . . . . . . . . . . . . . . . . . . . . . . 18
Configuring the Message Queue in the MDM Hub. . . . . . . . . . . . . . . . . . . . . . . . . . . . . . 18
Creating a JCEKS Keystore. . . . . . . . . . . . . . . . . . . . . . . . . . . . . . . . . . . . . . . . . . . . . . . 19
Creating an ApplicationAdministrator User. . . . . . . . . . . . . . . . . . . . . . . . . . . . . . . . . . . . . 20
Creating a User in the MDM Hub. . . . . . . . . . . . . . . . . . . . . . . . . . . . . . . . . . . . . . . . . 20
Assigning the ApplicationAdministrator Role. . . . . . . . . . . . . . . . . . . . . . . . . . . . . . . . . 20
Table of Contents 3

Configuring the Application Properties File. . . . . . . . . . . . . . . . . . . . . . . . . . . . . . . . . . . . . 21
Configuring the Keystore and D&B Linkage Properties. . . . . . . . . . . . . . . . . . . . . . . . . . . . . . 21
Configuring the Keystore Password. . . . . . . . . . . . . . . . . . . . . . . . . . . . . . . . . . . . . . . . . . 22
Configuring the Log File Path. . . . . . . . . . . . . . . . . . . . . . . . . . . . . . . . . . . . . . . . . . . . . . 23
Editing the Resource Bundle Files . . . . . . . . . . . . . . . . . . . . . . . . . . . . . . . . . . . . . . . . . . . 23
Copying the JDBC Drivers . . . . . . . . . . . . . . . . . . . . . . . . . . . . . . . . . . . . . . . . . . . . . . . . 23
Chapter 3: Installing MDM - Customer 360. . . . . . . . . . . . . . . . . . . . . . . . . . . . . . . . . . . 24Installing MDM - Customer 360. . . . . . . . . . . . . . . . . . . . . . . . . . . . . . . . . . . . . . . . . . . . . 24
Chapter 4: After You Install. . . . . . . . . . . . . . . . . . . . . . . . . . . . . . . . . . . . . . . . . . . . . . . . . 26Adding User Accounts and Assign Roles. . . . . . . . . . . . . . . . . . . . . . . . . . . . . . . . . . . . . . . 26
Adding User Accounts. . . . . . . . . . . . . . . . . . . . . . . . . . . . . . . . . . . . . . . . . . . . . . . 26
Role Privileges. . . . . . . . . . . . . . . . . . . . . . . . . . . . . . . . . . . . . . . . . . . . . . . . . . . . 27
Assigning Roles to Business Users. . . . . . . . . . . . . . . . . . . . . . . . . . . . . . . . . . . . . . . 27
Configure the Operational Reference Store. . . . . . . . . . . . . . . . . . . . . . . . . . . . . . . . . . . . . 28
Truncating a Repository Table. . . . . . . . . . . . . . . . . . . . . . . . . . . . . . . . . . . . . . . . . . 28
Populate Customer 360 Charts with Data. . . . . . . . . . . . . . . . . . . . . . . . . . . . . . . . . . . . . . 28
Charts and Graphs. . . . . . . . . . . . . . . . . . . . . . . . . . . . . . . . . . . . . . . . . . . . . . . . . . 29
Importing Customer 360 Chart Configurations. . . . . . . . . . . . . . . . . . . . . . . . . . . . . . . . 29
Configuring the Data Mart Database Connection. . . . . . . . . . . . . . . . . . . . . . . . . . . . . . . 29
Configuring the Report Parameters. . . . . . . . . . . . . . . . . . . . . . . . . . . . . . . . . . . . . . . 30
Populating the Data Mart with Data. . . . . . . . . . . . . . . . . . . . . . . . . . . . . . . . . . . . . . . 31
Configuring the Product 360 Connection Parameters. . . . . . . . . . . . . . . . . . . . . . . . . . . . . . . 31
Integrating Informatica MDM - Relate 360. . . . . . . . . . . . . . . . . . . . . . . . . . . . . . . . . . . . . . 32
Creating an External Resource for the Relationship Graph. . . . . . . . . . . . . . . . . . . . . . . . . 33
Design a Layout for the Person Business Entity View. . . . . . . . . . . . . . . . . . . . . . . . . . . . 34
Creating an External Resource for the Aggregate View. . . . . . . . . . . . . . . . . . . . . . . . . . . 35
Edit the Layout of Person Dashboard. . . . . . . . . . . . . . . . . . . . . . . . . . . . . . . . . . . . . . 36
Chapter 5: Business Processes for Customer Management. . . . . . . . . . . . . . . . . . 37Workflows. . . . . . . . . . . . . . . . . . . . . . . . . . . . . . . . . . . . . . . . . . . . . . . . . . . . . . . . . . 37
User Roles. . . . . . . . . . . . . . . . . . . . . . . . . . . . . . . . . . . . . . . . . . . . . . . . . . . . . . . . . . 37
Role Privileges. . . . . . . . . . . . . . . . . . . . . . . . . . . . . . . . . . . . . . . . . . . . . . . . . . . . . . . 38
Task Types. . . . . . . . . . . . . . . . . . . . . . . . . . . . . . . . . . . . . . . . . . . . . . . . . . . . . . . . . . 38
Chapter 6: Customizing Customer 360. . . . . . . . . . . . . . . . . . . . . . . . . . . . . . . . . . . . . . . 40Customizing Customer 360 Overview. . . . . . . . . . . . . . . . . . . . . . . . . . . . . . . . . . . . . . . . . 40
Customizing the Layout. . . . . . . . . . . . . . . . . . . . . . . . . . . . . . . . . . . . . . . . . . . . . . . . . . 40
User Interface Components. . . . . . . . . . . . . . . . . . . . . . . . . . . . . . . . . . . . . . . . . . . . 41
Components and Parent Elements. . . . . . . . . . . . . . . . . . . . . . . . . . . . . . . . . . . . . . . . 41
Customizing the Dashboard Components. . . . . . . . . . . . . . . . . . . . . . . . . . . . . . . . . . . 42
XML code for the Task Manager and My Records Components Configuration. . . . . . . . . . . . 42
4 Table of Contents

XML Code for the DaaS Providers Component Configuration. . . . . . . . . . . . . . . . . . . . . . . 43
XML Code for the File Import Component Configuration. . . . . . . . . . . . . . . . . . . . . . . . . . 45
XML Code for the Data View Component Configuration. . . . . . . . . . . . . . . . . . . . . . . . . . 45
XML Code for the External Link Components. . . . . . . . . . . . . . . . . . . . . . . . . . . . . . . . . 46
XML Code for the Twitter Component. . . . . . . . . . . . . . . . . . . . . . . . . . . . . . . . . . . . . . 48
Charts Configuration. . . . . . . . . . . . . . . . . . . . . . . . . . . . . . . . . . . . . . . . . . . . . . . . . . . 49
Adding a Custom Chart. . . . . . . . . . . . . . . . . . . . . . . . . . . . . . . . . . . . . . . . . . . . . . . 49
REST Web Services for Charts and Reports. . . . . . . . . . . . . . . . . . . . . . . . . . . . . . . . . . 50
Report Facet Web Service. . . . . . . . . . . . . . . . . . . . . . . . . . . . . . . . . . . . . . . . . . . . . 52
Extending the Data Model. . . . . . . . . . . . . . . . . . . . . . . . . . . . . . . . . . . . . . . . . . . . . . . . 53
Guidelines for Extending the Data Model. . . . . . . . . . . . . . . . . . . . . . . . . . . . . . . . . . . . 53
Guidelines for Adding Base Objects. . . . . . . . . . . . . . . . . . . . . . . . . . . . . . . . . . . . . . . 54
Extending the Customer 360 Resources. . . . . . . . . . . . . . . . . . . . . . . . . . . . . . . . . . . . . . . 54
Guidelines for Extending the Customer 360 Resources. . . . . . . . . . . . . . . . . . . . . . . . . . . 54
Chapter 7: Upgrading Customer 360. . . . . . . . . . . . . . . . . . . . . . . . . . . . . . . . . . . . . . . . . 55Upgrade Overview. . . . . . . . . . . . . . . . . . . . . . . . . . . . . . . . . . . . . . . . . . . . . . . . . . . . . 55
Before You Upgrade. . . . . . . . . . . . . . . . . . . . . . . . . . . . . . . . . . . . . . . . . . . . . . . . . . . . 55
Upgrading MDM Multidomain Edition. . . . . . . . . . . . . . . . . . . . . . . . . . . . . . . . . . . . . . 56
Backing Up the Customer 360 Library and Configuration Files. . . . . . . . . . . . . . . . . . . . . . 56
Extracting the Customer 360 Application Archive File. . . . . . . . . . . . . . . . . . . . . . . . . . . . 56
Copying the Customer 360 Configuration Files. . . . . . . . . . . . . . . . . . . . . . . . . . . . . . . . 57
Configuring the Application Properties File. . . . . . . . . . . . . . . . . . . . . . . . . . . . . . . . . . 57
Configuring the Base URL for the Business Entity Services. . . . . . . . . . . . . . . . . . . . . . . . 58
Updating the Customer 360 Database Schema. . . . . . . . . . . . . . . . . . . . . . . . . . . . . . . . 58
Adding the Employee Relationship Type. . . . . . . . . . . . . . . . . . . . . . . . . . . . . . . . . . . . 61
Upgrading Customer 360. . . . . . . . . . . . . . . . . . . . . . . . . . . . . . . . . . . . . . . . . . . . . . . . . 62
Updating the Charts. . . . . . . . . . . . . . . . . . . . . . . . . . . . . . . . . . . . . . . . . . . . . . . . . . . . 63
Chapter 8: Troubleshooting. . . . . . . . . . . . . . . . . . . . . . . . . . . . . . . . . . . . . . . . . . . . . . . . . 64Generate Business Entity Schema for the Customer 360 Application. . . . . . . . . . . . . . . . . . . . . 64
Check Your Security Access Manager Configuration. . . . . . . . . . . . . . . . . . . . . . . . . . . . . . . 65
Import of the IDD ZIP File Fails in IBM DB2. . . . . . . . . . . . . . . . . . . . . . . . . . . . . . . . . . . . . 65
Financials Section of the Dashboard Displays Null Values. . . . . . . . . . . . . . . . . . . . . . . . . . . . 66
Provisioning Tool Does Not Respond. . . . . . . . . . . . . . . . . . . . . . . . . . . . . . . . . . . . . . . . . 66
Installer Does Not Update the JNDI Path for JBoss. . . . . . . . . . . . . . . . . . . . . . . . . . . . . . . . 66
Index. . . . . . . . . . . . . . . . . . . . . . . . . . . . . . . . . . . . . . . . . . . . . . . . . . . . . . . . . . . . 67
Table of Contents 5

PrefaceThis Guide is intended for database administrators, system administrators, and implementers who are responsible for installing and setting up Informatica MDM Customer 360. For more information about configuring the underlying Informatica MDM ME environment, see the Informatica MDM Multidomain Edition Configuration Guide.
Informatica Resources
Informatica NetworkInformatica Network hosts Informatica Global Customer Support, the Informatica Knowledge Base, and other product resources. To access Informatica Network, visit https://network.informatica.com.
As a member, you can:
• Access all of your Informatica resources in one place.
• Search the Knowledge Base for product resources, including documentation, FAQs, and best practices.
• View product availability information.
• Review your support cases.
• Find your local Informatica User Group Network and collaborate with your peers.
Informatica Knowledge BaseUse the Informatica Knowledge Base to search Informatica Network for product resources such as documentation, how-to articles, best practices, and PAMs.
To access the Knowledge Base, visit https://kb.informatica.com. If you have questions, comments, or ideas about the Knowledge Base, contact the Informatica Knowledge Base team at [email protected].
Informatica DocumentationTo get the latest documentation for your product, browse the Informatica Knowledge Base at https://kb.informatica.com/_layouts/ProductDocumentation/Page/ProductDocumentSearch.aspx.
If you have questions, comments, or ideas about this documentation, contact the Informatica Documentation team through email at [email protected].
6

Informatica Product Availability MatrixesProduct Availability Matrixes (PAMs) indicate the versions of operating systems, databases, and other types of data sources and targets that a product release supports. If you are an Informatica Network member, you can access PAMs at https://network.informatica.com/community/informatica-network/product-availability-matrices.
Informatica VelocityInformatica Velocity is a collection of tips and best practices developed by Informatica Professional Services. Developed from the real-world experience of hundreds of data management projects, Informatica Velocity represents the collective knowledge of our consultants who have worked with organizations from around the world to plan, develop, deploy, and maintain successful data management solutions.
If you are an Informatica Network member, you can access Informatica Velocity resources at http://velocity.informatica.com.
If you have questions, comments, or ideas about Informatica Velocity, contact Informatica Professional Services at [email protected].
Informatica MarketplaceThe Informatica Marketplace is a forum where you can find solutions that augment, extend, or enhance your Informatica implementations. By leveraging any of the hundreds of solutions from Informatica developers and partners, you can improve your productivity and speed up time to implementation on your projects. You can access Informatica Marketplace at https://marketplace.informatica.com.
Informatica Global Customer SupportYou can contact a Global Support Center by telephone or through Online Support on Informatica Network.
To find your local Informatica Global Customer Support telephone number, visit the Informatica website at the following link: http://www.informatica.com/us/services-and-training/support-services/global-support-centers.
If you are an Informatica Network member, you can use Online Support at http://network.informatica.com.
Preface 7

C h a p t e r 1
Introduction to Informatica - MDM Customer 360
This chapter includes the following topics:
• Overview of Informatica MDM - Customer 360, 8
• Architecture, 9
• User Roles, 10
• Dun and Bradstreet Data Enrichment , 11
• Data as a Service Validation, 11
Overview of Informatica MDM - Customer 360Informatica MDM - Customer 360 provides clean, consistent, and connected information about customers. Business managers use the master customer data to make better business decisions about customers and manage customer relationships. You can get a single trusted view of a customer. You can enrich and update the customer data with the data from Data as a Service (DaaS) providers, such as Dun and Bradstreet (D&B).
With Customer 360, business users can achieve the following goals:
• Streamline the customer onboarding and qualification process.
• Centralize the data about customers in a master database.
• Enrich customer data with data from external sources, such as D&B.
• View the relationships between customers, parent companies, subsidiaries, and related organizations.
• Design campaigns based on customer preferences and behavior.
• Improve customer service.
• Connect customer data to the product catalogs and view the buying patterns.
• View customer-to-product relationships.
Customer 360 is based on Informatica MDM Multidomain Edition. Business users connect to master customer data through a business-friendly user interface. The user interface displays an enterprise-level dashboard as well as 360 degree customer views that are customized for different business users.
The Customer 360 environment integrates with Informatica Product 360, which is a product information management system.
8

Use Customer 360 to access the master data that is stored in the Hub Store. Master data is organized by business entities. Business entities are the type of top-level data that has significance for an organization. Business entities include persons and organizations.
Business users use Customer 360 to perform the following activities:
• Add business entities.
• Request DaaS providers to enrich the data in business entities.
• Search for and edit business entities.
• Manage relationships between business entities.
• Participate in review processes for new and changed business entities.
• Import records in bulk to create new customers.
ArchitectureInformatica MDM - Customer 360 requires Informatica MDM Multidomain Edition and the embedded Informatica ActiveVOS® Server. For product information, you need integration with MDM - Product 360.
The following diagram shows the architecture for Customer 360:
Customer Data ManagementCustomer 360 adds additional features to the Informatica MDM environment, such as a database schema for customer data, business processes for customer management, and an interface that the business users can use to access customer data.
Customer data management includes onboarding of a customer and customer profile management.
Informatica MDM Multidomain EditionCustomer 360 includes the standard MDM Multidomain Edition components:
Architecture 9

Hub Store
Databases that store and consolidate business data. The Hub Store consists of an MDM Hub Master Database and Operational Reference Stores. The Application ships with a database schema that you use to create an Operational Reference Store for customer master data.
Hub Server
A J2EE application that you deploy on an application server. The Hub Server processes data within the Hub Store and integrates the MDM Hub with external applications. The Hub Server is the run-time component that manages core and common services for the MDM Hub. It also manages user authentication across all components.
Process Server
A J2EE application that you deploy on an application server. The Process Server cleanses and matches data and performs batch jobs such as load, recalculates best version of the truth, and revalidates. The Process Server interfaces with cleanse engines to standardize the data and to optimize the data for match and consolidation.
ActiveVOS Server
Business process management software that automates business processes. The Application ships with business processes that help you to manage the customer lifecycle. These processes ensure that authorized business managers review customer profiles and review internal updates to master data.
Informatica Data Director
A browser-based interface that business managers use to view and manage data. The Application ships with Customer 360, which contains an enterprise-level workspace focused on customers and views designed for business managers.
Hub Console
A browser-based interface that administrators use to manage the MDM Hub and data stewards use for managing records and batch processing of records.
Informatica MDM - Product 360Informatica MDM - Product 360 creates a single repository for all product data. In Customer 360, MDM - Product 360 is an optional component.
Product 360 supplies the product data and the purchase history of a customer. You can view the data in the customer dashboard.
User RolesThe MDM Hub user roles control read and write privileges of the Operational Reference Store (ORS) that contains the customer master data.
Customer 360 uses the following MDM Hub user roles:User roles for system users
The ApplicationAdministrator role is for a super user, who has full privileges.
10 Chapter 1: Introduction to Informatica - MDM Customer 360

User roles for business users
User roles for the business users control the data privileges in the ORS and also the review privileges in the business processes. Each business user who is authorized to participate in customer data management receives one or more role assignments. Many users can have the same role.
Customer 360 includes the following predefined roles for the business users:
• Sales Operation Analyst
• Sales Operation Manager
Dun and Bradstreet Data EnrichmentYou can enrich the business entity data with data from Dun and Bradstreet (D&B). You can get the detailed business entity profile and the linkage data from D&B.
Data as a Service ValidationUse the integration of Customer 360 with Informatica DaaS for data verification and correction. You can verify customer contact information and store accurate data.
You can analyze, verify, correct, and format addresses according to the local postal standards. You can ensure that the email addresses are valid and formatted correctly. You can find email domains involved with spam networks, traps, and other malicious threats and verify that the email address is valid, not valid, or malicious. You can verify the phone numbers of your customers.
Dun and Bradstreet Data Enrichment 11
C h a p t e r 2
Before You InstallThis chapter includes the following topics:
• Read the Release Notes, 12
• Software Requirements, 13
• Extracting the Customer 360 Application Archive File, 13
• Creating the Operational Reference Store, 14
• Importing the MDM Metadata, 15
• Registering the Operational Reference Store, 15
• Importing the Application Metadata from a Change List, 15
• Inserting Reference Data, 16
• Importing and Deploying the Customer 360 Application, 16
• Informatica Data as a Service, 17
• Configuring Message Queue in the MDM Hub, 18
• Creating a JCEKS Keystore, 19
• Creating an ApplicationAdministrator User, 20
• Configuring the Application Properties File, 21
• Configuring the Keystore and D&B Linkage Properties, 21
• Configuring the Keystore Password, 22
• Configuring the Log File Path, 23
• Editing the Resource Bundle Files , 23
• Copying the JDBC Drivers , 23
Read the Release NotesRead the MDM - Customer 360 Release Notes. You can also find information about the known limitations for the release.
12

Software RequirementsSet up the Informatica MDM Multidomain Edition environment before you install Informatica MDM - Customer 360.
Perform the following tasks:
1. Review the Product Availability Matrix for Customer 360 to discover the system requirements and supported versions for products, databases, and application servers. You can find all Product Availability Matrices at https://network.informatica.com/community/informatica-network/product-availability-matrices.
2. Install a supported version of MDM Multidomain Edition and the embedded version of Informatica ActiveVOS® Server. Follow the instructions in the MDM Multidomain Edition 10.2 Installation Guides or the MDM Multidomain Edition 10.2 Upgrade Guides for your environment.
3. If you plan to use Informatica MDM - Product 360, install a supported version.
Extracting the Customer 360 Application Archive FileYou receive the Customer 360 application as an archive file. Create the following directory structure and extract the contents of the Customer 360 archive file into it:
<MDM Installation Directory>/app/tcr
The extracted content contains the following files and folders:
• bin/. Contains installation scripts.
• bpm/. Contains the ActiveVOS default business process in a deployable format.
- InfaCustomer360Workflow.bpr. Contains the default business process for the Party table-based data model.
- pre_c360_10.2_hf2/. Directory that contains the default business processes for the Party Role table-based data model.
• cleanse/. Contains custom Java cleanse functions.
• config/. Contains configuration properties files.
• data/. Contains the scripts for inserting lookup or reference data.
• datamart/. Contains the data mart service and the chart configurations.
- chart-config/, config/, and lib/. Directories that contain the chart configurations.
- populate_datamart. Data mart service for the Party table-based data model.
- pre_c360_10.2_hf2/. Directory that contains the data mart service for the Party Role table-based data model.
• docs/. Contains the data dictionary.
- C360_102HF2_DataDictionary_en.pdf. Data dictionary for the Party table-based data model.
- pre_c360_10.2_hf2. Directory that contains the data dictionary for the Party Role table-based data model.
• hub/. Contains the subdirectories that contain the database schema and the configuration files to deploy.
- cocs-config-xml/. Contains configuration files for the business entities and business entity services.
Software Requirements 13

- entity360config-xml/. Contains copies of the Entity 360 component instance definitions that ship with MDM Multidomain Edition.
- change-xml. Contains the MDM Hub metadata including components, such as landing tables, lookup tables, staging tables, base objects, and match and merge rules, cleanse functions, component instances, business entities, and business entity services.
• idd/. Contains IDD application archive to support Hierarchy Manager interface.
• lib/. Directory for the external libraries. Copy the JDBC driver files for your database to the lib directory.
• notices/. Contains the legal copyright file.
• pre_c360_10.2_hf2/. Directory that contains the Task Manager, My Records, Timeline, File Import, Charts, and Linkage-related services for the Party Role table-based data model.
• resources/. Contains the resource bundle.properties files for each of the supported locales.
• user_exit/. Contains the MDM Hub user exit archive.
• customer360view-ear.ear and uiwebapp-ear.ear. Files for the Customer 360 user interface.
• Customer360.war. File that contains the Task Manager, My Records, Timeline, File Import, Charts, and Linkage-related services for the Party table-based data model.
DaaS Linkage-Related Property FilesThe archive file contains the property files related to DaaS linkage. You can find the property files in the following directory:
/app/tcr/config
The following files contains the DaaS-related properties:
• daaslinkage-org-relationship-mapping.properties. Contains the mappings between CorporateLinkage relationships and Customer 360 relationships.
• daaslinkage-relatedorg-relationship-mapping.properties. Contains the mappings between CorporateLinkage relationships and Customer 360 relationships.
• daaslinkage-view-mapping.properties. Contains the mapping between CorporateLinkage fields and RelatedOrgLinkageView fields.
• daas-msg-trigger-config.properties. Contains the message queue trigger property related to the linkage service.
Creating the Operational Reference StoreCreate an Operational Reference Store (ORS) for Customer 360.
For more information about how to create an ORS, see the Informatica MDM Multidomain Edition Installation Guide.
14 Chapter 2: Before You Install

Importing the MDM MetadataAfter you create the Customer 360 Operational Reference Store (ORS), import the MDM metadata into the ORS.
For more information about how to import the MDM metadata, see the Informatica MDM Multidomain Edition Installation Guide.
Registering the Operational Reference StoreRegister the Customer 360 Operational Reference Store.
1. Log in to the MDM Hub Console.
2. In the Configuration workbench, click Databases.
3. On the Write Lock menu, click Acquire Lock.
4. Click Register database.
The Informatica MDM Hub Connection Wizard appears.
5. Follow the online instructions to specify the same parameters that you specified when you created the Operational Reference Store.
6. On the Summary page, click Test Database.
The Wizard tests the database connection parameters.
7. Ensure that you select Create datasource after registration.
8. Click Finish.
9. When prompted, enter the user credentials for the application server.
The wizard creates a data source.
Importing the Application Metadata from a Change List
The metadata for the Customer 360 database schema resides in an MDM Hub change list. You import the change list into the Hub Store. The metadata change list creates components, such as landing tables, user exits, lookup tables, staging tables, base objects, and match and merge rules. The created tables are empty.
Before you import the application metadata, you must start the Hierarchy Manager in the MDM Hub Console. For more information about starting the Hierarchy Manager, see the Informatica MDM Multidomain Edition Data Steward Guide.
1. In the Hub Console, in the Configuration workbench, click Repository Manager.
2. On the Import tab, click the button next to the Source field.
The Open Repository dialog box appears.
3. Click File Repository.
4. Browse to the following directory:
Importing the MDM Metadata 15

<MDM Installation Directory>/app/tcr/hub/change-xml 5. Select the TCR_HUB.change.xml file, and click OK.
6. In the Target list, select the ORS for Customer 360.
7. Select all the schema components, and click Apply.
The Repository Manager imports the selected components from the change list.
Inserting Reference DataAfter you import the metadata, you can populate the tables with some reference data. By using reference data, you can complete the configuration steps faster because you do not have to manually insert the rows into the tables.
Before you insert the reference data, you must configure a Process Server. The Process Server is a servlet that cleanses data and processes batch jobs. For more information about configuring a Process Server, see the Informatica MDM Multidomain Edition Configuration Guide.
Note: If you use the Dun and Bradstreet (D&B) service, ensure that you populate the lookup data for countries and states.
1. Open a command prompt, and navigate to the following directory:
<MDM Installation Directory>/app/tcr/data/reference-data 2. Run one of the following scripts based on the database you use:
• For Oracle. C360_lookup_script_oracle.sql• For Microsoft SQL Server. C360_lookup_script_MSSQL.sql• For IBM DB2. C360_lookup_script_DB2.sql
3. To verify whether the lookup records are loaded successfully, perform the following tasks:
a. In the Hub Console, in the Utilities workbench, click Batch Group.
b. Expand BG_All_Lookup_Load, and select Control & Logs.
c. In the Logs for each job table, review the Status column to verify that the load is successful. The Total records column shows the number of records added. The columns to the right of the Total records column displays zeros if all the records load successfully.
d. If the load is unsuccessful, try running the load. Select BG_All_Lookup_Load and click Execute.
Importing and Deploying the Customer 360 Application
Import the Customer360.zip file as an IDD application, and then deploy it.
1. To start Informatica Data Director (IDD) Configuration Manager, perform the following tasks:
a. Open a supported web browser.
16 Chapter 2: Before You Install

b. Enter the following URL:
https://<Home name:<Port number>/bdd/config c. Enter the user name and password, and then click Log In.
The Informatica Data Director Configuration Manager starts and the Applications page appears.
2. Click Import > Import complete IDD application (Zip).
3. Click Browse, and navigate to the following directory:
/app/tcr/idd/config4. Select Customer360.zip, and click Open.
5. Click Import.
6. Under Bind Logical ORS, select Operational Reference Store (ORS) from the list.
You must select the ORS that you created for Customer 360 when you installed MDM Multidomain Edition.
7. Click Save.
Informatica Data Director imports and validates the IDD application. The process might take some time.
8. Ignore any validation errors.
9. With the application selected, click Application State > Full Deployment.
Informatica Data Director deploys the IDD application.
Informatica Data as a ServiceInformatica Data as a Service (DaaS) cleanse functions are available to validate and verify postal addresses, email addresses, and phone numbers. To use a validation service, add the mandatory parameters for the service in the MDM Hub.
Each service contains default values for the optional parameters. If required, change the default values in the Hub Console.
Use the following rules for the validation service parameters:
• Address validation. Prepend the parameter names with ADV5_.
• Email address verification. Prepend the parameter names with EMV6_.
• Phone number validation. Prepend the parameter names with GPV15_.
The following table lists the mandatory parameters for the DaaS validation services:
Service Mandatory Parameter
Address validation LOGIN PASSWORD
Country type COUNTRYTYPE. Set the parameter value to ISO2.
Email address verification LICENSE_KEY
Phone number validation LICENSE_KEY
Informatica Data as a Service 17

Specifying the Mandatory Parameters for DaaS ValidationConfigure the mandatory parameters for DaaS validation in the Hub Console.
1. Log in to the MDM Hub Console.
2. Select the Customer 360 ORS.
3. In the Model workbench, click Cleanse Functions.
The Cleanse Functions tool appears.
4. On the Write Lock menu, click Acquire Lock.
5. Click Informatica Data as a Service.
6. Click the Add button.
7. Specify the parameter name and value.
8. Repeat steps 6 and 7 to add the other mandatory parameters.
9. Save the changes, and click Refresh.
Configuring Message Queue in the MDM HubConfigure a message queue and message triggers for the linkage service from Dun and Bradstreet (D&B).
1. Configure a JMS queue and connection factory on your application server.
Follow standard naming conventions for the application server. Remember the JNDI names of the queue and the connection factory for future use
2. Register your JMS queue and connection factory in Hub console.
3. Select appropriate events in trigger.
4. Assign created message queue to trigger.
5. Save your configuration.
Configuring JMS Queue and JMS Connection FactoryConfigure a JMS queue and a JMS queue connection factory on the application server. Follow the standard naming convention for the application server.
Note: Ensure that you note the JMS queue name and connection factory name for future use.
1. Log in to the administration console of your application server.
2. Configure a JMS connection factory.
3. Configure a JMS queue.
Configuring the Message Queue in the MDM HubConfigure the message queue in the MDM Hub. Register the JMS queue and connection factory, select the events for the trigger, and assign message queue to trigger.
1. Log in to the MDM Hub Console.
2. In the Configuration workbench, click Message Queues.
18 Chapter 2: Before You Install
3. Acquire a write lock.
4. Right-click anywhere in the navigation pane, and choose Add Message Queue Server.
The Add Message Queue Server dialog box appears.
5. Specify the message queue server properties, and then click OK.
6. Right-click the name of the message queue server that you added, and choose Add Message Queue.
The Add Message Queue dialog box appears.
7. Specify the message queue properties, and then click OK.
8. Select the message queue that you just added.
9. Under Queue Assignments, select Use with message triggers.
10. In the Model workbench, click Schema.
11. Acquire a write lock.
12. Expand the Party base object that you want to monitor, and select Message Trigger Setup.
13. Select the message queue that you added.
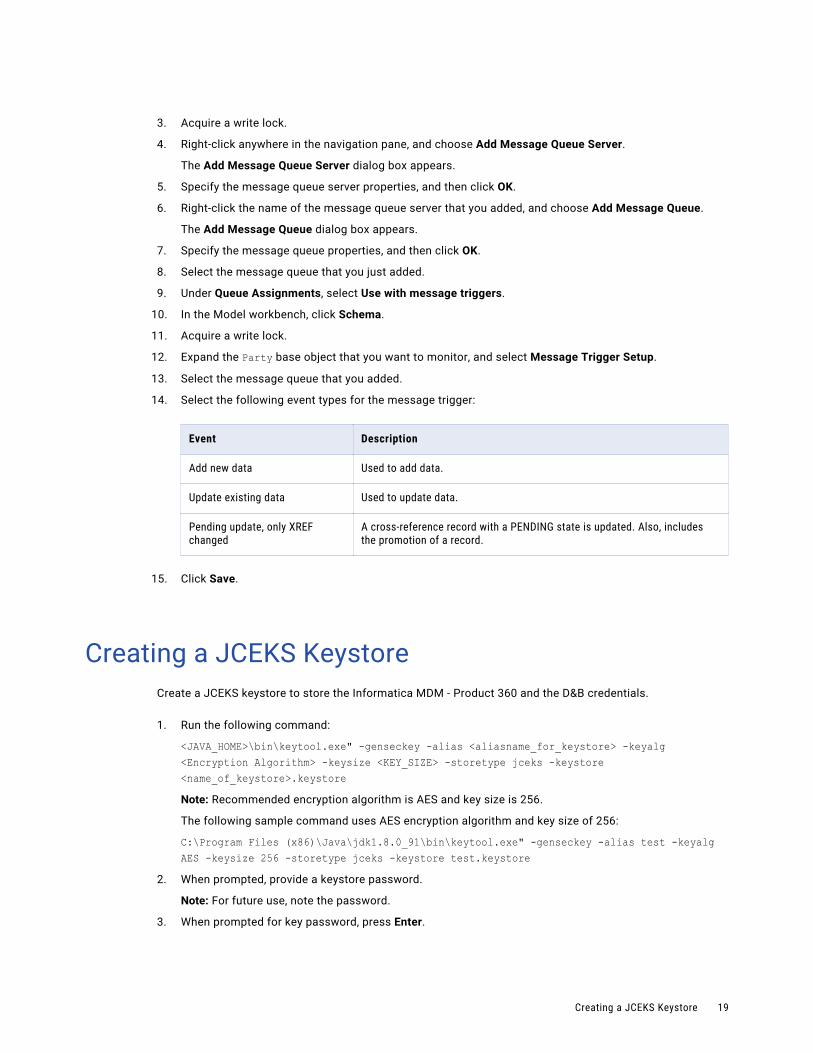
14. Select the following event types for the message trigger:
Event Description
Add new data Used to add data.
Update existing data Used to update data.
Pending update, only XREF changed
A cross-reference record with a PENDING state is updated. Also, includes the promotion of a record.
15. Click Save.
Creating a JCEKS KeystoreCreate a JCEKS keystore to store the Informatica MDM - Product 360 and the D&B credentials.
1. Run the following command:
<JAVA_HOME>\bin\keytool.exe" -genseckey -alias <aliasname_for_keystore> -keyalg <Encryption Algorithm> -keysize <KEY_SIZE> -storetype jceks -keystore <name_of_keystore>.keystore Note: Recommended encryption algorithm is AES and key size is 256.
The following sample command uses AES encryption algorithm and key size of 256:
C:\Program Files (x86)\Java\jdk1.8.0_91\bin\keytool.exe" -genseckey -alias test -keyalg AES -keysize 256 -storetype jceks -keystore test.keystore
2. When prompted, provide a keystore password.
Note: For future use, note the password.
3. When prompted for key password, press Enter.
Creating a JCEKS Keystore 19
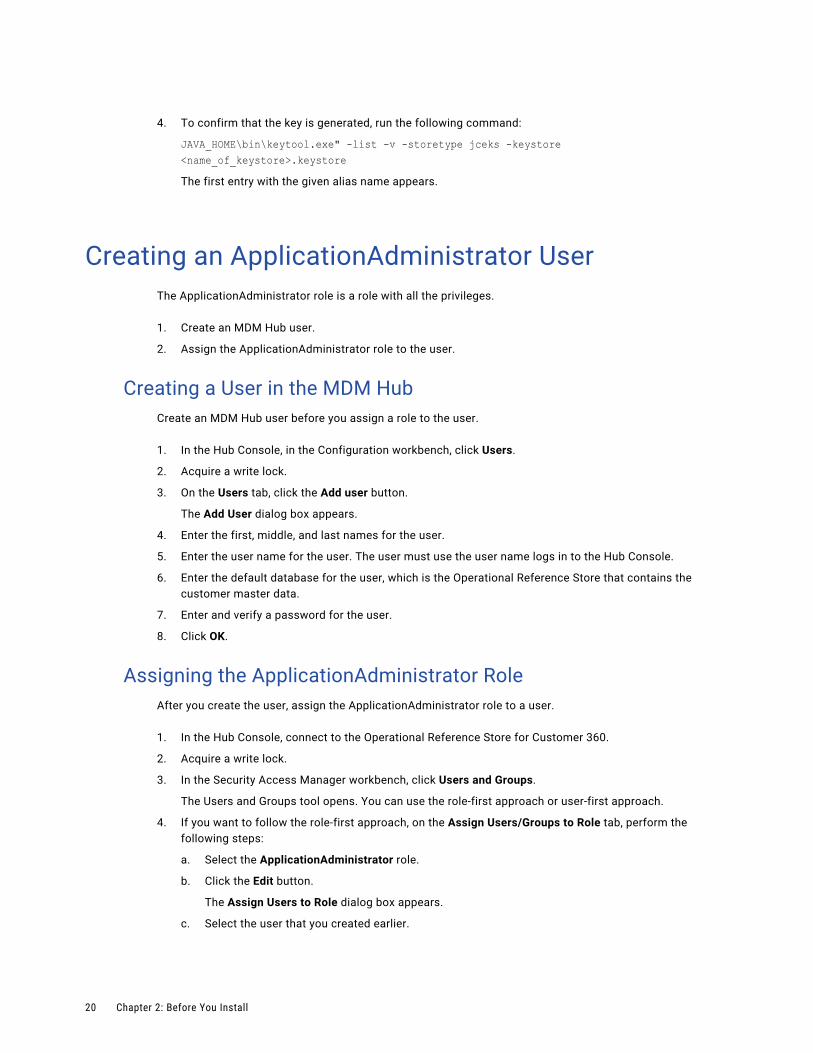
4. To confirm that the key is generated, run the following command:
JAVA_HOME\bin\keytool.exe" -list -v -storetype jceks -keystore <name_of_keystore>.keystore The first entry with the given alias name appears.
Creating an ApplicationAdministrator UserThe ApplicationAdministrator role is a role with all the privileges.
1. Create an MDM Hub user.
2. Assign the ApplicationAdministrator role to the user.
Creating a User in the MDM HubCreate an MDM Hub user before you assign a role to the user.
1. In the Hub Console, in the Configuration workbench, click Users.
2. Acquire a write lock.
3. On the Users tab, click the Add user button.
The Add User dialog box appears.
4. Enter the first, middle, and last names for the user.
5. Enter the user name for the user. The user must use the user name logs in to the Hub Console.
6. Enter the default database for the user, which is the Operational Reference Store that contains the customer master data.
7. Enter and verify a password for the user.
8. Click OK.
Assigning the ApplicationAdministrator RoleAfter you create the user, assign the ApplicationAdministrator role to a user.
1. In the Hub Console, connect to the Operational Reference Store for Customer 360.
2. Acquire a write lock.
3. In the Security Access Manager workbench, click Users and Groups.
The Users and Groups tool opens. You can use the role-first approach or user-first approach.
4. If you want to follow the role-first approach, on the Assign Users/Groups to Role tab, perform the following steps:
a. Select the ApplicationAdministrator role.
b. Click the Edit button.
The Assign Users to Role dialog box appears.
c. Select the user that you created earlier.
20 Chapter 2: Before You Install

d. Click OK.
5. If you want to follow the user-first approach, on the Assign Roles to User/Group tab, perform the following steps:
a. Select the user you created earlier.
b. Click the Edit button.
The Assign Users to Role dialog box appears.
c. Select ApplicationAdministrator.
d. Click OK.
Configuring the Application Properties FileIn the application.properties file, configure the properties related to file import, JMS queue, and ActiveVOS.
1. Navigate to the following directory:
/app/tcr/config2. Open the application.properties file in an editor, and configure the following properties:
activevos.datasource.url
Specifies the JNDI name of the ActiveVOS data source.
bulkimport.fileupload.directory
Specifies the directory to which you want to upload the import files.
bulkimport.fileupload.cleanupMinutes
Optional. Manually add the bulkimport.fileupload.cleanupMinutes property. Specifies the number of minutes to persist the import file in the specified directory after the import process is completed. The import process deletes the file after the specified time period. Default is 1 minute.
spring.jms.jndi.name
Specifies the JNDI name of the JMS queue.
spring.jms.jndi-name
Specifies the JNDI name of the JMS connection factory.
3. Save the file.
Configuring the Keystore and D&B Linkage PropertiesSpecify the properties related to the keystore and the D&B linkage service in the c360-config.properties file.
1. Navigate to the following directory:
/app/tcr/config2. Open the c360-config.properties file in an editor.
Configuring the Application Properties File 21

3. Specify the following properties:
Property Description
keystore.file.path Path to keystore.
keystore.pass.property.path Path to the keystore password file, which is keystore-pass.properties.
application.admin.user Name of the ApplicationAdministrator user that you created earlier.
base.url Base URL for the business entity services. For example, http://<Host>:<Port>
daaslinkage.filter.input.cities Optional. Comma-separated values of cities.
daaslinkage.filter.input.country.codes Optional. Comma-separated list of country codes.
daaslinkage.filter.input.state.provinces Optional. Comma-separated list of provinces.
daaslinkage.filter.input.business.relation.type Default values are provided. Do not change the values.
daaslinkage.company.input.order.reason.code Optional.
daaslinkage.be.view Default value is provided. Change only if you want to use a different view for linkage.
daaslinkage.source.system Source system.
daaslinkage.enabled.ors Comma-separated list of ORS names where the DaaS linkage service is enabled.
4. Save the file.
Configuring the Keystore PasswordSpecify the keystore password in the keystore-pass.properties file.
1. Navigate to the following directory:
/app/tcr/config2. Open the keystore-pass.properties file in an editor.
3. Specify the keystore.password parameter.
4. Save the file.
22 Chapter 2: Before You Install
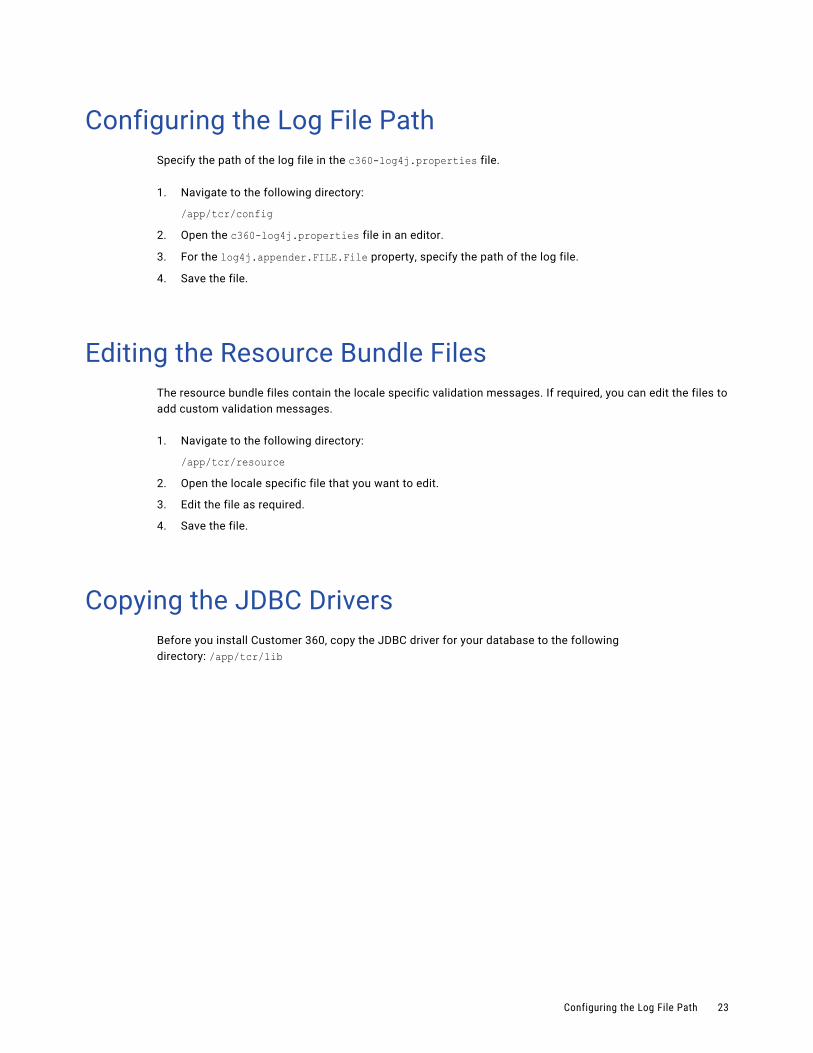
Configuring the Log File PathSpecify the path of the log file in the c360-log4j.properties file.
1. Navigate to the following directory:
/app/tcr/config2. Open the c360-log4j.properties file in an editor.
3. For the log4j.appender.FILE.File property, specify the path of the log file.
4. Save the file.
Editing the Resource Bundle FilesThe resource bundle files contain the locale specific validation messages. If required, you can edit the files to add custom validation messages.
1. Navigate to the following directory:
/app/tcr/resource2. Open the locale specific file that you want to edit.
3. Edit the file as required.
4. Save the file.
Copying the JDBC DriversBefore you install Customer 360, copy the JDBC driver for your database to the following directory: /app/tcr/lib
Configuring the Log File Path 23

C h a p t e r 3
Installing MDM - Customer 360This chapter includes the following topic:
• Installing MDM - Customer 360, 24
Installing MDM - Customer 360After you perform the pre-installation tasks, you can install MDM - Customer 360.
1. Navigate to the following directory:
/app/tcr/bin2. Run one of the following scripts:
• On Windows. install-tcr.bat• On Linux. install-tcr.sh
3. At the prompts, enter the following parameters:
Parameter Description
MDM Hub installation directory
Fully qualified path to the directory where you installed MDM Hub.
MDM - Customer 360 installation directory
Fully qualified path to the directory that contains the Customer 360 files.
Application Server Name of the application server in lowercase.
avos console username ActiveVOS Console user name.
avos console password ActiveVOS Console password.
PIM portal username Product 360 user name. If you do not want to enable the Product 360 service, press Enter.
PIM portal password Product 360 password.
linkage service license D&B linkage service license. If you do not want to enable the linkage service, press Enter.
24

Parameter Description
linkage username D&B linkage service user name.Note: For the linkage service, create a separate user in the MDM Hub with the ApplicationAdministrator role.
linkage password D&B linkage service password.
Note: If you use a Weblogic application server, you are prompted to enter the Weblogic console password.
Installing MDM - Customer 360 25

C h a p t e r 4
After You InstallThis chapter includes the following topics:
• Adding User Accounts and Assign Roles, 26
• Configure the Operational Reference Store, 28
• Populate Customer 360 Charts with Data, 28
• Configuring the Product 360 Connection Parameters, 31
• Integrating Informatica MDM - Relate 360, 32
Adding User Accounts and Assign RolesUser roles for the business managers control the data privileges in the MDM Hub and review privileges in the business processes. Each data steward or business user who is authorized to participate in customer data management receives one or more role assignments. Many users can have the same role.
1. If the business users who need to use the Customer 360 do not have the MDM Hub user accounts, add a user account for each business user.
2. Assign roles to the users.
For more information about users and roles, see the Informatica MDM Multidomain Edition Security Guide.
Adding User AccountsIf some business users do not have the MDM Hub user accounts, create the user accounts.
Before you begin, you can review an existing MDM Hub user account to see which authentication type is used in the Informatica MDM environment.
1. In the Hub Console, in the Configuration workbench, click Users.
2. Acquire a write lock.
3. On the Users tab, click the Add user button.
The Add User dialog box appears.
4. Enter the first, middle, and last names for the user.
5. Enter the user name for the user. The user must use the user name to log in to the Hub Console.
6. Enter the default database for the user, which is the Operational Reference Store that contains the customer master data.
7. Enter and verify a password for the user.
26

8. Choose the type of authentication.
• If your MDM Hub implementation uses authentication through a third-party security provider, select Use external authentication.
• If you want to use the internal authentication in the MDM Hub, clear Use external authentication.
9. Click OK.
The Users tool adds the user to the list of users.
Role PrivilegesThe following table lists the user roles and their privileges:
Role Add or edit a customer profile Review and Approve customer profiles or profile updates
ApplicationAdministrator Yes Yes
Sales Operation Analyst Yes No
Sales Operation Manager Yes Yes
Assigning Roles to Business UsersYou need to assign user roles to the business users who are responsible for reviewing the new customer profiles and the edited customer profiles.
Use the Hub Console to assign user roles. You can follow the role-first or user-first approach. For a role-first approach, you select a role and then select the users and user groups that you want to associate with the role. For a user-first approach, you select a user or user group and then select the roles for the user or user group.
1. In the Hub Console, connect to the Operational Reference Store of Customer 360.
2. Acquire a write lock.
3. In the Security Access Manager workbench, click Users and Groups.
The Users and Groups tool opens.
4. If you want to follow the role-first approach, on the Assign Users/Groups to Role tab, perform the following steps:
a. Select a workflow role.
b. Click the Edit button.
The Assign users to Role dialog box appears.
c. Select the users and user groups to whom you want to assign the role.
d. Click OK.
e. Repeat the steps for other workflow roles.
5. If you want to follow the user-first approach, on the Assign Roles to User/Group tab, perform the following steps:
a. Select a user or user group.
b. Click the Edit button.
Adding User Accounts and Assign Roles 27

The Assign users to Role dialog box appears.
c. Select the workflow roles suitable for the user or user group.
d. Click OK.
e. Repeat the steps for other users and user groups.
Configure the Operational Reference StoreBefore you start the Customer 360 application, configure the Operational Reference Store that contains customer data. You must disable a trigger, truncate the data in a repository table, and review the value of the GETLIST Limit property.
Truncating a Repository TableIf you imported the Oracle database dump, the repository table C_REPOS_RPT_DETAILS contains sample data. You must truncate the data.
1. In a database tool, connect to the Operational Reference Store for C360.
2. Run the following command:
truncate table C_REPOS_RPT_DETAILS
Populate Customer 360 Charts with DataCustomer 360 contains a Home Page that contains charts with metrics or data about customers and tasks. The data for all charts come from the data mart service.
The data mart service retrieves data from the Operational Reference Store and stores the results in a repository table. When the Home page loads, the page queries the data mart service for the data and populates the charts.
Note: In the data mart service and configuration files, the term report refers to the chart configuration.
To populate the charts, perform the following tasks:
1. Import the chart configurations into a repository table.
2. Configure a database connection between the data mart and the database that contains the Operational Reference Store.
3. Configure the report parameters to include the database name.
4. Populate the data mart with report data.
28 Chapter 4: After You Install

Charts and GraphsCharts and graphs on the Home page contain enterprise-level information about all customers and tasks. You can view a visual representation of the customers and related information. You can view the breakdown of tasks, grouped by their state and priority.
The following table lists the charts that the Home page displays:
Chart Description
Customers Added by Year Displays the number of customers added in each year.
Customer Onboarding Time Displays how long it took to qualify customers.
Source Systems Displays the percentage of customer data that comes from each source system in each year.
Tasks Overview Displays the total number of tasks and breaks down the tasks by status and priority.
Importing Customer 360 Chart ConfigurationsTo import the chart configurations, run an insert script on the Customer 360 Operational Reference Store (ORS). The script imports the chart configurations into the C_REPOS_RPT_CONFIG repository table.
1. Open a command prompt.
2. Navigate to the following directory:
<MDM Installation Directory>/app/tcr/datamart/chart-config 3. Use a database tool to run the insert_c_repos_rpt_config.sql script.
For example, log in with the ORS user name and password and the service name and then run the script.
.../chart-config> sqlplus <C360 ORS>/password@serviceSQL> @insert_c_repos_rpt_config.sql
The script inserts the charts into the C_REPOS_RPT_CONFIG repository table.
Configuring the Data Mart Database ConnectionBefore you can generate reports or populate charts, you must configure the data mart database connection.
1. Navigate to the following directory:
<MDM Installation Directory>/app/tcr/datamart/lib2. If the directory is empty, copy the following files from the <MDM installation directory>/hub/
server/lib directory to the <MDM installation directory>/app/tcr/datamart/lib directory:
• log4j-1.2.16.jar• ojdbc7.jar• siperian-common.jar• commons-validator-<version number>.jar
3. Navigate to the following directory:
<MDM Installation Directory>/app/tcr/datamart
Populate Customer 360 Charts with Data 29

4. Extract the contents of the populate_datamart.jar file.
5. Open the following file in an editor:
<Directory Containing Extracted Files>/META-INF/MANIFEST.MF6. To the Class-Path parameter, add the following value:
lib/commons-validator-<version number>.jar7. Save the file.
8. Open a command prompt.
9. Run the following command:
java -jar populate_datamart.jar config
10. At the prompt, type C to configure the database connection.
11. Answer the prompts described in the following table:
Prompt Description
Connection Name Enter a unique name for the connection. If the name exists, the connection is overwritten.
Type of Connection Enter the type of connection to the data mart. Currently only DB is supported.
Database vendor Enter the database to connect with, such as Oracle or IBM DB2.
User Enter the database user.
Password Enter the database password.
Token Reserved for future use.
Host Name Enter the database host name.
Port Enter the database port.
Database Name Enter the database name/SID.
12. When prompted to finish the configuration, enter Y.
The connection information is saved in the following file: /app/tcr/datamart/config/mart-population-config.xml
Configuring the Report ParametersBefore you can populate the data mart, you must configure the report parameters for the chart configuration.
1. Open a command prompt.
2. Navigate to the data mart directory.
<MDM Installation Directory>/app/tcr/datamart 3. Run the following command:
java -jar populate_datamart.jar config4. Type P to configure the report parameters.
30 Chapter 4: After You Install

5. Answer the prompts described in the following table:
Prompt Description
Report Name Specify a report name that appears in the following file: /app/tcr/datamart/config/report-class-mapping.properties file.
Report Configuration ID
Enter the report configuration ID for the report as it appears in the C_REPOS_RPT_CONFIG table.
Mart Connection Name
Enter the connection name for connecting the data mart to the Operational Reference Store. Use the connection name that you defined for the Operational Reference Store that contains the customer data.
Query Connection Name
Enter the connection name for the database to be queried.- For reports that include the word Tasks, specify the connection name that you defined
for the ActiveVOS database.- For all other reports, specify the connection name that you defined for the Operational
Reference Store that contains the customer data.
6. When prompted to finish the configuration, enter N.
7. Repeat the steps for other reports.
8. After you enter all tables, exit the configuration tool.
The parameters are saved in the following file: config/mart-population-config.xml.
Populating the Data Mart with DataRun a java command to populate the data mart with data for all charts or for a specific chart. If you want to specify a chart, use its report name.
1. Open a command prompt.
2. To populate the data mart with data for all the available reports, run the following command:
java -jar populate_datamart.jar 3. To populate the data mart with data for a specific report, run the following command:
java -jar populate_datamart.jar exec <report name> If the MDM Hub contains data, the C_REPOS_RPT_DETAILS repository table is populated with report data. The ROWID_RPT_CONFIG column links the data to the report configuration that requested the data.
Configuring the Product 360 Connection ParametersConfigure the Product 360 server connection parameters to display the product data from the party role product table in the dashboard view of a customer.
1. In the Provisioning tool, click UI Configuration > Component Editor.
The Component Editor appears.
2. In the Components list, select C360 Product Widget, and then select ProductComponent.
Configuring the Product 360 Connection Parameters 31
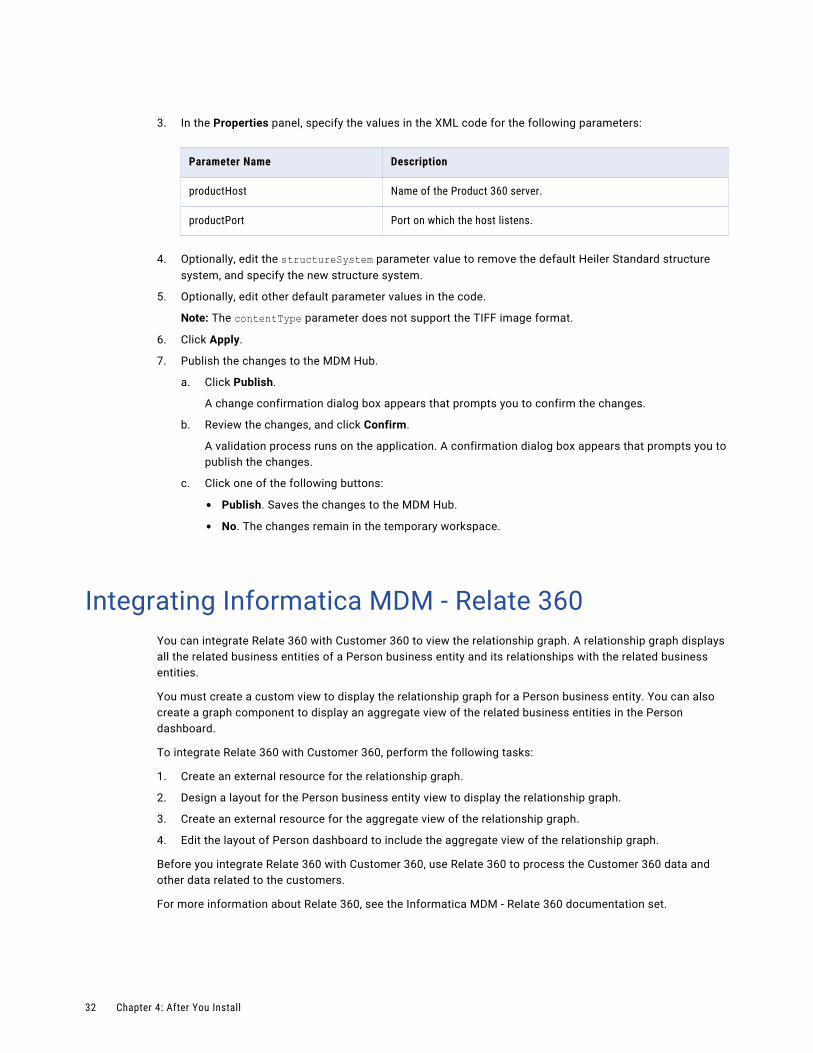
3. In the Properties panel, specify the values in the XML code for the following parameters:
Parameter Name Description
productHost Name of the Product 360 server.
productPort Port on which the host listens.
4. Optionally, edit the structureSystem parameter value to remove the default Heiler Standard structure system, and specify the new structure system.
5. Optionally, edit other default parameter values in the code.
Note: The contentType parameter does not support the TIFF image format.
6. Click Apply.
7. Publish the changes to the MDM Hub.
a. Click Publish.
A change confirmation dialog box appears that prompts you to confirm the changes.
b. Review the changes, and click Confirm.
A validation process runs on the application. A confirmation dialog box appears that prompts you to publish the changes.
c. Click one of the following buttons:
• Publish. Saves the changes to the MDM Hub.
• No. The changes remain in the temporary workspace.
Integrating Informatica MDM - Relate 360You can integrate Relate 360 with Customer 360 to view the relationship graph. A relationship graph displays all the related business entities of a Person business entity and its relationships with the related business entities.
You must create a custom view to display the relationship graph for a Person business entity. You can also create a graph component to display an aggregate view of the related business entities in the Person dashboard.
To integrate Relate 360 with Customer 360, perform the following tasks:
1. Create an external resource for the relationship graph.
2. Design a layout for the Person business entity view to display the relationship graph.
3. Create an external resource for the aggregate view of the relationship graph.
4. Edit the layout of Person dashboard to include the aggregate view of the relationship graph.
Before you integrate Relate 360 with Customer 360, use Relate 360 to process the Customer 360 data and other data related to the customers.
For more information about Relate 360, see the Informatica MDM - Relate 360 documentation set.
32 Chapter 4: After You Install

Creating an External Resource for the Relationship GraphAn external resource is a custom component that you can add to a layout. For the relationship graph, configure an external resource that you can add to the Person business entity view.
For more information about external resource, see the Informatica MDM Multidomain Edition Provisioning Tool Guide.
1. In the Provisioning tool, click UI Configuration > Component Editor.
The Component Editor appears.
2. In the Components list, select External Resources, and click Create.
The Properties panel appears.
3. Specify a name for the external resource.
4. Add the following XML code format for the external resource:
<iframe src="http://<Host>:<Port>/<Relationship Graph UI WAR Name>/noshell/graph/<Source>/Customer/{{rowidObject}}/network" width="100%" height="800px"></iframe>
The XML code format uses the following parameters:Host
Host name or IP address of the machine on which you deploy the Relate 360 relationship graph user interface WAR file.
Port
Port on which the host listens.
Relationship Graph UI WAR Name
Name of the relationship graph user interface WAR file that you deploy on the host.
Source
Source name of the business entities. If you do not have the source name for the business entities, use the source name that you used in Relate 360 to process the customer data.
The following sample XML code creates an external resource for the relationship graph:
<iframe src="http://10.12.128.71:8080/bdrm-ui/noshell/graph/MDM/Customer/{{rowidObject}}/network" width="100%" height="800px"></iframe>
5. Click Apply.
6. Publish the changes to the MDM Hub.
a. Click Publish.
A change confirmation dialog box appears that prompts you to confirm the changes.
b. Review the changes, and click Confirm.
A validation process runs on the application. A confirmation dialog box appears that prompts you to publish the changes.
c. Click one of the following buttons:
• Publish. Saves the changes to the MDM Hub.
• No. The changes remain in the temporary workspace.
Integrating Informatica MDM - Relate 360 33

Design a Layout for the Person Business Entity ViewAfter you create an external resource for the relationship graph, design a layout to include the external resource for the Person business entity view .
1. In the Provisioning tool, click UI Configuration > Layout Designer.
The Layout Designer appears.
2. Click Create > Entity View.
The Define Layout Properties page appears.
3. Define properties for the layout that you want to design.
a. Specify the following properties:
Property Description
Layout name Label for the layout that you design. After you design and publish the layout, the label appears in the layout list in the Layout Designer.
Unique label Label used for generating a system ID.
Description Optional. A meaningful description to identify the layout.
List option name Label for the option that you want in the Informatica Data Director views list.
List option icon Icon for the list option that appears in the views list.
List order Order of Entity view in the views list.
b. To assign the layout to the Person business entity view, select Person > CustomPersonView.
4. Click Next.
The Define Purpose page appears.
5. Specify the purpose of the layout that you want to design.
a. Select the user roles that can access the layout.
The user roles that appear on the Define Purpose page are configured in the MDM Hub environment.
b. Select Edit entities.
6. Click Next.
The Select a Template page appears.
7. Select Template 1, and click Next.
The Design page appears.
8. Drag the external resource that you created for the relationship graph into the workspace.
9. Click Save.
The changes are saved to the temporary workspace.
10. Publish the changes to the MDM Hub.
a. Click Publish.
A change confirmation dialog box appears that prompts you to confirm the changes.
b. Review the changes, and click Confirm.
34 Chapter 4: After You Install

A validation process runs on the application. A confirmation dialog box appears that prompts you to publish the changes.
c. Click one of the following buttons:
• Publish. Saves the changes to the MDM Hub.
• No. The changes remain in the temporary workspace.
Creating an External Resource for the Aggregate ViewConfigure an external resource for the aggregate view of the relationship graph. The aggregate view displays an aggregated view of the related business entities for a Person business entity.
1. In the Provisioning tool, click UI Configuration > Component Editor.
The Component Editor appears.
2. In the Components list, select External Resources, and click Create.
The Properties panel appears.
3. Specify a name for the external resource.
4. Add the following XML code format for the external resource:
<iframe src="http://<Host>:<Port>/<Relationship Graph UI WAR Name>/noshell/graph/<Source>/Customer/{{rowidObject}}/aggregate" width="100%" height="800px"></iframe>
The XML code format uses the following parameters:Host
Host name or IP address of the machine on which you deploy the Relate 360 relationship graph user interface WAR file.
Port
Port on which the host listens.
Relationship Graph UI WAR Name
Name of the relationship graph user interface WAR file that you deploy on the host.
Source
Source name of the business entities. If you do not have the source name for the business entities, use the source name that you used in Relate 360 to process the customer data.
The following sample XML code creates an external resource for the aggregate view:
<iframe src="http://10.12.128.71:8080/bdrm-ui/noshell/graph/MDM/Customer/{{rowidObject}}/aggregate" width="100%" height="800px"></iframe>
5. Click Apply.
6. Publish the changes to the MDM Hub.
a. Click Publish.
A change confirmation dialog box appears that prompts you to confirm the changes.
b. Review the changes, and click Confirm.
A validation process runs on the application. A confirmation dialog box appears that prompts you to publish the changes.
c. Click one of the following buttons:
• Publish. Saves the changes to the MDM Hub.
Integrating Informatica MDM - Relate 360 35

• No. The changes remain in the temporary workspace.
Edit the Layout of Person DashboardAfter you create an external source for the aggregate view of the relationship graph, edit the layout of Person dashboard to include the aggregate view.
1. In the Provisioning tool, click UI Configuration > Layout Designer.
The Layout Designer appears.
2. Expand the CustomerPerson layout category, and select layout2.
3. Click Edit.
The Design page appears.
4. Drag the external resource that you created for the aggregate view into the workspace.
5. Click Save.
The changes are saved to the temporary workspace.
6. Publish the changes to the MDM Hub.
a. Click Publish.
A change confirmation dialog box appears that prompts you to confirm the changes.
b. Review the changes, and click Confirm.
A validation process runs on the application. A confirmation dialog box appears that prompts you to publish the changes.
c. Click one of the following buttons:
• Publish. Saves the changes to the MDM Hub.
• No. The changes remain in the temporary workspace.
36 Chapter 4: After You Install

C h a p t e r 5
Business Processes for Customer Management
This chapter includes the following topics:
• Workflows, 37
• User Roles, 37
• Role Privileges, 38
• Task Types, 38
WorkflowsBusiness processes automate some common customer lifecycle management workflows.
Customer 360 ships with ActiveVOS business processes for the following workflows:
• Create a customer person or customer organization.
• Update a customer profile.
User RolesUser roles control the write privileges. User roles for business users control the data privileges in the ORS and also the review privileges in business processes. Each business user who is authorized to participate in reference data management receives one or more role assignments. Many users can have the same role.
Customer 360 has the following user roles:
• Sales Operation Analyst
• Sales Operation Manager
• ApplicationAdministrator
37

Role PrivilegesThe following table lists the user roles and summarizes the role privileges:
Role Add or edit a customer person or customer organization
Approve customer person or customer organization or profile updates
ApplicationAdministrator Yes Yes
Sales Operation Analyst Yes No
Sales Operation Manager Yes Yes
Task TypesBy default, workflows are triggered when a user with the Sales Operation Analyst role creates or updates a record. When a user with the Sales Operation Manager role creates or updates a record, no workflows are triggered.
The Customer 360 default configuration includes the following tasks:
Predefined Tasks Description
DraftState Triggered when a creator creates or updates a record and chooses to keep the change in draft state.
Notification Triggered when an approver approves or rejects a record.
Update Triggered when an approver sends back a record for resubmission.
FinalReview Triggered when a creator sends a new record or an updated record for approval.
The following steps summarize what happens when a user with the Sales Operation Analyst role creates or updates a record and a user with the Sales Operation Manager role approves the record:
Task Task Owner Possible Actions Result
DraftState Creator Submit Record is submitted for approval. Record is assigned to the users with the Sales Operation Manager role.
Discard Record is deleted.
FinalReview Approver Claim User claims the tasks. Record appears in the task inbox of the user.
Disclaim Record is assigned back to the users with the Sales Operation Manager role.
38 Chapter 5: Business Processes for Customer Management

Task Task Owner Possible Actions Result
Approve Record is promoted. Notification sent to the creator.
Reject Record is deleted. Notification is sent to the creator.
Send Back Record is sent back to the creator with comments.
Update Creator Submit Record is resubmitted for approval. Moves to the FinalReview workflow.
Discard Record is deleted.
Notification Creator Ok Closes the workflow.
Task Types 39
C h a p t e r 6
Customizing Customer 360This chapter includes the following topics:
• Customizing Customer 360 Overview, 40
• Customizing the Layout, 40
• Charts Configuration, 49
• Extending the Data Model, 53
• Extending the Customer 360 Resources, 54
Customizing Customer 360 OverviewAfter you configure Customer 360, you can customize some of the features to suit your environment. The customization includes extending the data model, modifying the layout for the dashboard view of a customer, modifying the Home page, and adding custom charts and user interface components.
Customizing the LayoutThe Customer 360 user interface consists of multiple components. Each component displays data related to an entity. You can configure some of the components that appear in a Customer 360 view.
You can customize the following three user interfaces:Home page
The default page you see when you log in to Customer 360.
Person dashboard
When you open a customer profile, you see the customer dashboard. If the customer is a person, the page you see is the Person dashboard.
Organization dashboard
If the customer is an organization, the page you see is the Organization dashboard.
The default Customer 360 layout comes with preconfigured components. The configuration is present in the C_REPOS_COMPONENT_INSTANCE table.
40

User Interface ComponentsThe Customer 360 user interface consists of default components and external link components. You can edit the default configuration of Customer 360 user interface components.
You can edit the configuration of the following components:
• Task Manager
• My Records
• DaaS Provider
• Data View
• File Import
You can edit the configuration of the following external link components:
• Social
• Overview
• Financials
• Identifiers
• Indicators
You can also add custom external link components and charts.
Components and Parent ElementsThe following table lists the parent XML elements for each of the default components:
Element Description
components Top level element that contains the component configuration.The element contains taskManager, myRecordsManager, daasProviders, bulkImport, and dataView.
taskManager Name of the component for Task Manager. Contains the configuration for the Task Manager.The element contains taskTypes.
myRecordsManager Name of the component for My Records. Contains the configuration for My Records.The element contains taskTypes.
daasProviders Name of the component for the DaaS providers. Contains the configuration for the display of the match grade information received from the DaaS provider.The element contains daasProvider.
bulkImport Name of the component for File Import. Contains the templates for file import.
dataView Name of the component for the display of the Draft check box when you create or update a business entity record.The element contains draft.
Customizing the Layout 41

Customizing the Dashboard ComponentsTo customize the dashboard components, use the Application Editor of the Provisioning tool.
1. In the Provisioning tool, click UI Configuration > Application Editor.
The Application Editor appears.
2. In the Applications list, select C360 Application Configuration, and then select C360WidgetConfiguration.
3. In the Properties panel, update the values in the XML code as required.
4. Click Apply.
5. Publish the changes to the MDM Hub.
a. Click Publish.
A change confirmation dialog box appears that prompts you to confirm the changes.
b. Review the changes, and click Confirm.
A validation process runs on the application. A confirmation dialog box appears that prompts you to publish the changes.
c. Click one of the following buttons:
• Publish. Saves the changes to the MDM Hub.
• No. The changes remain in the temporary workspace.
XML code for the Task Manager and My Records Components Configuration
The following table lists the sub-elements of the taskManager and the myRecordsManager parent elements:
Element Description
taskTypes Parent element for all the task types.The element contains taskType.
taskType Contains the configuration for a task type. For example, UpdateWithApproval or FinalReview. You configure the task types in Tasks configuration as part of the COCS configuration. The Tasks configuration is present in the C_REPOS_CO_CS_CONFIG repository table.Has the name attribute which specifies the name of the task.
role Role of the user for which you configure the workflow.Note: You specify the configuration for a task type and a user role.The element contains enableEditRecordDetails, enableAssignTo, and actions.
enableAssignTo Indicates whether the assign to a user option is available for the task type and user role. Set to true to make the option available to the user with the role and set to false to make the option unavailable.
actions Set of actions that are available for each task. Each task type has a set of possible actions that you can perform in the task context.The element contains action.
42 Chapter 6: Customizing Customer 360

Element Description
action An action, such as submit, approve, reassign, or reject, that you can perform on a task. Has the name attribute, which specifies the name of the action.The element contains enableCommentOnAction, enableAssignTo, isCommentMandatory, and actionMessage.enableAssignTo: Applicable to the task action that has the manual reassign set to true.
enableCommentOnAction Indicates whether you have the option to add a comment when you perform a task action. Set to true to make the option available. Set to false to make the option unavailable. If set to true, specify isCommentMandatory.
isCommentMandatory Indicates whether you must add a comment when you perform the action. If set to true, specify the actionMessage element.
actionMessage Message to display when you perform the action.
If you want to edit the XML code for the configuration, ensure that you follow the XML example.
The following sample code shows the configuration of the My Records component.
<myRecordsManager> <!-- Tasktypes as configured in Tasks in CO CS Config --> <taskTypes> <taskType name="AVOSBeDraftState"> <role name="SalesOperationAnalyst"> <enableAssignTo>false</enableAssignTo> <!-- Action of task as configured in BPR(ActiveVOS Workflow) --> <actions> <action name="Submit"> <enableCommentOnAction>false</enableCommentOnAction> </action> <action name="Discard"> <enableCommentOnAction>true</enableCommentOnAction> <isCommentMandatory>false</isCommentMandatory> <actionMessage><![CDATA[If you discard the record, the record will be deleted.]]></actionMessage> </action> </actions> </role> </taskType> </taskTypes></myRecordsManager>
XML Code for the DaaS Providers Component ConfigurationThe DaaS Providers component contains the configuration to display the match grade information that the DaaS provider returns.
The following table lists the sub-elements of daasProviders element:
Element Description
daasProvider Contains the configuration for a DaaS provider.Has the name attribute.
dataPackets Data that the DaaS provider returns.
Customizing the Layout 43

Element Description
matchGradeValues Parent element for the match grade values that the DaaS provider returns.
matchGrade Each match grade value. Contains the value and description.
matchGradeDetail Parent element.
grade Grade that the DaaS provider returns.
Refer to the DaaS provider documentation for more information about the match grades.
Ensure that you follow the XML example to write the XML code for the configuration correctly. The following sample code is an excerpt of the daasProviders configuration:
<daasProviders> <!-- DAAS provider configuration for particular provider --> <daasProvider name="D&B"> <dataPackets> <dataPacket>Detailed Company Profile</dataPacket> <dataPacket>Corporate Hierarchy</dataPacket> </dataPackets> <matchGradeValues> <matchGrade> <value>A</value> <description>Content is the same</description> </matchGrade> <matchGrade> <value>B</value> <description>Content is similar</description> </matchGrade> <matchGrade> <value>F</value> <description>Content is different</description> </matchGrade> <matchGrade> <value>Z</value> <description>One or both components are blank</description> </matchGrade> </matchGradeValues> <matchGradeDetail> <gradeDetail name="Name" label="Company Name"> <scoreDetail> <score>00</score> <text>Matches primary name</text> </scoreDetail> <scoreDetail
44 Chapter 6: Customizing Customer 360

XML Code for the File Import Component ConfigurationThe File Import component configuration is used to specify the templates that you can use to import data into Customer 360. Ensure that you follow the XML example to write the XML code for the configuration correctly.
The following table lists the sub-elements of File Import element:
Element Description
templates Top-level element.Contains: template
template Name of the import template.Has the name attribute.
The following sample code shows the File Import component configuration:
<bulkImport> <templates> <template name="CustomerPersonView" /> <template name="CustomerOrgView" /> <template name="ContactView" /> </templates></bulkImport>
XML Code for the Data View Component ConfigurationThe Data View component configuration specifies the business entity for which the Draft check box must be displayed.
The following table lists the sub-elements of the Data View element:
Element Description
draft Parent element.Contains: draftCoName and draftDefault
draftCoName Business entity name for which the Draft checkbox must be displayed.
draftDefault Indicates whether the Draft check box must be selected by default.
The following sample code shows the Data View component configuration:
<dataView> <draft> <draftCoName>draftInd</draftCoName> <!-- CO name of the draft fieldl which is to be rendered --> <draftDefault>true</draftDefault> <!-- Default value of the field --> </draft></dataView>
Customizing the Layout 45

XML Code for the External Link ComponentsThe widgets element contains the configuration for the external link components.
The following table lists the sub-elements in the widgets section:
Element Description
widget Parent element that contains the configuration for a widget or external link.
social Contains the URLs for social media. For example, <Facebook>http://www.facebook.com</Facebook>. Ensure that you use the same format in the implementation configuration.The element contains Facebook, Twitter, and other social media URLs.
b2b Contains the configuration for a business-to-business customer profile.
overview Title of the overview section.The element contains title and section.
title Title of a section in the user interface.
section Contains the configuration for a column in the widget.The element contains field.
field Contains the configuration for a field in the user interface. Has the following attributes:- group. Indicates whether the fields must be displayed as a group.- view. Can be set to horizontal to show the field labels and values in the
same line. Else, the value appears below the field.The element contains label, type, coValue, defaultValue, defaultKey, defaultKeyValue, getStrategy, coFieldValues, concatenateWith, and filterAs.
label Text that appears for the field in the user interface.
type Specifies the data type of the field. Has the following data types:- img. Indicates image.- text. Indicates text.- address. Indicates address.- phone. Indicates phone number.- email. Indicates email address.- social. Indicates social.- currency. Indicates currency.- textWithIcon. Indicates text with an icon. Replace with CSS class.
coValue Business entity child or field, including the path.
46 Chapter 6: Customizing Customer 360

Element Description
getStrategy Determines how a value is selected when the field has multiple values. Use the element only for child records. Has the following values:- defaultOrFirstOne. Default value or the first value in the list is selected.
You can either specify the default value or specify the business entity field that contains the value. When you have multiple child records, you need to specify which of the record to select. Specify the name of the field and the value in the field.
- getOne. Get the first available value.- all. Get all values.- getByEffectiveStartDate. Effective start date. If the effective start date
is not available, then the last updated date is used to select the value.
defaultValue If the desired value is not found, the value to be displayed for the field in the user interface.
defaultKey If you specify the default strategy as defaultOrFirstOne, specify the name of the business entity field. For example, default indicator.
defaultKeyValue If you specify the default strategy as defaultOrFirstOne, specify the value of the default key.
coFieldValues Contains the business entity fields that contain the value you want to display on the user interface. Follow the parent-child relationships until you reach the required element of field.
concatenateWith Specifies how to concatenate the fields. For example, comma-separated or space.
filter Reserved for future use.
The following sample code shows the configuration of the identifiers external link component:
<identifiers> <title>Identifiers</title> <section> <field> <label>DUNS</label> <type>text</type> <coValue>CustomerOrgRole_item_0_CustomerOrgIdentifiers</coValue> <defaultValue>-</defaultValue> <defaultKey>dfltInd</defaultKey> <defaultKeyValue>1</defaultKeyValue> <getStrategy>getByEffectiveStartDate[effStrtDt]_altIdTyp_idTyp[DUNS]</getStrategy> <coFieldValues>altIdVal</coFieldValues> <concatenateWith /> <filterAs /> </field> </section> <section> <field> <label>ParentDUNS</label> <type>text</type> <coValue>CustomerOrgRole_item_0_CustomerOrgIdentifiers</coValue> <defaultValue>-</defaultValue> <defaultKey>dfltInd</defaultKey> <defaultKeyValue>1</defaultKeyValue> <getStrategy>getByEffectiveStartDate[effStrtDt]_altIdTyp_idTyp[ParentDUNS]</getStrategy> <coFieldValues>altIdVal</coFieldValues>
Customizing the Layout 47

<concatenateWith /> <filterAs /> </field> </section> <section> <field> <label>NAICS</label> <type>text</type> <coValue>CustomerOrgClassification</coValue> <coFieldValues>Classification_classifVal</coFieldValues> <getStrategy>getByEffectiveStartDate[effStrtDt]_Classification_classifTyp_classifTyp[NAICS]</getStrategy> <defaultValue>-</defaultValue> <concatenateWith /> <filterAs /> </field> </section> <section> <field> <label>SIC</label> <type>text</type> <coValue>CustomerOrgClassification</coValue> <coFieldValues>Classification_classifVal</coFieldValues> <getStrategy>getByEffectiveStartDate[effStrtDt]_Classification_classifTyp_classifTyp[SIC]</getStrategy> <defaultValue>-</defaultValue> <concatenateWith /> <filterAs /> </field> </section></identifiers>
The sample code shows the configuration of four identifiers, SSN, TIN, Driver License Number, and Passport Number.
The following image shows the Identifiers section in the user interface:
XML Code for the Twitter ComponentThe configurable parameter in the Twitter component configuration is the number of tweets.
The following sample code shows the Twitter configuration:
<twitter> <numberOfTweets>5</numberOfTweets> <section> <field> <label>Social</label> <type>social</type> <coValue>CustomerOrgRole_item_0_CustomerOrgSocialHandle</coValue> <defaultValue>-</defaultValue> <defaultKey>dfltInd</defaultKey> <defaultKeyValue>1</defaultKeyValue> <coFieldValues>sclMdaVal</coFieldValues> <concatenateWith>_</concatenateWith> <getStrategy>getOne_sclMdaTyp_sclMediaTyp[Twitter]</getStrategy> <filterAs />
48 Chapter 6: Customizing Customer 360

</field> </section></twitter>
Use the numberofTweets element to specify the number of tweets that you want to display in the user interface. All other XML elements are standard elements that you use in an external link configuration.
Charts ConfigurationCharts and graphs in the Home page contain enterprise-level information about all the customers and tasks. You can add or delete charts or modify a chart configuration to display the information you want.
The Customer 360 default configuration includes the following charts and graphs:
• Customers Added by Year
• Customer Onboarding Time
• Source Systems
• Tasks Overview
The data for the charts comes from the data mart. The data mart service retrieves data from the Operational Reference Store and stores the results in a repository table. When the Home page loads, the page queries the data mart service for the data and populates the charts.
The data mart uses the C_REPOS_RPT_DETAILS table. The chart configurations are stored in the C_REPOS_COMPONENT_INSTANCE table.
Adding a Custom ChartYou can add a custom chart to the Home page of Customer 360. Customer 360 uses the Highcharts charting library for the charts. To add a custom chart, create an external resource for the custom chart, and then add the external resource to the Home page layout.
1. In the Provisioning tool, click UI Configuration > Component Editor.
The Component Editor appears.
2. In the Components list, select External Resources, and click Create.
The Properties panel appears.
3. Specify a name for the chart.
4. Add the code for the custom chart.
You can refer to the code of the existing charts, such as CustomerAddedByYearChart or SourceSystemsChart, to understand the code format of a chart.
5. Click Apply.
6. Click UI Configuration > Layout Designer.
The Layout Designer appears.
7. Expand the Start Page layout category, and then select layout1.
8. Click Edit.
The Design page appears.
9. Drag the external resource that you created for the custom chart into the workspace.
Charts Configuration 49

10. Click Save.
The changes are saved to the temporary workspace.
11. Publish the changes to the MDM Hub.
a. Click Publish.
A change confirmation dialog box appears that prompts you to confirm the changes.
b. Review the changes, and click Confirm.
A validation process runs on the application. A confirmation dialog box appears that prompts you to publish the changes.
c. Click one of the following buttons:
• Publish. Saves the changes to the MDM Hub.
• No. The changes remain in the temporary workspace.
REST Web Services for Charts and ReportsUse REST Web Services to extract data from the C_REPOS_RPT_DETAILS table and display the data in the charts.
You can use the following REST web services:
• Report Details. Retrieves data for a particular report. The web service also returns the metadata information about the report. You can retrieve data based on filters.
• Report Facet. Retrieves the unique values present in any column of the C_REPOS_RPT_DETAILS table. Use the values as filters to retrieve data from the table.
Report Details Web ServiceThe web service returns the data from the C_REPOS_RPT_DETAILS table for a specific report. The web service uses the GET method.
Report Details URL
The Report Details URL has the following format:
http://<host>:<port>/Customer360/services/<database ID>/reports/detailswhere database ID is the ID of the ORS that is registered in the Databases tool in the Hub Console.
Query Parameters
The following table lists the query parameters for the Report Details web service:
Parameter Description
reportId ID of the report.
qryParamString Optional. Filter condition that can be added as a part of a WHERE clause.If you include Date data type as filter, date must be provided in milliseconds. For example, 1400092200000.
Sample request with no filters specified
50 Chapter 6: Customizing Customer 360

The following sample request returns the details of a report with ID 4:
http://localhost:8080/Customer360/services/localhost-orcl-TCR_HUB/reports/details?reportId=4
Sample response
The following sample response shows the details of the report with ID 4:
{ "metadata": { "ROWID_RPT_CONFIG": "4 ", "DIMENSION_NAME_1": "Subject area", "DIMENSION_NAME_2": "null", "TIMEPERIOD_NAME": "Year", "RPT_NAME": "MDM Business Entity Growth Trends", "METRIC_NAME": "Number Of Records", "RPT_DESC": "MDM Business Entity Growth Trends", "RPT_TYPE": "null" }},{ "data": [ [ "Organization", "null", "2011-JAN-10", "450" ], [ "Organization", "null", "2012-JAN-10", "266" ], [ "TCR", "null", "2013-JAN-10", "450" ], [ "Customer", "null", "2014-JAN-10", "12903" ] ]}
Sample request with filtersThe following sample request returns the details of a report based on the specified filter and ID 4:
http://localhost:8080/Customer360/services/localhost-orcl-TCR_HUB/reports/details?reportId=4&qryParamString={"filterCondition":[{"colName":"TIMEPERIOD_VALUE","type":"range","dataType":"date","value":["1294621200000","1389292200000"]}],"qryOperator":"AND"}
The following sample response shows the details of the report with ID 4:
{ "metadata": { "ROWID_RPT_CONFIG": "4 ", "DIMENSION_NAME_1": "Subject area", "DIMENSION_NAME_2": "null", "TIMEPERIOD_NAME": "Year", "RPT_NAME": "MDM Business Entity Growth Trends", "METRIC_NAME": "Number Of Records", "RPT_DESC": "MDM Business Entity Growth Trends", "RPT_TYPE": "null" }},
Charts Configuration 51

{ "data": [ [ "Organization", "null", "2012-JAN-10", "266" ], [ "TCR", "null", "2013-JAN-10", "450" ] ]}
Report Facet Web ServiceThe Report Facet web service returns the list of unique values for the specified column for the specified report. You can use the values as filters. Use the GET method for the web service.
Report Facet URL
The Report Facet URL has the following format:
http://<host>:<port>/Customer360/services/<database ID>/reports/facetsQuery Parameters
The following table lists the query parameters for the Report Facet web service:
Parameter Description
reportId ID of the report.
facetType Any column of the C_REPOS_RPT_DETAILS table.
Sample requestThe following sample request returns the unique values in the DIMENSION_VALUE_1 column for the report with ID 4:
http://localhost:8080/Customer360/services/localhost-orcl-TCR_HUB/reports/facets?reportId=1&facetType=DIMENSION_VALUE_1
Sample response
{ "DIMENSION_VALUE_1": [ "Close 1", "Close 5", "Close 4", "Overdue", "Close", "Close 2", "Open" ]}
52 Chapter 6: Customizing Customer 360

Extending the Data ModelYou can extend the Customer 360 data model by changing the physical schema or by adding types and values to some of the existing tables. You can also add new tables and attributes.
To extend the data model, perform the following steps:
1. Compare your business requirements with the existing schema.
2. List the tables and columns that you want to add.
3. Take a backup of the existing schema.
4. Review the guidelines to extend the data model.
5. Add the tables and columns.
Guidelines for Extending the Data ModelYou can modify the definitions of tables or add new tables to the database.
Consider the following guidelines when you extend the data model:
• Check if you can use an existing child base object.
• Do not add a root base object to store the person or organization information.
• Do not define tables with names greater than 24 characters.
• Do not delete existing base objects.
• Do not delete existing columns.
• Do not modify the physical names of existing base objects. However, you can modify the display names.
• Do not modify the data type of an existing column.
• Do not decrease the length of an existing column.
• Prefix the names of the new base object tables to distinguish the tables from the existing tables. The prefix indicates the type of table. Use the following naming convention when you create a base object:
Prefix Table
C_XO_ Entity root or child base object.
C_XR_ Relationship base object.
C_XT_ Lookup base object.
• If you add a column to an existing table, prefix the name of a column with X_.
For more information about adding tables and columns, see the Informatica MDM Multidomain Edition Configuration Guide.
Extending the Data Model 53
Guidelines for Adding Base ObjectsYou can add base objects to extend the data model. You can add root or child base objects, lookup base objects, and relationship base objects.
Consider the following guidelines when you add a base object table:
• Child base object with one-to-many relationship. Add a Party Role foreign key in the table to relate the table to the Party Role table.
• Child base object with many-to-many relationship. Use the relationship base object to relate the table to the Party Role table.
• Lookup base object. Set the LookupIndicator to true.
Extending the Customer 360 ResourcesBased on the business requirements, you can extend the Customer 360 resources. For example, to extend business entities, you can create a business entity or a lookup business entity. After you create a business entity, you can add a business entity view. You can also add a child, field, or reference fields to an existing business entity.
Guidelines for Extending the Customer 360 ResourcesWhen you extend the Customer 360 resources, follow the naming guidelines so that you can distinguish the custom resources from the predefined Customer 360 resources.
The following table lists the naming guidelines for different Customer 360 resources:
Resource Guidelines
Business entity and business entity view - Add the prefix Ex to the names of the new business entities or lookup entities. For example, Ex_<Business Entity Name>.
- Add the prefix Ex_ to the names of the new child, field, or reference field. For example, Ex_<Business Entity Child Name>.
- Do not add a new view to an existing business entity. Create a new business entity, and then add the business entity view.
Relationship type, queries, packages hierarchy, and hierarchy code
Add the prefix X.
Staging tables Add the prefix C_X.
Business entity relationships, transformations, business entity service extensions, and component instances, such as layouts and external links
Add the prefix Ex.
54 Chapter 6: Customizing Customer 360

C h a p t e r 7
Upgrading Customer 360This chapter includes the following topics:
• Upgrade Overview, 55
• Before You Upgrade, 55
• Upgrading Customer 360, 62
• Updating the Charts, 63
Upgrade OverviewA Customer 360 environment can include a development environment, a test environment, and a production environment. You must upgrade each of these environments. As a best practice, upgrade your development environment first. Identify and resolve any upgrade issues. After you successfully upgrade the development environment, you can upgrade the test and production environments with a high degree of confidence.
Before you upgrade Customer 360, review the Product Availability Matrix to learn about changes to the system requirements.
You can find the Product Availability Matrix on Informatica Network: https://network.informatica.com/community/informatica-network/product-availability-matrices/overview
Before You UpgradeBefore you upgrade Customer 360, upgrade the MDM Multidomain Edition installation and back up the Customer 360 installation files.
1. Upgrade the MDM Multidomain Edition installation to a supported version.
2. Back up the Customer 360 library and configuration files.
3. Extract the latest Customer 360 application archive file.
4. Copy the Customer 360 configuration files to the tcr folder.
5. Configure the base URL for the business entity services.
6. Import the latest Customer 360 application metadata.
55

Upgrading MDM Multidomain EditionUpgrade the MDM Multidomain Edition environment to a supported version.
For more information about upgrading MDM Multidomain Edition, see the Informatica MDM Multidomain Edition Upgrade Guide.
Backing Up the Customer 360 Library and Configuration FilesBefore you back up the Customer 360 library and configuration files, ensure that you close the Customer 360 user interface and the Provisioning tool.
1. Go to the following directory:
<MDM Installation Directory>/app2. Rename the tcr folder.
For example, rename the folder to tcr_backup.
Extracting the Customer 360 Application Archive FileYou receive the Customer 360 application as an archive file. Create the following directory structure and extract the contents of the Customer 360 archive file into it:
<MDM Installation Directory>/app/tcr
The extracted content contains the following files and folders:
• bin/. Contains installation scripts.
• bpm/. Contains the ActiveVOS default business process in a deployable format.
- InfaCustomer360Workflow.bpr. Contains the default business process for the Party table-based data model.
- pre_c360_10.2_hf2/. Directory that contains the default business processes for the Party Role table-based data model.
• cleanse/. Contains custom Java cleanse functions.
• config/. Contains configuration properties files.
• data/. Contains the scripts for inserting lookup or reference data.
• datamart/. Contains the data mart service and the chart configurations.
- chart-config/, config/, and lib/. Directories that contain the chart configurations.
- populate_datamart. Data mart service for the Party table-based data model.
- pre_c360_10.2_hf2/. Directory that contains the data mart service for the Party Role table-based data model.
• docs/. Contains the data dictionary.
- C360_102HF2_DataDictionary_en.pdf. Data dictionary for the Party table-based data model.
- pre_c360_10.2_hf2. Directory that contains the data dictionary for the Party Role table-based data model.
• hub/. Contains the subdirectories that contain the database schema and the configuration files to deploy.
- cocs-config-xml/. Contains configuration files for the business entities and business entity services.
- entity360config-xml/. Contains copies of the Entity 360 component instance definitions that ship with MDM Multidomain Edition.
56 Chapter 7: Upgrading Customer 360
- change-xml. Contains the MDM Hub metadata including components, such as landing tables, lookup tables, staging tables, base objects, and match and merge rules, cleanse functions, component instances, business entities, and business entity services.
• idd/. Contains IDD application archive to support Hierarchy Manager interface.
• lib/. Directory for the external libraries. Copy the JDBC driver files for your database to the lib directory.
• notices/. Contains the legal copyright file.
• pre_c360_10.2_hf2/. Directory that contains the Task Manager, My Records, Timeline, File Import, Charts, and Linkage-related services for the Party Role table-based data model.
• resources/. Contains the resource bundle.properties files for each of the supported locales.
• user_exit/. Contains the MDM Hub user exit archive.
• customer360view-ear.ear and uiwebapp-ear.ear. Files for the Customer 360 user interface.
• Customer360.war. File that contains the Task Manager, My Records, Timeline, File Import, Charts, and Linkage-related services for the Party table-based data model.
Copying the Customer 360 Configuration FilesTo retrieve the existing Customer 360 configuration, copy the backed up Customer 360 configuration files to the newly created tcr folder.
1. Copy all the files in the following directory:
<MDM Installation Directory>/app/<renamed tcr folder>/config2. Paste the files in the following directory:
<MDM Installation Directory>/app/tcr/configNote: You must replace the existing files.
Configuring the Application Properties FileIn the application.properties file, configure the properties related to file import and ActiveVOS.
1. Navigate to the following directory:
/app/tcr/config2. Open the application.properties file in an editor, and configure the following properties:
activevos.datasource.url
Specifies the JNDI name of the ActiveVOS data source.
bulkimport.fileupload.cleanupMinutes
Optional. Manually add the bulkimport.fileupload.cleanupMinutes property. Specifies the number of minutes to persist the import file in the specified directory after the import process is completed. The import process deletes the file after the specified time period. Default is 1 minute.
3. Save the file.
Before You Upgrade 57

Configuring the Base URL for the Business Entity ServicesIf the base URL is not previously configured, configure the base URL for the business entity services to access the Hub Server.
1. Open the following file in a text editor:
<MDM Installation Directory>/app/tcr/config/c360-config.properties2. Configure an appropriate URL for the base.url property to access the Hub Server.
Use one of the following formats for the base URL based on your environment:
• http://<Host>:<Port>Host indicates the host name or the IP address of the machine on which you deploy Customer 360 and Port indicates the port number on which the host listens.
• http://<Domain name> Domain name indicates the fully qualified domain name of the machine that hosts Customer 360.
Updating the Customer 360 Database SchemaUse the latest change list file to update the Customer 360 database schema. Move the incremental changes from the change list to the Operational Reference Store (ORS) of Customer 360 and promote the incremental changes.
Note: If you upgrade Customer 360 from version 10.2 HotFix 2, do not update the database schema because your database schema is already up-to-date.
The latest change list supports new relationship types for the CustomerOrg business entity type. You can use the existing employee relationship type with the new ones or replace the employee relationship type with the new ones. If you do not want to use the new ones, you can continue to use the employee relationship type. If you want to replace the employee relationship type, contact Global Customer Support for assistance. For information about the new relationship types, see the Informatica MDM - Customer 360 Release Guide.
1. Back up the Operational Reference Store (ORS) of Customer 360.
2. In the Configuration workbench of the Hub Console, click Repository Manager.
The Repository Manager tool opens.
3. To select the source repository, perform the following tasks:
a. On the Promote tab, click Visual.
b. Click the Select button next to the Source list.
The Open Repository dialog box appears.
c. On the File Repository tab, browse to the following directory:
<MDM Installation Directory>/app/tcr/hub/change-xml/pre_c360_10.2_hf2d. Select the TCR_HUB.change.xml file, and click Open.
The Repository Manager tool loads and validates the repository from the selected file.
e. Click OK.
The Repository Manager tool displays the source repository as a hierarchical tree.
4. To select the target repository, in the Target list, select the ORS of Customer 360.
58 Chapter 7: Upgrading Customer 360

5. In the hierarchy tree of the source repository, select the following objects:
Parent Object Hierarchy Objects to Promote
Base Objects C_BO_PRTY > Message Triggers CustomerOrg Trigger
Business Entity/Business Entity Services Configurations > View Configuration > Views
CustomerOrgView > Children > CustomerOrgElectronicAddress (many) > Fields
etrncAddr
CustomerOrgView > Children > CustomerOrgElectronicAddress (many) > Children > CustomerOrgEAddrPreferences (many) > Fields
avlbltyTyptmPrdGrpFk
CustomerOrgView > Children > CustomerOrgPhone (many) > Children > CustomerOrgPhonePreferences (many) > Fields
avlbltyTyptmPrdGrpFk
CustomerOrgView > Children > CustomerOrgPhone (many) > Fields
phnNum
CustomerOrgView > Children > CustomerOrgPostalAddress (many) > Children > CustomerOrgAddressPreferences (many) > Fields
avlbltyTyptmPrdGrpFk
CustomerPersonView > Children > CustomerPersonElectronicAddress (many) > Children > CustomerPersonEAddrPreferences (many) > Fields
avlbltyTyptmPrdGrpFk
CustomerPersonView > Children > CustomerPersonElectronicAddress (many) > Fields
etrncAddr
CustomerPersonView > Children > CustomerPersonPhone (many) > Children > CustomerPersonPhonePreferences (many) > Fields
avlbltyTyptmPrdGrpFk
CustomerPersonView > Children > CustomerPersonPhone (many) > Fields
phnNum
CustomerPersonView > Children > CustomerPersonPostalAddr (many) > Children > CustomerPersonAddrPreferences (many) > Fields
avlbltyTyptmPrdGrpFk
Queries Query Group Report Query Custom Party InfoQuery Custom Party Postal Address
Note: When you promote changes to a query, the Repository Manager tool replaces the existing query. If you use any customized query, clone it before you promote changes to it.
Before You Upgrade 59

6. If you want to use the new relationship types for the CustomerOrg business entity type, select the following objects:
Parent Object Hierarchy Objects to Promote
Business Entity/Business Entity Services Configurations
View Configuration > Views > CustomerOrgView > Children > CustomerOrgContacts (many) > Fields
hmRelTypCd
Business Entities > Objects > CustomerOrg > Children > CustomerOrgContacts (many) > Fields
hmRelTypCd
Business Entities > Relationships OrganizationContactContactPersonOrganizationContactEmployeePersonOrganizationCustomerContactPersonOrganizationCustomerEmployeePerson
Business Entity Services > Services ReadOrganizationContactContactPersonReadOrganizationContactEmployeePersonReadOrganizationCustomerContactPersonReadOrganizationCustomerEmployeePersonWriteOrganizationContactContactPersonWriteOrganizationContactEmployeePersonWriteOrganizationCustomerContactPersonWriteOrganizationCustomerEmployeePerson
60 Chapter 7: Upgrading Customer 360

Parent Object Hierarchy Objects to Promote
REST Business Entity Service Configuration > Requests
ReadOrganizationContactContactPersonReadOrganizationContactEmployeePersonReadOrganizationCustomerContactPersonReadOrganizationCustomerEmployeePersonWriteOrganizationContactContactPersonWriteOrganizationContactEmployeePersonWriteOrganizationCustomerContactPersonWriteOrganizationCustomerEmployeePerson
Component Instances OrgContactHierarchy
Hierarchies Profiles > Default > Relationship Types ContactContactContactEmployeeCustomerContactCustomerEmployee
Relationship Objects > C_BR_PRTY_REL > Relationship Types
ContactContactContactEmployeeCustomerContactCustomerEmployee
Note: When you promote changes to a component instance, the Repository Manager tool replaces the existing component instance. If you use any customized component instance, clone it before you promote changes to it.
7. To promote the selected objects, perform one of the following tasks:
• Right-click the selected objects, and select Promote.
• Click the Promote icon.
• Drag the selected objects from the source repository to the target repository.
8. If the Repository Manager tool detects any conflicts in the target repository, select an appropriate action.
9. After you resolve the conflicts, click the Apply Changes icon.
Adding the Employee Relationship TypeIf you want to use the existing employee relationship type with the new ones, after you update the database schema, add the employee relationship type to the CustomerOrg business entity type.
Note: If you upgrade Customer 360 from version 10.2 HotFix 2, do not add the employee relationship type because the employee relationship type already exists in your environment.
1. In the Provisioning tool, click Business Entity > Modeling.
2. Select Business Entities, and then select CustomerOrg.
Before You Upgrade 61

3. In the Tree View panel, expand many > CustomerOrgContacts > field > hmRelTypCd.
4. In the Properties panel, include Employee as a value.
The value then becomes ContactEmployee,ContactContact,Employee.
5. Click Apply.
6. Click UI Configuration > Component Editor.
7. Select Related Records, and then select OrgContactHierarchy.
8. In the Tree View panel, select filter, and then click Create.
9. In the Properties panel, specify a name for the filter with prefix Ex. For example, Ex_OrgEmpPerson.
10. Select relationship as the type of filter.
11. Select OrganizationEmployeePerson as the filter value.
12. Click Apply.
13. Publish the changes to the MDM Hub.
a. Click Publish.
A change confirmation dialog box appears that prompts you to confirm the changes.
b. Review the changes, and click Confirm.
A validation process runs on the application. A confirmation dialog box appears that prompts you to publish the changes.
c. Click one of the following buttons:
• Publish. Saves the changes to the MDM Hub.
• No. The changes remain in the temporary workspace.
Upgrading Customer 360After you import the application metadata, run the installation script to upgrade Customer 360.
1. At a command prompt, go to the following directory:
<MDM Installation Directory>/app/tcr/bin2. Run one of the following scripts based on your operating system:
• On Windows. upgrade-tcr.bat• On Linux. upgrade-tcr.sh
3. At the prompts, enter the following parameters:
Parameter Description
MDM Hub installation directory
Fully qualified path to the directory where you installed MDM Hub.
MDM - Customer 360 installation directory
Fully qualified path to the directory that contains the Customer 360 files.
Application Server Name of the application server in lowercase.
62 Chapter 7: Upgrading Customer 360

Parameter Description
avos console username ActiveVOS Console user name.
avos console password ActiveVOS Console password.
PIM portal username Product 360 user name that you entered in the previous installation. If you do not want to enable the Product 360 service, press Enter.
PIM portal password Product 360 password that you entered in the previous installation.
linkage service license D&B linkage service license. If you do not want to enable the linkage service, press Enter.
linkage username D&B linkage service user name.Note: For the linkage service, create a separate user in the MDM Hub with the ApplicationAdministrator role.
linkage password D&B linkage service password.
Note: If you use a WebLogic application server, you are prompted to enter the WebLogic console password.
Updating the ChartsAfter you upgrade Customer 360, you can update a specific chart or all the charts.
1. At a command prompt, go to the following directory:
• If you upgrade Customer 360 from version 10.2 or 10.2 HotFix 1. <MDM Installation Directory>/app/tcr/datamart/pre_c360_10.2_hf2
• If you upgrade Customer 360 from version 10.2 HotFix 2. <MDM Installation Directory>/app/tcr/datamart
2. To update a specific chart, run the following command:
java -jar populate_datamart.jar exec <report name>3. To update all the charts, run the following command:
java -jar populate_datamart.jar
Updating the Charts 63

C h a p t e r 8
TroubleshootingThis chapter includes the following topics:
• Generate Business Entity Schema for the Customer 360 Application, 64
• Check Your Security Access Manager Configuration, 65
• Import of the IDD ZIP File Fails in IBM DB2, 65
• Financials Section of the Dashboard Displays Null Values, 66
• Provisioning Tool Does Not Respond, 66
• Installer Does Not Update the JNDI Path for JBoss, 66
Generate Business Entity Schema for the Customer 360 Application
In the Informatica Data Director Configuration Manager, if you accidentally generate business entity schema for the Customer 360 application, the Configuration Manager overwrites your business entity configuration. After you generate the business entity schema, Customer 360 does not function as expected. For example, the task inbox and the Task Manager does not display any tasks even though you have valid tasks.
To resolve this issue, perform the following tasks:
1. In the Configuration workbench of the Hub Console, click Repository Manager.
The Repository Manager tool opens.
2. To select the source repository, perform the following tasks:
a. On the Promote tab, click Visual.
b. Click the Select button next to the Source list.
The Open Repository dialog box appears.
c. On the File Repository tab, browse to the following directory:
• For Party table-based data model. <MDM installation directory>/app/tcr/hub/change-xml• For Party Role table-based data model.<MDM installation directory>/app/tcr/hub/change-
xml/pre_c360_10.2_hf2d. Select the TCR_HUB.change.xml file, and click Open.
The Repository Manager tool loads and validates the repository from the selected file.
64

e. Click OK.
The Repository Manager tool displays the source repository as a hierarchical tree.
3. To select the target repository, in the Target list, select the ORS of Customer 360.
4. In the hierarchy tree of the source repository, select Business Entity/Business Entity Services Configurations.
5. To promote the selected object, perform one of the following tasks:
• Right-click the selected object, and select Promote.
• Click the Promote icon.
• Drag the selected object from the source repository to the target repository.
The Promotion dialog box appears.
6. Select Replace the target objects with source objects, and click OK.
The Impact Analyser dialog box appears.
7. Click OK.
8. Click the Apply Changes icon.
9. If you have extended your business entities, restore or reconfigure the extended objects.
10. On the Validate tab, select the ORS of Customer 360, and click Validate.
11. Reopen a browser, and log in to Customer 360.
Check Your Security Access Manager ConfigurationVerify that Security Access Manager (SAM) has the correct permissions assigned at all levels.
A resource is an MDM Hub object that is used in your MDM Hub implementation. Ensure that all the resources are secure.
Import of the IDD ZIP File Fails in IBM DB2In a WebSphere and IBM DB2 environment, when you import an IDD application in the Zip format, the import might fail.
To resolve the issue, use one of the following options:
• Increase the size of BLOB_DATA column to 30 MB in the CMX_SYSTEM.C_REPOS_DS_CONFIG table with the following IBM DB2 command:
ALTER TABLE CMX_SYSTEM.C_REPOS_DS_CONFIG ALTER COLUMN BLOB_DATA SET DATA TYPE BLOB(31457280);
• Import and deploy the BDDConfig.xml file.
Check Your Security Access Manager Configuration 65

Financials Section of the Dashboard Displays Null Values
If D&B returns multiple values for total equity and annual revenue parameters, the financials section of the customer dashboard displays null values in the respective fields.
To resolve the issue, specify the value that you want to display in the Financials section of the customer dashboard.
To specify the values for the Financials section, perform the following tasks:
1. In the Provisioning tool, click UI Configuration > Application Editor.
The Application Editor appears.
2. In the Applications list, select C360 Application Configuration, and then select C360WidgetConfiguration.
3. In the Properties panel, configure appropriate values in the following XML code block:
<field> <label>Annual Revenue</label> <type>currency</type> <coValue>CustomerOrgRole_item_0_CustomerOrgAnnualRevenue</coValue> <defaultValue>-</defaultValue> <defaultKey>dfltInd</defaultKey> <defaultKeyValue>1</defaultKeyValue> <getStrategy>getOne_finInfoType[Annual Revenue]</getStrategy> <coFieldValues>annlRvnu_annlRvnuCrncy_crncyCd_annlRvnuUnt_untDesc</coFieldValues> <concatenateWith /> <filterAs /></field>
The preceding sample XML code specifies how to select a value when D&B returns multiple values for the annual revenue field.
Provisioning Tool Does Not RespondIn the C_REPOS_CO_CS_CONFIG repository table, if the TASKS configuration contains the LookupSegmentValue business entity for a trigger, the Provisioning tool does not respond.
To fix this issue, remove the LookupSegmentValue business entity from the TASKS configuration. However, after you remove the LookupSegmentValue business entity from the TASKS configuration, you cannot add a new tag to a business entity.
Installer Does Not Update the JNDI Path for JBossDuring reinstallation of Customer 360, if you change the installation directory, the JNDI path in the JBoss application server does not reflect the change.
Restart the JBoss application server to get the changed installation directory path.
66 Chapter 8: Troubleshooting
I n d e x
Aaccounts
MDM Hub users, creating 26architecture
Customer 360 9assigning
roles 20
Bbusiness entity schema 64business managers
MDM Hub user accounts, creating 26user roles, assigning 27
Ccharts
configurations, importing 29populating with data 28
charts and graphs about 29
components customizing 41
configuration bulk import 45DaaS Provider component 43draft check box 45file import 45My Records 42Task Manager 42twitter 48
configuring JMS connection factory 18JMS queue 18message queue 18
creating ApplicationAdministrator user 20JCEKS keystore 19user 20
Creating ORS 14
custom chart adding 49
Customer 360 architecture 9
Customer 360 application about 8
Customer 360 application developer about 8
customizing overview 40
DDaaS
cleanse functions DaaS 17
DaaS validation about 11
data enrichment Dun and Bradstreet 11
data mart configuring 28database connections, configuring 29populating 31report parameters, configuring 30
database connections data mart, configuring 29
directory structure 13, 56
drivers JDBC 23
Eediting
dashboard components 42ProductComponent configuration 31
extending business entities 54business entity views 54data model 53
ExternalLink configuration 46
Ffinancials
dashboard 66troubleshooting 66
Gguidelines
adding base objects 54extending business entities 54extending business entity views 54extending data model 53
Iimporting
Customer360.zip 16
67

Informatica MDM-Customer 360 about 8
installation directory structure 13, 56
installing Customer 360 24
Llayout
customization 40layout components
parent XML elements 41
Mmandatory DaaS parameters
adding 18message queue
configuring 18Hub Console 18
metadata Application, importing 15MDM, importing 15
OOperational Reference Store
configuring 28operational reference stores
registering 15Operational Reference Stores
MDM Hub Store metadata, importing 15ORS See Operational Reference Store
PProduct 360
about 10properties
application.properties 21, 57c360-config.properties 21c360-log4j 23keystore-pass.properties 22log file path 23
Rreference data
inserting 16
relationship type 58report parameters
data mart 30repository tables
C_REPOS_APP_CONFIG, populating 16C_REPOS_RPT_DETAILS, populating data mart 31C_REPOS_RPT_DETAILS, truncating 28
requirements software 13
resource bundle locales 23
REST API charts 50report details 50report facet 52
role privileges about 38
roles Customer 360 37
Ssoftware requirements
verifying 13
Ttask types
about 38
Uupgrade
database schema 58user accounts
MDM Hub users, creating 26user roles
about 10business managers, assigning 27Customer 360 10overview 26privileges 27
Wworkflows
customer data 37
68 Index