Fundamentals of Lotus Notes Email and Calendar
46
Fundamentals of Lotus Notes® Email and Calendar
-
Upload
suresh8159 -
Category
Documents
-
view
16 -
download
1
description
lotus notes software
Transcript of Fundamentals of Lotus Notes Email and Calendar
Fundamentals of Lotus Notes® Email and Calendar

ContentsLotus Notes® Welcome Page..........................................................................................................3Docking the Open List.....................................................................................................................4Sidebar.............................................................................................................................................5Want to subscribe to a RSS Feed?...................................................................................................6Opening Applications upon start-up................................................................................................6Elements of Lotus Notes® Email....................................................................................................7Inbox icons.......................................................................................................................................8Working with Email in your Inbox..................................................................................................9Creating and Sending Email..........................................................................................................12Selecting Documents.....................................................................................................................14All Documents View.....................................................................................................................15AutoSave your email.....................................................................................................................15Recalling Mail...............................................................................................................................16Out of Office..................................................................................................................................17More about Mail Preferences.........................................................................................................18Elements of Lotus Notes® Calendar.............................................................................................20Types of Calendar Entries.............................................................................................................21Options for Calendar Entries.........................................................................................................22Scheduling a Meeting in Notes®...................................................................................................23Setting Up Your Availability.........................................................................................................24Allowing Others to View your Calendar.......................................................................................25Adding calendars to your Notes® calendar...................................................................................27Archive..........................................................................................................................................29iNotes®: (www.esc.edu/myemail)..............................................................................................31
2

Lotus Notes® Welcome Page
3
Toolbar
Click to open applications and bookmark folders
Sidebar
Action Bar
Bookmarked applicationsPanel
Any open emails or Notes applications are displayed as tabs.
Announcement headlines
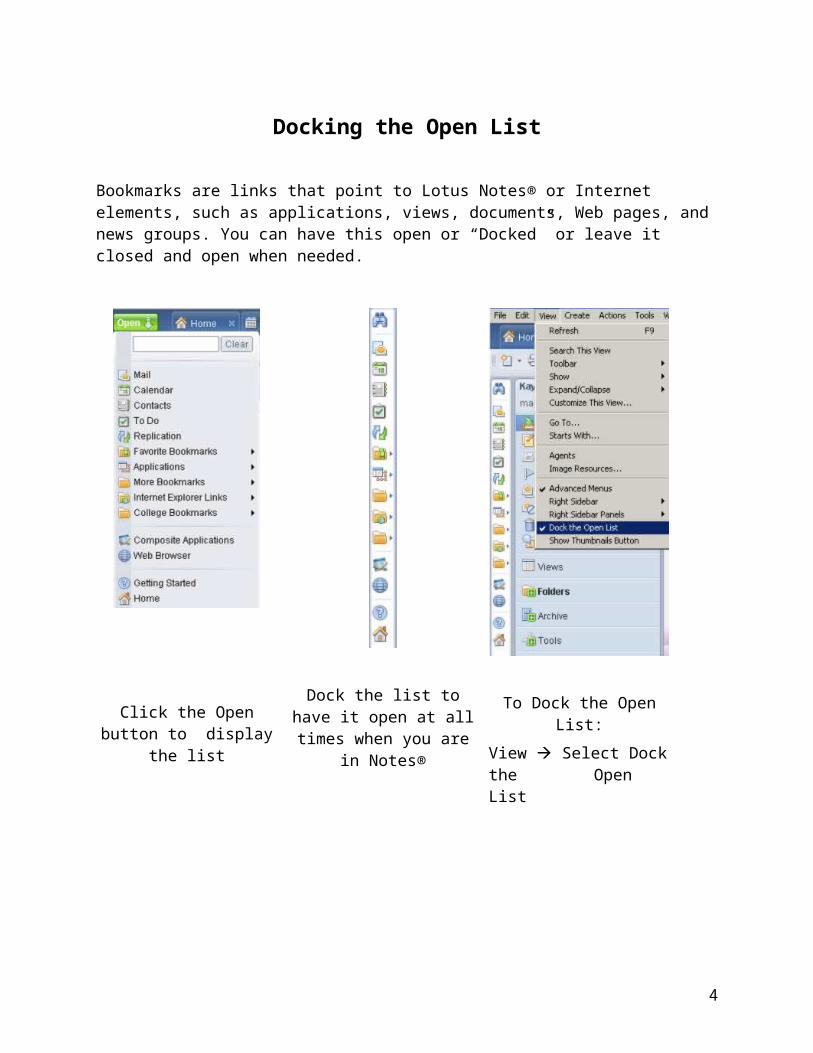
Docking the Open List
Bookmarks are links that point to Lotus Notes® or Internet elements, such as applications, views, documents, Web pages, and news groups. You can have this open or “Docked” or leave it closed and open when needed.
Click the Open button to display the list
Dock the list to have it open at all times when you are in
Notes®
To Dock the Open List:View Select Dock the Open List
4
Sidebar
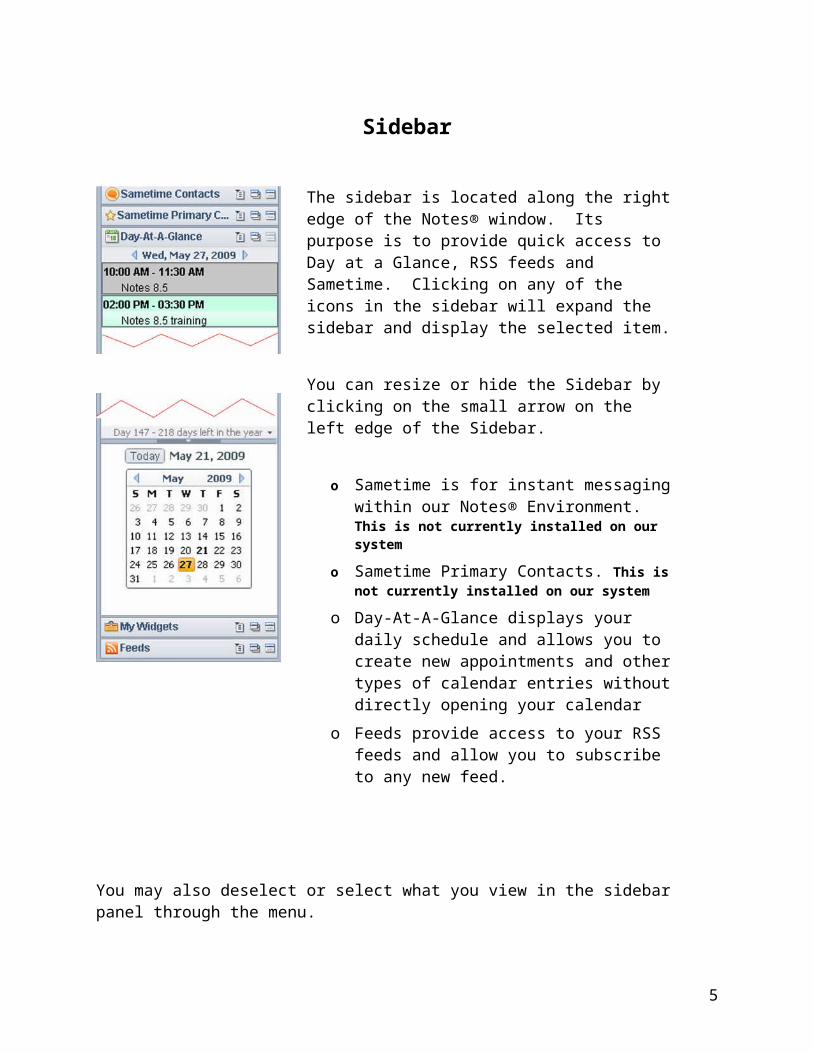
The sidebar is located along the right edge of the Notes® window. Its purpose is to provide quick access to Day at a Glance, RSS feeds and Sametime. Clicking on any of the icons in the sidebar will expand the sidebar and display the selected item.
You can resize or hide the Sidebar by clicking on the small arrow on the left edge of the Sidebar.
o Sametime is for instant messaging within our Notes® Environment. This is not currently installed on our system
o Sametime Primary Contacts. This is not currently installed on our system
o Day-At-A-Glance displays your daily schedule and allows you to create new appointments and other types of calendar entries without directly opening your calendar
o Feeds provide access to your RSS feeds and allow you to subscribe to any new feed.
You may also deselect or select what you view in the sidebar panel through the menu.
Try it
View Right Sidebar Panel:o Deselect or Select what you would like to view in the sidebar.
You may wish to deselect Sametime and Sametime primary contacts so they do not show up in the sidebar panel. You can reselect them when we roll Sametime out.
5

Want to subscribe to a RSS Feed?
A feed is a list of articles or documents that are available at a web site. Many major news and web sites provide feeds of their content and update them on a daily basis.The best way to get started is to check your favorite news or information sites for free feeds of their content.
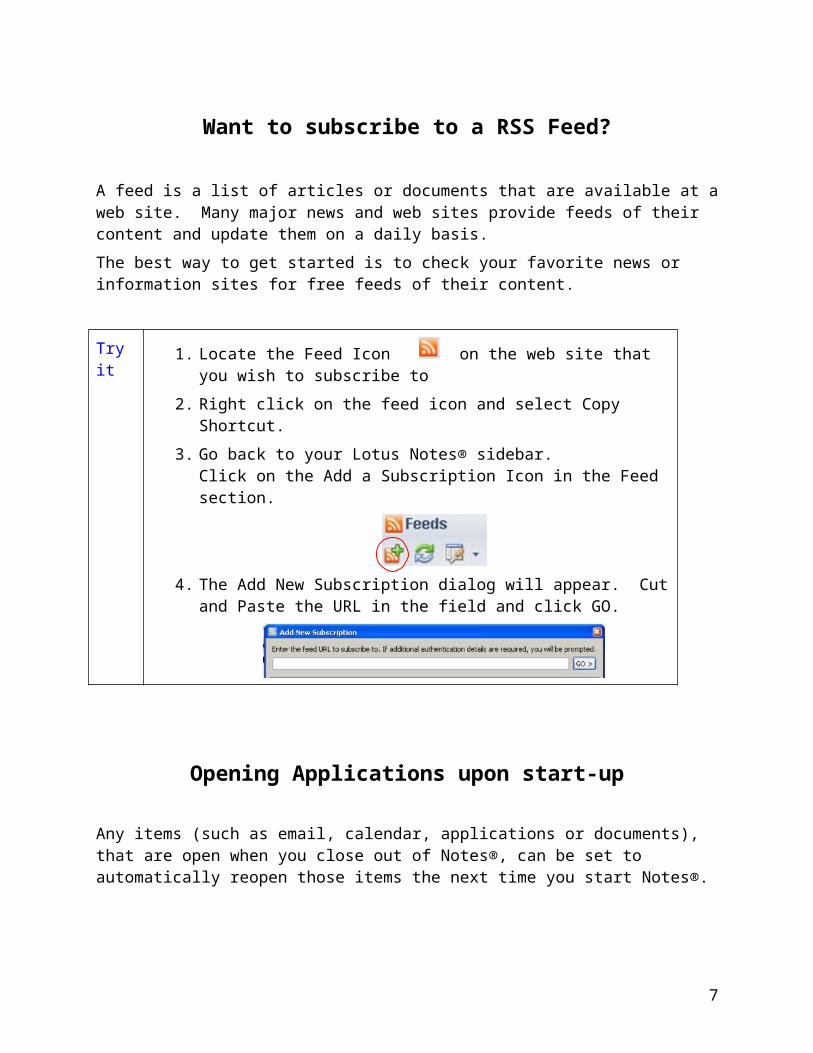
Try it 1. Locate the Feed Icon on the web site that you wish to subscribe to
2. Right click on the feed icon and select Copy Shortcut.3. Go back to your Lotus Notes® sidebar.
Click on the Add a Subscription Icon in the Feed section.
4. The Add New Subscription dialog will appear. Cut and Paste the URL in the field and click GO.
Opening Applications upon start-up
Any items (such as email, calendar, applications or documents), that are open when you close out of Notes®, can be set to automatically reopen those items the next time you start Notes®.
Try it
File Preferences Windows and Themes:o Select: “On restart, reopen any tabs that were open when I closed the
client “o Click Apply and OK
6
Elements of Lotus Notes® Email
7
Toolbar
Click to open applications and bookmark folders
Sidebar
Action Bar
NavigationPanel
Mini-view
Any open emails or Notes applications are displayed as tabs.
Preview Pane
View Pane

Inbox icons
New Mail
Attachment
Sent to me only (recipient icon)
Sent to me and a few people (recipient icon)
Sent to me and many people (recipient icon)
Flag – Normal priority
Flag - Urgent
Flag - Low
Message replied to
Message forwarded
Message replied to and forwarded
Recipient Icons: By default the Recipient Icons do not appear. If you wish to have these displayed, you enable them in your preferences.
Try it
File Preferences Mail Recipient Icons tab:o Select the indicators you want displayed.
o Click OK
8

Working with Email in your Inbox
Preview:You can preview your email before you open it. By default the preview pane is open and on the bottom of your inbox. You can select to have the preview pane display on the right of your inbox instead of the bottom. If you do not wish to preview your email prior to opening, you can also choose to close it entirely.
Open:Double click with your mouse to open an email. You may also highlight the email and press the enter key.
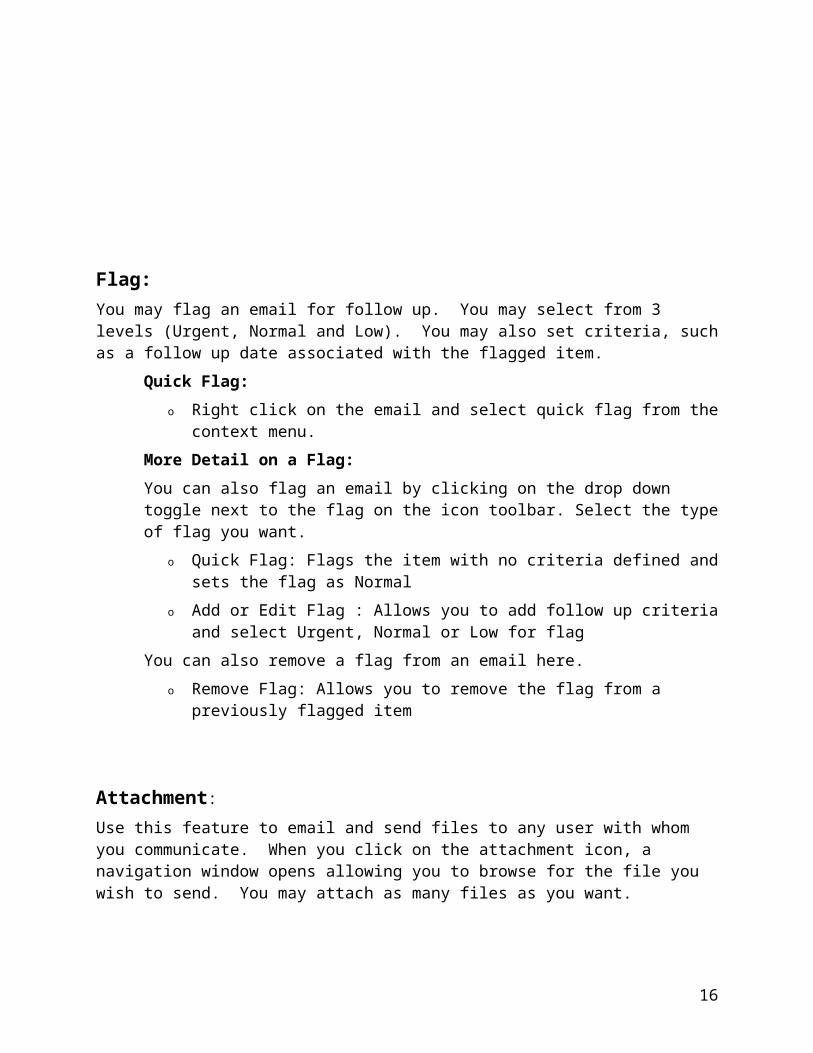
Flag:You may flag an email for follow up. You may select from 3 levels (Urgent, Normal and Low). You may also set criteria, such as a follow up date associated with the flagged item.
Quick Flag:To set a quick flag, right click on the email and select quick flag from the context menu. More Detail on a Flag:You can also flag an email by clicking on the drop down toggle next to the flag on the icon toolbar. Select the type of flag you want.
o Quick Flag: Flags the item with no criteria defined and sets the flag as Normalo Add or Edit Flag : Allows you to add follow up criteria and select Urgent, Normal
or Low for flagYou can also remove a flag from an email here.
o Remove Flag: Allows you to remove the flag from a previously flagged item
9

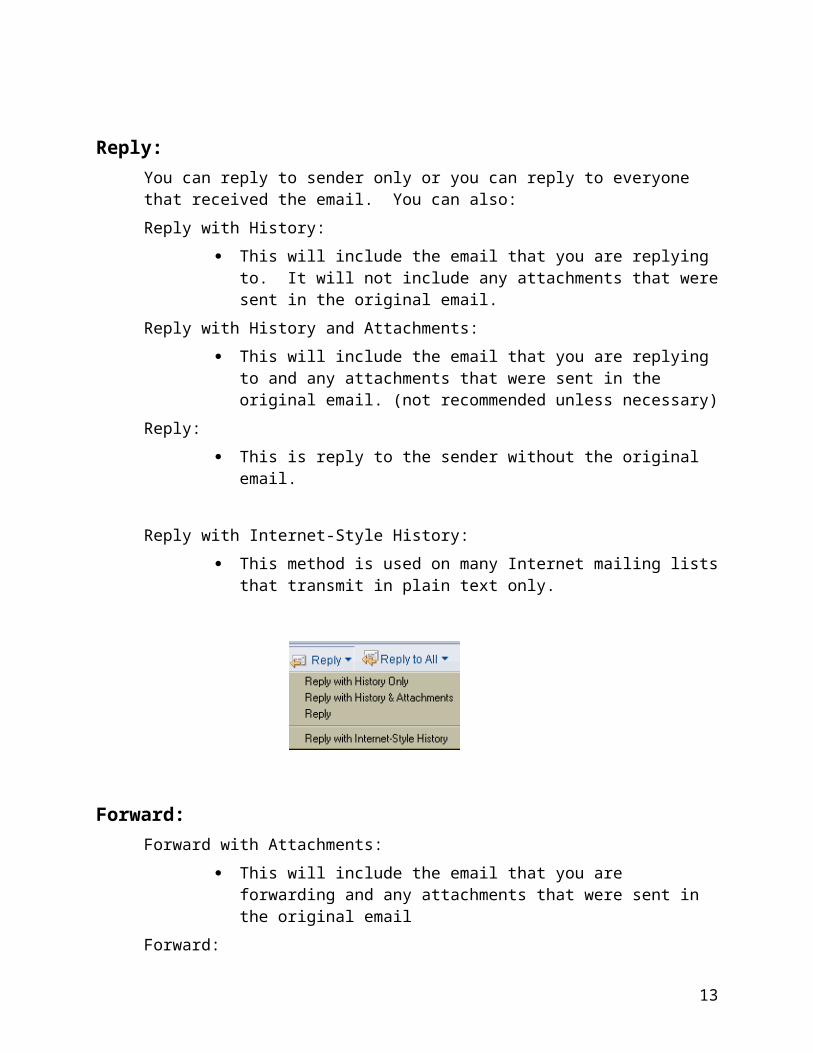
Reply:You can reply to sender only or you can reply to everyone that received the email. You can also:Reply with History:
This will include the email that you are replying to. It will not include any attachments that were sent in the original email.
Reply with History and Attachments: This will include the email that you are replying to and any attachments
that were sent in the original email. (not recommended unless necessary)Reply:
This is reply to the sender without the original email.
Reply with Internet-Style History: This method is used on many Internet mailing lists that transmit in plain
text only.
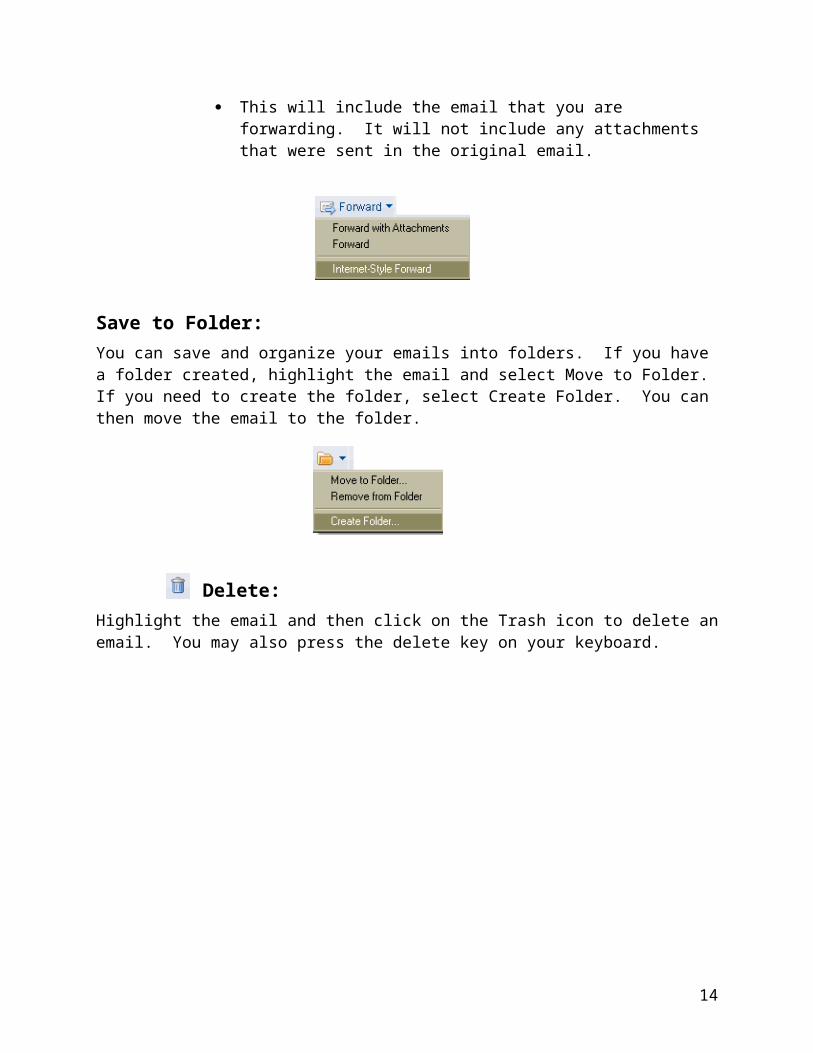
Forward:Forward with Attachments:
This will include the email that you are forwarding and any attachments that were sent in the original email
Forward: This will include the email that you are forwarding. It will not include any
attachments that were sent in the original email.
10
Save to Folder:You can save and organize your emails into folders. If you have a folder created, highlight the email and select Move to Folder. If you need to create the folder, select Create Folder. You can then move the email to the folder.
Delete:Highlight the email and then click on the Trash icon to delete an email. You may also press the delete key on your keyboard.
11

Creating and Sending Email
Send: Send the email to any and all recipients
Send and File: You are able to send the email and move the sent email to a folder. If a folder has
not been created, you will have the opportunity to create a folder and then move/file the email in the newly created folder
Save as Draft: This option allows you to save an email in a draft folder. You can work on the
email at your convenience and then send at a later time.
Delivery Options You can add a variety of delivery options to an outgoing email.
12
Flag:You may flag an email for follow up. You may select from 3 levels (Urgent, Normal and Low). You may also set criteria, such as a follow up date associated with the flagged item.
Quick Flag: o Right click on the email and select quick flag from the context menu.
More Detail on a Flag:You can also flag an email by clicking on the drop down toggle next to the flag on the icon toolbar. Select the type of flag you want.
o Quick Flag: Flags the item with no criteria defined and sets the flag as Normalo Add or Edit Flag : Allows you to add follow up criteria and select Urgent, Normal
or Low for flagYou can also remove a flag from an email here.
o Remove Flag: Allows you to remove the flag from a previously flagged item
Attachment:Use this feature to email and send files to any user with whom you communicate. When you click on the attachment icon, a navigation window opens allowing you to browse for the file you wish to send. You may attach as many files as you want.
13
Display:You can select to have commonly used delivery options at the top of each new message you are creating. This is handy if you frequently send emails as high priority and want something marked confidential in the subject line. You can also have Bcc added to the sender area. Click the drop down arrow next to Display to see your options
(Important Note: Sign is NOT the same as signature. It is digital and requires the use of certificates. Please do not use Sign or Encrypt.)
More:If you have not chosen to append your signature to every outgoing email, you can insert your signature selectively from here:
14
Additional Mail Options
Sender Information
Bcc

Selecting DocumentsYou can select several documents at once. You can move several emails into a single folder or you can also select several emails and forward them. Selecting and forwarding several emails would append all the emails together and forward them as one email. You can also select several emails at once for deletion.
o To select multiple documents in a view or folder click the top email, and while holding down the shift key, click the last email. All emails between the top and bottom will be highlighted.
o If you wish to select emails that are not concurrent, you may select the individual emails by holding down the control (Ctrl) key and selecting each email. Each email that you select will be highlighted.
Adding a document selection column:If you are more comfortable selecting your documents using the selection column on the left side of the listed emails, you may activate that preference.The selection column allows you to select documents by clicking in the column to the left of the list of documents. Your selected documents have a check mark in the column to the left of their titles.
Try it
File Preferences Basic Notes® Client Configuration:o Go to the Additional options selection box
o Scroll to the last option in the box
o Select “Show check marks in margin for selected documents”
15
o Click OK
16

All Documents ViewAll Documents view displays all your Notes entries (email, calendar and To Do). It also displays the folder where that document is stored. If the document was sent or if it is a calendar item or To Do, it will not have a folder listed.
AutoSave your email
The AutoSave option automatically saves documents you are working on so you can recover your work if there is a power outage or system crash.
Try it
File Preferences Basic Notes® Client Configuration:o Click box for AutoSave every
o Type in or use drop down option to select how often you want to have your email automatically save
o Click OK to Save
17

Recalling MailIf you sent an email erroneously, you may recall the message sent to recipients within Empire State College. You cannot recall messages that have been read or were sent more than 14 days from the day you are trying to recall. Please note: You cannot recall messages sent outside of the Empire State College Lotus Notes® network.To recall a message:
1. Open your Sent folder and select the message that you wish to recall2. With the message selected, click on the Recall Message button in the icon toolbar.3. When the Recall Message dialog box appears, select the recipient whose mail will be
recalled.
4. Ensure the “Send me a recall status report for each recipient” option is selected to receive a report in your inbox with information on the success or failure of each recall attempt.
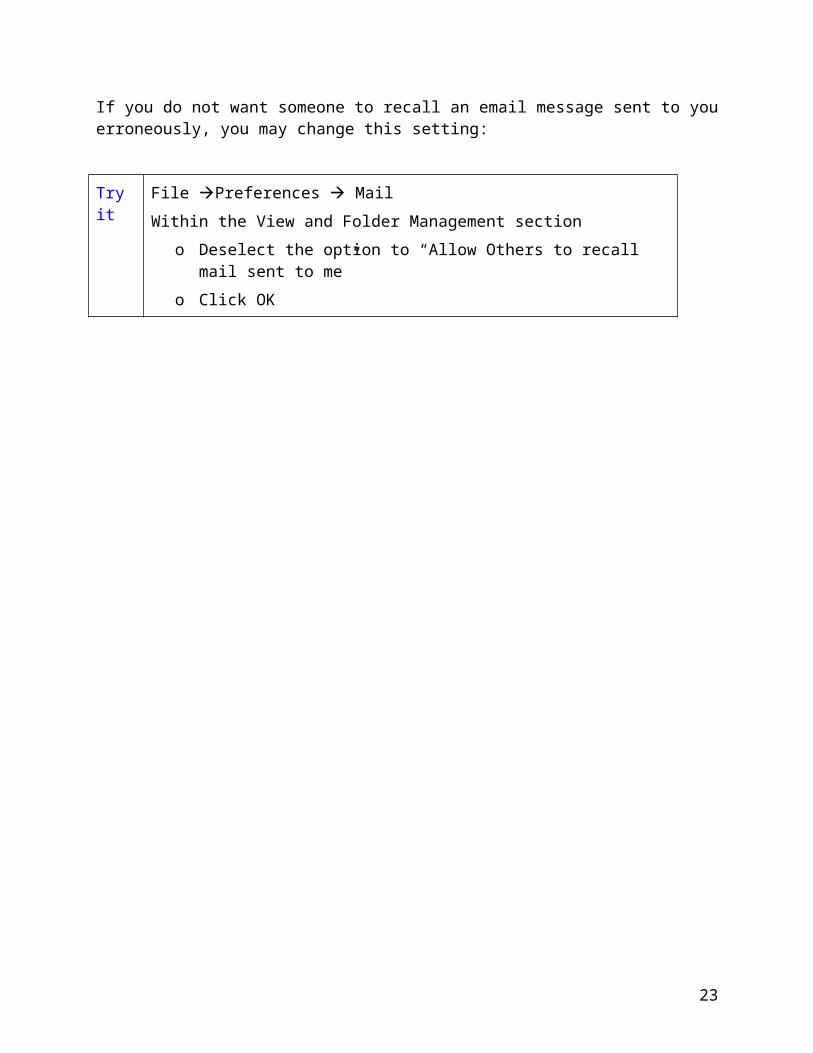
If you do not want someone to recall an email message sent to you erroneously, you may change this setting:
Try it
File Preferences MailWithin the View and Folder Management section
o Deselect the option to “Allow Others to recall mail sent to me”
o Click OK
18

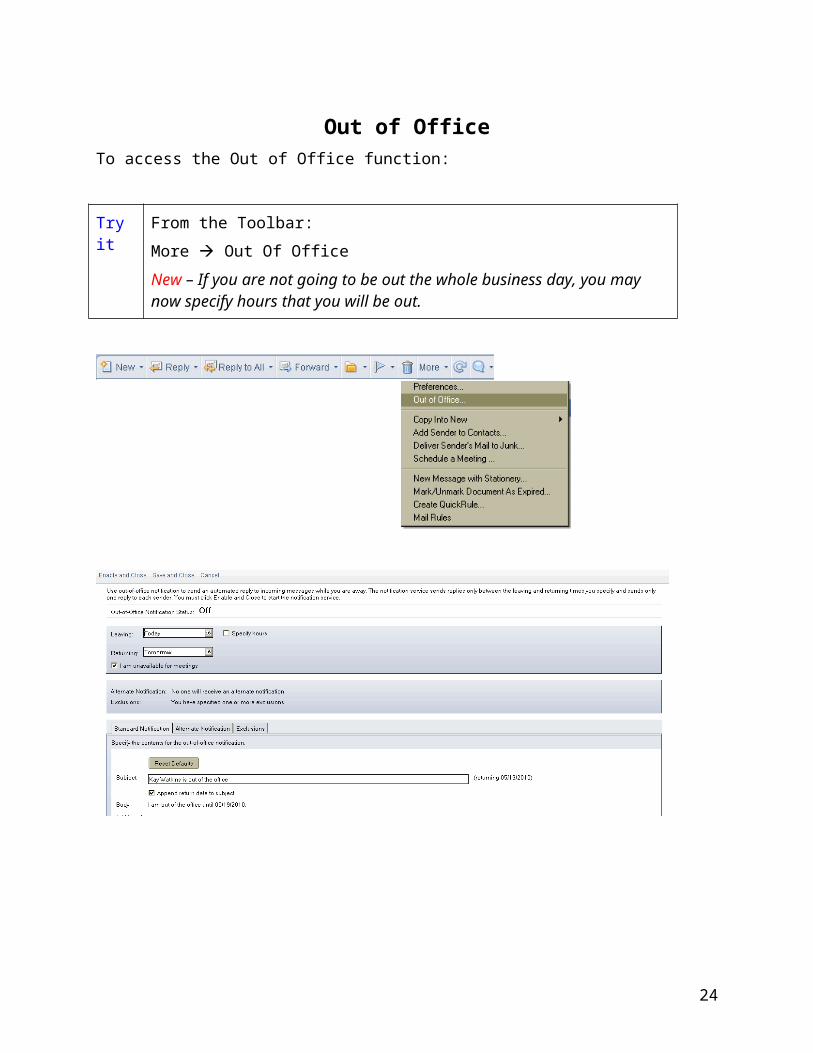
Out of OfficeTo access the Out of Office function:
Try it
From the Toolbar:More Out Of OfficeNew – If you are not going to be out the whole business day, you may now specify hours that you will be out.
19

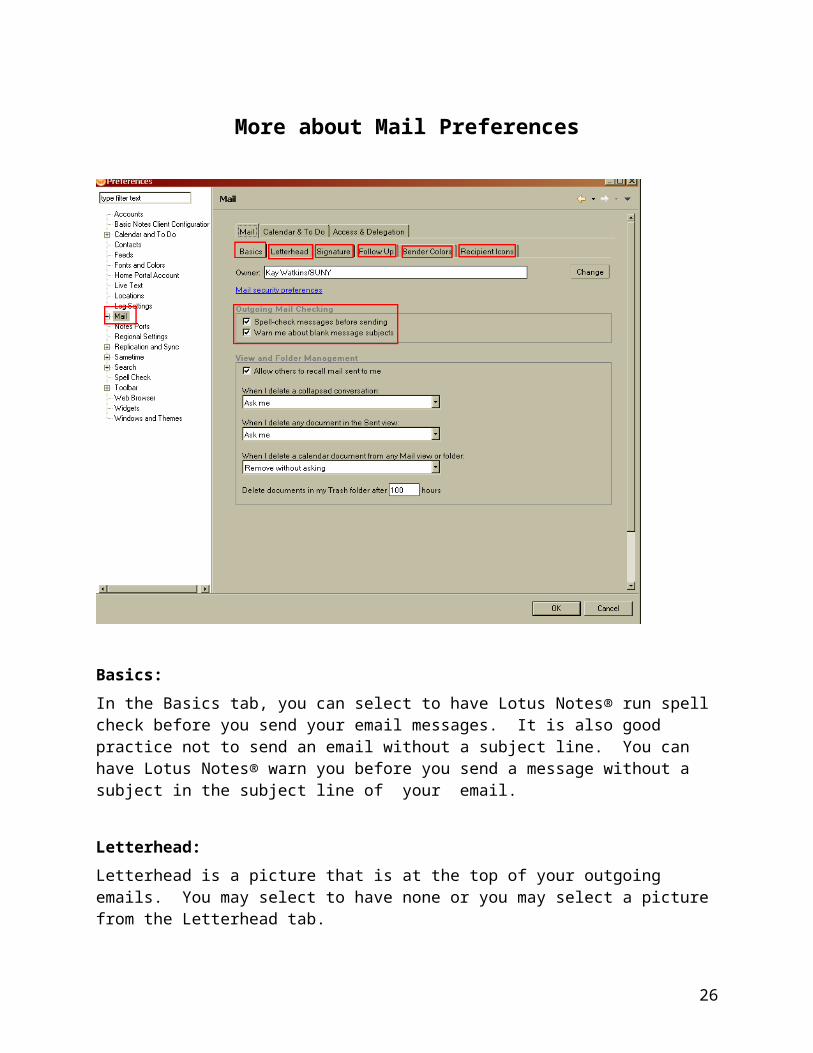
More about Mail Preferences
Basics:In the Basics tab, you can select to have Lotus Notes® run spell check before you send your email messages. It is also good practice not to send an email without a subject line. You can have Lotus Notes® warn you before you send a message without a subject in the subject line of your email.
Letterhead:Letterhead is a picture that is at the top of your outgoing emails. You may select to have none or you may select a picture from the Letterhead tab.
Signature:You may create a signature to add to the bottom of each outgoing email. This can be appended to each outgoing email automatically or you can add it only when you want to.
20

Sender Colors:You can set preferences to easily spot incoming emails from important senders in your inbox by assigning unique background and text colors from different senders.
Recipient Icons:You can also display different icons for mail sent to you only, sent to only a few people, or sent to you as a secondary recipient. This was discussed on page 8.
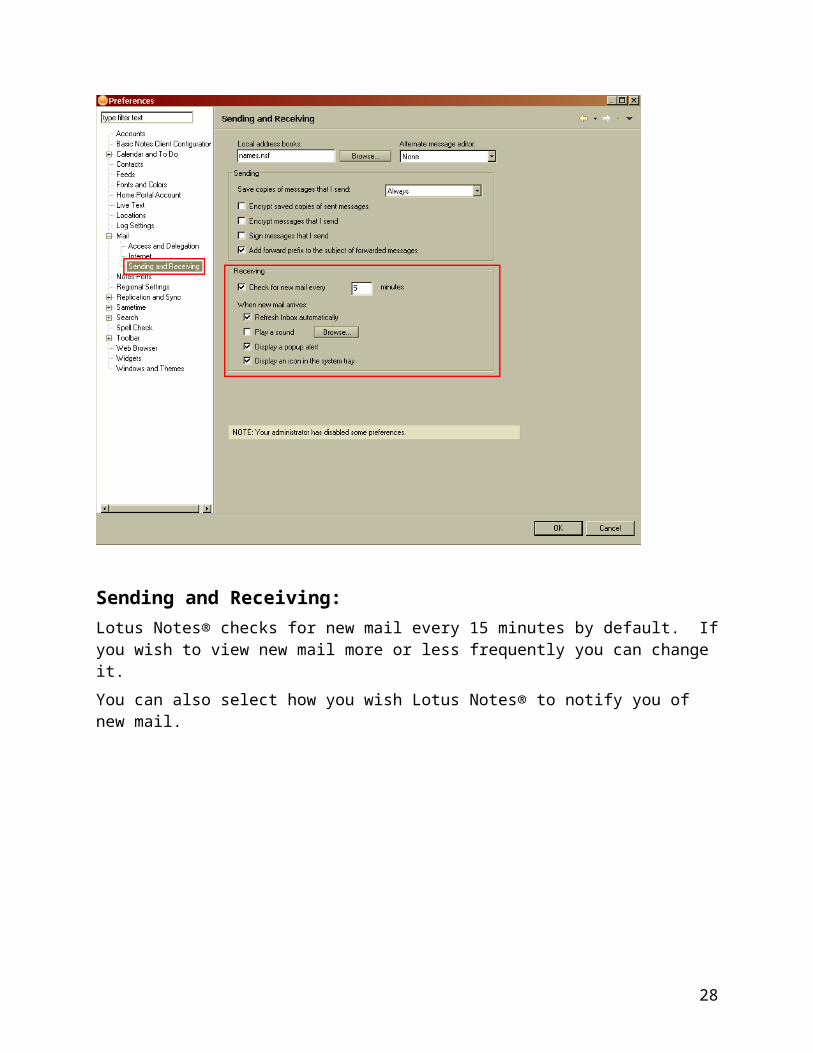
Sending and Receiving:Lotus Notes® checks for new mail every 15 minutes by default. If you wish to view new mail more or less frequently you can change it.You can also select how you wish Lotus Notes® to notify you of new mail.
21

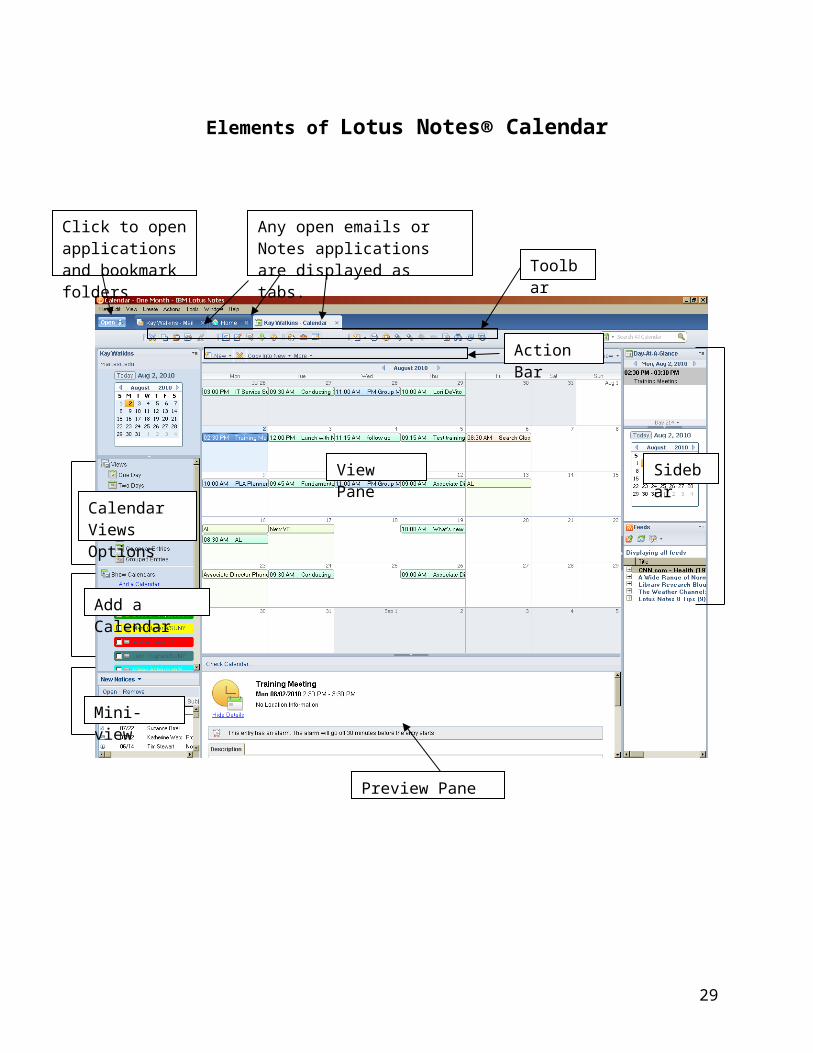
Elements of Lotus Notes® Calendar
22
Toolbar
Click to open applications and bookmark folders
Sidebar
Action Bar
CalendarViews Options
Options
Mini-view
Any open emails or Notes applications are displayed as tabs.
Preview Pane
View Pane
Add a Calendar
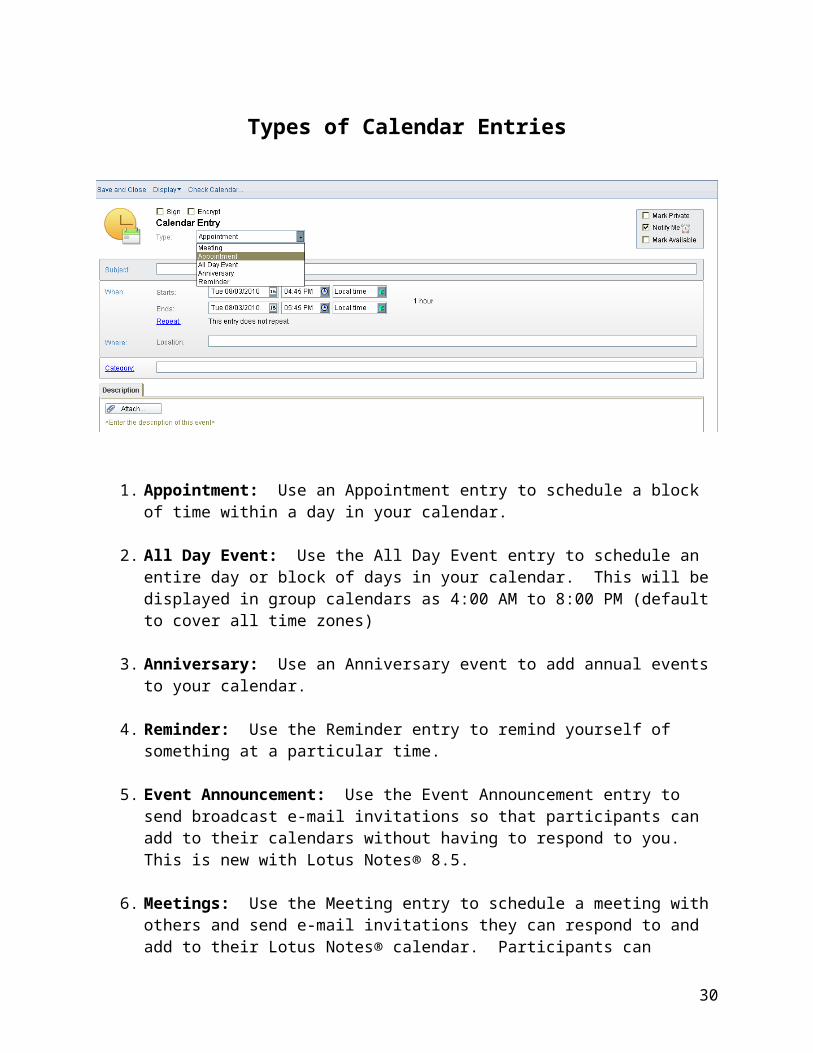
Types of Calendar Entries
1. Appointment: Use an Appointment entry to schedule a block of time within a day in your calendar.
2. All Day Event: Use the All Day Event entry to schedule an entire day or block of days in your calendar. This will be displayed in group calendars as 4:00 AM to 8:00 PM (default to cover all time zones)
3. Anniversary: Use an Anniversary event to add annual events to your calendar.
4. Reminder: Use the Reminder entry to remind yourself of something at a particular time.
5. Event Announcement: Use the Event Announcement entry to send broadcast e-mail invitations so that participants can add to their calendars without having to respond to you. This is new with Lotus Notes® 8.5.
6. Meetings: Use the Meeting entry to schedule a meeting with others and send e-mail invitations they can respond to and add to their Lotus Notes® calendar. Participants can accept, decline, or propose changes to meeting invitations. Note: meetings you accept will automatically be inserted into your personal calendar and any changes will be updated automatically.
23
Options for Calendar Entries
If you have given others access to your calendar, select Mark Private to prevent them from reading the entry. Those with access to your calendar but not your mail can see the times and dates of private calendar entries but cannot see details of the entries..
To note some information on your calendar as an All Day Event and still be available to schedule meetings, select the Mark Available option in the upper right-hand corner of the calendar entry form.
You can have an alarm go off to remind you of your calendar entry. Time settings for these alarms are dependent on the type of calendar item. For example, an All Day Event or Reminder calendar entry will go off the day before the event. For an Appointment entry, the alarm will go off 30 minutes before the appointment. You can change these defaults for an individual entry or for all entry types in Calendar preferences.
24

Scheduling a Meeting in Notes®
1. Open your Lotus Notes® calendar
2. Click the New button
3. Select Meeting
4. Enter Subject
5. Enter Start and End Dates and Times
6. If applicable, and this meeting repeats on a schedule, click the Repeat link and fill out all required fields.
7. In the Who section: enter the invitee names under the appropriate fields. Required is for those who MUST attend the meeting. Optional is for those who you would LIKE to attend the meeting. FYI is to notify appropriate people that the meeting is taking place, but they do NOT
need to attend the meeting.
Note: These fields give you the type ahead feature that points to the Lotus Notes® address books and you can use established mail lists.
8. In the Where section: ONLY use the Location field to note where the meeting will be held. We do not currently use Rooms, Resources, or Online Meeting.
9. Enter a Description. Examples include meeting agendas, telephone conferencing information, etc.
10. Attach any files needed for the meeting.
11. Click on the Find Available Times tab to see the availability of the people you entered in the Who section. The time will appear green if everyone is available. Click on the Summary option to find an alternative date and/or time. (Note: This is only effective if everyone you invite is keeping their calendar up to date)
12. When all your data is entered, click the Save and Send Invitations button. E-mails are sent to all participants entered in the Who section and the Meeting is placed on your calendar.
25
Setting Up Your Availability
You can customize your office hours, including your usual lunch break. This will mark you unavailable for those times when you are not normally in the office.
Try it File Preferences1. Select “Calendar and To Do”2. Click on the Scheduling tab3. Add your hours worked and your normal lunch hour.4. Select both of the following options in the Scheduling Notification
Options area:o Check for conflicts when adding calendar entrieso Note as a conflict if entry occurs outside of your available hours
26
Allowing Others to View your Calendar
You can let specified people read your calendar entries and to do items. You can also let selected people have access to Read, Create, Edit and Delete calendar entries for you.
NOTE: Access to your Calendar and access to your Schedule are different. Allowing others to view Your Calendar: This will allow others to view your calendar
and any calendar entry that you do not mark private. Allowing others to view Your Schedule: Allowing others to view your schedule does
not allow access to your calendar or the calendar entries unless you select that option. By default, it only shows when you are or are not available.
Allowing Others to View your CalendarTry it File Preferences Calendar and To Do
1. Click on Access & Delegation 2. Click on Access to Your Mail and Calendar3. Click Add – this will open the Add People/Group options
Within the Add People/Group options4. Specify to whom you want to give access. Select either
a. Everyone (this will be displayed as Default. This gives everyone at least read access to calendar entries not marked private) Or
b. Add a person or group in the Just this person or group field. (this will allow you to specify exactly who or what group you are allowing Read access to calendar entries not marked private)
5. Select Calendar, To Do and Contacts6. Select Read or Read, Create, Edit and Delete.
Read: Select this option to give the people you selected in step 4 access to read any calendar entry. People with Read access are not able to view any entry marked private.
Read, Create, Edit and Delete: Select this option if you want someone to have this additional access to your calendar. People with this access are still unable to view any entry marked private.
7. Click OKNote: You can select a person or group to have Read access and also add another person or group to have additional access to your calendar (for example your center may have access to Read your calendar entries but your support staff may have access to Read, Create, Edit and Delete)
27
28
Adding calendars to your Notes® calendar
You can add other’s calendars to your own Notes® calendar, display their entries in your Notes® calendar, and set display options to distinguish between calendar entries.
Add a Calendar. Under Add, select one of these options:
Notes® user's calendar Adds another person's Notes® calendar (requires that the person has given you
access to the calendar).Google Calendar
Adds a private calendar (which requires a user name and password) or a public calendar (which requires the calendar's URL).
29
If you are adding a Notes user’s calendar, you can start typing the user’s name in the User Name field. As you type, Lotus Notes will list users that fit what you are typing. Once the correct name appears, you can select if from the list.
Calendar Entry Formatting allows you to select display options to make the display of the added calendar's entries on your Notes® calendar unique. Click OK. If the calendar you're adding contains many entries, it may take a little longer for your Notes® calendar to display them. (Note: To hide or display a calendar's entries later, select or deselect the calendar's check box under Show Calendars.)
30
Archive
All Lotus Notes® mail items are automatically archived after 6 months. This includes email, calendar entries and To Dos.
To access your Archived Notes® items select your Archive folder from the Navigation pane.
Double click on the subfolder “email older than 6 months v6”. Your archived Notes® items will open as a new Notes® application tab.
31

Select the Recently Archived folder to see items categorized by date archived.
Your Calendar and To Do items older than 6 months are also archived. Use the hotspot tool to switch to those archived items. This will open the Calendar or To Do view, in another Notes tab.
32
Hotspot inguse the colher tabll open the new view, either calnd includes eltion.s would append all the emails together and forward

iNotes®: (www.esc.edu/myemail)
Lite Mode:
33

Full Mode:
34