Increased Incidence of Functional (Psychogenic) Movement ...
Upload
raphael-cruzCategory
view
2.203download
0
FUNCTIONAL MOVEMENT SCREENING AND CORRECTIVE EXERCISE SYSTEM
It seems more and more of today's individuals are working harder to become stronger and healthier. These individuals are constantly working to improve their activities by increasing their flexibility, strength, endurance, and power. A tremendous amount of athletes and individuals are performing high-level activities even though they are inefficient in their fundamental movements; without knowing it, these individuals are putting fitness on dysfunction. These individuals create poor movement patterns, train around a pre-existing problem or simply do not train their weakness during their strength and conditioning programs. In today’s evolving training and conditioning market, athletes and individuals have access to a huge arsenal of equipment and workout programs; however, the best equipment and programs cannot produce if the fundamental weaknesses are not exposed. The idea is to individualize each workout program based on the person’s weak link. This weak link is a physical or functional limitation. In order to isolate the weak link, the body’s fundamental movement patterns should be considered. Most people will not begin strength and conditioning or rehabilitative programs by determining if they have adequate movement patterns. This makes it essential to screen an individual’s fundamental movements prior to beginning a rehabilitative or strength and conditioning program. By looking at the movement patterns and not just one area, a weak link can be identified. This will enable the individual, strength and conditioning coach, athletic trainer or fitness professional to focus on that area. If this weak link is not identified, the body will compensate, causing inefficient movements. It is this type of inefficiency that can cause a decrease in performance and an increase in injuries. The Functional Movement Screen and Corrective Exercise System attempts to pinpoint these weak links, and alleviate them. This system is a process that identifies the weak link in the movement pattern and then assigns exercises to correct it. When this is accomplished, the individual or athlete will have greater movement efficiency, which will lead to improved performance and hopefully a decrease in injury potential. This system consists of The Functional Movement Screen, Core Training and Reactive Neuromuscular Training. The intended purpose of movement screening: 1. Identify individuals at risk, who are attempting to maintain or increase activity level. 2. Assist in program design by systematically using corrective exercise to normalize or
improve fundamental movement patterns. 3. Provide a systematic tool to monitor progress and movement pattern development in the
presence of changing fitness levels. 4. Create a functional movement baseline which will allow rating and ranking movement for
statistical observation.

4/17/2011
1
Gray CookMSPT, OCS, CSCS
FunctionalMovement.com MovementBook.com
It begins...
FunctionalMovement.com MovementBook.com
What happened to us?
FunctionalMovement.com MovementBook.com
Seated exercise for safety?
FunctionalMovement.com MovementBook.com
4/17/2011
2
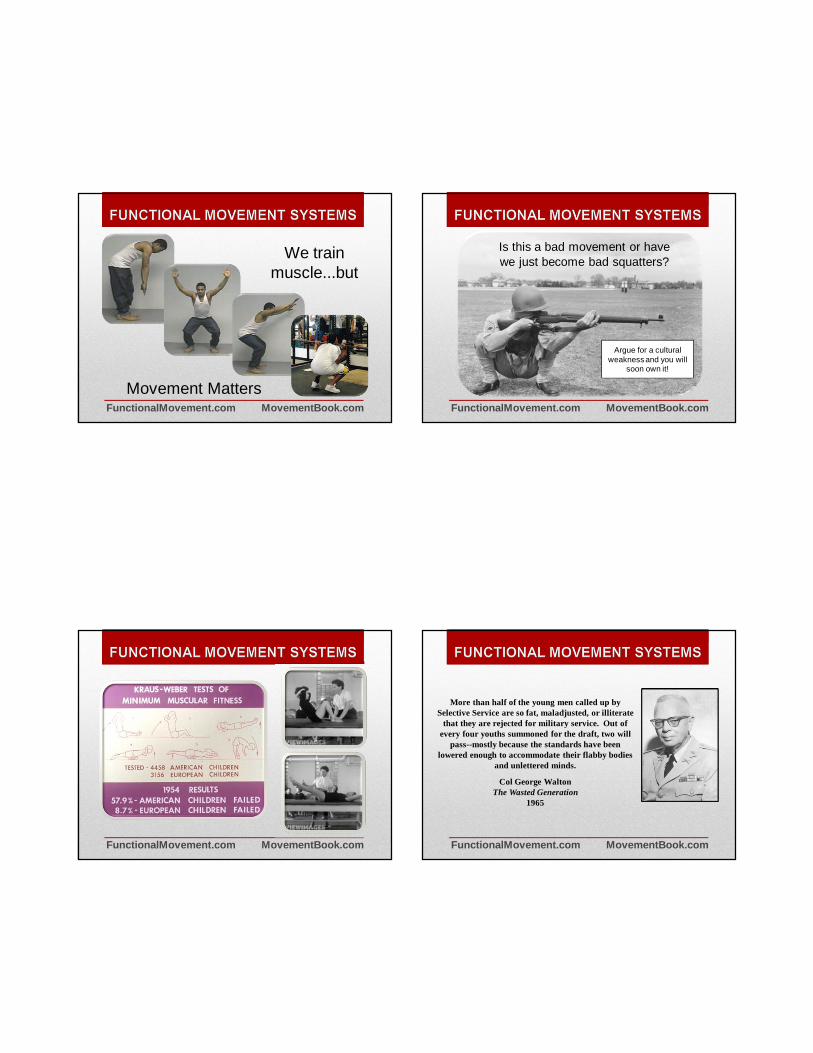
Movement Matters
We train muscle...but
FunctionalMovement.com MovementBook.com
Is this a bad movement or have we just become bad squatters?
Argue for a cultural weakness and you will
soon own it!
FunctionalMovement.com MovementBook.com
FunctionalMovement.com MovementBook.com
More than half of the young men called up by Selective Service are so fat, maladjusted, or illiterate
that they are rejected for military service. Out of every four youths summoned for the draft, two will
pass--mostly because the standards have been lowered enough to accommodate their flabby bodies
and unlettered minds.
Col George WaltonThe Wasted Generation
1965
FunctionalMovement.com MovementBook.com
4/17/2011
3
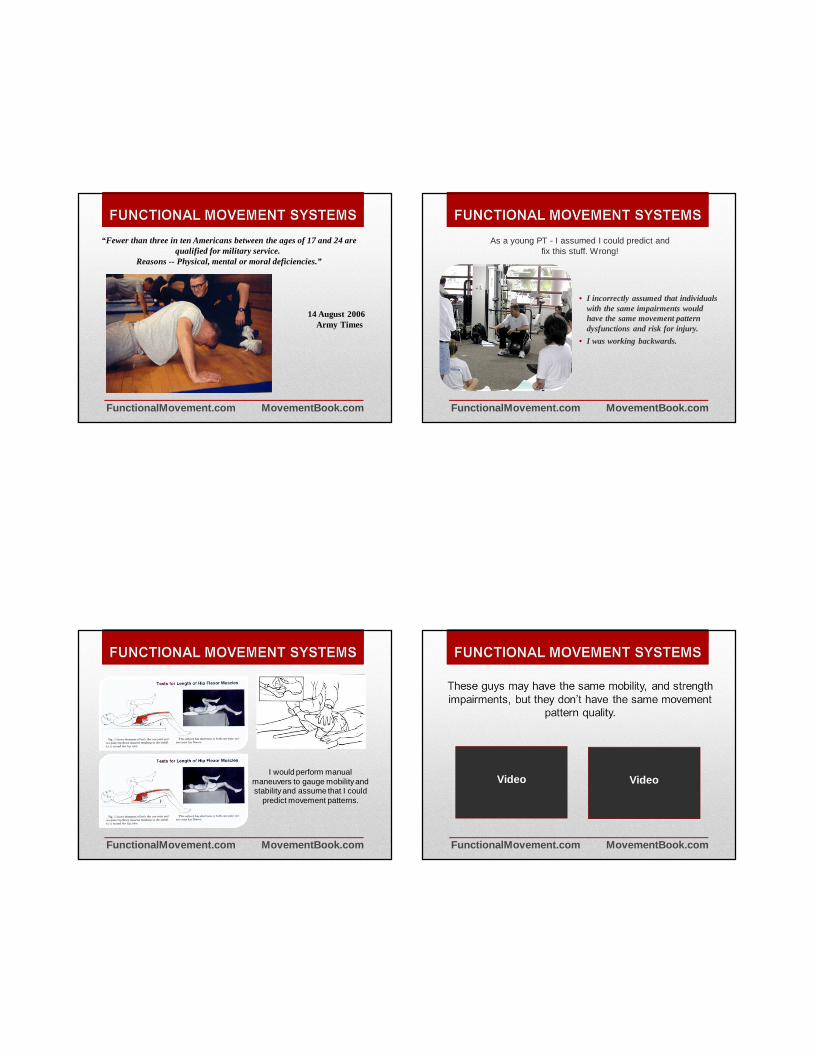
“Fewer than three in ten Americans between the ages of 17 and 24 are qualified for military service.
Reasons -- Physical, mental or moral deficiencies.”
14 August 2006 Army Times
FunctionalMovement.com MovementBook.com
As a young PT - I assumed I could predict and fix this stuff. Wrong!
• I incorrectly assumed that individuals with the same impairments would have the same movement pattern dysfunctions and risk for injury.
• I was working backwards.
FunctionalMovement.com MovementBook.com
I would perform manual maneuvers to gauge mobility and stability and assume that I could
predict movement patterns.
FunctionalMovement.com MovementBook.com FunctionalMovement.com MovementBook.com
Video Video
4/17/2011
4
Athletic Body in Balance
Part I. Athletic MovementChapter 1. Mind and Movement
Chapter 2. Identifying Weak Links
Chapter 3. Analyzing Movement
Chapter 4. Developing Resistance to Injury
FunctionalMovement.com MovementBook.com
Biomarkers for injury risk
• Previous Injury
• Asymmetry
• Motor Control
• BMI
• Stupidity
FunctionalMovement.com MovementBook.com
Injury risk factors
(prospective studies)
• Previous Injury (24) - “loaded statistic” • Asymmetries (8)• Motor Control (7) • BMI (5)• The studies on stupidity are ongoing in the
athletic and fitness world
FunctionalMovement.com MovementBook.comPyramid of FunctionFunctionalMovement.com MovementBook.com

4/17/2011
5
1. Deep Squat
2. Hurdle Step
3. Inline Lunge
4. Leg Raise
5. Seated Rotation
FunctionalMovement.com MovementBook.com
Correctives are the breakdowns
FunctionalMovement.com MovementBook.com
FunctionalMovement.com MovementBook.com FunctionalMovement.com MovementBook.com
2. Hurdle Step1. Deep Squat 3. Inline Lunge 4. Shoulder Mobility
5. Active Straight-Leg Raise
6. Trunk Stability Push-up
7. Rotary Stability
4/17/2011
6
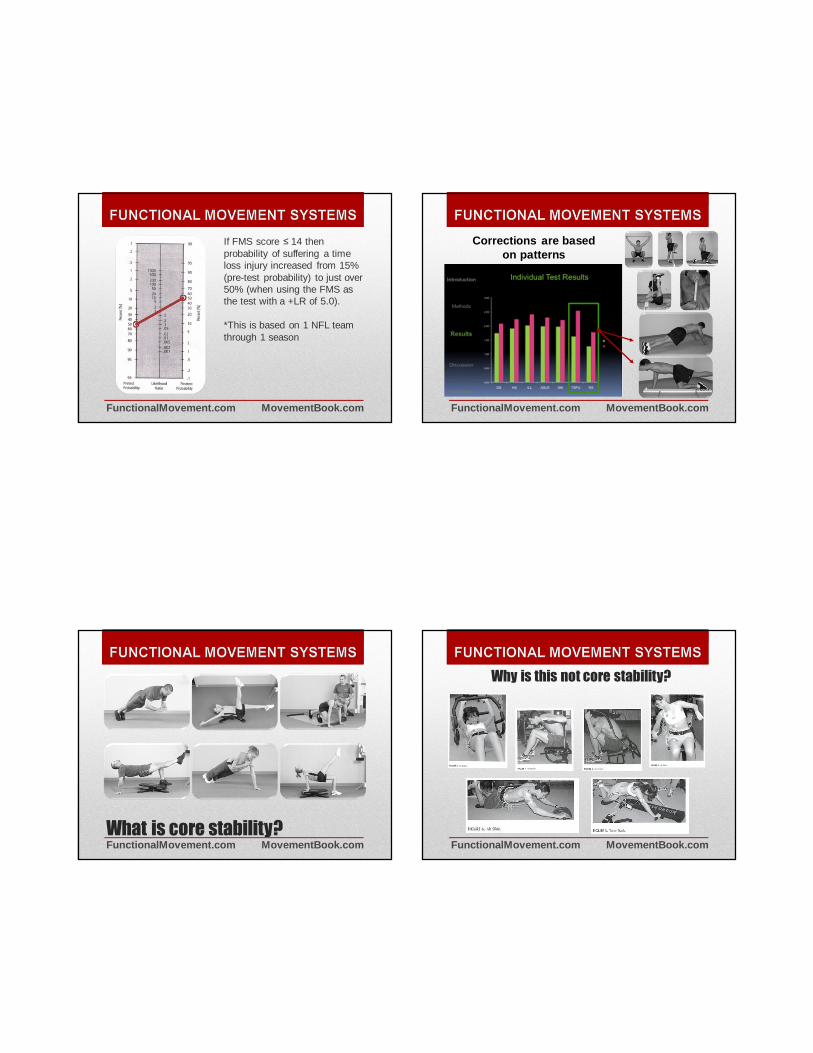
If FMS score ≤ 14 then probability of suffering a time loss injury increased from 15% (pre-test probability) to just over 50% (when using the FMS as the test with a +LR of 5.0).
*This is based on 1 NFL team through 1 season
FunctionalMovement.com MovementBook.com
Corrections are based on patterns
FunctionalMovement.com MovementBook.com
What is core stability?FunctionalMovement.com MovementBook.com
Why is this not core stability?
FunctionalMovement.com MovementBook.com
4/17/2011
7
Chops and Lifts
FunctionalMovement.com MovementBook.com
Video Video
Video Video
Our team developed a tool box called
Functional Movement Systems.
The line is pain!
FunctionalMovement.com MovementBook.com
FMS / SFMA• Functional Movement Screening
• Selective Functional Movement Assessment
• Musculoskeletal Interventions: Techniques for Therapeutic Exercise
• McGraw-Hill Medical
FunctionalMovement.com MovementBook.com
Please DefineFunctionalMovement.com MovementBook.com
4/17/2011
8
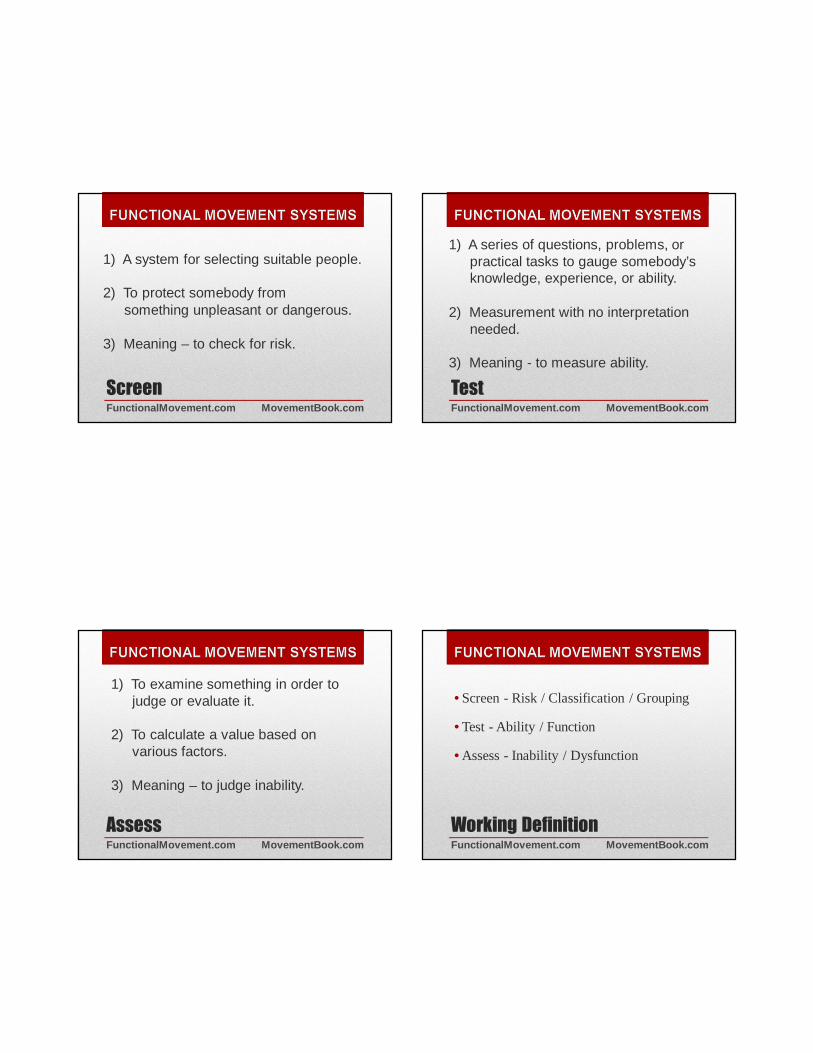
Screen
1) A system for selecting suitable people.
2) To protect somebody from something unpleasant or dangerous.
3) Meaning – to check for risk.
FunctionalMovement.com MovementBook.com
Test
1) A series of questions, problems, or practical tasks to gauge somebody’s knowledge, experience, or ability.
2) Measurement with no interpretation needed.
3) Meaning - to measure ability.
FunctionalMovement.com MovementBook.com
Assess
1) To examine something in order to judge or evaluate it.
2) To calculate a value based on various factors.
3) Meaning – to judge inability.
FunctionalMovement.com MovementBook.com
Working Definition
• Screen - Risk / Classification / Grouping
• Test - Ability / Function
• Assess - Inability / Dysfunction
FunctionalMovement.com MovementBook.com
4/17/2011
9
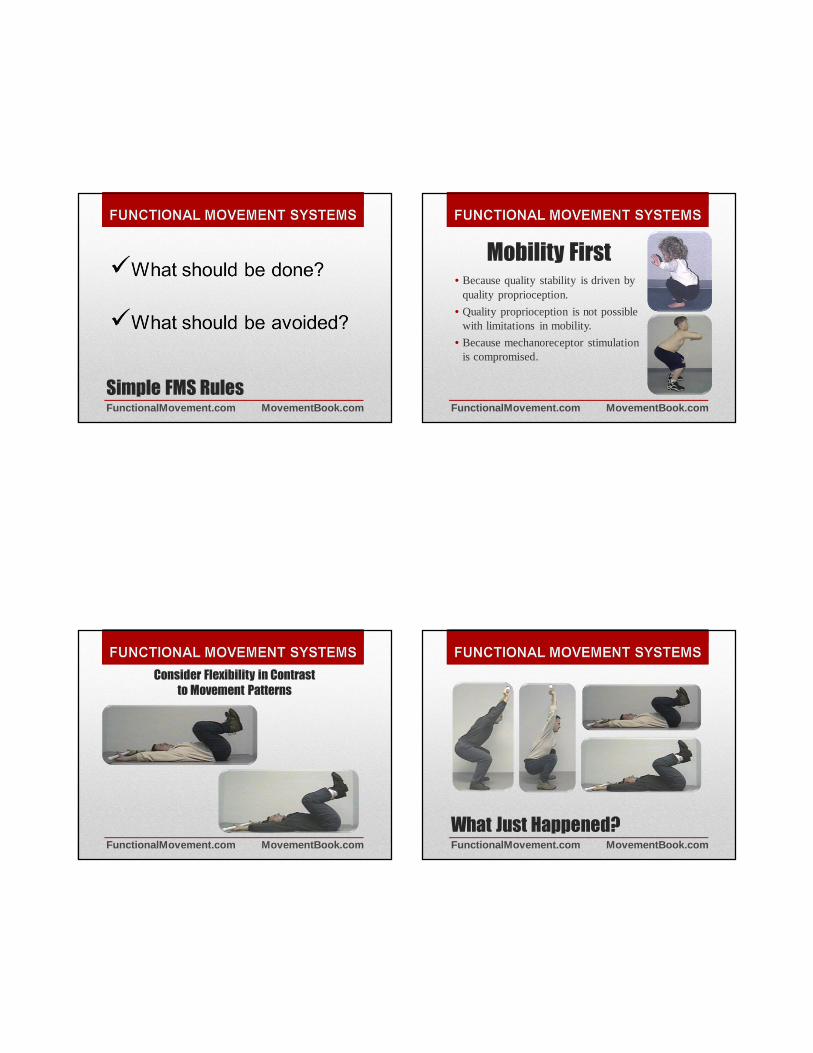
Simple FMS RulesFunctionalMovement.com MovementBook.com
Mobility First• Because quality stability is driven by
quality proprioception.
• Quality proprioception is not possible with limitations in mobility.
• Because mechanoreceptor stimulation is compromised.
FunctionalMovement.com MovementBook.com
Consider Flexibility in Contrast
to Movement Patterns
FunctionalMovement.com MovementBook.com
What Just Happened?FunctionalMovement.com MovementBook.com
4/17/2011
10
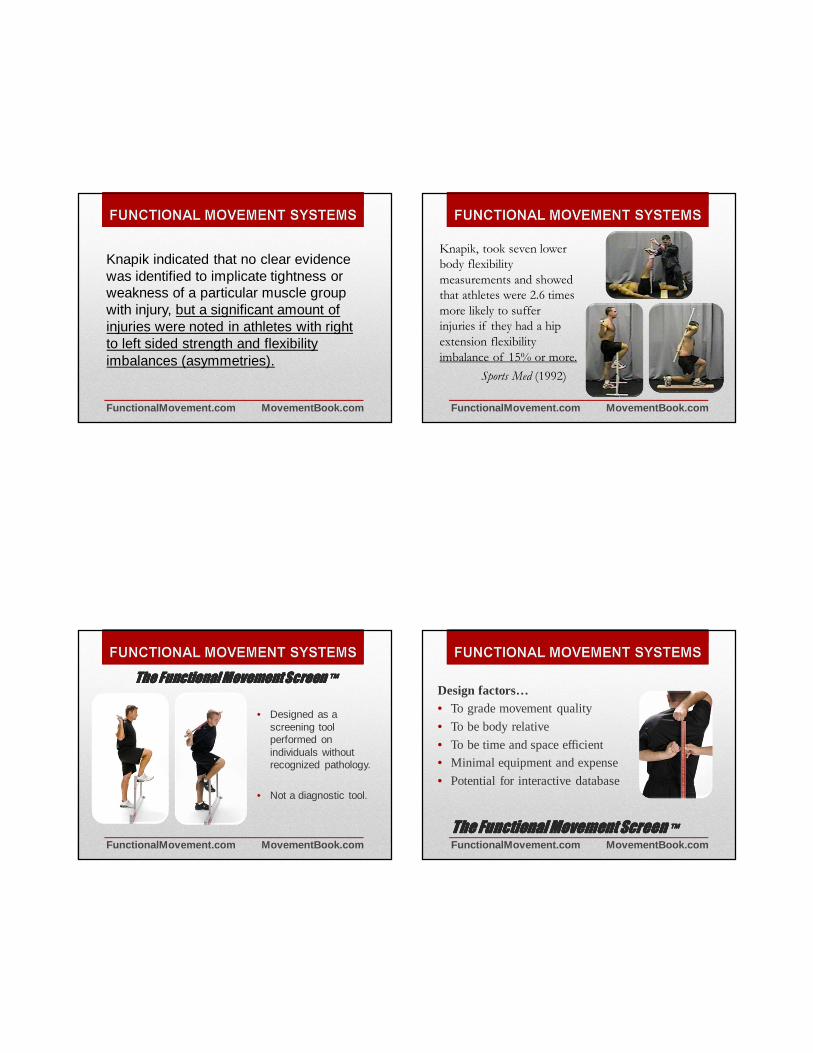
Knapik indicated that no clear evidence was identified to implicate tightness or weakness of a particular muscle group with injury, but a significant amount of injuries were noted in athletes with right to left sided strength and flexibility imbalances (asymmetries).
FunctionalMovement.com MovementBook.com
Knapik, took seven lower
body flexibility
measurements and showed
that athletes were 2.6 times
more likely to suffer
injuries if they had a hip
extension flexibility
imbalance of 15% or more.
Sports Med (1992)
FunctionalMovement.com MovementBook.com
The Functional Movement Screen The Functional Movement Screen The Functional Movement Screen The Functional Movement Screen ™™™™
• Designed as a screening tool performed on individuals without recognized pathology.
• Not a diagnostic tool.
FunctionalMovement.com MovementBook.comThe Functional Movement Screen The Functional Movement Screen The Functional Movement Screen The Functional Movement Screen ™™™™
Design factors…• To grade movement quality
• To be body relative
• To be time and space efficient
• Minimal equipment and expense
• Potential for interactive database
FunctionalMovement.com MovementBook.com
4/17/2011
11
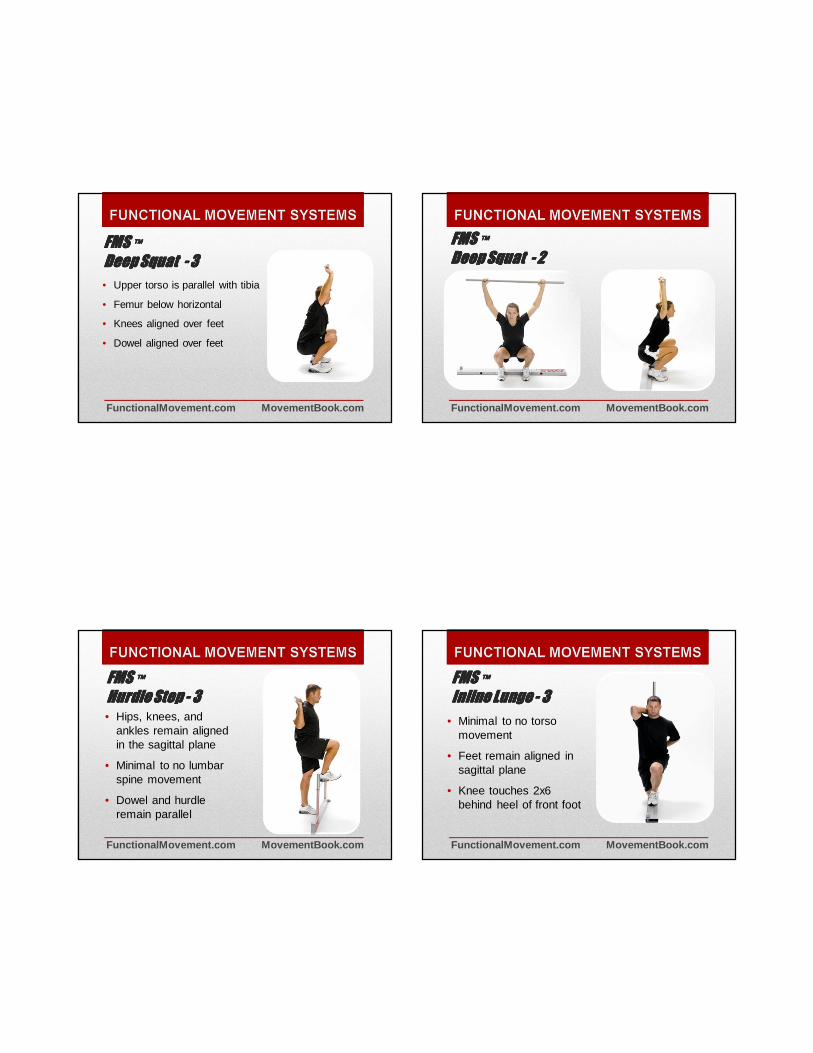
FMS FMS FMS FMS ™™™™
Deep Squat Deep Squat Deep Squat Deep Squat ---- 3333
• Upper torso is parallel with tibia
• Femur below horizontal
• Knees aligned over feet
• Dowel aligned over feet
FunctionalMovement.com MovementBook.com FunctionalMovement.com MovementBook.com
FMS FMS FMS FMS ™™™™
Deep Squat Deep Squat Deep Squat Deep Squat ---- 2222
• Hips, knees, and ankles remain aligned in the sagittal plane
• Minimal to no lumbar spine movement
• Dowel and hurdle remain parallel
FunctionalMovement.com MovementBook.com
FMS FMS FMS FMS ™™™™
Hurdle Step Hurdle Step Hurdle Step Hurdle Step ---- 3333
• Minimal to no torso movement
• Feet remain aligned in sagittal plane
• Knee touches 2x6 behind heel of front foot
FunctionalMovement.com MovementBook.com
FMS FMS FMS FMS ™™™™
Inline Lunge Inline Lunge Inline Lunge Inline Lunge ---- 3333
4/17/2011
12
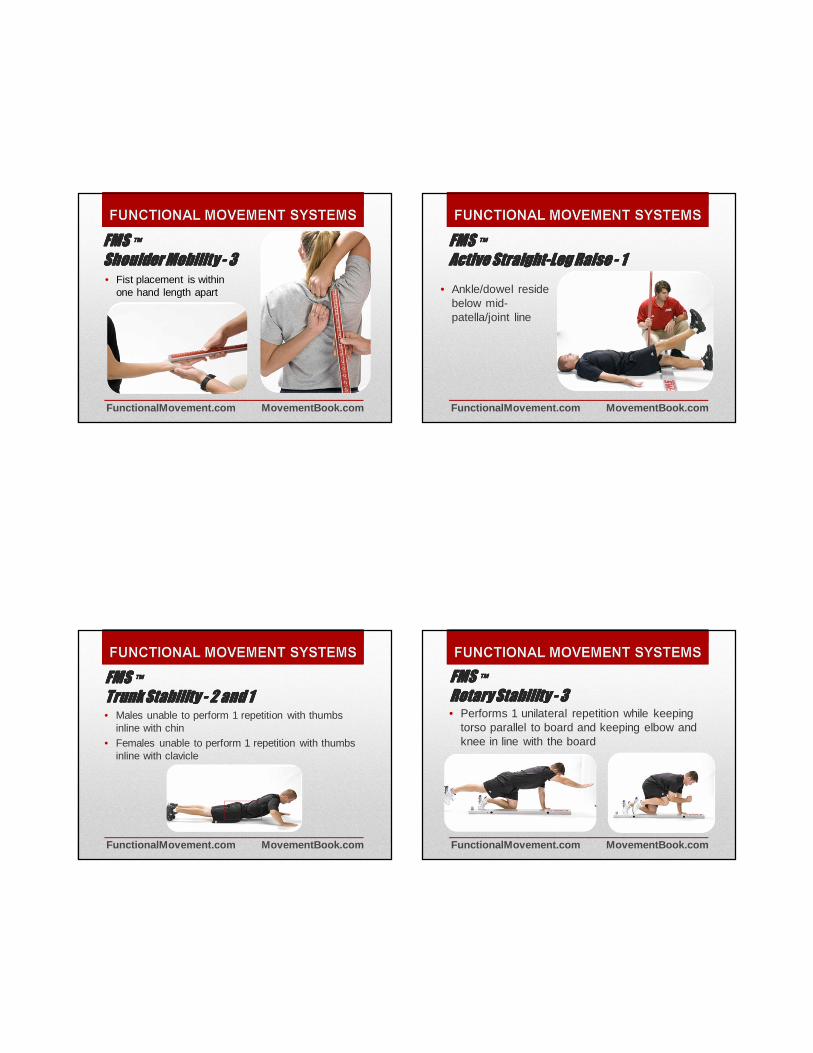
• Fist placement is within one hand length apart
FunctionalMovement.com MovementBook.com
FMS FMS FMS FMS ™™™™
Shoulder Mobility Shoulder Mobility Shoulder Mobility Shoulder Mobility ---- 3333
• Ankle/dowel reside below mid-patella/joint line
FunctionalMovement.com MovementBook.com
FMS FMS FMS FMS ™™™™
Active StraightActive StraightActive StraightActive Straight----Leg Raise Leg Raise Leg Raise Leg Raise ---- 1111
• Males unable to perform 1 repetition with thumbs inline with chin
• Females unable to perform 1 repetition with thumbs inline with clavicle
FunctionalMovement.com MovementBook.com
FMS FMS FMS FMS ™™™™
Trunk Stability Trunk Stability Trunk Stability Trunk Stability ---- 2 and 1 2 and 1 2 and 1 2 and 1 • Performs 1 unilateral repetition while keeping
torso parallel to board and keeping elbow and knee in line with the board
FunctionalMovement.com MovementBook.com
FMS FMS FMS FMS ™™™™
Rotary Stability Rotary Stability Rotary Stability Rotary Stability ---- 3333

4/17/2011
13
FunctionalMovement.com
MovementBook.com
FunctionalMovement.com MovementBook.com

The Functional Movement Screen (FMS®) captures fundamental movements, motor control within movement patterns, and competence of basic movements uncomplicated by specific skills. It will determine the greatest areas of movement deficiency, demonstrate limitations or asym-metries, and eventually correlate these with an outcome. Once you find the greatest asymmetry or deficiency, you can use measurements that are more precise if needed.
The original idea of the screen was to portray movement- pattern quality with a simple grading system of movement appraisal; it’s not intended to diagnose or measure isolated joint movement. At-tempting to measure in isolation does a disservice to the pattern—the body is too complex to take isolated movements seriously in the initial stages of screening.
This system was developed to rate and rank movement patterns in high school athletes, but through a two- year refining process, we discovered uses beyond its original intended purpose. While we have not changed the screen since its official introduction in 1998, the information gathered from its use has broadened our scope of corrective exercise, training and rehabilitation. The screen has taught us how to use it, and helped us gain timely and valuable feedback from our attempts at movement correction.
Our collective expertise has come from work-ing against the screen’s standard, not from modify-ing the screen every time things got confusing or inconvenient. We have changed the way we look at the screen data many times, but we have not changed the way we collect the information. In a way, this work represents our evolution, not that of the screen. The screen patiently waited for us to see and understand all it was providing in return for about 10 minutes worth of time.
This chapter covers the FMS. It, along with the two Selective Functional Movement Assessment (SFMA®) chapters that follow, is the juicy part of this book. Take the time to read this section to gain a complete understanding of the screen before implementing it with your clients.
THE FMS TESTS
The FMS is comprised of seven movement tests that require a balance of mobility and stability. The patterns used provide observable performance of basic, manipulative and stabilizing movements by placing clients in positions where weaknesses, imbalances, asymmetries and limitations be-come noticeable by a trained health and fitness professional.
When the screen’s movements mimic athletic moves, it is merely coincidence. The screen is not a training tool, nor is it a competition tool. It’s purely an instrument for rating and ranking movements.
The screen’s usefulness is its simplicity, practi-cality and ability to fill a void in the toolbox we use to judge performance and durability. It is not in-tended to determine why a dysfunctional or faulty movement pattern exists. Instead, it’s a discovery of which patterns are problematic. The FMS ex-poses dysfunction or pain— or both— within basic movement patterns.
Many people are able to perform a wide range of activities, yet are unable to efficiently execute the movements in the screen.39 Those who score poorly on the screens are using compensatory movement patterns during regular activities. If these compen-sations continue, sub- optimal movement patterns are reinforced, leading to poor biomechanics and possibly contributing to a future injury.
The public’s knowledge of the intricacies of the FMS is minimal at best. To introduce your client to the process, suggest a visit the Functional Move-ment Systems website at functionalmovement.com to watch the introductory video. The website also has video demonstrations of the seven FMS moves and the three clearing tests.
You’ll find scripted instructions for use with your client testing later in the text.
KEYS TO THE SCREEN
To administer the FMS correctly, you’ll need to be familiar with the following bony structures or superficial landmarks.
FUNCTIONAL MOVEMENT SCREEN DESCRIPTIONS

• Tibial tuberosity
• Anterior superior iliac spine (ASIS)
• Lateral and medial malleolus
• The most distal wrist crease
• Joint line of the knee
FMS KIT EQUIPMENT AND ASSEMBLY
The optional test kit equipment is self- contained in a two- by- six box, however you are able to use your own testing tools. There is a cap on one end of the two-by-six that can be removed so the pieces used for the FMS can slide out. The pieces are—
• A four- foot dowel rod
• Two smaller dowel rods
• A small- capped piece
• An elastic band
Once removed, the two small dowel pieces are inserted in holes in the two- by- six. The dowel pieces must be forced into the two holes in the box in order to be snug. The small- capped piece is in-serted into a small hole at the end of the two- by- six, which balances the hurdle once it is upright. The elastic band is then placed around the two upright pieces, making the hurdle.
Two- by- six box— used to carry equipment and to add compensation for the deep squat test. It is also used in the inline lunge and rotary stability tests for reliability and for reference during testing.
Four- foot dowel— used for the deep squat, inline lunge, hurdle step, shoulder mobility mea-surement and active straight-leg raise. The dowel is used in these tests for reliability and for more efficient scoring.
Hurdle— composed of the board serving as the base, two two- foot PVC dowels and an elastic band that goes around the dowels. It is used for the hurdle step, and allows for body- relative testing and improvement in scoring accuracy.
WHERE TO STAND DURING SCREENING
Where to stand during testing is a common question, because you might have three or four different criteria to review during each test, each putting you in a quandary of trying to be in two places at once. This is one of the reasons the client will perform three repetitions in each movement. If needed, this allows more than one opportunity to see the pattern.
Two things to consider when observing the movements of the screen are distance and move-ment. Considering these two things will take care of most of the issues involved in trying to see everything during the screen.
Distance
Step back from the client to create enough distance, allowing you to see the whole picture at once. Most of the confusion over where to stand comes from being too close and too focused on one area of the test. Stand far enough away to allow a more global focus. View the entire movement and let the test criteria become evident.
Movement
The client has three attempts to perform each test, so don’t be afraid to move around during the test. There are certain tests where standing to the side or facing the person provide the best vantage points. Take advantage of all three trials and move around if the score is not obvious from one point of view.
LIST OF FMS TESTSDeep Squat Movement PatternHurdle Step Movement PatternInline Lunge Movement Pattern
Shoulder Mobility Movement PatternActive Straight- Leg Raise Movement PatternTrunk Stability Pushup Movement Pattern
Rotary Stability Movement Pattern

TESTRAW
SCOREFINAL SCORE COMMENTS
DEEP SQUAT
HURDLE STEPL
R
INLINE LUNGEL
R
SHOULDER MOBILITYL
R
IMPINGEMENT CLEARING TESTL
R
ACTIVE STRAIGHT-LEG RAISEL
R
TRUNK STABILITY PUSHUP
PRESS-UP CLEARING TEST
ROTARY STABILITYL
R
POSTERIOR ROCKING CLEARING TEST
TOTAL
The Functional Movement Screen
Scoring Sheet
Raw Score: This score is used to denote right and left side scoring. The right and left sides are scored in five of the seven tests and both are documented in this space.
Final Score: This score is used to denote the overall score for the test. The lowest score for the raw score (each side) is carried over to give a final score for the test. A person who scores a three on the right and a two on the left would receive a final score of two. The final score is then summarized and used as a total score.
NAME DATE DOB
ADDRESS
CITY, STATE, ZIP PHONE
SCHOOL/AFFILIATION
SSN HEIGHT WEIGHT AGE GENDER
PRIMARY SPORT PRIMARY POSITION
HAND/LEG DOMINANCE PREVIOUS TEST SCORE

DEEP SQUAT MOVEMENT PATTERN
PURPOSE
The deep squat pattern is part of many func-tional movements. It demonstrates fully coordi-nated extremity mobility and core stability, with the hips and shoulders functioning in symmetrical positions. While full deep squatting is not often required in modern daily life, general exercise and sport moves, active individuals still require the basic components for the deep squat.
Extremity mobility, postural control, pelvic and core stability are well represented in the deep squat movement pattern. The deep squat is a move that challenges total body mechanics and neuromuscu-lar control when performed properly. We use it to test bilateral, symmetrical, functional mobility and stability of the hips, knees and ankles.
The dowel held overhead calls on bilateral, symmetrical mobility and stability of the shoul-ders, scapular region and the thoracic spine. The pelvis and core must establish stability and control throughout the entire movement to achieve the full pattern.
DESCRIPTION
The client assumes the starting position by placing the instep of the feet in vertical alignment with the outside of the shoulders. The feet should be in the sagittal plane with no lateral outturn of the toes. The client rests the dowel on top of the head to adjust the hand position resulting in the elbows at a 90-degree angle.
Next, the client presses the dowel overhead with the shoulders flexed and abducted and the el-bows fully extended. Instruct the client to descend slowly into the deepest possible squat position, heels on the floor, head and chest facing forward and the dowel maximally pressed overhead. The knees should be aligned over the feet with no valgus collapse.
As many as three repetitions may be performed, but if the initial movement falls within the criteria for a score of three, there is no need to perform another test. If any of the criteria for a score of three are not achieved, ask the client to perform the test with the board from the earlier described FMS kit under the heels. If any of the criteria for the score of two are not achieved while using the FMS board, the client receives a score of one.
TIPS FOR TESTING
1. Observe the client from the front and side.2. All positions including the foot position
should remain unchanged when the heels are elevated, with either the FMS kit or a similar size board.
3. Do not judge the pattern or interpret the cause of the score while testing.
4. Do not coach the movement; simply repeat the instructions if needed.
5. Was there pain?6. When in doubt, score low.
IMPLICATIONS OF THE DEEP SQUAT
MOVEMENT PATTERN
• Limited mobility in the upper torso can be attributed to poor glenohumeral or thoracic spine mobility, or both.
• Limited mobility in the lower extremities, in-cluding poor closed kinetic chain dorsiflexion of the ankles or poor flexion of the knees and hips can cause poor test performance.
• People might perform poorly because of poor stabilization and control.
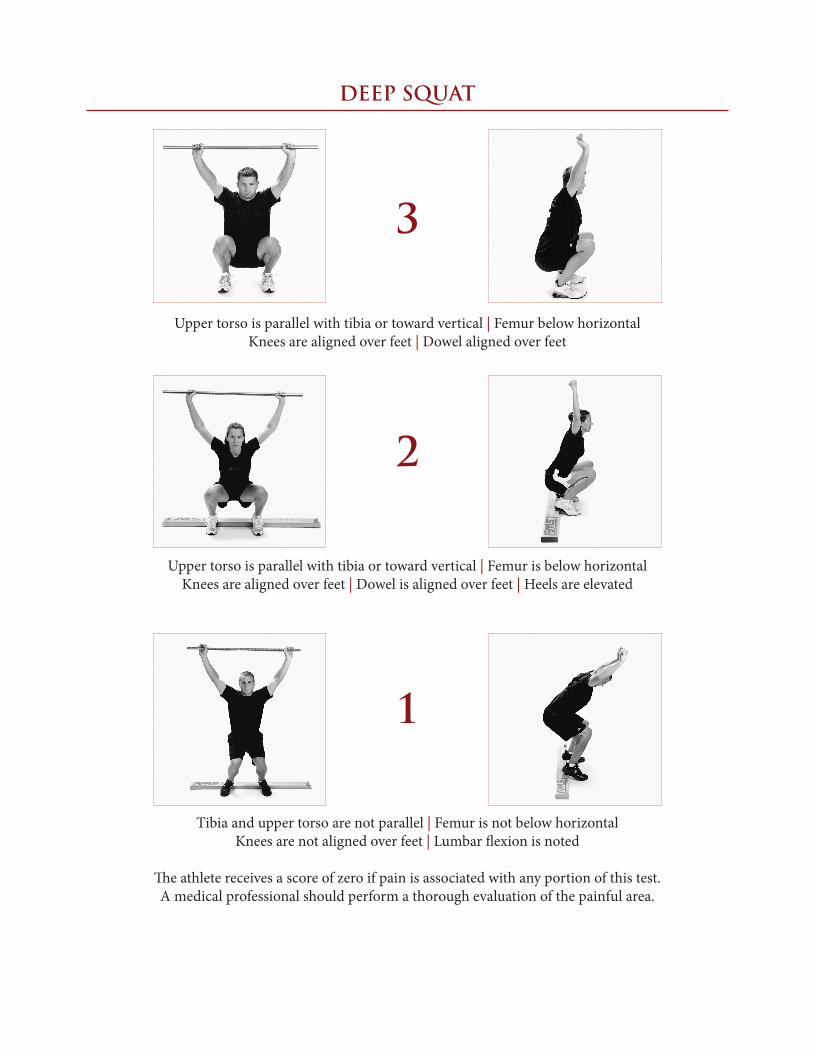
DEEP SQUAT
3
Upper torso is parallel with tibia or toward vertical | Femur below horizontalKnees are aligned over feet | Dowel aligned over feet
2
Upper torso is parallel with tibia or toward vertical | Femur is below horizontalKnees are aligned over feet | Dowel is aligned over feet | Heels are elevated
1
Tibia and upper torso are not parallel | Femur is not below horizontalKnees are not aligned over feet | Lumbar flexion is noted
The athlete receives a score of zero if pain is associated with any portion of this test. A medical professional should perform a thorough evaluation of the painful area.
HURDLE STEP MOVEMENT PATTERN
PURPOSE
The hurdle step movement pattern is an integral part of locomotion and acceleration. Although we do not step to this level in most activities, the hurdle step will expose compensation or asymme-try in stepping functions. The step test challenges the body’s step and stride mechanics, while testing stability and control in a single- leg stance.
The movement requires proper coordination and stability between the hips, moving asymmetri-cally with one bearing the load of the body while the other moves freely. The pelvis and core must begin with and maintain stability and alignment throughout the movement pattern. The arms are still as they hold a dowel across the shoulders, giving the observer further representation of the static responsibility of the upper body and trunk in the stepping movement.
Excessive upper body movement in basic step-ping is viewed as compensation; it is not seen when proper mobility, stability, posture and balance are available and functioning. The hurdle step chal-lenges bilateral mobility and stability of the hips, knees and ankles. The test also challenges stability and control of the pelvis and core as it offers an opportunity to observe functional symmetry.
DESCRIPTION
Take a height measurement of the client’s tibia to begin this test. Since it can be difficult to find the true joint line between the tibia and femur, the top center of the tibial tuberosity serves as a reliable landmark.
To adjust the previously described hurdle to the correct height, have the client stand with the outside of the right foot against the base of the hurdle, in line with one of the hurdle uprights. Slide the hurdle’s marking cord to the center of the tibial tuberosity, and adjust the other side until the cord is level and displays accurate tibial tuberosity height on both indicators.
The other measurement option is to use the dowel to measure the distance from the floor to the tibial tuberosity, and raise the cord to that level.
Have the client stand directly behind the center of the hurdle base, feet touching at both the heels and toes, and with the toes aligned and touching the base of the hurdle.
Position the dowel across the shoulders, below the neck. Ask the client to step over the hurdle to touch the heel to the floor while maintaining a tall spine, and return the moving leg to the starting position. The hurdle step is performed slowly and under control.
If any of the criteria for a score of three are not achieved, the client receives a score of two. If any of the criteria for the score of two are not achieved, score this a one.
TIPS FOR TESTING
1. Ensure the cord is aligned properly.2. Tell the client get as tall as possible at the
beginning of the test.3. Watch for a stable torso.4. Observe from the front and side.5. Score the hurdle- stepping leg.6. Make sure the toes of the stance leg stay in
contact with the hurdle during and after each repetition.
7. Do not judge the pattern or interpret the cause of the score while testing.
8. Do not coach the movement; simply repeat the instructions if needed.
9. Was there pain?10. When in doubt, score low.
IMPLICATIONS OF THE HURDLE STEP
MOVEMENT PATTERN
• Problems may be due to poor stability of the stance leg or poor mobility of the step leg.
• The main thing to consider is that no single part is being tested; a pattern is being tested. Imposing maximal hip flexion of one leg while maintaining apparent hip extension of the op-posite leg requires relative bilateral, asymmet-ric hip mobility and dynamic stability.
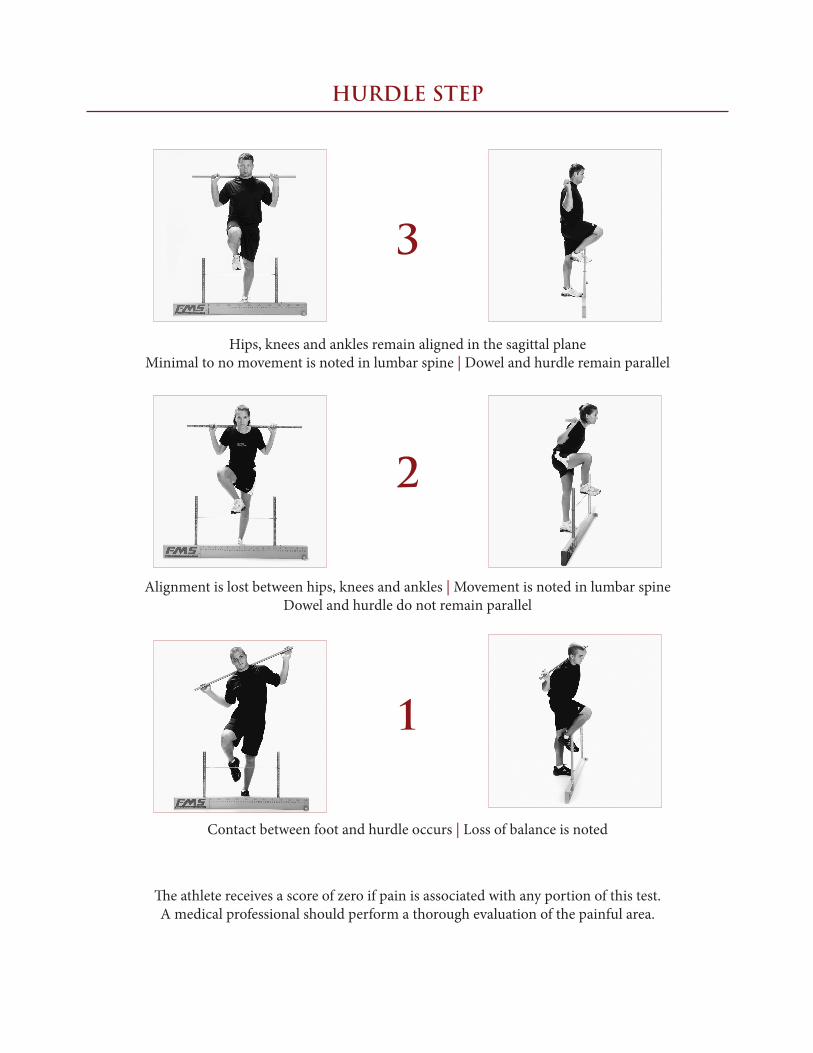
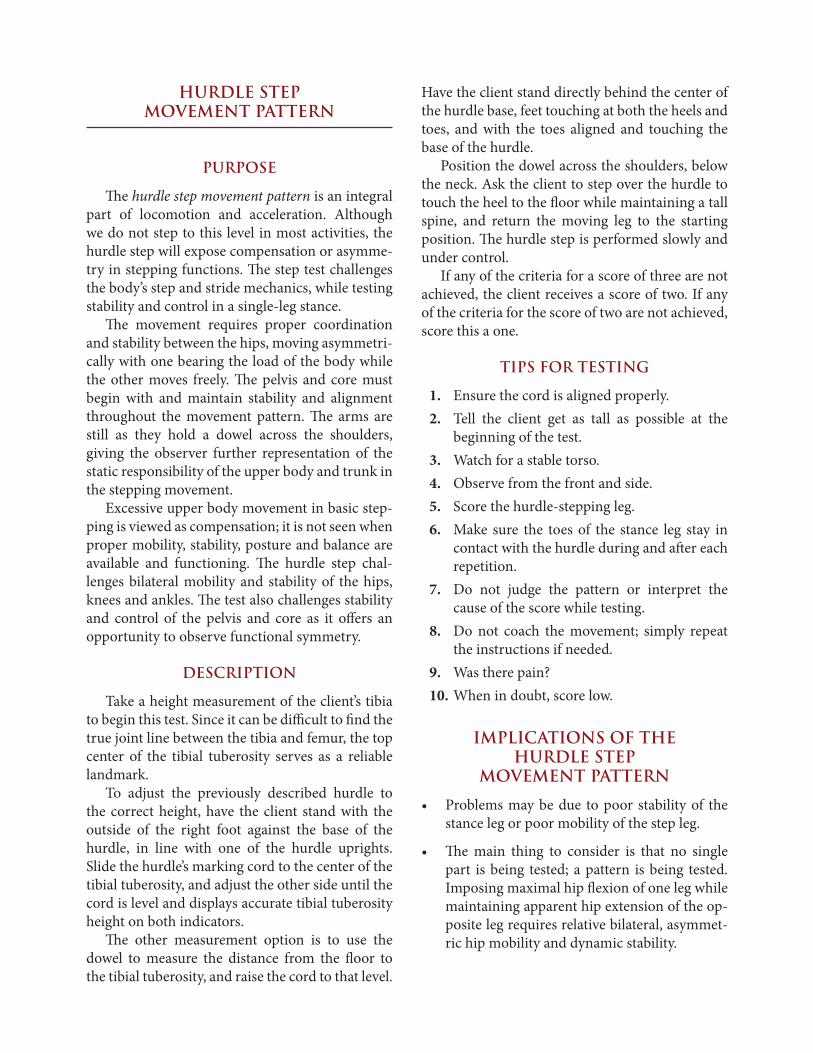
HURDLE STEP
3
Hips, knees and ankles remain aligned in the sagittal planeMinimal to no movement is noted in lumbar spine | Dowel and hurdle remain parallel
2
Alignment is lost between hips, knees and ankles | Movement is noted in lumbar spineDowel and hurdle do not remain parallel
1
Contact between foot and hurdle occurs | Loss of balance is noted
The athlete receives a score of zero if pain is associated with any portion of this test. A medical professional should perform a thorough evaluation of the painful area.
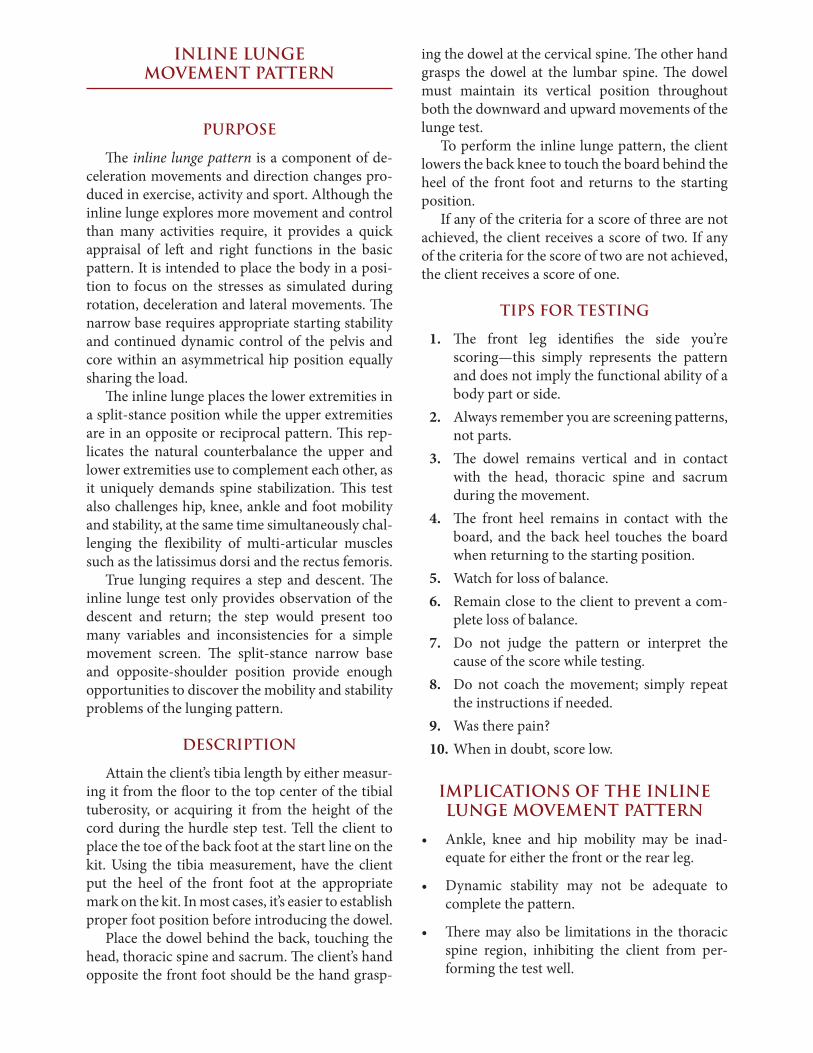
INLINE LUNGE MOVEMENT PATTERN
PURPOSE
The inline lunge pattern is a component of de-celeration movements and direction changes pro-duced in exercise, activity and sport. Although the inline lunge explores more movement and control than many activities require, it provides a quick appraisal of left and right functions in the basic pattern. It is intended to place the body in a posi-tion to focus on the stresses as simulated during rotation, deceleration and lateral movements. The narrow base requires appropriate starting stability and continued dynamic control of the pelvis and core within an asymmetrical hip position equally sharing the load.
The inline lunge places the lower extremities in a split- stance position while the upper extremities are in an opposite or reciprocal pattern. This rep-licates the natural counterbalance the upper and lower extremities use to complement each other, as it uniquely demands spine stabilization. This test also challenges hip, knee, ankle and foot mobility and stability, at the same time simultaneously chal-lenging the flexibility of multi- articular muscles such as the latissimus dorsi and the rectus femoris.
True lunging requires a step and descent. The inline lunge test only provides observation of the descent and return; the step would present too many variables and inconsistencies for a simple movement screen. The split- stance narrow base and opposite- shoulder position provide enough opportunities to discover the mobility and stability problems of the lunging pattern.
DESCRIPTION
Attain the client’s tibia length by either measur-ing it from the floor to the top center of the tibial tuberosity, or acquiring it from the height of the cord during the hurdle step test. Tell the client to place the toe of the back foot at the start line on the kit. Using the tibia measurement, have the client put the heel of the front foot at the appropriate mark on the kit. In most cases, it’s easier to establish proper foot position before introducing the dowel.
Place the dowel behind the back, touching the head, thoracic spine and sacrum. The client’s hand opposite the front foot should be the hand grasp-
ing the dowel at the cervical spine. The other hand grasps the dowel at the lumbar spine. The dowel must maintain its vertical position throughout both the downward and upward movements of the lunge test.
To perform the inline lunge pattern, the client lowers the back knee to touch the board behind the heel of the front foot and returns to the starting position.
If any of the criteria for a score of three are not achieved, the client receives a score of two. If any of the criteria for the score of two are not achieved, the client receives a score of one.
TIPS FOR TESTING
1. The front leg identifies the side you’re scoring— this simply represents the pattern and does not imply the functional ability of a body part or side.
2. Always remember you are screening patterns, not parts.
3. The dowel remains vertical and in contact with the head, thoracic spine and sacrum during the movement.
4. The front heel remains in contact with the board, and the back heel touches the board when returning to the starting position.
5. Watch for loss of balance.6. Remain close to the client to prevent a com-
plete loss of balance.7. Do not judge the pattern or interpret the
cause of the score while testing.8. Do not coach the movement; simply repeat
the instructions if needed.9. Was there pain?10. When in doubt, score low.
IMPLICATIONS OF THE INLINE LUNGE MOVEMENT PATTERN
• Ankle, knee and hip mobility may be inad-equate for either the front or the rear leg.
• Dynamic stability may not be adequate to complete the pattern.
• There may also be limitations in the thoracic spine region, inhibiting the client from per-forming the test well.
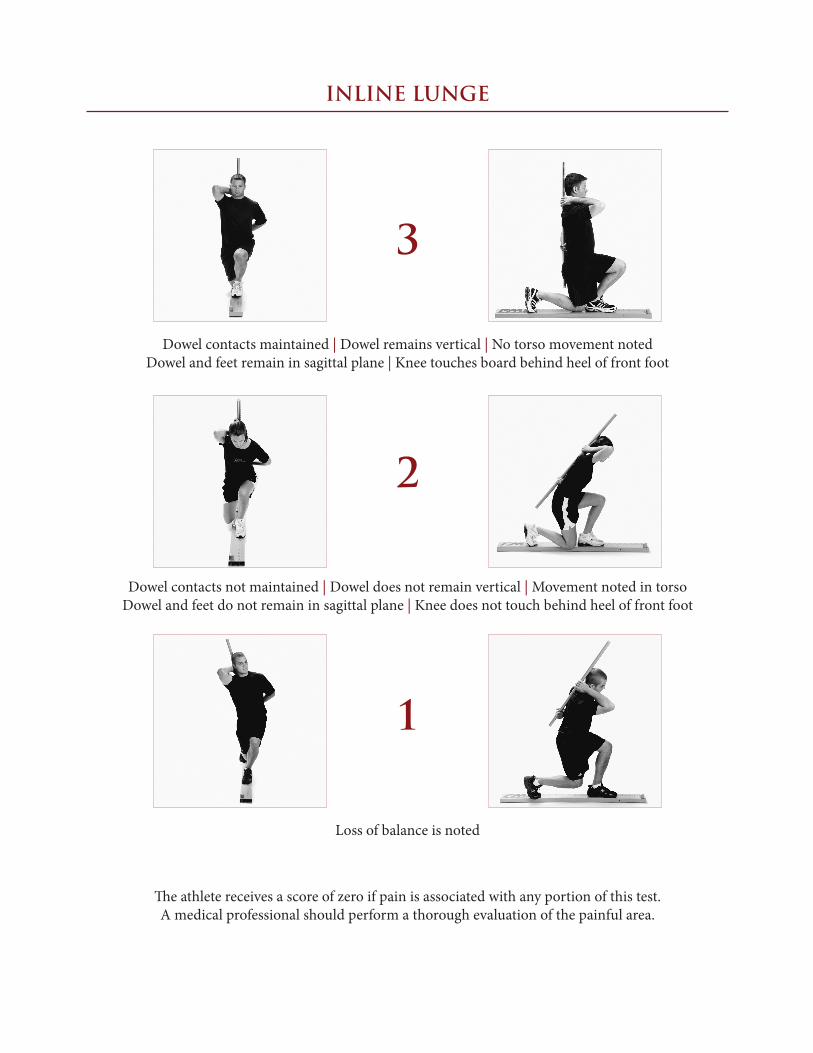
INLINE LUNGE
3
Dowel contacts maintained | Dowel remains vertical | No torso movement notedDowel and feet remain in sagittal plane | Knee touches board behind heel of front foot
2
Dowel contacts not maintained | Dowel does not remain vertical | Movement noted in torsoDowel and feet do not remain in sagittal plane | Knee does not touch behind heel of front foot
1
Loss of balance is noted
The athlete receives a score of zero if pain is associated with any portion of this test. A medical professional should perform a thorough evaluation of the painful area.

SHOULDER MOBILITY REACHING MOVEMENT PATTERN
PURPOSE
The shoulder mobility reaching pattern demon-strates the natural complementary rhythm of the scapular- thoracic region, thoracic spine and rib cage during reciprocal upper- extremity shoulder move-ments. Although the full reciprocal reaching pattern is not seen in basic activities, it uses each segment to its range of active control, leaving little room for compensation. Removing compensation provides a clear view of movement ability.
The cervical spine and surrounding musculature should remain relaxed and neutral, and the thoracic region should have a natural extension before doing the alternate upper- extremity patterns.
This pattern observes bilateral shoulder range of motion, combining extension, internal rotation and adduction in one extremity, and flexion, external rotation and abduction of the other.
DESCRIPTION
First, determine the client’s hand length by mea-suring the distance from the distal wrist crease to the tip of the longest digit. The client will stand with the feet together, and make a fist with each hand, thumbs inside the fingers. The client then simultaneously reaches one fist behind the neck and the other behind the back, assuming a maximally adducted, extended and internally rotated position with one shoulder, and a maximally abducted and externally rotated position with the other.
During the test, the hands should move in one smooth motion, and should remain fisted. Measure the distance between the two closest points of the hands to determine the client’s symmetrical reach.
Have the client perform the shoulder mobility test a maximum of three times bilaterally. If any of the criteria for a score of three are not achieved, the client receives a score of two. If any of the criteria for the score of two are not achieved, score this a one.
TIPS FOR TESTING
1. The top shoulder identifies the side being scored. This simply represents the pattern and does not imply the functional ability of a body part or side.
2. If the hand measurement is the same as the distance between the two points, score low.
3. If pain is present in the clearing test, the client receives a zero.
4. Make sure the client does not try to walk the hands toward each other following the initial placement.
5. Do not judge the pattern or interpret the cause of the score while testing.
6. Do not coach the movement; simply repeat the instructions if needed.
7. Was there pain?8. When in doubt, score low.
IMPLICATIONS OF THE SHOULDER MOBILITY REACHING
MOVEMENT PATTERN
• The most obvious is the widely accepted ex-planation of increased external rotation gained at the expense of internal rotation in overhead throwing athletes. Although this is true to some extent, this is not the first thing to consider. • Scapular stability depends on thoracic mobility.
This should be the primary focus.• Excessive development and shortening of the
pectoralis minor, latissimus dorsi and rectus ab-dominus muscles can cause the postural altera-tions of forward or rounded shoulders. This pos-tural problem leaves unrestricted mobility of the glenohumeral joint and scapula at a disadvantage.
• A scapulothoracic dysfunction may be present, resulting in decreased glenohumeral mobility secondary to poor scapulothoracic mobility or stability.
• The test requires an asymmetric movement be-cause the arms travel in opposite directions. The test also requires both arms reaching simulta-neously, coupled with postural control and core stability.
CLEARING EXAM
There is a clearing exam at the end of the shoulder mobility test. You’re not scoring this, but instead are watching for a pain response. If pain is produced, a positive (+) is recorded on the score sheet, and a score of zero is given to the entire shoulder reach test.
The client places a palm on the opposite shoulder and lifts the elbow as high as possible while main-taining the palm- to- shoulder contact. This clearing exam is necessary because shoulder impingement will sometimes go undetected by shoulder mobility testing alone.

SHOULDER MOBILITY
3
Fists are within one hand length
2
Fists are within one- and- a- half hand lengths
1
Fists are not within one and half hand lengths
The athlete will receive a score of zero if pain is associated with any portion of this test. A medical professional should perform a thorough evaluation of the painful area.
Clearing Test
Perform this clearing test bilaterally. If the individual does receive a positive score, document both scores for future reference. If there is pain associated with this movement, give a score of zero and perform a thorough evaluation of the shoulder or refer out.

ACTIVE STRAIGHT- LEG RAISE MOVEMENT PATTERN
PURPOSE
The active straight- leg raise may appear to be the least functional screen, but don’t be fooled by its simplicity. This pattern not only identifies the active mobility of the flexed hip, but includes the initial and continuous core stability within the pat-tern, as well as the available hip extension of the alternate hip. This is not so much a test of hip flex-ion on one side, as it is an appraisal of the ability to separate the lower extremities in an unloaded position. This movement is often lost when flex-ibility of multi- articular muscles is compromised.
The glute maximus/iliotibial band complex and the hamstrings are the structures most likely to result in flexion limitations. Extension limitations are often seen in the iliopsoas and other muscles of the anterior pelvis. This pattern challenges the ability to dissociate the lower extremities while maintaining stability in the pelvis and core. The movement also challenges active hamstring and gastroc- soleus flexibility, while maintaining a stable pelvis and active extension of the opposite leg.
DESCRIPTION
The client lies supine with the arms by the sides, palms up and the head flat on the floor. A board is placed under the knees; this can be either the FMS kit board, or a board of similar dimensions as described earlier. Both feet should be in a neutral position, the soles of the feet perpendicular to the floor.
Find the point between the anterior superior iliac spine (ASIS) and the joint line of the knee, and places a dowel at this position, perpendicular to the ground. Next, the client lifts the test limb while maintaining the original start position of the ankle and knee.
During the test, the opposite knee should remain in contact with the board; the toes should remain pointed upward in the neutral limb posi-tion, and the head remains flat on the floor.
Once reaching the end- range, note the position of the upward ankle relative to the non- moving limb. If the malleolus passes the dowel, record a score of three. If the malleolus does not pass the
dowel, move the dowel, much like a plumb line from the malleolus of the test leg, and again score per the criteria.
Perform the active straight-leg mobility test a maximum of three times bilaterally. If any of the criteria for a score of three are not achieved, the client receives a score of two. If any of the criteria for the score of two are not achieved, score this a one.
TIPS FOR TESTING
1. The moving limb identifies the side being scored.
2. If there is difficulty finding the joint line, identify the line by flexing and extending the knee.
3. Make sure the non- moving limb maintains a neutral position.
4. Do not judge the pattern or interpret the cause of the score while testing.
5. Do not coach; this is not exercise. This means if there’s fault in the execution, simply repeat the instructions, not offering corrections.
6. Was there pain?7. When in doubt, score low.
IMPLICATIONS OF THE ACTIVE STRAIGHT- LEG RAISE
MOVEMENT PATTERN
• Pelvic control may not be sufficient for the ex-ecution of the pattern.
• The client may have inadequate mobility of the opposite hip, stemming from inflexibility asso-ciated with limited hip extension.
• The client may have poor functional hamstring flexibility in the moving limb.
• A combination of these factors will be exhibit-ed if an client has relative bilateral, asymmetric hip mobility. The non- moving limb is at work during the optimal pattern; when the pattern is correct, the non- moving limb demonstrates stability, an automatic task, while the moving limb demonstrates mobility, a conscious task.
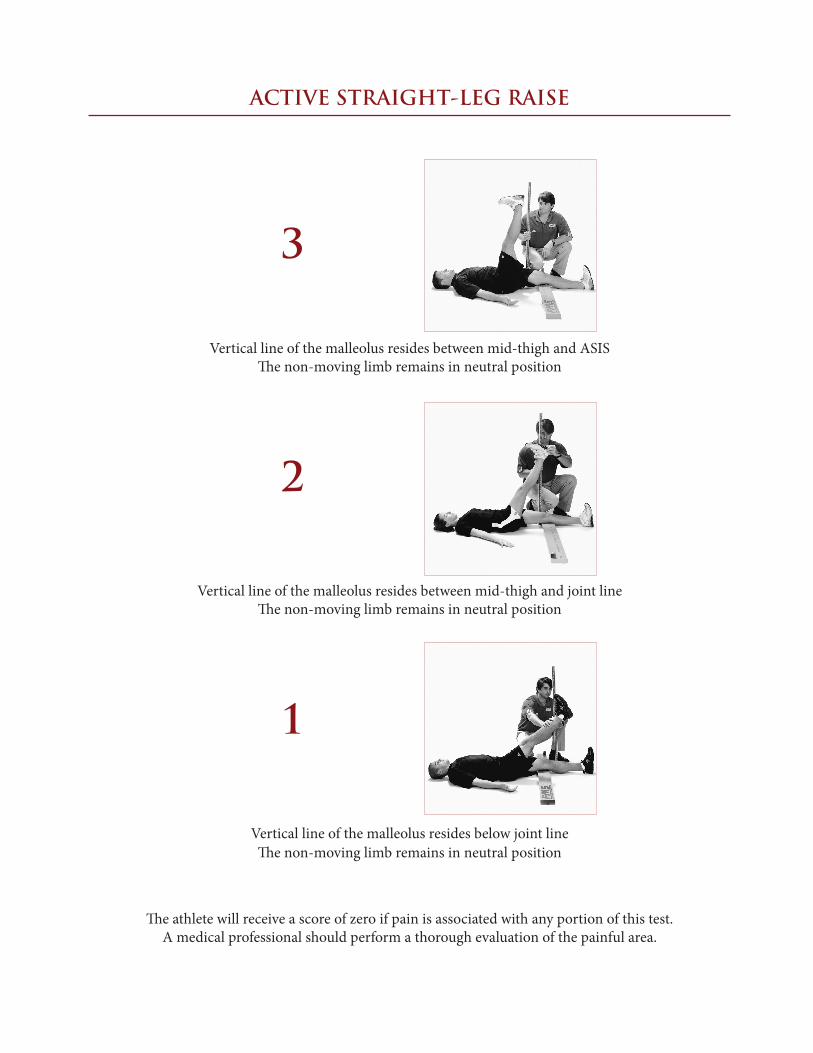
ACTIVE STRAIGHT-LEG RAISE
3
Vertical line of the malleolus resides between mid- thigh and ASIS The non- moving limb remains in neutral position
2
Vertical line of the malleolus resides between mid- thigh and joint lineThe non- moving limb remains in neutral position
1
Vertical line of the malleolus resides below joint lineThe non- moving limb remains in neutral position
The athlete will receive a score of zero if pain is associated with any portion of this test. A medical professional should perform a thorough evaluation of the painful area.

Trunk Stability Press-up Extension Test
TRUNK STABILITY PUSHUP MOVEMENT PATTERN
PURPOSE
The trunk stability pushup is a unique, single- repetition version of the common floor- based pushing exercise. It is used as a basic observation of reflex core stabilization, and is not a test or measure of upper- body strength. The goal is to initiate movement with the upper extremities in a pushup pattern without allowing movement in the spine or hips.
Extension and rotation are the two most com-mon compensatory movements. These compensa-tions indicate the prime movers within the pushup pattern incorrectly engage before the stabilizers.
The push- up movement pattern tests the ability to stabilize the spine in the sagittal plane during the closed kinetic chain, upper body symmetrical pushing movement.
DESCRIPTION
The client assumes a prone position with the arms extended overhead. During this test, men and women have different start positions. Men begin with their thumbs at the top of the forehead, while women begin with their thumbs at chin level. The thumbs are then lowered to the chin or shoulder level per the scoring criteria. The knees are fully extended, the ankles are neutral and the soles of feet are perpendicular to floor.
Ask the client to perform one push up in this position. The body should be lifted as a unit; there should be no sway in the spine during this test. If the client cannot perform a pushup in the initial position, the hands are lowered to an easier posi-tion. Give a score of three if all criteria are met with the hands at the forehead, a score of two if done with the hands at the chin, and a one if the client can’t complete the move.
Perform the trunk stability pushup test a maxi-mum of three times. If any of the criteria for a score of three are not achieved, the client receives a score of two. If any of the criteria for the score of two are not achieved, score this a one.
TIPS FOR TESTING
1. The client should lift the body as a unit.2. On each attempt, make sure the client main-
tains the hand position and the hands do not slide down as the client prepares to push.
3. Make sure the chest and stomach come off the floor simultaneously.
4. If pain is present in the clearing test, the client receives a zero.
5. Do not judge the pattern or interpret the cause of the score while testing.
6. Do not coach; this is not exercise.7. Was there pain?8. When in doubt, score low.
IMPLICATIONS OF THE TRUNK STABILITY PUSH UP
MOVEMENT PATTERN
• Limited performance during this test can be at-tributed to poor reflex stabilization of the core.
• Compromised upper- body strength or scapu-lar stability— or both— can also be a cause of poor performance during this test.
• Limited hip and thoracic spine mobility can affect an client’s ability to achieve the optimal start position, also leading to poor perfor-mance during the test.
CLEARING EXAM
We use a clearing exam at the end of the trunk stability press-up test. This movement is not scored; it is performed to observe a pain response. If pain is produced, a positive (+) is recorded and a score of zero is given to the entire press-up test. Clear spinal extension with a press up from the pushup position. If the client receives a positive score, document both scores for future reference.

TRUNK STABILITY PUSHUP
3The body lifts as a unit with no lag in the spine
Men perform a repetition with thumbs aligned with the top of the headWomen perform a repetition with thumbs aligned with the chin
2
The body lifts as a unit with no lag in the spineMen perform a repetition with thumbs aligned with the chin | Women with thumbs aligned with the clavicle
1Men are unable to perform a repetition
with hands aligned with the chin
Women unable with thumbs aligned with the clavicle
The athlete receives a score of zero if pain is associated with any portion of this test. A medical professional should perform a thorough evaluation of the painful area.
Spinal Extension Clearing Test
Spinal extension is cleared by performing a press- up in the pushup position. If there is pain associated with this motion, give a zero and perform a more thorough evaluation or refer out. If the individual does receive a positive score, document both scores for future reference.
ROTARY STABILITY MOVEMENT PATTERN
PURPOSE
The rotary stability pattern observes multi- plane pelvis, core and shoulder girdle stability during a combined upper- and lower- extremity move-ment. This pattern is complex, requiring proper neuromuscular coordination and energy transfer through the torso. It has as its roots the creeping pattern that follows basic crawling in our develop-mental sequence.
The test has two important implications. It demonstrates reflex stabilization and weight shifting in the transverse plane, and it represents the coordinated efforts of mobility and stability observed in fundamental climbing patterns.
DESCRIPTION
The client gets into the quadruped position with a board, either the FMS kit board or one of similar size, on the floor between the hand and knees. The board should be parallel to the spine, and the shoulders and hips should be 90 degrees relative to the torso, with the ankles neutral and the soles of the feet perpendicular to the floor.
Before the movement begins, the hands should be open, with the thumbs, knees and feet all touch-ing the board. The client should flex the shoulder while extending the same- side hip and knee, and then bring elbow to knee while remaining in line over the board. Spine flexion is allowed as the cli-ent brings the knee and elbow together.
This is performed bilaterally for a maximum of three attempts if needed. If one repetition is com-pleted successfully, there is no reason to perform the test again.
If a score of three is not attained, have the per-son perform a diagonal pattern using the opposite shoulder and hip in the same manner described above. During this diagonal variation, the arm and leg need not be aligned over the board; however, the elbow and knee do need to touch over it.
TIPS FOR TESTING
1. The upper moving limb indicates the side being tested.
2. Make sure the unilateral limbs remain over the board to achieve a score of three.
3. The diagonal knee and elbow must meet over the board to achieve a score of two.
4. Make sure the spine is flat and the hips and shoulders are at right angles at the start.
5. Do not judge the pattern or interpret the cause of the score while testing.
6. Do not coach; this is not exercise.7. Was there pain?8. When in doubt, score low.
IMPLICATIONS OF THE ROTARY STABILITY
MOVEMENT PATTERN
• Limited performance during this test can be attributed to poor reflex stabilization of the trunk and core.
• Compromised scapular and hip stability can also cause poor performance.
• Limited knee, hip, spine and shoulder mobility can reduce the ability to perform the complete pattern, leading to a poor test score.
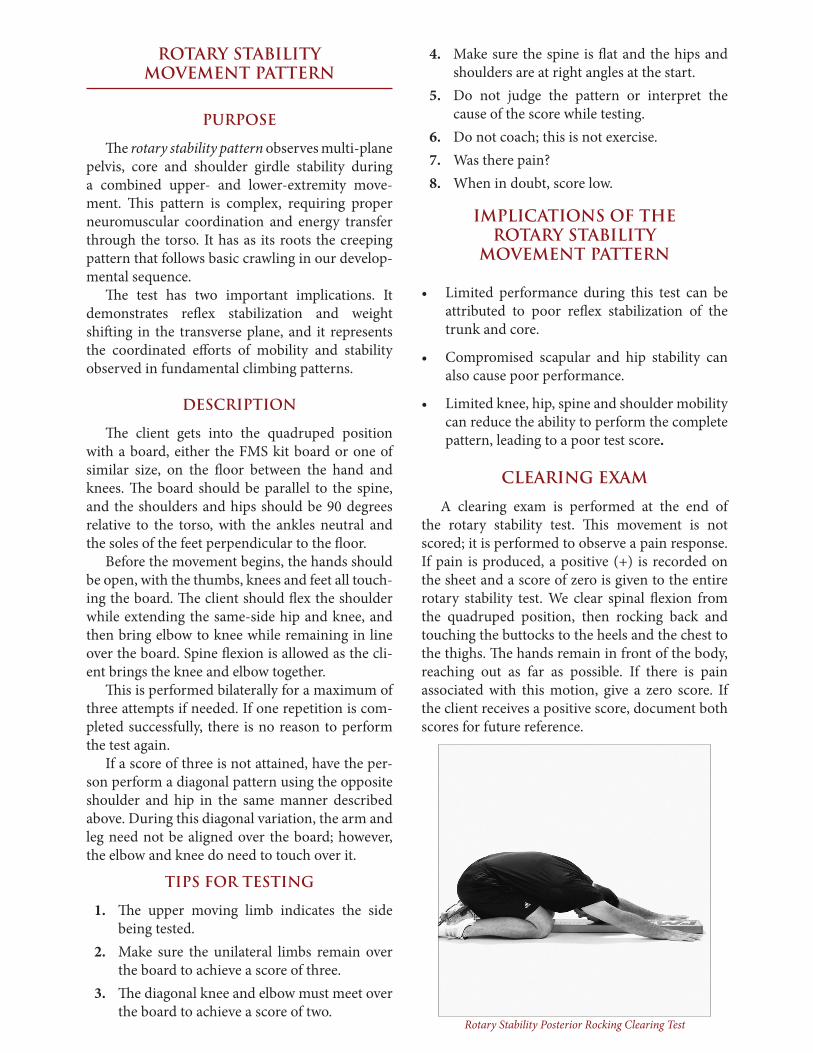
CLEARING EXAM
A clearing exam is performed at the end of the rotary stability test. This movement is not scored; it is performed to observe a pain response. If pain is produced, a positive (+) is recorded on the sheet and a score of zero is given to the entire rotary stability test. We clear spinal flexion from the quadruped position, then rocking back and touching the buttocks to the heels and the chest to the thighs. The hands remain in front of the body, reaching out as far as possible. If there is pain associated with this motion, give a zero score. If the client receives a positive score, document both scores for future reference.
Rotary Stability Posterior Rocking Clearing Test
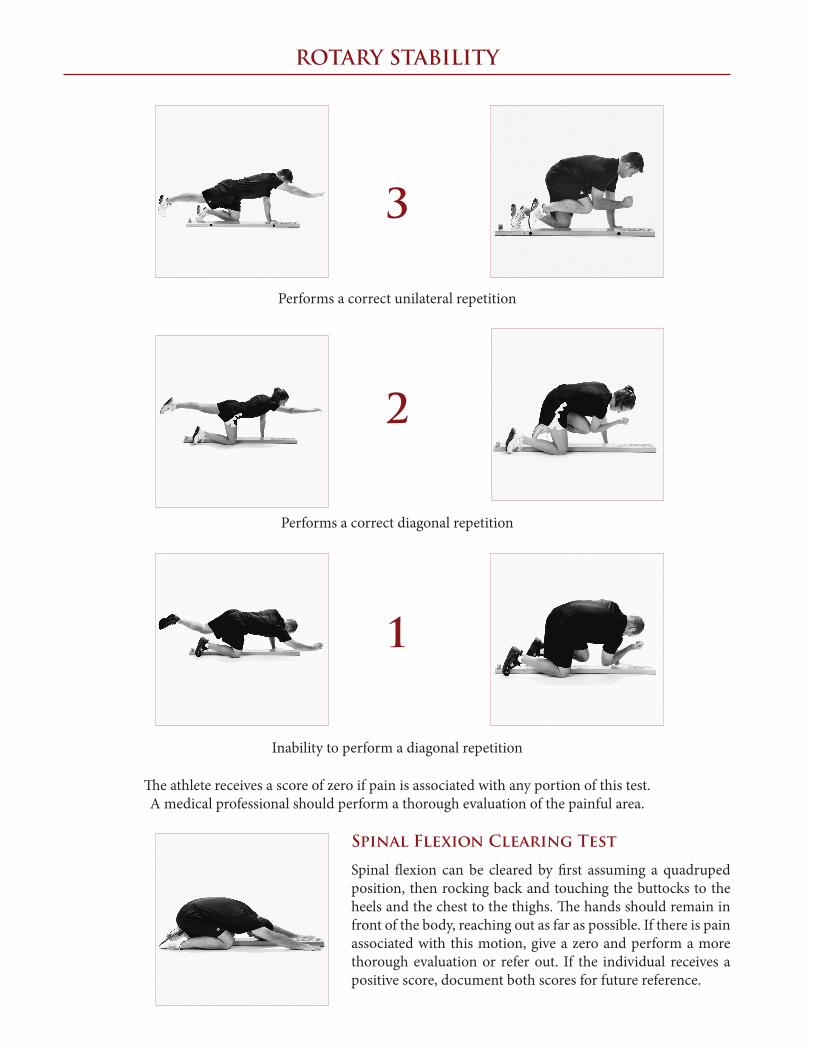
ROTARY STABILITY
3
Performs a correct unilateral repetition
2
Performs a correct diagonal repetition
1
Inability to perform a diagonal repetition
The athlete receives a score of zero if pain is associated with any portion of this test. A medical professional should perform a thorough evaluation of the painful area.
Spinal Flexion Clearing Test
Spinal flexion can be cleared by first assuming a quadruped position, then rocking back and touching the buttocks to the heels and the chest to the thighs. The hands should remain in front of the body, reaching out as far as possible. If there is pain associated with this motion, give a zero and perform a more thorough evaluation or refer out. If the individual receives a positive score, document both scores for future reference.

When performing the Functional Movement Screen™ it is important to remember not to begin making
decisions or try to interpret the weak link on a person before finishing the entire screen. The tester may find
that two or three tests uncover a weak area, but without looking at all seven movements, another more
important weakness may be overlooked. By performing the entire screen, you may further pinpoint an area
of weakness that was uncovered in the first two or three tests performed. Once you have finished the entire
screening process it is time to figure out where the individual’s functional movement problems may be and
from that make recommendations on improving them.
The first aspect of the screen that needs to be addressed is any tests on which the individual received a
zero. If a person received a zero on one or more of the tests, they need to have that area evaluated by a
sports medicine professional. It should be noted to the sports medicine professional what movement caused
the pain. It is in the person’s best interest not to continue with an exercise progression until this painful area
has been evaluated. The individual should be re-tested once the painful area has been resolved because a
zero on any aspect of this screen will greatly affect not only the overall score, but each individual test itself.
The next aspect of the interpretation would be to begin looking for any asymmetries involving a score of
one. This would give the individual an overall score of one, but the person may have scored a three or two
on one side of the body and a one on the other. A right or left side mobility or stability imbalance will
increase the chances of the individual having a breakdown in their body, causing an injury. This is why it is
important to begin looking at asymmetries first. If a person receives a score of one and there is an
imbalance, certain mechanical laws are being compromised and the individual is likely to be causing micro-
trauma to certain areas during activity. This imbalance will certainly lead to greater problems and is
definitely affecting performance.
If the person does not have any asymmetries with a score of one, then bilateral scores of one are
assessed. The individual who scores a one is exhibiting gross mobility or stability problems and is causing
high degrees of stress on the body during activities. It is likely that a person with a score of one, either with
or without an imbalance, will need hands-on therapeutic activities in order to overcome the mobility or
stability weakness.
Once you have established that there are no scores of one, you then begin looking for imbalances with the
score of two. The individual will have a score of two on one side and a three on the other. This person is
certainly moving better than a person who has a one, but again, with an imbalance they are still breaking
certain mechanical laws which will lead to micro-trauma. This imbalance should still take precedence
because of the issue that imbalances in mobility and stability will lead to greater chance of injuries.
The next score that should be addressed is a person who has bilateral scores of two. This person does not
exhibit adequate mobility and stability in order to perform fundamental movements, thereby causing
breakdowns during higher levels of activity. This person can overcome their weakness quicker, but without
SCORING INTERPRETATION AND RECORDING
proper intervention they will likely continue to compensate for their lack of mobility or stability. This
compensation will lead to a decrease in the quality of their fundamental movements and an increase in the
micro-trauma that is occurring during activity. This individual must work on their weakness through
therapeutic activities, but with a score of two, their deficits will not be as difficult to overcome.
If an individual has a score that does not exhibit any asymmetries or scores that are obviously lower than mobility works should be the focus. For example, if a person has all 1's or all 2's then the Active StraightLeg Raise and/or Shoulder Mobility will be the focus. By focusing on improving these two tests, you areactivating the body's natural process of proximo-distal relationship, or mobility and stability. The correctiveprocess for these two tests require proper sequencing to occur at a fundamental level of mobility andstability. This will help set the stage for improvement in higher level movement patterns.
The individual who has a perfect score and has adequate fundamental movement patterns throughout still
must work to maintain their level of functional movement. This individual must continue to incorporate proper
movement mechanics during activities in order to keep their fundamental movement patterns at an optimum.
It is important to continue to screen an individual who scores perfectly on The Functional Movement Screen
to monitor their workout regimen, making sure that they are maintaining proper movement mechanics.
The goal of the Functional Movement Screen™ is to locate the body’s weak link in a movement pattern and
improve it through therapeutic exercise. It should be noted that the tester continues to re-test each individual
periodically once they begin their therapeutic exercise regime. By doing this, the tester can check for
improvements, making sure they are not losing the fundamental movements they have attained.

Interpretation of Sample Scores
DEEP SQUAT 2 2
HURDLE ST. L 2 2
HURDLE ST. R 2
IN-LINE LUN. L 2
IN-LINE LUN. R 3
SHO. MOB. L 1
SHO. MOB. R 3 1
ACTIVE IMP. L -
ACTIVE IMP. R -
ASLR L 2 2
ASLR R 3
TSPU 2 2
EXT -
ROT. STAB. L 2 2
ROT. STAB. R 2
FLX -
TOTAL 13
TEST RAW SC FINAL COMMENTS
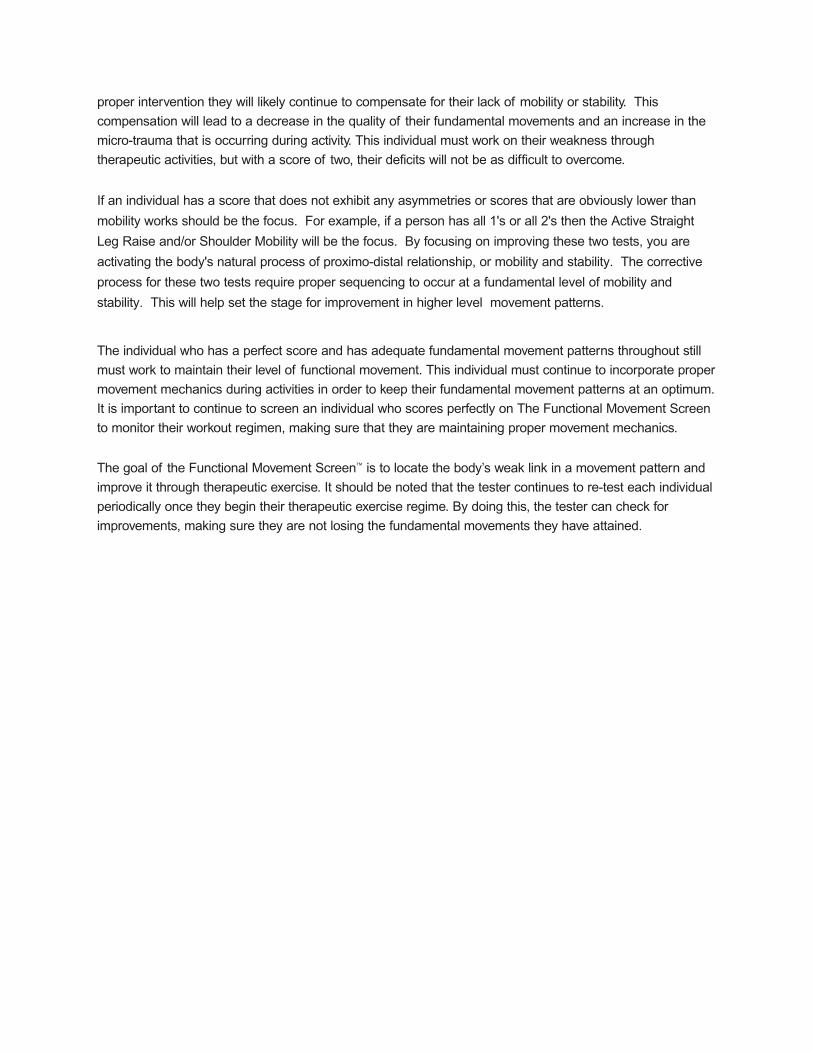
This athlete/client has an obvious imbalance in the shoulder, with a score of a 1 on the left side and a 3 on
the right side. Typically what you will see is a person who has limited internal rotation on the involved side
when you have an imbalance of this sort. In this scenario, the limited internal rotation would be on the right
side. In this case it would be best to perform a more detailed shoulder examination to see where the
limitations lie. Goniometric measurements can be taken to quantify the imbalance and flexibility and mobility
therapeutic activity should be undertaken to improve range of motion and decrease the imbalance.
The In-line Lunge and Active Straight Leg Raise also have imbalances; however, these imbalances occur
with a 2 and 3 which demonstrates that the limitations are not as severe as the shoulder. Once the shoulder
mobility has improved, the screen should be performed again in order to see any improvements. An
improvement in shoulder mobility will certainly affect the In-line Lunge score which may eliminate that
imbalance. However, these imbalances can also be addressed initially with certain therapeutic activity
focused on improving the lunging and leg raising movements.
Interpretation of the Functional Movement Screen Score ofAthlete/Client 1

Sample Score Sheet: Athlete/Client 2
TEST RAW SC
FINAL COMMENTS
DEEP SQUAT 2 2 HURDLE ST. L
2
HURDLE ST. R
3 2
IN-LINE LUN. L
2
IN-LINE LUN.R
2 2
SHO. MOB. L 3 3 SHO. MOB. R 3
ACTIVE IMP. L
-
ACTIVE IMP. R
-
ASLR L 2
ASLR R 2 2 TSPU 3
EXT - 3
ROT. STAB.L 2
ROT. STAB. R
2 2
FLX -
TOTAL 16
Interpretation of Sample Scores
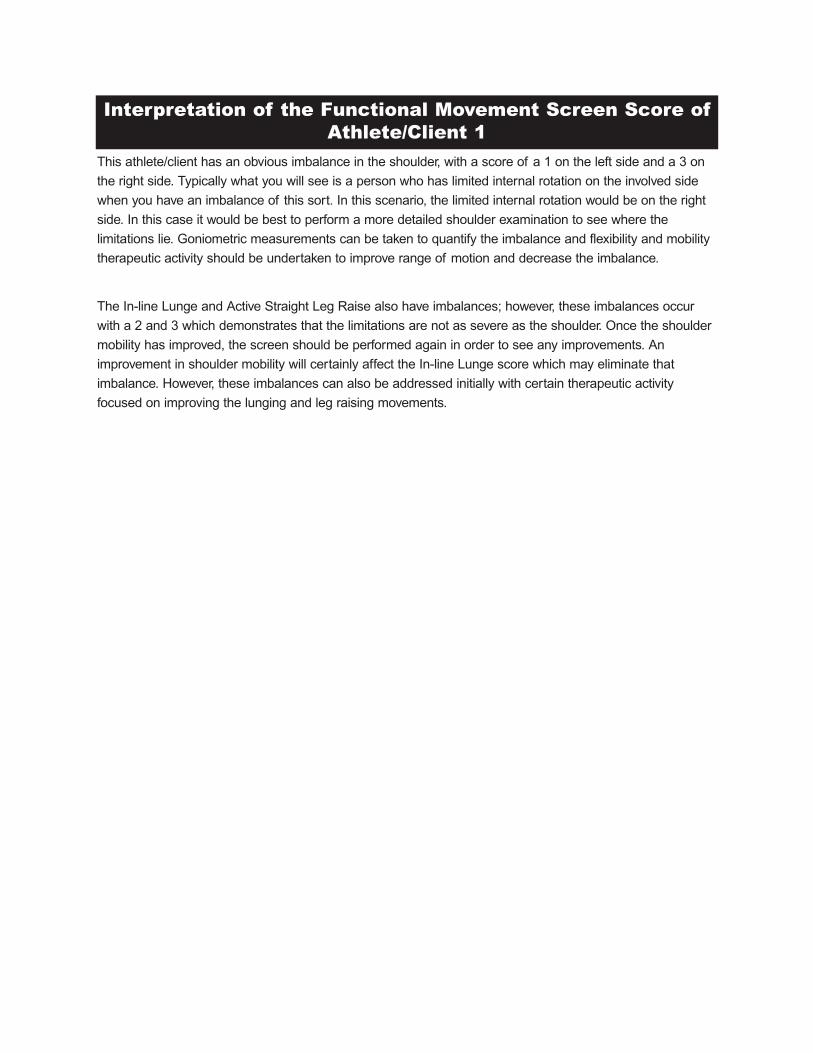
This athlete/client scores a 17, which is a fairly high score; however, there is still an imbalance with this
individual that may lead to future problems. This imbalance is where you should focus first when further
evaluating the individual. The imbalance is obvious, but as you review the scores, you will see that the
individual scores well on the Deep Squat and Trunk Stability Push-up but demonstrates problems with the
Hurdle Step, In-line Lunge and Active Straight Leg Raise. This indicates a problem during asymmetric
movements when the legs are in a scissored position. This type of position combines dynamic mobility and
stability during activities. An inability to perform this movement may indicate a problem due to more dynamic
mobility and stability problems which may be secondary to poor dynamic stability and proprioceptive ability
in the trunk and/or poor dynamic mobility in the extremities. The evaluation should focus on this area in a
dynamic scenario, looking for an imbalance which may become apparent. Single-leg stance, abdominal
stability and lower extremity mobility should be addressed during the evaluation. This person, because of
the high score, may be ready for higher-level therapeutic activities focusing on the asymmetrical dynamic
problems.
Interpretation of the Functional Movement Screen Score ofAthlete/Client 2
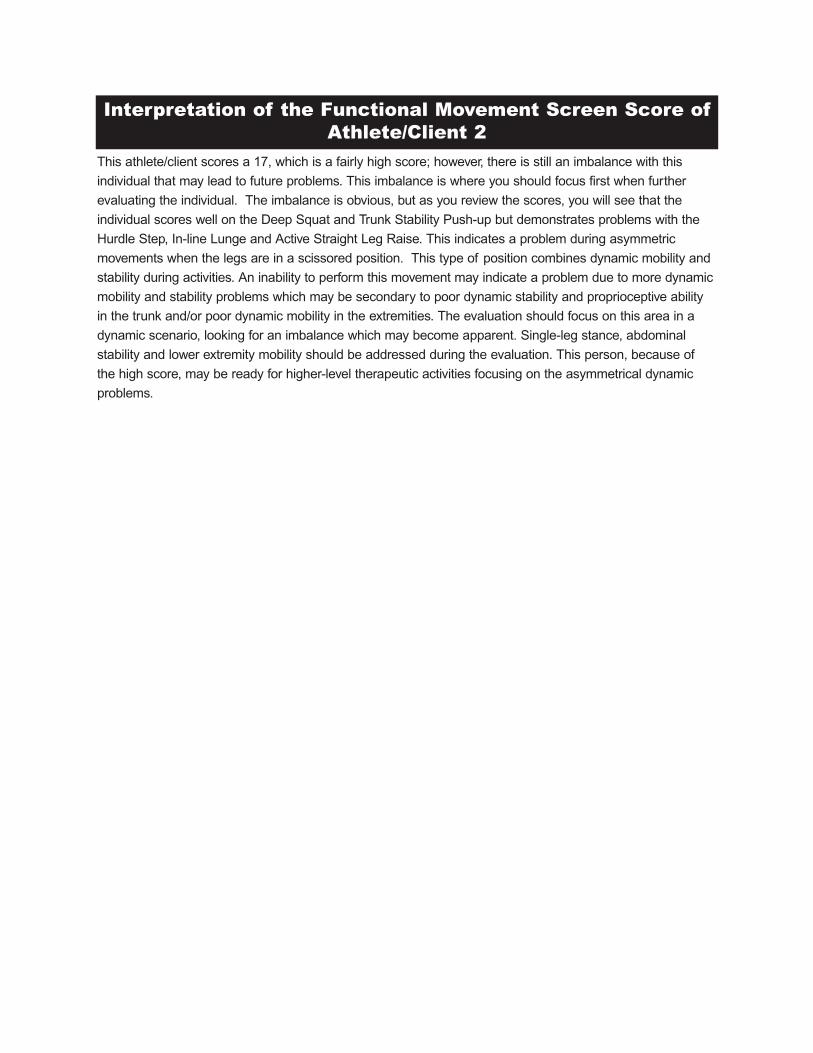
Sample Score Sheet: Athlete/Client 3
DEEP SQUAT 2 2
HURDLE ST. L 2 2
HURDLE ST. R 2
IN-LINE LUN. L 2 2
IN-LINE LUN. R 2
SHO. MOB. L 2 2
SHO. MOB. R 3
ACTIVE IMP. L -
ACTIVE IMP. R -
ASLR L 3 2
ASLR R 2
TSPU 3 0
EXT +
ROT. STAB. L 2 2
ROT. STAB. R 3
FLX -
TOTAL 12
TEST RAW SC FINAL COMMENTS
Interpretation of Sample Scores
The interpretation for athlete 3 is obvious, a thorough evaluation of the painful area must be determined.
When a score of 0 is given on the Trunk Stability Push-up due to a painful prone press-up, it is typical for the
lumbar spine to be the area of pathology. The sports medicine professional must rule out pathology in this
region before proceeding with therapeutic activity. The other scores in the screen should not be overlooked;
these scores may aid the sports medicine professional in the evaluation.
There are imbalances in the shoulder and active straight leg raise that must be addressed. An evaluation
should be performed in these areas in order to prescribe therapeutic exercise to overcome the imbalances.
Interpretation of the Functional Movement Screen Score ofAthlete/Client 3

Sample Score Sheet: Athlete
Interpretation of Sample Scores
DEEP SQUAT 2 2
HURDLE ST. L 2 2
HURDLE ST. R 2
IN-LINE LUN. L 2 2
IN-LINE LUN. R 2
SHO. MOB. L 2 2
SHO. MOB. R 2
ACTIVE IMP. L -
ACTIVE IMP. R -
ASLR L 2 2
ASLR R 2
TSPU 2 2
EXT -
ROT. STAB. L 2 2
ROT. STAB. R 2
FLX -
TOTAL 14
TEST RAW SC FINAL COMMENTS
Athlete/Client number 4 has a score of 14, with scores of two on all tests and no imbalances. In this
scenario, there is nothing obvious showing the sports medicine professional where to begin their evaluation.
In this case they must use his/her best judgment when determining what to improve upon. In most cases,
the sports medicine professional may have made notes during the testing which may need to be addressed
when making recommendations for improvement.This score is very common and needs to be addressed.Since the individual is close to falling below 14, wich has shown to be the cut-off for injury risk in certainpopulations. Even though this individual demonstrates adequate movements for most activities as his/her activity level increases the need for proper movement mechanics increases. In order to best address his/her needs to get back to the basics, the focus should be on the body's natural progression of mobility andstability. The corrective exercise progressions that will have the greatest influence on this individuals overall movement patterns, are the Shoulder Mobility and Active Straight Leg Raise. These two correctiveexercise strategies will focus on mobility work first, progressing to stability. A socre such as this will mostlikely yield improvements quickly when focusing bck on the fundamentals. Performing a follow-up FMS aweek to two weeks is important in order to re-focus the overall programming.
Interpretation of the Functional Movement Screen Score ofAthlete/Client 4
VERBAL INSTRUCTIONS FOR THE FUNCTIONAL MOVEMENT SCREEN
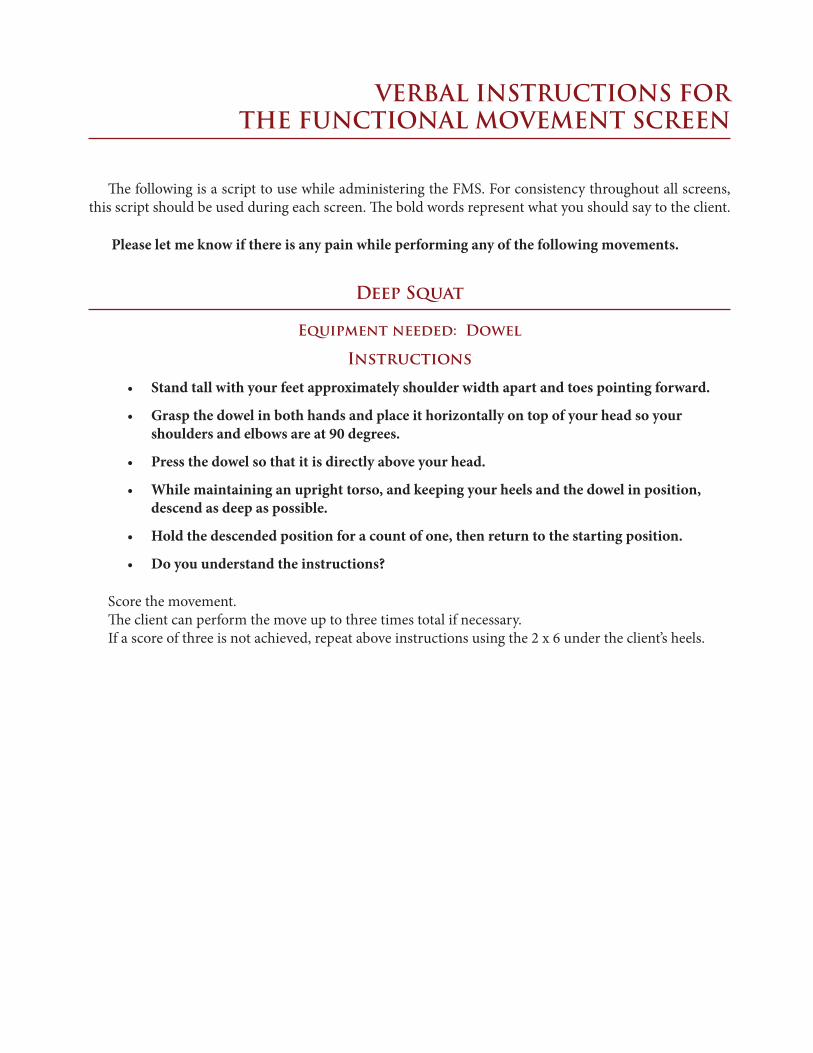
The following is a script to use while administering the FMS. For consistency throughout all screens, this script should be used during each screen. The bold words represent what you should say to the client.
Please let me know if there is any pain while performing any of the following movements.
Deep Squat
Equipment needed: Dowel
Instructions
• Stand tall with your feet approximately shoulder width apart and toes pointing forward.
• Grasp the dowel in both hands and place it horizontally on top of your head so your shoulders and elbows are at 90 degrees.
• Press the dowel so that it is directly above your head.
• While maintaining an upright torso, and keeping your heels and the dowel in position, descend as deep as possible.
• Hold the descended position for a count of one, then return to the starting position.
• Do you understand the instructions?
Score the movement. The client can perform the move up to three times total if necessary.If a score of three is not achieved, repeat above instructions using the 2 x 6 under the client’s heels.
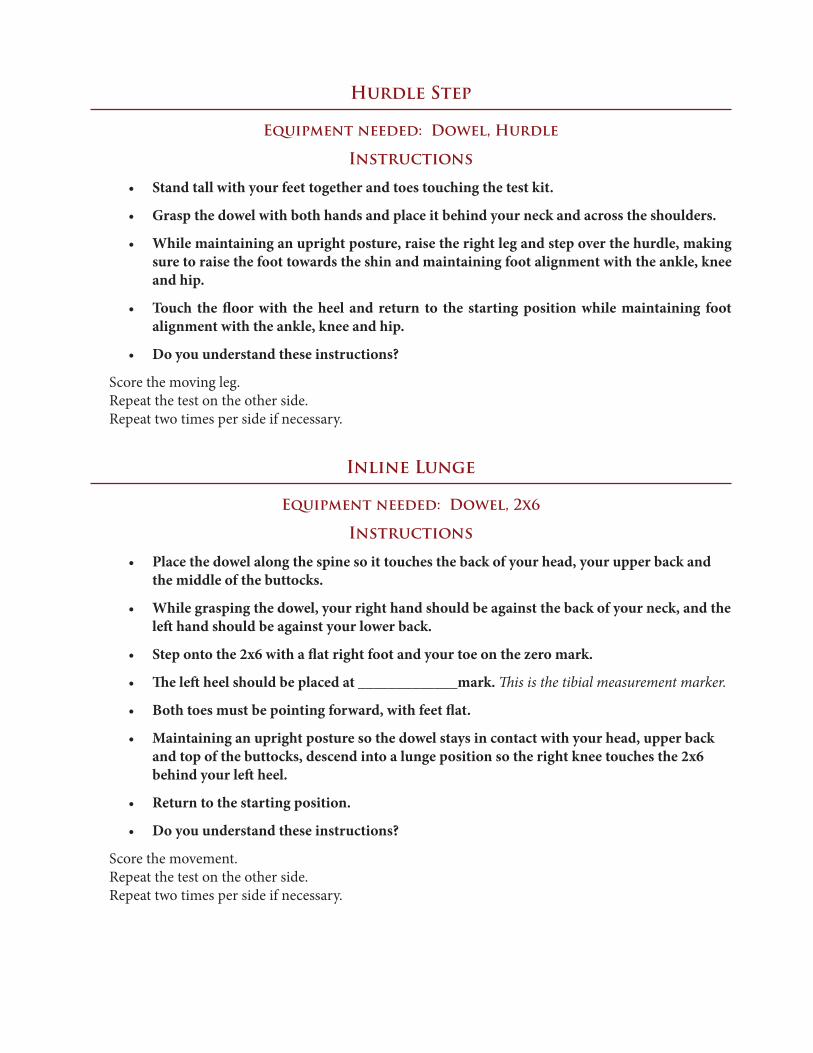
Hurdle Step
Equipment needed: Dowel, Hurdle
Instructions
• Stand tall with your feet together and toes touching the test kit.
• Grasp the dowel with both hands and place it behind your neck and across the shoulders.
• While maintaining an upright posture, raise the right leg and step over the hurdle, making sure to raise the foot towards the shin and maintaining foot alignment with the ankle, knee and hip.
• Touch the floor with the heel and return to the starting position while maintaining foot alignment with the ankle, knee and hip.
• Do you understand these instructions?
Score the moving leg.Repeat the test on the other side.Repeat two times per side if necessary.
Inline Lunge
Equipment needed: Dowel, 2x6
Instructions
• Place the dowel along the spine so it touches the back of your head, your upper back and the middle of the buttocks.
• While grasping the dowel, your right hand should be against the back of your neck, and the left hand should be against your lower back.
• Step onto the 2x6 with a flat right foot and your toe on the zero mark.
• The left heel should be placed at _____________mark. This is the tibial measurement marker.
• Both toes must be pointing forward, with feet flat.
• Maintaining an upright posture so the dowel stays in contact with your head, upper back and top of the buttocks, descend into a lunge position so the right knee touches the 2x6 behind your left heel.
• Return to the starting position.
• Do you understand these instructions?
Score the movement. Repeat the test on the other side.Repeat two times per side if necessary.
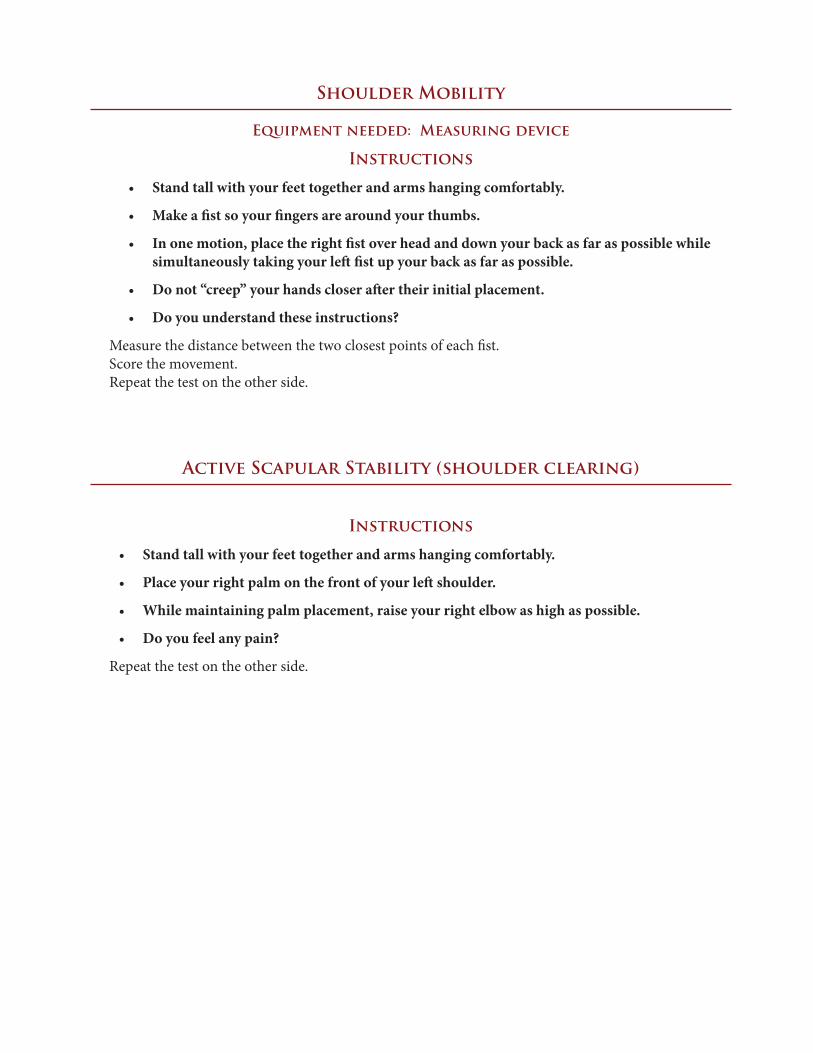
Shoulder Mobility
Equipment needed: Measuring device
Instructions
• Stand tall with your feet together and arms hanging comfortably.
• Make a fist so your fingers are around your thumbs.
• In one motion, place the right fist over head and down your back as far as possible while simultaneously taking your left fist up your back as far as possible.
• Do not “creep” your hands closer after their initial placement.
• Do you understand these instructions?
Measure the distance between the two closest points of each fist.Score the movement.Repeat the test on the other side.
Active Scapular Stability (shoulder clearing)
Instructions
• Stand tall with your feet together and arms hanging comfortably.
• Place your right palm on the front of your left shoulder.
• While maintaining palm placement, raise your right elbow as high as possible.
• Do you feel any pain?
Repeat the test on the other side.
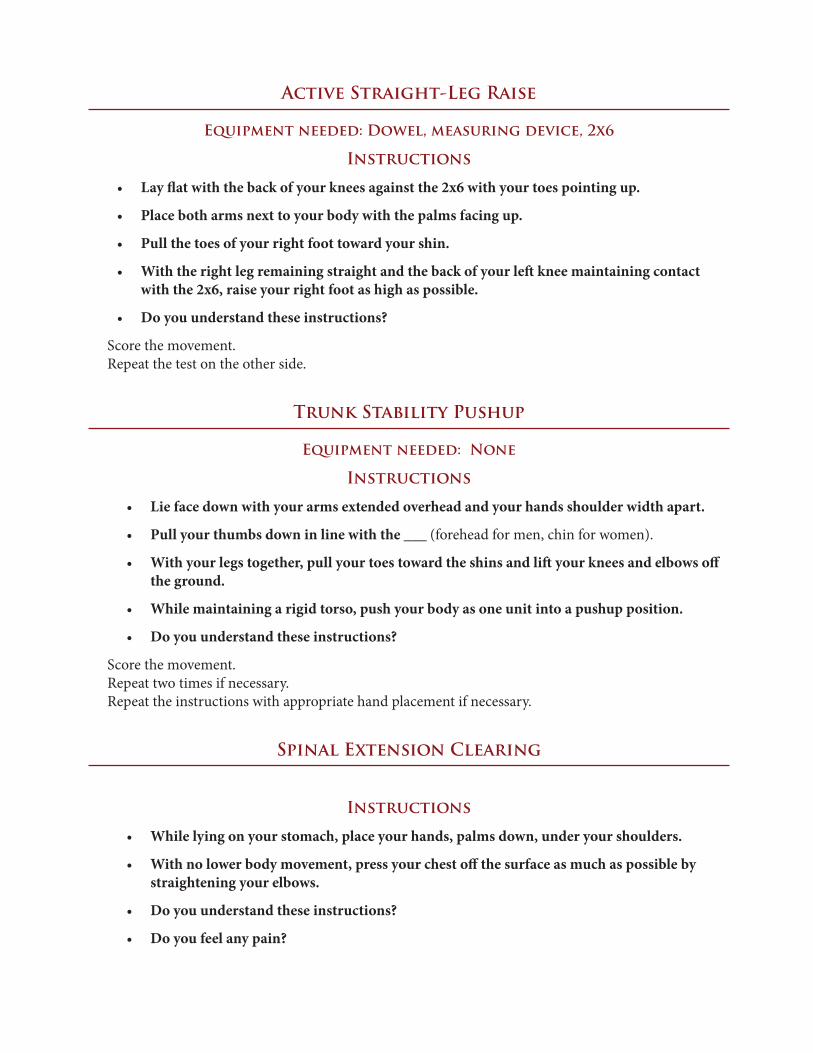
Active Straight- Leg Raise
Equipment needed: Dowel, measuring device, 2x6
Instructions
• Lay flat with the back of your knees against the 2x6 with your toes pointing up.
• Place both arms next to your body with the palms facing up.
• Pull the toes of your right foot toward your shin.
• With the right leg remaining straight and the back of your left knee maintaining contact with the 2x6, raise your right foot as high as possible.
• Do you understand these instructions?
Score the movement.Repeat the test on the other side.
Trunk Stability Pushup
Equipment needed: None
Instructions
• Lie face down with your arms extended overhead and your hands shoulder width apart.
• Pull your thumbs down in line with the ___ (forehead for men, chin for women).
• With your legs together, pull your toes toward the shins and lift your knees and elbows off the ground.
• While maintaining a rigid torso, push your body as one unit into a pushup position.
• Do you understand these instructions?
Score the movement.Repeat two times if necessary.Repeat the instructions with appropriate hand placement if necessary.
Spinal Extension Clearing
Instructions
• While lying on your stomach, place your hands, palms down, under your shoulders.
• With no lower body movement, press your chest off the surface as much as possible by straightening your elbows.
• Do you understand these instructions?
• Do you feel any pain?

Rotary Stability
Equipment needed: 2 x 6
Instructions
• Get on your hands and knees over the 2x6 so your hands are under your shoulders and your knees are under your hips.
• The thumbs, knees and toes must contact the sides of the 2x6, and the toes must be pulled toward the shins.
• At the same time, reach your right hand forward and right leg backward, like you are flying.
• Then without touching down, touch your right elbow to your right knee directly over the 2x6.
• Return to the extended position.
• Return to the start position.
• Do you understand these instructions?
Score the movement.Repeat the test on the other side.If necessary, instruct the client to use a diagonal pattern of right arm and left leg. Repeat the diagonal pattern with left arm and right leg.Score the movement.
Spinal Flexion Clearing
Instructions
• Get on all fours, and rock your hips toward your heels.
• Lower your chest to your knees, and reach your hands in front of your body as far as possible.
• Do you understand these instructions?
• Do you feel any pain?