FRAGMENTS OF LIVES PAST
16
FRAGMENTS OF LIVES PAST
Transcript of FRAGMENTS OF LIVES PAST

FRAGMENTS OF LIVES PAST


Fragments of Lives Past:archaeological objects from Irish road schemes
Edited by Bernice Kelly, Niall Roycroft and Michael Stanley
Archaeology and the National Roads Authority
Monograph Series No. 11

Published by the National Roads Authority 2014St Martin’s HouseWaterloo RoadDublin 4
© National Roads Authority and the authors
All rights reserved. No part of this book may be reprinted or reproduced or utilised in any electronic, mechanical or other means, now known or hereafter invented, including photocopying and recording, or otherwise without either the prior written consent of the publishers or a licence permitting restricted copying in Ireland issued by the Irish Copyright Licensing Agency Ltd, 25 Denzille Lane, Dublin 2.
Front and back cover imagesClose-up and full view of an early medieval copper-alloy ladle discovered in Ballynapark townland, Co. Wicklow, on the route of the N11 Rathnew–Arklow road scheme (John Sunderland).
ISBN 978-0-9574380-8-8ISSN 1649-3540
British Library Cataloguing-in-Publication Data.A catalogue record for this book is available from the British Library.
Managing editor: Michael Stanley
Copy-editor: Rachel Pierce, Verba Editing House
First published in 2014
Cover design, typesetting and layout: Artwerk Ltd
Printed by Brunswick Press Ltd

v
Contents
Foreword vii
Acknowledgements viii
Note on radiocarbon dates viii
1. Milk and molecules: secrets from prehistoric pottery 1 Jessica Smyth & Richard P Evershed School of Chemistry, Cardiff University
2. ‘Cad a dhéanfaimid feasta gan adhmad?’ Wooden objects from Irish 15 road schemes
Caitríona Moore Freelance archaeologist
3. The people behind the pots: considering the Early Bronze Age remains 27 from French Furze, Tully East, Co. Kildare
Ros Ó Maoldúin Ph.D Scholar, School of Geography and Archaeology, National University
of Ireland, Galway
4. Castlefarm 1 and the working of skeletal materials in early medieval rural 39 Ireland Ian Riddler & Nicola Trzaska-Nartowski Freelance Object Specialists
5. An early medieval copper-alloy ladle from Ballynapark, Co. Wicklow 53 Noel Dunne NRA Archaeologist
6. Dress and ornament in early medieval Ireland—exploring the evidence 67 Maureen Doyle Early Medieval Archaeology Project, School of Archaeology, University College
Dublin
7. Early medieval E ware pottery: an unassuming but enigmatic kitchen ware? 81 Ian W Doyle Head of Conservation, Heritage Council
8. In praise of Leinster Cooking Ware 95 Clare McCutcheon Freelance Medieval Pottery Specialist

vi
9. Witnesses to history: a military assemblage from the 1691 Aughrim 105 battlefield Damian Shiels Company Director, Rubicon Heritage Services Ltd
10. Experimental archaeology: making; understanding; story-telling 115 Aidan O’Sullivan, Mark Powers, John Murphy, Niall Inwood, Bernard Gilhooly,
Niamh Kelly, Wayne Malone, John Mulrooney, Cian Corrigan, Maeve L’Estrange, Antoinette Burke, Maria Kazuro, Conor McDermott, Graeme Warren, Brendan O’Neill, Mark Heffernan & Mairead Sweeney
School of Archaeology, University College Dublin
Appendix 1—Radiocarbon dates from excavated archaeological sites 127 described in these proceedings
References 129
105
9. Witnesses to history: a military assemblage from the 1691 Aughrim battlefieldDamian Shiels
The techniques of conflict and battlefield archaeology are increasingly being employed as a means of revealing new information about violent encounters in the past. Methodologies based around battlefield investigation have been developed over the past 30 years and are now widely employed on sites across the United States of America, the United Kingdom and mainland Europe. The principal tool used by battlefield archaeologists is the systematic, controlled collection of artefacts from a conflict site using metal-detection. The results have had a dramatic impact on our understanding of some of the most highly traumatic events in human history. This ranges from the discovery of weapons and equipment dropped by Roman soldiers wiped out by German tribesmen at Kalkriese in AD 9 to tracking the individual bullet signatures of doomed members of the 7th U.S. Cavalry on the 1876 Little Bighorn battlefield in Montana. Viewed in their context, objects from sites, which might individually be regarded as unremarkable, have the potential to reveal poignant information about individuals who found themselves in the maelstrom of battle.
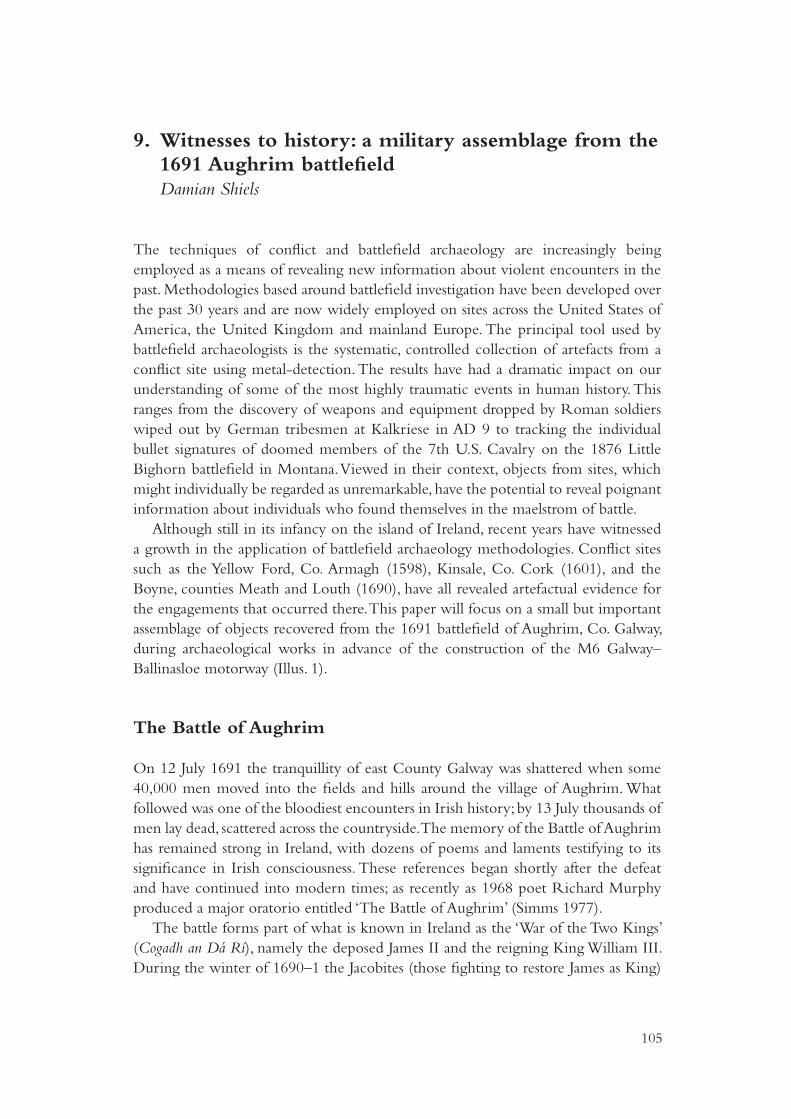
Although still in its infancy on the island of Ireland, recent years have witnessed a growth in the application of battlefield archaeology methodologies. Conflict sites such as the Yellow Ford, Co. Armagh (1598), Kinsale, Co. Cork (1601), and the Boyne, counties Meath and Louth (1690), have all revealed artefactual evidence for the engagements that occurred there. This paper will focus on a small but important assemblage of objects recovered from the 1691 battlefield of Aughrim, Co. Galway, during archaeological works in advance of the construction of the M6 Galway–Ballinasloe motorway (Illus. 1).
The Battle of Aughrim
On 12 July 1691 the tranquillity of east County Galway was shattered when some 40,000 men moved into the fields and hills around the village of Aughrim. What followed was one of the bloodiest encounters in Irish history; by 13 July thousands of men lay dead, scattered across the countryside. The memory of the Battle of Aughrim has remained strong in Ireland, with dozens of poems and laments testifying to its significance in Irish consciousness. These references began shortly after the defeat and have continued into modern times; as recently as 1968 poet Richard Murphy produced a major oratorio entitled ‘The Battle of Aughrim’ (Simms 1977).
The battle forms part of what is known in Ireland as the ‘War of the Two Kings’ (Cogadh an Dá Rí), namely the deposed James II and the reigning King William III. During the winter of 1690–1 the Jacobites (those fighting to restore James as King)

Fragments of Lives Past
106
held a line along the River Shannon, garrisoning key strong points, such as Athlone and Limerick. The fall of Athlone on 30 June 1691 allowed the Williamite army, under the command of the Dutchman Godert de Ginkel, to cross the Shannon in force. The Jacobite commander, the Frenchman Charles Chalmont, Marquis de St Ruth, pulled back in the face of their advance, moving to place his army on good ground, where they could make a stand and block the Williamite approach. The stage was set for the Battle of Aughrim.
St Ruth decided to centre his army on the high ground of Kilcommodan Hill, to the south of the village of Aughrim; he commanded 14,000 infantry, 2,500 cavalry and 3,500 dragoons (mounted infantry) (Childs 2007, 332). His left flank extended to include the village and Aughrim Castle (a medieval tower house), while his right rested on the Tristaun Stream. It was a strong defensive position. Immediately to his front was a large area of boggy ground that would be difficult for the Williamite forces to cross. The likely avenues for attack were reduced to a causeway on the Jacobite left (near what is now a roadway into the village) and in the vicinity of the Tristaun Bridge, on the right. The Williamites advanced towards these Jacobite positions with 14,000 infantry, 4,000 cavalry and 2,000 dragoons, taking up positions on Urraghry Hill to the east of the Jacobites (ibid., 332). The battle began in earnest
Illus. 1—Location of Luttrell’s Pass metal-detection survey near Aughrim, Co. Galway (based on the Ordnance Survey Ireland Discovery Series map).

Witnesses to history: a military assemblage from the 1691 Aughrim battlefield
107
in the late morning, when Ginkel tried to drive back Jacobite outposts positioned beyond Tristaun Bridge, which after some hard fighting he succeeded in doing. A pause in the fighting ensued and the Williamites considered postponing the battle until the following day. However, they perceived that St Ruth had weakened the centre of his line (and possibly his left) by redeploying troops to support the fighting on the Jacobite right and thus determined to try and cross the boggy ground in front of the Jacobite centre to take advantage of this.
The Williamites first renewed their attack at the Tristaun Stream in an effort to pin down the Jacobite troops already positioned there. They succeeded in advancing across the stream and moved to their right, where the attack stalled amid heavy fighting at a location afterwards known as the Bloody Hollow. Meanwhile, Williamite infantry began to advance across the boggy ground towards the Jacobite centre. These soldiers found themselves wading up to their waists in water as they proceeded towards Kilcommodan Hill, but eventually they drove the first line of Jacobite defenders from the ditches closest to the boggy ground in the centre. However, the Jacobites had cut gaps in these ditches to allow for their infantry and cavalry to manoeuvre in the enclosed landscape, and they pushed the Williamites back through the bog. Hard fighting continued for a time in this area, but the Williamites were unable to make ground.
They next decided to attack along the causeway on the Jacobite left, which was defended by troops around Aughrim Castle. Williamite infantry successfully advanced up to a ditch below the castle, and they were followed by cavalry, which were only able to advance two abreast on the narrow causeway. At this moment St Ruth began to move towards this latest area of fighting, only to be decapitated by a Williamite cannonball. This was the turning-point: with his death, the Jacobites lost cohesion and central command disintegrated. Henry Luttrell, commanding the cavalry supporting the troops at Aughrim Castle, elected to lead his cavalry from the field rather than launch a sustained counter-attack against the Williamites there.
As the position collapsed, the Williamites renewed their attack in the centre and began to drive the Jacobites back. As the left and centre of the line began to be rolled up, the Jacobite right put up strong resistance, but were also eventually forced to retreat. As Jacobite troops fled from the field, many of the infantry attempted to make for the safety of a large bog to the north and west of their original position on Kilcommodan Hill, to avoid the Williamite cavalry, which was now employed in killing as many as possible of the fleeing troops. The Battle of Aughrim was over; as night fell, up to 4,000 men lay dead, their bodies scattered throughout the countryside.
Battlefield investigations
The battlefield of Aughrim is undoubtedly one of the most promising sites for the archaeological study of conflict in Ireland. It already has a large number of battle-related objects associated with it, housed in the Battle of Aughrim Interpretive Centre
Fragments of Lives Past
108
and in the National Museum of Ireland. Although the analytical value of this material is reduced owing to the fact that their exact findspots were not securely recorded, they nonetheless indicate that there is a large amount of surviving material relating to the battle in the fields around the village. In addition, archaeologist Natasha Ferguson investigated the site as an archaeological landscape in 2006, further highlighting its potential and revealing, through geophysical survey, the possible site of a mass grave on Kilcommodan Hill (Ferguson 2006).
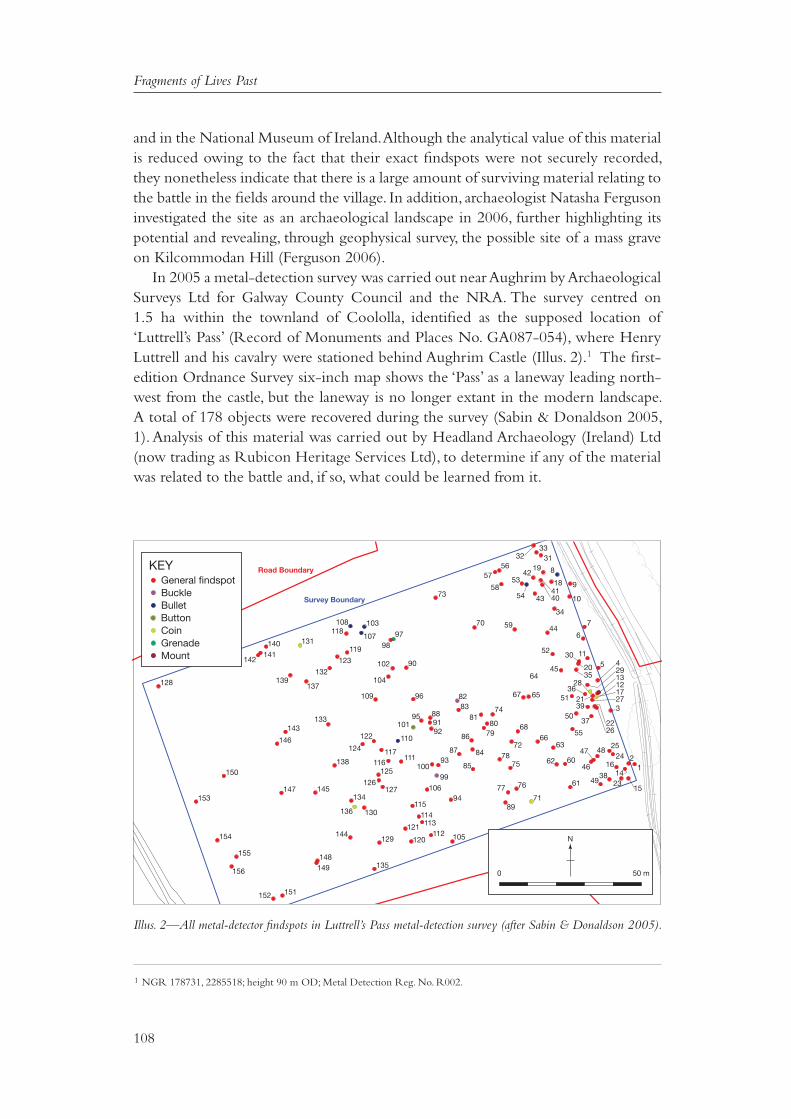
In 2005 a metal-detection survey was carried out near Aughrim by Archaeological Surveys Ltd for Galway County Council and the NRA. The survey centred on 1.5 ha within the townland of Coololla, identified as the supposed location of ‘Luttrell’s Pass’ (Record of Monuments and Places No. GA087-054), where Henry Luttrell and his cavalry were stationed behind Aughrim Castle (Illus. 2).1 The first-edition Ordnance Survey six-inch map shows the ‘Pass’ as a laneway leading north-west from the castle, but the laneway is no longer extant in the modern landscape. A total of 178 objects were recovered during the survey (Sabin & Donaldson 2005, 1). Analysis of this material was carried out by Headland Archaeology (Ireland) Ltd (now trading as Rubicon Heritage Services Ltd), to determine if any of the material was related to the battle and, if so, what could be learned from it.
Survey Boundary
Road Boundary
3651
50
49
6246
47
77
3823
3921
28
65
55
6366
68
7278
75
76
7189
60
61
37
64
82
93
106
120
115114
121112 105
113
94
84
74
8079
99
111
88
96
90
97
103
107
119
123
131140
128
143
146
150
153147
154
155
135
129
134
125
127
151
148
156 149
130
145
138
141
137
9192
110
117
83
44
34
10
9
81931
56
70
7343
4140
18
33
7
2035
6
115
2
2548
24
15
141
13294
1217273
67
100116
101
122
133
109
152
144
136
126
104
102
108118
132139
142
98
124
95
87
85
86
81
45
5230
59
57
5853
42
54
32
2226
16
KEYGeneral findspot
Coin
BulletBuckle
MountGrenade
Button
N
0 50 m
Illus. 2—All metal-detector findspots in Luttrell’s Pass metal-detection survey (after Sabin & Donaldson 2005).
1 NGR 178731, 2285518; height 90 m OD; Metal Detection Reg. No. R002.

Witnesses to history: a military assemblage from the 1691 Aughrim battlefield
109
A number of finds recovered during the survey were almost certainly deposited on 12 July 1691. These include seven lead bullets, a probable grenade fragment and up to four contemporary coins (Illus. 3–5). Additional items, such as a buckle (Illus. 6) and a lead badge, may also date from the battle. Analysis of the lead bullets revealed that the majority had been fired. They were weighed and measured to determine the most likely weapon of origin based on what is known of late 17th-century firearms. The bullets indicated that weapons such as pistols and carbines (a firearm shorter and lighter than a musket, used by light troops) appeared to dominate the assemblage. Both of these weapons were carried principally by mounted troops, be they cavalry or dragoons. In addition, a fragment of a metal sphere was identified as a probable hand-grenade fragment. Grenades at this time were round and hollow, the interior being filled with powder. They were carried by special troops called grenadiers, who used them by lighting a fuse at the top of the bombs and throwing them at the enemy. They were notoriously dangerous and in open field conditions could often cause injuries to friends as well as enemies. As for the coinage, though heavily corroded, one was positively identified as a copper gun-money shilling dating to 1689, with three further possible gun-money coins in the assemblage. Gun money was base metal coinage issued by the Jacobites during the course of the conflict.
Illus. 3—The grenade fragment (Find No. R002:97) and lead shot recovered from Luttrell’s Pass on the Aughrim Battlefield (Rubicon Heritage Services Ltd).

Fragments of Lives Past
110
Illus. 4—Schematic illustration of the Aughrim grenade fragment (Eavan O’Dochartaigh, Rubicon Heritage Services Ltd).
Illus. 5—James II 1689 gun-money shilling (R002:21) from Luttrell’s Pass (Rubicon Heritage Services Ltd).

Witnesses to history: a military assemblage from the 1691 Aughrim battlefield
111
How can this small number of battle-related objects inform us about what happened in these fields in 1691? To discover this, it is necessary to review the primary accounts of the battle in combination with the results of the analysis. The archaeological material was recovered in a position that was to the left and rear of the Jacobite line throughout much of the fighting, and traditionally the location of a large amount of Jacobite cavalry. The front line in this sector consisted of troops stationed in and around Aughrim Castle, which covered the causeway where the Williamites eventually broke through. The Reverend George Story is perhaps the best-known chronicler of the war; he travelled with the Williamite army for much of the campaign, leaving a record of events as he saw them. He described the ferocious fighting along the causeway and at Aughrim Castle, which eventually led to the forcing of the causeway. As the Jacobite left began to disintegrate, he states:
‘So that notwithstanding all their advantages of Hedges and Ground, Sun and Wind, they were forced to quit one advantageous Post, and after that another, till being beat from Ditch to Ditch, they were driven up to the Top of the Hill of Kilkommodon, where their Camp had laid, which being levelled, and they exposed to our Shot more openly, they began now to run down right; the Foot towards a great Bogg behind them on their left, and the Horse on the Highway towards Loughreagh . . . ’ (Story 1693, 134)
Illus. 6—The 17th-century shoe buckle (R002:99) from Luttrell’s Pass (Rubicon Heritage Services Ltd).

Fragments of Lives Past
112
Despite this initial Jacobite collapse towards the left and centre, the men on the right continued to fight on for a considerable time. When they eventually broke, the Jacobites ‘fled all out of the Field; their Foot were miserably slaughtered by our Horse and Dragoons, as they made towards the Bogg’ (Story 1693, 134–5) (Illus. 7). Captain Robert Parker was another Williamite commentator present at the battle. He describes how the Williamite horse ‘made a great slaughter of their Foot in the pursuit, which we continued till night came on’ (Parker 1746, 31).
Following the clearing of the battlefield the Williamite forces would have settled down to strip the bodies of all valuables, including their clothing. This activity probably took place during dusk or after night had fallen. Story described the post-battle scene:
‘ . . . looking amongst the Dead three days after, when all our own and some of theirs were buried, I reckoned in some small Inclosures 150 in others 120 &c. lying most of them by the Ditches where they were Shot; and the rest from the top of the Hill where their Camp had been, looked like a great Flock of Sheep, shattered up and down the Countrey, for almost four miles round . . .’ (Story 1693, 137)
Illus. 7—Adaptation of the Reverend George Story’s map of the Battle of Aughrim, with letters and text adapted for ease of reference. The bog to which the Jacobites fled is the one marked ‘F’ in the upper right quadrant. The position of the various troop formations is indicated by rectangular blocks (Jonathan Millar, Rubicon Heritage Services Ltd, after Story 1693).

Witnesses to history: a military assemblage from the 1691 Aughrim battlefield
113
These accounts give us two key pieces of information. First, we know that when the Jacobite lines broke, many of the infantry attempted to escape the Williamite cavalry and dragoons by running for a large bog located to the left and rear of the Jacobite positions, behind where Luttrell’s Pass is currently located. Secondly, we know that the Williamites stripped the bodies of the dead Jacobites to retrieve valuables: that they were naked is attested by Story’s reference to their appearing like ‘a great Flock of Sheep’, owing to the pale skin of the fallen.
The location of the metal-detection survey and the small number of military artefacts recovered make it clear that this position was not a scene of intense fighting during the battle. It may well have been the location of some of Luttrell’s cavalry, but as they do not appear to have been heavily engaged here before retreating, they would have left behind little in the way of artefacts. What we can say with some degree of confidence is that there was fighting in this field. Although the fired bullets may have travelled some distance before being deposited in the ground, it is probable that a number were discharged at a downward angle close to their eventual findspot. The presence of the probable exploded hand grenade (Illus. 4 & 5) confirms that infantry traversed the field on the day of the battle. With this and the historical information, it is possible to suggest an interpretation of this small military assemblage, based on an analysis of the objects in conjunction with the contemporary sources. Let us imagine for a moment a possible scenario.
A soldier’s tale
It’s late in the day and the battle is lost for the Jacobites. There is nothing left for the men to do except try to save themselves. A group race away from the carnage, desperately trying to find safety. Their best hope is the bog they noticed before the battle. It shouldn’t be too far away and it offers some hope of escape—at least the horses cannot follow them there. Where are the damned Jacobite cavalry? The men are defenceless without them, especially now that the Williamites are pouring their own cavalry and dragoons into the pursuit. They are closing in. One of the men risks a glance back; they are thundering after them, right on their tails. The group behind haven’t made it, they hear their shouts and cries as they are cut down to a man. But there isn’t far to go. Only a few hundred feet and they’ll be safe, at least for now. Most of the men have thrown away their weapons and equipment to run faster, straining every muscle to get clear.
Their hearts beat like never before, as they are literally in a race for their lives. The firing moves closer and one of the group crumples and falls. The Williamite dragoons are shooting at them now. They’re not going to make it. Breathless, a Jacobite grenadier decides to make a desperate stand. He turns to face the oncoming riders. Reaching for his last grenade, he fumbles to light the fuse. With his final reserves of energy he hurls it at the Williamites, who scatter as the deadly weapon wings its way towards them. He watches as the grenade explodes harmlessly, resigned to his fate. The cavalry are on him now and the end is quick. The Williamite trooper manoeuvres his mount at a fast trot to get into position, dispatching the grenadier with a single blow of his sword. He looks around for his next target.

Fragments of Lives Past
114
It is now dusk and the Williamite infantry have arrived in the area. They’re weary and exhausted from the terrible fighting of the day, but they are victorious. All around are the bodies of Jacobites who did not survive the rout. They lie in ones and twos across the field, but all is now quiet; the battle is over here. The campaign has been a physical drain on all of these men, but now is their opportunity for reward. They begin to search the bodies for valuables, hoping to come across an officer or person of rank. Night is falling fast and soon more men will arrive to see if there is anything to be had. They hurry to check as many bodies as they can. In the half-light they fumble through the bloodied clothes of the Jacobites, but in their haste some coins fall loose into the churned-up field. They are probably Jacobite gun money and not worth the time it would take to retrieve them; better to move on to the next body, to see if they have better luck.
Conclusion
This is one potential interpretation for the events that led to the deposition of the small military assemblage recovered at Luttrell’s Pass during the archaeological works on the M6, and clearly it is conjecture. However, it does highlight just how valuable even a seemingly insignificant assemblage of battlefield objects can be if they are retrieved and recorded correctly. This material forces the observer to think about how these items were deposited and to look again for explanations in the primary accounts. Perhaps their greatest value is that they refocus our attention on the individual in a battle that involved tens of thousands, every one of whom had different and very personal experiences on that bloody day.
Acknowledgements
Thanks to Alison Kyle for providing analysis of the buckles, buttons and a decorative mount. Jonathan Millar, Eavan O’Dochartaigh, Sara Nylund and Louise Baker prepared the graphics for publication. This work was carried out as part of the archaeological works associated with the construction of the M6 Galway–Ballinasloe motorway and analysis was funded by Galway County Council and the NRA. Special thanks to NRA Archaeologist Jerry O’Sullivan for the opportunity to analyse this important assemblage.