
Fourth Brigade Fort Bragg, North Carolina 28310 … Courses, Canopy Tours, Commercial Climbing...
42
Department of the Army 1 August 2014 Fourth Brigade United States Army Cadet Command Fort Bragg, North Carolina 28310-5000 Junior Reserve Officer’s Training Corps FOURTH BRIGADE JROTC HIGH ROPES STANDARD OPERATING PROCEDURES PROPONENT: The proponent of this publication is the 4th Brigade, US Army Cadet Command. Comments should be sent directly to 4th Brigade, US Army Cadet Command, ATTN: ATCC-DDJ, Fort Bragg, North Carolina 28310-5000. ANNEX: A. Glossary B. Equipment C. Rope Log and Equipment Record D. Daily Use Checklist E. Best Practices F. ACCT Builder/Inspector Vender G. Deliberate Risk Assessment Worksheet H. Safety Inspection checklist I. Certification Checklist J. Fort Jackson High Ropes Manual DISTRIBUTION: All JROTC programs in North Carolina, South Carolina, Virginia, West Virginia, Washington DC, Maryland and Delaware. This document is available on the 4th Brigade Web site at: http://www.ajrotc.us 1. References. a. CCR 145-2, Organization, Administration, Operation, Training and Support b. CCR 385-10, Cadet Command Safety Program c. 4th Brigade Rappelling SOP (14 Aug 13)
Transcript of Fourth Brigade Fort Bragg, North Carolina 28310 … Courses, Canopy Tours, Commercial Climbing...
Department of the Army 1 August 2014 Fourth Brigade United States Army Cadet Command Fort Bragg, North Carolina 28310-5000
Junior Reserve Officer’s Training Corps
FOURTH BRIGADE JROTC HIGH ROPES STANDARD OPERATING PROCEDURES
PROPONENT: The proponent of this publication is the 4th Brigade, US Army Cadet Command. Comments should be sent directly to 4th Brigade, US Army Cadet Command, ATTN: ATCC-DDJ, Fort Bragg, North Carolina 28310-5000. ANNEX:
A. Glossary B. Equipment C. Rope Log and Equipment Record D. Daily Use Checklist E. Best Practices F. ACCT Builder/Inspector Vender G. Deliberate Risk Assessment Worksheet H. Safety Inspection checklist I. Certification Checklist J. Fort Jackson High Ropes Manual DISTRIBUTION: All JROTC programs in North Carolina, South Carolina, Virginia, West Virginia, Washington DC, Maryland and Delaware. This document is available on the 4th Brigade Web site at: http://www.ajrotc.us 1. References.
a. CCR 145-2, Organization, Administration, Operation, Training and Support b. CCR 385-10, Cadet Command Safety Program c. 4th Brigade Rappelling SOP (14 Aug 13)
2
ATCC-DDJ 4TH BRIGADE JROTC HIGH ROPES PROCEDURES
d. FM 7-22 Army Physical Readiness Training (Oct 2012) e. Association for Challenge Course Technology: ACCT Standards for Challenge
Course & Canopy / Zip Line Tours (8th edition) f. COPE Manual
2. Purpose. To provide a safe training environment and guidance on conducting High/Low Ropes and Challenge Course Adventure Training for JROTC Cadets.
3. Summary. Challenge Courses and High/Low Ropes Courses provides an excellent "Experiential Learning" opportunity to develop cadet team work, communications, leadership, trust and self confidence. However, JROTC Instructors find themselves in a complex liability situation because they operate in civilian and military environments and the rules are different. 4. Responsibilities: a. Fourth Brigade JROTC will ensure sites selected to host Junior Cadet Leadership Challenge other than military bases are compliant with ACCT and if required ASTM standards before authorizing the use of their challenge course activities. Brigade will provide resources for staff training of cadre selected to operate challenge course activity. Brigade will approve high ropes/challenge course risk assessment before training is conducted.
b. Fourth Brigade will ensure rope training is only conducted by Brigade certified trainers. 4th Brigade will certify individuals who meet one of the following criteria:
(1) An instructor who completes one of the 4th Brigade Rope Certification courses
which certifies them as a Rope Trainer (Level I or Level II). (a) Level I Trainer: Certification is designed for Instructors who are new to challenge
course and are seeking the training needed to facilitate a Challenge Course Program. This certification also enables the instructor to grow as they gain more experience. This certification will last for 1 year.
(b) Level 2 Trainer: This certification is for anyone seeking an advanced level of
certification. This level reflects the instructor experience and training which will provide leadership to other cadre; it is not designed to prepare the instructor to train other cadre. This certification will last for 3 years.
3
ATCC-DDJ 4TH BRIGADE JROTC HIGH ROPES PROCEDURES
(c) Course Manager: This certification is designed to give the Course Manager the
ability to Train others, perform internal inspections and maintenance, mentor cadre, and develop plans for Ropes trainings. Every challenge course should have a Course Manager supervising but at a minimum a level II must be present. This certification lasts for 3 years. An instructor that has certifications from either any ACCT vender or any Boy Scouts Copes courses (level I or higher). If an instructor has these qualifications and can demonstrate these skills they can attend a one day Brigade Recertification Course. These instructors will have to pass all requirements in order to be Brigade certified. These courses are held during the normal Rope Certification Courses which are conducted yearly. Army schools or special unit training such as Special Forces, Ranger School, Rappel Master, Recruiters or Air Assault School alone is not sufficient. (3) Course Trainer Currency: For instructors to maintain currency with their rope certification they must perform duties as a Rope Trainer every six months or they recertify annually with at least a Level II. Rope Trainers must execute all critical tasks every year which will be witnessed and certified by another Certified Rope Trainer noted and signed on a Memo. c. Senior Army Instructors will:
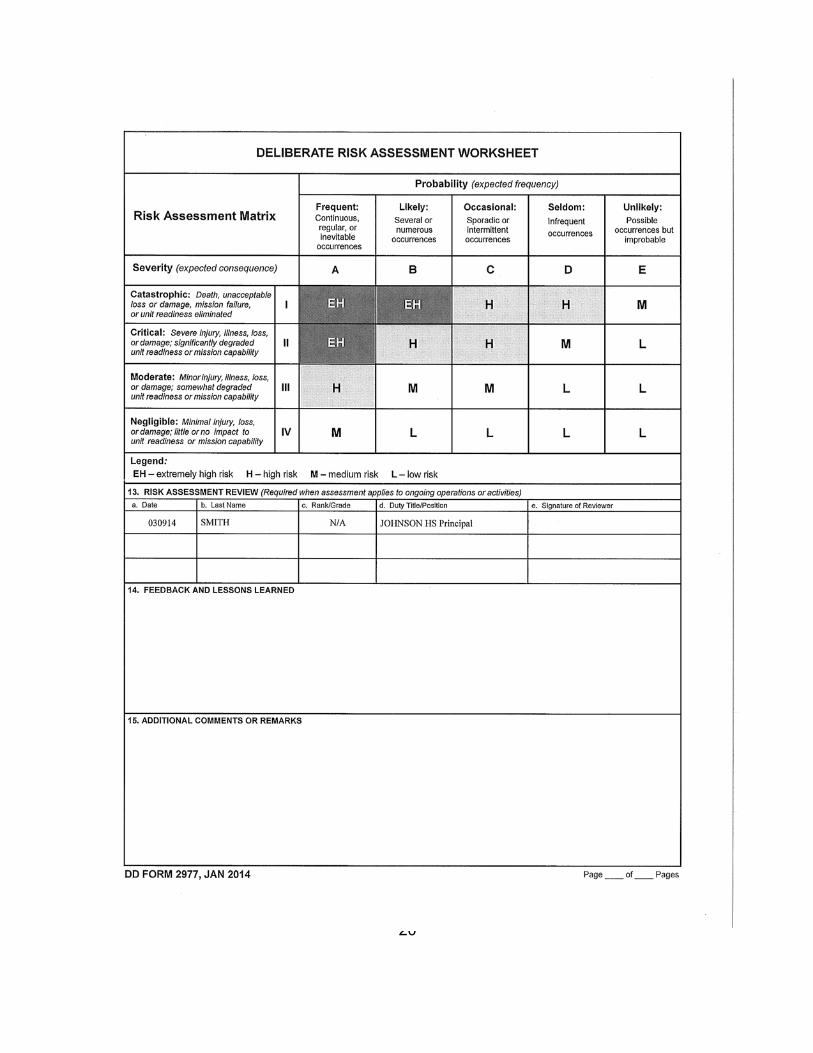
(1) Provide to Brigade a request to conduct high ropes training along with the annual safety inspection of the site or tower, and Deliberate Risk Assessment Worksheet (DRAW). See Appendix G.
(2) Submit a copy of the instructors 4th Brigade Ropes Trainer Certificate to 4th Brigade. Individuals who are not ropes certified may request training by submitting a memo to 4th Brigade. Rope trainer certification training will be conducted annually. (3) Verify the ACCT or ASTM compliance of the facility and forward to 4th Brigade for approval. If the school has a habitual relationship with a YMCA or Boy Scout Camp an annual recurring use DRAW may be submitted.
(4) Maintain a file copy for both the annual safety inspection, the instructors ropes certification certificate and DRAW.
(5) Ensure while training; cadre and cadets wear an approved protective helmet and harnesses. Cadets will not wear load-carrying equipment (LCE) or carry weapons while conducting ropes training. (6) Ensure only cadre trained by a certified Rope Trainer will act as belay safety while conducting ropes training.
4
ATCC-DDJ 4TH BRIGADE JROTC HIGH ROPES PROCEDURES (7) To successfully operate each ropes lane from an approved site, it will require numerous Brigade certified ropes trainers depending on the number of elements in that site specific course. The rope trainers will be responsible for cadet hook ups; the other Ropes Trainer level I will be located at the base and centered on the training site supervising the belaying of cadets and overall safety. All courses must have a Level II or higher Brigade certified OIC or NCOIC on site. 5. Requirements. The following requirements will be adhered to when conducting rope training with cadets. a. Challenge Courses are primarily used as a JCLC activity and can only be approved by Brigade. High Ropes, Challenge Courses and Zip Lines are considered Medium Risk training and cannot be mitigated any lower. Units are required to submit their Deliberate Risk Assessment Worksheet (DRAW) to 4th Brigade for approval prior to conducting any Challenge Course type training. JCLC Camp Commandants should sign all risk assessment as the reviewer before forwarding to 4th Brigade. Deliberate Risk Assessment Worksheets should be forwarded to brigade at least 30 days before the training event. Only JROTC personnel who have been certified by 4th Brigade and Brigade approved rope vendors will conduct rope training. b. Rope training must follow ACCT standards as close as possible. Rope training can only be conducted on ACCT approved sites which have been inspected by an approved ACCT vender as outlined in Appendix F. Rope site inspections are an annual requirement. c. All Cadets must use only brigade approved equipment as outlined in Appendix B. d. Only cadre who are Brigade Certified Level I Rope Trainers may be tasked for setting up the rope site, inspecting equipment, "hooking up" cadets, and supervising their training. A Level II or higher must be on site and is overall responsible.
e. MILITARY BASE: Operation of a Ropes Course on a Military Base is permissible if the installation range control/range safety requirements are met. Range Control and Director of Public Works are responsible for maintenance and annual inspections of the facility. The Range Office is responsible to insure all elements comply with Army Safety requirements. JROTC units desiring to utilize the high ropes course at FT Jackson must request site utilization approval through 4th Brigade and follow all required Brigade Rope SOP guidelines.
5
ATCC-DDJ 4TH BRIGADE JROTC HIGH ROPES PROCEDURES
f. OFF BASE: Three situations apply: Use of a commercial facility with your cadets; Use of elements on school or county park property and; Operating a JROTC program on third party property i.e. Boy Scout Camp or YMCA. In all the above you are subject to the National Standards as established by the Association for Challenge Course Technology (ACCT) and your state laws. Junior ROTC instructors are not qualified to operate a challenge course by virtue of previous military experience.
(1) Taking cadets to a commercial Zip Line, Ropes Course, Climbing/Rappelling Tower, Indoor Climbing Gym is the easiest option and most expensive. Instructors must have approval from Brigade and insure the vender is ACCT or state law compliant. The site should have a certificate of inspection within the last 12 months and the Course Manager should assure you his staff is trained to the appropriate ACCT standards. The JROTC unit must use the vender’s equipment and staff.
(2) School or county park elements must be inspected annually by qualified personnel. This is a responsibility of the owner. This may be the school system safety office, the county civil engineers office, a state inspector or ACCT vender inspector. In the case of high elements and towers the ACCT inspection may still be an additional requirement to the school or county inspection. All elements must meet ACCT and State Code. A school’s own ropes course is for the school and is considered a school activity for their students and not a JROTC activity.
(3) Third party courses: Junior Cadet Leadership Challenge (JCLC) may be conducted on Boy Scout, YMCA, Church Camps, or similar locations. In contracting the JCLC facility, 4th Brigade will verify ACCT compliance of the camp. JROTC programs are not allowed to use these facilities on their own. Instructors selected to staff JCLC events must be brigade certified. A Level 2 Instructor or Course Manager must be present on the course when it is in operation.
(4) High ropes and tower activities that include rappelling as part of the program are subject to the requirements of 4th Brigade Rappelling SOP. This includes the equipment requirements which are more restrictive than ACCT.
6
ANNEX A to 4th BRIGADE JROTC HIGH ROPES PROCEDURES DTD 1 AUG 14
GLOSSARY
Association for Challenge Course Technology (ACCT): The industry standards organization for Aerial Adventure Trekking Parks, Challenge Courses, Commercial High Ropes Courses, Canopy Tours, Commercial Climbing Structures and Zip Line Tours. ACCT provides standards and information relative to design, performance, inspection, operation, training and certification.www.infoacct.org American Society for Testing and Materials (ASTM): is an international standards organization that develops and publishes voluntary consensus technical standards for a wide range of materials, products, systems, and services. COPE: Challenging Outdoor Personal Experience: Term utilized by the Boy Scouts. Level 1 Rope Instructor: An instructor who possess all staff competencies for a specific site. Level 1 can apply competencies to routine, familiar program delivery situations under the supervision and with the support of a more experienced and knowledgeable staff. Full certification requires a minimum of 24 hours instruction, written test and skills demonstration. This certification is only good for 1 Year. Level 2 Rope Instructor: An instructor who possess all staff competencies for a specific site. Level 2 shall have the knowledge and skill to solve most non-routine situations and provide leadership to less experienced and less knowledgeable staff. Full certification requires a minimum of 24 additional hours of instruction, testing and skill demonstration. This certification is good for 3 years. Course Manager: An Instructor who has at a minimum Level 2+ and extensive experience in challenge courses and high ropes. This certification is designed to give a Course Manager the ability to Train others, write Local Operating Procedures, perform internal inspections and maintenance, mentor staff, and develop plans for Ropes trainings. They have overall administrative and operational control of the course. Every challenge course should have a Course Manager supervising but at a minimum a level II must be present. This certification lasts for 3 years. Zip Line: A lifeline suspended between support structures that enables a person attached to a pulley to traverse from one point another propelled only by the force of gravity. (Requires a minimum of 3/8 inch 7 by 19 aircraft cable with three forged wire rope clamps and must be backs up at each termination.) Snap link: Snap links are used to join equipment, rope and people into a functioning system. They must be UIAA and made of steel only.
7
Locking Snap links are the only snap links authorized for high ropes courses. Locking snap links have a locking mechanism with a threaded sleeve on the gate. No spring loaded locking snap links are authorized. Rope: Most important items of equipment. All ropes must be kermantle. Minimum tensile strength for an 11-mm (or 7/16th) rope for military use is 5000 lbs. 2 Types: a) Static Rope – Consist of an inner core and an outer sheath. Easiest to work with less friction. Most often used when you do not expect a dynamic fall. b) Dynamic Rope – Also consist of an inner core and an outer sheath. Dynamic ropes should be used on any element that you anticipate a dynamic fall. c) There is no way to identify a static rope from a dynamic rope unless it is marked by the person that purchased the rope from the vendor. Belay Safety: Cadre certified to conduct ropes training are responsible for supervising belay personnel. Challenge Course: A facility or facilities consisting of one or more elements that challenge participants including rappel/climbing towers, ropes courses, zip lines, canopy tours, or aerial adventure/trekking parks.
8
ANNEX B to 4th BRIGADE JROTC HIGH ROPES PROCEDURES DTD 1 AUG 14
EQUIPMENT Ropes Specifications All cordage used for climbing (climbing ropes, accessory cord, and webbing) must be designed for climbing and used according to the manufacturer’s recommendations. All dynamic climbing ropes must be UIAA- or CE-approved. All static ropes used for rappelling must have a tensile strength (breaking strength) rating of at least 22.2 kilo Newtons (5,000 pounds) when new. A diameter of 7⁄16 inch or 11 millimeters is recommended for static rappelling ropes; every climbing rope must have a minimum diameter of 10.5 millimeters. All ropes and nylon webbing must be new when procured. Use of three-strand rope is prohibited. Webbing must be designed for climbing and must have a minimum breaking strength of 15.6 kilo Newtons (3,500 pounds) when new.
Both dynamic and static ropes are acceptable for most dynamically belayed elements. Dynamic rope or another shock-absorbing system is recommended for reducing the force generated during diving activities such as jumping from the confidence pole.
Care and Maintenance ● Rope Inspection Before each day’s use, perform an inch-by-inch hand and eye inspection of every rope. Search for cuts or abrasions, puffs of fiber, soft or hard spots, lumps, dirt, petroleum or chemical contamination, or fused areas that are smooth and slick. Retire any rope that is of questionable reliability. Tie a figure eight on a bight at one end of the line to indicate that the rope has been inspected. ● General Rope Care - To prevent them from fraying, fuse the ends of a new rope by holding them above a flame. Take care not to apply heat to any other portion of the rope. Perform an inch-by-inch hand and eye inspection of every belay rope before each day of use. - Never step on a rope. Dirt ground into the fibers can damage and weaken the rope. - Never drag a rope along the ground. Rock crystals can work into a rope and slowly damage the fibers. - Never allow a rope to run over any sharp edge, especially if the rope is bearing a load. - Never run a rope over another nylon rope or webbing. Friction between the two may generate enough heat to melt the fibers. - Never leave a rope stretched or under tension for an extended period of time. - Keep rope dry, if possible, and air-dry wet rope before storing it. Wet ropes have a lower minimum breaking strength. - Nylon itself will not mildew, but organic materials such as lichen and mosses may become attached to the rope and produce mildew, which deteriorates rope. - Prolonged exposure to ultraviolet rays will cause a rope to deteriorate. While normal use in sunlight will cause some harm to nylon ropes, they should not be stored in direct sunlight. - Keep rope away from acids, alkalines, oils, spirits, gasoline, and lacquer thinners with the potential to destroy rope fibers.
9
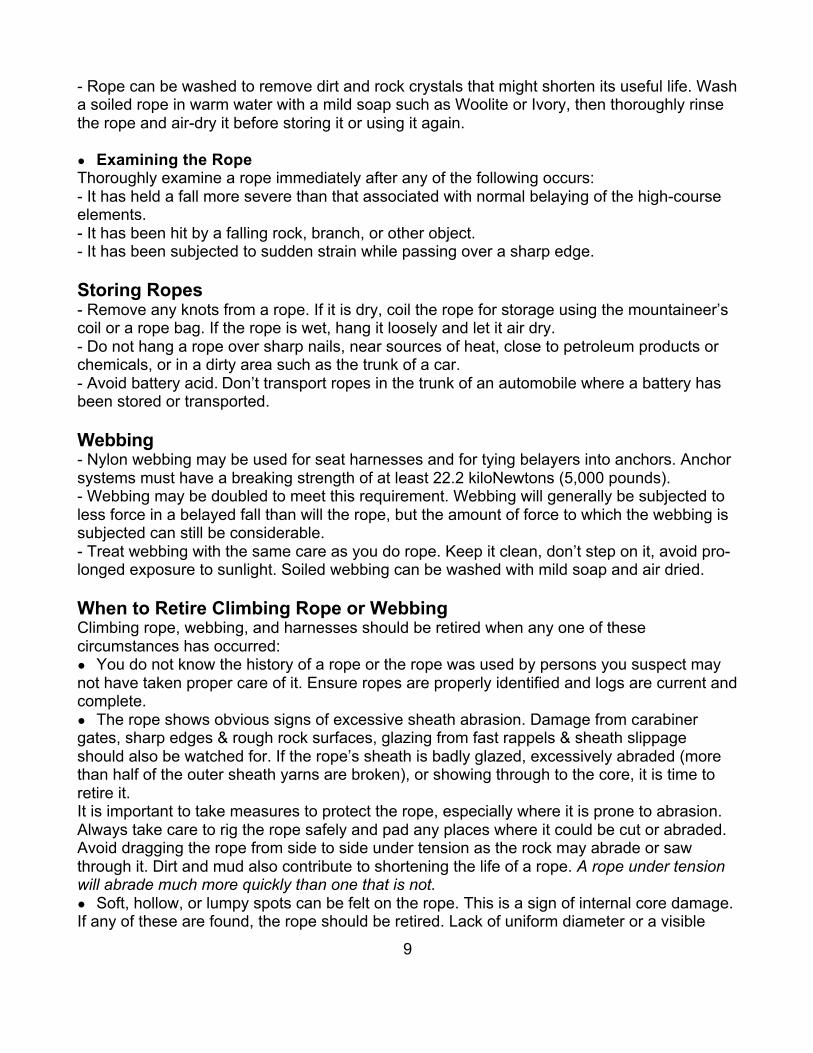
- Rope can be washed to remove dirt and rock crystals that might shorten its useful life. Wash a soiled rope in warm water with a mild soap such as Woolite or Ivory, then thoroughly rinse the rope and air-dry it before storing it or using it again. ● Examining the Rope Thoroughly examine a rope immediately after any of the following occurs: - It has held a fall more severe than that associated with normal belaying of the high-course elements. - It has been hit by a falling rock, branch, or other object. - It has been subjected to sudden strain while passing over a sharp edge.
Storing Ropes - Remove any knots from a rope. If it is dry, coil the rope for storage using the mountaineer’s coil or a rope bag. If the rope is wet, hang it loosely and let it air dry. - Do not hang a rope over sharp nails, near sources of heat, close to petroleum products or chemicals, or in a dirty area such as the trunk of a car. - Avoid battery acid. Don’t transport ropes in the trunk of an automobile where a battery has been stored or transported. Webbing - Nylon webbing may be used for seat harnesses and for tying belayers into anchors. Anchor systems must have a breaking strength of at least 22.2 kiloNewtons (5,000 pounds). - Webbing may be doubled to meet this requirement. Webbing will generally be subjected to less force in a belayed fall than will the rope, but the amount of force to which the webbing is subjected can still be considerable. - Treat webbing with the same care as you do rope. Keep it clean, don’t step on it, avoid pro-longed exposure to sunlight. Soiled webbing can be washed with mild soap and air dried. When to Retire Climbing Rope or Webbing Climbing rope, webbing, and harnesses should be retired when any one of these circumstances has occurred: ● You do not know the history of a rope or the rope was used by persons you suspect may not have taken proper care of it. Ensure ropes are properly identified and logs are current and complete. ● The rope shows obvious signs of excessive sheath abrasion. Damage from carabiner gates, sharp edges & rough rock surfaces, glazing from fast rappels & sheath slippage should also be watched for. If the rope’s sheath is badly glazed, excessively abraded (more than half of the outer sheath yarns are broken), or showing through to the core, it is time to retire it. It is important to take measures to protect the rope, especially where it is prone to abrasion. Always take care to rig the rope safely and pad any places where it could be cut or abraded. Avoid dragging the rope from side to side under tension as the rock may abrade or saw through it. Dirt and mud also contribute to shortening the life of a rope. A rope under tension will abrade much more quickly than one that is not. ● Soft, hollow, or lumpy spots can be felt on the rope. This is a sign of internal core damage. If any of these are found, the rope should be retired. Lack of uniform diameter or a visible
10
change in diameter resembling an hourglass shape is also a sign of damage. Often the 10 or 20 feet of rope on either end will wear out before the rest of the rope. It is acceptable to remove these damaged ends and continue to use the rest of the rope. Remember that repeated falls take a toll on the entire rope, so removing worn ends is not the same as replacing the rope. ● The rope is excessively stiff from use & age.This can make a rope difficult to knot & handle. ● The rope has come into contact with any compounds containing acids, alkalis, oxidizing agents, or bleaching compounds. Unless the chemical is specifically known to be harmless, it should be considered a contaminant. Be especially careful to avoid battery acid or fumes. ● The rope has been subjected to the kind of overload for which it was not designed. ● The rope was used for purposes other than belaying or rappelling. ● The rope has reached the life expectancy as indicated by the manufacturer. It is simply worn out from use. ● It has been used for more than 400 jumps or stressful challenge events, such as the Confidence Pole and Flying Squirrel. ● Puffs of internal fiber can be seen protruding from the cover (mantle) at any point along a kernmantle rope.
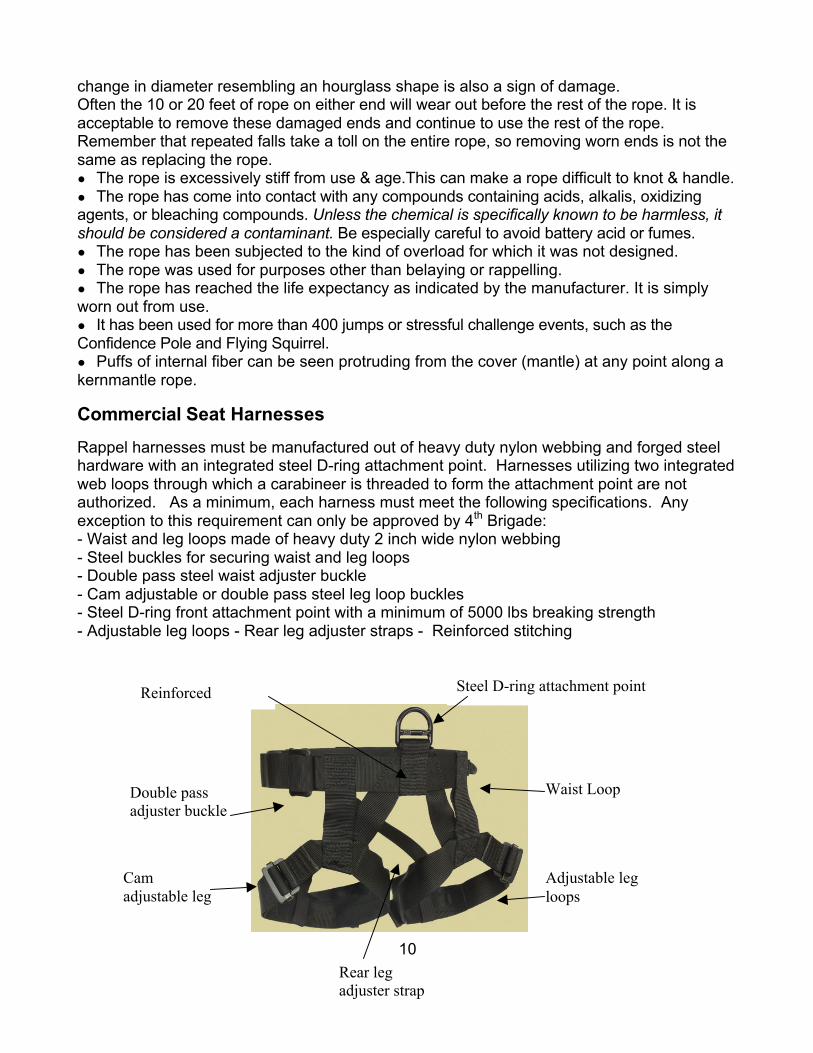
Commercial Seat Harnesses Rappel harnesses must be manufactured out of heavy duty nylon webbing and forged steel hardware with an integrated steel D-ring attachment point. Harnesses utilizing two integrated web loops through which a carabineer is threaded to form the attachment point are not authorized. As a minimum, each harness must meet the following specifications. Any exception to this requirement can only be approved by 4th Brigade: - Waist and leg loops made of heavy duty 2 inch wide nylon webbing - Steel buckles for securing waist and leg loops - Double pass steel waist adjuster buckle - Cam adjustable or double pass steel leg loop buckles - Steel D-ring front attachment point with a minimum of 5000 lbs breaking strength - Adjustable leg loops - Rear leg adjuster straps - Reinforced stitching
Waist Loop Double pass adjuster buckle
Steel D-ring attachment point
Adjustable leg loops
Cam adjustable leg buckle
Reinforced Stitching
Rear leg adjuster strap
11
Pulleys - Pulleys used to support a participant on a ROPE course must have a rated breaking strength of at least 5,000 pounds and be backed up. Any pulley used on a cable must have a steel sheave. Inspect pulleys before and after each use for signs of wear. Carabiners - A carabiner is a device used to secure a ROPE participant to a belay rope, or to attach a belay rope to an anchor or belay cable. ROPE specifications require that; ● Only locking or multiple-locking carabiners be used. ● Carabiners or rapid links that will be used on a steel cable must also be made of steel. ● Carabiners and rapid links must have a minimum breaking strength of at least 22.2 kiloNewtons (5,000 pounds). Care and Maintenance ● Do not drop carabiners or throw them on the ground or any hard surface. Impact could cause stress cracks not noticeable to the naked eye. ● Inspect carabiners for excessive wear, cracks, rust formation, deformities, and improperly closing gates or locking mechanisms. ● When in use, carabiner gates should always be locked and each carabiner positioned so that the gate is turned down and away from the participant’s body. Belay Devices Appropriate commercially made belay devices are all acceptable devices as long as instructors are knowledgeable and experienced in their use. ● Avoid dropping belay devices. ● Use of three-strand rope is prohibited.
Lobster Claws - A dynamic belay is much preferred over these static belay devices. In some cases, a static belay may be necessary, however. - The device referred to as lobster claws consists of 1⁄2-inch or larger multiline (stronger and adjustable) with prusik knots. - A shock-absorbing device must be used for self-belay applications, and should be used only by a ROPE staff member.
Helmets - For high-course activities, UIAA-, CE-, or ASTM- quality climbing helmets, designed to protect a climber from falling objects and swinging impacts, must be used. - They must have a chin strap that is secured when in use by participants. - A distinctive color used for the helmets of staff members will help provide immediate identification. - Any helmet that has been exposed to impact should be inspected. Color-Coding Equipment - Color-coding the equipment to be used on each high-course event will assure that gear is not mixed up while in storage or on the course. Establish a distinctive color for each event—red for Giant’s Ladder, blue for Balance Beam, yellow for Two-Cable Traverse, etc.
12
- Use colored tape or paint on the sealed ends of belaying ropes and a stripe of paint on pulleys, carabiners, and other hardware used on an event. An inventory of the items needed for each event will ensure that nothing is forgotten when gear is moved to and from the course. - Rope, hardware, and other items too worn for further use must be retired from the ROPE course and removed from inventory and the ROPE storage area. Some of this gear—rope, in particular—can be used elsewhere in camp. Retired equipment including webbing should be destroyed, and retired rope should be cut into lengths of 12 feet or shorter. Storage Proper storage and handling of equipment will substantially increase the life span of that equipment. All items on the ROPE course that are potentially dangerous and can be easily reached by an unsupervised person should be removed from the course daily. For most low-course elements, this can be accomplished with a turnbuckle that is removed when the ROPE course is closed. These items must be stored in an orderly fashion in a secured area. Ropes, webbing, and climbing hardware should also be stored in a neat, orderly fashion in an area where they will not be contaminated by dirt or grit or be exposed to direct sunlight. A separate area for storage of ROPE equipment should be established in a camp storage building. Only the ROPE director and instructors should be allowed access to this room. The room should have no windows and it should be in a dry area. Provisions should be made for hanging coiled ropes and webbing. Individual ropes should be tagged or color-coded according to the event for which they are used. Tubs, tote boxes, or plastic garbage cans for sorting and transporting the equipment to and from the course will help control equipment loss and keep the equipment in the best possible condition.
A permanent display of worn equipment (ropes, carabiners, figure eights, webbing, etc.) permanently secured to a display board in the storeroom will help the instructors know what to look for as they inspect equipment for daily wear. Any equipment in the same or worse condition as that in the display should be retired.
**All equipment must follow manufacturer’s wear out date**

13
ANNEX C to 4th BRIGADE JROTC HIGH ROPES PROCEDURES DTD 1 AUG 14
Rappel Harness Equipment Inspection and Maintenance Log
Harness ID: ______________________ Date in Service: ________________ Brand/Model: _____________________ Strength: _______________________
Date How Used or Maintained Comments Name
14
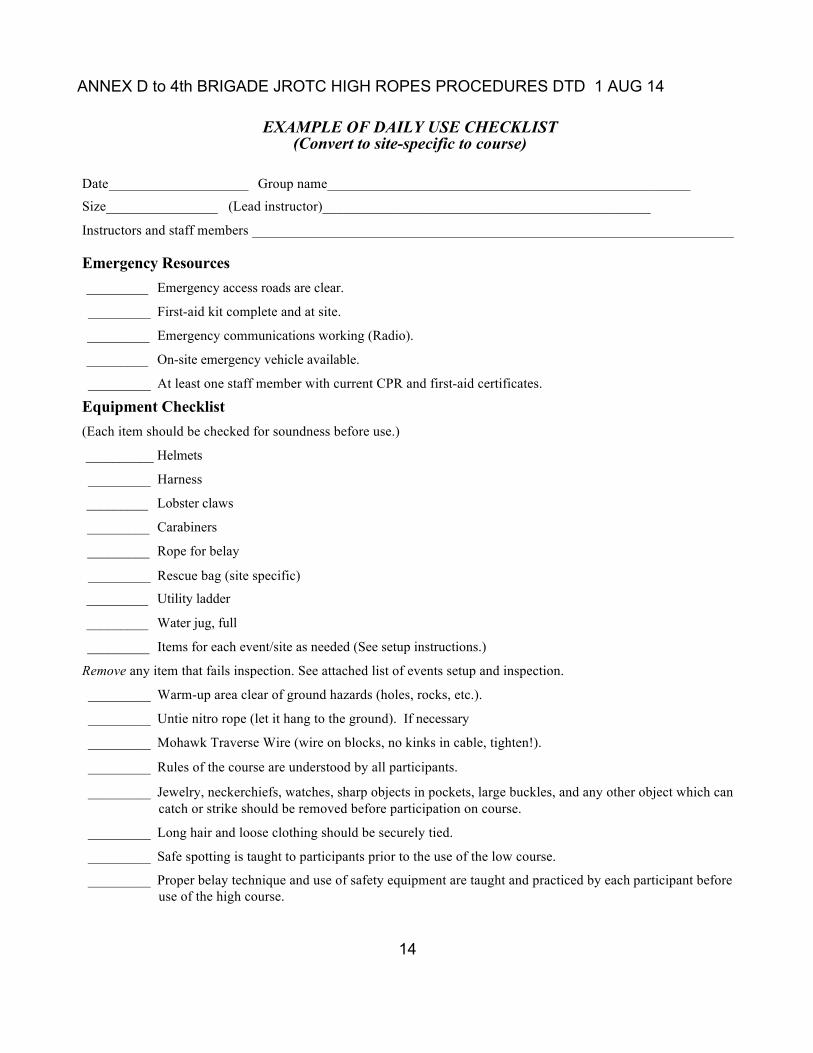
ANNEX D to 4th BRIGADE JROTC HIGH ROPES PROCEDURES DTD 1 AUG 14
EXAMPLE OF DAILY USE CHECKLIST (Convert to site-specific to course)
Date ____________________ Group name____________________________________________________
Size________________ (Lead instructor)_______________________________________________
Instructors and staff members _____________________________________________________________________
Emergency Resources
_________ Emergency access roads are clear.
_________ First-aid kit complete and at site.
_________ Emergency communications working (Radio).
_________ On-site emergency vehicle available.
_________ At least one staff member with current CPR and first-aid certificates.
Equipment Checklist
(Each item should be checked for soundness before use.)
__________ Helmets
_________ Harness
_________ Lobster claws
_________ Carabiners
_________ Rope for belay
_________ Rescue bag (site specific)
_________ Utility ladder
_________ Water jug, full
_________ Items for each event/site as needed (See setup instructions.)
Remove any item that fails inspection. See attached list of events setup and inspection.
_________ Warm-up area clear of ground hazards (holes, rocks, etc.).
_________ Untie nitro rope (let it hang to the ground). If necessary
_________ Mohawk Traverse Wire (wire on blocks, no kinks in cable, tighten!).
_________ Rules of the course are understood by all participants.
_________ Jewelry, neckerchiefs, watches, sharp objects in pockets, large buckles, and any other object which can catch or strike should be removed before participation on course.
_________ Long hair and loose clothing should be securely tied.
_________ Safe spotting is taught to participants prior to the use of the low course.
_________ Proper belay technique and use of safety equipment are taught and practiced by each participant before use of the high course.

15
_________ Staff members watch for effects of heat, cold, rain, exhaustion, hunger, bothersome insects on participants. If hazardous conditions prevail (including any sighting of lightning), the course will be closed until conditions improve.
_________ The buddy system is to be used whenever possible, especially with large groups or in poor weather conditions.
Course Activity
_________ Introductions, goals of ROPES, and ROPES philosophy are discussed with each group at the start of its ROPE experience.
_________ Stretching and warm-up precede more strenuous physical activity.
Take-Down
_________ Secure nitro rope by tying the end at least 12 feet off the ground.
_________ Disable all low-course elements.
Equipment Check-in
_________ All equipment taken down is returned to storage. (Use the hecklist.)
Daily Summary Description of the day (including weather conditions, type of group, problems, comments from participants, etc.)
*Close any event that fails inspection.
Participant Safety
16
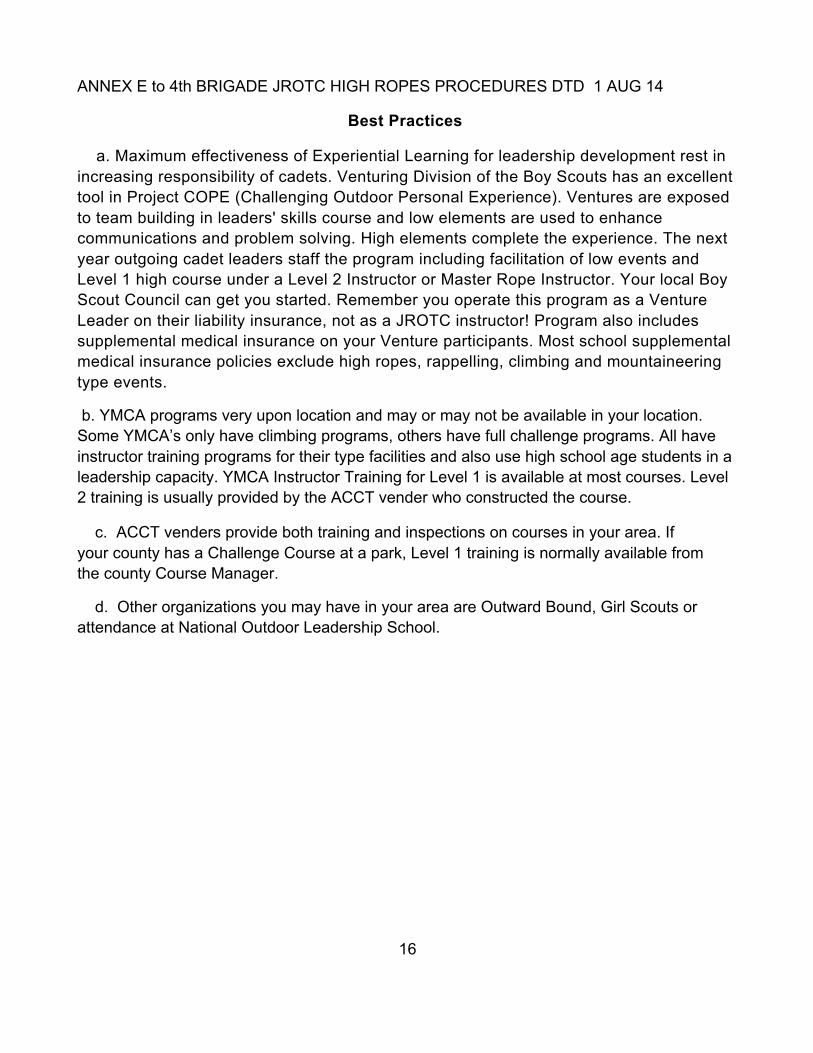
ANNEX E to 4th BRIGADE JROTC HIGH ROPES PROCEDURES DTD 1 AUG 14
Best Practices
a. Maximum effectiveness of Experiential Learning for leadership development rest in increasing responsibility of cadets. Venturing Division of the Boy Scouts has an excellent tool in Project COPE (Challenging Outdoor Personal Experience). Ventures are exposed to team building in leaders' skills course and low elements are used to enhance communications and problem solving. High elements complete the experience. The next year outgoing cadet leaders staff the program including facilitation of low events and Level 1 high course under a Level 2 Instructor or Master Rope Instructor. Your local Boy Scout Council can get you started. Remember you operate this program as a Venture Leader on their liability insurance, not as a JROTC instructor! Program also includes supplemental medical insurance on your Venture participants. Most school supplemental medical insurance policies exclude high ropes, rappelling, climbing and mountaineering type events.
b. YMCA programs very upon location and may or may not be available in your location. Some YMCA’s only have climbing programs, others have full challenge programs. All have instructor training programs for their type facilities and also use high school age students in a leadership capacity. YMCA Instructor Training for Level 1 is available at most courses. Level 2 training is usually provided by the ACCT vender who constructed the course.
c. ACCT venders provide both training and inspections on courses in your area. If your county has a Challenge Course at a park, Level 1 training is normally available from the county Course Manager.
d. Other organizations you may have in your area are Outward Bound, Girl Scouts or attendance at National Outdoor Leadership School.

17
ANNEX F to 4th BRIGADE JROTC HIGH ROPES PROCEDURES DTD 1 AUG 14
ACCT PROFESSIONAL VENDER MEMBERS Adventure Designs Anthony Curtis 1300 Narrows of the Harpeth Kingston, Springs TN 37082 Phone (615) 429-6684 [email protected] www.adventuredesignesinc.com Alpine Towers International, Inc. Joe Lackey P. O. Box 8434 Ashville, NC 28814 Phone (828) 733-0953 [email protected] www.alpinetowers.com EdVenture Builders Tony Drays 48 Timberview Drive Bloomsburg, PA 17815 Phone (570) 784-0381 [email protected] www.edventurebuilders.com The Adventure Guild, LLC Don and Kim Stock P. 0. Box 2621 Dunlap, TN 37327 Phone (423) 226-5709 [email protected] www.adventureguild.com Cornerstone Designs, Inc. Ethan Anderson P. 0. Box 8434 Ashville, NC 28804 Phone (828) 733-0953 [email protected] www.cornerstonedesignsinc.com Challenge Design Innovations Jim Wall P. 0. Box 219 Pineola, NC 28662 Phone (828) 737-6850 [email protected] www.challengedesigninnovations.com Challenge Towers Ken Jacquer 162 Timberlakes Drive Todd, NC 28684 Phone (828) 265-0602 [email protected] www.challengetowers.com

18
Signature Research, Inc. Ben Kopp P. 0. Box 6022 Doughlasville, GA 30154 phone (770) 577-8049 [email protected] www.signatureresearch.com Triple Eagle Experiences, Inc. Kevin Murphy P. 0. Box 1608 Mount Dora, FL 32756 Phone (352) 735-7708 [email protected] www.trieagle.com Universal Ropes Course Builders, Inc. Matt Miller P. 0. Box 12 Albrightsville, PA 18210 Phone (570) 722-3500 [email protected] www.universalropes.com Inner Quest, Inc. Randy Smith 34752 Charles Town Pike Purcellville, VA 20132 Phone (703) 478-1078 [email protected] www.innerQuestOnline.com New Frontiers Larry and Lori Nellist 3939 Snow Hill Rd. Dowelltown, TN 37059 Phone (615) 536-5634 [email protected] www.newfrontiers.org Phoenix Experiential Designs Tom Zartman P. 0. Box 396 Sugar Grove, NC 28679 Phone (828) 260-7864 [email protected] www.phex.bix
INSPECTIONS AND DESIGN ONLY ALSO AVAILABLE FROM
Collins Structural Consulting, PLLC Scott A. Collins PE P. O. Box 53 Creedmoore. NC 27522 Phone (919) 724-9045 [email protected]

19
20
21
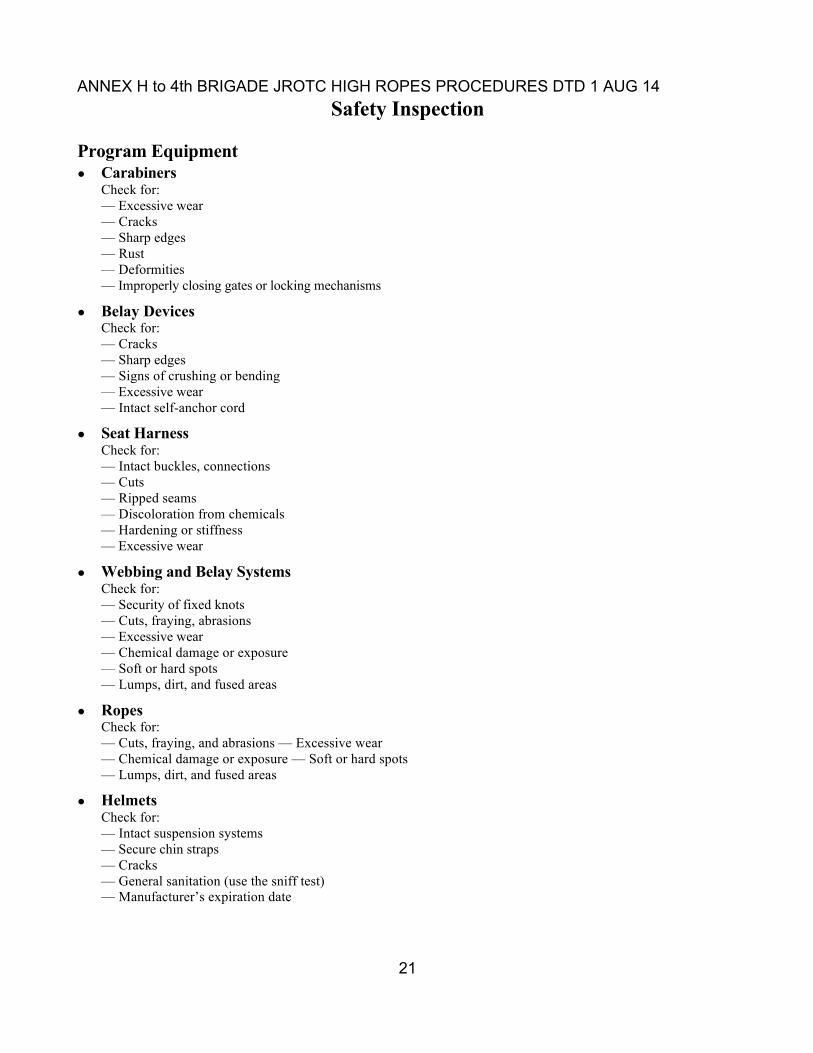
ANNEX H to 4th BRIGADE JROTC HIGH ROPES PROCEDURES DTD 1 AUG 14 Safety Inspection
Program Equipment ● Carabiners
Check for: — Excessive wear — Cracks — Sharp edges — Rust — Deformities — Improperly closing gates or locking mechanisms
● Belay Devices Check for: — Cracks — Sharp edges — Signs of crushing or bending — Excessive wear — Intact self-anchor cord
● Seat Harness Check for: — Intact buckles, connections — Cuts — Ripped seams — Discoloration from chemicals — Hardening or stiffness — Excessive wear
● Webbing and Belay Systems Check for: — Security of fixed knots — Cuts, fraying, abrasions — Excessive wear — Chemical damage or exposure — Soft or hard spots — Lumps, dirt, and fused areas
● Ropes Check for: — Cuts, fraying, and abrasions — Excessive wear — Chemical damage or exposure — Soft or hard spots — Lumps, dirt, and fused areas
● Helmets Check for: — Intact suspension systems — Secure chin straps — Cracks — General sanitation (use the sniff test) — Manufacturer’s expiration date

22
● First-Aid Equipment Check for: — Complete medical contents — Emergency and Rescue Procedures sheet — Accident/“Close Call” Report — Emergency communication means
Course Events and Structures ● Hardware
Check for: — Broken, loose, or rusted lag screws, nuts, bolts — Loose cable clips — Missing cable clips
● Cable and Chains Check for: — Splinters, barbs, or jagged edges — Kinks — Excessive rust — Signs of wear — Slippage at connections — Stretching
● Intermediate Attachments Check for: — Excessive corrosion or rust — Looseness — Damage
● Ladders Check for: — Rungs solidly secured — Splintered, cracked, or cut rungs — Bent or jammed steps, rails, or extension
mechanisms — End loops solidly secured
● Ground Check for: — Rocks — Adequate ground cover — Fallen branches — Debris, garbage — Pine cones — Glass — Other dangerous objects — Insects
● Wooden Structures Check for: — Signs of decay — Cracks — Splinters — Sounding test using a 2-pound hammer — Cuts
** All equipment must follow manufactures where out date**
23
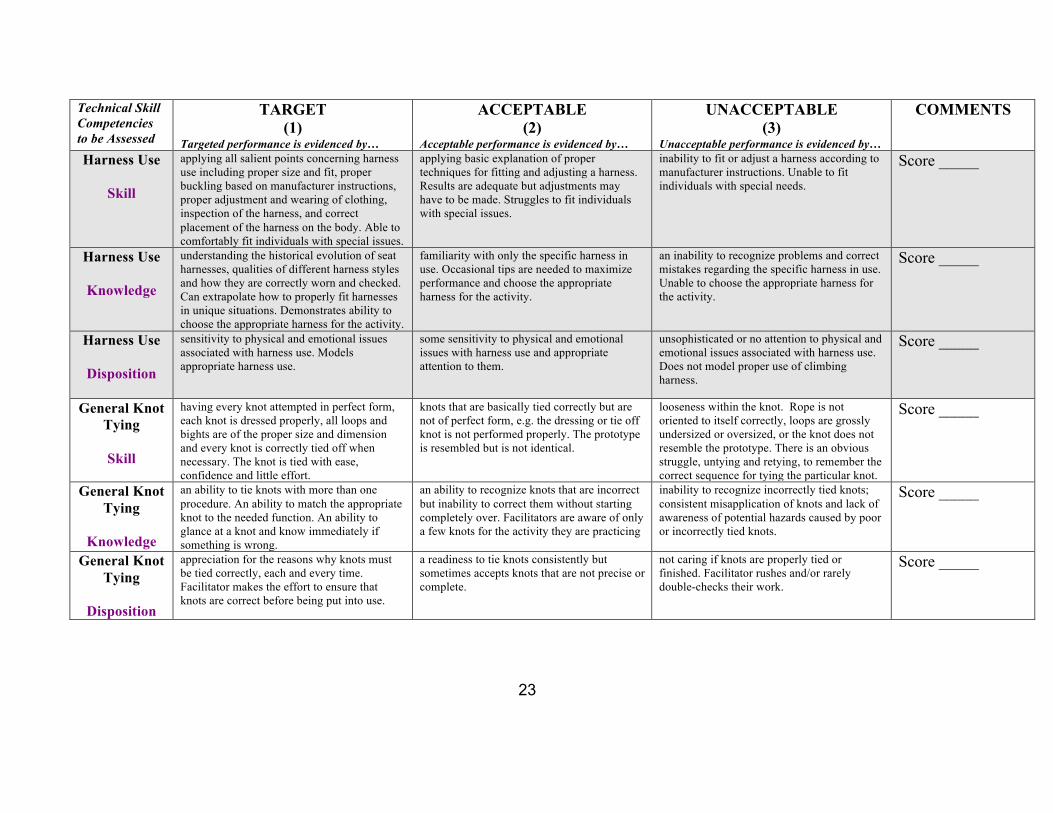
Technical Skill Competencies to be Assessed
TARGET (1)
Targeted performance is evidenced by…
ACCEPTABLE (2)
Acceptable performance is evidenced by…
UNACCEPTABLE (3)
Unacceptable performance is evidenced by…
COMMENTS
Harness Use
Skill
applying all salient points concerning harness use including proper size and fit, proper buckling based on manufacturer instructions, proper adjustment and wearing of clothing, inspection of the harness, and correct placement of the harness on the body. Able to comfortably fit individuals with special issues.
applying basic explanation of proper techniques for fitting and adjusting a harness. Results are adequate but adjustments may have to be made. Struggles to fit individuals with special issues.
inability to fit or adjust a harness according to manufacturer instructions. Unable to fit individuals with special needs.
Score _____
Harness Use
Knowledge
understanding the historical evolution of seat harnesses, qualities of different harness styles and how they are correctly worn and checked. Can extrapolate how to properly fit harnesses in unique situations. Demonstrates ability to choose the appropriate harness for the activity.
familiarity with only the specific harness in use. Occasional tips are needed to maximize performance and choose the appropriate harness for the activity.
an inability to recognize problems and correct mistakes regarding the specific harness in use. Unable to choose the appropriate harness for the activity.
Score _____
Harness Use
Disposition
sensitivity to physical and emotional issues associated with harness use. Models appropriate harness use.
some sensitivity to physical and emotional issues with harness use and appropriate attention to them.
unsophisticated or no attention to physical and emotional issues associated with harness use. Does not model proper use of climbing harness.
Score _____
General Knot Tying
Skill
having every knot attempted in perfect form, each knot is dressed properly, all loops and bights are of the proper size and dimension and every knot is correctly tied off when necessary. The knot is tied with ease, confidence and little effort.
knots that are basically tied correctly but are not of perfect form, e.g. the dressing or tie off knot is not performed properly. The prototype is resembled but is not identical.
looseness within the knot. Rope is not oriented to itself correctly, loops are grossly undersized or oversized, or the knot does not resemble the prototype. There is an obvious struggle, untying and retying, to remember the correct sequence for tying the particular knot.
Score _____
General Knot Tying
Knowledge
an ability to tie knots with more than one procedure. An ability to match the appropriate knot to the needed function. An ability to glance at a knot and know immediately if something is wrong.
an ability to recognize knots that are incorrect but inability to correct them without starting completely over. Facilitators are aware of only a few knots for the activity they are practicing
inability to recognize incorrectly tied knots; consistent misapplication of knots and lack of awareness of potential hazards caused by poor or incorrectly tied knots.
Score _____
General Knot Tying
Disposition
appreciation for the reasons why knots must be tied correctly, each and every time. Facilitator makes the effort to ensure that knots are correct before being put into use.
a readiness to tie knots consistently but sometimes accepts knots that are not precise or complete.
not caring if knots are properly tied or finished. Facilitator rushes and/or rarely double-checks their work.
Score _____
24
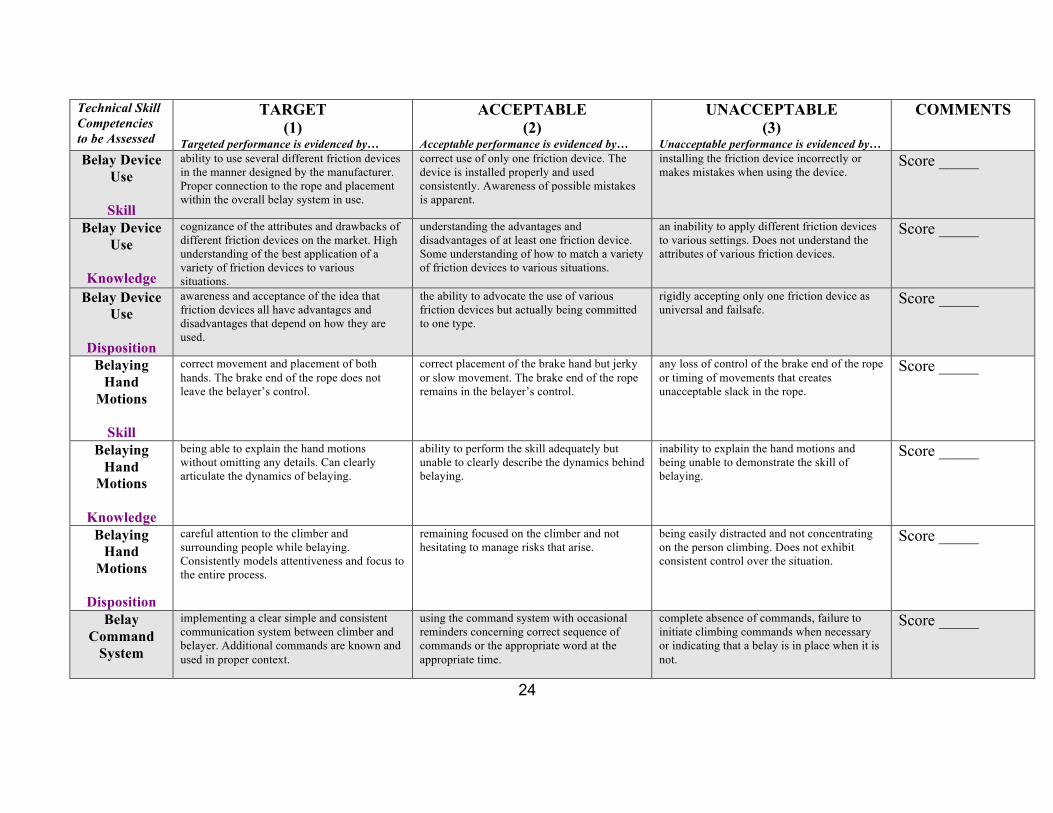
Technical Skill Competencies to be Assessed
TARGET (1)
Targeted performance is evidenced by…
ACCEPTABLE (2)
Acceptable performance is evidenced by…
UNACCEPTABLE (3)
Unacceptable performance is evidenced by…
COMMENTS
Belay Device Use
Skill
ability to use several different friction devices in the manner designed by the manufacturer. Proper connection to the rope and placement within the overall belay system in use.
correct use of only one friction device. The device is installed properly and used consistently. Awareness of possible mistakes is apparent.
installing the friction device incorrectly or makes mistakes when using the device.
Score _____
Belay Device Use
Knowledge
cognizance of the attributes and drawbacks of different friction devices on the market. High understanding of the best application of a variety of friction devices to various situations.
understanding the advantages and disadvantages of at least one friction device. Some understanding of how to match a variety of friction devices to various situations.
an inability to apply different friction devices to various settings. Does not understand the attributes of various friction devices.
Score _____
Belay Device Use
Disposition
awareness and acceptance of the idea that friction devices all have advantages and disadvantages that depend on how they are used.
the ability to advocate the use of various friction devices but actually being committed to one type.
rigidly accepting only one friction device as universal and failsafe.
Score _____
Belaying Hand
Motions
Skill
correct movement and placement of both hands. The brake end of the rope does not leave the belayer’s control.
correct placement of the brake hand but jerky or slow movement. The brake end of the rope remains in the belayer’s control.
any loss of control of the brake end of the rope or timing of movements that creates unacceptable slack in the rope.
Score _____
Belaying Hand
Motions
Knowledge
being able to explain the hand motions without omitting any details. Can clearly articulate the dynamics of belaying.
ability to perform the skill adequately but unable to clearly describe the dynamics behind belaying.
inability to explain the hand motions and being unable to demonstrate the skill of belaying.
Score _____
Belaying Hand
Motions
Disposition
careful attention to the climber and surrounding people while belaying. Consistently models attentiveness and focus to the entire process.
remaining focused on the climber and not hesitating to manage risks that arise.
being easily distracted and not concentrating on the person climbing. Does not exhibit consistent control over the situation.
Score _____
Belay Command
System
implementing a clear simple and consistent communication system between climber and belayer. Additional commands are known and used in proper context.
using the command system with occasional reminders concerning correct sequence of commands or the appropriate word at the appropriate time.
complete absence of commands, failure to initiate climbing commands when necessary or indicating that a belay is in place when it is not.
Score _____
25
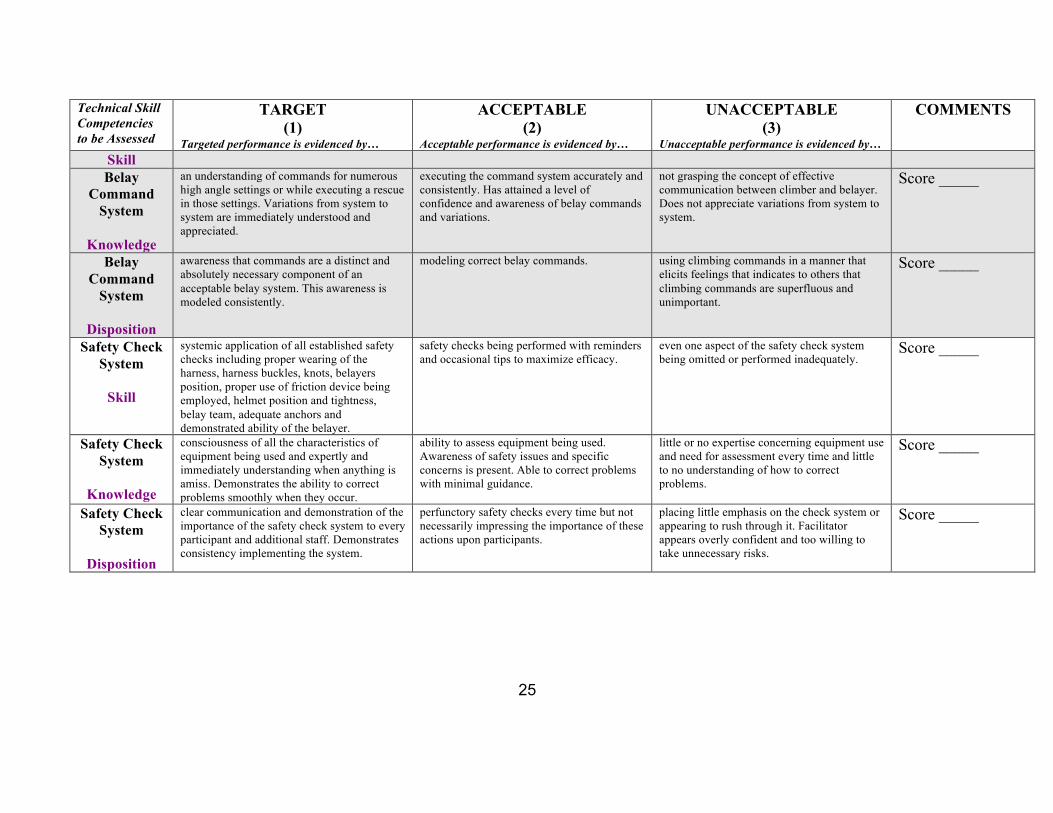
Technical Skill Competencies to be Assessed
TARGET (1)
Targeted performance is evidenced by…
ACCEPTABLE (2)
Acceptable performance is evidenced by…
UNACCEPTABLE (3)
Unacceptable performance is evidenced by…
COMMENTS
Skill Belay
Command System
Knowledge
an understanding of commands for numerous high angle settings or while executing a rescue in those settings. Variations from system to system are immediately understood and appreciated.
executing the command system accurately and consistently. Has attained a level of confidence and awareness of belay commands and variations.
not grasping the concept of effective communication between climber and belayer. Does not appreciate variations from system to system.
Score _____
Belay Command
System
Disposition
awareness that commands are a distinct and absolutely necessary component of an acceptable belay system. This awareness is modeled consistently.
modeling correct belay commands. using climbing commands in a manner that elicits feelings that indicates to others that climbing commands are superfluous and unimportant.
Score _____
Safety Check System
Skill
systemic application of all established safety checks including proper wearing of the harness, harness buckles, knots, belayers position, proper use of friction device being employed, helmet position and tightness, belay team, adequate anchors and demonstrated ability of the belayer.
safety checks being performed with reminders and occasional tips to maximize efficacy.
even one aspect of the safety check system being omitted or performed inadequately.
Score _____
Safety Check System
Knowledge
consciousness of all the characteristics of equipment being used and expertly and immediately understanding when anything is amiss. Demonstrates the ability to correct problems smoothly when they occur.
ability to assess equipment being used. Awareness of safety issues and specific concerns is present. Able to correct problems with minimal guidance.
little or no expertise concerning equipment use and need for assessment every time and little to no understanding of how to correct problems.
Score _____
Safety Check System
Disposition
clear communication and demonstration of the importance of the safety check system to every participant and additional staff. Demonstrates consistency implementing the system.
perfunctory safety checks every time but not necessarily impressing the importance of these actions upon participants.
placing little emphasis on the check system or appearing to rush through it. Facilitator appears overly confident and too willing to take unnecessary risks.
Score _____
26
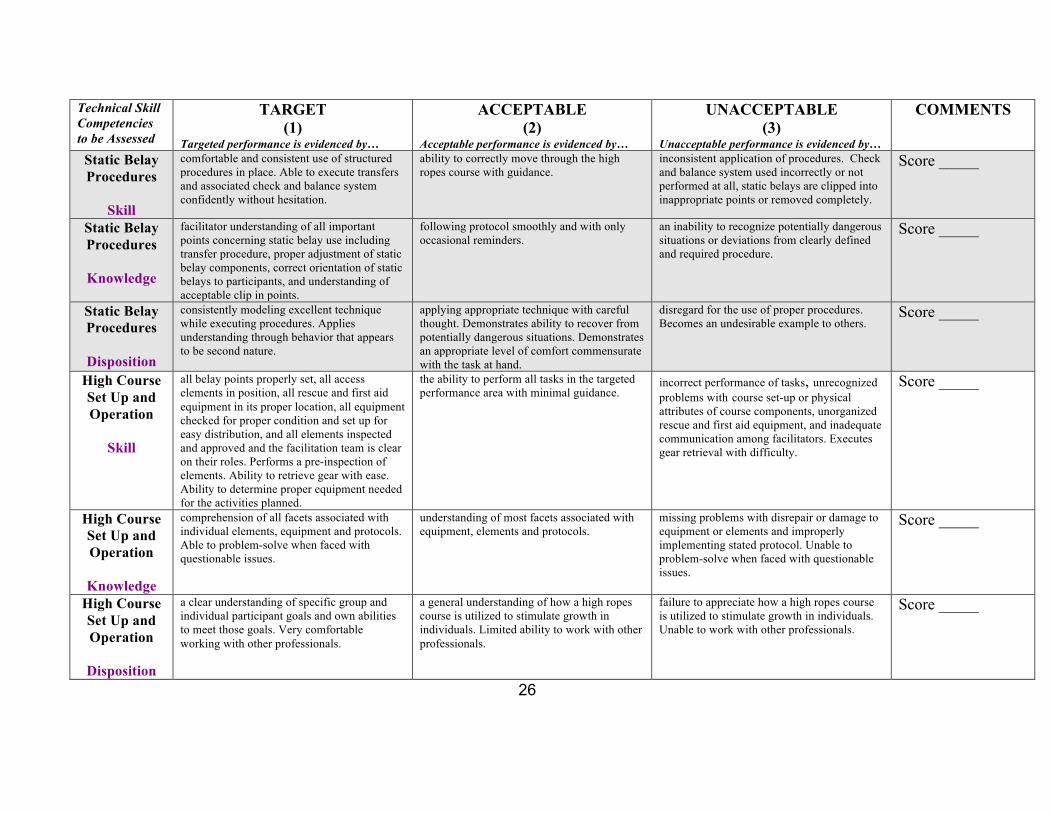
Technical Skill Competencies to be Assessed
TARGET (1)
Targeted performance is evidenced by…
ACCEPTABLE (2)
Acceptable performance is evidenced by…
UNACCEPTABLE (3)
Unacceptable performance is evidenced by…
COMMENTS
Static Belay Procedures
Skill
comfortable and consistent use of structured procedures in place. Able to execute transfers and associated check and balance system confidently without hesitation.
ability to correctly move through the high ropes course with guidance.
inconsistent application of procedures. Check and balance system used incorrectly or not performed at all, static belays are clipped into inappropriate points or removed completely.
Score _____
Static Belay Procedures
Knowledge
facilitator understanding of all important points concerning static belay use including transfer procedure, proper adjustment of static belay components, correct orientation of static belays to participants, and understanding of acceptable clip in points.
following protocol smoothly and with only occasional reminders.
an inability to recognize potentially dangerous situations or deviations from clearly defined and required procedure.
Score _____
Static Belay Procedures
Disposition
consistently modeling excellent technique while executing procedures. Applies understanding through behavior that appears to be second nature.
applying appropriate technique with careful thought. Demonstrates ability to recover from potentially dangerous situations. Demonstrates an appropriate level of comfort commensurate with the task at hand.
disregard for the use of proper procedures. Becomes an undesirable example to others.
Score _____
High Course Set Up and Operation
Skill
all belay points properly set, all access elements in position, all rescue and first aid equipment in its proper location, all equipment checked for proper condition and set up for easy distribution, and all elements inspected and approved and the facilitation team is clear on their roles. Performs a pre-inspection of elements. Ability to retrieve gear with ease. Ability to determine proper equipment needed for the activities planned.
the ability to perform all tasks in the targeted performance area with minimal guidance.
incorrect performance of tasks, unrecognized problems with course set-up or physical attributes of course components, unorganized rescue and first aid equipment, and inadequate communication among facilitators. Executes gear retrieval with difficulty.
Score _____
High Course Set Up and Operation
Knowledge
comprehension of all facets associated with individual elements, equipment and protocols. Able to problem-solve when faced with questionable issues.
understanding of most facets associated with equipment, elements and protocols.
missing problems with disrepair or damage to equipment or elements and improperly implementing stated protocol. Unable to problem-solve when faced with questionable issues.
Score _____
High Course Set Up and Operation
Disposition
a clear understanding of specific group and individual participant goals and own abilities to meet those goals. Very comfortable working with other professionals.
a general understanding of how a high ropes course is utilized to stimulate growth in individuals. Limited ability to work with other professionals.
failure to appreciate how a high ropes course is utilized to stimulate growth in individuals. Unable to work with other professionals.
Score _____
27
Technical Skill Competencies to be Assessed
TARGET (1)
Targeted performance is evidenced by…
ACCEPTABLE (2)
Acceptable performance is evidenced by…
UNACCEPTABLE (3)
Unacceptable performance is evidenced by…
COMMENTS
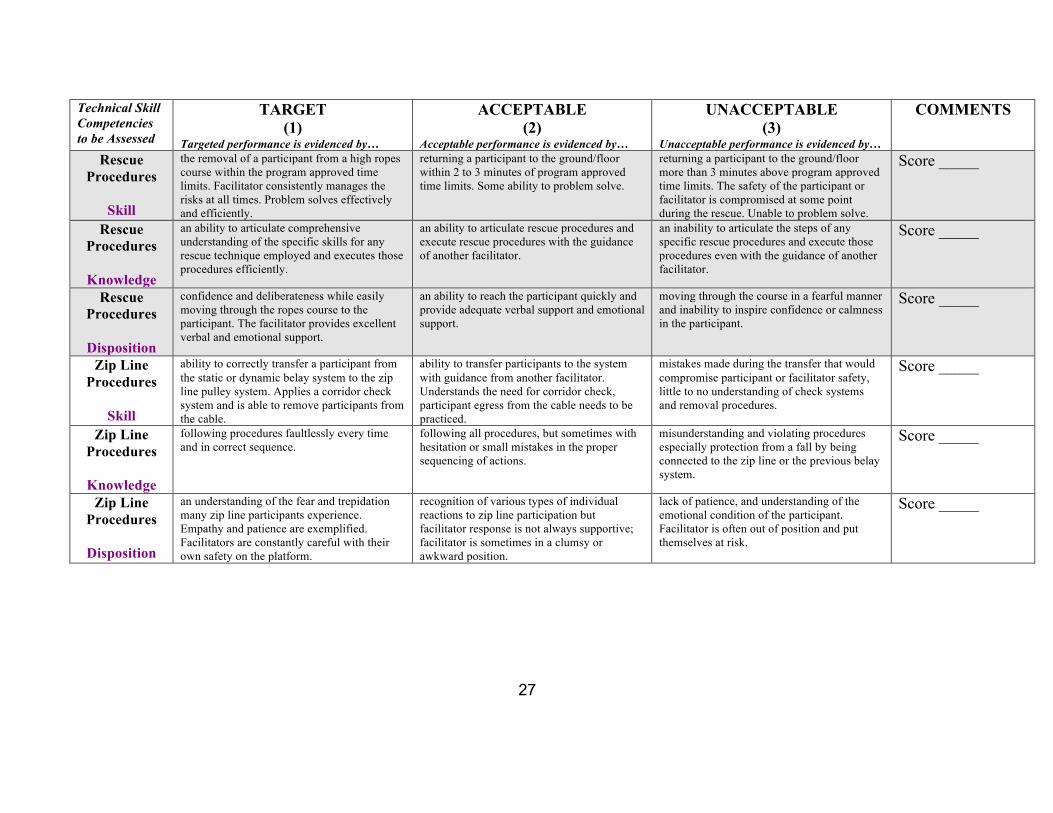
Rescue Procedures
Skill
the removal of a participant from a high ropes course within the program approved time limits. Facilitator consistently manages the risks at all times. Problem solves effectively and efficiently.
returning a participant to the ground/floor within 2 to 3 minutes of program approved time limits. Some ability to problem solve.
returning a participant to the ground/floor more than 3 minutes above program approved time limits. The safety of the participant or facilitator is compromised at some point during the rescue. Unable to problem solve.
Score _____
Rescue Procedures
Knowledge
an ability to articulate comprehensive understanding of the specific skills for any rescue technique employed and executes those procedures efficiently.
an ability to articulate rescue procedures and execute rescue procedures with the guidance of another facilitator.
an inability to articulate the steps of any specific rescue procedures and execute those procedures even with the guidance of another facilitator.
Score _____
Rescue Procedures
Disposition
confidence and deliberateness while easily moving through the ropes course to the participant. The facilitator provides excellent verbal and emotional support.
an ability to reach the participant quickly and provide adequate verbal support and emotional support.
moving through the course in a fearful manner and inability to inspire confidence or calmness in the participant.
Score _____
Zip Line Procedures
Skill
ability to correctly transfer a participant from the static or dynamic belay system to the zip line pulley system. Applies a corridor check system and is able to remove participants from the cable.
ability to transfer participants to the system with guidance from another facilitator. Understands the need for corridor check, participant egress from the cable needs to be practiced.
mistakes made during the transfer that would compromise participant or facilitator safety, little to no understanding of check systems and removal procedures.
Score _____
Zip Line Procedures
Knowledge
following procedures faultlessly every time and in correct sequence.
following all procedures, but sometimes with hesitation or small mistakes in the proper sequencing of actions.
misunderstanding and violating procedures especially protection from a fall by being connected to the zip line or the previous belay system.
Score _____
Zip Line Procedures
Disposition
an understanding of the fear and trepidation many zip line participants experience. Empathy and patience are exemplified. Facilitators are constantly careful with their own safety on the platform.
recognition of various types of individual reactions to zip line participation but facilitator response is not always supportive; facilitator is sometimes in a clumsy or awkward position.
lack of patience, and understanding of the emotional condition of the participant. Facilitator is often out of position and put themselves at risk.
Score _____
28
ANNEX J TO THE 4TH BRIGADE HIGH ROPES PROCEDURES DTD 1 AUG 14
FORT JACKSON ROPES PROCEDURES
PREFACE This Fort Jackson JROTC Ropes Procedures Manual serves as a guide for High Ropes Course at Fort Jackson. The contents of this manual will be updated and approved on an as needed basis. PURPOSE This manual is a resource for the Fort Jackson JROTC Ropes Course trainers and facilitator who conducts training at Fort Jackson for 4th Brigade JROTC students. This Annex is intended to supplement the 4th Brigade JROTC Ropes SOP. It is designed to give the ropes course facilitator an overview of operating and safety procedures, policies, and effective skills for facilitation at Fort Jackson JROTC High Ropes Course sites. It is to be used in conjunction with a required hands-on 4th Brigade Ropes Course Instructor Training workshops and continuing education in the field of Challenge Ropes Course learning. DISCLAIMER Ropes course activities will not be attempted without proper supervision and training by qualified 4th Brigade Instructors.
Purpose of the Ropes Course Program The purpose of our ropes course program is to provide an opportunity where JROTC Cadets are motivated to venture out into unfamiliar and challenging territories of life experiences. It offers JROTC Cadets the opportunity to participate in a series of activities involving mental, physical, and emotional risk taking. There are also less measurable factors to consider associated with abilities, such as critical thinking, judgment, beliefs, compassion, interpersonal communication, and leadership. It provides Cadets with an opportunity to learn skills such as cooperation, teamwork, respect, patience, courage, communication, perseverance, and all other life skills. Ropes Course Instructors All 4th Brigade JROTC ropes courses shall have at least Level I and Level II Instructor present during training. All Ropes Instructors must be certified by 4th Brigade. These certifications must be renewed every years. Each instructor must maintain currency. To maintain currency you must have conducted Ropes training within the last six months. To renew currency see the brigade Ropes SOP. Safety and Risk Management Our foremost purpose of Risk Management is to avoid injury to our participants. Risk management includes policies, practices, and procedures that will be used to appropriately address potential personal injury and financial losses. The idea of risk management is to maximize the areas where we have some control over the outcome, while minimizing the areas where we have absolutely no control over the outcome.

29
One needs to analyze the potential for risk exposures and then set forth a plan to reduce the severity and frequency of those exposures. It is the process with preventative actions that “head off” or forestall the problems. Risk management plans have three basic parts:
1. Analysis of risks 2. Policies and Procedures for reducing risks 3. Implementation of the plan
Equipment and Course Management
Equipment: Storage, Use, and Course Management
• Ropes and other valuable equipment should be stored in a secure area • Written inventory of equipment should be documented yearly • Ladders, trolleys, and other accessory equipment should be stored & locked up • A yearly safety inspection is required by a certified Challenge Course Vendor • Daily inspection is required before using the elements • All equipment that does not pass inspection is taken out of inventory • Any equipment that is in question of being safe should be retired immediately • All staples and leap anchors are set at about 12 feet to prevent climbing and
vandalism • Elements such as the Wall, Whale Watch, and Trust Fall Platform are checked for
bees, wasps, etc. before each use. • No trespassing signs shall be posted strategically around the course, and on the
climbing wall and the whale watch. • All removable equipment and ropes are to be taken in daily. • Equipment that could possibly be reached from ground level should be tied up out of
reach. • Ladders and other equipment are locked and storage near the course • Check hardware (carabiners, rapid links, pulleys) for wear and tear from high volume
usage • Check helmets and harnesses for wear and tear from high usage.
Ropes and Use:
• A rope log should be used for each high element. • Documentation of hours used and number of climbers on each rope should be noted. • There should be a rope for each high element. • Ropes are checked during annual safety inspection. If a rope does not pass yearly
inspections, it is retired immediately. • During daily use, ropes should be checked for unusual frays, glazing or flat spots
noticed in rope. If any of the previous conditions are noted, the rope should be retired immediately.
• Manufacturer’s recommendations should be followed on use and retirement of ropes.
Damage and Severe Weather:
30
• Poles and trees should be inspected carefully after a severe storm • Check for lightning strikes • Check daily for vandalism • Check platforms, climbing towers, and hanging elements for bees & hornets • Check equipment kept in sheds for damage from insect, mice, or weather damage. • Check poles and trees for woodpecker damage • Check for fallen branches on cables • Check cables, bolts, and pulleys for damage • If necessary, call in a professional course inspector
Emergency Action Plan
• Assess the situation in terms of safety (the injured person, other group members, and facilitators). Determine whether the injury is minor or if there is need for urgent medical care.
• Provide an Initial Response. It may be first aid, transporting to a medical facility, or contracting EMS.
• On site medic will make determination if transportation to medical facility or if EMS is required. If no medic on range then unit commander will make determination whether to transport to Medical Facilities for non-life threating conditions.
• For Emergencies where immediate action is needed Contact Range Control by radio and call Fort Jackson Emergency # 803-751-9111.
• Any incident should be documented of what happened and any other type information need for a report of the incident.
• Notify the 4th Brigade JROTC of emergencies after the situation is under control, and the participant has been treated.
• In an emergency situation the OIC will make a determination of whether to continue training.
Accident/Incident Tracking: Accidents and/or incidents are documented as follows: • Element of occurrence • Date and Time of day • Sequencing of activities • Name of injured • Group involved/witnesses • Accident report will be filed with the 4th Brigade JROTC.
Weather and Course Conditions:
• Range Control will be monitored at all times with Range Control Radio for Heat Category and any changes in weather.
• Local weather should also be monitored every day at weather.com and with local TV station coverage
31
• Be aware of local weather tendencies, and pay close attention when bad weather is called for in your area
• If there is a thunderstorm close to your area, keep a close eye out and if any lightning or thunder is witnessed in the distance, the group leaves all equipment and immediately goes to a lighting strike protection area. Unit Leaders will maintain control of their unit for accountability.
• If participants are on high element, they should be safely, but immediately lowered to the ground
Low Elements on the Ropes Course Safety on Low Elements:
• Design an appropriate sequence of activities • Set clear expectations for participants • Manage the group throughout the activities • Teach and assess spotting skills needed for each activity • Teach commands necessary for spotting techniques. Ex.”Spotters ready?”, “Ready”,
“OK, I’m walking, climbing, swinging, etc.” • Teach spotting of traversing elements, climbing elements, & swinging elements. • Teach proper lifting techniques
Lifter should stand erect, back straight, knees slightly bent, palms up, and arms straight
• Teach spotters to always protect the neck and head from injury • Inspect elements before daily use • Be prepared with appropriate gear
Low Elements Objectives
1. To promote group cooperation, teamwork, and facilitate and environment for bonding to naturally occur within the group.
2. To develop interpersonal skills to aid in peer relationships. 3. To promote and facilitate an atmosphere where support of all cultures, beliefs, and
opinions are respected. Activities:
Trust Fall Mohawk Traverse Wall Whale Watch Spider’s Web
Trust Fall Objective and Description
• To develop trust and mutual support within the group
32
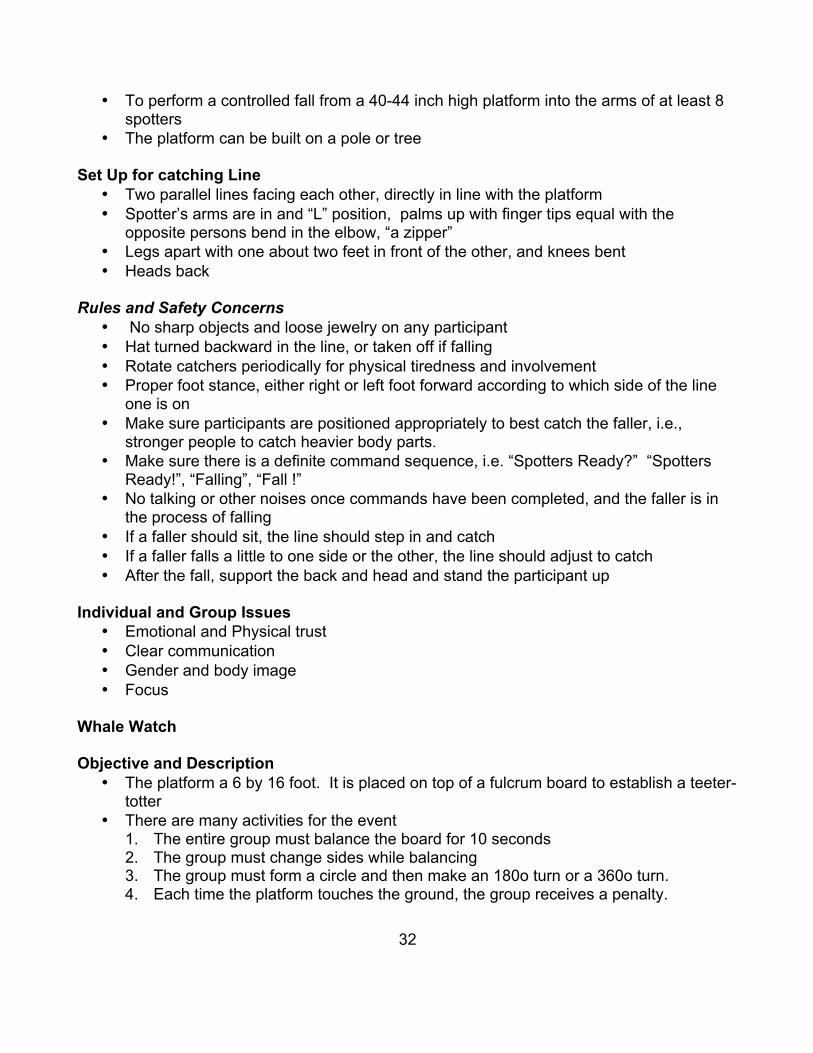
• To perform a controlled fall from a 40-44 inch high platform into the arms of at least 8 spotters
• The platform can be built on a pole or tree Set Up for catching Line
• Two parallel lines facing each other, directly in line with the platform • Spotter’s arms are in and “L” position, palms up with finger tips equal with the
opposite persons bend in the elbow, “a zipper” • Legs apart with one about two feet in front of the other, and knees bent • Heads back
Rules and Safety Concerns
• No sharp objects and loose jewelry on any participant • Hat turned backward in the line, or taken off if falling • Rotate catchers periodically for physical tiredness and involvement • Proper foot stance, either right or left foot forward according to which side of the line
one is on • Make sure participants are positioned appropriately to best catch the faller, i.e.,
stronger people to catch heavier body parts. • Make sure there is a definite command sequence, i.e. “Spotters Ready?” “Spotters
Ready!”, “Falling”, “Fall !” • No talking or other noises once commands have been completed, and the faller is in
the process of falling • If a faller should sit, the line should step in and catch • If a faller falls a little to one side or the other, the line should adjust to catch • After the fall, support the back and head and stand the participant up
Individual and Group Issues
• Emotional and Physical trust • Clear communication • Gender and body image • Focus
Whale Watch Objective and Description
• The platform a 6 by 16 foot. It is placed on top of a fulcrum board to establish a teeter-totter
• There are many activities for the event 1. The entire group must balance the board for 10 seconds 2. The group must change sides while balancing 3. The group must form a circle and then make an 180o turn or a 360o turn. 4. Each time the platform touches the ground, the group receives a penalty.
33
Rules and Safety Concerns
• When first entering, participants should only go to the middle board and stop until all participants are on
• No running, jumping or playing around on the platform • Do not stand on the side boards • Do not let any body part hang off of the side or end boards • If you are losing your balance and near the edge, step off • When off of the platform, stay at least one foot back at all times • Only enter when instructed to do so, and from the end that is touching ground
Individual and Group Concerns
• Emotional and physical balance • Individual influence on group outcome • Clear communication • Weight
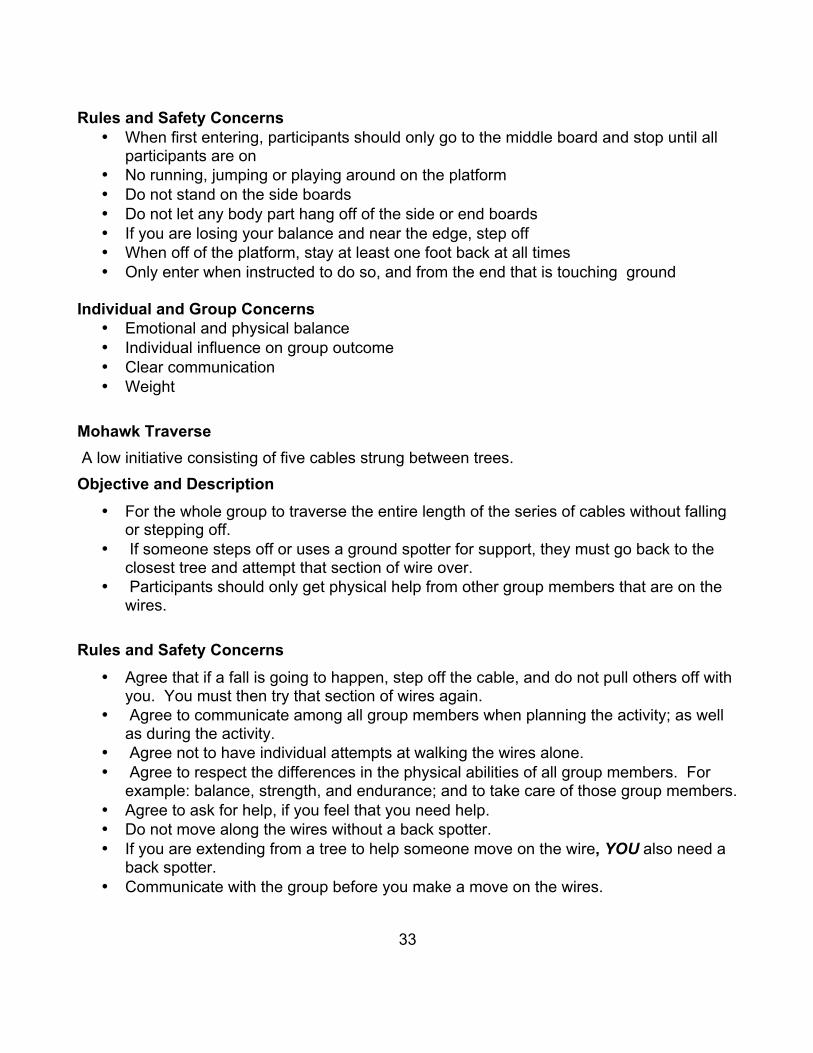
Mohawk Traverse A low initiative consisting of five cables strung between trees. Objective and Description
• For the whole group to traverse the entire length of the series of cables without falling or stepping off.
• If someone steps off or uses a ground spotter for support, they must go back to the closest tree and attempt that section of wire over.
• Participants should only get physical help from other group members that are on the wires.
Rules and Safety Concerns • Agree that if a fall is going to happen, step off the cable, and do not pull others off with
you. You must then try that section of wires again. • Agree to communicate among all group members when planning the activity; as well
as during the activity. • Agree not to have individual attempts at walking the wires alone. • Agree to respect the differences in the physical abilities of all group members. For
example: balance, strength, and endurance; and to take care of those group members. • Agree to ask for help, if you feel that you need help. • Do not move along the wires without a back spotter. • If you are extending from a tree to help someone move on the wire, YOU also need a
back spotter. • Communicate with the group before you make a move on the wires.
34
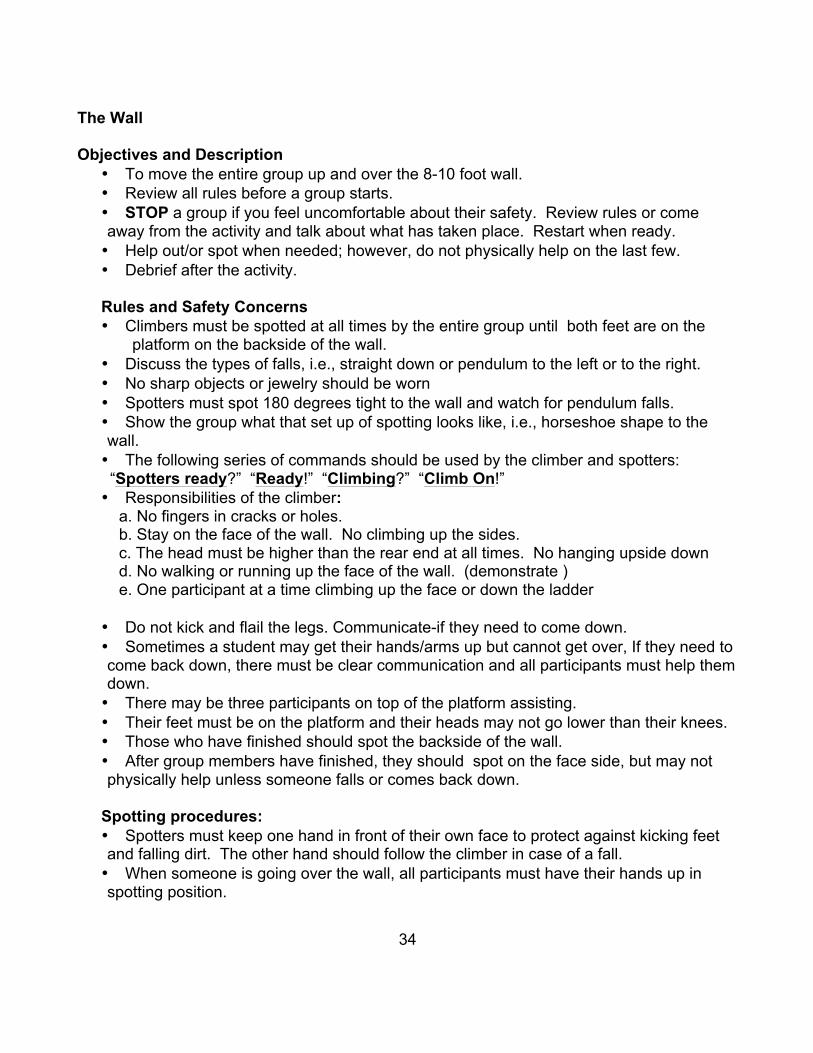
The Wall Objectives and Description
• To move the entire group up and over the 8-10 foot wall. • Review all rules before a group starts. • STOP a group if you feel uncomfortable about their safety. Review rules or come away from the activity and talk about what has taken place. Restart when ready. • Help out/or spot when needed; however, do not physically help on the last few. • Debrief after the activity. Rules and Safety Concerns • Climbers must be spotted at all times by the entire group until both feet are on the platform on the backside of the wall. • Discuss the types of falls, i.e., straight down or pendulum to the left or to the right. • No sharp objects or jewelry should be worn • Spotters must spot 180 degrees tight to the wall and watch for pendulum falls. • Show the group what that set up of spotting looks like, i.e., horseshoe shape to the wall. • The following series of commands should be used by the climber and spotters: “Spotters ready?” “Ready!” “Climbing?” “Climb On!” • Responsibilities of the climber: a. No fingers in cracks or holes. b. Stay on the face of the wall. No climbing up the sides. c. The head must be higher than the rear end at all times. No hanging upside down d. No walking or running up the face of the wall. (demonstrate ) e. One participant at a time climbing up the face or down the ladder • Do not kick and flail the legs. Communicate-if they need to come down. • Sometimes a student may get their hands/arms up but cannot get over, If they need to come back down, there must be clear communication and all participants must help them down. • There may be three participants on top of the platform assisting. • Their feet must be on the platform and their heads may not go lower than their knees. • Those who have finished should spot the backside of the wall. • After group members have finished, they should spot on the face side, but may not physically help unless someone falls or comes back down.
Spotting procedures: • Spotters must keep one hand in front of their own face to protect against kicking feet and falling dirt. The other hand should follow the climber in case of a fall. • When someone is going over the wall, all participants must have their hands up in spotting position.
35
• The group must be quiet during climbing so that they can hear the climber, and respond quickly if they need help.
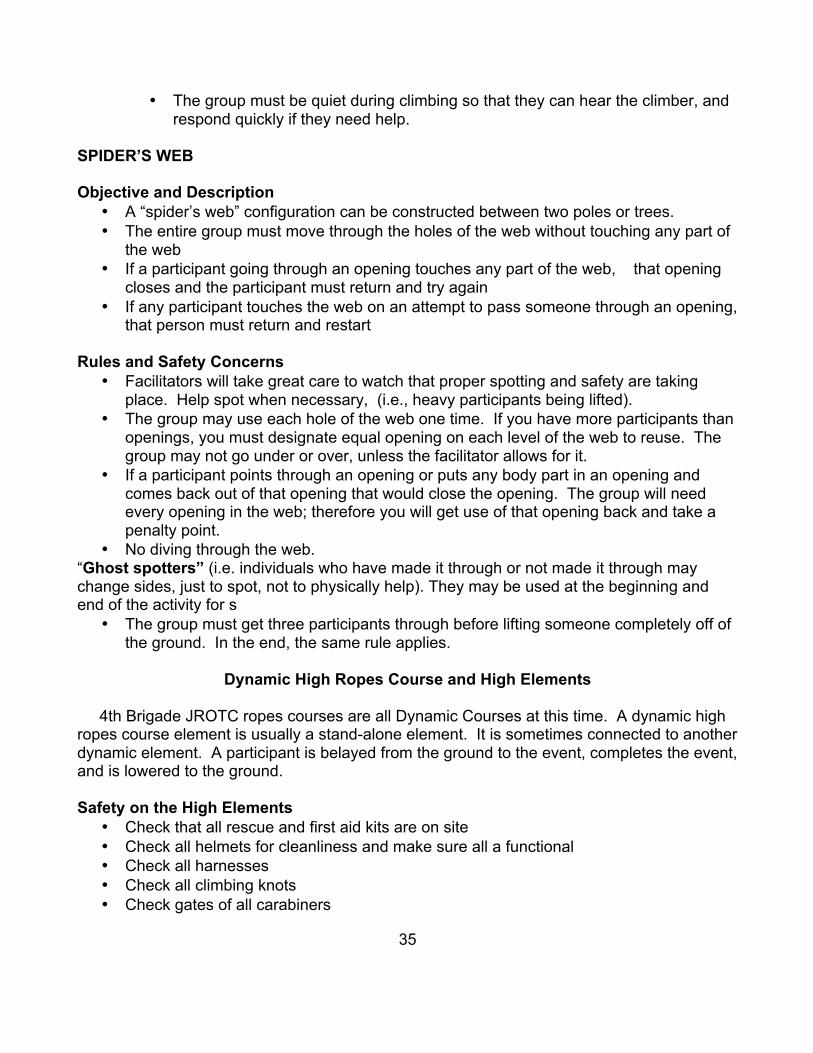
SPIDER’S WEB Objective and Description
• A “spider’s web” configuration can be constructed between two poles or trees. • The entire group must move through the holes of the web without touching any part of
the web • If a participant going through an opening touches any part of the web, that opening
closes and the participant must return and try again • If any participant touches the web on an attempt to pass someone through an opening,
that person must return and restart
Rules and Safety Concerns • Facilitators will take great care to watch that proper spotting and safety are taking
place. Help spot when necessary, (i.e., heavy participants being lifted). • The group may use each hole of the web one time. If you have more participants than
openings, you must designate equal opening on each level of the web to reuse. The group may not go under or over, unless the facilitator allows for it.
• If a participant points through an opening or puts any body part in an opening and comes back out of that opening that would close the opening. The group will need every opening in the web; therefore you will get use of that opening back and take a penalty point.
• No diving through the web. “Ghost spotters” (i.e. individuals who have made it through or not made it through may change sides, just to spot, not to physically help). They may be used at the beginning and end of the activity for s
• The group must get three participants through before lifting someone completely off of the ground. In the end, the same rule applies.
Dynamic High Ropes Course and High Elements
4th Brigade JROTC ropes courses are all Dynamic Courses at this time. A dynamic high ropes course element is usually a stand-alone element. It is sometimes connected to another dynamic element. A participant is belayed from the ground to the event, completes the event, and is lowered to the ground. Safety on the High Elements
• Check that all rescue and first aid kits are on site • Check all helmets for cleanliness and make sure all a functional • Check all harnesses • Check all climbing knots • Check gates of all carabiners
36
• Inspect all wires, wire rope clips, etc of the elements being used • Inspect climbing ropes, belay devices, and pulleys • Review “Comfort Zone” • Use proper command before climbing, ex: Ready, Ready, Climbing, Climb • Make sure belayer is in proper position to belay the element • Check the ground surface and evaluate the environment for ground cover and loose
limbs overhead • Belayer should be aware of sunlight which may affect their visibility
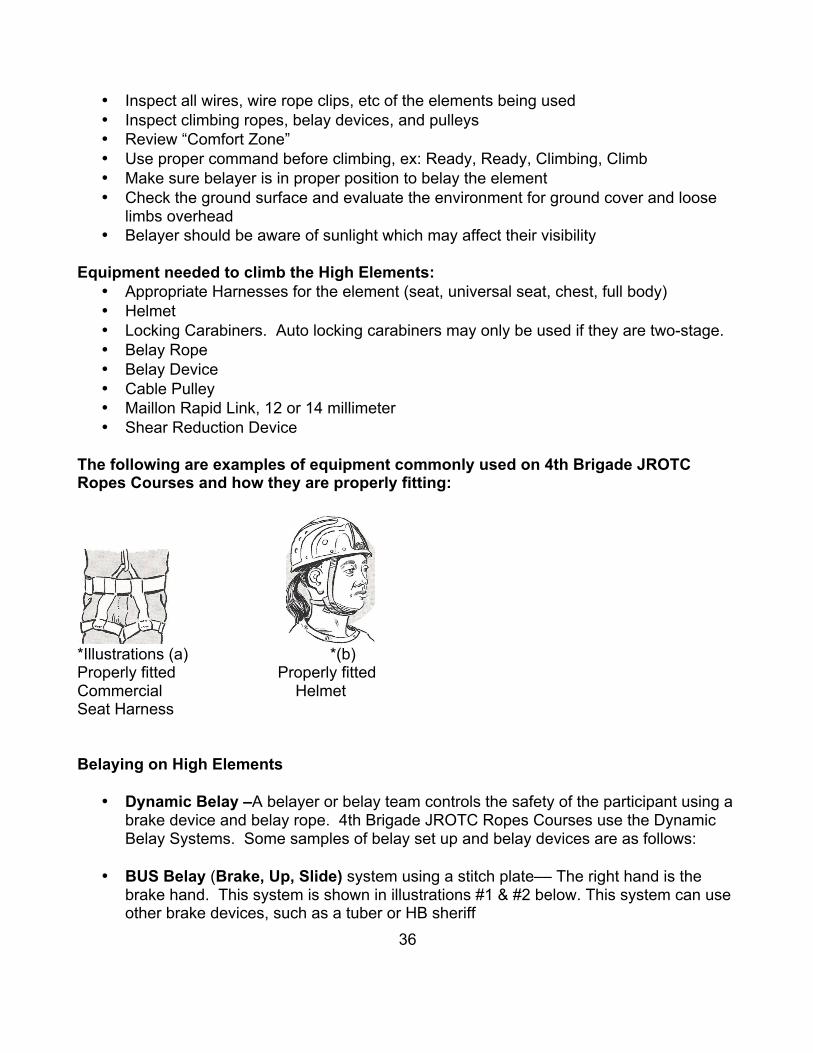
Equipment needed to climb the High Elements:
• Appropriate Harnesses for the element (seat, universal seat, chest, full body) • Helmet • Locking Carabiners. Auto locking carabiners may only be used if they are two-stage. • Belay Rope • Belay Device • Cable Pulley • Maillon Rapid Link, 12 or 14 millimeter • Shear Reduction Device
The following are examples of equipment commonly used on 4th Brigade JROTC Ropes Courses and how they are properly fitting:
*Illustrations (a) *(b) Properly fitted Properly fitted Commercial Helmet Seat Harness Belaying on High Elements
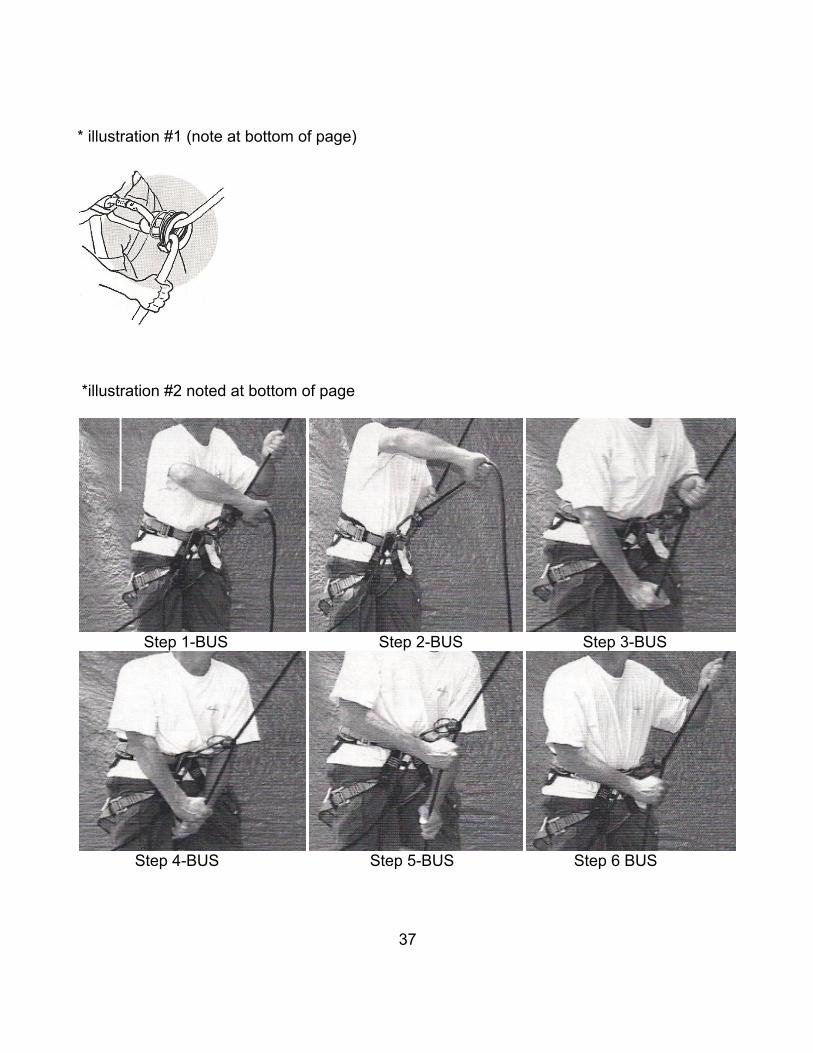
• Dynamic Belay –A belayer or belay team controls the safety of the participant using a brake device and belay rope. 4th Brigade JROTC Ropes Courses use the Dynamic Belay Systems. Some samples of belay set up and belay devices are as follows:
• BUS Belay (Brake, Up, Slide) system using a stitch plate–– The right hand is the
brake hand. This system is shown in illustrations #1 & #2 below. This system can use other brake devices, such as a tuber or HB sheriff
37
* illustration #1 (note at bottom of page)
*illustration #2 noted at bottom of page
Step 1-BUS Step 2-BUS Step 3-BUS
Step 4-BUS Step 5-BUS Step 6 BUS

38
Figure 8 Belay Device: Also set up to use the BUS System as shown above * illustration #3 noted at bottom of page
Equipment used to set up for belaying a Traversing High Ropes Element Pulley/Rapid Link/Shear Reduction Device – for belay rope set up Set up for traversing element: example (cat walk) *Illustration #6 *Illustration #7
The above is also an acceptable set up for a traversing high element Pulley/Rapid Link Device – for belay rope set up of non-traversing element: example (Pamper Pole) * Illustration #9 & #10
#9 #10
39
*Illustrations #4 - #10 were taken from The Guide for Challenge Course Operations, PA INC., by Bob Ryan High Elements Objectives
1. To motivate group members to seek beyond perceived limitations. 2. To aid group members in taking calculated risks. 3. To aid all group members in recognition of safety rules and behavior guidelines 4. To increase each participants level of self-confidence
High Elements:
• Cat Walk • Multivine Traverse • Pirate’s Crossing/Heebie Jeebie • Zip Wire
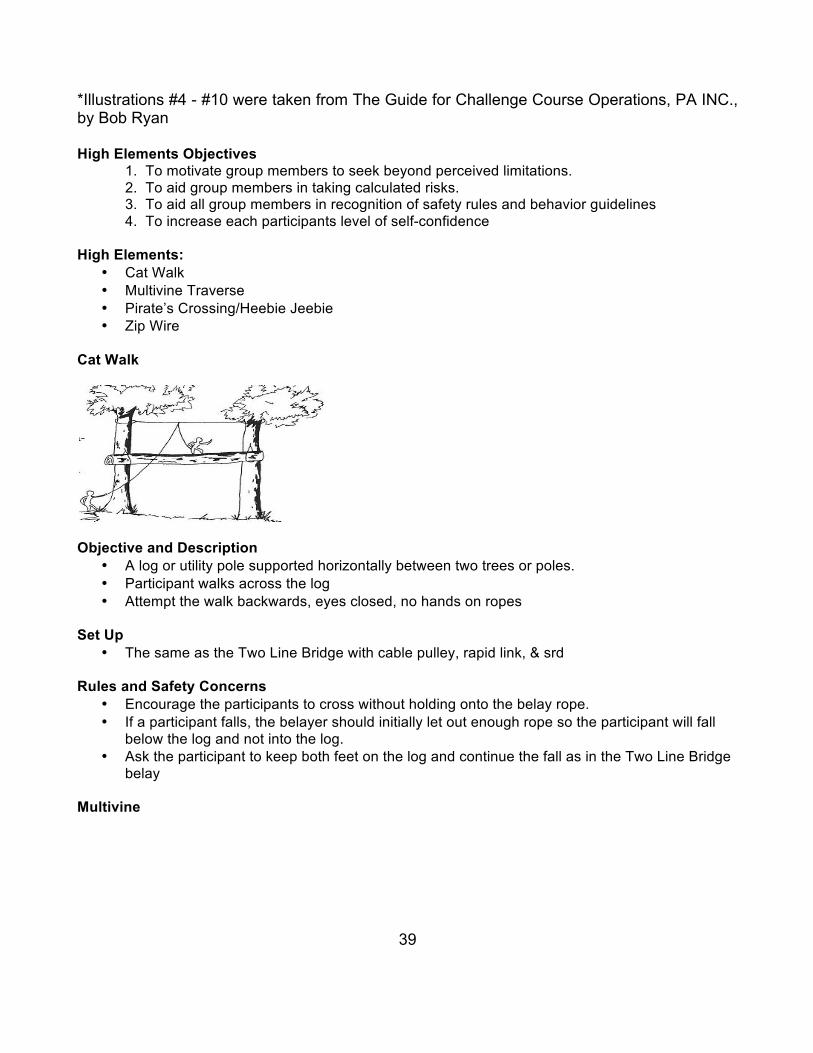
Cat Walk
Objective and Description
• A log or utility pole supported horizontally between two trees or poles. • Participant walks across the log • Attempt the walk backwards, eyes closed, no hands on ropes
Set Up
• The same as the Two Line Bridge with cable pulley, rapid link, & srd Rules and Safety Concerns
• Encourage the participants to cross without holding onto the belay rope. • If a participant falls, the belayer should initially let out enough rope so the participant will fall
below the log and not into the log. • Ask the participant to keep both feet on the log and continue the fall as in the Two Line Bridge
belay Multivine
40
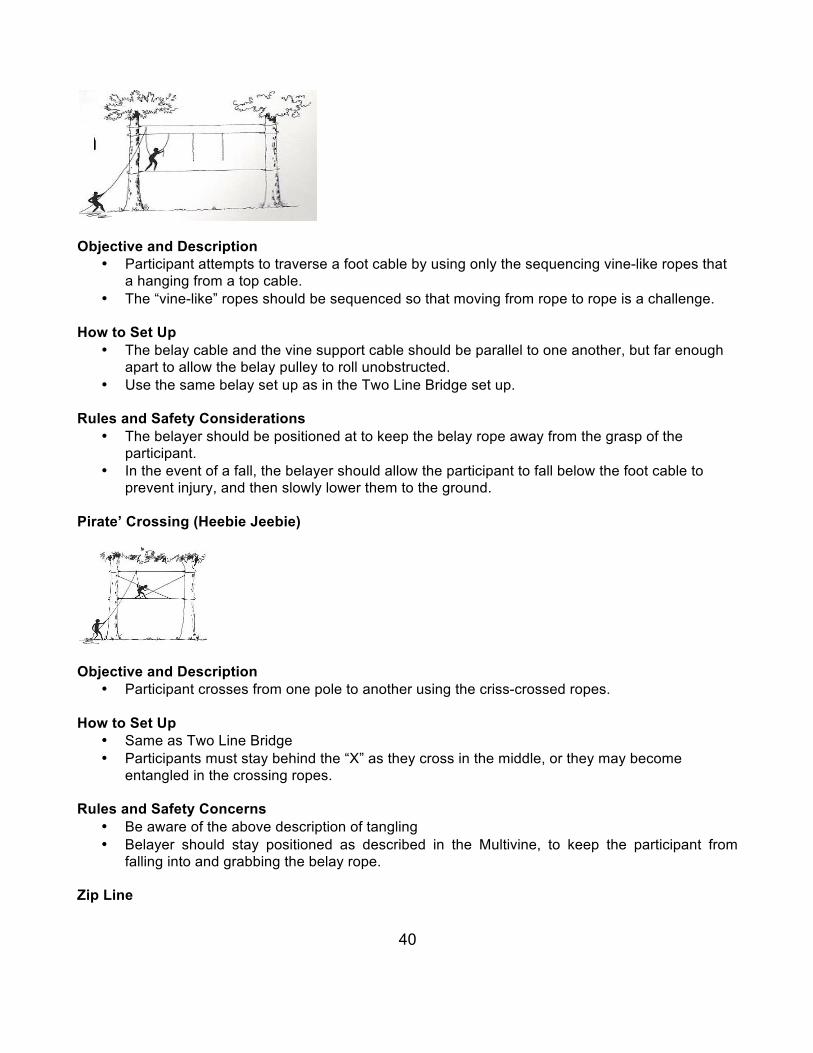
Objective and Description
• Participant attempts to traverse a foot cable by using only the sequencing vine-like ropes that a hanging from a top cable.
• The “vine-like” ropes should be sequenced so that moving from rope to rope is a challenge. How to Set Up
• The belay cable and the vine support cable should be parallel to one another, but far enough apart to allow the belay pulley to roll unobstructed.
• Use the same belay set up as in the Two Line Bridge set up. Rules and Safety Considerations
• The belayer should be positioned at to keep the belay rope away from the grasp of the participant.
• In the event of a fall, the belayer should allow the participant to fall below the foot cable to prevent injury, and then slowly lower them to the ground.
Pirate’ Crossing (Heebie Jeebie)
Objective and Description
• Participant crosses from one pole to another using the criss-crossed ropes. How to Set Up
• Same as Two Line Bridge • Participants must stay behind the “X” as they cross in the middle, or they may become
entangled in the crossing ropes. Rules and Safety Concerns
• Be aware of the above description of tangling • Belayer should stay positioned as described in the Multivine, to keep the participant from
falling into and grabbing the belay rope.
Zip Line
41
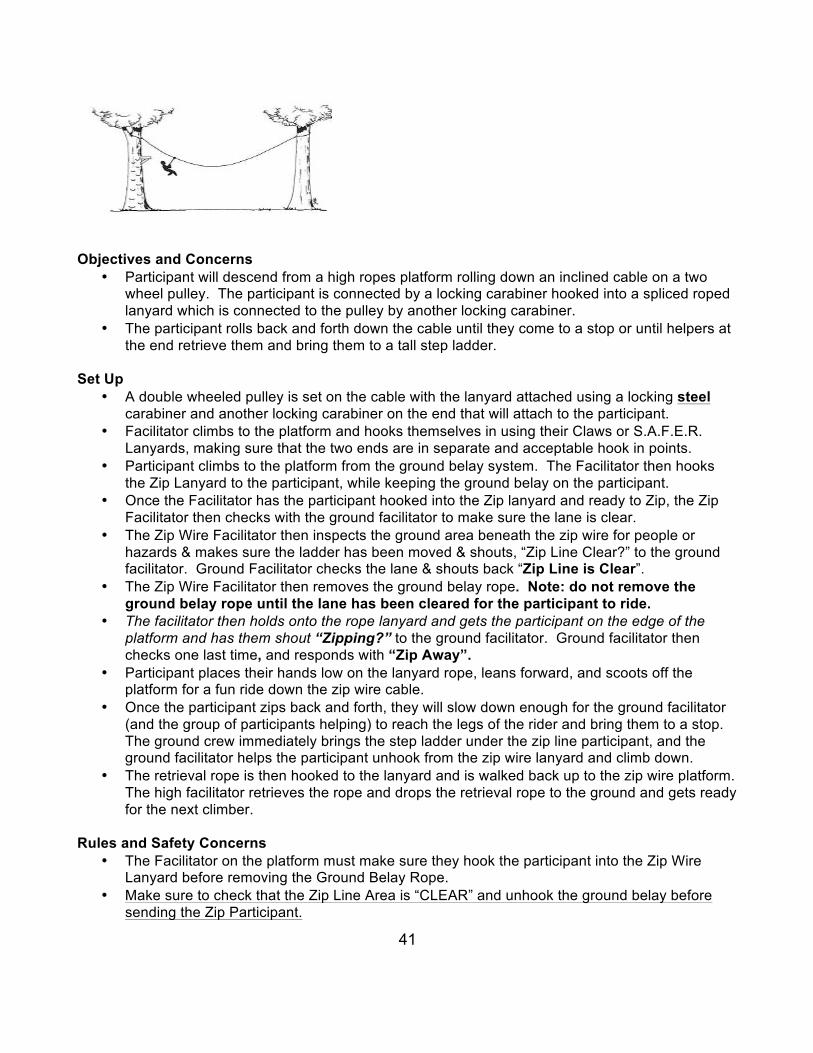
Objectives and Concerns
• Participant will descend from a high ropes platform rolling down an inclined cable on a two wheel pulley. The participant is connected by a locking carabiner hooked into a spliced roped lanyard which is connected to the pulley by another locking carabiner.
• The participant rolls back and forth down the cable until they come to a stop or until helpers at the end retrieve them and bring them to a tall step ladder.
Set Up
• A double wheeled pulley is set on the cable with the lanyard attached using a locking steel carabiner and another locking carabiner on the end that will attach to the participant.
• Facilitator climbs to the platform and hooks themselves in using their Claws or S.A.F.E.R. Lanyards, making sure that the two ends are in separate and acceptable hook in points.
• Participant climbs to the platform from the ground belay system. The Facilitator then hooks the Zip Lanyard to the participant, while keeping the ground belay on the participant.
• Once the Facilitator has the participant hooked into the Zip lanyard and ready to Zip, the Zip Facilitator then checks with the ground facilitator to make sure the lane is clear.
• The Zip Wire Facilitator then inspects the ground area beneath the zip wire for people or hazards & makes sure the ladder has been moved & shouts, “Zip Line Clear?” to the ground facilitator. Ground Facilitator checks the lane & shouts back “Zip Line is Clear”.
• The Zip Wire Facilitator then removes the ground belay rope. Note: do not remove the ground belay rope until the lane has been cleared for the participant to ride.
• The facilitator then holds onto the rope lanyard and gets the participant on the edge of the platform and has them shout “Zipping?” to the ground facilitator. Ground facilitator then checks one last time, and responds with “Zip Away”.
• Participant places their hands low on the lanyard rope, leans forward, and scoots off the platform for a fun ride down the zip wire cable.
• Once the participant zips back and forth, they will slow down enough for the ground facilitator (and the group of participants helping) to reach the legs of the rider and bring them to a stop. The ground crew immediately brings the step ladder under the zip line participant, and the ground facilitator helps the participant unhook from the zip wire lanyard and climb down.
• The retrieval rope is then hooked to the lanyard and is walked back up to the zip wire platform. The high facilitator retrieves the rope and drops the retrieval rope to the ground and gets ready for the next climber.
Rules and Safety Concerns
• The Facilitator on the platform must make sure they hook the participant into the Zip Wire Lanyard before removing the Ground Belay Rope.
• Make sure to check that the Zip Line Area is “CLEAR” and unhook the ground belay before sending the Zip Participant.

42
• Again, make sure the zip participant is completely detached from the platform, (no connector ropes or any part of their harness or loose clothing snagged in the platform) before initiating the ride.
• A participant that may not be able to support his/her own body weight may require a full body harness. A chest harness may be appropriate; however, a secondary attachment lanyard may be necessary to hook into the top of the lanyard. Consult a professional Vendor or talk with your builder about these options.


![A BRAGG LINE - Piedmont Historical Society Bragg Line.pdf · A Bragg Line by Dan W. Olds [6 July 2014] Page 1 A BRAGG LINE The purpose of this report is to collect, organize and share](https://static.fdocuments.us/doc/165x107/5aca87517f8b9a6b578dbd0d/a-bragg-line-piedmont-historical-bragg-linepdfa-bragg-line-by-dan-w-olds-6.jpg)


![Fiber Bragg Grating Sensors - Optical Sensing · Fiber Bragg Grating Sensors. ... Bragg grating production Commercial phase mask [Ibsen] with central pitch of 1061.27 nm and operating](https://static.fdocuments.us/doc/165x107/5eb72771ad990c1bc0201c29/fiber-bragg-grating-sensors-optical-fiber-bragg-grating-sensors-bragg-grating.jpg)