FORWARD - Tees Rowing Club - Hometeesrowingclub.co.uk/files/Final_Copy_Rec_Rowing.doc · Web...
88
THE RECREATIONAL ROWERS TOOLBOX---------------------------------------------------------------------------------- FORWARD Recreational Rowers come in all shapes and sizes. Some are former competitive rowers who just want to have the occasional row with friends. Others are people who have come to rowing rather late in life: parents of junior rowers, retired people with time on their hands, those who are returning from a bout of illness or recovering from injury, career types who just want to keep fit and finally those who are new to an area and want to meet new people. All the family, both young and those still young at heart, can enjoy recreational rowing. However, they normally have a number of common goals: To get fit (or fitter) To be part of a team or crew To learn new skills or develop their technique Tees Rowing Club is one of several clubs across the country with the facilities and expertise to be able to offer both recreational and long-distance or touring rowing. The latter events are fun and sociable but also require stamina and aerobic fitness – a great way to get fit. Tees have a range of boats specifically designed to be more stable than fine racing boats and thus ideal for learning the basic techniques. Recreational (off peak) Rowing takes place at Tees – 1
Transcript of FORWARD - Tees Rowing Club - Hometeesrowingclub.co.uk/files/Final_Copy_Rec_Rowing.doc · Web...

THE RECREATIONAL ROWERS TOOLBOX----------------------------------------------------------------------------------
FORWARD
Recreational Rowers come in all shapes and sizes. Some are former competitive rowers who just want to have the occasional row with friends. Others are people who have come to rowing rather late in life: parents of junior rowers, retired people with time on their hands, those who are returning from a bout of illness or recovering from injury, career types who just want to keep fit and finally those who are new to an area and want to meet new people. All the family, both young and those still young at heart, can enjoy recreational rowing.
However, they normally have a number of common goals:
To get fit (or fitter) To be part of a team or crew To learn new skills or develop their technique
Tees Rowing Club is one of several clubs across the country with the facilities and expertise to be able to offer both recreational and long-distance or touring rowing. The latter events are fun and sociable but also require stamina and aerobic fitness – a great way to get fit. Tees have a range of boats specifically designed to be more stable than fine racing boats and thus ideal for learning the basic techniques. Recreational (off peak) Rowing takes place at Tees – Monday to Friday between the hours of 9am and 4pm – and members qualify for a substantial reduction in annual membership rates.
1

THE RECREATIONAL ROWERS TOOLBOX----------------------------------------------------------------------------------
INTRODUCTION
TEES ROWING CLUB
Tees Rowing Club is one of the oldest continually operating rowing clubs in the world and is thought to have been in existence, in one form or another, since the early 1850s. It shares the facilities of the RIVER TEES WATERSPORTS CENTRE with other users, namely the Canoe Club (polo) and the Dragon Boat Club. Full details of the Tees Rowing Club can be found at www.teesrowingclub.co.uk.
RECREATIONAL ROWING
Recreational Rowing in its current format came into being in 2006/7 under the guidance of the Club President. At that time the Club facilities, although excellent by any standards, did not include boats suited to the older and less flexible athlete. This situation was swiftly corrected with the purchase of 2 Learn to Row coxed Quads complete with blades. These boats are highly suitable for teaching the basic skills and for touring; moreover, they are also useful as a means of technical improvement for senior rowers. The Clubs other boats and facilities are available to the Recreational Rower as ability improves.
Clearly rowing is not for everyone; therefore newcomers are not expected to take up full Tees Rowing Club membership until they are satisfied that the sport might be for them. However, in order that insurance and safety aspects are in order, newcomers will be required to complete a modified version of the normal membership joining form that will ask for confirmation of ability to swim 50 metres wearing appropriate clothing and to declare any medical conditions which could affect their ability to row safely. At the same time newcomers will be invited to highlight any skills that they can offer to the Club. From the outset they will be encouraged to become involved, should they so wish, in helping to run the Club and to maintain its facilities. It is essential that newcomers to Recreational Rowing receive coaching that is both relevant and delivered in a professional manner. Ideally newcomers would be enrolled in a specific ‘learn to row’ course where they would learn the basic skills with others of a similar level. The
2
THE RECREATIONAL ROWERS TOOLBOX----------------------------------------------------------------------------------disadvantage of this approach is that newcomers would have to wait for a course to become available by which time their interest could well be diluted. At Tees Rowing Club individual tuition is considered the preferred option with newcomers receiving instruction at a time that suits them. In addition, this approach is considered less formal and more appropriate to the Recreational Rower.
The disadvantage to open-door instruction is that it is not always possible to have available the best coaching expertise on all occasions and it sometimes becomes necessary to enlist the assistance of less experienced rowers. Experience has shown that in such instances less experience is not always a bad thing with the person giving the instruction often more able to identify with the initial problems that newcomers encounter. Therefore, Recreation Rowers who have either previous rowing experience or who show an aptitude for coaching are encouraged to take an active role with newcomers.
PURPOSE OF THE RECREATIONAL ROWERS TOOLBOX
A technically relevant and professional level of in-house instruction is not difficult to achieve given appropriate preparation. To help the less experienced Recreational Rower meet this requirement a series of technical and instructional guidelines have been produced and are contained within this folder. However, whilst preparing these notes, it become evident that there was also a need for a package containing information beyond the level envisaged for the Recreational Rowing newcomer. As confidence improved the questions being asked required a more considered response; a response that fully recognized that the recreational athlete whist not necessarily aspiring to the higher demands of the Club Racer, nevertheless, still had ambitions albeit of a lower level. Not for them the intricacies of the fine-tuning of riggers or high-end fitness training. Instead, an awareness of what contributes to good watermanship and maybe an understanding of fault, symptom, cause and correction being more relevant. Accordingly, this folder of information has been put together solely with the Recreational Rower in mind. It is not intended to be a cover to cover read, more a TOOLBOX; somewhere to go to extract that little bit of data necessary for a future outing or as part of ones preparations in order to take the instructional lead at a forthcoming session.
3
THE RECREATIONAL ROWERS TOOLBOX----------------------------------------------------------------------------------
RECREATIONAL ROWING - INITIAL TRAINING
PREPARATION
It may not be possible to arrange for all newcomers to undertake a programmed induction course; it is more likely that newcomers will arrive at the Club with little, if any, prior warning. Whatever the situation it is essential that they are welcomed and that at the end of their first visit they feel positive about the sport and are keen to develop further. These notes provide direction and standardization.
DAY ONE
A broad overview of the Club is to be given as soon as possible after initial introductions. It is equally important that newcomers receive a short taste of the rowing experience, conditions permitting. The first visit should not last more than 2-3 hours. Therefore, it is essential that whoever is leading the induction keeps a sharp eye on time and progress. Avoid becoming over technical at this stage and on the practical elements keep it simple and lighthearted. Always end on a positive note. The following tasks/topics should take no longer than 15-20 minutes to cover.
Tour of Club facilities. Explain briefly how the Club is managed and provide an outline of the coaching available. Whilst in the boathouse provide a brief explanation as to the variation(s) between sculling and sweep oar rowing. Ergometer. Discuss use as a training aid to both technical and fitness development. Confirm ability of newcomer to swim 50 metres wearing sports clothing. Discuss clothing requirements for both gym and whilst afloat. Explain need for close fitting clothing. Emphasize need to wash hands after every session following contact with the river. Briefly mention importance of need to warm up and warm down before and after physical activity. Help newcomer complete the membership joining form. Explain why a declaration of certain medical conditions is required.
4

THE RECREATIONAL ROWERS TOOLBOX----------------------------------------------------------------------------------
At this stage, having answered any questions that may have arisen, it is time to enter the practical stage(s) of the induction. A degree of flexibility may be needed, particularly if the newcomer is not suitably clothed. Given ideal water conditions and ample time the aim would be to end the first session with the newcomer having had a brief outing on the water. Before going afloat, however, the newcomer should be shown the essentials of the basic rowing stroke and given the opportunity to try it out for himself or herself using the ergometer. Keep in mind the need for time management; and aim to complete both the ergometer and afloat stages within 2 hours.
The Basic Stroke - Ergometer
This part of session 1 is to be used to demonstrate the rowing stroke and for the newcomer to have the opportunity of getting a feel for what is to come. At this stage the difficulty will be in keeping the content of the instruction to the right level. It is essential that the importance of effort, timing and body movement are discussed and demonstrated. However, it is not necessary for the newcomer to be able to apply these factors immediately. Moreover, whilst it is important that good technique from the outset is highlighted, be aware of the danger of overload on the newcomer and the possibility of their losing interest. Keep it simple and give ample opportunity for questions. Approach this session in the following order.
1. Background to ergometer - designed for use by the US national team.2. Ergometers use for both technique and fitness training.3. Explain the major parts of the ergometer and demonstrate how it works.4. Demonstrate how to set the damper, adjust feet height and hold handle.5. Demonstrate the complete stroke cycle.6. Demonstrate the 4 components of the stroke – finish, recovery, catch (or placement) and drive.7. Get newcomer to sit on ergometer and adjust damper setting (between 3 and 5) and height of feet.8. Explain how to sit on seat comfortably.9. Show front stops position with shins vertical. Be aware that not everyone can get to this position.
5
THE RECREATIONAL ROWERS TOOLBOX----------------------------------------------------------------------------------10. Sitting on adjacent ergometer demonstrate the finish position emphasising the following points:
Body angle. Height of handle. Straight legs. Elbows tucked in. Shoulders relaxed and head not drooping. How to drop hands and reason.
11. Allow newcomer to try to replicate your demonstration of the finish.12. Demonstrate the recovery with emphasis on the following points:
Importance of hands, body, slide sequence. Body angle, delay until arms straight. Delay leg movement until body is comfortably forward. Controlled recovery speed up the slide. Height of handle. Head and eye height.
13. Allow newcomer to try to replicate your demonstration of the recovery,14. Demonstrate the catch (or placement) with emphasis on the following points:
Shins vertical. Body angle. Chest lightly touching knees - be comfortable, do not overstretch. Arms straight and wrists flat. Head and eye height.
15. Allow newcomer to try and replicate your demonstration of the catch (or placement).
6

THE RECREATIONAL ROWERS TOOLBOX----------------------------------------------------------------------------------16. Demonstrate the drive with emphasis on the following points:
1. Importance of legs, body, slide sequence.2. Firm lower back. Explain the term ‘bum shove’.3. Pushing with the balls of the feet and feeling of suspension.4. Arms straight until leg drive 75 percent complete.5. Maintain body angle until legs have reached approximately one third of the total drive.6. Opening of body angle until chest is to rear of hips.7. Arm sequence as legs complete drive.8. Correct position of elbows.9. Relaxed shoulders.
17. Allow newcomer to try and replicate your demonstration of the drive.
Remember, keep session to a maximum of 60 minutes and avoid over complication. Be on the lookout for overload and check understanding by frequently asking questions. Be patient at all times and emphasise importance of getting the basics right from the outset. Finally, explain that whilst the ergometer is an essential tool it cannot replicate the feel of a boat on the water.
Getting Afloat - Session One
Ideally, you should conclude the first session with a water taster and if your time management has been good you should have approximately 1 hour in which to put a boat on the water and have a brief outing during which you demonstrate how to apply the earlier instruction given on the ergometer. The selection of class of boat to be used for this first outing could be influenced by a number of considerations not least, of which Club Policy could be paramount. Whatever route is taken the following fundamentals are common; attempt to keep to the order shown.
1. Types and Characteristics. Avoid confusion, it is not necessary at this stage to burden the inexperienced newcomer with facts and figures - plenty of time for that later! The minimum information necessary for a basic understanding should be as follows:
7

THE RECREATIONAL ROWERS TOOLBOX----------------------------------------------------------------------------------
Sweep Oar Rowing and Sculling - Explain. Brief look at boat types. Explain the terms coxed and cox-less. Outline role of the Cox
2. From Rack to Water. It is unlikely that a newcomer would become involved in removing a boat from its rack during this session. It is, however, vital that mention is made of boats vulnerability particularly whilst being moved from and back to the boathouse. The following points should be covered:
Strict adherence to commands from cox/coach/stroke. Spatial awareness whilst manoeuvring the boat. Fragility of boats.
3. Identification of Boat Parts. With the boat now out of the boathouse and upright you can now point out the various parts of the boat and explain their purpose. Remember, keep it relevant and avoid getting bogged-down in technical detail. At this stage limit your examination to the following parts:
Bow Ball. Buoyancy Hatches. Emphasise that boats are safe and are designed to remain afloat even in the worst-case scenarios. Seat and Slide Mechanism. Essential that runners are clean and that the seat runs freely. Foot Stretcher. Explain how to move and importance of correct adjustment. Rigger Assembly. Point out and name the rigger, pin, swivel and gate. Do not get involved in discussions over
inboard/outboard ratios etc. Steering Mechanism. If you are examining a coxed boat point out the position that the cox will take up and briefly look at the
rudder and explain its function.
8

THE RECREATIONAL ROWERS TOOLBOX---------------------------------------------------------------------------------- Oars and Sculls. Name the main parts – blade or spoon, loom, sleeve, collar and handle or grip. Explain that collar
adjustment has direct influence or gearing.
4. Getting In and Out of the Boat and Adjustment. A practical demonstration, highlighting the main points is the ideal way to approach what can be a worrying time for the newcomer. It is essential that this element is not rushed. Cover the following points:
Respond only on the command of the cox or other person who has been given responsibility. Placing of Oar/Scull in Outer Gate. At this stage do not expect the newcomer to reach out and undo his outer gate, but do
demonstrate that this function can be managed in a number of different and safe ways. Initial placement of Foot. Ensure a clear understanding of where it is safe to tread and where it is not. Three Point Entry/Exit Position. Outer hand grasping oar handle or both scull grips, inner hand over landside rigger and outer
foot on centre line of boat. Ensure that the body is lowered in a controlled manner and that stability is maintained. Adjustment of Foot Stretcher. Explain how position of foot stretcher effects position at both catch and finish; as its most
likely that the first outing will be in either a Virus or Learn to Row Quad adjust at backstops with a gap between thumbs of approximately 10cm.
Demonstrate the correct method for getting out of the boat, recovering the outer blade/scull and closing the gate.
5. Commands. A list of the Commands likely to be encountered during an outing can be found on pages 31-37. During this initial session, however, it will only be necessary to cover the following:
Number Off When Ready. Each member of the crew, normally starting with the bowman, will call out their position followed by ‘ready’ when they are adjusted and ready to go.
Backstops. The position to be adopted at this command should have been demonstrated during the earlier ergometer session. It should now be explained that this position is the start of the rowing cycle at this stage of learning to row. However, the correct placement of the blade on the water, with leading edge slightly raised will now have to be demonstrated.
Square Blades Only. Do not rush into feathering the blades during this session.
9
THE RECREATIONAL ROWERS TOOLBOX---------------------------------------------------------------------------------- Paddling Light, Go. Explain that most commands are made up of more than one word and that the last word is known as the
executive command and that it is on this word that action is taken. In this example Paddling Light is informative whilst Go is the time to react.
Easy All. Again the final word (All) is the time to react to the initial requirement. Demonstrate the position of hands, body, legs and blade(s) i.e. Legs, arms and body straight with blades off the water.
Drop. Raise the arms, relax the hands and allow the blades to sit flat on the water. Demonstrate briefly how raising and lowering the hands has an effect on the balance of the boat.
Hold/Hold Hard. Explain that this command is only used to slow the boat down quickly. Demonstrate what is required.
Debrief - Initial Session
Always finish any session, on the ergometer or on the water, with a debrief. The object of any debrief is as follows:
1. Establish that aims and objectives of that particular session have been met.2. Clear up any misunderstanding.3. Give opportunity for final questions.4. Collect feedback in order to be able to improve future sessions.
The order that you go about achieving the above is not set in stone but it is recommended that it follows a standard pattern that your students will come to recognize. A typical debrief for a Recreational Rowers Initial Session could well go along these lines:
“That concludes your initial introduction to Recreational Rowing. We hope that in the short time available to have given you a taster for our sport. We have not attempted to go too deep into what is a fairly technical activity; instead we have, in addition to showing you what facilities the Club can offer, demonstrated the basic rowing stroke. We have also shown you how important the ergometer is as a training aid. Finally, we have been on the water and you have taken those first few strokes. The purpose of this, and the next few sessions, is to provide you with an opportunity to row in order that you can decide whether or not you wish to join us and other Recreation Rowers”.
10

THE RECREATIONAL ROWERS TOOLBOX---------------------------------------------------------------------------------- “Firstly, have you enjoyed the session and secondly, do you feel that the instruction has been pitched at the right level”.
This is a general question and need not be directed at any particular person if you are dealing with more than one individual.
“At this stage it is perfectly normal for you to feel that your brains have gone into overload. Fear not this situation is common. You will also have some concerns and no doubt numerous questions of a technical nature. The technical questions can wait for the moment, we will deal with concerns first”. Listen to the concerns and then give a full and considered response - be sincere in the manner that you handle what to you might be an insignificant problem. Follow up with accepting questions of a technical nature. Measure your response to the audience i.e. you may receive a question from someone with previous rowing experience – beware of adding detail that could well confuse other newcomers. If necessary, answer the question on a one-to-one basis after the session has ended.
“ From our perspective the session has gone/or has not gone (with reasons why things were not as planned) as expected. Remember, we are Recreational Rowers and that means we are here because we get enjoyment from the sport. We do not have exams and no one is expected to do any more than they feel comfortable with. Rowing is not easy and that is one reason why many of us find it so addictive; do not become despondent if you find that you are not able to match the skills of many of the young athletes you will meet in the Club, they may have an advantage when it comes to flexibility but that does not mean that they have a monopoly over enjoyment”.
“The next session is ……… Do we have any final questions………….. Thank you very much, I/we look forward to seeing you next time”.
HOW TO STRUCTURE AND LEAD A TRAINING SESSION
WHY
11

THE RECREATIONAL ROWERS TOOLBOX----------------------------------------------------------------------------------Ideally every training session, both on and off the water, should be under the supervision of either a qualified rowing coach or instructor. Unfortunately, this level of control cannot always be assured and it may be necessary for someone with some rowing experience but no formal qualifications to take responsibility. These notes have been prepared for such an eventuality; use them to add purpose and structure and thus avoid wasted time and effort. Rigid adherence to these notes is not necessary but it is recommended that the key issues are included.
SITUATION APPRAISAL
Safety of your crew and the equipment being used must always be your number one consideration:
What are the prevailing weather conditions? What experience do we have available? What boats have been booked?
Having considered these 3 factors it now becomes possible to make a decision on what form the outing is to take. Clearly, if the conditions are marginal, experience limited and does not perhaps include a competent cox then land training is the only option. On the other hand, given a minimum of 2 experienced oarspersons and availability of a suitable stable boat then an outing might be a possibility.
WHAT DO WE WISH TO ACHIEVE FROM THE SESSION
Failure to identify/agree the aims and objectives for a session will almost certainly lead to wasted effort and a disillusioned crew. Identify from the outset:
What do the participants want to do? Remember we are dealing with Recreational Rowers and perhaps they do not see it essential to go out on the water if conditions are uninviting.
12

THE RECREATIONAL ROWERS TOOLBOX---------------------------------------------------------------------------------- What do the participants want to achieve from an outing or, alternatively, a land training session?
You should now be in a position to structure, in your mind, the way forward. Remember if your coaching experience is limited do not be over ambitious in what you think is achievable, particularly when dealing with an inexperienced crew; keep it simple, more complex sessions can be undertaken as confidence increases. Examples of possible sessions are given at Appendix 1.
What follows next is well-established practice: the initial briefing, followed by the outing/land training session and finally, the debrief. It is at this stage that it can go horribly wrong but it does not have to if you are well prepared and follow these guidelines.
THE INITIAL BRIEFING
At this stage its all in your head, your first task is to explain, in a clear and unambiguous manner, what you have decided.
1. Explain the format of the session and outline its aims and objectives.2. Name the equipment to be used.3. Detail crew positions.4. Name the cox.5. Detail someone to be responsible for booking out/in the boat.6. Delegate control and responsibility if more than one crew is involved.7. Agree length of outing.8. Explain what exercises will be undertaken including detail of intensity and duration.9. If necessary, demonstrate these exercises before going on the water.10. Ask for questions.11. Check crews understanding of what you have just outlined. Ask direct questions “What is the primary aim of this outing?”
THE EXECUTION
13

THE RECREATIONAL ROWERS TOOLBOX----------------------------------------------------------------------------------
Ideally you should be able to rely upon your cox to get the crew afloat in a safe and effective manner. If your cox is inexperienced, on the other hand, consider using the situation as a training point.
It is not absolutely essential that you take on the responsibility for conducting the on-water session, particularly if you are not going to be in the best position from which to be effective. For example, through necessity you could have positioned yourself in the boat where your overall vision might be restricted. The same applies if more than one boat is being used and you envisage difficulties in keeping crews together. In these situations you need to delegate.
Hopefully, the exercises that you have selected for the outing are “achievable” and relevant for your crew’s development. Moreover, you should at this stage be confident, following the response to your initial briefing, of the crews understanding of what is required of them. This means that you can now sit back and enjoy the outing. Wrong, all you have done so far is the easy bit, now you have to really start to concentrate (and possibly row at the same time) and be constantly mindful of the following issues:
1. Is the outing still satisfying the original aims and objectives?2. Are these aims and objectives still obtainable?3. Do I need to alter the aims and objectives in order to meet a change in circumstances?4. If I decide to make changes then I must give my reasons to the crew.5. Am I satisfied with the well being of the crew, again, do I need to make any adjustments?6. Are the exercises achieving what they were intended to achieve? If ineffective consider other options.7. Are we keeping to schedule?8. Have I been particularly harsh on anyone? Is yes, can they take it?9. Have I been praising when appropriate?10. How can I ensure that the outing ends on a positive note?
THE DEBRIEF
14

THE RECREATIONAL ROWERS TOOLBOX----------------------------------------------------------------------------------Always conclude a session with a debrief ideally after all equipment has been cleaned and returned to the boathouse. The debrief format is as follows:
1. Have the initial aims and objectives been achieved?2. If not why not?3. Give each person the opportunity to have an input.4. Establish what, hopefully, has been achieved from the outing. Given the right conditions this question could be asked individually of
everyone.5. Examine, by questioning, what could have been done differently in order to extract more from the outing.6. Give your assessment of the outing.7. Ask for any final points/questions.8. Agree time and date of next session.9. Give final words of encouragement and thanks for their attention.
Finally, it may not have been appropriate to discuss all issues in a group forum particularly if what needs to be said could cause embarrassment or resentment. In situations like this consider talking with the individual, on a one-to-one basis, privately. Do not rush into any action without first having given thought as to what you want to say and the possible reaction.
HEALTH AND INJURY PREVENTION
This section is intended for the Recreational Rower; it will be of limited relevance to the competitive athlete. However, whatever your level of commitment, rowing and sculling have many common health benefits. Recent studies have concluded that there are only a small number of major injuries associated with rowing but quite a few mild and moderate injuries. Some of the most frequently encountered being chest – rib
15

THE RECREATIONAL ROWERS TOOLBOX----------------------------------------------------------------------------------stress fractures and lower back injuries. Most injuries were found to be chronic and not acute reflecting the repetitive nature of rowing. In the world of exercise, rowing and sculling comes second only to swimming for exercising the whole body and on a par with cycling for demanding maximum strength and stamina. This section attempts to identify some of the medical problems that could affect the Recreational Rower and provide some guidance on injury prevention.
INFECTION
Highly –trained athletes suffer more upper respiratory tract infections (the common cold) than the average person and it is suggested that the reason for this is that high-intensity training can suppress the body’s immune system. On the other hand, moderate aerobic training can, it is believed, improve the body’s immune system. Avoid coming into contact with viruses and bacteria and follow sound general hygiene routines. Recreational Rowing is all about moderation, therefore, read on.
STRESS FRACTURES
Stress fractures are common but the cause of these injuries in rowers and scullers is not really known. The most popular theory is that the injuries are the direct result of poor posture whilst rowing and weak lower trunk development. The latter view sites the modern use of carbon in the manufacture of our oars and sculls and the corresponding greater force being applied to the athletes trunk. Until more is known about the cause of these injuries it is important that gearing ratios are proportionate to the athlete’s skills and levels of fitness. Ideally, Recreational Rowers will be supplied with appropriate equipment; should this not be the case then it is important that the coach is aware of the fact and tailors the outing accordingly.
LOWER BACK PAIN
Limited lower back development, poor technique and the repetitive nature of the sport all contribute to the possibility of pain in the lower back. A change of gearing and improved technique is often the answer but failure to respond to the first signs can result, at best, in a long lay-off and at worst, a prolapsed disc. The importance of a sound technique cannot be over emphasised. Get it right from the start.
16

THE RECREATIONAL ROWERS TOOLBOX----------------------------------------------------------------------------------HEAT STRESS
Heat stress whilst rowing or sculling is normally the result of dehydration. An average athlete can expect to lose up to 2 litres of water through sweating in the warmer months; during winter training a significant amount of water is also lost but this often goes unnoticed. It is good practise to ensure that your body is fully hydrated at the beginning of a session and that water is taken throughout the session in small but regular quantities. A trained athlete would normally drink 1.5 litres for every 1kg of weight lost per session.
WARM UP AND COOL DOWN
All sports acknowledge the benefits of warming up the muscular and cardiovascular systems prior to a training session and understand the need to cool down upon completion. Warming up increases blood flow to the muscles making them more flexible and less susceptible to injury. There is no need to go over the top at this stage, a light 5 minute jog or, some very light weight lifting if you expect to be working a particular muscle group fairly hard, is all that is recommended for the Recreational rower. The ergometer can also be used successfully to warm up all the major muscle groups. Normally the exercises that are undertaken at the start of most dry and water based sessions are all that is necessary.
Cooling down is more often than not ignored and we wonder why we are stiff the day after. Cooling down has 2 important reasons why it should be taken seriously. Firstly, it releases tension in your muscles and secondly, it flushes out the waste products that build up during a session. Recreational Rowers need allocate no more than a few minutes to the cooling down process; if your session has been fairly strenuous then 5 minutes light pressure on the ergometer will suffice. On the other hand, if your coach has been gentle with you 5 minutes stretching will be all that is required.
STRETCHING AND FLEXIBILITY
Stretching and Flexibility should not be confused as being the same thing. Stretching is the act of lengthening a muscle until the muscle receptors tell you to stop at which point you hold the position for 15 – 20 seconds and then relax. Flexibility is the range of movement that you have in a specific joint or group of joints. To give an example, one person may have to bend forward and place the palms of their hands on the floor in order to stretch their hamstrings whilst a second person could achieve the same result by just reaching their knees with their fingertips.
17
THE RECREATIONAL ROWERS TOOLBOX----------------------------------------------------------------------------------The first person has greater flexibility but both have stretched their hamstrings correctly. A great deal of dedication and time is needed in order to improve flexibility and needs to be undertaken correctly if injury is to be avoided.
GENERAL WELLBEING
Problems like being overweight, having a drink problem, smoking and generally feeling depressed all take time to address and unfortunately the problem of inertia (can I be bothered to do it today) is felt, to a lesser or greater extent, by us all. The good news is that it is well established that active involvement in a group or team activity can go a long way in helping to ease the problems of day-to-day life. Recreational Rowing is an ideal way to face the world and win.
RIGGING AND GEARING FOR THOSE NOT VERY INTERESTED
SCIENCE OR ART
Every rowing club has a “Rigging Expert”. Perhaps you have seen him; I say him because he comes with an enormous bag of bits that most normal females would be unable to carry. Within his bag he has a collection of spanners and things he calls “rigger jiggers”, an assortment of
18

THE RECREATIONAL ROWERS TOOLBOX----------------------------------------------------------------------------------spirit levels, balls of string, rolls of tape, and an incomprehensible range of jigs that would not look amiss in an architects office. The most important thing, however, is at the bottom of the bag. It looks like a book of logarithms but it is indeed his rigging tables. Armed with the information contained within its covers our expert can adjust the rigging of any rowing boat, to suit anyone from 1.5 to 2.5 metres in height, with a weight range of 40 to 120 kilograms and who might be in a crew with someone over 60 centimetres taller. Not only can he do all these things but he can also take into account the type of rowing to be undertaken (winter strength training outing or head race) together with other variables such as water conditions. He will have ensured that every club boat has been “rigged” to suit the crew(s) authorised to use it; training boats which are allocated for general usage will have been set up for Mr Average, if you do not meet this specification you can either make suitable adjustments or simply make do. If you are not Mr Average and are happy to make adjustments them read on because you will discover that a few simple adjustments to the position of the rower with respect to the work together with varying the gearing ratio can mean the difference between a comfortable and uncomfortable outing.
ADJUSTMENTS
When your club orders a new boat from a manufacturer they will specify the weight of the crew that will be using it. A boat intended for the elite club rowers has to be more weight sensitive than a boat for general club usage. Clearly, if you put a lightweight crew in a boat designed for heavyweights then you must expect the boat to sit higher out of the water and as a consequence be unstable. There are adjustments that can be made to improve the situation but no amount of adjustment can compensate for a large weight differential. Recreational Rowers will most likely have the use of boats designed specifically to be stable in all weathers and suitable for athletes of all weights. These boats are built to be robust and although they come with all the full range of adjustment points there is also a limit as to what can be achieved; an understanding of the principles of rigging will assist in achieving maximum efficiency but so far as the Recreational Rower is concerned we will simply concentrate on vertical and horizontal adjustment.
VERTICAL ADJUSTMENT
It is important that the legs, which provide most of the power, are as close to the waterline as possible during the leg drive. It is unlikely that you will be able to adjust your seat height but it may be possible to adjust your feet height in the stretcher in an endeavour to achieve the ideal. Unfortunately, Recreational Rowers tend to have lost some of the flexibility in their bodies and some, not all, may have increased their girth over
19

THE RECREATIONAL ROWERS TOOLBOX----------------------------------------------------------------------------------the years. If you fall into either of these categories adjust the height of your feet to a level that permits you to get your shins as near to vertical as possible comfortably. You may also find that in addition to being able to raise the height of the feet you have an adjustment that allows you to alter the angle or rake of your feet. Experiment with this adjustment in order to improve comfort.
The final adjustment that you can make and possibly the one adjustment that makes the real difference, is to raise or lower the height of the swivel. With a correctly adjusted swivel you should be able to sit at backstops with the spoon(s) just covered and the oar or scull handles touching the third rib up. If your hands are too high you will be inefficient and will find that as your arms become tired they drop and that the spoon is no longer covered at the finish. This is called “washing out”. If, on the other hand, your hands are too low your blade may not have sufficient clearance of the water during the recovery phase of the stroke. Increasing or decreasing the number of washers under the swivel alters swivel height and takes but a few minutes to accomplish. Remember, you need to adjust both riggers if in a sculling boat.
HORIZONTAL ADJUSTMENT
The rower will be in the correct horizontal position when at ¾ slide (from front stops) and with the back upright and arms just beginning to bend the oar/scull is at 90 degrees to the boat. In this position maximum force is being applied. What we must now ensure is that we are able to maximize the length of stroke or, time in the water. The ARA manuals suggest that we should aim to have the blade covered for approximately 90 degrees in a rowing boat and 110 degrees in a sculling boat. The ARA also suggests that the proportion of the stroke length before and after the pin is 60-40 or, to put it another way, in a rowing boat the catch should be taken at 55 degrees before the pin and finishing at 35 degrees after the pin. In a sculling boat this would change to 70 degrees at the catch and 40 degrees at the finish. Now here is the dilemma, how do we achieve these ideals when a. most people are of different stature and b. we all have different levels of flexibility. This problem manifests itself when we consider the multi oared boat and we are attempting to get the blades in and out of the water together. The normal reaction is to do nothing and as a result the whole crew will row to the length of the shortest rower and this individual will have a tendency to over reach, which, in turn leads to injury. Somehow, we need to scale down the rigging to allow the longest, most efficient stroke, possible by the individual rower. We can either reduce the stroke length or reduce the oar length and span and keep the angles the same. Mindful of the importance of “good rhythm” we can, if we elect to go down the path of keeping the angles the same, alter the inboard/outboard ratios. Too much outboard and the going gets tough, too little and the boat is slow and inefficient. How do we determine what is right? Remember the book of figures that our rigging expert keeps at the bottom of his bag? Here lies the answer; someone has already spent many hours working out ratios and spans to suit
20
THE RECREATIONAL ROWERS TOOLBOX----------------------------------------------------------------------------------every situation. There is another way, however- simple trial and error. Armed with a screwdriver and tape measure and a fair amount of patience it is possible to achieve a gearing that ensures blade work is synchronised, the stroke is mechanically efficient and maximum forward propulsion achievable. If you are over geared i.e. not enough span or insufficient inboard it will be difficult to increase the rate and there will be very little difference between the movement on the slide during the power and recovery phases of the stroke. A lighter gearing is always preferable because you can, if you so wish, increase boat speed by increasing stroke rate and, furthermore, it is less stressful on the more mature body!
BOAT CARE AND MAINTENANCE
ISSUE QUESTION ANSWERBoat Handling. When does an outing start? Before the boat is lifted off the rack.
When does an outing finish? When the boat is back on the rack.Responsibility. Who is in charge of a boat and the outing? In order: coach, stroke.Equipment Condition. What equipment checks are undertaken? Pre Row:
21
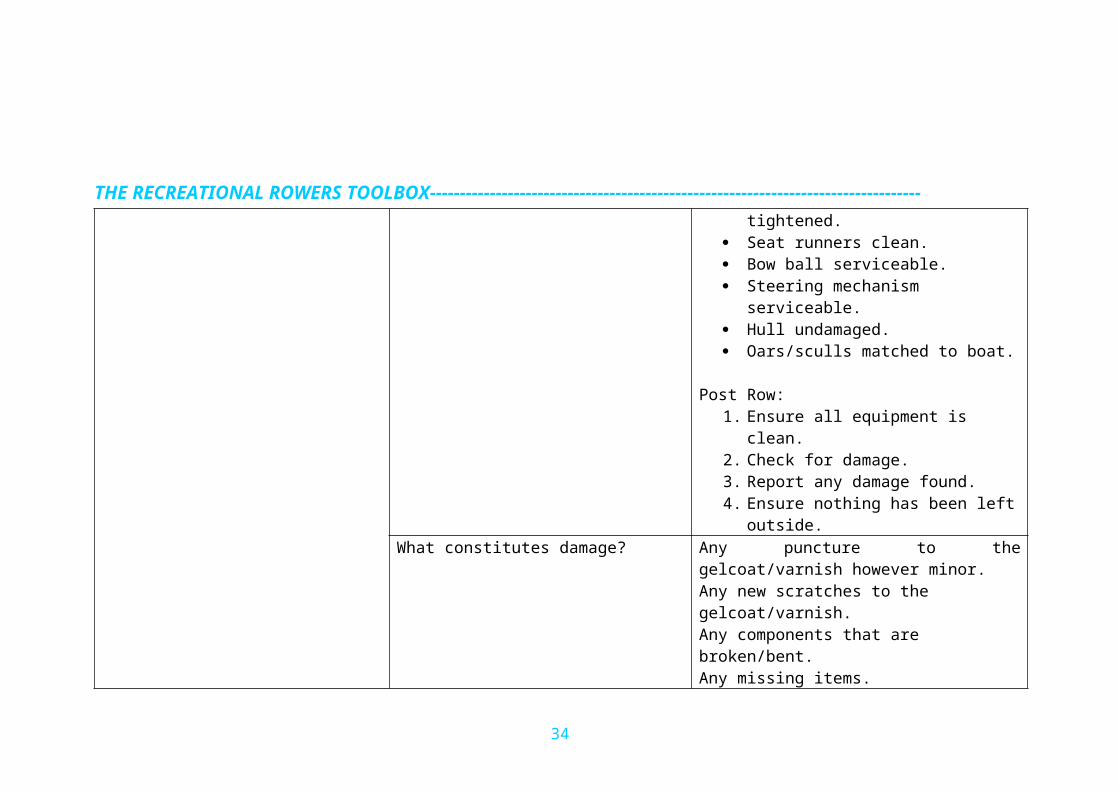
THE RECREATIONAL ROWERS TOOLBOX---------------------------------------------------------------------------------- Heel restraints serviceable. Riggers/nuts correctly tightened. Seat runners clean. Bow ball serviceable. Steering mechanism serviceable. Hull undamaged. Oars/sculls matched to boat.
Post Row:1. Ensure all equipment is clean.2. Check for damage.3. Report any damage found.4. Ensure nothing has been left outside.
What constitutes damage? Any puncture to the gelcoat/varnish however minor.Any new scratches to the gelcoat/varnish.Any components that are broken/bent.Any missing items.
ISSUE QUESTION ANSWEREquipment Condition (cont) What should I do if I notice damage? Record what you have found in the signing in/out
book.Report all damage to a committee member.If appropriate attach a “Do not use”sign.
Signing In/Out. Why do we sign boats out/in? Provides a register of boat usage.It informs others of who is on the river.Provides a record of damage.
22

THE RECREATIONAL ROWERS TOOLBOX----------------------------------------------------------------------------------Who is responsible for signing a boat out? The Cox or stroke.
Removing a Boat from Rack to Water. Who is responsible for a boats transfer? The Cox or person responsible for steering.How should a boat be carried? The crew should be positioned evenly up the
length of the boat, ideally opposite their riggers when the boat is inverted (unless the boat is a multi oared scull in which case a position alongside the rigger is taken)
Only one voice should be heard unless a member of the crew identifies a hazard.
A grip is taken on strong items e.g. shoulders or cross members.
The weight of a boat should be evenly distributed; it should not be carried just by its ends.
23
THE RECREATIONAL ROWERS TOOLBOX----------------------------------------------------------------------------------
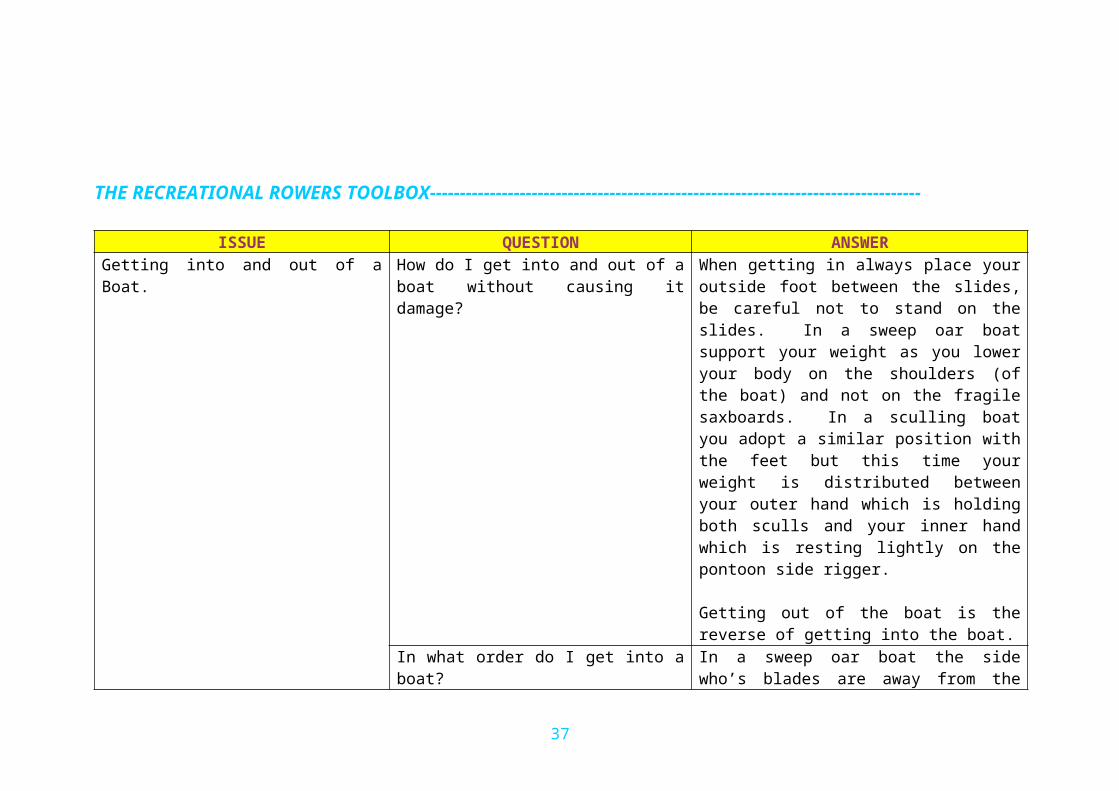
ISSUE QUESTION ANSWERGetting into and out of a Boat. How do I get into and out of a boat without
causing it damage?When getting in always place your outside foot between the slides, be careful not to stand on the slides. In a sweep oar boat support your weight as you lower your body on the shoulders (of the boat) and not on the fragile saxboards. In a sculling boat you adopt a similar position with the feet but this time your weight is distributed between your outer hand which is holding both sculls and your inner hand which is resting lightly on the pontoon side rigger.
Getting out of the boat is the reverse of getting into the boat.
In what order do I get into a boat? In a sweep oar boat the side who’s blades are away from the pontoon should always get in first whilst the remaining crew support the riggers. In a multi oared sculling boat there is no set order although it is normal to start from one end with an inexperienced crew.
24

THE RECREATIONAL ROWERS TOOLBOX----------------------------------------------------------------------------------
COXING - GIVE IT A GO
Had a go with the oars and apart from the blisters and the inability to “square early” quite enjoyed it really. But what about this coxing business, perhaps I should give it a go also. It might prove to be less stressful on the old joints and from what I can see there is even less chance of getting blisters. But hold on a minute, what about those commands - that sounds like serious stuff. Well, you will never know unless you give it a go.
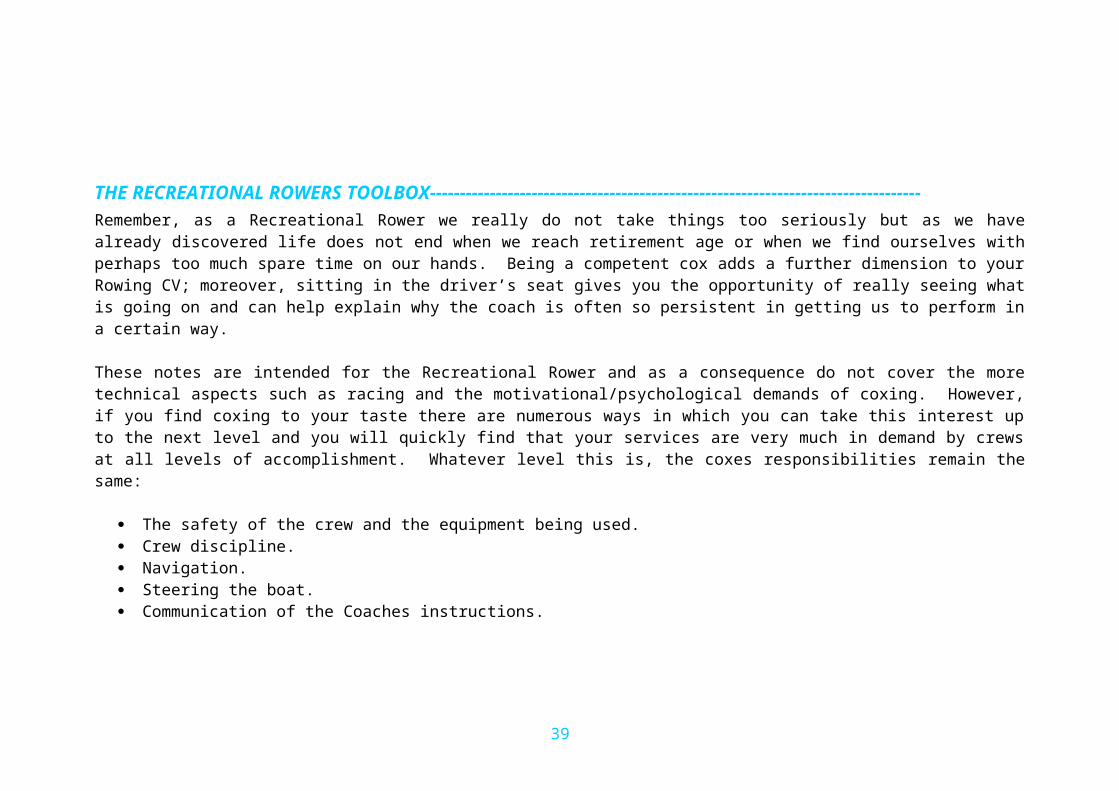
Remember, as a Recreational Rower we really do not take things too seriously but as we have already discovered life does not end when we reach retirement age or when we find ourselves with perhaps too much spare time on our hands. Being a competent cox adds a further dimension to your Rowing CV; moreover, sitting in the driver’s seat gives you the opportunity of really seeing what is going on and can help explain why the coach is often so persistent in getting us to perform in a certain way.
These notes are intended for the Recreational Rower and as a consequence do not cover the more technical aspects such as racing and the motivational/psychological demands of coxing. However, if you find coxing to your taste there are numerous ways in which you can take this interest up to the next level and you will quickly find that your services are very much in demand by crews at all levels of accomplishment. Whatever level this is, the coxes responsibilities remain the same:
The safety of the crew and the equipment being used. Crew discipline. Navigation. Steering the boat. Communication of the Coaches instructions.
25

THE RECREATIONAL ROWERS TOOLBOX----------------------------------------------------------------------------------SAFETY
As a cox you are responsible for keeping the rowers, the equipment and yourself safe. “Safety always comes first”
Clothing. An outing always starts with a look at the weather followed by an assessment of what clothing is appropriate for both yourself and your crew. In Winter the cox can expect to get cold and frequently wet. The Club will provide suitable waterproof outer clothing but this will not necessarily keep the core body temperature comfortable. Ideally you should wear a number of thin layers under your outer clothing rather than a single heavy item like a jumper. Heat loss through the head and the hands can also be significant so wear a hat and take with you a pair of thermal gloves. Heat pads that can be kept in the pocket can also be useful. It is very difficult to dictate to a crew as to what they should wear particularly if they are more experienced than you. The ideal clothing allows the body to flex, it will provide some protection against the wind and rain and, most importantly is warm. If you feel that someone is ill prepared it is your responsibility to say something via the coach or senior member if necessary. In Summer do remember that it is always a few degrees colder on the water so although you may not need to wear your winter clothing you should be covered against any eventuality. This could include a hat with a long peak/visor to protect against early morning and late evening glare from the sun and possibly a lightweight rainproof jacket. Again, your crew will have their own idea as to what is appropriate for them and this will often be based on the type of outing planned. The only point worth mentioning is for you to remind your crew of the dangers of unnecessary exposure to the sun particularly if the outing is to be lengthy. Sunglasses do come in handy especially when used to cover the eyes and not just as an adornment, moreover, sun cream is also to be recommended. Finally, the cox must always wear an approved lifejacket at all times whilst on the water. Remember “No lifejacket – No Cox”
Equipment. You do not allow your crew to take to the water until you have checked the equipment allocated for the outing and you are satisfied that it is in safe working order. You start your inspection once the boat has been removed from its rack and is sitting upright on its trestles. Starting form the bows check the following points:
Bow Ball - correctly attached and not damaged. Buoyancy Tank (Bows) - undamaged and with drainage plugs in position. Washboard - undamaged. Riggers - undamaged and all nuts correctly tensioned.
26
THE RECREATIONAL ROWERS TOOLBOX---------------------------------------------------------------------------------- Swivels - undamaged. Shoes - heel straps serviceable and correctly fitted. Steering mechanism (if fitted) - in good working order. Check rudder is undamaged. Buoyancy Tank (Stern) - undamaged and with drainage plugs in position. Hull - run your hand over all parts of the hull that cannot be seen, checking for damage.
It is not necessary for you to check the oars/sculls, that is the responsibility of your crew. Likewise, the crew are responsible for checking that their seat runners are clean and that the seats are in good working order and for the individual adjustment of their stretchers.
One final word on equipment, as you gain experience you will find that your list of “must haves” increases exponentially. Suddenly you find that you need an assortment of spanners, at least two different screwdrivers, a stopwatch, spare sun cream, a mobile phone – need to ring home and make suitable excuse for being late and not forgetting that we are Recreational Rowers, the flask containing something appropriate.
Water Safety. Capsizes are rare but if you should capsize it is important that you know what to do. The first rule to remember is “stay with your boat”. Rowing boats are designed to stay afloat even when full of water and with the sax boards below the water level. Staying together is also the best way of ensuring that everyone is accounted for and safe.
CREW DISCIPLINE
We have already had a brief look and some aspects of crew and equipment safety, it is now appropriate to have a look at a related topic - discipline. No, discipline is not something confined to the younger rowing fraternity; it is a necessary factor at all levels of rowing. Without discipline, rowing is dangerous and the risk of personal injury high. Moreover, damage to expensive equipment is inevitable if we do not have order.
Discipline starts with Club Policy which will set the rules as to who, what , when and how. Slightly further down the line we come to the coach/instructor of the day and then the cox, or in a coxless boat the steersperson or person appointed by the coach/instructor. From the moment
27
THE RECREATIONAL ROWERS TOOLBOX----------------------------------------------------------------------------------the crew gathers in the boathouse to collect a boat to the moment that same boat is returned to its rack there should only be “one voice” giving orders.
If you decide to take your coxing up a level e.g. enrolment on one of the excellent ARA Coxing Courses then you will find that a significant amount of time is spent looking at the various ways commands/orders are given and you will learn to differentiate between instructional, technical and motivational orders. You will also learn how to project your voice and how to put sufficient weight on the words being used. At this stage, however, it is sufficient that you appreciate the need for discipline, have the confidence to be able to steer the boat in the correct direction and have a basic understanding of the commands used in rowing.
NAVIGATION
You should treat the river with as much care and respect as you would a road. The river has its own “Code of Practice” with which the cox/steersperson should be familiar. Whilst each river will have its own distinct requirements there are some common practices:
You should always stay on the right side of the river - the opposite to driving a car. Sailing boats without a motor should be given navigational priority since they can find it difficult to change direction quickly. If you need to overtake another boat do so in the middle of the river. If you are being overtaken do not obstruct the faster boat; keep to the nearside bank as much as possible. You should warn other boats that are closing in on you by calling out “Ahead Sculler/Pair/Four/Eight”. If you decide to stop,chose a place that is safe. Avoid places where you are unseen.
STEERING THE BOAT
General Facts. It is perfectly normal to be apprehensive the first time that you are asked to steer a boat and it will take a short time for you to adjust to the peculiarities of the rudder and the fact that it is often hard to see what is ahead. It is worth pointing out at this stage the few things which can affect steering:
28
THE RECREATIONAL ROWERS TOOLBOX---------------------------------------------------------------------------------- Rudder - Only works when the boat is moving. Wind - Can be Head, Tail or Cross. Water Conditions - The strength of the current and the condition of the water surface. Direction of Travel - The resistance felt on the rudder is affected by direction of travel e.g. up or down stream. Boat Speed - The faster the boat the quicker the reaction to the rudder. Permanent Structures - Large structures like bridges can affect the water currents which in turn affects steering.
There are other factors that can and will affect the direction that a boat takes including poor balance and unequal pressure between stroke side and bow side blades. Suffice, at this stage to remember the basics and leave the rest for another day.
The Golden Rules. There are 3 Golden Rules to steering a boat; they apply to both front and rear loaders:
In normal conditions the rudder toggles/strings should only be moved 5cm in either direction or 45 degrees of rudder turn. Steering should be little and often. The boat does not respond immediately to the rudder direction being altered. Look ahead and start to make early corrections.
Rudder Control. It will take a few minutes for you to get to know which toggle or string to pull in order to change the direction that the boat is heading. Give yourself time for it to become a natural function and do not panic if it all goes wrong. If necessary halt the crew whilst you have a re-think. As soon as this problem is mastered try giving a thought to the following gems:
Ideally, only apply the rudder when the blades are in the water. This may require you to take a series of little direction changes rather than one large correction. Clearly, this only works if you have considered the path you wish the boat to take well in advance of any changes being made. If you fail to anticipate and apply full rudder at the last moment the likelihood is that the boat will lurch to one side and the crew will be thrown off balance.
Not withstanding the above it is often necessary on the Tees (tight corners) to take corrective action when the blades are off the water. Develop a light touch on the rudder toggles/strings – learn the 2-finger technique.
29

THE RECREATIONAL ROWERS TOOLBOX---------------------------------------------------------------------------------- If you do have to apply a large amount of rudder warn the crew – “Rudder Going On”. The boat will continue to turn even after the rudder has been straightened. Anticipate this characteristic to avoid a further correction
being necessary. As you approach a corner position the boat either on the right or to the right of middle of the river. If you are out of position you could
find that your boat is in the direct path of another boat coming from the opposite direction. If the corner is tight you may have to call upon the crew to assist you in getting the boat around the corner without encroaching on the
wrong side of the river. The appropriate command in this instance could be “Lighter on Bow Side, Harder on Stroke Side” or visa versa. In a very tight situation you could call “Easy Bow Side, Carry on Stroke Side”.
Be prepared to reduce the speed of the boat as you approach a corner particularly if you are new to the river. Remember, the bigger the boat the longer it takes to slow down, if in doubt, “STOP”.
Use part of an outing to hone your steering skills. Use the buoys to practice rudder control and to establish how reactive the boat is to your touch. Ensure that the crew are aware of what you are doing!
COMMUNICATION OF THE COACHES INSTRUCTION
Before getting afloat your coach/instructor will have briefed the crew as to the content and extent of the outing, it is also likely that he will have taken you aside and will have briefed you on your particular duties during the outing. As you become more experienced expect the coach/instructor to give you more responsibility; this could involve you in taking the crew through a series of exercises or even controlling a complete outing. The following tasks/responsibilities are included in order to give you a feel of what the future might entail:
Acting as the deputy to the coach/instructor. This requires the cox to fully understand what is required. Provide the coach/instructor with useful feedback. The identification of problems and reactions to various training routines and the
ability to communicate these findings to the coach/instructor after an outing.
Naturally, you do not have to take on these extra duties unless you want to, they are mentioned simply to give you an idea as to what being a regular cox might mean. Further on in this Tool Box you will find a section that gives examples of the type of exercises that a crew might be
30

THE RECREATIONAL ROWERS TOOLBOX----------------------------------------------------------------------------------expected to undertake during an outing; an awareness of what these exercises entail and the reason(s) for doing them would be useful even at this early stage.
Finally in this section we are going to have a look at some of the commands that a cox will be expected to give. Do not panic, you will not be expected to use them all during your first outing. Your repertoire of commands will expand as you gain in confidence and experience but it is important that you learn from the outset, how to give a command. A command needs to be:
Clear, concise and given with authority. Heard - not that easy. Timed in a manner that ensures smooth transition between actions. Key words such as “go”, “now”, “change” are known as the executive
commands and need to be given at precise parts of the stroke in order that rhythm is not compromised.
SITUATION ACTIVITY COMMANDGetting the Boat out of the Boathouse and on to the Water.
Crew stationed evenly along the boat opposite their riggers.
Hands On
Crew grasp the hull in readiness to lift. The boat is not lifted until the word “Lift” is given.
Lift on 3 1,2,3 Lift
Rolling the boat off the shelf to avoid touching adjacent boats,
Rolling the boat on 3 1,2,3 Roll
Half of the crew need to take up position on the opposite side of the boat.
Stroke/Bow Side going under Go
It may be necessary to reduce the width of the boat as it is removed from the boathouse.
Half Turn, Bow Side/Stroke Side up Go
SITUATION ACTIVITY COMMANDMoving the boat out of the boathouse. Ready to move, watching riggers
31

THE RECREATIONAL ROWERS TOOLBOX---------------------------------------------------------------------------------- Go Easy there
Turning the boat upright and placing on trestles.
Turning the boat upright Go Lowering to trestles Go
a. Taking the boat to the waters edge/pontoon. Keeping the boat upright.
Opposite your riggers Hands on ready to lift on 3 1,2,3 Lift Walking to pontoon, bows first Go Easy there Bow Side holding, Stroke Side under Go
SITUATION ACTIVITY COMMAND
32

THE RECREATIONAL ROWERS TOOLBOX----------------------------------------------------------------------------------b. Taking the boat to the waters edge/pontoon. Carrying the boat on the shoulders.
Whole crew to bow/stroke side Hands on ready to lift above heads on 3 1,2,3 Lift Alternate sides follow Stroke/Bow Go Lowering to shoulders Go Walking to pontoon, bows first Go Easy there Above heads Go Facing the water, lower to waists Go
Placing the boat on to the water whilst protecting the hull from the sides of the pontoon.
Moving to edge of pontoon Go Lowering the boat, one hand under, on 3 1,2,3
Putting Blades into swivels and getting crew aboard and adjusted. These commands are made on the assumption that the bows of the boat are pointing up-river and that the bow side riggers are nearest the pontoon, TRC practice.
Placing the blades in the swivels. Stroke Side holding, Bow Side, blades in Bow Side holding, Stroke side, blades across
(this command may be modified -“blades in swivels and tighten gates”)
SITUATION ACTIVITY COMMANDGetting the crew aboard. Stroke Side getting in. Bow Side holding, one
33
THE RECREATIONAL ROWERS TOOLBOX----------------------------------------------------------------------------------foot in, together. (Bow Side get into the boat in a similar manner to that of Stroke Side).
Moving and Manoeuvring the Boat whilst on the water.
Manoeuvring away from pontoon Touch it N (N= name of individual rower who takes a light pressure stroke).
Back it down N (N backs down lightly – the number of strokes taken will be determined by the cox).
Spinning the boat to face in the opposite direction.
Spinning the boat, Stroke Side backing down, Bow Side rowing on, BEGIN. (If you wish to spin the boat in the opposite direction Stroke Side back down whilst Stroke Side row on).
Easy Oars (command given when boat is facing in the required direction.
Stopping the boat under normal conditions. Next stroke, easy OARS or easy ALL Drop. (this command is only given when the
cox is satisfied that the boat is balanced)Stopping the boat in an emergency. Whole crew HOLD. (the crew will stop rowing
and will drop the blades –squared- into the water. The will stop quickly but not instantly).
Getting the Crew to undertake Basic Actions.
Identifying who is to react to the next command.
Bow Only – or individual position Stern Pair Bow Pair Stern Four Bow Four
SITUATION ACTIVITY COMMAND Whole Crew
34

THE RECREATIONAL ROWERS TOOLBOX----------------------------------------------------------------------------------Identifying the degree of pressure required. Light Pressure
Half Pressure Full/Firm Pressure
Identifying the amount of slide to be used. Quarter Slide Half Slide Three-Quarter Slide Full Slide
Identifying blade angle. Square Blade Rowing Feathered Blades
Breaking down the stroke into its component parts.
Arms Only With Bodies
Identifying where you want the crew to be in readiness for the start of the stroke/exercise.
From Backstops From Frontstops
Preparing crew for action. Are You ReadyThe Executive Command for most actions. Go
Getting the Crew to Perform Set Routines. Moving away from the pontoon and performing a warm-up sequence.
Whole Crew Backstops Arms Only Square Blades Begin/Go Next Stroke With Bodies Begin/Go (as the blade is leaving the water) Next Stroke
SITUATION ACTIVITY COMMAND Quarter Slide Begin/Go
35

THE RECREATIONAL ROWERS TOOLBOX---------------------------------------------------------------------------------- Next Stroke Half Slide Begin/Go Next Stroke Full Slide Begin/Go Next Stroke Easy Oars Drop
Carrying out a set piece at light pressure. Back Stops Paddling Light Are you Ready Begin/Go Next stroke Easy Oars Drop
Carry out a piece and varying the pressures. Back Stops Paddling Light Are you Ready Begin/Go Next Stroke Half Pressure Begin/Go
SITUATION ACTIVITY COMMAND Next Stroke Full Pressure Begin/Go Next Stroke
36
THE RECREATIONAL ROWERS TOOLBOX---------------------------------------------------------------------------------- Easy Oars Balance the boat Drop
Changing to square blade and back mid exercise.
Next Stroke – Square Blades Begin/Go Next Stroke – Feathering Blades Begin/Go
Basic Commands Given to Alert Crew to a Lowering of Standards.
Loss of rhythm, individuals moving too fast into the Catch and at differing times.
We are Rushing the Slide Slooooowly Forwards Glide Tooooogether Quick Hands Sloooow the Legs
Blade(s) out of sync at Catch, Finish or both. It is important that the Commands are given in time with Stroke.
Timing In Together Out Together
Blades at different heights during the recovery phase.
Keep hands low on the recovery Feel for the water Press with the toes at the catch
FAULTS AND HOW TO CLEAR THEM
37

THE RECREATIONAL ROWERS TOOLBOX----------------------------------------------------------------------------------This section of the Toolbox concentrates on some of the technical faults that we encounter in rowing. It’s all very well appearing knowledgeable and pointing out that someone is “skying at the catch” but what do we really mean? Moreover, the identification of a fault is the easy part, what is more difficult to identify is the cause of the fault and then to be able to suggest ways in curing that fault. The section ‘Exercises For On the Water’ (pages 47-51) should be used as an extension to this section.
FAULT SYMPTOM CAUSE SOLUTIONSkying at the catch. The blade is raised at the catch
instead of being lowered to just above the waterline.
1. Dropping the head as the body reaches front-stops.
Look at the head of the man in front or, concentrate on an object in the distance.
2. Over-reaching at the catch. Mark the saxboard, using coloured adhesive tape, the ideal position of the hands at front-stops.Practise body position exercises.
3. Hitting the water with the blade during recovery phase can result in overcompensating whilst squaring.
Practise square-blade paddling and blade control exercises. To maximize the benefit of square-blade paddling consider maintaining the position for the complete outing.
4. Rigging set too high. Check rigging height and adjust if necessary.
FAULT SYMPTOM CAUSE SOLUTIONTiming late at the catch. Blades not covered and locked-
on at the catch in time with Stroke.
1. Poor arms and leg coordination at the catch.
Bring problem to the attention of the crew. Concentration often goes as outing progresses.
38
THE RECREATIONAL ROWERS TOOLBOX---------------------------------------------------------------------------------- Ensuring that blade height is the
same at the catch. Concentrate on driving with the
arms and legs at the same time.2. Lack of control as the body reaches front-stops.
Slow recovery on the slide avoiding crashing into front-stops.
Squaring the blade early thus ensuring time available to prepare correctly for the catch.
Practise rhythm exercises – establishing a sound ratio will assist slide control.
The short stroke. The arc of the blade is less than others in the boat. It may be short at the catch or the finish or both.
1. Incorrect stretcher position. Check and adjust if necessary.
2. Incorrect gearing ratios Check and adjust if necessary.
FAULT SYMPTOM CAUSE SOLUTIONThe two-part stroke. The blade slows down in the
middle of the power/drive phase then accelerates to the finish.
1. Bum Shoving. Practise blade-control exercises.
39

THE RECREATIONAL ROWERS TOOLBOX----------------------------------------------------------------------------------2. Overgearing. Check that the gearing (both blades
and pin position) are suitable for the type of boat and size of the crew. Under ideal conditions, adjust to suit each crew member.
3. Uneven power through the stroke from catch to finish.
Make crew aware of problem and introduce exercises which assist in accelerating the blade evenly through the stroke from catch to finish.
Backsplash Water being knocked back towards the bows by the blade at the catch.
1. The blade is entering the water slower than the speed of the boat.
Increase the speed of the catch by practising paddling at frontstops and up to half slide.
2. The blade is entering the water at the incorrect angle.
Check that the pitch on the pin is correct.
Ensure that the handle is being held in the correctly.
Blade upon entry to water travels both downwards and towards stern of boat.
FAULT SYMPTON CAUSE SOLUTIONLooming. Blade going too deep with water
coming beyond the spoon and up the loom.
1. Lifting arms and shoulders too high at the catch.
Ensure that catch is not taken predominately by the upper body.
Ensure that the catch is taken with
40

THE RECREATIONAL ROWERS TOOLBOX----------------------------------------------------------------------------------the head up and the body not over stretching.
Ensure that the draw of the upper body is horizontal and not vertical.
Practise frontstops paddling.2. Blade not squared at the catch.
Check grip on handle(s). Practise square blade paddling.
3. Insufficient positive pitch. Check pin and adjust as necessary.Blade clipping water during recovery.
The blade hits the water whilst travelling from the finish to the catch.
1. Height of work inadequate. Check height of work and adjust at the pin if necessary.
2. Poor balance. Practise balancing exercises.3. Poor blade control. Check grip on handles.
Ensure handle(s) are moved parallel to the saxboard.
Check correct arms, body, slide sequence .
FAULT SYMPTOM CAUSE SOLUTIONOver reaching at the catch. Poor catch position with body
slumped over the feet and hands too low.
1. Incorrect stretcher position. Check position of stretcher and adjust if necessary.
41

THE RECREATIONAL ROWERS TOOLBOX----------------------------------------------------------------------------------2. Trying too hard. Ensure that the body angle obtain
during the first part of the recovery is maintained and not altered at the catch.
3. Not using the entire slide. Concentrate on using full slide particularly when the body becomes tired.
Washing out. Blade rising out of the water before the stroke is complete.
1. Incorrect (too much) pitch. Check and adjust pitch.
2. Incorrect height of work. Check gate and adjust if necessary.3. Failure to draw hands up into the chest at the finish.
Identify correct position at the finish - spoon(s) covered (just) and handle(s) aligned with third rib from the bottom. Consider marking the spot with tape.
4. Leaning away from the rigger at the finish (sweep oared boats only)
Twist into the rigger at the finish.
FAULT SYMPTOM CAUSE SOLUTIONDirty finishes including diving deep (catching a crab).
Unable to release the blade at the finish – blade feels that it is being dragged down.
1. Insufficient height of work. Check height of work and adjust if necessary.
42

THE RECREATIONAL ROWERS TOOLBOX----------------------------------------------------------------------------------2. Insufficient pitch. Check and adjust if necessary.3. Poor balance. Introduce balance control
exercises.4. Blade being feathered whilst spoon still under the water.
Practise dropping the hands at the finish before feathering the blade.
Practise square blade rowing.5. Pinching the boat at the finish.
Check stretcher position. Check blade(s) have sufficient
inboard.6. Poor release at the finish. Ensure that blade is being
accelerated at the finish.Leaning out at the catch (sweep oar).
Outside shoulder dropped at catch.
1. Poor balance Practise balance exercises.
2. Too much inboard. Check and adjust.3. Body not following arc of blade.
Ensure that the shoulders are parallel to the oar handle as they approach the catch.
FAULT SYMPTOM CAUSE SOLUTIONThe bent arm catch. Arms are not straight at the
moment that the blade enters the water.
1. Incorrect recovery position. Ensure that arms are straight immediately the recovery phase is started.
43

THE RECREATIONAL ROWERS TOOLBOX---------------------------------------------------------------------------------- Maintain the straight-arm
position as the body approaches front stops.
Do not let the seat overtake the hands.
Reinforce the “hands-body-slide”drill.
2. Attempting to take all the pressure at the catch on the arms.
Check hand positions. Ensure hands are in the soft
position (fingers hooked around the handle and not grasping)
Aim to get a feeling that the hands are being left behind as the legs drive from the start resulting in a feeling of arm stretch.
Legs not driving evenly through the stroke.
Knees not flattening together at the end of the stroke.
1. Unequal pressure on the stretcher during the drive.
Check physical problems. Leg-drive exercises.
2. Poor balance. Balance exercises.
FAULT SYMPTOM CAUSE SOLUTIONShooting the slide (bum Shoving) Seat moving towards backstops
before the blade is covered at the catch.
1. Starting leg drive too early. Essential that speed blade enters the water is equal to the speed of the leg drive. Try backstops, half
44

THE RECREATIONAL ROWERS TOOLBOX----------------------------------------------------------------------------------slide and frontstops paddling.
2. Weak trunk muscles unable to hold body firm during the leg drive.
Strengthen trunk muscles in Gym.
3. Legs being driven faster than speed at which the blade(s) are being pulled by the hands.
Concentrate on co-ordinating hands and leg actions. The speed that the seat travels needs to match the speed that the blades are travelling.
4. Overstretching at the catch. Identify ideal frontstops position and mark on saxboard. Do not reach beyond this point when taking catch.
Lack of slide control. A general feeling of being rushed – rating always looks and feels faster than it is.
Poor rhythm. Exercises which vary the rating.
Square early. Long pieces at low rating. Eyes shut rowing – use ears
to help set rhythm. Cox to call timings.
FAULT SYMPTOM CAUSE SOLUTIONExcessive lay-back at the finish. Shoulders too far behind the hips
at the finish.1. Stretcher adjusted too far away from the line of work.
Check and adjust if necessary.
2. Insufficient height of work. Check and adjust height of swivel.
45

THE RECREATIONAL ROWERS TOOLBOX----------------------------------------------------------------------------------3. Drawing with the arms after seat reaches backstops.
Practise extracting the blade as soon as the leg drive is completed.
Concentrate on finishing the leg drive and the arm draw at the same time.
Gripping the handles too tightly. Poor balance, early fatigue in the forearms and either diving-in to deep or washing-out at the catch.
1. Lack of confidence, fear of falling in.
Confidence exercises incl: Capsize Drill. Playing the piano.
2. Incorrect pitch. Check and adjust.Hands too far apart (sweep oar). Hands more than shoulder width
apart.1. Too much inboard . Check inboard/outboard ratio.
2. Stretcher positioned too far away from line of work.
Check and adjust stretcher position.
EXERCISES FOR ON THE WATER
46

THE RECREATIONAL ROWERS TOOLBOX----------------------------------------------------------------------------------A good maxim for all coach/instructors is “Tell them what they are going to do, Do it, Tell them what they did”. In practice this means that the crew understand what they are going to do before getting afloat and the reasons why. The crew will then carry out these instructions and when the outing is over they know that their performance will be reviewed by the coach/instructor during a full and frank debrief session. The hard part is in deciding what they are going to do; there is little to be gained in sending a crew out before having first identified their needs. If the crew consists of newcomers their needs are obvious, on the other hand if the crew is fairly established and have been rowing together for a season then their “needs” may be less clear and it may be necessary to include the crew in your deliberations in order to establish the aims of the outing. That done the next step is to identify what exercises would be best suited to helping achieve these aims and this is where this section of the TOOLBOX might be able to help. The exercises that are shown below are well established and will serve most needs, however, a good coach/instructor will always be prepared to try out something new if necessary so a degree of flexibility is recommended.
SITUATION EXERCISE DURATION PRESSURE TEACHING POINTSStart of outing, crew needs to warm-up
Fixed seat – Arms only 20 strokes Light Square blades Sitting up, Trunk just behind hips Relaxed hands Hands away fast Arms straight Move on to next exercise without stopping
Fixed seat – Arms and body only
20 strokes Light As for Arms only plus Trunk does not move until arms are straight Trunk angle comfortable and not extreme Head level
Quarter slide 20 strokes Light As for Arms and body plus Legs to remain flat until trunk (body) has swung over hips Ensure travel along slide restricted - just break the knees
Half slide 20 strokes Light As for Quarter slide plus Ensure travel along slide restricted – knees approx half bent
Three quarter slide 20 strokes Light As for half slide plus Ensure shins have not reached the vertical Movement along slide to be controlled and not rushed
47

THE RECREATIONAL ROWERS TOOLBOX----------------------------------------------------------------------------------Full slide 20 strokes Light As for three quarter slide plus
Ensure that rating is low – not above 20 spm Move into next exercise without stopping
Full slide - feathering 10 minutes Light Maintain good technique Look for rhythm
Full slide - feathering 100 strokes Half Maintain good technique Blades in and out of water together Puddles of equal size
Concentration drift - during the course of a steady state piece it has become apparent that concentration is falling
Catch 20 strokes Decided by the piece being undertaken
Body at correct angle, arms straight, shins vertical, head up Blade at correct angle - already squared Blade at correct height above the water Hands raised, blade dropped into water – spoon only covered
These exercises require the individual to concentrate on a single aspect of the stroke for a short period before moving on to the next aspect
Drive - initial 20 strokes As for catch Delay drive until spoon covered Feel pressure on toes Feel weight coming off seat Arms remain straight Delay opening of trunk until approximately half slide
Drive - final 20 strokes As for catch Start opening trunk as slide reaches half way Continue opening trunk until shoulders pass hips Maintain speed of blade by use of trunk and arms
Finish 20 stokes As for catch Forearms held parallel to water Body angle not excessive – do not lean back too far Tap hands down to extract spoons before feathering
Recovery – initial 20 strokes As for catch Hands –body (trunk) – slide sequence Straight arms, relaxed grip Complete body swing before raising legs Start to square blade
Recovery – final 20 strokes As for catch Controlled recovery – do not rush to front stops
48

THE RECREATIONAL ROWERS TOOLBOX---------------------------------------------------------------------------------- Complete squaring of blade before reaching front stops Ensure that arms are still straight with wrists flat Do not over stretch – keep head up
Weak catch – initial drive not being taken with legs
Legs only, arms straight 3 – 6 sets Light/half Maintain good trunk and arm posture throughout exercise Essential that spoons are covered before applying leg pressure Feel “suspended” between hands and feet Straight arms at all times Start 6 inches from front stops (recovery) Finish 6 inches from front stops (drive) Continue for 20 strokes before changing to: Starting 12 inches from front stops (recovery) Finishing 12 inches from front stops (drive) Continue for 20 strokes and easy. This completes 1 set Repeat exercise but at half pressure to complete set 2 Alternate light and half pressure for up to 6 sets
Blade handles being gripped too tightly causing blade to enter the water at an incorrect angle
Open palm sculling To benefit from this exercise it needs to be maintained for a long period, ideally half to a full outing, particularly if fault is significant
Varied After extracting blade from water, feather and then open fingers and rest grip (handle) under first set of knuckles. Relax forearms and shoulders whilst sliding forward
As handle (s) pass over shins put fingers back around grip and square blade in readiness for catch
Keep wrists flat with palms open Keep an outward pressure throughout with thumbs on end of grips
Blades being skied, of unequal height above the water or placed in the water too late or too slow
Square blade rowing As above for open palm sculling
Varied Ensure that blades are being held in the hands at the correct angle Ensure that when arms are straight the wrists are flat Lower blade height until just clipping water and then lower hands
half an inch - note position of hands Ensure that blades on both sides of the boat are at the same height
49
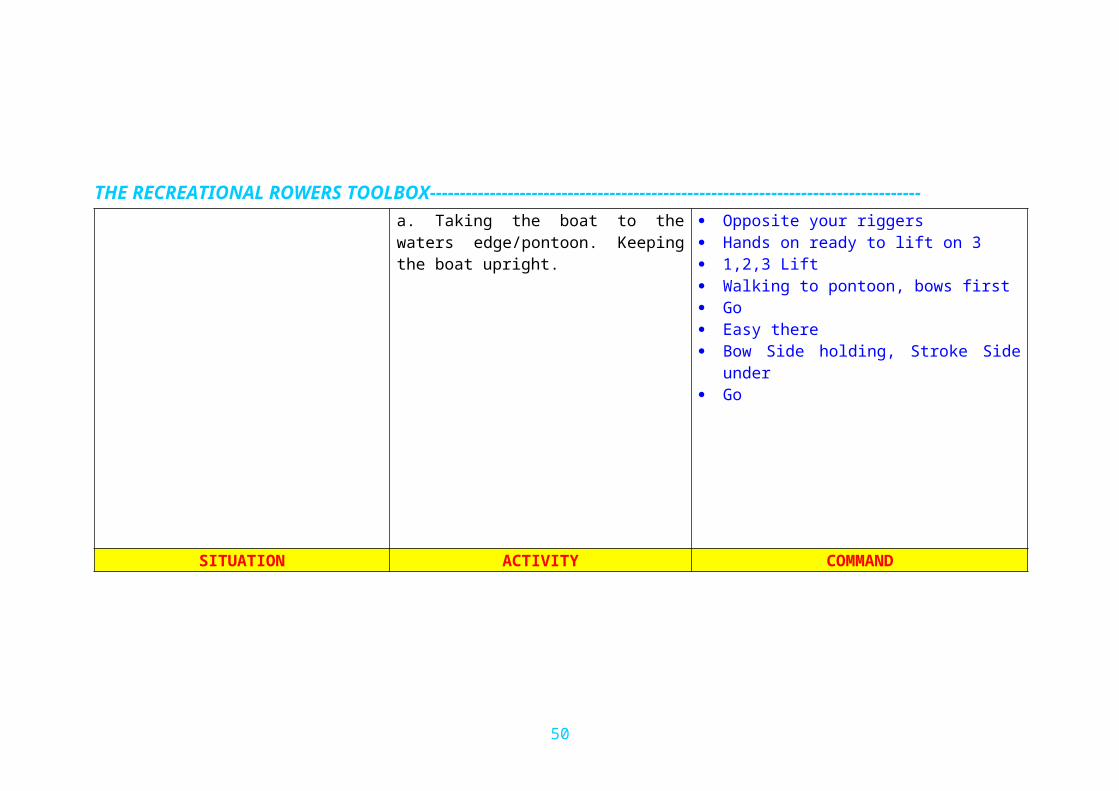
THE RECREATIONAL ROWERS TOOLBOX----------------------------------------------------------------------------------Double square blade rowing. Not for beginners. Useful in improving dexterity and relaxation during the recovery
20 – 60 strokes max, may be repeated after completion of further exercise(s)
Half pressure maximum
Keep rating below 20 spm Recovery up the slide as slow as possible Sequence: feather – square – feather- square – catch Aim for maximum relaxation with arms, shoulders and hands Ensure that blades are either squared or feathered, not somewhere
in betweenBody sequence on the recovery suspect, catch hurried and run on boat between strokes jerky
Arms only scullingFollowed bySculling with arms and trunkFollowed bySliding to quarter slide
40 strokes
40 strokes
40 strokes
Light to half Sit tall in finish position with shoulders behind hips Left hand to be slightly ahead and above right hand Ensure blades have consistent(spoons only covered) depth Arms straight before trunk rocks over Maintain horizontal draw of handles throughout drive sequence Maintain correct arm, body and legs sequence Ensure same length of slide on every stroke
As above but with a pause at forward position:Arms onlyArms and body onlyArms, body and quarter slide only
10 strokes10 strokes10 strokes
Light to half 3 – 5 second pause between each stroke Move into next 10 stroke sequence without stopping 30 strokes counts as one set. Aim to complete between 3 and 6
sets Key points as above
Poor transition from initial drive to opening the trunk
From the catch, legs only for 12 inches
20 strokes Light to half Start with boat still and crew in catch position (blades square) and sitting approx 12 inches from front stops
On command “go” crew slide to front stops, drop blades into water and drive with legs back to the 12 inch position
Trunk remains at catch position and arms remain straight After 20 strokes pause and then go into next exercise
From the catch, legs only for 12 inches and then start to open trunk - stop at half slide with the body nearing vertical and arms still straight
20 strokes Light Maintain teaching points from previous exercise Ensure that leg drive does not go beyond the half slide point Ideally the trunk at the half slide position is just reaching vertical,
ensure that it has not passed over the hips Blades are still squared. At the half slide point extract the blades
by dropping the hands (arms still straight) After 20 strokes pause before going on to next exercise
50
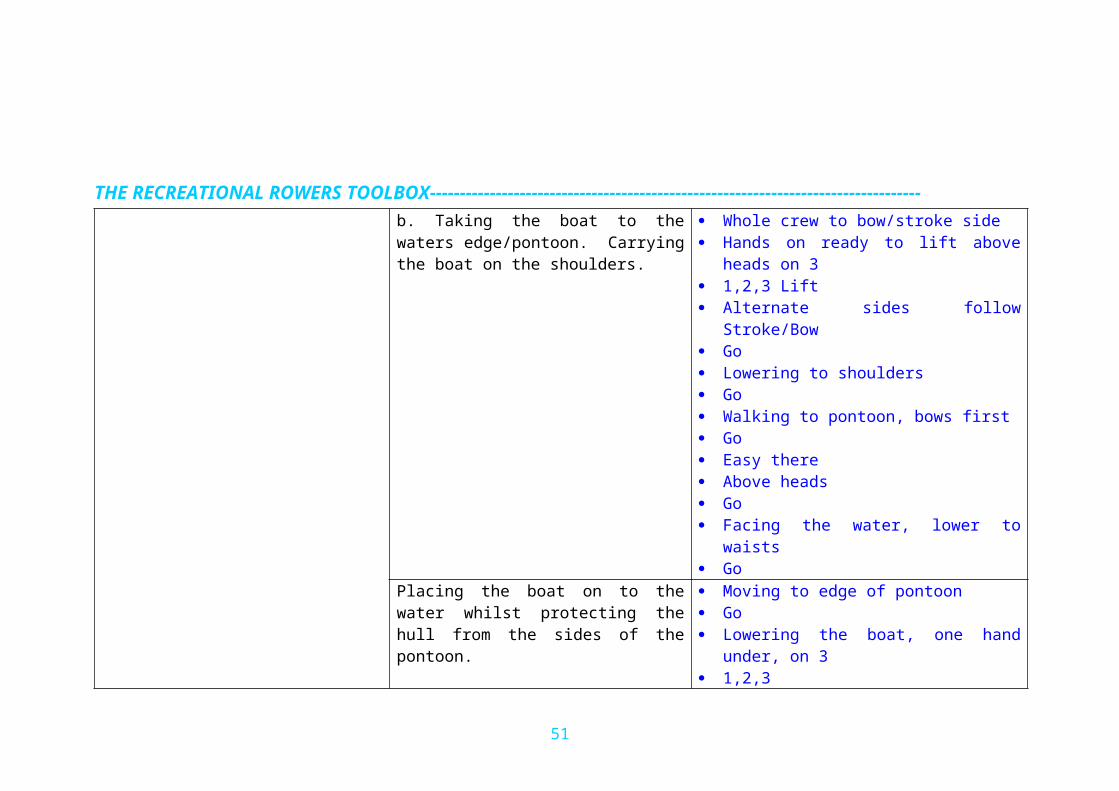
THE RECREATIONAL ROWERS TOOLBOX----------------------------------------------------------------------------------Poor transition from the finish of the leg drive to the introduction and completion of the arm draw
Complete the movements from the previous two exercises and then activate shoulders to commence the arm draw as trunk passes over hips
20 strokes Light Maintain teaching points from the two previous exercises Aim to maintain the momentum/power from the leg drive Shoulders should be held low and relaxed Hold arms straight until the trunk has passed over the hips On final part of the arm draw keep elbows in and forearms parallel
to the waterFeathering under water With boat stationary
practise tap down3 x 20 Light Check position of hands
Square blade paddling 5 to 30 minutes Variable Ensure problem is not the result of ‘low rigging’ Maintain blade propulsion Encourage idea of ‘sending’ the boat away at the finish
Extraction messy Exaggerated finish 5 to15 minutes See teaching points
Ensure that rigging is at correct height before undertaking exercise The concept of this exercise is a light catch followed by a firm
finish The blade propulsion is built-up during the drive Aim for a smooth drive and clean extraction (no snatching)
Spoon too deep with water up the loom
Square early 5 to 15 minutes Variable Check ‘hands, body, slide’ sequence Ensure that the slide phase is not rushed and that the blades are
squared early - the blade(s) should start to square as the hands come over the shins
Maintenance of body angle during first phase of the drive
5 to 15 minutes Variable Ensure that body angle does not change until the legs have completed approx 50% of the drive
In a multi oared boat the exercise can be practised in pairs. See the comments/exercises for “poor transition from initial drive….”
51

THE RECREATIONAL ROWERS TOOLBOX----------------------------------------------------------------------------------
52

THE RECREATIONAL ROWERS TOOLBOX----------------------------------------------------------------------------------
53

THE RECREATIONAL ROWERS TOOLBOX----------------------------------------------------------------------------------
54

THE RECREATIONAL ROWERS TOOLBOX----------------------------------------------------------------------------------
55

THE RECREATIONAL ROWERS TOOLBOX----------------------------------------------------------------------------------
GLOSSARY
56
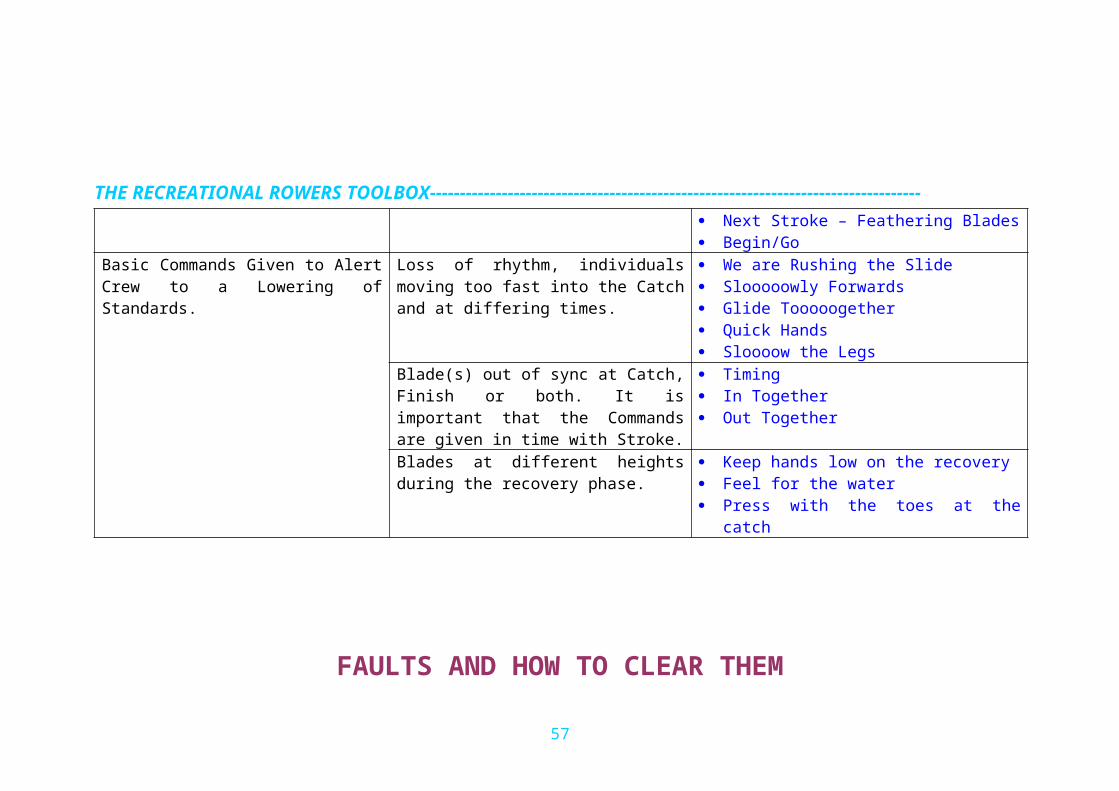
THE RECREATIONAL ROWERS TOOLBOX----------------------------------------------------------------------------------
BLADE - Spoon, at end of loom, that is placed in the water.BOW - The forward section of the boat.BOW MAN - The rowing/sculling position closest to the bows.CATCH - That part of the stroke as the blade enters the water.COCKPIT - That part of the boat where the sculler/rower sits.COLLAR - Part of the oar that pushes against the swivel.COXLESS BOAT - A boat which does not have a coxswain.COXSWAIN - Steersperson.DOUBLE-SCULL - A two man sculling boat.DRIVE PHASE - That part of the stroke when the body propels the boat.EIGHT - A rowing boat propelled by eight persons each holding one oar.ERGOMETER - The Rowing Machine, also known as the Ergo.FEATHERING - Rolling the oar until the blade is parallel to the water.FINISH - The extraction of the blade from the water.FOOT STRETCHER - Where the sculler/rowers feet are attached.INBOARD - Distance from end of handle to blade-side face of collar.OAR - Term used to describe the equipment used to propel the boat.OUTBOARD - Distance from tip of blade to blade-side face of collar.OVERLAP - The amount by which the hands cross over each other.PIN - The vertical axle attached to the end of the rigger.PITCH - Angle of the blade away from the perpendicular.PORT - Right-hand side of boat as you sit in it.QUAD SCULL - A 4-man boat, each person having 2 oars (sculls).RECOVERY PHASE - That part of the cycle between finish and catch.ROWING - Propelling a boat with a single oar held in both hands.SCULLING - Propelling a boat by holding an oar in each hand.SCULLS - A pair of sculling oars.
SINGLE SCULL - A one man boat propelled by a single pair of sculls.SPREAD - The distance between the two pins on a sculling boat.SQUARING - Moving the blade from the feathered position 90 degrees.STARBOARD - Left-hand side of boat as you sit in it.STERN - The aft or rear section of the boat.SWEEP OAR - Rowing with one blade as opposed to sculling with 2 blades.SWIVEL - The part of the rigger that holds the oar.
57