Ford Super Duty Dash Lighting LED Upgradejcray/04F250/pdfs/F250DashLEDs.pdfFord Super Duty Dash...
32
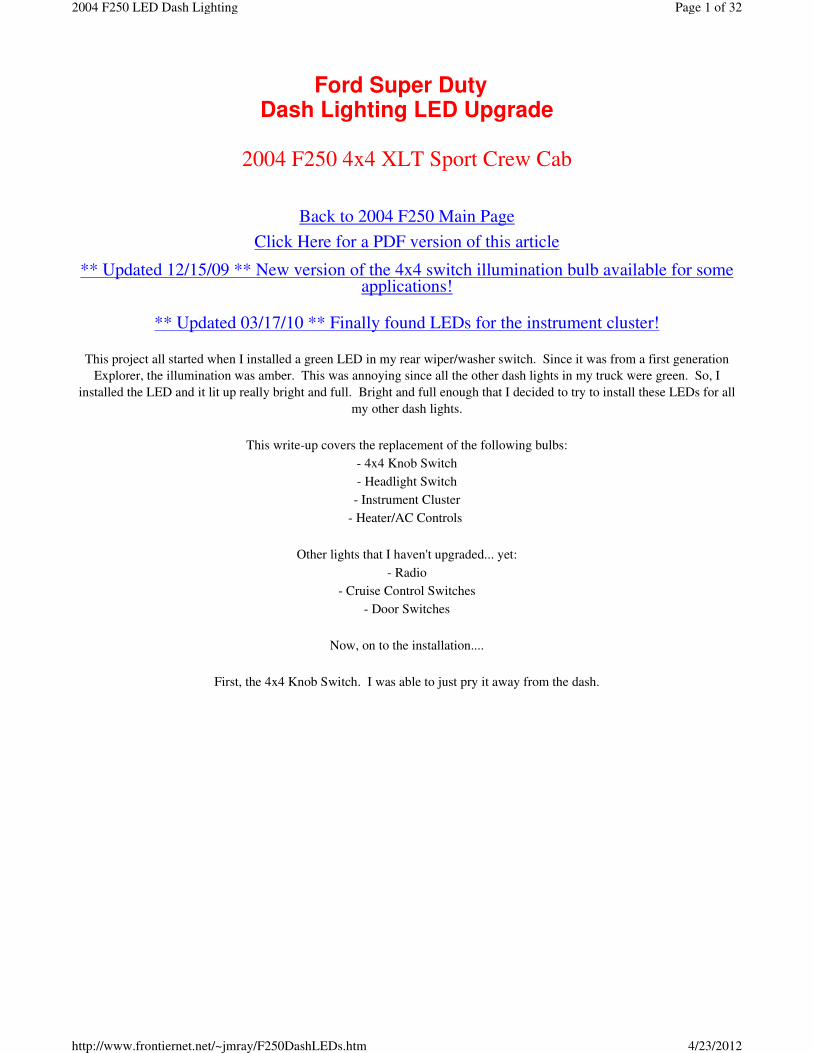
Ford Super Duty Dash Lighting LED Upgrade 2004 F250 4x4 XLT Sport Crew Cab Back to 2004 F250 Main Page Click Here for a PDF version of this article ** Updated 12/15/09 ** New version of the 4x4 switch illumination bulb available for some applications! ** Updated 03/17/10 ** Finally found LEDs for the instrument cluster! This project all started when I installed a green LED in my rear wiper/washer switch. Since it was from a first generation Explorer, the illumination was amber. This was annoying since all the other dash lights in my truck were green. So, I installed the LED and it lit up really bright and full. Bright and full enough that I decided to try to install these LEDs for all my other dash lights. This write-up covers the replacement of the following bulbs: - 4x4 Knob Switch - Headlight Switch - Instrument Cluster - Heater/AC Controls Other lights that I haven't upgraded... yet: - Radio - Cruise Control Switches - Door Switches Now, on to the installation.... First, the 4x4 Knob Switch. I was able to just pry it away from the dash. Page 1 of 32 2004 F250 LED Dash Lighting 4/23/2012 http://www.frontiernet.net/~jmray/F250DashLEDs.htm
Transcript of Ford Super Duty Dash Lighting LED Upgradejcray/04F250/pdfs/F250DashLEDs.pdfFord Super Duty Dash...
Ford Super Duty
Dash Lighting LED Upgrade
2004 F250 4x4 XLT Sport Crew Cab
Back to 2004 F250 Main Page
Click Here for a PDF version of this article
** Updated 12/15/09 ** New version of the 4x4 switch illumination bulb available for some applications!
** Updated 03/17/10 ** Finally found LEDs for the instrument cluster!
This project all started when I installed a green LED in my rear wiper/washer switch. Since it was from a first generation
Explorer, the illumination was amber. This was annoying since all the other dash lights in my truck were green. So, I
installed the LED and it lit up really bright and full. Bright and full enough that I decided to try to install these LEDs for all
my other dash lights.
This write-up covers the replacement of the following bulbs:
- 4x4 Knob Switch
- Headlight Switch
- Instrument Cluster
- Heater/AC Controls
Other lights that I haven't upgraded... yet:
- Radio
- Cruise Control Switches
- Door Switches
Now, on to the installation....
First, the 4x4 Knob Switch. I was able to just pry it away from the dash.
Page 1 of 322004 F250 LED Dash Lighting
4/23/2012http://www.frontiernet.net/~jmray/F250DashLEDs.htm
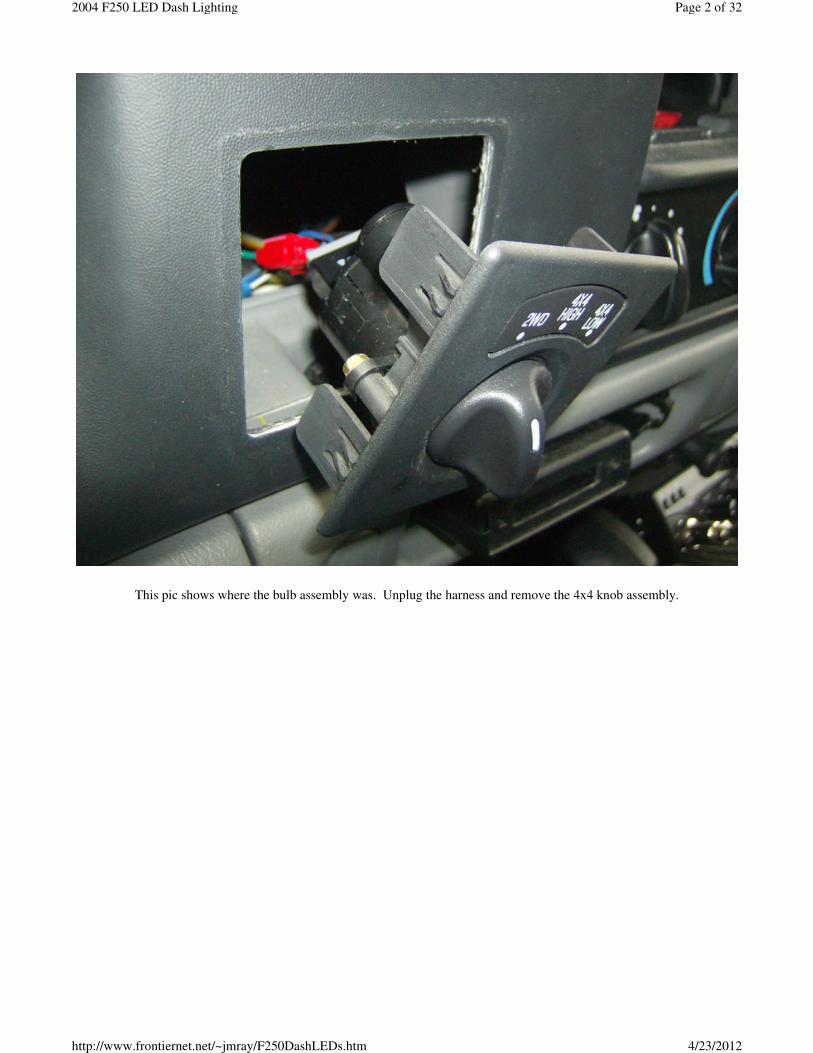
This pic shows where the bulb assembly was. Unplug the harness and remove the 4x4 knob assembly.
Page 2 of 322004 F250 LED Dash Lighting
4/23/2012http://www.frontiernet.net/~jmray/F250DashLEDs.htm

Here's the bulb housing with the new LED installed. The LED used for this bulb was from superbrightleds.com and is part
number NEO5-G. I soldered the LED legs to the housing contacts, same as I did with the regular bulb in my 4x4 knob
lighting write-up.
Page 3 of 322004 F250 LED Dash Lighting
4/23/2012http://www.frontiernet.net/~jmray/F250DashLEDs.htm
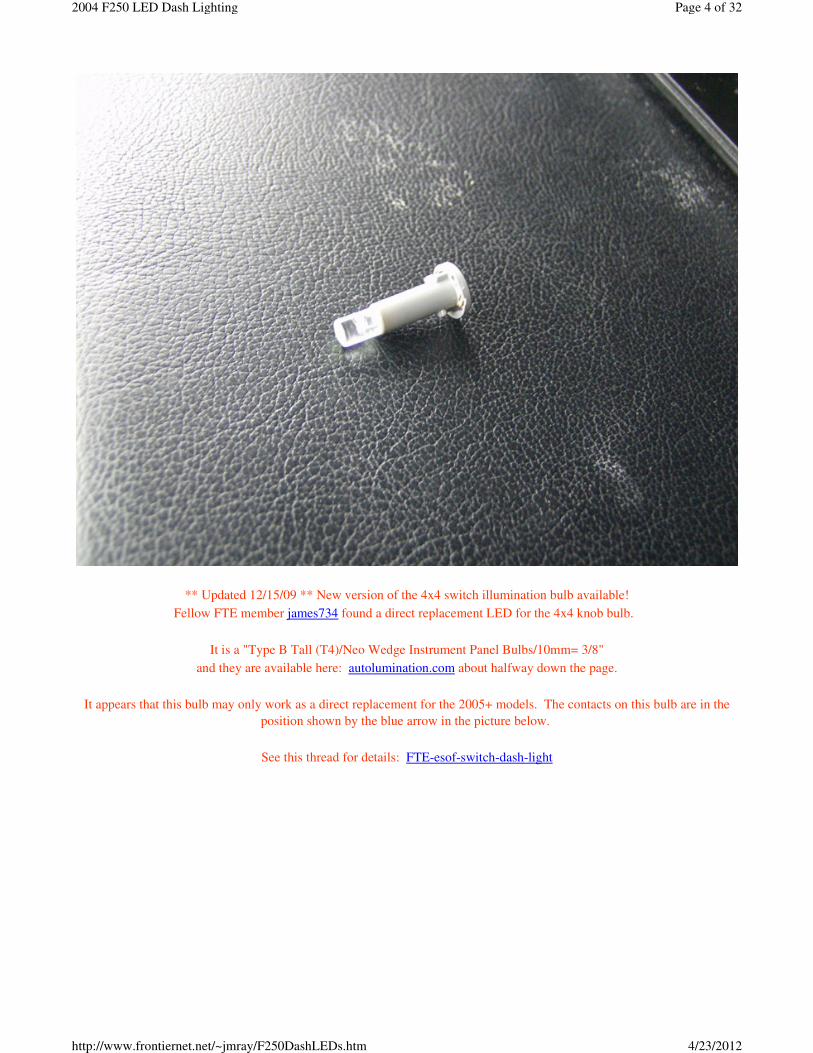
** Updated 12/15/09 ** New version of the 4x4 switch illumination bulb available!
Fellow FTE member james734 found a direct replacement LED for the 4x4 knob bulb.
It is a "Type B Tall (T4)/Neo Wedge Instrument Panel Bulbs/10mm= 3/8"
and they are available here: autolumination.com about halfway down the page.
It appears that this bulb may only work as a direct replacement for the 2005+ models. The contacts on this bulb are in the
position shown by the blue arrow in the picture below.
See this thread for details: FTE-esof-switch-dash-light
Page 4 of 322004 F250 LED Dash Lighting
4/23/2012http://www.frontiernet.net/~jmray/F250DashLEDs.htm

Reinstall the bulb assembly into the 4x4 knob assembly and turn on the headlights, to verify you have the LED in correctly, it
will only work one direction. Then, unplug the harness and set this assembly to the side, since it needs to be removed for the
upcoming dash removal.
Now, on to the headlight switch. There's a notch at the bottom of this assembly. Just pry it away with a screwdriver and it
pops out. Unplug the two plugs and its out.
Page 5 of 322004 F250 LED Dash Lighting
4/23/2012http://www.frontiernet.net/~jmray/F250DashLEDs.htm
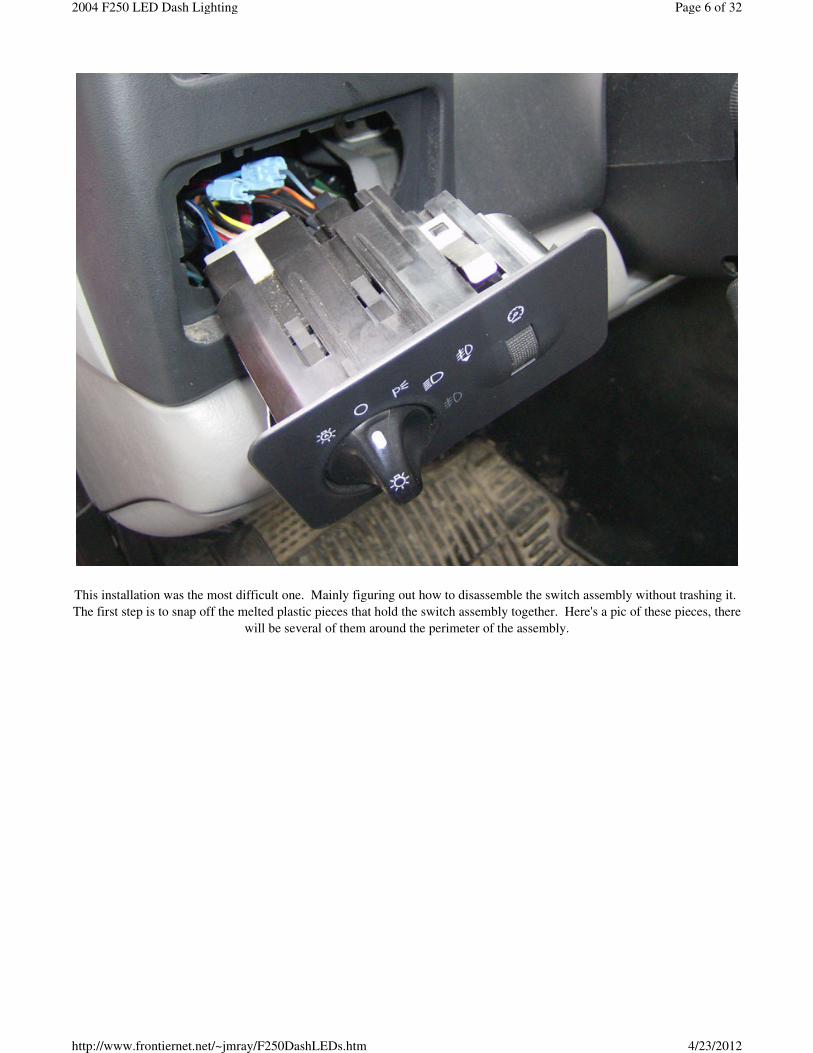
This installation was the most difficult one. Mainly figuring out how to disassemble the switch assembly without trashing it.
The first step is to snap off the melted plastic pieces that hold the switch assembly together. Here's a pic of these pieces, there
will be several of them around the perimeter of the assembly.
Page 6 of 322004 F250 LED Dash Lighting
4/23/2012http://www.frontiernet.net/~jmray/F250DashLEDs.htm
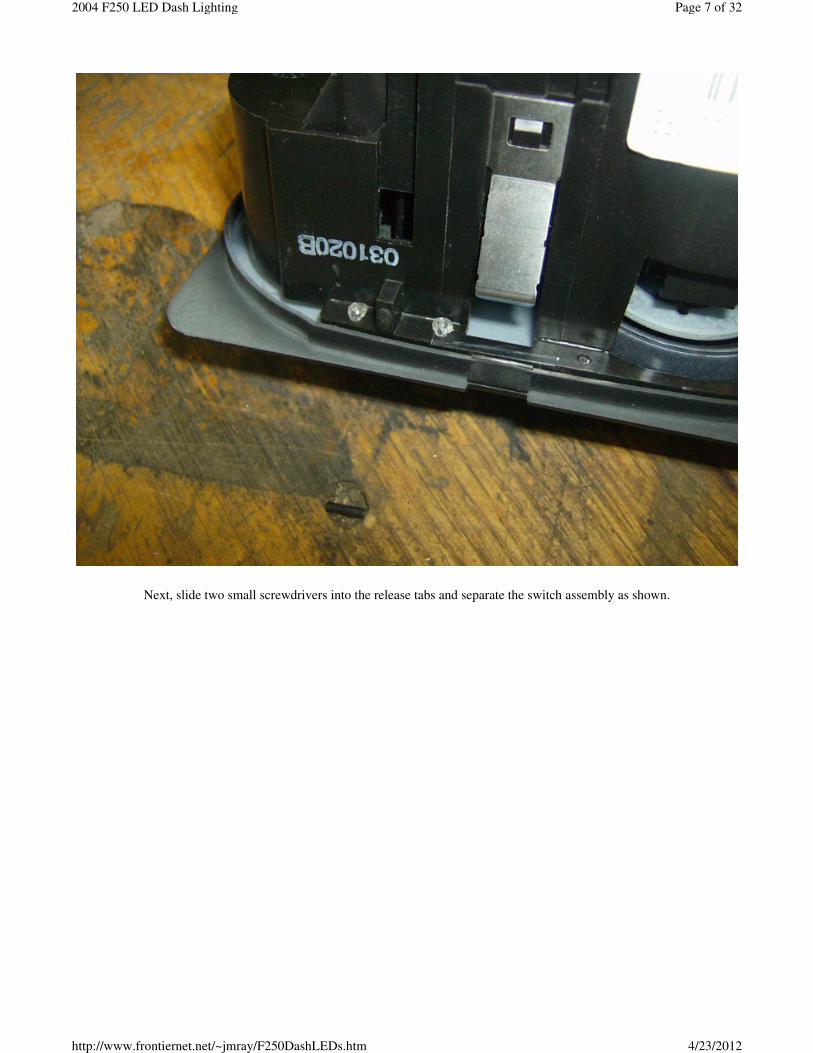
Next, slide two small screwdrivers into the release tabs and separate the switch assembly as shown.
Page 7 of 322004 F250 LED Dash Lighting
4/23/2012http://www.frontiernet.net/~jmray/F250DashLEDs.htm
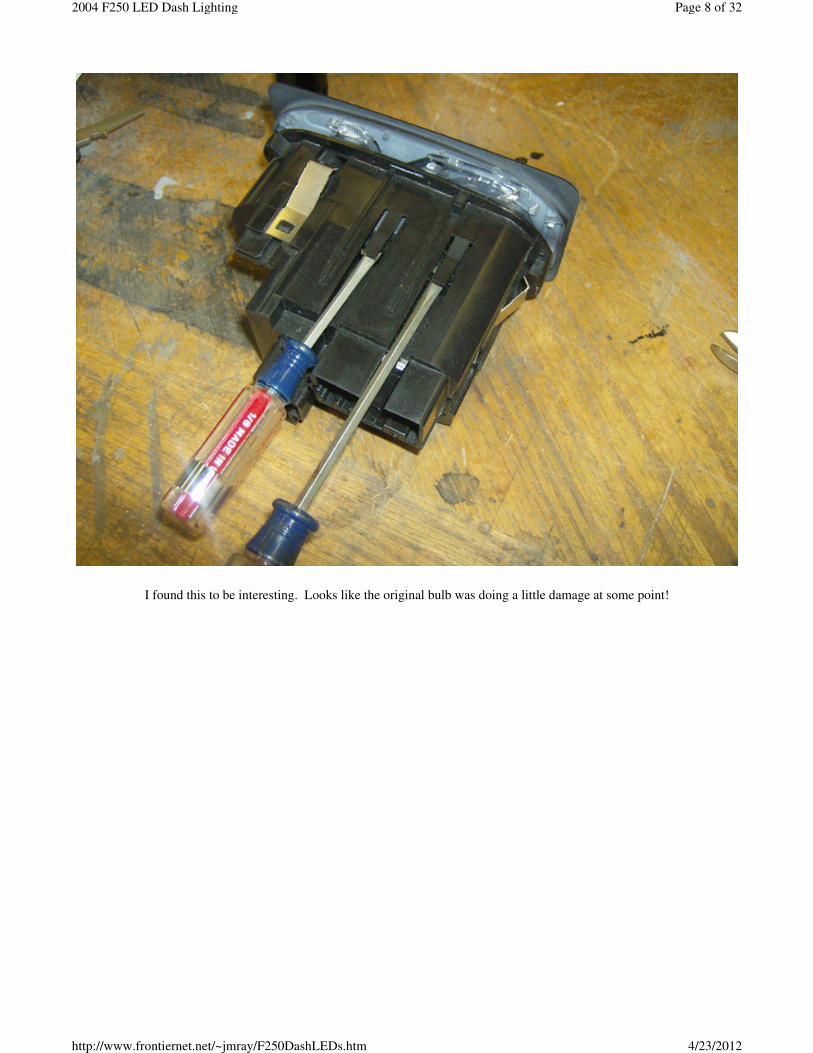
I found this to be interesting. Looks like the original bulb was doing a little damage at some point!
Page 8 of 322004 F250 LED Dash Lighting
4/23/2012http://www.frontiernet.net/~jmray/F250DashLEDs.htm
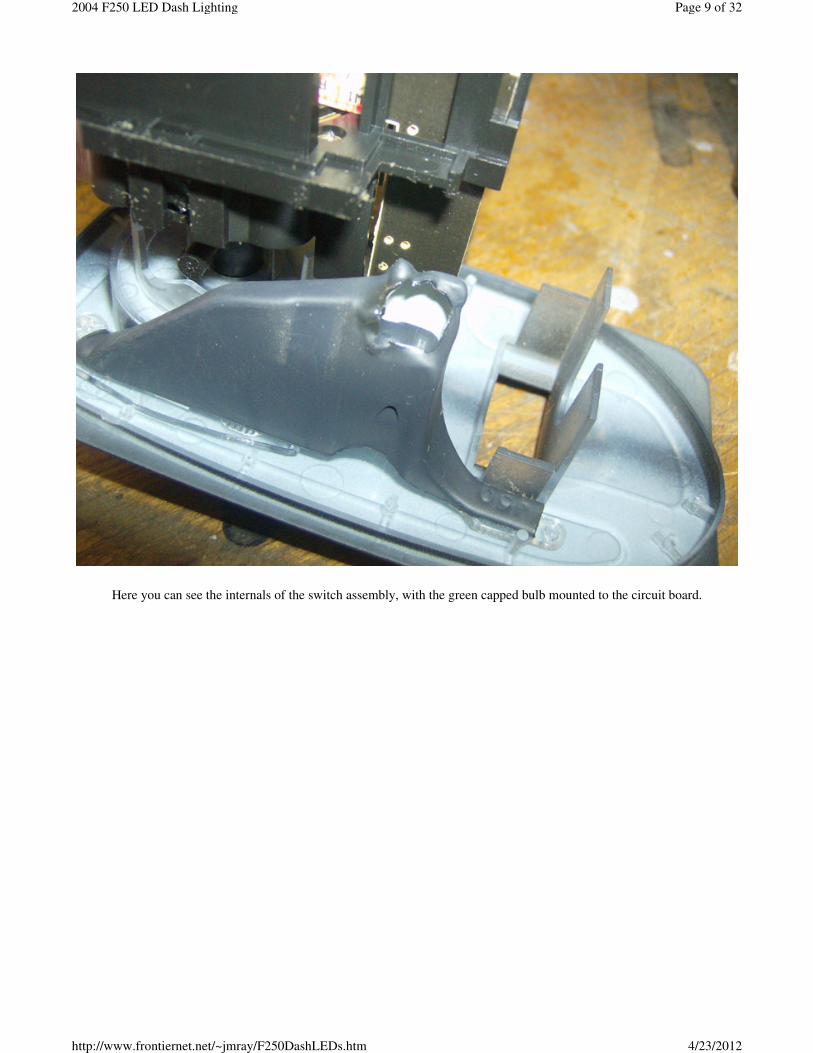
Here you can see the internals of the switch assembly, with the green capped bulb mounted to the circuit board.
Page 9 of 322004 F250 LED Dash Lighting
4/23/2012http://www.frontiernet.net/~jmray/F250DashLEDs.htm
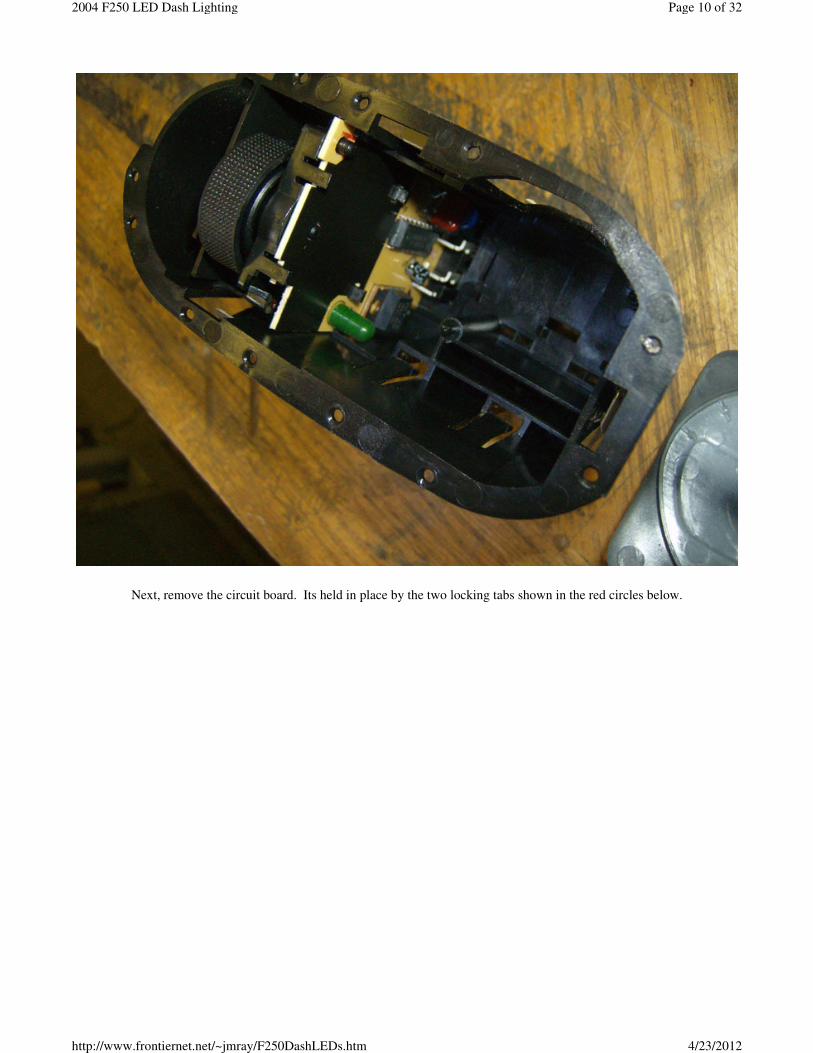
Next, remove the circuit board. Its held in place by the two locking tabs shown in the red circles below.
Page 10 of 322004 F250 LED Dash Lighting
4/23/2012http://www.frontiernet.net/~jmray/F250DashLEDs.htm
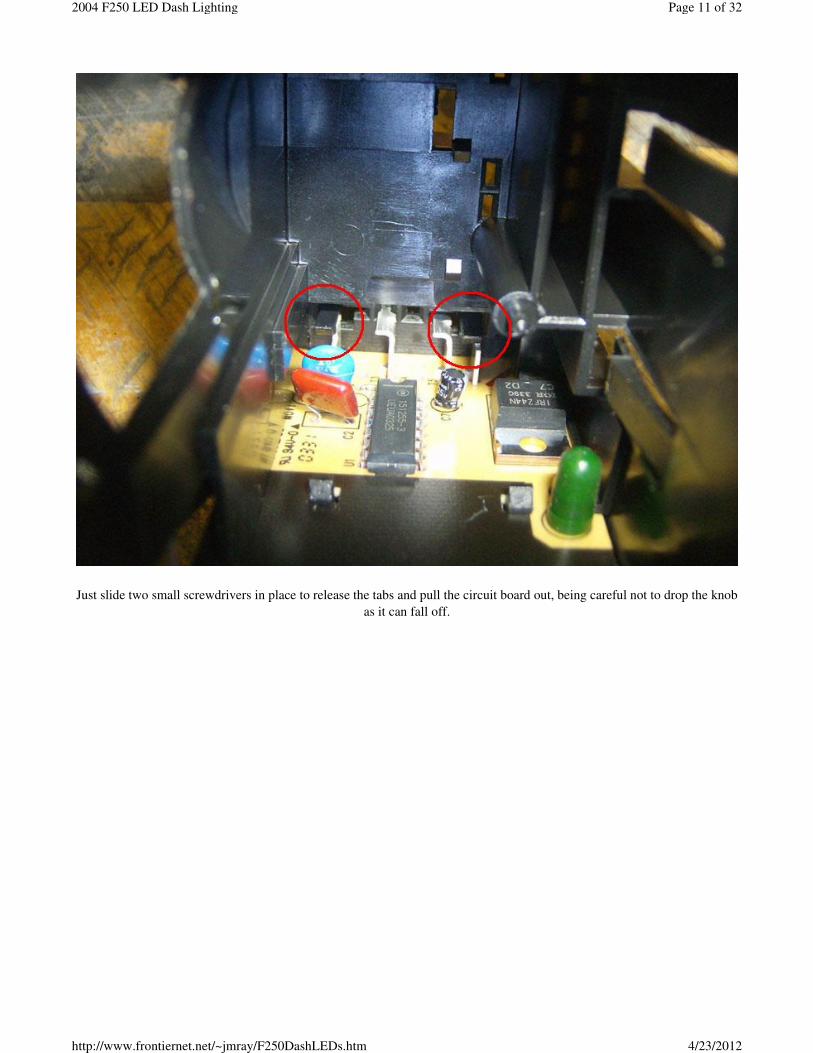
Just slide two small screwdrivers in place to release the tabs and pull the circuit board out, being careful not to drop the knob
as it can fall off.
Page 11 of 322004 F250 LED Dash Lighting
4/23/2012http://www.frontiernet.net/~jmray/F250DashLEDs.htm
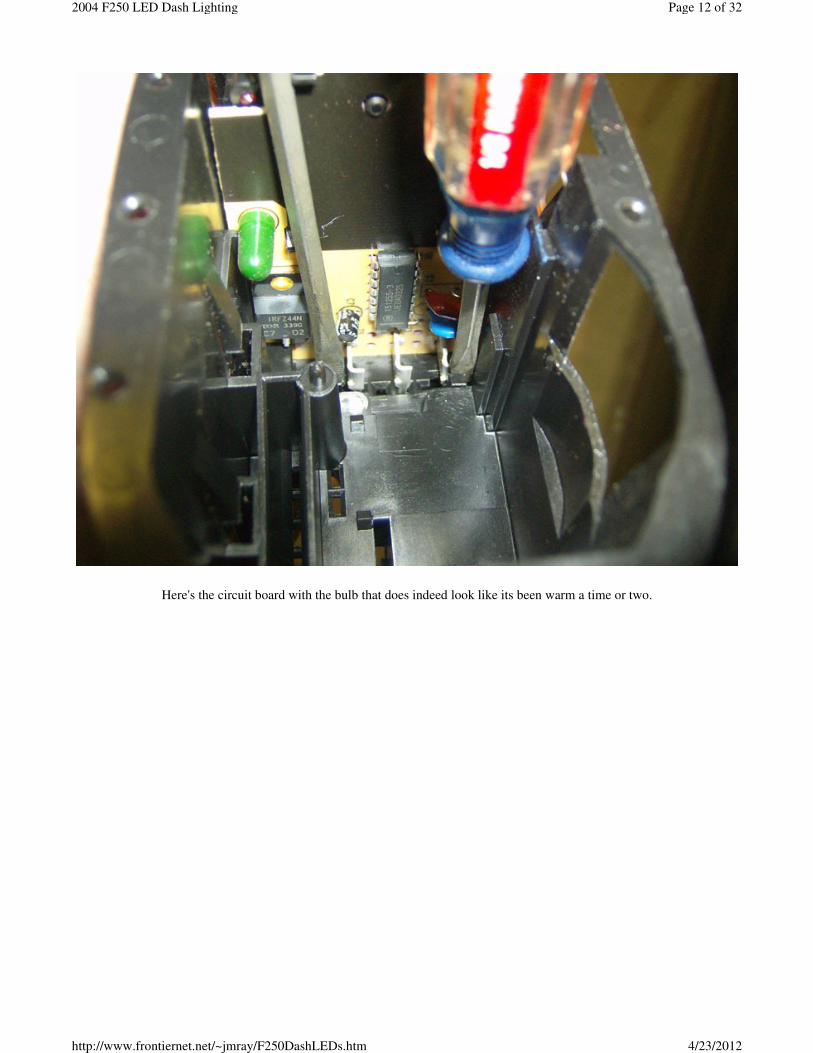
Here's the circuit board with the bulb that does indeed look like its been warm a time or two.
Page 12 of 322004 F250 LED Dash Lighting
4/23/2012http://www.frontiernet.net/~jmray/F250DashLEDs.htm
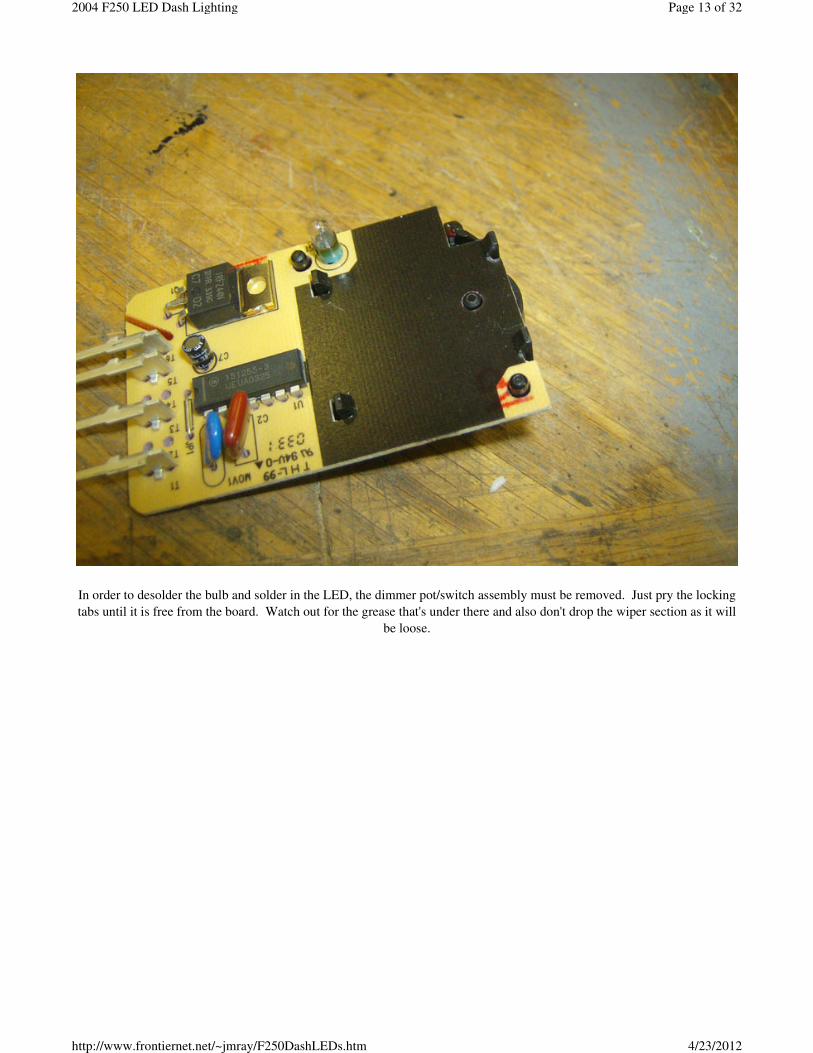
In order to desolder the bulb and solder in the LED, the dimmer pot/switch assembly must be removed. Just pry the locking
tabs until it is free from the board. Watch out for the grease that's under there and also don't drop the wiper section as it will
be loose.
Page 13 of 322004 F250 LED Dash Lighting
4/23/2012http://www.frontiernet.net/~jmray/F250DashLEDs.htm
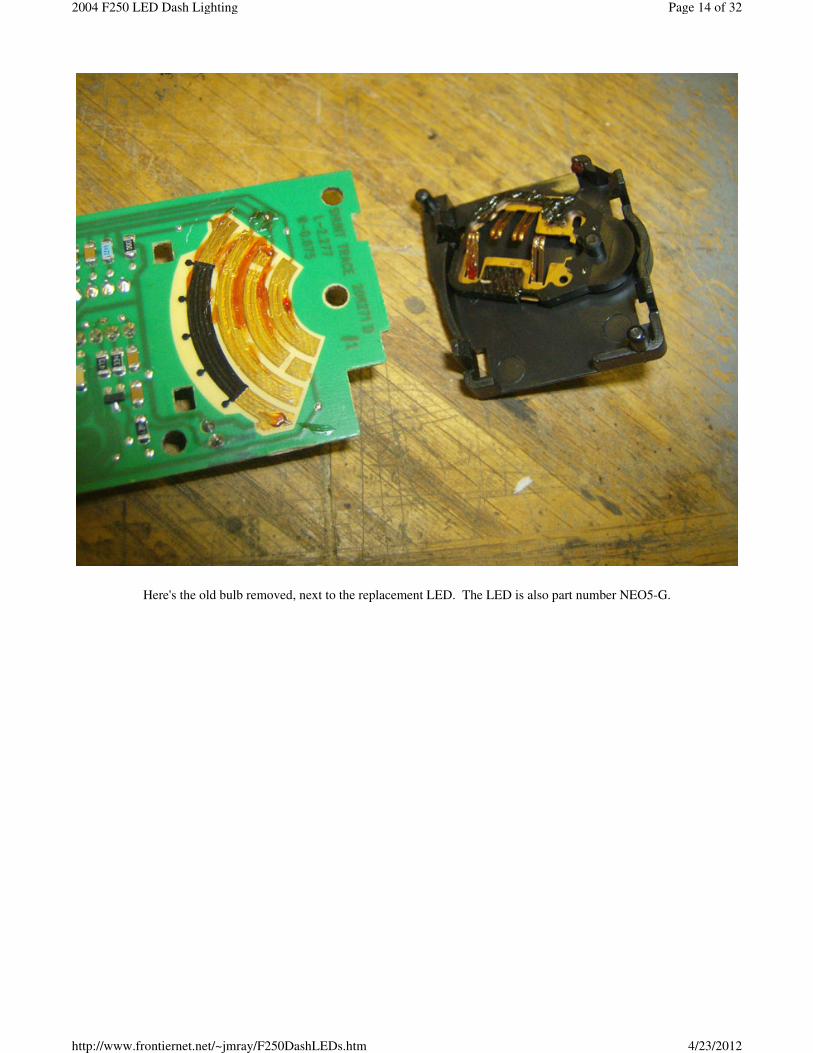
Here's the old bulb removed, next to the replacement LED. The LED is also part number NEO5-G.
Page 14 of 322004 F250 LED Dash Lighting
4/23/2012http://www.frontiernet.net/~jmray/F250DashLEDs.htm
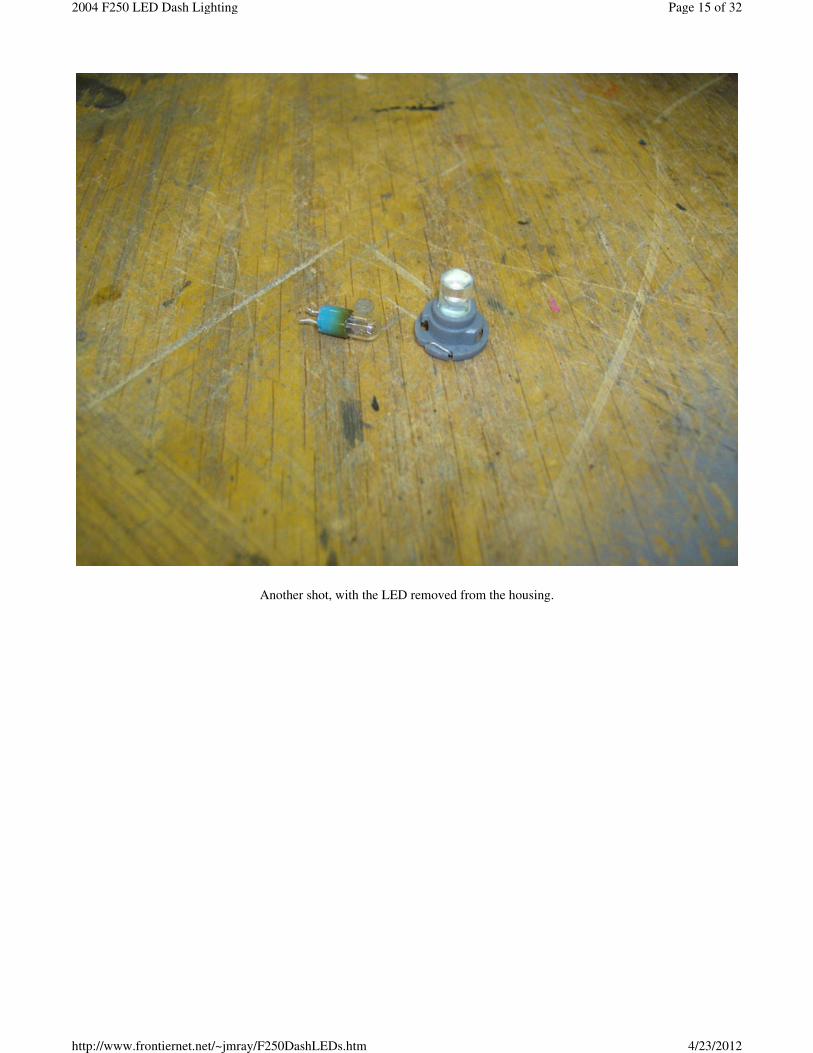
Another shot, with the LED removed from the housing.
Page 15 of 322004 F250 LED Dash Lighting
4/23/2012http://www.frontiernet.net/~jmray/F250DashLEDs.htm
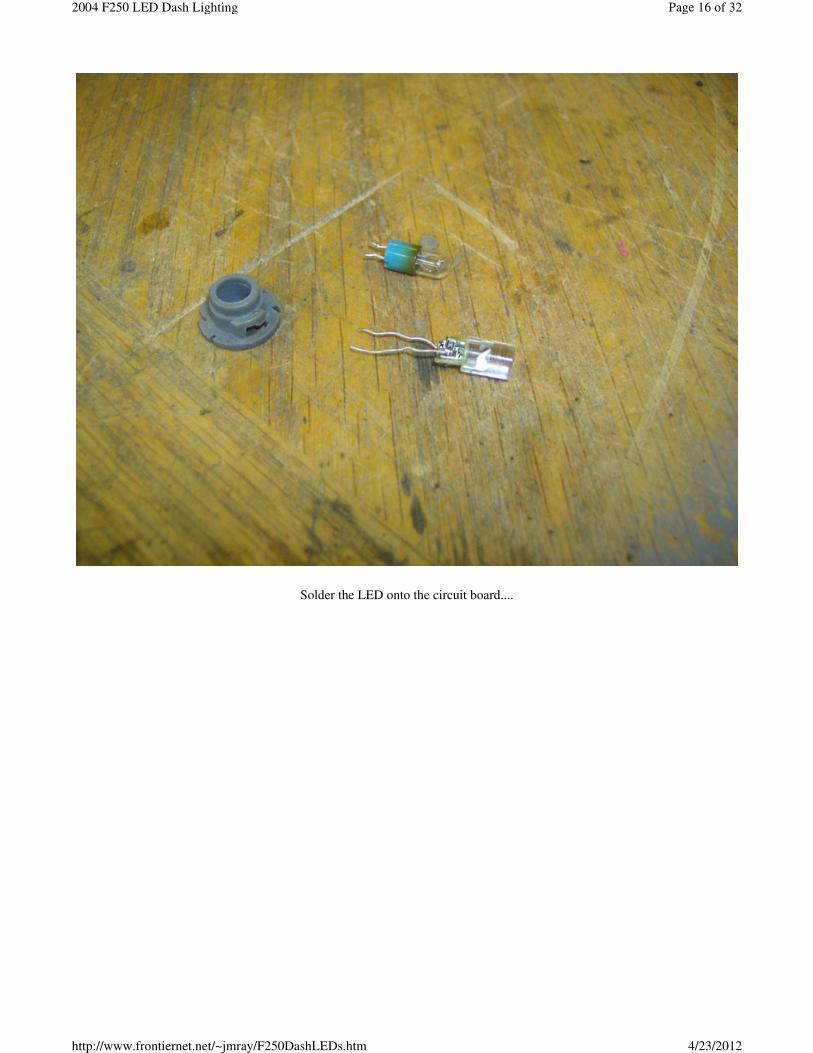
Solder the LED onto the circuit board....
Page 16 of 322004 F250 LED Dash Lighting
4/23/2012http://www.frontiernet.net/~jmray/F250DashLEDs.htm
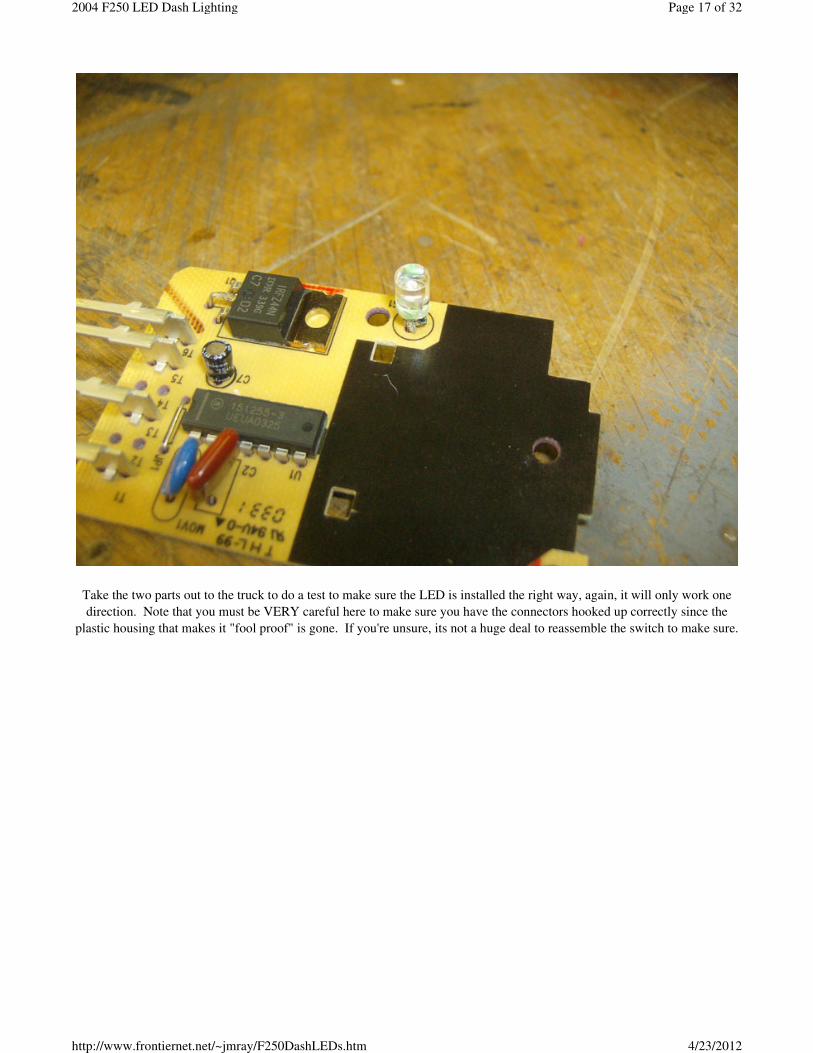
Take the two parts out to the truck to do a test to make sure the LED is installed the right way, again, it will only work one
direction. Note that you must be VERY careful here to make sure you have the connectors hooked up correctly since the
plastic housing that makes it "fool proof" is gone. If you're unsure, its not a huge deal to reassemble the switch to make sure.
Page 17 of 322004 F250 LED Dash Lighting
4/23/2012http://www.frontiernet.net/~jmray/F250DashLEDs.htm
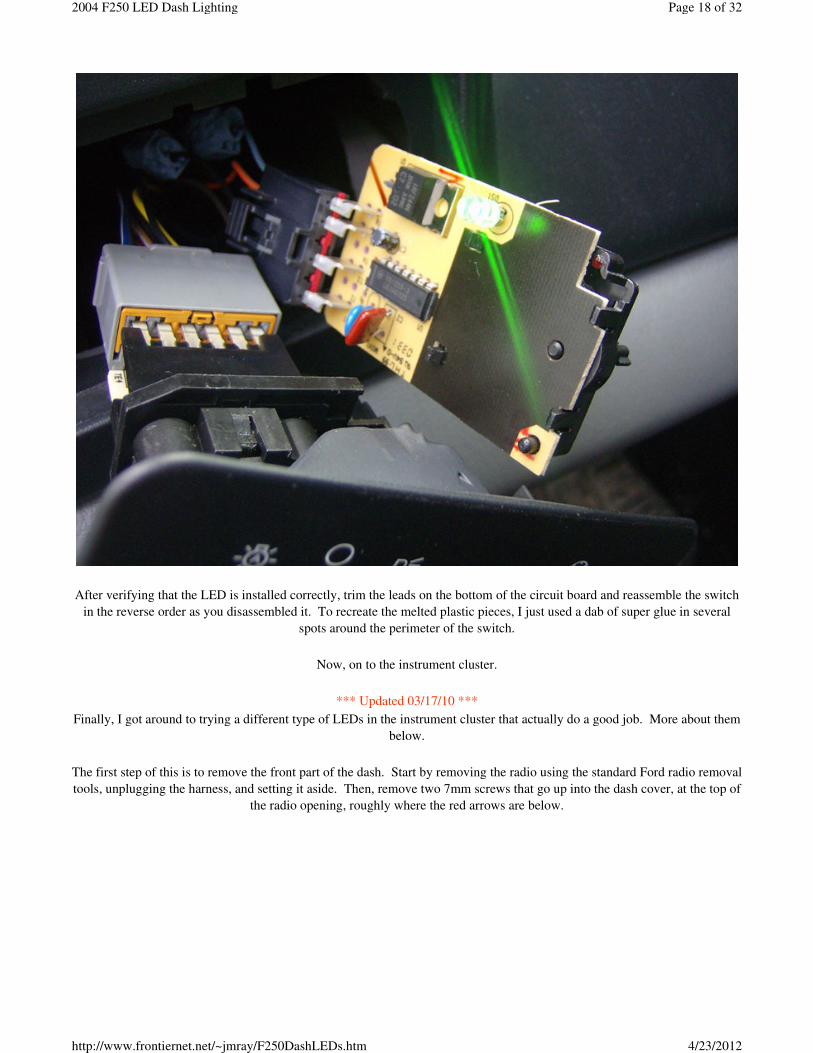
After verifying that the LED is installed correctly, trim the leads on the bottom of the circuit board and reassemble the switch
in the reverse order as you disassembled it. To recreate the melted plastic pieces, I just used a dab of super glue in several
spots around the perimeter of the switch.
Now, on to the instrument cluster.
*** Updated 03/17/10 ***
Finally, I got around to trying a different type of LEDs in the instrument cluster that actually do a good job. More about them
below.
The first step of this is to remove the front part of the dash. Start by removing the radio using the standard Ford radio removal
tools, unplugging the harness, and setting it aside. Then, remove two 7mm screws that go up into the dash cover, at the top of
the radio opening, roughly where the red arrows are below.
Page 18 of 322004 F250 LED Dash Lighting
4/23/2012http://www.frontiernet.net/~jmray/F250DashLEDs.htm
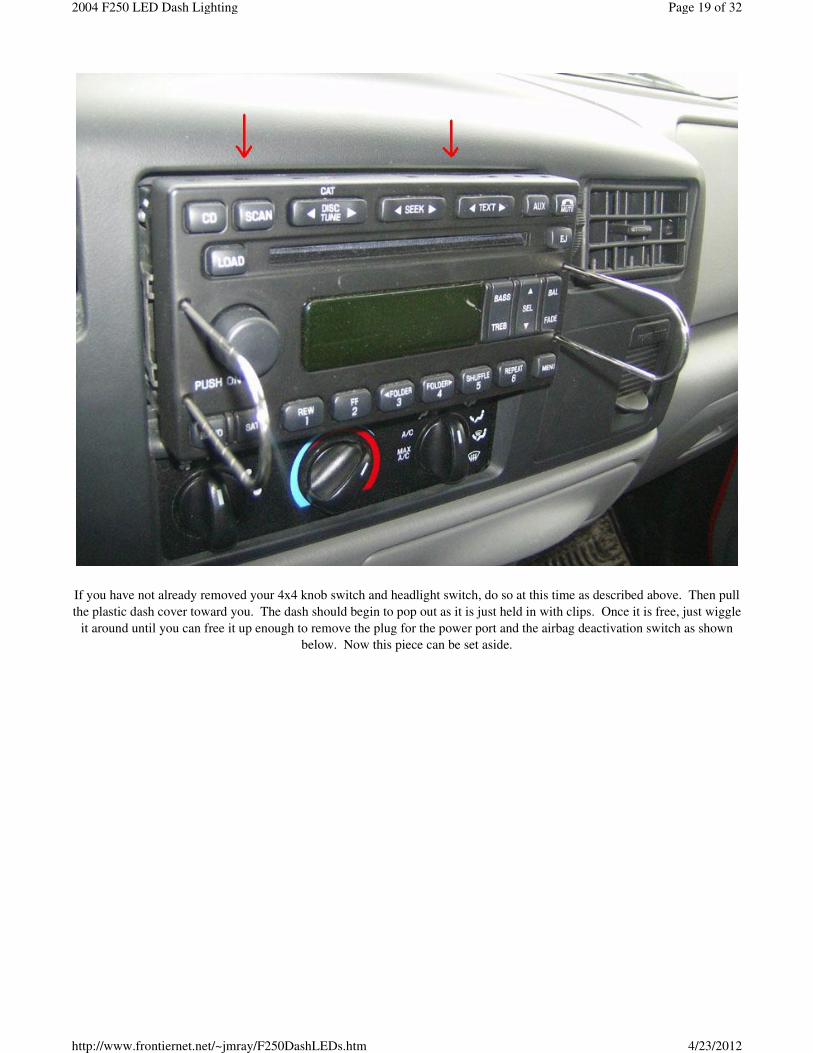
If you have not already removed your 4x4 knob switch and headlight switch, do so at this time as described above. Then pull
the plastic dash cover toward you. The dash should begin to pop out as it is just held in with clips. Once it is free, just wiggle
it around until you can free it up enough to remove the plug for the power port and the airbag deactivation switch as shown
below. Now this piece can be set aside.
Page 19 of 322004 F250 LED Dash Lighting
4/23/2012http://www.frontiernet.net/~jmray/F250DashLEDs.htm
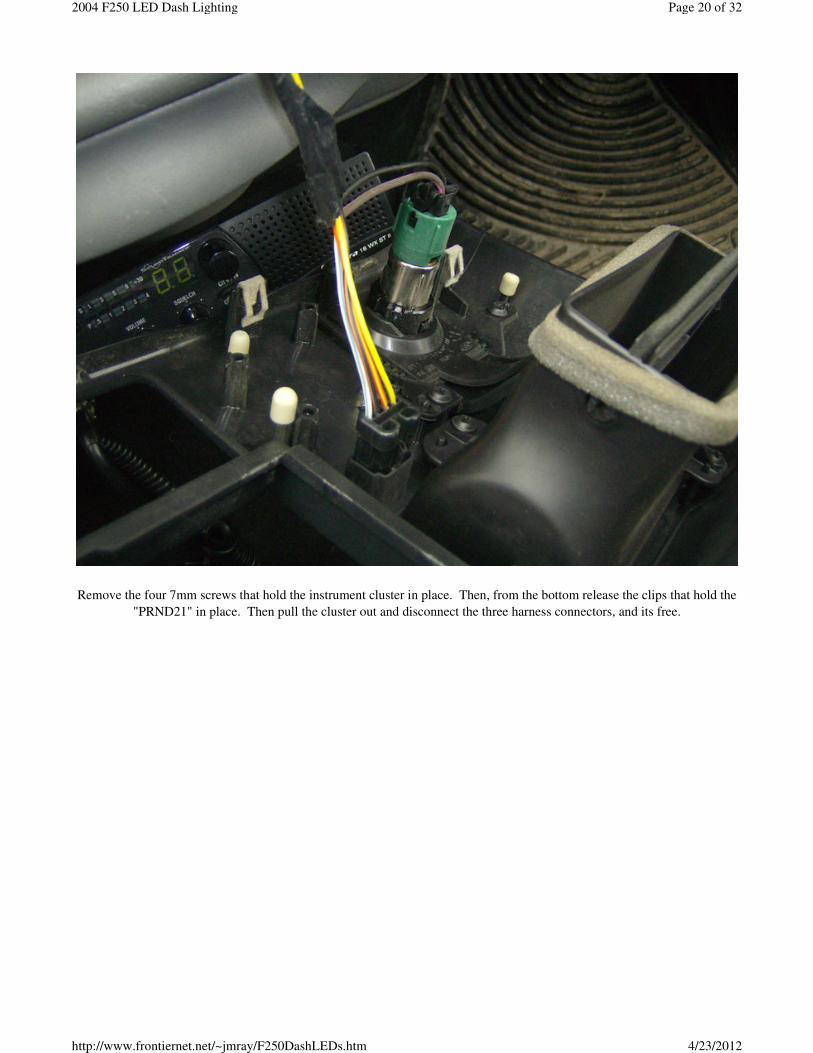
Remove the four 7mm screws that hold the instrument cluster in place. Then, from the bottom release the clips that hold the
"PRND21" in place. Then pull the cluster out and disconnect the three harness connectors, and its free.
Page 20 of 322004 F250 LED Dash Lighting
4/23/2012http://www.frontiernet.net/~jmray/F250DashLEDs.htm
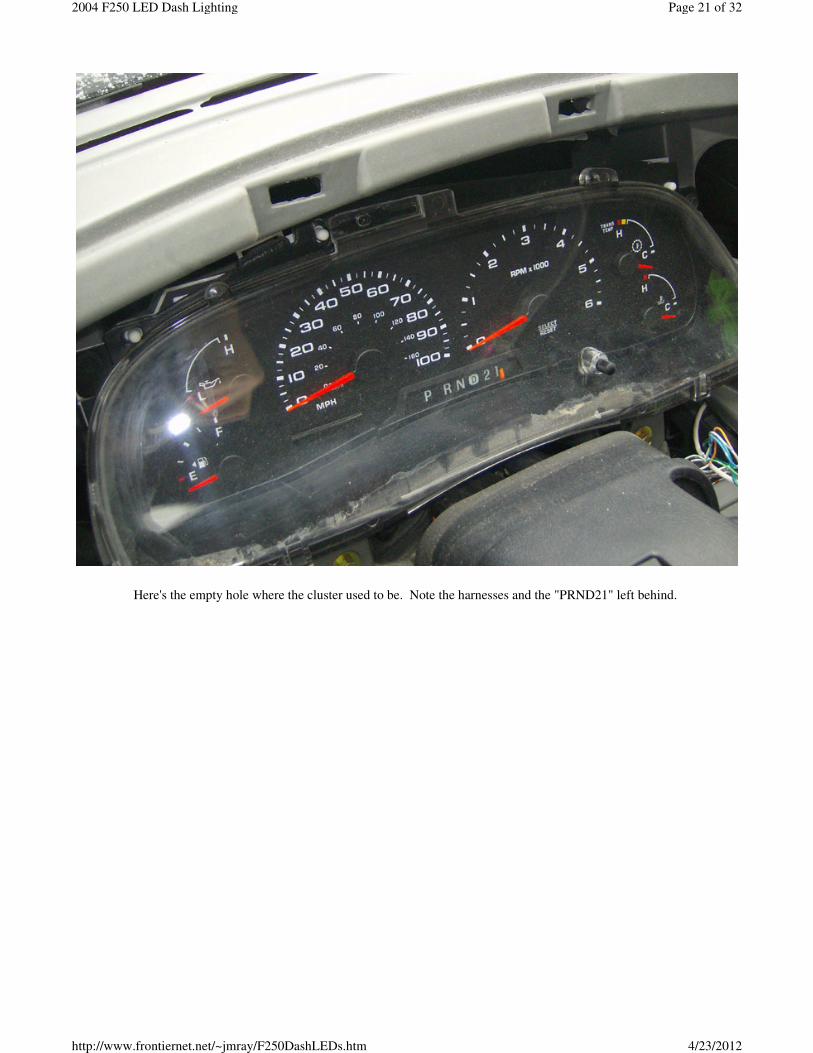
Here's the empty hole where the cluster used to be. Note the harnesses and the "PRND21" left behind.
Page 21 of 322004 F250 LED Dash Lighting
4/23/2012http://www.frontiernet.net/~jmray/F250DashLEDs.htm
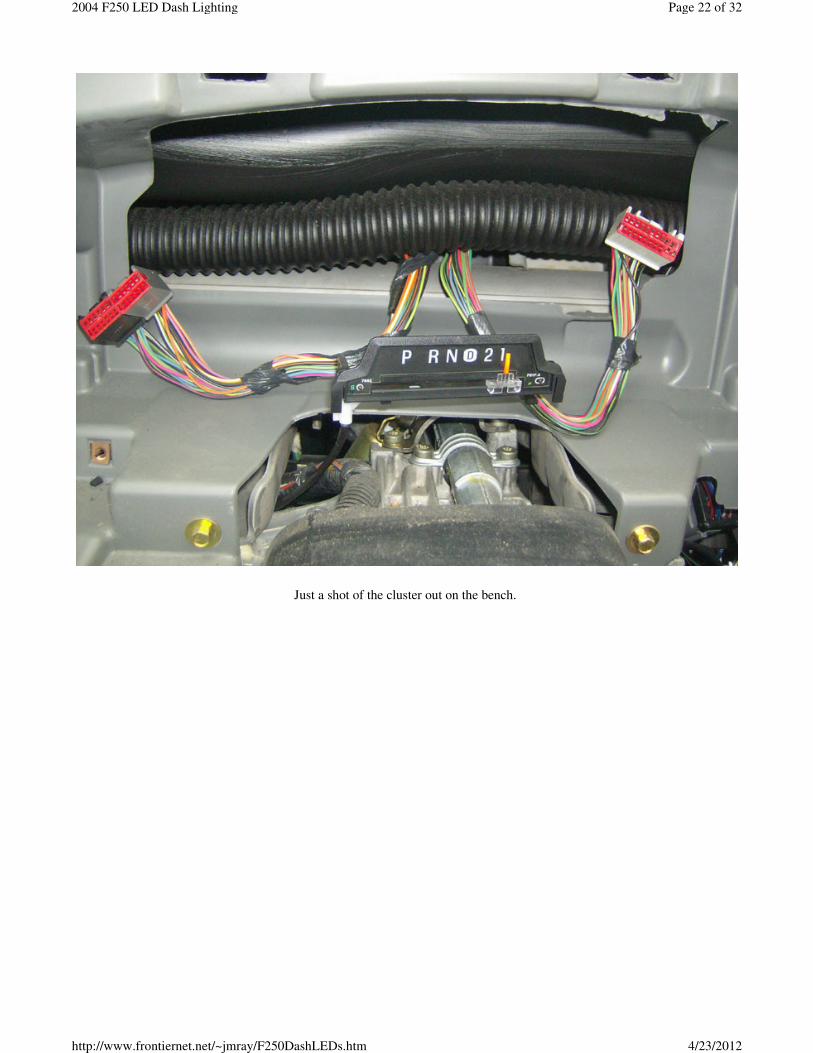
Just a shot of the cluster out on the bench.
Page 22 of 322004 F250 LED Dash Lighting
4/23/2012http://www.frontiernet.net/~jmray/F250DashLEDs.htm
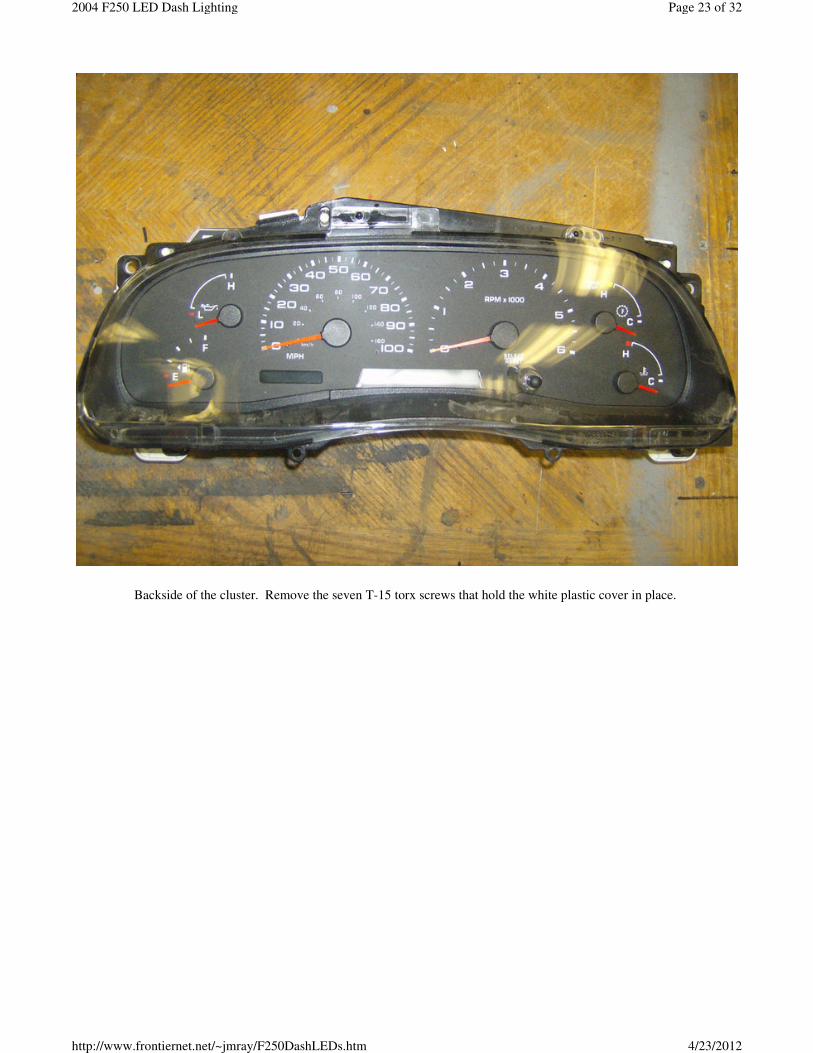
Backside of the cluster. Remove the seven T-15 torx screws that hold the white plastic cover in place.
Page 23 of 322004 F250 LED Dash Lighting
4/23/2012http://www.frontiernet.net/~jmray/F250DashLEDs.htm

Now you can see all the bulbs. I didn't mess with any of the smaller bulbs (gray housings) that are used for the idiot lights.
The only ones that need replaced are the six larger bulbs with white housings.
Page 24 of 322004 F250 LED Dash Lighting
4/23/2012http://www.frontiernet.net/~jmray/F250DashLEDs.htm
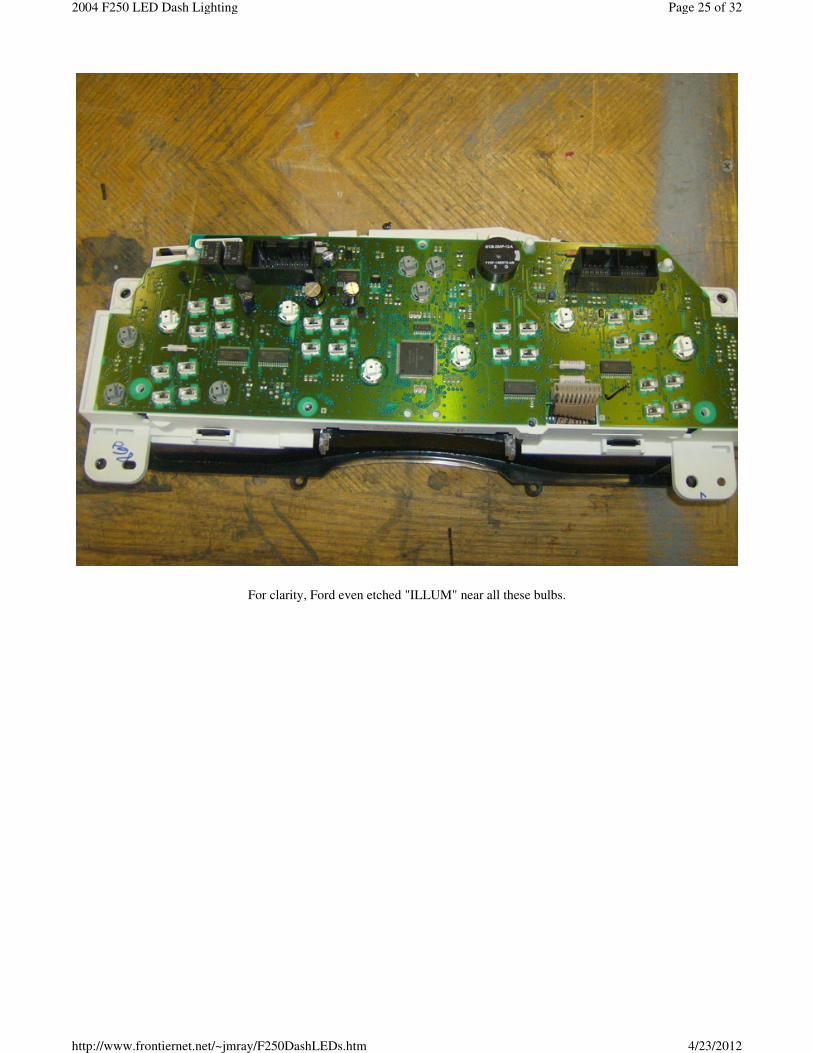
For clarity, Ford even etched "ILLUM" near all these bulbs.
Page 25 of 322004 F250 LED Dash Lighting
4/23/2012http://www.frontiernet.net/~jmray/F250DashLEDs.htm
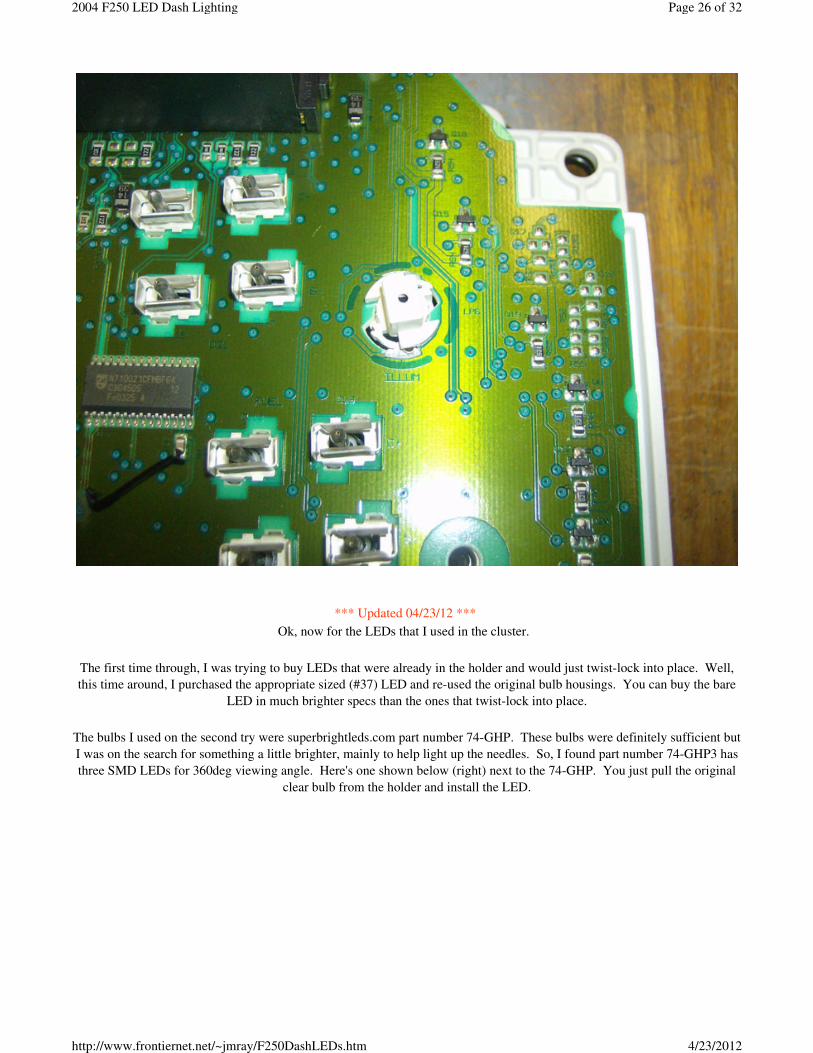
*** Updated 04/23/12 ***
Ok, now for the LEDs that I used in the cluster.
The first time through, I was trying to buy LEDs that were already in the holder and would just twist-lock into place. Well,
this time around, I purchased the appropriate sized (#37) LED and re-used the original bulb housings. You can buy the bare
LED in much brighter specs than the ones that twist-lock into place.
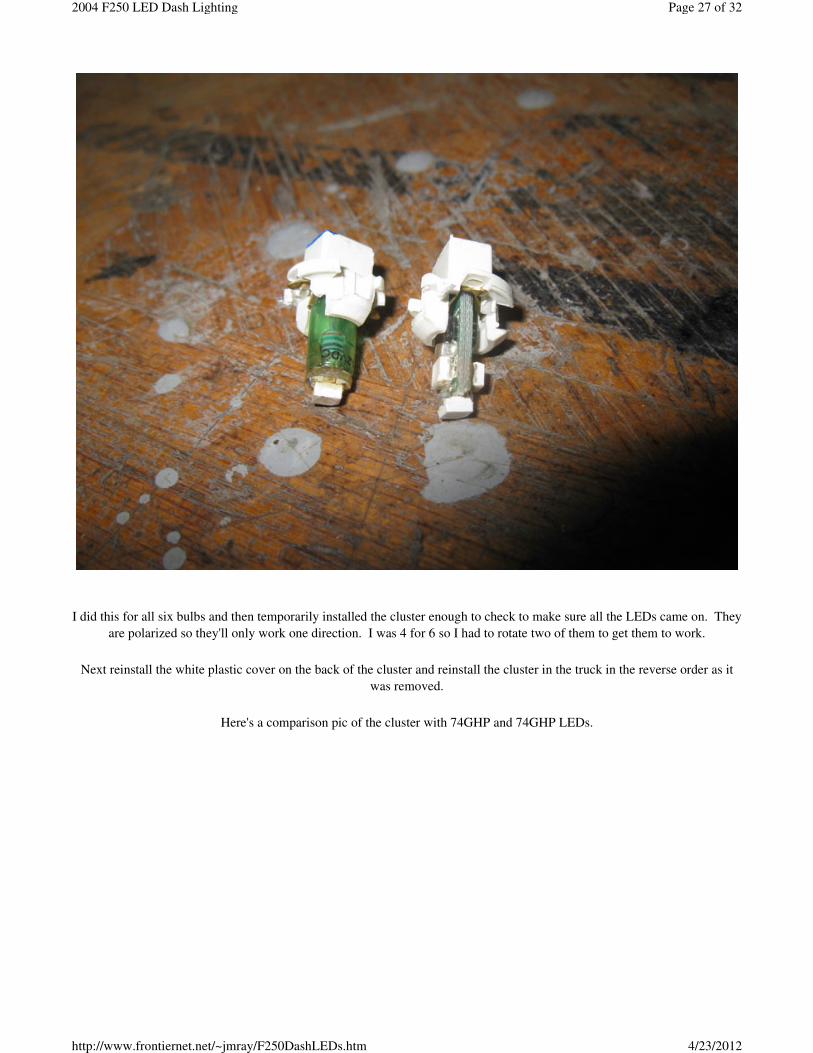
The bulbs I used on the second try were superbrightleds.com part number 74-GHP. These bulbs were definitely sufficient but
I was on the search for something a little brighter, mainly to help light up the needles. So, I found part number 74-GHP3 has
three SMD LEDs for 360deg viewing angle. Here's one shown below (right) next to the 74-GHP. You just pull the original
clear bulb from the holder and install the LED.
Page 26 of 322004 F250 LED Dash Lighting
4/23/2012http://www.frontiernet.net/~jmray/F250DashLEDs.htm
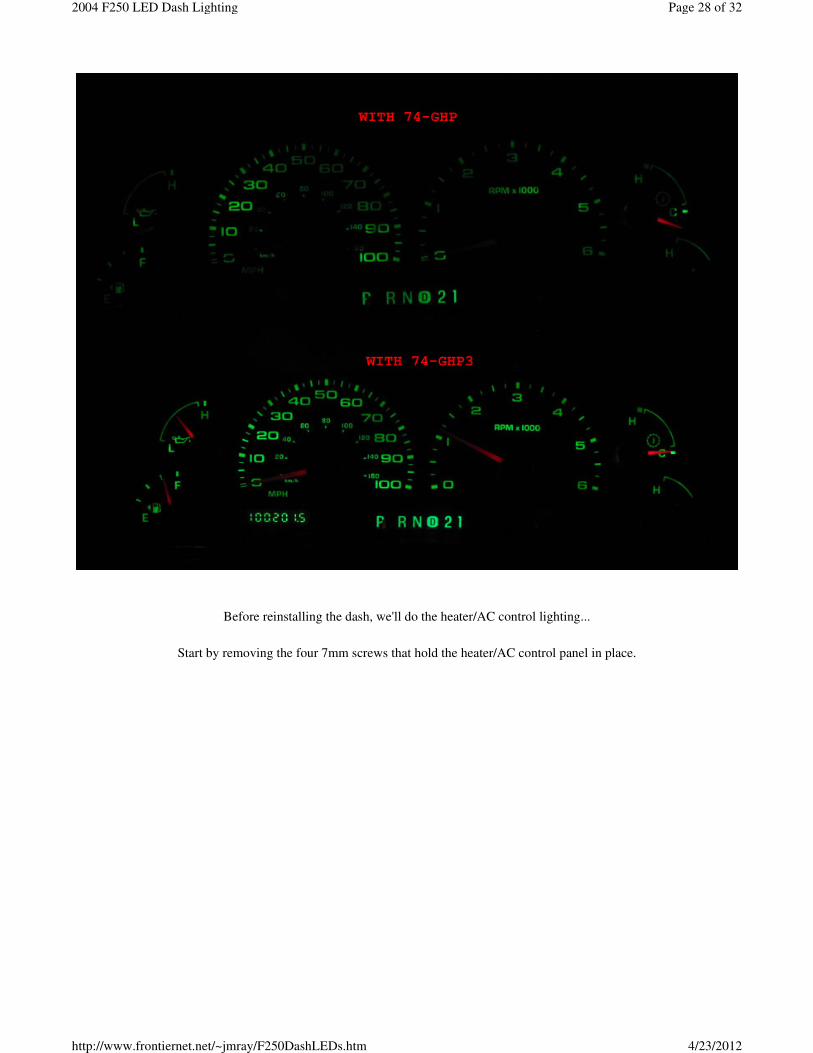
I did this for all six bulbs and then temporarily installed the cluster enough to check to make sure all the LEDs came on. They
are polarized so they'll only work one direction. I was 4 for 6 so I had to rotate two of them to get them to work.
Next reinstall the white plastic cover on the back of the cluster and reinstall the cluster in the truck in the reverse order as it
was removed.
Here's a comparison pic of the cluster with 74GHP and 74GHP LEDs.
Page 27 of 322004 F250 LED Dash Lighting
4/23/2012http://www.frontiernet.net/~jmray/F250DashLEDs.htm
Before reinstalling the dash, we'll do the heater/AC control lighting...
Start by removing the four 7mm screws that hold the heater/AC control panel in place.
Page 28 of 322004 F250 LED Dash Lighting
4/23/2012http://www.frontiernet.net/~jmray/F250DashLEDs.htm
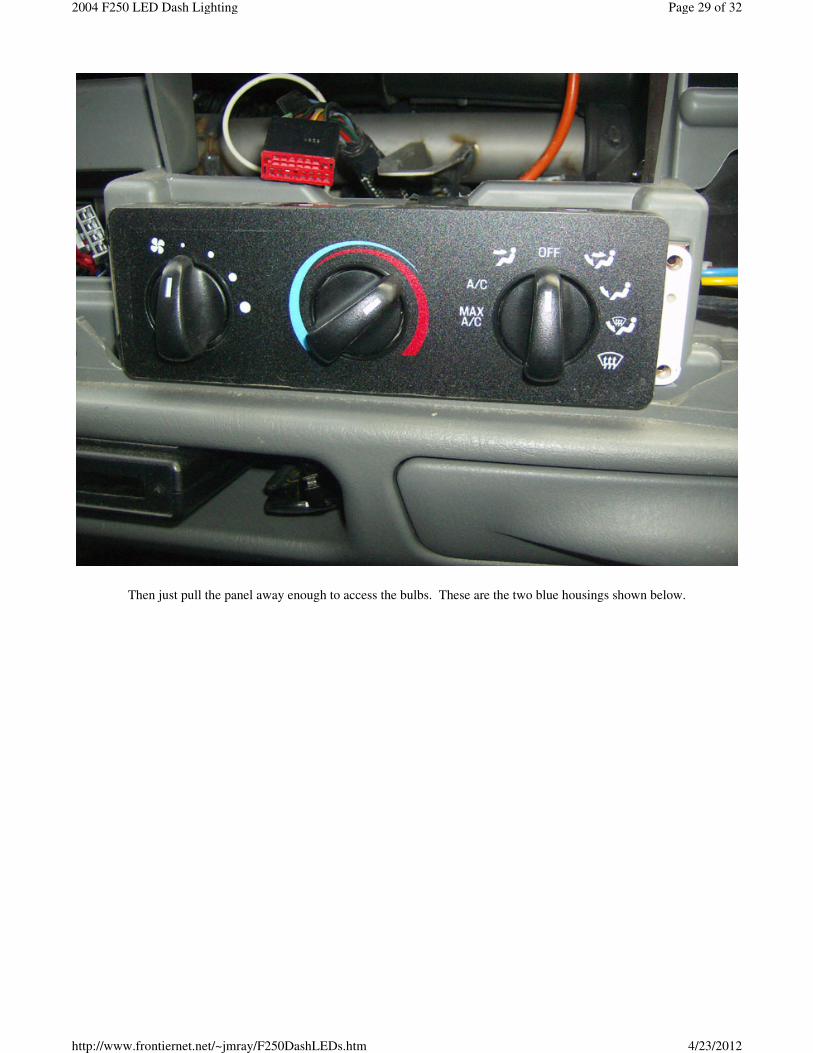
Then just pull the panel away enough to access the bulbs. These are the two blue housings shown below.
Page 29 of 322004 F250 LED Dash Lighting
4/23/2012http://www.frontiernet.net/~jmray/F250DashLEDs.htm
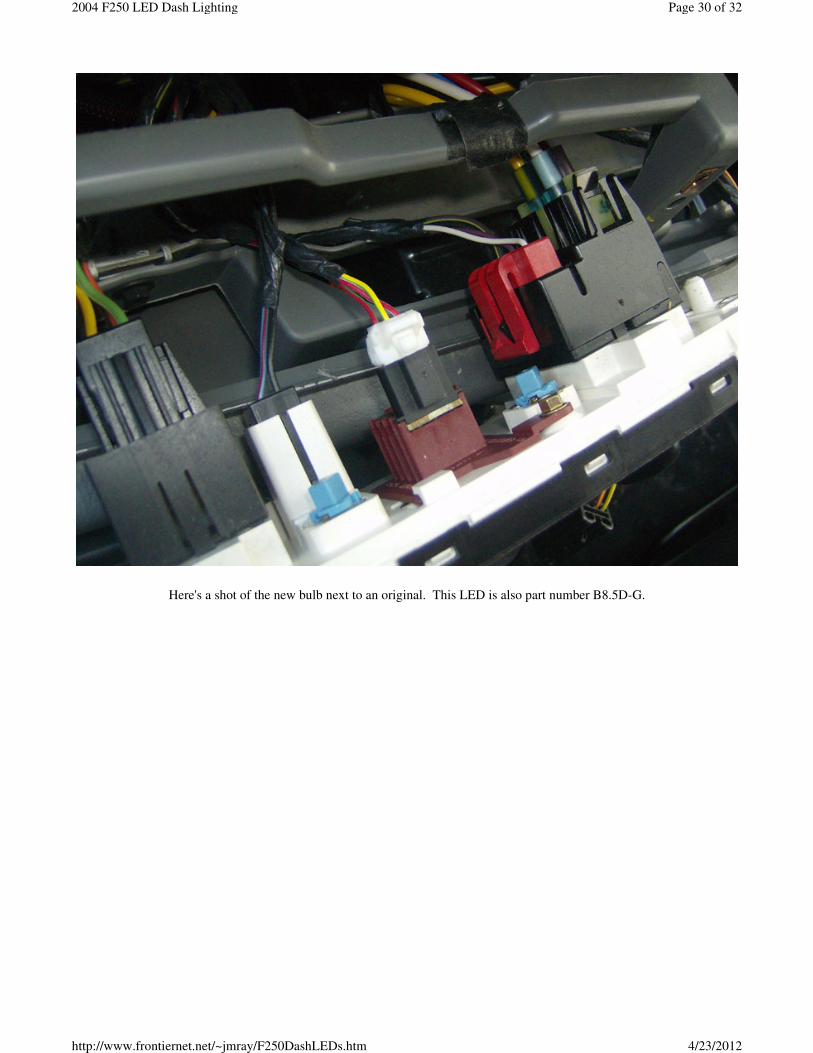
Here's a shot of the new bulb next to an original. This LED is also part number B8.5D-G.
Page 30 of 322004 F250 LED Dash Lighting
4/23/2012http://www.frontiernet.net/~jmray/F250DashLEDs.htm
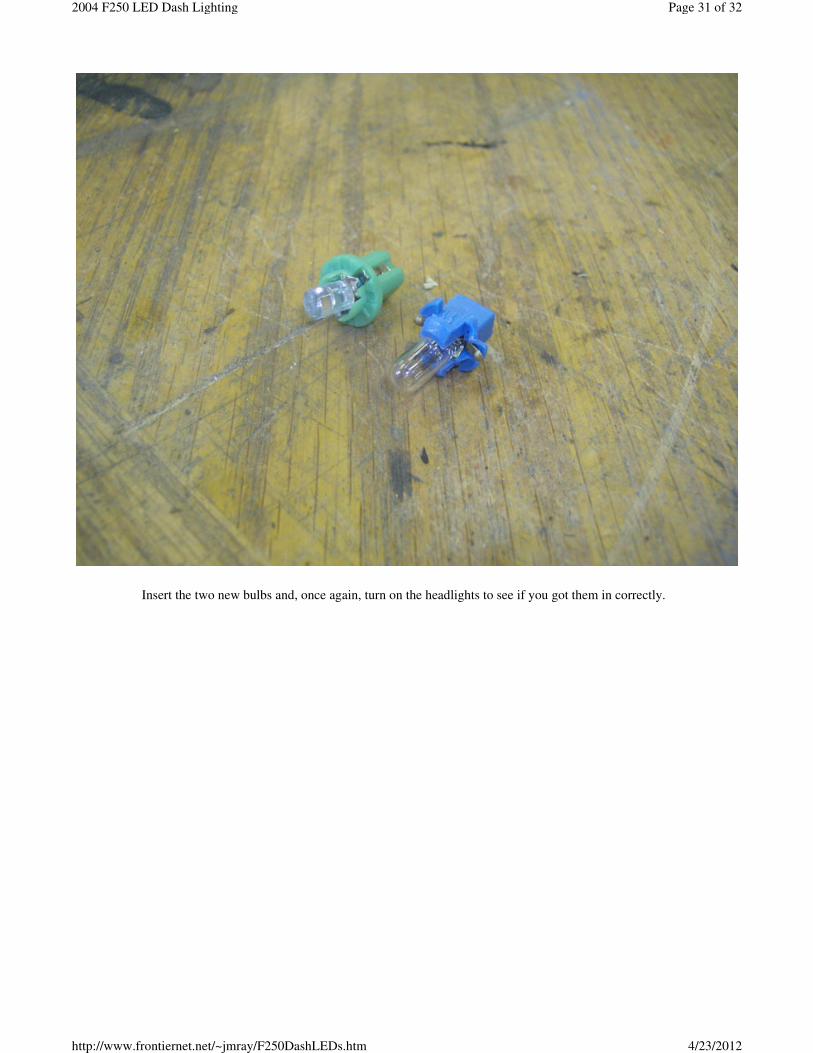
Insert the two new bulbs and, once again, turn on the headlights to see if you got them in correctly.
Page 31 of 322004 F250 LED Dash Lighting
4/23/2012http://www.frontiernet.net/~jmray/F250DashLEDs.htm

Now just reinstall the heater/AC panel with the four 7mm screws.
Now remove the headlight switch that was temporarily installed, replace the dash panel in the reverse order it was removed,
install the two 7mm screws at the top of the radio opening, reinstall the radio, the 4x4 knob switch, and the headlight switch.
I plan to someday replace the cruise control switch bulbs, the radio bulbs, and the door switch bulbs. Stay tuned!
Questions or Comments? Email [email protected]
Page 32 of 322004 F250 LED Dash Lighting
4/23/2012http://www.frontiernet.net/~jmray/F250DashLEDs.htm