for HP NonStop GUARDIAN Environments · 2018-06-05 · This manual describes the H363 USER-Access®...
205
MAN-REF-H363-3.4.2 H363 USER-Access ® for HP NonStop GUARDIAN Environments Release 3.4.2 Software Reference Manual
Transcript of for HP NonStop GUARDIAN Environments · 2018-06-05 · This manual describes the H363 USER-Access®...

MAN-REF-H363-3.4.2
H363 USER-Access®
for HP NonStop GUARDIAN Environments
Release 3.4.2
Software Reference Manual
Page ii MAN-REF-H363-3.4.2
Revision Description
01 (460650-01) Initial Manual released (superceded 460650-01)
3.4.2(06/2018) Update copyright; remove export notice; correct trademarks
© 2010-2018 by Network Executive Software. Reproduction is prohibited without prior permission of Net-work Executive Software. Printed in U.S.A. All rights reserved.
You may submit written comments using the comment sheet at the back of this manual to:
Network Executive Software, Inc. Publications Department 6450 Wedgwood Road, Suite 103 Maple Grove, MN 55311 USA
Comments may also be submitted over the Internet by addressing e-mail to:
or, by visiting our web site at:
http://www.netex.com
Always include the complete title of the document with your comments.
Revision Record

MAN-REF-H363-3.4.2 Preface Page iii
This manual describes the H363 USER-Access® software for HP NonStop GUARDIAN environments.
USER-Access is used in conjunction with TCP/IP to allow the end-user to easily transfer files across the net-work.
This manual is intended for all users of USER-Access, and contains all of the information necessary to ex-pand the user's ability to the fullest extent of the software.
The manual is divided into seven parts plus one appendix:
"Introduction," which gives a basic description of USER-Access and a sample of a USER-Access session.
"HP NonStop GUARDIAN Local User’s Guide," which describes the features of USER-Access on HP Non-Stop GUARDIAN systems as seen by the local user. This section includes a description of the commands in the local interface.
"HP NonStop GUARDIAN Remote User’s Guide," which describes features of H363 as seen by a remote user. This includes executing commands on a GUARDIAN host remotely and transferring files to and from a remote GUARDIAN host.
"File Handling Under GUARDIAN USER-Access," which describes the way GUARDIAN manipulates files. This includes examples of transferring files, transfer modes supported by GUARDIAN USER-Access, wild-card characters, and file specifications.
"Advanced Local User’s Guide," which describes the advanced features of USER-Access on HP NonStop GUARDIAN systems as seen by the local user.
"Command Descriptions," which provides detailed descriptions of all commands available in H363 USER-Access.
Preface

Page iv Preface MAN-REF- H363-3.4.2

MAN-REF-H363-3.4.2 Notice to the Reader Page v
This product is intended for use only as described in this document. Network Executive Software cannot be responsible for use of features or options in any undocumented manner. This manual is subject to change without notice.
This document and the programs described in it are furnished under a license from Network Executive Soft-ware and may be used, copied, and disclosed only in accordance with such license.
This document contains references to the trademarks of the following corporations.
Corporation Referenced Trademarks and Products Network Executive Software, Inc
HP Hewlett-Packard Company, L.P.
IBM
eFT, USER-Access
Tandem, NonStop, GUARDIAN, Integrity
zOS
These references are made for informational purposes only.
Notice to the Reader

Page vi Notice to the Reader MAN-REF- H363-3.4.2
Document Conventions The following notational conventions are used in this document.
Format Description displayed information Information displayed on a CRT (or printed) is shown in this font. user entry This font is used to indicate the information to be entered by the user.
UPPERCASE The exact form of a keyword that is not case-sensitive or is issued in up-percase.
MIXedcase The exact form of a keyword that is not case-sensitive or is issued in up-percase, with the minimum spelling shown in uppercase.
bold The exact form of a keyword that is case-sensitive and all or part of it must be issued in lowercase.
lowercase A user-supplied name or string.
value Underlined parameters or options are defaults.
<label> The label of a key appearing on a keyboard. If "label" is in uppercase, it matches the label on the key (for example: <ENTER>). If "label" is in lowercase, it describes the label on the key (for example: <up-arrow>).
<key1><key2> Two keys to be pressed simultaneously.
No delimiter Required keyword/parameter.

MAN-REF- H363-3.4.2 Contents Page vii
Revision Record ................................................................................................................................................ ii
Preface ............................................................................................................................................................... iii
Notice to the Reader ........................................................................................................................................... v Corporation ..............................................................................................................................................v Referenced Trademarks and Products ......................................................................................................v
Document Conventions ................................................................................................................................... vi
Contents ........................................................................................................................................................... vii Figures ........................................................................................................................................................... xiv Tables ............................................................................................................................................................ xiv
Introduction ........................................................................................................................................................ 1 USER-Access Overview .................................................................................................................................. 1 How USER-Access Works .............................................................................................................................. 1 Introduction to USER-Access and HP NonStop .............................................................................................. 2 Introduction to USER-Access and TCP/IP ...................................................................................................... 2 Sample HP NonStop GUARDIAN USER-Access Session ............................................................................. 3
HP NonStop GUARDIAN Local User’s Guide ............................................................................................... 9 Introduction ...................................................................................................................................................... 9 Invoking USER-Access on GUARDIAN ........................................................................................................ 9
Local HP NonStop GUARDIAN USER-Access Startup Files .................................................................. 10 Remote USER-Access Startup Files .......................................................................................................... 11
Getting Started ............................................................................................................................................... 11 USER-Access Commands and Command Qualifiers ................................................................................ 11
Displaying the Valid Qualifiers for a Command ...................................................................................11 Displaying the Current Value of a Qualifier ..........................................................................................12 Setting a Command Qualifier ................................................................................................................12 Overriding a Command Qualifier ..........................................................................................................13
Online Help ................................................................................................................................................ 14 Controlling USER-Access Input and Output ............................................................................................. 14 USER-Access Error Messages ................................................................................................................... 15 Aliasing ...................................................................................................................................................... 16 Terminating a USER-Access Session ........................................................................................................ 17
Establishing a Connection to a Remote Host ................................................................................................. 18 Using CONNECT to Establish a Connection ............................................................................................ 18 Using LOGINS/LOGIN to Establish a Connection ................................................................................... 19 Exchanging Host Information on Connect ................................................................................................ 19 Establishing Multiple Host Connections ................................................................................................... 21 Disconnecting from a Host ........................................................................................................................ 22
Transferring Files as a Local User ................................................................................................................. 23 Sending Files to a Remote Host ................................................................................................................. 23 Receiving Files from a Remote Host ......................................................................................................... 24 Send and Receive Qualifiers ...................................................................................................................... 24
Contents

Page viii Contents MAN-REF- H363-3.4.2
Executing Remote Host Commands .............................................................................................................. 26 Executing Local GUARDIAN Commands ................................................................................................... 28 Issuing Local GUARDIAN Host-Independent Commands........................................................................... 29 Editing Remote Files with a GUARDIAN Editor ......................................................................................... 31 Interrupting a Command within GUARDIAN USER-Access ...................................................................... 32
HP NonStop GUARDIAN Remote User’s Guide ......................................................................................... 33 Connecting into a GUARDIAN Host ............................................................................................................ 33 CONNECT Qualifiers Used by GUARDIAN USER-Access ....................................................................... 33 Remote GUARDIAN USER-Access Startup Files ....................................................................................... 34 Transferring Files to a GUARDIAN Host ..................................................................................................... 35 Executing Remote GUARDIAN TACL Commands ..................................................................................... 35 Issuing Remote GUARDIAN Host Independent Commands ....................................................................... 37
File Handling Under GUARDIAN USER-Access ......................................................................................... 39 GUARDIAN File Transfer Qualifiers and Default Values ........................................................................... 39 Definition of DIRECTORY Under Guardian USER-Access ........................................................................ 41 GUARDIAN File Specifications ................................................................................................................... 41
GUARDIAN File Specification Examples ................................................................................................ 42 File Transfer Examples from a Local GUARDIAN Host ......................................................................... 42
Example 1 .............................................................................................................................................. 42 Example 2 .............................................................................................................................................. 43 Example 3 .............................................................................................................................................. 43
File Transfer Examples to a Remote GUARDIAN Host .......................................................................... 43 Example 1 .............................................................................................................................................. 43 Example 2 .............................................................................................................................................. 43 Example 3 .............................................................................................................................................. 44 Example 4 .............................................................................................................................................. 44
Source Wildcard Support for GUARDIAN File Transfers ........................................................................... 44 Destination Wildcard Support for GUARDIAN File Transfers .................................................................... 45 Transfer Modes Supported Under GUARDIAN USER-Access ................................................................... 45
Advanced Local User’s Guide ........................................................................................................................ 47 Introduction ................................................................................................................................................... 47 Special Characters ......................................................................................................................................... 47 USER-Access String Substitution ................................................................................................................. 48
String Variables ......................................................................................................................................... 49 String Literals ............................................................................................................................................ 52 String Functions ........................................................................................................................................ 52
Arithmetic Operations ........................................................................................................................... 55 CHR Function ........................................................................................................................................ 56 CMP Function ....................................................................................................................................... 57 DATE Function ..................................................................................................................................... 58 DEC and INC Functions ........................................................................................................................ 59 DFN and NDF Functions....................................................................................................................... 60 ENCRYPT Function .............................................................................................................................. 61 ENV Function ........................................................................................................................................ 62 EQS and NES Functions ....................................................................................................................... 63 EXT Function ........................................................................................................................................ 64 INDEX Function ................................................................................................................................... 65 LEN Function ........................................................................................................................................ 66

MAN-REF- H363-3.4.2 Contents Page ix
Logical Operations .................................................................................................................................67 LOWER and UPPER Functions ............................................................................................................68 MSG Function ........................................................................................................................................69 PARAMS Function ................................................................................................................................70 SLEEP Function.....................................................................................................................................70 STATUS Function .................................................................................................................................71 TIME Function.......................................................................................................................................72
Disabling String Substitution ..................................................................................................................... 73 Nested String Substitution ......................................................................................................................... 73
Developing USER-Access Scripts Using Input Files and Aliases ................................................................. 74 USER-Access Input Files .......................................................................................................................... 74
Echoing Input Scripts at the Terminal ...................................................................................................76 Displaying Output and Accepting Input within a Script ........................................................................77 Passing Parameters to a Script ...............................................................................................................77 Using String Functions within an USER-Access Script ........................................................................79 Using USER-Access Labels and GOTOs ..............................................................................................80 Using the ON (ERROR/INTERRUPT) Command ................................................................................81 Checking Command Status ....................................................................................................................82
Creating USER-Access Aliases ................................................................................................................. 83 USER-Access Aliases Vs Host Aliases .................................................................................................84 Creating Multi-command USER-Access Aliases ..................................................................................84 Passing Parameters to an Alias ..............................................................................................................85 Accepting Input within an USER-Access Alias ....................................................................................86 Abbreviating Alias Names .....................................................................................................................87 Defining Multiword Alias Names ..........................................................................................................87
Debugging an USER-Access Alias or Input Script ................................................................................... 88 Error Message Formatting ............................................................................................................................. 89 USER-Access Code Conversion .................................................................................................................... 91 USER-Access Data Verification .................................................................................................................... 91 USER-Access Data Compression .................................................................................................................. 92
Character Mode Compression.................................................................................................................... 93
GUARDIAN USER-Access SEARCH Keywords (SITE), (USER), and (NONE) ...................................... 95 User-Definable HELP Files Under GUARDIAN .......................................................................................... 98 Running USER-Access as a Batch Job Under GUARDIAN ....................................................................... 100 Running a GUARDIAN Stand-Alone USER-Access Server ...................................................................... 102 Advanced GUARDIAN Transfer Modes ..................................................................................................... 103
Central Archiving .......................................................................................................................................... 105 Introduction .................................................................................................................................................. 105 Using Archiving ........................................................................................................................................... 106 Archiving from a Satellite Site ..................................................................................................................... 108 Archiving from a Central Site ...................................................................................................................... 110 File Transfer Options ................................................................................................................................... 113 GUARDIAN BACKUP Utility Considerations ........................................................................................... 114 GUARDIAN as a Central Site ..................................................................................................................... 114 The Central Archiving Aliases ..................................................................................................................... 114 BACKUP Alias ............................................................................................................................................ 115
Description ............................................................................................................................................... 115 Examples .................................................................................................................................................. 115
COPY Alias ................................................................................................................................................. 116

Page x Contents MAN-REF- H363-3.4.2
Description .............................................................................................................................................. 116 Examples ................................................................................................................................................. 117
LIST Alias ................................................................................................................................................... 118 Description .............................................................................................................................................. 118 Examples ................................................................................................................................................. 118
RESTORE Alias .......................................................................................................................................... 120 Description .............................................................................................................................................. 120 Format ..................................................................................................................................................... 120 Examples ................................................................................................................................................. 120
Command Descriptions ................................................................................................................................. 123 ASK Command ........................................................................................................................................... 124
Description .............................................................................................................................................. 124 Format ..................................................................................................................................................... 124 Examples ................................................................................................................................................. 125 Related Topics ......................................................................................................................................... 125
CONNECT Command ................................................................................................................................. 126 Description .............................................................................................................................................. 126 Format ..................................................................................................................................................... 127 Host Dependencies .................................................................................................................................. 128 Examples ................................................................................................................................................. 128 Related Topics ......................................................................................................................................... 129
CONTINUE Command ............................................................................................................................... 130 Description .............................................................................................................................................. 130 Format ..................................................................................................................................................... 130 Example ................................................................................................................................................... 130 Related Topics ......................................................................................................................................... 130
DISCONNECT Command .......................................................................................................................... 131 Description .............................................................................................................................................. 131 Format ..................................................................................................................................................... 131 Examples ................................................................................................................................................. 131 Related Topics ......................................................................................................................................... 131
EXIT Command .......................................................................................................................................... 132 Description .............................................................................................................................................. 132 Format ..................................................................................................................................................... 132 Examples ................................................................................................................................................. 132 Related Topics ......................................................................................................................................... 132
GOTO Command ........................................................................................................................................ 133 Description .............................................................................................................................................. 133 Format ..................................................................................................................................................... 133 Examples ................................................................................................................................................. 133 Related Topics ......................................................................................................................................... 133
HELP Command ......................................................................................................................................... 134 Description .............................................................................................................................................. 134 Format ..................................................................................................................................................... 134 Examples ................................................................................................................................................. 134
INPUT Command ........................................................................................................................................ 136 Description .............................................................................................................................................. 136 Format ..................................................................................................................................................... 136 Examples ................................................................................................................................................. 137 Related Topics ......................................................................................................................................... 137

MAN-REF- H363-3.4.2 Contents Page xi
LOCAL Command ....................................................................................................................................... 138 Description ............................................................................................................................................... 138 Format ...................................................................................................................................................... 138 Informational Qualifiers .......................................................................................................................... 138 Examples .................................................................................................................................................. 139 Related Topics ......................................................................................................................................... 140
ON Command .............................................................................................................................................. 141 Description ............................................................................................................................................... 141
ON ERRor ............................................................................................................................................141 ON INTerrupt.......................................................................................................................................141 ON LOCal_error ..................................................................................................................................141 ON REMote_error ...............................................................................................................................141
Format ...................................................................................................................................................... 141 Examples .................................................................................................................................................. 142 Related Topics ......................................................................................................................................... 143
OUTPUT Command .................................................................................................................................... 144 Description ............................................................................................................................................... 144 Format ...................................................................................................................................................... 144 Informational Qualifiers .......................................................................................................................... 145 Examples .................................................................................................................................................. 145 Related Topics ......................................................................................................................................... 145
QUIT Command .......................................................................................................................................... 146 Description ............................................................................................................................................... 146 Format ...................................................................................................................................................... 146 Examples .................................................................................................................................................. 146 Related Topics ......................................................................................................................................... 146
RECEIVE Command ................................................................................................................................... 147 Description ............................................................................................................................................... 147 Format ...................................................................................................................................................... 147 Examples .................................................................................................................................................. 147 Related Topics ......................................................................................................................................... 147
REMOTE Command.................................................................................................................................... 148 Description ............................................................................................................................................... 148 Format ...................................................................................................................................................... 148 Informational Qualifiers .......................................................................................................................... 149 Examples .................................................................................................................................................. 149 Related Topics ......................................................................................................................................... 149
SEND Command.......................................................................................................................................... 150 Description ............................................................................................................................................... 150 Format ...................................................................................................................................................... 150 Examples .................................................................................................................................................. 150 Related Topics ......................................................................................................................................... 150
SET Command ............................................................................................................................................. 151 Description ............................................................................................................................................... 151 Format ...................................................................................................................................................... 151 Examples .................................................................................................................................................. 151 Related Topics ......................................................................................................................................... 152
SET ALIAS Command ................................................................................................................................ 153 Description ............................................................................................................................................... 153 Format ...................................................................................................................................................... 153 Host Dependencies .................................................................................................................................. 153

Page xii Contents MAN-REF- H363-3.4.2
Examples ................................................................................................................................................. 154 Related Topics ......................................................................................................................................... 154
SET GLOBAL Command ........................................................................................................................... 155 Description .............................................................................................................................................. 155 Format ..................................................................................................................................................... 155 Example ................................................................................................................................................... 155 Related Topics ......................................................................................................................................... 156
SET HOST Command ................................................................................................................................. 157 Description .............................................................................................................................................. 157 Format ..................................................................................................................................................... 157 Examples ................................................................................................................................................. 157 Related Topics ......................................................................................................................................... 157
SET VARIABLE Command ....................................................................................................................... 158 Description .............................................................................................................................................. 158 Format ..................................................................................................................................................... 158 Examples ................................................................................................................................................. 158 Related Topics ......................................................................................................................................... 159
SHOW Command ........................................................................................................................................ 160 Description .............................................................................................................................................. 160 Format ..................................................................................................................................................... 160 Examples ................................................................................................................................................. 160 Related Topics ......................................................................................................................................... 160
SHOW ALIAS Command ........................................................................................................................... 161 Description .............................................................................................................................................. 161 Format ..................................................................................................................................................... 161 Examples ................................................................................................................................................. 161 Related Topics ......................................................................................................................................... 161
SHOW GLOBAL Command....................................................................................................................... 162 Description .............................................................................................................................................. 162 Format ..................................................................................................................................................... 162 Examples ................................................................................................................................................. 162 Related Topics ......................................................................................................................................... 162
SHOW HOST Command ............................................................................................................................ 163 Description .............................................................................................................................................. 163 Format ..................................................................................................................................................... 163 Examples ................................................................................................................................................. 163 Related Topics ......................................................................................................................................... 163
SHOW QUALIFIER Command .................................................................................................................. 164 Description .............................................................................................................................................. 164 Format ..................................................................................................................................................... 164 Examples ................................................................................................................................................. 164 Related Topics ......................................................................................................................................... 164
SHOW VARIABLE Command ................................................................................................................... 165 Description .............................................................................................................................................. 165 Format ..................................................................................................................................................... 165 Examples ................................................................................................................................................. 165 Related Topics ......................................................................................................................................... 165
TEXT Command ......................................................................................................................................... 166 Description .............................................................................................................................................. 166 Format ..................................................................................................................................................... 166 Examples ................................................................................................................................................. 166

MAN-REF- H363-3.4.2 Contents Page xiii
Related Topics ......................................................................................................................................... 166 TRANSLATE Command ............................................................................................................................. 167
Description ............................................................................................................................................... 167 Format ...................................................................................................................................................... 168 Examples .................................................................................................................................................. 168
Internal Features ............................................................................................................................................ 171 Password Encryption.................................................................................................................................... 171
Format ...................................................................................................................................................... 171 The ENCRYPT Alias ............................................................................................................................... 171 Examples .................................................................................................................................................. 172
Example 1: Encrypting Passwords Stored in a USER-Access Input Script File .................................172 Example 2: Using USER-Access to Generate the Input Script File ....................................................172
Command Piping.......................................................................................................................................... 174 Running USER-Access in Slave Mode .................................................................................................... 175 Additional Piped Command Qualifiers .................................................................................................... 175
Appendix A. USER-Access Error Messages for GUARDIAN ................................................................... 177 Additional Descriptions ............................................................................................................................... 187

Page xiv Contents MAN-REF- H363-3.4.2
Figures Figure 1. Diagram of a USER-Access Connection Sequence ............................................................................ 2
Figure 2. Nested String Substitution................................................................................................................. 73
Figure 3. Sample USER-Access MACRO file ............................................................................................... 101
Figure 4. Traditional Backup .......................................................................................................................... 105
Figure 5. Central Archiving ............................................................................................................................ 106
Figure 6. Satellite and Central Sites ............................................................................................................... 107
Figure 7. Data Center ..................................................................................................................................... 110
Figure 8. Sample Central Site JCL (Command Procedure) ............................................................................ 112
Figure 9. Sample Satellite Site GUARDIAN Script File ............................................................................... 113
Tables Figure 1. Diagram of a USER-Access Connection Sequence ............................................................................ 2
Figure 2. Nested String Substitution................................................................................................................. 73
Figure 3. Sample USER-Access MACRO file ............................................................................................... 101
Figure 4. Traditional Backup .......................................................................................................................... 105
Figure 5. Central Archiving ............................................................................................................................ 106
Figure 6. Satellite and Central Sites ............................................................................................................... 107
Figure 7. Data Center ..................................................................................................................................... 110
Figure 8. Sample Central Site JCL (Command Procedure) ............................................................................ 112
Figure 9. Sample Satellite Site GUARDIAN Script File ............................................................................... 113

MAN-REF-H363-3.4.2 Introduction Page 1
USER-Access Overview The Network Executive Software, Inc. ® USER-Access™ software is a user interface to TCP/IP. It provides the ordinary user with a means to move and manipulate files across an IP network using simple, easily re-membered commands. In addition, USER-Access provides extensive interactive help files so the user can be-come familiar with USER-Access.
USER-Access provides several advantages to network users. Among these are:
• User-friendly - Once USER-Access is installed, you can transfer files and exercise other USER-Access functions in very little time and with little training.
• Tailorable - The USER-Access interface can be tailored to meet your needs at the host and user levels. Default values can be set, aliases defined, etc., in site- and user-input files that are read by USER-Access when it is invoked.
• Common Interface - The USER-Access user interface is the same on all hosts. While the definition of a command may change from one host to another, the command remains the same to you.
• Security - USER-Access uses the host computers’ logon routines to provide security. You must be a val-id user on both the local and the remote systems to access them. Some systems may allow a guest ac-count, but this can be restricted by the security needs of the network.
How USER-Access Works USER-Access, whether full function, initiator, or responder, follows the same pattern of function. This pattern is illustrated in Figure 1 on page 2. As the figure shows, the user (initiator) sends a request to the remote (or responding) Service Initiator, including account and password information (1). The responding Service Initia-tor logs the user in and starts up a service module (2), which then offers a service and notifies the Service Ini-tiator (3). The Service Initiator module then returns a message to the Initiator and disconnects to wait for an-other incoming request (4). The Initiator then reconnects directly to the Service Module (5). The connection between the initiator and the Service Module is maintained until terminated by a command or a system timeout.
Introduction

Page 2 Introduction MAN-REF-H363-3.4.2
Figure 1. Diagram of a USER-Access Connection Sequence
Introduction to USER-Access and HP NonStop This manual describes the USER-Access software for HP NonStop hosts using GUARDIAN and TCP/IP.
USER-Access is a software product designed to simplify network communications. By reducing the interface to a set of simple commands (CONNECT, SEND, RECEIVE, DISCONNECT, etc.) network capabilities have been expanded to include the nontechnical user.
The user interface allows USER-Access to request services from other eFT or USER-Access hosts, to perform file transfers, and to submit remote commands. eFT and USER-Access will also accept requests from other eFT or USER-Access servers.
Introduction to USER-Access and TCP/IP USER-Access facility is a software package that extends file transfer capabilities to the less technical end-user. USER-Access has easy-to-use commands that direct TCP/IP to make connections, transfer files, and carry out related activities.
USER-Access is used as a standard TCP/IP application to enable communications between two or more ap-plication programs (which may be running on different hosts) to communicate with each other at multimega-bit speeds.

MAN-REF-H363-3.4.2 Introduction Page 3
The USER-Access and eFT family of software consists of different versions for use with different operating systems, such as Solaris, Linux, Windows, or IBM zOS. USER-Access and eFT simplifies the user.
Sample HP NonStop GUARDIAN USER-Access Session This section gives a very brief example of a few of the functions that can be accomplished during a USER-Access session. This sample session is meant to be only a simple introduction to USER-Access and how it may appear to the local HP NonStop GUARDIAN user. The sections following this provide a more detailed look at the product and its features. Users that have never seen USER-Access may spend a couple of minutes following through this sample session. Users that are familiar with the product may skip directly to the next section.
To invoke USER-Access, the user command is entered from the HP NonStop GUARDIAN command line as: > user User>
The returning prompt in this sample session is User>, although USER-Access may be configured to return another prompt. The prompt informs the user that USER-Access is waiting to accept a command.
A connection to any host in the network that is running USER-Access can be made using the LOGIN com-mand. The LOGIN command below establishes a connection with an IBM zOS host named zos5. LOGIN prompts the user for various login information such as remote username and password which it uses to estab-lish a login to the remote host. The LOGIN output returned is based on the host and username to which the connection is made. The connection is completed when a USER-Access prompt appears. Notice that in this session, USER-Access has been configured to prompt with the name of the remote host zos5.
Hostname? zos5 Username? guestl Password? _ Qualifiers? User: Connected to service 'USER' on host 'ZOS5'. ============================================================ GUESTl LOGON IN PROGRESS AT 12:47:27 ON JUNE 16, 2017 NO BROADCAST MESSAGES READY ============================================================ User: Logged in as user 'guest1'. ZOS5>
If a connection fails, an error message is displayed. The error generally begins: User: Failed to connect service 'USER' on host 'ZOS5' (UA-416S).
This is followed by a remote system error message. If the username, password combination was invalid, an error such as the one below would be seen:
User: Failed to connect service 'USER' on host 'MVSXA' (UA-416S). User: Remote: Login failure.
Of course, since all logins are made through the security system of the remote host, the error message actually seen by the user will depend on the host to which the connection is being made.
Following a successful login as above, a SHOW HOST command can be used to display all remote host con-nections held by this USER-Access session. Each session can support up to ten host connections. The com-

Page 4 Introduction MAN-REF-H363-3.4.2
mand below reveals just one remote host connection. The connection displayed is the one just established by LOGIN at the beginning of this session.
ZOS5> show host User: User: active (1) Host=ZOS5 User=guest1 User: ZOS5>
Once a connection is established, a SHOW REMOTE command can be issued to return useful information about the connection and the remote USER-Access host. From the list below, for example, it can be seen that the remote host character code is EBCDIC, the default directory (or TSO Prefix), is TEST1, and the USER-Access version number is 5.4.6.
10.1.5.11> show remote User: User: * BLOCKsize ......... 16384 User: * COPYRight ......... COPYRIGHT (c) 1999-2012 - Network Executive Software User: , Inc. Mpls. MN User: DIRectory ......... TEST1 User: * GATEway ........... User: HOMEdir ........... TEST1 User: * HOST .............. 10.1.5.11 User: * HOSTCODE .......... EBCDIC User: * HOSTENV ........... TSO FOREGROUND User: * HOSTOS ............ z/OS 2.2 User: * HOSTTYPE .......... MVS User: * LicExp ............ 20190531 User: * LicKey ............ DQGI-YAC2-AAA4-EDCO-NAZ6-7ZEZ User: * LicNotOper ........ 20190829 User: * PID ............... 0XFA37006D83B8 User: PREFix ............ MVS: User: * PRODuct ........... EFT213 User: QUIet ............. off User: * ROOTdir ........... EFT.EFT4.TCP.TEXT User: * SERvice ........... 6904 User: * STATus ............ User: * TRANSlate ......... Network User: TSOPREfix ......... TEST1 User: * USERname .......... TEST1 User: * VERsion ........... 5.4.6 User: User: * Informational qualifier (cannot be modified). User:

MAN-REF-H363-3.4.2 Introduction Page 5
Similar information can also be displayed about the local HP NonStop GUARDIAN host by issuing the SHOW LOCAL command. Note here that the local character code is ASCII7, the current local directory is $SYSTEM.UA34, and the local version of USER-Access is 3.4.0. 10.1.5.11> show local User: User: COMINT ............ $SYSTEM.SYSTEM.TACL User: * COPYright ......... COPYRIGHT (c) 2010 Network Executive Software, Inc. User: CPU ............... User: DIRectory ......... $SYSTEM.UA34 User: * GATEway ........... User: * HOSTCODE .......... ASCII7 User: * HOSTTYPE .......... TANDEM User: * NETwork ........... TCPIP User: * PID ............... $X1MN User: PREFix ............ Tandem: User: * PRODuct ........... UA363 User: QUIet ............. off User: * STATus ............ User: * TERMinal .......... \NETEXEC.$ZTN0.#PTNDDTP User: * USERname .......... SUP.TEST User: * VERsion ........... 3.4.0 User: User: * Informational qualifier (cannot be modified). User:
Once a connection is established to a remote host, users can issue commands to that host using the REMOTE command. The example below issues REMOTE LISTCAT (an IBM zOS TSO command) which says to re-turn a directory listing of files that reside on the remote host in the current default directory. Notice that a host specific prefix appears in the left hand column indicating the results are being returned from the zOS host. 10.1.5.11> remote listcat MVS: IN CATALOG:USERCAT1 MVS: TEST1.ABC MVS: TEST1.ABCDE [ … ] MVS: TEST1.XMIT1 MVS: TEST1.XSTART.LOG MVS: TEST1.XYZ

Page 6 Introduction MAN-REF-H363-3.4.2
A major feature of USER-Access is its implementation of a Host-Independent Command set. Host-Independent Commands allow a user to issue similar commands on all hosts around the network, without hav-ing to learn each host's native command set. The command in the example above can be issued again, but this time using the Host-Independent Command DIRECTORY. USER-Access simply maps DIRECTORY to the IBM zOS LISTCAT command. Now network users need only learn one network-wide command set. This command set can be the USER-Access default one or one that the site defines. Below is a second pass at a remote directory listing, but this time using the Host-Independent Command REMOTE DIRECTORY.
10.1.5.11> remote dir MVS: IN CATALOG:USERCAT1 MVS: TEST1.ABC MVS: TEST1.ABCDE [ … ] MVS: TEST1.XMIT1 MVS: TEST1.XSTART.LOG MVS: TEST1.XYZ
Local HP NonStop GUARDIAN commands or local Host-Independent Commands can also be executed from within USER-Access using the LOCAL command. Here, a local directory listing is given (using the Host-Independent Command DIRECTORY), showing all files in the local user's current directory. The prefix in the left hand column now reflects the local host's type HP Nonstop GUARDIAN.
10.1.5.11> local dir Tandem: Tandem: $SYSTEM.UA34 Tandem: Tandem: CODE EOF LAST MODIFIED OWNER RWEP PExt SExt Tandem: ALIASHLP 101 8726 01OCT2015 13:21 60,14 NOOO 4 28 Tandem: CLIENT O 700 1252640 01OCT2015 13:22 60,14 NONO 32 2
[ … ] Tandem: SAMPLE 101 2764 06MAR2018 11:07 255,255 AAAA 4 28 Tandem: USERHELP 101 54094 01OCT2015 13:21 60,14 NOOO 4 28 Tandem: VERIFY 101 4974 01OCT2015 13:21 60,14 NOOO 4 28
To transfer a file from the local host to the remote host, the SEND command is used. The example below sends the file EXAMPLE from the current local directory $SYSTEM.UA34 on the GUARDIAN host, to the current remote directory (or TSO/E Prefix) GUESTI on the IBM zOS host. Since all USER-Access com-mands can be pre-defined with reasonable site defaults, the typical user would just type SEND followed by the source file name. The status line indicates the file has successfully been transferred. Notice that USER-Access uses the source file name to create a default destination file name when one isn't specified.
10.1.5.11> send sample User: Source Destination Size User: ---------------------------- ---------------------------- -------- User: \NETEXEC.$SYSTEM.UA34.SAMPLE TEST1.SAMPLE 622

MAN-REF-H363-3.4.2 Introduction Page 7
A quick REMOTE DIRECTORY will act as a second verification that the file has indeed been transferred. Note the new file EXAMPLE below: 10.1.5.11> remote dir MVS: IN CATALOG:USERCAT1 MVS: TEST1.ABC MVS: TEST1.ABCDE [ … ] MVS: TEST1.SAMPLE MVS: TEST1.XMIT1 MVS: TEST1.XSTART.LOG MVS: TEST1.XYZ
File transfer is just as easy the other direction. To move a file from the remote host to the local host, use the RECEIVE command. The example below transfers the file SAMPLE from the IBM zOS system to the local GUARDIAN host.
10.1.5.11> receive sample sampback User: Source Destination Size User: ---------------------------- ---------------------------- ------- User: TEST1.SAMPLE sampback 622 This transfer can too be verified by viewing a LOCAL DIRECTORY listing.
10.1.5.11> local dir Tandem: Tandem: $SYSTEM.UA34 Tandem: Tandem: CODE EOF LAST MODIFIED OWNER RWEP PExt SExt Tandem: ALIASHLP 101 8726 01OCT2015 13:21 60,14 NOOO 4 28 Tandem: CLIENT O 700 1252640 01OCT2015 13:22 60,14 NONO 32 28 [ … ] Tandem: SAMPBACK 101 716 06MAR2018 11:08 60,14 NNNN 2 2 Tandem: SAMPLE 101 2764 06MAR2018 11:07 255,255 AAAA 4 28 Tandem: USERHELP 101 54094 01OCT2015 13:21 60,14 NOOO 4 28 Tandem: VERIFY 101 4974 01OCT2015 13:21 60,14 NOOO 4 28
To force a disconnection from all remote hosts (in this case the IBM zOS host), the EXIT command is used. EXIT insures a smooth shut down of network activities as well as local and remote files.
10.1.5.11> exit $SYSTEM UA34 6>
To keep this sample session short, no more commands or features of USER-Access will be shown. However, since only a small fraction of USER-Access has been described here, the user is encouraged to read the re-maining sections for a full description of the benefits that can be realized using the product.

Page 8 Introduction MAN-REF-H363-3.4.2

MAN-REF-H363-3.4.2 HP NonStop Guardian Local User’s Guide Page 9
Introduction This section is intended for GUARDIAN users that would like an introduction to USER-Access and some of its features. This section explains how to invoke USER-Access from a GUARDIAN terminal, what a USER-Access session looks like, logging in and transferring files to a remote host on the network, and executing commands on a remote host. Users are encouraged to refer to the "Advanced Local User’s Guide" on page 47 for a more in-depth look into USER-Access. Users should also refer to the appropriate User's Guidefl for the remote host in which a connection will be made for additional information about that host's environment.
Invoking USER-Access on GUARDIAN USER-Access is invoked using the following general format:
USER [/run-qualifiers/][input-file [argument1, argument2, ...]] [-keyword value]
Where:
USER is the command to invoke USER-Access. It is possible that this command may conflict with another GUARDIAN command or symbol already set up at a particular site. If that is the case, setup an alias for whatever you want to use. If USER-Access is not invoked by this command, contact the site ad-ministrator.
/run-qualifiers/ are optional GUARDIAN RUN qualifiers specifying such things as process NAME, INPUT file name or INV (from a variable), SWAP device, etc. See “Running USER-Access as a Batch Job Under GUARDIAN” on page 100 for an example of run-qualifiers. Refer to GUARDIAN documentation for more information.
input-file is an optional USER-Access input or script file containing USER-Access commands that may be read and executed. When USER-Access completes execution of the input file the session terminates and the GUARDIAN sys-tem prompt is displayed.
argument1, argument2… are optional arguments that may be passed as parameters to the input file. Multiword arguments should be enclosed in double quotation marks.
-keyword value specifies optional command line keywords that may be given to affect opera-tion of the USER-Access session. The following are valid keywords:
-GLObal specifies the size in bytes of the global variable environment. The default value is 3000 bytes which should be adequate unless a user session attempts
HP NonStop GUARDIAN Local User’s Guide

Page 10 HP NonStop Guardian Local User’s Guide MAN-REF-H363-3.4.2
to define a larger number of global variables, in which case the GLOBAL switch can be used to increase the space available for global variables.
-HOMEdir Specifieds the name of the user’s “login” or “home” directory when USER-Access is invoked. Changing this keyword’s value redefines the location USER-Access uses to locate user startup files.
-OUTput specifies the name of an output file that is to receive the output from this ses-sion.
-ROOTdir specifies the name of the installed USER-Access root directory containing the site specific initiator, help, and startup files. There is generally no reason to modify this keyword.
-SEArch specifies the search pat USER-Access follows to locate local initiator startup files. SEARCH is described in more detail in the “Local HP NonStop GUARDIAN USER-Access Startup Files”, below.
-SERvice specifies an alternative default CONNECT SERVICE name. The default is “USER”.
USER-Access is invoked for interactive use by typing user at the GUARDIAN system prompt: >user User>
The USER-Access prompt in the example above is User> although USER-Access may be configured to prompt with a different string. The prompt means that USER-Access is ready to accept commands.
Local HP NonStop GUARDIAN USER-Access Startup Files When USER-Access is invoked, it attempts to read two startup files on the local host: a site startup file which located in the USER-Access root directory (SITE) call SCLIENT, and a user startup file located in the user’s login directory called CLIENTUA. The site startup file is read first then the user startup file is read. Neither of the startup files is required.
The startup files consist of USER-Access commands. Typically a site administrator will create the site startup file to define basic aliases for general users. The user startup file provides more sophisticated users with a way to define custom aliases and qualifier defaults. User startup files make it possible to override defaults in the site startup file. For example, a simple startup file could contain the lines:
* My startup file (this is a comment line) * set alias ld local directory set alias rd remote directory set local prefix MYHOST:
This startup file creates two USER-Access aliases for displaying the local and remote directory listings, ld and rd respectively. It also sets the default USER-Access local prefix to be MYHOST:. After USER-Access is invoked, these new definitions will be read in, whether they are in the site startup file or the user startup file, and become available to the user as soon as the USER-Access input prompt appears.
It is possible to invoke USER-Access by declaring alternative startup files. This is done using the SEARCH qualifier on the command line when USER-Access is invoked. By default, SEARCH is defined as ‘(SITE) (USER)’. By implication, this reads SCLIENT from the local USER-Access (SITE) and then CLIENTUA from the user’s login directory, in that order. The order can be changed, other file names may be specified, or

MAN-REF-H363-3.4.2 HP NonStop Guardian Local User’s Guide Page 11
the special SEARCH keyword (NONE) can be used to override the default. Refer to “GUARDIAN USER-Access SEARCH Keywords (SITE), (USER), and (NONE)” on page 95for more information.
Remote USER-Access Startup Files In addition to the local startup files, there are equivalent remote startup files that the USER-Access Responder on the remote host returns to the local Initiator following a successful connection. By default, both a site and user startup files are processed, but this can be overridden by the CONNECT command’s SEARCH qualifier. Following a network connection, these startup files, if they exist, are sent back to the Initiator to be processed. They are not executed on the remote host. (For security reasons, the following commands may not be execut-ed from a remote server startup file: CONNECT, DISCONNECT, LOCAL, RECEIVE, REMOTE, and SEND.) Any aliases defined in these files become available to the local user. This is important in that a USER-Access alias defined in the remote startup file will override an alias that has been previously defined in the session. Whether or not this is desirable depends upon the situation; care must be taken when defining aliases in a remote startup file.
The exact name and location of the remote startup files depends on the remote host in which a connection is being made. Refer to the manual for the remote host for more information.
Getting Started Once the prompt appears, it is time to begin giving commands to USER-Access. This section will present some basic concepts that are an important foundation for understanding the details of USER-Access.
USER-Access Commands and Command Qualifiers A USER-Access command can be invoked anytime the command line prompt appears. Commands may be fully spelled out or abbreviated. The minimum spelling of any command is the first ‘n’ capital letters of the command name. Abbreviations for each command are shown in “Command Descriptions” on page 123.
Several of the USER-Access commands have qualifiers or keywords associated with them. A command’s qualifiers can affect how a command responds to a user, the performance of a command, and the flexibility of a command. Most of the qualifiers have default values already associated with them. The novice user does not need to be concerned with overriding or redefining these values. The sophisticated user can use the qualifiers to modify commands, often making the commands more powerful. There are two methods for changing the values of qualifiers:
1. A qualifier can be redefined to assume a new default value by means of the SET command.
2. The current value of a qualifier can be overridden by specifying a new value on the command line. This is accomplished by using the special character dash ‘-’ followed by the qualifier name and its new value.
Command qualifiers are similar to USER-Access commands in that they may be abbreviated. The minimum spelling of any qualifier is the first ‘n’ capital letters of the qualifier name. Abbreviations for each command qualifier are shown in “Command Descriptions” on page 123. For instance, the minimum spelling of the qual-ifier CREate is CRE.
Displaying the Valid Qualifiers for a Command
A list of valid qualifiers for a particular USER-Access command can be obtained with the SHOW QUALIFIER command. The list also includes a brief description of each qualifier. For example, to display the list of valid qualifiers for the INPUT command, type:

Page 12 HP NonStop Guardian Local User’s Guide MAN-REF-H363-3.4.2
User> show qualifier input User: User: CONTinue .... continue on error (on/off) User: ECHO ........ echo input to terminal (on/off) User: PROMPT2 ..... secondary prompt for input continuation User: PROMpt ...... prompt string for USER input User: SEArch ...... search path for default INPUT commands User: VERify ...... verify string/alias substitution (on/off) User:
Displaying the Current Value of a Qualifier
The SHOW command is used to obtain a listing of the current values for a command’s qualifiers. For exam-ple, a listing of the SEND qualifier values is displayed by entering:
User> show send User: User: CRC ............... off User: CREate ............ new User: * DIRectory:LOCal ... locdir_value User: * DIRectory:REMote .. remdir_value User: FLOW .............. off User: MAXRECord ......... value User: MODe .............. character User: PARTialrecord ..... on User: QUIet ............. off User: User: * Informational qualifier (cannot be modified).
The qualifier name appears in the left hand column and its value appears in the right hand column. In this ex-ample, the value of qualifier CREATE is currently set to ‘new’. Qualifier QUIET is turned ‘off’. Notice that some qualifiers are flagged as “informational qualifiers”. These are shown along with the SEND qualifiers but are not controllable in the same way. They appear because they provide information important to the com-mand and the one using it. Qualifiers flagged as informational cannot be modified. (DIRectory:LOCal and DIRectory:REMote, shown above, may be modified using SET LOCAL DIRECTORY and SET REMOTE DIRECTORY respectively. The SEND and RECEIVE commands list them as informational qualifiers since they are used to direct file lookup for file transfers.)
An individual qualifier’s value can be examined by using the SHOW command followed by the command name and qualifier name. For instance, the current value of the INPUT PROMPT qualifier can be shown by entering:
User> show input prompt User: PROMpt ............ User> User>
Setting a Command Qualifier
Use the SET command to redefine the value of a qualifier for a command for the duration of the USER-Access session or until it is changed again using the SET command. For example, to change the default RECEIVE file transfer mode to STREAM, modify the MODE qualifier of the RECEIVE command:
User> set receive mode stream

MAN-REF-H363-3.4.2 HP NonStop Guardian Local User’s Guide Page 13
The RECEIVE file transfer mode now will default to STREAM until the qualifier MODE is redefined. The change can be verified with the command:
User> show receive mode User: MODe .............. stream
Some command qualifiers, such as INPUT qualifiers CONTINUE, ECHO, and VERIFY, are Boolean qualifi-ers: their values are either ON or OFF. To set a Boolean command qualifier to ON, enter:
User> set command qualifier on
or User> set command qualifier
For the INPUT qualifier ECHO, this would be: User> set input echo on
or User> set input echo
For Boolean qualifiers, a missing value is interpreted by USER-Access as ON.
Besides string and Boolean qualifiers, there are also Integer qualifiers. These qualifiers, such as BLOCKSIZE, LINES, and TIMEOUT, accept only integer values and often have numeric range checks asso-ciated with them. Integer qualifier values may be appended with a ‘K’ (210) or ‘M’ (220) multiplier. For exam-ple, to set the CONNECT BLOCKSIZE qualifier to 16 kilobytes, the following may be entered:
User> set connect blocksize 16k
Overriding a Command Qualifier
The qualifiers that can be defined with the SET command (all non-informational qualifiers), can also be over-ridden on the command line. For example, if the current RECEIVE file transfer mode is STREAM, it can be overridden for a single transfer by entering:
User> receive -mode character sourcefile
This command does not change the default value of the MODE qualifier; it simply overrides the default value for the duration of the command. Therefore, the file ‘sourcefile’ above would be transferred in CHARACTER mode while the default value of RECEIVE qualifier MODE would remain STREAM. This can be verified with the command:
User> show receive mode User: MODe .............. stream
When forcing a Boolean qualifier to ON from the command line, the value ON is optional. For example, the commands shown below are equivalent.
User> send -quiet on sourcefile User> send -quiet sourcefile
USER-Access interprets the missing Boolean value to be ON, even if the default value is OFF.

Page 14 HP NonStop Guardian Local User’s Guide MAN-REF-H363-3.4.2
Online Help Built into USER-Access is an online help facility that makes it easy for a user to obtain help on a particular command or topic. The help facility also returns useful information on command qualifiers, qualifier defaults, and command examples. To obtain a general USER-Access help display, use the HELP command as follows:
User> help
The general, or top-level help display will include additional topics in which help can be obtained. For in-stance, one of the help sub-topics will be the USER-Access command LOCAL. To get additional help on the LOCAL command, one would type:
User> help local
To get help on qualifiers for the LOCAL command, one would type: User> help local qualifiers
It is important to note that some help information resides on remote hosts. Therefore, a remote connection is required in some cases (such as ‘HELP SEND QUALIFIERS’).
Refer to the HELP command in “HELP Command” on page 134for more details.
Controlling USER-Access Input and Output The USER-Access commands INPUT and OUTPUT, along with their respective qualifiers, control a majority of the user-oriented input and output within USER-Access. By setting various qualifiers, users can change the USER-Access prompt, tell USER-Access to continue processing even if an error occurs, cause output to be held after each page, save the output to a local file, etc. This section very briefly discusses some of the things that can be done to control USER-Access I/O.
By typing SHOW INPUT, the user can get a list of all INPUT qualifiers along with their current values: User> show input User: User: CONTinue ......... off User: ECHO ............. off User: PROMPT2 .......... More>> User: PROMpt ........... User> User: SEArch ........... User: VERify ........... off User:
Each of these qualifiers is explained in detail in “Command Descriptions” on page 123 under the INPUT command, along with examples of its use. Very simply, the SET command is used to modify any of the quali-fiers. For instance, to change the USER-Access prompt from User to MY-PROMPT: type the following:
User> set input prompt "MY-PROMPT: " MY-PROMPT:
Notice that the prompt for the next command has now changed to “MY-PROMPT:”. To tell USER-Access to continue processing within an input script or alias (discussed later) even after an error results, turn on the CONTINUE qualifier by entering:
User> set input continue on

MAN-REF-H363-3.4.2 HP NonStop Guardian Local User’s Guide Page 15
Users can affect the output as it is returned from USER-Access by modifying OUTPUT qualifiers. To look at the available qualifiers for the OUTPUT command, type SHOW OUTPUT command:
User> show output User: User: COLumns ........... 80 User: * DESTination ....... User: FORmat ............ {msg("text")}({msg("facility")}{msg("code")}). User: HOLD .............. off User: LINes ............. 24 User: PREFix ............ User: User: QUIet ............. off User: TRUNcate .......... off User: User: * Informational qualifier (cannot be modified). User:
Each of these qualifiers is explained in detail in “Command Descriptions” on page 123 under the OUTPUT command, along with examples of their use. As with the INPUT qualifiers, the SET command can be used to modify any of the OUTPUT qualifiers. For example, to tell USER-Access to pause every 24 lines (the current value of the LINES qualifier), turn on the HOLD qualifier with the following command:
User> set output hold on
This will prevent general USER-Access output from scrolling off the screen. To modify the number of lines per screen to twenty, change the LINES qualifier:
User> set output lines 20
The OUTPUT command itself can be used to capture the results of a USER-Access session to a file. This is done by typing OUTPUT followed by a file name. In addition, the user’s input can be captured by turning on the INPUT ECHO qualifier:
User> set input echo on User> output tmpfile
Following this command sequence, all input and output for this session is directed to the file named tmpfile. If the ECHO qualifier was not turned on, only the command results (output) would be captured. More infor-mation concerning INPUT and OUTPUT can be found in the “Advanced Local User’s Guide” on page 47 of this manual. This facility is particularly useful as a means of providing information to Network Executive Software’s technical support personnel regarding questions and problems.
USER-Access Error Messages USER-Access provides a friendly user interface across many different host types. This includes error messag-es that are easy to understand. Error messages returned by USER-Access consist of at least a USER-Access level error message followed by an optional host specific error message. All error messages also have an as-sociated error code that can be used to locate additional information in the error message appendices.
An example of a simple “Invalid command” error follows: User> xxxxxx User: Invalid command ‘xxxxxx’ (UA-4708).
The error text is straightforward. The error code (UA-4708) indicates the error is a general USER-Access er-ror with error number 4708.
The next example demonstrates an error resulting from a SEND command that contains a general USER-Access error followed by a host specific USER-Access error and finally an operating system specific error:

Page 16 HP NonStop Guardian Local User’s Guide MAN-REF-H363-3.4.2
User> send badfile User: Failure during CHARACTER mode send (UA-5001). User: Failed to access file 'badfile' (UA123-8302). User: OS - file not found (OS-18012).
The first error code (UA-5001) indicates that this is a general USER-Access error (UA) with an error number of 5001. The second error code (UA123-8302) says the error is from USER-Access (UA), but generated by the USER-Access product number 123 (or more exactly H123). The actual error number is 8302. The last er-ror code (OS-18012) indicates the error is generated by the operating system (OS or whatever the operating system name might be), with the operating system error number of 18012. The USER-Access error messages are listed in “Appendix A. USER-Access Error Messages for GUARDIAN” on page 177 and in similar ap-pendices in other USER-Access manuals. The general USER-Access errors can be found in any manual. The product specific errors are in the manual for the product indicated by the product number (e.g., UA123 is product H123). Refer to the appropriate manuals for the host operating system for any operating system mes-sages.
It is important to note that a site has the ability to change the error message format and it may not exactly match the examples above. There are, however, three main pieces of information for each message: the mes-sage text, the facility generating the message, and the error number. This information should be easy to deci-pher. If not, see the site administrator.
Aliasing Much of the versatility USER-Access offers for users is based on a very powerful script-processing or alias capability. Users of the product benefit from aliasing by having special commands, or aliases, defined for them. While a detailed description of the facility is provided in “Advanced Local User’s Guide” on page 47, this brief discussion is provided to give a general familiarity of aliasing without getting lost in detail.
Aliasing provides a means of creating a custom command set for a user or group of users. An alias is nothing more than a new name for a USER-Access command or set of commands. Aliases are useful for creating “shorthand” commands for complex or frequently used USER-Access command sequences. The simplest ali-ases are a one for one translation of an alias name and a USER-Access command. For example, if the user is accustomed to typing a question mark to obtain help in a given application, an alias can be defined very easily using the SET ALIAS command to map ‘?’ to HELP. The new alias may then be viewed with the SHOW ALIAS command.
User> set alias ? help User> show alias ? User: ? ........... HELP
Now, instead of typing HELP to obtain help information, the user can just type ‘?’ at the USER-Access prompt. The commands are considered equivalent by USER-Access. Below is the definition of a much more complicated alias called EDIT which allows a user to use a familiar local editor to edit a remote file.
User> set alias EDit {} - More>> receive -mode character {1} edit.tmp ! More>> local -interactive myeditor edit.tmp ! More>> send -mode character -create replace edit.tmp {1} ! More>> local delete edit.tmp
The basic procedure of the EDIT alias is to transfer the remote file to the local host (RECEIVE), edit the tem-porary file using the local editor (LOCAL -INTERACTIVE MYEDITOR), send the file back to the remote host when the edit is complete (SEND), and finally delete the temporary file (LOCAL DELETE). The exact syntax and special characters used to define the alias are explained in detail in “Developing USER-Access Scripts Using Input Files and Aliases” on page 74.

MAN-REF-H363-3.4.2 HP NonStop Guardian Local User’s Guide Page 17
To use the alias, the user simply invokes it from the command line like any other USER-Access command. For example, to edit an existing file on the remote host called MYFILE, you type:
User> edit myfile
USER-Access takes care of the rest. Even though several USER-Access commands are required to actually edit a remote file, the user sees it as a simple EDIT command. This is the real advantage of aliasing.
To display the definition of the EDIT alias, the SHOW ALIAS command is used: User> show alias edit User: Edit ........ receive -mode character {1} edit.tmp User: local -interactive myeditor edit.tmp User: send -mode character -create replace edit.tmp {1} User: local delete edit.tmp
Aliases created within an interactive session are lost when the session is terminated. To create aliases that can be used from session to session, they must be defined within a USER-Access input or script file, or within a site or user startup file which are read automatically when USER-Access is invoked. Refer to “Developing USER-Access Scripts Using Input Files and Aliases” on page 74 for a detailed description of aliasing.
Terminating a USER-Access Session To end an interactive USER-Access session type EXIT:
User> exit
EXIT will disconnect all connections to remote hosts and terminate the current USER-Access session. Any local or remote files that had been opened will be closed. The QUIT command also may be used to terminate an interactive session. Refer to “Command Descriptions” on page 123for more details on EXIT and QUIT.

Page 18 HP NonStop Guardian Local User’s Guide MAN-REF-H363-3.4.2
Establishing a Connection to a Remote Host In order to transfer files or execute commands on another host, a network connection must be established. This connection provides a link between the USER-Access Initiator on the local host and the USER-Access Responder on the remote host. There are three ways to make a connection to a remote host; the CONNECT command or the LOGIN and LOGINS aliases.
Using CONNECT to Establish a Connection The CONNECT command allows a user to login to a remote host. The basic format of the command is:
Command Parameters CONnect [qualifiers] host userid password [arguments]
Where:
qualifiers This represents optional CONNECT qualifiers that may be added to the command line to override the default- values. The CONNECT qualifiers control such things as NETEX blocksize negotiation, the service name in which to connect, and whether or not to display login information.is the name of a remote host as defined in the local network.
host is the name of a remote host as defined in the local network.
userid is the user name or ID describing a valid user account on that host.
password is the associated password needed to login to userid.
arguments indicates additional arguments that may be required by the remote host at login time.
Below is an example CONNECT where the host name is ‘bluesky’, the userid is ‘guest’, and the password is ‘netex’:
User> connect bluesky guest netex User: Connected to Service Initiator on host 'BLUESKY'. ====================================================================== Welcome to Operating System – Version 5.0 Today is November 11, 2017 – The system will be down For testing tonight between 19:00 and 22:00. Your System administrator ====================================================================== User: Logged in as user 'guest'. User: Connected to service 'USER015' on host 'BLUESKY'.
Following a successful CONNECT, USER-Access returns several informative messages, the exact syntax of which depends upon the host to which a connection is being made. The first message above indicates that an initial network connection was established to the USER-Access Responder (Service Initiator or service ‘Us-er’). Following that message are several lines of information surrounded by equal signs (= = =). The infor-mation between the equal signs is returned by the remote operating system at login time. This information is not necessarily important to USER-Access but may be to the user logging in. Next is a USER-Access mes-sage indicating that a successful login has completed. Finally a message may appear that informs the user of the name of the network service handling the connection.

MAN-REF-H363-3.4.2 HP NonStop Guardian Local User’s Guide Page 19
Besides the additional parameters that can be passed directly to the remote login procedure, the CONNECT command also has several qualifiers associated with it. The use of most of these qualifiers is a function of the remote host. Refer to the User’s Guide for the remote host for more information. “Command Descriptions” on page 123 describing the CONNECT command will also assist in the use of this command and its qualifiers.
Since most users would rather be prompted for input and would rather not see their passwords echoed back to the terminal (if possible), it is suggested that the LOGINS aliase be used when establishing a remote host connection. This alias is documented in the next section.
Using LOGINS/LOGIN to Establish a Connection The suggested way for establishing a remote connection is to use the LOGINS or LOGIN alias. LOGINS and LOGIN are similar to CONNECT but has the advantage of being interactive. Below is a repeat of the example from the previous section but using LOGINS instead of CONNECT:
User> logins Hostname? bluesky Username? guest Password? _____ Qualifiers? User: Connected to Service Initiator on host 'BLUESKY'. ====================================================================== Welcome to Operating System – Version 5.0 Today is November 11, 2017 – The system will be down For testing tonight between 19:00 and 22:00. Your System administrator ====================================================================== User: Logged in as user 'guest'. User: Connected to service 'USER015' on host 'BLUESKY'.
Notice that LOGINS prompts the user for appropriate login information and that the password was not printed to the terminal. (Whenever possible USER-Access supports NO-ECHO mode to improve security; not all sys-tems provide this mode.) The password is transferred encrypted. This interface is much more friendly than using CONNECT and can be tailored to the needs of a given site by the system administrator. Following the prompts, the connect proceeds as expected.
Note: Since LOGINS is an alias that can be modified by the site administrator, it may operate differently than the example. However, the overall process should remain similar.
Exchanging Host Information on Connect To the user, the connect/logins/login process appears fairly straightforward, but to USER-Access, much must be done in order for two hosts to communicate. The issues concerning CONNECT (LOGINS/LOGIN) quali-fiers and login are addressed in the Remote User’s Guide section of the manual for the host to which the con-nection is being made. Contained in this section is a general discussion on the information passed by USER-Access that is available to the user. This information may be useful in making decisions once a connection has been established.

Page 20 HP NonStop Guardian Local User’s Guide MAN-REF-H363-3.4.2
Once a successful login has been assured, the USER-Access Responder (the remote server) sends information about itself to the Initiator (the local client) and vice versa. The information, which describes both the remote and local environments, is exchanged in order for the two sides to establish how compatible they are and what functions can be supported. The SHOW command is used to display this information. For instance, to display information describing the local environment, type SHOW LOCAL as:
10.1.5.11> show local User: User: COMINT ............ $SYSTEM.SYSTEM.TACL User: * COPYright ......... COPYRIGHT (c) 2010 Network Executive Software, Inc. User: CPU ............... User: DIRectory ......... $SYSTEM.UA34 User: * GATEway ........... User: * HOSTCODE .......... ASCII7 User: * HOSTTYPE .......... TANDEM User: * NETwork ........... TCPIP User: * PID ............... $X1MN User: PREFix ............ Tandem: User: * PRODuct ........... UA363 User: QUIet ............. off User: * STATus ............ User: * TERMinal .......... \NETEXEC.$ZTN0.#PTNDDTP User: * USERname .......... SUP.TEST User: * VERsion ........... 3.4.0 User: User: * Informational qualifier (cannot be modified). User:
The qualifiers that are preceded by an asterisk (HOSTCODE, PID, etc.) reflect environmental data describing the local host and cannot be changed by the user. The remaining qualifiers (DIRectory, PREFix, etc.) that ap-pear are directly tied to the LOCAL command and may be modified to affect that command’s execution. (Note that the display above is only a sample of the information that might actually be seen for a particular host).

MAN-REF-H363-3.4.2 HP NonStop Guardian Local User’s Guide Page 21
To display the remote environment’s information, use the SHOW REMOTE command:
10.1.5.11> show remote User: User: * BLOCKsize ......... 16384 User: * COPYRight ......... COPYRIGHT (c) 1999-2012 - Network Executive Software User: , Inc. Mpls. MN User: DIRectory ......... TEST1 User: * GATEway ........... User: HOMEdir ........... TEST1 User: * HOST .............. 10.1.5.11 User: * HOSTCODE .......... EBCDIC User: * HOSTENV ........... TSO FOREGROUND User: * HOSTOS ............ z/OS 2.2 User: * HOSTTYPE .......... MVS User: * LicExp ............ 20190531 User: * LicKey ............ DQGI-YAC2-AAA4-EDCO-NAZ6-7ZEZ User: * LicNotOper ........ 20190829 User: * PID ............... 0XFA37006D83B8 User: PREFix ............ MVS: User: * PRODuct ........... EFT213 User: QUIet ............. off User: * ROOTdir ........... EFT.EFT4.TCP.TEXT User: * SERvice ........... 6904 User: * STATus ............ User: * TRANSlate ......... Network User: TSOPREfix ......... TEST1 User: * USERname .......... TEST1 User: * VERsion ........... 5.4.6 User: User: * Informational qualifier (cannot be modified). User:
Again the qualifiers marked by an asterisk describe the remote environment (HOST, PID, etc.) as well as in-formation important to the connection itself (BLOCKsize, TRANSlate, etc.). The remaining qualifiers (DI-Rectory, QUIet, etc.) are directly associated with the REMOTE command and affect its execution.
Establishing Multiple Host Connections A USER-Access session may have up to ten host connections at any given time. Although ten may be unreal-istic in most applications, it may be desirable from time to time to make a second host connection at the same time another connection is in place. For example, assume the user of the session below has already established a connection from the local host to a remote host named BLUESKY. This first connection can be verified by invoking the SHOW HOSTS command:
User> show hosts User: active ----> (1) Host=BLUESKY User=guest

Page 22 HP NonStop Guardian Local User’s Guide MAN-REF-H363-3.4.2
SHOW HOSTS gives a list of all existing connections for the present session. The current “active” connection is flagged. The active connection is the one, if any, that reflects the current remote host. To establish a second connection the LOGIN alias is used as explained in a previous section. For example, to connect to a host named REDSKY, the following command sequence is used:
User> login Hostname? redsky Username? newuser Password? _______ Qualifiers? User: Connected to Service ‘USER’ on host 'REDSKY'. =================================================== ***** Welcome to Network Host REDSKY ***** 04 - 02 - 17 =================================================== User: Logged in as user 'newuser'.
The SHOW HOSTS command can be used again to display the list of connections held by this session: User> show hosts User: (1) Host=BLUESKY User=guest User: active ----> (2) Host=REDSKY User=newuser
Notice that REDSKY is now flagged as the active host. This means that any file transfer or remote command execution will be directed to it instead of host BLUESKY. The SHOW REMOTE command also will display the remote environment for host REDSKY since it is now active. The connection to host BLUESKY remains but is in an idle state. To make it the active connection, the SET HOST command is used as:
User> set host bluesky
or User> set host 1
Now a look at the host display will show that BLUESKY is the active host: User> show hosts User: active ----> (1) Host=BLUESKY User=guest User: (2) Host=REDSKY User=newuser
Having multiple host connections can be useful for managing system activities on a number of hosts from a single point. For instance, a user on one host can send messages to a number of other hosts. Or a user can start up jobs on several other hosts all from a single terminal on the network.
Disconnecting from a Host To terminate an existing connection, the DISCONNECT command is used. Assume two connections are cur-rently established to hosts BLUESKY and REDSKY respectively, where BLUESKY is the active connection. The following will terminate this connection:
User> disconnect User: Disconnected from host BLUESKY.
To verify the connection has been broken, use the SHOW HOSTS command: User> show hosts User: (2) Host=REDSKY User=newuser

MAN-REF-H363-3.4.2 HP NonStop Guardian Local User’s Guide Page 23
Following a disconnect, there is no active host. In order to make an existing idle connection active, use the SET HOST command. The following command will make the connection to REDSKY active:
User> set host redsky
SHOW HOSTS will now indicate the change: User> show hosts User: active ----> (2) Host=REDSKY User=newuser
An alternative way to disconnect from an active host is to exit the USER-Access session. The EXIT command causes all connections to be disconnected prior to terminating the session.
Transferring Files as a Local User The file transfer capabilities of USER-Access are provided by two commands, SEND and RECEIVE. The SEND command provides file transfer from a user’s local host to the current remote host. The RECEIVE command transfers files from the remote host back to the local host. Prior to transferring files, a network con-nection must exist.
Sending Files to a Remote Host The basic format of the SEND command is:
Command Parameters SEND src_spec [dest_spec] [qualifiers]
Where:
src_spec is the file specification of the local file to be transferred to the remote host.
dest_spec is the file specification of the remote file which is to be created or replaced by the transfer. This parameter is optional. If it is omitted, USER-Access will use src_spec to create the des-tination file specification based on the remote host.
qualifiers represents optional SEND qualifiers that may be added to the command line to override the default values. The SEND qualifiers control such things as file creation, mode of transfer, and record orientation, and are defined by the remote host.
Once a connection to a remote host has been established, the user may begin transferring files. This is gener-ally as easy as typing SEND followed by a local file name:
User> send src_spec
where src_spec is the name of an existing file on the local host. USER-Access takes care of mapping the local file name to a valid remote file specification in all but a few instances. If USER-Access cannot successfully handle the mapping, for example if the source file name contains unusual characters that the remote host just cannot tolerate, then the user must include the destination file name on the command line. Specifying the des-tination name is also useful for changing the name of a file from one host to another. The example below transfers file src_spec and renames it new_file on the remote host:
User> send src_spec new_file
The SEND command also supports wildcarding on both the source and destination file specifications. This information along with all of the host specific information concerning file transfers, including examples, is explained in the file handling section of the appropriate manual. Source file specifications, source wildcard-

Page 24 HP NonStop Guardian Local User’s Guide MAN-REF-H363-3.4.2
ing, etc., can be found in “File Handling Under GUARDIAN USER-Access” on page 39. Destination file specifications, destination wildcarding, and qualifiers that affect the SEND command, can be found in the same section of the manual for the host to which files are being transferred.
Receiving Files from a Remote Host The basic format of the RECEIVE command is:
Command Parameters RECeive src_spec [dest_spec] [qualifiers]
Where:
src_spec is the file specification of the remote file to be transferred to the local host.
dest_spec is the optional specification of the local file which is to be created or replaced by the transfer. If it is omitted, USER-Access will use src_spec to create the destination file specification on the local host.
qualifiers represents optional RECEIVE qualifiers that may be added to the command line to override the default values. The RECEIVE qualifiers are defined by the local host. As do the SEND qualifiers, the RECEIVE qualifiers control such things as file creation, mode of transfer, and record orientation.
Files can be received from a remote host as soon as a connection has been established. Receiving a file is as easy as typing RECEIVE followed by a remote file name:
User> receive src_spec
where src_spec is the name of a file that currently resides on the re-mote host. In the same way as it handles SEND, USER-Access maps the remote file name to a valid local file name in all but a few instances which are generally due to character or length conflicts. If the file name mapping cannot be automated, or if the user simply wishes to rename the file as it is received, the local file name must be included as a second parameter on the command line, as shown:
User> receive remote_file local_file
The example above transfers file remote_file from the remote host and renames it local_file on the local host.
The RECEIVE command supports wildcarding on both the source and destination file specifications. This information along with all of the host specific information concerning file transfers, is explained in the file handling section of the appropriate manual. Source file specifications, source wildcarding, etc., can be found in file handling in the manual for the remote host. Destination file specifications, destination wildcarding, and qualifiers that affect the RECEIVE command can be found in “File Handling Under GUARDIAN USER-Access” on page 39 of this manual.
Send and Receive Qualifiers USER-Access was designed to make file transfer very easy for all types of users. Much of the simplicity comes through the use of default qualifier values. Although SEND and RECEIVE have several qualifiers as-sociated with them, defaults can be set up to operate most of the time for most users. Therefore, the majority of users seldom need to modify the qualifier values. On the other hand, changing the value of a SEND or RECEIVE qualifier is simple.

MAN-REF-H363-3.4.2 HP NonStop Guardian Local User’s Guide Page 25
Only simple validation of many of these qualifiers is performed when the set command is issued. Detailed validation is performed when the send or receive is issued.
To show the available SEND or RECEIVE qualifiers after establishing a remote connection, use the SHOW QUALIFIERS command. For example, to display the list of valid qualifiers for SEND, type the following:
User> show qualifiers send User: User: CRC ............. file transfer checksum (on/off) User: CREate .......... file create options User: MAXRECord ....... maximum RECORD mode size User: MODe ............ file transfer mode User: QUIet ........... inhibit file transfer display (on/off) User:
The output above reflects a sample of the many qualifiers that might be seen. The actual qualifiers for SEND depend on the remote host since that is where file creation takes place. The RECEIVE qualifiers are directly associated with the local host for the same reason. If a new connection is made to a different host, the qualifi-ers may change significantly.
To view the current values for the SEND or RECEIVE qualifiers, use the SHOW command. For example, SHOW SEND displays the list of SEND qualifiers along with their current values:
User> show send User: User: CRC .............. off User: CREate ........... new User: * DIRectory:LOCal ...local_dir_value User: * DIRectory:REMote ..remote_dir_value User: MAXRECord ........ 10000 User: MODe ............. character User: QUIet ............ off User: User: * Informational qualifier (cannot be modified).
Notice that a DIRECTORY entry appears for both the local and remote host. This value determines where the file will come from and where it will be sent if the respective file specifications are not given. (These qualifi-ers may be modified by using SET LOCAL DIRECTORY and SET REMOTE DIRECTORY.) The remain-ing qualifiers (the non-informational qualifiers) may be modified using the SET command. For example, to change the RECEIVE command’s default file option CREATE from NEW to REPLACE, use the following:
User> set receive create replace
Or, to override the current value for a single file transfer, modify it on the SEND or RECEIVE command line. For example:
User> receive sourcefile -create replace
For a complete list of valid RECEIVE qualifiers, refer to the “File Handling Under GUARDIAN USER-Access” section on page 39 of this manual. This section will also address detailed information about transfer-ring files to this host, wildcard support, transfer modes, and much more. Refer also to the RECEIVE com-mand in “Command Descriptions” on page 123 of this manual.

Page 26 HP NonStop Guardian Local User’s Guide MAN-REF-H363-3.4.2
The qualifiers for the SEND command on the other hand, are detailed in the file handling and command de-scription sections of the manual for the remote host to which file transfers will be made. That manual will also address information concerning host file specifications, wildcard support, file types supported, etc.
Executing Remote Host Commands USER-Access users can issue host commands on the remote host and view the results. Host commands can take the form of a native host command or an alias that translates to a host-specific command. Remote com-mands are issued from a USER-Access session via the REMOTE command. A network connection to a re-mote host must exist prior to issuing REMOTE. The command line format is:
Command Parameters REMOTE [qualifiers] command
Where:
REMOTE is the keyword for this command.
qualifiers represents optional USER-Access REMOTE qualifiers that may be added to the command line to override the default values. These qualifiers and their default values are defined by the remote host. Qualifiers must appear before the remote command.
command either a valid command on the remote host, an alias command defined using SET REMOTE ALIAS, or one of the predefined host independent commands.
USER-Access performs translation on any alias prior to passing the command string to the remote host. By default, the results of a REMOTE command get transferred back across the network and displayed at the local user’s terminal.
For example, assume the remote host supports a command called DISPLAY TIME that returns the current time of day. A user could execute this command from a USER-Access session by typing the following:
User> remote display time SYSTEM-A: SYSTEM-A: The current time is: 12:12:01 pm SYSTEM-A:
The results are displayed in the remote host’s format with the exception of the optional host prefix that pre-cedes each line of output (SYSTEM-A:). This prefix can be modified to the user’s liking with the SET REMOTE PREFIX command.

MAN-REF-H363-3.4.2 HP NonStop Guardian Local User’s Guide Page 27
Since users may be unfamiliar with the command syntax of a remote host, USER-Access defines a set of commands (implemented as aliases) that exist on all hosts1. These commands, referred to as host-independent commands, allow a user to execute commands on many different systems with a single, simple command set. To look at the list of host independent commands defined for the current remote host, issue the SHOW REMOTE ALIAS command:
User> show remote alias User: User: COPY .............. Copy_a_file User: DELete ............ Delete_a_file User: DIRectory ......... List_files User: REName ............ Rename_a_file User: TYPe .............. Type_contents_of_a_file User: WHO ............... Who_is_on_the_system User:
The actual output seen by the user will list all of the remote aliases (including host independent commands) in the left column and the host command translations in the right column. Users can issue host-independent commands as if they were commands native to the remote host. USER-Access handles the translation. For example, to obtain a list of files that reside on the remote host, the host-independent command DIRectory could be used:
User> remote dir
The actual native command for the remote host could be given. Assuming the native command for listing files on the remote host is LISTFILES, an alternative to the above would be:
User> remote listfiles
The commands would give identical results since the host independent command DIRectory would be mapped to the native command LISTFILES for this host.
Refer to the remote user’s guide in the manual of the remote host for a list of host independent commands defined for that system, as well as a discussion on executing commands on that host. Also see the command description section of the same manual for the list of valid REMOTE qualifiers and an example of their use.
1 Some of these commands may not be supported on all hosts.

Page 28 HP NonStop Guardian Local User’s Guide MAN-REF-H363-3.4.2
Executing Local GUARDIAN Commands Users can issue host commands on the local host and view the results. Host commands can take the form of a valid GUARDIAN command or an alias that translates to a valid GUARDIAN command. Local commands are issued from a USER-Access session via the LOCAL command. The format of the LOCAL command is:
Command Parameters LOCAL [qualifiers] [command]
Where:
qualifiers represents optional USER-Access LOCAL qualifiers that may be added to the command line to override the default values. Qualifiers must appear before the local command.
command can be a valid GUARDIAN TACL command (or COMINT), an alias command defined us-ing SET LOCAL ALIAS, or one of the predefined host independent commands (e.g. DIRECTORY, TYPE, WHO, etc.). USER-Access performs translation on any alias prior to passing the command string to GUARDIAN. The default is none, which means to drop into an interactive TACL subprocess.
By default, the results of a local command get displayed at the user’s terminal.
The figure below is an example of the LOCAL command being used within GUARDIAN USER-Access to obtain a list of what is happening on the system. The GUARDIAN command is “status”.
User> local status
Tandem:
Tandem: System \NETEXEC
Tandem:
Tandem: Process Pri PFR %WT Userid Program file Homet
Tandem: erm
Tandem: $X6G5 0,203 158 R 000 60,14 $SYSTEM.SYS02.TACL $X6G4
User>
The prefix Tandem: indicates that the results are being returned from the GUARDIAN host. Using LOCAL from within a USER-Access session, it is also possible to invoke a compiler, run command procedures, etc.
To execute a local command under GUARDIAN, USER-Access activates a command interpreter then issues the command under it. Therefore, any command issued within the subprocess that changes the user’s envi-ronment will have no effect on the parent process or USER-Access. Issuing a LOCAL VOLUME command will not change the volume-subvolume permanently. The only way to effectively change your volume-subvolume is by using the SET LOCAL DIRECTORY command: User> set local directory $NSC.TEMP
A display of the local directory will verify the change: User> show local directory User: DIRectory ….*.*….. $NSC.TEMP

MAN-REF-H363-3.4.2 HP NonStop Guardian Local User’s Guide Page 29
The new directory value will be used as the default volume-subvolume for all subsequent LOCAL commands and file transfers, since USER-Access makes this change to the parent process, not a sub-process. Therefore, the GUARDIAN command WHO displays the “current volume”:
User> local who Tandem: Home terminal: $X6G4 Tandem: TACL process: \NETEXEC.$X6G5 Tandem: Primary CPU: 0 (NSR-E) Tandem: Default Segment File: \NETEXEC.$DATA1.#0001071 Tandem: Pages allocated: 8 Pages Maximum: 1024 Tandem: Bytes Used: 12924 (0%) Bytes Maximum: 2097152 Tandem: Current volume: $DATA1.TEST Current system: \NETEXEC Tandem: Saved volume: $DATA1.TEST Tandem: Userid: 60,14 Username: SUP.TEST Security: "NNNN" Tandem: Logon name: SUP.TEST User>
The LOCAL command also gives the user the ability to enter an interactive command interpreter, keeping the USER-Access session in the background. This local interactive mode can be invoked by leaving the com-mand off of the LOCAL command line.
User> local To return to USER-Access type ACTIVATE $X6BF and then PAUSE. $DATA1 TEST1 3>
At this point the user is simply running a GUARDIAN process. Any valid GUARDIAN command can be is-sued just as if USER-Access had never been invoked. Note the output from the LOCAL command; the ACTIVATE will always be of the form:
ACTIVATE $ProcessID
Where $ProcessID is the process running the UA Client. In the example, USER-Access is running as pro-cess $X6BF. To return to the USER-Access session, the user must reactivate USER-Access and pause the GUARDIAN process by typing:
12> activate $X6BF 13> pause User>
ACTIVATE and PAUSE returns the user back to the USER-Access session, where all remote connections, alias definitions, and the like have been retained. Local interactive mode makes it easy for a user to bring up USER-Access, establish a remote connection, and then return to GUARDIAN for further activity. When a file or remote job is requested, the user simply returns to USER-Access where the remote host is actively waiting.
For more information on the LOCAL command and its qualifiers, refer to “Command Descriptions” on page 123 of this manual.
Issuing Local GUARDIAN Host-Independent Commands As on the remote host, the local USER-Access user has the option of executing native host commands, host-independent commands, or user defined aliases. The host-independent commands allow a user to execute

Page 30 HP NonStop Guardian Local User’s Guide MAN-REF-H363-3.4.2
commands on many different systems with a single command set. To display the list of host-independent commands defined for GUARDIAN USER-Access, issue the SHOW LOCAL ALIAS command:
User> show local alias User: User: CANcel ............ (TYPE)CANCEL is not available for TANDEM User: COPY .............. FUP DUP {1},{2},PURGE User: DELete ............ PURGE User: DIFference ........ (TYPE)DIFFERENCE is not available for TANDEM User: DIRectory ......... FILEINFO User: HELP .............. HELP User: PRInt ............. (TYPE)PRINT is not available for TANDEM User: QUEue ............. (TYPE)QUEUE is not available for TANDEM User: REName ............ RENAME User: STAtus ............ STATUS {ndf(1,"*,TERM")} {0} User: SUBmit ............ (TYPE)SUBMIT is not available for TANDEM User: TYPe .............. FUP COPY User: WHO ............... WHO User: User>
The host independent commands are in the left column and the GUARDIAN command translations are in the right column. Users can issue host independent commands as if they were commands native to GUARDIAN. USER-Access takes care of the translation. Notice that a few commands, CANCEL, DIFFERENCE, PRINT, QUEUE and SUBMIT are simply mapped to a special keyword ’( ’ with the message “xxx is not available for TANDEM”. If the user was to invoke one of these commands, USER-Access, upon seeing ‘(TYPE)’, would display the message. These commands have no GUARDIAN translation. WHO translates to the GUARDIAN command WHO. Typically, the WHO alias in USER-Access displays a list of users currently logged on to the system; because of a lack of support for this command in GUARDIAN command interpreters, WHO de-scribes the user’s environment and defaults.
The following is an example of a LOCAL command that invokes a host independent command called TYPE. TYPE translates to the GUARDIAN command FUP COpy which types out the contents of a file:
User> local type hello Tandem: HELLO WORLD Tandem: 1 RECORDS TRANSFERRED
Notice that the output from TYPE is equivalent to the output from FUP COPY:
User> local fup copy hello Tandem: HELLO WORLD Tandem: 1 RECORDS TRANSFERRED
Local GUARDIAN USER-Access users can also create their own local aliases using the SET LOCAL ALIAS command. For example, to create a local alias called CURRENTDIR that shows the current default directory (i.e. \NETEXEC.$DATA1.TEST), issue the following command:
User> set local alias currentdir env volume

MAN-REF-H363-3.4.2 HP NonStop Guardian Local User’s Guide Page 31
Now the SHOW LOCAL ALIAS command can be used to display the new alias: User> show local alias
User: CANcel ............ (TYPE)CANCEL is not available for TANDEM User: COPY .............. FUP DUP {1},{2},PURGE User: CURRENTDIR ........ env volume User: DELete ............ PURGE User: DIFference ........ (TYPE)DIFFERENCE is not available for TANDEM User: DIRectory ......... FILEINFO User: HELP .............. HELP User: PRInt ............. (TYPE)PRINT is not available for TANDEM User: QUEue ............. (TYPE)QUEUE is not available for TANDEM User: REName ............ RENAME User: STAtus ............ STATUS {ndf(1,"*,TERM")} {0} User: SUBmit ............ (TYPE)SUBMIT is not available for TANDEM User: TYPe .............. FUP COPY User: WHO ............... WHO User:
This new alias is equivalent to the GUARDIAN command env Volume and is stored along with the local host independent commands. Users can create as many local aliases as desired. To make them available for use in all USER-Access sessions, edit them into a local USER-Access startup file.
Refer to “Command Descriptions” on page 123 of this manual for the list of valid LOCAL qualifiers and an example of their use. Also see the “Advanced Local User’s Guide” on page 47 for further discussion on host aliases and aliases in general.
Editing Remote Files with a GUARDIAN Editor Using a predefined alias called EDIT, users can invoke their favorite GUARDIAN editor to edit files that re-side on the remote host in which they are connected. The EDIT alias is typically defined in the USER-Access site startup file but can easily be redefined and customized in the user's startup file. The following is a sample EDIT alias that invokes a GUARDIAN editor:
User> show alias edit User: EDit .............. receive -mode char -cre repl {1} edittmp User: ledit edittmp User: ask -prom "Update remote (Yes/No)? " -def "Y" yn User: set var S send -mode char -cre repl edittmp {1} User: {cmp(yn,"Yes",S)} User: local delete edittmp User>
To invoke EDIT, the user simply types EDIT followed by the name of an existing file on the remote host:
User> edit rfile
In the example, the remote file rfile would automatically be transferred to the GUARDIAN system and the local editor would be invoked. The user would then edit the file in the normal way. Once the edit session is over, the user has the option of over-writing the remote file or not. Finally, the local temporary file is deleted.
Page 32 HP NonStop Guardian Local User’s Guide MAN-REF-H363-3.4.2
This EDIT alias can be greatly enhanced to address file protection, loss of remote connection, etc. It is up to the site to determine exactly how EDIT should function in each environment.
Refer to the “Advanced Local User’s Guide” on page 47 for more information on developing multicommand aliases.
Interrupting a Command within GUARDIAN USER-Access To interrupt or terminate a command from executing once it has started, hit the <BREAK> key. This key will cause any USER-Access, local, or remote host command to terminate within a few seconds. Often it is desira-ble to interrupt a command if the output becomes too lengthy (e.g. a directory listing), or if the operation is no longer wanted (e.g. sending a group of files). Interrupting a command with a single <BREAK> will result in the USSER-Access prompt being displayed unless an alias or input script is handling interrupts specially. (This is discussed in more detail in the “Advanced Local User’s Guide” on page 47.)
To terminate a USER-Access session that appears to have hung for some reason, hit the <BREAK> key three times in a row. Three consecutive interrupts causes USER-Access to cleanup and exit.

MAN-REF-H363-3.4.2 HP NonStop Guardian Remote User’s Guide Page 33
This section is intended for users who are currently running the USER-Access Initiator from any local host, regardless of operating system, and would like to establish a network connection into a GUARDIAN host. The information provided here and in “File Handling Under GUARDIAN USER-Access” on page 39 should be enough to help a non-GUARDIAN user start being productive in a very short period of time. GUARDIAN users should also reference these sections to become comfortable with how USER-Access operates in the GUARDIAN environment.
Connecting into a GUARDIAN Host A USER-Access network connection is established into a GUARDIAN environment by means of a process known as the Service Initiator. The task of the Service Initiator is to process GUARDIAN login attempts from remote USER-Access users (Initiators) and, if successful, start-up a server process (Responder) that will then communicate with the remote user for the duration of the USER-Access session.
The server process started by the Service Initiator is a logged in, interactive process running under the given username/password as supplied by the remote user. All remote login requests are logged in through GUARDIAN’s COMINT (or, optionally, TACL) process to ensure that proper security is checked. Once the Service Initiator has started the server process, it severs ties with both the remote user and the server process, thus becoming available to service additional remote login requests.
Since all GUARDIAN logons through USER-Access are made using the standard COMINT or TACL pro-cess, Guardian system and user logon startup files get processed in the usual way. If any of these startup files prompt users for additional information at logon time (e.g. account number), this information must be passed as additional parameters on the USER-Access CONNECT or LOGIN command line. These additional param-eters are simply written to standard input following a successful logon, and will be read by the logon startup files as they are requested.
For example, if the system wide logon startup file at a particular site prompts users for a company access code, this access code would need to be passed through as an additional parameter on CONNECT or LOGIN. For this example, assume the host name is TAN1, the username is GUEST with a password of NETEX, and the access code is Al234. A remote user would issue the CONNECT command to logon to the TAN1 system as:
User> connect tan1 guest netex a1234
CONNECT Qualifiers Used by GUARDIAN USER-Access The CONNECT command (which is used by the LOGIN alias) has several qualifiers associated with it, of which some are only used by certain systems to assist in the login process. One CONNECT qualifier is of special importance to GUARDIAN USER-Access.
-COMmand creates the specified GUARDIAN command interpreter process with which to login. COMINT is the default; TACL is an alternative. Note that logging in with TACL may take more time than logging in with COMINT.
HP NonStop GUARDIAN Remote User’s Guide

Page 34 HP NonStop Guardian Remote User’s Guide MAN-REF-H363-3.4.2
By default the following CONNECT qualifiers are not used by GUARDIAN USER-Access at connect/login time:
ACCount APPlication PROFile PROJect SCRIpt SECondary SITE
Note: Your site may have customized USER-Access to use one or more of these additional qualifiers.
The CONNECT command as described in “Command Descriptions” on page 123 lists all applicable CONNECT qualifiers.
Remote GUARDIAN USER-Access Startup Files After establishing a successful connection into a remote GUARDIAN host, USER-Access executes the startup files as described by the CONNECT SEARCH qualifier on the Initiator. The normal default definition of this qualifier is:
User> show connect search User: SEArch ............ (SITE) (USER)
Possible values for CONNECT SEARCH are the keywords (NONE), (SITE), (USER), or any valid remote file specification containing USER-Access commands. The definitions for the special keywords as they relate to USER-Access for GUARDIAN are given below.
(NONE) do not process any responder (or server) startup files.
(SITE) implies a USER-Access site startup file called ‘SSERVER’ located in the remote GUARDIAN site directory. This is explained in more detail in “GUARDIAN USER-Access SEARCH Keywords (SITE), (USER), and (NONE)” on page 95.
(USER) implies a USER-Access user-level startup file called ‘SERVER’ that is located in the user’s login directory. This is explained in more detail in “GUARDIAN USER-Access SEARCH Keywords (SITE), (USER), and (NONE)” on page 95.
No server startup files are required. If any do exist, USER-Access sends their contents (a sequence of USER-Access commands) back to the local Initiator where they are then executed in the order described by the SEARCH qualifier. The following USER-Access commands cannot be used in server startup files:
CONNECT DISCONNECT LOCAL RECEIVE REMOTE SEND

MAN-REF-H363-3.4.2 HP NonStop Guardian Remote User’s Guide Page 35
Transferring Files to a GUARDIAN Host The file transfer capabilities of USER-Access are provided by two commands, SEND and RECEIVE. The SEND command provides file transfer from the local host to a remote GUARDIAN host. The RECEIVE command transfers files from a remote GUARDIAN host back to the local host.
The SEND and RECEIVE commands function the same regardless of the host from which they are executed. However, the command qualifiers to SEND and RECEIVE differ depending on the hosts involved. The qual-ifiers affect how files are stored, transferred, named, etc. For details on the SEND and RECEIVE qualifiers that exist for file transfers to and from a GUARDIAN system, refer to “File Handling Under GUARDIAN USER-Access” on page 39.
Executing Remote GUARDIAN TACL Commands The REMOTE command gives users the ability to execute host commands on a remote GUARDIAN system and view the results. Host commands can be either a native TACL command or a USER-Access remote alias (or host-independent command) having a TACL command translation.
The following is an example of the REMOTE command being used within GUARDIAN USER-Access to display the Home terminal of the USER-Access connection. The TACL command is who:
User> remote who Tandem: Home terminal: $Z0X4 Tandem: TACL process: \NETEXEC.$Z0X5 Tandem: Primary CPU: 0 (NSR-E) Tandem: Default Segment File: \NETEXEC.$DATA1.#0001612 Tandem: Pages allocated: 8 Pages Maximum: 1024 Tandem: Bytes Used: 12924 (0%) Bytes Maximum: 2097152 Tandem: Current volume: $DATA1.TEST Current system: \NETEXEC Tandem: Saved volume: $DATA1.TEST Tandem: Userid: 60,14 Username: SUP.TEST Security: "NNNN" Tandem: Logon name: SUP.TEST
The prefix Tandem: indicates that the results are being returned from the GUARDIAN host. This prefix can be modified or turned off using the SET REMOTE PREFIX command.
Using REMOTE to execute commands on a GUARDIAN host, it is possible to do tasks such as invoke a compiler, run a command procedure, delete a file, etc. Any noninteractive, nonscreen oriented GUARDIAN command can be issued. Interactive commands that require users to respond to prompts or full screen orient-ed applications cannot be run through USER-Access using the REMOTE command. It should be noted, how-ever, that many interactive tasks can still be performed remotely by providing an input file containing the re-quested information.
To execute a remote command under GUARDIAN, USER-Access activates a command interpreter, then is-sues the command under it. Therefore, any command that is issued within the sub-process that changes the user’s environment will have no effect on the parent process or USER-Access.
The most likely item for a user to modify is the remote directory default. Issuing a REMOTE VOLUME will not permanently change the volume-subvolume. The only way to effectively change the volume-subvolume is to use the SET REMOTE DIRECTORY command:
User> set remote directory $data1.uatest

Page 36 HP NonStop Guardian Remote User’s Guide MAN-REF-H363-3.4.2
A display of the remote directory will verify the change: User> show remote directory User: DIRectory *.**.****…$data1.uatest
The new directory value will be used as the default directory for all subsequent REMOTE commands and file transfers since USER-Access makes this change to the parent process, not a sub-process. Therefore, the GUARDIAN command WHO results in the following display:
User> remote who Tandem: Home terminal: $Z0X4 Tandem: TACL process: \NETEXEC.$Z0X5 Tandem: Primary CPU: 0 (NSR-E) Tandem: Default Segment File: \NETEXEC.$DATA1.#0001612 Tandem: Pages allocated: 8 Pages Maximum: 1024 Tandem: Bytes Used: 12924 (0%) Bytes Maximum: 2097152 Tandem: Current volume: $DATA1.UATEST Current system: \NETEXEC Tandem: Saved volume: $DATA1.TEST Tandem: Userid: 60,14 Username: SUP.TEST Security: "NNNN"
Tandem: Logon name: SUP.TEST
Note the value of the “Current Volume:”.
For more information on the REMOTE command, refer to “Command Descriptions” on page 123 of this manual.

MAN-REF-H363-3.4.2 HP NonStop Guardian Remote User’s Guide Page 37
Issuing Remote GUARDIAN Host Independent Commands Although executing GUARDIAN commands from a remote system may be very useful, many times remote users are not familiar with the GUARDIAN command set. Therefore, USER-Access makes a set of Host In-dependent Commands available for all users around the network to use, without requiring them to learn each host’s command set. To display the list of host independent commands defined for GUARDIAN USER-Access, issue the SHOW REMOTE ALIAS command:
User> show remote alias 12:46:59 MVS: 12:46:59 MVS:CANcel ............ (TYPE)CANCEL is not available for TANDEM 12:46:59 MVS:COPY .............. FUP DUP {1},{2},PURGE 12:46:59 MVS:DELete ............ PURGE 12:46:59 MVS:DIFference ........ (TYPE)DIFFERENCE is not available for TANDEM 12:46:59 MVS:DIRectory ......... FILEINFO 12:46:59 MVS:HELP .............. HELP 12:46:59 MVS:PRInt ............. (TYPE)PRINT is not available for TANDEM 12:46:59 MVS:QUEue ............. (TYPE)QUEUE is not available for TANDEM 12:46:59 MVS:REName ............ RENAME 12:46:59 MVS:STAtus ............ STATUS {ndf(1,"*,TERM")} {0} 12:46:59 MVS:SUBmit ............ (TYPE)SUBMIT is not available for TANDEM 12:46:59 MVS:TYPe .............. FUP COPY 12:46:59 MVS:WHO ............... WHO 12:46:59 MVS: User>
The host independent commands are in the left column and the GUARDIAN command translations are in the right column. Users can issue host independent commands as if they were commands native to GUARDIAN. USER-Access takes care of the translation. Notice that a few commands, CANCEL, DIFFERENCE, PRINT, QUEUE, and SUBMIT are simply mapped to a special keyword ‘(TYPE)’ with the message “xxx is not available for TANDEM”. If the user was to invoke one of these commands, USER-Access, upon seeing ‘(TYPE)’, would display the message. These commands have no GUARDIAN translation. Since there cur-rently exists a GUARDIAN command WHO, the HOST-Independent Command WHO translates to the GUARDIAN command WHO. Typically, the WHO command in USER-Access displays a list of users cur-rently logged on to the system; because of a lack of support for this command in GUARDIAN command in-terpreters, WHO describes the user’s environment and defaults.
Below is a list of all standard GUARDIAN host independent commands along with a description of how they are used. From any local USER-Access Initiator, any of these commands can be invoked on a GUARDIAN system by means of the REMOTE command.
CANcel this command is not supported in GUARDIAN USER-Access.
COPY copy a GUARDIAN file to another file name or GUARDIAN directory. The format is: COpy file_spec1 file_spec2
DELete delete a file or set of files on the GUARDIAN host. The format of DELETE is: DELETE file_spec

Page 38 HP NonStop Guardian Remote User’s Guide MAN-REF-H363-3.4.2
DIFference this command is not supported in GUARDIAN USER-Access.
DIRectory display a listing of all the files in the given GUARDIAN directory. The wildcard character ‘*’ can be used to list only select files if desired. The format is:
DIRECTORY [directory_name | file_spec]
HELP obtain help on a GUARDIAN topic. The format is: HELP [guardian_topic]
PRInt this command is not supported in GUARDIAN USER-Access.
QUEue this command is not supported in GUARDIAN USER-Access.
REName chance the name of the specified GUARDIAN file to the new name specified as the second parameter. The format is:
RENAME old_name new_name
STAtus display a listing of the current activity on the GUARDIAN host. If no parameters are given, the default parameter is ‘*,TERM’. No parameters are required.. The format is:
STATUS
SUBmit this command is not supported in GUARDIAN USER-Access.
TYPE type out the contents of a GUARDIAN file. The format is: TYPE file_spec
WHO since there currently exists a GUARDIAN command WHO, this command is not supported in GUARDIAN USER-Access as a host-independent command.
Users can also create their own remote aliases using the SET REMOTE ALIAS command. For example, to create a remote alias called LISTFILES that gives a GUARDIAN directory listing (FILEINFO), issue the fol-lowing command:
User> set remote alias listfiles FILEINFO
Now the SHOW REMOTE ALIAS command can be used to display the new alias: User> show remote alias listfiles User: LISTFILES ............ FILEINFO
This new alias is equivalent to the DIRECTORY host independent command and is stored in the same fash-ion. Users can create as many remote aliases as desired. To make them available for use in all USER-Access sessions, edit them into a remote USER-Access startup file.
Refer to “Advanced Local User’s Guide” on page 47 for further discussion on host aliases and aliases in gen-eral.

MAN-REF-H363-3.4.2 File Handling Under GUARDIAN USER-Access Page 39
This section is intended to address GUARDIAN file handling issues as they relate to USER-Access file trans-fer commands SEND and RECEIVE. Both local and remote GUARDIAN USER-Access users should use this section as a reference for transferring files to and from a GUARDIAN host. Prior to reading this section, it is important to understand the following terminology:
Source Host Refers to the host in which the source file (of either a SEND or RECEIVE), resides. The source file is the existing file which is being transferred to the destination host.
Destination Host Refers to the host in which the destination file (of either a SEND or RECEIVE), will be created. The destination file is the new file that results following a file transfer.
The distinction between Source Host and Destination Host is important since both the SEND and RECEIVE commands always transfer files from the Source Host to the Host. SEND and RECEIVE command qualifiers are for the most part tied directly to the Destination Host Destination since that is where files get created.
The following section describes the SEND and RECEIVE qualifiers that exist for file transfers when a GUARDIAN system is the Destination Host.
GUARDIAN File Transfer Qualifiers and Default Values Below is a list of the SEND and RECEIVE command qualifiers that are available for file transfers when a GUARDIAN system is the Destination Host. That is, when the local host is a GUARDIAN system, the quali-fiers listed below pertain to the RECEIVE command (local GUARDIAN is the Destination Host). When the remote host is a GUARDIAN system, the qualifiers listed below are valid for the SEND command (remote GUARDIAN is the Destination Host).
-COMPress (BOOLEAN) this optional qualifier indicates whether or not USER-Access should perform compression as part of the file transfer. This value should be set to either ON or OFF. When COMPRESS is enabled, the data is compressed by the sender. The compression can be done by differing methods specified by the file transfer qual-ifier –METHOD (specified by the sender). The default for this value is OFF. For more information on the compression algorithms, refer to “USER-Access Data Com-pression” on page 92.
-CRC (BOOLEAN) indicates whether or not USER-Access should perform a CRC as part of the file transfer. When CRC is enabled, a 32-bit CRC is calculated by the sender along with a block sequence number. These are verified by the receiver. The default for this value is OFF.
-CREate (STRING) indicates to the destination GUARDIAN host how to create the new file. Each host has its own CREATE options and defines a default that represents the “normal” thing to do when creating new files. On GUARDIAN, the “normal” thing to do is replace an existing file if a file by the same name currently exists. Therefore, the default CREATE option on GUARDIAN is REPLACE. Other options are APPEND and NEW. NEW returns an error if a file by the same name already exists. APPEND appends the source file to the destination file if it exists, or creates a new file if it does not.
File Handling Under GUARDIAN USER-Access

Page 40 File Handling Under GUARDIAN USER-Access MAN-REF-H363-3.4.2
-EXPand (BOOLEAN) this optional qualifier indicates whether or not USER-Access should perform data expansion (decompression) as part of the file transfer. This value should be set to either ON or OFF. When EXPAND is enabled, the data is decom-pressed by the receiver. There are differing methods of decompression and the re-ceiver will automatically use the same method as was used to compress the data. If the file was not compressed and this qualifier is set ON, USER-Access will not de-compress the file while returning an informational message. The default is OFF. For more information on the compression algorithms, refer to “USER-Access Data Com-pression” on page 92.
-FLOW (BOOLEAN) indicates whether or not USER-Access should enable file transfer flow control. When FLOW is on, every block to be transferred must be requested by the receiving host. The sender sends a block only when the receiver is ready for one. FLOW exists to prevent unnecessary transfers causing retry conditions when there are delays at the remote host during file transfers that can be caused, for example, by an interactive/selective restore from an archive file. (Waiting for an operator to load a tape is another example of when FLOW may be required). Because each block must be requested by the USER-Access receiver, a significant penalty in performance is paid when FLOW is enabled. Default is ‘OFF’.
-MAXRECord (INTEGER) the maximum allowed record size when transferring files in CHARACTER or RECORD mode. If an attempt is made to transfer a file in CHARACTER or RECORD mode that has records larger than MAXRECORD, the transfer will terminate with an appropriate error message.
-METHod (STRING) this optional qualifier specifies the data compression method that USER-Access should use to compress the data when the –COMPRESS qualifier is ON. This value can be set to either LZW or RLE. LZW specifies Lempel-Ziv-Welch compression, and RLE specifies the run-length-encoding method. The default is method is LZW. For more information on the compression algorithms, refer to “USER-Access Data Compression” on page 92.
-MODe (STRING) the current file transfer mode. USER-Access for GUARDIAN supports the following modes: CHARACTER, STREAM, RECORD, BACKUP, RESTORE, V1CHAR, and COPY. The value of MODE is used internally by USER-Access to decide how to open and create files being transferred. A mode must be supported by both hosts in order to have a successful transfer. For more information, refer to “Transfer Modes Supported Under GUARDIAN ” on page 45.
-PARTialrecord (BOOLEAN) with PARTialrecord enabled, records of length greater than the block size can be transferred. The default is ON
-QUIet (BOOLEAN) tells USER-Access whether or not to display informational type mes-sages on file transfer. This value should be set to either ON or OFF. The default is OFF.
-SPAce (INTEGER) the number of bytes which USER-Access should allocate to the destina-tion file prior to the file transfer. A ‘K’ or an ‘M’ may be appended to the number to represent kilobytes or megabytes, respectively. If SPACE is specified as either a 0 or a value with a leading asterisk (*), USER-Access uses the size of the source file to determine how much space should be allocated to the destination file. Specifying a positive SPACE value without a leading asterisk tells USER-Access to use the larger of the SPACE values or the size of the source file. Generally SPACE is used only for

MAN-REF-H363-3.4.2 File Handling Under GUARDIAN USER-Access Page 41
special applications or when the source host cannot determine the size of the source file being transferred.
-TANCode (integer) specifies a GUARDIAN file type to assign the file when transferred to a GUARDIAN host. The default is a null string (“ “) and assigns a file type of O. This qualifier is valid on a SEND or RECEIVE command TO a GUARDIAN host.
-WILDCode (integer) specifies a GUARDIAN file tie to select only those files with types that match this type when wildcarding files. The default (..”) matches all file types. This qualifier is valid on a SEND or REEIVE command FROM a GUARDIAN host.
Definition of DIRECTORY Under Guardian USER-Access When USER-Access is invoked from either the Initiator or Responder side, the session begins with a default definition for the DIRECTORY qualifier for both LOCAL and REMOTE. The definition of this qualifier under GUARDIAN is the user’s current volume-subvolume combination. This DIRECTORY value becomes the default for all file transfers when no source or destination pathname is specified. It is also the default for all LOCAL and REMOTE commands issued through USER-Access.
To change the default value of DIRECTORY, the USER-Access commands SET LOCAL DIRECTORY and SET REMOTE DIRECTORY are used. For example, if the remote host is a GUARDIAN system and the current value of the remote DIRECTORY is $DISK4.OLD, a new volume-subvolume value of $VOL1.GUEST can be established as:
User> set remote directory $vol1.guest
To display the new value of the remote directory, the SHOW command is used: User> show remote directory User: DIRectory ............ $VOL1.GUEST
All subsequent file transfers and remote commands will then use this new value as a default when no volume-subvolume is given.
GUARDIAN File Specifications Below is a very brief discussion of file specification syntax on GUARDIAN operating systems. This is pro-vided as an aid to the occasional GUARDIAN user who is interested in transferring files to or from a GUARDIAN system yet is unsure of file specification syntax.
A GUARDIAN file specification begins with the volume (identified by ‘$’), a unique name that identifies the current volume. One subvolume name may follow, being separated from the volume name and the file name by periods (‘.’).
A file specification under GUARDIAN has the format: $volume.subvolume.name
Where:
VOLUME the volume name can be 1 to 7 characters in length, and must begin with a letter and al-phanumeric characters may follow.
SUBVOLUME the subvolume name can be 1 to eight characters in length and must begin with a letter; alphanumeric characters may follow.

Page 42 File Handling Under GUARDIAN USER-Access MAN-REF-H363-3.4.2
NAME the file name can be 1 to eight characters in length and must begin with a letter; alpha-numeric characters may follow.
An example GUARDIAN file specification is: $work7.smith.manual
GUARDIAN doesn’t care if a certain SUBVOLUME name currently exists when creating files or displaying files. For example, if the user wants to save a file, and the file to create has a SUBVOLUME name that is un-known when it is specified, GUARDIAN simply creates the SUBVOLUME at that time.
A typical USEER-Access user would set his GUARDIAN default directory, then SEND files from it to a re-mote host or RECEIVE files into it. In this way, one only needs to specify the file name portion of the path-name in most cases.
In a network situation, to provide access to files on remote systems, any file name can be qualified by a sys-tem name. A system name must be prefixed by a backslash (\), can be 1 to 7 characters in length and must begin with a letter, then alphanumeric characters my follow, and should be separated from the file name with a period (.). The length of the volume name used with a system name must have at most 6 letters and/or digits. The external form of a network file name follows:
\systemname.$volume.subvolume.name
GUARDIAN File Specification Examples Some example GUARDIAN file specifications are listed below to help non-GUARDIAN users set a better understanding of their appearance.
$USR.BARRY.PAG $GUARDIAN.SOURCES.FILEC $MYPROG.FILE.O \NEWYORK.MYFILE $ETC.PROGS.x $GIANT.DOC.TEXT NONAME
When the VOLUME name is missing, and/or SUBVOLUME name is missing the current the current volume and/or subvolume is used as the default.
File Transfer Examples from a Local GUARDIAN Host
Example 1
To send the file alpha.for from the current default volume-subvolume ($nsc.smith), to a remote host, the fol-lowing command would be issued:
User> send alphafor User: SOURCE DESTINATION SIZE User: ------------------------- ----------------- ------- User: $NSC.SMITH.ALPHAFOR ALPHAFOR 54909
Notice the entire source filename is displayed. The resulting destination file specification depends on the re-mote host in which the connection is made. If no destination name is specified, the source name is used to construct the destination name, and the file is stored in the current default remote directory. The size indicat-ed in the display represents an approximation of the number of bytes from the source file transferred.

MAN-REF-H363-3.4.2 File Handling Under GUARDIAN USER-Access Page 43
Example 2
To send the executable file test1exe from the volume-subvolume $mary.joe, to the remote host with the new name of testlsav, issue the following.
User> send $mary.joe.test1exe test1sav -mode stream User: SOURCE DESTINATION SIZE User: ------------------------- ----------------- ------- User: $MARY.JOE.TEST1EXE TEST1SAV 228512
The MODE qualifier was set to STREAM because it was known that the file being transferred was a non-record oriented binary file.
Example 3
The following example demonstrates wildcarding with the SEND command qualifier WILDCode. This quali-fier allows further selection of the files to transfer by specifying the types of files that USER-Access can send.
User> send b* -wildcode 101 User: SOURCE DESTINATION SIZE User: ------------------------- ----------------- ------- User: $SYSTEM.TMP.BROWNDOC BROWNDOC 4365
Note that other files that begin in ‘B’ would also have been sent if they had a GUARDIAN WILDCODE of 101.
File Transfer Examples to a Remote GUARDIAN Host
Example 1
To send a local file called myfile.tmp from a non-GUARDIAN system to a GUARDIAN host, forcing a CRC on the transfer, the following command is issued:
User> send myfile.tmp -crc User: SOURCE DESTINATION SIZE User: ----------------- ------------------------- ------- User: MYFILETMP $JONES.TXT.MYFILE 1922
Note that USER-Access removed the period and extension (‘.TMP’) from the GUARDIAN system’s file name.
Example 2
To receive a file called logincom from a remote GUARDIAN host, issue the command: User> receive logincom User: SOURCE DESTINATION SIZE User: ---------------------- -------------------- ------- User: $SYSTEM.JONES.LOGINCOM LOGINCOM 2046
Note that the source file came from the default volume-subvolume $SYSTEM.JONES.

Page 44 File Handling Under GUARDIAN USER-Access MAN-REF-H363-3.4.2
Example 3
The following example demonstrates the RECEIVE command qualifier TANCode to set the TANDEM FILECODE to 101:
User> receive black.doc –tanc 101 User: SOURCE DESTINATION SIZE User: ---------------------- -------------------- ------- User: BLACKDOC $SYSTEM.TMP.BLACK 82293
Note that the extension from the non-GUARDIAN system file specification was ignored on the GUARDIAN host.
Example 4
To perform the same receive command as in Example 3, and tell USER-Access to append any file extension to the end of the filename, use the following command:
User> receive black.doc ** –tanc 101 User: SOURCE DESTINATION SIZE User: ---------------------- -------------------- ------- User: BLACKDOC $SYSTEM.TMP.BLACKDOC 82293
Note that USER-Access removed the period (‘.’) in the non-GUARDIAN system’s file name. The first aster-isk is replaced with the source file name portion, and the second asterisk is replaced with the extension por-tion. The same effect would occur with a wildcard specification on the files to be transferred from the non-GUARDIAN system, all of the files transferred would contain the file name with the extension appended to it on the GUARDIAN host.
Source Wildcard Support for GUARDIAN File Transfers Wildcarding is valid on the source file specification for both the SEND and RECEIVE commands. Two USER-Access wildcard characters have been defined in an attempt to standardize the wildcarding for all hosts which can support it. These are:
* matches zero or more characters. For example, *def matches the strings abcdef, cdef, def.
? matches exactly one character. For example, ?def matches the strings adef, bdef, cdef, but does not match abcdef or def.
In addition to the USER-Access wildcard characters, one can also make use of the GUARDIAN wildcarding capabilities where the two do not conflict.
An example use of source wildcarding for GUARDIAN USER-Access appears below. The example demon-strates sending all the files in the default volume-subvolume that start with the letter B:
User> send b* User: SOURCE DESTINATION SIZE User: ------------------------------------------------------ User: $SYSTEM.TMP.BLACK BLACK 82293 User: $SYSTEM.TMP.BLUE BLUE 167461 User: $SYSTEM.TMP.BROWN BROWN 4365

MAN-REF-H363-3.4.2 File Handling Under GUARDIAN USER-Access Page 45
Destination Wildcard Support for GUARDIAN File Transfers Destination wildcarding is also available on GUARDIAN USER-Access. Destination wildcarding makes it possible to transfer a set of files from one system to a GUARDIAN host, modifying the file names as part of the process. The single character ‘*’ is used to make this happen.
When a ‘*’ is seen as part of the destination file specification, USER-Access replaces it with either the “file name” portion of the source file specification or the “file extension” portion of the source file specification, depending on its position in the destination file specification. For example, to send all of the files with an extension of FTN from some local host to a GUARDIAN host, renaming the files with an extension of FOR, destination wildcarding would be used as:
User> send *.ftn *.for User: SOURCE DESTINATION SIZE User: ------------------------------------------------------- User: ABCDEF.FTN $GUEST.WORK.ABCDEFFO 33114 User: SAMPLE.FTN $GUEST.WORK.SAMPLEFO 67261 User: TEST.FTN $GUEST.WORK.TESTFOR 4277
In this example, USER-Access replaced the ‘*’ in the destination file specification with file names (ABCDEF, SAMPLE, TEST) from the source file specifications. The file extension was also renamed from FTN to FOR. Notice that USER-Access truncated the file name to fit the 8 character requirement in GUARDIAN. It is also possible to append characters around the ‘*’. For instance the destination file specifi-cation could have appeared as:
User> send *.ftn x*x User: SOURCE DESTINATION SIZE User: --------------------------------------------------------- User: ABCDEF.FTN $GUEST.WORK.XABCDEFX 33114 User: SAMPLE.FTN $GUEST.WORK.XSAMPLEX 67261 User: TEST.FTN $GUEST.WORK.XTESTX 4277
In this example, destination wildcarding was used to modify both the file name and file extension portion of the destination file.
Transfer Modes Supported Under GUARDIAN USER-Access GUARDIAN USER-Access supports seven modes of file transfer: BACKUP, CHARACTER, COPY, RECORD, RESTORE, STREAM and V1CHAR. A user selects the file transfer mode by setting the SEND or RECEIVE qualifier MODE. The mode must be supported by both hosts for a successful file transfer. The MODE qualifier defines the form in which data will be transferred between two actively connected hosts. Keep in mind that the internal representation of data within a file varies from host to host even though most hosts define the same modes of transfer. Each mode is described in further detail below as it relates to GUARDIAN.
Note: A more detailed description of each transfer mode is given in “Advanced GUARDIAN Transfer Modes” on page 98.
BACKUP mode is designed to allow GUARDIAN files to be backed up on some other host and then restored, with full characteristics, at some later time. A special header is built around the resulting file in order to

Page 46 File Handling Under GUARDIAN USER-Access MAN-REF-H363-3.4.2
properly restore the file and its original characteristics. BACKUP under USER-Access for GUARDIAN is more advanced than in other systems; it saves full file characteristics as part of the backup header. The result-ing file will generally not be intelligible on the destination host, but can be restored to a GUARDIAN system as it originally existed.
CHARACTER mode file transfers are generally designed for moving text files from one host to another. This mode performs automatic code conversion across the network and assumes the data being transferred contains only text data. An error will generally result if an attempt to transfer binary data is made.
COPY mode is designed for peer to peer file transfers. In COPY mode, GUARDIAN files can be moved from one GUARDIAN system to another very efficiently. USER-Access keeps track of all file characteristics and restores them on file creation. Any type of file (text or binary) can be transferred very fast in COPY mode since file access is done as efficiently as possible, without individual records having to be manipulated. The data in COPY mode is transferred as an unstructured stream of bytes.
RECORD mode transfers are designed for moving record oriented binary data. As in STREAM mode, no code conversion is performed on the data. In RECORD mode, the qualifier MAXRECORD determines the maximum allowable record that can be read from or written to a file.
RESTORE mode is used to restore a file previously transferred in BACKUP mode. RESTORE mode expects to find a backup header built around the file it is attempting to restore. Refer to the discussion on BACKUP mode above.
STREAM mode file transfers are generally designed for moving files that contain block oriented binary data. STREAM mode files are transferred as an unstructured stream of bytes, without record orientation, although the data may contain record headers. No code conversion is performed on the data for STREAM mode trans-fers.
V1CHAR mode is provided for compatibility with Release 1 versions of USER-Access. It is equivalent to CHARACTER mode under Release 1.

MAN-REF-H363-3.4.2 Advanced Local User’s Guide Page 47
Introduction This section is intended for users who already have a good working knowledge of USER-Access and would like to learn more details about the product. Site administrators responsible for USER-Access as well as those users developing USER-Access scripts and aliases will benefit most from this section.
The majority of this section discusses how to develop a custom USER-Access interface through the use of string functions, input scripts, and aliases. The remainder of the section discusses advanced topics such as user-definable help files and USER-Access batch jobs.
Special Characters Several characters have special meaning to USER-Access when it is parsing a command line. The position of the character within a line is a determining factor on how USER-Access will interpret it. The characters are:
* The asterisk is treated as a comment character if it appears as the first character on the command line. That is, USER-Access ignores the line. (An alternate comment character is the ‘#’). Comments are generally used within USER-Access alias definitions and input files to make them more readable for the user. The following are example USER-Access comment lines:
User> * This is a comment and is ignored.
# This is identical to the ‘*’ character as described above. User> # The pound sign is treated as a comment too.
- The dash character has two meanings within USER-Access. First, if it appears as the last character of a command line, it tells USER-Access to continue the command on the next line. USER-Access then prompts for more input. For example:
User> set alias example - More>> text Example of continuing a command on the next line.
The second use of the dash character is to specify a qualifier to a USER-Access command. A qualifi-er must follow the dash without any spaces between the two. For example, to turn on quiet mode on the SEND command, the user would specify the QUIET qualifier as below:
User> send -quiet source destination
To tell USER-Access to take the dash literally on a command line, escape it by typing two dashes in a row (i.e.,’- -‘)
! The exclamation point is used by USER-Access as the escape character for special command line processing. Depending upon its position within a command line, it is interpreted several different ways. First, the exclamation point is used to create multi-command aliases when it appears as the last character on the command line (with no trailing spaces). For example, to create a two command alias called NAME, the exclamation point is used as follows:
User> set alias NAME {} ask –prompt “Enter Name: “ name ! More>> text Hello {name}
Advanced Local User’s Guide

Page 48 Advanced Local User’s Guide MAN-REF-H363-3.4.2
Second, the exclamation point is used to escape the ‘{‘ and ‘}’ characters. An exclamation point ap-pearing immediately before either of these characters tells USER-Access to take them literally and skip any string processing that would normally be done. For example:
User> text Leave the braces !{here!}.
Finally, the exclamation point is used to tell USER-Access not to do any alias processing on a given command. Since an alias may have the same name as a USER-Access command, an exclamation point immediately preceding a command tells USER-Access to use the command, not the alias. The same holds true for local and remote command aliases. If an exclamation point appears immediately before a command preceded by LOCAL or REMOTE, USER-Access uses the command as it appears without processing it as an alias. Each of the following lines in the example below tell USER-Access to use the command even if an alias by the same name has been defined
User> !text ignore alias processing on text User> local !dir User> remote !who
{ This character marks the beginning of string substitution. It is used along with the character ‘}’ to delimit a positional parameter, a string variable, or a string function. For example, to print out the value of string variable NAME, the following command could be issued:
User> text Your name is {name}
To tell USER-Access to take either the ‘{‘ or ‘}’ literally, use the exclamation point: User> text Print the line with braces !{name!}
To tell USER-Access to turn off string, substitution, the sequence ‘{}’ is used: User> text {} Turn off string substitution {name}
} This character marks the end of string substitution. See the explanation of ‘{‘ above.
“ The double quote character allows the user to create a string that contains embedded blanks: User> set input prompt “NEW PROMPT> “
To escape the double quote character, type two in a row (i.e.,””).
USER-Access String Substitution USER-Access string substitution gives users the ability to write complex aliases and input scripts. String sub-stitution can take place anywhere within a USER-Access command line. The syntax is:
{string}
where string is either a string literal, string variable (including positional parameters), or a string function. String substitution involves the replacement of {string} by its computed value. The result, or replaced val-ue, of string substitution is always a string.
A string literal refers to any quoted string. The following are examples of a string literal: “ “ Box “ “ Big Box “ “This is a Big Box”
Performing string substitution on these string literals within a USER-Access TEXT command produces the following results:
User> text {“ “}.

MAN-REF-H363-3.4.2 Advanced Local User’s Guide Page 49
User: . User> text {“Box”}. User: Box. User> text {“This is a Big Box”}. User: This is a Big Box.
A string variable, also referred to simply as a variable, is an arbitrary name that is associated with a prede-fined character string value. Assume the following string variables exist and are defined as indicated:
Variable Definition hostname BLUESKY a Sample string day 28
String substitution involves the replacement of a string variable by its currently assigned value. Therefore, performing string substitution on these variables within the TEXT command, produces the following results:
User> text {hostname}. User: BLUESKY. User> text {a}. User: Sample string. User> text {day}. User> 28.
String function refers to one of the USER-Access defined functions that may accept parameters and return a string as a result. A few simple string functions with sample arguments appear below:
date() upper(“this is a test”) cmp(“good”, “bad”, “Compared”, “Didn’t compare”)
Performing string substitution on these example string functions result in the following: User> text {date()}. User: Sun Apr 7, 2017. User> text {upper(“this is a test”)} User: THIS IS A TEST. User> text {cmp(“good”, “bad”, “Compared”, “Didn’t compare”)} User: Didn’t compare.
Although the TEXT command was used in all of the examples above, string substitution can be performed anywhere within a USER-Access command line, whether it is part of another USER-Access command, or on a line by itself. It’s important to remember that the result of any string substitution is simply another string. Therefore, the resulting string could even be a USER-Access command.
String Variables USER-Access variable names can be from one to twenty alphanumeric characters long, including underscores or similar special characters. There are two types of variables, local and global. A local variable exists only within the input level, or input file in which it was initially defined. If an input file is nested, it cannot refer-ence local variables defined by its caller. A local variable defined within an input file is no longer valid after that input file is exited.

Page 50 Advanced Local User’s Guide MAN-REF-H363-3.4.2
A global variable can be defined from any input level, or input file, and referenced by any other one. That is, once a global variable is defined within a USER-Access session, that variable is known throughout the ses-sion, regardless of the current input level. Generally it is better to use local variables whenever possible since these do not get left around from input file to input file. Global variables, on the other hand, take up USER-Access internal storage and can eventually lead to a “Environment overflow” condition. This condition may be relieved by undefining some previously defined global variables as described later in this section. This will recover internal storage space, even though the undefined variable will still be displayed with a null val-ue.
Variables can be defined in a couple of ways. The most obvious is with the SET VARIABLE and SET GLOBAL commands. SET VARIABLE is used to define a local variable; SET GLOBAL defines a global variable. An example of each of these appears below:
User> set variable username smith
and, User> set global days Saturday and Sunday
In the first case, local variable username was given the value ‘smith’. In the second case global variable days was assigned the value ‘Saturday and Sunday’. Keep in mind, all variables are defined as character strings. To show the current value of the variables defined above use the SHOW VARIABLE and SHOW GLOBAL commands respectively:
User> show variable username User: USERNAME .......... smith
and, User> show global days User: DAYS .............. Saturday and Sunday
To undefine a local or global variable, use the SET command with the variable name and no value. For ex-ample, to undefine the two variables described above, use the following commands:
User> set variable username
and, User> set global days
An undefined variable will appear in a SHOW VARIABLE or SHOW GLOBAL display as a variable without a definition. If an undefined variable is referenced within a USER-Access command, a null string is substi-tuted in its place.
The second way to define a local variable is with the ASK command. The example below defines the varia-ble username again, but using ASK:
User> ask –prompt “Enter Username: “ username Enter Username: smith
The real significance of string variables is the ability to use them within USER-Access aliases and input scripts. To reference the value of a variable, enclose the variable name in braces {} within a USER-Access command line (this invokes string substitution). Refer back to the variables username and days above. Their values can be used in the TEXT command as:
User> text The value of variable username is {username}. User: The value of variable username is smith.
and,
MAN-REF-H363-3.4.2 Advanced Local User’s Guide Page 51
User> text {days} are coming soon. User: Saturday and Sunday are coming soon.
The braces around the variable name tell USER-Access to replace it with its assigned value.
Since local and global variables are stored differently within USER-Access, it is possible to create a global variable with the same name as a local variable. For example:
User> set variable hostname alpha User> set global hostname omega
The variable hostname has been defined twice, once as a local variable with a value of ‘alpha’ and again as a global variable with a value of ‘omega’. Because USER-Access gives precedence to local variables, referenc-ing {hostname} will result in the local value of ‘alpha’. A special syntax is used to reference the value of a global variable when a local variable of the same name exists. An example follows:
User> text The local value is {hostname}. User: The local value is alpha. User> text The global value is {hostname:global}. User: The global value is omega.
By default, when a variable is enclosed in braces (without the ‘:global’ syntax), USER-Access looks for a lo-cal variable by that name. If one is found, its value is returned. If one is not found, USER-Access looks next for a global variable by the same name and uses its value if found. Appending the variable name with ‘:global’ within the braces tells USER-Access not to look for a local variable but instead look immediately for a global variable of that name.
USER-Access carries this special syntax one step further in allowing the substitution of USER-Access com-mand qualifier values. These values can be used as variables as shown below. The syntax is:
{qualifier:cmd}
where qualifier is a valid qualifier (including informational qualifiers) for the specified command cmd. For example, if the current value of the SEND qualifier ‘CREATE’ was defined to be ‘new’, this could be referenced as:
User> text SEND qualifier CREATE is {create:send}. User: SEND qualifier CREATE is new.
The following example shows how the command qualifiers can be used to set the USER-Access input prompt. Since the prompt is controlled by the INPUT command qualifier PROMPT, this can be modified to the user’s liking. To change the prompt from the default of ‘User> ‘ to the current name of the remote host (assume it’s called STARMAN), the following command is used:
User> set input prompt {} {host:remote}> STARMAN>
The syntax {host:remote} says to extract the value of informational qualifier HOST from the REMOTE command defaults, and replace this value on the command line. (The empty {} is explained in the section entitled “Disabling String Substitution” on page 73). The following command produces an equivalent result:
User> set input prompt STARMAN> STARMAN>
Although the result is equivalent, the second example above does not allow for flexibility within an alias or input script, nor is it flexible enough to change for each connection made to a different remote host.

Page 52 Advanced Local User’s Guide MAN-REF-H363-3.4.2
String Literals A string literal as mentioned earlier, is any quoted string. Quoted strings refer to a string of characters, en-closed in double quotes, from zero to n long, where n is arbitrarily long depending on the space remaining in the USER-Access input buffer.
Below is an example of a string literal used with string substitution and the string function LOWER() (de-scribed on page 68) to define the USER-Access prompt as command? with two leading and two trailing spac-es.
User> set input prompt {lower(“ COMMAND? “)}
This will result in the following prompt, including the two leading and two trailing spaces: command?
In order to have embedded double quotes within a string literal, the user must escape each one with a second double quote. The example below shows this:
User> set input prompt {lower(“““Enter a Command:““ “)}
The resulting prompt would be: “enter a command:”
with a single trailing space.
The examples above demonstrate the use of string literals within the SET command. Quoted strings within a TEXT command, however, are taken literally. Therefore, to display the same “enter a command:” with dou-ble quotes using the TEXT command, the following syntax is used:
User> text “enter a command:” User: “enter a command:”
String Functions USER-Access string functions perform certain predefined tasks and return a string as output. String functions perform such tasks as comparing two strings, forcing a string to upper/lower case, returning the status of the previous command, and sleeping for a predetermined amount of time. Some string functions require argu-ments and some do not. All arguments passed to a string function must be either a numeric constant, string literal, a string variable, or another string function. For example, the string function lower () takes a single argument which is a string that will be forced to all lower case characters. The following are all valid argu-ments:
lower (“sample string”) - a string literal lower (hostname) - a variable named hostname lower (date () ) - a string function date () lower(ext(time(),l,5)) - string functions with numeric constants
USER-Access performs string substitution from the inside out. Therefore, if a string function exists as an ar-gument to another string function, the innermost string function is executed first, and the resultant string is passed as an argument to the outer string function. In the example lower(date()) above, the date() function would get processed first then the actual date string would be passed as an argument to lower().
The greatest use of string, functions comes within USER-Access scripts (input files or aliases). Often it is desirable to perform a particular USER-Access comment based on a certain condition. String functions make this possible. The following is an example of a simple script that tests the results of a command with the sta-tus() function and operates accordingly:

MAN-REF-H363-3.4.2 Advanced Local User’s Guide Page 53
Set input continue on * * Loop until successful connection. * again: ask –prompt “Hostname? “ host connect –quiet {host} {eqs(status(), “S”, “text Connect worked.”, “goto again”)}
This script also makes use of the eqs() function. Eqs() compares the result of status() with the string “S” (Success). If the strings compare (i.e., if the CONNECT was successful), the third argument of eqs() is used to replace the function in the substitution. If the strings do not compare, the fourth argument is used.
Notice that these last two arguments are simply USER-Access commands enclosed in double quotes. The third argument “text Connect worked.” prints a message at the user’s terminal and continues processing. The fourth argument “goto again”, causes processing to loop back to the “again:” label where the user is prompted for a new hostname. The GOTO command is discussed in a later section.
The remainder of this section describes the USER-Access string functions in more detail. The functions are listed in alphabetical order except where functions are grouped by a logical association (for example, arithme-tic operations). Each function is indexed individually.
The descriptions assume the user is familiar with USER-Access strings and string variables as described in the section entitled “String Variables” on page 49. Table 1 on page 53 is a list of the available string func-tions. Most of these functions follow the table in alphabetical order, however the arithmetic and logical func-tions are grouped together.
Table 1. List of Functions
Function Description Page
ADD Adds two numeric string expressions and returns the result. 55
CHR Returns a single character represented by the specified number in the local host machine’s native character set (ASCII or EBCDIC).
56
CMP Compares two strings. Allows for partial string match by specifying the re-quired characters in upper case.
57
DATE Returns the system date of the local host 58
DEC Subtracts one from a numeric string expression and returns the result. 59
DFN Tests if a variable is defined. 60
DIV Divides the first numeric string expression specified by the second and returns the result.
55
ENCRYPT Takes a user password, encrypts that password and returns an alphanumeric string that represents the encrypted password.
61
ENV Returns the value of the local host environment variable if the local host sup-ports such variables. If local host environment variables are not supported or if the specified variable is not defined, a null string is returned.
62
EQ Tests if the first number specified is equal to the second number specified. 67
EQS Tests if the first string specified is equal to the second string specified. 63

Page 54 Advanced Local User’s Guide MAN-REF-H363-3.4.2
Table 1. List of Functions
Function Description Page
EXT Extracts and returns a bounded sequence of characters from a string. 64
GE Tests if the first number specified is greater than or equal to the second. 67
GT Tests if the first number specified is greater than the second 67
INC Adds one to a numeric string expression and returns the result. 59
INDEX Returns the position of the second string specified within the first string. The function returns zero if the second string is not found.
65
LE Tests if the first number specified is less than or equal to the second. 67
LEN Returns the count of characters that make up the specified string. 66
LOWER Returns the lower case equivalent of a string expression, all characters but up-per case are left untouched.
68
LT Tests if the first number specified is less than the second. 67
MOD Returns the remainder of the division of the first numeric string expression specified by the second.
55
MUL Multiplies two numeric string expressions and returns the result. 55
MSG Returns the information of the last message. MSG is most often used to tailor the USER-Access output message format.
69
NDF Tests if a variable is not defined. 60
NE Tests if the first number specified is not equal to the second. 67
NES Tests if the first string specified is not equal to the second. 63
PARAMS Substitutes the positional parameters specified. It is important to note that quoted parameters remain quoted and are considered one whole parameter – regardless of imbedded spaces.
70
SLEEP Causes USER-Access to pause or “sleep” for a specified number of seconds. This process is not interruptible. This function results in a null string.
70
STATUS Returns the single status character of the previous command: S = Success, E = Error.
71
SUB Subtracts the second numeric string expression specified from the first and re-turns the result.
55
TIME Returns the system time of the local host. 72
UPPER Returns the upper case equivalent of a string expression, all characters but low-er case are left untouched.
68

MAN-REF-H363-3.4.2 Advanced Local User’s Guide Page 55
Arithmetic Operations
The following is a list of arithmetic operators.
ADD add two numeric string expressions and return the result.
DIV divide the first numeric string expression specified by the second and return the result.
MOD return the remainder of the division of the first numeric string expression specified by the second.
MUL multiply two numeric string expressions and return the result.
SUB subtract the second numeric string expression specified from the first and return the result.
Format: add(number1, number2) div(number1, number2) mod(number1, number2) mul(number1, number2) sub(number1, number2)
Where:
number1, number2 numbers to be operated on.
Examples: Add two constants and return the result: User> text {add(5,10)} User: 15
Ask the user to enter three numbers: User> ask –prompt “Enter 3 #’s: “ num1 num2 num3 User: Enter 3 #’s: 2 3 4
Find the square of the first number: User> text The Square of {num1} is: {mul(num1,num1)} User: The Square of 2 is: 4
Find the total sum of the three numbers: User> text {num1}+{num2}={num3} = {add(num1,add(num2,num3))} User: 2+3+4 = 9
Divide the third number by the first number: User> text {num3}/{num1} = {div(num3,num1)} User: 4/2 = 2
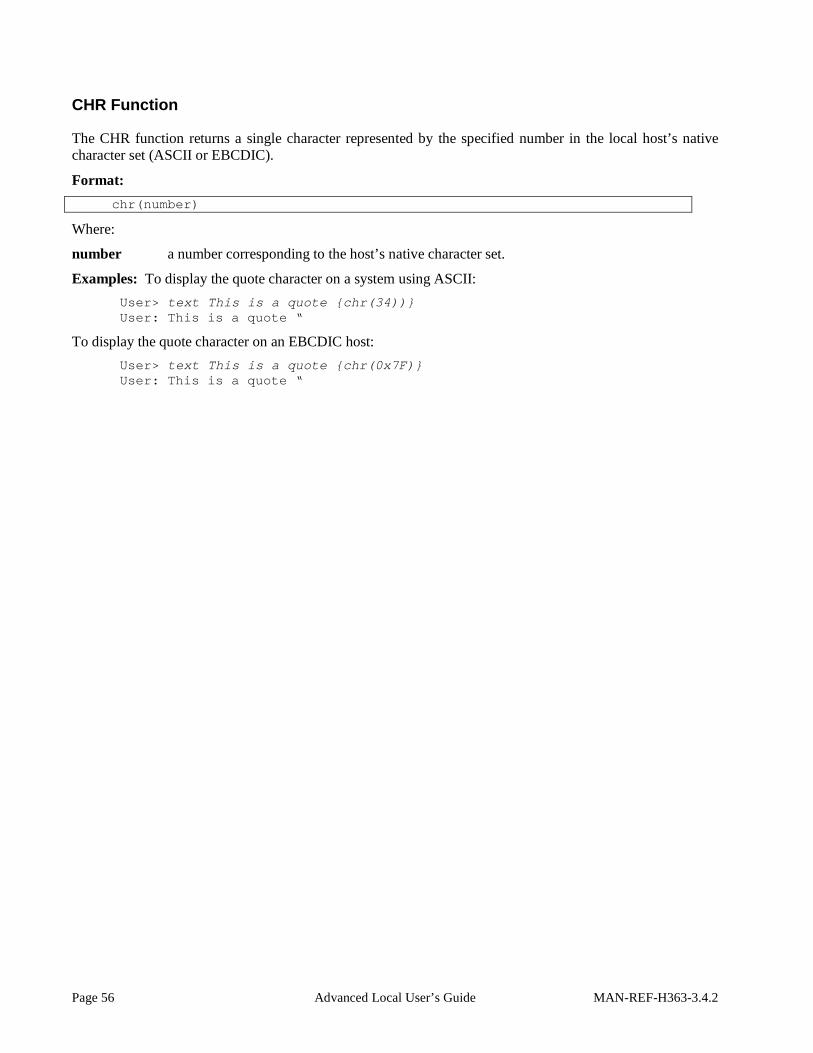
Page 56 Advanced Local User’s Guide MAN-REF-H363-3.4.2
CHR Function
The CHR function returns a single character represented by the specified number in the local host’s native character set (ASCII or EBCDIC).
Format: chr(number)
Where:
number a number corresponding to the host’s native character set.
Examples: To display the quote character on a system using ASCII: User> text This is a quote {chr(34))} User: This is a quote “
To display the quote character on an EBCDIC host: User> text This is a quote {chr(0x7F)} User: This is a quote “

MAN-REF-H363-3.4.2 Advanced Local User’s Guide Page 57
CMP Function
The CMP function compares two strings. Allows for partial string match by specifying the required charac-ters in upper case.
Format: cmp (string, key, if_true [, if_false])
Where:
string a string expression whose letters are compared with the key argument.
key a string expression defining the letters required for partial string match. Upper case letters define the minimum required spelling. Key is used to validate the argument string.
if_true a string expression whose value the function takes if the test is successful.
if_false an optional string expression whose value the function takes if the test fails. If this argument is omitted, the function takes on the value of a null string.
Examples: Ask the user for a Yes/No response, and compare the reply with the key “Yes”. Require the user to type at least “Y”:
User> ask -prompt “Yes/No? “ reply User: Yes/No? y User> text {cmp(reply, ”YES”, ”YES”, ”NO”)} User: YES
Ask the user for a Yes/No response, and compare the reply with the key “YES”. Force the user to type the entire word “YES”:
User> ask -prompt “YES/No? “ reply User: YES/No? yes User> text {cmp(reply, ”YES”, ”YES, ”NO”)} User: YES
In order to not compare to the key, do the same commands, but reply to the prompt with text that doesn’t meet the minimum spelling requirements:
User> ask -prompt “YES/NO? “ reply User: YES/No? y User> text {cmp(reply, ”YES”, ”YES”, ”NO”)} User: NO

Page 58 Advanced Local User’s Guide MAN-REF-H363-3.4.2
DATE Function
The DATE function returns the system date of the local host.
Format: date ([number])
Where:
number this is a number that specifies the format of the date:
0 = WWW MMM DD, YYYY
1 = YYMMDD
where W = Weekday; M = Month; D = Day; Y = Year. The default is 0. Specifying a value other than 0 or 1 will return a null value.
Examples: Display the system date: User> text Today is {date(O)} User: Today is Thu Mar 14, 2013
Display the system date in YearMonthDay format: User> text Today is {dated(1)} User: Today is 130314
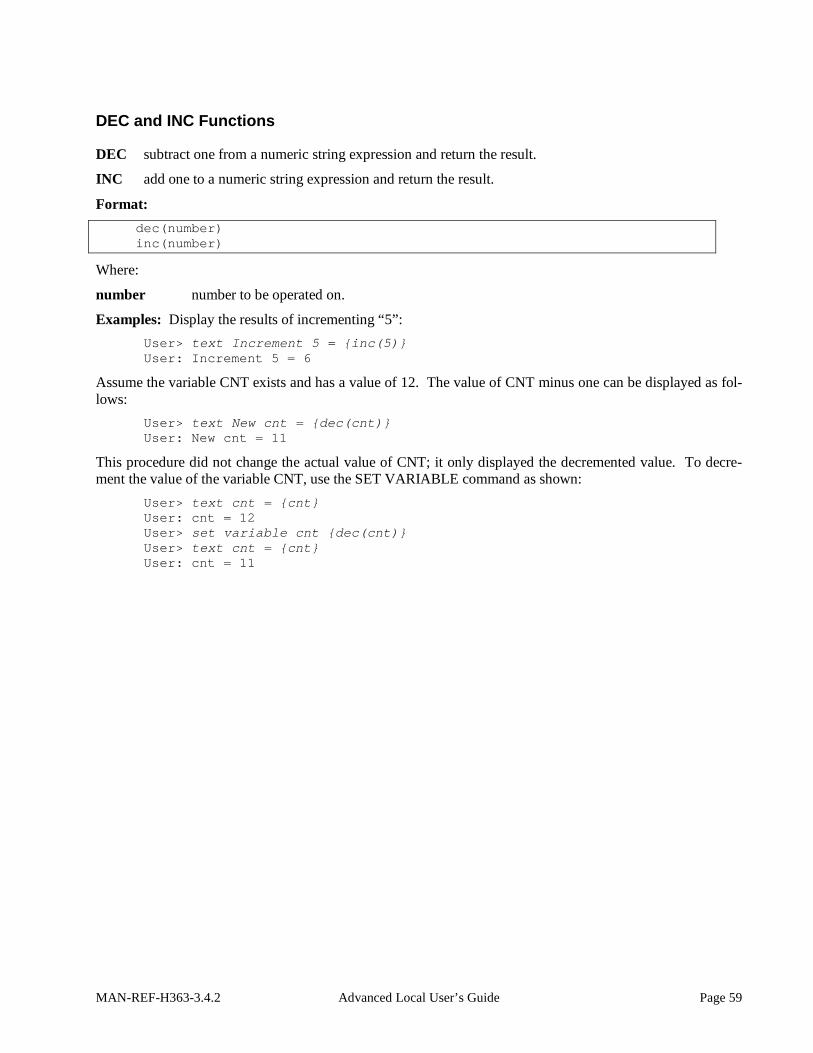
MAN-REF-H363-3.4.2 Advanced Local User’s Guide Page 59
DEC and INC Functions
DEC subtract one from a numeric string expression and return the result.
INC add one to a numeric string expression and return the result.
Format: dec(number) inc(number)
Where:
number number to be operated on.
Examples: Display the results of incrementing “5”: User> text Increment 5 = {inc(5)} User: Increment 5 = 6
Assume the variable CNT exists and has a value of 12. The value of CNT minus one can be displayed as fol-lows:
User> text New cnt = {dec(cnt)} User: New cnt = 11
This procedure did not change the actual value of CNT; it only displayed the decremented value. To decre-ment the value of the variable CNT, use the SET VARIABLE command as shown:
User> text cnt = {cnt} User: cnt = 12 User> set variable cnt {dec(cnt)} User> text cnt = {cnt} User: cnt = 11

Page 60 Advanced Local User’s Guide MAN-REF-H363-3.4.2
DFN and NDF Functions
The DFN function tests if a variable is defined. The NDF function tests if a variable is not defined.
Format: dfn(variable, if_true [ , if_false]) ndf(variable, if_true [ , if_false])
Where:
variable a string variable that is to be tested. A string is considered to be undefined if it has no value (i.e., null string).
if_true a string expression whose value the function takes if the test is successful.
if_false an optional string expression whose value the function takes if the test fails. If this argument is omitted, the function takes on the value of a null string.
Examples: To find out if a variable is defined, such as the variable COUNT: User> text {dfn(count, “YES”, “NO”)}
If COUNT was defined, User-Access would respond with YES.
Set the input prompt to be the remote host variable if it is defined; otherwise use the string literal “User”: User> set input prompt {} {dfn(host:remote, host:remote, “User”)}>
If the remote host name is BLUESKY, the prompt would be: BLUESKY>
NDF can also be used to set the input prompt to be the remote host variable or to the string literal “User”: User> set input prompt {} {ndf(host:remote, ”User”, host:remote)}> User>
If the remote host name is BLUESKY. the prompt would be: BLUESKY>
Define an alias “PRINT” to output the first parameter passed to it, or to output “no parameter” if no parameter is passed.
User> set alias print {} {ndf(1, ”text no parameter”, ”text {1}”)}
Execute the alias with no parameters: User> print User: no parameter
Now execute the alias with the parameter “this text”: User> print this text User: this

MAN-REF-H363-3.4.2 Advanced Local User’s Guide Page 61
ENCRYPT Function
The purpose of this function is to encrypt host passwords which later will be used by USER-Access to estab-lish host connections. This approach eliminates the security risk of having readable (clear-text) passwords stored in files. For additional usage information, please refer to “The ENCRYPT Alias” page 171.
Format: encrypt(password [,username])
Where:
password Specifies the case-sensitive password you want to encrypt. The encrypted form of this pass-word is returned by the ENCRYPT string function. The encrypted form can be stored in script files containing USER-Access CONNECT commands.
username Optionally specifies the username associated with the local USER-Access process that will issue the CONNECT command. This is optional. If omitted the encrypted password can be used by anyone. This username is used as a secondary encryption key for the specified password. When USER-Access is later run it queries the operating system for the username running the current process. USER-Access then uses this username as one of its keys in de-crypting the password. The value for username must be entered in uppercase to match the username value returned by the NonStop operating system. A value of ‘*’ (single asterisk) tells the USER-Access ENCRYPT function to use the current username running the USER-Access process as the secondary key. You must be running as the same user which will later run USER-Access to issue the CONNECT command. The value for “username” above must be entered in uppercase in order to match the username value later returned by MVS/zOS/Tandem and VMS.
Example: Encrypt the password ‘COBRA’ using the NonStop username ‘SUPER.GEM1’ as the local username for secondary encryption. Use the USER-Access TEXT command to display the encrypted results:
User> text {encrypt(“COBRA”, “SUPER.GEM1”)} User: *249eece8e4203b189

Page 62 Advanced Local User’s Guide MAN-REF-H363-3.4.2
ENV Function
The ENV function returns the value of the local host environment variable if the local host supports such var-iables. If local host environment variables are not supported or if the specified variable is not defined, a null string is returned.
Format: env(variable)
Where:
variable a local host environment variable. This variable may be upper/lower case sensitive. The def-inition of such a variable depends on the local host.
Examples: Assume a variable “bite” is defined to be “apple” in the local host’s environment. Display the value of the host environment variable with ENV:
User> text {env(“bite”)} User: apple
To return the host environment variable “HOME”: User> text {env(“HOME”)}
User: SYS$SYSDEVICE:[ROOT
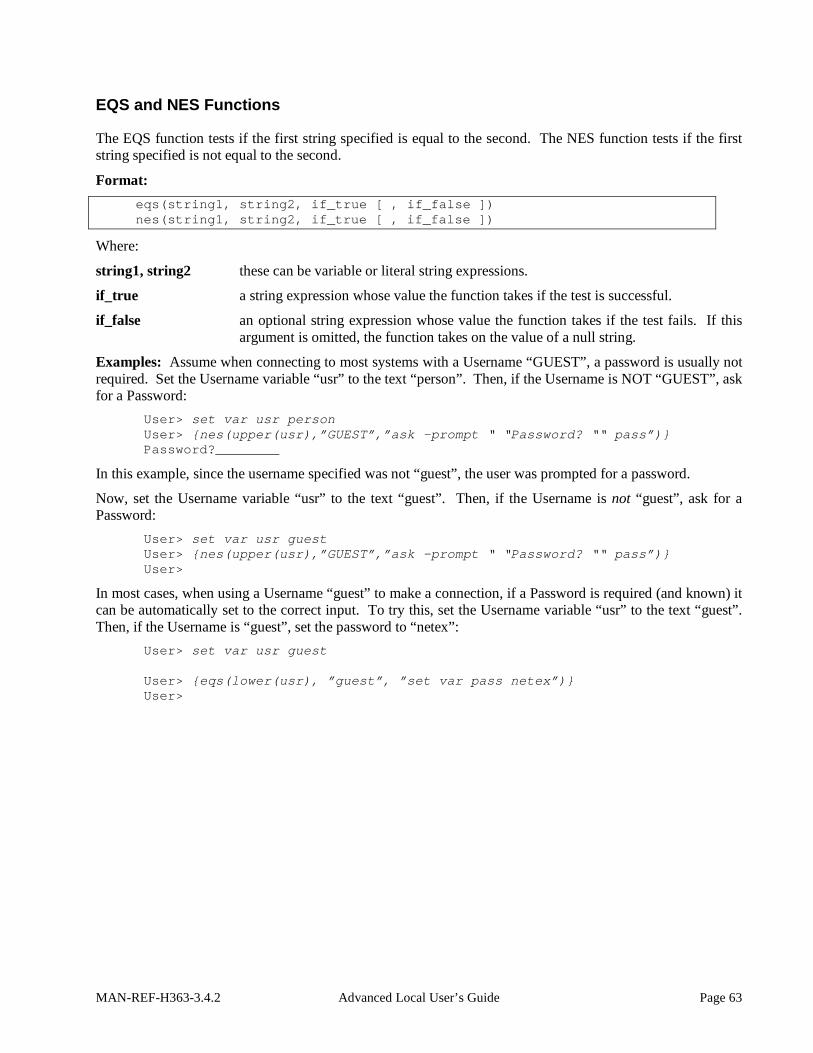
MAN-REF-H363-3.4.2 Advanced Local User’s Guide Page 63
EQS and NES Functions
The EQS function tests if the first string specified is equal to the second. The NES function tests if the first string specified is not equal to the second.
Format: eqs(string1, string2, if_true [ , if_false ]) nes(string1, string2, if_true [ , if_false ])
Where:
string1, string2 these can be variable or literal string expressions.
if_true a string expression whose value the function takes if the test is successful.
if_false an optional string expression whose value the function takes if the test fails. If this argument is omitted, the function takes on the value of a null string.
Examples: Assume when connecting to most systems with a Username “GUEST”, a password is usually not required. Set the Username variable “usr” to the text “person”. Then, if the Username is NOT “GUEST”, ask for a Password:
User> set var usr person User> {nes(upper(usr),”GUEST”,”ask –prompt “ “Password? ““ pass”)} Password?________
In this example, since the username specified was not “guest”, the user was prompted for a password.
Now, set the Username variable “usr” to the text “guest”. Then, if the Username is not “guest”, ask for a Password:
User> set var usr guest User> {nes(upper(usr),”GUEST”,”ask -prompt “ “Password? ““ pass”)} User>
In most cases, when using a Username “guest” to make a connection, if a Password is required (and known) it can be automatically set to the correct input. To try this, set the Username variable “usr” to the text “guest”. Then, if the Username is “guest”, set the password to “netex”:
User> set var usr guest User> {eqs(lower(usr), ”guest”, ”set var pass netex”)} User>

Page 64 Advanced Local User’s Guide MAN-REF-H363-3.4.2
EXT Function
The EXT function extracts and returns a bounded sequence of characters from a string.
Format: ext(string, number1, number 2)
Where:
string a string expression in the form of a variable, literal, or function.
number1, number2 the lower and upper boundary limits for the characters to be extracted from ‘string’. Parameter values less than or equal to zero are interpreted relative to the end of the string.
Examples: Display the sequence “CDE” from the string “ABCDEF”: User> text {ext(“ABCDEF”,3,5)} User: CDE
The same sequence (“CDE”) may be displayed by using parameter values relative to the end of the string, as shown:
User> text {ext(“ABCDEF”,-3,-1)} User: CDE
Display only the Hours and Minutes of the system time: User> text Time: {ext(time( ),1,5)} User: Time: 14:27
Define the input prompt to display ‘User’ and the Version Number of USER-Access extracted from ‘VERSION:LOCAL’:
User> set input prompt {} User {ext(version:local,5,9)}> User 3.4.10>

MAN-REF-H363-3.4.2 Advanced Local User’s Guide Page 65
INDEX Function
The INDEX function returns the position of the second string specified within the first string. The function returns zero if the second string is not found.
Format: index(string1, string2)
stringl, string2 string expressions in the form of a variable, literal, or function.
Examples: Display the position of the sequence “CDE” within “ABCDEF”: User> text {index(“ABCDEF”,”CDE”)} User: 3
Find the position of the month March in a string containing a list of the months: User> text {index(“JanFebMarAprMayJunJlyAugSepOctNovDec”,”Mar”)} User: 7
The following is an example of an index() search that failed to find the second string within the first: User> text {index(abcdef”, “cat”)} User: 0

Page 66 Advanced Local User’s Guide MAN-REF-H363-3.4.2
LEN Function
The LEN function returns the count of characters that make up the specified string.
Format: len(string)
Where:
string a string expression in the form of a variable, literal, or function.
Examples: Display the number of characters in “ABCDE”: User> text {len(“ABCDE”)} User: 5
Display the length of the results of the DATE() string function: User> text Length = {len(date())} User: Length = 16
Display only the year portion of the system date by subtracting three from the length of the date and then ex-tracting the last four characters:
User> text Year: {ext(date(),sub(len(date(),3),len(date()))} User: Year: 2018
A simpler form of the example above is: User> text Year: {ext(date(),-3,0)} User: Year: 2018

MAN-REF-H363-3.4.2 Advanced Local User’s Guide Page 67
Logical Operations
The following is a list of the operators for numerical equivalence tests:
EQ test if the first number specified is equal to the second.
NE test if the first number specified is not equal to the second.
LT test if the first number specified is less than the second.
GT test if the first number specified is greater than the second.
LE test if the first number specified is less than or equal to the second.
GE test if the first number specified is greater than or equal to the second.
Format: eq(number1, number2, if_true [, if_false ]) ne(number1, number2, if_true [, if_false ]) lt(number1, number2, if_true [, if_false ]) gt(number1, number2, if_true [, if_false ]) le(number1, number2, if_true [, if_false ]) ge(number1, number2, if_true [, if_false ])
Where:
numberl, number2 numbers to be compared.
if_true a string expression whose value the function takes if the test is successful.
if_false an optional string expression whose value the function takes if the test fails. If this argument is omitted, the function takes on the value of a null string.
Examples: Ask the user to enter a number between 1 and 10: User> ask –prompt “Enter a # (1-10): “ num1 User: Enter a # (1-10): 10
Check if the number is less than or equal to 10: User> text {le(num1,10,”Good”,”Bad”)} User: Good
Check the number for proper entry as defined in the first example, if it is between 1 and 10: User> text {ge(num1,1,le(num1,10,”Good”,”Bad”),”Bad”)} User: Good

Page 68 Advanced Local User’s Guide MAN-REF-H363-3.4.2
LOWER and UPPER Functions
The UPPER function returns the upper case equivalent of a string expression, all characters but lower case are left untouched.
The LOWER function returns the lower case equivalent of a string expression, all characters but upper case are left untouched.
Format: upper(string) lower(string)
Where:
string a string expression in the form of a variable, literal, or function.
Examples: Display the lower case equivalent of “ABCdef”: User> text {lower(“ABCdef”)} User: abcdef
Display the upper case equivalent of “ABCdef”: User> text {upper(“ABCdef”)} User: ABCDEF
Display the system date in lower case: User> text Today is: {lower(date())} User: Today is: thu mar 14, 2018
To display the Weekday in upper case: User> text The Day is: {ext(upper(date()),1,3)} User: The Day is: WED
To set a predefined USER-Access variable “password” to its lower case equivalent: User> set var password {lower(password)} User>

MAN-REF-H363-3.4.2 Advanced Local User’s Guide Page 69
MSG Function
The MSG function returns the information of the last message. MSG is most often used to tailor the USER-Access output message format.
Format: msg(component [, facility])
Where:
component the code for the type of message data to return. Valid message components are: Text, Facili-ty, Code, Severity, Retry, or Purge.
Text requests the text from the message.
Facility requests the source of the message: NETEX (in NetEx only environments), UAxxx, (where xxx represents the host product code), SIxxx, MUXxxx, or the operating sys-tem mnemonic for the host generating the error.
Code requests the message number from the facility.
Severity requests the severity of the message: E, W, or I for Error, Warning, and Informational respectively.
Retry requests whether or not the NETEX error can be retried (not fatal). Results are either Y for can-be-retried or N for cannot-be-retried.
Purge will purge the message stack. One may find it useful to ensure that the next attempt to read a message resulted in a message from the last command, in this case the user will need to Purge the message stack.
facility to get the message from a certain facility: NETEX (in NetEx only environments), UAxxx (where xxx represents the host product code), SIxxx, or the operating system mnemonic for the host generating the error. The default is UA.
Examples: Display the facility of the last error message: User> text The Last Error Message came from: {msg(“f”)} User: The Last Error Message came from: UA
Display the text of the last error message from USER-Access: User> text The Last Error Message was: {msg(“t”}
Display the code of the last error message from USER-Access: User> text The Last Error Code was: {msg(“c”)} User: The Last Error Code was: 4708
Set the OUTPUT FORMAT qualifier to display only the message text when an error occurs:
User> set output format {} {msg(“text”)}

Page 70 Advanced Local User’s Guide MAN-REF-H363-3.4.2
PARAMS Function
The PARAMS function substitutes the positional parameters specified. It is important to note that quoted pa-rameters remain quoted and are considered one whole parameter - regardless of imbedded spaces.
Format: params(number1, number2 [, char])
Where:
number1, number2 positional parameters number1 through number2 for substitution. Use number2 = “0” to mean “the rest”.
char is the optional parameter separator to use. The default is a space.
Examples: Define an alias “PRINT” to display the parameters passed to it: User> set alias print {} text {params(2,3)}
Execute the alias with no parameters: User> print User:
Now execute the alias with the parameters: this text string User> print this text string User: text string
Execute the alias with the parameters: this “is a” test User> print this “is a” test User: “is a” test
SLEEP Function
The SLEEP function causes USER-Access to pause or “sleep” for a specified number of seconds. This pro-cess is not interruptible. This function results in a null string.
Format: sleep(number)
Where:
number number of seconds to pause/sleep.
Examples: To pause/sleep a USER-Access session for ten seconds: User> {sleep(10)} User>
If an error occurs during a connect command, the alias “RECONnect” will go to sleep for thirty seconds and then attempt to connect again:
User> set alias RECONnect {} set input continue on ! More>> start: ! More>> con {params(1,0)} ! More>> {eqs(status(),”S”,”exit”)} ! more>> {sleep(30)} ! More>> goto start

MAN-REF-H363-3.4.2 Advanced Local User’s Guide Page 71
STATUS Function
The STATUS function returns the single status character of the previous command: S = success, E = Error. Successful execution of the following commands leave the previous command status intact: CONTINUE, EXIT, GOTO and TEXT. This gives the user the ability to position within a script (for example, to an error processing section) without clearing the status from a previous failure. If any of these commands fail, an er-ror status is set. A status return specified by EXIT or QUIT (e.g., EXIT ERROR) will override the previous command status.
Format: status()
Examples: To display the output of the status function: User> text {status()} User: S
To display the status of the last command: User> text Last Command {eqs(status(), ”S”, ”Succeeded”, ”Failed”)} User: Last Command Succeeded
Define the input prompt to signal a message when an error has occurred: User> set input prompt {} {nes(status(),”S”,”Error”)}User>
With the above definition, issue an invalid command and then a valid command to test the new prompt: User> oops User: Invalid command ‘oops’ (UA-4708) Error User> text Correct the Prompt User: Correct the Prompt User>

Page 72 Advanced Local User’s Guide MAN-REF-H363-3.4.2
TIME Function
The TIME function returns the system time of the local host.
Format: time([num])
Where:
num this is a number that specifies the format of the time. For the TIME function:
0 = HH:MM:SS
1 = HHMMSS
where H = Hours: M = Minutes: S = Seconds. Default is 0. Specifying a value other than 0 or 1 will return a null value.
Examples: Output the time without the colon separator: User> text The Time is: {time(1)} User: The Time is: 142448
Output the time: User> text The Time is: {time()} User: The Time is 14:24:48
Redefine the input prompt to prompt with the system time: User> set input prompt {} {time()}> 14:25:04>
The empty braces ({}) in the above example are needed to disable string substitution until each prompt is dis-played. The new system time is then evaluated each time the prompt is displayed.

MAN-REF-H363-3.4.2 Advanced Local User’s Guide Page 73
Disabling String Substitution When USER-Access sees {string} on a command line, it immediately tries to perform string substitution on string. To tell USER-Access to disable string substitution, place an empty {} on the command line prior to the string substitution syntax. The typical place to do this is during an alias definition. For example:
User> set alias put send {} {sourcefile} {dfile}
Upon seeing the empty {} before the string substitution syntax {sourcefile} and {dfile}, USER-Access knows to not substitute the values of ‘sourcefile’ and ‘dfile’ at this time. The resulting definition for alias PUT is:
User> show alias put User: PUT ............... send {sourcefile} {destinationfile}
If the empty {} had not been included during the definition above, USER-Access would have replaced {sourcefile} and {destinationfile} by their current values at the time the alias was defined. If they were unde-fined, they would have been replaced by the null string. The goal of an alias is usually to replace the value of the variable at the time the alias is run, not when it is defined.
The empty {} is actually used as a toggle to turn string substitution on and off. In the following example, the first occurrence of {} turns off string substitution, which results in {sourcefile} not being replaced by its val-ue. The second occurrence of {} turns string substitution back on. This results in {destinationfile} being re-placed by its current value (assume ‘dest.new’):
User> set alias put send {} {sourcefile} {} {destinationfile}
The resulting alias definition looks like: User> show alias put User: PUT .............. send {sourcefile} dest.new
In this case, the alias PUT becomes a send command where the destination file is always ‘dest.new’. Since {} is used as a toggle, it should only appear once within an alias definition (including multicommand aliases) when string substitution is to be ignored for all variables declared.
Nested String Substitution The string substitution syntax also allows for nested substitution. Nested substitution provides for embedding string substitution syntax within string substitution. Figure 2 is a representation of nested substitution.
Figure 2. Nested String Substitution

Page 74 Advanced Local User’s Guide MAN-REF-H363-3.4.2
The example above sets the USER-Access input prompt to either the value of variable myprompt (if it is de-fined), or else to the string User>. Since there exists nested string substitution, USER-Access first processes the innermost one (labeled string sub1 above) to evaluate the variable myprompt. The double quotes outside of {myprompt} turns the resulting value into a string literal that is then used as the second argument to the dfn() function. Once this is done, USER-Access processes the outermost string substitution syntax (labeled string sub2 above).
All string substitution processing is performed by USER-Access from the inside out. This is important to keep in mind when creating such things as custom prompts or scripts. Since the inside string substitution syn-tax is processed first, it is treated as a separate entity in itself. This is significant because it affects the use of double quotes for string literals. Normally double quotes must be escaped when they are used within another set of double quotes in order for USER-Access to take them literally. However, if the outer set of double quotes is not part of the immediate string substitution syntax containing the inner set of double quotes, then the inner set of double quotes should not be escaped. The following example illustrates this point.
User> ask –prompt “{upper(“enter your name”)}” name
Since the outer set of double quotes (“{…}”) is outside of the string substitution syntax, the inner set should not be escaped. This is because the string substitution syntax is processed first, resulting in the non-quoted string ENTER YOUR NAME. The outer set of quotes then is applied to that string and the remainder of the command is processed.
Developing USER-Access Scripts Using Input Files and Aliases USER-Access was designed to be very easy to use for all types of users. The commands are simple and the syntax is straightforward. However, it is often the case that a site wants to customize the USER-Access inter-face to be even more simple or familiar for its users. This “customization” is generally done by more sophis-ticated USER-Access users then handed back to the general user base. This section addresses the areas im-portant to developing USER-Access scripts.
A script can be in the form of an input file or an alias, USER-Access treats them the same internally. The dif-ference is in the way they are defined. Input files are created using a standard text editor. Aliases are created using the SET ALIAS command and require special command line syntax. The examples that are given in this section, although they apply to all types of scripts, are generalized to emphasize the topic of discussion and do not include the special syntax required for creating aliases. The reader should be familiar with USER-Access command line processing, most notably, the sections on “Special Characters” on page 47 and “USER-Access String Substitution” on page 48.
USER-Access Input Files USER-Access input Files or input scripts give users the ability to write powerful program-like procedures that can be run on several different host types, without regard to host-specific command language differences. A USER-Access input file or input script is a file that contains a list of USER-Access commands. Input scripts are created using any standard text editor.
Assume for the following examples, that there exists an input script called HOSTDIR, shown below, which connects to a predefined host named BETA, issues a REMOTE DIRECTORY command, and then discon-nects.
* Input script HOSTDIR - Give directory listing of * remote host named BETA
MAN-REF-H363-3.4.2 Advanced Local User’s Guide Page 75
* connect beta default test remote dir disconnect
There are three ways to make use of an input script:
1. With the INPUT command.
The INPUT command tells USER-Access to read and execute the USER-Access commands in the input file given. For example:
User> input hostdir
This command tells USER-Access to look for an input script with the file specification HOSTDIR, and then read it line by line, executing commands along the way. If the file specification is not found, the INPUT SEARCH qualifier is used to locate the file (see item 2).
2. Using the INPUT qualifier SEARCH.
When USER-Access reads a command from the command line, it first looks for an alias by that name and translates it if found. If the command is not an alias, USER-Access determines if it is a USER-Access command. If not, it looks at the INPUT qualifier SEARCH. If that qualifier is defined, USER-Access uses the SEARCH path to find an input file by the name of the command it read. If an input file is found, USER-Access reads and executes it. If no input file is found, USER-Access issues an “Invalid command” error. Therefore, the second way to use the HOSTDIR input script is to first define the INPUT SEARCH qualifier (see the INPUT Command in “Command Descriptions” on page 123), and then type HOSTDIR on the command line:
User> hostdir
Typing HOSTDIR here gives the appearance that HOSTDIR is actually a USER-Access command. The INPUT SEARCH qualifier can also contain SEARCH keywords (SITE) and (USER). Refer to “GUARDIAN USER-Access SEARCH Keywords (SITE), (USER), and (NONE)” on page 95 for more information.
3. On the USER-Access command line.
The third option is to specify the input file on the USER-Access command line when it is invoked. This option is most often used when running USER-Access within a batch job. It simply tells USER-Access to read and execute all of the commands within the input script and then exit USER-Access. For more in-formation, see “Running USER-Access as a Batch Job Under GUARDIAN” on page 100.

Page 76 Advanced Local User’s Guide MAN-REF-H363-3.4.2
Echoing Input Scripts at the Terminal
In order to have USER-Access display the INPUT commands as they are executed, the user must turn on in-put echo with the SET INPUT command:
* Echo all commands as they execute * set input echo on
This command can be issued interactively, prior to the INPUT command, or given as the first command in the input file. INPUT ECHO will echo each command as it appears prior to string substitution. To display each input command after string substitution, turn on the INPUT VERIFY qualifier as:
* Echo all commands after string substitution * set input verify on
Refer to the INPUT command in “Command Descriptions” on page 123 for more details on these qualifiers. The section “Debugging an USER-Access Alias or Input Script” on page 88 also addresses the VERIFY qual-ifier.

MAN-REF-H363-3.4.2 Advanced Local User’s Guide Page 77
Displaying Output and Accepting Input within a Script
The TEXT command is used to display output within a USER-Access session. For example, the commands in a script to display a welcome message to a user could be:
text ********************************* text Welcome to USER-Access! text *********************************
A TEXT string can also include USER-Access string substitution syntax {...}. Therefore, string literals, string variables, or string functions can be substituted within a TEXT command line to provide additional in-formation. For example, to enhance the example above, the string function DATE() could be used, along with qualifier values VERSION and DIRECTORY from the LOCAL environment:
text ****************************************************** text Welcome to USER-Access Version {version:local}. text text {date()}. text text Your current directory is: {directory:local}. text *******************************************************
The ASK command can be used to make scripts more friendly for novice users. For example, a TRANSFER script could be defined that would prompt a user for worthwhile information then execute the commands on the user’s behalf:
*This is a sample TRANSFER script * ask –prompt “Transfer being made to what host? “ host ask –prompt “User ID on host {host}? “ uid ask –secure –prompt “Password for used {uid}? “ pw ask –prompt “File to be transferred? “ file connect –quiet {host} {uid} {pw} send –quiet {file} text *********************** text File ‘{file}’ has been transferred to {host} text *********************** disconnect –quiet
To execute the script (if appropriate setup was done by the site administrator), the user would type only TRANSFER:
User> transfer Transfer being made to what host? BLUESKY User 10 an host BLUESKY? guest Password for user guest? _____ File to be transferred? Tmpfile ****************** File ‘tmpfile’ has been transferred to BLUESKY. ****************** User>
Passing Parameters to a Script
Parameters may be passed to a USER-Access script. These parameters are referred to as positional parame-ters because they are identified by their position on the command line. For example, the following INPUT

Page 78 Advanced Local User’s Guide MAN-REF-H363-3.4.2
command passes the input file SETUP three positional parameters, the first positional parameter is HOSTA, the second is SMITH and the third is JOHN: User> input setup hosta smith john
An input file can be passed several positional parameters. Each parameter is identified in the input file by its position number in braces ({1}, {2}, {3}, etc.). In the example above, HOSTA is represented by {1} in the input script SETUP, SMITH is {2}, and JOHN is {3}. In general, the mapping is:
{0} ... positional parameter zero – the entire parameter string {1} ... positional parameter one {2} ... positional parameter two . . . {n} ... positional parameter n
Positional parameters are used with an input script using the syntax described above. For example, the file SETUP may contain the three lines:
text {3} {2} is attempting to connect to host {1} connect {1} {2} {3} text hello {3} {2}. How are you?
When the INPUT command is issued, USER-Access performs string substitution. After string substitution the command lines appear as:
User> input setup hosta smith john text john smith is attempting to connect to host hosta connect hosta smith john text hello john smith. How are you?
To pass multiple words or strings with embedded blanks as a single parameter, enclose them in double quotes. Refer again to the example above. If the third parameter was JOHN HENRY instead of just JOHN, the string JOHN HENRY would have to be enclosed in double quotes:
User> input setup hosta smith “john henry”
Now, parameter 1 is HOSTA, parameter 2 is SMITH, and parameter 3 is JOHN HENRY. Up to this point positional parameter passing and input prompting has been discussed. The next section combines these fea-tures by making use of string functions.

MAN-REF-H363-3.4.2 Advanced Local User’s Guide Page 79
Using String Functions within an USER-Access Script
In order to gain even more flexibility, a script can be designed to use positional parameters if they are passed, and to prompt for input in the absence of positional parameters. This added feature of scripting makes use of USER-Access string functions. (See the section entitled “String Functions” on page 52 for a more detailed discussion.)
In the sample below, the string function ndf(), (if Not DeFined), is used. ndf() tests its first argument (varia-ble 1, 2, 3, or 4) to see if it’s defined. If it’s not, ndf() executes its second argument (ASK -prompt ... ). If argument 1is defined, ndf() executes argument three (optionally left out). The new definition of the TRANSFER script is:
* This is a sample TRANSFER script that uses String Functions * {ndf(1, “ask –prompt “”Transfer being made to what host? “” 1”)} {ndf(2, “ask –prompt “”User ID on host {1}? “” 2”)} (ndf(3, “ask –secure –prompt “”Password for user {2}? “” 3”)} {ndf(4, “ask –prompt “”File to be transferred? “” 4”)} connect –quiet {1} {2} {3} send –quiet {4} text *********************** text File ‘{4}’ has been transferred to {1}. text *********************** disconnect – quiet
The logic of the script when invoked is:
• If no parameters are on the TRANSFER command line, prompt the user for all four pieces of information and read them into variables 1, 2, 3, and 4.
• If one parameter is passed, use it as variable 1 (Host), and prompt for the other three.
• If a second parameter is passed on the TRANSFER command line, use it as variable 2 (User id), and prompt for the third and fourth variables.
• If three parameters are passed on the command line, read them into variables 1, 2, and 3 (Password) re-spectively and prompt only for the fourth variable.
• If four parameters are passed on the command line, read them into variables 1, 2, 3 and 4 (file) respective-ly, and do not prompt at all.
• Finally, execute the remaining commands, substituting the variables or parameters as needed.
The following is an example execution of the TRANSFER script with two parameters passed to it: User> transfer BLUESKY guest Password for user guest?_____ File to he transferred? tmpfile *********************** File ‘tmpfile’ has been transferred to BLUESKY. *********************** User>
Since two parameters were passed, the script prompted only for the last two. Scripts like this one are espe-cially useful when there is a need to run both interactively and in batch. Batch jobs require all the parameters to be defined since they cannot prompt for user input.

Page 80 Advanced Local User’s Guide MAN-REF-H363-3.4.2
Using USER-Access Labels and GOTOs
To make USER-Access scripts even more powerful, users can merge string functions with GOTO processing. The GOTO command instructs script processing to continue at the specified label, either backwards or for-wards. The format is:
Command Parameters GOTO label
where label is an alphanumeric string from one to twenty characters (including underscores or other special characters) in length. All labels are case sensitive and must appear somewhere within the current input level. That is, if the GOTO appears within an input script, the matching label must also be in that input script. If the GOTO appears in an interactive input level, the matching label must also be found within that interactive lev-el. The format of a command line that contains a label is:
label: [command]
The colon immediately following the label is required. The label can appear on a line by itself, or it may be followed by a valid USER-Access command or alias. The following is an example of a simple loop alias:
* Sample GOTO/Label script. Send 5 files * having the names FILE1 thru FILE5. * set variable count 1 LOOP: send FILE{count} set variable count {inc(count)} {le(count, 5, “goto LOOP”)} * text All files sent.
The variable count is first initialized to 1. The next line simply declares a label called LOOP. The SEND command is then issued for a file named FILEx where x is the current value of count. Following that, the var-iable count is reset to its value plus one (incremented by one). Finally, a check is made on the value of count. If it is less than or equal to 5, the GOTO LOOP command is substituted as the next USER-Access command and processing branches up to label LOOP. If count exceeds 5, processing falls through to the next command outside of the loop.
It is important to remember that USER-Access treats labels as case sensitive. Therefore, one must make sure that a label specified on a GOTO command matches the actual label’s case exactly. Duplicate labels (labels that have the same name with identical case), are considered an error.
Whenever a GOTO or a label is encountered during command line processing, all future commands get stored internally within USER-Access. The number of commands that can be stored is limited by the amount of available memory allocated for the process which varies from machine to machine. The best practice is to avoid letting scripts that contain GOTOs become too large.
Since scripting is really an interpretive command language, USER-Access must parse each command as it executes it. Therefore, an error within a script will not be caught until the script is run and the erroneous con-dition is encountered. A missing label, for example, will result in the entire script being read before an error message is given.
GOTO and labels may also appear at the interactive session level. Refer to the GOTO command in “Command Descriptions” of this manual for further information.

MAN-REF-H363-3.4.2 Advanced Local User’s Guide Page 81
Using the ON (ERROR/INTERRUPT) Command
A useful command for building more robust scripts is the ON command. ON has the format:
Command Parameters ON exception [action]
where
exception is any one of the following:
ERRor on USER-Access error perform action
INTerrupt on keyboard interrupt perform action
LOCal_error on LOCAL command error perform action
REMote_error on REMOTE command error perform action
action is any single valid USER-Access command or alias, the most likely of which being:
CONTinue ignore the exception
EXit exit the current USER-Access session
GOTO GOTO a specified label
INput input a specified USER-Access script
TEXT display a message
<none> turn off the specified exception
If action is more than one command, the results are unpredictable.
The ON command allows a user to catch anyone of the exceptions listed above and perform a predefined ac-tion. It is most useful within USER-Access scripts for tailoring exception handling. ON commands generally appear at the beginning of a USER-Access script since they set up actions to be taken on future processing within that script. For example, the following script catches any keyboard interrupt (initiated by the user), and automatically causes the session to terminate:
* Cause keyboard interrupt to exit session * on interrupt exit connect hosta guest netex send src_file disconnect
The ON INTERRUPT exception as shown above, establishes an alternative action to be taken in the case of a user generated keyboard interrupt. By default, without an ON INTERRUPT specified, USER-Access termi-nates all input levels (if within nested input scripts), and returns to the interactive level. If the INPUT CONTINUE qualifier was set, USER-Access terminates only the current input level and continues processing in the next level up.
The ON ERROR exception establishes an alternative action to be taken when a USER-Access error occurs. Without an ON ERROR specified, USER-Access terminates all input levels (for nested input scripts), and begins processing at the interactive level. If the INPUT CONTINUE qualifier was set, USER-Access dis-plays the error but continues processing the next command. The ON ERROR command allows for more flex-ibility on an error condition.

Page 82 Advanced Local User’s Guide MAN-REF-H363-3.4.2
The ON LOCAL_ERROR and ON REMOTE_ERROR exceptions give the user the ability to take special action when a LOCAL or REMOTE host command fails. On hosts that support it, a special LOCAL or REMOTE STATUS qualifier will be set reflecting that host’s error code for the particular error condition. Normally, without ON LOCAL_ERROR or ON REMOTE_ERROR specified, USER-Access just ignores host errors and continues processing the next command.
For further details about the ON command, see “Command Descriptions” on page 123.
Checking Command Status
The status() function allows the user to write scripts that check the status of the previous command and take action accordingly. A simple example appears below:
* * Print status of a single file transfer. * set input continue on send -quiet src_file text Transfer {eqs(status(), “S”, “Successful,”, “Failed.”)}
The example above demonstrates how status() can be used to print the results of the previous command (in this case SEND). Status() returns either an “S” for Success, or an “E” for Error. Since it is a string function, the result is a string. Status() can be combined with any other string function or USER-Access command to enhance script processing. Above it is used with the eqs() function to check the results which are then printed by the TEXT command.
Refer to the section on string, functions for more details and examples of the status() function.

MAN-REF-H363-3.4.2 Advanced Local User’s Guide Page 83
Creating USER-Access Aliases Aliasing is simply another form of USER-Access scripting. Although the previous sections discussed script-ing in the context of INPUT files, everything described applies to USER-Access aliases. Aliases can be thought of as USER-Access input files. In fact, a multicommand alias (discussed later) is treated in exactly the same way. The difference between a multicommand alias and an input script is the way in which they are defined. As mentioned earlier, input scripts are defined using a standard text editor. Aliases are defined using the SET ALIAS command.
The alias capabilities of USER-Access provide a means of creating a custom command set that can be used by all users or a group of users. An alias is simply a new name for an USER-Access command or set of com-mands. The following example shows how to create a simple alias (or new command) called FETCH that is equivalent to the RECEIVE command:
User> set alias fetch receive
To display the definition of the new alias, use the SHOW ALIAS command: User> show alias fetch User: FETCH ............. receive
The alias name FETCH appears on the left and its translation or definition appears on the right. Now to trans-fer a file from the remote host to the local host, either the RECEIVE command or the FETCH alias can be used. All qualifiers and parameters for the RECEIVE command are also valid for FETCH since USER-Access just maps FETCH to RECEIVE. The RECEIVE command is executed, but as far as the user is con-cerned, the command executing is FETCH. Therefore, the following are equivalent:
User> fetch -quiet -mode character sourcfile
and, User> receive -quiet -mode character sourcefile
Aliases can be more complex than a single mapping of FETCH to RECEIVE. For example, the FETCH alias can be defined to include parameters or qualifiers as part of its definition. Below is an example of the FETCH alias that includes some RECEIVE qualifiers in its definition:
User> set alias fetch receive -quiet -mode character
To display the new definition alias FETCH, the SHOW ALIAS command is again used: User> show alias fetch User: FETCH ............. receive -quiet -mode character
Now every time FETCH is invoked, the QUIET qualifier is turned on and the MODE is set to CHARACTER. Therefore, the following are equivalent:
User> fetch sourcefile
and, User> receive -quiet -mode character sourcefile
As was true earlier, additional qualifiers and parameters may be passed to FETCH (and thus passed through to RECEIVE) simply by adding, them to the FETCH command line when it is invoked.
To remove a previously defined alias, simply define the alias again without a definition: User> set alias fetch

Page 84 Advanced Local User’s Guide MAN-REF-H363-3.4.2
This will in effect “undefine” the specified alias. Following the command issued above, FETCH will no longer be a valid alias.
USER-Access Aliases Vs Host Aliases
There are two types of aliases, Host Aliases and USER-Access aliases. Host aliases are either Local aliases or Remote aliases. That is, their definitions translate to either Local host commands or Remote host commands. USER-Access aliases translate to USER-Access commands (SEND, RECEIVE, CONNECT, ASK, etc.).
In addition to the obvious differences between the two alias types, there are a couple of other distinctions that must be mentioned. First, USER-Access aliases are defined using SET ALIAS. The format is:
Command Parameters SET ALIAS alias_name UA_command
where UA_command must translate into a USER-Access command. Host aliases on the other hand are defined using SET LOCAL ALIAS or SET REMOTE ALIAS. The format is:
Command Parameters SET LOCAL ALIAS loc_alias_name host_command
and
Command Parameters SET REMOTE ALIAS rem_alias_name host_command
where host_command must be a valid command on the local or remote host respectively.
The other big distinction between USER-Access aliases and Host aliases is that USER-Access aliases may have multi-command definitions (see the section entitled “Creating Multi-command USER-Access Aliases” on page 84), whereas Host aliases can translate only into a single host command. This is not typically a prob-lem since most hosts support command procedures or script files which can then be accessed by a Host alias.
The remainder of this section is devoted to issues relating to USER-Access aliases. The topics apply to host aliases as well unless specifically designated as “USER-Access Aliases”. For more information on host alias-es, refer to the Local or Remote User’s Guide.
Creating Multi-command USER-Access Aliases
An alias can translate to a single USER-Access command as shown above where FETCH was mapped to RECEIVE. USER-Access aliases can also be defined to be a sequence of several commands. The method for defining a multi-command alias is to put each command of the definition on a separate line, where each line, except for the last one, is terminated by the escape character ‘!’. The escape character tells USER-Access to continue the alias definition on the next line. The following is an example of a three line FETCH alias that connects to HOSTA, receives a file called ‘sourcefile’, then disconnects:
User> set alias fetch connect hosta guest netex ! More>> receive sourcefile ! More>> disconnect
The SHOW ALIAS command can be used to display the new FETCH alias: User> show alias fetch User: FETCH ............... connect hosta guest netex User: receive sourcefile User: disconnect

MAN-REF-H363-3.4.2 Advanced Local User’s Guide Page 85
Notice that USER-Access strips the ‘!’ from the alias definition. It is only needed for the initial definition of the alias.
Although they are very powerful, multi-command aliases are limited to roughly 500 characters in length. It is suggested that if an alias approaches this limit, it should be made into an input script and stored in a file. It will function correctly and not be a constant burden.
Unlike single command aliases (such as the simplest FETCH alias defined earlier), multi-command aliases do not implicitly pass command parameters or qualifiers through to the actual USER-Access commands. USER-Access has no way of determining which command a particular parameter is destined for unless the alias is set up to pass its own parameters, as explained in the next section.
Passing Parameters to an Alias
When creating multi-command aliases, it is often desirable to allow parameters to be passed on the alias command line. These parameters can then be substituted into various places within the command sequence in the same way as was done for input scripts.
Refer back to the FETCH alias defined in the previous section. To make that alias more flexible, one can de-fine it to take as parameters such things as userid and password on the CONNECT line, and file name on the RECEIVE line. The definition then is:
User> set alias fetch {} connect hosta {1} {2} ! More>> receive {3} ! More>> disconnect
Note the empty ‘{}’ above. These are important when defining alias parameters and will be discussed short-ly. The resulting alias becomes:
User> show alias fetch User: FETCH ............... connect hosta {1} {2} User: receive {3} User: disconnect
To invoke the alias with the same parameters that were embedded in the alias earlier, a user would type: User> fetch guest netex source file
Parameter 1, represented as {1}, gets replaced by ‘guest’, parameter 2, represented as {2}, gets replaced by ‘netex’, and parameter 3, represented as {3}, gets replaced by ‘sourcefile’. The actual commands that get ex-ecuted would be equivalent to typing the following:
User> connect hosta guest netex User> receive sourcefile User> disconnect
Now refer back to the empty ‘{}’ used in the definition of FETCH earlier. This special notation is used to tell USER-Access to “turn off” parameter substitution while the alias is being defined. The empty ‘{}’ is crucial when defining aliases that use positional parameters or any string substitution (refer to “USER-Access String Substitution” on page 48). If parameter substitution is not turned off, USER-Access will attempt to replace the positional parameters with their values at the time the alias is defined (which generally means they get replaced with a null string). The empty ‘{}’ may be placed anywhere within the alias definition and turns off string substitution until the alias definition ends or another ‘{}’ is encountered.
Notice that the empty ‘{}’ appears only on the first line even though the second line is referencing positional parameter 3. The empty ‘{}’ is really a toggle that turns string substitution from off to on or from on to off each time it is encountered within a definition. See the section entitled “Disabling String Substitution” on page 73 for further details.

Page 86 Advanced Local User’s Guide MAN-REF-H363-3.4.2
Accepting Input within an USER-Access Alias
Although aliases that accept parameters are more flexible than those that do not, it may become confusing to a new user which parameters to pass and in what order. Therefore, a more desirable solution is to create aliases that prompt for input. Refer once again to the FETCH alias defined in the previous section. It was set up to take three parameters: userid, password, and file name. FETCH can be made much more usable by having it prompt for the required parameters, as follows:
User> set alias fetch {} - More>> ask –prompt “User Id? “ uid! More>> ask –prompt “Password? “ –secure pw ! More>> ask –prompt “File Name? “ fname ! More>> connect hosta {uid} {pw} ! More>> receive {fname} ! More>> disconnect
Note the empty ‘{}’ again. These tell USER-Access not to perform string substitution (in this case on varia-bles uid, pw, and fname), until the alias is actually executed. The dash (-) on the first line is used to tell USER-Access to continue the definition on the next line.
Quickly breaking this alias apart, the first line simply prompts the user for a userid and reads the response into variable uid. The next line prompts for a password and reads the result into variable pw. (The SECURE qual-ifier for ASK is used to tell USER-Access not to echo the response back to the terminal. It should be noted that some versions of USER-Access cannot support this feature due to operating system limitations. For more information, refer to the ASK command in the “Command Descriptions” on page 123.) Next, the file name is requested and read into variable fname. The CONNECT and RECEIVE commands are then issued with the appropriate variables to be substituted. Finally the DISCONNECT is performed.
To run the new FETCH alias, a user need not know anything about the parameters; the alias will take care of that by prompting for them. Below is an example execution of FETCH, including user responses:
User> fetch User Id? guest Password? _____ File Name? sourcefile User: < connect results > User: < receive results > User: < disconnect results >
The output here has been removed to emphasize how prompts can now be used to interact with a user in order to make a friendlier interface. It should be noted here that string functions can also be used within an alias to provide the option of parameter passing or input prompting in exactly the same way as explained in “USER-Access Input Files” on page 74.

MAN-REF-H363-3.4.2 Advanced Local User’s Guide Page 87
Abbreviating Alias Names
To make life more simple for the user, alias names can be defined to allow abbreviations when they are in-voked. For instance, to allow the simplified FETCH alias to be invoked by typing only FET, define it as:
User> set alias FETch receive
Now the definition can be displayed: User> show alias fetch User: FETch ................ receive
By capitalizing only a portion of the alias name (leading consecutive uppercase characters only), a user can define aliases that can be abbreviated or spelled out. In the example above, the FETCH alias can now be in-voked as “fetch”, “fetc”, or “fet”. By default, aliases are created with all capital letters unless a combination of upper and lower case characters are given in its definition, the first character of which must be upper case. The minimum spelling of an alias name includes all letters up to the first lower case letter. If alias names are defined which cause duplicate abbreviations (e.g., ABc and ABd), the first alphabetical alias is processed (AB would execute ABc).
Defining Multiword Alias Names
For those interested in being even more creative, an alias can be defined with a multiword name. That is, by putting double quotations around the alias name on its definition, the name can contain embedded blanks. For example, to create an alias called “FETCH A FILE”, define it as:
User> set alias “FETch A FIle” receive
Its definition can then be displayed as: User> show alias “fetch a file” User: FETch A FIle ........ receive
And it can be invoked as: User> fet a file sourcefile
Where sourcefile is the file name to receive.
Multiword alias names are particularly useful for users that prefer a more English-like command set. They can also be used to redefine Multiword USER-Access commands such as SHOW HOST, SET ALIAS, etc.
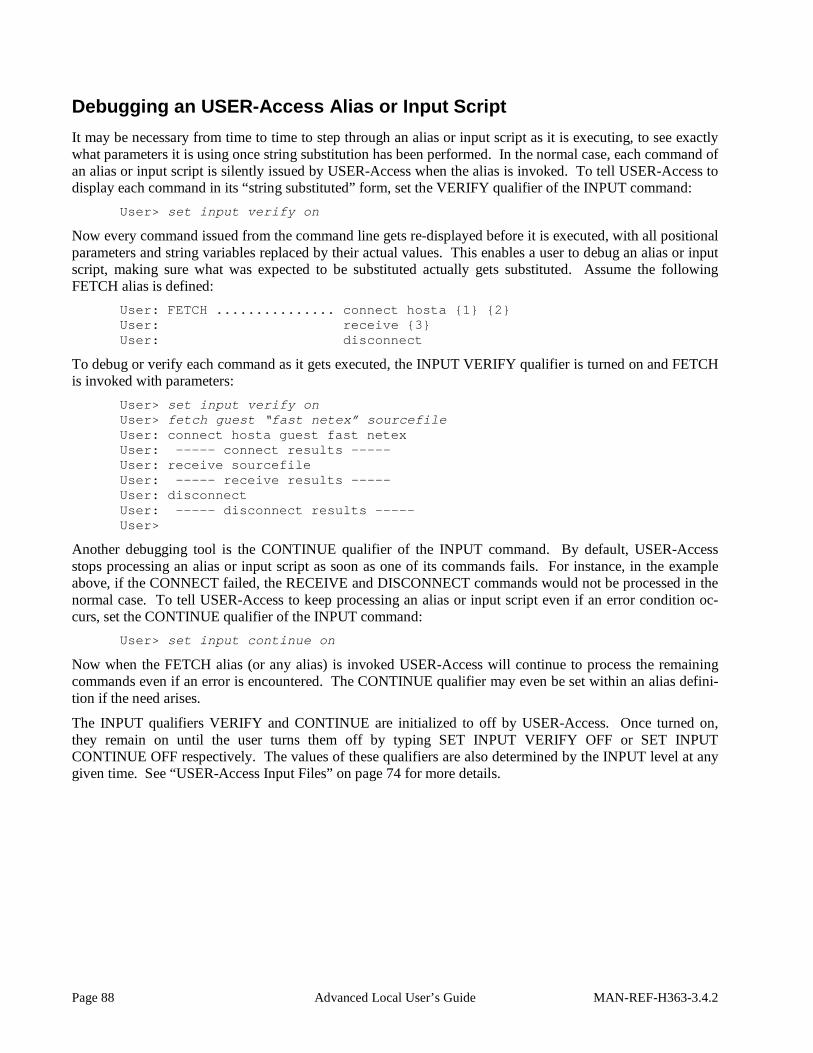
Page 88 Advanced Local User’s Guide MAN-REF-H363-3.4.2
Debugging an USER-Access Alias or Input Script It may be necessary from time to time to step through an alias or input script as it is executing, to see exactly what parameters it is using once string substitution has been performed. In the normal case, each command of an alias or input script is silently issued by USER-Access when the alias is invoked. To tell USER-Access to display each command in its “string substituted” form, set the VERIFY qualifier of the INPUT command:
User> set input verify on
Now every command issued from the command line gets re-displayed before it is executed, with all positional parameters and string variables replaced by their actual values. This enables a user to debug an alias or input script, making sure what was expected to be substituted actually gets substituted. Assume the following FETCH alias is defined:
User: FETCH ............... connect hosta {1} {2} User: receive {3} User: disconnect
To debug or verify each command as it gets executed, the INPUT VERIFY qualifier is turned on and FETCH is invoked with parameters:
User> set input verify on User> fetch guest “fast netex” sourcefile User: connect hosta guest fast netex User: ----- connect results ----- User: receive sourcefile User: ----- receive results ----- User: disconnect User: ----- disconnect results ----- User>
Another debugging tool is the CONTINUE qualifier of the INPUT command. By default, USER-Access stops processing an alias or input script as soon as one of its commands fails. For instance, in the example above, if the CONNECT failed, the RECEIVE and DISCONNECT commands would not be processed in the normal case. To tell USER-Access to keep processing an alias or input script even if an error condition oc-curs, set the CONTINUE qualifier of the INPUT command:
User> set input continue on
Now when the FETCH alias (or any alias) is invoked USER-Access will continue to process the remaining commands even if an error is encountered. The CONTINUE qualifier may even be set within an alias defini-tion if the need arises.
The INPUT qualifiers VERIFY and CONTINUE are initialized to off by USER-Access. Once turned on, they remain on until the user turns them off by typing SET INPUT VERIFY OFF or SET INPUT CONTINUE OFF respectively. The values of these qualifiers are also determined by the INPUT level at any given time. See “USER-Access Input Files” on page 74 for more details.

MAN-REF-H363-3.4.2 Advanced Local User’s Guide Page 89
Error Message Formatting USER-Access messages consist of the following components:
SEVERITY A single character severity level indicator. Possible values are:
I Information
W Warning
E Error
F Fatal
FACILITY The facility or subsystem name Generating the message. This will generally be some version of the following:
UA USER-Access host independent message.
UAxxx USER-Access host dependent message where xxx represents the product number of the host generating the error (e.g. UA263, UA213, etc.)
SI USER-Access Service Initiator (SI) host independent message.
Sixxx USER-Access Service Initiator (SI) host dependent message.
MUXxxx USER-Access Multiplex Server (MUX) host independent message.
MUXxxx USER-Access Multiplex Server (MUX) host dependent message.
NETEX A NETEX generated error (only in NetEx environments).
OpSys An operating system specific error where OpSys is replaced by the operating system name generating the error.
CODE The unique error or message code.
TEXT The single line message text describing the error code.
The format of a message display is controlled by the OUTPUT command qualifier FORMAT. Specific com-ponents of a USER-Access message are extracted using the string function msg() (described in the section on “String Functions”). The default message format can be displayed as:
User> show output format User: FORmat .......... {msg(“text”)} ({msg(“facility”)}-{msg(“code”)})
With this format defined, a simple “Invalid command” error would generate the following: User> badcmmand User: Invalid command ‘badcommand’ (UA-4708).
The user can modify the format simply by changing the value of the FORMAT qualifier of the OUTPUT command. The value can be any string so long as it includes some reference to string substitution when it gets interpreted. That is when OUTPUT FORMAT is defined, it must disable string substitution using the {} syntax. An invalid FORMAT specification will result in USER-Access returning the value to its original, default value. This is done to make sure error messages are properly displayed in the event that they were inadvertently shut off.
The following example modifies the error message format to print only the error severity, facility, and code. Note the use of {}
User> set output format {} {msg(“severity”)}:{msg(“facility”)}-{msg(code”)}

Page 90 Advanced Local User’s Guide MAN-REF-H363-3.4.2
With this message format, the same “Invalid command” error would generate the following display: User> badcommand User: W:UA-4708
It is advised that error message format tailoring should be left up to the site administrator. Most users will never need to modify the default format.

MAN-REF-H363-3.4.2 Advanced Local User’s Guide Page 91
USER-Access Code Conversion In NetEx environments, NetEx is ordinarily responsible for performing code conversion between ASCII and EBCDIC computer systems. USER-Access provides an alternative code conversion facility intended for en-vironments where TCP/IP is the networking protocol or for those sites requiring more flexibility than that of-fered within NETEX. USER-Access code conversion adds the following capabilities:
• It supports ASCII to ASCII and EBCDIC to EBCDIC code conversion, allowing a site to handle differ-ences among “like” conversion tables (Unisys A versus IBM EBCDIC, for example).
• It supports full (256-character) ASCII as well as the NETEX 128-character ASCII tables. This is particu-larly useful for handling the variety of country codes that appear in the last half of the ASCII tables.
• It allows a site to specify incoming code conversion and outgoing conversions separately.
• It allows USER-Access to offer optional data verification facilities (CRC) for character file transfer as well as bit-stream transfer. Refer to “USER-Access Data Verification” on page 91 for more infor-mation.
All USER-Access code conversion is controlled by means of the TRANSLATE command. Refer to the TRANSLATE command as described in “TRANSLATE Command” on page 167. Using TRANSLATE, a site administrator can define code conversion tables, review the current tables, and enable or disable the USER-Access code conversion facility.
Although a user may use the TRANSLATE command to specify changes to the conversion tables “on the fly,” it is strongly suggested that code conversion be treated as a site operations issue and that any code con-version table changes be established at a site level by means of the TRANSLATE SEARCH qualifier. By using the TRANSLATE SEARCH Path mechanism, site administrator can define the tables and enable USER-Access code conversion as part of the CONNECT/LOGIN process to particular systems.
USER-Access code conversion is enabled by default in TCP/IP environments. When USER-Access code conversion is enabled, it replaces NetEx/IP code conversion in all communications between systems in NetEx/IP environments.
To protect the USER-Access protocol from code conversion changes the following characters may not be modified:
Uppercase alphabetic characters (A-Z) Digits (0-9) Space, equal sign (=), and null
If USER-Access code conversion is to be used for only certain file transfers, it is recommended that aliases be set up to control enabling and disabling of the facility.
USER-Access Data Verification USER-Access offers an optional data verification facility or Cyclic Redundancy Check (CRC) that can be involved on file transfers. When CRC is turned on, as a SEND or RECEIVE qualifier, USER-Access ap-pends a block number, and the result of a CRC calculation to each block of the file transferred. If a block is lost or if the source CRC calculation does not match the destination calculation, the file transfer is aborted.
A sample alias, SENDCRC, shown below, will attempt to re-send an aborted file a specified number of times. For readability, this alias uses the ASSIGN and TEST aliases that are shipped with USER-Access.

Page 92 Advanced Local User’s Guide MAN-REF-H363-3.4.2
* * SENDCRC - send a file with CRC enabled - if the transfer * fails with a retryable error (this includes a * CRC failure), sleep for a while and try again. * A retry counter limits the number of attempts. * set alias sendcrc {} on error goto check! send: send -crc {0)! exit success! check: test msg(“retry”) eqs “N” exit error! {sleep(10)}! assign count inc count! test count le 100 goto send! text Maximum retries exceeded - SENDCRC cancelled. exit error
Since during normal operation a CRC error should be extremely rare, the SENDCRC alias (or similar logic incorporated in user-defined scripts) is an effective way to guarantee the delivery of data.
If CRC is performed on character files, USER-Access code conversion is used (refer to “USER-Access Code Conversion” on page 91) automatically. Although the CRC facility invokes the code conversion facility without any user action required, it must be noted that the code conversion facility will process the data based on the current user conversion tables (including SEARCH paths) only if translation has been enabled (i.e., TRANSLATE ON). If translation has not been enabled, USER-Access uses its own default tables and does not use any user specified translation tables or search paths.
The CRC algorithm is performed using 32-bit values. The integrity of a data stream is checked by comparing its state at the sending and the receiving host. Each character in the data stream is used to generate a value based on a polynomial. The values for each character are then added together. This operation is performed at both ends of the data transmission, and the two results compared. If the results are different, an error has oc-curred during transmission.
USER-Access Data Compression Support has been added to USER-Access for data compression and expansion during file transfer. The new SEND/RECEIVE qualifiers are:
COMPRESS - compress the source data stream (on/off) EXPAND - expand the destination data stream (on/off) METHOD - the method of compression (RLE/LZW)
Supported compression methods are RLE and LZW methods.
The RLE compression method uses a simple Run Length Encoding algorithm that counts strings of repeated characters (usually spaces or nulls). The RLE method will never grow data that is already compressed (except for the addition of the compression header).
The LZW (default) method uses the Lempel-Ziv-Welch algorithm for finding common substrings. This method is deterministic and can be performed on the fly. Block compression is performed with an adaptive reset whereby the code table is cleared when the compression ratio decreases. This method generally pro-vides the best overall compression ratio, but requires significantly more CPU resource than the RLE method. LZW compression ratios for character data are typically 40% to 60% of the original data size. LZW compres-sion ratios for binary data are difficult to predict. Applying LZW compression to already compressed data could actually increase the data size up to 130% of the original size.
The following examples demonstrate file transfers using the -COMPRESS and -EXPAND qualifiers.

MAN-REF-H363-3.4.2 Advanced Local User’s Guide Page 93
Send a binary source file ‘data’ with data compression enabled. The destination file ‘data.cmp’ contains the compressed data:
User> send -mode stream data data.cmp -compress
Receive the same compressed file expanding the data stream back to the original binary file: User> receive -mode stream data.cmp data -expand
The same binary data file can be compressed, sent across the network and expanded into the destination file: User> send -mode stream data -compress data -expand
One-sided compress/expand (the first two examples) is possible when connected to earlier releases of USER-Access for all supported modes except CHARACTER. Two-sided compress/expand (the last example) re-quires that both sides (client and server) support compression.
Only certain combinations of -COMPRESS and -EXPAND are valid with the various USER-Access transfer modes. The following table shows which combinations are valid (Yes) and which are not valid (No):
Table 2. COMPRESS/EXPAND combinations
Transfer Mode -COMPRESS only -EXPAND only Both -COMP/-EXP
CHARACTER Yes Yes Yes
RECORD No No No
STREAM Yes Yes Yes
BACKUP Yes No Yes
RESTORE No Yes Yes
COPY No No Yes
V1CHAR No No No
Character Mode Compression
Both sides (client and server) of a CHARACTER mode transfer must support compression. In addition, when transferring between hosts with different native character sets (eg. ASCII to EBCDIC) there are some subtle problems caused by the fact that only the USER-Access client performs code conversion.
The character set of the compressed data is stored in the compression header that prefixes the compressed data stream. This information can be used during expansion to determine if code conversion must be performed.
The following table illustrates the various combinations of CHARACTER mode compress/expand. The source and destination file types are shown as well as any code conversion issues:
Table 3. Combinations of CHARACTER mode compress/expand
USER-Access command Source Destination Code Conversion performed
send-compress text stream by client before compress
receive -compress text stream not done - server pushes an informative message - flags its native char set in header

Page 94 Advanced Local User’s Guide MAN-REF-H363-3.4.2
Table 3. Combinations of CHARACTER mode compress/expand
USER-Access command Source Destination Code Conversion performed
send -expand stream text not done - error if char set in header does not match server’s char set
receive -expand stream text by client after expand if char set in header does not match client’s native char set
send -compress -expand text text by client before compress
receive -compress -expand text text by client after expand

MAN-REF-H363-3.4.2 GUARDIAN USER-Access SEARCH Keywords Page 95
This section assumes the reader has a working knowledge of the USER-Access commands as well as a gen-eral understanding of the SEARCH qualifier for each of them.
The USER-Access commands CONNECT, INPUT, HELP, and TRANSLATE have SEARCH qualifiers as-sociated with them. The SEARCH qualifiers generally instruct USER-Access to look for a file or set of files (depending on the command it is associated with), with the given name and in the specified location. One option the user always has is to give the entire file specification (path and file name) for each path or file that is to be searched. The other option, implemented simply as a shortcut for the user, is to specify the keywords (SITE), (USER), or (NONE), in some form, as the definition for qualifier SEARCH. The SEARCH key-words have the following “generic” definitions:
(SITE) This keyword refers to the USER-Access site or root directory on the local or remote host. (SITE) is where system wide USER-Access files are stored. The actual value for (SITE) can be determined by displaying the LOCAL or REMOTE qualifier called ROOTDIR:
User> show local rootdir
or User> show remote rootdir
(USER) This keyword refers to the user’s login or home directory (or equivalent) on the local or re-mote host. Often (USER) is where users keep personal files (such as startup files) that are in-tended for tailoring USER-Access to personal taste. The actual value for (USER) can be found in the LOCAL and REMOTE informational qualifier HOMEDIR, as shown below:
User> show local homedir
or User> show remote homedir
(NONE) This keyword simply tells USER-Access to not search for any files. It is different than leav-ing a SEARCH qualifier value blank in that a SEARCH qualifier with no definition often im-plies some default files should be located. Specifying (NONE) as a definition for SEARCH specifically tells USER-Access not to look for any files.
The keywords (SITE) and (USER) can be used as they appear above, or with file names appended to them. Appending a file name to (SITE) or (USER) tells USER-Access to look in the specified location for the given file name. When specified without a file name, the keywords have implied file names that USER-Access at-tempts to locate. The rest of this section addresses each USER-Access command that has a SEARCH qualifi-er and how that qualifier interprets the keywords (SITE), (USER), and (NONE).
CONNECT The SEARCH qualifier for the CONNECT command is used to locate USER-Access startup files on the remote host following a successful connection. The default definition for SEARCH is the string “(SITE) (USER)”. (SITE), when declared without a file name, always refers to the file SSERVER.UA on the remote host in the (SITE) directory. When (USER) is declared without a file name, it implies a file by the name of SERVER.UA in the (USER) di-rectory. (NONE) tells USER-Access to not process any remote startup files.
GUARDIAN USER-Access SEARCH Key-words (SITE), (USER), and (NONE)

Page 96 GUARDIAN USER-Access SEARCH Keywords MAN-REF-H363-3.4.2
For example, to define the CONNECT SEARCH qualifier to locate the default site startup file, the default user startup file, and a third startup file called UANEW located in the USER-Access root directory, issue the following command:
User> set connect search (SITE) (USER) (SITE)UANEW
The user should be reminded that the order here is important. USER-Access uses the SEARCH definition from left to right. In the example above, (SITE) would be searched first, then (USER), and finally (SITE)UANEW.
HELP The HELP SEARCH qualifier is used to locate USER-Access help files on the local host. The default definition for SEARCH is (SITE). (SITE), when declared without a file name, always implies the file userhelp.ua in the (SITE) directory. (USER) has no implied file name associated with it. Users may define SEARCH as a string containing (SITE)xxx or (USER)xxx where ‘xxx’ is the name of a user defined help file.
For example, issue the following command to define the HELP SEARCH qualifier to look for a user created help file called myhelp.hlp located in the user’s login directory, and the default USER-Access help file:
User> set help search (USER)myhelp (SITE)
INPUT The SEARCH qualifier for the INPUT command is used to locate user defined USER-Access input scripts. There are no implied file names associated with (SITE) or (USER) for this command, which means specifying (SITE) or (USER) without an accompanying file name is equivalent to defining it as (NONE). The user can, however, append a file name onto (SITE) or (USER) instructing USER-Access to locate the specified file upon an INPUT request. In fact, the appended file name may even include an asterisk ‘*’ which USER-Access replaces with the name of the input file specified.
For example, the INPUT SEARCH qualifier can be defined to search all the files in the root directory that have an extension of ‘.ua’:
User> set input search (SITE)*ua
Now any input requests (via the INPUT command or implied), will only require a file name. For example, if a USER-Access input script by the name of myjob.ua is located in the root di-rectory, it can be invoked as:
User> input myjob
or User> myjob
The first example only uses the INPUT SEARCH path if a file with a file specification of myjob is not found first.
TRANSLATE The SEARCH qualifier for the TRANSLATE command is used to locate user defined script files. The default definition for SEARCH is (SITE). (SITE), when declared without a file name, always refers to a file in the root directory on the local host with the name {HOSTCODE:REMOTE}.ua, where {HOSTCODE:REMOTE} is the string substitution syn-tax for the host character code (ASCII8. EBCDIC, etc.) of the remote host. (USER) has no implied file name associated with it for the TRANSLATE command. Users may define SEARCH as a string containing (SITE)xxx or (USER)xxx where ‘xxx’ is the name of a user defined script file containing TRANSLATE commands.

MAN-REF-H363-3.4.2 GUARDIAN USER-Access SEARCH Keywords Page 97
For example, issue the following command to define the SEARCH qualifier for the TRANSLATE command to locate a user created script file called guatoibm located in the us-er’s login directory:
User> set translate search (USER)guatoibm

Page 98 GUARDIAN USER-Access SEARCH Keywords MAN-REF-H363-3.4.2
User-Definable HELP Files Under GUARDIAN A site has the ability to create its own HELP files that USER-Access will look for upon request. User defina-ble help files allow a site or user to write help text for newly created aliases and input scripts. The HELP qualifier SEARCH is used to tell USER-Access to look for additional help files. By default, the HELP SEARCH qualifier is defined as:
User> show help search User: SEArch ............ (SITE)
(SITE) is a special SEARCH keyword used by USER-Access to indicate the default help file userhelp.ua from the local USER-Access root directory. This help file contains all USER-Access commands, qualifiers, examples, etc. To instruct USER-Access to also look in a site or user defined help file, for example, $NSC.UAHELP.MYALIAS, type the following:
User> set help search $NSC.UAHELP.MYALIAS (SITE)
The order of the SEARCH list is important. In the example above, USER-Access will look first in the MYALIAS help file upon any help request. USER-Access then continues on to read the next help file in the SEARCH list, in this case the (SITE) default help file.
It may be desirable to store any site help files along with the USER-Access default one, in the root directory. The (SITE) keyword allows for appending- file names as shown below: User> set help search (SITE)myalias (SITE)
This example instructs USER-Access to first look for any help in the file MYALIAS in the (SITE) directory, followed by the USER-Access default file USERHELP from the same directory. Refer to “GUARDIAN USER-Access SEARCH Keywords (SITE), (USER), and (NONE)” on page 95 for more information.
To create a site or user help file, use any standard text editor available on the system. The format of the help file must follow the example below: Topic_Level Topic_Name ...............Help text Topic_Level Topic_Name ...............Help text
Where
Topic_Level is a numeric value from 1 to 9 indicating the help level representing this Topic_Name. The first Topic_Level of all help files must be level 1. Subsequent topics can then be sub-topics (2,3,etc.) to the level 1 topic, or new top-level topics.
Topic_Name is the character string, representing the help topic. This is the name the user types to obtain help text (e.g. HELP SENd). This string should be limited to 15 characters in length for out-put formatting purposes. The Topic_Name may include upper case characters followed by lower case characters in order to allow an abbreviation on the help request.
Help Text is the actual help text the user will see in response to a help request. All help text should be character (text) data only. Users should be careful not to include unprintable characters, in-cluding tabs (multiple spaces are recommended) and control characters.
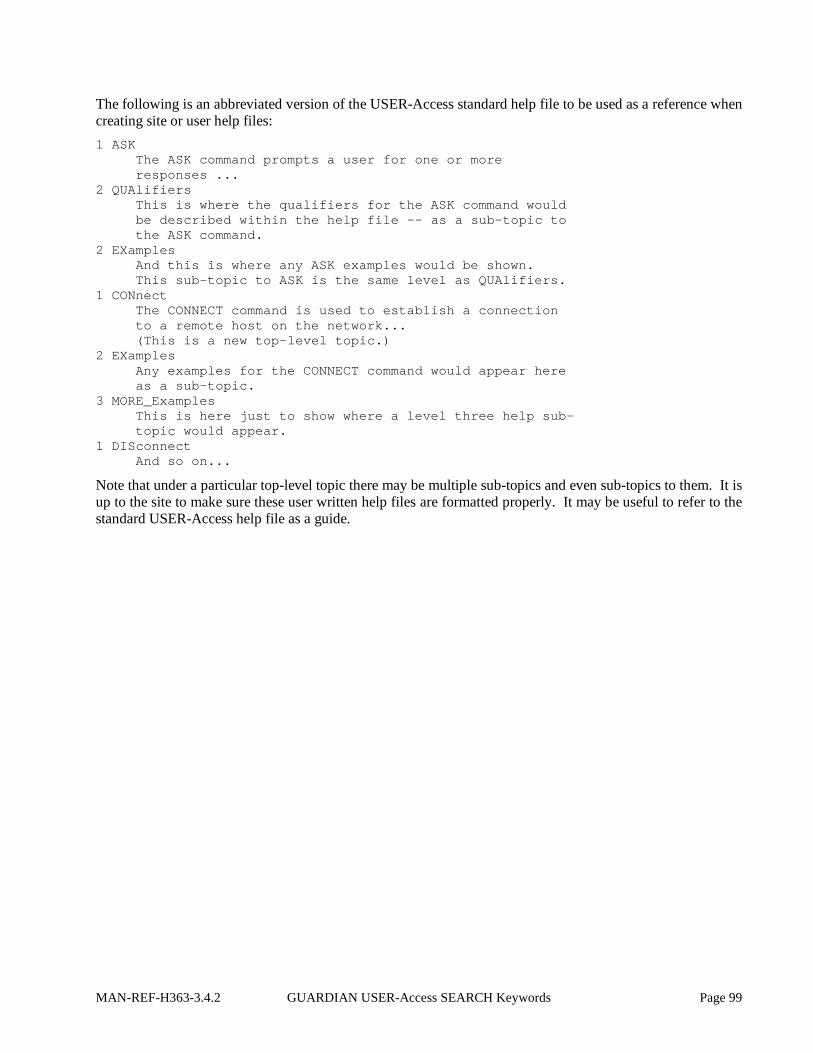
MAN-REF-H363-3.4.2 GUARDIAN USER-Access SEARCH Keywords Page 99
The following is an abbreviated version of the USER-Access standard help file to be used as a reference when creating site or user help files: 1 ASK The ASK command prompts a user for one or more responses ... 2 QUAlifiers This is where the qualifiers for the ASK command would be described within the help file -- as a sub-topic to the ASK command. 2 EXamples And this is where any ASK examples would be shown. This sub-topic to ASK is the same level as QUAlifiers. 1 CONnect The CONNECT command is used to establish a connection to a remote host on the network... (This is a new top-level topic.) 2 EXamples Any examples for the CONNECT command would appear here as a sub-topic. 3 MORE_Examples This is here just to show where a level three help sub- topic would appear. 1 DISconnect And so on...
Note that under a particular top-level topic there may be multiple sub-topics and even sub-topics to them. It is up to the site to make sure these user written help files are formatted properly. It may be useful to refer to the standard USER-Access help file as a guide.

Page 100 GUARDIAN USER-Access SEARCH Keywords MAN-REF-H363-3.4.2
Running USER-Access as a Batch Job Under GUARDIAN Since the USER-Access Initiator is a GUARDIAN application program, it can easily run as a TACL MACRO. The TACL MACRO can be executed as done in the example MACRO file UAMACRO. USER-Access is executed from within this MACRO. The input to USER-Access is contained in a variable which performs a COMMECT, SEND, and EIT. USER-Access returns EXIT STATUS to the MACRO, which then displays a message of Success or Failure. The MACRO file must be executed by specifying the entire path-name (including volume-subvolume), unless the current volume-subvolume is in the #PMSEARCHLIST (volume-subvolume search path). One may define their #PMSEARCHLIST to include #DEFAULTS, which would then always include their own current volume-subvolume combination (i.e. to search system files and the user’s defaults, use the command: #PMSEARCHLIST $SYSTEM.SYSTEM #DEFAULTS). The MACRO can then be executed by entering:
> uamacro
Without using the #PMSEARCHLIST, the MACRO can be executed with the command (assuming the MACRO file exists in the volume-subvolume combination $vol1.smith):
> $vol1.smith.uamacro
Read through the sample in Figure 3 on page 101, taking special note of error catching and checking by both GUARDIAN and USER-Access. The main point is that each USER-Access command returns a status which can then be passed through to GUARDIAN for special processing

MAN-REF-H363-3.4.2 GUARDIAN USER-Access SEARCH Keywords Page 101
Figure 3. Sample USER-Access MACRO file
?TACL MACRO == UAMACRO: == Sample USER-Access MACRO file. == The MACRO connects to a remote host, Sends some files and exits with status. == The status from USER-Access is then passed to the TACL MACRO == where it is evaluated. == Invoke this TACL MACRO with a full file name == or include the current volume/subvol on your #pmsearchlist. #frame #push exit_status == Create the TACL variable for input to USER-Access. == The commands in this variable will be executed in USER-Access. [#def input_text text |BODY| text Today is ~{date()~} - ~{time()~}. connect downey test1 testtest send -create replace *doc exit success ] == Run the USER-Access CLIENT taking input from the variable 'input_text' == and capturing the exit status in variable 'exit_status'. user /name, inv input_text, status exit_status/ == test the exit status [#if [#match [exit_status] STOP] |then | #output ****USER-Access Job Completed Successfully!**** |else | #output *** Error from USER-Access: [exit_status]. *** ]
#unframe

Page 102 GUARDIAN USER-Access SEARCH Keywords MAN-REF-H363-3.4.2
Running a GUARDIAN Stand-Alone USER-Access Server The USER-Access Server (or Responder) is typically invoked by the Service Initiator following a successful login request under GUARDIAN USER-Access. It may be desirable at some time to run the server as a stand-alone task, without it being tied to the Service Initiator. This type of operation is generally desired for background processing, when login is not crucial, or when the server is invoked from some non-privileged user account.
The USER-Access Stand-Alone Server (or Responder) can be invoked from a GUARDIAN command line (interactively or in batch), with the instruction: uaserver [/run-qualifiers/ [-keyword value]
Where: uaserver is the command to invoke the USER-Access Stand-Alone Server. UASERVER
should be defined at installation time. If it is not, contact the site administrator. /run-qualifiers/ optional GUARDIAN RUN qualifiers specifying such things as process NAME,
INPUT file or INV (from variable), SWAP device, etc. See “Running USER-Access as a Batch Job Under ” on page 100.
-keyword value (optional) specifies optional command line keywords that may be given to affect the operation of the USER-Access session. The following are valid keywords:
-BLOCKsize specifies an alternative default blocksize value in which to offer. The default is 32768.
-HOMEdir specifies the name of the user's “login” or “home” directory when USER-Access is invoked. Changing this keyword’s value redefines the location USER-Access uses to locate user startup files.
-OUTput specifies the name of an output file that is to receive the server output displays from this session. The default is the terminal or batch log file.
-PASSword specifies an optional password that will be checked (by the server) after a connection is established to this server. A connecting initiator must pass a password matching in length and exact character case.
-PREfix an alternative server prefix string that precedes au server displays. The default is “Server: “.
-ROOTdir specifies the name of the installed USER-Access root directory containing site specif-ic server help and startup files. There is generally no reason to modify this keyword.
-SEArch specifies the search path USER-Access follows to locate server startup files follow-ing a successful connection. This value is only used if the CONNECT SEARCH path from the initiator is empty. The default is (SITE) (USER).
-SERvice specifies a service name to listen for TCP/IP environments (or offer for NetEx/IP en-vironments). The default is “USER”.
As mentioned earlier, the Stand-Alone Server would generally be run as part of a GUARDIAN batch job. Using the exit status returned by each USER-Access command, special processing can be built into a batch

MAN-REF-H363-3.4.2 GUARDIAN USER-Access SEARCH Keywords Page 103
job as seen in the section entitled “Running USER-Access as a Batch Job Under ”. A Stand-Alone Server could be run in the same manner as described there.
Advanced GUARDIAN Transfer Modes As discussed in “File Handling Under GUARDIAN USER-Access” on page 39, several file transfer modes are supported: CHARACTER, RECORD, STREAM, BACKUP, RESTORE, and COPY. Not all of these modes are supported by all USER-ACCESS implementations. This section attempts to provide more detail on what these different modes imply and when each might be appropriate. If there were differences in byte/word addressability among USER-ACCESS hosts, a user might see differences in file and/or record sizes when transferring files. Some provisions are made in CHARACTER, BACKUP, and RESTORE modes to try to correct for this. In general, though, if there is a difference between byte addressability (8 bits on most ma-chines) versus word addressability, there will tend to be some slight variations.
CHARACTER mode is used to transfer text files, such as program source files. USER-ACCESS assumes the file is record-oriented and provides character code conversion between the GUARDIAN ASCII character set and the remote host’s native character set. When –MODE CHARACTER is specified, one of two formats will be used internally for transmitting the data over the network. These two formats are designated internally as v1char and text. v1char is the version 1 USER-Access mode, while text mode is the version 2 enhanced for-mat. Each mode involves packing multiple records into a single block for transmission over the network. However, the file access and network block-packing algorithms are different.
Internal v1char format (which is identical to –MODE V1CHAR in version 2 of USER-Access or –MODE CHARACTER in version 1) causes the file to be accessed as a structured file. Each record is preceded by its length in the network block and each block is prefixed by a block record count.
In internal text format (which is identical to –MODE CHARACTER in version 2 of USER-Access), GUARDIAN USER-Access attempts to access the file a block at a time and pack blocks into one of two for-mats. A linefeed terminated record format (format <LF> or a carriage-return/linefeed terminated record for-mat (format <CR/LF>) is used.
The text format of CHARACTER mode provides significant performance advantages if one of the hosts in the transfer supports files defined by one of these two formats. Text format is generally faster when communi-cating with other hosts as well due to not needing to encode and decode the record header containing the rec-ord length.
In CHARACTER mode, GUARDIAN USER-ACCESS attempts to access the file a block at a time (bypass-ing record at-a-time overhead) and pack blocks into one of two formats. A linefeed terminated record format as on GUARDIAN systems (format <LF>) or a carriage-return, linefeed terminated record format (format <CR-LF>) is used.
When the user specifies mode CHARACTER, GUARDIAN USER-Access internally uses text format when-ever the remote host supports it, otherwise it uses v1char format. V1char format may be manually selected at any time by specifying –MODE V1CHAR in the SEND or RECEIVE command.
RECORD mode is used to transfer record-oriented binary files. The file is accessed as a structured file type using record I/O. No code conversion is attempted nor is any other attempt made to reorient the individual records between the hosts. The record can contain a mixture of characters (text), integers, floating point numbers or any other site specific structures. However, USER-ACCESS has no knowledge of this format. The user may need to convert the data once it arrives at its destination, allowing for differences in byte order-ing or floating point representation. Note also that records may be padded (with nulls) to some multiple of addressable units at the destination host. For instance, when sending a file between a system with 8-bit byte addressability and a machine which has 16-bit word addressability, an odd length record of length 1 byte would be padded to 2 bytes on the 16-bit machine. RECORD mode is not supported on all hosts since not all

Page 104 GUARDIAN USER-Access SEARCH Keywords MAN-REF-H363-3.4.2
operating systems support the same record concept. A pseudo-record mode has been implemented, however, for UNIX which does not normally support records for non-character data.
STREAM mode is used to transfer files in an unstructured manner. It provides no code conversion nor pro-vides any structure to the network transmission. The file is accessed in block I/O mode and read/written as a continuous stream of bits or bytes. This means that files containing embedded structures will have those structures or headers copied along with the data. It is the user’s responsibility to understand those possibly embedded formats and to process them appropriately on the destination host. When sending between like hosts there may be no requirement to interpret these embedded formats.
BACKUP mode is similar to STREAM mode but entails copying a file in such a way as to be able to later restore it as it originally existed. The file is stored as a bitstream on the destination host and will be in a for-mat such that it would likely not be able to be processed directly on the destination host. For GUARDIAN hosts it involves accessing the file as unstructured in block I/O mode, copying the file as a bitstream. This mode is provided as a means to make a backup copy of a file on another host or as part of the COPY mode for transferring files GUARDIAN to GUARDIAN. Record lengths and total file length are preserved so that the file can be restored as it originally existed even when the file is copied to a host which has different addressa-bility limitations. BACKUP mode is also used in Central Archiving, as described in the Archiving section of this manual.
RESTORE mode is the counterpart of BACKUP mode. It is used to restore a file which has previously been copied in BACKUP mode. Again, unstructured access mode is used to create the file on the destination GUARDIAN system. Again the file is accessed merely as a bitstream on the originating host. This mode is also used internally as part of the COPY mode for transferring files GUARDIAN to GUARDIAN. RESTORE mode is also used in Central Archiving, as described in the Archiving section of this manual.
COPY mode is a special means of copying files between peer hosts. On GUARDIAN host systems, COPY mode allows copying of most any sequential disk file from one GUARDIAN to another. It is efficient be-cause it essentially uses BACKUP mode on the originating host and RESTORE mode on the destination host. It also provides for full wildcarding capability because one can now copy a complete directory branch with a single command even when the directory contains files of character and/or binary data.

MAN-REF-H363-3.4.2 Central Archiving Page 105
Introduction Central Archiving entails backing up systems over the network into a controlled, central environment. The development of Central Archiving is based on the concept that the files stored on all the systems on a network could be backed up to a central location. If done, the safe guarding of these files is simplified and more as-sured. The responsibility for the activity can be fixed and procedures can be developed to carry out corporate policies regarding backup and archiving.
Most corporate data centers have established archiving procedures already in place and except for satellite locations, are executing backup and archival on a routine basis. Central Archiving provides a way to incorpo-rate satellite files into the same process by operating in conjunction with the satellite system’s own backup and restore utilities.
Figure 4. Traditional Backup
As depicted in Figure 4, a traditional backup archives GUARDIAN files to a local device, generally tape. Figure 5 diagrams Central Archiving across the network. In a NonStop - IBM z/OS environment, for exam-ple, Central Archiving captures the output of the TANDEM BACKUP utility and sends that output via USER-Access to the z/OS site’s disk or tape drive. The satellite files being transferred are combined into one container file on the central side which looks like' a locally-generated save set; that is, it is readable only by the GUARDIAN RESTORE facility through USER-Access.
Central Archiving
GUARDIAN
System
Backup Utility
Tape Subsystem

Page 106 Central Archiving MAN-REF-H363-3.4.2
Figure 5. Central Archiving
Central Archiving can be invoked from either the satellite system or from the central site. When initiated by a satellite system, Central Archiving is a variation of a simple SEND command. But the implication is that the activity will be controlled better if it is the central site's scheduling utility that initiates Central Archiving. When invoked by the central site, the script includes a logon to the satellite system followed by a RECEIVE command that is modified to trigger Central Archiving.
Users of satellite systems can make use of Central Archiving in any of several ways: • They can format and execute their own SEND and RECEIVE commands as described in "Archiving
from a Satellite Site" on page 108 • They can make use of the USER-Access aliases BACKUP, LIST, and RESTORE, described in "The
Central Archiving Aliases" on page 114 • They, or site administrators, can create and execute aliases or command procedures tailored for the
site.
Central site operators can also make use of Central Archiving in any of several ways: • They can format and execute their own SEND and RECEIVE commands as described in "Archiving
from a Satellite Site" on page 108 • They can invoke the satellite host procedures provided for the various systems supporting archiving. • They can create and execute aliases or command procedures tailored for the site.
It is often desirable to invoke and control Central Archiving from a central site's job scheduling facility. Be-cause USER-Access provides status indications to the requester (messages to a user or operator, status codes to a procedure) the central job scheduler can be used effectively to control the archiving process; these proce-dures are described in "Archiving from a Central Site' on page 110.
Using Archiving Archiving under GUARDIAN looks very much like a normal USER-Access file transfer. An archive can be invoked either from the satellite site, by issuing a SEND command, or from a central site, by issuing a RECEIVE command. Two transfer modes exist to facilitate the backup and restore of GUARDIAN files. BACKUP mode archives GUARDIAN files. RESTORE mode restores GUARDIAN files that were previous-ly archived.
GUARDIAN
System
Backup Utility
USER-Access
Central Site
System

MAN-REF-H363-3.4.2 Central Archiving Page 107
Archiving under GUARDIAN requires the use of a special GUARDIAN device. The GUARDIAN BACKUP/RESTORE utility can exchange data with USER-Access by writing and reading from this device. This special device is referenced by the logical name (TAPE). The following example is how a normal TANDEM backup command could archive data to an existing local tape drive; assume the name of the tape drive is ‘$TAPE’:
backup $tape.*.listall
Archiving under GUARDIAN USER-Access replaces the tape device, ‘$TAPE’, with special archive device, (TAPE). A BACKUP command through USER-Access could look like: backup (TAPE).*.listall
Instead of archiving to the tape device ‘$TAPE’, the archive is written to the named process file (i.e. USER-Access). This BACKUP command can now be used on the USER-Access command line. The commands SEND and RECEIVE use the special device (TAPE) to either read from or write to a GUARDIAN BACKUP/RESTORE command.
The following is a diagram of Central Archiving both from a satellite and central site's perspective. The dia-gram depicts the relationship between the SEND and RECEIVE commands, the file transfer modes BACKUP and RESTORE, and the source and destination file specifications.
Figure 6. Satellite and Central Sites
For example, a GUARDIAN satellite site would backup to a central site with the command: SEND -MODE BACKUP "!<GUARDIAN_command>" <container>
A GUARDIAN satellite site would then restore from a central site with the command: RECEIVE -MODE RESTORE <container> "'<GUARDIAN_command>"
A central site would backup a GUARDIAN satellite site with the command: RECEIVE –MODE BACKUP “!<GUARDIAN-command>” <container>
A central site would then restore a GUARDIAN satellite site with the command: SEND -MODE RESTORE <container> "!<GUARDIAN_command>"
The string '<GUARDIAN command>' is either a GUARDIAN BACKUP/RESTORE command, or an exist-ing TACL command procedure containing a GUARDIAN BACKUP/RESTORE command. The '!' and dou-ble quotes are required around the specification '<GUARDIAN_command>' to tell USER-Access to invoke the specified procedure (either a GUARDIAN BACKUP/RESTORE command or a TACL macro). If the string '< GUARDIAN_command>' is a BACKUP/RESTORE command, (TAPE) must be part of the in-put/output specifier for the BACKUP/RESTORE command. If the string '< GUARDIAN_command >‘ refer-
Satellite Site Central Site
BACKUP
RESTORE
SEND
“!<GUARDIAN command>”
RECEIVE
RECEIVE
“<container>”
SEND
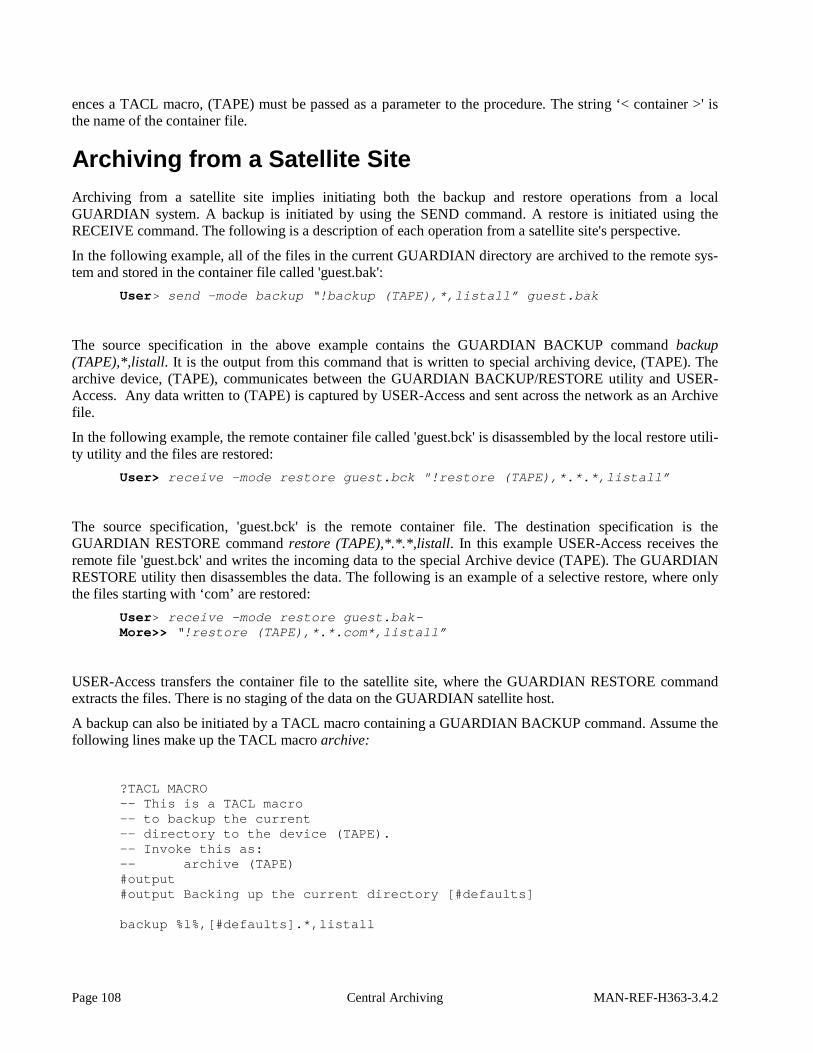
Page 108 Central Archiving MAN-REF-H363-3.4.2
ences a TACL macro, (TAPE) must be passed as a parameter to the procedure. The string ‘< container >' is the name of the container file.
Archiving from a Satellite Site Archiving from a satellite site implies initiating both the backup and restore operations from a local GUARDIAN system. A backup is initiated by using the SEND command. A restore is initiated using the RECEIVE command. The following is a description of each operation from a satellite site's perspective.
In the following example, all of the files in the current GUARDIAN directory are archived to the remote sys-tem and stored in the container file called 'guest.bak':
User> send –mode backup “!backup (TAPE),*,listall” guest.bak
The source specification in the above example contains the GUARDIAN BACKUP command backup (TAPE),*,listall. It is the output from this command that is written to special archiving device, (TAPE). The archive device, (TAPE), communicates between the GUARDIAN BACKUP/RESTORE utility and USER-Access. Any data written to (TAPE) is captured by USER-Access and sent across the network as an Archive file.
In the following example, the remote container file called 'guest.bck' is disassembled by the local restore utili-ty utility and the files are restored:
User> receive -mode restore guest.bck "!restore (TAPE),*.*.*,listall”
The source specification, 'guest.bck' is the remote container file. The destination specification is the GUARDIAN RESTORE command restore (TAPE),*.*.*,listall. In this example USER-Access receives the remote file 'guest.bck' and writes the incoming data to the special Archive device (TAPE). The GUARDIAN RESTORE utility then disassembles the data. The following is an example of a selective restore, where only the files starting with ‘com’ are restored:
User> receive –mode restore guest.bak- More>> “!restore (TAPE),*.*.com*,listall”
USER-Access transfers the container file to the satellite site, where the GUARDIAN RESTORE command extracts the files. There is no staging of the data on the GUARDIAN satellite host.
A backup can also be initiated by a TACL macro containing a GUARDIAN BACKUP command. Assume the following lines make up the TACL macro archive:
?TACL MACRO -- This is a TACL macro -- to backup the current -- directory to the device (TAPE). -- Invoke this as: -- archive (TAPE) #output #output Backing up the current directory [#defaults] backup %l%,[#defaults].*,listall

MAN-REF-H363-3.4.2 Central Archiving Page 109
A GUARDIAN satellite site can invoke the TACL macro named archive with the following command: User> send –mode backup “!mymacro.archive (TAPE)” save.bck
The TACL macro named archive is prefixed with mymacro. to identify the subvolume in which to find the macro. A sufficient path must be given to the macro or a file not found error will result from GUARDIAN.
The archived files are saved in a remote container file named save.bck. (TAPE) is required as an argument to the procedure archive. USER-Access recognizes the string (TAPE) and replaces it with the named process file.
FOUR aliases are predefined with USER-Access. The aliases are BACKUP, COPY, LIST, and RESTORE. Each of these aliases provides a simple interface to the USER-Access archiving, capabilities. For more infor-mation on each of these aliases refer to “The Central Archiving Aliases” on page 110.

Page 110 Central Archiving MAN-REF-H363-3.4.2
Archiving from a Central Site One of the largest benefits of Central Archiving is the expanded use of data center resources. A central data center can provide the personnel, procedures, and peripherals for archiving remote sites. It is rare to find all three in existence at each satellite site. USER-Access and Central Archiving provide the interface for sharing the resources of a central data center with remote satellite facilities. The figure below depicts this concept:
Figure 7. Data Center
A central data center can invoke archive procedures to backup the remote GUARDIAN sites. A central site's job scheduler can start a GUARDIAN host backup automatically, directing the GUARDIAN BACKUP save set to a central system peripheral (e.g. tape, disk, ...). Central procedures can be set up to check status of each job step, verifying that the backup is operating successfully.
Since much of the functionality of archiving from the central site depends on the specific central host type, only a general overview can be presented here. One general approach is described below.
Assume the satellite site is HP NonStop GUARDIAN, and the central site is some large mainframe with the resources and procedures to maintain and organize the archives of several satellite sites.
On the satellite site, create a GUARDIAN Archive procedure that directs its output through (TAPE) (de-scribed earlier). The output from the LISTALL qualifier, on the GUARDIAN BACKUP command should be saved to a GUARDIAN file.
Data Center
• Operators
• Job Schedulers
• Sophisticated devices
GUARDIAN
GUARDIAN
Satellite
Satellite
Internet

MAN-REF-H363-3.4.2 Central Archiving Page 111
On the central site, create a command procedure or JCL job that first allocates a local tape or disk device, and then invokes USER-Access with input. USER-Access connects to the remote satellite GUARDIAN host, and then invokes a RECEIVE command to start the archive. An example of what the RECEIVE command could look like is:
receive -mode backup “!mymacro.archive (TAPE)” guardian.bck
The remote GUARDIAN procedure ‘mymacro.archive’ is invoked as the source of the file transfer. Because (TAPE) appears in the source specification, the special archive device is allocated and available for use by referencing the GUARDIAN logical name (TAPE). The remote GUARDIAN procedure ‘mymacro.archive’ would contain a GUARDIAN BACKUP command. After the archive completed, the log file could be re-ceived from the remote GUARDIAN site. The log file could be saved or checked for any expected problems (e.g. failure to backup certain files, …). Figure 8 on page 112 and Figure 9 on page 113 are examples of the central and satellite procedures. Both procedures are only skeletons of what could actually exist. The central site procedure does not detail any system specific commands, since knowledge of the central site's host type is limited:

Page 112 Central Archiving MAN-REF-H363-3.4.2
Figure 8. Sample Central Site JCL (Command Procedure)
[initial JCL]
.
. [ALLOCATE TAPE DEVICE ‘TAPE’]
. [additional JCL]
. USER
* On error exit with an error status *
ON ERROR exit Error * * Connect to the remote satellite site (GUARDIAN) * CONNECT GUARDIAN USERNAME PASSWORD * * Invoke the remote archive procedure and receive * The archived files into the local container file * ‘{host:rem}.{date(1)}’. Receive the log file after the * backup is complete. * RECEIVE “!MYMACRO.ARCHIVE (TAPE)” {host:rem}.{ddate(1)} –
-CRe –MODE BACKUP RECEIVE LOGFILE * * Exit with a successful status * EXIT Success
. [additional Commands]
.

MAN-REF-H363-3.4.2 Central Archiving Page 113
Figure 9. Sample Satellite Site GUARDIAN Script File
USER-Access is implemented in such a way that each command returns status that can be checked by the central site either within USER-Access or within the central host’s command procedure. The interaction of-fered by USER-Access allows a central site to set up closed-loop operations with a single or group of GUARDIAN hosts. A central site operator, or job scheduler, receives much the same feedback from the GUARDIAN task as it does from a non-networked local job. This feedback allows the operator/scheduler to employ retry procedures, delay the execution of jobs dependent on a failed job, and notify personnel as re-quired.
File Transfer Options This section discusses the USER-Access SEND and RECEIVE qualifiers that are of particular interest for Archiving. They are discussed here as they relate to Archiving. More discussion can be found in “File Han-dling Under GUARDIAN USER-Access” on page 39.
-CRC The USER-Access file transfer commands, SEND and RECEIVE, allow for a CRC qualifier. If the CRC qualifier has a value of 'ON', a cyclic redundancy check is done for each block of data transferred. If an error is detected the transfer is aborted and notification is given to the user. An example backup from a central site with CRC active is:
User> receive –mode backup “!backup (TAPE),*,listall” – More>> guest.bck –crc -FLOW
-FLOW Central Archiving may require writing the remote container file to tape. USER-Access has a FLOW qualifier to allow for suspended file transfers. It is primarily provided to allow for de-lays in tape handling when writing directly to tape on a central site. The FLOW qualifier uses additional 'handshake' protocol to prevent one side of a connection from 'over running' the other side. An example backup from a central site using the FLOW qualifier is:
User> receive –mode backup “!backup (TAPE,*,kustakk: - More>> guest.bck –crc –FLOW
A performance penalty is paid when the FLOW qualifier is used. It is highly recommended that an alternative method be used.
. [initial Commands]
. Backup [out logfile] %1%,$DISK4.*.*,listall
. [additional Commands]

Page 114 Central Archiving MAN-REF-H363-3.4.2
-SPACE When a SEND common is issued from the local GUARDIAN host, information is exchanged between the two connected hosts. One piece of information that is exchanged is the size of the file to create on the destination host. Because this is an archive of several files a total size is not known unless the user explicitly passes one. Both the SEND and RECEIVE commands have a SPACE qualifier for passing an initial allocation. The following is an example backup from a central site of an archive with the SPACE qualifier:
User> receive -mode backup '!backup (TAPE),*,listall” – More>> guest.bck -crc -flow -SPACE 1M
An initial allocation of 1 Megabyte is given for the remote container file 'guest.bck'.
GUARDIAN BACKUP Utility Considerations When using the GUARDIAN BACKUP/RESTORE utility as a part of Archiving there are some special con-siderations. The areas addressed here include: blocksize setting, output options, and verify limitations. For more information about the backup utilities described here, refer to the GUARDIAN Utilities manual.
BLOCKSIZE The BACKUP utility has a BLOCKSIZE parameter which the user may use to control the size of blocks BACKUP writes to tape. In the case of Central Archiving, this BLOCKSIZE pa-rameter controls the size of records or blocks that BACKUP writes to the (TAPE) device, be-cause this parameter affects how many I/Os BACKUP must issue, it is recommended that it be set to a value of at least 8192 (the default). BACKUP records may span the Transport blocks. A larger blocksize may cause a slight improvement in performance.
LISTALL By default, the output from the BACKUP utility used with the LISTALL parameter sends output to the terminal. The output can be captured to an output or log file if desired. This can be done using the [out name] syntax in the ‘<GUARDIAN_command>’ string, where name is the name of the file to which the output should go.
GUARDIAN as a Central Site A GUARDIAN system can also be a central site to other systems or workstations, assuming a central GUARDIAN site exists that can provide the necessary resources, such as operators, peripherals, and com-mand procedures.
The Central Archiving Aliases The BACKUP, COPY, LIST, and RESTORE aliases are provided in the default USER-Access startup file for GUARDIAN (as a satellite system). Their purpose is to simplify a GUARIDIAN user's interactive use of the central archiving facility. These aliases are described on the following pages. Keep in mind that any of them may be changed to address specific site concerns.

MAN-REF-H363-3.4.2 Central Archiving Page 115
BACKUP Alias
Description The BACKUP alias is used to archive local files using the GUARDIAN BACKUP utility. The output from the utility is transferred to the specified remote container file. The additional parameter allows SEND qualifi-ers, such as –SPACE or -CRC, to be appended to the SEND command in the BACKUP alias definition.
All of the parameters are optional. If the parameters are not passed on the command line, they are prompted for by the BACKUP alias.
Format
Alias Parameters
BACKUP [source] [container] [qualifiers]
Where:
source (prompt) a local file specification to be archived.
container (prompt) the name of the remote container file to be created.
quahfiers (prompt) additional qualifiers that are appended to the file transfer command.
Examples
Assume the current local directory is $USERS.GUEST. All of the files in the $USERS.GUEST directory, are backed up to the container file 'guest.bak' on a remote system with the following command:
USER> backup Source specification? * Container file name? guest.bak Other send qualifiers? -crc File Mode BACKUP Program - T9074G08 (21JUL2008) (AFO) (C)2000 Compaq (C)2006 Hewlett Packard Development Company, L.P. Drives: (\NETEXEC.$Z0X7.#TAPE) System: \NETEXEC Operating System: G06 Tape Version: 3 Backup options: NO AUDITED, BLOCKSIZE 8, NO IGNORE, NO OPEN, PARTONLY OFF, INDEXES IMPLICIT *WARNING-7147* Files created and stored via OSS and SQL/MX objects are not supported. *WARNING-7033* This tape can only be restored with TNS/II RESTORE (B41, C00 or later). Backup time: 1Jun2018 12:57 Page: 1

Page 116 Central Archiving MAN-REF-H363-3.4.2
Tape: 1 Code EOF Last modif Owner RWEP Type Rec Bl $DATA1.TEST DSAPCSTM 101 120 1Jun2018 12:48 60,14 NNNN FUPCSTM 101 62 30Jan2014 13:55 -1 AAAA MYMACS 101 166 30Jan2014 13:55 -1 AAAA SCFCSTM 101 144 30Jan2014 13:55 -1 AAAA TACLCSTM 101 2252 30Jan2014 13:55 -1 AAAA TCPIPUP 101 668 30Jan2014 13:55 -1 AAAA Summary Information Files dumped = 12 Files not dumped = 0 User: Source Destination Size User: ---------------------------- ---------------------------- -------- User: !backup (TAPE),*,listall /mnt/home2/huhned/guest.bak 697664
The above command can also be issued by passing the parameters on the command line:
User> backup * guest.bak –crc
COPY Alias
Description The COPY alias is used to copy local GUARDIAN files to a remote GUARDIAN host using the local GUARDIAN BACKUP and the remote GUARDIAN RESTORE utilities. The output from the local BACKUP utility is transferred to the remote RESTORE utility. The COPY alias copies full file characteristics from the source GUARDIAN to the destination GUARDIAN.
All of the parameters are optional. If the parameters are not passed on the command line, they are prompted for by the COPY alias.
Format
Alias Parameters
COPY [source] [destination]
Where:
source (prompt) a local file specification to be copied.
destination (prompt) the remote volume and/or subvolume to receive the files. The default is to copy to the original volume-subvolume on the remote GUARDIAN host.
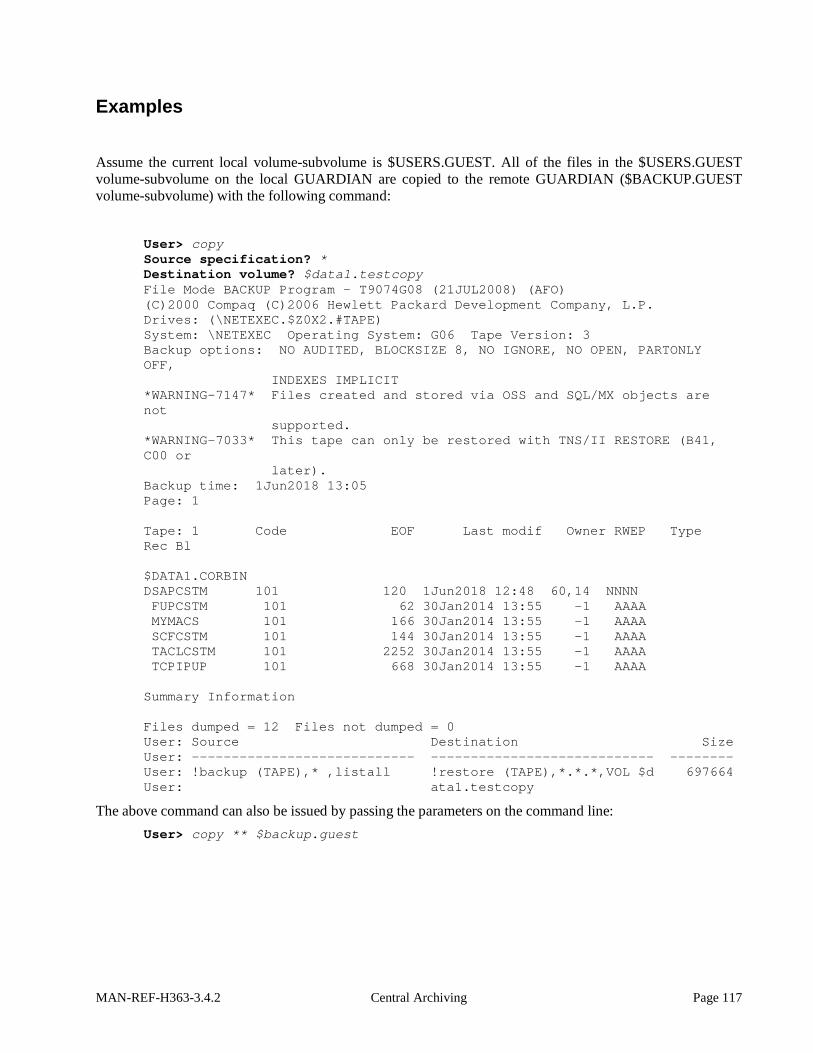
MAN-REF-H363-3.4.2 Central Archiving Page 117
Examples
Assume the current local volume-subvolume is $USERS.GUEST. All of the files in the $USERS.GUEST volume-subvolume on the local GUARDIAN are copied to the remote GUARDIAN ($BACKUP.GUEST volume-subvolume) with the following command:
User> copy Source specification? * Destination volume? $data1.testcopy File Mode BACKUP Program - T9074G08 (21JUL2008) (AFO) (C)2000 Compaq (C)2006 Hewlett Packard Development Company, L.P. Drives: (\NETEXEC.$Z0X2.#TAPE) System: \NETEXEC Operating System: G06 Tape Version: 3 Backup options: NO AUDITED, BLOCKSIZE 8, NO IGNORE, NO OPEN, PARTONLY OFF, INDEXES IMPLICIT *WARNING-7147* Files created and stored via OSS and SQL/MX objects are not supported. *WARNING-7033* This tape can only be restored with TNS/II RESTORE (B41, C00 or later). Backup time: 1Jun2018 13:05 Page: 1 Tape: 1 Code EOF Last modif Owner RWEP Type Rec Bl $DATA1.CORBIN DSAPCSTM 101 120 1Jun2018 12:48 60,14 NNNN FUPCSTM 101 62 30Jan2014 13:55 -1 AAAA MYMACS 101 166 30Jan2014 13:55 -1 AAAA SCFCSTM 101 144 30Jan2014 13:55 -1 AAAA TACLCSTM 101 2252 30Jan2014 13:55 -1 AAAA TCPIPUP 101 668 30Jan2014 13:55 -1 AAAA Summary Information Files dumped = 12 Files not dumped = 0 User: Source Destination Size User: ---------------------------- ---------------------------- -------- User: !backup (TAPE),* ,listall !restore (TAPE),*.*.*,VOL $d 697664 User: ata1.testcopy
The above command can also be issued by passing the parameters on the command line: User> copy ** $backup.guest

Page 118 Central Archiving MAN-REF-H363-3.4.2
LIST Alias
Description The LIST alias provides a complete index of a remote container file created using the BACKUP alias. A list of the contents of the container file is returned.
AU of the parameters are optional. If the parameters are not passed on the command line, they are prompted for by the LIST alias.
Format
Alias Parameters
LISt [container]
Where:
container (prompt) the name of the remote container file to be listed.
Examples Suppose a number of local files are archived in the remote container file 'guest.bak'. LIST alias provides an index of the specified container file:
User> List Container file name? guest.bak File Mode RESTORE Program - T9074G08 (21JUL2008) (AFO) (C)2000 Compaq (C)2006 Hewlett Packard Development Company, L.P. Drives: (\NETEXEC.$Z0X7.#TAPE) System: \NETEXEC Operating System: G06 Tape Version: 3 Backup options: NO AUDITED, BLOCKSIZE 8, NO IGNORE, NO OPEN, PARTONLY OFF, INDEXES IMPLICIT *WARNING-7147* Files created and stored via OSS and SQL/MX objects are not supported. Restore (list only) time: 1Jun2018 13:10 Backup time: 1Jun2018 12:5Page: 1 Tape: 1 Code EOF Last modif Owner RWEP Type Rec Bl $DATA1.TEST DSAPCSTM 101 120 1Jun2018 12:48 60,14 NNNN FUPCSTM 101 62 30Jan2014 13:55 -1 AAAA MYMACS 101 166 30Jan2014 13:55 -1 AAAA SCFCSTM 101 144 30Jan2014 13:55 -1 AAAA TACLCSTM 101 2252 30Jan2014 13:55 -1 AAAA TCPIPUP 101 668 30Jan2014 13:55 -1 AAAA

MAN-REF-H363-3.4.2 Central Archiving Page 119
Summary Information Files on tape = 12 Files not read = 0 User: Source Destination Size User: ---------------------------- ---------------------------- -------- User: /mnt/home2/huhned/guest.bak !restore (TAPE), 697664
The above command can also be issued by passing the parameters on the command line: User> list guest.bak

Page 120 Central Archiving MAN-REF-H363-3.4.2
RESTORE Alias
Description The RESTORE alias is used to restore local GUARDIAN files from a remote container file created using the BACKLUP alias. The local GUARDIAN RESTORE utility is used to disassemble the container while the file is being, retrieved from the remote host.
All of the parameters are optional. If the parameters are not passed on the command line, they are prompted for by the RESTORE alias.
Format Alias Parameters
RESTORE [container] [source] [destination]
Where:
container (prompt) the name of the remote container file.
source (prompt) a local file specification to be restored. The default is to restore all of the files in the container file.
destination (prompt) the destination volume and/or subvolume where the files should be restored into. The default is to restore starting from the current directory on the local GUARDIAN host.
Examples Suppose all of the files in the /nsc/guest directory are archived in a remote container file named 'guest.bak'. The files can be restored with the following command:
User> restore Container file name? guest.bak Files(s) to restore (all)? Alternate destination? $data1.filesbak File Mode RESTORE Program - T9074G08 (21JUL2008) (AFO) (C)2000 Compaq (C)2006 Hewlett Packard Development Company, L.P. Drives: (\NETEXEC.$Z0X7.#TAPE) System: \NETEXEC Operating System: G06 Tape Version: 3 Backup options: NO AUDITED, BLOCKSIZE 8, NO IGNORE, NO OPEN, PARTONLY OFF, INDEXES IMPLICIT *WARNING-7147* Files created and stored via OSS and SQL/MX objects are not supported. Restore time: 1Jun2018 13:12 Backup time: 1Jun2018 12:57 Page: 1 Tape: 1 Code EOF Last modif Owner RWEP Type Rec Bl

MAN-REF-H363-3.4.2 Central Archiving Page 121
$DATA1.FILESBAK DSAPCSTM 101 120 1Jun2018 12:48 60,14 NNNN FUPCSTM 101 62 30Jan2014 13:55 -1 AAAA MYMACS 101 166 30Jan2014 13:55 -1 AAAA SCFCSTM 101 144 30Jan2014 13:55 -1 AAAA TACLCSTM 101 2252 30Jan2014 13:55 -1 AAAA TCPIPUP 101 668 30Jan2014 13:55 -1 AAAA Summary Information Files restored = 12 Files not restored = 0 User: Source Destination Size User: ---------------------------- ---------------------------- -------- User: /mnt/home2/huhned/guest.bak !restore (TAPE),*.*.*,listal 697664
User: l,VOL $data1.filesbak
The above command can also be issued by passing, the parameters on the command line: User> restore guest.bak

Page 122 Central Archiving MAN-REF-H363-3.4.2

MAN-REF-H363-3.4.2 Command Descriptions Page 123
This section contains descriptions of these commands:
ASK
CONNECT
CONTINUE
DISCONNECT
EXIT
GOTO
HELP
INPUT
LOCAL
ON
OUTPUT
QUIT
RECEIVE
REMOTE
SEND
SET
SET ALIAS
SET GLOBAL
SET HOST
SET VARIABLE
SHOW
SHOW ALIAS
SHOW GLOBAL
SHOW HOST
SHOW QUALIFIER
SHOW VARIABLE
TEXT
TRANSLATE
The command descriptions or qualifiers for some commands may differ slightly between hosts. These varia-tions are detailed in the User Guide for that host.
Command Descriptions

Page 124 Command Descriptions MAN-REF-H363-3.4.2
ASK Command
Description The ASK command prompts a user for one or more responses. If multiple responses are desired, the com-mand line should contain multiple variables to receive the user’s input. For example, if you are prompting a user for name and number, you should declare two variables (e.g. uname, unum) on the ASK command line in order to save both responses. ASK terminates as soon as the user hits a carriage return or upon expiration of the TIMEOUT qualifier value. If a user responds without typing anything other than a carriage return or if the ASK request times out, the variable gets defined to nothing unless a default value is supplied with the DEFAULT qualifier.
ASK variables get set to whatever the user types as input, whether it be one word or an entire string. If multi-ple variables are declared, the first one is set to the first word of input, the second one gets set to the second word of input, and so on. The last variable declared gets defined to the remainder of the input string. If you prompt for more input than the user gives (e.g., you declare four variables and the user types just two words of input), the remaining variables are defined to be nothing.
Variable names specified on the ASK command line must be alphanumeric and no longer than 20 characters in length. If no variable names are specified at all on the command line, ASK still prompts the user but no variables get defined. (This can be used to pause during input processing.)
In addition to the ASK command, you can define a variable by typing SET VARIABLE name value. You can display the list of all of your session variables by typing SHOW VARIABLES.
Format Command Qualifiers Parameters ASK [-DEFault string]
[-PROMpt string] [-SECure |on |] |off| [-TIMeout seconds]
[var1 [var2...]]
Where:
ASK (required) the verb for this command.
-DEFault (optional) the default string passed to ASK if the user does not provide one or if the ASK command “times out”. This default string gets processed as if the user had typed it. The minimum spelling if -DEF.
-PROMpt (optional) a string used for the ASK prompt. You need to enclose the PROMPT string in double quotes in order to include trailing spaces on the prompt or to use multiple word prompts. The minimum spelling is -PROM.
-SECure (optional) tells USER-Access not to echo the user’s response to this ASK command. As the ASK qualifier SECURE is used primarily for reading in a user’s password or any other time security is a concern. This value should be set to either ON or OFF. The default is OFF un-less SECURE is specified. The minimum spelling is -SEC.
-TIMeout (optional) the number of seconds to allow the user to respond to the ASK command before timing out. A value of zero means to wait forever. This is the default. The minimum spelling is -TIM.

MAN-REF-H363-3.4.2 Command Descriptions Page 125
variables (optional) zero or more variable names separated by a space that will receive the user’s re-sponse to the ASK command.
Examples To prompt a user for input into variable name with a default name of Ed, and a prompt of Name?, type:
User> ask –prompt “Name? “ –default Ed name Name? Joe Smith
The user’s response here Joe Smith is read into variable name. Now using standard USER-Access string substitution syntax, you can display the value of name with the TEXT command:
User> text Hello {name}. User: Hello Joe Smith.
Alternatively, you can display the value of variable name as: User> show variable name User: NAME ............. Joe Smith
If you wanted to prompt for the variables day and date, you could type: User> ask –prompt “Enter day and date: “ day date Enter day and date: Tuesday January 9, 1918
The value of variable day would become Tuesday and the value of variable date would be the remainder of the line which is the string January 9, 1918.
Related Topics INPUT command SHOW command TEXT command
Page 126 Command Descriptions MAN-REF-H363-3.4.2
CONNECT Command
Description The CONNECT command is used to establish a connection to a remote host on the network. The host name must be known via the name resolver (DNS) or the local host lookup file.
By default, CONNECT attempts to connect to the service named USER offered on the remote host. If this service is not offered the connection request will eventually time out. A remote Service Initiator or multiplex server is usually the one making the service offer available. You can set or display the service name with the SET CONNECT SERVICE and SHOW CONNECT SERVICE command respectively. The recommended way for connecting to a remote host is to use the LOGIN alias. This alias prompts the user for a hostname, username, and password, then issues the appropriate CONNECT command for the user.
The connect process actually logs you in to the remote host using its standard login procedure, valid usernames and passwords must be passed to accomplish this. Some systems provide a default USER-Access login username and password. If the system you are connecting to supports this feature, you could optionally leave off these two parameters.
When a connection is first established it becomes the current “active” connection -- any REMOTE command refers to the host associated with that connection. When a connection to another host is attempted, the old “active” connection is put into an idle state. USER-Access allows as many as ten connections to exist at a time, although one or two connections is normally all that a user would have use for. You can switch from one connection to another by means of the SET HOST command.
Connecting to certain hosts often takes more than a few seconds. Therefore, USER-Access displays interme-diate CONNECT messages informing you of its current connect status. If a connection cannot immediately be established due to NetEx/IP errors 3501 (“Service not offered on specified host”) or 3502 (“Service is busy”), CONNECT will retry every INTERVAL seconds for a total of TIMEOUT seconds (INTERVAL and TIMEOUT are CONNECT command qualifiers). Intermediate connect messages display both success and failure information.

MAN-REF-H363-3.4.2 Command Descriptions Page 127
Format Command Qualifiers Parameters CONnect [-ACCount code]
[-APPlication string] [-BLOCKsize bytes] [-COMmand name] [-INTerval seconds] [-PASSword pw] [-PROFile name] [-PROJect code] [-QUIet |ON | ] |OFF| [-SCRIpt filename] [-SEArch string] [-SECondary pw] [-SERvice name] [-SITE string] [-TIMeout seconds] [-USERname user] [-VERBose |ON | ] |OFF|
host [user] [password] [arg ...]
Where:
CONnect (required) the verb for this command.
-ACCount (optional) login account code that may be used by the host in which you are attempting to connect.
-APPlication (optional) identify the login application on the remote host.
-BLOCKsize (optional) local host’s maximum block size in bytes. This size gets sent to the remote host on a CONNECT and a new negotiated block size gets returned. The REMOTE “information on-ly” BLOCKSIZE qualifier contains this new value. The range of BLOCKSIZE is 512 to 32768 bytes.
-COMmand (optional) startup command file name that may be used by the host in which you are attempt-ing to connect.
-INTerval (optional) connect retry interval in seconds used for connection retries when connecting to a remote host. The default is to retry every 5 seconds.
-PASSword (optional) default login password that is used to validate a user on a remote host during a connect. PASSWORD is usually overridden on the command line of the CONNECT com-mand.
-PROFile (optional) startup profile file name that may be used by the remote host during a connect se-quence.
-PROJect (optional) login project code that may be used by the remote host during a connect.
-QUIet (optional) tells USER-Access whether or not to display intermediate connect messages. This value should be set to either ON or OFF. The default is OFF.
-SCRIpt (optional) script file name that is used by some remote hosts during the connect and login process.

Page 128 Command Descriptions MAN-REF-H363-3.4.2
-SEArch (optional) describes the server startup files to be read during connect time. Refer to “GUARDIAN USER-Access SEARCH Keywords (SITE), (USER), and (NONE)” on page 95. The default is “(SITE)(USER)”.
-SECondary (optional) secondary login password that can be used by the remote host during connect.
-SERvice (optional) service name that USER-Access tries to connect to on the remote host during a connect. This service name is USER by default.
-SITE (optional) site-specific login information that may be used by the remote host at connect time.
-TIMeout (optional) connect timeout value in seconds. If a connection cannot be established within TIMEOUT seconds you will receive an error message from USER-Access. The default is to time out after 2 minutes.
-USERname (optional) default login name of the user attempting to connect. USERNAME is usually overridden on the command line of the CONNECT command.
-VERBose (optional) when this qualifier is set to ON, login information returned from the remote host is displayed to the local user. When this qualifier is OFF, the login information is not dis-played. The default is ON.
host (required) name of the remote host to which you want to connect.
username (optional) your login user name on the remote host.
password (optional) your login password on the remote host.
arg (optional) any number of argument strings that get passed along to the remote host at connect time.
Host Dependencies Many of the CONNECT qualifiers are treated differently depending on the host to which you are connecting. Also, the optional arguments are both host and site dependent. Refer to the remote host’s “Remote User’s Guide” for further detail.
Examples To connect to a host named sun (in the local network database (either in the local hosts file, accessible through DNS)) with a user name of smith and a password of allen, type:
User> connect sun smith allen User: Connected to Service Initiator on host ‘SUN’ =================================================== Welcome to SUN * * * =================================================== User: Logged in as user ‘smith’. User: Connected to service ‘USER31’ on host ‘SUN’
To connect to host aix with a user name of jones, a password of jane, a blocksize of 4096 bytes, and connect timeout of 10 seconds, type: User> connect –blocksize 4096 –timeout 10 – More>> aix jones jane User: Connected to Service Initiator on host ‘AIX’ =================================================== Welcome to AIX

MAN-REF-H363-3.4.2 Command Descriptions Page 129
* * * =================================================== User: Logged in as user ‘jones’. User: Connected to service ‘USER01’ on host ‘AIX’
An alternative way of setting the blocksize and timeout qualifier values would have been to issue the following: User> set connect blocksize 4096 User> set connect timeout 10 User> connect aix jones jane User: Connected to Service Initiator on host ‘AIX’ =================================================== Welcome to AIX * * * =================================================== User: Logged in as user ‘jones’. User: Connected to service ‘USER01’ on host ‘AIX’
This second approach would cause the CONNECT default values to be changed for all subsequent connects during this USER-Access session where as the first approach would only affect the connect being issued.
Related Topics DISCONNECT command SET HOST command SHOW HOST command

Page 130 Command Descriptions MAN-REF-H363-3.4.2
CONTINUE Command
Description The CONTinue command is a no-op command. Its most useful purpose is to provide an action for the ON command when the particular exception is to be ignored.
Format Command Qualifiers Parameters CONTinue
Where:
CONTinue (required) is the verb for this command. The minimum spelling is CONT
Example In this example the CONTinue command is used as the action part of an ON ERROR command. In the fol-lowing script any errors are completely ignored:
* Sample USER-Access script - this script * continues should any USER-Access error occur * on error continue set variable count 1 LOOP: send file {count} set variable count {inc(count)} {le(count, 5, “goto LOOP”)}
Related Topics ON

MAN-REF-H363-3.4.2 Command Descriptions Page 131
DISCONNECT Command
Description Terminate the connection from the current remote host which was previously connected with CONNECT. Following a DISCONNECT, you will not have any “active” remote connections even though you may still be connected to other hosts. Use the SHOW HOST command to display all of your remote connections. The SET HOST command can be used to make an idle connection active again.
An implied disconnect of 0 connections takes place following an EXIT or QUIT from a USER-Access ses-sion.
Format Command Qualifiers Parameters DISconnect [-QUIet |ON |]
|OFF|
Where:
DISconnect (required) the verb for this command. The minimum spelling is DIS.
-QUIet (optional) tells USER-Access whether or not to confirm the disconnect with a message. This value should be set to either ON or OFF. The default is OFF. The minimum spelling is -QUI.
Examples Assume connections have already been made to the hosts AIX and IBM. This results in the following output from SHOW HOST:
User> show host User: (1) Host=AIX User=scott User: active --> (2) Host=IBM User=meyers
A DISCONNECT at this point terminates the current “active” connection (host IBM) as seen below: User> disconnect User: Disconnected from host IBM. User> show host User: (1) Host=AIX User=scott
The connection to IBM has been terminated and only the connection to host aix remains (still idle). To dis-connect from it, you would have to use SET HOST, then DISCONNECT as seen below:
User> set host aix User> disconnect –quiet
When the QUIet qualifier is used, the message confirming the disconnect is not displayed.
Related Topics CONNECT command SET HOST command SHOW HOST command

Page 132 Command Descriptions MAN-REF-H363-3.4.2
EXIT Command
Description The EXIT command causes USER-Access to exit to the previous input level. When EXIT is issued from within an input script, the current input script is exited and control is returned to the previous input level (ei-ther an input script or interactive command line). EXIT differs from QUIT in that it returns control only to the previous input level. QUIT always returns control to the interactive input level (command line).
When issued from the interactive input level, EXIT causes USER-Access to terminate. If issued from an in-put script as part of a non-interactive USER-Access session (e.g., a batch job), the session terminates.
Format Command Qualifiers Parameters EXit [status]
Where:
EXit (required) the verb for this command. The minimum spelling is EX.
status (optional) the value to be returned by an input script, or USER-Access if used at the interactive level. The valid values for status are: Success, Warning, Error, and Fatal. The ON ERROR command can be used to capture an error resulting from an input script exiting with a status of Warning or Error. An exit status of Fatal causes USER-Access to immediately abort. If status is not specified, an exit status of Success is assumed.
Examples If you desire to leave the USER-Access session and return to your local system’s command line interpreter, you would type:
User> exit $
At this point you should receive the prompt you normally receive from your system’s command line inter-preter (e.g. $).
The following script exits with an Error status if any error occurs within the script, otherwise the script exits with a status of Success:
* Sample USER-Access script * on error exit error send -crc sample.file exit success
If the SEND command above results in an error, the script exits with a status of Error, otherwise it exits with a status of Success.
Related Topics DISCONNECT command QUIT command

MAN-REF-H363-3.4.2 Command Descriptions Page 133
GOTO Command
Description The GOTO command instructs USER-Access to continue processing at the given label. The label must be the first item to appear on the USER-Access command line and must be succeeded immediately by a colon (‘:’). All labels are case sensitive and must appear somewhere within the current input level.
Format Command Qualifiers Parameters GOTO label
Where:
GOTO (required) is the verb for this command.
label (required) an alphanumeric string from one to twenty characters in length including underscores and other special characters.
Examples The following is an example of a simple loop alias:
*Sample GOTO/Label script. Send 5 files *having the names FILE1 thru FILE5 * set variable count 1 LOOP: send file{count} set variable count {inc(count)} {le(count, 5, “goto LOOP”)} text All files sent.
Related Topics INput ON

Page 134 Command Descriptions MAN-REF-H363-3.4.2
HELP Command
Description The USER-Access help facility gives you on-line access to USER-Access topics including host specific quali-fier information (both locally and remotely), formats and descriptions of all USER-Access commands and examples of how to use them. Some help text is actually retrieved from the remote host and therefore re-quires a remote connection. Typing HELP without a topic name will generate a top level help message fol-lowed by a list of all topics and commands for which help is available.
You can abbreviate any topic name on the HELP command line (including- USER-Access commands) alt-hough the abbreviation must be unique to the topic name itself. The unique portion of the topic is represented in upper case letters as shown in the subtopics list.
Format Command Qualifiers Parameters HELp [-SEArch string] [topic [subtopic]]
Where:
HELP (required) the verb for this command. The minimum spelling is HEL.
-SEArch (optional) allows the user to search alternate paths for USER-Access help files. For more information, refer to “GUARDIAN USER-Access SEARCH Keywords (SITE), (USER), and (NONE)” on page 95. The default is (SITE). The minimum spelling is -SEA.
topic (optional) name of a USER-Access topic or command in which you desire additional infor-mation.
subtopic (optional) a subtopic for which further help is available. These subtopics are displayed in the top level help information.
Examples To get the highest level of help, you would just type:
User> help
This will provide you with a list of all topics in which help is available. From that list of topics you can begin getting help on more specific items of interest. For example, if you want help on the SEND command, you would type:
User> help send
Now, depending on the subtopics of SEND available, you might type: User> help send example
which would display a sample SEND command.
The SEARCH qualifier for the HELP command is used to define where the USER-Access help files exist: User> show help search User: User: SEArch .......... (SITE) User:
MAN-REF-H363-3.4.2 Command Descriptions Page 135
The default is “(SITE)”, when “(SITE)” is not succeeded by a file name the file “userhelp.ua” is assumed. Suppose a user help file is defined, such as “alias.hlp”, which contains the help text for the LOGIN alias. The alias LOGIN is defined as:
User> show alias login User: User: LOGin .......... ask -prompt “Host? “ host User: ask -prompt “Username? “ user User: ask -sec -prompt “Password? “ pass User: !connect {host} {user} {pass} User:
The HELP command does not find the text for the LOGIN alias unless the user help file has been included on the HELP SEARCH path, in this case the help file “alias.hlp” is in the (SITE) location:
User> help login User: Help is not available for ‘login’ (UA-4301).
Now add to the HELP SEARCH path “(SITE)alias.hlp”: User> set help search {search:help} (SITE)alias.hlp User> show help search User: User: SEArch .......... (SITE) (SITE)alias.hlp User: User> help login User: User: FORMAT User: User: LOGin User: User: DESCRIPTION User: User: The LOGin alias is used to prompt user’s for the User: necessary LOGin information. User:
Now when the HELP command is used, two locations, (SITE) and (SITE)alias.hlp, are searched for help on the requested topic.

Page 136 Command Descriptions MAN-REF-H363-3.4.2
INPUT Command
Description The INPUT command instructs USER-Access to take its commands from the specified input file on the local host. This file may contain any number of USER-Access commands. These commands can be structured in such a way that a sophisticated user could create predefined USER-Access procedures that can be used by beginning USER-Access users. These procedures can prompt users for input, give them instructions, and is-sue USER-Access commands for them.
Format Command Qualifiers Parameters INput [-CONTinue |ON |]
|OFF| [-ECHO |ON |] |OFF| [-PROMpt string] [-PROMPT2 string] [-SEArch string] [-VERify |ON |] |OFF|
[source] [arguments]
Where:
INput (required) the verb for this command. The minimum spelling is IN.
-CONTinue (optional) tells USER-Access how to respond to an error encountered when processing input files. This value should be set to either ON or OFF. ON tells USER-Access to continue pro-cessing even if an error is encountered while processing commands in the input file. OFF says to terminate processing of the input file if an error is encountered. The default is OFF. The minimum spelling is -CONT.
-ECHO (optional) tells USER-Access whether or not to echo input to the terminal as it reads input commands. Commands are echoed as they appear in the input file before string substitution (and alias translation) is performed. This value should be set to either ON or OFF. The de-fault is OFF.
-PROMpt (optional) the string used as the USER-Access command prompt. The default is User>. The minimum spelling is -PROM.
-PROMPT2 (optional) a secondary USER-Access command prompt string used for command continua-tion. The default is More>>.
-SEArch (optional) search path used for default INPUT commands (the location of input files). SEARCH is only used if USER-Access cannot locate the source file specified on the com-mand line. A SEARCH path is a space-separated list of UNIX file specifications. If SEARCH is defined, USER-Access will use it in an attempt to locate input files. Refer to “GUARDIAN USER-Access SEARCH Keywords (SITE), (USER), and (NONE)” on page 95 for more information. The minimum spelling is -SEA.
-VERify (optional) works like ECHO, but displays input commands after string substitution (and alias translation) has taken place. This value should be set to either ON or OFF. The default is OFF. The minimum spelling is -VER.

MAN-REF-H363-3.4.2 Command Descriptions Page 137
source (optional) the file specification for the Input file on the local host. USER-Access attempts to open this file before using the INPUT SEARCH path.
arguments (optional) zero or more arguments that are passed to the input file as positional parameters for parameter substitution.
Using the INPUT command causes a new INPUT environment to be established. The values for all the above qualifiers are initialized to the then current values. Changing a qualifier value changes the value for the dura-tion of the input script only. Exiting the input script restores the INPUT qualifier values to the values existing before the INPUT command was issued.
Examples To input USER-Access commands from a file named setup.si located in the current local working directory, you would type:
User> input -echo on setup.si
USER-Access will then attempt to execute all of the commands in setup.si before displaying the interactive User> prompt again. The -echo on switch forces each line from the input file to be echoed to the screen as it is processed.
If input file setup.si was set up to accept positional parameters you could also pass arguments on the INPUT command line as:
User> input setup.si HOST3 Smith
Suppose there exists a file by the name of “myalias.ua” in the user’s login directory. By default there is no INPut SEArch path defined. If a search path is defined as follows:
User> set inp search (USER)*.ua
the user need only specify the filename portion of the file specification if the files extension is “.ua”, and the file is located in the user’s login directory:
User> input myalias
The “input myalias” command uses the SEArch path to find the USER-Access script file “myalias.ua” in the user’s login directory. Notice that the INPut SEArch qualifier is defined as “(USER)*.ua”, the ‘*’ is replaced by the argument to the input command, in this case “myalias”.
The user can also execute an input file without preceding the name of the input file by the INPut command. The order of processing a command is: check for alias, check for command, check for input file. Setting the search path as in the previous example:
User> set input search (USER)*.ua
The “myalias.ua” script file can be executed by issuing the command: User> myalias
Command processing checks for an alias by the name “myalias”, then a USER-Access command by the name “myalias”, and then uses the INPut SEArch qualifier to look for the file “myalias.ua” in the user’s login direc-tory.
Related Topics OUTPUT command SET ALIAS command

Page 138 Command Descriptions MAN-REF-H363-3.4.2
LOCAL Command
Description LOCAL executes a command on the local host and displays the results. The command can be a valid com-mand for the local host’s command line interpreter or an alias command defined using SET LOCAL ALIAS, or one of the predefined host independent commands (e.g., DIRECTORY, TYPE, STATUS, etc.). Whatever the case may be, the command specified must translate into a valid command on your local host or it will re-turn an error to you. Any qualifiers passed to the local command must come before the command parameter.
If the command parameter is missing, you will enter an interactive local terminal mode. You will remain in local terminal mode until you leave it using the appropriate command for your local host (e.g., exit, logout, ...), at which time you will again see the User> prompt. All of your remote host connections will be intact.
Format Command Qualifiers Parameters LOCal [-COMint | COMINT ]
| TACL | | string | [-DIRectory string ] [-PREFix string] [-QUIet |OFF|] |ON |
[command]
Where:
LOCal (required) the verb for this common. The minimum spelling is LOC.
-COMint (optional) allows the user to choose the command interpreter process to create when perform-ing LOCAL operations. Use this qualifier to tell USER-Access which command interpreter to use: COMINT, TACL, or third party. The minimum spelling is -COM.
-DIRectory (optional) the current working directory on the local GUARDIAN host. This qualifier can be modified by using the SET LOCAL DIRECTORY command.
-PREFix (optional) a prefix string that appears before each line of local command output. Its purpose is to “flag” output as coming from the local host versus USER-Access or remote output. You can define this qualifier to be null if no prefix is desired. The minimum spellings is -PREF.
-QUIet (optional) forces local command output not to be displayed. The default is OFF. The mini-mum spelling is -QUI.
command (optional) a valid local host command or local alias command.
Informational Qualifiers The following informational qualifiers are provided to give the user information about the local GUARDIAN environment. With the exception of DIRectory, these qualifiers cannot be modified by the user.
-HOSTCODE (string) the native host character code.
-HOSTTYPE (string) Operating system type.
-PID (integer) GUARDIAN Process ID.

MAN-REF-H363-3.4.2 Command Descriptions Page 139
-PRODuct (string) NESi Product number.
-STATus (string) exit status of the last LOCAL command.
-TERMinal (string) the device name of the terminal from which USER-Access is running.
-VERSION (string) USER-Access version number.
Examples To perform a Disk Space Analysis of your local GUARDIAN host, you would execute the GUARDIAN WHO command from USER-Access:
User> local who Tandem: Home terminal: $Z0XC Tandem: TACL process: \NETEXEC.$Z0XD Tandem: Primary CPU: 1 (NSR-E) Tandem: Default Segment File: \NETEXEC.$DATA1.#0001620 Tandem: Pages allocated: 8 Pages Maximum: 1024 Tandem: Bytes Used: 12924 (0%) Bytes Maximum: 2097152 Tandem: Current volume: $DATA1.TEST Current system: \NETEXEC Tandem: Saved volume: $DATA1.TEST Tandem: Userid: 60,14 Username: SUP.TEST Security: "NNNN" Tandem: Logon name: SUP.TEST
One could force the prefix to be something else by changing the value of the PREFIX qualifier. For example: User> local –prefix “HOSTA: “ who HOSTA: Home terminal: $Z0XC HOSTA: TACL process: \NETEXEC.$Z0XD HOSTA: Primary CPU: 1 (NSR-E) HOSTA: Default Segment File: \NETEXEC.$DATA1.#0001620 HOSTA: Pages allocated: 8 Pages Maximum: 1024 HOSTA: Bytes Used: 12924 (0%) Bytes Maximum: 2097152 HOSTA: Current volume: $DATA1.TEST Current system: \NETEXEC HOSTA: Saved volume: $DATA1.TEST HOSTA: Userid: 60,14 Username: SUP.TEST Security: "NNNN" HOSTA: Logon name: SUP.TEST
This command would cause the prefix HOSTA: to display before each line of output instead of the default GUARDIAN: .
To drop into the local system’s command line interpreter without losing remote host connections, you can simply type:
User> local To return to USER-Access type ACTIVATE 1,47 and then PAUSE. 6>
The local system’s prompt should appear (e.g., >>). Note the output from the LOCAL command; the ACTIVATE will always be of the form:
ACTIVATE x,y

Page 140 Command Descriptions MAN-REF-H363-3.4.2
Where x is the CPU number and y is the process ID. In the example, USER-Access is running on CPU #1 with the process ID #24. At this point you can interact with your local system in the usual manner until you again want to return to your USER-Access and pausing the GUARDIAN process:
72> activate 1,47 73> pause User>
Related Topics REMOTE command SET command

MAN-REF-H363-3.4.2 Command Descriptions Page 141
ON Command
Description The ON command allows users to catch any one of the exceptions:
ERRor on USER-Access error
INTerrupt on keyboard interrupt
LOCal_error on LOCAL command error
REMote_error on REMOTE command error
The ON command initializes the exception by specifying an action that should occur each time the exception takes place. To turn off the exception handler, issue the same command without an action.
ON ERRor
The ON ERRor exception establishes an alternative action to be taken when a USER-Access error occurs. Without an ON ERRor specified, USER-Access terminates all input levels (for nested input scripts), and be-gins processing at the interactive level. If INPut CONTinue is ON, USER-Access displays the error and con-tinues processing the next command.
ON INTerrupt
The ON INTerrupt exception establishes an alternative action to be taken when a keyboard interrupt occurs. Without an ON INTerrupt specified, USER-Access terminates all input levels (for nested input scripts), and begins processing at the interactive level. If INPut CONTinue is ON, USER-Access terminates the current level and continues processing in the next level up.
ON LOCal_error
The ON LOCal_error exception establishes an alternative action to be taken when a LOCal command error occurs. A local error occurs when a VMS command or DCL script exits with an unsuccessful status.
ON REMote_error
The ON REMote_error exception establishes an alternative action to be taken when a REMote command error occurs. A remote error occurs when the remote command issued returns an unsuccessful status. The defini-tion of REMote_error is dependent upon the remote host. Some hosts cannot detect command execution er-rors, in which case ON REMote_error becomes ineffective.
Format Command Qualifiers Parameters ON exception [action]
Where:
ON is the keyword for this command.
exception is any one of the following: ERRor, INTerrupt, LOCal_error, or REMote_error.

Page 142 Command Descriptions MAN-REF-H363-3.4.2
action is any USER-Access command or alias.
Examples The following is a short USER-Access script that immediately exits should any error occur:
* Sample USER-Access script - this script * exits should any USER-Access error occur * on error exit set variable count 1 LOOP: send file{count} set variable count {inc(count)} {le(count, 5, “goto LOOP”)} * text All files sent.
The exception being handled is ERRor and the action to be taken, should an error occur, is the USER-Access command EXit.
The following is a short USER-Access script that immediately continues execution should any keyboard in-terrupt occur:
* Sample USER-Access script – this script * continues should any keyboard interrupt * occur. * on interrupt continue set variable count 1 LOOP: send file{count} set variable count {inc(count)} {le(count, 5, “goto LOOP”)} * text All files sent.
The exception being handled is INTerrupt and the action to be taken should a keyboard interrupt occur is the USER-Access no-op command CONTinue.
The following script issues a “loc directory” command with a file name as an argument. If the command fails, implying the file does not exist, the ON LOCal_error action is to receive that file:
*Sample USER-Access script * * Setup ON LOCal_error, the action is to * receive ‘file{count)’. * on LOCal_error {}receive file{count} set variable count 1 LOOP: loc –quiet directory file {count} set variable count {inc(count)} {le(count,5, “goto LOOP”)} * exit

MAN-REF-H363-3.4.2 Command Descriptions Page 143
Related Topics GOTO INput

Page 144 Command Descriptions MAN-REF-H363-3.4.2
OUTPUT Command
Description The OUTPUT command instructs USER-Access to capture all of its standard output to a file on the local host OUTPUT gives the user the capability of saving the output of a local or remote command execution to a file on the local host.
Format Command Qualifiers Parameters OUTput [-COLumns integer]
[-CREate |APPend |] |NEW | |REPLace| [-FORmat string] [-HOLD |ON |] |OFF| [-LINes integer] [-PREFix string] [-QUIet |OFF|] |ON | [-TRUNcate |OFF|] |ON |
[destination]
Where:
OUTput (required) the verb for this command.
-COLumns (optional) the maximum number of columns per terminal page of output. This represents the maximum number of characters across a page or terminal screen.
-CREate (optional) describes how to create the output file on the local system. The valid values are APPend, NEW, and REPLace. The default is NEW.
-FORmat (optional) all USER-Access messages are displayed using the format string defined by this qualifier. The ‘msg()’ string function is used to construct an appropriate format for USER-Access messages.
-HOLD (optional) suspends scrolling of the output from a command or input file. The number of lines that scroll by before the output is suspended is specified by the LINES qualifier.
-LINes (optional) the maximum number of lines per terminal page of output.
-PREFix (optional) the prefix string displayed before each line of USER-Access output. The default is User:.
-QUIet (optional) when this qualifier is ON, no USER-Access output is displayed to the user’s termi-nal. If an output destination file exists, the output is still captured to the destination file. The default is OFF.
-TRUNcate (optional) works in conjunction with the COLumns qualifier. If any USER-Access output lines are longer than the COLumns value, the lines are truncated when this qualifier is ON. The default is OFF.
destination (optional) a local file specification that will receive the captured USER-Access output.

MAN-REF-H363-3.4.2 Command Descriptions Page 145
Informational Qualifiers The following qualifiers are provided to give the user information about the OUTput command.
DESTination (STRING) the output destination file specification.
Examples To begin capturing USER-Access output to a file on the local host named session, you would type:
User> output session
Now every line of USER-Access output that appears on the screen will also be sent to the output file until you close the file with another output command:
User> output
To tell USER-Access to hold the screen every time a full screen of output is displayed, type the following: User> set output hold on
Related Topics INPUT command

Page 146 Command Descriptions MAN-REF-H363-3.4.2
QUIT Command
Description The QUIT command causes USER-Access to return control to the interactive (command line) input level. When QUIT is issued from a nested input script, control is returned all the way back to the interactive input level (i.e., any input scripts nested before the one issuing the QUIT are also terminated). QUIT differs from EXIT in that QUIT always returns control to the interactive level whereas EXIT returns control back to the previous input level, whether it was interactive or another input script.
When issued from the interactive input level, QUIT causes USER-Access to terminate. If issued from an in-put script as part of a non-interactive USER-Access session (e.g., a batch job), the session terminates.
Format Command Qualifiers Parameters Quit [status]
Where:
Quit (required) the verb for this command. The minimum spelling is Q.
status (optional) the value to be returned by an input script, or USER-Access if used at the interactive level. The valid values for status are: Success, Warning, Error, and Fatal. The ON ERROR command can be used to capture an error resulting from an input script exiting with a status of Warning or Error. An exit status of Fatal causes USER-Access to immediately abort. If status is not specified, an exit status of Success is assumed.
Examples If you desire to leave USER-Access and return to your local system’s command line interpreter, you would type:
User> quit $
At this point you should receive the prompt you normally receive from your system’s command line inter-preter (e.g. $).
If you desire to leave USER-Access and return an Error status to your local system, you would type: User> quit error $
At this point you should receive the prompt you normally receive from your system’s command line inter-preter (e.g. $).
Related Topics DISCONNECT command EXIT command

MAN-REF-H363-3.4.2 Command Descriptions Page 147
RECEIVE Command
Description The RECEIVE command receives the source file from the current active remote host and saves it as a destina-tion file on the local host. If no path to the file is specified on either the source or destination file (i.e., if a file name is given without a directory or device specification), the default remote and local directories are used respectively. That is, the source file is assumed to exist in the remote default directory, and the newly re-ceived file will be created in the local default directory. If the destination parameter is not specified at all, a file by the same name as the source file name will be created in the local default directory.
The source file name may include the USER-Access wildcard characters * and ? as well as host specific wild-card characters where the two do not conflict. See the discussion on USER-Access wildcarding in “Source Wildcard Support for GUARDIAN File Transfers” on page 44 for further details.
Format Command Qualifiers Parameters RECeive [-qualifiers] source [destination]
Where:
RECeive (required) the verb for this command. The minimum spelling is REC.
-qualifiers (optional) the qualifiers that apply to the RECEIVE command. Refer to “File Handling Un-der GUARDIAN ” on page 39 for a description of the RECEIVE command qualifiers. See also the file handling section of the remote host manual for details on qualifiers supported.
source (required) the file specification for the file on the remote host that you intend to receive.
destination (optional) the file specification for the new file that is to be created On the local host.
Examples Refer to “File Handling Under GUARDIAN ” on page 39 for examples of using the RECEIVE command.
Related Topics LOCAL command REMOTE command SEND command SET command

Page 148 Command Descriptions MAN-REF-H363-3.4.2
REMOTE Command Note: For details on how the REMOTE command operates, refer to the User’s Guide for the remote host. The description provided here gives a general overview of the command from the perspective of the local USER-Access initiator.
Description REMOTE executes a command on the remote host and displays the results on the local system. The com-mand can be a valid command for the remote host’s command line interpreter or an alias command defined using SET REMOTE ALIAS, or one of the predefined host independent commands (e.g., DIRECTORY, WHO, TYPE, etc.). Whatever the case may be, the command specified must translate into a valid command on the remote host or it will return an error to you.
There is no interactive mode for the REMOTE command. You must specify a remote host command or an error will result. Also, since REMOTE doesn’t operate in an interactive mode, you will not be able to suc-cessfully execute commands or programs on the remote host that require an interactive user (e.g. one that prompts for input, such as graphics programs). You could however, use REMOTE to submit a job file on the remote host (or execute a script) that would accomplish much the same task given proper input data.
Format Command Qualifiers Parameters REMote [-COMint | COMINT ]
| TACL | | string| [-DIRectory string] [-PREFix string] [-QUIet |OFF|] |ON |
command
Where:
REMote (required) the verb for this command. The minimum spelling is REM.
-COMint (optional) allows the user to choose the command interpreter process to create when perform-ing REMOTE operations. Use this qualifier to tell USER-Access which command interpreter to use: COMINT, TACL, or third party..
-DIRectory (optional) the current working directory of the remote host. This qualifier can be modified using the SET REMote DIRectory command.
-PREFix (optional) a prefix string that appears before each line of remote command output. Its pur-pose is to “flag” output as coming from the remote host versus USER-Access or local output. You can define this qualifier to be null if no prefix is desired. The minimum spelling is -PREF.
-QUIet (optional) ON forces local command output not be displayed. The default is OFF. The min-imum spelling is -QUI.
command (required) a valid remote host command or remote alias command.

MAN-REF-H363-3.4.2 Command Descriptions Page 149
Informational Qualifiers The following qualifiers are provided to give the user information about the remote environment. Only the DIRectory qualifier can be modified by the user.
-BLOCKsize (integer) NetEx/IP negotiated block size.
-HOST (string) the remote host name.
-HOSTCODE (string) the native host character code.
-HOSTTYPE (string) Operating system type.
-PID (integer) remote host Process ID
-PRODuct (string) USER-Access product number.
-SERvice (string) the name of the service connected to.
-STATus (integer) exit status of the last REMote command.
-TRANSlate (string) the current translation in effect.
-USERname (string) the user name.
-VERSION (string) the USER-Access version number
Examples Assume the remote host has a “date” command. To display what it thinks is the current date, you would type:
User> remote date
The results would be whatever the current date is on the remote host.
Related Topics LOCAL command SET command

Page 150 Command Descriptions MAN-REF-H363-3.4.2
SEND Command
Description The SEND command sends the source file from the local host to the current active remote host and saves it as a destination file. If no path to the file is specified on either the source or destination file (i.e., if a file name is given without a directory or device specification), the default local and remote directories are used respective-ly. That is, the source file is assumed to exist in the local default directory, and the new file is created in the remote default directory. If the destination parameter is not specified at all, a file by the same name as the source file name will be created in the remote default directory.
The source file name may include the USER-Access wildcard characters * and ? as well as host specific wild-card characters where the two do not conflict. See “Source Wildcard Support for GUARDIAN File Trans-fers” on page 44 and “File Handling Under GUARDIAN ” on page 39 for more details.
Format Command Qualifiers Parameters SENd [-qualifiers] source [destination]
Where:
SENd (required) the verb for this command. The minimum spelling is SEN.
-qualifiers (optional) the qualifiers that apply to the SEND command. Refer to the file handling section of the remote host for details about these qualifiers. For a remote UNIX host, refer to “File Handling Under GUARDIAN ” on page 39.
source (required) the file specification for the file on the local host that you intend to send to the re-mote host.
destination (optional) the file specification for the new file that is to be created on the remote host.
Examples Refer to “File Handling Under GUARDIAN ” on page 39 for examples of the SEND command under GUARDIAN. Refer to the file handling. section of the appropriate remote host manual for examples under other operating systems.
Related Topics LOCAL command RECEIVE command REMOTE command SET command

MAN-REF-H363-3.4.2 Command Descriptions Page 151
SET Command
Description This form of the SET command allows you to change the default value of a command qualifier. Most qualifi-ers are initially assigned reasonable defaults by USER-Access to novice users can issue commands without being concerned with switches on the command line. Once a user becomes more familiar with USER-Access and wants to perform more complex tasks, he can set up commands with defaults of his own choosing. This is done with the SET command.
The value assigned to a command qualifier with SET becomes the new default for the command. The value of a qualifier is the remainder of the SET command line following the qualifier parameter. If a value is not specified on the SET command line, the qualifier is defined to be nothing (assigned a null value). The quali-fier specified must be valid for the command. Use the SHOW QUALIFIER command to see which qualifiers are valid for a given command.
The value parameter is taken literally unless it is enclosed in double quotes (“value”). If the value is enclosed in double quotes, USER-Access expects any embedded quotes (that is, within the value) to be “escaped”. There must be two double quotes together. This special processing allows value to include leading and/or trailing spaces.
Note: The SET command is the only way to change the DIRECTORY qualifier for the LOCAL and REMOTE commands.
The commands SET VARIABLE and SET GLOBAL are detailed in later sections.
Format Command Qualifiers Parameters SET command qualifier [value]
Where:
SET (required) the verb for this command.
command (required) name of a USER-Access command that supports the use of command qualifiers (e.g., CONNECT, REMOTE, etc.)
qualifier (required with command) name of a valid qualifier for the command specified.
value (optional) the new default value you are assigning to this qualifier.
Examples To change the default INPUT prompt string to >>, type:
User> set input prompt >> >> show input prompt User: PROMpt ............. >>
To change the current REMOTE default directory to “DRA2:[TEMP]” (assuming the remote host is a Power-series running AIX), you would type:
>> set remote directory DRA >> show remote directory User: DIRectory .......... DRA2

Page 152 Command Descriptions MAN-REF-H363-3.4.2
Related Topics SHOW command SHOW QUALIFIER
MAN-REF-H363-3.4.2 Command Descriptions Page 153
SET ALIAS Command
Description The SET ALIAS command allows you to define your own alias commands. By creating aliases you can tailor your own command language making things very simple for both beginning and advanced USER-Access us-ers.
You can define three kinds of aliases - USER-Access, local, and remote. USER-Access alias definitions are made up of other USER-Access commands and are invoked simply by typing the alias command name in re-sponse to the USER-Access prompt. Local alias definitions are commands understood by your local host’s command line interpreter and are invoked by typing LOCAL followed by the alias command name. Remote alias definitions are commands understood by the remote host’s command line interpreter and are invoked by typing REMOTE followed by the alias command name. A remote connection is required to create a remote alias.
The definition of the alias is the remainder of the line following the alias command name. You redefine an existing alias by using SET ALIAS to overwrite the previous definition with the new definition. If you do not supply the definition parameter, the alias becomes undefined. Use the SHOW ALIAS comment to see which aliases are defined.
You can also create multi-command USER-Access aliases using the USER-Access escape character ! at the end of the line. Multi-command aliases are discussed further in the “Creating Multi-command USER-Access Aliases” on page 84.
Format Command Qualifiers Parameters SET [|LOCal |] ALias |REMote|
alias [definition] [!]
Where:
SET (required) the verb for this command.
LOCal or REMote (optional) entering either LOCAL or REMOTE here tells USER-Access to create a local or remote alias command instead of a USER-Access alias. The minimum spell-ings are LOC and REM.
ALias (required) the subject for this command. The minimum spelling is AL.
alias (required) name of the new or existing alias in which you are attempting to define. If a portion of this is capitalized, that portion will be the minimum required spelling for the alias.
definition (optional) the string definition of the alias command you are defining
! (optional) indicates the alias definition continues on the next line.
Host Dependencies LOCAL and REMOTE aliases should translate to host dependent commands on the local or remote host re-spectively.

Page 154 Command Descriptions MAN-REF-H363-3.4.2
Examples To define a USER-Access alias called he to be the USER-Access command HELP COMMANDS, you would type:
User> set alias he help commands
Now, to display the USER-Access command summary, you would just type he: User> he
which is equivalent to typing: User> help commands
If your local host supports the command “whoami”, which displays your local username, you can create a local alias command that displays your local username:
User> set local alias ? whoami
To invoke your new alias, all you need to do it type: User> local ?
which is equivalent to typing: User> local whoami
To create a multicommand USER-Access alias named STAtus that displays the current LOCAL and REMOTE qualifier defaults, you would type:
User> set alias STAtus show local ! More>> show remote
To execute your new alias command you would type: User> status
which would result in the list of LOCAL qualifier defaults followed by the list of REMOTE qualifier defaults.
Related Topics LOCAL command SHOW ALIAS command REMOTE command
MAN-REF-H363-3.4.2 Command Descriptions Page 155
SET GLOBAL Command
Description The SET GLOBAL command assigns a value to a global variable name. The scope of the variable within USER-Access scripts is not limited to the input level on which it was defined (global in scope). Refer to the SET VARIABLE command if the scope of the variable needs to be limited to the current input level. If the value parameter does not exist the variable becomes undefined.
The value parameter is taken literally unless it is enclosed in double quotes (“value”). If the value is enclosed in double quotes, USER-Access expects any embedded quotes (that is, within the value) to be “escaped”. There must be two double quotes together. This special processing allows value to include leading and/or trailing spaces.
Global variables may be referenced by placing the variable name between braces, in one of two ways. As-sume a global variable by the name of num exists. The global variable num can be referenced by either “{num}” if a local variable by the same name does not exist, or by “{num:global}” to explicitly request the global definition.
If a global variable is referenced and does not exist the variable is replaced by a NULL string. If the global variable num is not defined the string “{num:global}” is equivalent to “”. Also the number of global variables that can be defined at one time is limited.
Format Command Qualifiers Parameters SET GLOBal name [value]
Where:
SET (required) the verb for this command.
GLOBal (required) the keyword for this command. The minimum spelling is GLOB.
name (required) global variable name. USER-Access variable names must be alphanumeric and no longer than 20 characters.
value (optional) variable value. The value assigned to the variable name is the remainder of the line starting with the first non-blank character.
Example The following sample script assigns a numeric value to the global “num”:
User> set global num 1 User> text The global num = {num:global} User: The global num = 1 User> show global num User: User: NUM ........... 1 User:

Page 156 Command Descriptions MAN-REF-H363-3.4.2
Related Topics SHOW GLOBAL SET VARIABLE SHOW VARIABLE

MAN-REF-H363-3.4.2 Command Descriptions Page 157
SET HOST Command
Description The SET HOST command allows you to select a host as the current “active” host. SET HOST is typically used following a DISCONNECT command in order to activate some other remote connection that is currently idle.
You can either specify a host name or host number on the command line. The host number is obtained from the SHOW HOST command.
Format Command Qualifiers Parameters SET HOst hostname
Where:
SET (required) the verb for this command.
HOst (required) the subject for this command. The minimum spelling is HO.
hostname (required) host name or host number of a previously established connection.
Examples Assume the following connections have already been made:
User> connect aix scott john User> connect sun01 meyers ed
Typing the SHOW HOST command then would result in: User> show host User: (1) Host=aix User=scott User: active --> (2) Host=sun01 User=meyers
We can use SET HOST here to “re-activate” the first connection (to host aix) in one of two ways: User> set host 1 User> set host aix
The result would be the same: User> show host User: active --> (1) Host=aix User=scott User: (2) Host=sun01 User=meyers
Now any USER-Access command that requires a remote connection (e.g. SEND and RECEIVE), would communicate with host aix.
Related Topics CONNECT command DISCONNECT command SHOW HOST command

Page 158 Command Descriptions MAN-REF-H363-3.4.2
SET VARIABLE Command
Description The SET VARIABLE command assigns a value to a local variable name. The scope of the variable is limited to the current input level (local in scope). If the variable needs to be visible outside the current input level refer to the SET GLOBAL command. If the value parameter does not exist the variable becomes undefined. A variable may also be set using the ASK command.
The value parameter is taken literally unless it is enclosed in double quotes (“value”). If the value is enclosed in double quotes, USER-Access expects any embedded quotes (that is, within the value) to be “escaped”. There must be two double quotes together. This special processing allows value to include leading and/or trailing spaces.
Variables are referenced by placing the variable name between braces. Assume a variable by the name of num exists. The variable num can be referenced by “{num}”.
If a variable is referenced and does not exist the variable is replaced by a NULL string. If the variable num is not defined the string “{num}” is equivalent to “”.
Format Command Qualifiers Parameters SET VARiable name [value]
Where:
SET (required) the verb for this command.
VARiable (required) the keyword for this command. The minimum spelling is VAR.
name (required) variable name. USER-Access variable names must be alphanumeric and no longer than 20 characters.
value (optional) variable value. The value assigned to the variable name is the remainder of the line starting with the first non-blank character.
Examples The following sample script assigns a numeric value to the variable 'num':
User> set variable num 1 User> text The variable num = {num} User: The variable num = 1 User> show variable num User: User: NUM .......... 1 User:

MAN-REF-H363-3.4.2 Command Descriptions Page 159
Related Topics ASK SHOW VARIABLE SET GLOBAL SHOW GLOBAL

Page 160 Command Descriptions MAN-REF-H363-3.4.2
SHOW Command
Description SHOW allows you to display the current default for any command qualifier. You can display the current de-faults for all qualifiers of a particular command by leaving the qualifier parameter off the command line.
Note that some commands require a remote connection to show a complete list of qualifiers with the SHOW command. These commands, for example RECEIVE, gather information from the remote host and may dis-play only a partial list without a connection. They also may just return an error message.
The commands SHOW GLOBAL and SHOW VARIABLE are described later in this document.
Format Command Qualifiers Parameters SHow command [qualifier]
Where:
SHow (required) the verb for this command. The minimum spelling is SH.
command (required) the name of a USER-ACCESS command that supports the use of command quali-fiers (e.g., CONNECT, LOCAL, etc.).
qualifier (optional) name of a valid qualifier for the given command.
Examples To display the current default values for all INPUT qualifiers, you would type:
suse1> show input User: User: CONTinue .......... off User: ECHO .............. off User: PROMPT2 ........... More>> User: PROMpt ............ User> User: SEArch ............ User: VERify ............ off User: suse1>
If you are only interested in the default value of qualifier PROMPT2, you would type: User> show input prompt2 User: PROMPT2 ............. More>>
Related Topics SET command ASK command
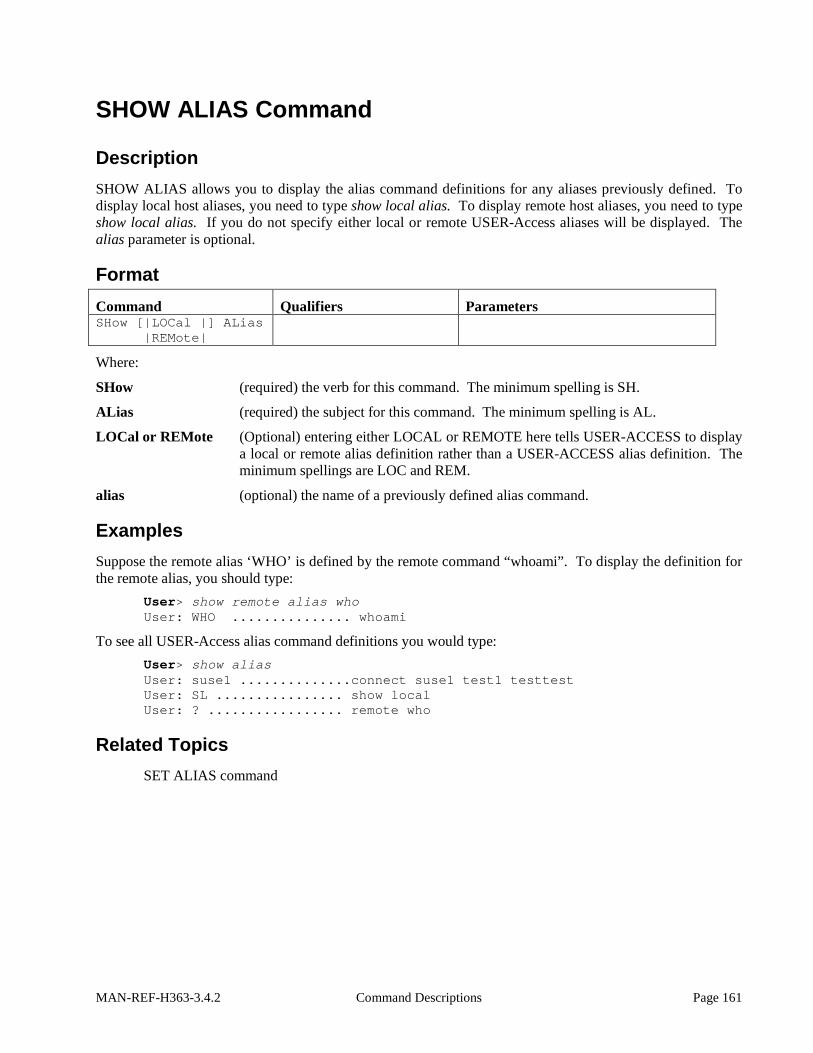
MAN-REF-H363-3.4.2 Command Descriptions Page 161
SHOW ALIAS Command
Description SHOW ALIAS allows you to display the alias command definitions for any aliases previously defined. To display local host aliases, you need to type show local alias. To display remote host aliases, you need to type show local alias. If you do not specify either local or remote USER-Access aliases will be displayed. The alias parameter is optional.
Format Command Qualifiers Parameters SHow [|LOCal |] ALias |REMote|
Where:
SHow (required) the verb for this command. The minimum spelling is SH.
ALias (required) the subject for this command. The minimum spelling is AL.
LOCal or REMote (Optional) entering either LOCAL or REMOTE here tells USER-ACCESS to display a local or remote alias definition rather than a USER-ACCESS alias definition. The minimum spellings are LOC and REM.
alias (optional) the name of a previously defined alias command.
Examples Suppose the remote alias ‘WHO’ is defined by the remote command “whoami”. To display the definition for the remote alias, you should type:
User> show remote alias who User: WHO ............... whoami
To see all USER-Access alias command definitions you would type: User> show alias User: suse1 ..............connect suse1 test1 testtest User: SL ................ show local User: ? ................. remote who
Related Topics SET ALIAS command

Page 162 Command Descriptions MAN-REF-H363-3.4.2
SHOW GLOBAL Command
Description The SHOW GLOBAL command displays the currently assigned value of the global variable specified. If none is specified, then all global variables and their values are displayed.
Format Command Qualifiers Parameters SHow GLOBal [name]
Where:
SHow (required) the verb for this command. The minimum spelling is SH.
GLOBal (required) the keyword for this command. The minimum spelling is GLOB.
name (optional) global variable name. USER-Access variable names must be alphanumeric and no longer than 20 characters.
Examples The following commands define two variables, “first” and “last”:
User> set global first john User> set global last doe
The following SHOW GLOBAL command displays the values of the global variables “first” and “last”: User> show global first User: User: FIRST ............. john User: User> show global User: User: FIRST ............. john User: LAST .............. doe User:
Related Topics SET GLOBAL SET VARIABLE SHOW VARIABLE

MAN-REF-H363-3.4.2 Command Descriptions Page 163
SHOW HOST Command
Description SHOW HOST displays all remote hosts currently connected to the local host in this USER-ACCESS session. Connections are established with the CONNECT command. The list displayed by SHOW HOST includes a host connection number. the host name, logged in user name, and which host (if any) is the current “active” remote host. The host number that is displayed can be used as input to the SET HOST command.
Format Command Qualifiers Parameters Show HOst
Where:
SHow (required) the verb for this command. The minimum spelling is SH.
HOst (required) the subject for this command. The minimum spelling is HO
Examples Assume the following connections have already been made:
User> connect zos5 scott john User> connect sunrise meyers ed
Typing the SHOW HOST command then would result in: User> show host User: (1) Host=zos5 User=scott User: active --> (2) Host=sunrise User=meyers
Related Topics CONNECT command DISCONNECT command SET HOST command

Page 164 Command Descriptions MAN-REF-H363-3.4.2
SHOW QUALIFIER Command
Description SHOW QUALIFIER lists all of the valid qualifiers for the specified USER-Access command and gives a brief definition of each. Note that some commands require a remote connection to show a complete list of qualifiers with the SHOW QUALIFIER command. These commands, for example RECEIVE, gather infor-mation from the remote host and may display only a partial list without a connection. They also may just re-turn an error message.
Format Command Qualifiers Parameters SHow QUAlifier command
Where:
SHow (required) the verb for this command. The minimum spelling is SH.
QUAlifier (required) the subject for this command. The minimum spelling is QUA.
command (required) the name of a USER-Access command that supports the use of command qualifiers (e.g. SEND, LOCAL, etc.).
Examples To list all of the valid qualifiers for the INPUT command you would type:
User> show qualifier input User: CONTinue .. continue on error User: ECHO ...... echo input to screen User: PROMpt .... prompt for USER-Access input User: PROMPT2 ... USER-Access continuation prompt User: SEARCH .... search path for default INPUT User: VERify .... verify string substitution
Related Topics SHOW command SET command

MAN-REF-H363-3.4.2 Command Descriptions Page 165
SHOW VARIABLE Command
Description The SHOW VARIABLE command displays the currently assigned value of the variable specified. If none is specified then all variables and their values are displayed.
Format Command Qualifiers Parameters SHow VARiable name
Where:
SHow (required) the verb for this command. The minimum spelling is SH.
VARiable (required) the keyword for this command. The minimum spelling is VAR.
name (optional) variable name. USER-Access variable names must be alphanumeric and no longer than 20 characters.
Examples Example #1: The following commands define two variables, “first” and “last”:
User> set variable first john User> set variable last doe
The following SHOW VARIABLE commands display the values of the variables “first” and “last”: User> show variable first User: User: FIRST ............. john User: User> show variable User: User: FIRST ............. john User: LAST .............. doe User:
Related Topics SET VARIABLE SET GLOBAL SHOW GLOBAL
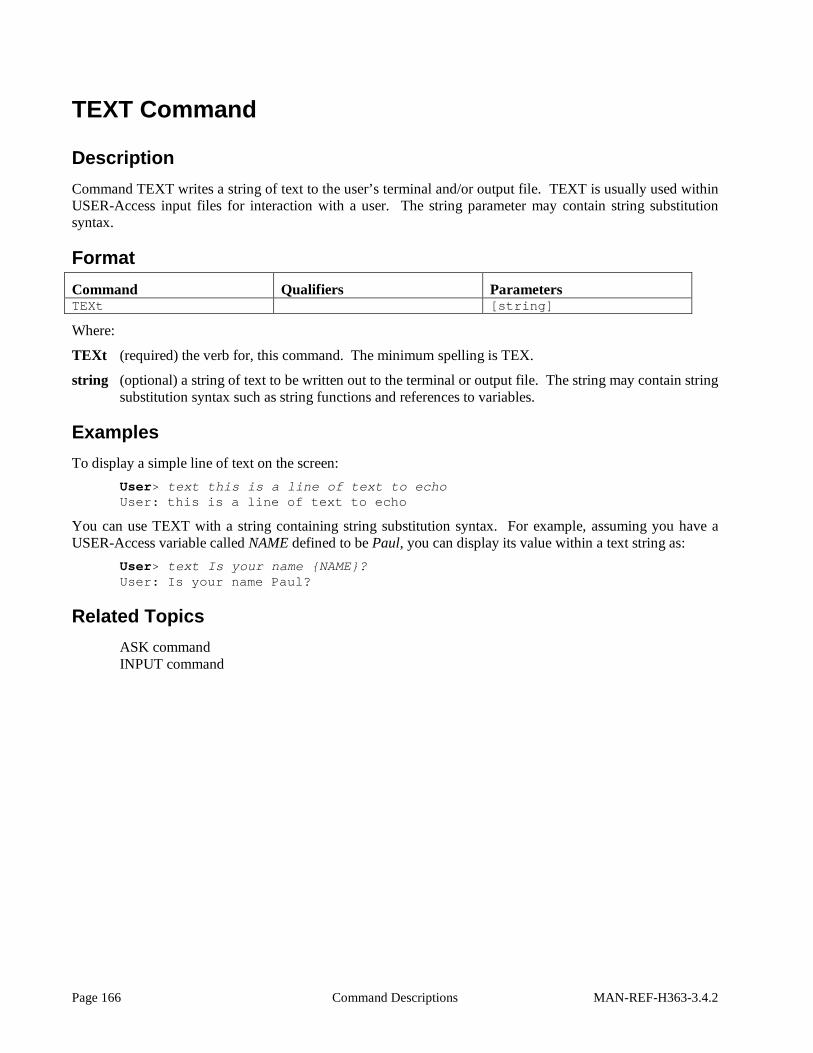
Page 166 Command Descriptions MAN-REF-H363-3.4.2
TEXT Command
Description Command TEXT writes a string of text to the user’s terminal and/or output file. TEXT is usually used within USER-Access input files for interaction with a user. The string parameter may contain string substitution syntax.
Format Command Qualifiers Parameters TEXt [string]
Where:
TEXt (required) the verb for, this command. The minimum spelling is TEX.
string (optional) a string of text to be written out to the terminal or output file. The string may contain string substitution syntax such as string functions and references to variables.
Examples To display a simple line of text on the screen:
User> text this is a line of text to echo User: this is a line of text to echo
You can use TEXT with a string containing string substitution syntax. For example, assuming you have a USER-Access variable called NAME defined to be Paul, you can display its value within a text string as:
User> text Is your name {NAME}? User: Is your name Paul?
Related Topics ASK command INPUT command

MAN-REF-H363-3.4.2 Command Descriptions Page 167
TRANSLATE Command
Description The TRANSLATE command is used to specify and display USER-Access code conversion tables, to enable and disable USER-Access code conversion, and to indicate whether or not USER-Access code conversion is currently enabled.
The TRANSLATE command followed by an action lets the user display and control the use of the USER-Access translation tables.
In a TCP/IP environment, USER-Access translation is on by default.
USER-Access translation can be turned off with the command TRANSLATE OFF. The USER-Access trans-lation tables can be displayed using the TRANSLATE command followed by the actions DISPLAY or FULL. The RESET action reinitializes the USER-Access translation tables.
The TRANSLATE command is also used to tailor the default USER-Access translation tables. Modifications are made to the USER-Access tables by using the TRANSLATE common followed by a native character code and a remote character code.
The initial invocation of TRANSLATE (that is, any TRANSLATE command) loads the USER-Access tables with the defaults and then uses the SEARCH qualifier to make changes to the USER-Access translation ta-bles. The TRANSLATE RESET command reinitializes the USER-Access tables with the NETEX defaults and uses the SEARCH qualifier again, to make changes to the USER-Access tables.
When USER-Access translation is enabled with the command TRANSLATE ON, the USER-Access tables are used to convert native character codes into remote character codes, and remote character code into native character codes.
The qualifiers IN_only and OUT_only allow the tables to be modified in one direction. By default, modifica-tions are made to both the incoming and outgoing tables. For example, if the user requests that an incoming EBCDIC cent sign be converted to an ASCII7 left bracket, then an outgoing ASCII7 left bracket is converted into an EBCDIC cent sign. By specifying either IN_only or OUT_only, only the incoming or outgoing table is modified.
The TRANSLATE command without any arguments displays the status of USER-Access translation, either enabled or disabled.
The TRANSLATE command does not allow the user to change the following native characters since these characters are required for USER-Access protocol:
upper case alphabetic (A-Z) digits (0-9) space equal sign null

Page 168 Command Descriptions MAN-REF-H363-3.4.2
Format Command Qualifiers Parameters TRanslate [-IN_only |OFF|]
|ON | [-OUT_only |OFF|] |ON | [SEArch string]
|[action] | |[native] [remote] [comment]|
Where:
TRanslate (required) is the keyword for this command. The minimum spelling is TR.
-IN_only (optional) is used to modify only the Incoming USER-Access code conversion table. The default is OFF. The minimum spelling is -IN.
-OUT_only (optional) is used to modify only the outgoing USER-Access code conversion table. The de-fault is OFF. The minimum spelling is -OUT.
-SEArch (optional) the TRANSLATE SEARCH path is used to find default translation tables for the different HOSTCODES. On a GUARDIAN system the default search path is “(SITE)”. Each time a translate command is issued USER-Access looks in the (SITE) directory for the file “{HOSTCODE:remote}.ua”. For additional information, refer to “GUARDIAN USER-Access SEARCH Keywords (SITE), (USER), and (NONE)” on page 95. The minimum spelling is -SEA.
action (optional) describes the action TRANSLATE takes. The action can be one of the following:
DIsplay display differences from default tables
FUll display entire translate table
OFF disable USER-Access translation
ON enable USER-Access translation
REset reset table and process search path
native (optional) the native character code (in octal, decimal, or hexadecimal format).
remote (optional) the remote character code (in octal, decimal, or hexadecimal format).
comment (optional) descriptive comment.
Examples Example #1: Suppose the native character set is ASCII7 and the remote host has a HOSTCODE value of EBCDIC. A translation table is setup to convert the EBCDIC cent sign (0x4A) and solid bar (0x4F) (which are invalid ASCII7 characters) to the ASCII7 left bracket (0x5B) and right bracket (0x5D), with the following USER-Access commands:
User> translate 0x5B 0x4A (left bracket <--> cent sign) User> translate 0x5D 0x4D (right bracket <--> solid bar)
USER-Access translation is enabled with the following command: User> translate on
This translation effects both the incoming and outgoing tables. The EBCDIC cent sign (0x4A) is converted into a ASCII7 left bracket (0x5B) on its way in, and the ASCII7 left bracket (0x5B) is converted into and EBCDIC cent sign (0x4A) on its way out.

MAN-REF-H363-3.4.2 Command Descriptions Page 169
Example #2: Suppose the native character set is ASCII7 and the remote host has a HOSTCODE value of EBCDIC.
User> connect zos user pw –quiet
The current TRANSLATE SEARCH path is: User> show translate search User: User: SEArch ............. (SITE) User:
USER-Access translation is turned on with the following command: User> translate on
At this point USER-Access uses the SEARCH path to look for a USER-Access script file using the remote HOSTCODE, in this case EBCDIC. For a GUARDIAN system the SEARCH path tells USER-Access to look for the file “EBCDICUA” in the (SITE) directory. The file “EBCDICUA” could contain the lines from the above example:
* Sample EBCDIC translation table for * an ASCII7 host * translate 0x5B 0x4A (left bracket <--> cent sign) translate 0x5D 0x4F (right bracket <--> solid bar)
Now every time a connection is active to an EBCDIC host and the USER-Access translation tables are initial-ized, the table is automatically loaded.
The translate table can be displayed with the command: User> translate full
Example #3: The TRANSLATE search path allows the user to select optional files for input when the TRANSLATE command is issued. Suppose instead of loading the default tables for the active host, {HOSTCODE:REMOTE}UA” in the (SITE) directory, the user would rather load a table from the user’s log-in directory. The current search path is:
User> show translate search User: User: SEArch ............. (SITE) User:
The search path can be changed with the command: User> set translate search (USER)transua User> show translate search User: User: SEArch ............. (USER)transua User:
The search path for the TRANSLATE command now implies, look for the file “TRANSUA” in the user’s login directory. The following command turns on translation and initializes the translate tables by reading the file “TRANSUA” in the user’s login directory:
User> translate on
Example #4: Suppose a Swedish GUARDIAN host (ASCII7) is connected to a PC-DOS host (ASCII8). The Swedish national characters represented by the ASCII7 characters []\{}| can be converted to the actual PC-DOS ASCII8 representations. The GUARDIAN default HOSTCODE file “ASCII8UA” in the (SITE) direc-tory contains the following commands:

Page 170 Command Descriptions MAN-REF-H363-3.4.2
* USER-Access TRANSLATE code conversion defaults * * Native: ASCII7 * Remote: ASCII8 * TRANS 0x5D 0x8F & to upper case A with ring TRANS 0x5B 0x8E ¢ to upper case A with umlaut TRANS 0x5C 0x99 / to upper case O with umlaut TRANS 0x7D 0x86 } to lower case a with ring TRANS 0x7B 0x84 { to lower case a with umlaut TRANS 0x7C 0x94 to lower case o with umlaut TEXT Loaded the SWEDISH translation tables.
Once connected to PC-DOS the USER-Access translation tables are initialized with the first invocation of TRANSLATE:
User> translate User: User: USER-ACCESS translation is currently disabled. User: User: Loaded the SWEDISH translation tables.
Translation is turned on with the following command: User> translate on
All file transfers and remote command executions that follow, perform translations as defined by the USER-Access tables.

MAN-REF-H363-3.4.2 Internal Features Page 171
Password Encryption The string function ENCRYPT has been added to USER-Access. The purpose of this function is to encrypt host passwords which later will be used by USER-Access to establish host connections. This approach elimi-nates the security risk of having readable (clear-text) passwords stored in files.
Format encrypt(password, [username])
Where:
password
Specifies the password you want to encrypt. The encrypted form of this password is returned by the ENCRYPT string function. The encrypted form can be stored in script files containing USER-Access CONNECT commands.
username
Optionally specifies the username associated with the local USER-Access process that will issue the CONNECT command. This username is used as a secondary encryption key for the specified pass-word. When USER-Access is later run it queries the operating system for the username running the current process. USER-Access then uses this username as one of its keys in decrypting the password. The value for username must be entered in uppercase to match the username value returned by the GUARDIAN environment. A value of ‘*’ (single asterisk) tells the USER-Access ENCRYPT func-tion to use the current username running the USER-Access process as the secondary key. You must be running as the same user which will later run USER-Access to issue the CONNECT command.
For example, encrypt the password COBRA using the GUARDIAN username SUPER.GEM1 as the local username for secondary encryption. Use the USER-Access TEXT command to display the encrypted results:
User> text {encrypt(“COBRA”, “SUPER.GEM1”)} User: *249eece8e4203b189
The ENCRYPT Alias To simplify the use of the ENCRYPT string function, an ENCRYPT alias is provided in the SCLIENT startup file in the USER-Access distribution. The ENCRYPT alias definition is shown:
Internal Features

Page 172 Internal Features MAN-REF-H363-3.4.2
set alias ENCrypt {}{dfn(1, "goto skip")} ! ask -secure -prompt "Enter password? " 1 ! skip1: {dfn(2, "goto skip2")} ! text Make sure to enter the username in UPPERCASE ! text if the system where this password will be !
text used on is VMS, Tandem or zOS. ! ask -prompt "Enter optional username(or press Enter)? " 2 !
skip2: set global pw {encrypt(1,2)} ! text The encrypted password is {pw}
For example, the ENCRYPT alias could be used to encrypt the same password COBRA with the same sec-ondary key SUPER.GEM1 shown previously:
User> encrypt Enter password? COBRA (password does not display) Enter optional username (or '*')? SUPER.GEM1 User: The encrypted password is *249eece8e4203b189
Note the following items regarding the ENCRYPT alias:
1. The password is prompted in -SECURE mode to avoid displaying on the terminal.
2. The ENCRYPT alias can be invoke with ‘password’' and optional ‘username’ passed as alias parameters to avoid prompting. However, the password will display.
3. The optional ‘username’ is forced to uppercase using the UPPER string function.
4. The resulting encrypted password is stored in a global variable PW for later reference.
Examples
Example 1: Encrypting Passwords Stored in a USER-Access Input Script File
Suppose a job running under the local GUARDIAN username NSC.JONES inputs the USER-Access script $SYSTEM.SCRIPTS.MVS1 during program execution and the script $SYSTEM.SCRIPTS.MVS1 contains the following line:
CONNECT mvs1 admin7 secret
To avoid storing the password ‘secret’ in readable form in the script file, the password is encrypted by invok-ing the USER-Access client and using the ENCRYPT alias:
User> encrypt secret NSC.JONES User: The encrypted password is *26f17e2a4c9c65c56
Username NSC.JONES is specified because that is the local GUARDIAN username under which the USER-Access job that uses the connect/login information will run. Using a local text editor, modify the input script $SYSTEM.SCRIPTS.MVS1 to look like:
CONNECT mvs1 admin7 *26f17e2a4c9c65c56
Example 2: Using USER-Access to Generate the Input Script File
As you can see in the ENCRYPT alias definition, the global variable ‘pw’ is set to the encrypted password value. This value can be used to generate an input file containing the USER-Access CONNECT command to be later referenced by a USER-Access script. We can use the USER-Access OUTPUT command to generate the script file $SYSTEM.SCRIPTS.MVS1 to connect to the host ‘mvs1’ as user ‘admin7’ with the password ‘secret’ (as shown in example #1):
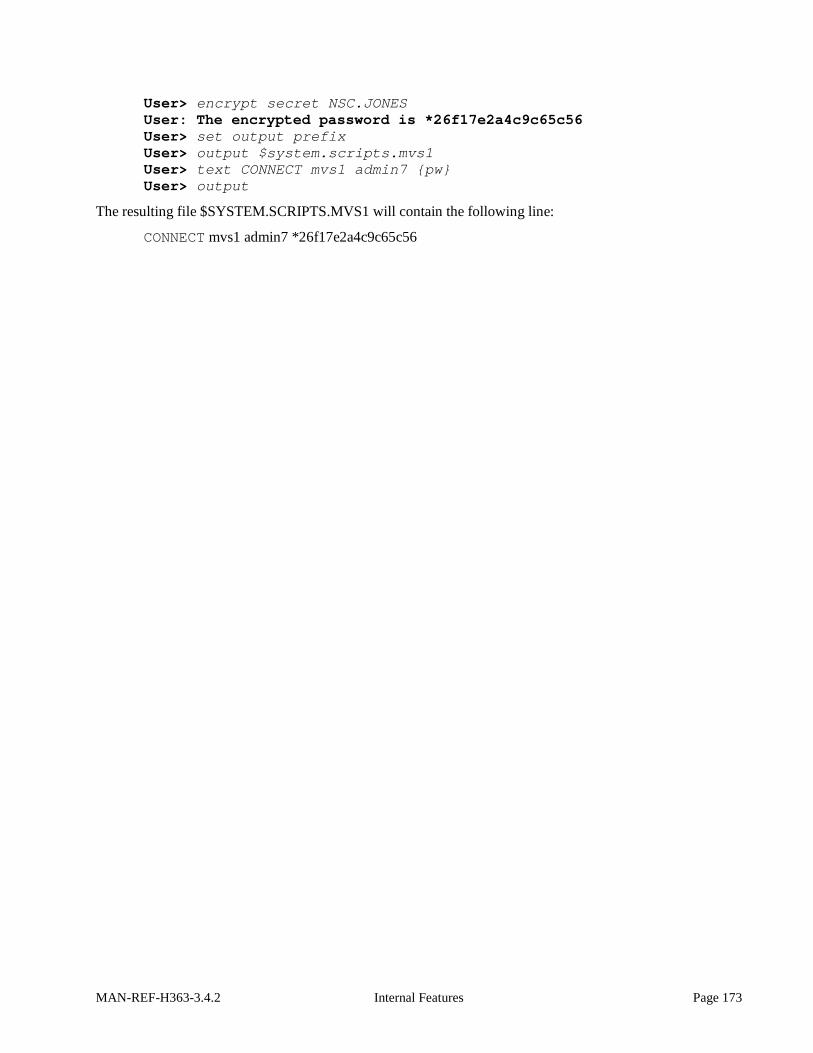
MAN-REF-H363-3.4.2 Internal Features Page 173
User> encrypt secret NSC.JONES User: The encrypted password is *26f17e2a4c9c65c56 User> set output prefix User> output $system.scripts.mvs1 User> text CONNECT mvs1 admin7 {pw} User> output
The resulting file $SYSTEM.SCRIPTS.MVS1 will contain the following line:
CONNECT mvs1 admin7 *26f17e2a4c9c65c56

Page 174 Internal Features MAN-REF-H363-3.4.2
Command Piping Command piping is the mechanism used for GUARDIAN BACKUP/RESTORE where a data stream is di-rected to/from the USER-Access (TAPE) device. In this case the USER-Access named process looks like a tape device to the BACKUP and RESTORE utilities.
This mechanism has been generalized to allow command piping for any application or GUARDIAN utility that supports I/O to a named process file. The source or destination of a file transfer can be a ‘piped com-mand’ where the data is piped directly to/from the application or GUARDIAN utility without intermediate staging of data on disk. This usually provides a performance advantage as well as eliminating the disk space requirements.
Piped commands are flagged in the USER-Access SEND/RECEIVE command by prefixing the command string with an exclamation mark (!). Piped commands containing embedded blanks must be enclosed within double quotes. Piped commands usually contain a special tag string such as (TAPE) that gets replaced by USER-Access with a named process file. For example, if the USER-Access process name is $Z347, the tag string (TAPE) gets replaced with the named process file $Z347.#TAPE. Then USER-Access monitors its $RECEIVE queue looking for open/close system messages with the special process name qualifiers (e.g., #TAPE).
There are several tag strings recognized by USER-Access. They are:
(TAPE)
Piping mechanism used where the USER-Access named process looks like a tape device to the GUARDIAN BACKUP and RESTORE utilities.
(PIPE)
General named process piping mechanism. Each logical record is processed individually.
(BLOCK)
Piping mechanism where records are blocked or unblocked using the FUP format described for the VARIN/VAROUT parameter. Performance is improved by eliminating the overhead of read-ing/writing individual logical records.
The following examples of command piping use the GUARDIAN FUP utility to perform a variety of “filter-ing” operations. Recognize that FUP is used to demonstrate functionality. However any GUARDIAN utility, TACL macro or user application can utilize the piped command facility:
Example #1: Send the local structured file LOCDATA to the remote file REMDATA while padding each record with blanks (ASCII 32) to 132 characters:
User> send “!fup copy locdata,(pipe),recout 132,pad 32” remdata
Example #2: Receive the remote file REMDATA to the local structured file LOCDATA while trimming trailing blanks:
User> receive remdata "!fup copy (pipe),locdata,trim 32"
Example #3: Load a key-sequenced file KEYDATA from a sorted remote file REMDATA: User> receive remdata "!fup load (pipe),keydata,sorted"
Example #4: The example above can be optimized by having USER-Access block the records in VARIN format using the (BLOCK) tag string. By default, USER-Access uses 32000 byte blocks:
User> receive remdata "!fup load (block),keydata,sorted, -

MAN-REF-H363-3.4.2 Internal Features Page 175
More>> varin,blockin 32000"
Example #5: Copy 1000 records from the local keyed file KEYDATA starting at the record with primary key “SMITH”. Block the data in VAROUT format. Send to the remote file REMDATA using record mode to pre-serve binary data. Notice the required set of quotes around SMITH to escape the embedded quotes:
User> send "!fup copy keydata,(block),first key ""SMITH"", - More>> count 1000,varout,blockout 32000" remdata -mode record
Example #6: If no tag string is specified, then the normal OUTPUT (for a source command) or INPUT (for a destination command) is piped. The following will send the FUP INFO of all the files on my current volume to the remote file VOLINFO:
User> send "!fup info *.*" volinfo
Example #7: Piped commands can be initiated locally (as shown in the previous example) or remotely by any USER-Access client connected to a NonStop GUARDIAN server. The same volume information could be received by a remote client as follows:
User> receive "!fup info *.*" volinfo
Running USER-Access in Slave Mode In all of the previous examples, USER-Access has been operating as the “master” process controlling the “slave” piped commands. The command piping facility allows USER-Access to operate as a slave process interacting with external commands. Simply use the piped command syntax without any command - just the exclamation mark (!) followed by the appropriate tag string. This is a flag to USER-Access to read/write its named process file being accessed by an external command. USER-Access looks for an OPEN system mes-sage with the appropriate name qualifier (e.g., #TAPE, #PIPE or #BLOCK). In order to synchronize with the external command, USER-Access sends a command interpreter WAKEUP message (-20) to its creator. This could be TACL or any user application invoking USER-Access with the NEWPROCESS system service.
The following example uses a TACL macro to activate USER-Access as a “nowait” named process $USER. USER-Access commands are taken from the text file UASCRIPT (shown later). Once USER-Access is start-ed, the TACL macro will PAUSE waiting for the WAKEUP message. Then a FUP COPY is directed to the USER-Access slave process:
?tacl macro user /name $USER, in UASCRIPT, out UALOG, nowait/ pause fup copy locdata, $USER.#PIPE
The USER-Access script file UASCRIPT contains the following: connect host username password send !(pipe) remdata exit
The USER-Access output will appear in UALOG. Multiple SEND and RECEIVE commands can be pro-cessed. Each must be synchronized with a PAUSE command in the TACL macro.
Additional Piped Command Qualifiers Some additional qualifiers can be included with the tag strings to fine tune the piped command processing. These qualifiers are:

Page 176 Internal Features MAN-REF-H363-3.4.2
Open Timer
A numeric value (in seconds) specifying how long to wait for the piped command to actually open the USER-Access named process. The default open timer is 5 minutes (300 seconds). You can increase or decrease the open timer based on your requirements. A value of zero disables the open timer (i.e., never times out).
NOWAIT
Boolean flag indicating that the piped command is being run in NOWAIT mode. USER-Access will continue processing even though the command interpreter indicates command completion. This flag is especially useful when invoking a piped command that “kicks off” another job that will eventually open the named pipe process. Completion of the “kick off” process does not terminate piped com-mand processing.
NOWAKEup
Boolean flag that disables the WAKEUP message to the creator process. When USER-Access is op-erating as a “slave” process (described earlier) the WAKEUP messages is not always necessary to synchronize processing. This flag prevents the WAKEUP message from being sent.
The following examples expand on some of the previous examples. Once again the FUP utility is used to demonstrate functionality:
Example #1: Send the local file LOCDATA to the remote file REMDATA. Run the piped command in NOWAIT mode:
User> send "!fup /nowait/ copy locdata,(pipe,nowait)" remdata
Example #2: Run USER-Access as a “slave” process and send the piped data to the file REMDATA. Set an open timer of 30 seconds. Don’t send the WAKEUP message to the creator:
User> send !(pipe,30,nowakeup) remdata

MAN-REF-H363-3.4.2 Appendix A. USER-Access Error Messages Page 177
This appendix is intended to give users more information about USER-Access messages that may be seen during a session. All of the USER-Access messages have been listed along with details describing them. Many of the messages are self-explanatory (e.g. “Invalid command”) and require no further discussion. At the end of this message table is a list and description of the messages that require further explanation.
It should be noted that the USER-Access messaging scheme is designed to generate various levels of messag-es which is why a single erroneous condition may result in two, three, or even four messages. Each level of message that is displayed (from first to last), is designed to be slightly more specific than the message preced-ing it. All of the messages that are displayed should be considered when attempting to diagnose an error con-dition.
Below is a breakdown of each column of the message table alone, with a description of the entries that may appear under it.
Appendix A. USER-Access Error Messag-es for GUARDIAN

Page 178 Appendix A. USER-Access Error Messages MAN-REF-H363-3.4.2
FAC The FACility or subsystem name that generated the message. This will be UA (USER-Access host independent Message), UA363 (USER-Access H363 GUARDIAN host depend-ent message), SI (USER-Access Service Initiator), or SI363 (USER-Access H363 GUARDIAN Service Initiator). If a message contains an eFTxx3 or UAxx3, MUX, SIxx3, or some facility other than these, this message must be looked up in the appropriate USER-Access/eFT manual for that host (e.g. eFTxx3, Hxx3 User-Access).7
CODE The unique error or message code.
SEV A single character severity level indicator. The possible values are S (Success), I (Infor-mation), W (Warning), E (Error), or F (Fatal).
COMMENT A comma separated list of zero to five special characters giving more details about the mes-sage. If no COMMENT characters are given, the message (along with accompanying mes-sages), is intended to be self-explanatory. The possible COMMENT characters are:
A An additional description of the message is given at the end of the message table.
D Diagnostic or Internal error. These errors are very unlikely to occur and may indicate a more severe problem is at hand or that some unexpected internal condition oc-curred. The user should refer to accompanying messages if displayed, for a further explanation of the problem. These messages should be logged and reported to the system administrator.
H Host specific messages will accompany these messages. The host specific messages should provide additional information as to the cause of the condition.
N Network related message. These messages should be logged and reported to the sys-tem administrator unless it is obvious that the network condition is temporary and for a known reason. These messages could possibly be a sign of a network interruption of some kind.
R Re-triable error condition. The command used to generate this error can be re-tried at some later time without fear of a fatal condition occurring.
TEXT The message text.
7 eFT/UA identifies a host by its facility number. Under UNIX, this number varies depending on the host that is running EFT. For example, if a Solaris system with UNIX is running eFT the facility would be ‘673’.
Although there are many different hosts that run UNIX eFT, because of similarity the manuals were combined into one. Now, the manual is identified by: eFTxx3 eFT for UNIX.

MAN-REF-H363-3.4.2 Appendix A. USER-Access Error Messages Page 179
Table 4. Error Messages
FAC Code SEV Comment Text
UA 201 E Invalid positional parameter ‘SSS’
UA 202 E Invalid command line switch ‘SSS’
UA 203 E Missing value for switch ‘SSS’
UA 302 E A Overflow of NNN byte environment buffer
UA 303 E A Failed to add ‘SSS=SSS…’
UA 304 E Environment concatenate failure
UA 413 W Invalid numeric parameter for function ‘SSS’
UA 501 E A,D,N Protocol error – expected [SS] – got [SS]
UA 503 E N Failed to receive INFORMATIVE messages
UA 701 E Protocol buffer size NNN is less than minimum NNN
UA 704 E D Failed to get protocol keyword value for SSS
UA 706 E Protocol record (NNN) is larger than buffer size (NNN)
UA 712 E D Failed to read STDIN
UA 713 E D,N Invalid protocol Record flag [S]
UA 714 E D Protocol buffer (NNN) is too small for record (NNN)
UA 717 E D,N Invalid protocol Block/Record flag [S]
UA 801 E D Missing HOST name
UA 802 E D Missing SERVICE name
UA 803 E R Service ‘SSS’ is not offered on host ‘SSS’
UA 804 E Host ‘SSS’ does not exist in configuration
UA 805 E N,R Error connecting to service ‘SSS’ on host ‘SSS’
UA 806 E N,R CONFIRM timed out after NNNN seconds
UA 807 E N,R Errof on CONFIRM from service ‘SSS’
UA 808 E N,R Error on WRITE to service ‘SSS
UA 809 E N,R READ timed out after NNN
UA 810 E N,R Error on READ from service ‘SSS’
UA 811 E D,N,R Bad data length NNN on READ
UA 812 E D,R Bad DATAMODE ‘NNN’ on exchange

Page 180 Appendix A. USER-Access Error Messages MAN-REF-H363-3.4.2
Table 4. Error Messages
FAC Code SEV Comment Text
UA 813 E D,N Failed to open protocol connection
UA 814 E D,N Failed to send CONNECT environment
UA 815 E D,N Failed to receive CONNECT response
UA 816 E D,N Failed to close protocol connection
UA 817 E D Missing SERVICE name
UA 818 E Offer of service ‘SSS’ exceeded NNN second timeout
UA 819 E N,R Failed to OFFER service ‘SSS’
UA 820 E N,R CONFIRM of offer failed
UA 821 E N,R READ timed out after NNN seconds
UA 822 E N,R Error on READ of datamode
UA 823 E D,N,R Bad data length NNN on READ
UA 824 E D,R Bad DATAMODE ‘NNN’on exchange
UA 825 E N,R Error on WRITE of datamode
UA 826 E D,N Failed to open protocol connection
UA 827 E D,N Failed to receive CONNECT environment
UA 828 E R Invalid process identifier (PIFD) on reconnect
UA 829 E D,N Failed to send CONNECT response
UA 830 E D,N Failed to close protocol connection
UA 831 E NETEX blocksize negotiation failed (NNN) (In a NETEX environment only)
UA 832 E Remote server does not support gateway (SI+) protocol
UA 4003 W Alias ‘SSS’ is not defined
UA 4102 E BLOCKSIZE of NNN is out of range (NNN-NNN0
UA 4103 W Cannot have more than NNN active connections
UA 4104 E D Missing connect SERVICE
UA 4105 E Failed to connect service ‘SSS; on host ‘SSS’
UA 4106 I A The requested blocksize NNN was reduced to NNN
UA 4107 E D Failed to open CLIENT protocol connection
UA 4108 E D,N Failed to receive connect information

MAN-REF-H363-3.4.2 Appendix A. USER-Access Error Messages Page 181
Table 4. Error Messages
FAC Code SEV Comment Text
UA 4109 I A There were NNN CONNECT records ignored
UA 4110 E M Failed to DISCONNECT
UA 4112 W Remote host required for remote help request.
UA 4113 E N Failed to request remote RECEIVE
UA 4114 E N Failed to get SEND acknowledge
UA 4116 E N Failed to request remote SEND
UA 4117 E N Failed to get RECEIVE acknowledge
UA 4118 E N Failed to send SOURCE/DEST environments
UA 4121 W Missing remote command
UA 4123 E N Failed to receive an ABORT acknowledge
UA 4124 E Remote SSS failed
UA 4126 W D Command ‘SSS’ is not implemented
UA 4127 E A,D The MESSAGE stack is empty
UA 4128 E N Failed to send error message to remote server
UA 4129 E N Failed to communicate with remote server
UA 4131 E A,N Failed to establish secondary NETEX connec-tion (In a NETEX environment only)
UA 4132 E A Restricted command in server startup file
UA 4201 E Missing SSS parameter
UA 4202 E Invalid SSS parameter ‘SSS’
UA 4203 W There is no active remote host
UA 4301 E Help is not available for ‘SSS’
UA 4302 E Help line is longer than NNN characters
UA 4501 E A Nested (or recursive) input/alias limit of NNN exceeded
UA 4502 F D Can’t open STDOUT
UA 4503 E Output PREFIX (NNN) exceeds COLUMNS (NNN)
UA 4504 E A Bad output FORMAT definition –reset to default
UA 4505 E A Input request (NNN byte maximum) failed
UA 4601 W A Variable ‘SSS’ contains invalid characters
UA 4602 W Variable ‘SSS’ is longer than NNN characters

Page 182 Appendix A. USER-Access Error Messages MAN-REF-H363-3.4.2
Table 4. Error Messages
FAC Code SEV Comment Text
UA 4603 W Qualifier SSS cannot be modified
UA 4604 W A value is required for qualifier SSS
UA 4605 W Invalid SSS numeric value ‘SSS’
UA 4606 W SSS value SSS is out of range (SSS)
UA 4607 W Invalid SSS Boolean value ‘SSS’
UA 4610 W Invalid SSS option ‘SSS’
UA 4701 W A Recursive alias ‘SSS’
UA 4702 W There is no active remote host
UA 4703 W Invalid SSS qualifier ‘SSS’
UA 4704 W A Use SET LOCAL/REMOTE to modify SSS qualifier ‘SSS’
UA 4705 W Missing value for SSS qualifier ‘SSS’
UA 4706 W Too many parameters for SSS
UA 4707 W SSS requires additional parameters
UA 4708 W Invalid command ‘SSS’
UA 4709 W A Command token is greater than NNN characters
UA 4710 E Cmd not supported for full screen emulation
UA 4802 E D Missing MAXRECORD specification
UA 4803 E D MAXRECORD (NNN) greater than maximum (NNN)
UA 4804 E A MAXRECORD (NNN+NNN) too large for BLOCKSIZE (NNN)
UA 4807 E D Invalid datamode (NNN) in record RECEIVE
UA 4808 E D,N Bad header flag (NNN) in record RECEIVE
UA 4809 E A,D,N Sequence error (NNN vs. NNN) in record RECEIVE
UA 4812 E D Missing MIN_BYTE_COUNT specifier
UA 4901 E Failure during SSS mode receive
UA 4903 E Failure during RECEIVE file setup
UA 5001 E Failure during SSS mode send
UA 5003 E Failure during SEND file setup
UA 5050 E Invalid transfer mode for AUTO data generation

MAN-REF-H363-3.4.2 Appendix A. USER-Access Error Messages Page 183
Table 4. Error Messages
FAC Code SEV Comment Text
UA 5107 F N Failed to receive next CLIENT request
UA 5109 E Server SSS failed
UA 5111 E Keyboard interrupt
UA 5112 E Keyboard interrupt
UA 5115 E D Missing VALIDATE qualifier
UA 5116 E D Invalid VALIDATE qualifier ‘SSS’
UA 5118 E D,N Invalid code table length NNN
UA 5119 E D Unsupported request code ‘S’ – no action taken
UA 5120 E A,D The MESSAGE stack is empty
UA 5121 F N Failed to send error message to CLIENT
UA 5122 F N Failed to offer service ‘SSS’
UA 5123 F D Failed to open SERVER protocol connection
UA 5124 F Missing or invalid password
UA 5201 W Missing HOST specifier
UA 5202 W Invalid HOST index ‘NNN’
UA 5203 W Host ‘SSS’ is not active
UA 5204 W Missing SSS qualifier
UA 5205 W Invalid SSS qualifier ‘SSS’
UA 5206 W A Use SET LOCAL/REMOTE to modify SSS qualifier ‘SSS’
UA 5207 W Invalid SSS qualifier ‘SSS’
UA 5208 W There are no remote host connections
UA 5301 E A Invalid allocation Parameters (NNN + NNN > NNN)
UA 5304 E A Invalid ARCHIVE file format [SSS]
UA 5305 E A Invalid ARCHIVE block length (NNN)
UA 5306 E A Incomplete ARCHIVE file – missing end-of-file
UA 5401 W A More than NNN levels of nested strings
UA 5402 W Unmatched string delimiter ‘S’
UA 5403 W Invalid string format
UA 5404 W Unmatched string delimiter ‘S’
UA 5405 W No closing quote on string literal

Page 184 Appendix A. USER-Access Error Messages MAN-REF-H363-3.4.2
Table 4. Error Messages
FAC Code SEV Comment Text
UA 5406 W A Empty string substitution
UA 5407 W String variable ‘SSS:SSS’ is invalid
UA 5408 W Invalid SSS qualifier ‘SSS’
UA 5410 W Invalid string function ‘SSS’
UA 5411 W Invalid parameter for function ‘SSS’
UA 5412 W Too many parameters for function ‘SSS’
UA 5414 W Missing parameters for function ‘SSS’
UA 5415 W D String function ‘SSS’ is not supported
UA 5501 E N Failed to send DEBUG information
UA 5601 E D TRANSLATE trouble – invalid sequence
UA 5602 E TRANSLATE (code conversion not supported by remote host)
UA 5603 W A Character code cannot be translated
UA 5604 E D,N Failed to capture NETEX code conversion table (In a NETEX environment only)
UA 5605 E D,N Invalid translate code table length NNN
UA 5306 E A Incomplete ARCHIVE file – missing end-of-file
UA 5606 E N Failed on binary read of NETEX code table (NNN) (In a NETEX environment only)
UA 5607 E N Failed to exchange TRANSLATE information
UA 5608 Q Invalid TRANSLATE value ‘SSS’
UA 5609 W TRANSLATE value SSS is out of range (0-NNN)
UA 5610 W Translate IN_ONLY and OUT_ONLY are both on
UA 5701 E Duplicate label ‘SSS’
UA 5702 E Label ‘SSS’ is not 1-NNN characters in length
UA 5703 E Label ‘SSS’ contains invalid characters
UA 5704 E Missing label ‘SSS’
UA363 2002 E A,N,R Data checksum (CRC) error at block NNN
UA363 2004 E R Sequence number error at block NNN
UA363 2101 E A Failed to allocate NNN bytes of dynamic memory

MAN-REF-H363-3.4.2 Appendix A. USER-Access Error Messages Page 185
Table 4. Error Messages
FAC Code SEV Comment Text
UA363 8001 E Keyboard interrupt
UA363 8002 E A File size limit exceeded
UA363 8201 E D Missing command interpreter (COMINT)
UA363 8210 E A Request for input not supported
UA363 8211 E D Unexpected status (NNN) when flushing output
UA363 8301 E D Missing SOURCE
UA363 8302 E H Failed to access file ‘SSS’
UA363 8303 E H Failed to get status for file ‘SSS’
UA363 8305 E H Failed to open ‘SSS’ for reading
UA363 8306 E H Failed to open ‘SSS’ for writing
UA363 8307 E Missing SOURCE file name
UA363 8303 E File ‘SSS’ already exists with –CREATE NEW option
UA363 8311 E H Failed to delete file ‘SSS’
UA363 8312 E H Failed to create file ‘SSS’
UA363 8318 E H Failed to CLOSE SSS
UA363 8321 E H Failed to open HOME terminal SSS
UA363 8322 E H File read of NNN bytes failed
UA363 8324 E H File write of NNN bytes failed
UA363 8330 E RECORD length NNN exceeds MAXRECORD of NNN
UA363 8334 E D Transfer mode ‘NNN’ is not supported
UA363 8336 E A Unknown archive mode tag field fflSSS”
UA363 8337 E A Invalid wildcard specified ‘SSS’
UA363 8338 E Bad ARCHIVE record length NNN
UA363 8339 E Invalid ARCHIVE tag field [SSS]
UA363 8340 E H Failed to position to end of file for APPEND
UA363 8341 E H Failed to mark the end of file
UA363 8342 E H Character read of NNN bytes failed
UA363 8343 E H Character write of NNN bytes failed
UA363 8344 E H Failed to set terminal spacing
UA363 8345 E Invalid file name ‘SSS’

Page 186 Appendix A. USER-Access Error Messages MAN-REF-H363-3.4.2
Table 4. Error Messages
FAC Code SEV Comment Text
UA363 8346 E H Failed to WAIT for ‘SSS’ completion
UA363 8647 E D File number mismatch (NNN vs. NNN) during SS WAIT
UA363 8603 E H Invalid directory ‘SSS’
UA363 8604 E Failed to get working directory – SSS
UA363 8606 E Invalid SPACE value ‘SSSS’
UA363 8701 E Missing DESTINATION specifier
UA363 8702 I Piped command failed with an exit status of SSS
UA363 8703 E H Failed to create named pipe ‘SSS’
UA363 8704 E H Failed to open named pipe ‘SSS’
UA363 8903 E Remote BATCH is not supported
UA363 9002 E A Invalid wildcard specifier ‘SSS’
UA363 9003 E H Failed to get filecode for SSS
UA363 9501 E D,H Failed to open DUMMY file
UA363 9502 E H Failed to open $RECEIVE
UA363 9503 E Invalid program name ‘SSS’
UA363 9504 E Failed to create process SSS (error = NNN,NNN)
UA363 9505 E H Failed to open file for STARTUP message
UA363 9506 E H Failed to write STARTUP message
UA363 9507 E Failed to STOP process (NNN,NNN)
UA363 9508 E H Read of NNN bytes from $RECEIVE failed
UA363 9509 E D REPLY length NNN greater than read count NNN
UA363 9510 E H Failed to send NNN byte REPLY
UA363 9511 E Cannot determine creator’s PID
UA363 9512 E H Failed to send WAKEUP message to creator
UA363 9513 E D Invalid user ID (NNN,NNN)
UA363 9514 E H Failed to tale BREAK ownership
UA363 9515 E H Failed to return BREAK ownership
SI 4001 W A Invalid OPERATOR password
SI 4002 W Service Initiator stopped

MAN-REF-H363-3.4.2 Appendix A. USER-Access Error Messages Page 187
Table 4. Error Messages
FAC Code SEV Comment Text
SI 4003 W Trace flag settings: SSS
SI 4004 W INFO not implemented
SI 4005 W Invalid CONTROL request ‘SSS’
SI363 8001 E Missing USERNAME
SI363 8002 E Login failed – invalid user name
SI363 8008 E A Login exceeded NNN second timeout
SI363 8012 E A Failed to start server: SSS
SI363 8034 E Login input of SSS failed
Additional Descriptions This list provides additional descriptions for some USER-ACCESS messages. These messages are marked in the preceding table with an “A” in the comment column. The descriptions below expand on the information in the table.
UA-302 Overflow of NNN byte environment buffer Severity: Error Explanation: User data is stored in fixed length environment buffers and the string that was to be added caused the environment buffer to overflow.
UA-303 Failed to add ‘SSS = SSS...’ Severity: Error Explanation: The variable name and its definition (truncated to 15 characters) will be displayed. SSS=SSS represents the variable addition to the environment that would not fit. To remedy this prob-lem reduce the length of the name or the size of the description or if attempting to add to the GLOBAL environment, use the -GLOBAL switch when invoking USER-ACCESS to increase the GLOBAL environment.
UA-501 Protocol error - expected [SS] - got [SS] Severity: Error Explanation: The protocol type in USER-ACCESS did not match the protocol type of the remote host. The probable cause is either a network interruption or a revision-level incompatibility between the Initiator and the Responder.
UA-4106 The requested blocksize NNN was reduced to NNN Severity: Informational Explanation: The reduction (and resultant message) will only occur during the connect process. First, the local NETEX and remote NETEX perform a blocksize negotiation, and then there is a sec-ondary blocksize negotiation between the USER-ACCESS Responder and Initiator. During negotia-tion the requested blocksize gets sent to the remote host and a negotiated blocksize gets returned. The negotiated blocksize is always the smaller of the two hosts.

Page 188 Appendix A. USER-Access Error Messages MAN-REF-H363-3.4.2
UA-4109 There were NNN CONNECT records ignored Severity: Warning Explanation: The records that are ignored are typically records coming from a newer release of the Responder than the Initiator. In this case the Responder sends more CONNECT information than the Initiator knows how to use. The message provides a warning that the connection may not support all of the functions offered by the Responder.
UA-4127 The MESSAGE stack is empty Severity: Error Explanation: An error has occurred, but there is no message associated with the error.
UA-4131 Failed to establish secondary NETEX connection Severity: Error Explanation: Some NETEX Responders need a second connection to perform file transfers. There is likely to be a NETEX error (e.g. too many sessions); check the NETEX message if one is provided and retry. This error could occur as a result of a timeout or because of a revision-level incompatibil-ity between the Initiator and the Responder
UA-4132 Restricted command in server startup file Severity: Error Explanation: For security reasons, USER-ACCESS server startup files may not contain any of the following commands: CONNECT, DISCONNECT, LOCAL, RECEIVE, REMOTE, or SEND. These commands also may not be embedded within USER-ACCESS aliases.
UA-4501 Nested (or recursive) input/alias limit of NNN exceeded Severity: Error Explanation: USER-ACCESS restricts the number of times an input script or alias can call itself or another script/alias; the current limit is ten levels. This error can also be a result of a user failing to escape alias processing (using the ‘!’ escape character) when redefining a USER-ACCESS command as an alias within a multicommand alias.
UA-4504 Bad output FORMAT definition - reset to default Severity: Error Explanation: A user can redefine the format of error messages by using the SET OUTPUT FORMAT command. This message results when the new definition does not begin with ‘{}’ to disa-ble string substitution.
UA-4505 Input request (NNN byte maximum) failed Severity: Error Explanation: USER-ACCESS provides a buffer for holding a multiline command or alias; this error occurs when that buffer is exceeded. If a large command or alias is required, it should be defined as an Input Script.
UA-4601 Variable ‘SSS’ contains invalid characters Severity: Warning Explanation: A variable name was created that contains invalid characters; SSS represents the vari-able name. Valid characters are alphanumeric ‘A’..’Z’, ‘0’..’9’. It is recommended for future com-patibility that variable names and alias names begin with an alpha character ‘A’..’Z’.
UA-4701 Recursive alias ‘SSS’ Severity: Warning Explanation: A warning message resulted when USER-ACCESS attempted to execute a single line alias that was recursive (it calls itself). A common cause of this error is executing an alias that calls an alias that calls the first alias back again.

MAN-REF-H363-3.4.2 Appendix A. USER-Access Error Messages Page 189
UA-4704 Use SET LOCAL/REMOTE to modify SSS qualifier ‘SSS’ Severity: Warning Explanation: Some LOCAL and REMOTE qualifiers cannot be modified with some USER-ACCESS commands. This error occurs if a user attempts to modify either current directory by means of a -DIR switch on a SEND, RECEIVE, LOCAL, or REMOTE command line.
UA-4709 Command token is greater than NNN characters Severity: Warning Explanation: A token is a sequence of characters separated by either blanks, tabs, end-of-line, or any combination thereof. The token cannot exceed NNN length. Note that a token, enclosed in quotes, can include spaces.
UA-4804 MAXRECORD (NNN + NNN) too large for BLOCKSIZE (NNN) Severity: Error Explanation: MAXRECORD plus the record header size must be less than or equal to the BLOCKSIZE negotiated at connect time. To correct the error, reduce the MAXRECORD qualifier, reconnect with a larger BLOCKSIZE, or enable the PARTial record qualifier.
UA-4809 Sequence error (NNN vs. NNN) in record RECEIVE Severity: Error Explanation: USER-ACCESS has a sequence number associated with each record in a RECORD MODE file transfer. A sequence error is probably caused by a network interruption.
UA-5120 The MESSAGE stack is empty Severity: Error Explanation: Refer to previous identical message: UA-4127
UA-5206 Use SET LOCAL/REMOTE to modify SSS qualifier ‘SSS’ Severity: Warning Explanation: Refer to previous identical message: UA-4704
UA-5304 Invalid ARCHIVE file format [SSS] Severity: Error Explanation: This error results from trying to use the RESTORE MODE to SEND or RECEIVE a file that was not created by a BACKUP MODE transfer, or to use COPY MODE to SEND or RECEIVE a file to or from a host that is a different type from the local host (i.e., not peer-to-peer).
UA-5305 Invalid ARCHIVE block length (NNN) Severity: Error Explanation: This error results from trying a RESTORE or COPY MODE file transfer on an incom-patible HOSTTYPE or ARCHIVE file.
UA-5306 Incomplete ARCHIVE file - missing end-of-file. Severity: Error Explanation: This error results from trying a RESTORE MODE file transfer on a container file that for unknown reasons is not complete. The most likely reason is that the BACKUP MODE transfer that created the file was aborted, leaving a partial file with missing data and no Archive end-of-file mark.
UA-5401 SSS more than NNN levels of nested strings Severity: Warning Explanation: This warning occurs with string substitution. If the nesting level is more than NNN, this warning results. (i.e., if NNN is 8, then {{{{{{{{{password}}}}}}}}} causes a warning.)

Page 190 Appendix A. USER-Access Error Messages MAN-REF-H363-3.4.2
UA-5406 Empty string substitution Severity: Warning Explanation: This warning results when USER-ACCESS is unable to find an alphanumeric string (string variable or function) where one was expected. This is generally due to a syntax problem caused by a missing parameter to a string function or a missing function name itself. Make sure that a string substitution does not result in a null string. For example, placing too many, or unnecessary brackets ‘{‘ ‘}’ around a variable or argument will cause this warning condition.
UA-5603 Character code cannot be translated Severity: Warning Explanation: This warning results from the TRANSLATE command to define character transla-tions. Characters that cannot be redefined are uppercase alpha (“A”...”Z”), digits (“0”...”9”), space (“ “), equal (“=”), and null (“”).
UA363-2002 Data checksum (CRC) error at block NNN Severity: Error Explanation: When the CRC qualifier is enabled for a SEND or RECEIVE operation, a 32-bit CRC is calculated by the sender and verified by the receiver. The verification has failed due to some net-work interruption. Retry the transfer.
UA363-2004 Sequence number error at block NNN Severity: Error Explanation: When the CRC qualifier is enabled for SEND or RECEIVE, a block sequence number is assigned by the sender and verified by the receiver. The verification has failed usually indicating lost data. Retry the transfer.
UA363-2101 Failed to allocate NNN bytes of dynamic memory. Severity: Error Explanation: This error indicates that the host (or user process) exceeded virtual memory limits. To remedy the problem, one could take action to increase virtual memory or reduce the number of open connections.
UA363-8002 File size limit exceeded Severity: Error Explanation: This error indicates that there is not enough room for the file to fit on the current vol-ume. The file size limit is the amount of free space on the destination.
UA363-8210 Request for input not supported
Severity: Error Explanation: The GUARDIAN host requested input from the terminal during command execution. If a LOCAL or REMOTE GUARDIAN command requires input, edit your responses into a text file and use the IN qualifier on the RUN command (e.g. RUN MYPROG /IN MYRESP/).
UA363-8336 Unknown archive mode tag field ‘SSS’ Severity: Error Explanation: When restoring an archive file using mode RESTORE or COPY, the indicated prefix field is not supported. This error indicates an incompatible host type (i.e., not a peer) or an incompat-ible USER-ACCESS version.

MAN-REF-H363-3.4.2 Appendix A. USER-Access Error Messages Page 191
UA363-8337 Invalid wildcard specifier ‘SSS’ Severity: Error Explanation: The first asterisk found in the DESTINATION wildcarding specifier indicates the NAME portion of the filename. The second asterisk indicates the EXTENSION portion of the file-name. An invalid wildcard specifier would be caused by any additional asterisk characters in the DESTINATION wildcarding specification on a SEND or RECEIVE command line.
UA363-9002 Invalid wildcard specifier ‘SSS’ Severity: Error Explanation: An invalid wildcard source specifier would be caused by a file specification that is not a valid GUARDIAN file specification, or an asterisk was found in the volume or subvolume portion of the file specification.
SI-4001 Invalid OPERATOR password Severity: Warning Explanation: This warning is issued from the CONTROL program for the Service Initiator. The password was not specified or it was invalid.
SI363-8008 Failed to start server: SSS Severity: Error Explanation: Following a successful GUARDIAN login, the USER-Access server (RESPONDER) could not be started up for some reason. Verify that the server task exists and that the user has appro-priate privileges for accessing them. Refer to the accompanying GUARDIAN message for further in-formation.
SI363-8012 Login exceeded NNN second timeout Severity: Error Explanation: The cause of this error is that either LOGIN (CONNECT) failed to successfully login and activate the USER-Access Responder, or the system is extremely busy (cannot get logged in dur-ing the allotted time interval). To remedy the error either try again or if it is due to a busy system, have the remote site administrator increase the LOGTIMEOUT value in the Service INITIATOR startup file and stop and restart the Service Initiator.