Food Preservation Made Simple -...
45
Kendra Stamy Food Preservation Made Simple SAMPLE SAMPLE SAMPLE
Transcript of Food Preservation Made Simple -...

Kendra Stamy
Food Preservation Made Simple
SAMPLE
SAMPLE
SAMPLE

A start-up guide to freezing, canning and dehydrating. This ebook is designed to give you the information and tools needed to begin preserving
your own foods. It is written for the beginner homesteader and contains the basics to preserving
summer’s bounty for winter’s cold.
SAMPLE
SAMPLE
SAMPLE

All contents copyright 2015 by Kendra Stamy. All rights reserved. No part of this document may
be reproduced or transmitted in any form, by any means (electronic, photocopying, recording, or
otherwise) without the prior written permission of the publisher!
The author spent many hours creating this resource for you and asks that you respect this. To gift a
copy to a friend, please visit A Proverbs 31 Wife to purchase it there.
This publication is protected under the US Copyright Act of 1976 and all other applicable international, federal, state, and local laws, and all rights are
reserved.
SAMPLE
SAMPLE
SAMPLE

Kendra Stamy grew up on a farm in an Ohio county sometimes referred to as Preble-Tucky. A large red farmhouse is where she learned most of the food preservation skills that she is sharing in this book.
As the oldest of six children she knows first hand just how much food it takes to feed a family. Preserving summer’s bounty for winter’s cold was how her mom managed to keep food on the table for the family without mortgaging the farm!
Today Kendra and her husband live in town with their small son. They both dream of the country and have turned most of their small backyard into garden space to grow food which she then preserves for winter.
A Proverbs 31 Wife
About the Author
SAMPLE
SAMPLE
SAMPLE

About the Author 4Table of Contents 5Introduction 6Money Matters: The financial side of food preservation. 7Healthwise: The Nutritional Side to Food Preservation 8Safety First 9Why I highly Recommend a Vacuum Sealer 10Freezing - Startup 11Freezing - Quick Freeze 12Freezing - Blanch or Cook First 15Vegetable Blanching Times 19Dehydration - Startup 20Dehydration - Fruits 21Dehydration - Vegetables 24Dehydrating Times for Fruits & Vegetables 26Canning Safety 28Canning - Startup 29Canning - Startup 31Hot Water Bath Times for Commonly Canned Fruits 34Canning - Pressure Canning 36Canning Times and Instructions for Commonly Canned Vegetables 38Common Canning Problems and Solutions 39Preserving Meats 41Which Method is Right for You? 43Deciding How Much to Preserve 44Conclusion 45
Table of Contents
SAMPLE
SAMPLE
SAMPLE

Food preservation has always been a part of my life. From the earliest time I can remember, mother would be busy at the canner most of the summer.
By age ten, mother was allowing me to assist her in many different aspects of freezing and canning foods. By 15 she had taught me enough to preserve most foods from start to finish on my own.
In this book you are going to learn the basics of canning and freezing that my mother taught me. In addition, we will be going over the basics of dehydration which Mother and I learned together.
We will start by learning the financial and health advantages to food preservation. Next, a crash course in safety, followed by resources and recommendations for food preservation equipment.
After we learn about each aspect of preservation, there will be instructions for you to put into practice what you just learned. You will freeze strawberries and green beans; dehydrate apples and make a spice; and can salsa!
My goal is for you to walk away from this book with the confidence to begin preserving your own foods.
Let’s get started!
*Throughout this book I mention different supplies and equipment that I use for preserving foods. All of the supplies mentioned are listed here for easy access.
Introduction
SAMPLE
SAMPLE
SAMPLE

Money Matters: The financial side of food preservation.In the summertime it’s easy to obtain naturally grown fruits and veggies. Some can go out their own back door to the garden, others may visit their local Farmer’s Markets. Using websites like Local Harvest, one can also find organic and naturally grown seasonal produce as well.
The wintertime is a different story. Most, if not all of your produce, may have to come from the grocery store and if you are wanting natural or organically grown foods, you can be prepared to kiss your paycheck goodbye. Of course, if you are fortunate enough to live in the south, this may not be an issue.
Food preservation is a wonderful way to stock up on fruits and veggies while prices are at their lowest.
A Brief Look at the Startup Costs to Preserving Foods:Canning has the largest start-up costs, with canners, jars, etc. However, canning has the lowest ongoing cost. Primarily new lids and occasional jars and rings to replace old or broken ones.
Dehydration is probably the simplest to start up, needing only a dehydrator and airtight containers. A vacuum sealer is highly recommended, but not necessary. Ongoing costs would only be containers, and if you have a vacuum sealer, mason jars work the best, leaving you with almost no ongoing cost.
Freezing is least expensive to start up. Assuming you already have a freezer, you will only need containers. However it has the most expensive ongoing cost and contains a small amount of risk too. Ongoing cost is electricity, and if your electricity goes out you could lose your food.
Last year I wrote an article where I shared some basic figures on how gardening and canning saved us money. One example was of salsa. We grew our own tomatoes and peppers for for the salsa, and have to buy just a few other things costing less than $20 in all. Based on how much salsa we eat, and the cheapest salsa I could find in store, I figured that we saved a minimum of $100 a year by canning our own salsa.
In a nutshell, food preservation will cost more upfront, but it saves money in the long run.
If you have the space and time to grow your own fruits and vegetables, this is the best way to maximize your savings. A packet of seeds may cost 50 cents to a couple dollars depending on the seeds and whether or not you buy organic. Some seeds can even be saved from year to year, like our heirloom tomatoes.
Fertilizer can often be obtained from farmers for free, and produce scraps get tilled into the garden to help maintain the soil. In our case, less than $50 a year goes into our garden, producing $100’s of dollars worth of fruits and veggies to eat, preserve, and give away.
SAMPLE
SAMPLE
SAMPLE

Healthwise: The Nutritional Side to Food PreservationPreserving your own foods gives you a greater control over where your food comes from. If you have available space to grow your own food, you can have even more control.
I think most of us will agree that our health is one of the most important things in our lives. And what we eat largely contributes to our health.
At the grocery store many of us are faced with two choices; the affordable fruits and veggies (fresh, canned, frozen or otherwise) that are commercially grown and covered in pesticides and chemicals, or the natural/organic foods that are good for you and hurt your wallet.
Shopping at farmer’s markets allow you to purchase natural/organic foods at a more affordable price. Bulk purchasing of produce at farmers’ markets will often procure you a cheaper price, making it very cost effective to buy in bulk and preserve it.
Another issue is how foods are packaged. The tin cans you buy canned goods in are lined with plastic that contains… BPA. Yes, the plastic that we have all tried to remove from our homes; seeking to replace our estrogen leaching BPA plastics with BPA-free, and yet we are still buying it.
The plastic lining is to prevent foods (especially high acid foods) from corroding the tin can. But the plastic in turn, leaches into our foods. To read more about the dangers found in our canned foods, I recommend this article found at Treehugger.
If you are concerned about plastics (any kind) then your healthiest option for preserving is to can your foods in glass jars. Next would be dehydration, as long as you have a vacuum sealer and can store your dehydrated foods in vacuum sealed glass jars. You can freeze foods in glass jars as well, but it takes up far more space, and since freezing foods expand, you run the risk of breakage.
If you care about where your food comes from and want to be sure it’s preserved in the best way possible, home preservation is perfect for you!
SAMPLE
SAMPLE
SAMPLE

When it comes to food preservation, don’t take food-prep safety lightly. You are, after all, working with foods that you will be eating months down the road.
Make sure foods are safely packaged, in sanitized containers. Jars and plastic containers should be washed in the dishwasher if at all possible, otherwise be sure to wash in hot water and allow to air dry. Vacuum seal bags are already sanitized.
Fruits and vegetables should be freshly picked, and free from bad spots. If the fruit has rotten or bad spots, be sure to completely remove the bad spots.
A kitchen sink is the most convenient place to wash fruits and vegetables. However, studies have shown that the kitchen sink often contains more germs and bacteria than the toilet. Before you place any foods into your sink, be sure to scrub your sink and sanitize it with a food safe cleaner.
Canning has its own set of safety challenges; which we will go over in detail in the canning section.
Safety First
SAMPLE
SAMPLE
SAMPLE

A vacuum sealer is not necessary for any part of food preservation, yet I love mine and use it nearly exclusively for just that.
There are many different brands and models out there, but my mom and I own the FoodSaver GameSaver Deluxe. We love it, the suction is great and have used them for several years. I cannot say anything about other model/brands because I haven’t tried them, but I do recommend the one I have.
Whichever brand you get, you will want one that has a port to seal jars and canisters as well. You will need to purchase a separate attachment to seal jars and canisters, but they are quite worth it.
A vacuum sealer is most beneficial to frozen foods. Tons of food gets wasted each year because of freezer burn, simply vacuum sealing the food helps eliminate over 75% of that.
Vacuum sealing also keeps food tasting fresher, longer. Most frozen meats need used within 6 months to a year. Pork especially starts tasting old after 6 months or so in the freezer. However, we have kept beef (primarily hamburger) in vacuum sealed packages for nearly 2 years in the freezer and it still tastes good. Pork will stay fresh tasting for over a year as well.
Fruits and vegetables are especially susceptible to freezer burn, vacuum sealing them, keeps them tasting like a fresh bite of summer. Berries, green beans, red beets and peas are just a few things that get vacuum sealed.
Dehydrated foods, and dry foods will oxidize and the dehydrated foods can get moisture in them and become tough and unfit to eat. Vacuum sealing these foods, both in jars and in bags, help me keep our dried foods as fresh as possible.
While a vacuum sealer is not a necessity; if you plan on buying in bulk or storing food long term, it’s worth your consideration. Don’t feel like you can afford one? Look on sites like Ebay or local garage sale groups for a used one. I found mine for $15 at a garage sale!
Why I highly Recommend a Vacuum Sealer
SAMPLE
SAMPLE
SAMPLE

In my opinion freezing is the simplest way to preserve foods. You need containers, labels and marker, a freezer and your foods.
For containers, freezer boxes and Ziploc or vacuum seal bags fit nicest and work the best for freezing foods. Mason jars may be used, but they don’t fit as nice, and one must be careful not to overfill, or tightly seal them as the freezing foods can cause them to break.
Some will use old yogurt or sour cream containers (among others) to freeze in. This is not my recommendation, using thin plastic containers to freeze foods is the equivalent of using sandwich bags instead of freezer bags. Your foods will taste like freezer very quick and will also freezer burn easily. In addition, those containers are not meant for freezing and have the potential to crack open as the foods freeze and expand.
Make sure to clearly date and label everything you freeze. I cannot tell you how many times I have looked at a container of something and wondered what it was. I have also used beef broth instead of chicken and vise versa because I didn’t label it and later guessed incorrectly as to what was in the container.
Freezing - Startup
SAMPLE
SAMPLE
SAMPLE

Many fruits need nothing more than to be cleaned or washed and put into containers.
Fruits like blueberries and bing cherries can be easily dumped into bags or containers and frozen. They seem to last nicely for a year or so, at which point I’ve used them all and need to freeze more. :)
Depending on the fruit, I may do a quick freeze and freeze on freezer trays before bagging and sealing.
Fruits like raspberries and sliced strawberries need the quick freeze method. They are soft and squishy, packing them into bags and vacuum sealing them while they are still fresh will create a lump of frozen fruit that must be thawed completely before using them.
I use the quick freeze method for any fruit that I may want to measure out while still frozen. Peppers, strawberries, raspberries, peach slices, and even banana slices are all done this way.
I sort out the bad, and wash the good. Then I line cookie trays with wax paper and place the fruit on the paper in a single layer. 3-5 hours later I quickly remove the frozen fruits and place them in containers or bags.
Bell peppers stay the nicest when I vacuum seal 5-10 halves in a bag. Once I open a vacuum sealed bag, I transfer them to a freezer bag (not vacuum sealed) and put back into the freezer. Since it takes about a month to use a bag of peppers like that, they stay pretty nice. This is what works for how we cook, you will discover what works for you as well.
If you work quickly to transfer from trays to containers, your fruits will thaw very little at all and you will have loose, frozen fruits to use in recipes, smoothies and more!
*Note on the peppers: When I want to use a frozen pepper for a recipe, I remove it from the bag, run cool water over it for a few seconds and then cut it before it completely thaws. I only freeze peppers for use in recipes where they will be cooked or baked. If you want peppers for fresh eating, I suggest you buy fresh.
Freezing - Quick Freeze
SAMPLE
SAMPLE
SAMPLE

Freezing Strawberries: Quick freeze method.Be sure to scrub your sink with a food safe sanitizer. Dump your fruit in and begin.
Strawberries can be frozen whole, quartered, sliced or diced depending on what you want to do with them. Sliced strawberries are perfect for many recipes and amazing in smoothies. We will be slicing these strawberries.
Cut off the stems and cut out any bad, then slice your strawberries. Once you slice your berries, lay them on a towel to air dry for a bit. Try to do the washing and sorting quickly as possible so the fruit retains as many nutrients as possible.
Line several cookie sheets with wax paper and spread your sliced berries over them.
SAMPLE
SAMPLE
SAMPLE
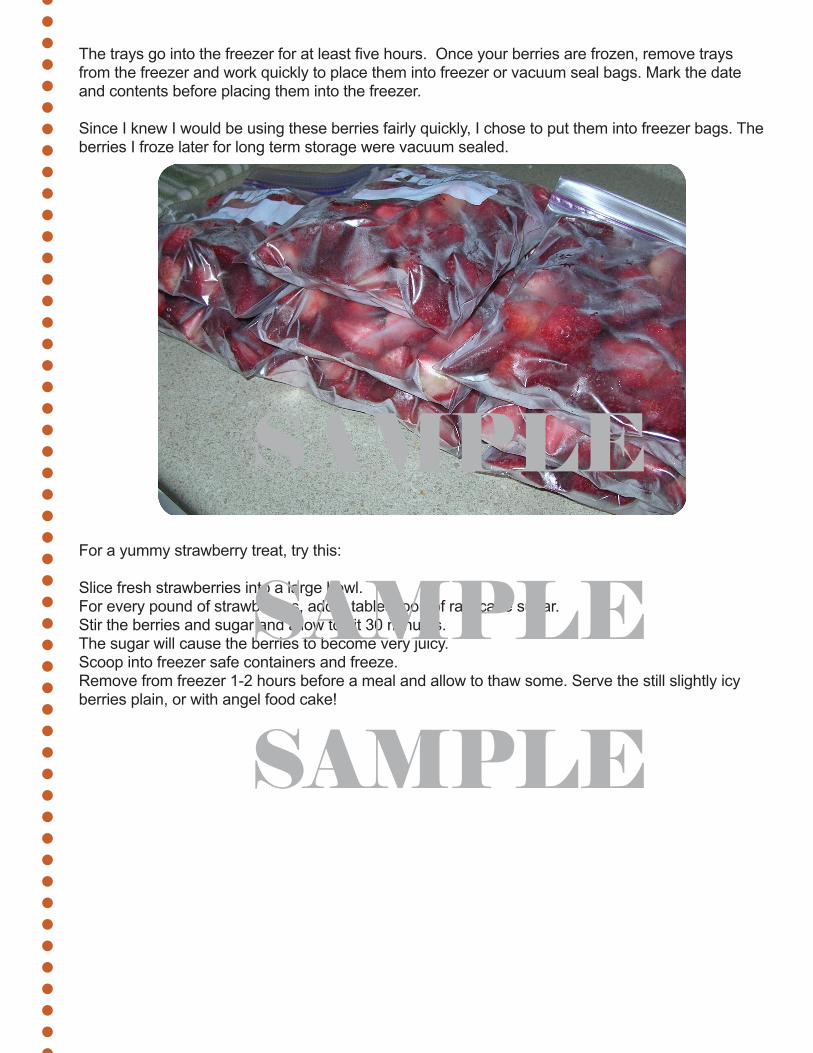
The trays go into the freezer for at least five hours. Once your berries are frozen, remove trays from the freezer and work quickly to place them into freezer or vacuum seal bags. Mark the date and contents before placing them into the freezer.
Since I knew I would be using these berries fairly quickly, I chose to put them into freezer bags. The berries I froze later for long term storage were vacuum sealed.
For a yummy strawberry treat, try this:
Slice fresh strawberries into a large bowl. For every pound of strawberries, add a tablespoon of raw cane sugar.Stir the berries and sugar and allow to sit 30 minutes. The sugar will cause the berries to become very juicy.Scoop into freezer safe containers and freeze.Remove from freezer 1-2 hours before a meal and allow to thaw some. Serve the still slightly icy berries plain, or with angel food cake!
SAMPLE
SAMPLE
SAMPLE

All starchy foods need to be blanched before freezing.
Blanching is the process of scalding vegetables in boiling water for a short time, and then plunging into very cold, or ice water to halt the cooking process.
This stops the enzyme actions which cause loss of flavor and vitamins. It cleanses the surface of dirt and organisms, helps retain color and texture, while wilting or softening the veggies making them easier to pack.
If you have a blanching pan, the process is very simple. I have one, but most of the time I use a basic steamer basket that I plunge down into the boiling water.
To blanch my veggies, I rinse and prepare them (cutting, etc.). Then, I get water on to boil and scrub my sink clean. I fill the sink with ice cold water. Once the water boils, I plunge the veggies into the boiling water and set the timer. Once done, I transfer the veggies to the cold water and cool.
Once cooled, I remove the veggies from the sink and place on a towel to dry before packing into containers or vacuum sealing them in bags.
Freezing - Blanch or Cook First
SAMPLE
SAMPLE
SAMPLE

Freezing Green Beans: Blanch first method.In my opinion, frozen green beans have the best flavor of all. Once we learn how to freeze them, I will share our family’s favorite way to enjoy frozen green beans.
Growing up, mother and I would freeze our beans in Ziploc freezer bags. They worked but the beans began to freezer burn within 6 months. Now we vacuum seal our green beans and they stay nice for well over a year.
Start out by preparing your beans. You can pick them young (three to four inches long) and remove the ends, or let them mature and break them into one inch pieces.
Wash your beans to remove dirt and plant debris.
Put a large pan of water on to boil. This is where a steamer pan is nice, today I’m just using a soup pan with a steamer basket.
Once your water comes to a boil, fill your basket halfway full of beans and lower into the pan.
Set your timer for two minutes. This blanches the beans enough to break down the certain enzymes and preserve the best flavor.
SAMPLE
SAMPLE
SAMPLE

Once the timer goes off, remove your beans from the boiling water. Pour them into a (clean) sink full of cold water. To stop the cooking action even quicker, add ice cubes to the cold water.Once the beans have cooled, scoop them out of the sink and onto a towel to dry.
Once your beans have air dried for a few minutes, it is time to package them for the freezer. Put enough beans for one or two meals into your bags or containers.
A typical serving size of green beans is ½ a cup.
Be sure to date your packages before placing them into the freezer.
Our family favorite: Dump frozen beans into a skillet with a small amount of water. Cover and cook until beans thaw and become tender. Remove lid and add, butter, onion slivers and minced garlic.
SAMPLE
SAMPLE
SAMPLE

Saute until onions are tender. Lightly salt and serve.
Once you are comfortable preparing and freezing simple vegetables, consider making making freezer pickles with cucumbers, or freezer jams? There are many great recipes out there for you to try!
SAMPLE
SAMPLE
SAMPLE

Artichoke-Globe (hearts) Artichoke-Jerusalem Asparagus (depending on stalk size) Beans-Snap, Green, or Wax Beans-Lima, Butter or Pinto Broccoli Brussel Sprouts (depending on size) Carrots Small Diced or sliced Cauliflower Celery Corn on the Cob sm med lg Whole kernel or cream style - blanch before cutting off cob.Eggplant Greens Peas-Edible pod Peas-Blackeye Peas-Green PotatoesTomatoesTurnips or Parsnips (cubes) Zucchini (and summer squash) Sliced
Vegetable Blanching Times
742-43333-5
5233
79 114422213-51-223
Minutes Vegetable
I usually cook and mash, or cut squash and pumpkins for freezing. Here you can find more on how I make my own pumpkin puree.
SAMPLE
SAMPLE
SAMPLE
If you are looking for the most cost and space effective way to preserve foods, dehydration will be your best friend. Dried foods take up far less room than their fresh counterparts, making the most of your food storage space.
There are three different ways commonly used to dry foods:
Sun drying is the oldest form of dehydration, with the appeal of no cost. However, it’s very hard to ensure that your fruit and veggies dry before the bugs eat it all! You also run the risk of spoilage, as the foods are very susceptible to growing bacteria in an uncontrolled environment like that. I do not recommend this method at all.
Oven drying will work if your oven will heat at 150 or lower. My oven doesn’t heat that low (it only gets down to 170), I tried drying tomatoes twice in my oven, burning them both times. Needless to say, I gave up until I could afford the dehydrator I wanted.
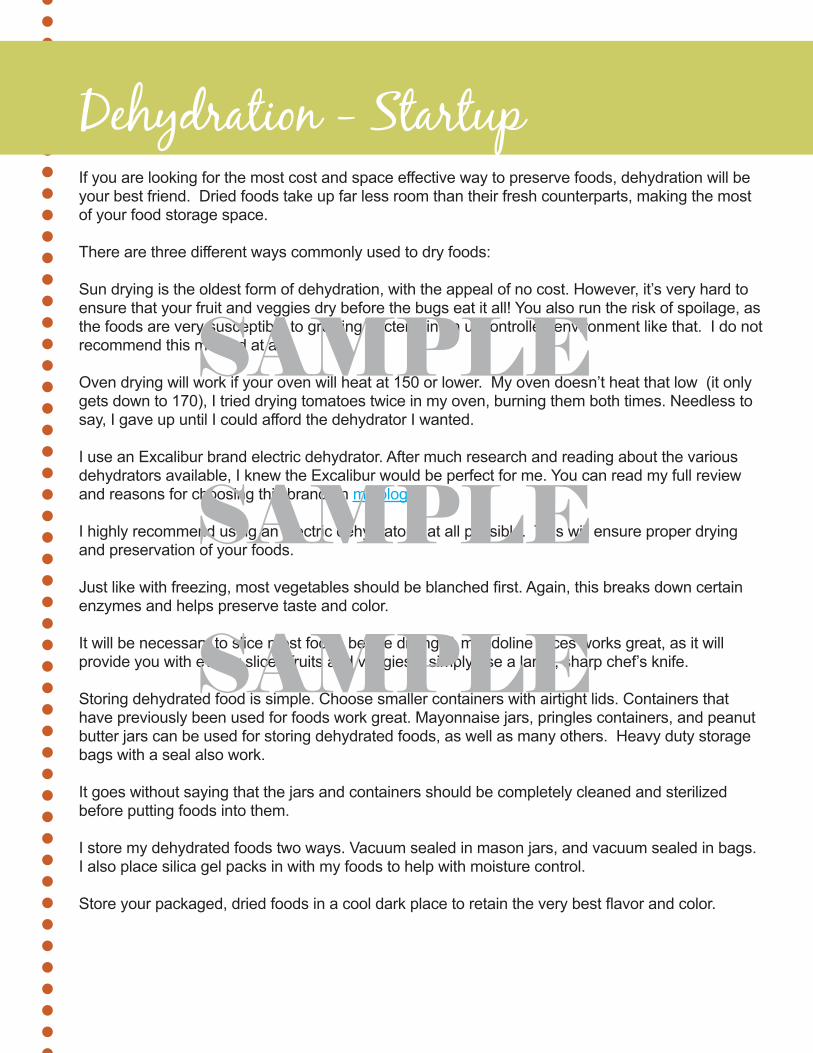
I use an Excalibur brand electric dehydrator. After much research and reading about the various dehydrators available, I knew the Excalibur would be perfect for me. You can read my full review and reasons for choosing this brand on my blog.
I highly recommend using an electric dehydrator if at all possible. This will ensure proper drying and preservation of your foods.
Just like with freezing, most vegetables should be blanched first. Again, this breaks down certain enzymes and helps preserve taste and color.
It will be necessary to slice most foods before drying. A mandoline slices works great, as it will provide you with evenly sliced fruits and veggies. I simply use a large, sharp chef’s knife.
Storing dehydrated food is simple. Choose smaller containers with airtight lids. Containers that have previously been used for foods work great. Mayonnaise jars, pringles containers, and peanut butter jars can be used for storing dehydrated foods, as well as many others. Heavy duty storage bags with a seal also work.
It goes without saying that the jars and containers should be completely cleaned and sterilized before putting foods into them.
I store my dehydrated foods two ways. Vacuum sealed in mason jars, and vacuum sealed in bags. I also place silica gel packs in with my foods to help with moisture control.
Store your packaged, dried foods in a cool dark place to retain the very best flavor and color.
Dehydration - Startup
SAMPLE
SAMPLE
SAMPLE

Choose fully ripe, fresh fruits, organic is best. Wash, core, and peel, fruits like apples, pears and pineapple. Bananas need peeled, Strawberries need washed and stemmed. Slice as evenly as possible in ¼” thick slices, and lay in a single layer on trays.
Fruits with pits like peaches and apricots, can be cut, peeled, pitted and dried in halves if you desire, keep in mind that this will increase drying time. Make sure to put the seed hole facing down on the trays.
Berries and grapes may be left whole, the only necessary prep is rinsing and sorting out the bad.
Nearly all fruits can be dried at 135 degrees. Drying times will vary greatly depending on the humidity of the air, the amount of moisture in your fruits, and your method of dehydration. The drying time chart included in this book is estimates only.
Since most fruits are ate dried without reconstituting them, you want your fruit to retain about 20% of its moisture. Dried fruits should be crisp to pliable depending on the fruit. Apples can be left soft or dried clear down to a chip-like texture.
While strawberries are best dried to a crunch, most other fruits are best with a chewy pliable texture. When I am drying fruits, I set my timer for a time an hour less than recommended and then check every hour until I am satisfied with the texture.
Do not pack dried fruits while still warm. In a sealed container, the warm fruit will create condensation and then soak up the moisture as it cools. This leads to bacteria growth, mold and other unsavory things.
I turn the dehydrator off and let the fruit sit and cool for about an hour before vacuum sealing it in jars or bags.
Dried apples and bananas are very easy to do and make wonderful snacks. Dried strawberries and raspberries are so good in cereals. Fruits like peaches, pears, and apricots are also favorites around our house for easy snacks.
Dehydrate citrus peels and finely chop for diy lemon and orange peel.
Dehydrated strawberries, raspberries, and kiwi make lovely edible decorations for cakes, and other confections.
If for some reason you wish to rehydrate your dried fruits, let fruits sit in just enough boiling water to cover them. They should be ready in about 7 minutes, or as soon as the water is gone. Don’t add sugars or spices until after the fruit is hydrated, as that will slow the process down.
Dehydration - Fruits
SAMPLE
SAMPLE
SAMPLE

Drying ApplesMy husband helps take care of his aunt’s apple trees and as a result, most years we get our apples right off the tree. This isn’t always the case. Just recently the trees didn’t do well at all. I began looking for nice organic apples to dry.
I look for freshly picked fruits, that are fully ripe. In order to retain most of the vitamins in my apples, I dried as many as I could the day I bought them. The others went into the fridge to be stored until my dehydrator was empty again.
Some people like to dry apples with the skins on. As long as your produce is organic and washed, there is no reason why you couldn’t; and since the skins contain so many nutrients, it stands to reason that you should. (It is our personal preference to peel them.)
You can core, peel, and slice apples by hand, however, I have an apple peeler, corer and slicer and I love it. It makes the whole process very quick and easy.
You may wish to soak your apples in a solution to prevent browning. The brown apples do not taste any different, they simply aren’t as pretty. I recommend soaking them in pineapple juice for 3-5 minutes.
Once your apples are ready, place them in a single layer on your trays.
SAMPLE
SAMPLE
SAMPLE
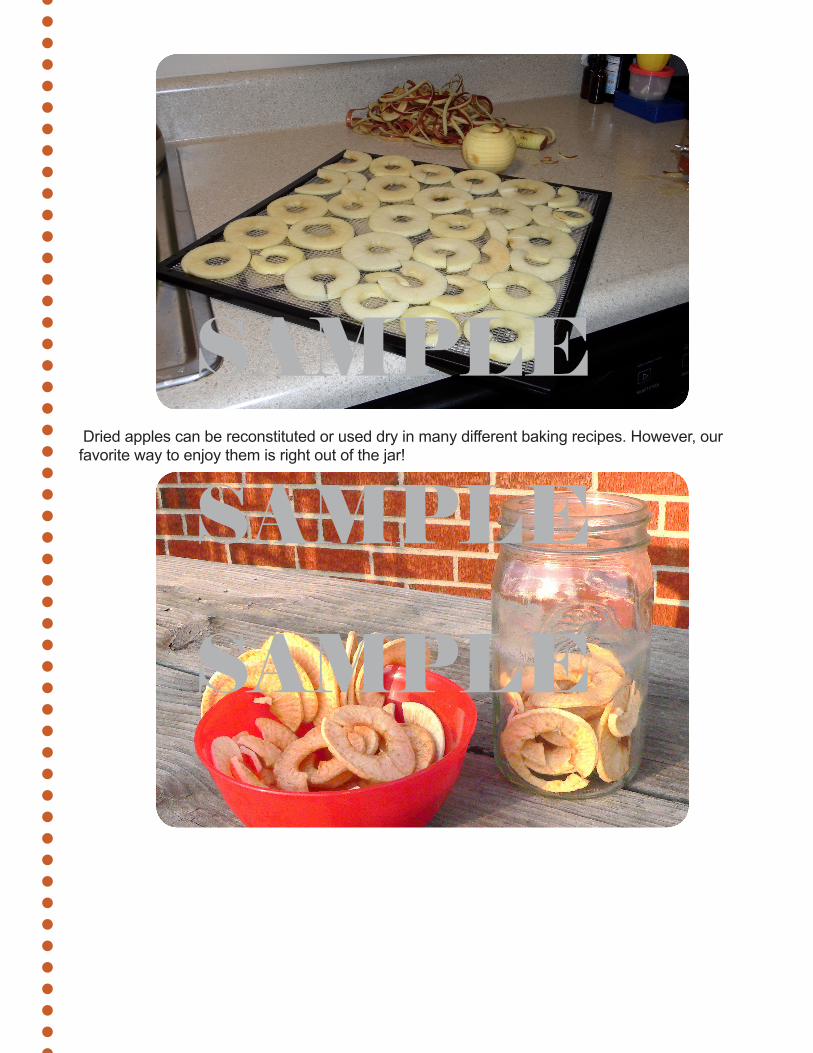
Dried apples can be reconstituted or used dry in many different baking recipes. However, our favorite way to enjoy them is right out of the jar!
SAMPLE
SAMPLE
SAMPLE

While fruits are dried for snacks, veggies are dried with the idea that they will be reconstituted and cooked later.
Veggies should be dried down to 10% of moisture or less for best results. Dry veggies at a temp of 125, with the exception of tomatoes and onions which need dried at 155.
Similar to freezing, most veggies should also be blanched before drying. Without the blanching, colors fade dramatically and nutrients are lost. Blanching is sometimes called “checking” as it “checks” or stops the loss of nutrients.
Greens and mushrooms are an exception to this along with a few others. Just check the dehydrating times and instructions chart at the end of this section.
Make sure to always choose freshly ripened veggies for dehydration. Dehydrating retains most of the nutrition and great taste of your veggies, but it cannot improve the original product. The fresher veggies are when you dry them, the better they will taste when rehydrated and cooked.
To reconstitute veggies, place equal amounts of water and dried vegetable into a pan. You can use hot or boiling water to speed the process if you like. Allow to vegetables to soak up to 2 hours or until they are plump again. 10 minutes is usually enough for most veggies.(do not soak leafy greens, as they are thin enough to rehydrate while cooking)
Foods like green beans, beets, carrots, corn, okra, peas, and broccoli are great reconstituted and cooked for a meal. While you can rehydrate while cooking; the best flavor is obtained by rehydrating as a separate step.
Veggies like carrots, zucchini, sweet potatoes, beets, cucumbers, parsnips and turnips make great veggie chips. Slice veggies ⅛” thick to make chips.
Other foods may not need reconstituted, but are rather used as seasoning and flavorings.
I dry celery, onions, and peppers to a crisp and then powder in the blender, to use as seasonings in our foods.
Dried mushrooms and tomatoes are often crumbled (tomatoes get cut) and tossed in soups and stews.
Dried veggies are stored in vacuum sealed mason jars. Once I open the jar, it stays in my fridge or freezer. While the dried foods do not have to be kept cold, I feel that they retain their flavors much better if I keep them in the fridge or freezer once opened.
Dried tomatoes, mushrooms, onion, celery powder and pepper powder all have permanent spots in my fridge. These are rarely rehydrated, instead they are cut or crumbled into various dishes for flavor.
Dehydration - Vegetables
SAMPLE
SAMPLE
SAMPLE

You can make your own greens powder to add to soups, sprinkle in salads, or mix with protein shakes.
1. Dry a mixture of kale, spinach and any other greens you like. 2. Put the dried greens in your blender and powder them. 3. Keep in mind, the greens will dry down a lot. 5 pounds of fresh greens will dry to about 10 ounces of dried greens.
Make Hot Pepper PowderOne thing I really love about dehydration, is just how easy it is to dry small batches of produce.
At summer’s end, most garden plants are done producing. Tomatoes and peppers are two plants that will often produce right up until the first frost. When we find out there will be a killing frost, we strip the plants of anything remaining that could possibly be used.
I picked all of the peppers, even the little ones. The result was a random mix of bell, jalapeno and banana peppers.
You can choose a blend of your favorite peppers in the store. A mix of sweet bananas with a few chili peppers result in a slightly spicy, flavorful seasoning.
Slice larger peppers, and cut small ones in half or leave whole. Keep in mind that the seeds will increase the heat, so you may wish to remove most of them.
Pour the dehydrated peppers into your chopper and grind to a coarse powder.
Add small amounts to any foods you would like to have a little extra heat. We occasionally use ours in place of cayenne pepper, and like adding it to chilis.
SAMPLE
SAMPLE
SAMPLE

Dehydrating Times for Fruits & Vegetables
Fruit/Veg PrepDrying Time Final Texture
Apples
ApricotsAsparagus
BananasBeans- Green and WaxBeans- Lima, Kidney etcBeets
BlueberriesBroccoli
Brussels SproutsCarrotsCauliflower
CeleryCherries Citrus Peel
Corn
CucumberEggplantGrapes
Greens- Spinach, Kale, ChardHerbsKiwiMushroomsNectarinesOkraOnionsPeachesPearsPeas
Peel, core and slice. Soak in pineapple juice 15-45 min. for color preservation.Halve, peel and pitWash, cut off tough ends, break into 1” pieces, blanch 3 minutesPeel and sliceCut or break into 1” pieces, blanch 3 minutes
Shell, wash and blanch 3 minutes
Wash, trim tops leaving 4 inches. Steam 45 minutes; cool, peel and sliceWash, blanch 30 seconds and drainTrim, soak in salt water to remove bugs and worms. Rinse, and blanch 3 minutes.Remove outer leaves and cut in half.Wash, peel, trim, slice and blanch 2 minutes.Soak in salt water, rinse, slice through stem and blanch 2 minutes.Wash, trim, and slice.Wash and pit.Choose organic fruit, was well and peel off the very top layer.Remove shuck and silk, steam 9 minutes and cut from cob.Peel, wash and slice into ⅛” pieces.Wash, peel and slice.Wash, remove from stems, blanch 1 minute and drain.Wash and trim from stems.
Prepare the same as greens.Peel and slice.Rinse, cut off woody stems and slice.Peel, pit and slice.Wash, trim and slice.Peel off paper shell, remove ends and slice.Peel, pit and slice.Peel, core and sliceWash, shell and blanch 1 minute.
12 hours
24 hours7 hours
8 hours 10 hours
12 hours
10 hours
13 hours13 hours
13 hours10 hours10 hours
6 hours17 hours6 hours
9 hours
7 hours7 hours26 hours
6 hours
6 hours16 hours6 hours31 hours13 hours7 hours13 hours30 hours7 hours
Pliable to Brittle
PliableBrittle
Leathery or crunchyBrittle
Hard. Should break if hit with hammerLeathery
PliableBrittle
BrittleLeatheryTough-Brittle
BrittleLeatheryCrisp
Brittle
LeatheryLeatheryWrinkled and pliable.
Crumbly
CrumblyLeatheryCrispPliablePliableCrispPliablePliableHard
SAMPLE
SAMPLE
SAMPLE

Fruit/Veg PrepDrying Time Final Texture
PliableBrittle
PliableLeatheryBrittlePliableBrittle
Light and crunchy
Light and crunchy
Leathery
Brittle
12 hours10 hours
15 hours7 hours7 hours27 hours10 hours
15 hours
12 hours
8 hours
10 hours
Wash, thinly peel, remove seeds and slice.Wash, peel, trim and slice.
Peel, core and slice.Remove stems, seeds and white sections, slice.Wash, trim and slice.Cut in half, pit and pop the backsides in.Wash, peel, slice and blanch 4 minutes.
Wash, place topside down on tray.
Wash, remove stem and slice.
Wash, dip in boiling was just until skins split, then remove skins and slice.Choose young fruit, wash and slice.
PapayaParsnips & TurnipsPineapplePeppers, BellPeppers, HotPlumsPotatoes,Regular and SweetRaspberries and BlackberriesStrawberriesTomatoes, High acid
Zucchini
Note: Fruits are dehydrated at 135, vegetables are dehydrated at 125. Two exceptions are onions and tomatoes which should be dried at 155.All slicing should be done at ⅜” to ¼” thick unless otherwise noted.
SAMPLE
SAMPLE
SAMPLE
Canning is a rewarding way to preserve foods. Processed properly, canned foods will last several years in your pantry. Processed improperly, could result in some pretty nasty food poisoning.
Let’s take a look at some safety issues.
Oven and microwave canning, are dangerous and unsafe. It is impossible to get foods properly heated to the necessary temperatures needed to kill possible Clostridium botulinum spores. These spores are very heat resistant and if not properly killed, will grow inside your sealed jar. Botulism can be deadly, don’t take chances.
Our grandmothers used to use the open kettle method where you heat the foods, primarily jams and jellies, then pour the hot food into hot jars, add your lids and rings then turn upside down to cool and seal.
Today this is also considered unsafe because even if you get the food hot enough, it is still possible to contaminate it during the process of filling the jars. It is also very easy to burn yourself while ladeling boiling hot foods into glass jars.
We will only cover the two methods of canning that are considered safe according to the information found at USDA.gov. Hot Water Bath Method and Pressure Canning.
If you follow the proper processing times, you shouldn’t ever have to worry about botulism. However, to err on the side of caution, here are some things to keep in mind. If canned foods lose their seal over time, do not taste. Just throw it away.
If your food has a funny look or texture, I would recommend throwing it away as well. If you aren’t sure about the food being spoiled, boil it for thirty minutes and smell it while simmering. The simmering can cause any off odor to become more noticeable.
Here’s a good rule of thumb. If you aren’t sure, then toss it. Better to lose a little food than to lose health or life.
All this being said, I’ve been canning for over ten years (I started at 14) . While that’s not a great amount of time, there was only one time that we had food spoil. The food was clearly spoiled as the entire batch lost their seals.
Use proper processing times, obey the “rules” and you will do just fine!
Canning Safety
SAMPLE
SAMPLE
SAMPLE

Canning started in 1795 when the French army offered a cash reward to anyone who could discover a way to preserve food for their troops. Frenchman Nicolas Appert, a chef and scientist accepted the challenge. In 1809 he achieved the goal and won the prize.
The first canned foods were achieved by filling glass jars with food, corking the jars and wiring them shut. He put the jars in sacks, before lowering them into the water for cooking.
Today, we pack glass jars with foods, place a single use lid on top and tighten down with a reusable metal ring. We’ve certainly come a long ways from the 1800’s.
High acid foods like fruits and tomatoes can be processed with a boiling hot water bath. ALL low acid foods must be pressure canned.
Jars: There are many decorative canning jars out there. However for safety reasons I only use and recommend the typical Mason jar (other brands like Ball are fine too).
Jars are found with both narrow mouth (regular) openings and wide mouth openings. Narrow mouth jars are good for broths and sauces, while the wide mouth are ideal for whole foods.
Lids and Rings: Always use new lids, never try reusing an old one. Rings can be reused many times. Throw away if they become bent or rusty.
Canning - Startup
SAMPLE
SAMPLE
SAMPLE

Hot water bath Canner: I highly recommend a steel porcelain water bath canner like this one. It nicely holds 7 quarts, the rack makes it easy to lift and lower jars, and the spacer on the bottom nicely disperses air bubbles from the boiling water.
Pressure Canner: I own an All American brand canner and a Presto canner. While the Presto canner is more budget friendly, I love my All American one. If you own either one of these, they can be used for the hot water bath method of canning as well.
Other Supplies: A jar lifter is the other tool that I consider a must for canning. However, funnels, jar tightener, magnet and tongs are also helpful. I use the stuff pictured below.
SAMPLE
SAMPLE
SAMPLE
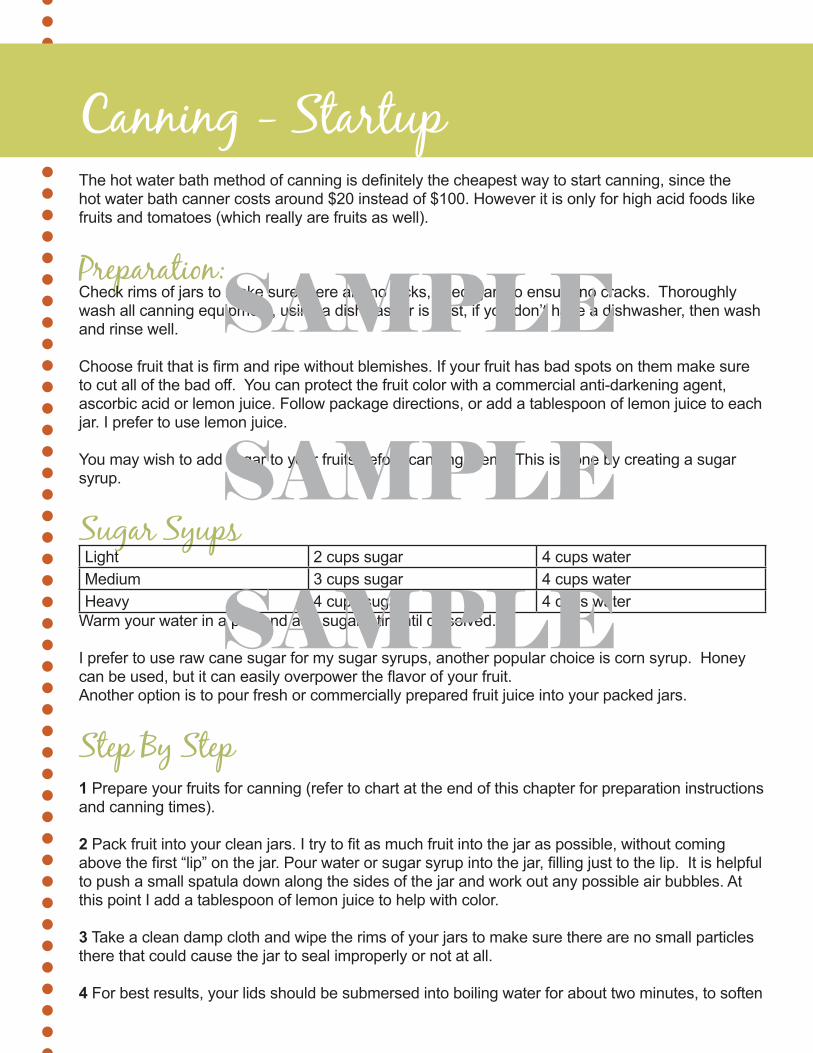
The hot water bath method of canning is definitely the cheapest way to start canning, since the hot water bath canner costs around $20 instead of $100. However it is only for high acid foods like fruits and tomatoes (which really are fruits as well).
Preparation:Check rims of jars to make sure there are no nicks, check jars to ensure no cracks. Thoroughly wash all canning equipment, using a dishwasher is best, if you don’t have a dishwasher, then wash and rinse well.
Choose fruit that is firm and ripe without blemishes. If your fruit has bad spots on them make sure to cut all of the bad off. You can protect the fruit color with a commercial anti-darkening agent, ascorbic acid or lemon juice. Follow package directions, or add a tablespoon of lemon juice to each jar. I prefer to use lemon juice.
You may wish to add sugar to your fruits before canning them. This is done by creating a sugar syrup.
Sugar Syups Light 2 cups sugar 4 cups waterMedium 3 cups sugar 4 cups waterHeavy 4 cups sugar 4 cups water
Warm your water in a pan and add sugar, stir until dissolved.
I prefer to use raw cane sugar for my sugar syrups, another popular choice is corn syrup. Honey can be used, but it can easily overpower the flavor of your fruit.Another option is to pour fresh or commercially prepared fruit juice into your packed jars.
Step By Step1 Prepare your fruits for canning (refer to chart at the end of this chapter for preparation instructions and canning times).
2 Pack fruit into your clean jars. I try to fit as much fruit into the jar as possible, without coming above the first “lip” on the jar. Pour water or sugar syrup into the jar, filling just to the lip. It is helpful to push a small spatula down along the sides of the jar and work out any possible air bubbles. At this point I add a tablespoon of lemon juice to help with color.
3 Take a clean damp cloth and wipe the rims of your jars to make sure there are no small particles there that could cause the jar to seal improperly or not at all.
4 For best results, your lids should be submersed into boiling water for about two minutes, to soften
Canning - Startup
SAMPLE
SAMPLE
SAMPLE
the rubber seal. Place hot lids onto the cleaned jars, and tighten down with a metal ring.
5 Place your jars into the hot water bath canner and fill with water until the jars are an inch underwater. Remove the jars and bring the water to a gentle boil. Slowly lower the jars into the boiling water. Never put cold jars (out of the fridge) into boiling water, as they will likely break.
6 If you fill more jars than you are able to can that day (not recommended) put them in the fridge overnight. Before canning, remove the jars from your fridge and allow them to sit on your counter for 2-3 hours.
7 Once you lower your jars into the water, bring the water back to a gentle boil and process for the recommended length of time.
8 When they are done canning, slowly remove them from the water and set them on the counter to cool. As the jars are cooling, you should start hearing pops. That is the sound of the lids sealing. A sweet reward for your work!
9 After a few hours test your seals. The lids should be not pop back, and should sound tight. Unsealed jars should be put in the fridge and consumed within a week. Allow sealed jars to sit overnight to cool completely.
10 Remove the metal rings from your jars. Wash or wipe down the jars, and wash and dry the rings. Be sure to date your jars before moving them to their storage area.
Fruits are a rather persnickety thing to can. Clearly one must can them for the proper length of time to ensure food prep safety, but over-canning will cause the fruit to be mushy and soft. Even worse, over-canned fruits will leak juice through the seal while cooling, before the jar gets to it’s “seal point”.
The juice leaking through can prevent the jar from sealing. However, for the most part, the jar will still seal, but the fruits will look overcooked, and the liquid level will look low.
I’ve had jars emptied of nearly a third of their moisture, and still seal fine and be okay to eat, although rather overcooked. Anytime the liquid level is much lower than that, the jars do not stay sealed very long. My advice is to be precise. The minute your water returns to a boil (bubbles coming up through the water), set your timer. As soon as the timer goes off, began removing jars.
Here is the way my husband’s grandpa did it. Fruit naturally shrinks as it is cooking (which is why you should pack the jars as full as possible), and grandpa would watch the shrinkage. Every couple minutes or so he would lift out a jar and see how much the fruit had “lifted”. Once the fruit had lifted about 2 inches from the bottom, he would pull out the jars. To my knowledge, grandpa never had juice leak out of his jars.
If you want, set your timer for 5 minutes less than the recommended time and then check them for lift.
Altitude can also make a difference in canning times, meaning the recommended time may be less than needed. I’ve listed times for an altitude of 1000 feet or less. For every 1000 feet higher that you are, add 5 minutes to your processing time. If 1000 ft elevation needs 10 minutes, then 2000 ft elevation needs 15 mins.
SAMPLE
SAMPLE
SAMPLE

Tomatoes are probably the easiest fruit to process using the hot water bath method. They are the one fruit that I’ve never had issues with juicing over. Tomatoes are used in many of our family’s favorite dishes so I make sure to can plenty of sauce, juice and whole tomatoes.
SAMPLE
SAMPLE
SAMPLE

Hot Water Bath Times for Commonly Canned Fruits
Fruit Preparation ProcessPints
ProcessQuarts
Apples
Applesauce
Apricots
Nectarinesand Freestone PeachesClingstone Peaches
Pears
Tomatoes
Tomato Juice
Halve or quarter. Remove peel and core. Dip into 1 gallon of water with 2 tbs salt, & 2 tbs vinegar. Cook in hot sugar syrup for 3 minutes. Pack into the jars while hot and pour syrup over them. SealWash, peel and core. Simmer in small amount of water until tender. Run through food processor and puree. Sweeten if desired. Return to pan and bring to a simmer. Pour into jars, and add 1tbs lemon juice. Seal.Choose firm fruits, that are not over ripe. Peel if desired, cut in half, and remove pits. Seal.Cut into halves, remove stones and peel. Pack into jars and pour hot sugar syrup over the fruit. Add 1tbs lemon juice. Seal.Cut into halves and carefully remove the stones. Peel and pack into jars. Pour hot sugar syrup over fruit and add 1 tbs lemon juice. Seal.Choose fruit that is just ripe but still very firm. Cut into quarters, remove core, and peel. Pour hot sugar syrup over the top. Seal.Choose ripe fruit and cut out any bad spots. Do not can overripe tomatoes as they could be too low in acid for safe water bath canning.Wash well before dipping into boiling water for 1 minute to crack the sins.Press each tomato firmly into the jar to help release juices and fill spaces. Add 2 teas. lemon juice. If desired, add 1 teas. salt. SealUse well ripened but not overripe tomatoes. Wash and cut out any bad spots. Put tomatoes into a saucepan squishing them as you do so. Cook until tender then extract or strain out the juices. Bring juice to a simmer and pour into jars with 1 tbs lemon juice and 1 teas. salt. Seal.
15 min.
20 min.
25 min.
20 min.
25 min.
20 min.
30 min.
15 min.
15 min.
20 min.
30 min.
25 min.
30 min.
25 min.
30 min.
15 min.
Once you have become adept at using the hot water bath method to can simple fruits, you can then venture out into pie fillings, jams and jellies.
SAMPLE
SAMPLE
SAMPLE

Canning Homemade SalsaWe are huge salsa eaters around our house. In recipes, added to guac, with chips, and a dozen other ways. Salsa is something I can every year in large batches.
Let’s start with the basic recipe:
● 1 pound of chopped onions● 6 cloves minced garlic● 1/3 pound chopped jalapenos● 1 pound chopped sweet banana peppers● 5 pounds chopped tomatoes● 1/3 cup raw cane sugar● 4 teaspoon cumin● 3 tablespoons salt● 2/3 cup apple cider vinegar● 1 quart tomato sauce● 4 ounces chopped fresh green chilli peppers● 1/4 pound minced cilantro● 3/4 cup clear jell or corn starch
Mix the clear jell with the tomato sauce first, making sure there are no clumps. Then mix everything all together.
Next comes the tasting. No batch of salsa will taste quite the same from year to year due to weather effecting the heat of your peppers. If your salsa is not hot enough, add more banana peppers first and then just a smidgen more jalapeno. If the salsa is too hot, add a few more tomatoes.
Pour salsa into clean pint jars, top with new lids and tighten with canning rings. Place jars into a hot water bath canner and cover with water. Remove jars and turn the heat to high.
Once the water begins to boil, carefully lower your jars into the water and set your timer for 20 minutes. When the timer goes off, slowly lift your jars out of the water and set on the counter to cool. (If you can your salsa in quart jars, process for 30 minutes)
Makes approximately 10 pints of salsa.~To enjoy just as a fresh salsa, leave out the clear-jell.
SAMPLE
SAMPLE
SAMPLE

Most pressure canners are equipped with the following:● a rack at the bottom of the pan so the steam can circulate ● a lid that locks onto the pan ● a pressure gauge● pressure valve● valve weight● pressure vent
I’m using both of mine as examples.
The locking lid, pressurizes the pan, thus the “pressure canning”. The pressure gauge measures the pounds of pressure inside the canner. The pressure valve has a weight to place over it to help adjust pressure. The pressure vent is an indicator of the pan being pressurized, (if the vent is up, there is pressure).
The canner weight allows the canner to build up pressure for the canning process. Too much pressure is dangerous, never leave canners unattended while processing foods.
My All American canner has a weight with 3 different pressure holes. If I place the weight on the valve using the 10 pound pressure hole, the canner will pressure to 10 pounds and release the rest. With the Presto canner, pressure is adjusted by adjusting the heat source.
Canning - Pressure Canning
SAMPLE
SAMPLE
SAMPLE

Pressure Canning Step by Step1 Prepare your vegetables for canning (refer to chart at the end of this chapter for preparation instructions and canning times).
2 Pack your veggies into clean jars, pour water over the top, filling just to the lip. It is helpful to push a small spatula down along the sides of the jar and work out any possible air bubbles. Add salt if desired.
3 Take a clean damp cloth and wipe the rims of your jars to make sure there are no small particles there that could cause the jar to seal improperly or not at all.
4 For best results, your lids should be submersed into boiling water for about two minutes, to soften the rubber seal. Place hot lids onto the cleaned jars, and tighten down with a metal ring.
5 Place jars into your canner. Most canners will hold 7 quart jars or 10 pint jars. Once the jars are in, pour 3-4 quart of water over them. For pressure canning, the jars should not be covered.
6 Place lid on the canner and lock or tighten down. Turn stove-top on to high.
7 Once the water inside is boiling, the pressure vent will be popped up, and steam should start coming out of the pressure valve.
8 The pressure vent should be up for about 10 minutes, during which time steam is released from the valve. After 10 minutes are passed, place the weight over the valve to begin building up pressure.
9 Allow pressure to build to the required pounds, then set your timer. You may need to turn down your heat to prevent the canner from building up to much pressure, but do not allow the pressure gauge to dropped below required poundage. If the pressure drops below the required pounds, you will need to bring it back up and reset your time.
10 Once your timer goes off, turn off your heat and lift the canner off of the burner. *If you are canning with a glass top stove, lift the canner clear off the stovetop. Allow pressure to drop back to 0 and make sure the pressure vent is back down.
11 Unlock the canner lid and carefully open, tilting the lid open away from your arms and face. Remove the lid completely and allow the canner to sit open and cool for at least 10 minutes.
12 Remove the jars from the canner and sit on the counter to cool. Overnight cooling is best.
13 Once cooled, tap the lids to make sure the jars are sealed. Lids should be tight and not pop. Remove metal rings, wash jars, mark them with the date and place in your pantry.
*I have heard that glass top stoves can break if you can on them. I have a glass top stove and have canned on it for several years without any issue though. For me at least, I believe the trick is to completely remove the hot canner from the stovetop once it is done canning.
It sounds like a lot of work, and looks like a lot of steps. However, I prefer pressure canning over open kettle any day of the week. In the end, pressure canning is easier for me, and releases a lot less hot steam into the air.
SAMPLE
SAMPLE
SAMPLE

Canning Times and Instructions for Commonly Canned Vegetables
Vegetable How to Prepare Pints QuartsAsparagus
Lima Beans
Wax and String Beans
Beets
Carrots
Whole Kernel Corn
Cream Corn
Okra
Peas
Fresh Black-eye peasNew Potatoes
Sweet Potatoes
Pumpkin or mature Squash
Turnips
Sort, wash and cut into desired lengths or 1” shorter than the jar. Fill jar and pour boiling water over top to ¾” from the rim. Shell, wash and pack loosely into jars within an inch from the top. Cover with boiling water to ¾” from the rim.Snip off ends, and string if necessary. Break into 1 ½ inch pieces. Pack tightly to 1” from the rim. Cover with boiling water.Leave on roots and 2 inches of the top. Boil until the skins slip off (15 min). Dip in cold water. Peel, trim and slice. Pack into jars, filling to 1” from the rim. Cover with hot water.Wash and scrape or peel. Slice and pack, filling to 1” from the rim. Cover with boiling water.Use a sharp knife to cut raw corn from cob. Cut just the kernels and do not scrape the cobs. Place in pan and cover with brine (1 qt. water to 1 tbs. salt). Bring to a boil and pour over into jars, filling to 1” of the rims.Prepare as for kernel corn, but also scrape the cob. Proceed as directed for kernel corn and fill to 1 ½” from the rim.Use young pods for best results. Wash and cut off ends. Leave whole or cut into 1 inch slices. Boil for 1 min before packing into jars, cover with the water they were boiled in, filling to 1” from the rim.Only can fresh, tender, and young, green peas. Shell and cook until the skins wrinkle (2-4 min.). Pack into jars, filling to 1 ¼” from the top. Cover with the hot water, they were cooked in, adding more hot water if needed.Follow directions for green peas.
Peel, leave small ones whole, cut larger ones in half. Create a brine of 2 tbs salt to 1 qt of water. Pack potatoes into jars, filling to 1”of rim. Cover with boiling brine.Wash and peel. Cut into 1” cubes and pack in jars to 1” of rims. Cover with boiling water. Or create syrup of 1 part sugar, 2 parts water. Boil and cover the sweet potatoes.* Wash, remove seeds and peel. Cut into 1” cubes, place in a pan with just enough water to cover them and bring to a full boil. Pack hot cubes to ¾” from the top and cover with the water they boiled in.Follow carrot directions.
½ teas. salt28 min.½ teas. salt40 min.½ teas. salt20 min.
½ teas. salt35 min.
½ teas. salt 30 min.55 min.
85 min.
½ teas. salt25 min.
½ teas. salt40 min.
½ teas. salt50 min.35 min.
55 min.
½ teas. salt55 min.
1 teas. salt.32 min.1 teas. salt.50 min.1 teas. salt25 min.
1 teas. salt40 min.
1 teas. salt30 min.70 min.
don’t can
1 teas. salt40 min.
1 teas. salt45 min.
1 teas. salt55 min.40 min.
90 min.
1 teas. salt90 min.
*Do not can pumpkin puree as it is very dense and nearly impossible to get hot enough all the way through to kill bacteria.
All processing times are figured at 10 pounds of pressure. If you are above 1000 feet of elevation, you must can at 15 pounds of pressure.
SAMPLE
SAMPLE
SAMPLE

Problem #1: Jars do not seal.Solution: Simple prevention.
Always check the rim of your jar before filling. Even small chips can prevent a jar from sealing, and if the jar does seal, chances are it will unseal later.
Always wipe the rims of your jars clean before setting your lids and rings.
A jar may not seal if the food wasn’t processed long enough, or at the proper temperature. Make sure your times and pressures are right for your altitude.
Most foods may be re-canned, however you should keep in mind that re-canned foods are re-cooked foods. Sometimes it is better to just place the unsealed jars in the fridge and eat within 3-5 days.
To re-can any foods, process as though you were canning them the first time.
Problem #2: Jars Break.Solutions.
If your jar breaks as you place it into the water, the most common cause is temperature difference. Never place jars from the fridge right into boiling hot water. If you need to refrigerate before canning, remove the jars from the fridge 2-3 hours before you can them.
Pulling hot jars out of the canner into a cold room. This has only happened to me once, but I opened the canner and promptly pulled the jar out while a fan was blowing air from the AC right at it. The jar popped and everything fell back into the canner. What a mess!
Problem #3: Liquid Leaks out of the Jars.Solution: Don’t over-can.
I have the most problems with fruit doing this. I fill the jars with fruit and water, can them and pull them out of the canner. Suddenly the liquid is just pouring right between the jar and the lid. And before it stops my jar has lost 1/3 of it’s liquid.
The jars usually seal, but the fruit ends up mushy. The key here is making sure you do not over-can. Just like under-canning causes issues, over-canning may as well.
Problem #4: Jars unseal after they have been shelved.Solutions.
If you used the hot water bath method, the ph balance could be wrong. To ensure a high enough ph balance, add a tablespoon of lemon juice before hot water bathing.
Common Canning Problems and Solutions
SAMPLE
SAMPLE
SAMPLE

The canning time wasn’t long enough. Even though the jar seemed to be sealed, if the processing time isn’t long enough your jars may unseal later.
You canned something that cannot be canned. Um, yes. Been there done that.
Mother and I mixed up a huge batch of cream of mushroom soup and canned it. The jars came out beautiful and we were thrilled. A week later, every single one of those jars were unsealed with foul smelling foamy stuff rising out of the jars.
Turns out milk and flour cannot be canned together. Canned together, these two items will begin to ferment and the result will be horrible.
NEVER eat from a jar that has come unsealed.
Problem #5 Cloudy with Sediment on the BottomSolution.
This can be a result of either hard water, table salt or both. Use bottled water for clarity.
Cloudy water can also be caused by vegetables that were too old. Check for a bad smell before eating and toss if you are unsure.
SAMPLE
SAMPLE
SAMPLE

Meats can be frozen, dried or canned. Frozen is my preference, however I do can a few different meats and jerky is pretty amazing.
Making jerky is a fairly simple process with many recipes to choose from online. Before you try making jerky I recommend that you become familiar with the ends and outs of dehydrating fruits and vegetables first.
Freezing
The main reason you would choose to freeze large amounts of meat is if you, A. found a great deal at the grocery, or B. buy your meat on the hoof directly from a farmer. If you are wondering why you would buy meat from a farmer, I address that in this article.
Meat can be wrapped in dry wax and then freezer paper, or vacuum sealed. If you wrap in freezer paper, pork will be good for about 6 months and beef and chicken for about a year. Vacuum sealing your meat will double its freezer time, making it the best way to freeze large amounts of meat.
Canning
Nearly all meats may be canned, but not all meats are good canned.
We have canned sausage links and ground meat before, however, they both tasted like boiled meat (which is basically what it was) and it took us a long time to use it, simply because we didn’t like it.
If you are thinking disaster preparedness though, canned meat is the way to go, since it lasts several years if properly canned, while freezer meat doesn’t last more than a year or two. As well, freezer meat will spoil without electricity.
My mother and I can two meats. Stew meat, and chicken.
● CanningChicken
Prepare your chicken by covering the bird with water and bringing to a boil. Once your water comes to a boil, turn the temp down and simmer for several hours until the meat falls off the bone.
Remove chicken from the pan and allow to cool for 10-20 minutes. Pick the meat off of the bones and cut it against the grain into 1” lengths. Pack meat loosely into jars to 1” from the top.
Strain the broth from cooking the chicken and pour off the grease. Pour strained broth into the jars and cover the meat.
Add 1 teaspoon salt to quart jars, or ½ teaspoon salt to pint jars if you wish.Process quarts at 10 pounds pressure for 90 minutes. Process pints at 10 pounds pressure for 75 mins.
Preserving Meats
SAMPLE
SAMPLE
SAMPLE

If you have any broth left over after filling the jars of chicken, you can put it into jars and process it with the jars of meat for the same amounts of time.
Broth may also be pressure canned alone for 25 minutes at 10 pounds of pressure. Pints and quarts.
● CanningStewMeat
Beef is the best meat choice for this. Remove fat and gristle from meat and cut into 1 ½” cubes. Place cubed meat into a saucepan and cover the meat with water and simmer for about 10 minutes.
Pack hot meat into jars and cover with the water it simmered in.
Add 1 teaspoon salt to quart jars, or ½ teaspoon salt to pint jars if you wish.Process quarts at 10 pounds pressure for 90 minutes. Process pints at 10 pounds pressure for 75 mins.
Having canned chicken and stew meat on hand saves me time when fixing a meal, and prevents the need to buy canned meats.SAMPLE
SAMPLE
SAMPLE

After reading through this guide, you may be feeling overwhelmed and not sure where to start. You may also be ready to jump in with both feet.
Whether you feel overwhelmed or excited, allow me to make a suggestion. Rather than trying the three forms of food preservation that I’ve mentioned here all at once; focus on mastering one at a time.
I use all three methods on a regular basis, but even I learned one at a time. You may find one or two of these to work best for your family, and those are what you should work on learning first.
A Refresher:
Freezing is the simplest to learn. You need a way to blanch veggies, containers and a freezer. Freezing is also the best way to preserve that fresh picked taste.
Dehydration, is the best space saver. Dehydrated foods may be placed in jars, or bags on the shelf. While I highly recommend vacuum sealing, foods will keep nicely in an airtight bag or jar as well. Just be sure to place silica bags in with your foods to help control the moisture.
Canning is probably the most disaster prepared way to preserve. Since the canning process completely cooks your food, you can open a jar and eat it directly. There are no worries about losing food if the electric goes out, and you don’t need water to rehydrate anything either. Your main concern would be the jars possibly breaking.
While every family has different cooking styles and favorite foods, I’m going to share an overview of the foods I typically preserve, and how I preserve them.
Which Method is Right for You?
I Freeze:● Corn● Red beets● Black eyed peas● Green beans● Peas● Peppers● Zucchini● Broccoli● Pumpkin● Bing cherries● Blueberries● Raspberries● Strawberries● Strawberry Jam● Beef● Chicken● Pork● Game meat (when available)
I Can:● Peaches● Pears● Apples● Apple butter● Jams and Jellies● Green beans● Tomatoes● Red beets● Salsa● Stew meat● Chicken● Meat stock
I Dehydrate:● Mushrooms● Celery● Onions● Peppers● Carrots● Tomatoes● Herbs & Greens● Apples● Strawberries● Jerky
While this isn’t a complete list, these are the foods I commonly preserve. As you can see, freezing is my prefered method of preservation. However, all three are very important to our lifestyle and how I cook.
SAMPLE
SAMPLE
SAMPLE

This one is tricky. People wonder how much food should they preserve, and everyone has a different answer.
If you are thinking disaster preparedness only, then according to experts you need enough to last you three months.
If you are wanting to preserve healthy foods while they are cheap and in season like we do, then you want enough to last until the food is in season again (typically a year).The easiest way for me to decide how much to preserve, is the 52 week method. I’m going to focus on green beans for this example.
We are home for two meals a day during the week, and three meals a day on the weekends. One of these meals is breakfast, so in this case it doesn’t count. According to that figure, there are 9 meals a week that we could eat green beans. Clearly, one doesn’t want to eat green beans every day, but in our family we eat them about twice a week.
Two times a week, multiplied by fifty-two weeks in a year, is just over one hundred meals a year that we would eat green beans. Thus I need to preserve enough green beans to serve one hundred meals.
One quart of green beans will serve two meals for us, giving me a total of fifty quarts of green beans to can. However, I like to freeze about half of my green beans. So I actually need to can twenty-five quart and freeze fifty-two bags of green beans.
I follow the same procedure for any other fruits and veggies. We may not always eat green beans twice a week, but sometimes we have company and use more, so it evens out very nicely.
As long as you keep the fifty-two weeks method in mind, it shouldn’t be too hard deciding how much to preserve.
In the case of foods like celery or mushrooms that we don’t grow; I wait until they go on sale, and buy just what I can dry at the time.
Deciding How Much to Preserve
SAMPLE
SAMPLE
SAMPLE

As you can see, most foods can be preserved in some way or another. Now it’s up to you to determine which form of preservation will be best for your family.
I encourage you to start small, master one form of preservation at a time, and enjoy the journey. Take pride in your accomplishments, and use the gifts of the earth that God has blessed you with to feed your family all year long.
Remember, as you are learning, mistakes can happen. A misread recipe, getting distracted while the canner is going, discovering that you really dislike how something tastes after being frozen. This is a journey. Not everything is going to taste great, or even turn out perfect the first time.
My desire is to have armed you with the knowledge and the understanding to get started. Let me tell you, once you open that first jar, or thaw that first container of food, and use it to feed your hungry family; you will feel a great sense of pride in your accomplishments and realize that there is no going back!
A special thanks to Heather Harris-writer at The Homesteading Hippy, and Serafina Holeman-writer at A Gypsy Herbal for their assistance in editing.
Layout and design by Stacey Shipman.
Conclusion
SAMPLE
SAMPLE
SAMPLE