Food Preservation Basics 2-18-15€¦ · Food Preservation Basics Debbie Clouthier Extension...
23
3/6/2015 1 Just Can It! Food Preservation Basics Debbie Clouthier Extension Associate February 2015 The Basics Food safety and sanitation Bacteria and how they grow Research-based home canning techniques • principles of home canning • ingredients • recipes • equipment • high- and low-acid foods • using a boiling water bath canner (Lunch!) • using a pressure canner • food spoilage • What’s new? Drying foods at home Home freezing basics Where to go for research-based answers FOOD SAFETY AND SANITATION
Transcript of Food Preservation Basics 2-18-15€¦ · Food Preservation Basics Debbie Clouthier Extension...

3/6/2015
1
Just Can It! Food Preservation
Basics
Debbie ClouthierExtension Associate
February 2015
The Basics Food safety and sanitation Bacteria and how they grow Research-based home canning techniques
• principles of home canning• ingredients• recipes• equipment• high- and low-acid foods• using a boiling water bath canner (Lunch!)• using a pressure canner• food spoilage• What’s new?
Drying foods at home Home freezing basics Where to go for research-based answers
FOOD SAFETY AND SANITATION

3/6/2015
2
Food Safety & SanitationPUT FOOD SAFETY FIRST!
Growers should use fertilizers and pesticides correctly—read the label!
Growers should reduce the risks of potential contamination• minimize exposure to animal waste• use potable water for irrigation• do not use fields for dumping trash
Food handlers should practice good personal hygiene
The Safe Food HandlerMost important to prevent the contamination of
food products:HAND WASHING!
HAND WASHING!HAND WASHING!
Also: Keep yourself neat, clean and healthy Protect food from open cuts or sores Avoid smoking, eating or drinking Keep all equipment and surfaces clean
The Sanitary Kitchen
Washed, rinsed and sanitized
Clean means free of visible soil
Wash cutting boards, utensils and counters with hot, soapy water
Sanitary means free of harmful levels of disease-causing bacteria
Sanitize with hot water or chemical sanitizer/bleach

3/6/2015
3
BACTERIA ~HOW THEY GROW
Requirements for Bacteria to Grow Food Acidity (pH) Time Temperature Oxygen Moisture (Aw = water activity)
FoodFood for us = Food for bacteria

3/6/2015
4
Acidity: pH of Common Foods
Bacteria will not grow well at pH below 4.6
High Acid Foods
4.6
Tomatoes 4.4 - 4.6Cucumbers 5.1 - 5.8String beans 5.6Beets 5.3 - 6.6Cabbage 5.2 - 6.8Corn 5.9 - 7.3
Grapes 2.8 – 3.8Strawberries 3.0 – 3.9Apples 3.3 – 4.0 Peaches 3.3 – 4.0
Low Acid Foods
Time:Bacterial Reproduction
Compliments of National Restaurant Associations of National Restaurant Association
The result of this kind of growth is a tremendous increase in the numbers of bacteria over a relatively short period of time.
Temperature Requirements Psychotrophic
• Grow best at 58 – 68 °F• Can grow slowly at refrigerator temperatures
Mesophilic• Grow best at 86 – 98 °F• Most of the microorganisms that affect food safety
grow within this range• Clostridium botulinum of special concern
Thermophilic• Grow best at 122 – 150 °F• Spoilage bacteria—most affect food quality, not food
safety

3/6/2015
5
Temperature:Food Danger Zone
120°F
140°F
60°F
40°F
DANGER ZONEBacteria survive and grow
40ºF - 140ºF
Bacteria Reproduce
Rapidly
Oxygen Requirements Aerobic
• with oxygen• out in the air
Anaerobic• without oxygen• canned foods• Clostridium botulinum
Facultative• either with or without oxygen• cause most foodborne illness
Moisture Requirements
0 0.1 0.2 0.3 0.4 0.6 0.7 0.8 0.9
0.5
Dry egg noodles
1.0
Distilled water
PHF
Meats Poultry
Minimum required for bacteria to grow
Raw bacon
Soft cheese
0.67 0.75
0.85
0.950.92
0.98
Water Activity (Aw) = measure of water available for
bacterial growth
JamsJellies
Crisp cooked bacon
FlourCandy
Most fresh and canned fruits, vegetables, meat and fish have
Aw > 0.95

3/6/2015
6
Requirements for Bacteria to Grow Food Acidity (pH) Time Temperature Oxygen Moisture (Aw = water activity)
Bacteria
Able to grow and reproduce
May be killed by high temperatures
May survive freezing
Spore: a thick-walled formation within the bacterial cell
Does not reproduce
Resistant to heat, cold and chemicals
Can become a vegetative cell when conditions become favorable
Clostridium botulinum
Vegetative Cells With Spores
Clostridium botulinum Bacterium of chief concern in home canning—
produces the toxin that causes botulism Spores are found in soil and on surface of
fruits and vegetables; oxygen in the air prevents them from growing
Spores will not germinate and grow (producing botulism toxin) until conditions are favorable:• low oxygen (as in canned foods)• low acidity (pH > 4.6)
Cannot grow in high acid foods (pH 4.6) Spores can survive boiling water bath processing

3/6/2015
7
HOME CANNINGBASICS
Select fresh, good quality ingredients Wash hands, produce, equipment and work
surfaces as needed Use good sanitation procedures Use research-based recipes Use appropriate equipment and supplies Apply enough heat to:
• destroy harmful bacteria and spoilage microorganisms• inactivate enzymes• drive air from jars, to produce vacuum seal on cooling
Principles of Home Canning
Ingredients Produce
• start with fresh, top-quality produce• choose varieties best suited for canning• wash produce well• can as soon as possible after harvesting

3/6/2015
8
Ingredients Salt
• adds flavor to canned fruits, vegetables and meats; can be reduced or omitted in these products
• needed for safety in fermented pickles and sauerkraut; should not be reduced
• pickling or canning salt is the best choice table salt may cause cloudiness iodized salt may darken pickles and cause unusual colors in
vegetables
Sugar• acts as a sweetener; usually not needed for safety• can be reduced in many recipes• can have a preservative effect
Ingredients Vinegar
• increases acidity; acts as a preservative• adds tart flavor• use commercial (5% acidity) vinegar only• never reduce or dilute in a recipe; add sugar if a less
sour product is desired• use white distilled vinegar for light color
Lemon juice• increases acidity; acts as a preservative• adds flavor
Spices• add flavor
Home Canning Recipes Always use current, research-based recipes
Avoid the advice of untrained celebrities, old cookbooks, “back to nature” publications, and out-of-date home canning leaflets (even those from Extension!)
Follow recipes closely; modify only when suggested in the recipe
3/6/2015
9
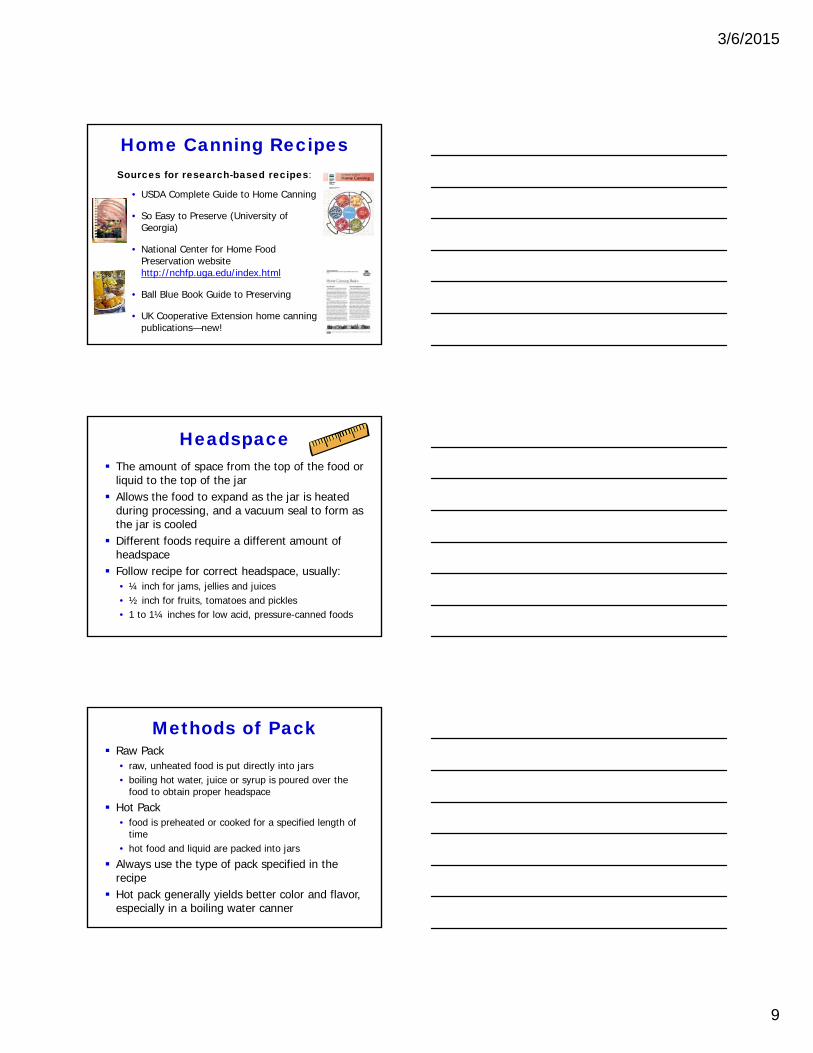
Home Canning RecipesSources for research-based recipes:
• USDA Complete Guide to Home Canning
• So Easy to Preserve (University of Georgia)
• National Center for Home Food Preservation website http://nchfp.uga.edu/index.html
• Ball Blue Book Guide to Preserving
• UK Cooperative Extension home canning publications—new!
Headspace The amount of space from the top of the food or
liquid to the top of the jar Allows the food to expand as the jar is heated
during processing, and a vacuum seal to form as the jar is cooled
Different foods require a different amount of headspace
Follow recipe for correct headspace, usually:• ¼ inch for jams, jellies and juices• ½ inch for fruits, tomatoes and pickles• 1 to 1¼ inches for low acid, pressure-canned foods
Methods of Pack Raw Pack
• raw, unheated food is put directly into jars• boiling hot water, juice or syrup is poured over the
food to obtain proper headspace
Hot Pack• food is preheated or cooked for a specified length of
time• hot food and liquid are packed into jars
Always use the type of pack specified in the recipe
Hot pack generally yields better color and flavor, especially in a boiling water canner

3/6/2015
10
Jars and Lids Use only Mason-type jars designed
for canning; can be reused; inspect each year for cracks and nicks
Do not reuse commercial single-use jars (e.g. mayonnaise, peanut butter)
USDA recommends two-piece screw-on caps (lids and screw bands)
Lids are used only once; check new lids for dents or uneven sealing compound
Screw bands (rings) may be reused if not rusty or damaged
Preparing Jars and Lids Wash jars, lids and screw bands in hot, soapy
water; rinse in hot water
Dry screw bands and set aside
Prepare lids as directed by manufacturer• new Ball/Kerr lids do not need preheating—just wash,
rinse and keep at room temperature until ready to use; preheating will not harm
• do not boil lids—can result in seal failure
Heat jars before filling to help prevent breakage• submerge jars in enough water to cover• bring water to simmer (180°F) and keep
jars in hot water until ready to use
Additional Canning Utensils Jar funnel
Headspace tool
Bubble freer—not metal!
Magnetic lid wand
Jar lifter
Clean cloths
Timer
Other utensils and equipment needed to prepare recipe (knives, cutting board, saucepans, hot pads)

3/6/2015
11
Two Types of Canners
Pressure Canner240˚F @ 10 pounds pressure
Boiling Water Canner212°F
Which Canner to Use?
Bacteria will not grow well at pH below 4.6
Boiling Water CannerHigh Acid Foods
Pressure CannerLow Acid Foods
4.6
Tomatoes 4.4 - 4.6Cucumbers 5.1 - 5.8String beans 5.6Beets 5.3 - 6.6Cabbage 5.2 - 6.8Corn 5.9 - 7.3
Grapes 2.8 – 3.8Strawberries 3.0 – 3.9Apples 3.3 – 4.0 Peaches 3.3 – 4.0
High Acid vs. Low Acid Canned Foods
High acid (or acidified) pH 4.6 depend on the pH of
the food to prevent the growth of Clostridium botulinum
May use boiling water canner
Low acid pH > 4.6 depend on heat
processes under pressure to destroy the spores of Clostridium botulinum
Must use pressure canner

3/6/2015
12
Steps to SafeHome Canning
Follow research-based recipes Place the food in hot, prepared jars, leaving the
correct headspace; remove air bubbles Wipe jar rims; adjust two-piece caps; tighten lids
until fingertip tight only Heat the filled jars to the specified temperature for
the food, using the right type of canner Process jars for the specified time to inactivate
enzymes and destroy harmful bacteria and spoilage microorganisms
Altitude affects processing times and pressures Cool jars properly so a vacuum seal forms
Two Types of Canners
Pressure Canner240˚F @ 10 pounds pressure
Low acid foods: All vegetables, meat, poultry and fish
High acid foods: Fruits, jams, jellies, pickled fruits or
vegetables, acidified tomatoes, salsa, barbecue sauce
Boiling Water Canner212°F
Boiling Water Canner Fill canner half full of clean warm water; place rack in bottom;
preheat water to simmering (180°F) Prepare recipe and fill jars Using a jar lifter, load jars into canner one at a time, keeping
them upright at all times Add more boiling water if needed so that water level is 1-2
inches above jar tops Place lid on canner; turn up heat When water returns to a boil, begin timing; adjust heat to
maintain a gentle but complete boil for entire processing time At end of processing time, turn off heat and remove canner
lid; wait 5 minutes before removing jars from canner Using a jar lifter, remove jars from canner, keeping them
upright Set jars on a towel on counter to cool; leave undisturbed for
12-24 hours (as jars cool, vacuum seal forms)

3/6/2015
13
Hands-on Canning Activity: Corn Relish
Recipe adapted from Ball Blue Book, page 53 (half recipe)
Vinegar used to increase acidity to level safe for boiling water canning (pH 4.6)
Using half-pint jars in place of pints; processing time cannot be reduced; use full pint jar processing time
Read through entire recipe before beginning
Pressure Canner Fill canner with 1-2 inches of water, following the
manufacturer’s instructions Prepare recipe and fill jars; load jars into canner and secure
canner lid; leave weight off vent port Turn up heat and vent canner for 10 minutes to remove
trapped air; place counterweight or weighted gauge over vent port to begin building pressure in the canner
Bring pressure up to that specified in recipe Begin timing process as indicated in recipe; adjust heat to
maintain steady pressure for entire processing time At end of processing time, turn off heat and allow canner to
cool naturally to return to zero pressure; then remove weight from vent port (Canner and contents are still very hot!)
Wait 10 minutes; remove lid carefully; remove jars Set jars on a towel on counter to cool; leave undisturbed for
12-24 hours (as jars cool, vacuum seal forms)
After Processing Allow jars to cool, undisturbed, for 12-24 hours to
allow vacuum to form After 24 hours, test to be sure that jars are sealed
• most two-piece lids will seal with a “pop” while they’re cooling
• sealed lid will be curved downward and should not move when pressed with finger
Remove screw bands to prevent them from rusting on during storage
Wash outside of jars and lid surfaces Date and label jars and store in cool, dry place for
up to two years

3/6/2015
14
Unsealed Jars If a jar is not sealed, refrigerate and use
within two to three days
Freeze the food for longer storage
Unsealed jars can be reprocessed within 24 hours• remove lid and check jar rims for nicks• change jar if necessary• add new, properly prepared lids• reprocess for the full processing time specified in the
recipe
Sources of Bacterial Spoilage Incipient spoilage
• food held too long before canning• allows spoilage to start before canning occurs
Inadequate heat processing• insufficient time or temperature to kill all bacteria
and/or spores present in the food• bacterial growth continues after processing
Contamination after processing• before vacuum seal is complete
Thermophilic bacterial spoilage• improper cooling• storage above 95°F
Signs of Bacterial SpoilageDo not taste any foods that show the following signs: Unsealed jar or bulging lid Dried food on outside of jar, indicating seepage Rising air bubbles Cloudiness Spurting liquid when opened Disagreeable odor Mold growth on food surface or underside of lid
Remember that harmful bacteria can be present without any signs of spoilage, if the home-canned product was improperly processed!

3/6/2015
15
One More Time…Low acid foods pH 4.6 All fresh
vegetables, red meats, seafood, poultry, eggs, milk, soups and stews Process at 240°F
for specified time Pressure canner
High acid foods pH 4.6 Fruit, pickles, relishes,
jams, jellies, fruit butters, salsa, tomatoes acidified with lemon juice or citric acid Process at 212°F for
specified time Boiling water canner
What’s New in Home Canning?
Ball® FreshTECH Automatic Home Canning System
Ball® FreshTECH Automatic Jam & Jelly Maker
Ball® FreshTECH Electric Water Bath Canner and Multi-Cooker
Ball® Sure TightTM Band Tool
DRYING FOODS AT HOME

3/6/2015
16
Food Drying/Dehydrating
One of the oldest methods of food preservation
Preserves food by removing the moisture that bacteria and other microorganisms (yeasts, molds) need to grow (FAT TOM)
Enzyme action is slowed (but not stopped); helps maintain color, texture and quality
What Can You Dry?
Fruits
Vegetables
Leathers
Herbs
Nuts and seeds
Meat jerkies
Drying Methods ~ Outdoor Sun drying
• fruits; a few vegetables• needs hot, dry, breezy weather
Solar drying• fruits; a few vegetables• dryer magnifies sun’s heat
Vine drying• beans, lentils and soybeans• leave pods on vines until they rattle
Pasteurization required to kill insects and eggs• freezer (0°F for 48 hours or longer)• oven (160°F for 30 minutes)
3/6/2015
17
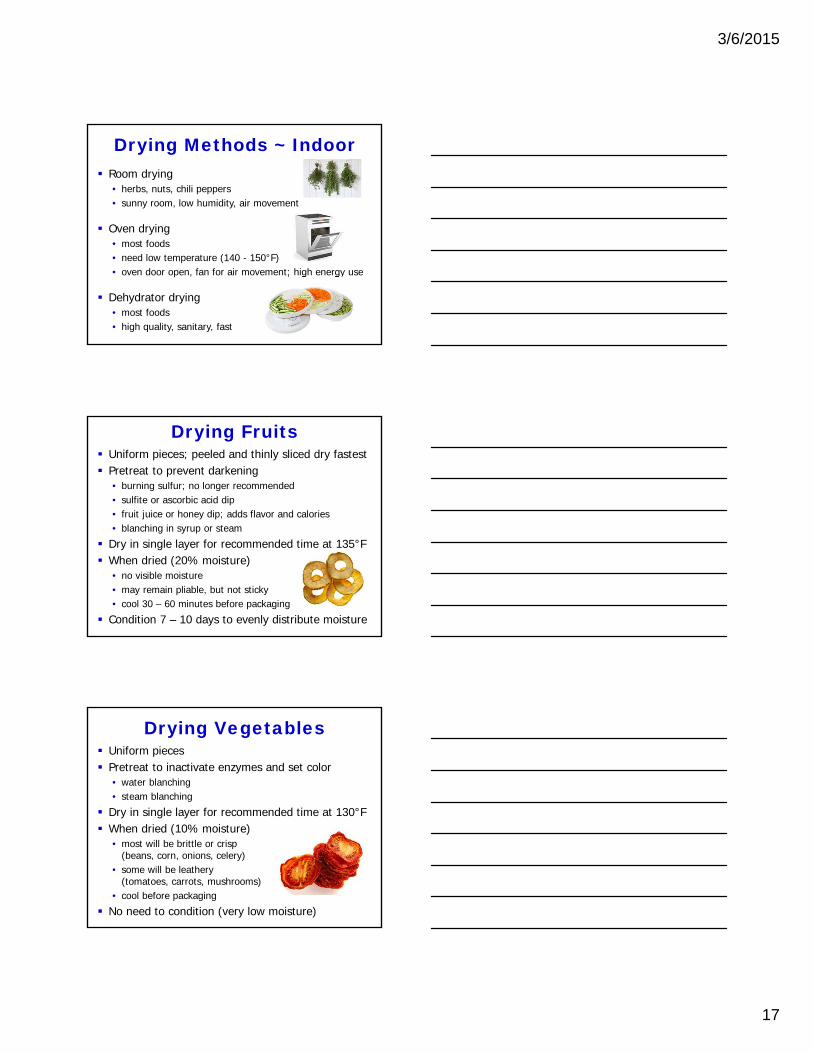
Drying Methods ~ Indoor Room drying
• herbs, nuts, chili peppers• sunny room, low humidity, air movement
Oven drying• most foods• need low temperature (140 - 150°F)• oven door open, fan for air movement; high energy use
Dehydrator drying• most foods• high quality, sanitary, fast
Drying Fruits Uniform pieces; peeled and thinly sliced dry fastest Pretreat to prevent darkening
• burning sulfur; no longer recommended• sulfite or ascorbic acid dip• fruit juice or honey dip; adds flavor and calories• blanching in syrup or steam
Dry in single layer for recommended time at 135°F When dried (20% moisture)
• no visible moisture• may remain pliable, but not sticky• cool 30 – 60 minutes before packaging
Condition 7 – 10 days to evenly distribute moisture
Drying Vegetables Uniform pieces Pretreat to inactivate enzymes and set color
• water blanching• steam blanching
Dry in single layer for recommended time at 130°F When dried (10% moisture)
• most will be brittle or crisp(beans, corn, onions, celery)
• some will be leathery(tomatoes, carrots, mushrooms)
• cool before packaging
No need to condition (very low moisture)

3/6/2015
18
Fruit & Vegetable Leathers Use fresh, frozen or drained canned fruit
Use tomatoes, pumpkin puree, or mixed vegetables (tomato, onion, celery)
Combine fruits or vegetables to mix flavors
Puree fruits or vegetables until smooth
Add lemon juice or ascorbic acid to prevent browning (light-colored fruit)
Sweeten if desired (sugar, honey or corn syrup)
Pour 1/8 – 1/4 inch thick layer; dry at 140°F
When dried• no indentation when touched• peel from tray when warm to prevent sticking
Drying Herbs Harvest before flowers open
Room drying• bundle and tie; hang in warm, dry well-ventilated room• hang tender herbs inside paper bags with holes in sides
Dehydrator drying• dry in single layer at 95 – 115°F
Oven drying• leaves only (mint, sage, bay leaf)• up to 5 layers between paper towels in very cool oven
When dried• leaves crumble• stems break when bent
Storing Dried Foods Cool completely before packaging
Seal out air and moisture• clean, dry canning jars• plastic freezer containers
with tight-fitting lids• plastic freezer bags• vacuum packaging
Store in cool, dry, dark area
Recommended storage time: 4 months to 1 year, depending on the food

3/6/2015
19
HOME FREEZING BASICS
Freezing Food One of the easiest methods of home food
preservation Preserves food by using low temperatures to
prevent the growth of bacteria and other microorganisms; also lowers Aw (FAT TOM)
Slows down chemical changes that affect quality or cause food spoilage
Does not kill bacteria or other microorganisms—on thawing, any bacteria present will begin to grow and may cause spoilage or illness
Does not destroy enzymes that cause color and flavor changes—just slows them down
What Can You Freeze?
Fruits
Most vegetables
Meats, poultry and seafood
Dairy foods
Eggs
Nuts
Prepared or cooked foods
3/6/2015
20
Foods That Don’t Freeze Well
Some vegetables (e.g. cabbage, celery, lettuce, cucumbers, radishes)
Some dairy foods (e.g. sour cream, meringue, custards, milk sauces)
Cooked macaroni, spaghetti or rice
Mayonnaise or salad dressing
Gelatin
Spices, herbs and seasonings
Most fried foods
Start with top quality foods• freezing will not improve flavor or texture
Work under sanitary conditions Follow directions for each individual food Package to keep air out, moisture in
• helps maintain flavor and nutritive value
Label and date each package Freeze foods quickly
• cool all foods before packaging• don’t overload freezer with unfrozen food• allow space between packages for air circulation
Freeze foods to 0°F or lower
Freezing Basics
Containers for Freezing Freezer is a dry climate Choose containers or packaging
that will protect the flavor, color, moisture content and nutritive value of food
Look for:• moisture-, vapor-, oil- and water-resistant materials• durable and leak-proof• will not crack at low temperatures• easy to seal• easy to mark• half-gallon size or less, for quicker freezing

3/6/2015
21
Types of Containers/Packaging Rigid containers
• plastic or tempered glass• tight-fitting lids• straight sides desirable• headspace allows for expansion of food during freezing
Flexible bags or wrappings• plastic bags or wrap, freezer paper,
or heavy-weight aluminum foil• press to remove as much air as possible
before closing (except for headspace)
Vacuum packaging• keep food frozen until ready to use (risk of botulism
from some vacuum-packaged foods)
Freezing Fruits Select fruit of best quality (firm, ripe, at
peak of freshness) Enzymes can cause browning and loss of vitamin C
• controlled by chemical compounds (ascorbic acid most effective)
Follow specific directions for each type of fruit Types of packs
• syrup pack—better texture and flavor for most fruits• sugar pack—better texture and flavor for most fruits• dry pack or tray pack—good for small whole fruits such
as berries• unsweetened packs—water, unsweetened juice, or
pectin syrup; may use sugar substitutes
Freezing Vegetables Select vegetables of best quality
(fresh, young, tender) Enzymes can cause loss of flavor, color and texture
• controlled by blanching in boiling water or steam, followed by rapid cooling
• blanching is a must for almost all vegetables• blanching cleans surface, brightens color, helps slow loss
of vitamins, softens hard veggies for easier packaging• blanching time is crucial and varies with the vegetable
and size
Follow specific directions for each type of vegetable
Dry pack or tray pack
3/6/2015
22
Freezing Meat, Poultry and Seafood
Select only high quality, fresh products Follow directions for specific products Package meats in moisture-proof freezer paper or
wrap, wrapping tightly and sealing well If packaging in store wrap, overwrap with suitable
freezer wrap Package in meal-size portions Label and freeze immediately Do not stuff poultry before freezing Package shellfish in rigid containers or freezer bags
Storing Frozen Foods Freezer temperature: 0°F or lower
• check temperature periodically with thermometer
• avoid temperature fluctuations
For best quality, observe recommended storage times for frozen foods• after these times, food should still be safe—just lower
in quality
Arrange foods so that food frozen longer can be used first
Keep a frozen food inventory up to date
Thawing Foods for Serving Fruits
• thaw in refrigerator, in microwave oven, at room temperature, or in a pan of cool water
Vegetables• most should be cooked without thawing first
Meat, fish and poultry• can be cooked frozen or thawed• best thawed in refrigerator in original wrapping• can be thawed in cold water• can be thawed in microwave, if cooked immediately
after thawing
Butter, eggs, milk, cheese and cream• thaw in refrigerator
3/6/2015
23
WHERE DO I GO FOR ANSWERS?
Research-based Information on Home Food Preservation So Easy to Preserve (University of Georgia)
National Center for Home Food Preservation website http://nchfp.uga.edu/index.html
Ball Blue Book Guide to Preserving
UK Cooperative Extension publications• Home Canning series• Drying Food at Home• Home Freezing series
Questions? References
• Andress, E. L., and J. A. Harrison (2011). So Easy to Preserve(6th ed.). Athens, GA: University of Georgia
• National Center for Home Food Preservation website http://nchfp.uga.edu/index.html
• United States Department of Agriculture (2009). USDA Complete Guide to Home Canning (Agriculture Information Bulletin No. 539).
Images from• Microsoft Office Clip Art• 123RF Stock Images• National Center for Home Food Preservation
February 2015
Educational programs of Kentucky Cooperative Extension serve all people regardless of race, color, age, sex, religion, disability, or national origin.