FLIGHT MANUAL - Fresh Breeze · Operating limits Following in the manual you'll find information...
32
FLIGHT MANUAL Version1.1
Transcript of FLIGHT MANUAL - Fresh Breeze · Operating limits Following in the manual you'll find information...

FLIGHT MANUAL
Version1.1

INTRODUCTION
This manual has been prepared to provide pilots and instructors information to
contribute safe and efficient operation of this paramotor trike.
It contains important legal information, additional information from the manufacturer of the
trike.
To fly this aircraft a licens for paramotor trike is required and the authorization for two-seater
flying when a passenger is on board. In addition, may be started and ended only on approved
courses. Flights inside the controlled flight space require a permit, the most requested on radio
and is issued. Other legal requirements, such as third party liability insurance must
observed.
The pilot must become familiar with the aircraft prior to the first flight
It is mandatory to read the manuals and operating instructions.
FLIGHT OPERATIONS
Legal basis for the operation of UL –Paramotor Tikes are regulated in the air right
Details are given in the relevant regulations. Every country has its own laws
Rregulations and requirements must be observed when operating.
ADMISSION
The trike is registered with the DGAC and thus legal to operate in Germany.
The legal basis shall be the:§ 11 LuftGerPV,
(1) Bei Luftsportgerät nach § 1 Absatz 4 Nummer 1 der Luftverkehrs-Zulassungs-Ordnung hat der Hersteller vor der Auslieferung an den Kunden eine Prüfung, ob das Muster mit den anwendbaren Lufttüchtigkeitsforderungen übereinstimmt, in einer Inspektionsstelle oder einer Prüfstelle durchführen und die Übereinstimmung bescheinigen zu lassen, die akkreditiert ist nach der Verordnung (EG) Nr. 765/2008 des Europäischen Parlaments und des Rates vom 9. Juli 2008 über die Vorschriften für die Akkreditierung und Marktüberwachung im Zusammenhang mit der Vermarktung von Produkten und zur Aufhebung der Verordnung (EWG) Nr. 339/93 des Rates (ABl. L 218 vom 13.8.2008, S. 30) gemäß ISO/IEC 17020 oder ISO/IEC 17025 Standard. Bei Luftfahrtgerät mit einem Motor ist hierbei auch die Einhaltung der Lärmemissionsgrenzwerte zu prüfen. (2) Die Stückprüfung hat der Hersteller vor Auslieferung des Luftfahrtgeräts an den Kunden entsprechend § 10 Absatz 3 Satz 1 durchzuführen. Er hat dem Halter die Betriebsanweisungen bei Auslieferung des Luftfahrtgeräts sowie die zur Mängelbehebung erforderlichen Anweisungen spätestens fünf Tage nach Feststellung des Mangels zur Verfügung zu stellen. (3) Als Hersteller gilt auch, wer Luftfahrtgerät nach Absatz 1 in die Bundesrepublik Deutschland einführt. (4) Muster- oder Gerätezulassungen eines Mitgliedstaates der Europäischen Union oder
eines Vertragsstaates des Abkommens über den Europäischen Wirtschaftsraum sind
unmittelbar gültig und ersetzen die Prüfungen nach den Absätzen 1 und 2.
.

1.1 WARNINGS, PRECAUTIONS
The following definitions are used in this guide for warnings, precautions and remarks. The
meaning and their meanings are explained below.
WARNING:
The following definitions are used in this guide for warnings, precautions and remarks.
Meaning and significance explained below.
CAUTION:
Means that missing or failure for non-observance procedure reduce the durability of aviation
safety.
NOTE:
Emphasizes attention to specific issues which are not directly concerning
PRECAUTION:
Read the flight safety messages in various publications
Do not perform any flights in turbulent weather condition. A paraglider is shaped by the
internal pressure.This can only maintained when the glider is flown from the front.
Find out about low-flying military aircraft zones and avoid those.

2070
2700
1870
1710
1360

Operating limits
Following in the manual you'll find information for the safe operation and mandatory limits
Even for the Trike,engine, glider and standard systems.
It contains the during flight testing practically flown operating limits.Calculated and verified
by experiments limits.
The X-Light is like all Ultralight not approved for aerobatics. Curves with angle of more than
60 ° are not allowed. Flights in icing conditions are not permitted.
No flight operation in gusty wind or wind speeds greater than 20 km / h = set 5.6 m/s , as well
in the rain.
Engine
• Typ: 4-stroke engine 1-disc- rotary piston
• Power: 26 kW / 6500 /min
• Weight engine: 18,7kg without gearbox
• Weight trike : 99 kg ( No glider, no rescue)
• Propeller: 3 blade 170 cm (57“)
• Torc: >35Nm von 4500-7000 /min
• Chamber volume.: 294cm³
• RPM: 6900 1/min
• Gas: Oil/Gas 1:40
• Fuel consumption: max. 5-7 Liter/h at 5000 U/min (ca. 370 gr/Kw.)
• Centrifugal clutch
• Gearbox 1:3,32 with Poly-V-Belt 790 PJ 16
• Ignition: Digital, Batterie with Generator 125W at 7000 1/min
• Motor housing: Aluminium coated
• Motor housing outside: Aluminium
• Time for overhaul: ? h
• Lengh/With/Height: 300x250x250mm
The maximum take-off weight of the X-LIGHT is 300 kg. This mean empty weight plus mass
pilot plus fuel and plus baggage. Shall subsequently equipment installed which increase the
empty weight, the load must be reduced. The pilot is responsible for compliance with the
maximum takeoff weight.
Caution ! Maximum take-off weight 300 kg!
The maximum allowable CG positions must not be exceeded. If the trike is flown single seat,
the front seat must be used. The pilot weight must be less than 45 kg up to 100 kg.
The rear seat is rated for a minimum of 0 kg up to 100 kg.
The UL Paratrike is designed in strength for maneuver in which loads only between the "Safe
load factor" of +4 G and a minimum load of + 0.5G occur .
WARNING
- All aerobatic maneuvers are FORBIDDEN!
- Turning flight angles greater than 60 ° is also FORBIDDEN !!

The engine is fueled with oil -
gasoline mixture
(95 octanes) lead free.
We strongly recommend the
Liquid Moly Racing Synth to use
2 T oil. (Art. 1505)
A ratio of 1:50.
Coolant meets specification:
VW TL 774 G
From the factory the motor is
protected at least to -20 ° C.
The color of the coolant is pink. It
must not be mixed with other
colors coolant

Possible Cockpit Instrumentation
Temperatur Main Bearing
Rev .counter
Ignition Switch
Start Button
Voltmeter
Water Temperatur
Hour Meter
Altimeter

Chokelever Cruise Control
Accelerator Brake Pedal
Ballpump
Fuelfilter

The propeller cage separates into
2 halves for easy transport.
The mounts are located under the
engine and
right and left sides of the motor
sustain.
The cage halves are secured with
Velcro.

The cage is additionally secured
even with 4 straps.
This must always be pulled tight.
An additional pipe is designed to
protect the cage lines at start and
landing. After installation of the
cage they must hanging in the hub
of the rear wheels.

We recommend the rockets rescue
system Magnum 250.
In case of emergency the recue
opens very fast.The survival
chance is greatly increased
The container is mounted laterally
on the trike
The shooting direction also takes
place to the side.
WARNING
The trigger handle is equipped
with a cotter pin and secure
against accidental release.
Before your start remove this pin.
The laying of the V-line can be
seen in the picture.

Brake Handle
Carabiner
Brake Line
Stabilizer lines
Stabilizer
Leading edge
Name Plate
Top Sail
Trainling Edge
Main Lines
Riser

In order to reduce the braking forces, the brake line is equipped with a pulley system
Pulley system
for easy brake
Double Way
Half Force

Line Lengths RelaX 25
ll lengths are measured from the riserm(open trim) until lower sail

• Before starting the engine use the ball pump. The float chamber must be filled
with petrol. (See page 8)
• The choke is operated ( See page 8)
• The cruise throttle control is in neutral position (See page 8)
• Make sure that the propeller is free
• Now the ignition switch can be closed and the start button is pressed (See page
7)
• During startup do not use throttle
• If the engine starts, the choke lever should be operated about 30 seconds
• The motor requires no special warm-up procedure
• The motor requires no special warm-up procedure
• Maximum water temperature <100 ° C
Maximum temperature of the main bearing 140 ° C. The temperature in the
overflow channelvaries significantly during operation and depends on the throttle
and rpm.
Once the temperature rises above 140 ° C in the overflow channel, you should
reduce throttle. If the temperature should still continue to rise, this could be an
indication of wear of the main bearing. In case of overheating (water or main
bearing) you should stress the motor according to a minimum and switch off as
soon as possible.
Then you should definitely check the engine , as a not yet visible damage may be
possible.

OPERATION AND FLYING
PARAGLIDER UNFOLD AND PRE FLIGHT CHECK
Unfold
Place the paraglider with the top surface to the bottom and spread so that the leading
edge is draped in a big curve
Carefully separate all the lines and make sure that no lines are underneath the canopy,
tangled or somewhere to hang.
Pre Flight Check
Always check carefully before starting :.
• Are there any cracks or other damage to the sail?
• All lines clear?
• Are the brake lines clear and tightly connected to the handle?
• Are the brake lines properly adjusted?
• Are the shackle to the suspension lines and the belts firmly closed and secured?
• Is the canopy dry
• Are the risers and seams in good condition?
• Is the rescue handle correctly unlocked?

6-POINT CHECK
Just before the start we recommend the 6-point check:
1) Is the canopy arranged in a half round, and all entry ports are open?
2) Are all the lines untangled there are no lines under the canopy?
3) Are the clothes and the helmet closed , the seat belt is applied
ist die Lehne des vorderen Sitzes gesichert?
4) Trimm´s closed, Brake handle ready to hand?
5) Wind strength and direction in order for safe flight?
6) Are the airspace and launch area clear?
First Flight
Note!
Perform your first flights only in calm weather and on a well-known place.
Make the first flight without hard maneuvers
Accident risk!
Do not overestimate yourself. Do not be mislead of other pilots to reckless behavior.
Adjusting Bake Lines
Note!
The main brake lines must be checked by an expert before the first test of the paraglider.
Correct Adjust
Properly installed brake lines have almost no flow. This means you have to pull the
brakes down a little until the trailing edge of the canopy starts to move downwards and
start braking. This is the manufacturer's setting. Basically this paraglider has a very long
brake.
To Long Set
If the brake lines are too long, the paraglider reacts slowly and is difficult to land.
However, you can wrap during the flight the brake lines around your hands to reduce the
problem. After landing the brake lines should adjusted to the correct length.
Recommendation:
After touch down we recommend the brake lines again to wrap around the hand. When
approaching use the brakes as less as possible, so the speed is not to low. Flair the
glider evenly with both brake lines. After the flight the glider should fall behind the
trike.
Accident risk!
If the brake lines are too short, the following risks:
A stall can occur to early
The paraglider does not launch well and there is a constant stall risk.
The glider can makes a dangerous extreme flight behavior.

TRIMMS
Accident risk!
With increased speed disorders (collapses) affect more drastic than in unaccelerated
flightIn turbulent weather conditions do not fly close to the ground when the trim´s are
open. The trim´s are operated by the lever
The trim´s should be adjusted so that the X-Light in cruise flies straight.
Start Up Device The glider starts easier when the start up device is activated. The red wire should sag
slightly when the strap is vertically upwards.
Danger: A tight rope in flight pulls the A-riser down and increases the risk of a front
collaps.
ROLL
The nose wheel steering is easy to learn. Do some taxi tests at yourself..Get familiar
before your first flight. When rolling get control by means of pedals. If the glider is in
the air, you have the control coordinates as well by using the brake lines.
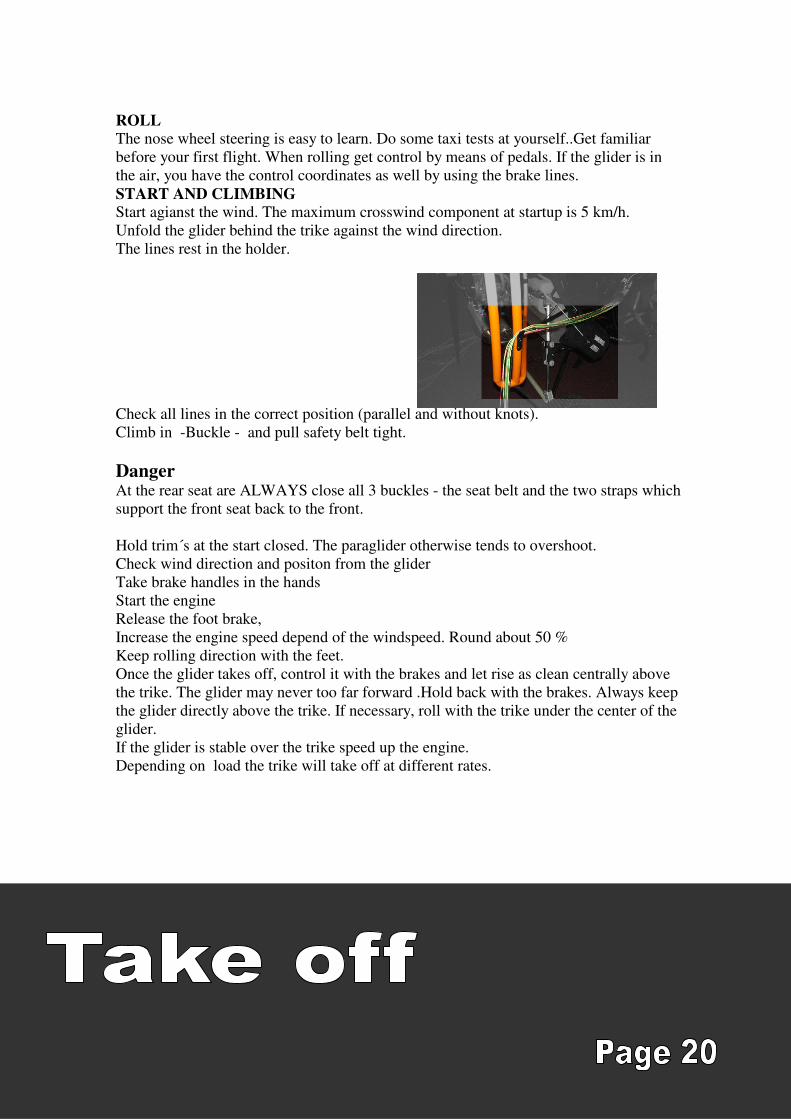
START AND CLIMBING
Start agianst the wind. The maximum crosswind component at startup is 5 km/h.
Unfold the glider behind the trike against the wind direction.
The lines rest in the holder.
Check all lines in the correct position (parallel and without knots).
Climb in -Buckle - and pull safety belt tight.
Danger At the rear seat are ALWAYS close all 3 buckles - the seat belt and the two straps which
support the front seat back to the front.
Hold trim´s at the start closed. The paraglider otherwise tends to overshoot.
Check wind direction and positon from the glider
Take brake handles in the hands
Start the engine
Release the foot brake,
Increase the engine speed depend of the windspeed. Round about 50 %
Keep rolling direction with the feet.
Once the glider takes off, control it with the brakes and let rise as clean centrally above
the trike. The glider may never too far forward .Hold back with the brakes. Always keep
the glider directly above the trike. If necessary, roll with the trike under the center of the
glider.
If the glider is stable over the trike speed up the engine.
Depending on load the trike will take off at different rates.

CRUISE
The torque effect can be compensated by means of the trimmer (Pic. Page 13 ) .
Speed control maintains the travel speed constant ((Pic. Page 8 ).
LANDING
The landing should always be against the wind.
Close the trims and reduce the engine speed. Take the brake handles, Start with the
braking in 5-8 m height If the brakes started too early can be landed with engine support
The glider should after landing fall behind the Trike
PARK
Idle running.
Motor abschalten (Main Switch „Off“).
Leave the trike only when the propeller not urning any more
GROUNDHANDLING
For maneuvering at the bottom of the trike may only be lifted over the front wheel
The cage easily tempted to this, but is not designed for this load. Deformations would
result

FLIGHTS UNDER SPECIAL CONDITIONS
Rain
Basically belongs to every conscientious flight preparation the look of the weather
situation, so that "really" no flights in rain should be necessary.
Nevertheless, each pilot can fall into worse unpredictable weather conditions.
In general: No flights in the rain, as soon as possible to land!
In very light rain the flight can be continued at first. The increasingly becoming wet
glider is correspondingly heavier and therefore must flown faster to generate the
necessary lift. The stall speed increases accordingly. A stall is possible!
Therefore: Cautious flying, avoid abrupt maneuvers, do not fly too slow for landing.
In heavy rain always land, perform if need a safety landing.
Store away the glider only dry , they rot otherwise. A wet glider also starts slower and
worse!
WIND: Generally, each start and each landing must be performed whenever possible
into the wind.The glider will always turn into the wind. Must be rolled diagonally to the
wind, use the leeward brake line slightly to hold the glider in the right direction.
Must be landed in strong winds use the foot pedal brake.It prevent a back pulling effect
of the trike.After touch down turn the brake line one time around your hand.
You will get a more efficience brake.
In turbulence do not fly at maximum speed. The reduced angle of attack allow a collapse
of the glider in case of wind gusts.
Close the trim´s
Flights are not permitted at snowfall and must be stopped if necessary.
Extreme temperatures: Restrictions in "normal" temperatures between -10 and +35 ° C
does not exist. “START PILOT” could simplify at low temperatures to start the engine.
However, the cooling water must be mixed according to the manufacturer's instructions
of the engine with antifreeze. In warm weather please have special attention to the
engine temperatures. The power consumption and flight speed increases in result for
longer take off and landing roll distancen

Start,Flight,Landing:
Here are some supplements that goes beyond the description of the first flight
If the glider falls too far on the side, do not continue the take off procedure.
It is better to cancel two times the start than one time to get up side down.
If the glider is already collapsed while pulling up try to get clear by pumping the brake
lines.
Take off only with a complete opend glider
Experienced pilots can ride with in no wind a full circles with less than 50 m diameter.
The glider is herwith over the pilot

FLYING UNDER TURBULENT CONDITIONS
Note!
Take care crossing your own vortexes!
Though the tendency to collapse is significantly reduced due to the high wing load
of the X-LIGHT, in turbulent air you should fly it with the trim system set to slow.
The stabilizing effect of the increased pressure inside the wing at higher speeds is
more than counteracted by the smaller angle of attack.
Use both brake lines in turbulent air and keep them slightly pulled down (20%), and
keep the canopy above you and centred with active work at the brake lines. This
reduces the risk of a collapse.
If the canopy collapses anyway on one side, keep the direction with the brake lines
(and, if necessary, fly away from any obstacles). Only if you fly stable “pump” the
brake on the collapsed side to re-open the wing quicker. You may have to do it
forcefully due to the high wing load.
If you fly into very thermal conditions fly slowly but don’t pull the brake too much to
stay away from a dynamic stall. If you leave such a thermal area pull the brake
lines to avoid a forward shooting canopy and the potential risk of a front collapse.
You may give more gas as well to increase the angle of attack.
Note!
If the canopy collapses on one side brake the other side until the X-LIGHT is flying
straight forward. But better use less than too much brake input!

LANDING WITH ENGINE SHUT OFF
In principle landing with the engine shut off is the same as if it is still running –
always facing the wind. But the speed should be kept up high enough for a prop
flaring. So hold the brake lines up until you are roughly 2 m high. You should win
them 1x around your hand to have more brake travel. In 2m altitude start to app
brake continuously. Just at touch down the brake lines should be completely pul
down.
If due to wind the canopy doesn’t fall down behind the trike you may release the
brake for a moment, wind them 1x more around the hand and pull it again. You
may repeat this procedure until the glider comes down.
If the canopy pulls too much to the side the trike may finally roll over. Therefore
keep the canopy centered as good as possible behind the trike.
If the wind is quite strong at may help to get the canopy down by not braking too
much with the front wheel. Then the trike may roll back with the wind a little bit.
LANDING WITH THE HELP OF THE ENGINE
As the wing load of the X-LIGHT is quite high compared with a backpack motor, the
RelaX should not be flown too slow prior to touch down. We recommend to keep
the brake wide open until you reach roughly 2 m, and then pull it continuously
down until you touch the ground. At this time the brake should be fully applied.
Please make sure that the brake line is perfectly adjusted to your X-LIGHT so you
don’t loose brake travel when landing.
You may use the engine to adjust the descent rate. Control altitude and speed with
brake lines and gas.
Caution! Accident risk!
Being close to the ground watch your air speed carefully, don’t fly too slow: Always
much faster than your stall speed!

RAPID DESCENTS
There are many situations when you need to lose altitude rapidly to avoid potential
dangers e.g. pulled up from a cumulus cloud, an approaching cold front, a storm front
etc. Below we explain various ways to make a rapid descent which can be
carried out safely with the X-LIGHT if the pilot has the necessary knowledge and if
they are correctly executed.
NOTE!
With all rapid descent methods, the trim system should be completely set to slow
and the rpm's reduced to idle.
All of the manoeuvres are more dynamic than when you fly with a backpack system
or even without a motor due too the high wing load.
DEEP SPIRAL
The spiral dive is the classic method for making a rapid descent with a sink rate of
up to 14 m/s in normal flight situations, and up to 20 m/s in extreme flight
situations. It is particularly suitable where there is a high ascent rate and little wind.
Spiral dives with a sink rate above 14 m/s are not tested on certification; this
exceeds the manufacturer's limits.
STARTING THE MANOEUVRE
Whilst flying at full speed, start to apply the brake on one side. This will steer the
paraglider into a turn with a strong bank. You can tell that you are in a spiral dive if
you are being pressed hard against your seat (high centrifugal force).
When you are in a spiral dive, you should steer very carefully because the
paraglider will react immediately. Banking and rate of turn increase if braking
efficiency increases. Look down before and during a spiral dive so that you always
know how far you are away from the ground!
RECOVERY
Recover from the spiral dive slowly and carefully. If you release the brakes too
quickly, the increased speed can cause the wing to climb, become unsettled, or
partly collapse.
Due to the reduced possibility when flying in a trike to use weight-shifting, you must
always recover actively from the spiral dive with the outside brake.
Caution! Accident risk!
Very high turn speeds can be reached with spiral dives, with high G-loads.
So be careful when you try this!
Do not continue the spiral dive too long; you could lose consciousness.
Never attempt this with less than 150 to 200 meters ground-clearance.
Spiral dives combined with other methods like B-stall or "big ears" are not
possible with the X-LIGHT without any changes and are not allowed at all.

INSTRUCTIONS FOR EXTREME FLYING AND
DANGEROUS SITUATIONS
DANGEROUS SITUATIONS Extreme flying with a motor trike and full gas are extremely dangerous and
therefore cannot be tested. They must be avoided at all costs.
Problems do not arise during a normal flight. However, pilot error during the flight
or extreme wind conditions may force the wing into an unusual flying position. This
may require the pilot to make corrections during flight to which he may not be used
to. In this section we explain how to correct extreme situations if they do arise. The
manoeuvres described below are based on the legal -take-off weight as described
in the technical data section.
Note!
These instructions do not replace safety training or specialised literature. We
recommend that you undertake special safety training which will prepare you for
extreme situations.
Always keep within the recommended limits. Do not perform aerobatics or extreme
flying manoeuvres. This will prevent accidents caused by over-loading the glider.
DEEP STALL
Various things can cause a paraglider to deep stall, e.g. shrinkage of the C and D
lines as a result of dampness or flying in the rain. The airflow from the front of the
glider gradually breaks away towards the back and the canopy sags, with the glider
remaining upright. Paragliders are particularly susceptible to deep stalls if the wing
loading is too low. C and D lines which are too short, for example, can often be recognised because
launch behaviour deteriorates. You can recognise a deep stall because there is less flight noise than
normal. In addition, your sink rate will increase (6-8 m/s).
Recovery
The XWing couldn’t be deep-stalled at all during our test flights. The usual recovery
procedure would be to decrease the angle of attack be shortening the A- nd B-
lines. But this would require huge forces at the X-LIGHT. Better would be to decrease
the angle of attack be pulling both trim levers back.
Caution! Accident risk!
A wet canopy or flying in the rain increases the weight of the canopy and may
cause a stall. You are not allowed to fly under these circumstances. FRONTSTALL Strong turbulence can cause part or all of the leading edge of the glider to fold or
tuck under. Normally the RelaX will immediately recover into its normal flight position.
RECOVERY
If the XWing does not immediately recover from a frontal tuck, brake quickly and
strongly with both steering-lines (brake lines) to re-inflate the glider.
Any weather condition which causes a front stall is much outside the allowed and
safe weather conditions. If you get into such weather land as soon as possible a
continue not before the weather got quieter!
ASYMMETRICAL TUCKS
In turbulent air, one side of the paraglider may collapse. Some of the cells deflate
and the paraglider may collapse or spin.
During test flights the RelaX self-recovered on release of the A-risers which wer
pulled down to initiate the collapse. It turned less than 90° and stabilised itself.
Recovery
• Counter-brake slightly on the side of the paraglider that is still inflated to
stop it turning away and to stabilise it.
• Counter-brake just enough that the paraglider continues to fly straight
ahead.
• If the wing has not yet self-recovered, pump with the brake on the side th
has collapsed in order to open it, making use of the full brake travel.

Caution! Accident risk!
Counter-braking too strongly can result in a stall on the inflated side.
FULL STALL
A full stall could occur if full brake is applied during the flight. The paraglider slows
down, surges backwards and deflates. If the brakes are held down, the canopy
comes up over the pilot again. The result is an almost vertical descent with a sink
rate of about 8-12m/s.
Recovery
Fully release the brakes within 3 seconds. If you release the brakes too slowly, the
paraglider may spin. The spin stops automatically when the brakes are released
completely.
Caution! Accident risk!
If the canopy has gone backwards, you must hold the brakes down, or the canopy
can surge forward and, in an extreme case, end up underneath the pilot. Hold the
brakes down until the canopy is above you again.
SPIN
Spins occur when one side of the canopy stalls. The other side still continues to fly
forward, while the stalled side turns in the opposite direction.
RECOVERY
Quickly release the brakes.
Note!
If the spin does not stop:
1. Check whether you have released the brakes fully.
2. Is the spin still doesn’t stop, use your recovery system.
Caution! Accident risk!
In strong turbulence, always keep far enough away from rock faces and other
obstacles. You need time and enough height to recover from extreme situations.

Empty

Run-In-Phase
The engine should be subjected to a one-time start-up phase. In the first period, the
motor should run at full throttle as little as possible
The engine has very good emergency running properties and can withstand even
immediate operation at full load, but a careful shrinkage reduces internal friction and
therefore has a positive effect on the subsequent power.
RPM The XF40, so the designation of the manufacturer is designed to a maximum speed of
7000 1/min. The electronic speed limiter begins only from a speed of 11000 1/min . The
speed limiter is just a safety feature.
The maximum speed can be adjusted via the pitch of the propeller.
Water temperature Never opertate the engine below 100 ° C water temperatur
If the temperature fluctuates significantly, the cooling system may have a leak.
Switch off the engine as soon as possible. The engine could otherwise be damaged
Temperature Main Bearing The temperature in the overflow channel varies significantly during operation and is
depends on the load and the speed. You should never rise above 140 ° C !
If the power demand will just a little reduced, so the temperature drop quickly. If the
Temepratur still continue to rise, this may be an indication of a defective main bearing.
Emergency mode A Wankel engine has basically good emergency running properties and can be operated
beyond its limits, without being to brake directly
Nevertheless operation outside the specified temperatures can cause damage.
Stopp the engine as soon as possible.
In case of overheating ( Water or Main Brearing) check the enginge because a non yet
visible damage may be possible
.

DAILY INSPECTION
The safety of an aircraft depends on his regular, diligent inspection and maintenance.
1. Engine: Pay attention to spills.
2. Check propeller for tightness and damage.
3. Check the frame for cracking, paying particular attention to the areas of the
clutch and the engine mount.
4. Note oil and coolant level according to engine manual.
5. Lubrication, cooling and fuel system for leaks connections
6. Electrical connections, spark plug, throttle cables
7.
NOTE: A turning the engine by hand for testing purposes is not possible due to the
built-in centrifugal clutch on the propeller.
8. Check Paraglider - All lines without knots or damage.
No deformation, cracks or visible external damage
9. Check the entire pilot suspension
10. Check chassis for damage and rubber parts of the suspension
11. Check front brake and tire
12. Pedals free and cable o.k.
13. Belts for Engine support
14. Check seat boards and belts for strength and damage
15. Tires and air pressure ( frontwheel 1,5 bar , Rear wheel
16. Rear Glass Axle: Check for damages
17. Cable on Rear Glass Axle o.k.?