
Fender Protectors - Quadratecoutside edge of the Fender Protectors. Remove the Fender Protectors and...
14
1 Fender Protectors To ensure a successful installation, please read all of these instructions prior to starting. General Instructions All Tough Stuff Protective Products use a waterproof contact adhesive. q The surface temperature of your vehicle and your Tough Stuff Protectors must be above 60 Degrees F (16 C) for a successful installation. q The air temperature should also be above 60 Degrees F (16 C) before you begin. q Do not install your protectors in direct sunlight . Allow your vehicle to cool in the shade to ensure a trouble free installation. q Unroll the Protectors and lay on a clean flat surface . (You may lay them out in the sun for a minute or two to assist in getting them to lay flat.) q Proper surface preparation is vitally important for proper adhesion . Your vehicle body must be cleaned thoroughly to remove all dirt, wax, oil and on/off road film. Please follow the detailed directions on how to clean the surface using 70%
Transcript of Fender Protectors - Quadratecoutside edge of the Fender Protectors. Remove the Fender Protectors and...
1
Fender Protectors
To ensure a successful installation, please read all of these instructions prior to starting.
General Instructions All Tough Stuff Protective Products use a waterproof contact adhesive.
q The surface temperature of your vehicle and your Tough Stuff Protectors must be above 60 Degrees F (16 C) for a successful installation.
q The air temperature should also be above 60 Degrees F (16 C) before you begin.
q Do not install your protectors in direct sunlight. Allow your vehicle to cool in the
shade to ensure a trouble free installation.
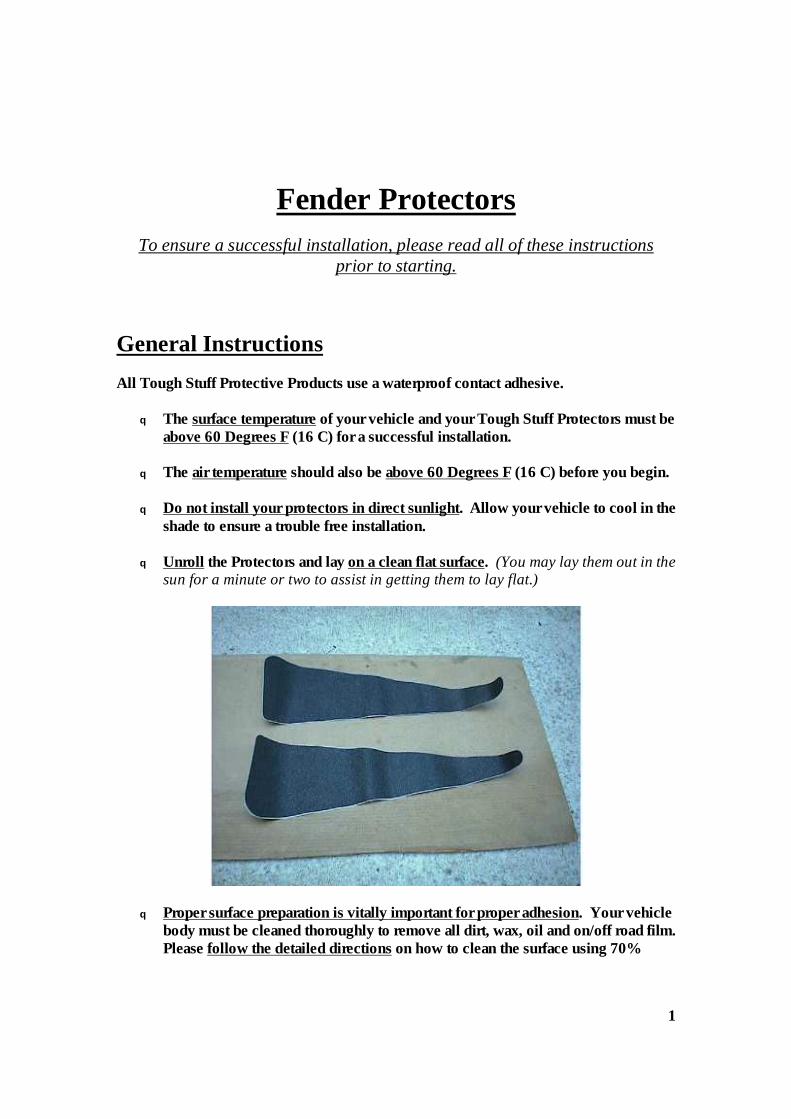
q Unroll the Protectors and lay on a clean flat surface. (You may lay them out in the sun for a minute or two to assist in getting them to lay flat.)
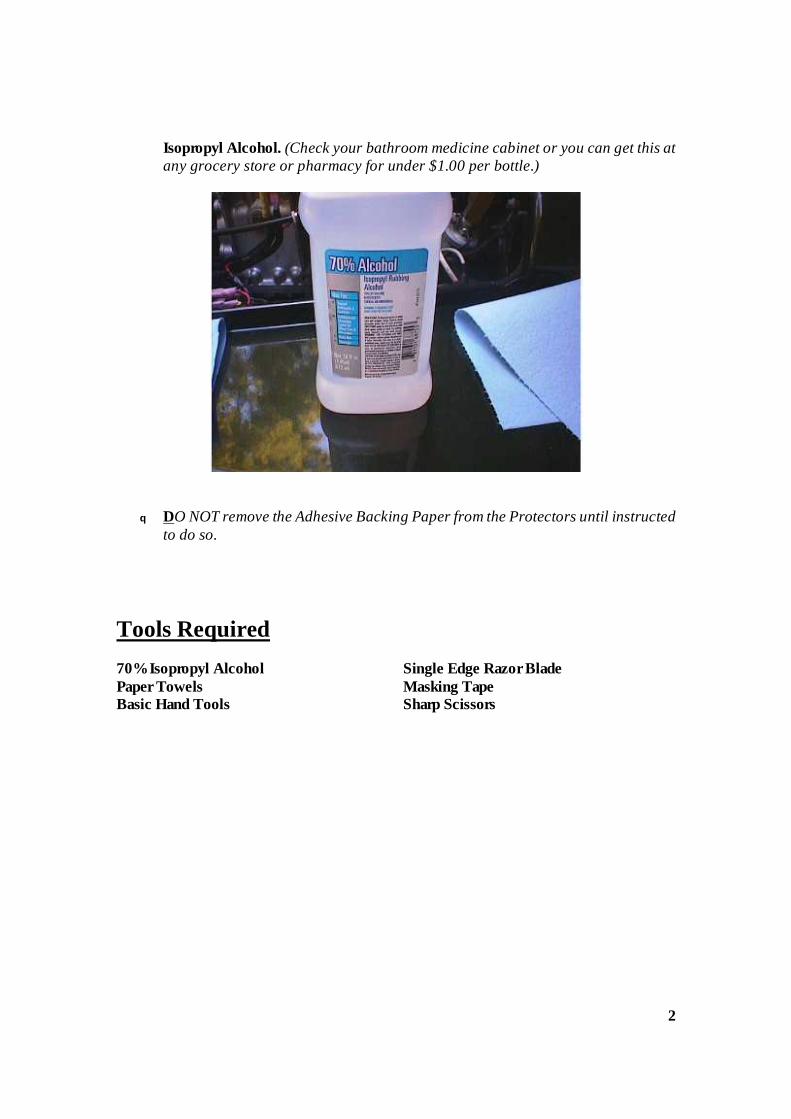
q Proper surface preparation is vitally important for proper adhesion. Your vehicle body must be cleaned thoroughly to remove all dirt, wax, oil and on/off road film. Please follow the detailed directions on how to clean the surface using 70%
2
Isopropyl Alcohol. (Check your bathroom medicine cabinet or you can get this at any grocery store or pharmacy for under $1.00 per bottle.)
q DO NOT remove the Adhesive Backing Paper from the Protectors until instructed to do so.
Tools Required 70% Isopropyl Alcohol Single Edge Razor Blade Paper Towels Masking Tape Basic Hand Tools Sharp Scissors
3
Detailed Instructions:
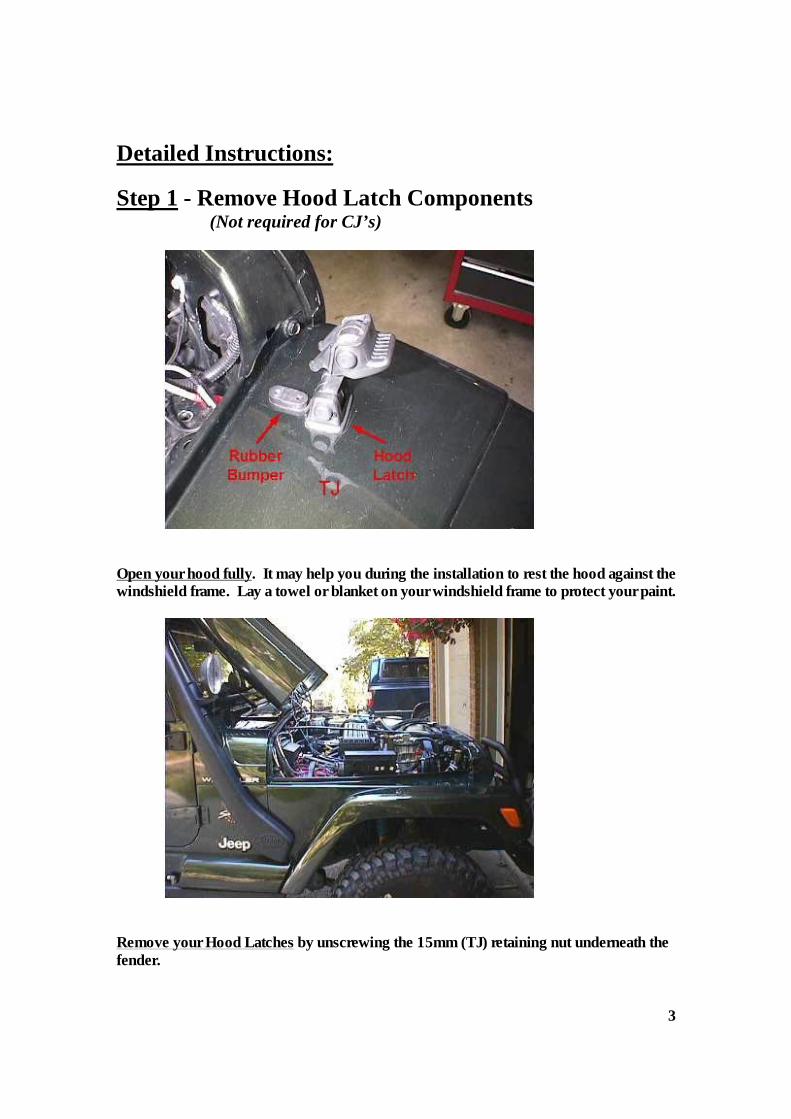
Step 1 - Remove Hood Latch Components
(Not required for CJ’s)
Open your hood fully. It may help you during the installation to rest the hood against the windshield frame. Lay a towel or blanket on your windshield frame to protect your paint.
Remove your Hood Latches by unscrewing the 15mm (TJ) retaining nut underneath the fender.
4
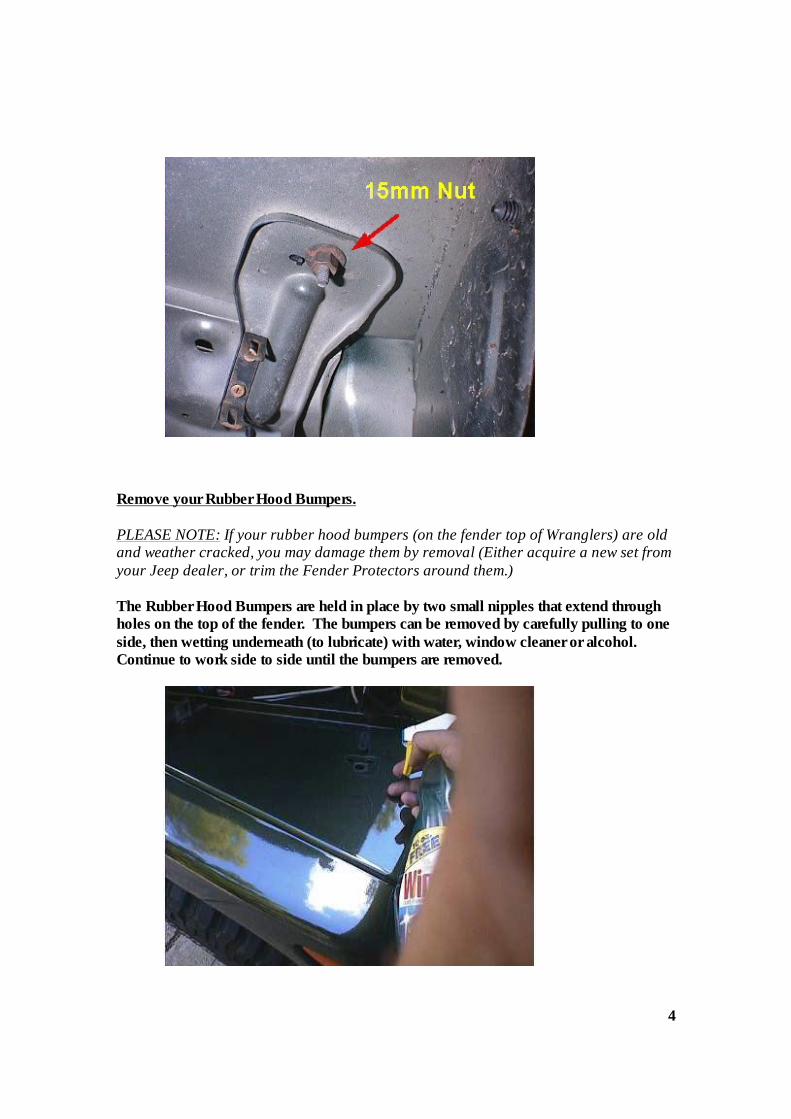
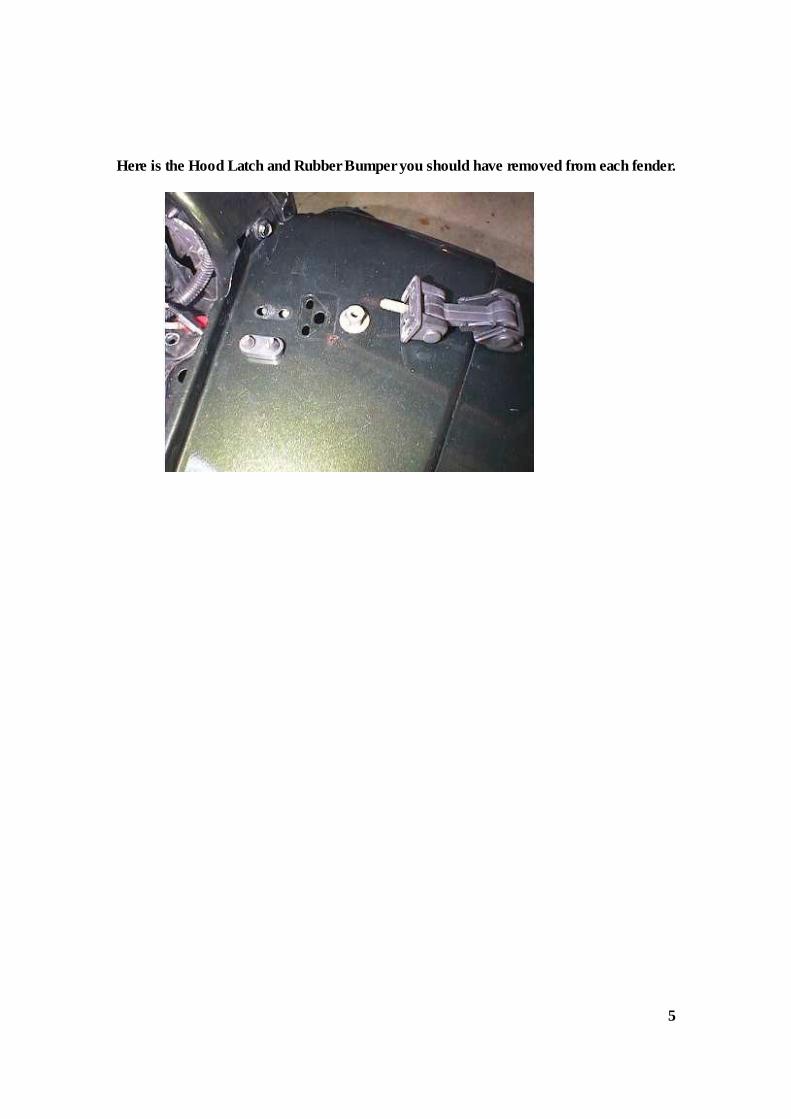
Remove your Rubber Hood Bumpers. PLEASE NOTE: If your rubber hood bumpers (on the fender top of Wranglers) are old and weather cracked, you may damage them by removal (Either acquire a new set from your Jeep dealer, or trim the Fender Protectors around them.) The Rubber Hood Bumpers are held in place by two small nipples that extend through holes on the top of the fender. The bumpers can be removed by carefully pulling to one side, then wetting underneath (to lubricate) with water, window cleaner or alcohol. Continue to work side to side until the bumpers are removed.
5
Here is the Hood Latch and Rubber Bumper you should have removed from each fender.
6
Step 2 – Cleaning / Surface Preparation
*** Proper surface preparation is vital for proper adhesion. ***
WARNING: Do Not Remove the Adhesive Backing Paper from the Fender Protectors Yet!
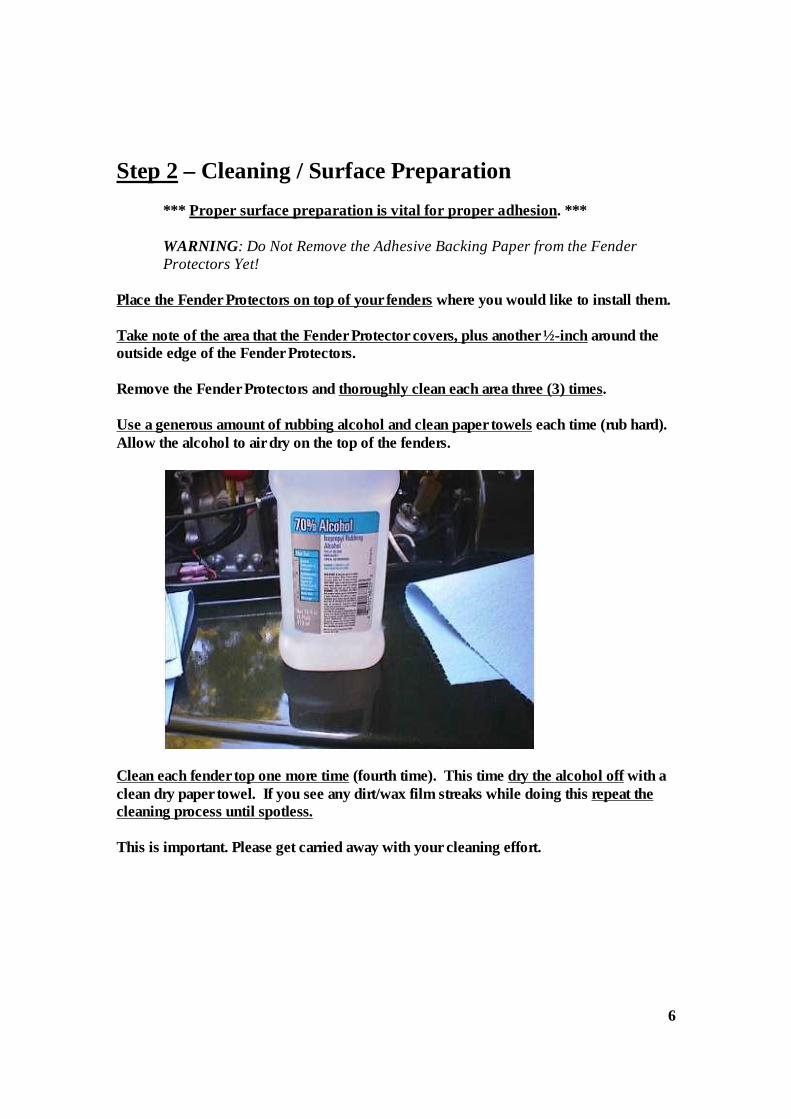
Place the Fender Protectors on top of your fenders where you would like to install them. Take note of the area that the Fender Protector covers, plus another ½-inch around the outside edge of the Fender Protectors. Remove the Fender Protectors and thoroughly clean each area three (3) times. Use a generous amount of rubbing alcohol and clean paper towels each time (rub hard). Allow the alcohol to air dry on the top of the fenders.
Clean each fender top one more time (fourth time). This time dry the alcohol off with a clean dry paper towel. If you see any dirt/wax film streaks while doing this repeat the cleaning process until spotless. This is important. Please get carried away with your cleaning effort.

7
Step 3 – Installation
*** The tops of your fenders are clean, right? ***
WARNING: Do Not Remove the Adhesive Backing Paper from the Fender Protectors Yet!
Carefully locate the Fender Protectors on your fenders and check for the proper fit. (Normally 1/8-inch to ¼-inch gap will be around all outside edges.) If you find any areas need trimming, trim with a sharp scissors to fit to your liking. Securely tape the Fender Protectors in the proper location using masking tape. Make sure there are no voids under the Protectors.
Double-check the location of your Protectors. Close your vehicle hood to make sure you are satisfied with this location.
8
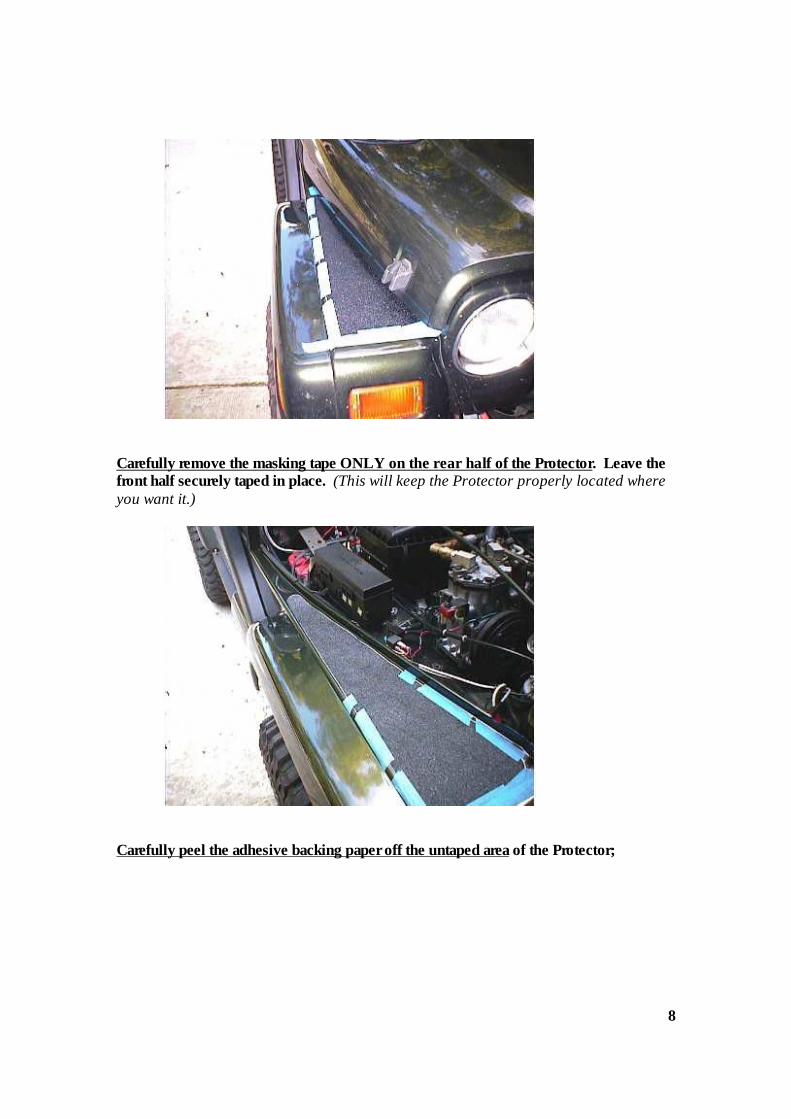
Carefully remove the masking tape ONLY on the rear half of the Protector. Leave the front half securely taped in place. (This will keep the Protector properly located where you want it.)
Carefully peel the adhesive backing paper off the untaped area of the Protector;
9
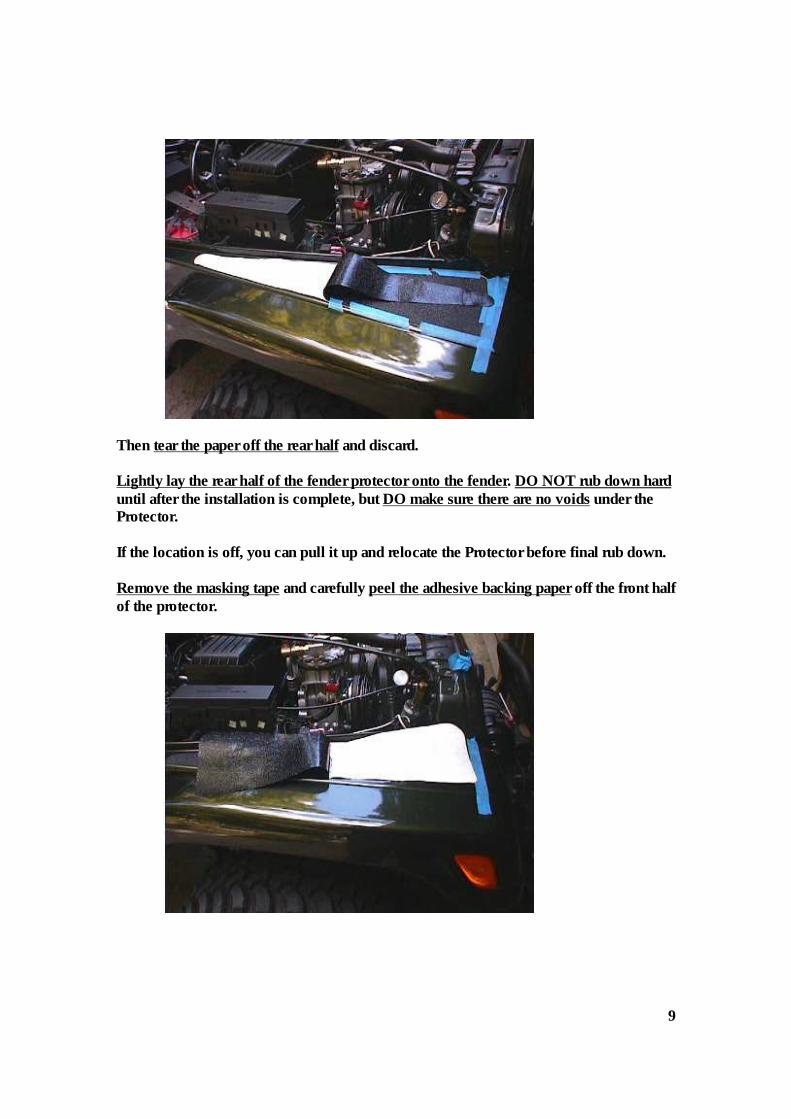
Then tear the paper off the rear half and discard. Lightly lay the rear half of the fender protector onto the fender. DO NOT rub down hard until after the installation is complete, but DO make sure there are no voids under the Protector. If the location is off, you can pull it up and relocate the Protector before final rub down. Remove the masking tape and carefully peel the adhesive backing paper off the front half of the protector.
10
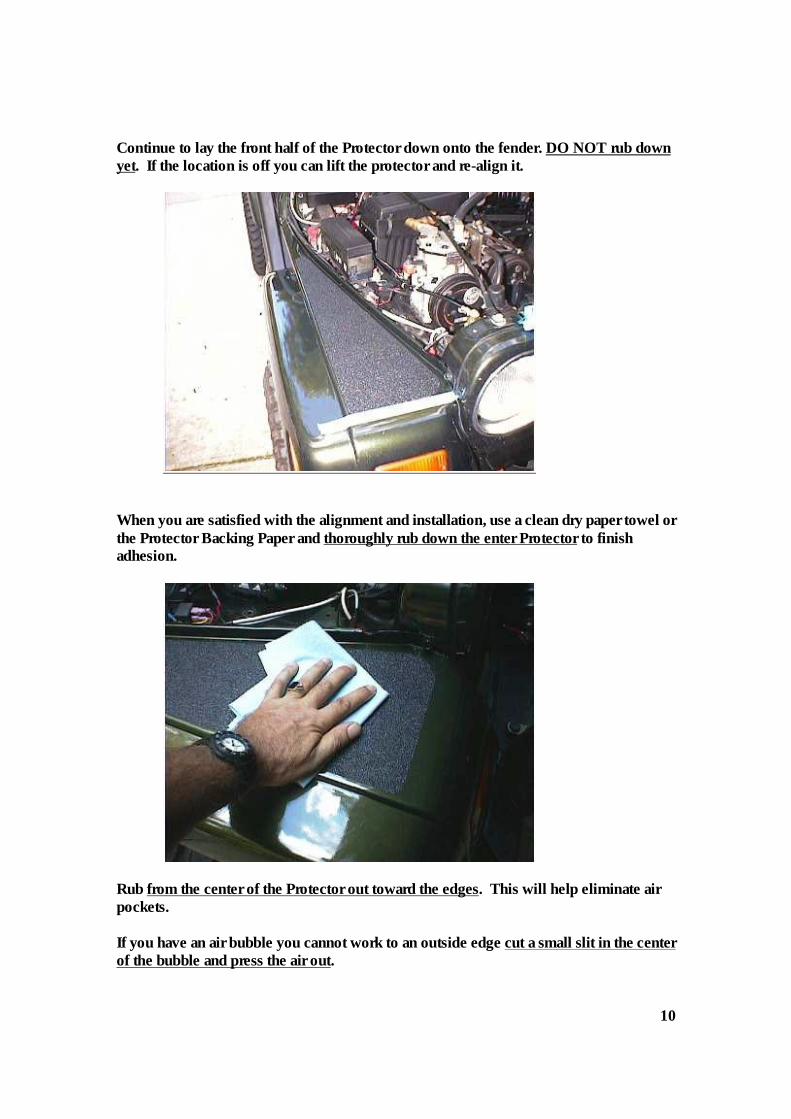
Continue to lay the front half of the Protector down onto the fender. DO NOT rub down yet. If the location is off you can lift the protector and re-align it.
When you are satisfied with the alignment and installation, use a clean dry paper towel or the Protector Backing Paper and thoroughly rub down the enter Protector to finish adhesion.
Rub from the center of the Protector out toward the edges. This will help eliminate air pockets. If you have an air bubble you cannot work to an outside edge cut a small slit in the center of the bubble and press the air out.

11

12
Step 4 – Reinstall Removed Hood Latch and Bumper
(Not required for CJ’s) Locate the mounting holes for the rubber bumper and hood latch under the Fender Protector with your finger. Press down to make small indentations in the Protector over the holes.
Press a Philips Head screwdriver into each indentation to open up the five (5) holes in the top of the fender needed to mount the latch and bumper.
13
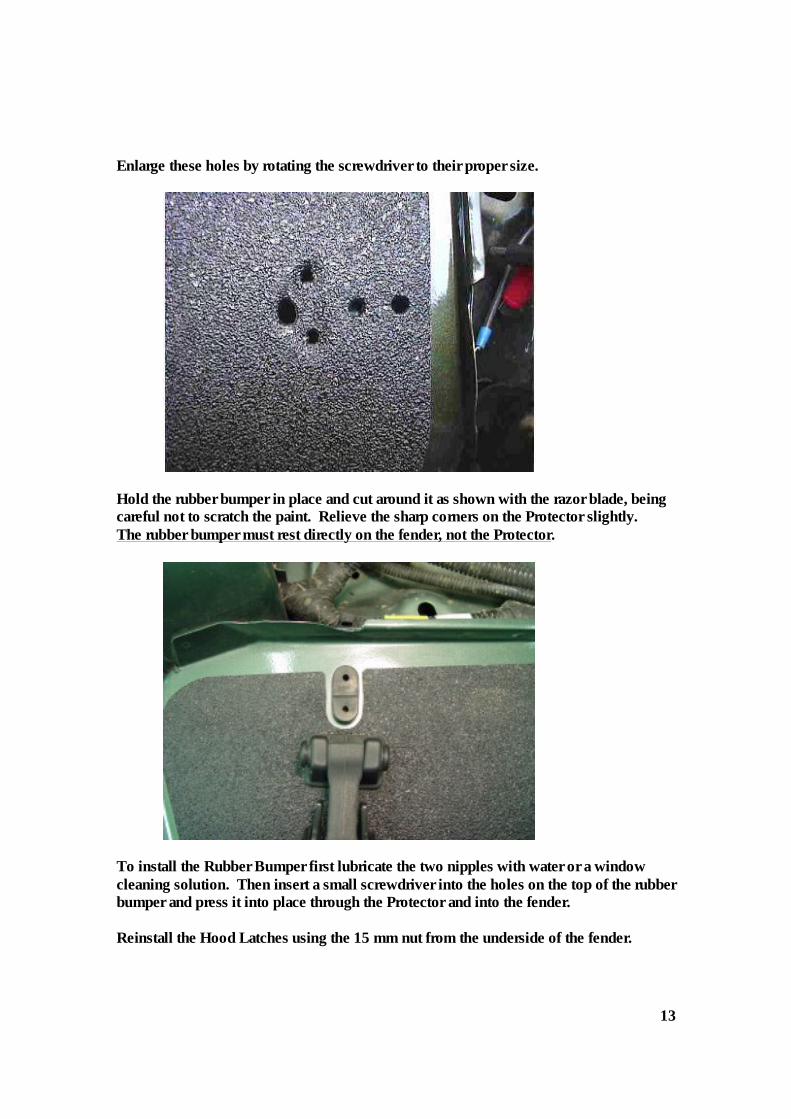
Enlarge these holes by rotating the screwdriver to their proper size.
Hold the rubber bumper in place and cut around it as shown with the razor blade, being careful not to scratch the paint. Relieve the sharp corners on the Protector slightly. The rubber bumper must rest directly on the fender, not the Protector.
To install the Rubber Bumper first lubricate the two nipples with water or a window cleaning solution. Then insert a small screwdriver into the holes on the top of the rubber bumper and press it into place through the Protector and into the fender. Reinstall the Hood Latches using the 15 mm nut from the underside of the fender.
14
NOTE: The "Clear Frost" colored Protectors will take a week or so (faster in warm temperatures) before the clear color will even out, the adhesive is very thick and viscous and it takes time for the adhesive to fully "wet out". Please do not be alarmed if, directly after application, the Protector looks spotty, you are only seeing the adhesive through the clear material.
MAINTENANCE and REMOVAL There is no real maintenance required for your Tough Stuff Fender Protectors. Simply clean them with a soft brush or sponge and soapy water. DO NOT direct a pressure washer spray at an angle around the edges of the Protectors for 14 days after installation. If a Protector ever needs to be removed, use a hair drier to heat one corner. You will be able to pull the Protector off, however this will destroy it. Use rubbing alcohol to soften and remove any residual adhesive. Thank you for purchasing our product. We are certain you will receive many years of value from your purchase. We also manufacture many other body protection products and accessory items for your vehicle. Our complete product line can be seen at www.toughstuffproducts.com