FedEx SmartPost Job Aid - Select Your Location
4
FedEx SmartPost ® The efficient, cost-effective way to ship low-weight, residential packages. Getting Started For more information about FedEx SmartPost, or to get started using this contract-only service, contact your FedEx account executive, or call 1.800.GoFedEx 1.800.463.3339. Download Rates and Tracking Numbers Use the Demand Download screen to download FedEx SmartPost rates and FedEx SmartPost tracking numbers. To download: 1. Select Download from the Utilities drop-down menu. 2. Select the SmartPost Rates and SmartPost Earned Discounts check boxes from the Rates section. 3. Select the SmartPost Tracking Numbers check box from the Tracking Numbers section. 4. Click OK and restart the software. Note: Tracking numbers should only have to be downloaded when FedEx Ship Manager ® Software version 2500 is initially loaded on your system. Create a Shipment 1. Click the Ship tab at the top of the screen. The “Shipment details” screen displays. 2. In the Recipient Information section, select an existing Recipient ID from the drop-down menu or enter required information manually in the bolded fields (including the “Contact name”). Note: You can add, view, edit and delete recipients in the “Recipient database.” To access the “Recipient database,” select Recipient from the Databases menu or click the Address Book tab. Refer to the Database Functions section in the Interactive User Guide — available for download in PDF format at fedex.com/us/software/ user_guide.html. 3. In the “Sender information” section, you can change the current sender by selecting the appropriate sender from the “Change sender” menu. You can also select a different return address from the “Change return address” menu. You must select a return address before shipping the package. Note: If you select a different sender (not the return address), the ZIP code must match the ZIP code of the account address. 4. In the “Package and shipment details” section, select or enter the following information: Note: The number of packages defaults to 1, but it can be edited for multiple-piece entries. • Weight — The maximum weight is 70 lbs. for all FedEx SmartPost services, except for FedEx SmartPost ® Bound Printed Matter (maximum weight is 15 lbs.).
Transcript of FedEx SmartPost Job Aid - Select Your Location

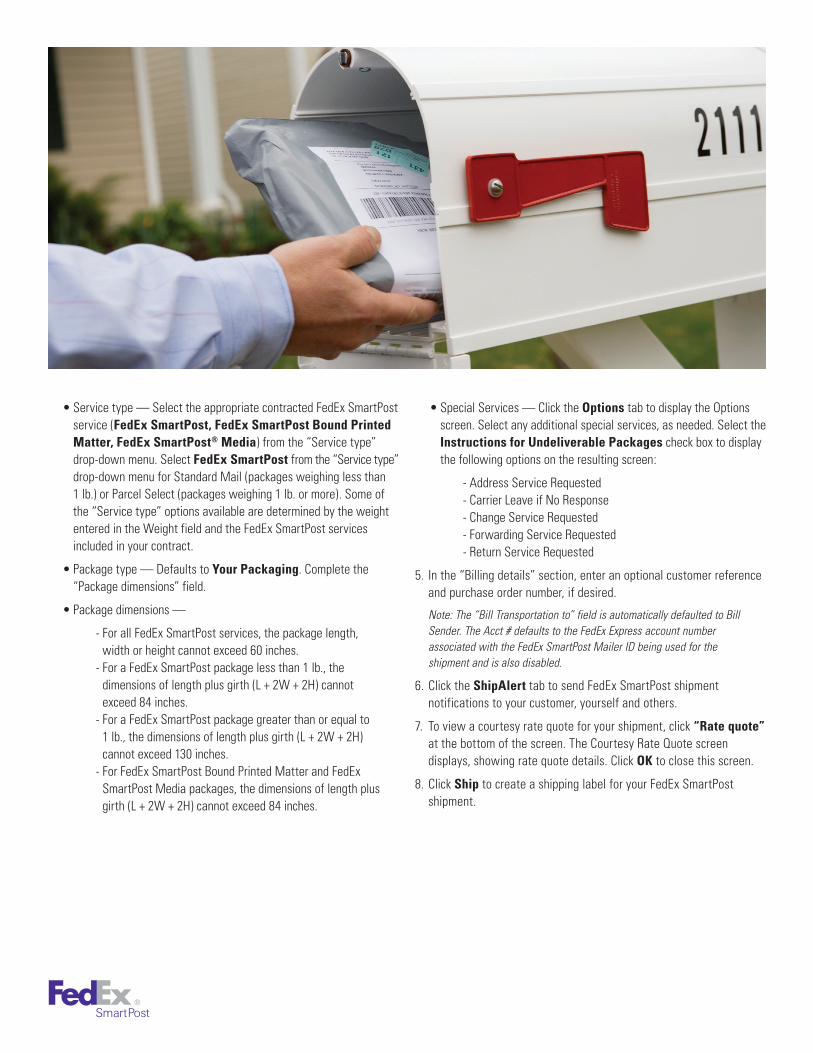
FedEx SmartPost® The efficient, cost-effective way to ship low-weight, residential packages.
Getting StartedFor more information about FedEx SmartPost, or to get started using this contract-only service, contact your FedEx account executive, or call 1.800.GoFedEx 1.800.463.3339.
Download Rates and Tracking NumbersUse the Demand Download screen to download FedEx SmartPost rates and FedEx SmartPost tracking numbers.
To download:
1. Select Download from the Utilities drop-down menu.
2. Select the SmartPost Rates and SmartPost Earned Discounts check boxes from the Rates section.
3. Select the SmartPost Tracking Numbers check box from the Tracking Numbers section.
4. Click OK and restart the software.
Note: Tracking numbers should only have to be downloaded when FedEx Ship Manager ® Software version 2500 is initially loaded on your system.
Create a Shipment1. Click the Ship tab at the top of the screen. The “Shipment details”
screen displays.
2. In the Recipient Information section, select an existing Recipient ID from the drop-down menu or enter required information manually in the bolded fields (including the “Contact name”).
Note: You can add, view, edit and delete recipients in the “Recipient database.”
To access the “Recipient database,” select Recipient from the Databases menu or click the Address Book tab. Refer to the Database Functions section in the Interactive User Guide — available for download in PDF format at fedex.com/us/software/user_guide.html.
3. In the “Sender information” section, you can change the current sender by selecting the appropriate sender from the “Change sender” menu. You can also select a different return address from the “Change return address” menu. You must select a return address before shipping the package.
Note: If you select a different sender (not the return address), the ZIP code must match the ZIP code of the account address.
4. In the “Package and shipment details” section, select or enter the following information:
Note: The number of packages defaults to 1, but it can be edited for multiple-piece entries.
• Weight — The maximum weight is 70 lbs. for all FedEx SmartPost services, except for FedEx SmartPost® Bound Printed Matter(maximum weight is 15 lbs.).
• Service type — Select the appropriate contracted FedEx SmartPost service (FedEx SmartPost, FedEx SmartPost Bound Printed Matter, FedEx SmartPost® Media) from the “Service type” drop-down menu. Select FedEx SmartPost from the “Service type” drop-down menu for Standard Mail (packages weighing less than 1 lb.) or Parcel Select (packages weighing 1 lb. or more). Some of the “Service type” options available are determined by the weight entered in the Weight field and the FedEx SmartPost services included in your contract.
• Package type — Defaults to Your Packaging. Complete the “Package dimensions” field.
• Package dimensions —
- For all FedEx SmartPost services, the package length, width or height cannot exceed 60 inches.
- For a FedEx SmartPost package less than 1 lb., the dimensions of length plus girth (L + 2W + 2H) cannot exceed 84 inches.
- For a FedEx SmartPost package greater than or equal to 1 lb., the dimensions of length plus girth (L + 2W + 2H) cannot exceed 130 inches.
- For FedEx SmartPost Bound Printed Matter and FedEx SmartPost Media packages, the dimensions of length plus girth (L + 2W + 2H) cannot exceed 84 inches.
• Special Services — Click the Options tab to display the Options screen. Select any additional special services, as needed. Select the Instructions for Undeliverable Packages check box to display the following options on the resulting screen:
- Address Service Requested- Carrier Leave if No Response- Change Service Requested- Forwarding Service Requested- Return Service Requested
5. In the “Billing details” section, enter an optional customer reference and purchase order number, if desired.
Note: The “Bill Transportation to” field is automatically defaulted to Bill Sender. The Acct # defaults to the FedEx Express account number associated with the FedEx SmartPost Mailer ID being used for the shipment and is also disabled.
6. Click the ShipAlert tab to send FedEx SmartPost shipment notifications to your customer, yourself and others.
7. To view a courtesy rate quote for your shipment, click “Rate quote” at the bottom of the screen. The Courtesy Rate Quote screen displays, showing rate quote details. Click OK to close this screen.
8. Click Ship to create a shipping label for your FedEx SmartPost shipment.

FedEx SmartPost® ReturnsYou can prepare a FedEx SmartPost Returns shipment the same way you prepare other return shipments. Since FedEx SmartPost Returns is also an optional contract service, a FedEx representative can enable FedEx SmartPost and FedEx SmartPost Returns separately or together.
Enabling FedEx SmartPost ReturnsAfter FedEx SmartPost Returns is set up on your system, you can enable it as follows:
1. Select System Settings from the Customize drop-down menu. The System Settings – System/Account screen displays.
2. Select the appropriate System # and click Modify. The System Settings screen displays.
3. Click the 1-Your System Settings tab.
4. In the FedEx SmartPost Returns Settings section, select the “I want to be able to add SmartPost return addresses” check box.
5. Click OK. FedEx SmartPost Returns is now enabled.
Setting Up Your FedEx SmartPost Returns Addresses1. Select Sender from the Databases drop-down menu. The View
Sender screen displays.
2. Click Add. The Add Sender screen displays.
3. Select the “This is a SmartPost returns address” check box.
4. Enter a unique sender ID in the Sender ID field.
5. Enter the account number that is enabled for FedEx SmartPost Returns shipping in the Account Number field.
6. Click Get Address. The system populates the return address fields.
7. Click OK.
Creating Both a Shipping Label and a Return Label To create a shipping label and a return label for a FedEx SmartPost Returns shipment, follow these steps:
1. Complete the “Shipment details” screen for a FedEx SmartPost shipment.
2. In the “Package and shipment details” section, select the appropriate contracted FedEx SmartPost service (FedEx SmartPost, FedEx SmartPost Bound Printed Matter, FedEx SmartPost Media) from the “Service type” drop-down menu. The “Package type” field defaults to Your Packaging. Complete the “Package dimensions” field.
3. Click the Options tab. The Options screen displays.
4. Select the Return Labels check box and any additional special service options and other optional information you want for your shipment. The “Return shipment” tab becomes active.
5. Click the “Return shipment” tab. The “Return shipment details” screen displays.
6. In the Return Package To section, select a FedEx SmartPost Returns sender from the “Return to” drop-down menu.
Note: You can create a FedEx SmartPost Returns label with FedEx SmartPost, FedEx Express® and FedEx Ground ® outbound shipments.
7. Complete the “Return package from,” “Package and shipment details” and “Billing details” sections.
8. Click Ship to create a shipping label and a return label for your FedEx SmartPost Returns shipment.
Creating Just a Return Label To create only a return label for a FedEx SmartPost Returns shipment, follow these steps:
1. Click the “Return shipment” tab. “The Return shipment details” screen displays.
2. In the Return Package To section, select a FedEx SmartPost Returns sender from the “Return to” drop-down menu.

3. In the “Return package from” section, enter the recipient information or select the appropriate recipient from the “Return from” drop-down menu.
4. Complete the “Package and shipment details” and “Billing details” sections. For a FedEx SmartPost Returns shipment, select FedEx SmartPost from the “Service type” drop-down menu.
Note: You can create a FedEx SmartPost Returns label as a print or email return label.
5. Click Ship to create a return label for your FedEx SmartPost Returns shipment.
View a Shipping ListFedEx SmartPost shipments are available in the Domestic Shipping List when FedEx SmartPost has been enabled on your system. FedEx SmartPost Returns shipments are available in the Returns Shipped List.
To access this list:
1. Click the “Shipping list” tab.
2. Select Domestic from the drop-down menu. The View Shipped List – Domestic screen displays.
Access LabelsA FedEx SmartPost Labels option is available in the Label/Report Type list on the Form Settings screen when FedEx SmartPost has been enabled on your system.
To access this option:
1. Click the Reports tab. The 1-Shipment screen displays.
2. Click the “Customize forms” tab. The Form Settings screen displays.
Note: You can also access the Form Settings screen by selecting Forms from the Customize drop-down menu.
3. Select FedEx SmartPost Labels from the “Form settings” list.
4. Click OK.
Utilize a FedEx SmartPost Only OptionA FedEx SmartPost option is available for the Close process when FedEx SmartPost has been enabled on your system.
To access this option:
1. Click the Close tab. The 1-Request Close screen displays.
2. Click the “All systems” radio button in the “Select system(s)” section.
3. Select the FedEx SmartPost check box in the “Select shipments to close” section.
4. Click “End your shipping day” to complete the close process. A message displays when the close finishes.
Note: FedEx SmartPost shipments can also be included along with the close of any FedEx Express and FedEx Ground shipments by selecting the All Shipments check box in the “Select shipments to close” section.
Note: If your pickup carrier is set to FedEx Ground, a FedEx Ground Pickup Manifest containing all of your FedEx SmartPost shipments prints out at the end of the day.
Additional FedEx SmartPost BenefitsThe following features are available in FedEx Ship Manager Software for FedEx SmartPost shipments:
• Outbound shipping• Rate quote• Shipping list• FedEx ShipAlert®
• Customized reports• Download rates and tracking numbers
Service DescriptionThe following is current service information for FedEx SmartPost:
Coverage100 percent of U.S. residential addresses, including P.O. boxes, APO, FPO and DPO destinations, Alaska, Hawaii, Puerto Rico, Guam, U.S. Virgin Islands and all other U.S. territories.
Transit timesDelivery in 2 to 8 business days, or 10 to 14 business days outside the 48 contiguous U.S. states.
Service daysMonday through Saturday delivery with Monday through Friday pickup.
Maximum package weightThe maximum weight is 70 lbs. for all FedEx SmartPost services, except for FedEx SmartPost Bound Printed Matter (maximum weight is 15 lbs.).
FedEx SmartPost and FedEx SmartPost Returns services are available for FedEx account holders who have signed an agreement for FedEx SmartPost services.
For more information, go to fedex.com/us/smartpost.
© 2011 FedEx0004422PM