FEDERAL UNIVERSITY, NDUFU-ALIKE, IKWOoer.funai.edu.ng/wp-content/uploads/2017/11/FELIX-AMAH... ·...
54
FEDERAL UNIVERSITY, NDUFU-ALIKE, IKWO STUDENTS’ INDUSTRIAL WORK EXPERIENCE SCHEME (SIWES) A REPORT OF SIX (6) MONTHS STUDENTS’ INDUSTRIAL WORK EXPERIENCE SCHEME AT HOLY FAMILY CATHOLIC HOSPITAL (HFCH), IKOM BY; NAME: FELIX AMAH MICHAEL REG. NO.: FUNAI/B.Sc/14/1156 DEPARTMENT: ANATOMY COURSE TITLE: SIWES AND SEMINARS COURSE CODE: ANA 372 In partial fulfillment for the award of a Bachelor of Science degree (B.Sc) in Anatomy 10-0CT-2017
Transcript of FEDERAL UNIVERSITY, NDUFU-ALIKE, IKWOoer.funai.edu.ng/wp-content/uploads/2017/11/FELIX-AMAH... ·...

FEDERAL UNIVERSITY, NDUFU-ALIKE, IKWO
STUDENTS’ INDUSTRIAL WORK EXPERIENCE SCHEME (SIWES)
A REPORT OF SIX (6) MONTHS STUDENTS’ INDUSTRIAL WORK EXPERIENCE
SCHEME
AT
HOLY FAMILY CATHOLIC HOSPITAL (HFCH), IKOM
BY;
NAME: FELIX AMAH MICHAEL
REG. NO.: FUNAI/B.Sc/14/1156
DEPARTMENT: ANATOMY
COURSE TITLE: SIWES AND SEMINARS
COURSE CODE: ANA 372
In partial fulfillment for the award of a Bachelor of Science degree (B.Sc) in Anatomy
10-0CT-2017

i
TOPIC: A REPORT OF SIX (6) MONTHS STUDENTS’ INDUSTRIAL WORK EXPERIENCE
SCHEME (SIWES)
--------------------------------- -----------------------------------
Miss Itoro Oku George Mr. Gabriel Godson Akunna

ii
DEDICATION
I dedicate this IT report to my beloved mother, Mrs. Amah Vivian who has in one way or the other
been there for me in my time of needs and necessities, and also financially supporting me in carrying
out these industrial training.
iii
ACKNOWLEDGEMENT
My gratitude goes to almighty God who in his infinite mercy has given me the grace to be alive
today.
With great passion in my heart, I would like to acknowledge my late father, Mr. Oka Felix Amah,
Friends, Lecturers, Business and school mates, who have contributed immensely towards my
education.
I will also like to acknowledge my friends and families (relatives) in numerous who have
encouraged me during my time of difficulties in school.
Mostly, I thank my able and capable lecturers, especially Prof. E. Uche-Nwachi, Dr O. A. Egwu, Dr.
U. K. Ezemagu, Mr. S. G. Obaje who have trained me in the field of Anatomy and my departmental
SIWES coordinators Miss Itoro George and Mr. G. G. Akunna who in their own capacities assisted
in making my industrial training a success.

iv
TABLE OF CONTENTS
TOPICS PAGE NO
TOPIC: A REPORT OF SIX (6) MONTHS STUDENTS’ INDUSTRIAL WORK
EXPERIENCE SCHEME (SIWES).....………………………………………………………… i
DEDICATION……………………………………………………………………………………. ii
ACKNOWLEDGEMENT………………………………………………………...……………… iii
TABLE OF CONTENTS ………………………………………………………………………... iv
CHAPTER ONE – INTRODUCTION ……………………………………………………….… 1
1.0 MEANING AND HISTORY OF SIWES …………………………………………... 1
1.1 AIMS AND OBJECTIVES OF SIWES……………………………………….……. 1
1.2 HISTORY OF HOLY FAMILY CATHOLIC HOSPITAL, IKOM...…….........… 2
1.3 ORGANIZATIONAL CHART OF HFCH, IKOM ………………… …….……..... 3
CHAPTER TWO
2.0 REPORT ON THE DIFFERENT DEPARTMENTS/UNITS OF THE
ORGANIZATION AND INSTRUMENTATION ……………………………….... 4
2.1 RADIOLOGY DEPARTMENT ……………………………………………………. 4
2.2 DEPARTMENT OF MORBID ANATOMY/ HISTOPATHOLOGY …………… 5
2.2.1 MORTUARY UNIT ……………………………………………………... 5
2.2.2 HISTOPATHOLOGY LABORATORY UNIT ………………………... 5
2.3 INSTRUMENTATION ……………………………………………………………… 6
2.3.1 MATERIALS USED IN RADIOLOGY DEPARTMENT …………… 6
2.3.2 MATERIALS USED IN MORTUARY UNIT …………….…………… 8
2.3.3 MATERIALS USED IN HISTOPATHOLOGY UNIT.………………. 9

v
2.4 OTHER RELEVANT EXPERIENCES …………………………………………… 12
CHAPTER THREE
3.0 DETAILED DESCRIPTION OF WORK DONE DURING THE SIWES
PROGRAM …………………………………………………………………...……… 13
3.1 TEST CARRIED OUT IN THE DEPARTMENT OF RADIOLOGY …………... 13
3.1.1 IMAGING MODALITIES USED IN THE RADIOLOGY
DEPARTMENT …………………………………………………………………….... 13
3.1.1.1 PLAIN RADIOGRAPHY (X-RAY) …………………………………….. 13
3.1.1.2 ULTRASONOGRAPHY ……………………………………………...…. 17
3.1.1.3 COMPUTED TOMOGRAPHY ………………………………………… 19
3.1.1.4 CONTRAST STUDY ……………………………………………….……. 20
3.1.1.5 OTHER IMAGING MODALITIES ……………………………………. 21
3.2 TESTS DONE IN THE DEPARTMENT OF MORBID ANATOMY/
HISTOPATHOLOGY.................................................................................................. 22
3.2.1. MORTUARY UNIT ........................................................................................... 22
3.2.1.1 EMBALMMENT/EMBALMING TECHNIQUES ................................. 23
3.2.1.2. DRESSING OF AN EMBALMED BODY .............................................. 27
3.2.2. HISTOPATHOLOGY UNIT............................................................................. 28
3.2.2.1. CYTOLOGY BENCH................................................................................ 28
3.2.2.2. GROSSING OR SURGICAL CUT-UP BENCH.................................... 32
3.2.2.3. FIXATION.................................................................................................. 34
3.2.2.4. TISSUE PROCESSING BENCH.............................................................. 36
3.2.2.5. EMBEDDING BENCH.............................................................................. 40

vi
3.2.2.6. SECTIONING OR MICROTOME BENCH........................................... 41
3.2.2.7. STAINING BENCH................................................................................... 42
CHAPTER FOUR
4.0 CONCLUSION ………………………………………………………………………. 46
4.1 PROBLEMS ENCOUNTERED ……………………………………..……………… 46
4.2 RECOMMENDATION …………………………………………………………….... 47

1
CHAPTER ONE – INTRODUCTION
1.0 MEANING AND HISTORY OF SIWES
SIWES is an acronym that stands for Students Industrial Work Experience Scheme. It is a skill
training program, designed to expose and prepare students of different tertiary institutions to real
life work/situation after graduation.
The scheme exposes students to industrial based skills necessary for smooth transition from the
classroom to the world of work. It affords students of tertiary institutions the opportunity of being
exposed to the needed experience in handling machinery and equipment which are not available in
the educational institute.
The Student industrial work experience scheme (SIWES) was established as a result of the
realization by the Federal Government of Nigeria in 1973 of the need to introduce a new
dimension to the quality and standard of education obtained in the country in order to achieve the
much needed technological advancement.
The scheme was solely funded by Industrial Training Fund (ITF) during its formative years. But
due to the increased rate of financial involvement, it was withdrawn from the scheme in 1978. In
1979, the Federal Government handed the scheme to both the National University Commission
(NUC) and National Board for Technical Education (NBTE). In November 1984, the government
changed the management and implementation of SIWES fund to ITF. It was effectively taken over
by ITF, in July 1985, with the funding being solely bear by the Federal Government.
The Federal Government, ITF, the supervising agencies – NUC, NBTE, NCE (National
Commission for Colleges of Education), Employers of Labour, and the Institutions each contribute
one quarter in the management of SIWES.
1.1 AIMS AND OBJECTIVES OF SIWES
To provide an avenue for students in tertiary institutions to acquire industrial skills and
experience in their course of study.
To expose students to work methods and techniques in handling equipment and
machineries that may not be available in the institution.
To prepare students for the work situation that they are likely to meet after graduation
To provide students with the opportunity to apply their theoretical knowledge in real work
situation, thereby bridging the gap between the university work and the actual work
practices.

2
To expose students to the latest developments and technological innovations in their chosen
professions.
To establish and strengthen employers’ involvement in the educational process of preparing
undergraduates for employment.
To promote industrialization in Nigeria
1.2 HISTORY OF HOLY FAMILY CATHOLIC HOSPITAL, IKOM (HFCH)
Holy Family Catholic Hospital is a tertiary health institution in Ikom, Cross River State, Nigeria
dedicated to the provision of quality, accessible and affordable healthcare services and effective
training and research.
The former Holy Family Joint Hospital now Holy Family Catholic Hospital, Ikom was established
by and managed by the community in the 1970s to serve as a community general hospital for less
privileged that were not able to access the General Hospital in Calabar. It subsequently became
Holy Family Joint Hospital, in 1998 when the government took control of its management and
funding due to the inability of the community to fund and run the hospital.
By 2009, due to mismanagement by the state government, the hospital name was changed to Holy
Family Catholic Hospital, and full control was given to the church to manage the hospital, though
few of the government workers employed then were still retained but are been paid salaries by the
government.
Currently, the hospital is run by an administrator in the person of Rev. Fr. Emmanuel Edi who
oversees the affairs of the hospital and gives reports to the bishop of the diocese and a medical
director who takes charged of medical related issues.

3
1.3 ORGANIZATIONAL CHART OF HOLY FAMILY CATHOLIC HOSPITAL,
IKOM
Fig. 1.0 Organizational Chart of HFCH, Ikom, CRS, Nigeria
HOLY FAMILY CATHOLIC HOSPITAL, IKOM(HFCH)
HOSPITAL ADMINISTRATOR MEDICAL DIRECTOR (MD)
ADMISSIONS
BILLING AND
COLLECTION
MEDICAL
RECORDS
INFORMATION
SYSTEMS
ACCOUNTS
HUMAN
RESOURCES
NURSING
PHARMACY
MEDICAL
PSYCHOLOGY
PHYSICAL
THERAPY
SOCIAL
SERVICES
RESPIRATORY
THERAPY
EMERGENCY CENTRAL
SUPPLY
BIOMEDICAL
TECHNOLOGY
HOUSE KEEPING
AND SECURITY
MAINTENANCE
TRANSPORTATION
AND WORKS
INFORMATION
DEPARTMENTS
THERAPEUTIC
DEPARTMENTS
DIAGNOSTIC
DEPARTMENTS
SUPPORT
DEPARTMENTS
MEDICAL
LABORATORY
RADIOLOGY
SURGERY
MORBID ANATOMY/
HISTOPATHOLOGY

4
CHAPTER TWO
2.0 REPORT ON THE DIFFERENT DEPARTMENTS/UNITS OF THE ORGANIZATION
AND INSTRUMENTATION
2.1 RADIOLOGY DEPARTMENT
Clinical radiology is a specialised branch of medicine that uses a variety/range of techniques and
equipments to capture images of the visceral body/organs. It is a section on this establishment that
takes the job of imaging and examination of internal organs of human which are invisible with
naked eye. Within this section, X-rays, ultrasound, computed tomography, magnetic resonance
imaging modalities are used to produce the images of human body depending on the area of
interest which can be analyze by the radiographer and send the report to the doctor who requested
for that to carry his medication and treatment. It also comprises of a reception room, H. O. D.
office, radiation room and the dark room or technicians room.
It uses three main types of imaging modalities to capture images of the visceral body, which
include:
Plain radiography and computed tomography (CT) scans, which uses ionising radiation in
the form of x-rays to image the body.
Ultrasound scan which uses high frequency sound waves to image visceral structures in the
body.
Magnetic resonance imaging (MRI) scan which measures the radio waves emitted while in
an external magnetic field.
Other important imaging modalities include:
Angiography and fluoroscopy,
Doppler`s sonography,
Mammography,
Contrast study,
Nuclear medical imaging.
It has a range of benefits for patients, which include:
i. It is used to determine when a patient needs surgery.
ii. It assists in making a diagnosis and further management of most body conditions.
5
iii. It can eliminate the need for exploratory surgery.
iv. Interventional radiology, which involves treatment as well as diagnosis, involves less risk,
a shorter recovery time and less time in hospital than open surgery or key-hole surgery.
2.2 DEPARTMENT OF MORBID ANATOMY/HISTOPATHOLOGY
Morbid Anatomy/Histopathology is a branch of pathological anatomy or medical science and one
of the most important departments in HFCH because it is concerned with the study of the visible
structural changes caused in the body by disease or injury and discernible at postmortem
examination (autopsy). It also contributes towards patients’ maintenance and also towards
educational services such as research and students training.
Tissue biopsy is carried out on patients of different pathologic complications ranging from tissue
cancer, tumor in the breast, kidney, and liver, prostate and other tissues or organs of the body.
Embalmment of dead human bodies is also part of the services rendered by this department.
This department is tasks with numerous medical activities, and in other to easily perform this huge
but important tasks, the department is divided into two (2) units.
These units include:-
i. Mortuary unit and,
ii. Histopathology laboratory unit.
2.2.1. MORTUARY UNIT
The mortuary unit deals with the embalming of deceased human bodies that have been confirmed
dead by a doctor or a pathologist. The corpse after embalmment is also stored, awaiting
identification and disposal for burial, or for academic purposes. This unit also handles autopsy to
find out the actual cause of death.
This section encompasses different apartments which includes; the embalming and reception
room, documentation room, storage hall, dressing and autopsy hall and last the resting room
convenient room. This section is fully equipped with embalming tools, reagents and trolleys
for ease the job.
2.2.2. HISTOPATHOLOGY LABORATORY UNIT
Histopathology deals with the study of microscopic changes in tissues that are caused as a result of
diseases or injury. This unit collects samples from patients by excision (for histology samples) and
by aspiration (for cytology samples), pass the samples through different stages of procession and
perform microscopic analysis of the samples to determine the nature of the disorder. The collected

6
samples are also preserved in the process so as to retain their original shape and structure as
closely as possible and also to protect them from autolysis and putrefaction.
This is the section of the establishment that deals with the collection and processing of
histological and cytological tissues. The aim is to process tissues that can be evaluated by the
pathologist to examine the health status of the tissue. It have different processing machines
ranging from automated tissue processing machine, embedding machine, microtome machine,
tissue container, Bunsen burner, hot air oven, staining containers.
2.3. INSTRUMENTATION
2.3.1. MATERIALS USED IN RADIOLOGY DEPARTMENT
X-ray machine – used during plain radiography to produce images of structures within the
body.
Dark room – where x-ray films are been processed, developed, fixed and dried
Developing chemical – used to develop an exposed film
Fixing chemical – used to fix an exposed film
Dryer – used to dry a well fixed film
Cassette – this is where an unexposed film is been loaded
Chest stand – it is made of metal and used during chest examination
Couch – a table used during exposure
Lead apron – wore during exposure to cover or protect the body from radiation
X-ray film which are translucent sheet used to produce radiologic images
Indicators and markers – are used for indicating the names, date and side of the examination
Computed tomography machine - used during CT scan to visualise the interior of the body and
produces axial images. It is also used for PET-CT scan.
Ultrasound machine – used during ultrasonography and doppler`s sonography.
Magnetic resonance imaging machine – used during magnetic resonance imaging.
Contrast dye – introduced into the body during contrast study.
Ultrasound gel – used during ultrasonography to displace air and enhance the image gotten
from the ultrasound transducer.

7
Fig. 2.1 Pictures of some of the Equipments used in Radiology unit obtained in HFCH, Ikom
COUCH
FILM DRYER
FILM HANGERS CASSETTESAFE LIGHT
X-RAY MACHINE
MARKERS
LEAD APRONLEAD DIVIDER
INDICATORS
CHEST STAND
LEAD SCREEN
ULTRASOUND GEL

8
2.3.2. MATERIALS USED IN THE MORTUARY UNIT
Embalming Table or Trolley- where dead bodies are kept for embalmment
Scalpel and surgical blade- for making incisions
Dissecting Forceps- for holding tissues during dissection
Needle and Thread- for stitching tissues after embalmment
Surgical Gloves- for protecting the hand from infections
Face mask and eye goggle- for protecting the face and eye
Rubber Tubule and Cannula- for delivery or removal of fluids
Boots- for protecting the leg and feet from infectious agent
Laboratory Coats and Aprons- for protection of the entire body
Embalming Tanks- contain embalming fluid
Pumping machine – for pumping and passing embalming fluid
Dyes- for dressing
Cosmetics- for dressing
Reagent Bottles- contain embalming fluid
Reagents- mostly embalming fluids which includes :-
Isopropyl alcohol
Phenol
Glycerine
Formaldehyde
Water
Mentholated spirit etc.

9
Fig. 2.2 Pictures of some Equipments used and rooms in the Mortuary unit obtained in HFCH,
Ikom
2.3.3. MATERIALS USED IN THE HISTOPATHOLOGY (TISSUE PROCESSING) UNIT
Histology and cytology samples- for diagnosis and research
Scalpel and blades- for anatomical dissections and surgery
Surgical knives- for anatomical dissections and surgery
STORAGE SECTION TROLLEY
POST MORTEM SECTION

10
Gloves- cover and protect hands from infections
Cassettes-for storing samples after grossing and during processing
Cotton wool- for cleansing and also serves as barrier during embedding
Grossing board- where samples are placed and cut-up or grossed
Reagents- used for fixing and processing the samples and also staining the slides
Reagent bottles-for storing reagents
Reagent containers- contains reagents and chemicals
Microtome- for tissue sectioning
Water bath- for floating and cooling tissue sections
Electric Hot plate- for heating scalpels, knives, drying of slides and also for impregnation
Wax Jar- contains molten wax
Stove - for melting wax and heating of water
Pencil and Papers- for marking or labelling
Embedding mould- for shaping and moulding wax block during embedding
Embedding knives and bolts- for pressing the tissue to the surface during embedding
Wooden Blocks- for mounting tissue blocks for sectioning
Binocular Microscope- for viewing microscopic slide after staining
Staining racks- for holding slides during processing and staining
Microscopic slides and Cover slips- for sample smears
Stop watch- for observing and time keeping
Coupling jar- for fixing slides
Refrigerator- for preserving samples
Spatula-for lifting, mixing and spreading materials especially cassettes
Microtome knives and Sharpener- sections tissues and sharpens microtome knives
Conical flask- for storing reagents ready for use
11
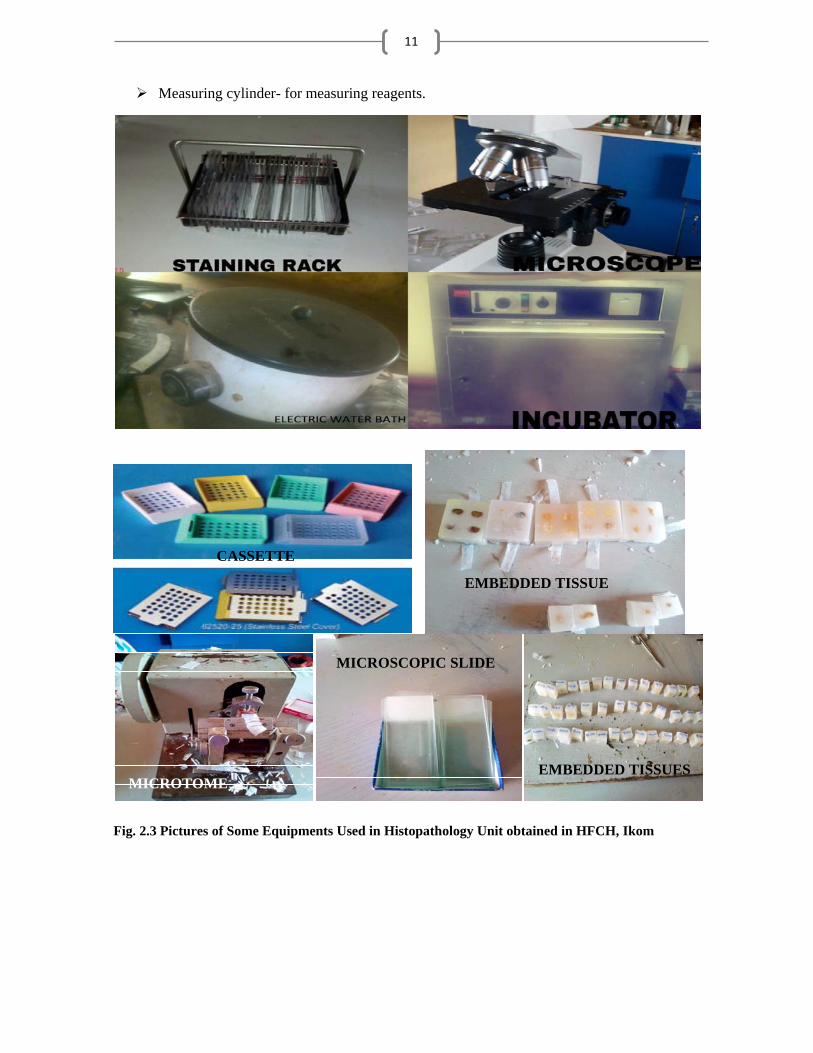
Measuring cylinder- for measuring reagents.
Fig. 2.3 Pictures of Some Equipments Used in Histopathology Unit obtained in HFCH, Ikom
CASSETTE
EMBEDDED TISSUE
MICROSCOPIC SLIDE
EMBEDDED TISSUES MICROTOME

12
Fig. 2.4 Pictures of Some Equipments Used in Histopathology Unit obtained in HFCH, Ikom
2.4. OTHER RELEVANT EXPERIENCES
This program has helped in widening my knowledge in the field of anatomy. It has also helped in
bridging the gap between the theoretical class and the practical aspect. Mostly this program has
helped me know the radiologic anatomy of different part of human body; how they appears in the
x-ray film, ultrasound, magnetic resonance image, computed tomography and to differentiate on
the images produced by these modalities and how they appears. It has also helped me to
understand tissue processing and how to mount them and stain it in microscopic slide, and also to
understand embalming techniques.
While also during the IT, I was able to gain little knowledge on general medicine and
medical/hospital ethics, privileged to attend seminars on health related issues and also
associated with the workers and other students who came for training, mutual understanding
was created between us. Thus it has exposed me to different experiences.
13
CHAPTER THREE
3.0. DETAILED DESCRIPTION OF WORK DONE DURING THE SIWES PROGRAM
During the course of my six (6) months industrial training, I worked in two departments namely;
Radiology Department and
Morbid Anatomy/Histopathology Department.
3.1. TEST CARRIED OUT IN THE DEPARTMENT OF RADIOLOGY
Radiology is a medical specialty that uses different imaging modalities to diagnose and treat
diseases seen within the body. Radiology as a discipline has different imaging modalities
employed when imaging several pathological conditions.
3.1.1. IMAGING MODALITIES USED IN THE RADIOLOGY DEPARTMENT
Plain radiography
Ultrasound
Computed tomography
Magnetic resonance imaging (MRI)
Doppler`s sonography
Contrast study
Angiography and fluoroscopy
Mammography
Nuclear medical imaging
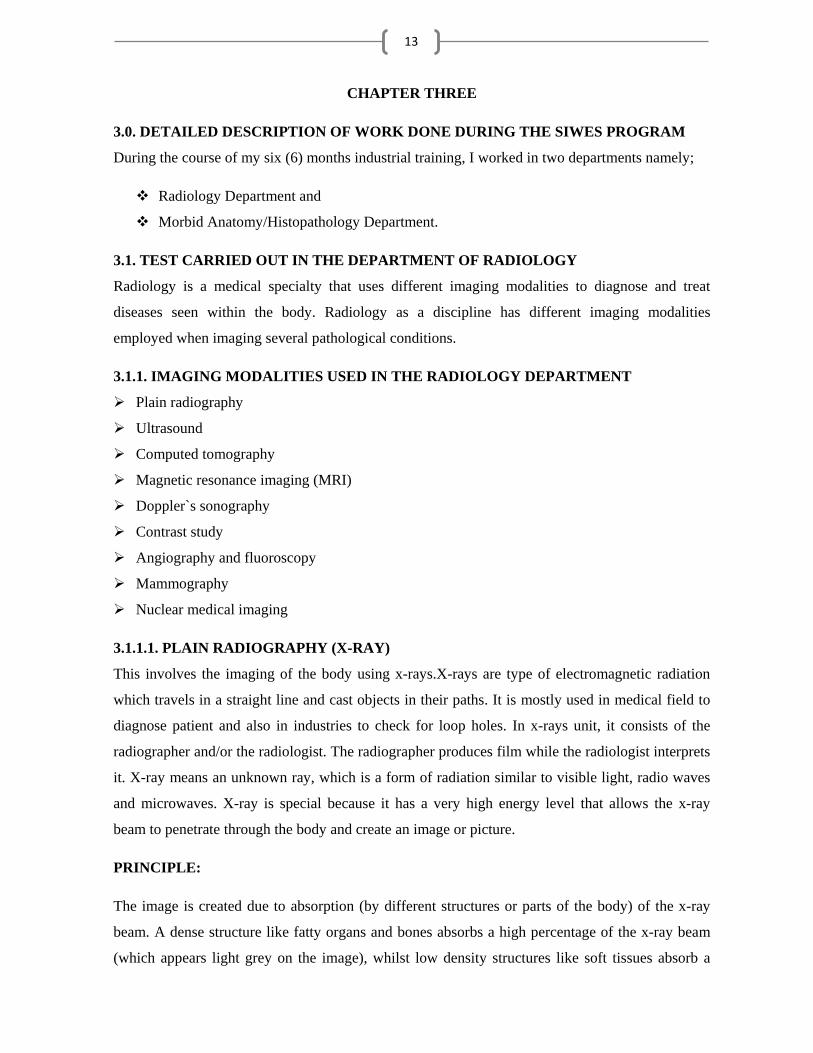
3.1.1.1. PLAIN RADIOGRAPHY (X-RAY)
This involves the imaging of the body using x-rays.X-rays are type of electromagnetic radiation
which travels in a straight line and cast objects in their paths. It is mostly used in medical field to
diagnose patient and also in industries to check for loop holes. In x-rays unit, it consists of the
radiographer and/or the radiologist. The radiographer produces film while the radiologist interprets
it. X-ray means an unknown ray, which is a form of radiation similar to visible light, radio waves
and microwaves. X-ray is special because it has a very high energy level that allows the x-ray
beam to penetrate through the body and create an image or picture.
PRINCIPLE:
The image is created due to absorption (by different structures or parts of the body) of the x-ray
beam. A dense structure like fatty organs and bones absorbs a high percentage of the x-ray beam
(which appears light grey on the image), whilst low density structures like soft tissues absorb a

14
small percentage (which appears dark grey on the image). Thus an exposed x-ray film has different
variations of densities of the body.
Generation of x-ray
X-ray consists of two poles which are the cathode and the anode inside a vacuum tube which has a
high voltage built inside it. The cathode is heated about 2000oc by a specific heating filament.
Electrons are emitted by the cathode and accelerate by the electric field between the cathode and
the anode and hit the anode with a considerable amount of energy, where they induce
electromagnetic radiation called x-ray. These rays are richer in energy, the higher the applied
voltage the higher the energy. The area where the electron hit the anode is called the focus. A lot of
energy is generated along this process, the anode consist of heat resistance disk covered with
tungsten in most cases. The disk rotates quickly to disperse the heat along its circumference, thus
forming a focal track. The vacuum tube is surrounded by oil inside a lead lined housing that
features only one small opening for the radiation to escape. The generated radiation has a spectrum
or spread of energies only a part of which can be used for imaging. It could be of low dose or high
dose energy
Attenuation of x-rays
X-rays are attenuated as they pass through the patient’s body. Two processes play a role;
absorption and scatter with lower energy radiation (corresponding to lower exposure voltage)
absorption dominates. With high energy (corresponding to high exposure voltage) scatter is mainly
responsible for attenuation. In this process, the radiation beam loses energy and is diverted in all
directions. The scattered radiation increases with irradiated body volume.
Detection of x-rays
A variety of detectors can make x-rays visible. The simplest is photographic film. Because of the
high spatial resolution one can achieve, it is used in nondestructive testing of industrial materials
such as pipeline, alloy, and car wheel. To expose film alone an incredible dose of x-rays is
necessary. Film is much more sensitive to light than x-rays, as light exposes film better, in
diagnostic radiology, a combination use of film and intensifying screens that are made up of rare
earth materials such as gadolinium, barium, and lanthanum are used as gamma screen.
Components of an X-ray machine

15
X-ray is made up of different components/parts which helps in the control of the machine and it is
divide into three (3) major parts, namely;
(a) Operating console
(b) High frequency generator
(c) X-ray tube which is further divided into two;
a. Internal and
b. External
Other parts include;
(d) Collimator and Grid
(e) X-ray film
(a) Operating console
The operating console allows the radiologist technologist to control the x-ray tube, current
and voltage, so that the useful x-ray beam is of proper quantity and quality. Radiation
quantity refers to the numbers of x-ray or the intensity of the x-ray beam. Radiation
quantity is usually expressed in milliroentgens (mR) or milliroentgens/milliampere-second
(mR/mAs). The operating console usually provide for the control of line compensation,
kVp, mA and exposure time. Meters are provided for monitoring kVp, mA and exposure
time.
(b) High frequency generator
A high frequency generator powers the x-ray tube. Earlier, high voltage generators were
used. High frequency generators are used on x-ray because there operates on single phase
and gives less voltage ripples. Another reason for using, is it small size, which makes it
portable.
(c) X-ray tube
The x-ray tube can be classified as;
a. External, and
b. Internal
a. External; the external parts includes- tube support, protective housing and glass or
metal envelope
b. Internal; the internal parts includes-
(I) Cathode; the filaments that causes thermionic emission
(II) Anode; a flat disc made of tungsten that draws the electrons across the tube

16
The inside of the tube is vacuumed so that the x-rays are produced isotropic ally
(d) Collimator and grid; collimator is a device used to minimize the field of view, avoid
unnecessary exposure using lead plate. Lead shooter is used to restrict the beam. The
collimator is attached to the x-ray below the glass window where the useful beams is
emitted. The grid is similar to the collimator expect there have different positions. Grid is
placed right after the patient. It is made up of lead strips which are used to eliminate excess
light. This strip only allows rays at 900.
(e) X-ray films; it is a film that is placed after the Bucky. It turns blacks when x-rays interacts
with it and stays white when the x-ray is absorbed. This causes an image to be formed that
is in black, grey and white.
PROCEDURES:
An x-ray request form or referral letter from a doctor is provided by the patient. This is a legal
requirement and no x-ray examination is performed without it.
The patient is taken to a changing room to remove clothes and wear the hospital dress. This
ensures the x-ray is of the highest quality as some clothing can make it difficult to see the
images clearly.
Certain items like watches, necklaces and certain types of clothing that contain metallic objects
(such as zips) are removed because these items may interfere with the quality of the image
The patient is led to the radiation room by the radiographer.
The procedure is explained to the patient to clear anxiety and doubt.
Depending on the part of the body that is to be imaged, the patient is placed in a chest stand, or
in a couch
Depending on the pathological organ that is to be imaged, the radiographer determines whether
an anterior-posterior (AP), posterior-anterior (PA), lateral or oblique view should be used to
image the organ. However, most organs, particularly organs in the chest are well represented in
images gotten from posterior-anterior (PA).
The radiographer instructs the patient to stay still few seconds before exposing the x-ray beam
because any movement would cause a blur image.
During chest examination, the patient is expected to breath in when he or she is about to be
exposed.
A radiologist (specialised x-ray doctor) then carefully assesses the images, makes a diagnosis
and produces a written report based on the findings.

17
The report is sent to the referring doctor, specialist or allied health professional that referred
the patient for the test.
Fig. 3.1 X-ray of a normal chest examination obtained through permission after examination of a
patient chest in HFCH, Ikom
SIGNIFICANCE
X-ray is very useful in the examination of most structures in the, cardiovascular system,
respiratory system, urogenital system and musculoskeletal system. X-ray imaging is useful to
diagnose disease and injury such as pneumonia, heart failure, fractures, bone infections, arthritis,
cancer, blockage of the bowel, bone ulcer, collapsed lung, etc.
3.1.1.2. ULTRASONOGRAPHY
An ultrasound scan is a medical test that uses high frequency sound waves to capture live images
from the inside of a patient’s body. Unlike other imaging techniques, ultrasound uses no radiation.
For this reason, it`s the preferred method for viewing a developing foetus during pregnancy.
PRINCIPLE
In ultrasonography, the sound waves are generated artificially by means of piezoelectric crystals.
When connected to an alternating current of certain frequency, these crystals vibrate and thus emit
a sound wave of the same frequency, but if they are exposed to sound waves of a certain
frequency, they will produce an alternating current of that frequency.
If, by way of ultrasound gel, the crystal is brought into direct contact with the body, the emitted
ultrasound waves spread through the tissue. The tissue absorbs, scatters, or reflects them. Only the
reflection of sound back to the piezoelectric crystal will result in a signal as the basis for an image.

18
PROCEDURES;
Ultrasound procedures depend on the area or organ to be imaged. The following must be noted
before a scan is done;
For abdominal examination, the patient will fast for 8-12 hours before the ultrasound. This is
because undigested food can block the sound waves, making it difficult for the technician to
get a clear picture.
For examination of the gallbladder, liver, pancreas, or spleen, the patient maybe told to eat a fat
free food 8-12 hours before the scan. However, the patient can continue to drink water and take
any medication as instructed
For examination of the urinary system, the patient might be asked to drink a lot of water and to
hold his/her urine so that the bladder is full and better visualised.
Procedure of an ultrasound scan;
The patient changes his/her clothing into a hospital gown.
The patient is told to lie down on a table with a section of his/her body exposed (the exposed
part depends on the location of the organ that is to be imaged).
The technologist applies the ultrasound jelly on the patient`s skin. This prevents friction so that
the ultrasound transducer can be rubbed easily on the skin. The ultrasound jelly also helps to
transmit the sound waves.
The transducer is placed on the skin of the patient and constantly adjusted to produce images in
different directions of the organ that is being imaged.
Depending on the area being examined, a patient might need to change position so that the
technologist can have better access and view.
The gel is cleaned off from the patient`s skin after the scan.
In imaging the oesophagus and other related structures like the heart, the technologist performs a
trans-oesophageal approach by passing the transducer through the mouth into the oesophagus. The
rectum and other related structures can be imaged via a trans-rectal approach (inserting the
transducer into the rectum).
The brain of neonate can be imaged through a trans-fontanel approach. In this approach, the
technologist places the transducer on the anterior fontanel because that area lacks the presence of
bone tissue.

19
Ultrasound imaging modality is not ideal when imaging the respiratory system because sound
waves don’t transmit via air medium. But an ultrasound transducer can be used to image the
pharynx.
SIGNIFICANCE
It is the ideal imaging modality for pregnancy. It also provide a view of the bladder, brain (in
infants), eyes, gallbladder, kidneys, liver, ovaries, pancreas, spleen, thyroid, testicles, uterus, blood
vessels etc.
An ultrasound is also a helpful way to guide surgeons` movements during certain medical
procedures, such as biopsies and fine needle aspiration.
3.1.1.3. COMPUTED TOMOGRAPHY (CT)
Computed tomography is a helical tomography technique which uses a high ionizing radiation to
produce a 2D image of the body’s interior structures in thin slices. In CT, a beam of X-rays spin
around an object being examined and is picked up by sensitive radiation detectors after having
penetrated the object from multiple angles. A computer then analyses the information received
from the scanner’s detectors and constructs a detailed image of the object and its contents.
PRINCIPLE
In computed tomography the x-ray tube continuously rotates around the cranio-caudal axis of the
patient. A beam of radiation passes through the body and hits a ring or a moving ring segment of
detectors. The incoming radiation is continuously registered; the signal is digitized and fed into a
data matrix taking into account the varying beam angulations. The data matrix is then be
transformed into an output image. The CT machine`s tube rotation continues as the patient is fed
through the ring-like CT gantry, thus generating not single slice scans but spiral volume scans of
larger body.
PROCEDURE:
In computed tomography, the patient is laid on the spiral tray of CT, the x-ray tube continuously
rotate around cranio-caudal axis of the patient. A beam of radiation passes through the body and
hits a ring or moving ring segment of detectors. The incoming radiation is continuously registered;
the signal is digitalized and fed into a data matrix taking into account the varying beam
angulations. The data matrix can be transformed into output image.

20
Fig. 3.2 Images showing the CT scan of; (a) the abdomen and (b) the brain
SIGNIFICANCE
a. CT scan images bones and bone marrows very clearly. These can help to diagnose bone
marrow tumour
b. CT scan is a fast, effective and accurate way of assisting doctors to make a diagnosis and treat
disease conditions
3.1.1.4. CONTRAST STUDY
Contrast radiography is a method of studying the organs using x-ray and the administration of
special dye called contrast medium. Contrast dyes mostly used are barium sulphate, iodine and air.
There are various types of examination in contrast studies which includes;
Hysterosalpingography which is an important test of female fertility potential.
Upper and lower gastrointestinal (GI) endoscopy is used to view the inside lining of the
gastrointestinal tract
Angiography also called arteriography is used to visualize the inside or lumen of blood
vessels and organs of the body with particular interest in the arteries, veins and the heart
chambers.
PRINCIPLE OF HYSTEROSALPINGOGRAPHY AS A CONTRAST STUDY
It is a radiologic procedure carried out to investigate the shape of the uterine cavity and the shape
and patency of the fallopian tubes. It is an out- patient procedure that takes place in less than one
half hour. It is usually done after a woman sees her menses but before ovulation to prevent
interferences with an early pregnancy.
A B

21
PROCEDURES;
A patient is positioned in a lithotomic position under a fluoroscope (a real time imager) or
x-ray on a couch
A plain radiograph is taken first as a control x-ray film which is regarded as a scout
radiograph
The gynaecologist or radiographer then examine her uterus through palpation
The patient vagina and cervix is cleaned with disinfectant, then a vagina speculum is
inserted into the vagina to visualize the cervix properly
Different sizes of dilators is used to open the cervix to allow the entering of Cannula
The physician gently fills the uterus with a liquid contrast containing iodine through the
Cannula which has been placed/inserted into the opening of the cervix
The liquid contrast then enters the uterus and fallopian tubes, outlining the length of the
uterus and tubes, and spills out the ends of the tubes if only there are open.
Any abnormalities in the uterine cavity or fallopian tubes will be visible in a monitor or
exposed in an x-ray film.
Finally, the patient is exposed to radiation for a delayed film after about 5-10mins of the
examination and the film is referred to as the delayed film or radiograph
SIGNIFICANCE
a. Contrast medium helps to highlight a specific organ of interest in the body.
b. It helps in diagnosing tumours, cancer, blockage, inflammation, blood vessel rupture,
etc.
c. It increases the image quality of plain radiography, CT scan and MRI.
3.1.1.5. Other Imaging Modalities I Was Thought Theoretically While in SIWES includes;
Nuclear Medical Imaging Technique
The working principle of this is based on the ability of the radioactive substance to emit radiations.
Here, a radioactive element is injected into the body and imaged using a special gamma camera to
detect the radiation emitted from the body. The image quality is always low and depends on the
localization of the radioactive element used.

22
Mammography
This is another special technique used in radiology to capture the image of the breast region. It is a
special type of x-ray called soft x-ray, with low ionizing dose to detect cancer and tumor cells in
the breast.
Angiography
This is a special imaging modality used to image the blood vessels. In this technique, a radioactive
element is injected into the blood stream and allowed to localize in the cardiovascular system. It is
used alongside with a special form of x-ray called fluoroscopy.
Doppler Sonography
It is another type of imaging modality used in radiology to image the flow of blood in the blood
vessels. It is a kind of ultrasound which, in combination with a contrast media, shows a clear
picture of the blood flow towards the circulatory system and blood vessels at large.
3.2. TESTS DONE IN THE DEPARTMENT OF MORBID ANATOMY/
HISTOPATHOLOGY
As mentioned earlier, the department of morbid anatomy/ histopathology has two (2) units, which
includes:
Mortuary unit, and
Histopathology unit
3.2.1. MORTUARY UNIT
The Morgue is a place used for the embalmment and storage of deceased human bodies awaiting
identification or removal for autopsy, or disposal by burial, cremation or other methods. In this
section, embalming technique is a method used in preserving dead bodies. In modern times corpses
have customarily been refrigerated to delay decomposition. A mortuary generally performs some
functions, namely;
For reception and temporary storage of bodies;
For performing post-mortem diagnosis or autopsy;
Demonstration of post-mortem findings in cases of clinical interest or teaching purposes;
A section for viewing and/ or identification of a body and
Accommodating visiting relatives/ next of kin

23
3.2.1.1 EMBALMMENT/EMBALMING TECHNIQUES
Embalming is the art and science of preserving human remains by treating them with modern
forms of chemicals to forestall putrefaction and decomposition. The intension is to keep them
suitable for public display at funeral, religious, medical or scientific purposes.
AIMS OF EMBALMMENT:
To prevent decomposition, autolysis, and putrefaction
To disinfect, preserve, and restore the dead body to a possible life-like appearance
To make the deceased body more presentable
For religious or academic purposes
CLASSIFICATION OF EMBALMING TREATMENTS
i. Arterial Embalming: This has to do with injecting of preservative solution (embalming
fluid) under pressure, into the body circulatory system (but not through the heart)
through an artery (usually the carotid, femoral, or brachial arteries) while concurrently
draining blood from the veins.
Arterial embalming is also referred to as capillary embalming. 85% of the body’s blood is
contained in the capillaries. The embalming fluid must go through the capillaries to enter
the tissue spaces where it makes contact with the cells of the tissue and the body’s protein
thus preserving the body.
ii. Cavity embalming: is performed after arterial embalming. It is the direct treatment of the
body’s cavities which include abdominal, thoracic, and pelvic cavities with embalming
chemicals through the aid of an aspirator and trocar.
The embalmer makes a small incision just above the navel and pushes the trocar into the
chest and the stomach cavities to puncture the hollow organs and aspirate their contents. He
then fills the cavities with concentrated formaldehyde. The incision is then closed with
trocar button.
The purpose of cavity embalming is to reach the hollow organs that are not penetrated by
the arterial embalming solution.
iii. Hypodermic Embalming: is the injection of suitable preservative chemical directly into
the tissues. It is accomplished by use of a hypodermal syringe and needle.

24
The treatment area can include finger tips, the cavity walls of an autopsied body, gluteal
region, or extremities that arterial embalming did not reach.
iv. Surface Embalming: is the direct application of an embalming chemical directly to the
surface of the tissues either by dipping the corpse directly into the embalming fluid or
applied with an aerosol spray, or painted on with a brush using a liquid or gel, and can even
be applied using cotton wool. Areas that are surfaced embalmed can be under the eyelids,
the cavity walls in autopsied bodies, and underneath the cranial scalp when a cranial
autopsy has been performed.
Methods of embalmment:
Infusion: is the gravity-flow method used for arterial embalming or by pressure using
embalming pumping machines.
Injection: injection of the embalming fluid through the skin, muscles, tissues, orifices. This
method does not reach the organs; it only reaches tissues close to the skin.
Immersion: to submerge the bodies completely in a pool of embalming fluid.
Refrigeration: to put the bodies in a cold room (it is not really an embalming technique
because embalming fluids are not used) but autolysis is prevented.
EMBALMING FLUIDS
These are mixtures of various preservative, sanitising and disinfectant agents. The three essential
components of embalming fluids are centred on disinfection, preservation, and restoration. There
are varieties of embalming fluids available for embalmment. The embalming fluid is made up of
preservatives, germicides, anticoagulants, dyes and perfume. The embalming fluids are prepared
from propylene glycol, which keeps the muscle moist; 10% buffered formalin, used as fixative;
isopropyl alcohol, used as a preservative; and liquefied phenol, which is used to prevent the growth
of mould. Colouring of the blood vessels is useful in their identification with a small amount of
amphyl, which is also used as a disinfectant.
ARTERIES USED FOR EMBALMMENT
a) Common carotid artery
b) Femoral artery
c) Brachial artery

25
EMBALMING PROCEDURES
Materials needed; Embalming fluid, Scalpel and blade, Forceps, Needle, Thread, Gauze,
Cannula, Surgical gloves, Face masks, Cotton wool, Light, Embalming tanks and reagent bottles.
There are three stages in embalming procedure:
3 Pre-embalming procedure,
4 Main embalming procedure, and
5 Post-embalming procedure.
Pre-embalming procedures
The body is received in the mortuary together with the death certificate. This is to show that
both clinical and anatomy signs of death has been confirmed by the medical doctor and an
authorization from the family, was given to the mortician to embalm the body.
An embalming report is filled, containing the body's personal items, details any discolorations,
cuts, bruises, etc on the body; and documents the procedures and chemicals used during the
embalmment. This report can become very valuable if a deceased's family brings a lawsuit
against the embalmer.
Payment is made at this point
Main embalming procedures
The body is undressed, removing every wear and jewelleries worn by the body, and then laid
on the trolley or embalmment table.
A strong disinfectant is used to clean the skin, eyes, mouth and other orifices. Rigor mortis is
relieved by moving the limbs and head about and massaging the muscles (If the deceased is a
man, shaving is done at this point).
The body is set in anatomical position, with the hands turned downwards. The external
genitalia area is covered with a piece of cloth or towel. The breast (in the case of women) is
arranged and clamped to enable easy dressing for burial or cremation.
The nasal and buccal cavities are filled with cotton to prevent any leakage during and after
embalmment. This is done to retain all chemicals and fluid for better fixation.
The arterial embalmment begins by selecting an artery to inject the fluid into. And the most
commonly used artery is the femoral artery because it is easily located unlike other arteries and
situated superficially in front of the thigh in the femoral triangle.

26
A small incision is made on the region of the femoral triangle. The femoral artery is exposed
by cleaning the fascia of the artery to allow movement and space for the Cannula to be inserted
into it.
The artery is raised above the skin surface with an aneurism hook and two suture strings are
passed beneath it to tie off or ligate the vessel caudally and then proximally as soon as the
arterial Cannula is inserted to keep the Cannula in place while embalming. This is done to help
avoid leakage or release of the Cannula due to pressure exerted by the embalming apparatus.
The artery is incised (very carefully as to not cut it in half) and an arterial Cannula is inserted
into the artery towards the heart. The ligature is then tightened.
The Cannula is connected to a polyethylene Y-tubing which is connected to an embalming tank
(improvised bucket) through a pumping machine.
Before the embalming fluid is infused, air is removed from the connecting tube to avoid any
possible airlocks produced by the vessels of the body during the infusion of the fluid.
When all the procedure is completed, the pumping machine is turned on to allow the
embalming fluids to flow through the Y-tubing, Cannula and into the femoral artery, thus
dispersing the fluid into the vascular system.
Any area not receiving enough embalming fluid during the arterial embalmment was later
injected by hand after 2-3 days, with a hypodermic needle and a syringe. These areas include;
lumbar region, gluteal region, feet, and sometimes the face. When injecting these areas, the
needle was best inserted at a higher point than the injecting area, to keep the fluid from leaking
out.

27
Fig. 3.3 Pictures showing some of the main procedures in embalming techniques obtained with
permission from the mortuary unit in HFCH, Ikom, Cross River State, Nigeria
Post-embalmment procedures
After embalmment, the deceased is covered properly and kept in a neat section of the mortuary
awaiting disposal or when the relatives are ready for burial or cremation.
The body is washed with disinfectant and dressed with cloths, hand gloves, socks and made
make-up
The eyes and mouth are forced to close using adhesive glues
The body is then laid in a coffin ready for burial
3.2.1.2. DRESSING OF AN EMBALMED BODY
When the duration for the contract is due, the relative of the deceased comes and pays the
remaining part of the mortuary charges.
The body is identified using the tags worn on their feet
A receipt is issued to the relative, which he/she uses to get a release authority from the unit
in charge of it
The release authority is brought to the morgue, before the morticians proceed with the
dressing of the body.

28
The body is washed with a solution of disinfectants and germicides, and then placed on a
tray
The inner wears are worn on it, just like a living being
Depending on the size of the body, the trouser (in the case of a male corpse) is either torn
with a pair of scissors from the back, and worn on the body before stitching; or worn
directly without tearing.
The top/shirt is also torn or worn directly, depending on the size
Hand gloves and socks are worn on the hands and feet respectively
Glycerine and other make ups are applied on the face (depending on the relatives’ choice)
to make it look life-like as possible and presentable (for funeral)
Jewelleries, tie, cap and shoe may also be worn on it.
The body is at this juncture, carried to the casket and then discharged.
3.2.2. HISTOPATHOLOGY UNIT
Histopathology is a branch of science that deals with the gross and microscopic study of tissues
affected by disease. It provides diagnostic services for evaluation of specimens gotten from
humans as well as live animals. This laboratory processes samples for diagnosis and also for
research purposes. The samples received require tissue preparation, and are treated and analysed
using techniques appropriate for the type of tissue and the investigation required. This led to the
division of the unit into six (6) subsections or benches;
1. Cytology Bench
2. Grossing or Surgical Cut-up Bench
3. Tissue Processing Bench
4. Embedding Bench
5. Microtome Bench
6. Staining Bench
3.2.2.1. CYTOLOGY BENCH
Cytology is the study of the structure and function of cells. The examination of cells under a
microscope is used in the diagnosis of various diseases. In this subsection, cytology samples such
as Fine Needle Aspiration (FNA) are collected. The samples are received with a request form that

29
lists the patient's information and history along with the description of site of origin. The samples
are given numbers that will help to identify the sample for each patient.
COLLECTION OF CYTOLOGICAL SPECIMENS METHOD:
ASPIRATION CYTOLOGY: It is the aspiration of specimens of cells through hollow needle,
using a syringe by a means of suction and their subsequent examination under the microscope
after suitable preparation. It is valuable in diagnosing lesions of the breast, thyroid, lymph
nodes, liver, lungs, skin, soft tissues and bones. The technique is now widely used, especially
for superficial cysts or tumours, and has become a specialised branch of diagnostic pathology.
Example is Fine Needle Aspiration Cytology (FNAC)
Fine Needle Aspiration Cytology (FNAC): is a technique that uses samples
obtained from fine-needle aspiration to provide information on the cells of tumours or
cysts. It is useful for detecting the presence of malignant cells, particularly in lumps of
the breast and thyroid gland.
STEPS FOLLOWED BEFORE PERFORMING FNAC
i. Relevant history and clinical details, radiological findings, provisional diagnosis etc. are
entered in the request form, and the site of FNA is clearly stated.
ii. The lesion to be aspirated is palpated and its suitability for aspiration assessed. The
appropriate needle is selected accordingly.
iii. The procedure is clearly explained to the patient, consent and co-operation ensured to clear
the patient’s anxiety
iv. Before starting the procedure, it is ensured that all the required equipment/instruments and
supplies are available.
v. All general precautions are as well followed during the procedure.
MATERIALS:
Glass microscope slides (Frosted-end slides),Coupling jar containing 95% alcohol, Syringes,
Needles, Pencil for marking, Gloves, Cotton wool, Alcohol or Methylated spirit.
PROCEDURE FOR FINE NEEDLE ASPIRATION CYTOLOGY:
The patient is made to lie supine on an examination couch or in a sitting position before
performing the FNAC.

30
i. The mass is localised and cleansed with an alcohol swab (as used for routine injection).
ii. Local anaesthetic is sometimes used
iii. Apprehensive patients are reassured about the procedure.
iv. The patient's name is labelled on two slides for each sample.
v. The needle is introduced into the mass, and reverse pressure is created and maintained.
vi. The area is vigorously sampled on several planes, maintaining the reverse pressure.
vii. The plunger on the syringe is released to equalize pressure, and the needle is then
withdrawn from the mass.
viii. A small drop of the aspirated sample is placed onto a glass slide.
ix. A second glass slide is placed on the top of the drop of aspirated material and smeared
against each other. Excessive pressure is limited when preparing the smears to prevent cell
distortion and crush artefact.
x. The slides are fixed immediately in a Coupling jar with 95% alcohol. If both breasts were
aspirated, the breast from which each sample was obtained is indicated on the glass slides.
xi. A minimum of two samples per site is used.
xii. The sample is sent to the Laboratory immediately for processing.
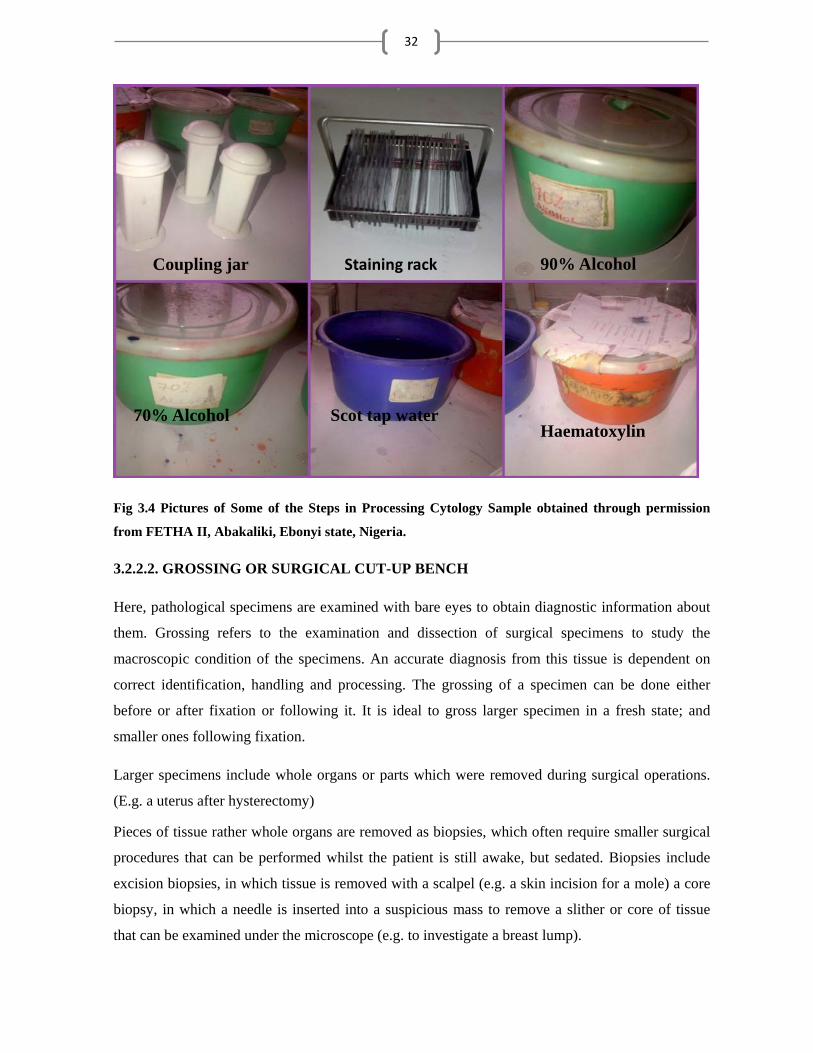
PROCEDURE FOR PROCESSING CYTOLOGY SAMPLE
i. The sample is left in a Coupling jar containing 90% alcohol for thirty (30) minutes to an
hour after collection.
ii. The slides are removed from the Coupling jar and placed in a staining rack.
iii. The samples are hydrated in descending concentrations of alcohol at one (1) minute to two
(2) minutes interval.
(95% alcohol 2mins 90% alcohol 2mins 70% alcohol)
iv. Rinse in scot tap water
v. Dip in haematoxylin stain for three (3) to five (5) minutes.
vi. Rinse in scot tap water to wash the stain from the cytoplasm.
Note: Haematoxylin (basic stain) stains the nucleus blue, while Eosin (acidic stain) stains the
cytoplasm red/pink

31
vii. Dip in Acid alcohol (1% HCl) three times to wash off the stain entirely from the
cytoplasm. It should not stay long in the acid alcohol because it can denature the whole
cell.
viii. Dip in Eosin stain for thirty minutes to stain the cytoplasm
ix. Rinse in scot tap water
x. Dehydrate the sample in ascending concentrations of alcohol at one (1) minute to two
minutes interval.
(70% alcohol 2mins 90% alcohol 2mins 100% alcohol)
xi. Dry in air or oven (at room temperature).
xii. Rinse in a clearing solution (Xylene) which helps for a better optical differentiation. The
clearing solution should be colourless and its refractive index should be close to that of the
cover slip, slides and mounting medium. Slides should remain in the clearing agent until
cover slipping is performed.
xiii. Pick a slide and clean the back with gauze and not with cotton wool because it can leave
some particles on the slide.
xiv. Mounting medium (Distyrene Plasticizer Xylene- DPX mountant) is used to bond the slide
and the cover slip should be compatible with the clearing agent, transparent, and have a
refractive index similar to the glass slide and the stained specimen. Adequate mounting
should be applied to protect the cellular material from air-drying and shrinkage, and to
prevent fading of the cell sample.
xv. The cellular material should be covered by a suitably sized cover slip or covering material
of appropriate quality. Different methods used to cover slip include placing the mounting
medium on the cover slip, then inverting the cover slip onto the slide surface, or lowering
the slide onto a cover slip containing adequate mounting medium.
xvi. Press the cover slip to remove air-bubbles trapped inside to prevent misinterpretation of
result while viewing with the aid of a microscope
xvii. Ideally, the mounting medium should be allowed to dry before the slides are reviewed to
reduce movement of cellular material during the slide examination.
SIGNIFICANCE: It provides accurate result and information for diagnosis and research if well
processed.
32
Fig 3.4 Pictures of Some of the Steps in Processing Cytology Sample obtained through permission
from FETHA II, Abakaliki, Ebonyi state, Nigeria.
3.2.2.2. GROSSING OR SURGICAL CUT-UP BENCH
Here, pathological specimens are examined with bare eyes to obtain diagnostic information about
them. Grossing refers to the examination and dissection of surgical specimens to study the
macroscopic condition of the specimens. An accurate diagnosis from this tissue is dependent on
correct identification, handling and processing. The grossing of a specimen can be done either
before or after fixation or following it. It is ideal to gross larger specimen in a fresh state; and
smaller ones following fixation.
Larger specimens include whole organs or parts which were removed during surgical operations.
(E.g. a uterus after hysterectomy)
Pieces of tissue rather whole organs are removed as biopsies, which often require smaller surgical
procedures that can be performed whilst the patient is still awake, but sedated. Biopsies include
excision biopsies, in which tissue is removed with a scalpel (e.g. a skin incision for a mole) a core
biopsy, in which a needle is inserted into a suspicious mass to remove a slither or core of tissue
that can be examined under the microscope (e.g. to investigate a breast lump).
Coupling jar Staining rack 90% Alcohol
70% Alcohol Scot tap water Haematoxylin

33
COLLECTION OF HISTOLOGY SAMPLES
MATERIALS NEEDED: A cutting board, specimen containers, 10% formal saline, forceps of
various sizes, scissors of various types and size, probe, bone cutting saw or electric bone cutter,
scalpel handle, disposable blades, long knife and ruler to measure the size of lesion and specimens,
Box with cassettes and labels, reagent containers, disposable gloves.
PROCEDURE:
A surgical specimen is received together with a reception form, containing the name, sex,
age, and clinical conditions of the patient
The specimen is then identified, confirming the patient’s age and sex, and anatomical site
from which the specimen has been obtained.
Clinical details of the patient is noted
Gross description – written record of physical appearance of the specimen is carried out
The shape or configuration of the tissue is noted. It could be round, spherical, ovoid,
elliptical, cylindrical, rectangular, irregular, polypoid, exophytic, endophytic, gyriform,
ulcerated, heaped up, raised, linear, whorled, bulging, multiloculated, cystic, vesicular,
globular, etc.
The colour of the specimen is also noted such as; red, tan brown, red-purple to brown
black, transparent, haemorrhagic, etc.
The odour (only if obvious) is also noted such as; rancid, burnt, etc.
The measurement and weight of the specimen is taken
The specimen is cut open to perform same examination on the internal parts
Only a small portion from the large specimen is put in cassettes which are fixed in a
suitable fixative.
Each cassette is labelled with a number or letter, or combination of both, using led-pencil.
The content of each cassette is indicated, and the total number of cassettes is recorded
The gross examination carried out by a skilled pathologist so as to collect important parts
of the sample for accurate diagnosis.
Only soft tissue are cut into small blocks and processed directly.

34
Bony specimens are decalcified before processing.
SIGNIFICANCE: Helps to examine pathologic specimens with bare eye to obtain diagnostic
information prior to fixation.
3.2.2.3. FIXATION
Fixation is the use of chemicals to prevent deterioration of dead tissues, thereby maintaining the
tissue chemistry and architecture as life-like as possible. This is necessary as it keeps the tissues in
a useful state for diagnostic studies.
Once a tissue is harvested from the body, it starts undergoing some degenerative changes due to
putrefaction and autolysis, if the tissue is not fixed immediately.
Putrefaction is a phenomenon which occurs due to invasion of the tissues by Bacteria, which
spread from the alimentary canal and quickly into the surrounding organ causing decomposition.
Autolysis is due to the action of enzymes from the dead cells. This is particularly disastrous to the
nervous and endocrine tissues. These changes can be retarded by low temperature or prevented by
the use of fixatives.
PRINCIPLES OF FIXATION
The fixative brings about cross-linking of proteins which produces denaturation or coagulation of
proteins so that the semi fluid state is converted to semisolid state; so that it maintains everything
in vivo in relation to each other. Thus semisolid state facilitates easy manipulation of tissue.
AIMS OF FIXATION
i. To preserve the tissue in a life-like state as possible
ii. To prevent postmortem changes like autolysis and putrefaction
Autolysis is the lyses or dissolution of cells by enzymatic action probably as a result of
rupture of lysosomes
iii. Preservation of chemical compounds and micro anatomic constituents so that further
histochemistry is possible.
iv. Hardening: the hardening effect of the fixatives allow for easy manipulation of soft tissues
like brain, intestines etc.
v. Solidification: converts the normal semi fluid consistency of cells to an irreversible semi
solid consistency.

35
vi. Effects of staining: certain fixatives like formaldehyde intensify the staining character of
tissue especially with haematoxylin.
CLASSIFICATION OF FIXATIVES
The classification is based on two criteria;
a. Number of chemicals that constitutes the fixative:
They are two kinds;
i. Primary Fixative: Has only one fixative e.g. formalin, ethanol, methanol, 10% formal saline,
10% normal saline.
ii. Secondary or Compound Fixative: It has two or more fixatives and combined in a solution
e.g. Zenker's fluid (contains mercuric chloride, potassium dichromate and formalin), Acetic
acid and Picric acid, Formal alcohol, Carnoys fluid.
b. Specific application of the fixative:
They are two kinds here too;
a. Micro anatomical Fixatives: These are used to preserve the anatomy of the tissue e.g. 10%
formal saline, buffered formalin
b. Cytological Fixatives: These are used to fix intracellular structures.
They are;
Nucleic Fixatives: These fixatives fix nucleus, sometimes at the detriment of the cytoplasm e.g.
Carnoy's fluid, Fleming's with acetic acid, Clarke's fluid, Newcomer's fluid. The pH of the fluid
must be 4.4 or less.
Cytoplasmic Fixatives: These fixatives fix the cytoplasm sometimes at the detriment of the
nucleus e.g. Fleming's fluid without acetic acid, Helly's fluid, Scardin's fluid, Regaud's fluid,
Formalin with post-chroming.
COMMONLY USED FIXATIVES:
Formalin: It is used for all routine surgical pathologic and autopsy tissues when an H&E slide
is to be produced. For most tissues, 10% formalin is used, except in brain tissue which 20%
formalin is used. It is the most commonly used fixative.
Bouin’s solution: It is recommended for fixation of testis, gastro-intestinal tract and endocrine
tissues.

36
Zenker’s fixative: It is recommended for reticuloendothelial tissues including lymph nodes,
spleen, thymus and bone marrow. However, the zenker’s fixative ought to be removed before
staining to remove its mercury deposits.
Papanicolaou fixative: Both its fixative and stain are used for cytology. It is prepared by
mixing equal volume of dimethyl ether and tertiary alcohol.
QUALITIES OF A GOOD FIXATIVE
i. It should penetrate the tissue rapidly and evenly.
ii. It should harden the tissue for easy handling and renders it insensitive to subsequent
treatment.
iii. It should prevent osmosis and leaking of the cell and tissue constituents i.e. it should render
substances of the cell insoluble.
iv. It should kill rapidly without distortion.
v. It should allow accurate histochemistry of the tissue constituents.
vi. It should be able to permit the use of dyes and other reagent.
vii. It should prevent autolysis and putrefaction.
viii. It should permit long storage of tissue.
ix. It should give good optical differentiation to unstained tissue constituent for easy
microscopy.
x. It should permit restoration of natural colour of photomicrograph.
xi. It should be simple to prepare and economical to use.
3.2.2.4. TISSUE PROCESSING BENCH
Tissue processing is a procedure that takes place between tissue fixation and the
embedding/sectioning of paraffin blocks. It is the process of passing tissue gradually through a
series of reagents which end in the solid medium. This can be done by an automatic tissue
processor, but was faulty throughout my period of attachment.
There are three (3) main steps in Tissue Processing;
a. Dehydration
b. Clearing (Dealcoholisation)
c. Infiltration (Impregnation)

37
a. DEHYDRATION
It is the process in which the water content in the tissue to be processed is completely reduced by
passing the tissue through increasing concentrations of dehydrating agents. Paraffin wax is
hydrophobic; therefore, most of the water in the tissue must be removed before it can be embedded
in wax. A series of increasing concentrations until absolute alcohol is used to ensure that the water
in the tissue is gradually replaced by the alcohol and to avoid excessive distortion of the tissue.
Various components of the cells are also removed by this process such as water soluble proteins
and lipids
PRINCIPLE: To remove water from tissue which is present either bound to the tissue or free in
the tissue.
AIM: The main aim of dehydration is to enable infiltration of the tissue by wax, since paraffin
wax is immiscible with water
VARIOUS DEHYDRATING AGENTS: there are several agents used for dehydration such as;
Ethyl alcohol, Acetone, Isopropyl alcohol, Dioxane, etc. But the one we used was ethyl alcohol.
METHODS OF DEHYDRATION
RAPID METHOD:
70%Alcohol 90% Alcohol Absolute Alcohol I Absolute Alc II Absolute Alc III
30 minutes 30 minutes 1 hour 1 hour 1 hour
ROUTINE METHOD:
70%Alcohol 90% Alcohol Absolute Alcohol I Absolute Alc. II Absolute Alc. III
2 hours overnight 2hours 2 hours 2 hours
NOTE: The time in each step is dependent on the type and size of the sample but as a general rule
the intervals given above is used.
SIGNIFICANCE: Dehydration is done so that paraffin wax which is used for impregnation can
be easily miscible as it is immiscible with water.
b. CLEARING (DEALCOHOLISATION)
This is the process of removing absolute alcohol from tissue and replacing it with a solvent which
is miscible with paraffin wax. The aim is to increase the refractive index of the tissue, making it

38
transparent or clear. Clearing agents can also be called antimedia because they can also remove
alcohol from tissue. Examples of antimedia are;
Xylene
Benzene
Touluene
Petroleum ether
Chloroform
Cedar wood oil
Carbon disulphate
Tetrahydrofural and
Carbon tetrachloride.
PRINCIPLE: To remove alcohol in the tissue and replaced with a fluid which will dissolve the
wax to be used for impregnation.
QUALITIES OF A GOOD ANTIMEDIA
Removes alcohol quickly.
Clears the tissue without causing much hardening.
Do not dissolve dyes used in staining.
It is not highly volatile.
It is able to mix with dehydrating and impregnating medium
METHODS OF CLEARING
RAPID METHOD:
Xylene I Xylene II
30 minutes 30 minutes
ROUTINE METHOD:
Xylene I Xylene II
2 hours 2 hours
SIGNIFICANCE OF DEALCOHOLISATION: It removes alcohol and also increases the
refractive index of the tissue, making the tissue transparent or clear.

39
c. INFILTRATION (IMPREGNATION)
Infiltration is when the final xylene is replaced with molten paraffin wax, which infiltrates and
hardens the tissue. Molten paraffin completely displaces clearing agents from the tissue and goes
to fill the intra and inter cellular spaces and cavities within the cell, thereby making the tissue solid
enough for easy microtomy.
PRINCIPLE: To keep a tissue in a molten paraffin wax, this infiltrates the interstitial of the tissue
and replaces the clearing agent.
TYPES OF INFILTRATION
Manual/Automatic impregnation (Impregnation at normal pressure): This is carried
out by the manual and automatic machine. In manual impregnation, hot air oven is used,
maintained a temperature of 50C to 100C above the melting point of wax to keep the wax in
molten condition.
Vacuum impregnation (Impregnation at reduced pressure): Infiltration is faster when
done at a reduced pressure in a vacuum oven. It involves rapid replacement of clearing agent
with paraffin wax at a reduced pressure using vacuum oven.
Materials used: Reagent container, molten wax, Vacuum oven, spatula, forceps, samples in
cassettes
METHODS OF IMPREGNATION
Rapid method:
Paraffin wax I Paraffin wax II Paraffin wax III
30 minutes 30 minutes 30 minutes
Routine method:
Paraffin wax I Paraffin wax II Paraffin wax III
2 hours 2 hours 2 hours
The jar containing paraffin wax I, II and III should be put in oven at a temperature of 50C to 100C
above the melting point of wax to keep the wax in molten condition. After the final infiltration, the
tissue cassettes are transferred to embedding bench.

40
Significance of infiltration: It increases the optical differentiation and hardens the tissue which
helps in easy sectioning of the tissue.
3.2.2.5. EMBEDDING BENCH
Embedding is the process of burying tissue inside a medium such as molten paraffin wax thereby
supporting the processed tissue bit when solidified. This medium not only makes it possible for
easy microtomy but also for easy preservation of tissue for future use. Tissue should be well
oriented in the mould during embedding so that a complete representation of all parts of the tissue
is presented in cut sections.
Principle: To bury tissue in a mould containing molten paraffin wax.
Embedding is performed in special containers called moulds. These containers help to give shape
to the wax containing the tissue when it set. There are many types of embedding moulds but we
used two types;
Plastic moulds: A rectangular or square-shaped plastic containers.
Metal moulds: Also rectangular or square-shaped container but metallic.
Materials used: Bunsen burner, forceps, tripod stand, Vacuum oven, moulds, molten wax, wax
jar, hot plate, cassettes, gauze, groundnut oil or engine oil, knives, bolts, processed samples.
PROCEDURE FOR EMBEDDING TISSUES:
With the aid of forceps, the paraffin-infiltrated tissue cassettes are picked out of the
stainless jar containing liquid wax.
The paraffin infiltrated tissues are removed from the tissue cassettes
The plastic moulds are arranged on the bench to obtain a square or rectangular shape. The
metal moulds can as well be used.
Grease is applied on the surfaces for easy separation of the wax from the mould.
A little hot paraffin wax from the wax jar is poured directly into the mould to fill the base
area of the mould.
The tissue samples are buried inside the molten paraffin wax quickly before the wax starts
to solidify. The samples are arranged so that they lie horizontally within the mould. This
makes the orientation and trimming of the block easier.

41
A warm forceps or head of a bolt is used to slightly press the tissue down to the surface of
the mould.
It is ensure that the tissue touches the surface of the mould and not left hanging by using a
warm forceps or knife to melt any solidifying wax.
A label is placed close to the tissue for easy identification.
The empty portion of the mould is filled to the brim in order to get a perfect square shape.
The wax is either allowed to solidify on its own or lifted carefully with the mould and place
in cold water (for about 10 minutes) to speed up the solidification process.
The mould is carefully detached, and the sample is cut into wax blocks. This is done when
it is soft (i.e. when it is not too solid) to avoid breaking or for easy cutting.
The wax blocks are trimmed to a suitable size and shape.
The wax block is mounted on a wooden block, by placing a hot knife between the wax
block and the wooden block.
The blocks are labelled and then transferred to microtome bench for sectioning.
SIGNIFICANCE: It helps in the proper alignment and orientation of tissues in wax blocks for
easy sectioning.
3.2.2.6. SECTIONING OR MICROTOME BENCH
In this subsection, tissues are been sectioned into thin slices. Microtomy is the process of making
thin slices of tissues for anatomical observation with a microscope. Sections can range from
hundreds of microns to tens on nanometres in thickness depending on the target of observations.
PRINCIPLE: To use a rotator microtome or any other type of microtome to make thin sections
for microscopy.
MATERIALS USED: Water bath, wax blocks embedded with tissues, rotatory microtome,
microtome blade, distilled water, frosted slide, glycerol and egg albumen, 20% alcohol.
PROCEDURE FOR SECTIONING:
i. The water bath is set to about 50 degree Celsius before sectioning, to heat water. The water
is used to float the tissue section prior to picking with a slide.
ii. The wax block is put on the block holder of the microtome.

42
iii. A new, sharp blade (disposable microtome blade) is fixed tightly on the microtome and the
blade guards are closed.
iv. The block holder screws are adjusted to place the block parallel to the blade.
v. The handle, usually locked when not in use is unlocked and turned until samples start
cutting a little. The block is repeatedly sectioned at 20microns thickness per slice to remove
excess wax till the entire surface of the tissue is exposed. The paraffin ribbon is then
discarded.
vi. The wax block is secured and readjusted to section the block at 3-5microns, which gives
the normal thickness for easy microscopy.
vii. The sections are gradually picked with forceps and lowered onto a water bath.
viii. In case of difficulty in spreading of the section, it is floated on a 20% alcohol to increase
the surface tension before transferring to the water bath.
ix. The section is allowed to remain on the water bath until it spreads sufficiently.
x. The section is picked from the water bath, using the plain side of the frosted slide
xi. The slides (with paraffin sections) are placed on a hot plate for 20 minutes (so the wax just
starts to melt) to bond the tissue to the glass and also to dry off some of the moisture.
xii. The biopsy number is labelled on the frosted end of the slide with a pencil.
xiii. The slides are arranged on a staining rack and transferred to staining bench for staining.
SIGNIFICANCE: It enables the sectioning of tissues into thin slices for anatomical
study/examination with a microscope.
3.2.2.7. STAINING BENCH
Most cells are colourless and transparent, and therefore histological sections are stained in some
ways to make the cells visible. The techniques used can either be specific, selectively staining
particular chemical groupings or molecules within cells or tissues; or non-specific, staining most of
the cells in much the same way.
PRINCIPLE: To stain histological sections in order to make the cell structures visible when
viewed with a microscope.

43
HAEMATOXYLIN AND EOSIN STAIN (H&E)
This is a good general stain and widely used. Most of the slides, when it is not otherwise stated are
stained with H&E. Haematoxylin acts as a basic stain via a substance called Haematin which is
formed in solutions of haematoxylin. It stains nucleic acids in the nucleus (chromatin and
nucleolus) blue. Eosin is an acidic aniline dye, which stains the more basic proteins and other
materials pink or red. Thus, it is mainly a cytoplasmic stain.
CONSTITUENTS OF HAEMATOXYLIN STAIN:
i. Haematoxylin - 2.5g
ii. Absolute alcohol - 250ml
iii. Potassium alum - 50g
iv. Mercuric chloride - 1.25g
v. Distilled water - 500ml
vi. Glacial acetic alcohol - 20ml
CONSTITUENTS OF EOSIN STAIN:
i. Eosin - 10g
ii. Distilled water - 1000ml
PROCEDURE FOR STAINING:
The slides are arranged in a staining rack, and;
i. Dewaxed in xylene for 15minutes,
ii. Rinsed in absolute alcohol,
iii. Rinsed in 90% alcohol,
iv. Rinsed in 70% alcohol,
v. Rinsed in 50% alcohol,
vi. Rinsed in water,
vii. Dipped in haematoxylin stain for 10minutes,
viii. Rinsed in water,
ix. Rinsed in acid alcohol,
x. Dipped in eosin and left for 1minute,

44
xi. Rinsed in water by dipping twice.
xii. It is then mounted using DPX (Distyrene Plasticizer Xylene) mountant.
xiii. The slides are then dried in air, making them ready for viewing with a microscope.
SIGNIFICANCE: Helps to make most colourless and transparent cells visible when viewed under
a microscope.
PAPANICOLAOU STAIN
A PAP stain is the most important stain utilized in the practice of cytopathology, a screening
procedure for cervical cancer. It is a polychromatic stain that contains five dyes in three solutions,
namely; Haematoxylin, OG6, and Eosin Azure (which is a polychrome mixture of eosin Y, light
SF and Bismarck brown). This staining technique was discovered by George Papanicolaou.
PAP smear staining procedure
1. PAP smears are normally preserved in 95% alcohol, therefore the smear is taking down to
water from alcohol by passing it through decreasing grade of alcohol
2. Stain with haematoxylin for 5minutes (depending on the concentration of haematoxylin)
3. Wash in water
4. Briefly differentiate in 1% acid alcohol
5. Wash in water
6. Blue in Scotts tap water for 3 minutes
7. Wash in two changes of absolute alcohol
8. Counter stain with OG6 (orange G6) for 3 minutes
9. Wash in two changes of absolute alcohol
10. Stain with EA36 (Eosin Azure) for 3 minutes
11. Wash in two changes of absolute alcohol
12. Dry
13. Mount with cover slip and DPX (Distyrene Plasticizer and Xylene)
RESULT:
Haematoxylin stain the cells nuclei blue
OG6 stains keratinize squamous cell carcinoma present orange-red
EA 36 stains

45
o Eosin Y stain cytoplasm pink
o Light green SF stains metabolically active cytoplasmic (Para basal squamous cells,
intermediate squamous cells and columnar cells) cells blue
o Bismarck brown stain nothing

46
CHAPTER FOUR
4.0. CONCLUSION
Throughout my stay doing my industrial attachment in Holy Family Catholic Hospital, Ikom
(HFCH), I was privileged to gain the practical knowledge of the anatomical and medical practices,
which I learnt theoretically in the class. Thus, the SIWES program served to me as an ‘eye opener’
in my course of study. Also, there was a peaceful and mutual coexistence between me and most of
the staff I met and worked with in the hospital (in Morbid Anatomy and Radiology Departments).
Thus, making me feel more like a worker, thereby contributing the best of my knowledge and
skills towards the progress of the departments.
The practical knowledge/skills acquired during the course of my industrial training include:
The radiographic anatomy of most of the body parts, their imaging modalities, and the
techniques uses in imaging them.
Embalming techniques and
Tissue processing techniques
However, the SIWES program has not only improved the practical knowledge of my course of
study but has also sharpened my thinking and moral behaviour. I met a lot of people including
doctors and patients, and interacting with them on regular bases has helped me to keep a positive
attitude and talk to people in a heart-warming way.
4.1. PROBLEMS ENCOUNTERED
There in HFCH, where I did my industrial training, some relevant/modern machines were not
available throughout the six months I worked with them. Some were too outdated to carry out
modern procedures, while some of the available machines were faulty and have been abandoned.
Therefore, some procedures are performed manually, skipped or manoeuvred. This requires much
labour and it also consumes time, in addition to the fact that sometimes the end results are affected.
Financially, I wasn’t stable, unlike in school, where the distance from my lodge to the lecture halls
is trek able, here I have to take public transports to my place of work five times a week, for
twenty-four weeks. This was a very big challenge for me because no financial assistance was
rendered to me either by the ITF or the organisation where I was attached.

47
4.2. RECOMMENDATION
The federal government and industrial training fund should endeavor to keep this program on,
make it compulsory for all relevant public and private establishments to accept students for the
SIWES program when due and should not separate it from student because it is the principle key
that guide and prepare the student for future development.
There should be regular disbursement of allowances to enable most students participate effectively
in all the SIWES activities/programs because most challenges that we encounter during the
training is lack of finance to feed ourselves and to transport ourselves to the place of work. We
therefore apologize and recommend that the government of this federation should put solutions to
these situations.