FCC WARNING - Scanner Master Police Scanners · 1 FCC WARNING Changes or modifications not...
49
0
Transcript of FCC WARNING - Scanner Master Police Scanners · 1 FCC WARNING Changes or modifications not...
0

1
FCC WARNING
Changes or modifications not expressly approved by the party responsible for compliance could void
the user’s authority to operate the equipment.
NOTICE
This equipment has been tested and found to comply with the limits for a Class B digital device,
pursuant to part 15 of the FCC Rules. These limits are designed to provide reasonable protection
against harmful interference in a residential installation.
This equipment generates uses and can radiate radio frequency energy and, if not installed and
used in accordance with the instructions, may cause harmful interference to radio communications.
However, there is no guarantee that interference will not occur in a particular installation. If this
equipment does cause harmful interference to radio or television reception, which can be
determined by turning the equipment off and on, the user is encouraged to try to correct the
interference by one or more of the following measures:
-Reorient or relocate the receiving antenna
-Increase the separation between the equipment and receiver.
-Connect the equipment into an outlet on a circuit different from that to which the receiver is
connected.
-Consult the dealer or an experienced radio/TV technician for help.
This device complies with Part 15 of the FCC Rules. Operation is subject to the
following two conditions: (1) this device may not cause harmful interference,
and (2) this device must accept any interference received, including interference that may
cause undesired operation.
2
・・・・FOR SAFETY
FCC warning …………………………………………………………………………. 1
・INTRODUCTIONS
Packing List ………………………………………………………………………….. 4 About AR-mini ……………………………………………………………………….. 5 About AR-mini’s Mode ………………………………………………………………. 5 Part Name and Function …………………………………………………………….. 6 Descriptions of LCD (Liquid Crystal Display) ……………………………………… 9
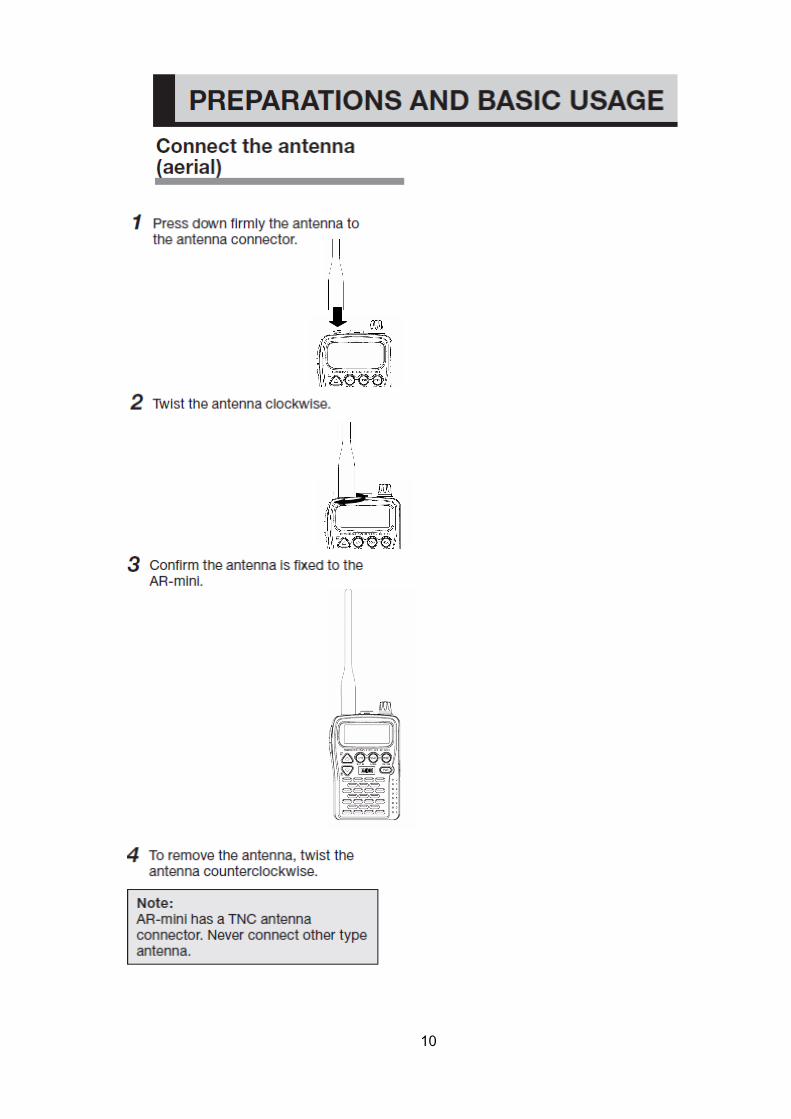
・ PREPARATIONS AND BASIC USAGE Connect the antenna …………………………………………………………………. 10
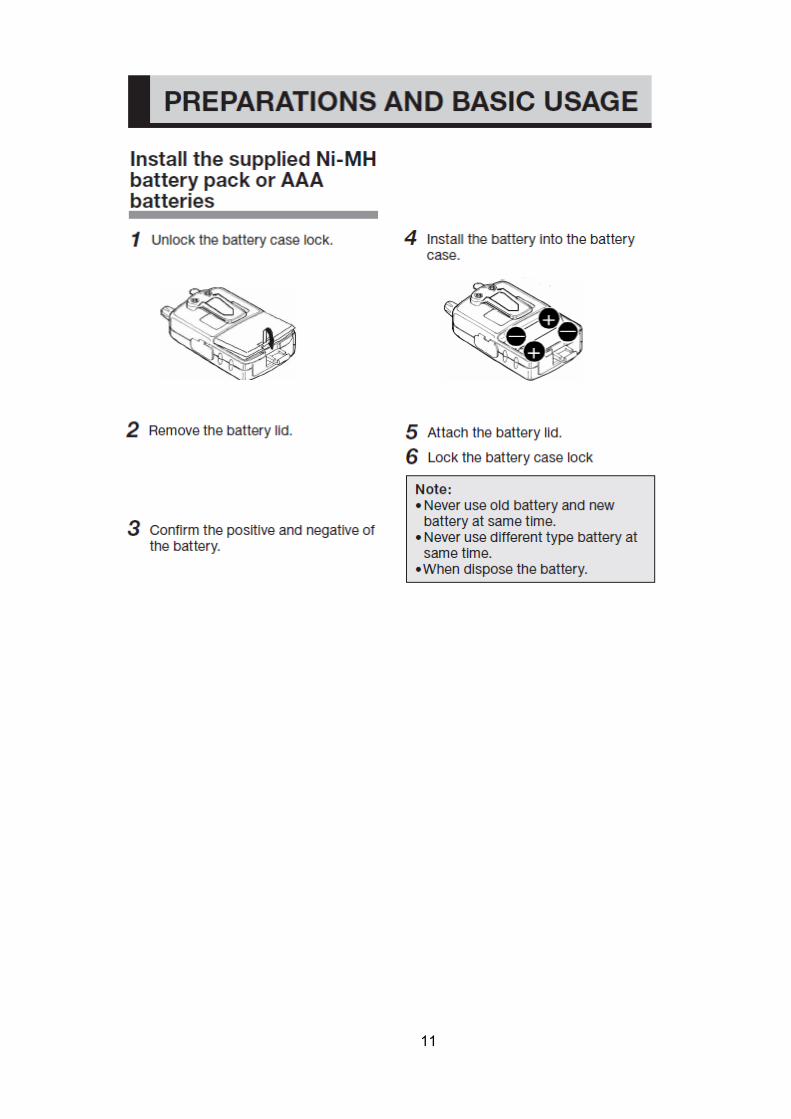
Install the supplied Ni-MH battery pack or AAA batteries ………………………… 11 Charge the supplied Ni-MH battery pack ………………………………………….. 12 Basic Usage ……………………………………………………………………………. 12 Using the Optional Items ……………………………………………………………… 13
・・・・BASIC OPERATION
Switching On ……………………………………………………………………………. 14 Adjusting the Volume …………………………………………………………………… 15 Adjusting the Frequency ……………………………………………………………….. 15 Adjusting the Squelch ………………………………………………………………….. 16 Monitoring ……………………………………………………………………………….. 16 Changing the mode …………………………………………………………………….. 17 Finding the Desired Frequency ……………………………………………………….. 18 Priority Watch …………………………………………………………………………… 18 Dual Watch ……………………………………………………………………………… 19 Search …………………………………………………………………………………… 19 Memory Scan …………………………………………………………………………… 20 Priority Watch ………………………………………………………………………….. 20 Dual Watch ……………………………………………………………………………… 21 Dual Watch with Dual Watch Receiving Memory …………………………………… 21 VFO Search …………………………………………………………………………….. 22 Skip the Desired Frequency in the Search ………………………………………….. 22 Limit Search …………………………………………………………………………….. 23 Limit Link Search ……………………………………………………………………….. 23 Memory mode …………………………………………………………………………… 24 Storing a Frequency in the Memory ………………………………………………….. 24 Recalling the Memory ………………………………………………………………….. 25 Erasing a Memory ……………………………………………………………………… 25 Erasing All Memories in the Memory Bank …………………………………………. 25 Naming the Memory …………………………………………………………………… 25 The Memory Scanning ………………………………………………………………… 27 Setting the Skip Memory in the Scanning …………………………………………… 27 Scanning the Memory Bank ………………………………………………………….. 28 Scanning the Memory Bank Link …………………………………………………….. 28 Setting the Preset mode ………………………………………………………………. 29 Using the Tone Squelch ………………………………………………………………. 29
CONTENTS

3
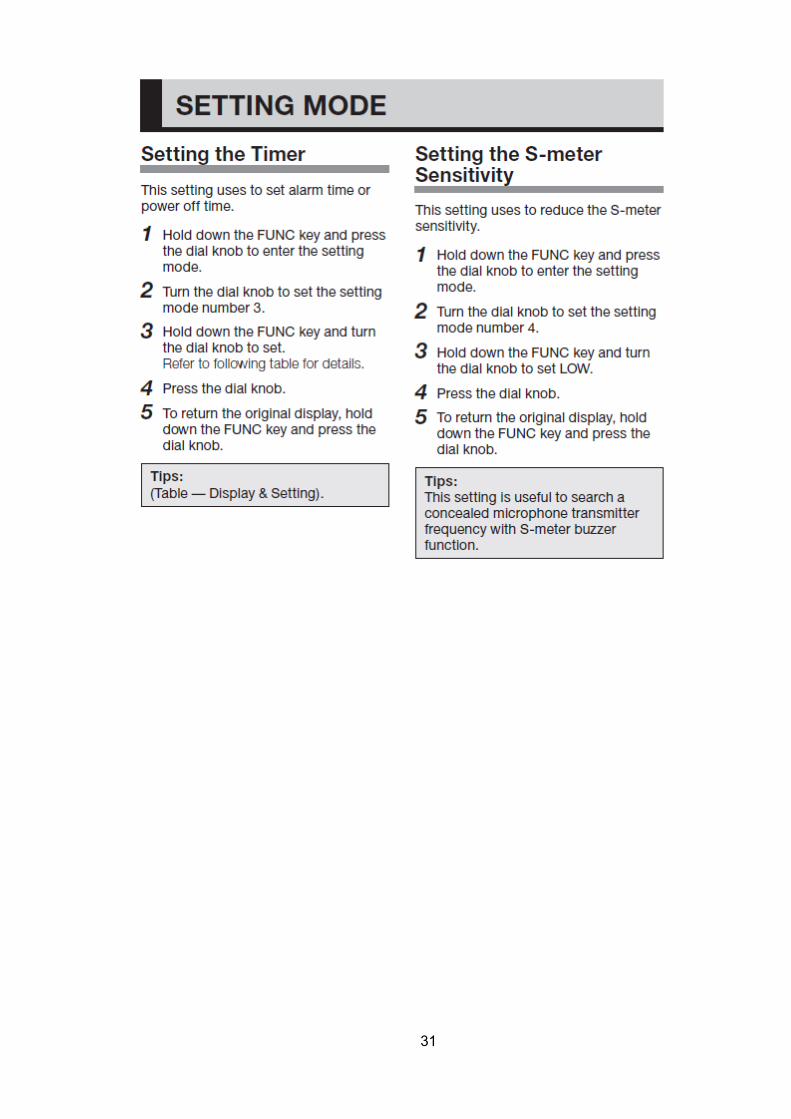
・SETTING MODE
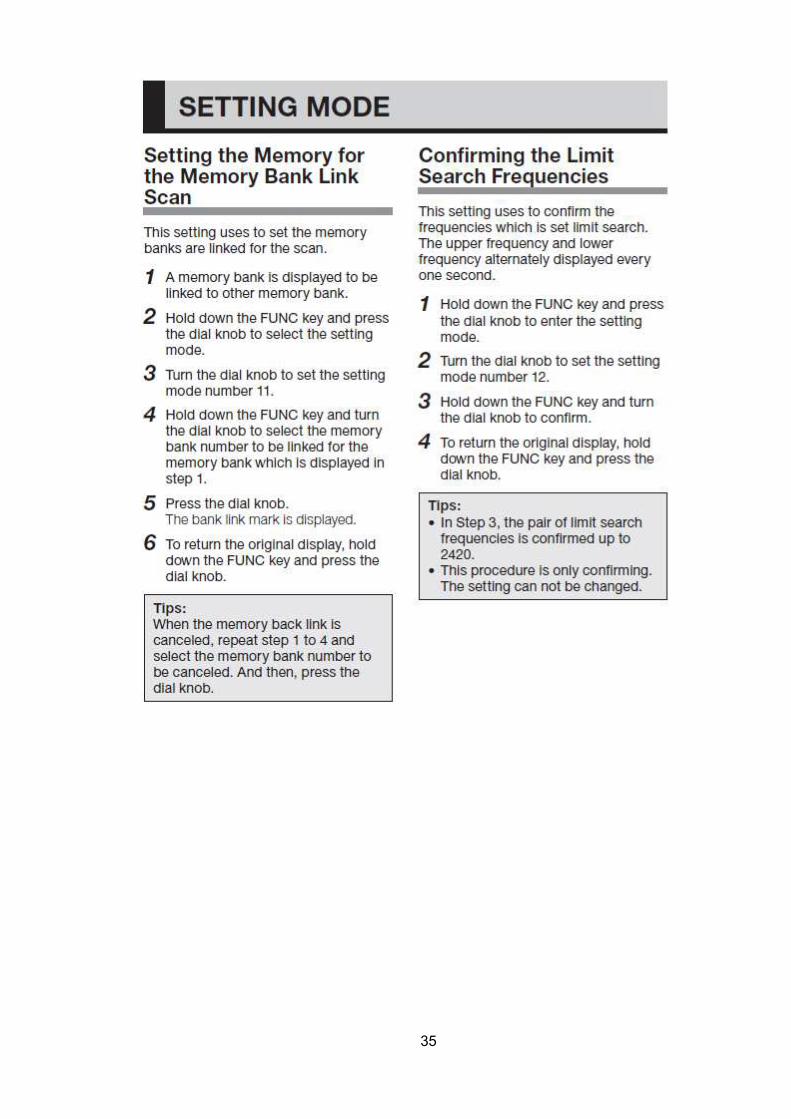
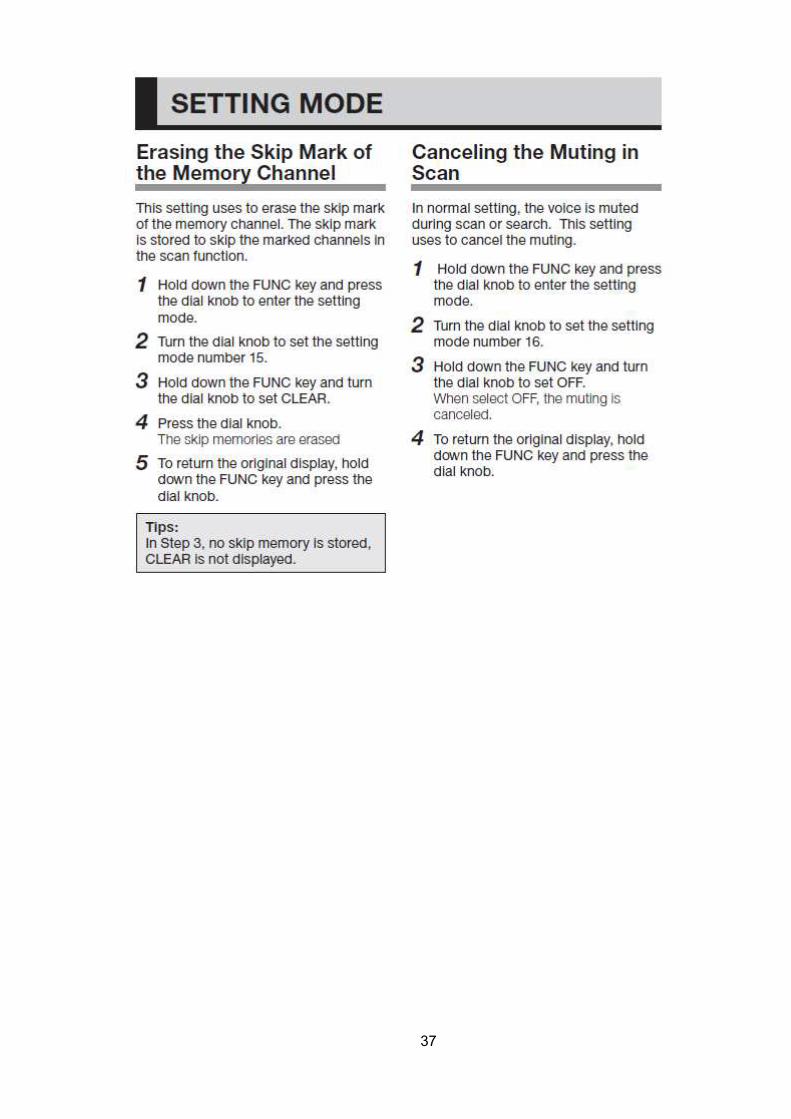
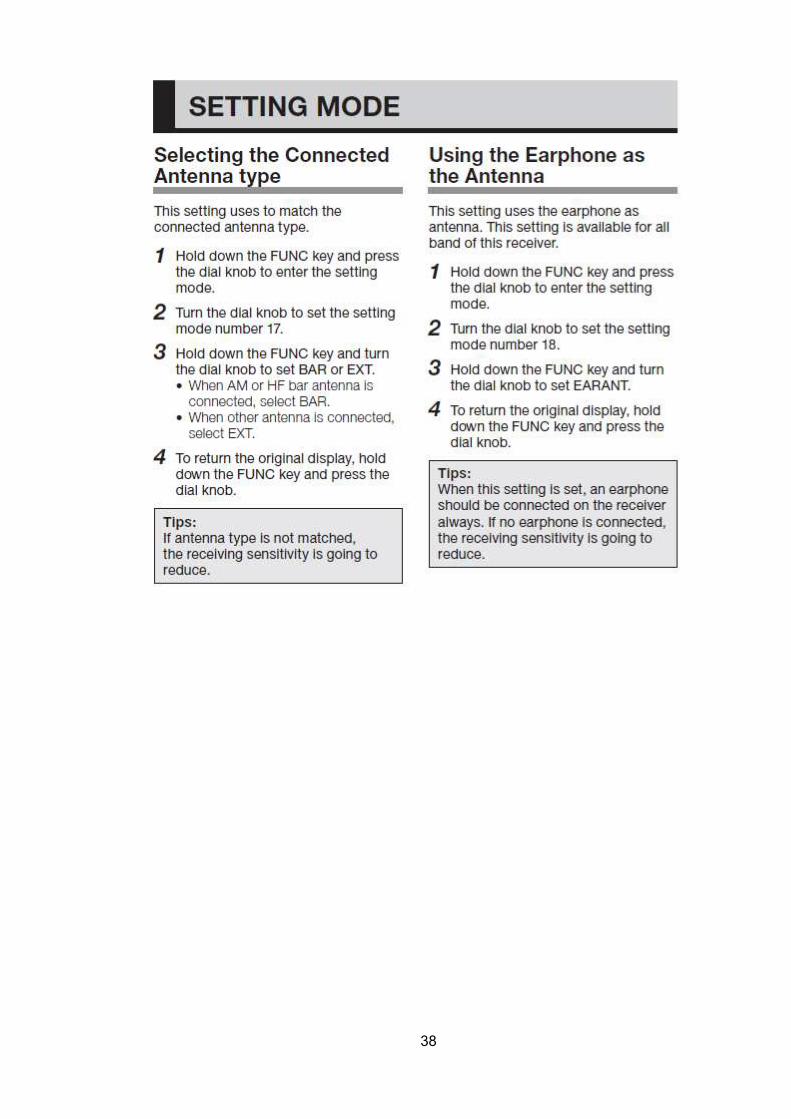
Changing the Fast Step ……………………………………………………………… 30 Setting the Lamp ……………………………………………………………………… 30 Setting the Timer ……………………………………………………………………… 31 Setting the S-meter Sensitivity ………………………………………………………. 31 Setting the S-meter Buzzer ………………………………………………………….. 32 Setting the Resume Time ……………………………………………………………. 33 Setting the Search ……………………………………………………………………. 33 Setting the Memory Scan ……………………………………………………………. 34 Setting the Limit Link Search ………………………………………………………… 34 Setting the Memory for the Memory Bank Link Scan ……………………………... 35 Confirming the Limit Search Frequencies ………………………………………….. 35 Erasing the All Memories in a Memory Bank ………………………………………. 36 Erasing the VFO Skip Memory ………………………………………………………. 36 Erasing the Skip Mark of the Memory Channel ……………………………………. 37 Canceling the Muting in Scan ……………………………………………………….. 37 Selecting the Connected Antenna type …………………………………………….. 38 Using the Earphone as the Antenna ………………………………………………… 38
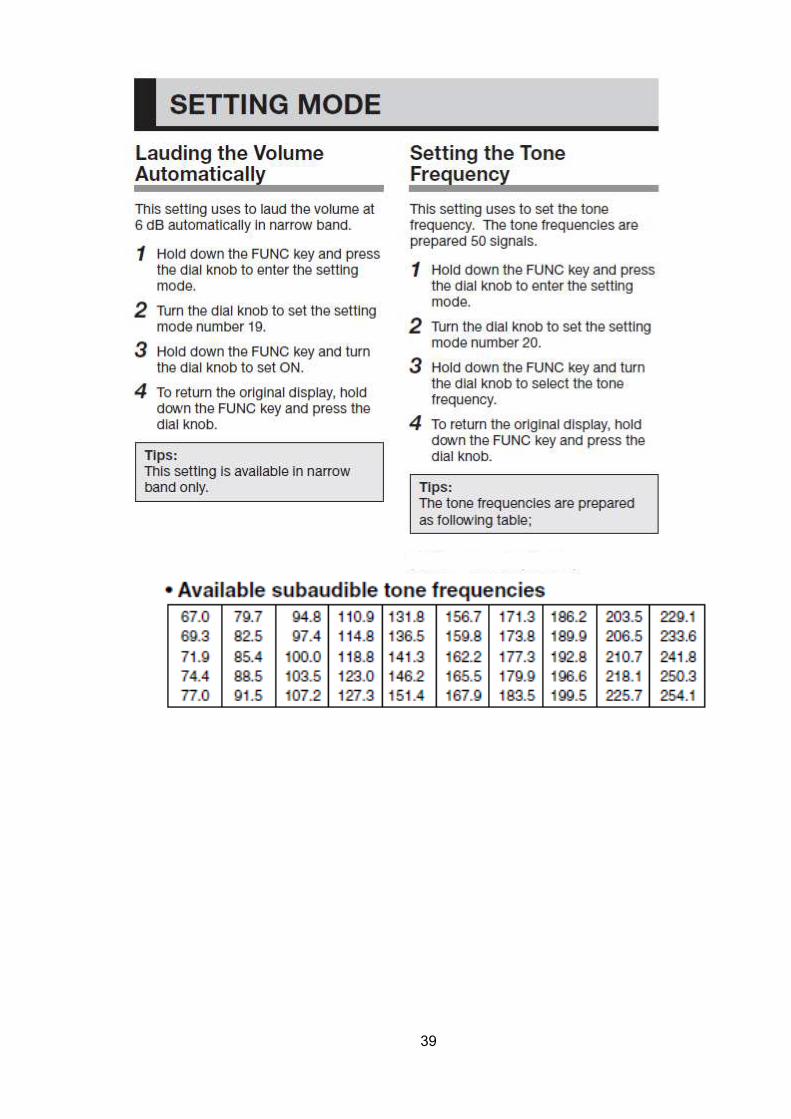
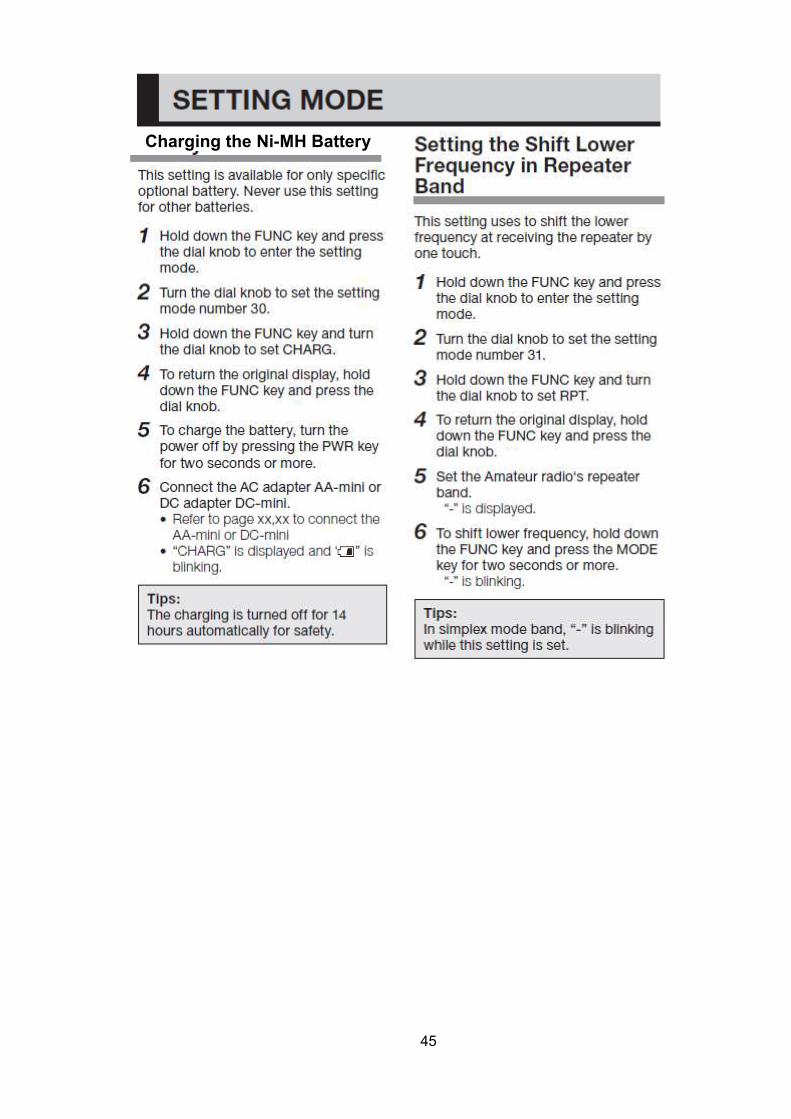
Lauding the Volume Automatically ………………………………………………….. 39 Setting the Tone Frequency …………………………………………………………. 39 Selecting the Reversed Tone Frequency …………………………………………… 40 Selecting the Carrier Frequency of the Scramble …………………………………. 41 Switching the Display Automatically ………………………………………………… 41 Setting the DCS code ………………………………………………………………… 42 Reversing the Phase of DCS code ………………………………………………….. 42 Turning the Beep Off ………………………………………………………………….. 43 Changing the Battery Saving Time ………………………………………………….. 43 Displaying the Battery Voltage ………………………………………………………. 44 Charging the Ni-MH Battery ………………………………………………………….. 45 Setting the Shift Lower Frequency in Repeater Band …………………………….. 45 Revising the Step Frequency ………………………………………………………… 46 Shifting the Microprocessor’s Clock rate ……………………………………………. 46
・・・・SPECIFICATIONS ……………………………………………………………………………. 47
CONTENTS

4
Packing ListPacking ListPacking ListPacking List
When you unpack the carton box,
could you check the following items are
provided in the carton box.
If you will find a missing item, please
contact your dealer.
●Receiver AR-mini ●Hand Strap
●Antenna ●Belt Clip (hook)
● NI-MH Battery
●AC adaptor
5
About AR-mini
AR-mini can receive the 0.1 MHz to
1299.995 MHz of AM, FM and Wide FM
bands. AR-mini is designed for simply
operating by five keys.
About AR-mini’s Mode
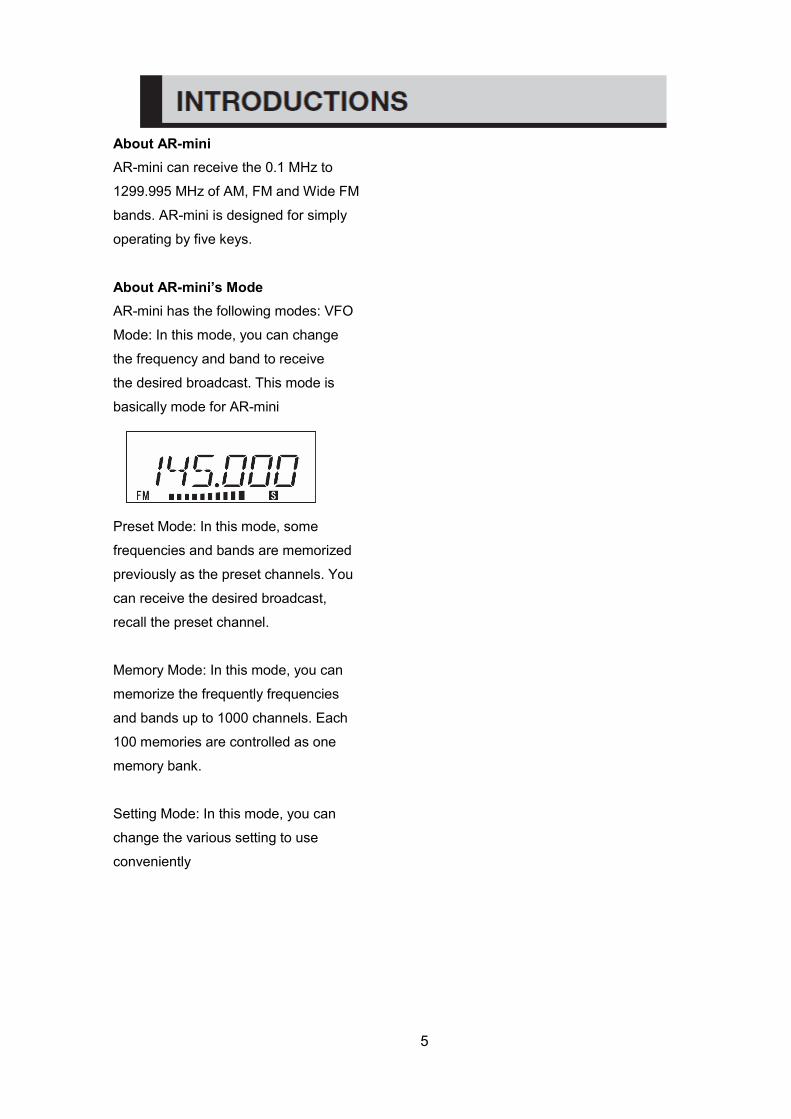
AR-mini has the following modes: VFO
Mode: In this mode, you can change
the frequency and band to receive
the desired broadcast. This mode is
basically mode for AR-mini
Preset Mode: In this mode, some
frequencies and bands are memorized
previously as the preset channels. You
can receive the desired broadcast,
recall the preset channel.
Memory Mode: In this mode, you can
memorize the frequently frequencies
and bands up to 1000 channels. Each
100 memories are controlled as one
memory bank.
Setting Mode: In this mode, you can
change the various setting to use
conveniently

6
7
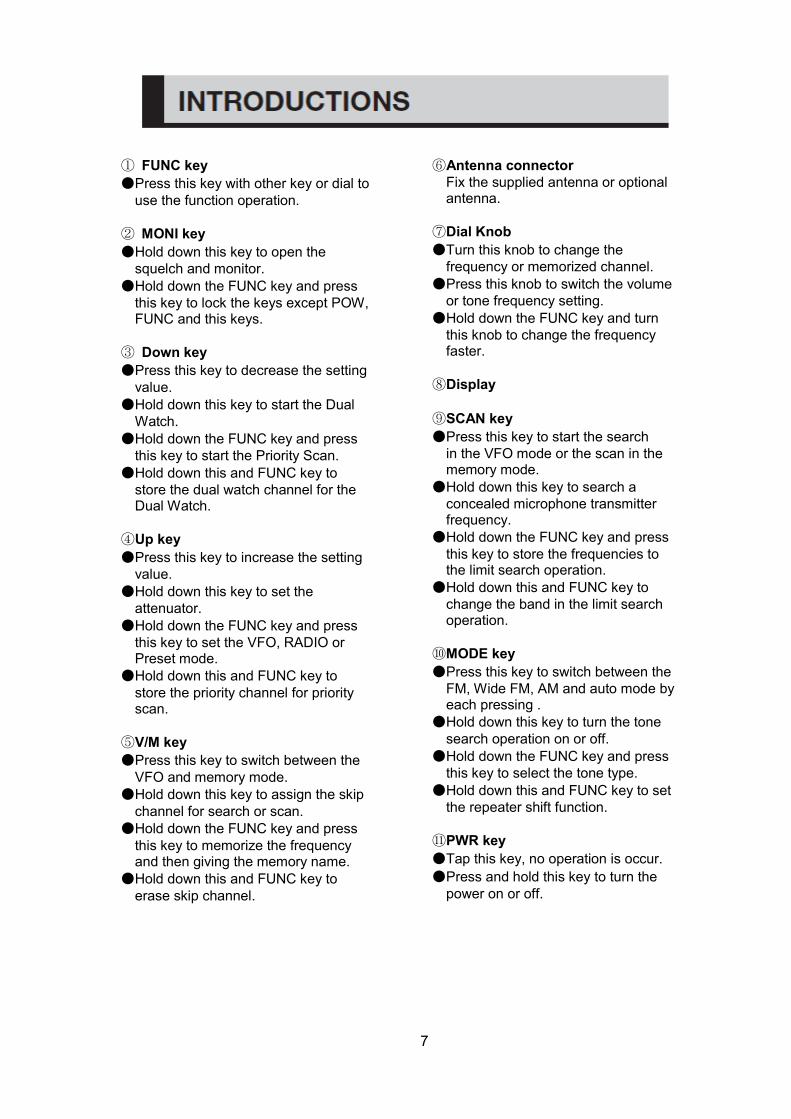
① FUNC key ●Press this key with other key or dial to
use the function operation.
② MONI key
●Hold down this key to open the
squelch and monitor.
●Hold down the FUNC key and press
this key to lock the keys except POW, FUNC and this keys.
③ Down key
●Press this key to decrease the setting
value.
●Hold down this key to start the Dual
Watch.
●Hold down the FUNC key and press
this key to start the Priority Scan.
●Hold down this and FUNC key to
store the dual watch channel for the Dual Watch.
④Up key
●Press this key to increase the setting
value.
●Hold down this key to set the
attenuator.
●Hold down the FUNC key and press
this key to set the VFO, RADIO or Preset mode.
●Hold down this and FUNC key to
store the priority channel for priority scan.
⑤V/M key
●Press this key to switch between the
VFO and memory mode.
●Hold down this key to assign the skip
channel for search or scan.
●Hold down the FUNC key and press
this key to memorize the frequency and then giving the memory name.
●Hold down this and FUNC key to
erase skip channel.
⑥Antenna connector
Fix the supplied antenna or optional antenna.
⑦Dial Knob
●Turn this knob to change the
frequency or memorized channel.
●Press this knob to switch the volume
or tone frequency setting.
●Hold down the FUNC key and turn
this knob to change the frequency faster.
⑧Display
⑨SCAN key
●Press this key to start the search
in the VFO mode or the scan in the memory mode.
●Hold down this key to search a
concealed microphone transmitter frequency.
●Hold down the FUNC key and press
this key to store the frequencies to the limit search operation.
●Hold down this and FUNC key to
change the band in the limit search operation.
⑩MODE key
●Press this key to switch between the
FM, Wide FM, AM and auto mode by each pressing .
●Hold down this key to turn the tone
search operation on or off.
●Hold down the FUNC key and press
this key to select the tone type.
●Hold down this and FUNC key to set
the repeater shift function.
⑪PWR key
●Tap this key, no operation is occur.
●Press and hold this key to turn the
power on or off.

8
⑫ Battery case Remove the battery case lid, and install the supplied Ni-MH battery or AAA battery.
⑬External DC jack
●Connected the AA-mini (AC adaptor) or
DC-mini (DC adaptor). And, can be used charging the Ni-MH battery.
⑭ Earphone jack
Remove the earphone jack cover and connect the optional earphone.
⑮ Battery case lock
Unlock the this to remove the battery case lid.
9
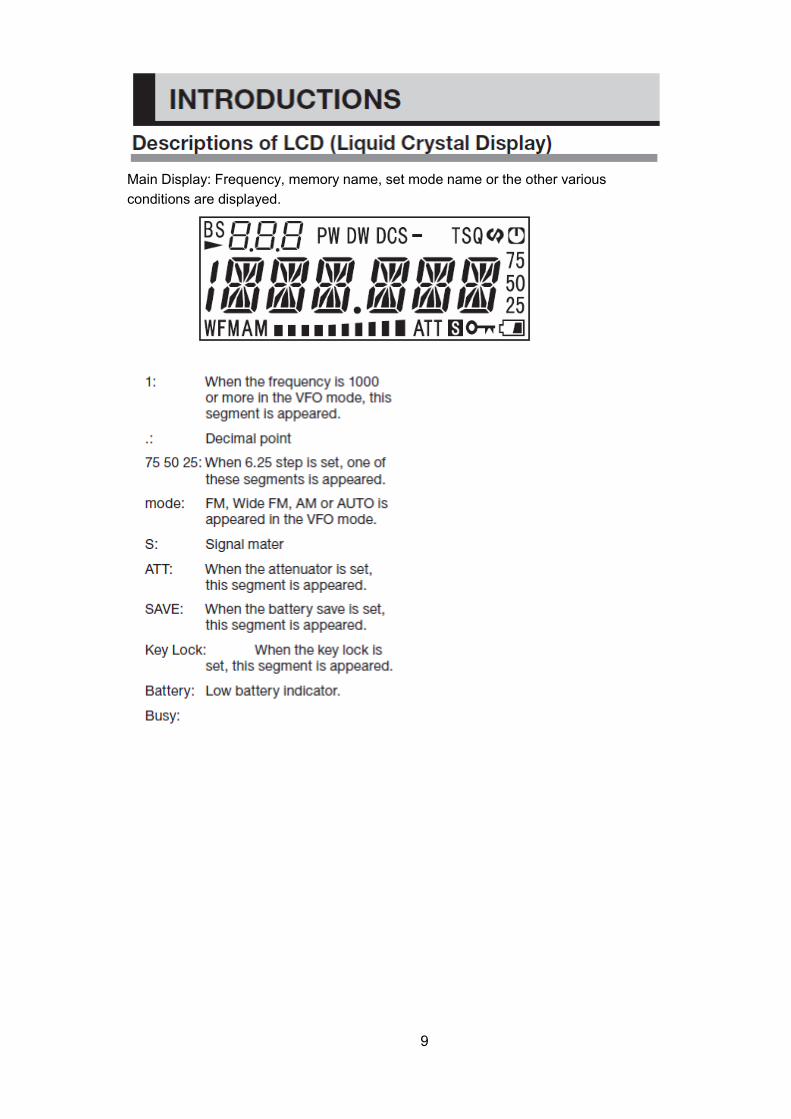
Main Display: Frequency, memory name, set mode name or the other various
conditions are displayed.
10
11
12
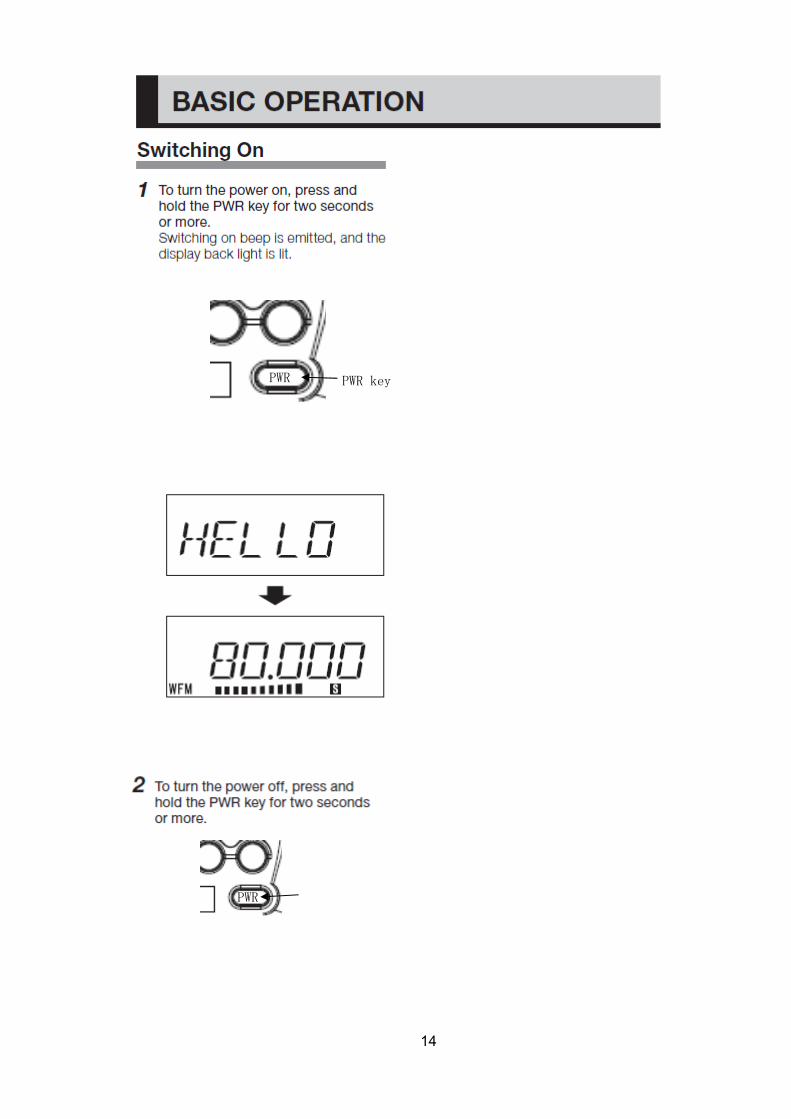
PWR PWR key
13
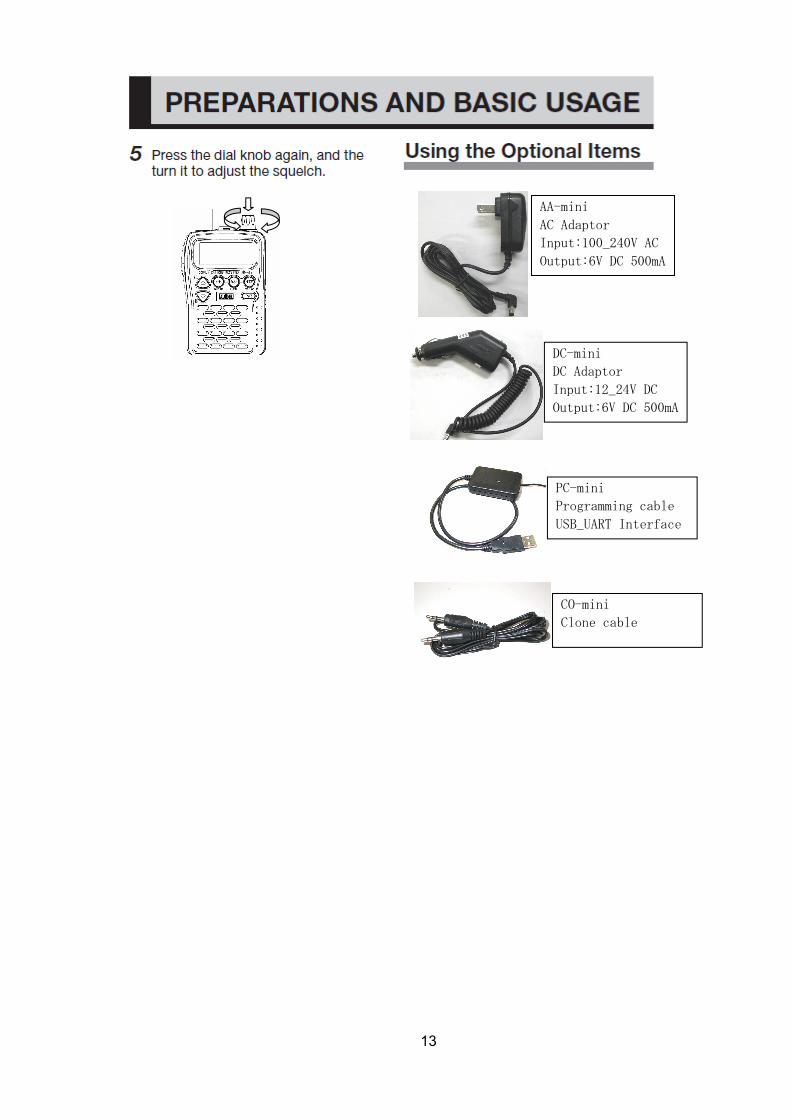
AA-mini
AC Adaptor
Input:100_240V AC
Output:6V DC 500mA
DC-mini
DC Adaptor
Input:12_24V DC
Output:6V DC 500mA
PC-mini
Programming cable
USB_UART Interface
CO-mini
Clone cable
14
PWR PWR key
PWR PWR
15
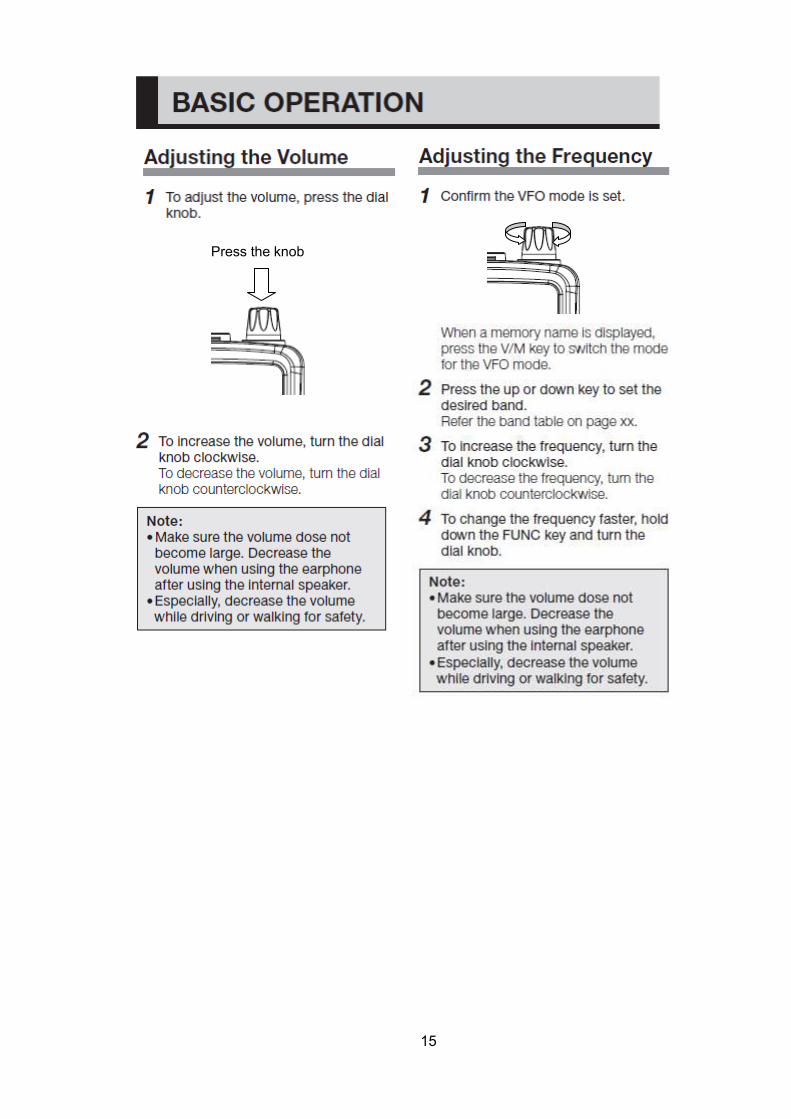
Press the knob
16
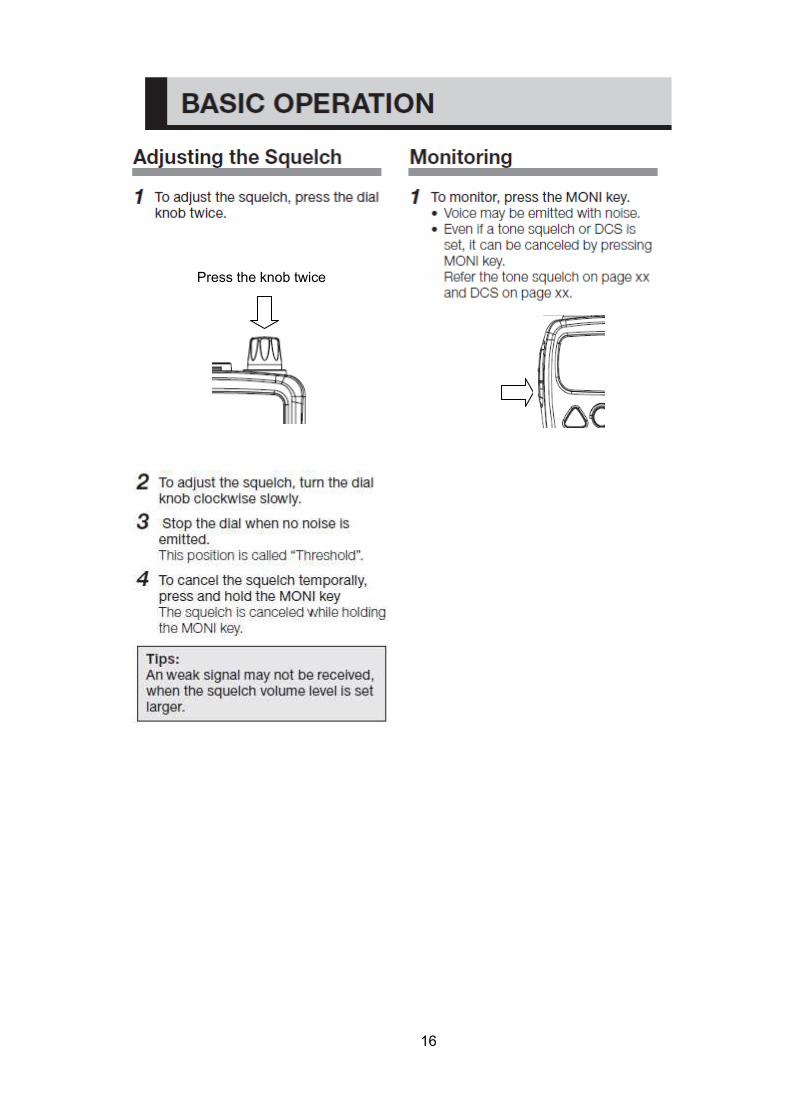
Press the knob twice

17
VFO⇔Memory

18
19

20
21
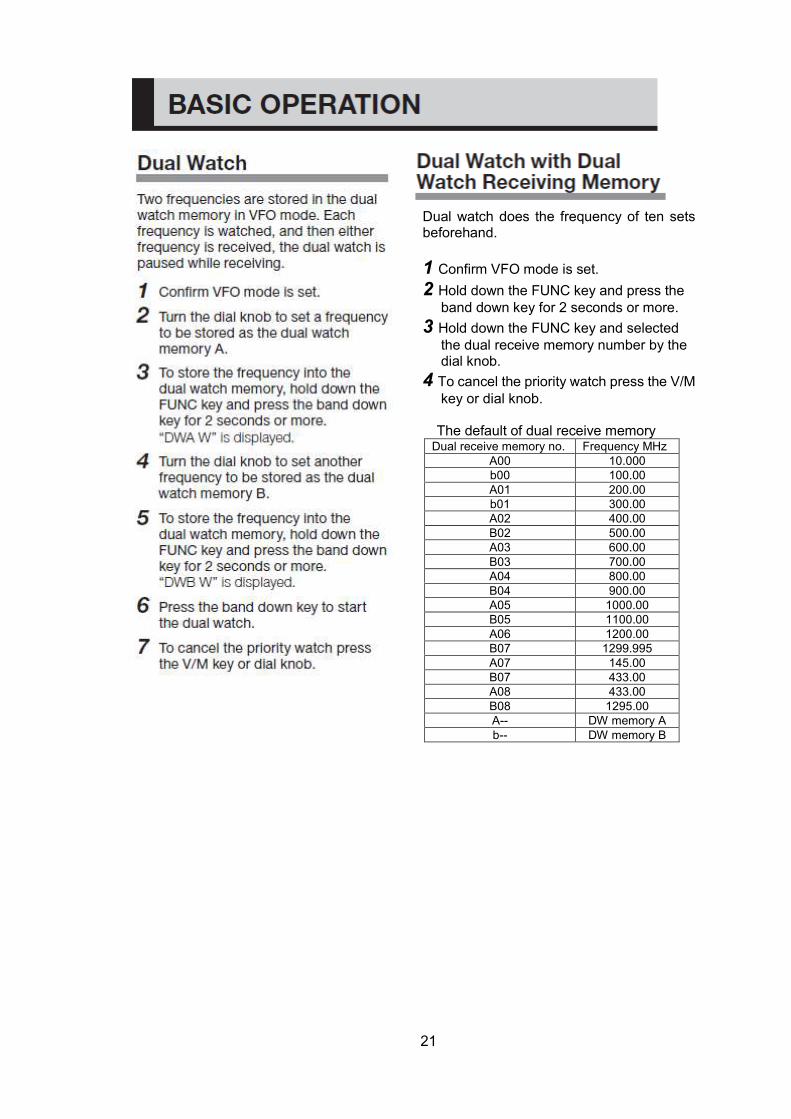
Dual watch does the frequency of ten sets beforehand.
1 Confirm VFO mode is set.
2 Hold down the FUNC key and press the band down key for 2 seconds or more.
3 Hold down the FUNC key and selected the dual receive memory number by the dial knob.
4 To cancel the priority watch press the V/M key or dial knob.
The default of dual receive memory Dual receive memory no. Frequency MHz
A00 10.000
b00 100.00
A01 200.00
b01 300.00
A02 400.00
B02 500.00
A03 600.00
B03 700.00
A04 800.00
B04 900.00
A05 1000.00
B05 1100.00
A06 1200.00
B07 1299.995
A07 145.00
B07 433.00
A08 433.00
B08 1295.00
A-- DW memory A
b-- DW memory B
22

23
24

25
26
1. To set memory mode from VFO mode, press the V/M key.
2. Hold down the FUNC key and press the SCAN key to writing mode.
3. Selected the words by dial knob. 4. Hold down the FUNC key and turned the dial knob to change digit.
5. Hold down the FUNC key and press the V/M key to enter the write.
All memories can be add the name
27
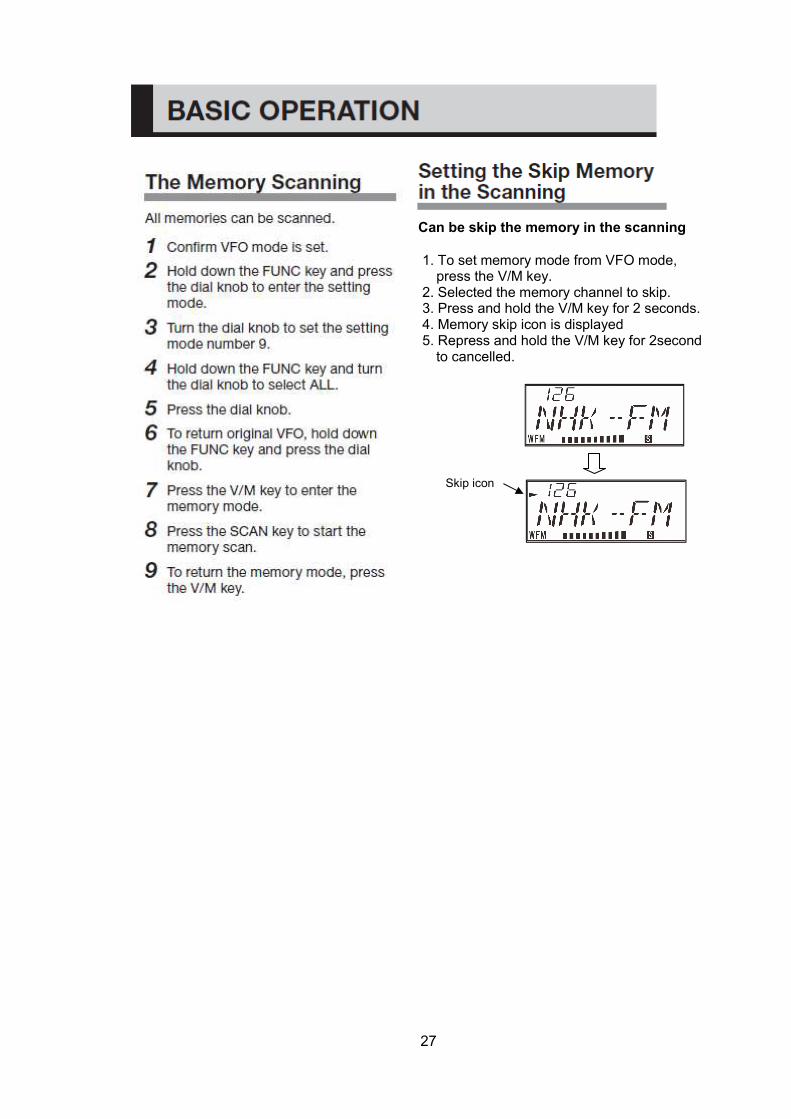
Can be skip the memory in the scanning
1. To set memory mode from VFO mode, press the V/M key.
2. Selected the memory channel to skip. 3. Press and hold the V/M key for 2 seconds. 4. Memory skip icon is displayed 5. Repress and hold the V/M key for 2second to cancelled.
Skip icon
28
Can be scan the memory in a bank. Can be scan the memory in few banks.
Can be selected banks at 10 maxim
1. Hold down the FUNC key and press the dial knob to set mode and selected the s09.
2. Selected the BANK by the dial knob. 3. Press the dial knob and returned to VFO mode.
4. Press the V/M key, and press the SCAN key to scanning the Memory bank mode.
5. When change the bank, use the dial knob.
6. Press the V/M key, while to scan stop and return the memory mode. 7. Press the V/M key again, return to VFO mode.
1. Hold down the FUNC key and press the dial knob to set mode and selected the s09.
2. Selected the BKLNK by the dial knob. 3. Hold down the FUNC key and selected the dial knob to bank number. If you release the FUNC key, can not be change the bank number.
4. After release the FUNC key to set the bank link.
5. Repeat step 3 to 4 other bank number.

29
This setting used to preset mode. This setting uses to the tone squelch
1. Confirm VFO mode is set. 2. Hold down the FUNC key and press the MODE key and select the TSQ.
3. Press the V/M key or press the dial knob to TSQ mode.
4. Hold down the FUNC key and press the dial knob to set mode.
5. Selected the s20 by the dial knob. 6. Hold down the FUNC key and selected the dial knob to tone frequency
7. Hold down the FUNC key and press the dial knob to VFO mode.
1. Hold down the FUNC key and press the BAND UP key to watch select function.
2. Select the preset mode by the dial knob.
3. The P icon and memory number are displayed.
4. select the band of the preset memory by BAND UP key or BAND DOWN key
30
31

32

33

34
35

36
37
38
39

40
41

42
• Available DCS code
43
44
45
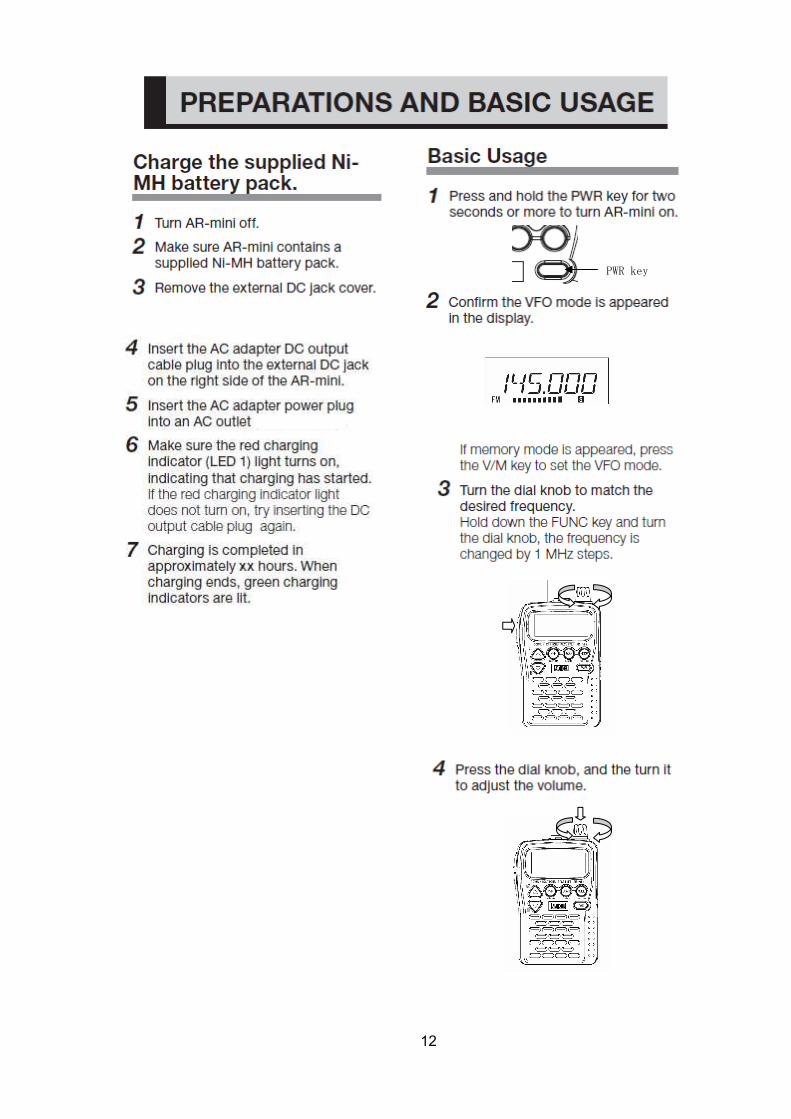
Charging the Ni-MH Battery

46
47
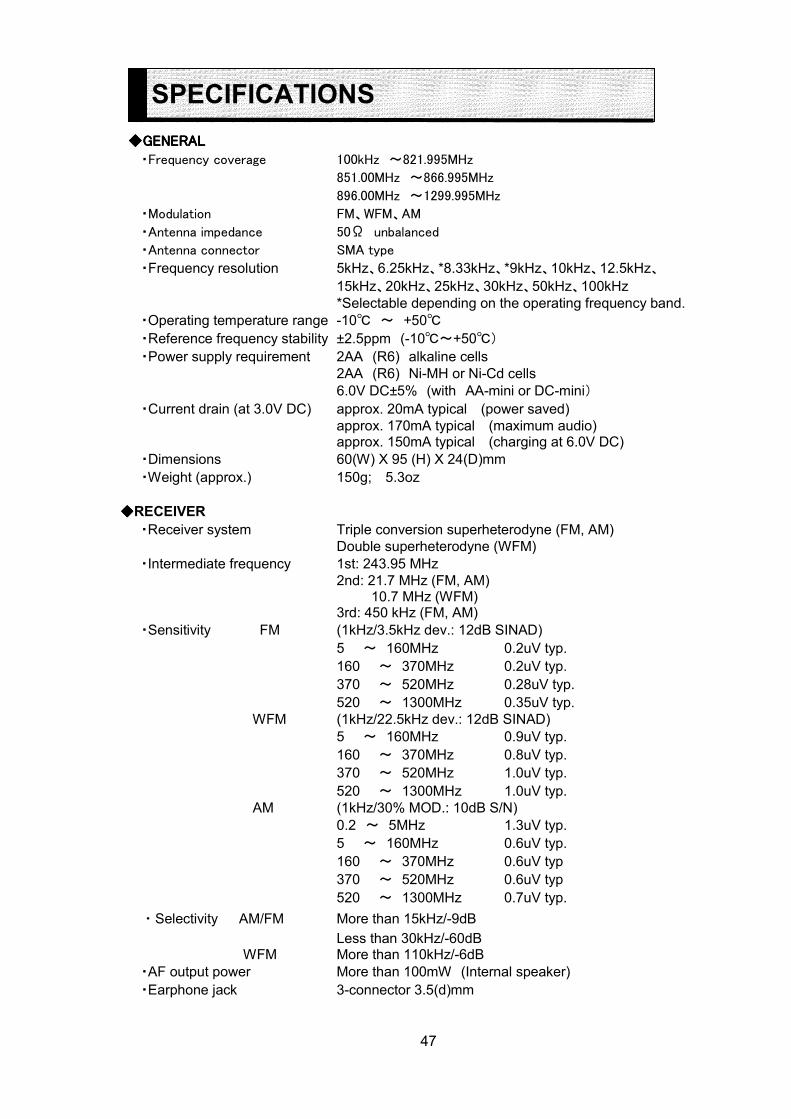
◆◆◆◆GENERALGENERALGENERALGENERAL
・Frequency coverage 100kHz ~821.995MHz
851.00MHz ~866.995MHz
896.00MHz ~1299.995MHz
・Modulation FM、WFM、AM
・Antenna impedance 50Ω unbalanced
・Antenna connector SMA type
・Frequency resolution 5kHz、6.25kHz、*8.33kHz、*9kHz、10kHz、12.5kHz、
15kHz、20kHz、25kHz、30kHz、50kHz、100kHz *Selectable depending on the operating frequency band.
・Operating temperature range -10℃ ~ +50℃
・Reference frequency stability ±2.5ppm (-10℃~+50℃)
・Power supply requirement 2AA (R6) alkaline cells 2AA (R6) Ni-MH or Ni-Cd cells 6.0V DC±5% (with AA-mini or DC-mini)
・Current drain (at 3.0V DC) approx. 20mA typical (power saved)
approx. 170mA typical (maximum audio) approx. 150mA typical (charging at 6.0V DC)
・Dimensions 60(W) X 95 (H) X 24(D)mm
・Weight (approx.) 150g; 5.3oz
◆◆◆◆RECEIVER
・Receiver system Triple conversion superheterodyne (FM, AM)
Double superheterodyne (WFM)
・Intermediate frequency 1st: 243.95 MHz
2nd: 21.7 MHz (FM, AM) 10.7 MHz (WFM) 3rd: 450 kHz (FM, AM)
・Sensitivity FM (1kHz/3.5kHz dev.: 12dB SINAD)
5 ~ 160MHz 0.2uV typ.
160 ~ 370MHz 0.2uV typ.
370 ~ 520MHz 0.28uV typ.
520 ~ 1300MHz 0.35uV typ.
WFM (1kHz/22.5kHz dev.: 12dB SINAD)
5 ~ 160MHz 0.9uV typ.
160 ~ 370MHz 0.8uV typ.
370 ~ 520MHz 1.0uV typ.
520 ~ 1300MHz 1.0uV typ.
AM (1kHz/30% MOD.: 10dB S/N)
0.2 ~ 5MHz 1.3uV typ.
5 ~ 160MHz 0.6uV typ.
160 ~ 370MHz 0.6uV typ
370 ~ 520MHz 0.6uV typ
520 ~ 1300MHz 0.7uV typ.
・Selectivity AM/FM More than 15kHz/-9dB
Less than 30kHz/-60dB WFM More than 110kHz/-6dB
・AF output power More than 100mW (Internal speaker)
・Earphone jack 3-connector 3.5(d)mm
SPECIFICATIONS

48
AOR, LTD.
2-6-4 Misuji, Taito-ku 111-0055 JAPAN TEL:+81-3-3865-1695 FAX:+81-3-3862-1697 URL: http://www.aorja.com
Email: [email protected]
Authority On Radio communications
C AOR, LTD. 2008 All Rights Reserved
Prinred in JAPAN 08/2008
00M63AC851110