FAT-0111 - EN (Suriname) -...
10
LINE EN · NL FAT-0111 INSTRUCTION MANUAL HANDLEIDING FAT-0111 PAINT SPRAY GUN VERFPISTOOL EN ENGLISH ORIGINAL INSTRUCTION MANUAL NL NEDERLANDS VERTAALDE VERSIE VAN DE ORIGINELE HANDLEIDING Operation manual and security instructions inside the box. Use safety glasses. Keep this tool away from children. Ford Motor Company trademarks and trade dress used under license to Nine HKG, Ltd. fordmotorcompany.com Importer: Zhong Nan Trading CO., Gompertsstraat nr.78-80, Suriname
Transcript of FAT-0111 - EN (Suriname) -...
LINE
EN · NLFAT-0111
INSTRUCTIO
N M
ANUAL
HAN
DLEIDING
FAT-0111PA
INT
SP
RAY
GU
N
VER
FPISTO
OL
EN ENGLISH
ORIGINAL INSTRUCTIO
N MANUAL
NL NEDERLANDS
VERTAALDE VERSIE VAN DE ORIGINELE HANDLEIDING
Operation m
anual and security instructions inside the box.
Use safety glasses.
Keep this tool away from
children. Ford M
otor Company tradem
arks and trade dress used under license
to Nine H
KG, Ltd.
fordmotorcom
pany.com
Importer:
Zhong Nan Trading CO
., Gom
pertsstraat nr.78-80, Suriname
FAT-0111 EN
Copyright © 2015 P a g e | 1 www.Ford-tools.com
1 APPLICATION ............................................................... 2
2 DESCRIPTION (FIG A) .................................................. 2
3 PACKAGE CONTENT LIST .............................................. 2
4 SAFETY INSTRUCTIONS ................................................ 3
5 INSTRUCTIONS FOR OPERATION ................................. 3 5.1 Preparation .............................................................................................................. 3 5.2 Adjustment ............................................................................................................... 4 5.2.1 Pattern adjustment: .................................................................................................. 5 5.2.2 Fluid (paint) adjustment: ........................................................................................... 5 5.2.3 Operation ................................................................................................................. 5
6 MAINTENANCE ............................................................. 6
7 STORING ...................................................................... 6
8 TECHNICAL DATA ......................................................... 6
9 TROUBLE SHOOTING .................................................... 7
10 ENVIRONMENT ............................................................. 8
11 DECLARATION OF CONFORMITY ................................... 9
FAT-0111 EN
Copyright © 2015 P a g e | 2 www.Ford-tools.com
AIR GRAVITY SPRAY GUN FAT-0111 1 APPLICATION An air gravity spray gun is ideal for refinishing a wide variety of home improvement projects. This high pressure paint sprayer features fluid and fan controls to offer a wide variety of patterns. It is not designed for commercial use.
WARNING!Please read and understand this operating manual before use and keep it for your future reference. Your power tool should only be passed on together with these instructions.
2 DESCRIPTION (FIG A) 1. Nozzle, needle and air cap 2. Needle adjustment knob 3. Air flow adjustment knob 4. Pattern adjustment knob 5. Air inlet plug 6. Aluminium cup 7. Trigger
3 PACKAGE CONTENT LIST � Remove all packing materials � Remove remaining packaging and transit supports (if existing) � Check the completeness of the packing content � Check the appliance, the power cord, the power plug and all accessories for
transportation damages. � Keep the packaging materials as far as possible till the end of the warranty
period. Dispose it into your local waste disposal system afterwards.
WARNING Packing materials are no toys! Children must not play with plastic bags! Danger of suffocation!
1 x Spray gun 1 x Aluminium cup 350cc 1 x Wrench 1 x Brush 1 x Hose tail 1 x Hex nut 1 x Manual
When parts are missing or damaged,please contact your dealer.
FAT-0111 EN
Copyright © 2015 P a g e | 3 www.Ford-tools.com
4 SAFETY INSTRUCTIONS
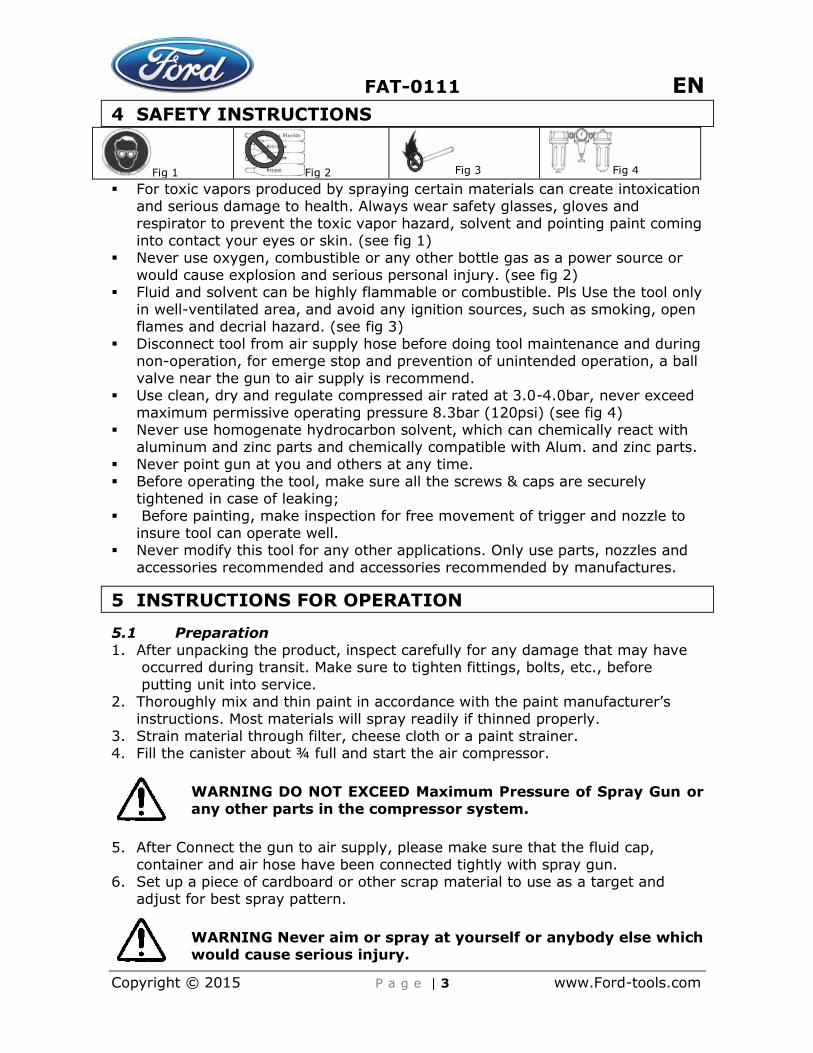
Fig 1 Fig 2 Fig 3 Fig 4
� For toxic vapors produced by spraying certain materials can create intoxication and serious damage to health. Always wear safety glasses, gloves and respirator to prevent the toxic vapor hazard, solvent and pointing paint coming into contact your eyes or skin. (see fig 1)
� Never use oxygen, combustible or any other bottle gas as a power source or would cause explosion and serious personal injury. (see fig 2)
� Fluid and solvent can be highly flammable or combustible. Pls Use the tool only in well-ventilated area, and avoid any ignition sources, such as smoking, open flames and decrial hazard. (see fig 3)
� Disconnect tool from air supply hose before doing tool maintenance and during non-operation, for emerge stop and prevention of unintended operation, a ball valve near the gun to air supply is recommend.
� Use clean, dry and regulate compressed air rated at 3.0-4.0bar, never exceed maximum permissive operating pressure 8.3bar (120psi) (see fig 4)
� Never use homogenate hydrocarbon solvent, which can chemically react with aluminum and zinc parts and chemically compatible with Alum. and zinc parts.
� Never point gun at you and others at any time. � Before operating the tool, make sure all the screws & caps are securely
tightened in case of leaking; � Before painting, make inspection for free movement of trigger and nozzle to
insure tool can operate well. � Never modify this tool for any other applications. Only use parts, nozzles and
accessories recommended and accessories recommended by manufactures.
5 INSTRUCTIONS FOR OPERATION
5.1 Preparation 1. After unpacking the product, inspect carefully for any damage that may have
occurred during transit. Make sure to tighten fittings, bolts, etc., before putting unit into service.
2. Thoroughly mix and thin paint in accordance with the paint manufacturer’s instructions. Most materials will spray readily if thinned properly.
3. Strain material through filter, cheese cloth or a paint strainer. 4. Fill the canister about ¾ full and start the air compressor.
WARNING DO NOT EXCEED Maximum Pressure of Spray Gun or any other parts in the compressor system.
5. After Connect the gun to air supply, please make sure that the fluid cap, container and air hose have been connected tightly with spray gun.
6. Set up a piece of cardboard or other scrap material to use as a target and adjust for best spray pattern.
WARNING Never aim or spray at yourself or anybody else which would cause serious injury.
FAT-0111 EN
Copyright © 2015 P a g e | 4 www.Ford-tools.com
7. Test the consistency of the material by making a few strokes on a cardboard target. If material still appears too thick, add a small amount of thinner. THIN WITH CARE! Do not exceed paint manufacturer’s thinning recommendations.
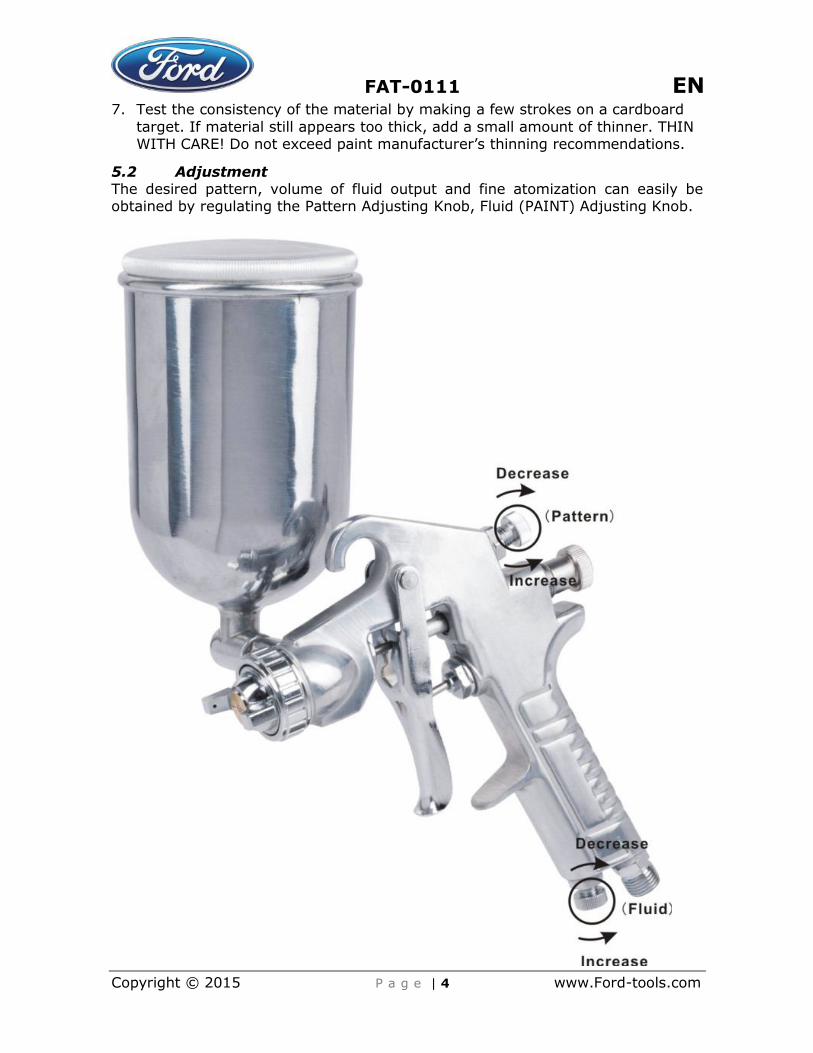
5.2 Adjustment The desired pattern, volume of fluid output and fine atomization can easily be obtained by regulating the Pattern Adjusting Knob, Fluid (PAINT) Adjusting Knob.
FAT-0111 EN
Copyright © 2015 P a g e | 5 www.Ford-tools.com
5.2.1 Pattern adjustment: Turning pattern adjusting knob to the right till the end will make spray pattern round, or turning left will make spray pattern ellipse.
5.2.2 Fluid (paint) adjustment: Turning the paint adjusting knob clockwise will decrease the volume of fluid output and counter-clockwise will increase fluid output.
5.2.3 Operation 1. Begin spraying. Always keep the gun at right angles to the work . 2. Keep the nozzle about 6 to 12 inches from the work surface. Grip the gun
keeping perpendicular with spraying area then move it parallel for several times, Stopping gun movement in mid-stroke will cause a build up of paint and result in runs. Do not fan the gun from side to side while painting. This will cause a build-up of paint in the center of the stroke and an insufficient coating at each end.
3. Trigger the gun properly. Start the gun moving at the beginning of the stroke BEFORE SQUEEZING THE TRIGGER and release the trigger BEFORE STOPPING GUN MOVEMENT at the end of the stroke. This procedure will blend each stroke with the next without showing overlap or unevenness .
4. The amount of paint being applied can be varied by the speed of the stroke, distance from the surface and adjustment of the fluid control knob.
5. Overlap strokes just enough to obtain an even coat.
NOTE: Two thin coats of paint will yield better results and have less chance of runs than one heavy layer.
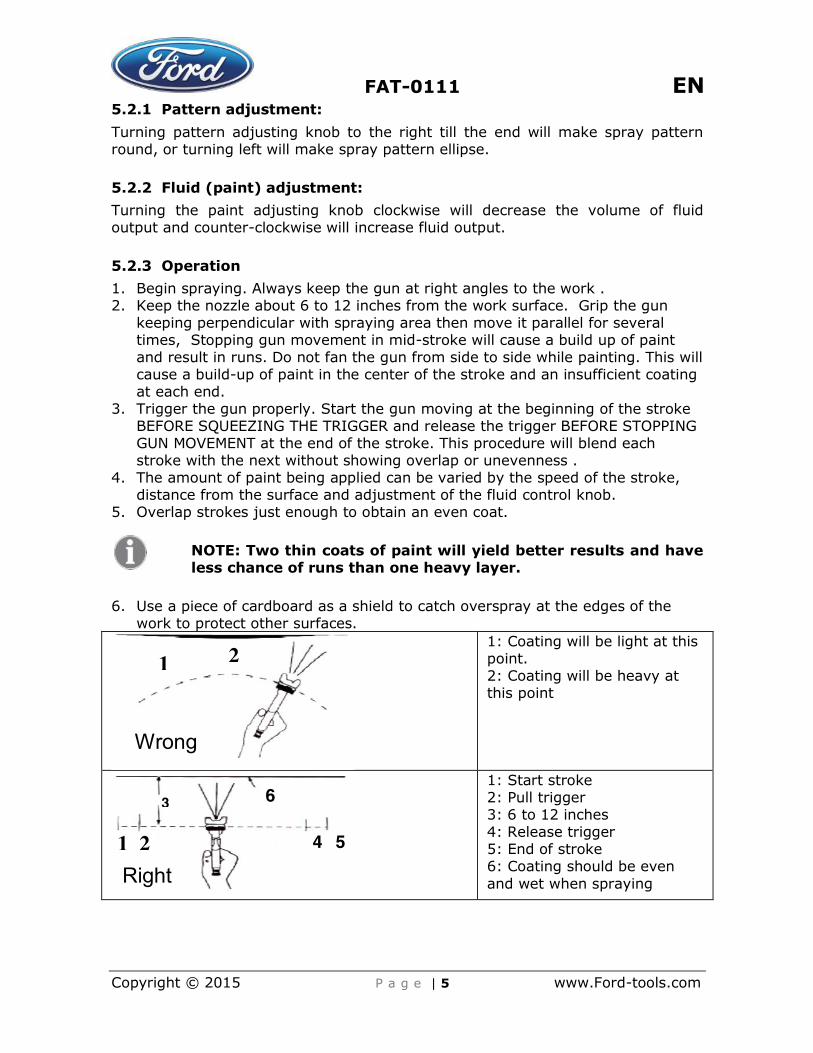
6. Use a piece of cardboard as a shield to catch overspray at the edges of the work to protect other surfaces.
1: Coating will be light at this point. 2: Coating will be heavy at this point
1: Start stroke 2: Pull trigger 3: 6 to 12 inches 4: Release trigger 5: End of stroke 6: Coating should be even and wet when spraying
2 1
Wrong
Right 1 2
3
4 5
6
FAT-0111 EN
Copyright © 2015 P a g e | 6 www.Ford-tools.com
6 MAINTENANCE
Incomplete cleaning could cause function failures and a degradation of the fan form.
� Remove any remaining paint by pouring it into another container. � Disassemble the spray gun making sure to remove the needle before
disassembling the nozzle to avoid damage to the housing of the nozzle closure. � Clean all the paint passages and the nozzle. Clean the other components using
a brush soaked in solvent. � Reassemble the spray gun and spray a small quantity of solvent to eliminate
all the residues in the paint passages.
Warning: Never use metal or other objects that could damage the holes in the nozzle and cap. never immerse the spray gun completely in solvent. never use components or parts that are not manufacturer originals.
7 STORING � When not using spray gun, turn the fluid adjustment knob counter-clockwise
to open which will reduce spring tension on needle fluid tip. � Spray gun MUST BE well cleaned and lightly lubricated.
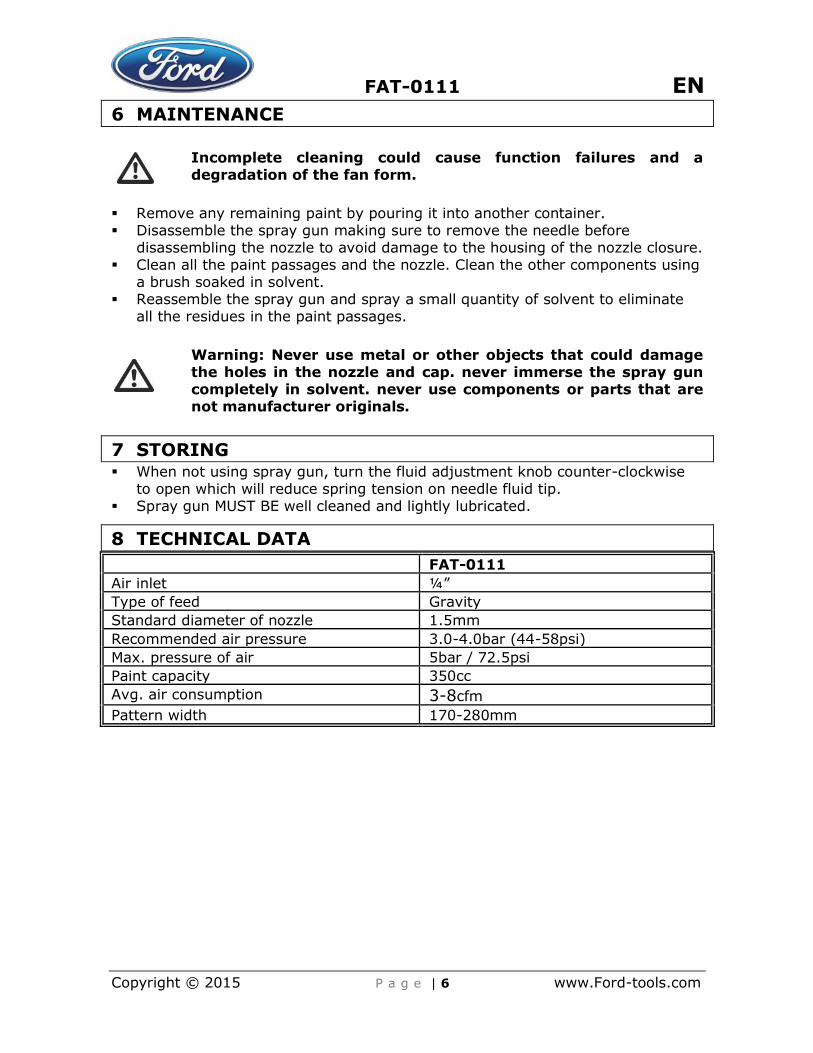
8 TECHNICAL DATA FAT-0111 Air inlet ¼” Type of feed Gravity Standard diameter of nozzle 1.5mm Recommended air pressure 3.0-4.0bar (44-58psi) Max. pressure of air 5bar / 72.5psi Paint capacity 350cc Avg. air consumption 3-8cfm Pattern width 170-280mm
FAT-0111 EN
Copyright © 2015 P a g e | 7 www.Ford-tools.com
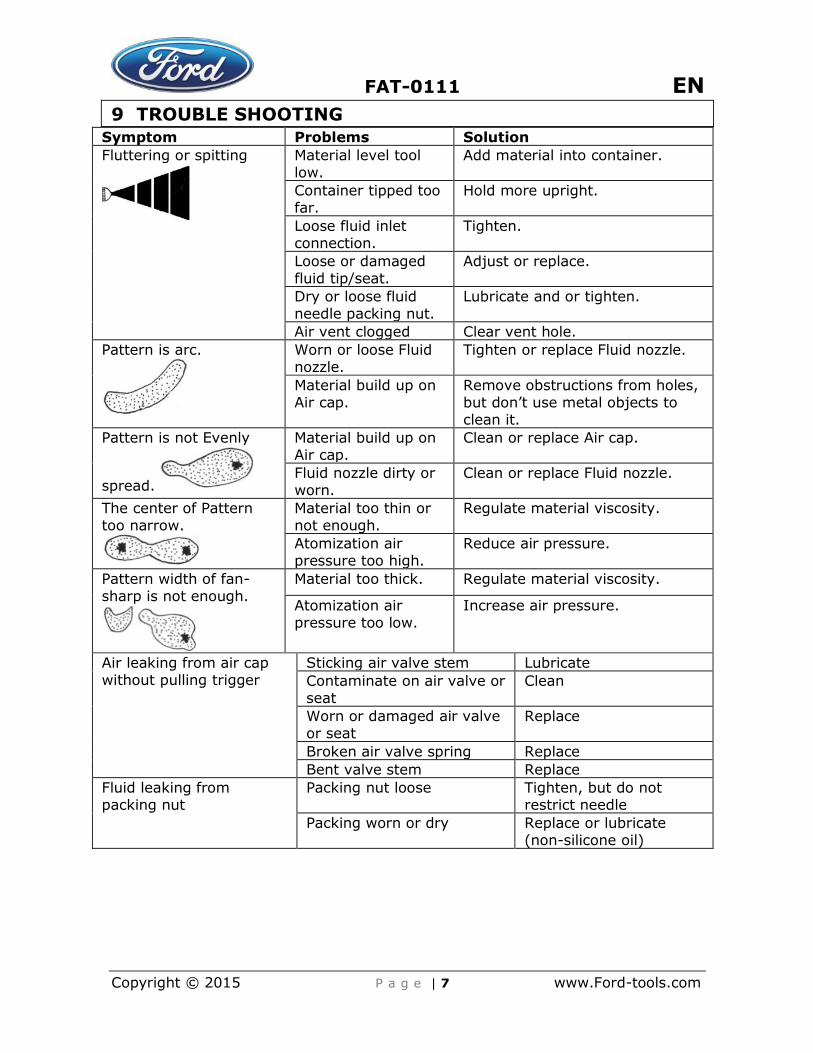
9 TROUBLE SHOOTING Symptom Problems Solution Fluttering or spitting
Material level tool low.
Add material into container.
Container tipped too far.
Hold more upright.
Loose fluid inlet connection.
Tighten.
Loose or damaged fluid tip/seat.
Adjust or replace.
Dry or loose fluid needle packing nut.
Lubricate and or tighten.
Air vent clogged Clear vent hole. Pattern is arc.
Worn or loose Fluid nozzle.
Tighten or replace Fluid nozzle.
Material build up on Air cap.
Remove obstructions from holes, but don’t use metal objects to clean it.
Pattern is not Evenly
spread.
Material build up on Air cap.
Clean or replace Air cap.
Fluid nozzle dirty or worn.
Clean or replace Fluid nozzle.
The center of Pattern too narrow.
Material too thin or not enough.
Regulate material viscosity.
Atomization air pressure too high.
Reduce air pressure.
Pattern width of fan-sharp is not enough.
Material too thick. Regulate material viscosity.
Atomization air pressure too low.
Increase air pressure.
Air leaking from air cap without pulling trigger
Sticking air valve stem Lubricate Contaminate on air valve or seat
Clean
Worn or damaged air valve or seat
Replace
Broken air valve spring Replace Bent valve stem Replace
Fluid leaking from packing nut
Packing nut loose Tighten, but do not restrict needle
Packing worn or dry Replace or lubricate (non-silicone oil)
FAT-0111 EN
Copyright © 2015 P a g e | 8 www.Ford-tools.com
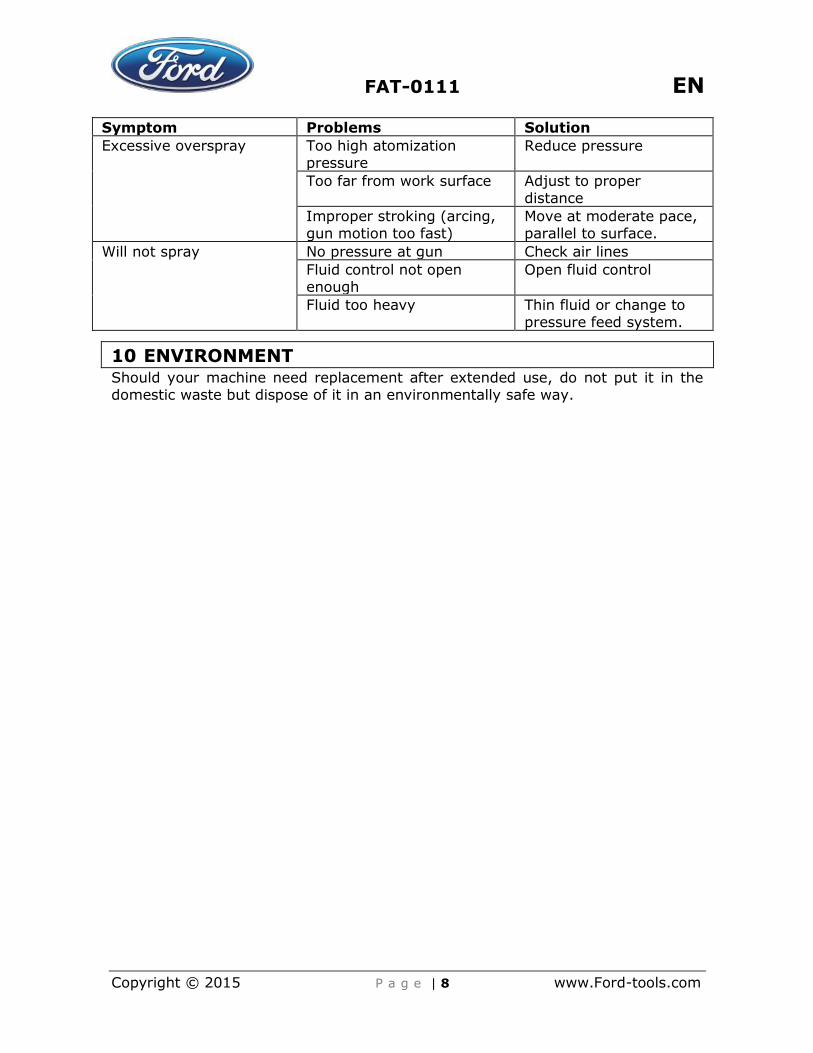
Symptom Problems Solution Excessive overspray Too high atomization
pressure Reduce pressure
Too far from work surface Adjust to proper distance
Improper stroking (arcing, gun motion too fast)
Move at moderate pace, parallel to surface.
Will not spray No pressure at gun Check air lines Fluid control not open enough
Open fluid control
Fluid too heavy Thin fluid or change to pressure feed system.
10 ENVIRONMENT Should your machine need replacement after extended use, do not put it in the domestic waste but dispose of it in an environmentally safe way.
FAT-0111 EN
Copyright © 2015 P a g e | 9 www.Ford-tools.com
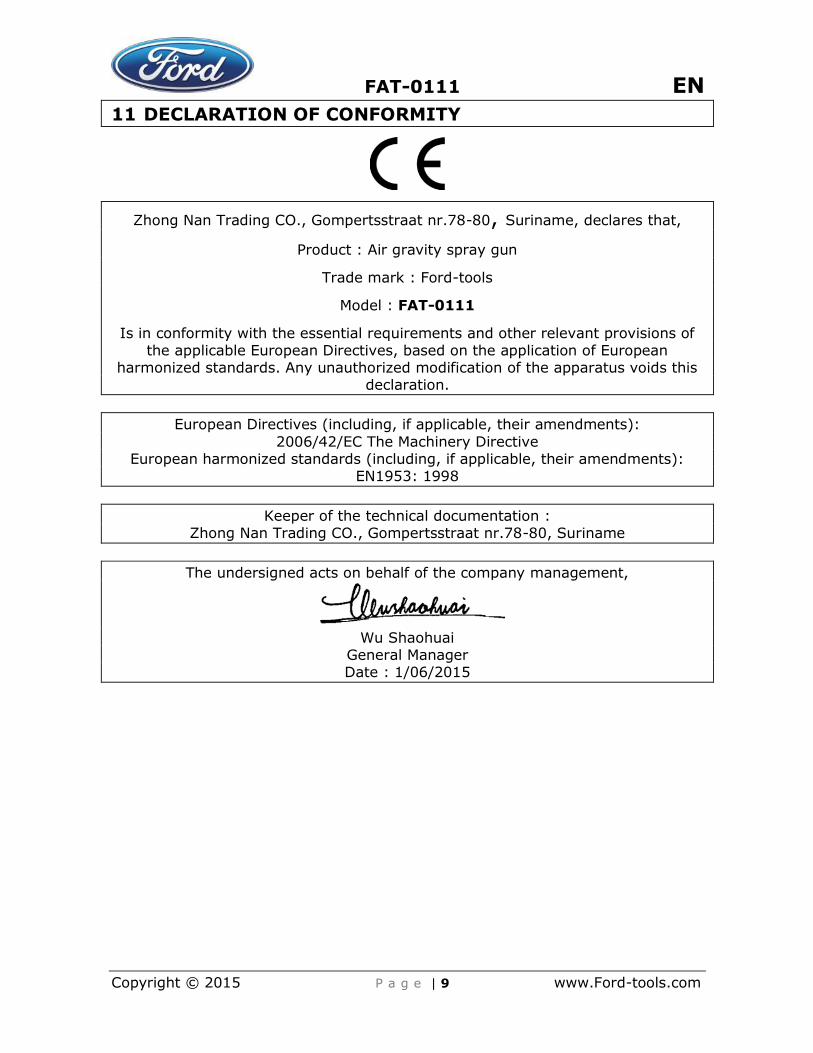
11 DECLARATION OF CONFORMITY
Zhong Nan Trading CO., Gompertsstraat nr.78-80, Suriname, declares that,
Product : Air gravity spray gun
Trade mark : Ford-tools
Model : FAT-0111
Is in conformity with the essential requirements and other relevant provisions of the applicable European Directives, based on the application of European
harmonized standards. Any unauthorized modification of the apparatus voids this declaration.
European Directives (including, if applicable, their amendments):
2006/42/EC The Machinery Directive European harmonized standards (including, if applicable, their amendments):
EN1953: 1998
Keeper of the technical documentation : Zhong Nan Trading CO., Gompertsstraat nr.78-80, Suriname
The undersigned acts on behalf of the company management,
Wu Shaohuai
General Manager Date : 1/06/2015