Facilitation Skills -...
19
Facilitation Skills Facilitator’s Guide Material copyrighted by client.
Transcript of Facilitation Skills -...
Facilitation Skills
Facilitator’s Guide Material copyrighted by client.
Page 2
Table of Contents A Few Tips ..................................................................................................................................................................... 3
Be a Dynamic Trainer ................................................................................................................................................ 3
About the Participant Workbook .............................................................................................................................. 4
Icons Used in the Course ........................................................................................................................................... 4
Facilitation Skills Workshop .......................................................................................................................................... 5
Introduction .............................................................................................................................................................. 5
Course Objectives ..................................................................................................................................................... 5
Target Audience ........................................................................................................................................................ 6
Course Structure ....................................................................................................................................................... 6
Participant Preparation ............................................................................................................................................. 7
Course Theme ........................................................................................................................................................... 7
Course Outline .......................................................................................................................................................... 7
Follow-up and On-the-job Performance Support ..................................................................................................... 8
Module 0: Instructor Preparation ................................................................................................................................. 9
Module 1: Course Overview ....................................................................................................................................... 11
Module 2: Presenting vs. Facilitating .......................................................................................................................... 15
Jeopardy Game Instructions ................................................................................................................................... 17
Module 3: Lights, Cameras… Establishing a Positive, Productive Atmosphere ............. Error! Bookmark not defined.
Module 4: Action! Engaging the Group ......................................................................... Error! Bookmark not defined.
Module 5: Managing Conflict ......................................................................................... Error! Bookmark not defined.
Module 6: It’s a Wrap! Concluding a Session ................................................................ Error! Bookmark not defined.

Page 3
A Few Tips Welcome to the Facilitation Skills Workshop Facilitation Guide! This guide will help you to prepare for and conduct the Facilitation Skills Workshop. Here are a few tips on how to use this guide:
1. You are the facilitator of a facilitation skills course, helping your participants to become effective facilitators themselves. To reduce confusion, you will see that we use the term, facilitator, to refer to the participant’s role, and instructor, to refer to your role and your materials within the course. For example, you will see Hidden Slide – Instructor Use Only and Instructor FYI only. The exceptions to this are: • We are still calling this document a Facilitator’s Guide. • You will still refer to yourself as a facilitator when talking with the participants.
2. The course includes several lists of facilitation tools and strategies. These are, by no means, comprehensive lists. They are simply starting points from which the participants can build their own repository of tools and strategies. Encourage them to explore and experiment with other options after they return to their work environments.
3. This course is designed to use many of the facilitation tools and strategies that we are presenting to the participants. You will be setting an example, so be sure to allow ample time to familiarize yourself with this guide, the PowerPoint (PPT) deck, and the Participant Workbook. Then, practice, practice, practice!
4. Use the Facilitator Guide during course conduct.
Be a Dynamic Trainer Adults learn best from dynamic trainers who engage them in the learning process. To be a dynamic trainer:
• Know your subject matter.
• Review the Facilitator Guide and the PPT deck.
• Make notes in your own words in the Facilitator Guide.
• Include examples and stories to illustrate the content.
• Get comfortable enough with the content to present it without simply reading the script.
• Review the Participant Workbook until you are very familiar with the participants’ point of reference.
• Present yourself as motivated and enthusiastic.
• Use appropriate humor and stories to reinforce learning.
• Handle challenges professionally using the strategies provided in this course.
Page 4
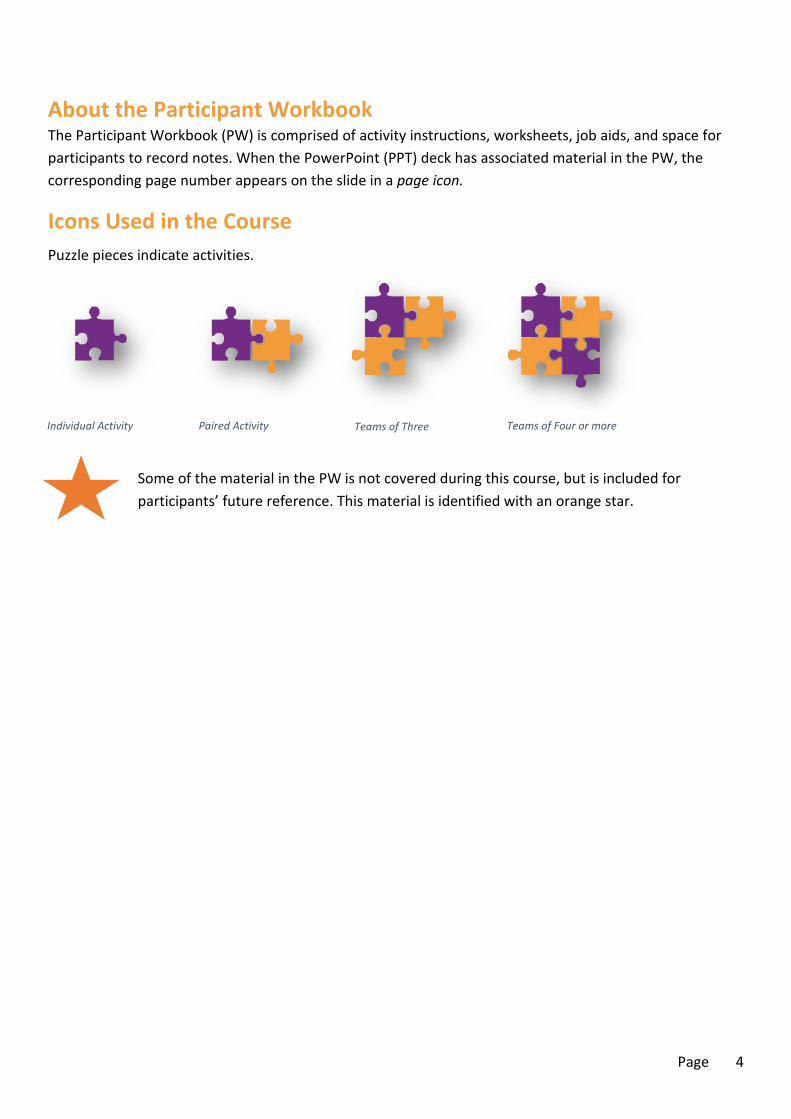
About the Participant Workbook The Participant Workbook (PW) is comprised of activity instructions, worksheets, job aids, and space for participants to record notes. When the PowerPoint (PPT) deck has associated material in the PW, the corresponding page number appears on the slide in a page icon.
Icons Used in the Course Puzzle pieces indicate activities.
Some of the material in the PW is not covered during this course, but is included for participants’ future reference. This material is identified with an orange star.
Paired Activity Teams of Three Teams of Four or more Individual Activity
Page 5
Facilitation Skills Workshop Introduction Merriam-Webster defines the word facilitate as:
“To make (something) easier; to help cause (something); to help (something) run more smoothly and effectively.”
[The organization] has identified a need to enhance facilitation skills among their workforce members throughout the organization. These individuals facilitate various types of sessions, including training, requirements gathering, onboarding, focus groups, and succession planning meetings. Regardless of the type of session, facilitators need certain skills to achieve the desired results of the session. Facilitators at [the organization] often face challenges related to:
• Drawing input from participants • Engaging disengaged participants • Facilitating interactivity • Managing participants who dominate discussion • Creating a positive atmosphere
This interactive workshop was developed to address these challenges. Participants will bring in actual facilitation situations from their offices. Using these situations, they will practice applying specific tools to help them develop their facilitation skills.
Course Objectives By the end of this course, participants will be able to conduct meetings and training sessions that maximize participation and achieve desired outcomes. More specifically, participant will be able to:
• Differentiate between presenting and facilitating • Establish a positive, productive atmosphere at the beginning of a session • Apply various strategies for obtaining immediate participation • Facilitate a group through a task • Use various methods to prevent and resolve conflicts
Note that the course does not focus on meeting management or training design, but rather on fostering participant interactivity and a positive atmosphere during the conduct of meetings as well as training sessions.
Page 6
Target Audience The target audience is everyone at [the organization] for whom the course will be optional. Few of the participants are expected to have solid existing facilitation skills; therefore, this is an introductory course.
The course is first being offered to …. Approximately XX employees may eventually attend this course.
Target class size is 30 participants.
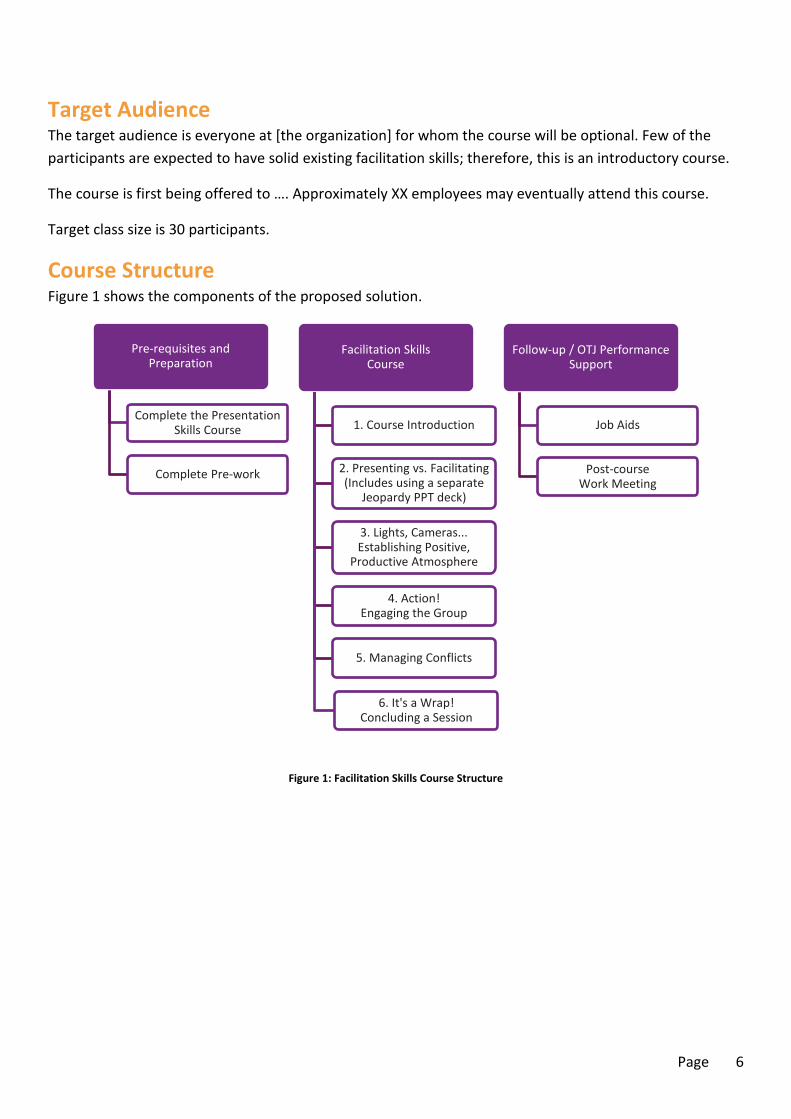
Course Structure Figure 1 shows the components of the proposed solution.
Figure 1: Facilitation Skills Course Structure
Pre-requisites and Preparation
Complete the Presentation Skills Course
Complete Pre-work
Facilitation Skills Course
1. Course Introduction
2. Presenting vs. Facilitating(Includes using a separate
Jeopardy PPT deck)
3. Lights, Cameras...Establishing Positive,
Productive Atmosphere
4. Action! Engaging the Group
5. Managing Conflicts
6. It's a Wrap! Concluding a Session
Follow-up / OTJ Performance Support
Job Aids
Post-course Work Meeting
Page 7
Participant Preparation Prior to attending this class, participants are expected to have completed the Presentation Skills Course. Participants are also expected to have completed the pre-work, which requires them to document 1-2 previous or upcoming, on-the-job challenges related to facilitation. This could be related to meeting facilitation, requirements gathering, training, focus groups, or some other facilitation challenge. Participants are expected to bring the pre-work with them to class, as it will become the basis for some of the in-class exercises.
Course Theme The course is an interactive, skills-based program, during which participants will practice applying core content to their real-world work scenarios.
In honor of the organization’s entertainment focus, the course theme centers around a movie production. The framework serves to tie together the various strategies into a mental model to help participants recall and apply the strategies back on the job. The course differentiates between presenting, which could be compared to an actor performing for an audience, and facilitating, which could be compared to a director working with an ensemble cast to create something for an audience.
This workshop includes numerous lists of activities and strategies for dealing with various aspects of facilitation. These lists are not exhaustive by any means, but are only intended to be an introduction. Encourage participants to research other options and add to these lists after the course.
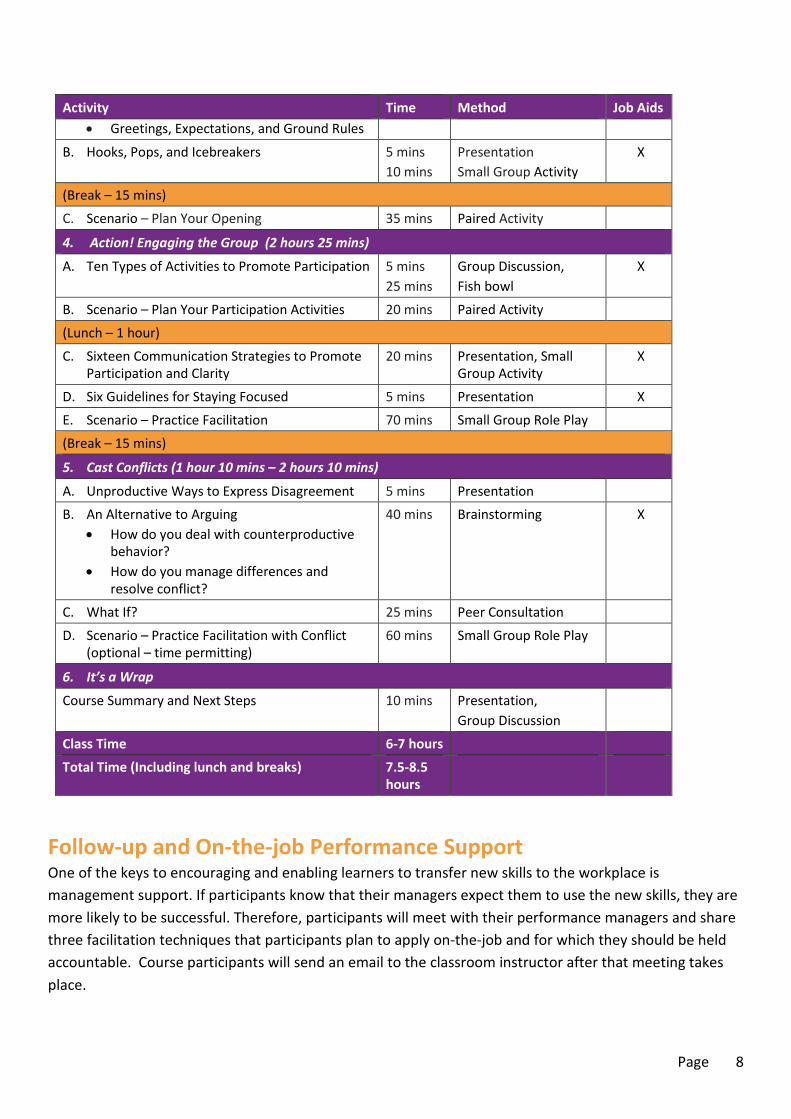
Course Outline The structure of the course is as follows:
Activity Time Method Job Aids
1. Course Overview (10 mins)
Introductions, Objectives, Agenda, Expectations, and Ground Rules
10 mins Presentation, Group Discussion, Poll
2. Presenting vs. Facilitating (1 hour 15 minutes)
A. Presenting Isn’t Facilitating • Review Presentation Course basics • Torn paper exercise • Compare presenting vs. facilitating
30 mins 10 mins
Jeopardy Activity Present
B. What Makes Good Facilitation? 10 mins Whip, Calling on Next Speaker
C. Obstacles to Good Facilitation 20 mins Anonymous Cards, Shared Stories
D. Classroom Debrief 5 mins Discussion
3. Lights, Cameras,… Establishing a Positive, Productive Atmosphere (55 minutes)
A. Be Prepared • What, Why, Who • Where • Objectives, Agenda
5 mins Group Discussion, Presentation
X
Page 8
Activity Time Method Job Aids • Greetings, Expectations, and Ground Rules
B. Hooks, Pops, and Icebreakers 5 mins 10 mins
Presentation Small Group Activity
X
(Break – 15 mins)
C. Scenario – Plan Your Opening 35 mins Paired Activity
4. Action! Engaging the Group (2 hours 25 mins)
A. Ten Types of Activities to Promote Participation 5 mins 25 mins
Group Discussion, Fish bowl
X
B. Scenario – Plan Your Participation Activities 20 mins Paired Activity
(Lunch – 1 hour)
C. Sixteen Communication Strategies to Promote Participation and Clarity
20 mins Presentation, Small Group Activity
X
D. Six Guidelines for Staying Focused 5 mins Presentation X
E. Scenario – Practice Facilitation 70 mins Small Group Role Play
(Break – 15 mins)
5. Cast Conflicts (1 hour 10 mins – 2 hours 10 mins)
A. Unproductive Ways to Express Disagreement 5 mins Presentation B. An Alternative to Arguing
• How do you deal with counterproductive behavior?
• How do you manage differences and resolve conflict?
40 mins Brainstorming X
C. What If? 25 mins Peer Consultation
D. Scenario – Practice Facilitation with Conflict (optional – time permitting)
60 mins Small Group Role Play
6. It’s a Wrap
Course Summary and Next Steps 10 mins Presentation, Group Discussion
Class Time 6-7 hours
Total Time (Including lunch and breaks) 7.5-8.5 hours
Follow-up and On-the-job Performance Support
One of the keys to encouraging and enabling learners to transfer new skills to the workplace is management support. If participants know that their managers expect them to use the new skills, they are more likely to be successful. Therefore, participants will meet with their performance managers and share three facilitation techniques that participants plan to apply on-the-job and for which they should be held accountable. Course participants will send an email to the classroom instructor after that meeting takes place.
Page 9
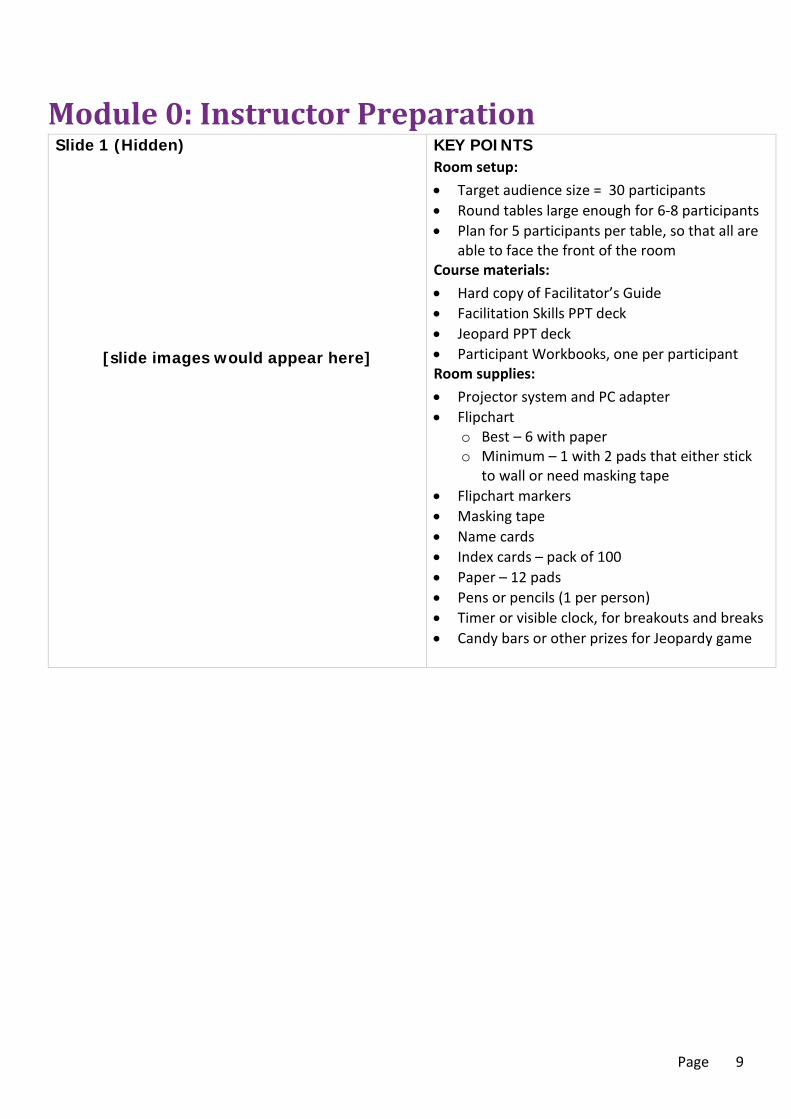
Module 0: Instructor Preparation Slide 1 (Hidden)
[slide images would appear here]
KEY POINTS Room setup: • Target audience size = 30 participants • Round tables large enough for 6-8 participants • Plan for 5 participants per table, so that all are
able to face the front of the room Course materials: • Hard copy of Facilitator’s Guide • Facilitation Skills PPT deck • Jeopard PPT deck • Participant Workbooks, one per participant Room supplies: • Projector system and PC adapter • Flipchart
o Best – 6 with paper o Minimum – 1 with 2 pads that either stick
to wall or need masking tape • Flipchart markers • Masking tape • Name cards • Index cards – pack of 100 • Paper – 12 pads • Pens or pencils (1 per person) • Timer or visible clock, for breakouts and breaks • Candy bars or other prizes for Jeopardy game
Page 10
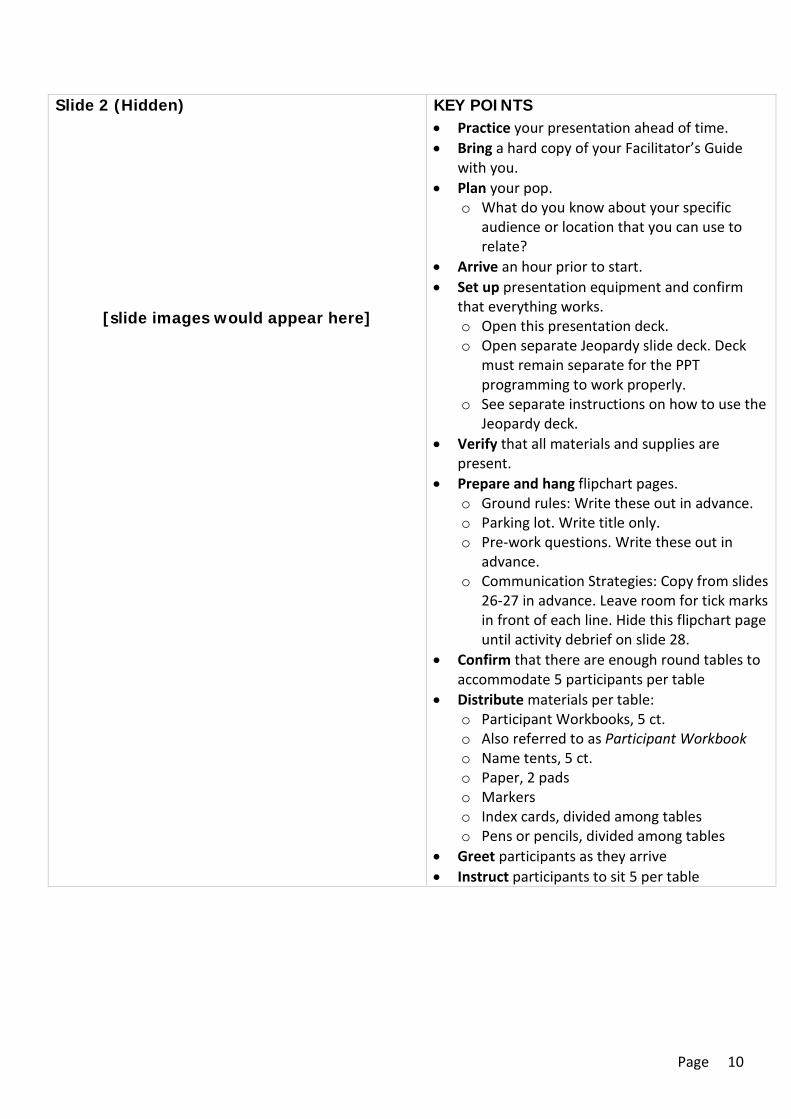
Slide 2 (Hidden)
[slide images would appear here]
KEY POINTS • Practice your presentation ahead of time. • Bring a hard copy of your Facilitator’s Guide
with you. • Plan your pop.
o What do you know about your specific audience or location that you can use to relate?
• Arrive an hour prior to start. • Set up presentation equipment and confirm
that everything works. o Open this presentation deck. o Open separate Jeopardy slide deck. Deck
must remain separate for the PPT programming to work properly.
o See separate instructions on how to use the Jeopardy deck.
• Verify that all materials and supplies are present.
• Prepare and hang flipchart pages. o Ground rules: Write these out in advance. o Parking lot. Write title only. o Pre-work questions. Write these out in
advance. o Communication Strategies: Copy from slides
26-27 in advance. Leave room for tick marks in front of each line. Hide this flipchart page until activity debrief on slide 28.
• Confirm that there are enough round tables to accommodate 5 participants per table
• Distribute materials per table: o Participant Workbooks, 5 ct. o Also referred to as Participant Workbook o Name tents, 5 ct. o Paper, 2 pads o Markers o Index cards, divided among tables o Pens or pencils, divided among tables
• Greet participants as they arrive • Instruct participants to sit 5 per table
Page 11
Module 1: Course Overview Slide 3
[slide images would appear here]
KEY POINTS • Class time: 6-7 hours • Total time, including lunch and breaks: 7.5-8.5
hours
Course Overview (10 mins.) • Welcome participants to the Facilitation Skills
course.
Slide 4
[slide images would appear here]
KEY POINTS • Introduce yourself. Be very brief. • Use the pop you came up with during your
instructor preparation activities. • Briefly relate YOUR worst experience as a
facilitator. This is your hook. • Explain that your goal in this course is to help
you avoid ever having a similar experience. • Ask participants to state their name and one
expectation they have for this course. • Capture those expectations on a flipchart page.
Omit duplicates.
Page 12
Slide 5
[slide images would appear here]
KEY POINTS • Present:
o Good facilitation skills are a hot commodity. o I guarantee that at some point in your
career, you are going to be asked to facilitate something, even if it’s just to reach a decision in an informal group setting.
o During this course, we are going to give you some facilitation tools and opportunities to practice using them.
o These are going to help you to become better facilitators, regardless of circumstances.
o You will learn how to: Differentiate between presenting and
facilitating. Establish a positive, productive
atmosphere at the beginning of a session.
Apply various strategies to obtain immediate participation.
Facilitate a group through a task. Use various methods to prevent and
resolve conflicts. • Take a poll. Ask: Who is interested in being
able to do each of the actions I just mentioned?
Transition: Let’s talk about how we’re going to do this.
Page 13
Slide 6
[slide images would appear here]
KEY POINTS • Outline the course structure
o Module 1: Course Overview o Module 2: Presenting vs. Facilitating o Module 3: Lights, Cameras… Establishing a
Positive, Productive Atmosphere o Module 4: Action! Engaging the Group o Module 5: Managing Conflicts o Module 6: It’s a Wrap! Concluding a Session
• Explain that you will be not only explaining good facilitation tools and practices, but using them throughout the course.
• (Click) Explain icons in upper right corner. These particular occurrences are just for example. o Any time you see a document icon, you
have corresponding material in your Participant Workbook. The page number or numbers are shown within the icon.
o Puzzle icons represent activities. o A single piece represents an activity you do
alone. o Two pieces mean you complete the activity
in pairs. o Three pieces mean you complete the
activity in small groups of three. o Four pieces represent groups of four or
more. Sometimes, you will be asked to work with everyone at your table as a table group.
o We will also have classroom activities.
Page 14
Slide 7
[slide images would appear here]
KEY POINTS (Try to keep these a bit lighthearted while conveying importance.) • Present:
o Ground rules are guidelines for desired behavior that will enhance the process of a meeting or training session.
o They are standards that help clarify expectations regarding participation and can be used to control counterproductive behavior.
o Our starting list of ground rules: Be punctual – we will start on time Avoid using mobiles – common
courtesy and allows us all to focus on learning
One speaker at a time – everyone is important; please listen without interrupting.
Volunteer and participate – show your interest. And like many things in life, the more you put into this course, the more you’ll get out of it.
Ask questions – if you have a question, chances are others do, too.
• Move to prepared flipchart. • Ask the group to suggest other ground rules,
and then add them to the flipchart page. Transition: Participation expectations.
Slide 8
[slide images would appear here]
KEY POINTS Present: • My participation expectations are pretty
straightforward. • Follow the ground rules, but also • (click) Ask questions to help you learn and grow • (click) Offer your valuable input so that others
can learn from you • (click) I also just want you to participate to have
FUN!
Transition: You’ve had the Presentation Skills course. You will use a lot of those skills when facilitating.
Page 15
Module 2: Presenting vs. Facilitating Slide 9
[slide images would appear here]
KEY POINTS Presenting vs. Facilitating (1 hour) Objective: Differentiate between presenting and facilitating. Transition: So, let’s see how much you remember from the Presentation Skills course.
Page 16
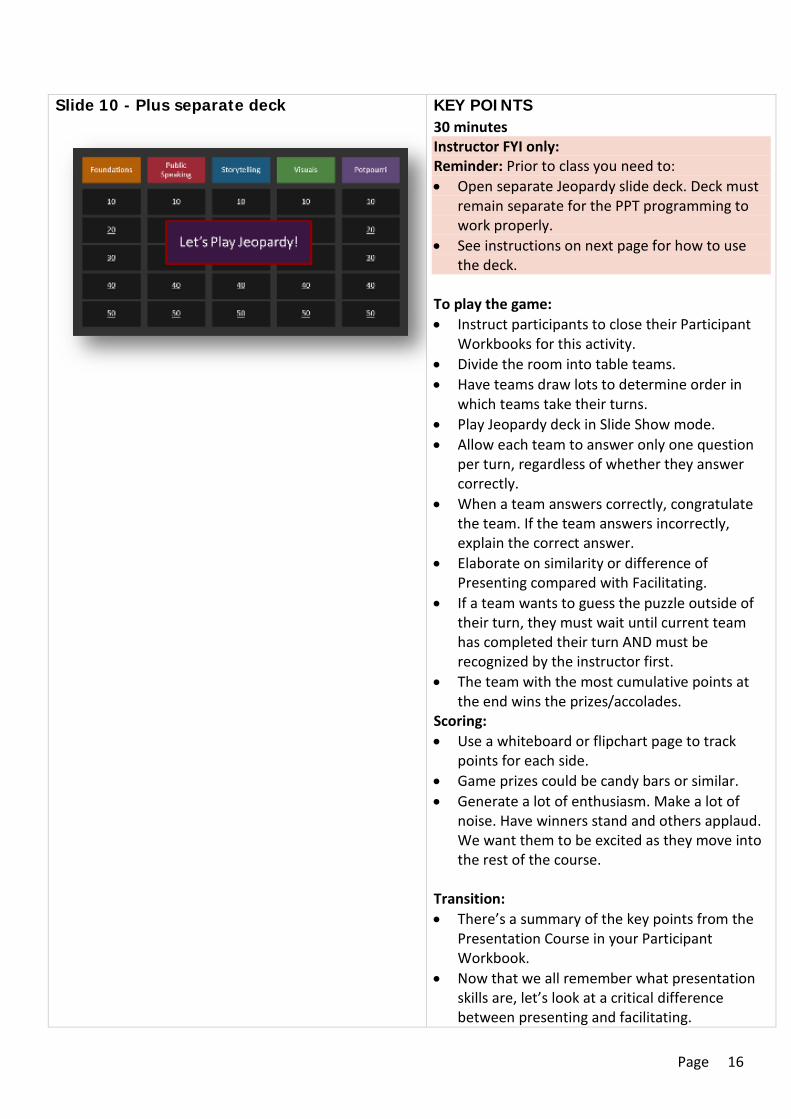
Slide 10 - Plus separate deck
KEY POINTS 30 minutes Instructor FYI only: Reminder: Prior to class you need to: • Open separate Jeopardy slide deck. Deck must
remain separate for the PPT programming to work properly.
• See instructions on next page for how to use the deck.
To play the game: • Instruct participants to close their Participant
Workbooks for this activity. • Divide the room into table teams. • Have teams draw lots to determine order in
which teams take their turns. • Play Jeopardy deck in Slide Show mode. • Allow each team to answer only one question
per turn, regardless of whether they answer correctly.
• When a team answers correctly, congratulate the team. If the team answers incorrectly, explain the correct answer.
• Elaborate on similarity or difference of Presenting compared with Facilitating.
• If a team wants to guess the puzzle outside of their turn, they must wait until current team has completed their turn AND must be recognized by the instructor first.
• The team with the most cumulative points at the end wins the prizes/accolades.
Scoring: • Use a whiteboard or flipchart page to track
points for each side. • Game prizes could be candy bars or similar. • Generate a lot of enthusiasm. Make a lot of
noise. Have winners stand and others applaud. We want them to be excited as they move into the rest of the course.
Transition: • There’s a summary of the key points from the
Presentation Course in your Participant Workbook.
• Now that we all remember what presentation skills are, let’s look at a critical difference between presenting and facilitating.
Page 17
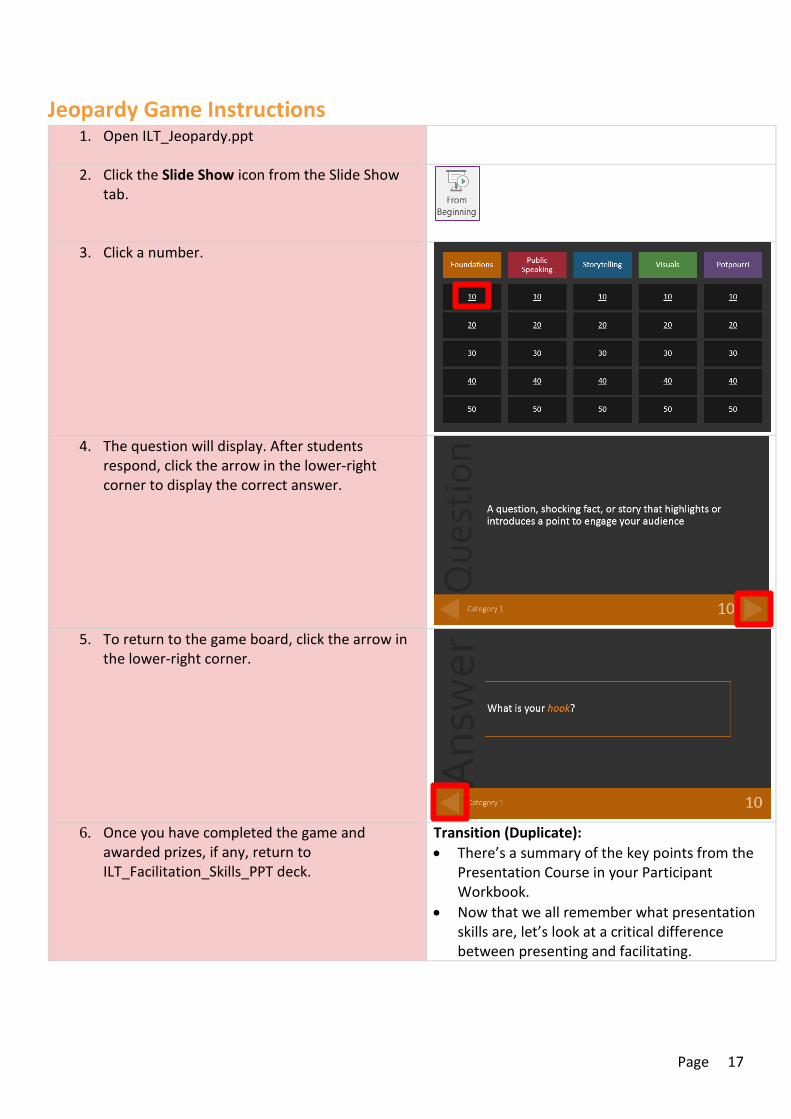
Jeopardy Game Instructions 1. Open ILT_Jeopardy.ppt
2. Click the Slide Show icon from the Slide Show tab.
3. Click a number.
4. The question will display. After students
respond, click the arrow in the lower-right corner to display the correct answer.
5. To return to the game board, click the arrow in
the lower-right corner.
6. Once you have completed the game and
awarded prizes, if any, return to ILT_Facilitation_Skills_PPT deck.
Transition (Duplicate): • There’s a summary of the key points from the
Presentation Course in your Participant Workbook.
• Now that we all remember what presentation skills are, let’s look at a critical difference between presenting and facilitating.

Page 18
Slide 11
[slide images would appear here]
KEY POINTS Classroom Activity (10 mins) • Present: Here’s an activity that illustrates some
important differences between presenting and facilitating. Hold a sheet of paper up in front of you. Now, close your eyes and follow my directions. NO PEEKING!”
• Give the following directions while you do the same with your sheet of paper: o “Fold your sheet of paper in half.” Give
them time to do this. o “Tear off the upper right-hand corner.” o “Fold it in half again and tear off the upper
left-hand corner of the sheet.” o “Fold it in half again. Now tear off the lower
right-hand corner of the sheet.” o “Now, open your eyes. Let’s see what you
have. If I did a good job of communicating, and you did a good job of listening, all of our sheets should look the same!”
• Hold your sheet up for them to see. It is highly unlikely that any of theirs will match yours.
• Comment on the differences. The class will probably be laughing.
• Ask the group members why their papers did not match yours exactly. You will probably get responses like, “You didn’t let us ask questions!” or “Your directions could be interpreted in different ways.“
• Point out to the group what a “poor job” you did as a facilitator during this exercise. Not only did you not allow for questions but you failed to recognize an important fact about facilitating groups. What a facilitator says or does is not the measure of success. How well the participants achieve the desired goal is.
Transition: Summarize primary differences between presenting and facilitating.
Page 19
Slide 12
[slide images would appear here]
KEY POINTS • Ask: So, what are the primary differences
between presenting and facilitating? • Accept a few answers. Good facilitating
requires good presentation skills, but also requires more.
• Present: o (click) When you are presenting, you are
essentially, the Sage on the Stage. o You are the key to your presentation’s
success. • Present:
o (click) However, when you are facilitating, you are more the Guide on the Side.
o Biggest difference between presenting and facilitating is that your success as a facilitator is a direct reflection of the group’s success. Torn paper exercise demonstrated this.
Transition: So, what makes a good facilitator?
[FG would continue on as above.]