Exploring Body Works - Leaders first pages
56
Welcome 4-H Leaders! Welcome to the “Body Works” project. There is lots of information, fun facts, and hands on activities that covers the basics of why we look and feel the way we do. This guide provides you with project meeting plans (Skill Builders) that include, a skills list, background information, activity suggestions, and ways to know if your members have learned the skills identified. In short, all the information and tools necessary to make this project a rewarding one for you and your members. In this project, members will examine, by learning to do by doing, the components of a healthy and balanced life style. The Leader Guide is written with the expectation that the project leader(s) will have a working knowledge about the project topics and how they work. If not, you may need to do some pre-work / research on the activities, or recruit assistance for certain sections. Be sure to try out activities, demonstrations or hands on work ahead of time to ensure you have an understanding of each Skill Builder - this also allows for any adjustments should an activity not work for you or if any equipment or supplies are unavailable. The 3D’s of Learning - Each Skill Builder has three sections of learning called “Dream it!”, “Do it!” and “Dig it!”. Below is a description of each. Dream it! Plan for Success - this gives members a chance to help plan their activities. A skills checklist, background information, important words, and activating questions are included in the Member Manual so they will be able to think about the topic and activity and decide how they will approach it. The Leader Guide contains in depth background information on the topics, material lists, suggestions, time requirements for activities, and activating, acquiring, and applying questions to engage member’s thinking through each step of the learning process. Do it! Hands on learning - this is where members are engaged in the activity planned / discussed in the Dream it! Section. Here members are doing the activities and leaders are observing, recording, and providing feedback on how well they are doing. Allow as much individual practice as required; you are assessing the progress and understanding of individual members. Dig it! What did you learn? - this simply means that members and leaders need to ‘dig into their learning’. For the learning cycle to be completed, both need to reflect on how things went and how well they did. For members, this involves self-assessment, giving feedback, creating meaning from their experiences, and thinking about what they would do differently next time. Once this is done they will be in a good position to apply what they have learned to the next experience. The sequence of project meetings and specific skill building outcomes for members in this project are on the chart on the following page. 4-H Body Works Series Exploring Body Works Table of Contents Introduction 1 Project Summary 2 Skill Builder 1: Feed Your Body 5 Skill Builder 2: Feed Your Body 14 Skill Builder 3: Move Your Body 21 Skill Builder 4: Love Your Body 29 Skill Builder 5: Beyond Your Body 38 Skill Builder 6: Maintain Your Body 43 - Draft 2009 - Showcase Challenge 52 Portfolio Page 53 Do It Dig It Dream It
Transcript of Exploring Body Works - Leaders first pages

Welcome 4-H Leaders!
Welcome to the “Body Works” project. There is lots of information, fun facts, and hands on activities that covers the basics of why we look and feel the way we do. This guide provides you with project meeting plans (Skill Builders) that include, a skills list, background information, activity suggestions, and ways to know if your members have learned the skills identified. In short, all the information and tools necessary to make this project a rewarding one for you and your members. In this project, members will examine, by learning to do by doing, the components of a healthy and balanced life style. The Leader Guide is written with the expectation that the project leader(s) will have a working knowledge about the project topics and how they work. If not, you may need to do some pre-work / research on the activities, or recruit assistance for certain sections. Be sure to try out activities, demonstrations or hands on work ahead of time to ensure you have an understanding of each Skill Builder - this also allows for any adjustments should an activity not work for you or if any equipment or supplies are unavailable. The 3D’s of Learning - Each Skill Builder has three sections of learning called “Dream it!”, “Do it!” and “Dig it!”. Below is a description of each. Dream it! Plan for Success - this gives members a chance to help plan their activities. A skills checklist, background information, important words, and activating questions are included in the Member Manual so they will be able to think about the topic and activity and decide how they will approach it. The Leader Guide contains in depth background information on the topics, material lists, suggestions, time requirements for activities, and activating, acquiring, and applying questions to engage member’s thinking through each step of the learning process. Do it! Hands on learning - this is where members are engaged in the activity planned / discussed in the Dream it! Section. Here members are doing the activities and leaders are observing, recording, and providing feedback on how well they are doing. Allow as much individual practice as required; you are assessing the progress and understanding of individual members. Dig it! What did you learn? - this simply means that members and leaders need to ‘dig into their learning’. For the learning cycle to be completed, both need to reflect on how things went and how well they did. For members, this involves self-assessment, giving feedback, creating meaning from their experiences, and thinking about what they would do differently next time. Once this is done they will be in a good position to apply what they have learned to the next experience.
The sequence of project meetings and specific skill building outcomes
for members in this project are on the chart on the following page.
4-H Body Works Series
Exploring Body Works
Table of Contents
Introduction 1
Project Summary
2
Skill Builder 1: Feed Your Body
5
Skill Builder 2: Feed Your Body
14
Skill Builder 3: Move Your Body
21
Skill Builder 4: Love Your Body
29
Skill Builder 5: Beyond Your Body
38
Skill Builder 6: Maintain Your Body
43
- Draft 2009 -
Showcase Challenge
52
Portfolio Page 53
Do It
Dig It
Dream It
2
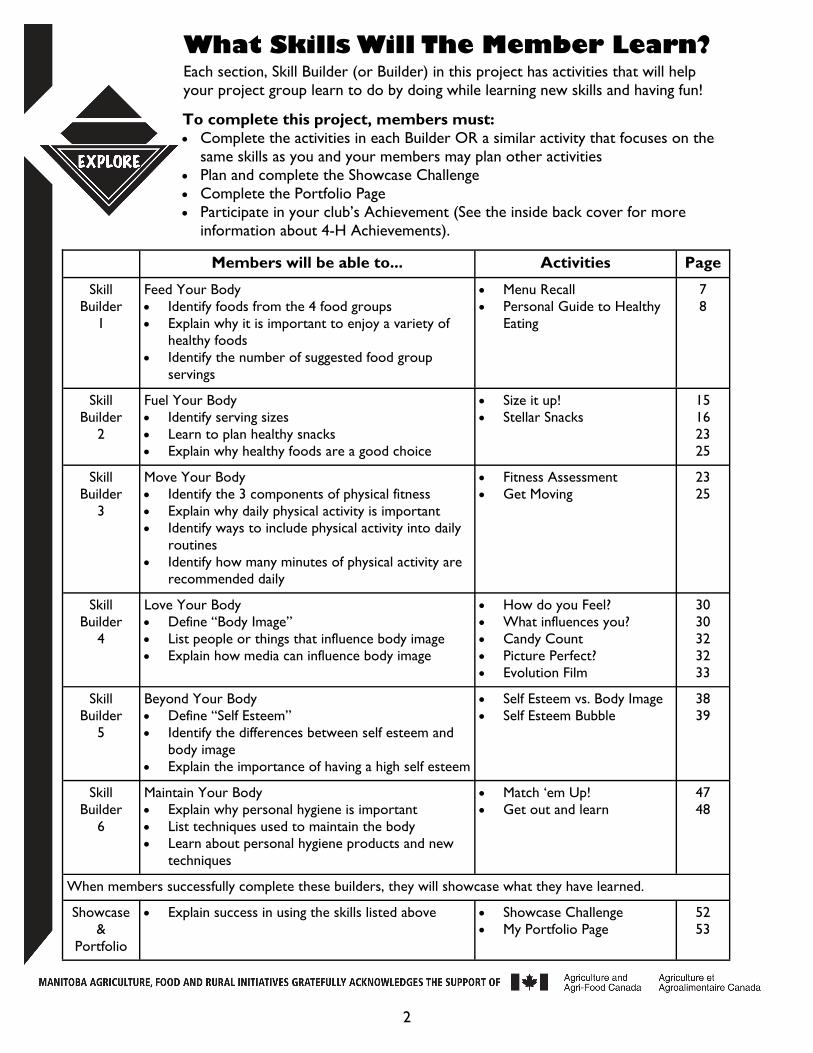
Each section, Skill Builder (or Builder) in this project has activities that will help your project group learn to do by doing while learning new skills and having fun!
What Skills Will The Member Learn?
To complete this project, members must: Complete the activities in each Builder OR a similar activity that focuses on the
same skills as you and your members may plan other activities Plan and complete the Showcase Challenge Complete the Portfolio Page Participate in your club’s Achievement (See the inside back cover for more
information about 4-H Achievements).
Members will be able to... Activities Page
Skill Builder
1
Feed Your Body Identify foods from the 4 food groups Explain why it is important to enjoy a variety of
healthy foods Identify the number of suggested food group
servings
Menu Recall Personal Guide to Healthy
Eating
7 8
Skill Builder
2
Fuel Your Body Identify serving sizes Learn to plan healthy snacks Explain why healthy foods are a good choice
Size it up! Stellar Snacks
15 16 23 25
Skill Builder
3
Move Your Body Identify the 3 components of physical fitness Explain why daily physical activity is important Identify ways to include physical activity into daily
routines Identify how many minutes of physical activity are
recommended daily
Fitness Assessment Get Moving
23 25
Skill Builder
4
Love Your Body Define “Body Image” List people or things that influence body image Explain how media can influence body image
How do you Feel? What influences you? Candy Count Picture Perfect? Evolution Film
30 30 32 32 33
Skill Builder
5
Beyond Your Body Define “Self Esteem” Identify the differences between self esteem and
body image Explain the importance of having a high self esteem
Self Esteem vs. Body Image Self Esteem Bubble
38 39
Skill Builder
6
Maintain Your Body Explain why personal hygiene is important List techniques used to maintain the body Learn about personal hygiene products and new
techniques
Match ‘em Up! Get out and learn
47 48
Showcase &
Portfolio
Explain success in using the skills listed above Showcase Challenge My Portfolio Page
52 53
When members successfully complete these builders, they will showcase what they have learned.

4-H Project Series Skill Development Levels Each project topic series contains three levels of skill development: explore, discover, and master. Explore - each project series has is one project outlining the fundamentals. All members will be expected to complete the Explore level project before moving into the Discover level of projects. It introduces the basic skills and terms needed by members for subsequent projects in that series. Discover - each project series has several project options and members are encouraged to take as many as they would like. At this level, members practice topic specific techniques and gain theme related skills through specialized builders. Master - multiple project options encourage members to specialize in a topic. They may branch out and take advantage of community options such as cooking for a canteen or participating in a food drive. The Leader’s role is look for opportunities for their members to have more authentic experiences by: working with other mentors, partnering with outside agencies, participating in exchanges, entering competitions, etc. Projects at this level may include the “Partner-a-Project” whereby pre-approved courses will allow members to advance their skills, while applying their learning to the 4-H program.
Showcase Challenge and My Portfolio Page At the end of the members’ section are the “Showcase Challenge” and “My Portfolio Page”. The Showcase Challenge page gets members to think about their accomplishments and explain or demonstrate how they were successful. There are a number of suggestions along with planning information to help them decide how they will best “showcase” their learning to friends, family, community members and/or fellow 4-H members. Record keeping is an important part of every 4-H project. “My Portfolio Page” is a
3
graphic organizer used to keep track of members’ 4-H experiences. As each member learns skills, the evidence of learning (through participation and completion of the various activities) is recorded on the page. When the Portfolio Page has been completed and confirmed by the leader, then it becomes a record of the member’s completion of the project and participation in other 4-H activities beyond the project. 4-H leader assessment of members will happen throughout the project as you assess the progress and understanding of individual members. You need to observe the members doing the skill and record what you see and hear. Your feedback should be positive and descriptive (not just “well done”). Share that feedback with members frequently so they can put your suggestions into action. How you choose to observe and record is up to you. Some methods are to create checklists, videos and notes while encouraging discussions, peer observations and questions. Recognize that members may improve over the course of a builder and that records should be updated to reflect when they demonstrated their best learning. You are discussing how well members are meeting the skills checklists that are at the beginning of each of the project books, in each Builder and on the Portfolio Page. Projects promote technical, communication, meeting management, and leadership skills, as well as community involvement and real-world experiences. In addition to the specific skills members are to learn in each builder, the following general learning goals for members are important: Following instructions - Working with others - Using supplies safely - Using the key words - Improving with practice - Respecting timelines.
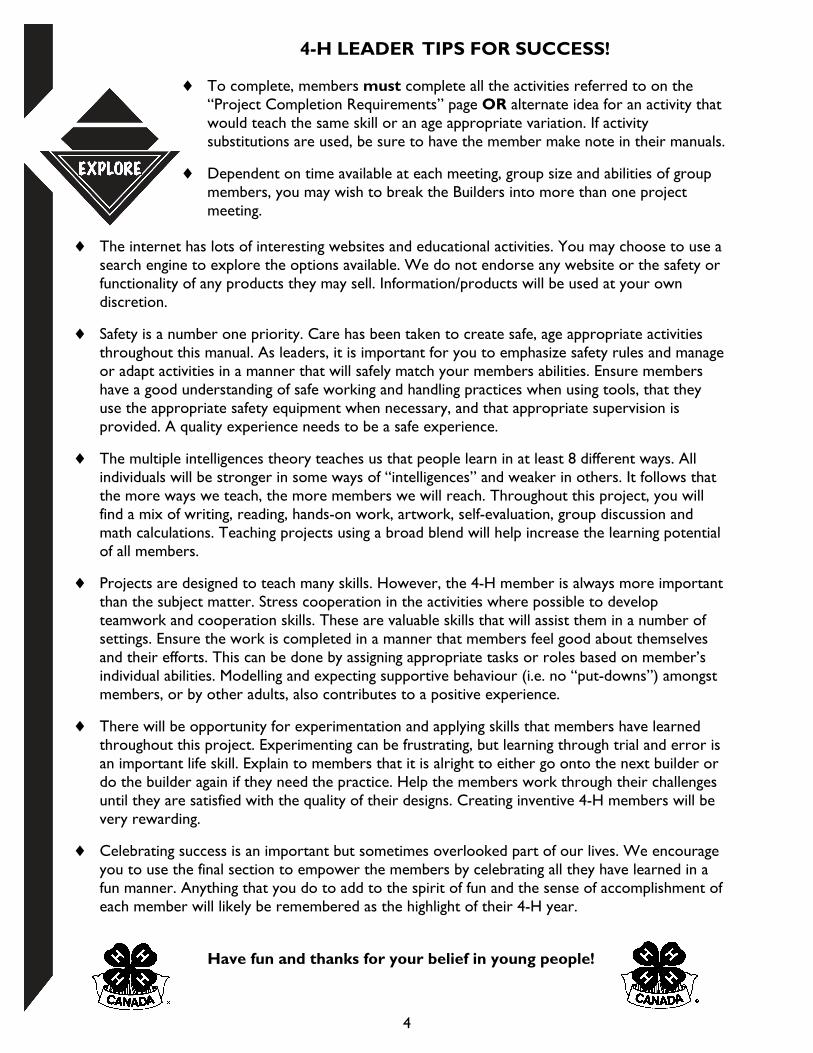
4-H LEADER TIPS FOR SUCCESS!
To complete, members must complete all the activities referred to on the “Project Completion Requirements” page OR alternate idea for an activity that would teach the same skill or an age appropriate variation. If activity substitutions are used, be sure to have the member make note in their manuals.
Dependent on time available at each meeting, group size and abilities of group members, you may wish to break the Builders into more than one project meeting.
The internet has lots of interesting websites and educational activities. You may choose to use a search engine to explore the options available. We do not endorse any website or the safety or functionality of any products they may sell. Information/products will be used at your own discretion.
Safety is a number one priority. Care has been taken to create safe, age appropriate activities throughout this manual. As leaders, it is important for you to emphasize safety rules and manage or adapt activities in a manner that will safely match your members abilities. Ensure members have a good understanding of safe working and handling practices when using tools, that they use the appropriate safety equipment when necessary, and that appropriate supervision is provided. A quality experience needs to be a safe experience.
The multiple intelligences theory teaches us that people learn in at least 8 different ways. All individuals will be stronger in some ways of “intelligences” and weaker in others. It follows that the more ways we teach, the more members we will reach. Throughout this project, you will find a mix of writing, reading, hands-on work, artwork, self-evaluation, group discussion and math calculations. Teaching projects using a broad blend will help increase the learning potential of all members.
Projects are designed to teach many skills. However, the 4-H member is always more important than the subject matter. Stress cooperation in the activities where possible to develop teamwork and cooperation skills. These are valuable skills that will assist them in a number of settings. Ensure the work is completed in a manner that members feel good about themselves and their efforts. This can be done by assigning appropriate tasks or roles based on member’s individual abilities. Modelling and expecting supportive behaviour (i.e. no “put-downs”) amongst members, or by other adults, also contributes to a positive experience.
There will be opportunity for experimentation and applying skills that members have learned throughout this project. Experimenting can be frustrating, but learning through trial and error is an important life skill. Explain to members that it is alright to either go onto the next builder or do the builder again if they need the practice. Help the members work through their challenges until they are satisfied with the quality of their designs. Creating inventive 4-H members will be very rewarding.
Celebrating success is an important but sometimes overlooked part of our lives. We encourage you to use the final section to empower the members by celebrating all they have learned in a fun manner. Anything that you do to add to the spirit of fun and the sense of accomplishment of each member will likely be remembered as the highlight of their 4-H year.
Have fun and thanks for your belief in young people!
4

Skills Checklist
Identify foods from the 4 food groups Explain why it is important to enjoy a variety of healthy foods Identify the number of suggested food group servings
5
Skill Builder 1: Feed Your Body
Background for Leaders
The foods that we choose to eat should keep us healthy and strong. That’s why it is important to follow the recommendations provided in Eating Well with Canada’s Food Guide (Attached to Leader Guide and Member Manual). Both the type and amount of food that we eat can affect our physical and mental performance throughout the day. It is important to be able to identify foods from each of the four food groups; vegetables and fruit, grain products, milk and alternatives, and meat and alternatives, and how many servings of each food group are recommended each day. It is important to understand and be able to identify servings sizes for the common foods that we eat. This is because nutrition labels and dietary recommendations are based on these serving sizes. Healthy body weight is an important and popular topic among people of all ages. Calories have sometimes been incorrectly used as a measure of how healthy a food is. We must recognize that calories are actually a measure of energy that can be used by your body. Youth should understand that calories consumed should equal calories spent, through daily physical activity, to maintain a healthy lifestyle. However be cautious when discussing calories, as they should not be the sole determining factor in dietary selections. If the body does not use all of the nutrients to fuel metabolic and physical activities, it rearranges them into storage compounds such as glycogen and fat, to be drawn on between meals and overnight when fresh supplies run low. If more energy is consumed that is expended, the result is weight gain. Malnutrition implies an imbalance (too much or too little intake of essential nutrients), resulting in poor nutrition or health. If under nutrition, or dietary deficit for one or more nutrients occurs, deficiency diseases result. In over nutrition, excessive intake of one or more nutrients may lead to toxic response and overdose disease. Once food is eaten, real nutrition begins. The human body works to obtain nourishment from the food through the processes of digestion, absorption, transport, and metabolism. Important Messages from Canada’s Food Guide Vegetables and Fruit
Eat at least one dark green and one orange vegetable each day. Choose vegetables and fruit prepared with little or no added fat, sugar or salt Have vegetables and fruit more often than juice Grain Products
Make at least half of your grain products whole grain each day. Choose grain products that are lower in fat, sugar and salt.
6
Milk and Alternatives
Drink skim, 1% or 2% milk each day. Select lower fat milk alternatives Meat and Alternatives
Have meat alternatives such as beans, lentils and tofu often Eat at least 2 Food Guide servings of fish each week Select lean meat and alternatives prepared with little or no added fat or salt
Oils and Fats
Include a small amount of unsaturated fat each day. Beverages
Satisfy your thirst with water Principals of Meal Planning
When planning meals, keep the following principles in mind:
Adequacy - obtaining from foods, all nutrients in sufficient quantities Balance - ensuring that all food groups are represented in recommended proportions Calorie Control - managing energy intake to meet the body’s needs without being excessive or
sufficient Moderation - providing enough, but not too much, of a food or beverage by following
recommended serving sizes and number of servings Variety - eating a wide selection of different foods within each food group
Important Words
Help members define the following words and listen for them using these words in their discussions. To increase the members’ understanding try providing a synonym members know or provide examples. The more personalized the examples the better.
Calories A measure of energy in food, that can be used by the body.
Food Groups Classifications of foods based on their nutritional properties
Thinking Ahead
What will you discuss with members? Gather observations and think of examples that will help support your discussion.
Preparing for Success
Linking back to the Skills Checklist, help members identify how they will know they have been successful in learning from this builder. Discuss what success in these activities might look like, sound like, or feel like.
Activating Strategies
Activate member’s prior knowledge of healthy eating by asking them to think healthy foods and what healthy food choices they make.

7
Dream It! Menu Recall
Ask members to recall everything that they ate and drank the previous day, including breakfast, lunch, dinner, and any snacks. Write them down. Be sure that they include how much of each food or beverage they consumed. Activity Goals Review what members may already know about healthy eating and the 4 food groups Get members thinking about the amount of food and beverages that they consume each day Background Information
There are four food groups Vegetables and Fruits, Grain Products, Milk and Alternatives, and Meat and Alternatives. Encourage members to start using the names of the four food groups throughout the activity Age Considerations
8 and up Time Required
20 minutes Equipment & Supplies
Paper and pen/pencil Resources
Canada’s Food Guide: http://www.hc-sc.gc.ca/fn-an/food-guide-aliment/index-eng.php Instructions
Assist members with identifying what they ate, by talking them through their day. Ask members what they ate and drank for each meal and snack.
Help members break down foods that included multiple ingredients, such as pizza or a casserole.
Discussion
Be sure to ask members what size their food or beverage was, to get them thinking about serving sizes.
Try to use the key words throughout your discussions. Suggested Variations
Members can do this activity as a group, brainstorming a typical day as a group and assigning a recorder.

8
Optional Activity
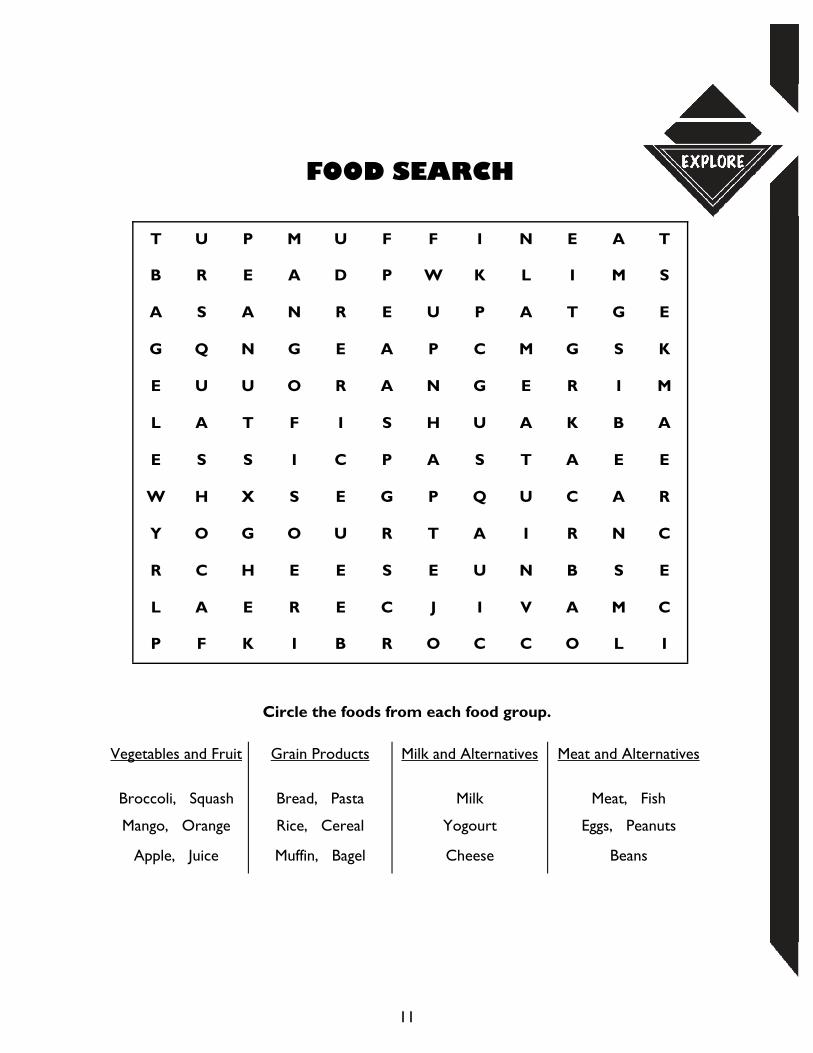
Members may also be interested in completing a word search. This is as a way to get them thinking about foods. This activity is found at the end of this Skill Builder in the Leader Guide and is ready to be copied. The answer key is below.
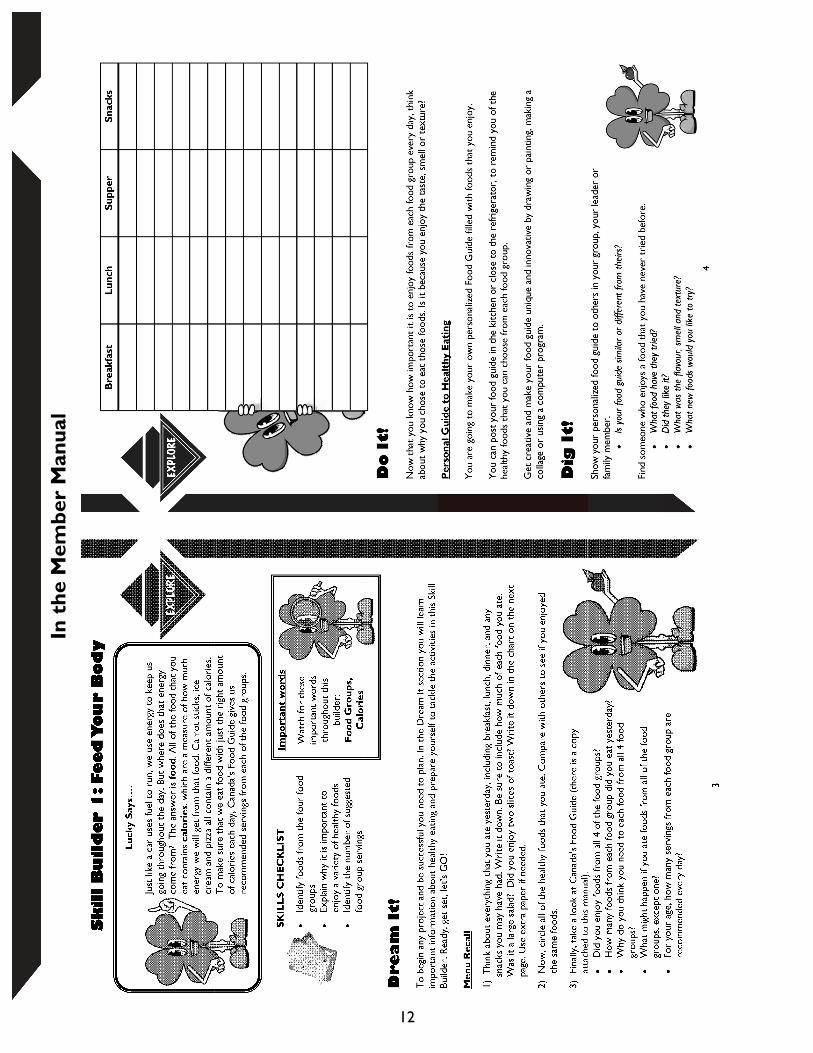
Do It! Personal Guide to Healthy Eating
Members create a personalized food guide based on the foods that they enjoy. Activity Goals Members learn how to identify foods from the four food groups. Members understand why they have certain food preferences. Background Information Why we choose the foods we do
We choose foods for a number of reasons; how it looks, smells, tastes, feels and even sounds. Some are listed below: How it looks - the colour, texture, size, shine and shape of food How it smells - is the food spicy, flowery, fruity, resinous, burnt or fowl? How it tastes - different parts of the tongue can taste bitter, sour, salty and sweet How it feels - includes the temperature, and texture of the food How it sounds - does the food pop, crack, fizz, bubble, or crunch when it is poured or eaten?
T U P M U F F I N E A T
B R E A D P W K L I M S
A S A N R E U P A T G E
G Q N G E A P C M G S K
E U U O R A N G E R I M
L A T F I S H U A K B A
E S S I C P A S T A E E
W H X S E G P Q U C A R
Y O G O U R T A I R N C
R C H E E S E U N B S E
L A E R E C J I V A M C
P F K I B R O C C O L I
FOOD SEARCH
Circle the foods from each food group.
Vegetables and Fruit Grain Products Milk and Alternatives Meat and Alternatives
Broccoli, Squash Bread, Pasta Milk Meat, Fish
Mango, Orange Rice, Cereal Yogourt Eggs, Peanuts
Apple, Juice Muffin, Bagel Cheese Beans

9
Age Considerations
8 and up Time Required
Approximately 1 hour Equipment/Supplies
Members may choose to colour, paint, draw, cut and paste, or computer generate their food guides (see variation below). Supplies will depend on the preference of the group or individual.
Resources
Canada’s Food Guide Store flyers with examples of common foods Instructions
1. Provide members with the supplies they will need to create their food guide. 2. Assist members in creating a rainbow similar to Canada’s Food Guide. Some members may
require assistance with this, and you may choose to create a template ahead of time. 3. The food guide should include the recommended daily servings for the member. 4. Continue discussions about food groups and serving sizes throughout the activity, encourage
members to assist each other in problem solving. Discussion
Members may select foods that contain multiple ingredients, such as pizza or casserole. Help members identify each of the foods included in the meal. Encourage discussion about other meals that might include these same ingredients. Example - tomato sauce Suggested Variations
The Health Canada website has many helpful resources and on-line activities. One such activity is “My Food Guide”, which allows members to create their personal food guide on line. This is a much faster way to complete the activity, and allows members to print their personalized food guide.
Dig It! Now that members have a deeper understanding of the 4 food groups and the recommended daily servings, it is time for them to reflect on their learning and apply what they know by answering the following questions and completing the tasks. 1. By choosing foods from your personal food guide, would you be enjoying your recommended
number daily servings from each food group? Refer members back to Canada’s Food Guide if necessary.
2 . Do any of your favorite foods fit into more than one food group? Continue discussion about
foods with multiple ingredients.

10
3. Was it difficult to eat all of the recommended servings from any of the food groups? Why do you think it was difficult? Discuss the importance of balance and variety in the diet. Ask if there are any foods from that particular food group that they would like to try.
4. In which food group are most of your favorite foods? Ask members why they en-
joy these foods the most? Is it the flavor, smell, texture, etc.? 5. What happens if you choose too many foods from one food group and not enough
from another? Discuss the affects of malnutrition. Encourage members to think about how this will affect their strength and energy.
Leader’s Notes
6. Show your personal food guide to others in your group. Is your food guide similar to theirs? 7. Find someone who enjoys a food that you have never tried before. What foods have they tried? Why did they like it? What was the flavour, smell and texture? Are there any new foods that you would like to try? You may choose to make this a group discussion, and focus on the reasons why we like or dislike certain foods. What’s Next?
In the next builder, members will learn more about healthy eating and using Canada’s Food Guide. They will learn about serving sizes and have the chance to make their own healthy snack. Have a discussion with your members about what types of foods they would like to try and/or types of snack they would like to make. If time allows, assist them with a recipe search either online or in a recipe book.
11
T U P M U F F I N E A T
B R E A D P W K L I M S
A S A N R E U P A T G E
G Q N G E A P C M G S K
E U U O R A N G E R I M
L A T F I S H U A K B A
E S S I C P A S T A E E
W H X S E G P Q U C A R
Y O G O U R T A I R N C
R C H E E S E U N B S E
L A E R E C J I V A M C
P F K I B R O C C O L I
Circle the foods from each food group.
FOOD SEARCH
Vegetables and Fruit Grain Products Milk and Alternatives Meat and Alternatives
Broccoli, Squash Bread, Pasta Milk Meat, Fish
Mango, Orange Rice, Cereal Yogourt Eggs, Peanuts
Apple, Juice Muffin, Bagel Cheese Beans
12
In t
he
Mem
ber
Man
ual

13
In t
he
Mem
ber
Man
ual

Skills Checklist
Identify serving sizes Learn to plan healthy snacks Explain why healthy foods are a good choice
Dream it!
14
Skill Builder 2: Fuel Your Body
Background for Leaders Food Guide Servings
In planning our diet, it’s not just what food we eat that matters, but how much of it. This is the idea behind the concepts of servings and serving sizes. The quantity of food recommended by Canada’s Food Guide is called Food Guide Servings. The amount of food that counts as one serving depends on the food group. For example, one Food Guide Serving is equivalent to about 75g of cooked poultry, 1 cup of milk, 1/2 bagel and 1 medium apple, banana or orange. Product food labels also specify serving sizes as measured in common household and metric measures (g) (mL) Snacking Today Snacks are a common part of everyone’s day. Whether it is a piece of fruit before a soccer practice or popcorn during a movie, snacks can provide us with energy, nutrients and oftentimes, excess fat sugar and salt. Snacking can also provide a way to consume enough daily servings from each food group. Today snacks have been made extremely convenient, being marketed as “grab and go” products that are available nearly everywhere. Youth will most often choose to eat brightly coloured, sugary, salty or fatty snacks and drinks that do not require preparation, so it is important to educate them about healthy snacking. Healthy snacks can be easy to prepare, tasty and visually appealing to youth. It’s all in how you spin it. Important Words
Help members define the following words and listen for them using these words in their discussions. Here are some examples of how to use the “important words” to increase the members understanding: Ask members to form a mental image of the new word. Have members describe (rather than define) the new word in terms of their experiences.
Thinking Ahead
What will you discuss with members? Gather observations and think of examples that will help support your discussion.
Preparing for Success
Linking back to the Skills Checklist, help members identify how they will know they have been successful in learning from this builder. Discuss what success in these activities might look like, sound like, or feel like.
Serving The defined size or proportion of a specific type of food. The serving size could be determined by a physical dimension or weight.
Flavour The combined sense of taste, odor, and mouthfeel.

15
Activating Strategies
Activate member’s prior knowledge of nutrition by asking them to think about what they think healthy food choices are and what food choices they make.
Dream It! Size it Up!
Activity Goals
Members will learn to identify correct serving sizes for commonly enjoyed foods by comparing them to common household items
Background Information
Canada’s Food Guide describes serving sizes in units of weight and common household measure, in both metric and imperial measure. This can make it difficult to estimate serving sizes when preparing food or eating out. Youth are better able to determine serving size when comparing it to a common shape or item. Serving Size Comparisons Taken from Alberta Milk—Visual Ways to Show Serving Sizes 1 Serving of Grain Product 1 slice of bread a music CD case 1 cup dry cereal a baseball 1/2 cup spaghetti 1/2 cup yarn 1/2 bagel 1 hockey puck 1/2 cup pasta or rice small cupcake wrapper 7 soda crackers 7 corrugated squares cut to measures 5 cm x 5 cm Pancake or waffle a CD 1Serving of Vegetable of Fruit 1/2 cup sliced fruit a computer mouse 1 medium fruit a baseball 1/2 cup peas a computer mouse 1 cup raw leafy vegetables or salad a softball 1/2 cup juice 1/2 tetra pack (250 mL) 1/2 cup dried fruit 1 large egg 1/2 cup frozen vegetables/fruit 7 cotton balls 1 Serving of Milk/Milk Products 1/2 oz. cheese a nine-volt battery 1 cup milk white paper placed inside a clear tumbler 3/4 cup yogurt 1individual size yogurt container 3 Tbsp. processed cheese spread 3 Tbsp. of play-dough rolled up in a ball 2 oz. firm cheese 2 golf balls 1 1/2 cups ice cream a softball

16
1 Serving of Meat and Alternatives 3 oz. cooked meat a deck of cards 1 Tbsp. peanut butter 1 golf ball of 6 dice 60 mL nuts/seeds 2 oz. shot glass of almonds 1/2 cup beans and lentils a light bulb 50 to 100 g grilled or baked fish a cheque book Other foods 1 tsp. butter/margarine a postage stamp 2 Tbsp dressing 1 ping pong ball
Age Considerations
9 and up Time Required
20 minutes Equipment/Supplies
Common household measuring utensils (liquid and dry measuring cups), small household items (dice, golf balls, softball, computer mouse, etc), ruler and a small scale.
Resources
Canada’s Food Guide-www.healthcanada.gc.ca/foodguide Instructions
1. Supply some common foods that you members might eat at a meal or choose as a snack 2. Reference the Food Guide to determine the recommended serving size 3. Allow members to weigh or measure the food item to gain an understanding of the size or
amount of the serving 4. Have the members find a familiar household object that is of similar weight or size Suggested Variations
Members might choose to cut out or construct models to represent serving sizes. Examples include: 7 corrugated cardboard squares cut to measure 5 cm x 5 cm to represent 7 soda crackers. 20 wide pipe cleaners cut cm long to represent one serving of raw vegetables. (Use orange and
green to represent different vegetables)
Do It! Stellar Snacks
Activity Goals
Members learn how to select and prepare healthy snacks Members try foods they have never tried before, and describe the flavour
17
Time Required
Approximately 1 hour Equipment/Supplies
Food preparation tools and equipment necessary for chosen recipe(s) Resources
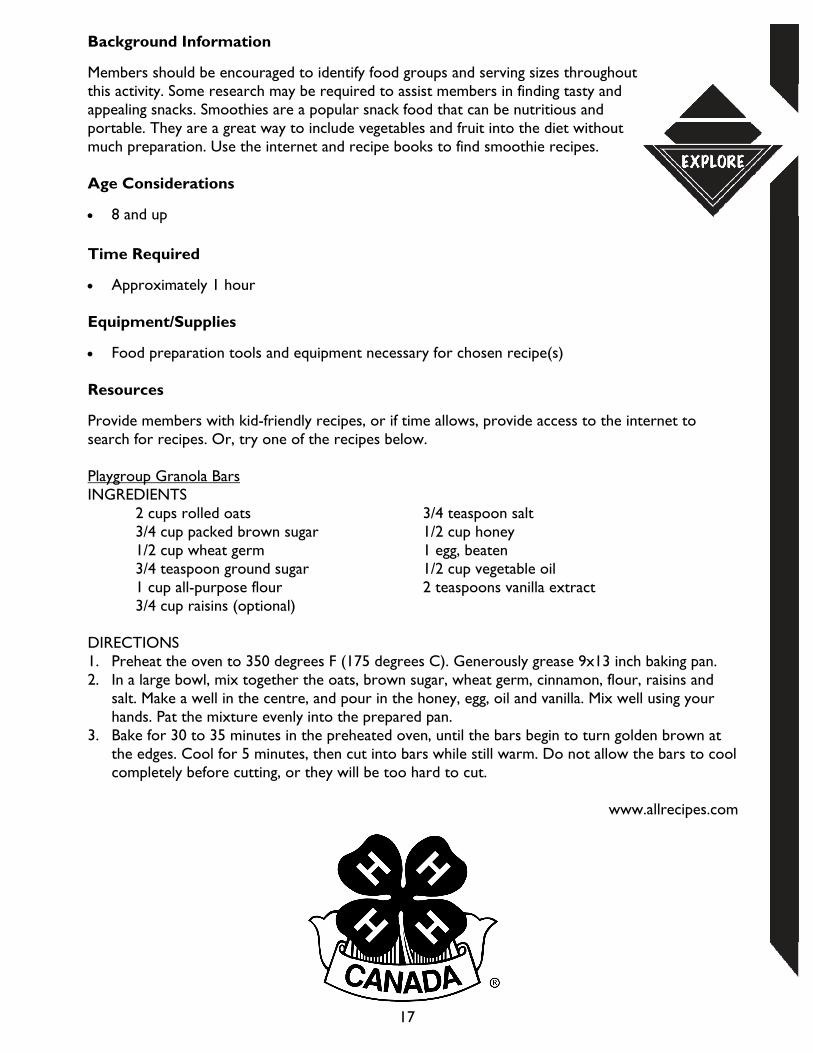
Provide members with kid-friendly recipes, or if time allows, provide access to the internet to search for recipes. Or, try one of the recipes below. Playgroup Granola Bars INGREDIENTS 2 cups rolled oats 3/4 teaspoon salt 3/4 cup packed brown sugar 1/2 cup honey 1/2 cup wheat germ 1 egg, beaten 3/4 teaspoon ground sugar 1/2 cup vegetable oil 1 cup all-purpose flour 2 teaspoons vanilla extract 3/4 cup raisins (optional) DIRECTIONS 1. Preheat the oven to 350 degrees F (175 degrees C). Generously grease 9x13 inch baking pan. 2. In a large bowl, mix together the oats, brown sugar, wheat germ, cinnamon, flour, raisins and
salt. Make a well in the centre, and pour in the honey, egg, oil and vanilla. Mix well using your hands. Pat the mixture evenly into the prepared pan.
3. Bake for 30 to 35 minutes in the preheated oven, until the bars begin to turn golden brown at the edges. Cool for 5 minutes, then cut into bars while still warm. Do not allow the bars to cool completely before cutting, or they will be too hard to cut.
www.allrecipes.com
Background Information
Members should be encouraged to identify food groups and serving sizes throughout this activity. Some research may be required to assist members in finding tasty and appealing snacks. Smoothies are a popular snack food that can be nutritious and portable. They are a great way to include vegetables and fruit into the diet without much preparation. Use the internet and recipe books to find smoothie recipes. Age Considerations
8 and up
18
ww.healthymenumailer.com Editors—Susanne Myers & Christine Steendahl © 2005
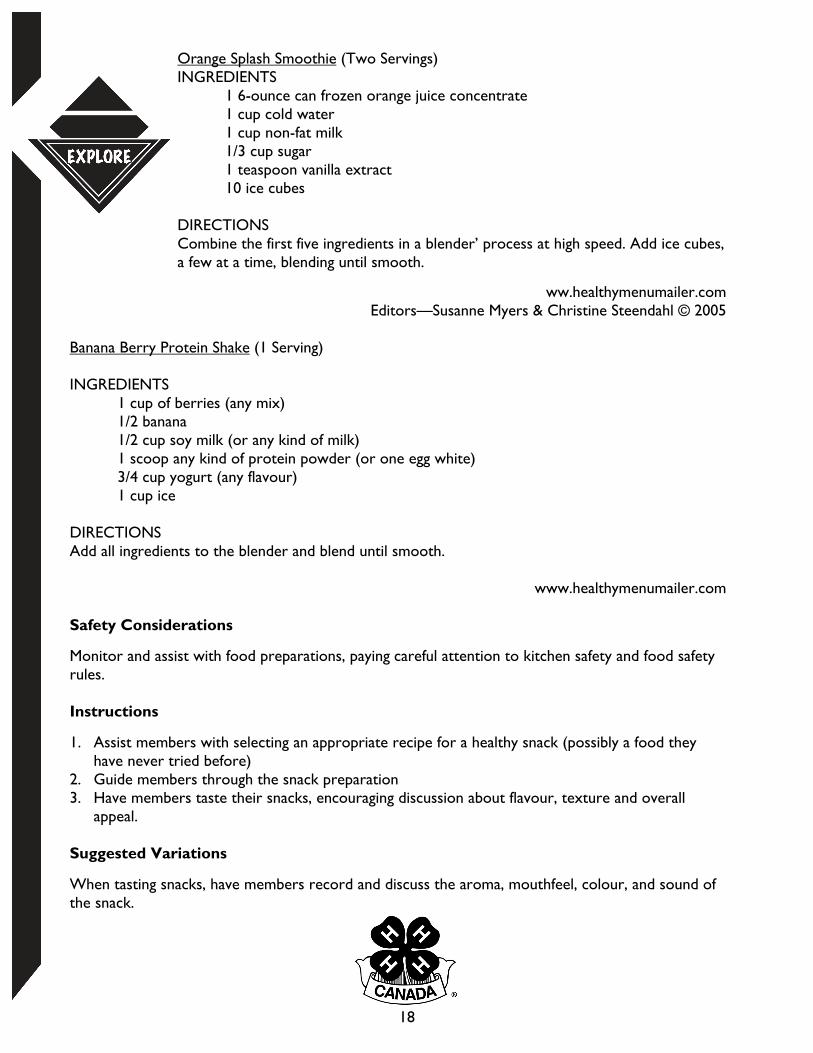
Banana Berry Protein Shake (1 Serving) INGREDIENTS
1 cup of berries (any mix) 1/2 banana 1/2 cup soy milk (or any kind of milk) 1 scoop any kind of protein powder (or one egg white) 3/4 cup yogurt (any flavour) 1 cup ice
DIRECTIONS Add all ingredients to the blender and blend until smooth.
www.healthymenumailer.com Safety Considerations
Monitor and assist with food preparations, paying careful attention to kitchen safety and food safety rules. Instructions
1. Assist members with selecting an appropriate recipe for a healthy snack (possibly a food they have never tried before)
2. Guide members through the snack preparation 3. Have members taste their snacks, encouraging discussion about flavour, texture and overall
appeal. Suggested Variations
When tasting snacks, have members record and discuss the aroma, mouthfeel, colour, and sound of the snack.
Orange Splash Smoothie (Two Servings) INGREDIENTS
1 6-ounce can frozen orange juice concentrate 1 cup cold water 1 cup non-fat milk 1/3 cup sugar 1 teaspoon vanilla extract 10 ice cubes
DIRECTIONS Combine the first five ingredients in a blender’ process at high speed. Add ice cubes, a few at a time, blending until smooth.
19
Dig It! Members are asked to include a picture of their snacking experience in the Dig It! Section. They may alternately choose to include their healthy snack recipe. Lead members in a discussion about how they can encourage their friends and family to include healthy snacks into their daily routine and try new foods.
Leader’s Notes
What’s next?
In the next builder, members will learn about the importance of daily physical activity. They will do a basic fitness assessment and try a new activity. Hold a discussion with your members about what sports or physical activities they have never tried but would like to try. This may require some research to learn about the rules, and you may need to source out equipment.

20
In t
he
Mem
ber
Man
ual

21
Skill Builder 3: Move Your Body
Skills Checklist
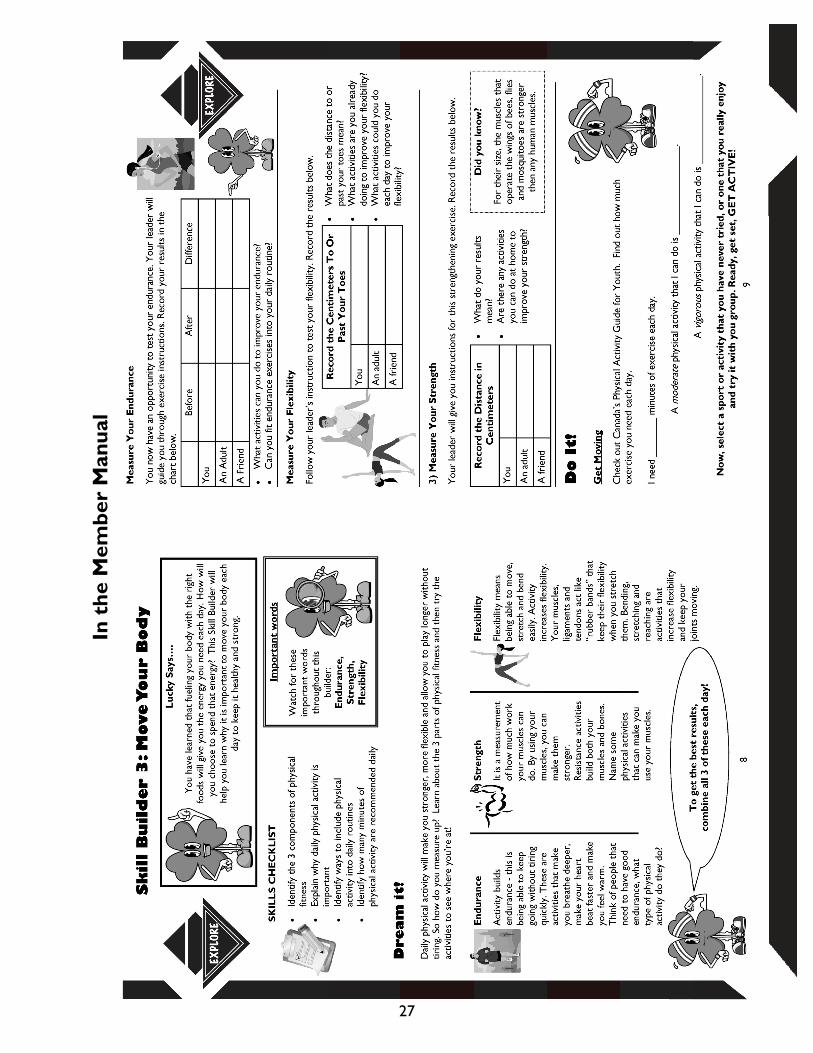
Identify the 3 components of physical fitness Explain why daily physical activity is important Identify ways to include physical activity into daily routines Identify how many minutes of physical activity are recommended daily Important Words
Help members define the following words and look for members using this vocabulary in their discussions. One strategy to help members learn new vocabulary is to have them paraphrase the definitions. Having members use their own words increases connection making.
Background for Leaders
No matter what age, or stage in life, physical activity improves health. By building physical activity into daily routines, at home, school, work or play, anyone can improve their physical fitness. Canada’s Physical Activity Guide to Healthy Active Living and Canada’s Physical Activity Guide for Youth encourage us to; increase strength, flexibility, and endurance activities, while reducing long periods of sitting or inactivity. It may be useful to familiarize yourself with these documents prior to holding your project meeting. They can be found at: http://www.phac-aspc.gc.ca/pau-uap/paguide/index.html and http://www.phac-aspc.gc.ca/pau-uap/paguide/child_youth/youth/index.html 3 Components of Physical Fitness Endurance - means being able to keep going without tiring quickly. Activities that build endurance are those that make you breathe deeper, make your heart beat faster and make you feel warm. Think of people that need to have good endurance, what type of physical activity do they do? Strength - is a measurement of how much work your muscles can do. By using your muscles, you can make them stronger. Resistance activities build both your muscles and bones. Flexibility - means being able to move, stretch and bend easily. Activity increases flexibility. Your muscles, ligaments and tendons act like “rubber bands” that keep their flexibility when you stretch them. Bending, stretching and reaching are activities that increase flexibility and keep your joints moving. Screen Time Over the years, we have become increasingly inactive. We spend more time in front of “screens” (watching television, playing video games and using the computer) than ever before. This means that less of our time is being spent in physical activity.
Endurance The ability to do an activity without tiring quickly. Activities that make you breathe deeper, you heart beat faster and make you feel warm.
Strength A measurement of how much work your muscles can do. Activities that build your muscles and bones.
Flexibility Ability to move, stretch and bend easily. Activities like bending, stretching and reaching that keep your joints moving.
22
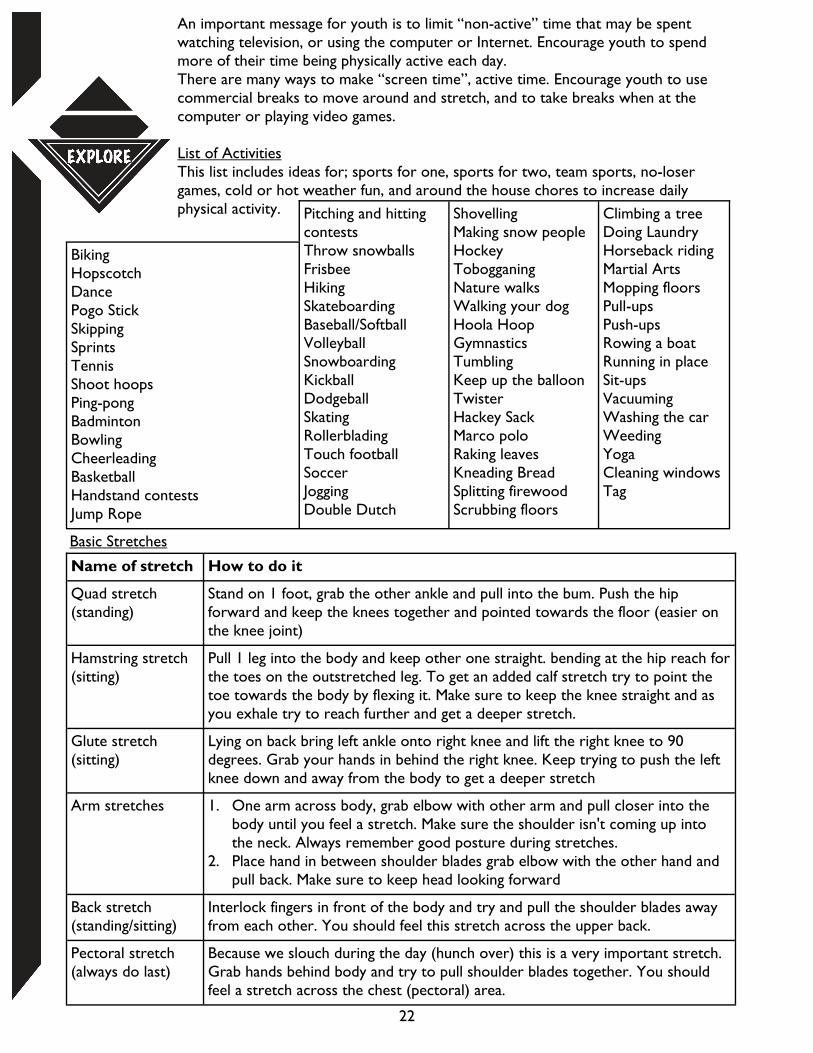
Basic Stretches
Name of stretch How to do it
Quad stretch (standing)
Stand on 1 foot, grab the other ankle and pull into the bum. Push the hip forward and keep the knees together and pointed towards the floor (easier on the knee joint)
Hamstring stretch (sitting)
Pull 1 leg into the body and keep other one straight. bending at the hip reach for the toes on the outstretched leg. To get an added calf stretch try to point the toe towards the body by flexing it. Make sure to keep the knee straight and as you exhale try to reach further and get a deeper stretch.
Glute stretch (sitting)
Lying on back bring left ankle onto right knee and lift the right knee to 90 degrees. Grab your hands in behind the right knee. Keep trying to push the left knee down and away from the body to get a deeper stretch
Arm stretches 1. One arm across body, grab elbow with other arm and pull closer into the body until you feel a stretch. Make sure the shoulder isn't coming up into the neck. Always remember good posture during stretches.
2. Place hand in between shoulder blades grab elbow with the other hand and pull back. Make sure to keep head looking forward
Back stretch (standing/sitting)
Interlock fingers in front of the body and try and pull the shoulder blades away from each other. You should feel this stretch across the upper back.
Pectoral stretch (always do last)
Because we slouch during the day (hunch over) this is a very important stretch. Grab hands behind body and try to pull shoulder blades together. You should feel a stretch across the chest (pectoral) area.
Shovelling Making snow people Hockey Tobogganing Nature walks Walking your dog Hoola Hoop Gymnastics Tumbling Keep up the balloon Twister Hackey Sack Marco polo Raking leaves Kneading Bread Splitting firewood Scrubbing floors
Climbing a tree Doing Laundry Horseback riding Martial Arts Mopping floors Pull-ups Push-ups Rowing a boat Running in place Sit-ups Vacuuming Washing the car Weeding Yoga Cleaning windows Tag
Biking Hopscotch Dance Pogo Stick Skipping Sprints Tennis Shoot hoops Ping-pong Badminton Bowling Cheerleading Basketball Handstand contests Jump Rope
Pitching and hitting contests Throw snowballs Frisbee Hiking Skateboarding Baseball/Softball Volleyball Snowboarding Kickball Dodgeball Skating Rollerblading Touch football Soccer Jogging Double Dutch
An important message for youth is to limit “non-active” time that may be spent watching television, or using the computer or Internet. Encourage youth to spend more of their time being physically active each day. There are many ways to make “screen time”, active time. Encourage youth to use commercial breaks to move around and stretch, and to take breaks when at the computer or playing video games. List of Activities This list includes ideas for; sports for one, sports for two, team sports, no-loser games, cold or hot weather fun, and around the house chores to increase daily physical activity.

23
Thinking Ahead
What will you discuss with members? Gather observations and think of examples that will help support your discussion.
Preparing for Success
Linking back to the Skills Checklist, help members identify how they will know they have been successful in learning from this builder. Discuss what success in these activities might look like, sound like, or feel like.
Activating Strategies
Activate member’s prior knowledge of physical activity by asking them to think about how, what type and how much physical activity they do each day.
Dream It! Fitness Assessment
Members will have a chance to do a basic physical fitness assessment by testing strength, endurance and flexibility. Throughout this exercise it is important to remind members that no matter what their current level of fitness may be, there is always room to improve. Each of us is built differently, some of us have more natural flexibility, strength or endurance than others. Activity Goals Members will gain an understanding of their current level of fitness. Background
The purpose of this activity is to determine members’ current level of fitness. As members increase their physical activity level, they may want to re-test on a weekly basis to track improvements. Each member will be at a different fitness level, therefore it is important to stress that any increase in physical activity will improve health and fitness level. This activity is not meant to compare members against each other, but rather to gain an understanding of current individual level of fitness. Age Considerations
Ages 8 and up Time Required
Approximately 20 minutes Equipment/Supplies
Stop watch or clock Stairs, or stationary step Measuring tape or meter stick Tape or rope to draw a start line Safety Considerations
Be sure that members do not strain when attempting these exercises. The focus of the test is to complete each exercise to the best of the member’s ability. Excessive straining, specifically in the flexibility test can cause injury.

Instructions
Measure your Endurance 1. Find the pulse on the underside of your wrist. Count the number of beats for 30
seconds. 2. Step up onto one stair with one foot and then the other foot, staying on that
same step. Then step down one foot at a time. Count aloud, “up, up, down, down”. This is one set. Try to complete two of these sets every 5 seconds.
3. Keep up this pattern for one minute, then sit down and rest for one minute. Take your pulse again after the one-minute rest.
4. Have members record their results, the results of an adult and those of another group member.
What does it mean?
Measure your flexibility 1. Sit on the floor with your legs straight out in front of you. 2. Bend forward and reach toward your toes. Hold that position for five seconds; try not to
bounce. Have another member measure how far to or past your toes you can reach. 3. Have members record their results, the results of an adult and those of another group member. Measure your strength 1. Draw a line in the dirt, or put a stick down to mark a starting line. 2. Stand with both feet behind the line. Put your arms out behind you and swing them forward as
you leap. 3. Jump as far as you can. Measure from the start line to the sport where you heels touch down. 4. Have members record their results, the results of an adult and those of another group member. Discussion
Work through the discussion questions with members. What activities can you do to improve your endurance? Brainstorm ideas with members. Examples include; walking, jogging or running, swimming skating or playing basketball. Refer to the List of Activities provided in the Background Information section. Can you fit endurance exercises into your daily routine? Ask members to identify how they could modify their current daily routines to include more physical activities. The aim is not to create specific times for physical activity, but rather to incorporate them into current activities. Examples include; walking or biking to school, or playing catch with a friend rather than watching television together. What does the distance to or past your toes mean? It is an indication of your current level of flexibility in a specific muscle group. Be sure to explain that this doesn’t necessarily mean that they aren’t flexible in other ways. As we stretch specific muscle groups, we can increase the flexibility in that area.
If the difference is: Your heart is:
The same or less In excellent shape
One or two beats faster In fair shape
Five or six beats faster In poor shape
Seven or more beats faster In need of work
24

What do your results mean? This is the current muscle strength in a specific muscle group. The body could be strong in other areas as well, but any exercise that uses muscles increases strength in that muscle group. Are there any activities you can do at home to improve your strength? Any activity that includes muscle resistance will improve your strength. Examples of activities around that house that will build muscle strength include; using a push-style lawn mower, house cleaning and push-ups during commercial breaks.
Do It! Get Moving Activity Goals Members will learn about a new physical activity including the rules, equipment needed and any special skills or resources required. Background Information
Some sports or activities will be easier to facilitate than others, due to availability of equipment, or other resources. Some equipment and instructions may come from school or community sports groups. Age Considerations
8 years and up Time Required
Activities may vary from between 30 and 60 minutes. Equipment/Supplies
Dependent upon the activity or sport chosen. Safety Considerations
Safety should be considered before engaging in any activity. Be sure that members are wearing the proper equipment and that adequate instruction is given before participating in any sport or activity. If necessary, review the importance of wearing properly fitted safety equipment.
What activities are you already doing to improve flexibility? Any activity that involves stretching of muscles can improve flexibility. Even stretching after active periods can improve your level of flexibility. Examples include; yoga, gymnastics and dancing. What activities could you do each day to improve flexibility? Remind members that stretching after active periods is important not only to prevent injury, but also a great way to improve flexibility every day. Review Basic Stretches with members, as provided in the Background Information.
25
What’s Next?
Members will learn about the importance of a positive body image and how the media and others influence our view of beauty. You will need popular youth, fashion or sports magazines for the Dig It! activity - perhaps the members can assist by bringing some.
Dig It! Now that members understand how much physical activity is recommended each day, lead the members through the questions in their manuals to help them dig into their learning. Keep mem-bers thinking about all of the physical activity that they currently are doing, or can do each day. Are these activities available in their community?
Instructions
Guide members through Canada’s Physical Activity Guide for Youth and help them answer the questions in the manual. Then have members select a sport or activity that they have never tried and do it as a group. Ex) archery, lawn bowling, rollerblading. This may involve learning rules and reviewing specific safety guidelines. Suggested Variation
If an activity must be completed at a different time than the project meeting, you may choose to include internet research on new sports or activities to make the most of the project meeting.
Leader’s Notes
26
27
In t
he
Mem
ber
Man
ual

28
In t
he
Mem
ber
Man
ual
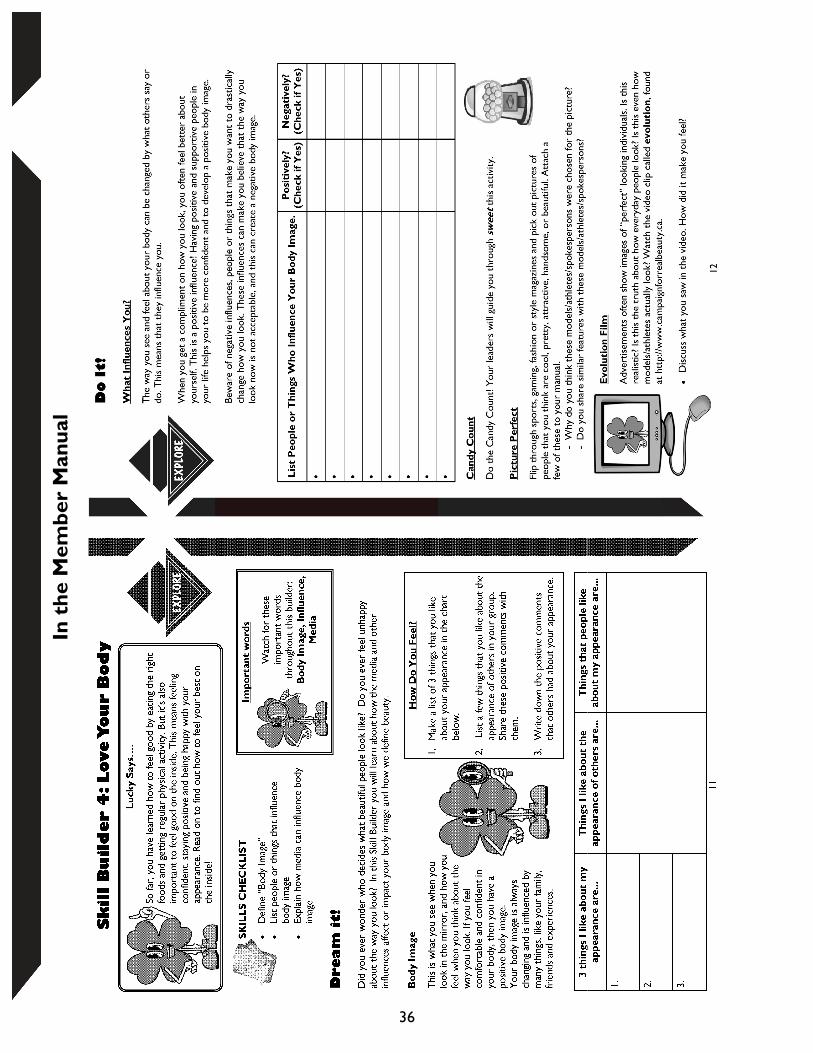
Skill Builder 4: Love Your Body Skills Checklist
Define “Body Image” List people or things that influence body image Explain how media can influence body image Thinking Ahead
What will you discuss with members? Gather observations and think of examples that will help support your discussion.
Preparing for Success
Linking back to the Skills Checklist, help members identify how they will know they have been successful in learning from this builder. Discuss what success in these activities might look like, sound like, or feel like.
Activating Strategies
Activate member’s prior knowledge of body image by asking them if they ever wonder who decides what beautiful people look like. Do they ever feel unhappy about the way they look?
Background for Leaders
This builder will help members understand who influences them and the power that the media and marketers have on their body image. Body Image is a mental picture that we have of ourselves, influenced by our self-esteem and self worth. It is how you feel about your body, and what you think other people think about you. Body image is always changing. It can change with your moods, your physical environment and your experiences. It is formed from all of your experiences, and by everyone around you: parents, role models, media and peers. It can also include the expectations you have about how you think you should look. Body image is what you see when you look in the mirror, and also what you feel when you think about your body. If you feel comfortable and confident in your body, then you have a positive body image.
Important Words
Help members define the following words and look for members using this vocabulary in their discussions. A few strategies you can use include: Teach synonyms by providing a synonym members know. Also, teach antonyms. Not all words have antonyms, but thinking about opposites requires the
members to evaluate the critical attributes of the words in question. Provide non-examples. Similar to using antonyms, providing non-examples requires students to
evaluate a word's attributes. Invite students to explain why it is not an example.
Body Image A mental picture that we have of ourselves, based on how we feel about our body and what we believe others think about our appearance.
Influence Some thing or someone who has the power to sway or affect your way of thinking
Media Various means of communication, including radio, television, newspapers, maga-zines and the internet.
29
30
Do It! What Influences You?
Activity Goals Members will identify people or things that influence their body image Background Information
Members will brainstorm people or things that may influence their body image. Members can think individually and then have a group discussion. Discuss what the media is, what it involves and how it affects us every day. Age Considerations
Ages 9 and up
Dream It! How do you Feel?
Members are asked to reflect on their feelings and attitudes towards their body image by listing thing they like about their appearance. Background Information
The purpose of this activity is to get members thinking about their personal view of themselves. It is not intended to be a comparison activity, but rather a positive, confidence building activity.
Age Considerations
Ages 9 and up Time Required
Approximately 15 minutes Equipment/Supplies
Member Manual and a pencil or pen Instructions
You may want to have members sit apart from each other to ensure that privacy is being respected and members can have a time for personal reflection. You may need to assist individual members by using prompting questions such as:
When you look in the mirror, what’s your favourite part of your body? What’s the first thing that you notice about other’s appearance? Do you ever receive compliments from others about your appearance? What were
they? Finally, be sure that the conversations and personal reflections remain positive. This activity is aimed to increase understanding and awareness of positive body image, emphasizing the things that the members like about their body, and building from there.

Time Requirements
Approximately 5-10 minutes Equipment/Supplies
Member Manual and pencil or pen Instructions
Have members list some people or things that influence their body image. Members can brainstorm individually, or have a group discussion. Discuss what the media is, what it involves and how it affects us every day. Some prompting questions are: Name some celebrities. Why are they famous? Where do you see them? What are some of your favourite commercials? What are they advertising? Where do you
see them? Where do you learn about new toys, or the latest styles? Is it television, magazines, or the
Internet? Resources
Use the following exercises to help members think about people who can influence them in different areas of their lives. Here’s a list of people that can influence us in different areas of our life. Check the ones who have the greatest influence on you. __ Best friend __ Favorite music star __ Parents(s) __ Next door neighbour __ Favorite teacher __ Brothers/sisters __ Star of favourite TV show __ Relative __ Classmates __ Coach Using this list, identify the people who influence you the most in making the following decisions (If the biggest influence is you, write in “self”). How you dress ________________________ How hard you work in school ________________________ What kind of career you want _____________________________ The hairstyle you choose _____________________________ What you do in your free time _________________________ Whether you play sports ________________________ What style of clothes you wear ____________________________ How you spend your allowance/earnings ____________________________ What you do after school _________________________
31
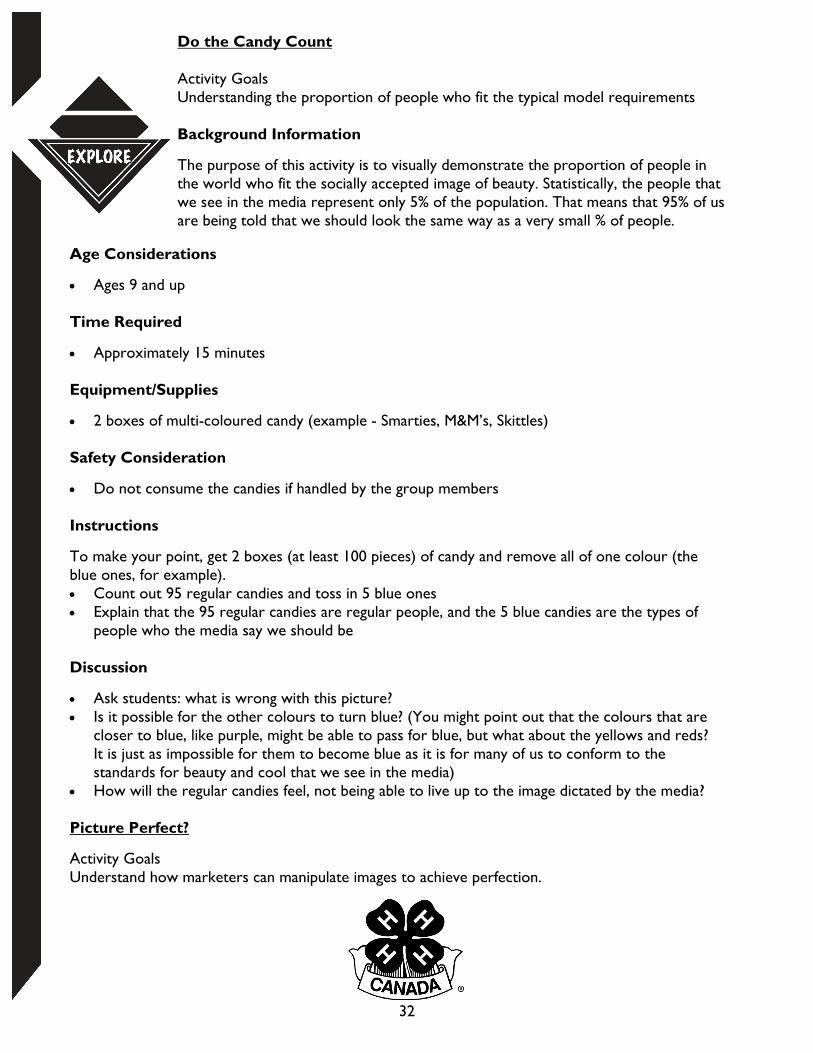
Do the Candy Count Activity Goals
Understanding the proportion of people who fit the typical model requirements Background Information
The purpose of this activity is to visually demonstrate the proportion of people in the world who fit the socially accepted image of beauty. Statistically, the people that we see in the media represent only 5% of the population. That means that 95% of us are being told that we should look the same way as a very small % of people.
32
Age Considerations
Ages 9 and up Time Required
Approximately 15 minutes Equipment/Supplies
2 boxes of multi-coloured candy (example - Smarties, M&M’s, Skittles) Safety Consideration
Do not consume the candies if handled by the group members Instructions
To make your point, get 2 boxes (at least 100 pieces) of candy and remove all of one colour (the blue ones, for example). Count out 95 regular candies and toss in 5 blue ones Explain that the 95 regular candies are regular people, and the 5 blue candies are the types of
people who the media say we should be Discussion
Ask students: what is wrong with this picture? Is it possible for the other colours to turn blue? (You might point out that the colours that are
closer to blue, like purple, might be able to pass for blue, but what about the yellows and reds? It is just as impossible for them to become blue as it is for many of us to conform to the standards for beauty and cool that we see in the media)
How will the regular candies feel, not being able to live up to the image dictated by the media? Picture Perfect?
Activity Goals Understand how marketers can manipulate images to achieve perfection.
Background
There can be 2 different types of cool people - those who are cool because they are famous or fashionable, and those who are cool because of how they act. The thrust is that very few people look like those you see in the media. In fact, some of the people we see in the media don't look anything like their media images in real life, because their photographs are touched up to make them look more attractive, or they are filmed using lots of make-up and special lighting. There are even software programs that can take a picture of someone and give them longer legs, or make them thinner! Yet despite knowing this, many of us are still influenced by images we see in magazines and on television.
33
Age Considerations
9 years and up Time Required
Approximately 15 – 20 minutes Equipment/Supplies
Magazines, catalogues and the Internet Instructions
Have members flip through the magazines and catalogues that you provided. Have them select pictures that represent the current standards of beauty and cool. Have the members compare and contrast the pictures to find similarities or point out areas where the photos might have been enhanced to create a better picture. Some prompting questions might be: What are some similarities that you see between models Where might the picture have been touched up? What might have been done to this model before the pictures were taken? Evolution Film
Activity Goals
Explain how media can affect body image Background Information
This short video, found on the Dove Campaign for Real Beauty website, shows viewers how marketers and the media can manipulate images to conform to societies standards of beauty. Advertisements often show images of “perfect” looking individuals. Is this realistic? Is this the truth about how everyday people look? Is this even how models/athletes actually look? Age Considerations
Ages 9 and up Time Requirements
Approximately 5 -10 minutes

Equipment/Supplies
Internet access Resources
Dove Campaign for Real Beauty website - http://www.campaignforrealbeauty.ca Instructions
Watch the video clip called evolution, found through the links at http://www.campaignforrealbeauty.ca. Follow up by asking members what they saw and how they feel about it.
Suggested Variations / Additional Optional Activity Anatomy of Cool activity
Taken from Media Awareness Network website - www.media-awareness.ca Activity Goals Understand the influences of the media in defining society’s standards regarding who is
successful and what is desirable. Understand the transience and superficiality of media images and messages regarding who and
what is cool. Understand how they themselves are influences by these media images and message. Background Information
This activity helps members become more aware of the media’s role in determining what and who are perceived as being cool. Through discussions and activities, members explore the differences between superficial and real “coolness”, how marketers use cool to sell products, and how their own attitudes and perceptions are affected by media messages and reinforce scientific messages about what “coolness” is. Popular concepts of what is cool can be artificial – in many cases they are determined by advertisers, who use “coolness” as a way of marketing goods. They also need to understand that not everyone can, or needs to, look or act like people in the media. Age Considerations
9 years and up Time Requirements
Approximately 1 hour Equipment & Supplies
A large roll of paper, markers, paints Safety Considerations
Be conscious of members’ comfort level with being traced. As an option, you may bring in a ready made form/outline for the activity.
34
Instructions
In groups or working in pairs, have each member lie on the floor to be traced onto paper. Tell groups that they are going to create a “Media Kid”, a kid who is totally influenced by what the media says you have to have in order to be cool. Have members “dress” their Media Kid in the latest fashions with hand drawn clothing and accessories, or with real items pinned on. Have them create a cartoon character’s “sound bubble” or make a tape demonstrating how this cool person would talk.
What’s Next?
In this builder members learned why it’s important to be aware of the many influences on body image - both positive and negative. It’s also important for members to feel positive about themselves as an individual. They need to feel good about their personality, skills, and talents. In Skill Builder 5 members will learn about self esteem, and how they can build it to feel good about themselves everyday.
Leader’s Notes
35
Have the members share their Media Kids with each other, and share what kind of personality they would have (nice, mean, shy, etc.) Discussion Questions
Ask members which Media Kid/s they think is the coolest. Who would they want to hang out with, why? Suggested Variations
Assign each Media Kid a different personality demeanour (mean, friendly, snobby, etc.). Ask members; now that you know what these media kids are like as people, who do you think is cool? Who would you want to be friends with?
36
In t
he
Mem
ber
Man
ual

37
In t
he
Mem
ber
Man
ual

Skill Builder 5: Beyond Your Body
Skills Checklist
Define “Self Esteem” Identify the differences between self esteem and body image Explain the importance of having a high self esteem
Thinking Ahead
What will you discuss with members? Gather observations and think of examples that will help support your discussion.
Preparing for Success
Linking back to the Skills Checklist, help members identify how they will know they have been successful in learning from this builder. Discuss what success in these activities might look like, sound like, or feel like.
Activating Strategies
Activate member’s prior knowledge of self esteem by asking them to think about a time when they felt good about themselves. Why did they feel this way?
Background for Leaders
In this builder, the members will learn about the importance of maintaining a high self esteem. As youth advance into their teens, having a high self esteem will give them the self confidence they need to try new activities, explore and gain new skills, and plan a bright new future. Talking about self esteem at a young age will help members face the challenges of peer pressure, bullying, etc. Members will be asked to identify skills, positive experiences and talents that give them self confidence. Their focus should be around positives in all aspects of their life and members should be encouraged to share ideas, future plans and gaining new skills. Important Words
Help members define the following words and look for members using this vocabulary in their discussions. Get members to use a dictionary (printed or online) and show them the range of information it provides.
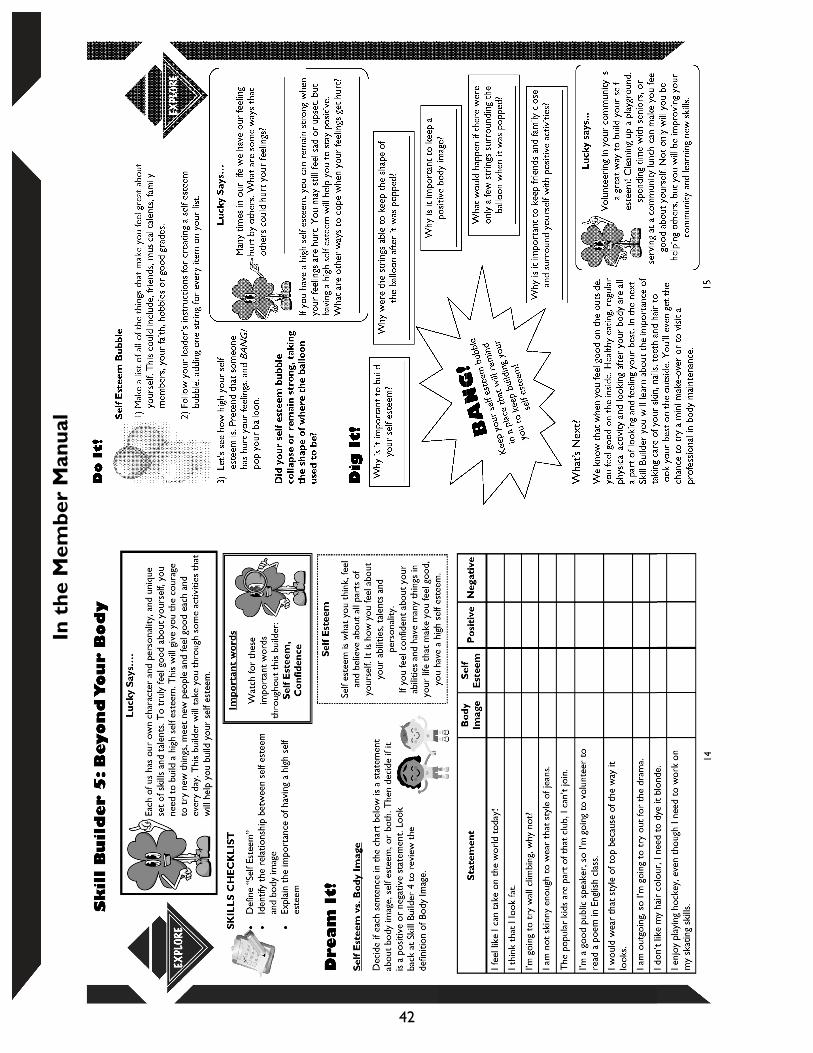
Dream it! Self Esteem vs. Body Image
Activity Goals
Members will be able to identify the relationship between body image and self esteem
Self Esteem How you think and feel, and believe about all parts of your body
Self Confidence To have trust in one’s own abilities
Body Image A mental picture that we have of ourselves, based on how we feel about our body, and what we believe others think about our appearance
38

39
Equipment & Supplies
Member Manual and a pencil or pen Instructions
Have members decide if the statements printed in their manual (at end of this builder) refer to body image, self esteem, or both. Have the members try the activity on their own, then share and discuss with the group. Emphasize the relationship between the two and how they can affect each other. Discussion
Members are asked to decide if the statements provided describe body image, self esteem, or both. Have the members try the activity on their own, and then share and discuss with the group. Be sure to emphasize the relationship between the two and how they can affect each other. Suggested Variations
Have members create their own statements about body image and self esteem.
Do it!
Self Esteem Bubble
Activity Goals Members will learn how having a high self esteem will help them through difficult times and how to reflect on the skills, talents, and positive experiences in their life to increase their self esteem. Background Information
A high self esteem can give an individual the courage and self confidence to endure through challenging times. The purpose of this activity is to visually demonstrate this concept. Age Considerations
Ages 9 and up Time Required
Approximately 2 hours - 1/2 hour to create bubble, 11/2 hour to dry
Background Information
There is no one right answer for each of the statements in the Member Manual. There are many linkages between self esteem and body image. The focus of this activity is to have members think about how body image and self esteem can positively or negatively affect one another. Age Considerations
8 and up Time Required
Approximately 15 minutes
Equipment/Supplies
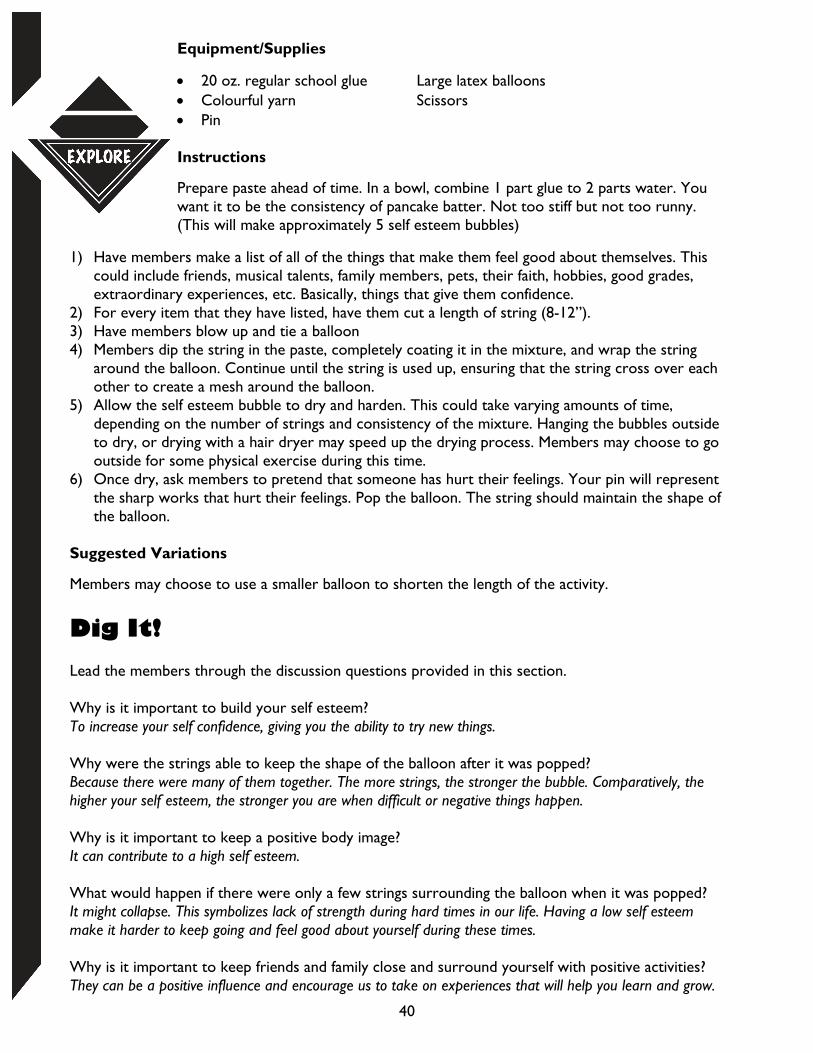
20 oz. regular school glue Large latex balloons Colourful yarn Scissors Pin Instructions
Prepare paste ahead of time. In a bowl, combine 1 part glue to 2 parts water. You want it to be the consistency of pancake batter. Not too stiff but not too runny. (This will make approximately 5 self esteem bubbles)
40
1) Have members make a list of all of the things that make them feel good about themselves. This could include friends, musical talents, family members, pets, their faith, hobbies, good grades, extraordinary experiences, etc. Basically, things that give them confidence.
2) For every item that they have listed, have them cut a length of string (8-12”). 3) Have members blow up and tie a balloon 4) Members dip the string in the paste, completely coating it in the mixture, and wrap the string
around the balloon. Continue until the string is used up, ensuring that the string cross over each other to create a mesh around the balloon.
5) Allow the self esteem bubble to dry and harden. This could take varying amounts of time, depending on the number of strings and consistency of the mixture. Hanging the bubbles outside to dry, or drying with a hair dryer may speed up the drying process. Members may choose to go outside for some physical exercise during this time.
6) Once dry, ask members to pretend that someone has hurt their feelings. Your pin will represent the sharp works that hurt their feelings. Pop the balloon. The string should maintain the shape of the balloon.
Suggested Variations
Members may choose to use a smaller balloon to shorten the length of the activity.
Dig It! Lead the members through the discussion questions provided in this section. Why is it important to build your self esteem? To increase your self confidence, giving you the ability to try new things. Why were the strings able to keep the shape of the balloon after it was popped? Because there were many of them together. The more strings, the stronger the bubble. Comparatively, the higher your self esteem, the stronger you are when difficult or negative things happen. Why is it important to keep a positive body image? It can contribute to a high self esteem. What would happen if there were only a few strings surrounding the balloon when it was popped? It might collapse. This symbolizes lack of strength during hard times in our life. Having a low self esteem make it harder to keep going and feel good about yourself during these times. Why is it important to keep friends and family close and surround yourself with positive activities? They can be a positive influence and encourage us to take on experiences that will help you learn and grow.
What’s Next?
In the final Skill Builder, members will be learning about personal hygiene, including proper care for skin, nails, teeth and hair. If possible, members would benefit from visiting a professional in one of the areas mentioned above. They may also choose to do a mini-makeover. Depending on the desires of the group, appropriate preparations or arrangements should be made for this lesson.
Leader’s Notes
41
42
In t
he
Mem
ber
Man
ual
43
Skill Builder 6: Maintain Your Body Skills Checklist
Explain why personal hygiene is important List techniques used to maintain the body Learn about personal hygiene products and new techniques Thinking Ahead
What will you discuss with members? Gather observations and think of examples that will help support your discussion.
Preparing for Success
Linking back to the Skills Checklist, help members identify how they will know they have been successful in learning from this builder. Discuss what success in these activities might look like, sound like, or feel like.
Activating Strategies
Activate member’s prior knowledge of personal hygiene by asking them to think about what people do each day to stay clean.
Background for Leaders
Members will be able to choose their Dig It! Activity for this skill builder. They might choose to do a mini makeover, or visit a professional in hairstyling, aesthetics, dentistry or skin care. This may require making arrangements for a tour, or research on certain techniques. Hair Care
Why is it important to keep you hair clean? The hair follicles (which the hair grows from) produce oil which keeps the hair smooth. You also have sweat glands in your scalp, and dead skin cells come off the scalp. The oil, sweat and dead cells all add together and can make the hair greasy and look dirty unless you wash it regularly. To keep hair clean: - wash hair regularly with shampoo - massage your scalp well, this will remove dead skin cells, excess oil and dirt - rinse well with clean water - conditioner is helpful if you have longer hair as it makes the hair smoother and easier to comb, but hair doesn’t need to have conditioner - use a wide toothed comb for wet hair as it is easier to pull through
Interesting Fact - you have over 100,000 hairs on your head! Each hair grows for about 2-6 years. You lose about 50 to 100 hairs a day. Skin Care
Just like we have different body and hair types, we also have different skin types: Oily Skin -skin’s surface is shiny -pores are larger -blackheads, whiteheads and pimples occur easily
Dry Skin -skin is tight, dull and sometimes flaky -pores are small -fine lines are visible Dehydrated Skin -skin lacks water/hydration -complexion is dull -pores are enlarged -this can be a temporary condition Normal/Combination Skin -centre or “t-zone” is oily -pores are fairy small -cheeks are fairly smooth
Sensitive Skin -very fine texture -skin has a translucent-like appearance and tiny veins are sometimes visible -tends to be more irritable and reactionary Acne-prone Skin -more likely at puberty -skin surface is shiny with large pores -redness, inflammation and irritation are common -presence of blackheads, whiteheads and pimples Elastin and Collagen
Are proteins that keep your skin flexible while you are young. You lose this as you get older. To avoid wrinkles, stay out of tanning salons, avoid tobacco smoke and drink enough water. Nails
Your nails are made of the same stuff as your skin and hair; keratin. It’s just a lot harder. -trim fingernails weekly -trim toenails monthly -use a nail brush to get rid of dirt -don’t bite nails or pick at cuticles Teeth
5 Steps to Good Oral Health Taken from Canadian Dental Association - http://www.cda-adc.ca/ As part of a healthy lifestyle and to help reduce the risk of oral disease, follow these 5 steps to good oral health. 1. See your dentist regularly
Regular checkups and professional cleanings are the best way to prevent problems or to stop small problems from getting worse.
Your dentist will look for signs of oral disease. Oral diseases often go unnoticed and may lead to or be a sign of serious health problems in other parts of the body.
Only your dentist has the training, skill and expertise to diagnose and treat oral health diseases and to meet all your oral health care needs.
44

2. Keep your mouth clean Brush your teeth and tongue at least twice a day with a soft-bristle
toothbrush and fluoride toothpaste to remove plaque and bacteria that can cause cavities and periodontal disease (gum disease)
Floss every day. If you don’t floss, you are missing more than a third of your tooth surface.
Your dentist may also recommend that you use a fluoride or antimicrobial mouth rinse to help prevent cavities or gum disease.
When choosing oral care products, look for the Canadian Dental Association (CDA) Seal of Recognition. Oral care products that have earned the Sea of Recognition have been reviewed by CDA and will effectively contribute to your oral health.
3. Eat, drink, but be wary Healthy food is good for your general health and your oral health. The nutrients that
come from healthy foods help you to fight cavities and gum disease. Limit how much and how often you consume foods and beverages that contain sugar.
Sugar is one of the main causes of dental problems. Limit your consumption of foods and beverages that are high in acid. The acid may play a
part in causing dental erosion. 4. Check your mouth regularly
Look for warning signs of periodontal disease (gum disease) such as red, shiny, puffy, sore or sensitive gums; bleeding when you brush or floss; or bad breath that won’t go away. Gum disease is one of the main reasons why adults lose their teeth.
Look for warning signs of oral cancer. The 3 most common sites for oral cancer are the sides and bottom of your tongue, and the floor of your moth. The warning signs include:
Bleeding that you can’t explain Open sores that don’t heal within 7 to 10 days White or red patches Numbness or tingling Small lumps of thickening on the sides or bottom of your tongue, the floor or
roof of your mouth and the inside of your cheeks or on your gums. Look for warning signs of tooth decay. The possible warning signs include teeth that are
sensitive to hot, cold, sweetness or pressure. Report any of these warning signs to your dentist
5. Avoid all tobacco products
Staining and missing teeth, infected gums and bad breath are just some of the ways smoking can affect your oral health. Besides ruining your smile, smoking an cause oral cancer, heart disease and a variety of other cancers, all of which can kill you.
All forms of tobacco are dangerous to your oral health and your overall health, not just cigarettes. Smokeless tobacco such as chewing tobacco, snuff and snus tobacco can cause mouth, tongue and lip cancer and can be more addictive than cigarettes.
If you use tobacco products, ask your dentist and your family doctor for advice on how to quit.
If you take care of your teeth and gums at home and visit your dentist regularly, your smile should last you a lifetime. You and your dentist are partners in keeping your oral health good for life.
Canadian Dental Association website: www.cda-adc.ca
45
Flossing
Flossing removes plaque and bacteria that you cannot reach with your toothbrush. If you don’t floss, you are missing more than one-third of your tooth surface. Plaque is the main cause of gum disease. It is an invisible bacterial film that develops on your teeth every day. Within 24 to 36 hours, plaque hardens into tartar (also called calculus), which can only be removed by professional cleaning. Floss at least once a day, and plaque never gets the chance to harden into tartar. Getting into the habit of daily flossing is easier when you floss while doing something else like watching TV or listening to music, for example.
How to Floss your teeth: Step 1- Take a length of floss equal to the distance from your hand to your shoulder. Wrap it
around your index and middle fingers, leaving about two inches between your hands. Step 2 - Slide the floss between your teeth and wrap it into a “C” shape around the base of the
tooth and gently under the gum line. Wipe the tooth from base to tip two to three times. Step 3 - Be sure to floss both sides of every tooth. Don’t forget the backs of your last molars. Go
to a new section of the floss as it wears and picks up particles. Step 4 - Brush your teeth after you floss—it is a more effective method of preventing decay and
gum disease. Brushing
Ideally you should brush after every meal, because the bacterial attack on teeth begins minutes after eating. At the very least, brush once a day and always before you go to bed. Brushing your teeth isn’t complicated, but there is a right and wrong way. How to brush your teeth: Step 1- Brush at a 45 degree angle to your teeth. Direct the bristles to where your gums and teeth
meet. Use a gentle, circular massaging motion, up and down. Don’t scrub. Gums that recede visibly are often a result of years of brushing too hard.
Step 2 - Clean every surface of the tooth. The chewing surface, the cheek side and the tongue side. Step 3 - Don’t rush your brush. A thorough brushing should take at least two to three minutes. Try
timing yourself. Step 4 - Change your usual brushing pattern. Most people brush their teeth the same way all the
time. That means they miss the same spots all the time. Try reversing your usual pattern. Step 5 - Use a soft brush with rounded bristles. The right toothbrush cleans better. Choose a size
and shape that allow you to reach all the way to your back teeth. There are many different types of brushes, so ask your dentist to suggest the best one for you. CDA recommends you replace your toothbrush every three months.
Bad Breath (or halitosis) comes from lots of places: some stems from food getting trapped in pockets in the tonsils, some comes from the stomach, and still more originates from the tongue - where the stench from bacteria build-up can clear a room. Some even comes as a side effect of medication. One good way to handle bad breath: a tongue scraper, which removes bacteria and takes some of the smell away.
46

Dream it! Match ‘em Up!
Activity Goals
Members will understand the functions of hair, skin, nails and teeth and why personal hygiene is important. Age Considerations
Ages 9 & Up Time Required
Approximately 10-15 minutes Equipment/Supplies
Member Manual and pencil or pen Instructions
Have members complete the Match ‘em Up activity and follow up by reviewing the answers and working through discussion questions. Answers: 1. C 2. A 3. D 4. B 5. C 6. A,B,D 7. A 8. B 9. A,B
Important Words
Help members define the following words and look for members using this vocabulary in their discussions. Ask for sentences that "show you know." When members construct novel sentences they confirm their understanding of a new word. Have members use as many terms per sentence to show that connections can be useful. Members can also create impromptu speeches using these terms.
47
Personal Hygiene Keeping your body clean and healthy. Good personal hygiene can make you less likely to become sick. It also helps you look and feel your best.
S.P.F. (Sun Protection Factor)
A number on a scale for rating the degree of protection provided by sunscreens.
Keratin An extremely strong protein which is a major component of skin, hair, nails, hooves, horns and teeth. It can be inflexible and hard, or soft. Most keratin that people interact with is actually dead; hair, skin and nails are formed from dead cells which the body sheds as new cells push up from underneath. If the dead cells are kept in good condition, they will serve as an insulating layer to protect the delicate new keratin below them.

Discussion
Guide members through the discussion questions: Think of some products and tools that we use to keep our bodies clean and smelling good. This could include shampoo, deodorant, floss or nail clippers. What kinds of products do we use to protect our bodies? This might include sunscreen, moisturizers or bug repellents. What might happen to your teeth if you don’t clean them properly? Tooth decay, bad breath or gum disease.
48
Why would it be dangerous to leave your nails dirty and ragged? Dirty nails can carry bacteria that is easily spread. Ragged nails can carry a danger of scratching or cutting skin. What might happen to your hair if you didn’t wash it regularly? It could become oily and greasy looking. It may also begin to smell bad. Do it! Get Out and Learn
Activity Goals
Learn about personal hygiene products and new techniques Age Considerations
Ages 9 & up Time Required
1-2 hours Equipment/Supplies
Dependant upon what activity is selected Note: Glow Germ kit is available to borrow from all MAFRI GO Offices/Centres. Safety Considerations
If using tools for nail care or hair styling, provide instructions for safe and proper use. Instructions
Get going and take members on a tour, visit a professional, or set up a mini make-over. Look online to find techniques for manicures or pedicures, hairstyles, make-up, massages, face masks, etc. Members may also choose to interview or visit a professional or learn about styles, techniques, costs, etc. You could: Visit a hair stylist and learn how to do a new hair style Test deodorants and antiperspirants for best smell and wetness protection before, during, and
after intense exercise.
Help members through some basic planning exercises, by having them complete the “My Plan” in the Member Manual as shown below.
Dig It! If possible, capture a picture of your experience and include it in the Dig It! Section. Have the members explain what was happening in the photo. What’s next?
At this point members have completed all the developmental activities as set out in this project. This final section is a chance for leaders to evaluate the learning of the members, and a chance for the members to present their findings to their peers, parents and others.
Test your cleanliness level. Use a Glow Germ kit to see how well you wash your hands. Use Listerine Agent Cool Blue Rinse or a similar product to see how well you are brushing your teeth. If needed you may need to do some research to wash/brush better.
Talk to an esthetician and try a manicure or pedicure. Visit a drug store and learn about make-up application. Do research on the internet, and learn how to make your own face mask. Test out different hair products to see which one gives you the best
“mohawk”! Go price shopping and compare the costs of personal hygiene products. Or think of your own project!
My Plan
In this skill builder, I am going to: ________________________________________________ The supplies I will need are: ____________________________________________________ I will get resources & information from: ____________________________________________
49
Leader’s Notes
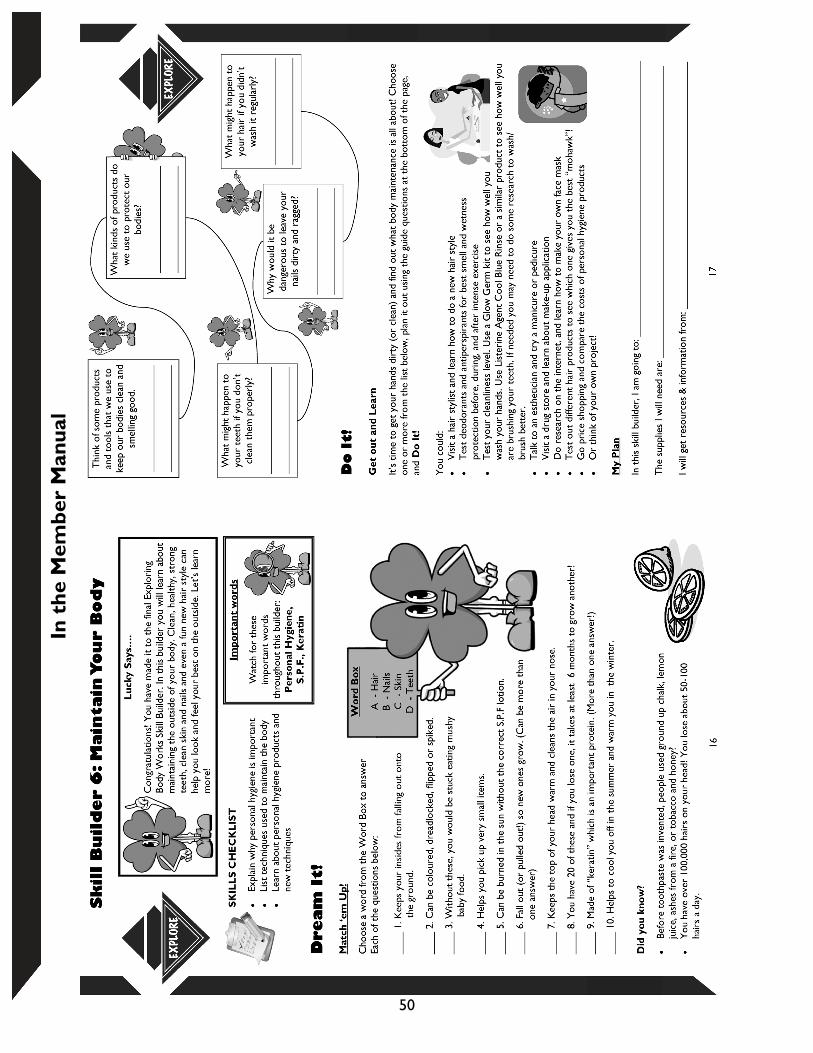
50
In t
he
Mem
ber
Man
ual
51
In t
he
Mem
ber
Man
ual

Showcase Challenge
Have members use their Member Manual to help them in organizing what they learned. The form of this showcase can vary according to the wishes of the leaders and member’s ability. Information could be presented in many forms, some of which are: posters, pamphlets, written reports, speeches, computer presentations, displays, etc. Suggestions are listed on the Showcase Challenge page at the back of the Member Manual. The best results are almost always obtained when members are allowed to present their information in the style of their choice.
52
In t
he
Mem
ber
Man
ual
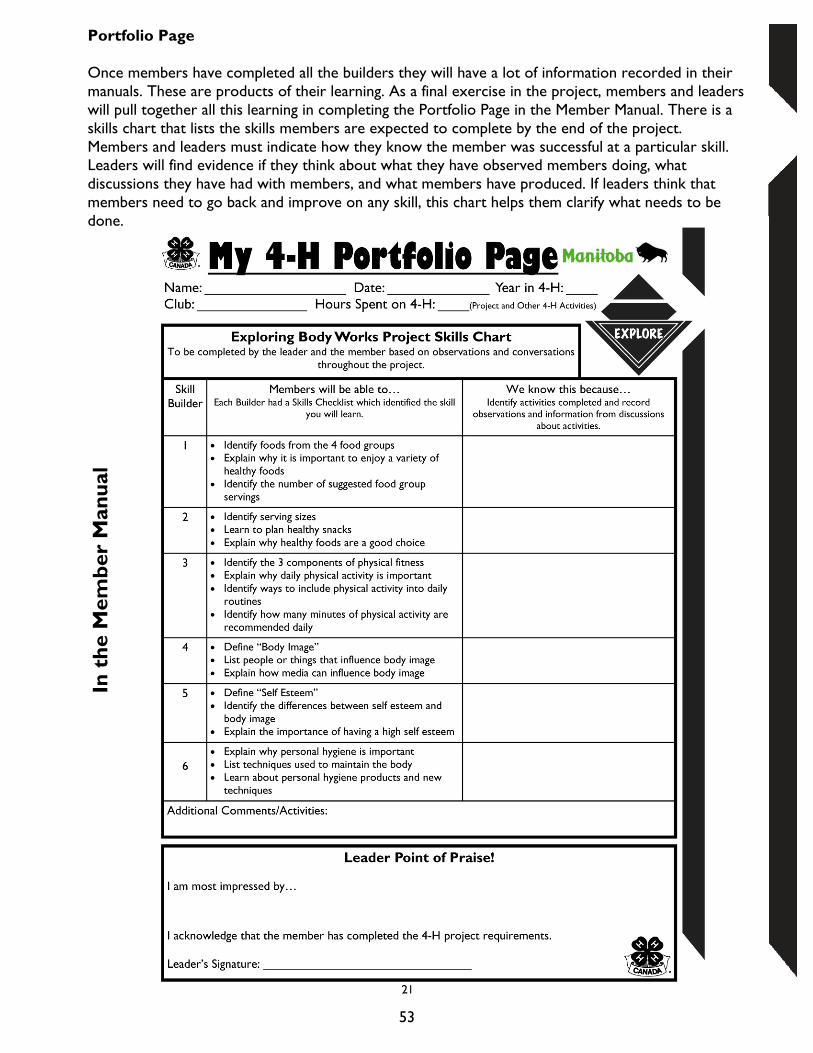
Portfolio Page Once members have completed all the builders they will have a lot of information recorded in their manuals. These are products of their learning. As a final exercise in the project, members and leaders will pull together all this learning in completing the Portfolio Page in the Member Manual. There is a skills chart that lists the skills members are expected to complete by the end of the project. Members and leaders must indicate how they know the member was successful at a particular skill. Leaders will find evidence if they think about what they have observed members doing, what discussions they have had with members, and what members have produced. If leaders think that members need to go back and improve on any skill, this chart helps them clarify what needs to be done.
53
In t
he
Mem
ber
Man
ual
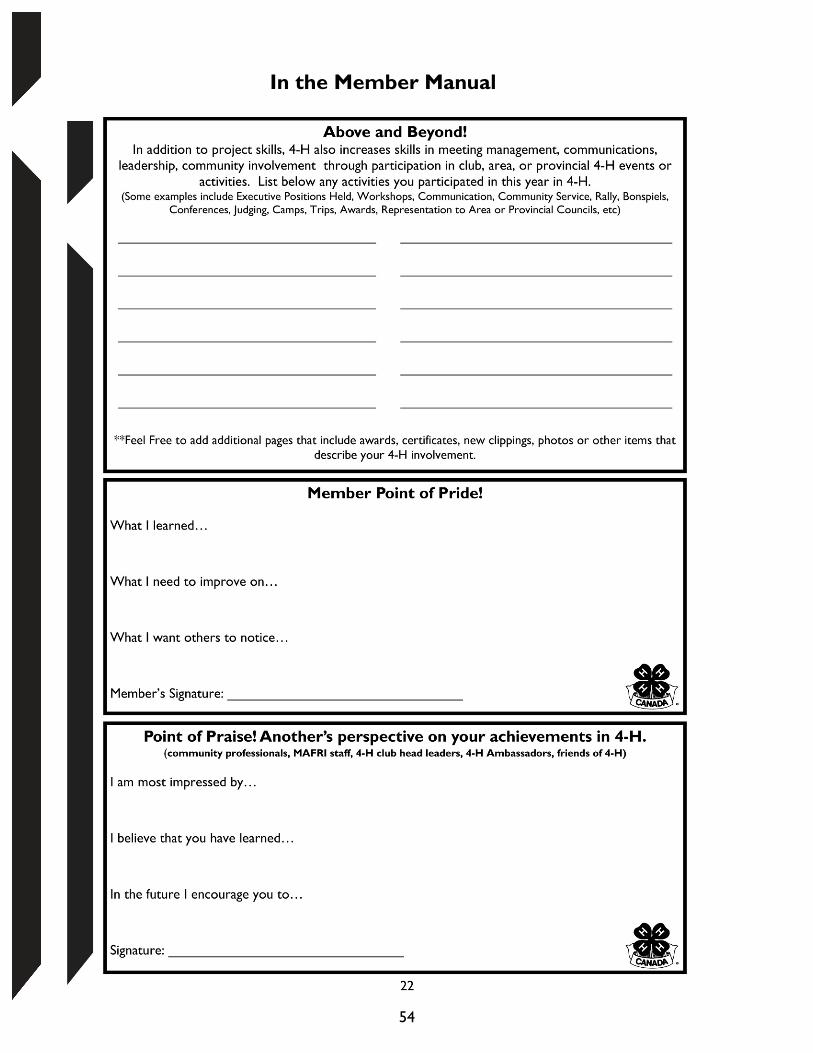
54
In the Member Manual
4-H Achievement
4-H Achievement is… a 4-H club celebration when members have completed their projects. Achievements are planned by the club to give recognition to members and leaders for their accomplishments in their 4-H projects and club activities.
A 4-H Achievement can take many different formats: from choosing a theme, to member project displays, to members using their new skills for the event (entertainment, food, decorating, photographer, etc.), to members presenting their project to the whole group, the options are endless and open to the creativity of the members and leaders in each club! Clubs may also plan their Achievement to promote 4-H to the community or to recognize sponsors and others who have helped the club. Members and leaders - be sure to check your project books for the project completion requirements, so you will be ready for your club’s Achievement celebration!
For more information about 4-H and the many 4-H opportunities available please visit
http://www.gov.mb.ca/agriculture/4-h/
If you have any questions, comments or suggestions for this or other 4-H projects contact:
Manitoba 4-H Projects
Manitoba Agriculture Food and Rural Initiatives 1129 Queens Avenue
Brandon, MB R7A 1L9
Email: [email protected]
Phone: 204-726-6613 Fax: 204-726-6260
This manual is for educational use only and is not intended as professional advice.

4-H Motto
“Learn To Do by Doing” 4-H Pledge
I pledge, My HEAD to clearer thinking, My HEART to greater loyalty, My HANDS to greater service, My HEALTH to better living, For my club, my community, and my country.
What is 4-H?
4-H is an international youth organization involving more than 7 million members in 80 countries around the world. In Canada, 4-H began in 1913 in Roland, Manitoba as a community-based organization dedicated to growth and development of rural youth. Today’s 4-H program reaches both farm and non-farm youth across Canada. The motto of “Learn to Do by Doing” is embodied in the program, as 4-H focuses on skill development as well as personal development of life skills such as communications, leadership and citizenship.
Manitoba 4-H project material is developed by
Manitoba Agriculture, Food and Rural Initiatives (MAFRI)
4-H Quality Equation Principles
Quality People Promote responsibility, respect, trust, honesty, fairness,
sportsmanship, citizenship, teamwork and caring. Quality Experiences
Provide members with personal development and skill development experiences.
Quality Projects Promote and value quality effort. Promote high quality, safe food production within industry standards.