
excel lesson2
41
Lesson 2 Building Simple Workbooks
-
Upload
lheevaldez2091 -
Category
Documents
-
view
241 -
download
0
Transcript of excel lesson2
8/7/2019 excel lesson2
http://slidepdf.com/reader/full/excel-lesson2 1/41
Lesson 2 Building Simple
Workbooks
8/7/2019 excel lesson2
http://slidepdf.com/reader/full/excel-lesson2 2/41
Lesson Objectives
� Use the mouse and keyboard to select single cells,contiguous and noncontiguous ranges, rows, columns,and worksheets.
� Select and print a range.
� Set and clear a print area.
� Clear the contents of one or more cells.
� Undo and redo changes.
� Insert and delete rows and columns.
8/7/2019 excel lesson2
http://slidepdf.com/reader/full/excel-lesson2 3/41
� Save a workbook in a different file format.
� Spell check a worksheet.
� Use the AutoCorrect feature to correct commonmistakes.
� Find and replace data.
� Use the Search command to find files.
� Align and rotate data.
Lesson Objectives (cont.)
� Adjust column width and row height.
8/7/2019 excel lesson2
http://slidepdf.com/reader/full/excel-lesson2 4/41
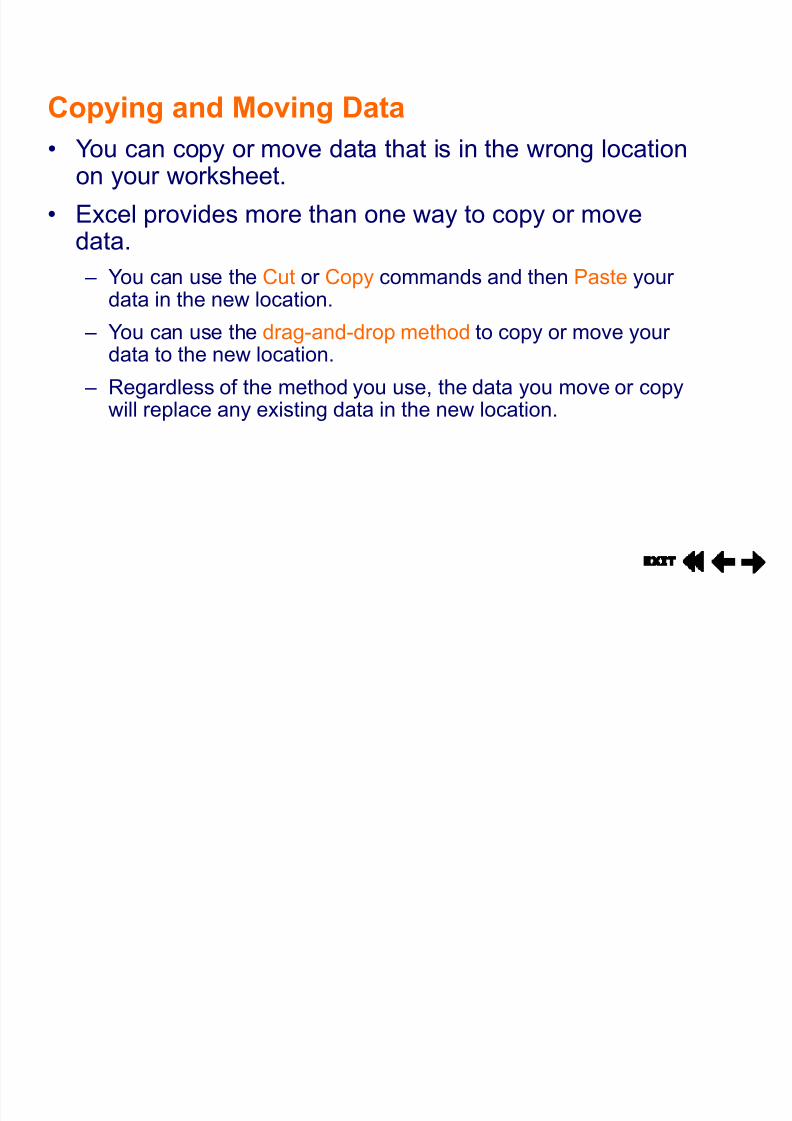
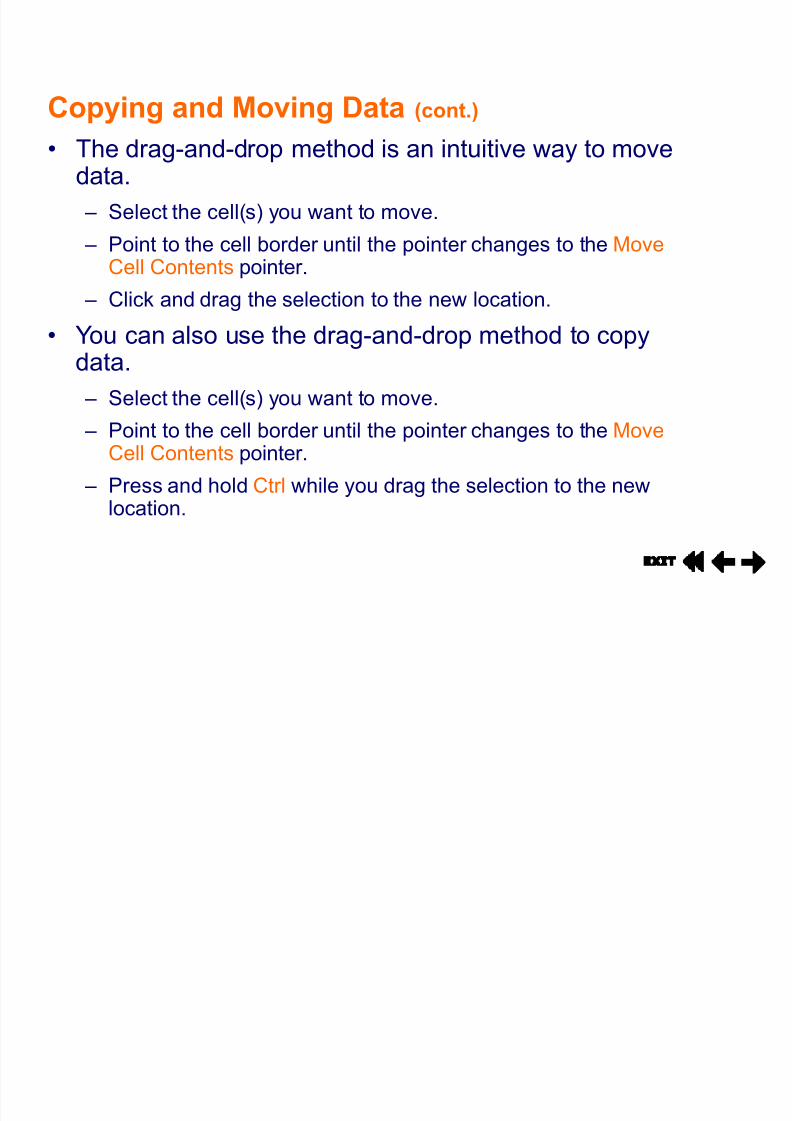
� Move and copy the contents of one or more cells.
� Create, revise, and copy formulas.
� Understand the order of arithmetic operations.
� Use the AutoSum button.� Use the SUM, AVERAGE, MINIMUM, and MAXIMUM
functions.
� Use AutoCalculate.
Lesson Objectives (cont.)
8/7/2019 excel lesson2
http://slidepdf.com/reader/full/excel-lesson2 5/41
Lesson Objectives (cont.)
� Understand and use relative and absolute cellreferences.
� Perform a what if analysis.
� Identify the elements of a chart.
� Create a chart using the Chart Wizard.
� Move, modify, resize, and print a chart.
� Add hyperlinks to a worksheet.

8/7/2019 excel lesson2
http://slidepdf.com/reader/full/excel-lesson2 6/41
Selecting Groups of Cells
� Before you apply a command to a group of cells, youshould select or highlight the cells.
� After you select a group of cells, you can perform anaction on those cells.
� A selected cell or group of cells is called a range.± A range that consists of an adjoining block of cells is called a
contiguous or adjacent range.
± You can also select multiple groups of cells to form anoncontiguous or nonadjacent range.
8/7/2019 excel lesson2
http://slidepdf.com/reader/full/excel-lesson2 7/41
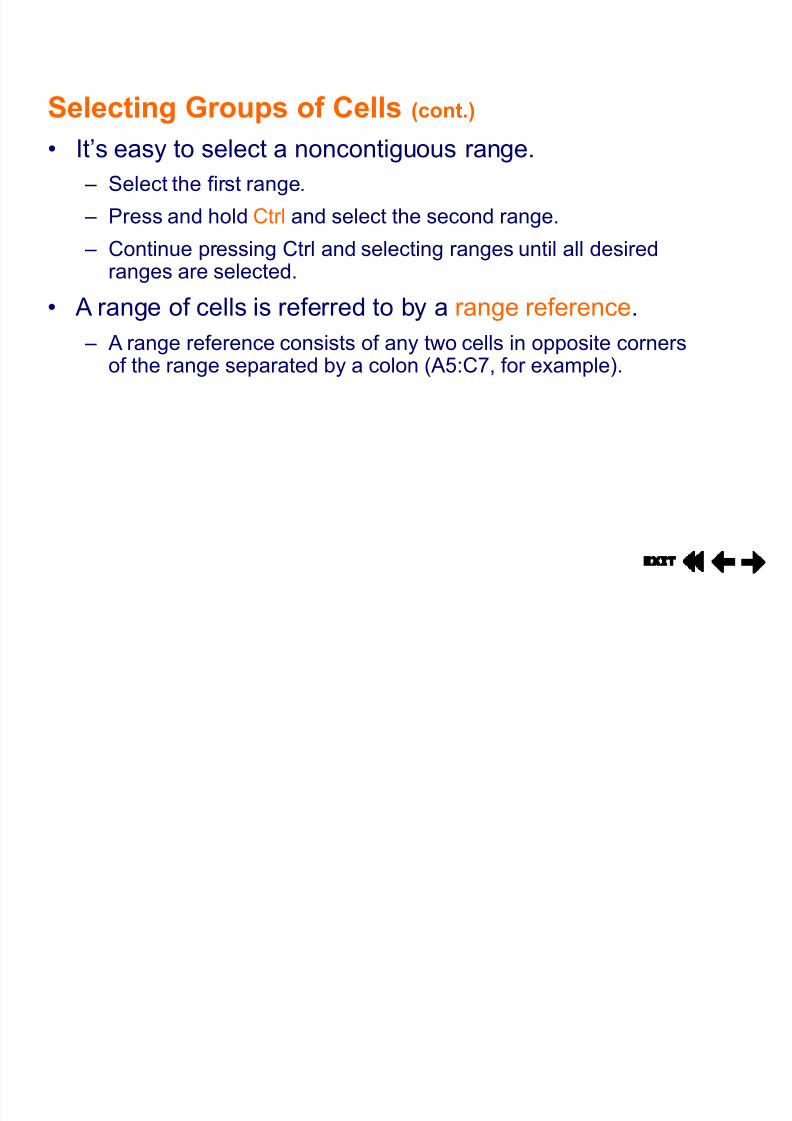
Selecting Groups of Cells (cont.)
� It¶s easy to select a noncontiguous range.
± Select the first range.
± Press and hold Ctrl and select the second range.
± Continue pressing Ctrl and selecting ranges until all desired
ranges are selected.� A range of cells is referred to by a range reference.
± A range reference consists of any two cells in opposite cornersof the range separated by a colon (A5:C7, for example).
8/7/2019 excel lesson2
http://slidepdf.com/reader/full/excel-lesson2 8/41
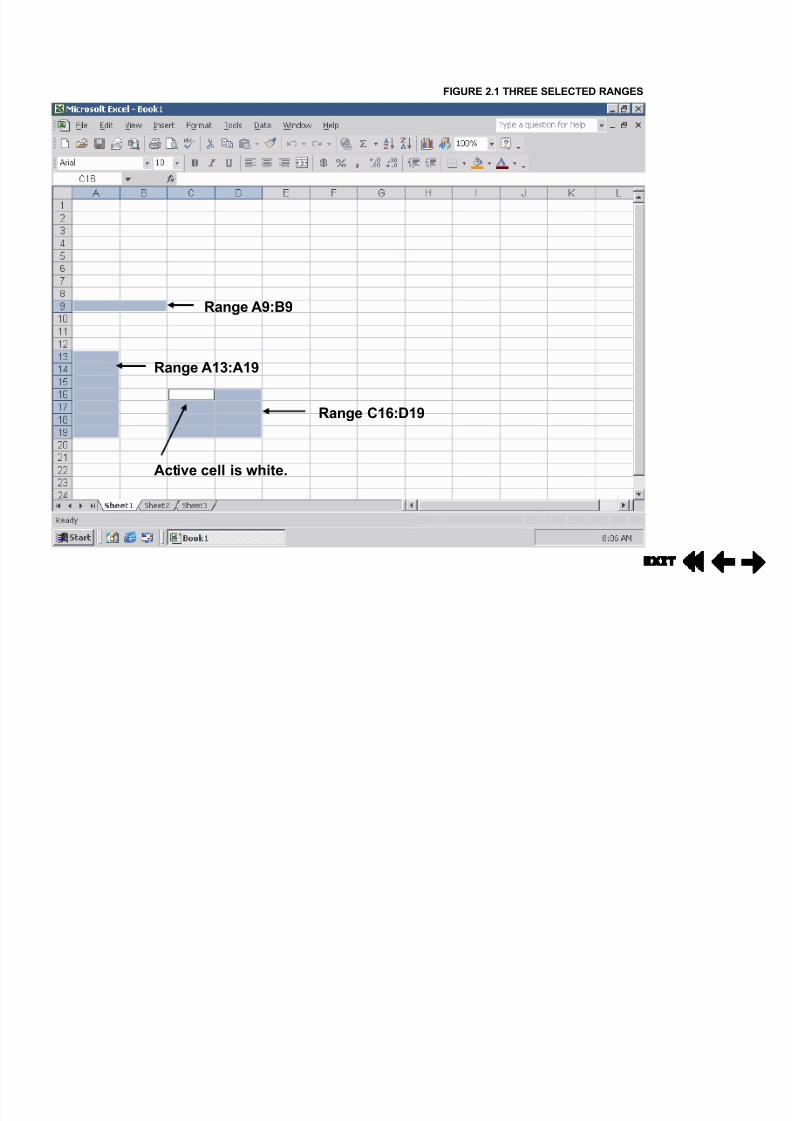
FIGURE 2.1 THREE SELECTED RANGES
Range A9:B9
Range C16:D19
Active cell is white.
Range A13:A19
8/7/2019 excel lesson2
http://slidepdf.com/reader/full/excel-lesson2 9/41
Selecting Groups of Cells (cont.)
� You can select rows, columns, and even an entireworksheet at once.
� Click a row heading to select the entire row.
� Drag across row headings to select multiple adjacent
rows.
� Click a column heading to select an entire column.
� Drag across column headings to select multipleadjacent columns.
� Click the Select All button to select the entire worksheet.
8/7/2019 excel lesson2
http://slidepdf.com/reader/full/excel-lesson2 10/41
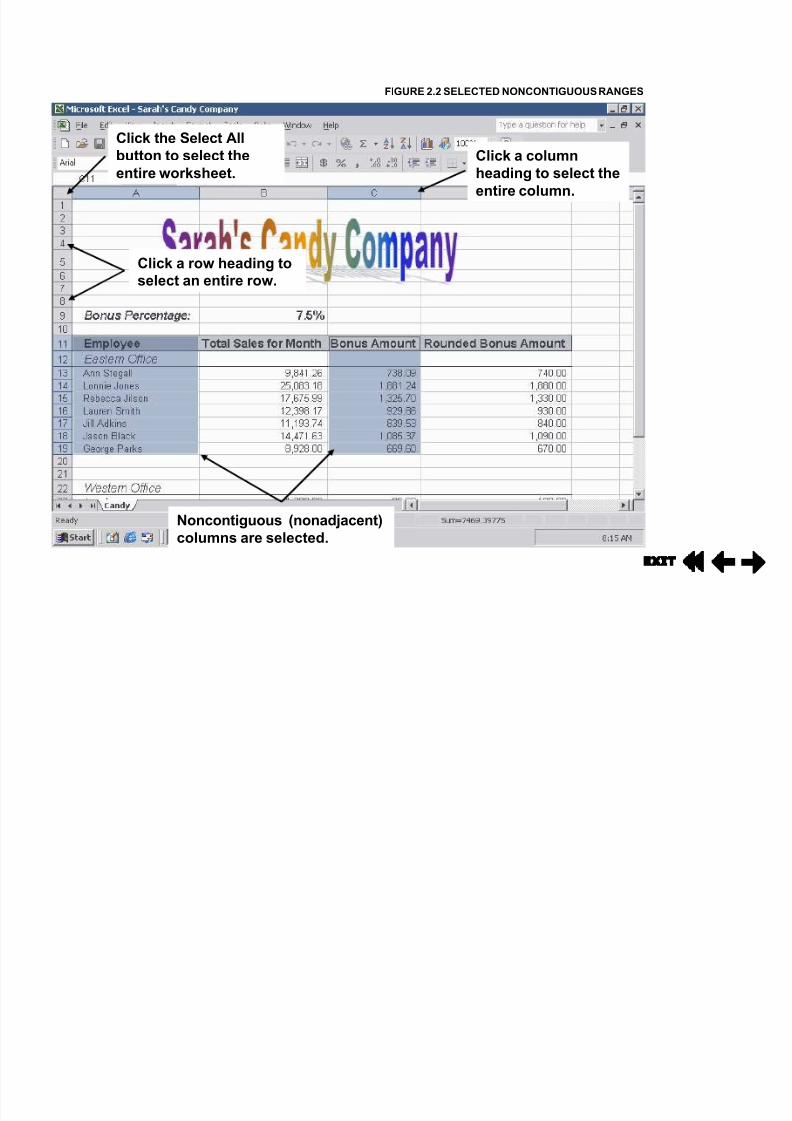
FIGURE 2.2 SELECTED NONCONTIGUOUS RANGES
Click a column
heading to select the
entire column.
Noncontiguous (nonadjacent)
columns are selected.
Click a row heading to
select an entire row.
Click the Select Allbutton to select the
entire worksheet.
8/7/2019 excel lesson2
http://slidepdf.com/reader/full/excel-lesson2 11/41
Selecting Groups of Cells (cont.)
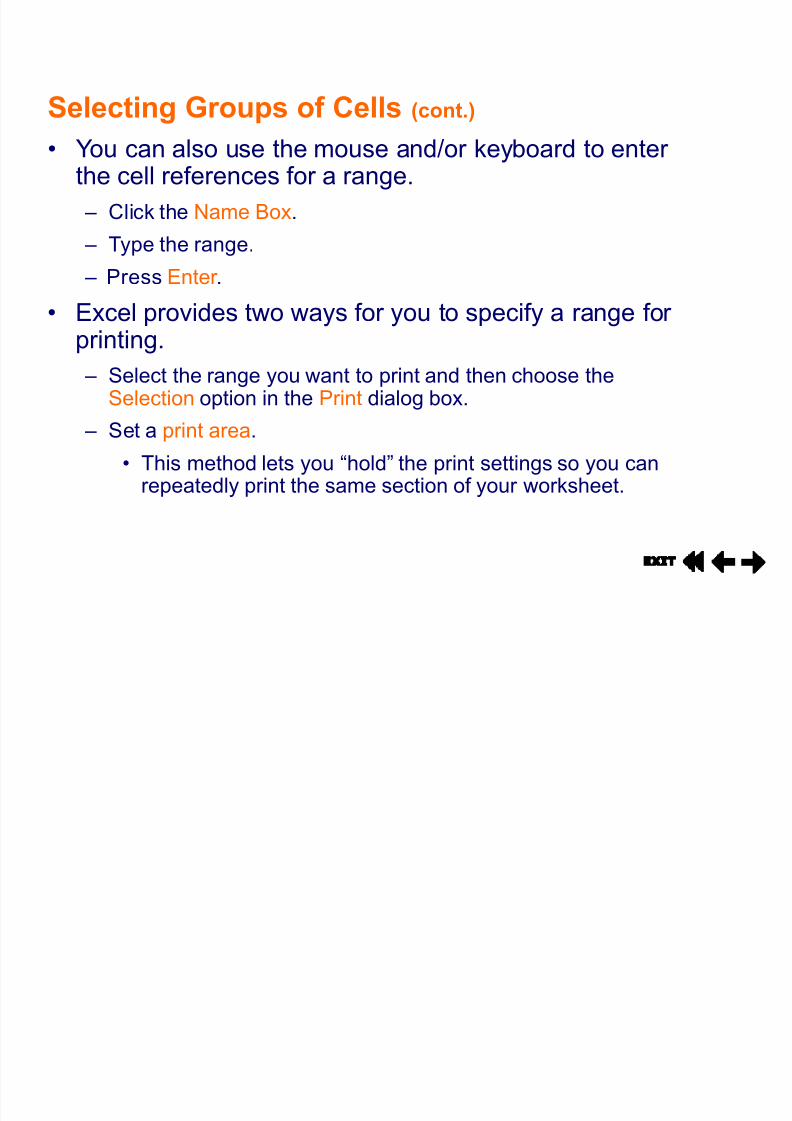
� You can also use the mouse and/or keyboard to enter the cell references for a range.
± Click the Name Box.
± Type the range.
± Press Enter .
� Excel provides two ways for you to specify a range for printing.
± Select the range you want to print and then choose theSelection option in the Print dialog box.
± Set a print area.
� This method lets you ³hold´ the print settings so you canrepeatedly print the same section of your worksheet.
8/7/2019 excel lesson2
http://slidepdf.com/reader/full/excel-lesson2 12/41
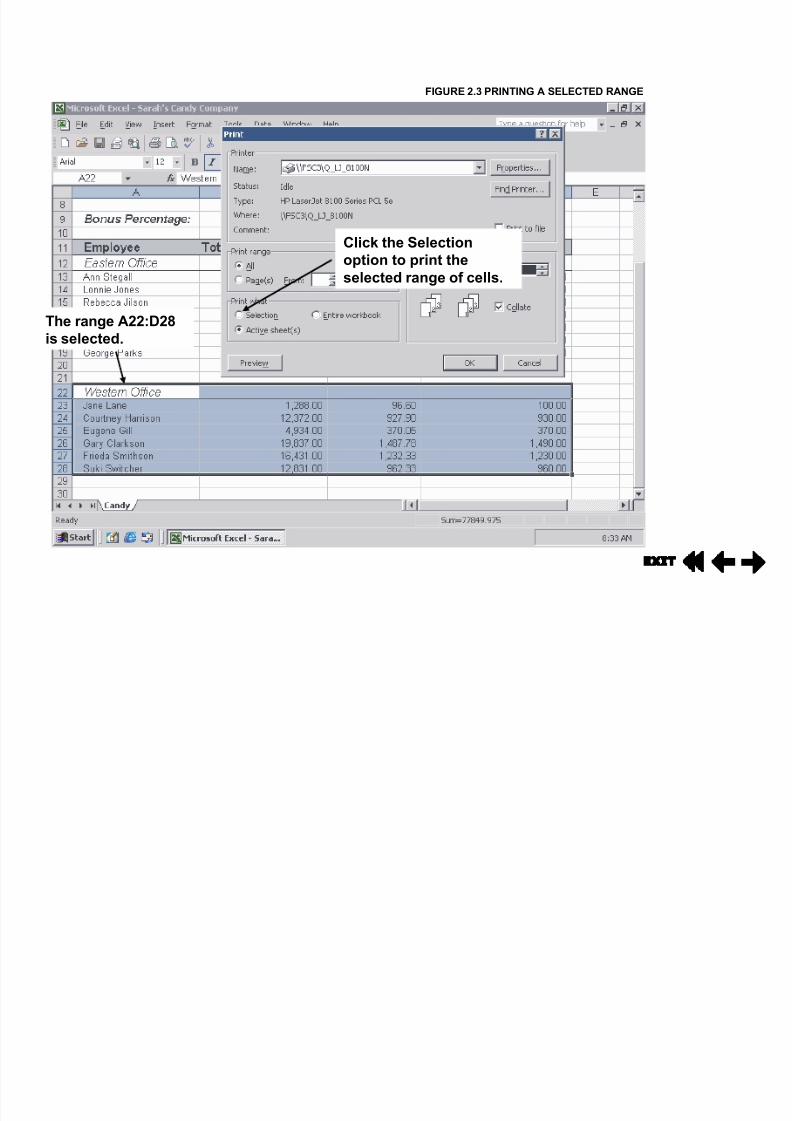
FIGURE 2.3 PRINTING A SELECTED RANGE
Click the Selection
option to print the
selected range of cells.
The range A22:D28
is selected.

8/7/2019 excel lesson2
http://slidepdf.com/reader/full/excel-lesson2 13/41
Deleting and Restoring Data
� Excel makes it easy to delete data.
± To clear the contents of a cell, right-click the cell or range andclick Clear Contents on the shortcut menu.
± To clear the contents of an entire worksheet, click the Select Allbutton and press Delete.
� If you accidentally delete data that you didn¶t mean todelete, use the Undo command to reverse your actions.
± You can use the Undo command to reverse several types of actions (not just accidental deletions).
± You can reverse as many as 16 of your most recent actions.
� Use the Redo command to reverse the most recentUndo command.
8/7/2019 excel lesson2
http://slidepdf.com/reader/full/excel-lesson2 14/41
Restructuring Your Worksheet
� Excel provides several ways to restructure your worksheet.
± Insert cells, rows, and columns.
± Delete cells, rows, and columns.
± Move data.± Copy data.
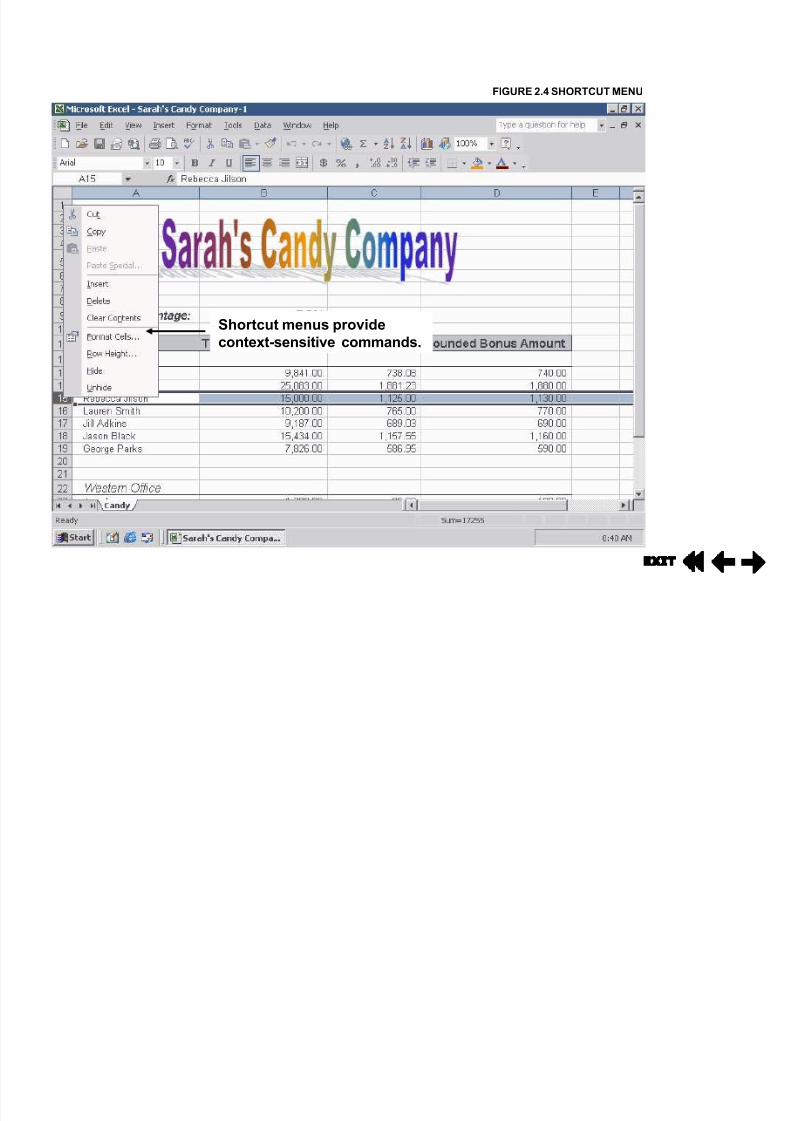
� Use menu commands, keyboard shortcuts, or shortcutmenus to perform the restructuring actions.
± A shortcut menu is a context-sensitive menu that you activate byright-clicking an object.
8/7/2019 excel lesson2
http://slidepdf.com/reader/full/excel-lesson2 15/41
FIGURE 2.4 SHORTCUT MENU
Shortcut menus provide
context-sensitive commands.
8/7/2019 excel lesson2
http://slidepdf.com/reader/full/excel-lesson2 16/41
Inserting Cells, Columns, and Rows
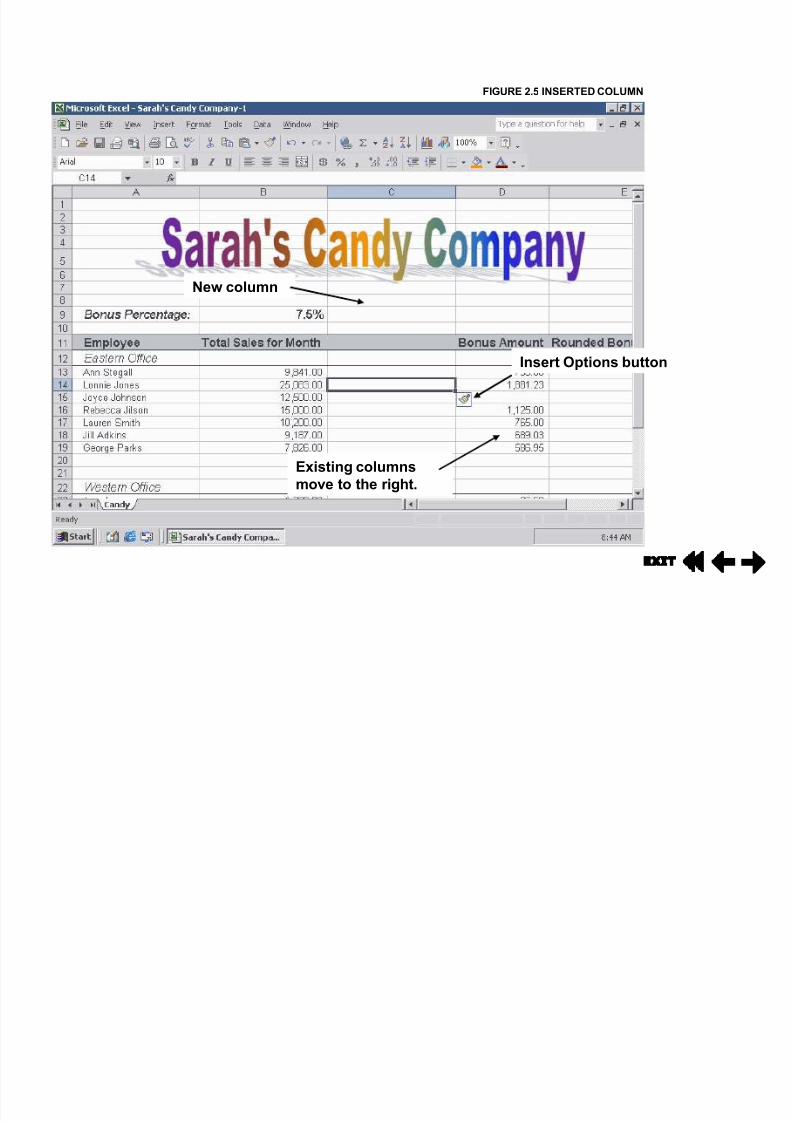
� You may need to insert cells, columns, and rows in your worksheet to make room for new data.
� When you insert cells, columns, and rows into your worksheet, Excel moves the existing data out of the
way.± New cells are inserted either to the right of or below the cell
pointer.
± New rows are inserted above the cell pointer.
± New columns are inserted to the left of the cell pointer.
� Whenever possible, insert entire columns or rows rather than individual cells.
± Otherwise, your data may become misaligned.
8/7/2019 excel lesson2
http://slidepdf.com/reader/full/excel-lesson2 17/41
FIGURE 2.5 INSERTED COLUMN
Insert Options button
Existing columns
move to the right.
New column
8/7/2019 excel lesson2
http://slidepdf.com/reader/full/excel-lesson2 18/41
Deleting Cells, Columns, and Rows
� You can delete cells, columns, and rows you no longer need.
� Deleting a column or row is not the same as clearing thecontents of a column or row.
± When you delete a column or row, the entire column or row isremoved.
± Excel moves up the remaining rows or moves over theremaining columns.
� When you delete a cell, the remaining cells are moved
to fill the hole created by the deletion.
� Whenever possible, delete entire columns or rowsrather than individual cells.
± Otherwise, your data may become misaligned.
8/7/2019 excel lesson2
http://slidepdf.com/reader/full/excel-lesson2 19/41
8/7/2019 excel lesson2
http://slidepdf.com/reader/full/excel-lesson2 20/41

8/7/2019 excel lesson2
http://slidepdf.com/reader/full/excel-lesson2 21/41
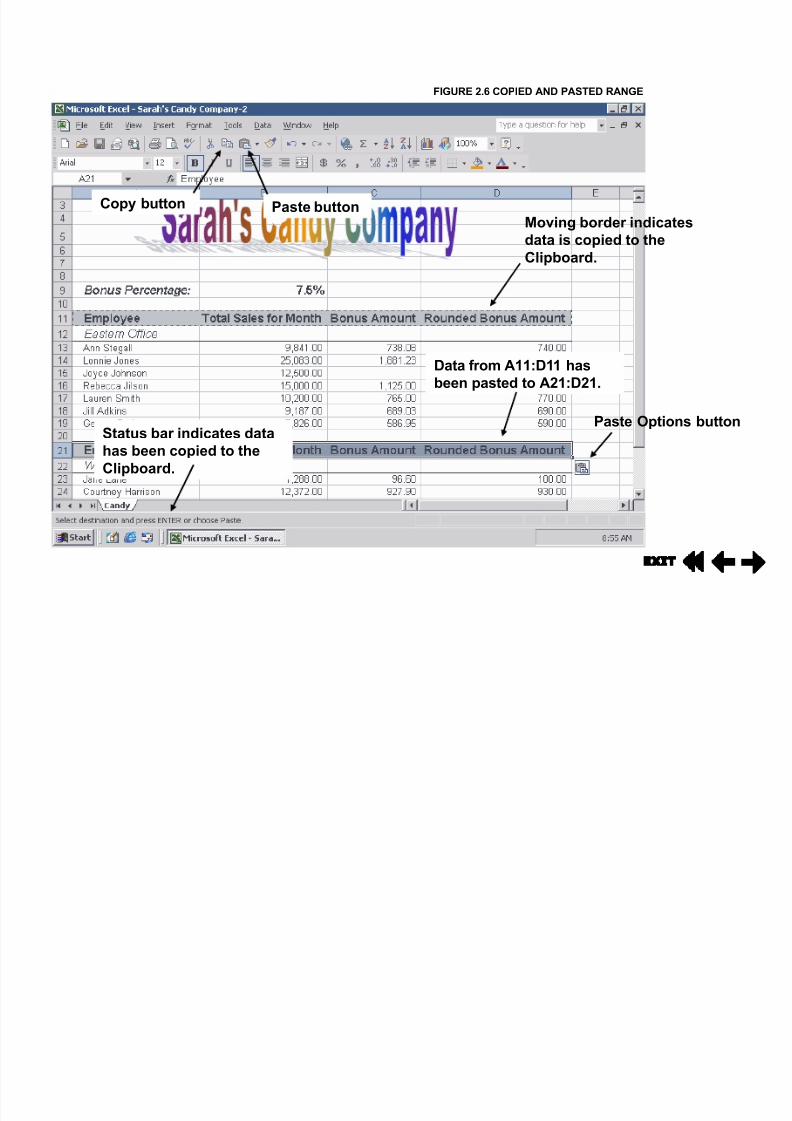
Copying and Moving Data (cont.)
� When you use the Cut or Copy commands to move or copy data, Excel uses the Clipboard to temporarily storethe data.
± Select the cell you want to copy or move.
± Click the Cut button to move the data to the Clipboard, or theCopy button to copy the data to the Clipboard.
± Position the cursor in the cell where you want the data toappear.
± Click the Paste button to place the data in the new location.
� Use the Paste Options feature to copy a cell¶s formattingalong with the data.
8/7/2019 excel lesson2
http://slidepdf.com/reader/full/excel-lesson2 22/41
8/7/2019 excel lesson2
http://slidepdf.com/reader/full/excel-lesson2 23/41
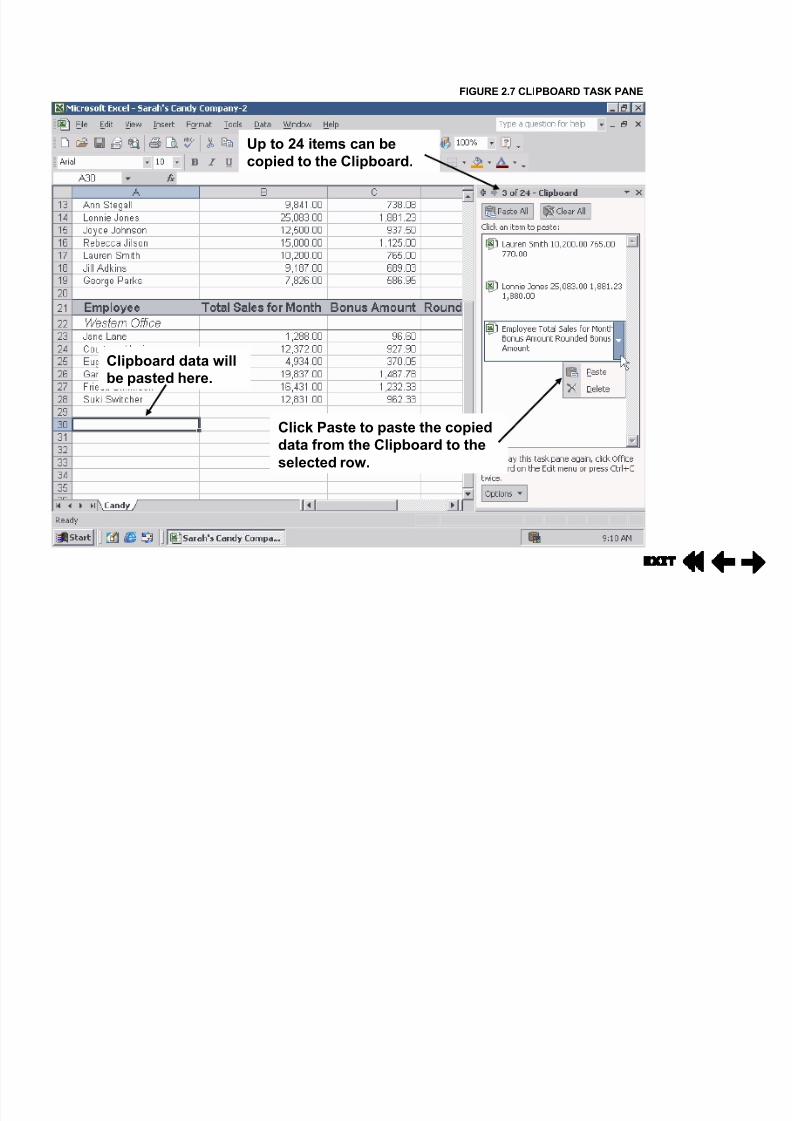
FIGURE 2.7 CLIPBOARD TASK PANE
Up to 24 items can becopied to the Clipboard.
Click Paste to paste the copied
data from the Clipboard to the
selected row.
Clipboard data will
be pasted here.
8/7/2019 excel lesson2
http://slidepdf.com/reader/full/excel-lesson2 24/41
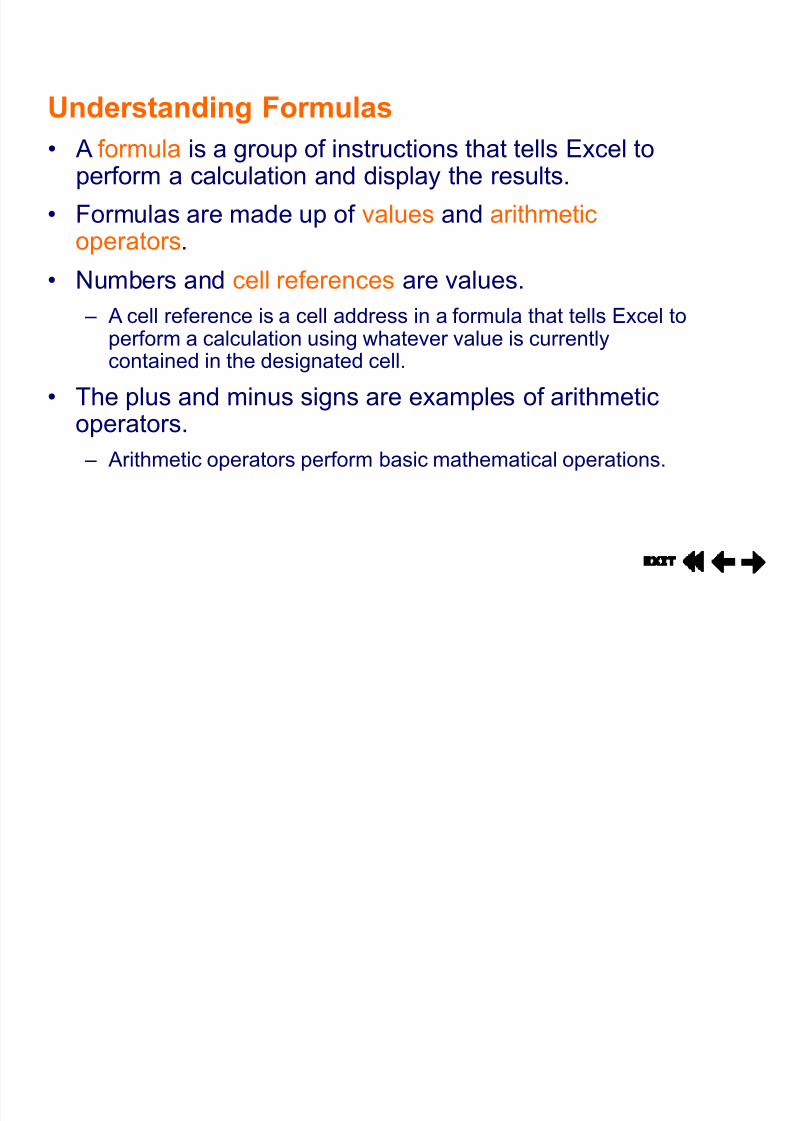
Understanding Formulas
� A formula is a group of instructions that tells Excel toperform a calculation and display the results.
� Formulas are made up of values and arithmeticoperators.
� Numbers and cell references are values.± A cell reference is a cell address in a formula that tells Excel to
perform a calculation using whatever value is currentlycontained in the designated cell.
� The plus and minus signs are examples of arithmetic
operators.
± Arithmetic operators perform basic mathematical operations.
8/7/2019 excel lesson2
http://slidepdf.com/reader/full/excel-lesson2 25/41
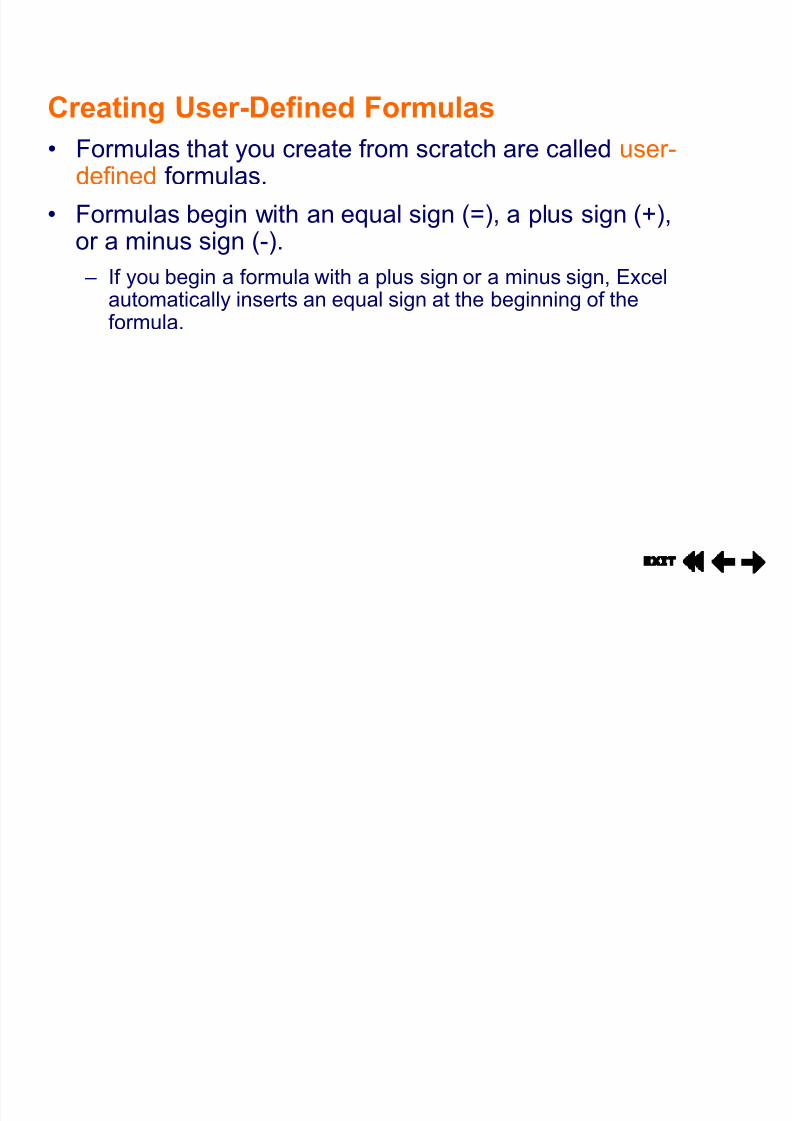
Creating User-Defined Formulas
� Formulas that you create from scratch are called user-defined formulas.
� Formulas begin with an equal sign (=), a plus sign (+),or a minus sign (-).
± If you begin a formula with a plus sign or a minus sign, Excelautomatically inserts an equal sign at the beginning of theformula.
8/7/2019 excel lesson2
http://slidepdf.com/reader/full/excel-lesson2 26/41
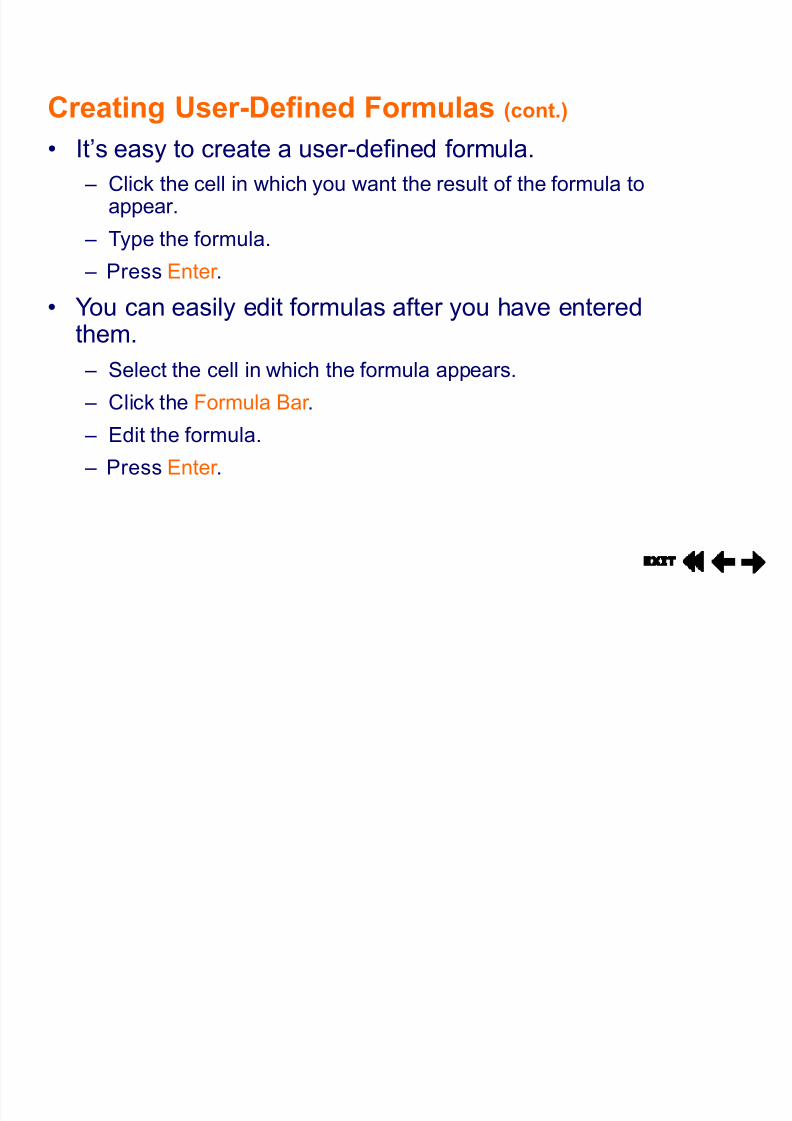
Creating User-Defined Formulas (cont.)
� It¶s easy to create a user-defined formula.
± Click the cell in which you want the result of the formula toappear.
± Type the formula.
± Press Enter .� You can easily edit formulas after you have entered
them.
± Select the cell in which the formula appears.
± Click the Formula Bar .
± Edit the formula.
± Press Enter .
8/7/2019 excel lesson2
http://slidepdf.com/reader/full/excel-lesson2 27/41
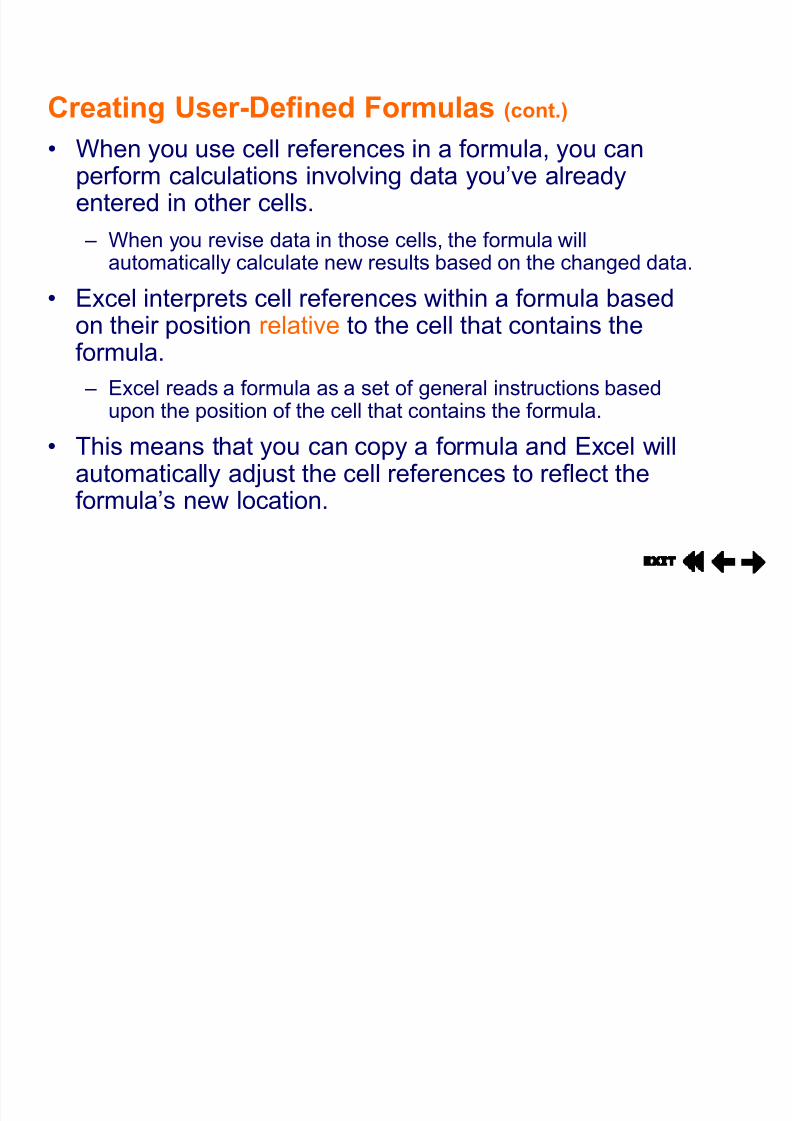
Creating User-Defined Formulas (cont.)
� When you use cell references in a formula, you canperform calculations involving data you¶ve alreadyentered in other cells.
± When you revise data in those cells, the formula willautomatically calculate new results based on the changed data.
� Excel interprets cell references within a formula basedon their position relative to the cell that contains theformula.
± Excel reads a formula as a set of general instructions based
upon the position of the cell that contains the formula.� This means that you can copy a formula and Excel will
automatically adjust the cell references to reflect theformula¶s new location.
8/7/2019 excel lesson2
http://slidepdf.com/reader/full/excel-lesson2 28/41
Creating User-Defined Formulas (cont.)
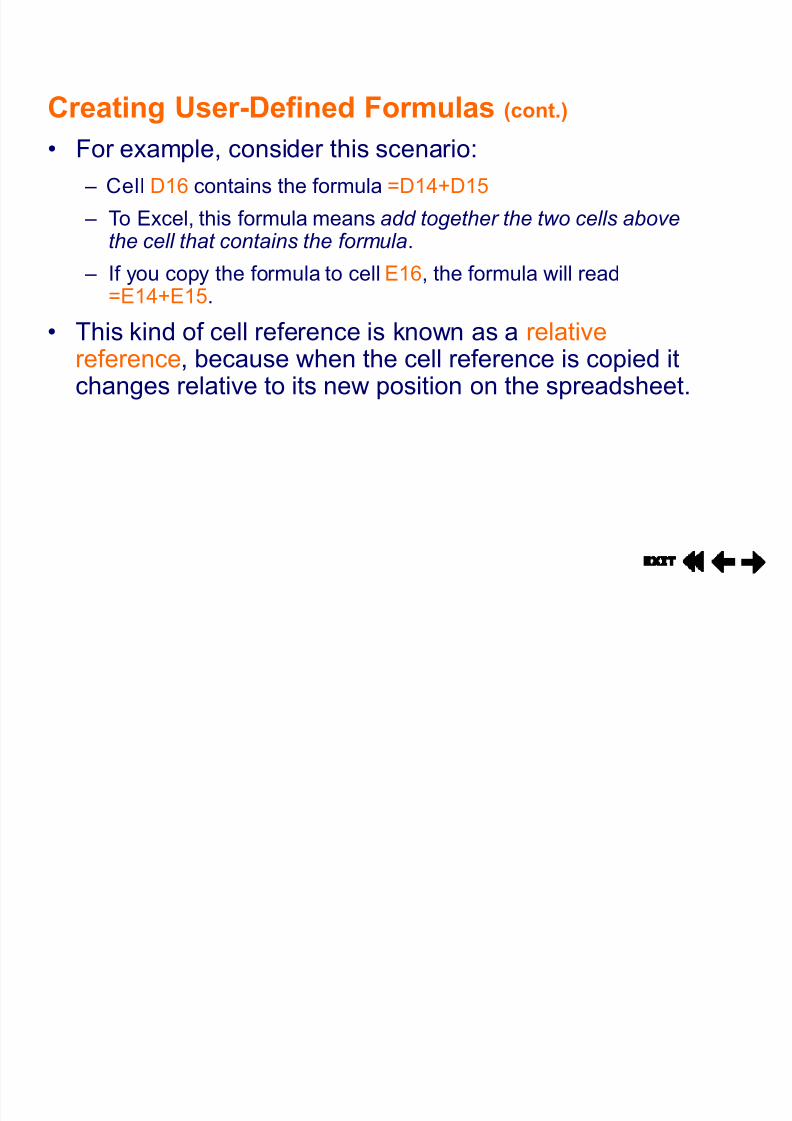
� For example, consider this scenario:
± Cell D16 contains the formula =D14+D15
± To Excel, this formula means add together the two cells abovethe cell that contains the formula.
± If you copy the formula to cell E16, the formula will read=E14+E15.
� This kind of cell reference is known as a relativereference, because when the cell reference is copied itchanges relative to its new position on the spreadsheet.
8/7/2019 excel lesson2
http://slidepdf.com/reader/full/excel-lesson2 29/41
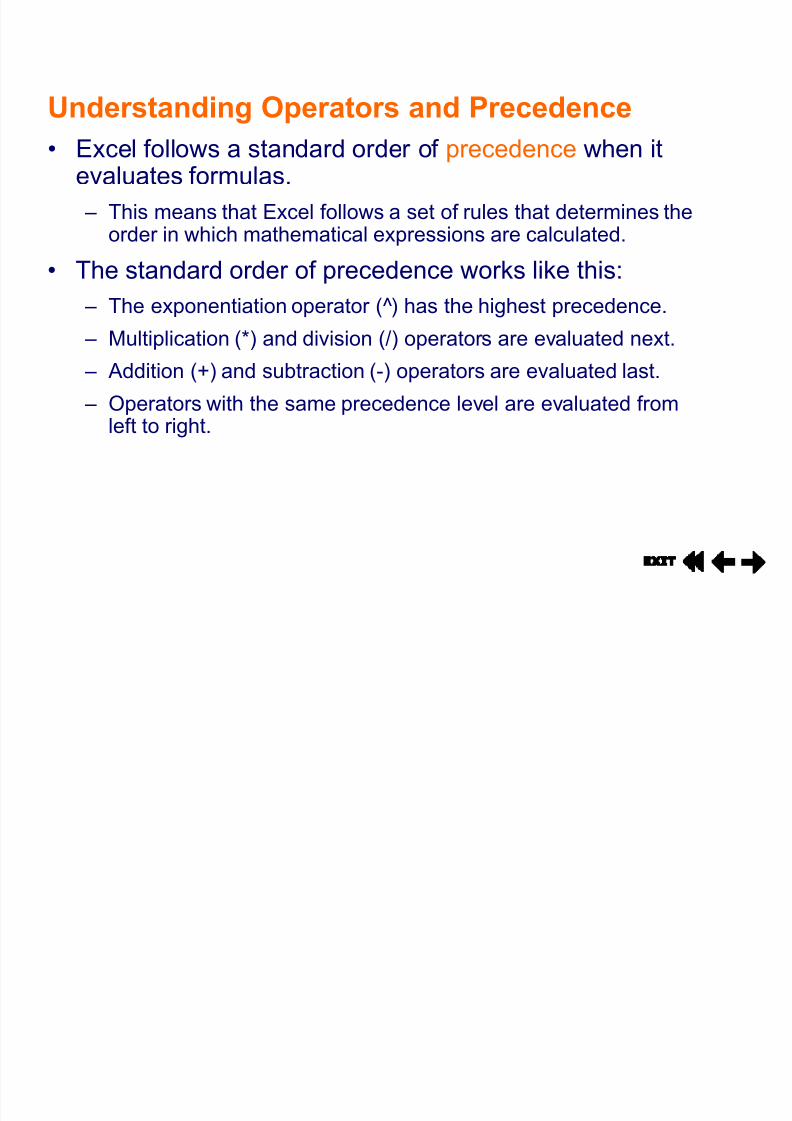
Understanding Operators and Precedence
� Excel follows a standard order of precedence when itevaluates formulas.
± This means that Excel follows a set of rules that determines theorder in which mathematical expressions are calculated.
� The standard order of precedence works like this:± The exponentiation operator ( )̂ has the highest precedence.
± Multiplication (*) and division (/) operators are evaluated next.
± Addition (+) and subtraction (-) operators are evaluated last.
± Operators with the same precedence level are evaluated fromleft to right.
8/7/2019 excel lesson2
http://slidepdf.com/reader/full/excel-lesson2 30/41
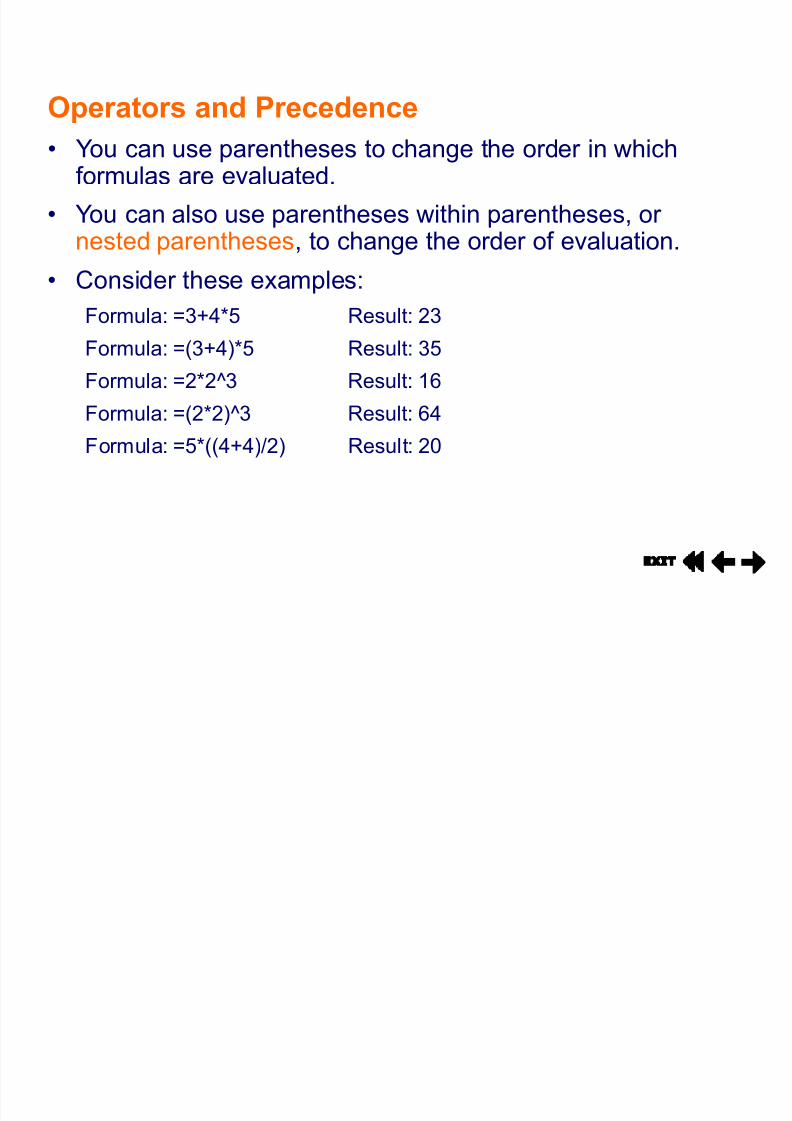
Operators and Precedence
� You can use parentheses to change the order in whichformulas are evaluated.
� You can also use parentheses within parentheses, or nested parentheses, to change the order of evaluation.
� Consider these examples:Formula: =3+4*5 Result: 23
Formula: =(3+4)*5 Result: 35
Formula: =2*2^3 Result: 16
Formula: =(2*2)^3 Result: 64Formula: =5*((4+4)/2) Result: 20
8/7/2019 excel lesson2
http://slidepdf.com/reader/full/excel-lesson2 31/41
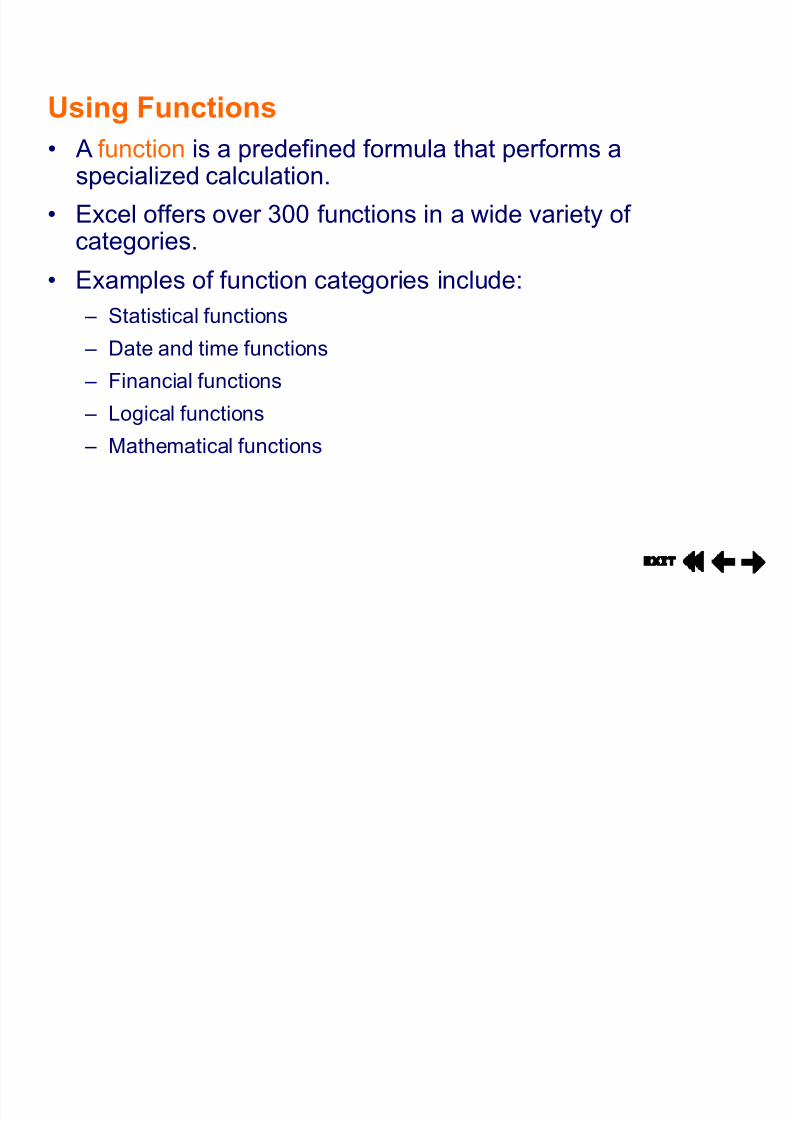
Using Functions
� A function is a predefined formula that performs aspecialized calculation.
� Excel offers over 300 functions in a wide variety of categories.
� Examples of function categories include:± Statistical functions
± Date and time functions
± Financial functions
± Logical functions± Mathematical functions
8/7/2019 excel lesson2
http://slidepdf.com/reader/full/excel-lesson2 32/41
Using Functions (cont.)
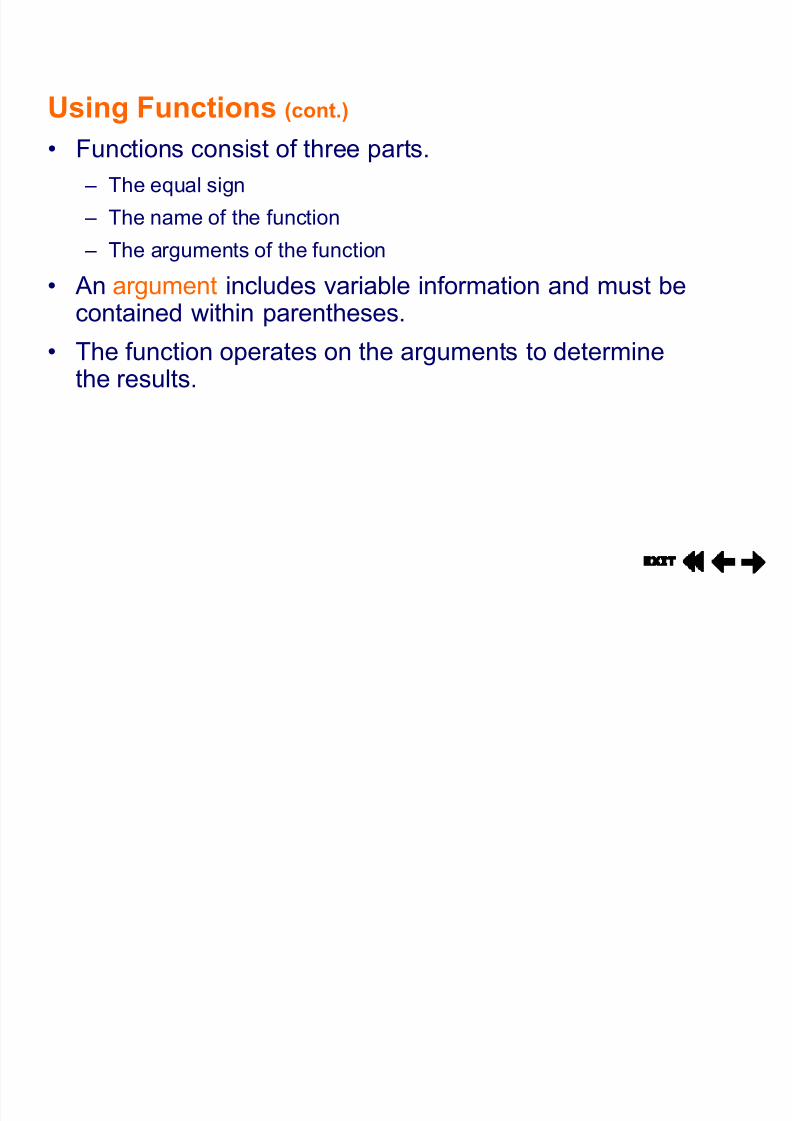
� Functions consist of three parts.
± The equal sign
± The name of the function
± The arguments of the function
� An argument includes variable information and must becontained within parentheses.
� The function operates on the arguments to determinethe results.
8/7/2019 excel lesson2
http://slidepdf.com/reader/full/excel-lesson2 33/41
Using Functions (cont.)
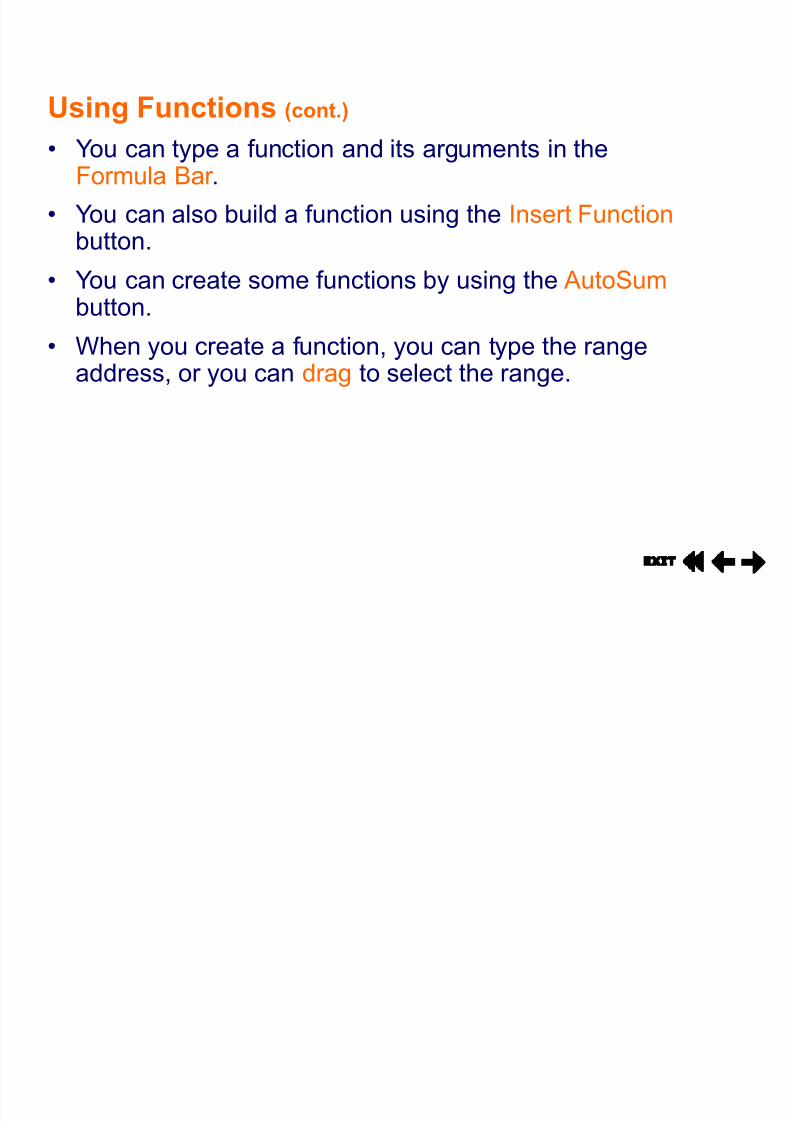
� You can type a function and its arguments in theFormula Bar .
� You can also build a function using the Insert Functionbutton.
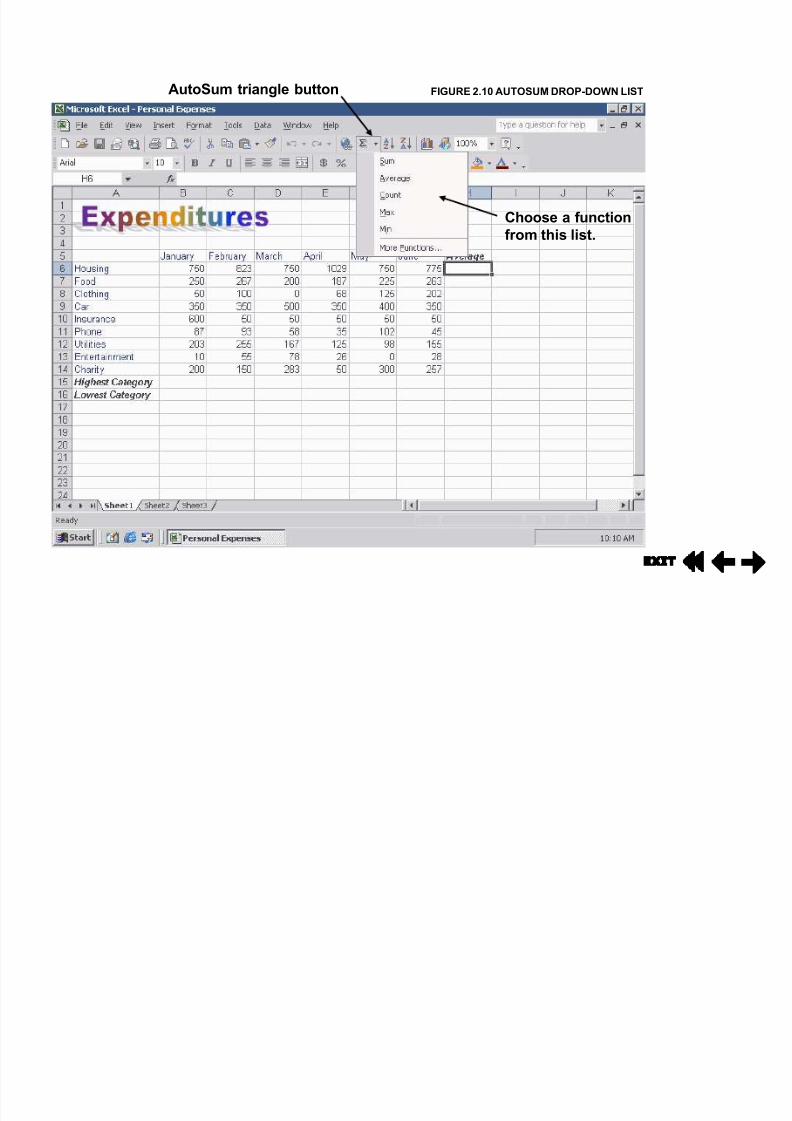
� You can create some functions by using the AutoSumbutton.
� When you create a function, you can type the rangeaddress, or you can drag to select the range.
8/7/2019 excel lesson2
http://slidepdf.com/reader/full/excel-lesson2 34/41
Using Functions (cont.)
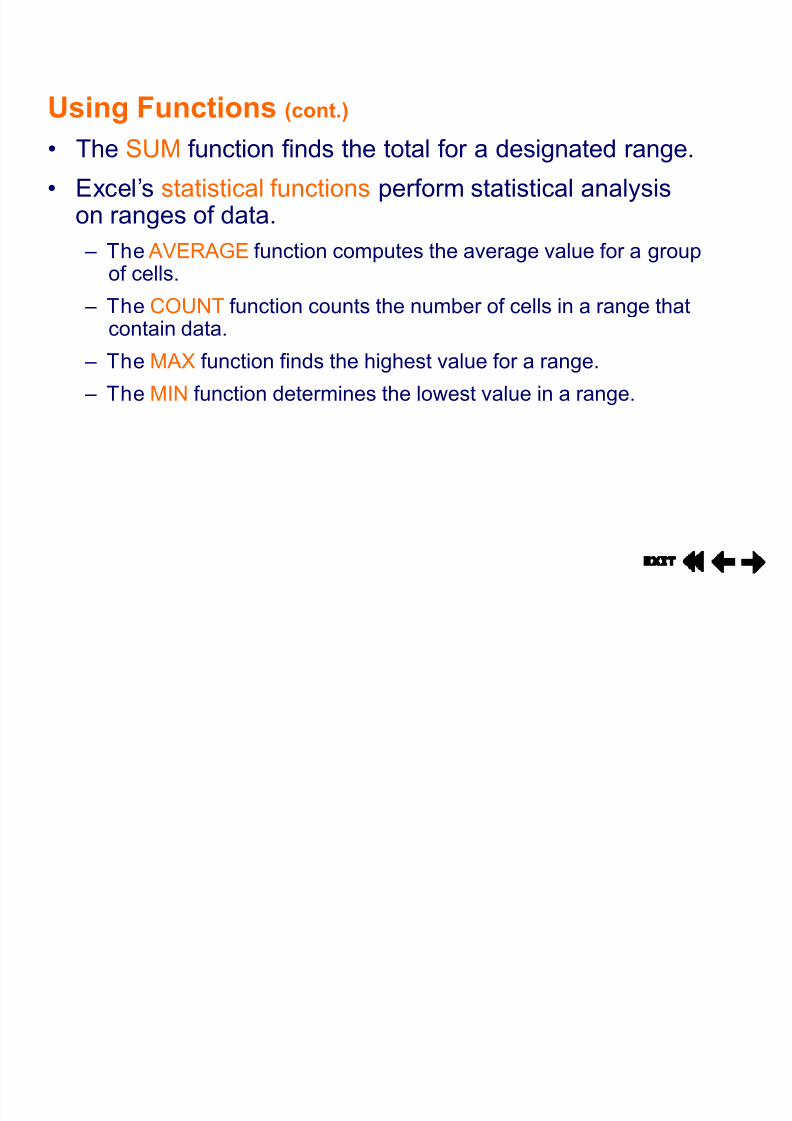
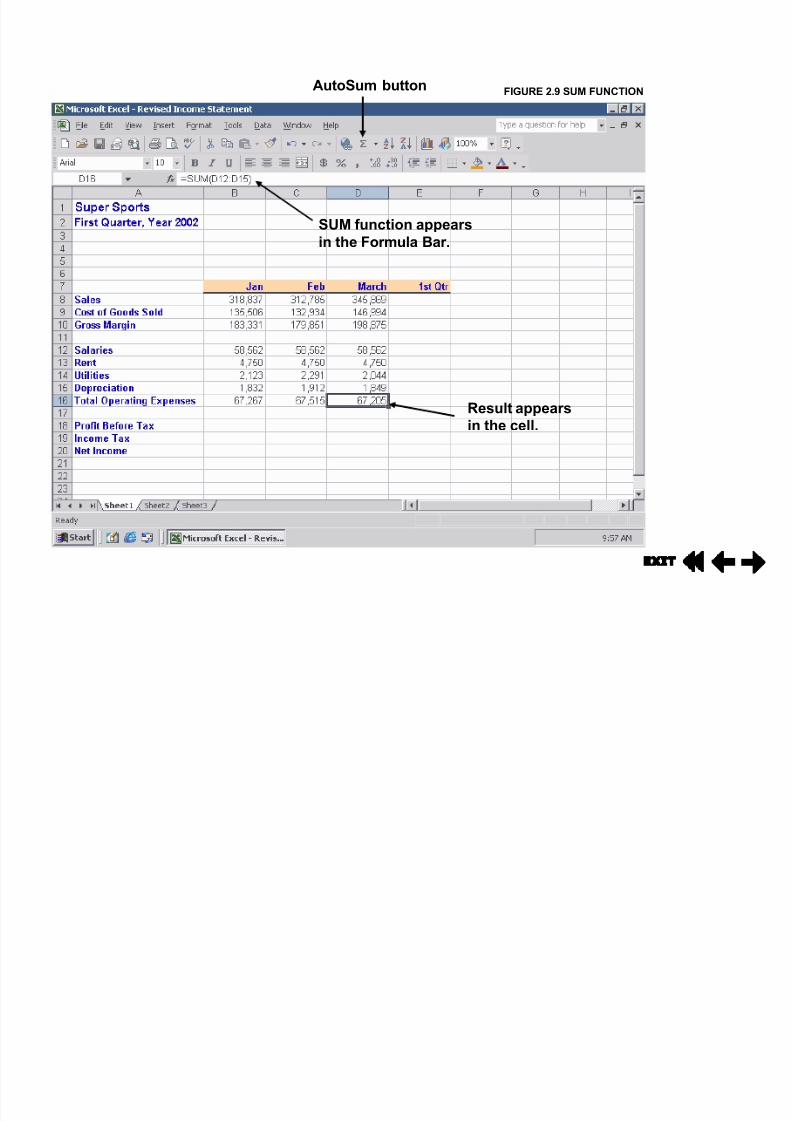
� The SUM function finds the total for a designated range.
� Excel¶s statistical functions perform statistical analysison ranges of data.
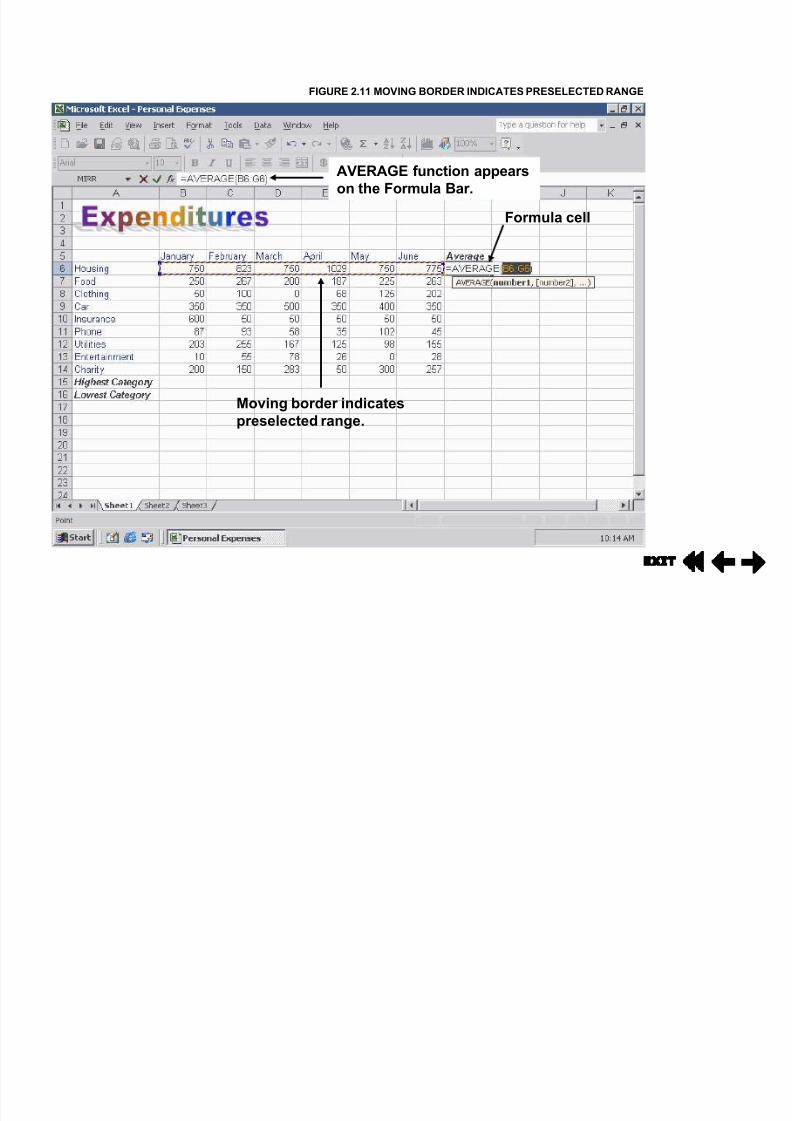
± The AVERAGE function computes the average value for a group
of cells.± The COUNT function counts the number of cells in a range that
contain data.
± The MAX function finds the highest value for a range.
± The MIN function determines the lowest value in a range.
8/7/2019 excel lesson2
http://slidepdf.com/reader/full/excel-lesson2 35/41
FIGURE 2.9 SUM FUNCTION
SUM function appears
in the Formula Bar.
Result appears
in the cell.
AutoSum button
8/7/2019 excel lesson2
http://slidepdf.com/reader/full/excel-lesson2 36/41
FIGURE 2.10 AUTOSUM DROP-DOWN LIST
Choose a function
from this list.
AutoSum triangle button
8/7/2019 excel lesson2
http://slidepdf.com/reader/full/excel-lesson2 37/41
FIGURE 2.11 MOVING BORDER INDICATES PRESELECTED RANGE
Formula cell
Moving border indicates
preselected range.
AVERAGE function appears
on the Formula Bar.

8/7/2019 excel lesson2
http://slidepdf.com/reader/full/excel-lesson2 38/41
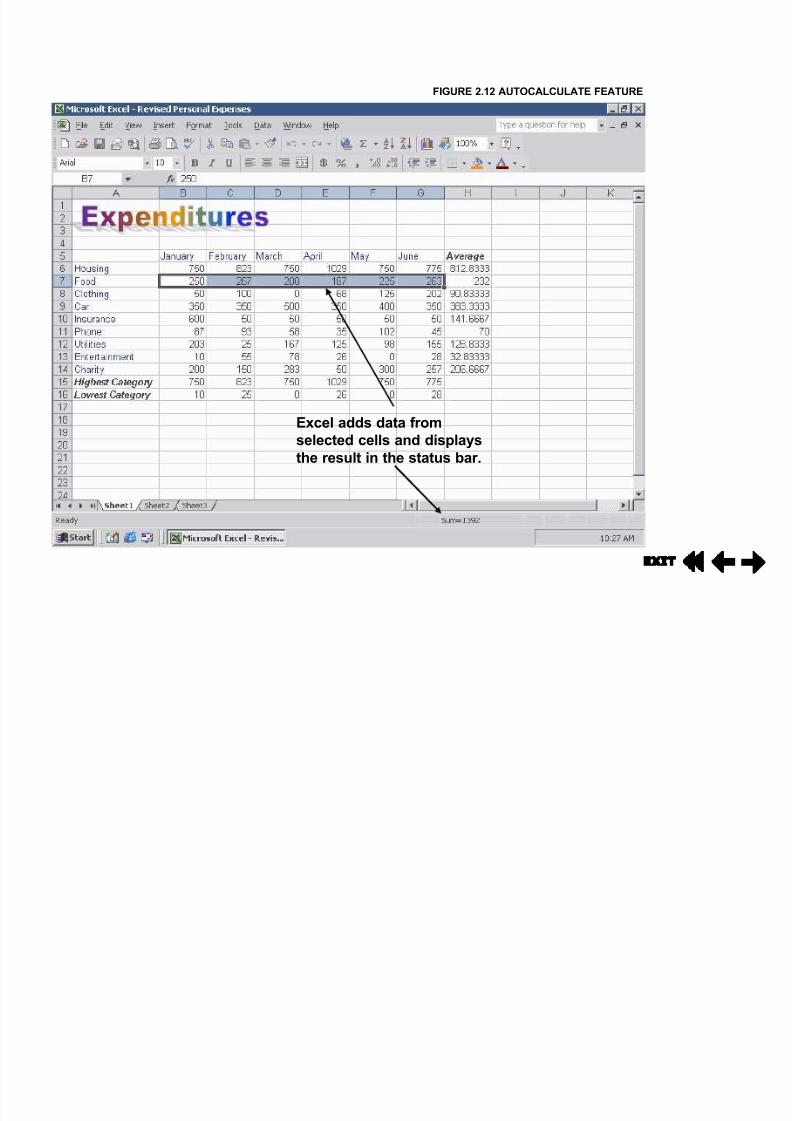
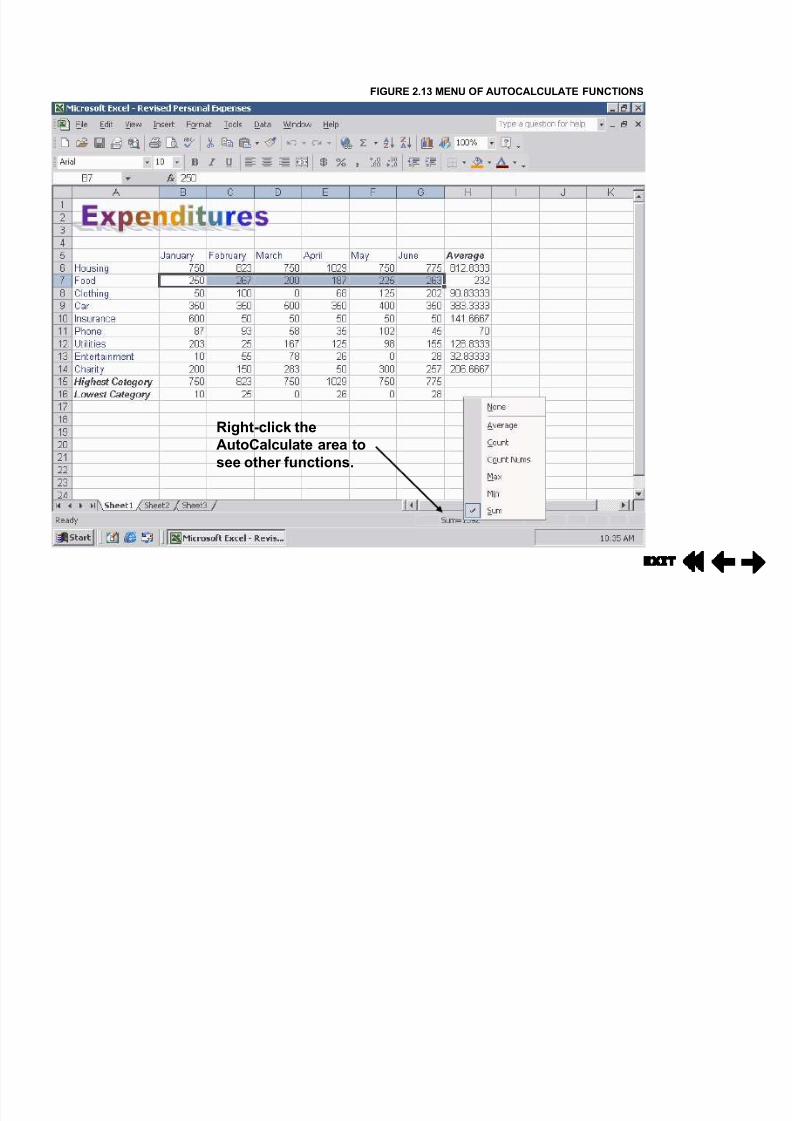
Using AutoCalculate
� Use Excel¶s AutoCalculate feature to quickly display thetotal, average, minimum, or maximum value in a rangewithout entering a formula.
� AutoCalculate is easy to use.
± Select the range you want to calculate.± View the total on the status bar.
± Right-click the status bar to choose a statistical function (suchas MAX or MIN) from the shortcut menu.
8/7/2019 excel lesson2
http://slidepdf.com/reader/full/excel-lesson2 39/41
FIGURE 2.12 AUTOCALCULATE FEATURE
Excel adds data fromselected cells and displays
the result in the status bar.
8/7/2019 excel lesson2
http://slidepdf.com/reader/full/excel-lesson2 40/41
FIGURE 2.13 MENU OF AUTOCALCULATE FUNCTIONS
Right-click the
AutoCalculate area to
see other functions.

8/7/2019 excel lesson2
http://slidepdf.com/reader/full/excel-lesson2 41/41
EndLesson 2