Examination: Physical to Functional
140
EXAMINATION: PHYSICAL TO FUNCTIONAL JUSTIN HILDEBRAND DC
Transcript of Examination: Physical to Functional

EXAMINATION: PHYSICAL TO
FUNCTIONAL
JUSTIN HILDEBRAND DC

WHO AM I?
• Dr. Justin Hildebrand
• Clinician at NXT Rehab & Wellness
• Doctor of Chiropractic, Cleveland
Chiropractic College
• Cleveland University Adjunct Faculty
• Structure & Function Instructor
• Board Certified Chiropractic Acupuncture
• National Academy of Sports Medicine
• Corrective Exercise Specialist & Golf
Fitness Specialist
• Highland Community College Faculty
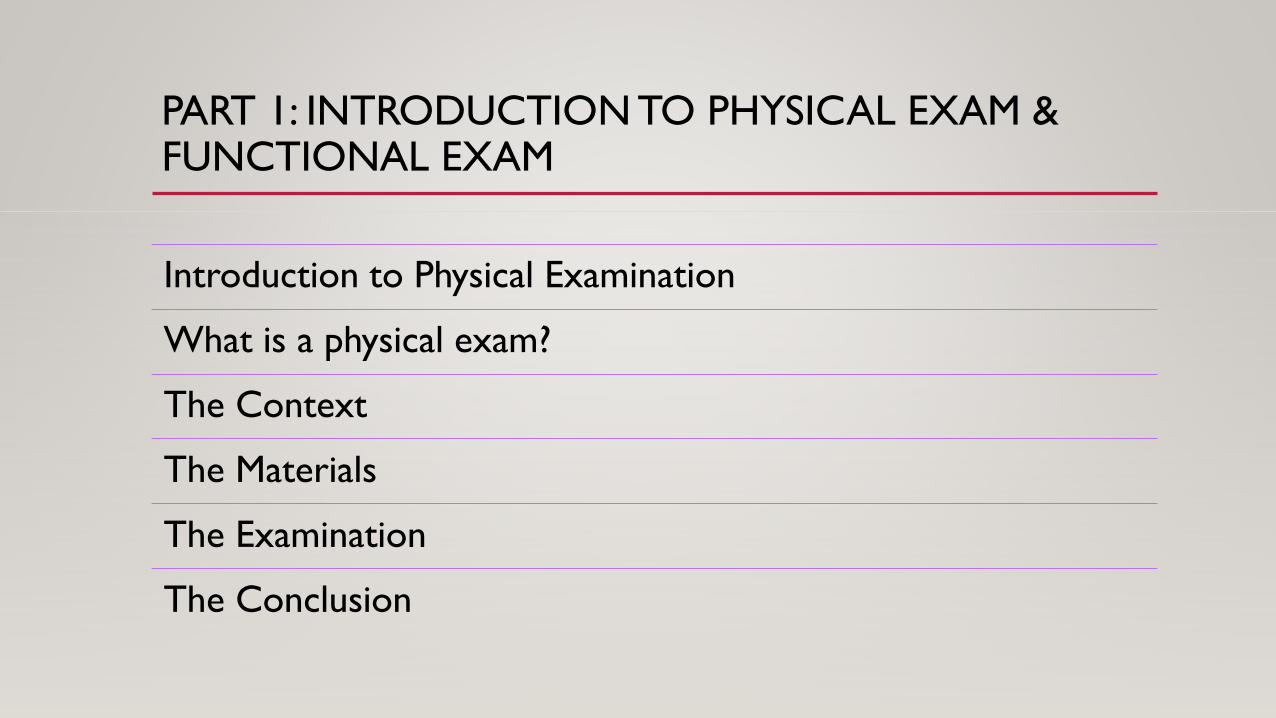
PART 1: INTRODUCTION TO PHYSICAL EXAM & FUNCTIONAL EXAM
Introduction to Physical Examination
What is a physical exam?
The Context
The Materials
The Examination
The Conclusion
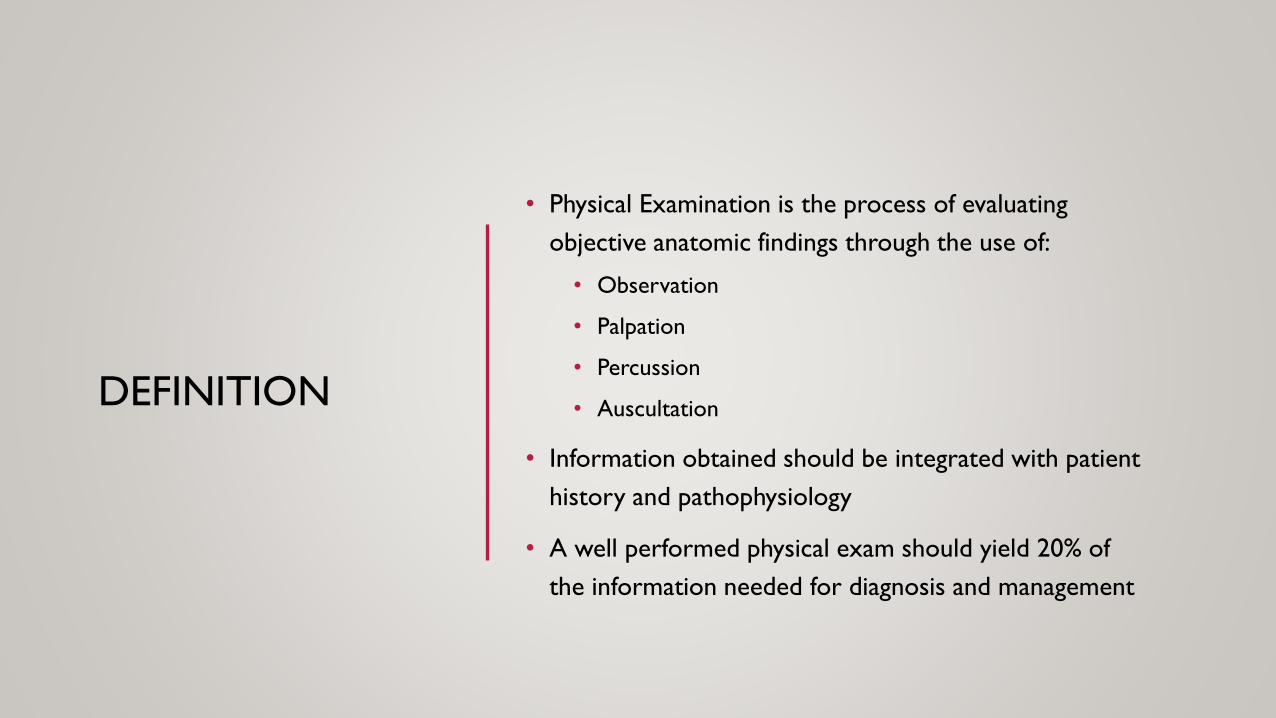
DEFINITION
• Physical Examination is the process of evaluating
objective anatomic findings through the use of:
• Observation
• Palpation
• Percussion
• Auscultation
• Information obtained should be integrated with patient
history and pathophysiology
• A well performed physical exam should yield 20% of
the information needed for diagnosis and management

THE CONTEXT
• Since some medical history is generally known about
each patient during the examination, this information
should be used to enhance the effectiveness
• Pertinent information can be learned from
• Speech
• Gestures
• Habits
• Gait
• Patient manipulation of features and extremities

CONTINUED
• Pigment changes such as cyanosis, jaundice and
pallor should be noted
• Blanching & Flushing may provide clues about
vasomotor function and physiologic
abnormalities

MATERIALS
Most important toll is the ability to be inquisitive and have a sensitive mind
2nd most is mastering observation, palpation, percussion, & auscultation
Tools required see Table 4.1

TABLE 4.1EQUIPMENT REQUIRED FOR THE PHYSICAL EXAMINATION
Cotton wisp Sphygmomanometer
Flashlight Stethoscope
Lubricating jelly Tape measure
Mydriatic solution Thermometer
Oto-ophthalmoscope Tissues
Paper towels Tongue depressors
Pocket eye chart Tuning fork (128 Hz)
Rectal gloves Vials of coffee and cinnamon
Reflex hammer
THE PHYSICAL EXAM
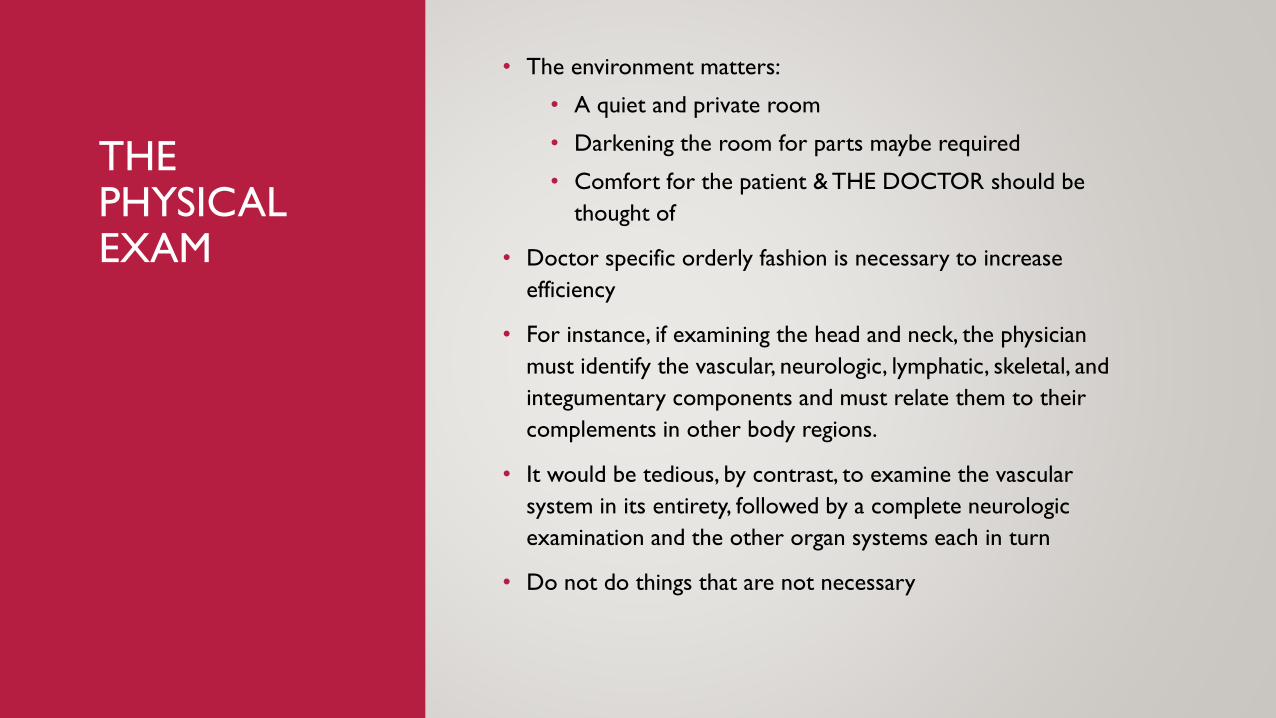
• The environment matters:
• A quiet and private room
• Darkening the room for parts maybe required
• Comfort for the patient & THE DOCTOR should be
thought of
• Doctor specific orderly fashion is necessary to increase
efficiency
• For instance, if examining the head and neck, the physician
must identify the vascular, neurologic, lymphatic, skeletal, and
integumentary components and must relate them to their
complements in other body regions.
• It would be tedious, by contrast, to examine the vascular
system in its entirety, followed by a complete neurologic
examination and the other organ systems each in turn
• Do not do things that are not necessary

EXAMPLE OF EXAM FLOW
1. Be certain the patient is in a relaxed position and proper
attire is worn
2. Be certain the exam surface is appropriate for anything you
will doing and distractions are eliminated
3. Vital signs & general inspection
1. Evaluate radial pulse for rate and rhythm
2. Measure blood pressure
3. Inspect nails, skin, and hair
4. Note appearance, body habits, hair, muscle mass,
movement coordination, odors, breathing problems

VITAL SIGNS• School age (6-12)
• Respiratory rate – 20-
30
• Heart rate – 70-110
• Diastolic BP – 50-90
• Systolic BP – 80-120
• Temp – 98.6
• Weight – 41-92lbs
• Adolescent (13-17
• Respiratory rate – 12-
20
• Heart rate – 55-105
• Diastolic BP – 60-92
• Systolic BP – 110-120
• Temp – 98.6
• Weight – >110lbs
• Adult (18 & up)
• Respiratory rate – 18-
20
• Heart rate – 60-100
• Diastolic BP – <85
• Systolic BP – <130
• Temp – 98.6
• Weight – varies
EXAM FLOW
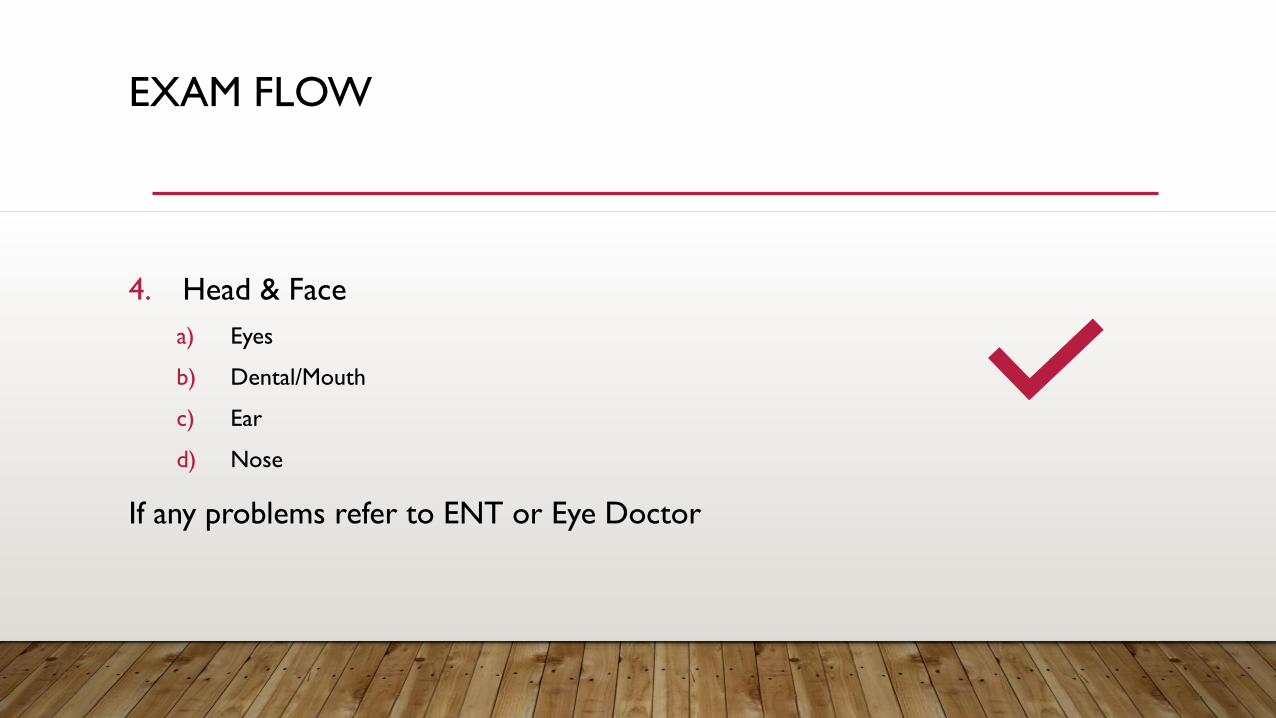
4. Head & Face
a) Eyes
b) Dental/Mouth
c) Ear
d) Nose
If any problems refer to ENT or Eye Doctor

4. HEAD AND FACE
EYES
• Visual acuity is usually examined with Snellen chart
• Question to ask
• Have you had any problems with your eyes
or vision?
• Have you injured your eyes?
• Do you wear glasses, contacts or eyewear?
• Are you color blind?
• Peripheral vision problems?
• Medications for your eyes?
• Have you had an eye infection?
• Any positives or yes more depth eye examination
maybe needed
DENTAL/MOUTH
• Examine the vermilion border
• The oral mucosa
• The tongue
• Identify the salivary duct papillae
• Assess the dentition for decay, repair, condition of
bite
• View the pharynx
• Determine taste function
4. HEAD & FACE
EAR
• Examine the pinnae & periauricular
tissue
• Test hearing with Weber and Rinne
• If any abnormalities refer to ENT
NOSE
• Examine the Nares with nasal Speculum
• Note the condition of the mucosa,
septum and turbinates
• Determine smell function

SNELLEN CHART
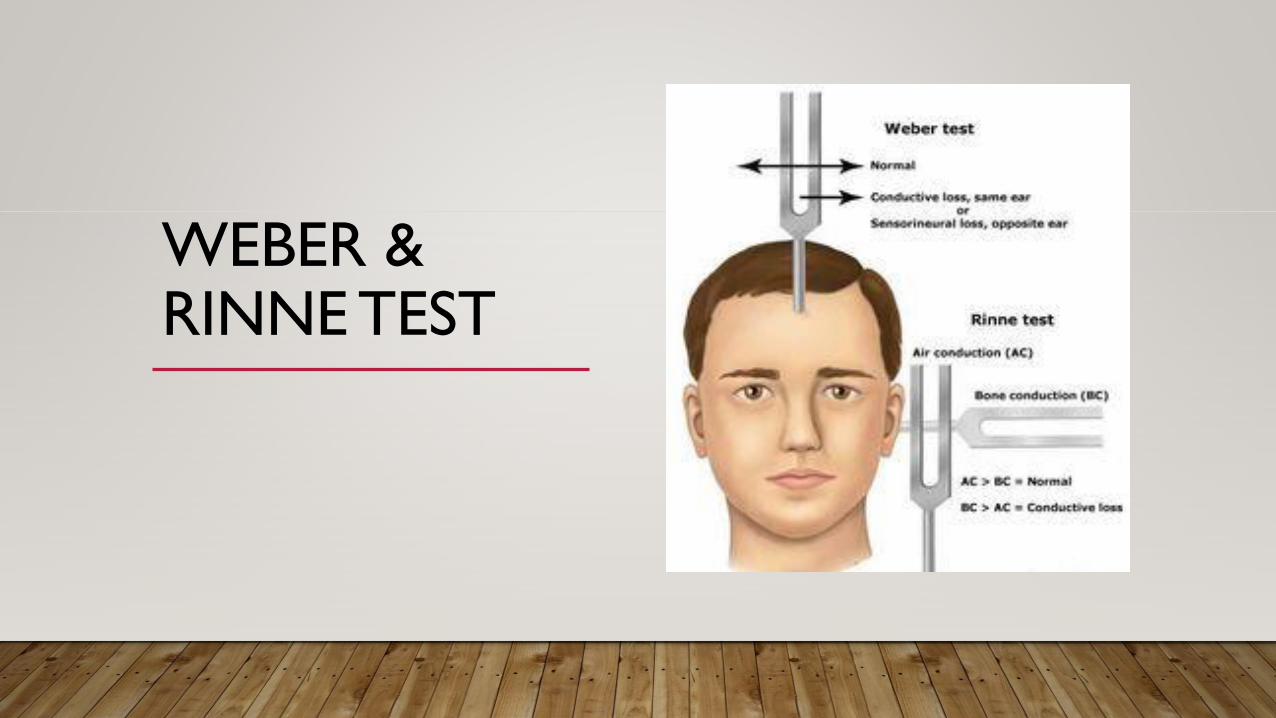
WEBER & RINNE TEST

QUICK CRANIAL NERVE SCREEN
I. Olfactory – Smell – Test: Identify familiar odors
II. Optic – Sight – Test Visual Fields
III. Oculomotor – Eye Movement – Test: Reaction to light, eye movement
IV. Trochlear – Superior Oblique – Test: Downward & Lateral gaze
V. Trigeminal – Face pain/Touch, Muscle of Mastication – Test: Clench Teeth
VI. Abducens – Lat Rectus of Eye – Test Lateral Gaze

QUICK CRANIAL NERVE SCREEN
VII. Facial – Ant taste, Fascial M., Glands – Test: Fascial
Muscles
VIII. Vestibulocochlear – Hearing & Balance – Test: Hearing
Test
IX. Glossopharyngeal – Touch/Pain & Tongue/Pharynx
Muscles – Test: Gag Reflex/Swallowing
X. Vagus – Pain/Touch & Muscles of Throat, Viscera – Test:
Gag Reflex/Swallowing
XI. Accessory – SCM/Trap – Test: Shrug
XII. Hypoglossal – Tongue Muscles – Test: Tongue Protrusion
(towards injured side)
EXAMPLE OF EXAM FLOW
5. NECK
• Palpate salivary glands, lymph
nodes, and thyroid
• Look for tracheal deviation
• Identify and auscultate carotid
arteries
• Check jugular for distention
• Test shoulder shrug
6. TORSO
• Seated
• Auscultate lungs post & lateral
• Inspect ant/post structures
• Supine
• Listen to heart
• Listen to bowels
• Percuss/palpate abdomen *spleen
and liver
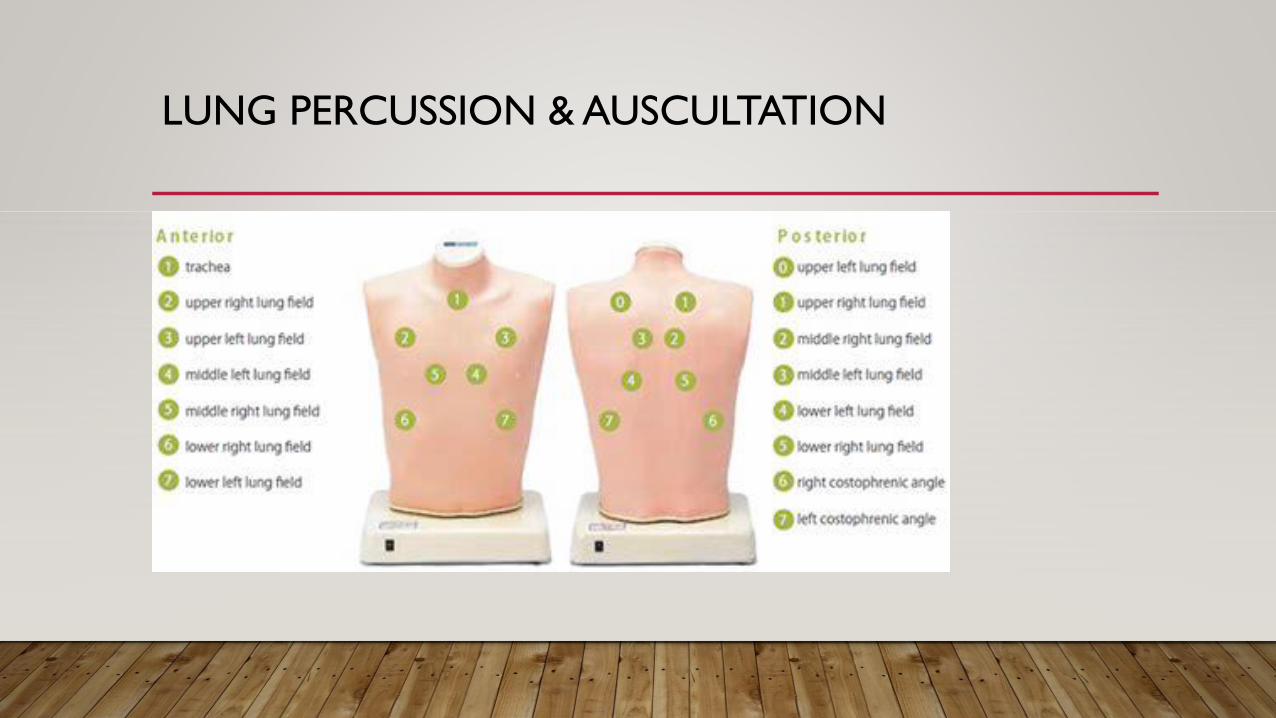
LUNG PERCUSSION & AUSCULTATION

HEART PERCUSSION & AUSCULTATION
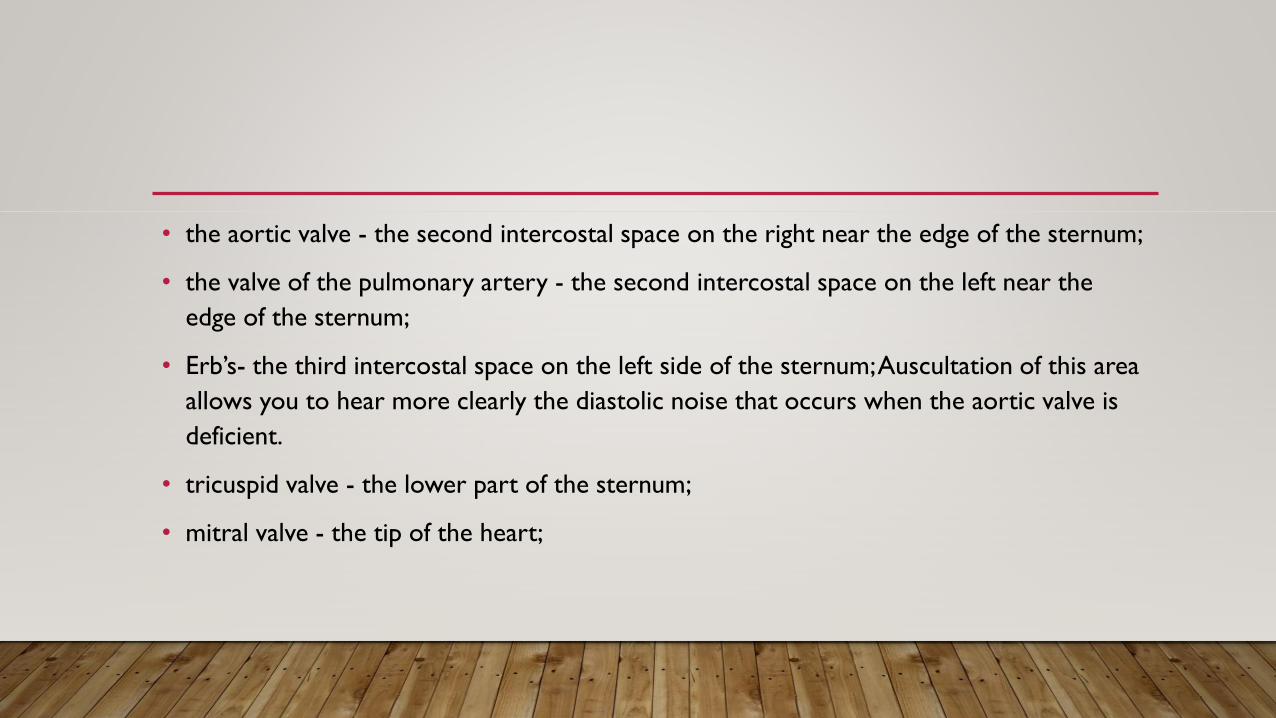
• the aortic valve - the second intercostal space on the right near the edge of the sternum;
• the valve of the pulmonary artery - the second intercostal space on the left near the
edge of the sternum;
• Erb’s- the third intercostal space on the left side of the sternum; Auscultation of this area
allows you to hear more clearly the diastolic noise that occurs when the aortic valve is
deficient.
• tricuspid valve - the lower part of the sternum;
• mitral valve - the tip of the heart;
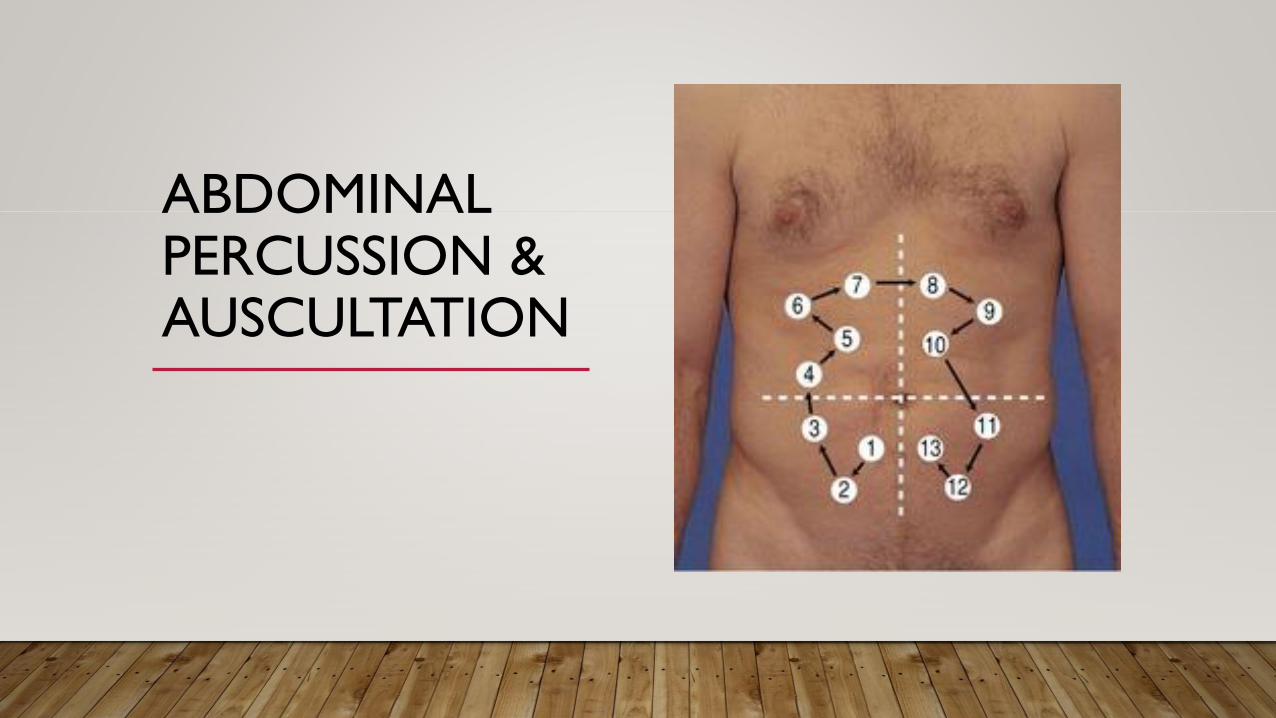
ABDOMINAL PERCUSSION & AUSCULTATION

7. NEUROMUSCULOSKELETAL EXAM
• Perform Joint ROM
• Deep Tendon Reflex (See Orthopedic Section)
• MRS (See Orthopedic Section)

CONCLUSION
• Any abnormal findings deserves further investigation
• Refer to the appropriate physician for further testing
• If the patient history and physical exam are linked properly by clinical reasoning,
laboratory testing can be the next measure of confirmatory
• Interpretation of isolated findings in physical exam is often influenced by historical info
• Example: Does the patients thyroid feel large? Does the patient complain of hair, skin, weight,
energy changes? Is there a family history of hypo/hyper thyroid problems?
• There is a large degree of variability in intra & inter-examiner reliability
PART 1: INTRODUCTION TO PHYSICAL EXAM & FUNCTIONAL EXAM
Introduction to Functional Examination
What is a Functional exam?
The Examinations
The Conclusion

BOOKS

INTRODUCTION TO FUNCTIONAL ASSESSMENT
• Fxnal Assessment plays an important role in the evaluation of the patient
• It is different from specific movements of active, passive and isometric ROM
• Fxnal Assessment involves task analysis, observation of function and effects of activities
on the patient's ability to function in everyday life
• What the patient can not do functionally is extremely important in the choice of
treatment and if they will be successful
• IT IS A MEASURE of Whole Body Task Performance Ability
CONTINUED
• Fxnal Ass is not the isolation examination of joint
• But the function of that joint in a posture, movement or moment in time
• The examiner must determine what functional factors are important to the patient
• Different movements under different loads can be performed depending on the patient
• A step down test would be different for a Senior Citizen then an office worker
• Just as the same test is different for an office worker and an athlete
• Movements under different loads can be used to determine ones functional capacity and
repeated movements or sustained postures maybe necessary for work, recreation or social
activities

• Any and all functional test can and should be used
• No matter which is performed, the examiner should understand the purpose of the test
• No one test should be used just because it is available, it should be used in conjunction
with the overall assessment of the patient
• If the test is not going to change your diagnosis, treatment or aid in clinical outcome, why
do the test?
WHAT IS FUNCTIONAL ASSESSMENT?
• “Look for Texas-sized deficits.” –Annie O’Connor PT RIC
• Clinically, it is necessary to perform functional assessments/screens to gain an
appreciation for how our patients’ bodies are working and if their bodies are functionally
up to the tasks required of them (even if that is just standing and sitting).
• If dysfunction is present, these assessments are an objective means of telling us where to
look.
• They are vital in showing us “key link” dysfunctions that will assist in directing treatment

• A single assessment is not going to give you all the answers…instead, let them be a guide to
tell you where to go next and what other assessments need to be done to confirm/rule out a
finding
• Don’t get “locked in” on one aspect of a screen. Remember to look for other possibilities,
otherwise you might miss something important
• Functional tests help you find the source of a problem and treat those problems versus
treating symptoms (even if it is far removed from the pain, which it often is!)
• “He who only treats the sight of pain is usually lost. Actually, his or her patient is.” Karel Lewit,
1999

• Functional tests are looking for the weak or rusty link in the kinetic chain.
• Many times the test will become treatment.
• Don’t over-analyze the test(s) (Texas sized)
• An exceptional practitioner will use functional tests, posture analysis, static (muscular)
palpation, and motion palpation in their assessment of the patient

THIS CLASS
• We can not go over ever functional test
• Since all movement can be considered a test, we will focus on:
• Janda’s Movement Patterns
• Muscle Imbalance & other test
• Directional Preference
• Orthopedic test
JANDA’S BASIC MOVEMENT PATTERNS
• Functional movement is never isolated because it requires several muscles to be acting as
prime movers, synergists, or stabilizers
• Functional strength does not require maximal activation
• Rather muscle onset and time are more important
• According to Janda, movement pattern analysis is more reliable than studying pain when
assessing functional pathology because is very subjective

JANDA 6 MOVEMENTS
• Janda’s 6 movement/functional patterns provide overall information about a patient’s
movement quality and control
• These movements are:
• Hip extension
• Hip abduction
• Curl-up
• Cervical flexion
• Push-up
• Shoulder abduction

THE 6 MOVEMENTS
• During the test or movements:
• The patient should have minimal clothing on so the clinician can visually see the body
• Minimal verbal cues should be used so the patient’s preferred pattern may be observed
• The clinician should not touch the patient if possible
• The patient should preform each movement slowly and at least 3 times
• Each movement has a typical motor response
• Which means they also have clinical indicators for functional pathology

HIP EXTENSION
• Indications
• Lower Back Pain
• Extremity Dysfunction
• Screens for:
• Hip extension pattern
• Core/hip stability
• Overactive erectors, hamstrings, and external rotators

HIP EXTENSION PROCEDURE
• Patient prone w/ arms off table and low back exposed
• Patient instructions: “with your knees straight slowly lift one leg at a time off the table.”

FINDINGS
• Worst finding is ipsilateral roll of pelvis = very poor hip extension pattern and core
stability
• Knee bend = hamstring over activity
• Foot ext rot = piriformis over activity
• Hyperlordosis = extension biased stability pattern, lower cross syndrome
• Glut under activity accompanies most positive findings
• Look for crease at or below T/L junction = long term extension from L-spine, not hips

HIP ABDUCTION
• Indications:
• Lateral shift of the pelvis
• Lower quarter pain
• Asymmetrical ilium height
• Trendelenburg sign
• Screens for:
• Quality of lateral pelvic brace
• Stabilization of the pelvis in the frontal plan
• Imbalance in gluteus medius/minimus, TFL
• Overactivity in hip external rotators and/or QL

HIP ABDUCTION PROCEDURE
• Patient side lying with top leg straight
• They are instructed to lift the leg towards the ceiling

FINDINGS
• Hip flexion: facilitated TFL
• Hip hike: contraction of QL before 20 degrees of abduction
• Limb external rotation: facilitated hip external rotators
• Pelvic rotation: weak core stability
• Knee bend: Facilitated TFl/hamstring

HIP ABDUCTION NORMAL
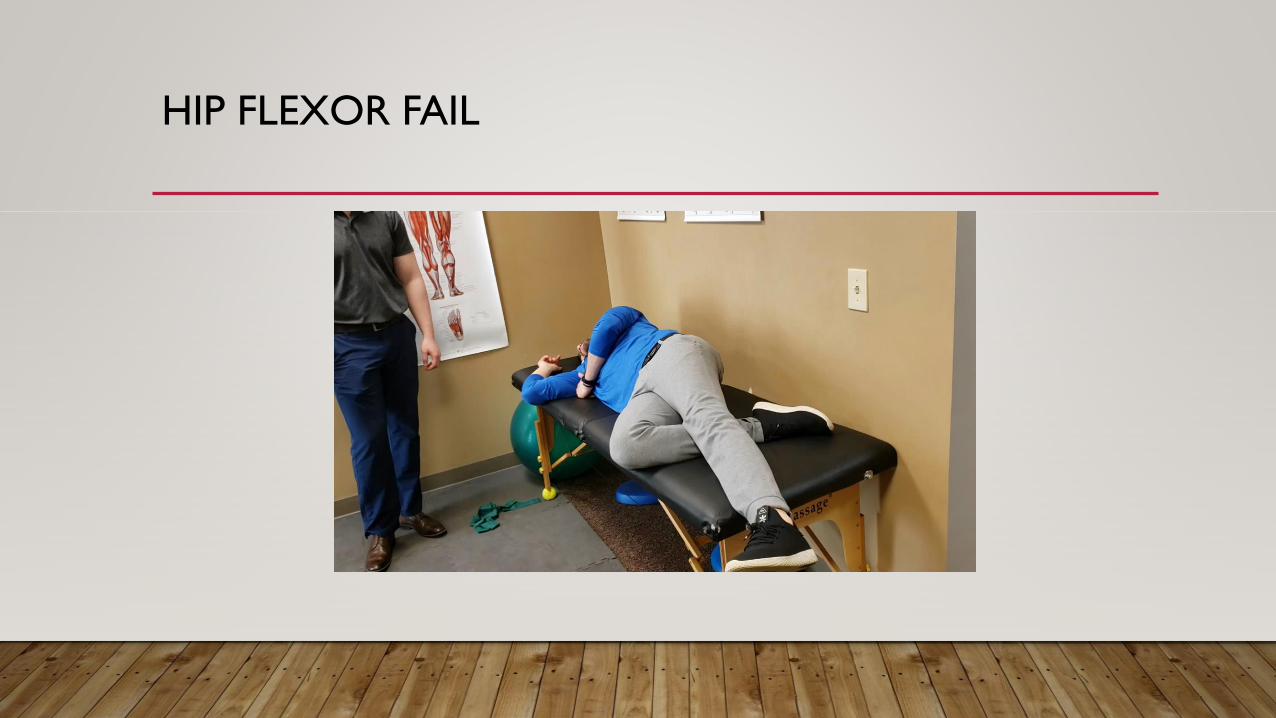
HIP FLEXOR FAIL

CORE INSTABILITY FAIL
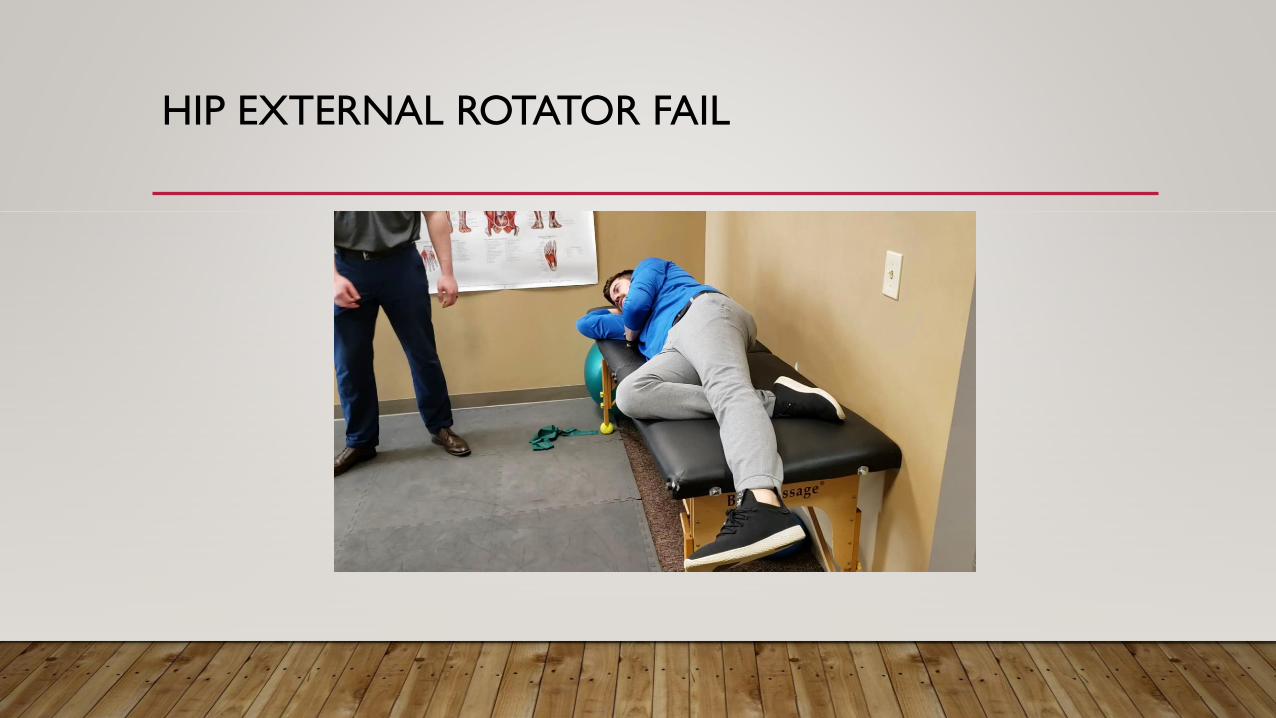
HIP EXTERNAL ROTATOR FAIL
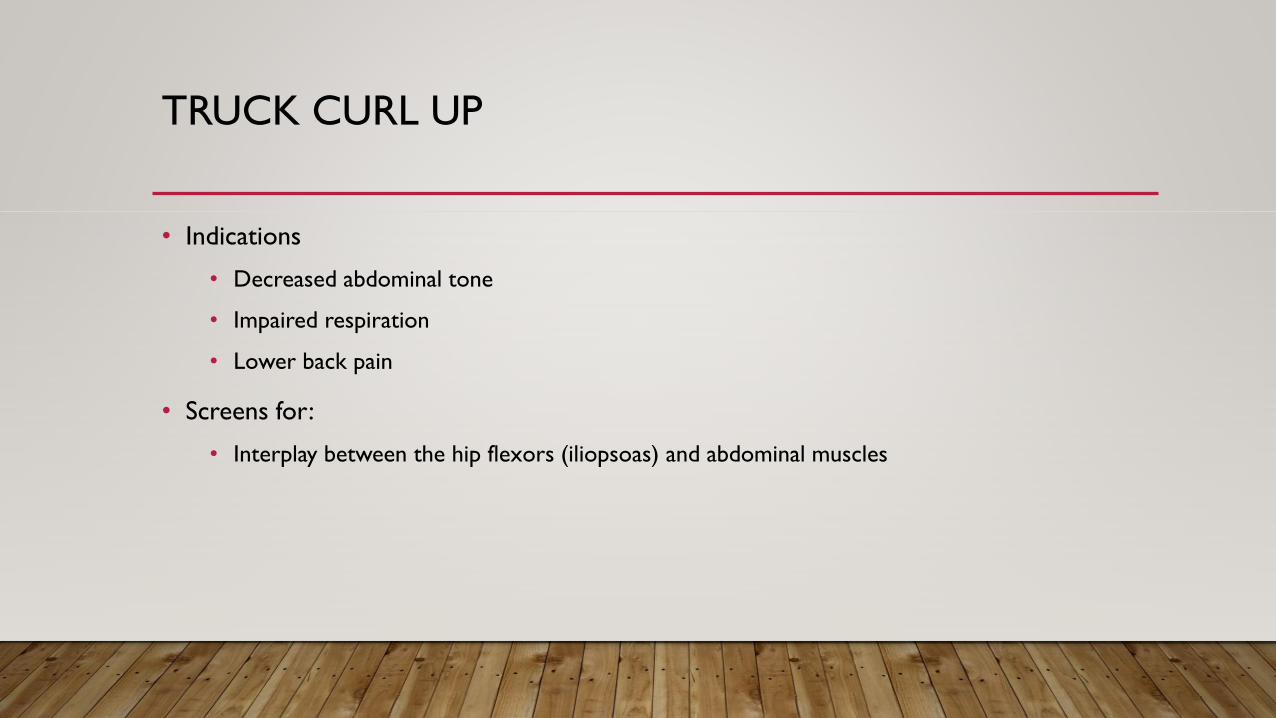
TRUCK CURL UP
• Indications
• Decreased abdominal tone
• Impaired respiration
• Lower back pain
• Screens for:
• Interplay between the hip flexors (iliopsoas) and abdominal muscles

TRUCK CURL UP PROCEDURE
• Patient supine
• They are instructed to curl up
• Clinician analysis the patient’s preferred way of curling up

FINDINGS
• Flexion or kyphosis of the upper truck:
• Adequate abdominal contraction
• Anterior tilting of the pelvis:
• hip flexor dominance
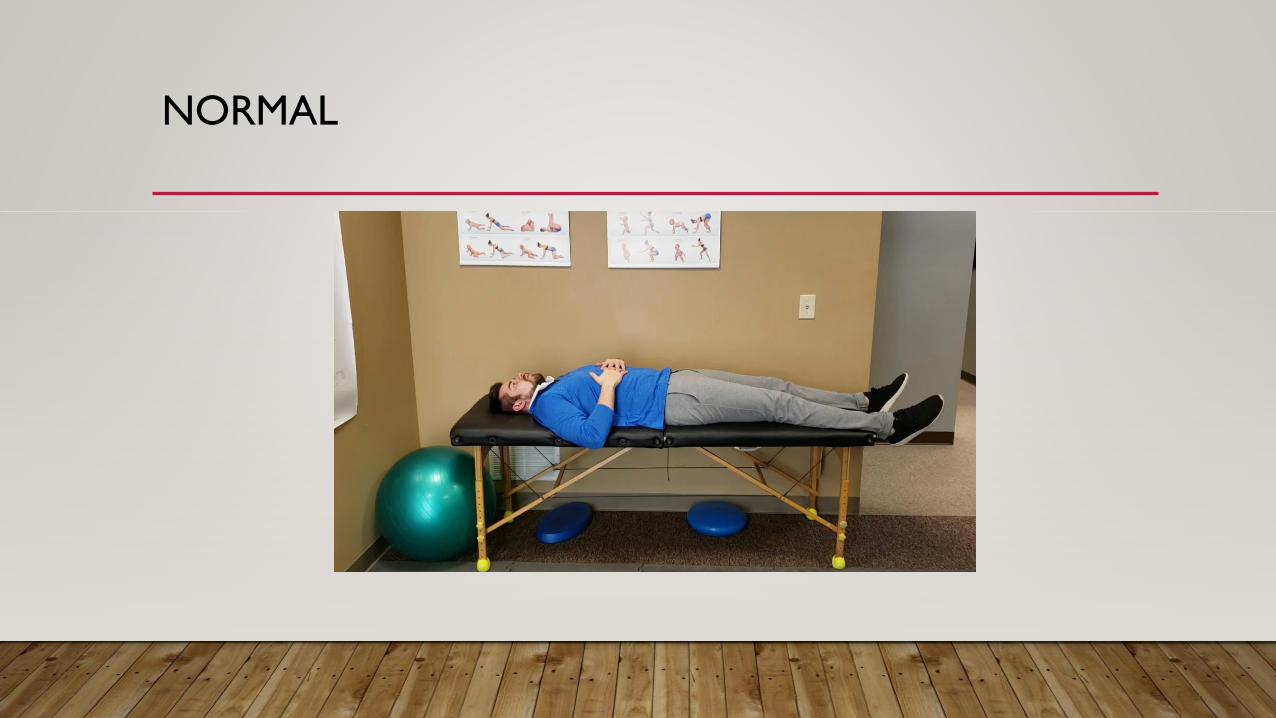
NORMAL
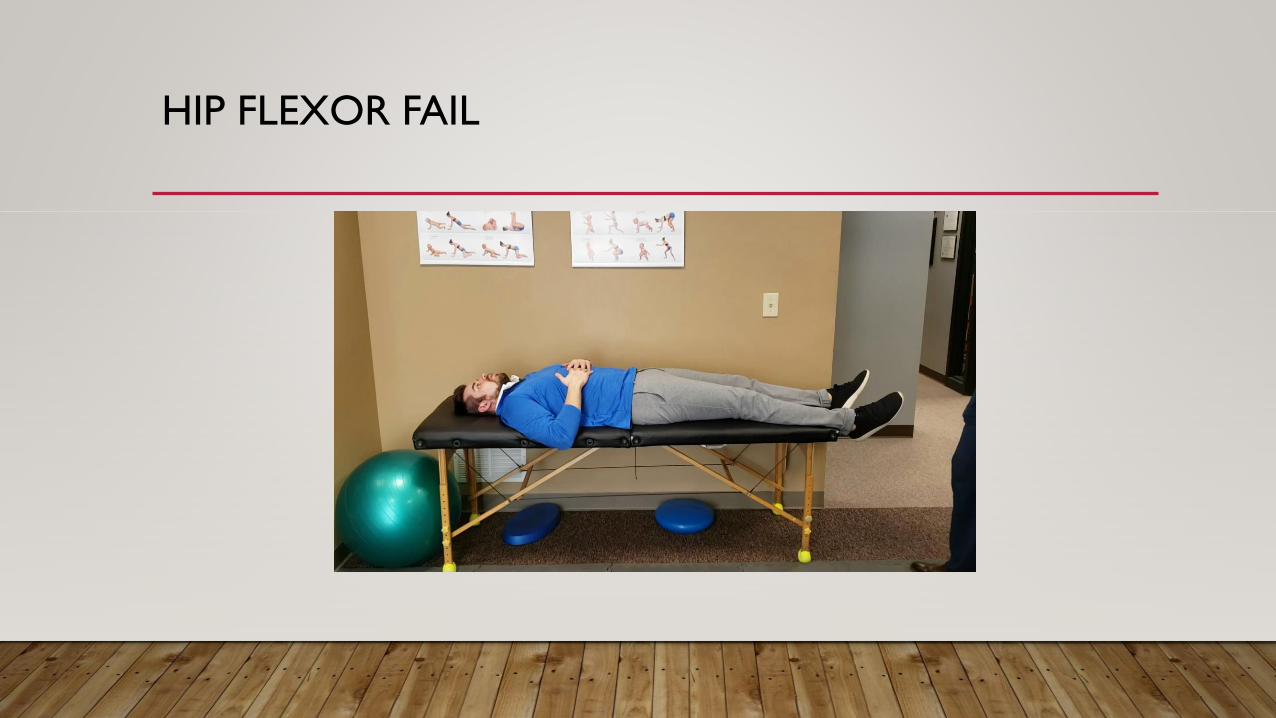
HIP FLEXOR FAIL

CERVICAL FLEXION
• Indications:
• Prominence of the SCM
• Forward head posture
• Impaired Respiration
• Neck Pain and/or Headaches
• Upper Quarter Pain
• Screen for:
• Interplay between the deep neck flexors and their synergists (SCM, Anterior Scalene)
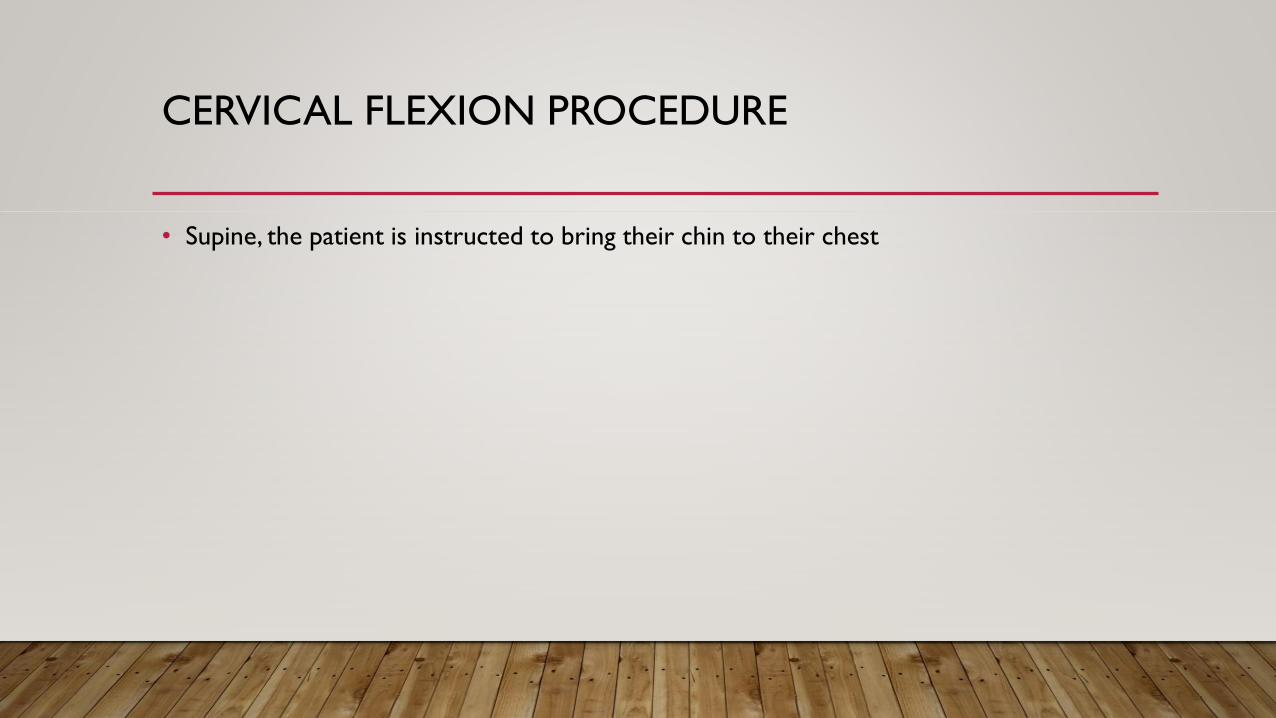
CERVICAL FLEXION PROCEDURE
• Supine, the patient is instructed to bring their chin to their chest

FINDINGS
• Chin Jaw jutting forward: Dominance of the SCM/Scalenes
• If forward head posture present than inhibited DNF indicated

NORMAL

FAIL

PUSH-UP
• Indications:
• Forward head posture
• Protracted shoulders
• Increased internal rotation of arms
• Scapular winging
• Neck, Shoulder, Thoracic pain
• Screens for:
• Quality of dynamic scapular stabilization

PUSH-UP PROCEDURE
• Patient prone starting in a pushup position
• Patient lowers themselves down and back up

FINDINGS
• Scapular winging: weakness in serratus anterior
• Shoulder elevation: dominance in Trap/Levator Scapulae

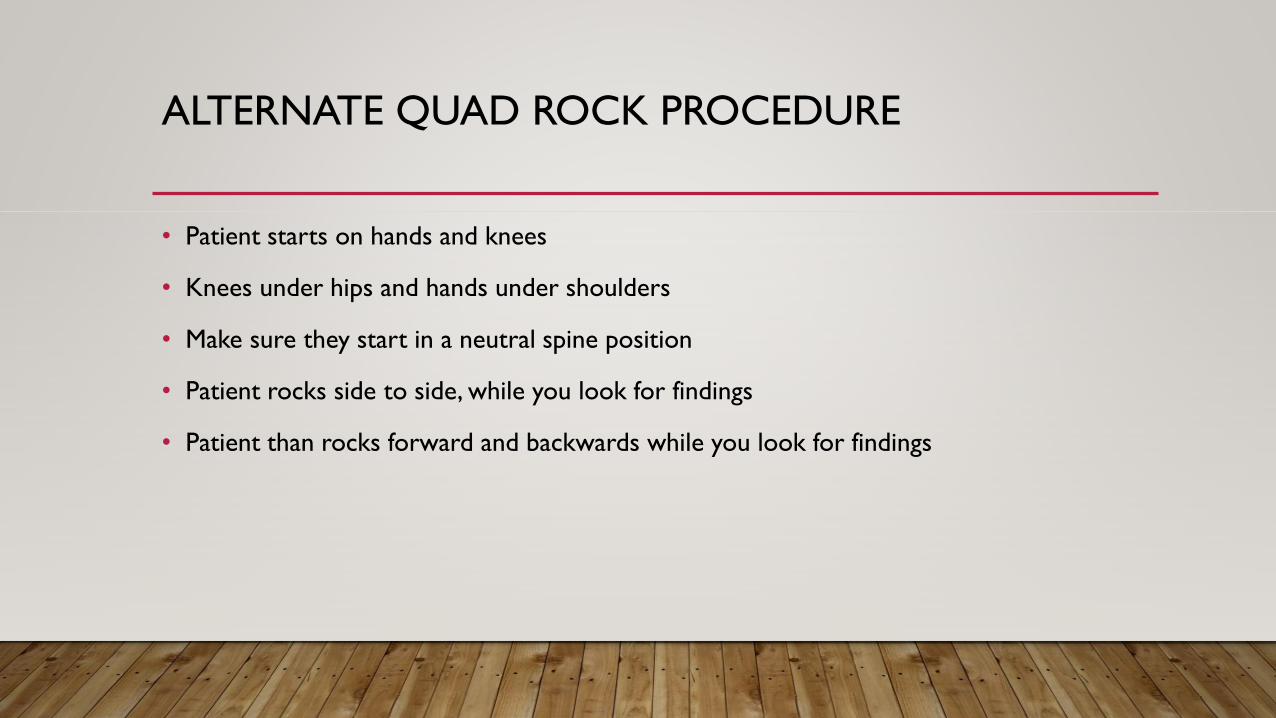
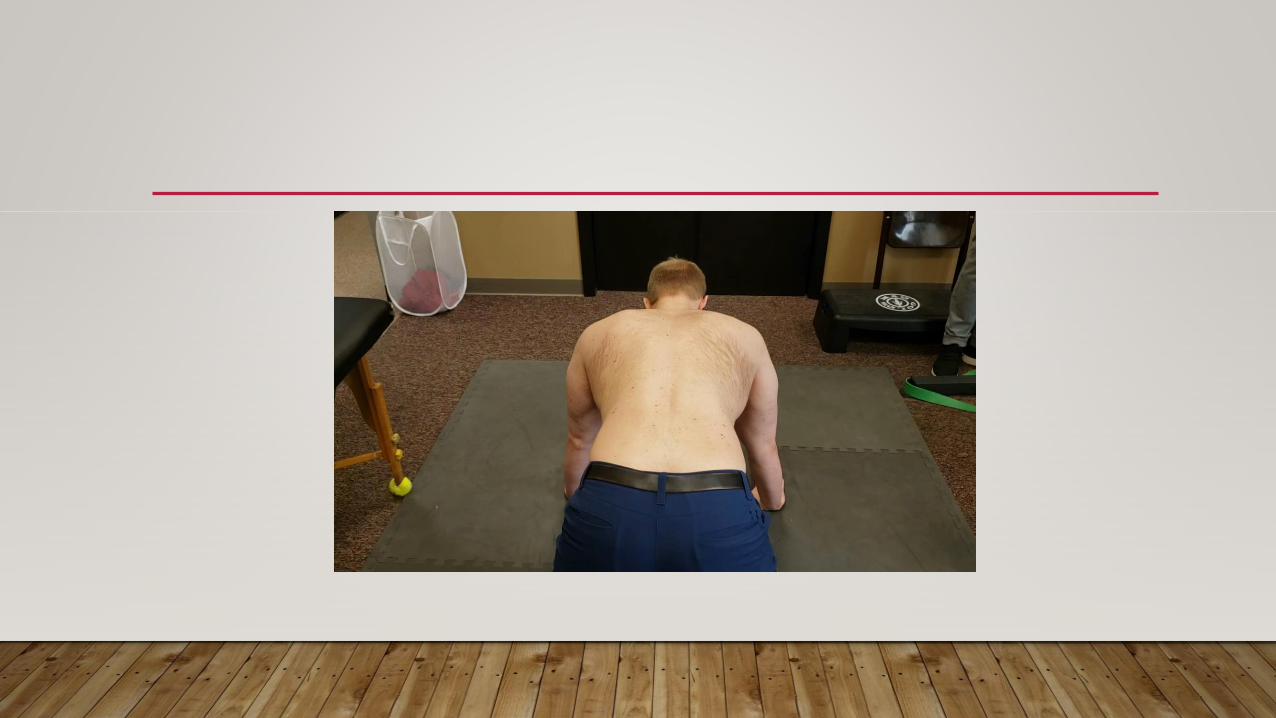
ALTERNATE QUAD ROCK PROCEDURE
• Patient starts on hands and knees
• Knees under hips and hands under shoulders
• Make sure they start in a neutral spine position
• Patient rocks side to side, while you look for findings
• Patient than rocks forward and backwards while you look for findings
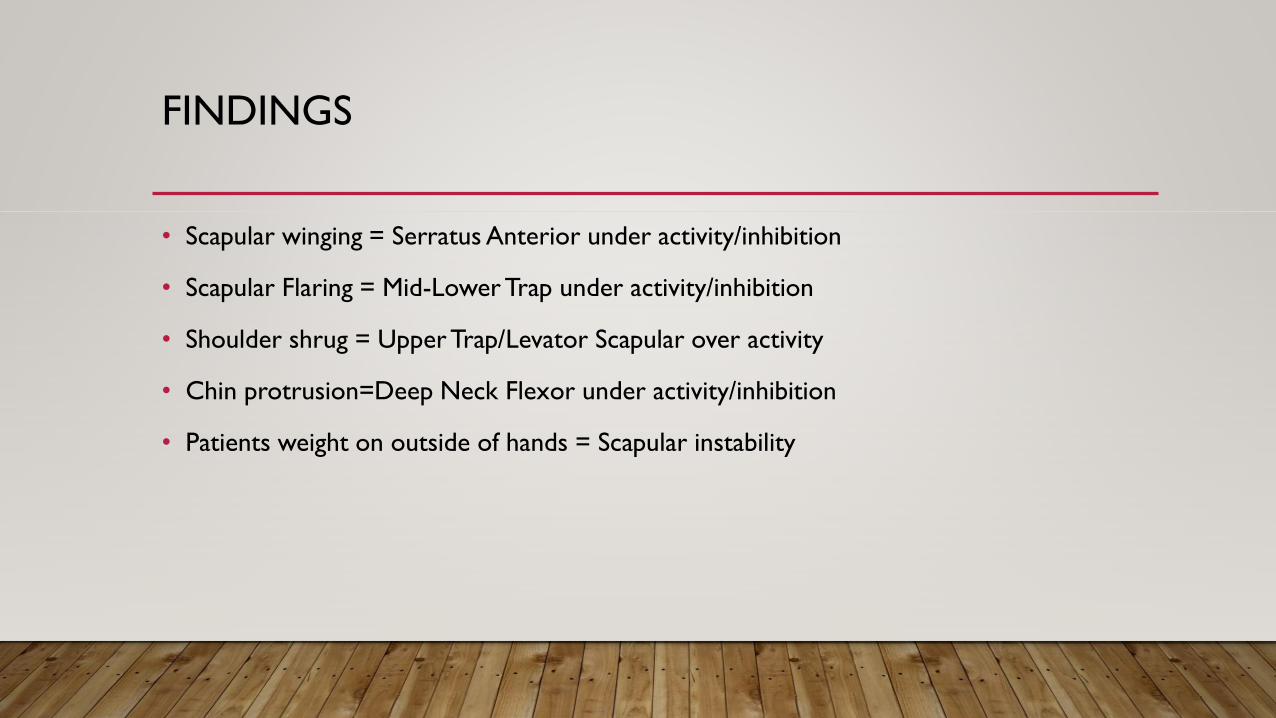
FINDINGS
• Scapular winging = Serratus Anterior under activity/inhibition
• Scapular Flaring = Mid-Lower Trap under activity/inhibition
• Shoulder shrug = Upper Trap/Levator Scapular over activity
• Chin protrusion=Deep Neck Flexor under activity/inhibition
• Patients weight on outside of hands = Scapular instability


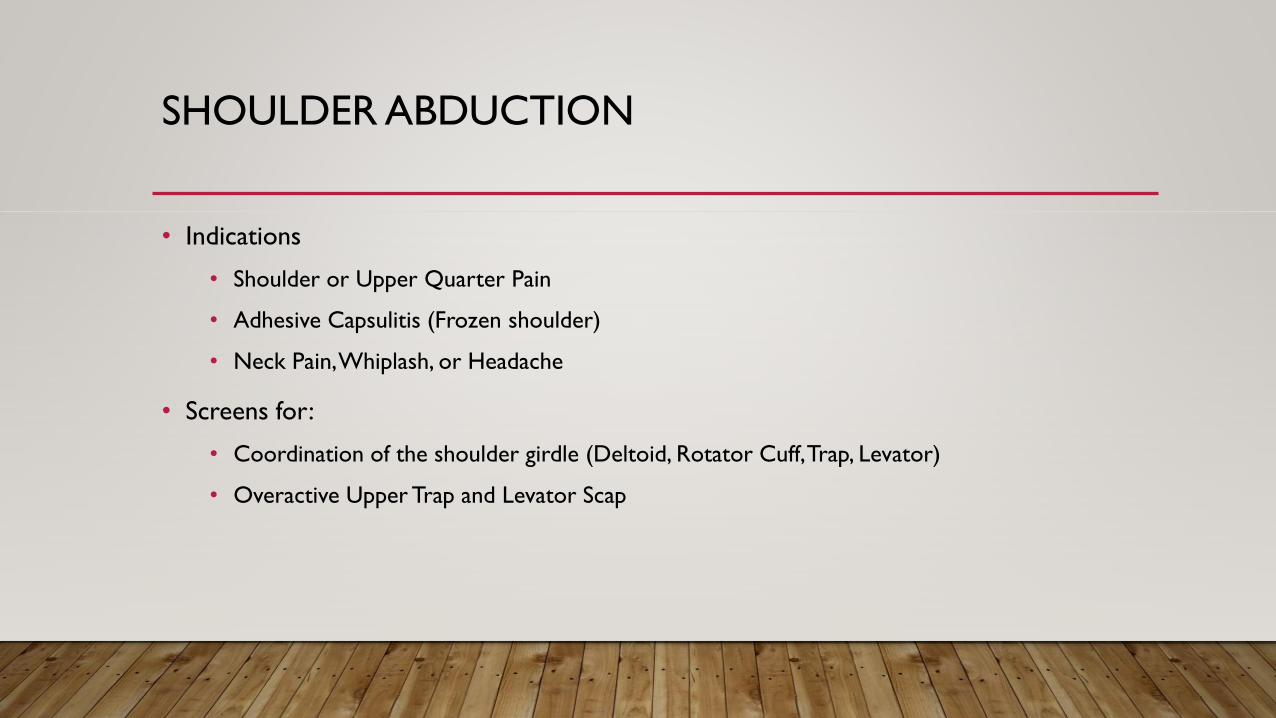
SHOULDER ABDUCTION
• Indications
• Shoulder or Upper Quarter Pain
• Adhesive Capsulitis (Frozen shoulder)
• Neck Pain, Whiplash, or Headache
• Screens for:
• Coordination of the shoulder girdle (Deltoid, Rotator Cuff, Trap, Levator)
• Overactive Upper Trap and Levator Scap

SHOULDER ABDUCTION PROCEDURE
• Patient seated with arms at the sides an elbows flexed
• Patient laterally raises the arms to 90 degrees
• Arm slowly returns to side

FINDINGS
• Shoulder elevation in first 60 degrees: Incoordination
• Hypertonic LevatorsandTraps
• Head movement
• Lack of or excessive scapular movement
• Contralateral lateral bending: Weakness in Rotator cuff and Deltoid

NORMAL

LEVATOR/TRAP FAIL

OTHER FUNCTIONAL TEST
• T4 Extension
• 6-8 inch step down
• Dorsiflexion screen
• Dynamic Foot
• Modified Thomas (muscle length analysis)

WHY T4 EXTENSION
Cervical Spine functions to T4
Proper DNF Extension
Proper scapular load and stability
Proper activation of the core
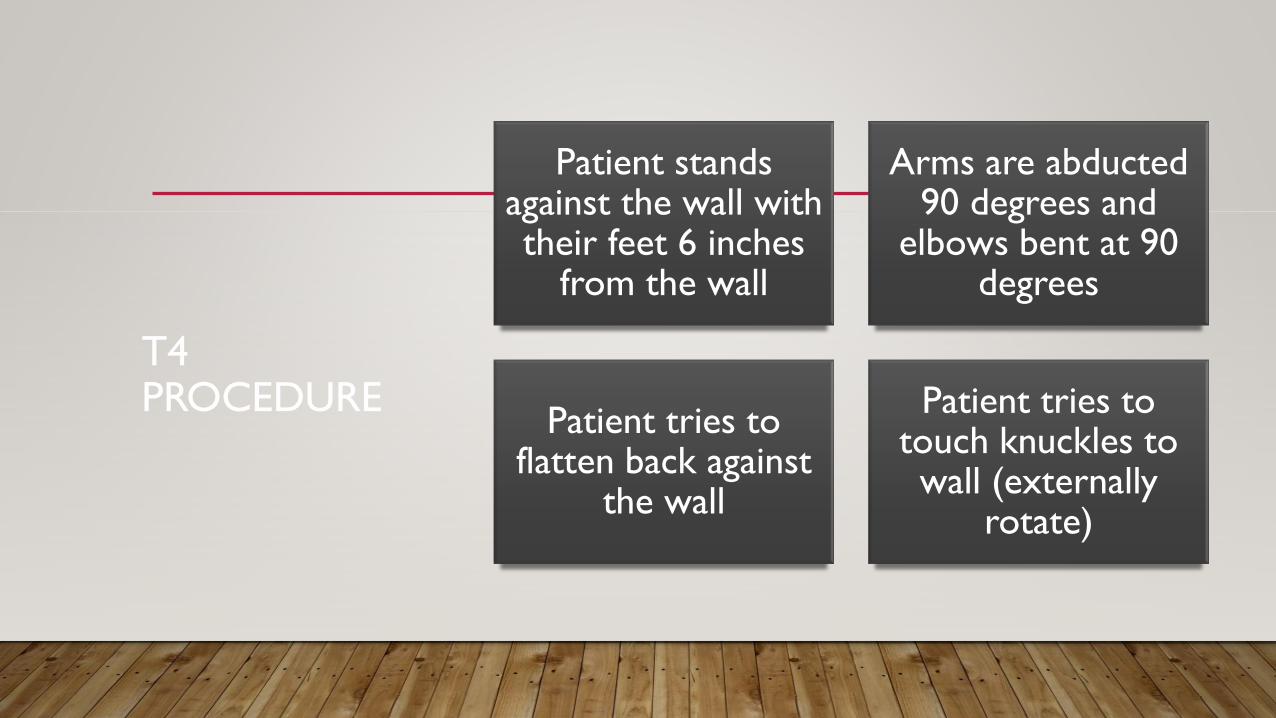
T4 PROCEDURE
Patient stands against the wall with their feet 6 inches
from the wall
Arms are abducted 90 degrees and
elbows bent at 90 degrees
Patient tries to flatten back against
the wall
Patient tries to touch knuckles to wall (externally
rotate)

T4 EXTENSION SCREEN
WHEN T4 SCREEN?• Indication
• Subacute or Musculoskeletal Pain
(Upper or Lower)
• Poor Posture
• Over-head Athlete
• Screens for:
• T/S extension
• Overactive Latisimus Dorsi, Pectoralis,
Suboccitals
FINDINGS
• Lack of Thoracic Extension and…
• Cervical extension suggest overactive
suboccipitals
• Lumbar Extension suggest core instability
and overactive lats(overactive hip flexors?)
• Knuckles can not touch the wall suggest
overactive

T4

SHOULDER FAIL

CERVICAL FAIL

LUMBAR FAIL

LAT ADDITION

SIX INCH STEP DOWN
• Indications:
• Pain with physical activity
• Lower quarter symptoms
• LBP
• Athletic injury (eight inch step down)
• Screens for:
• Decreased dorsiflexion
• Calf tightness
• Decreased eversion
• Glute weakness/hip instability
• Motor control/proprioception

FINDINGS
• Heel on step comes off and/or heel whips medially (lateral foot flare) = decreased
dorsiflexion/calf tightness
• Lack of eversion
• Knee valgosity = glut medius under activity/inhibition or decreased dorsiflexion/adductor
overactivity
• Lateral hip sway = glut med/hip stabilizers under activity/inhibition
• Lack of balance = decreased motor control (decreased proprioception)


DYNAMIC FOOT
• Have the patient stand barefoot with feet shoulder width apart
• Instruct them to twist through the hip and ankles
• Watch for pronation and supination B/L

VIDEOS

DORSIFLEXION SCREEN
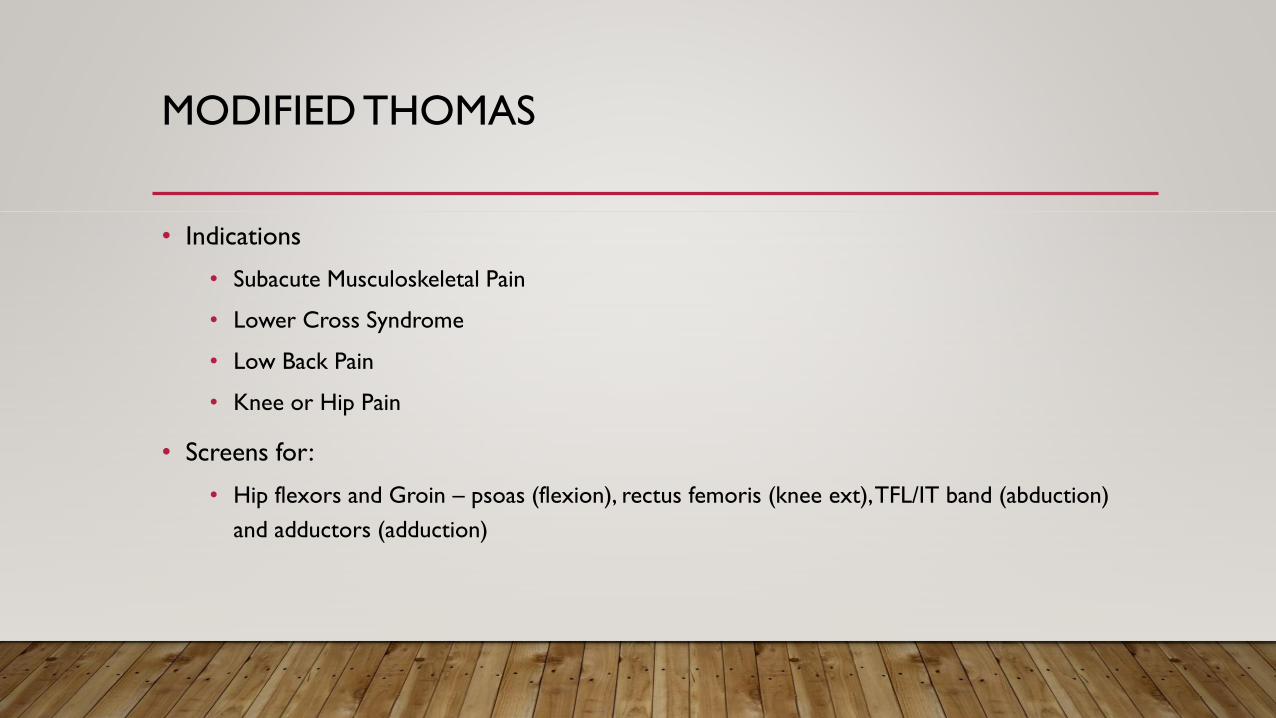
MODIFIED THOMAS
• Indications
• Subacute Musculoskeletal Pain
• Lower Cross Syndrome
• Low Back Pain
• Knee or Hip Pain
• Screens for:
• Hip flexors and Groin – psoas (flexion), rectus femoris (knee ext), TFL/IT band (abduction)
and adductors (adduction)

MODIFIED THOMAS PROCEDURE
• Patient sits at the end of the table, bring one knee to the chest.
• Slowly lower themselves onto the table
• Keep knee near the chest so that the back stays flat
• Allow opposite leg to dangle freely from the table

• TENSOR FASCIA LATA FAIL

PSOAS FAIL

ADDUCTOR FAIL

LOWER EXTREMITY MOVEMENT PATTERNS
• It is very common for patients to lose:
• The ability to maintain a neutral spine in lower extremity movement
• The ability to maintain stability of the lumbar spine
• The ability to stabilize in the frontal plane
• The ability to stabilizes in the saggital plane
• Ant vs post pelvic tilt
• Thoracic spine flexion
SQUAT

COMMON MISCONCEPTIONS
• Weight in heels and chest up
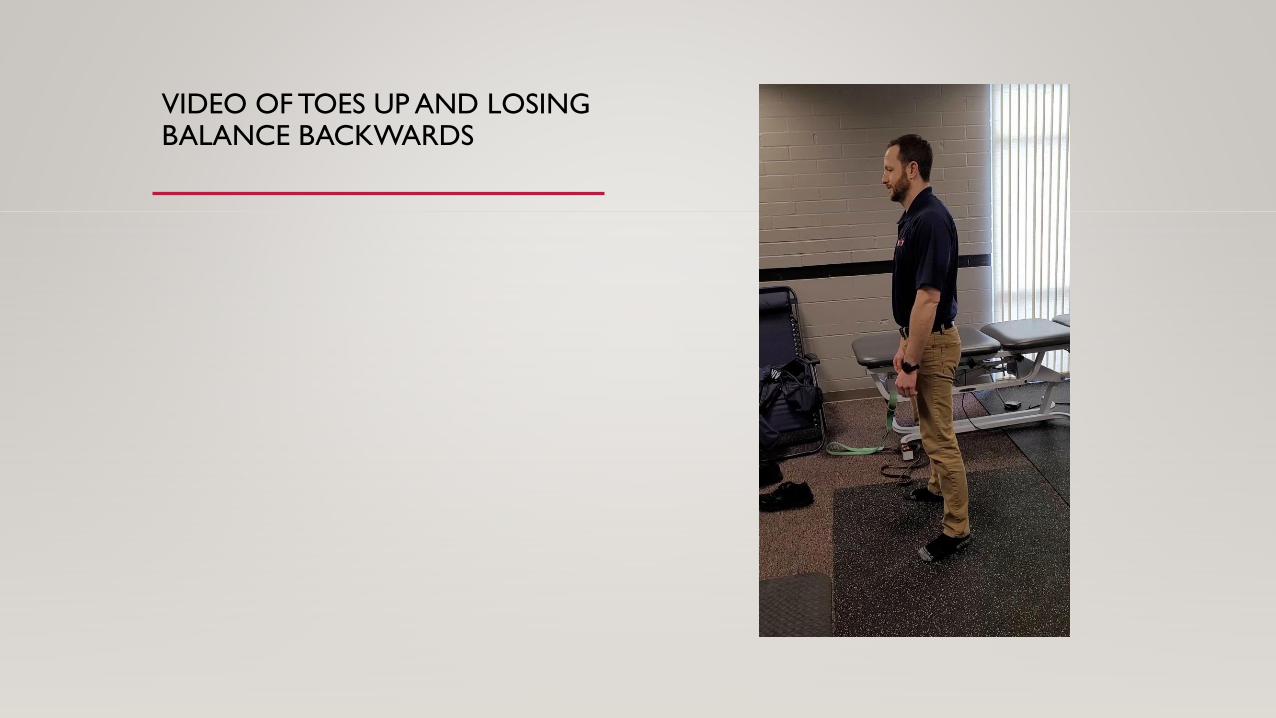
VIDEO OF TOES UP AND LOSING BALANCE BACKWARDS
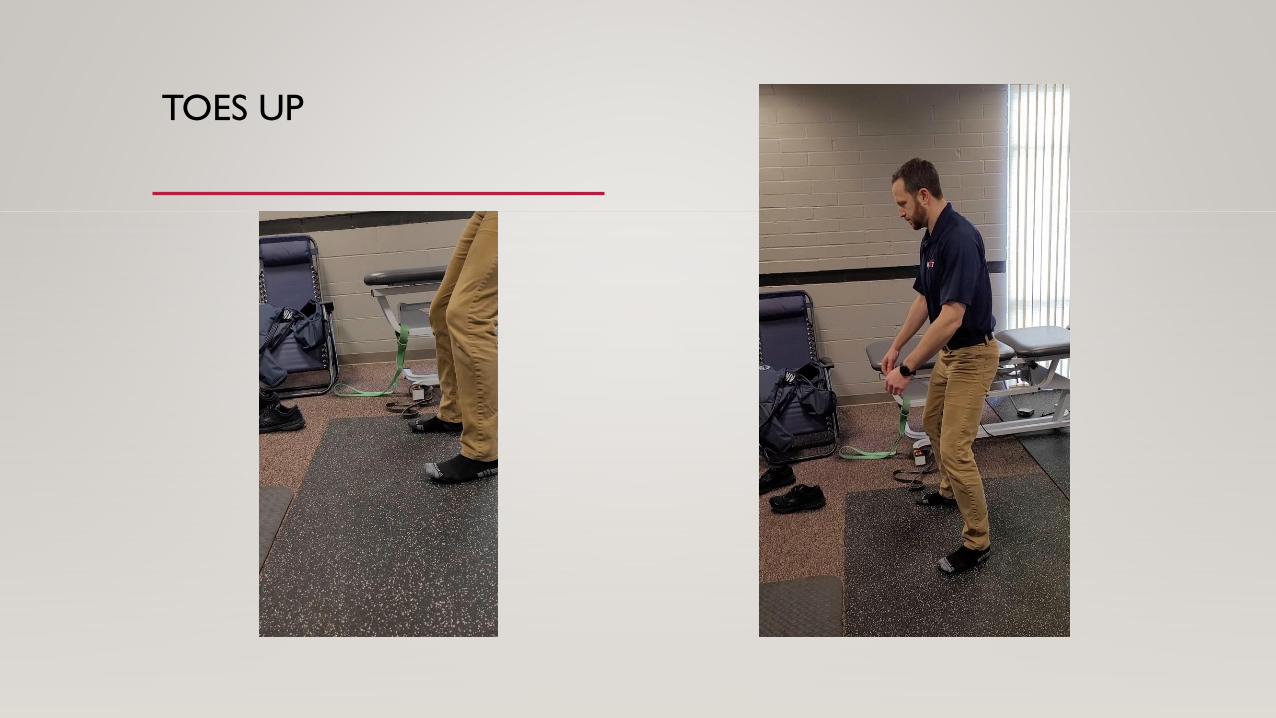
TOES UP

CHEST UP
• Great for someone who is caving forward
• But can cause overextension
• Causes stress on erectors
• Increases facet compression
• Decreases ability to braces
• Increased Ant Pelvic Tilt
• Decreased hip flexion
• Causes butt wink too early

CAVING FORWARD AND CORRECTION

CHEST UP IN NEUTRAL SPINE

BUTT WINK

KNEE VALGOSITY

LUNGE

SAGITTAL LUNGE

FRONTAL (CORONAL) PLANE LUNGE

HORIZONAL PLANE LUNGE
SQUARED PELVIS
• A proper squared pelvis is controlled in movement by the pelvic stabilizers
• The iliac crest should remain level during movement and not rotate
• The knee, hip and ankle should also remain level
• If control is lost
• The pelvis lateral shifts on stabilizing side
• Internal rotation and adduction of the lower extremity occurs
• Pronation?
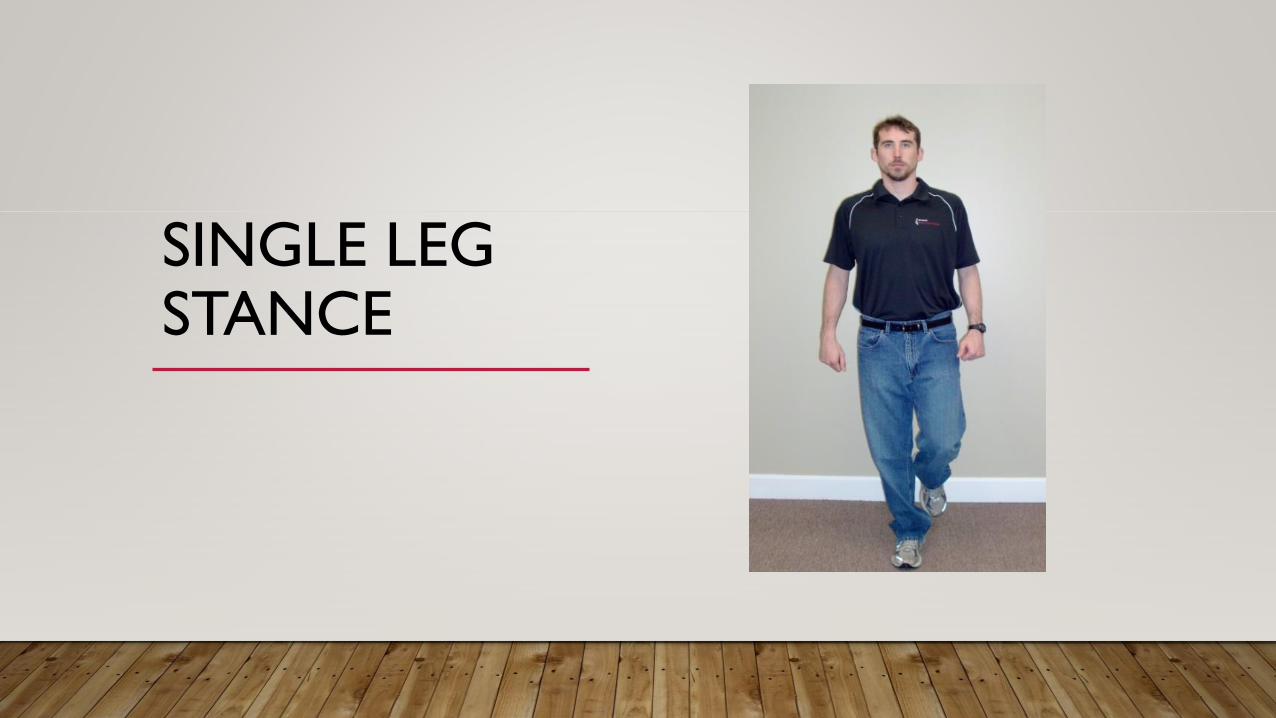
SINGLE LEG STANCE
PELVIC BRIDGE
• Squared pelvis must also be maintained during single leg patterns
• As the pelvic brace fatigues or is challenge the pelvis tilts towards the raised leg

VIDEO OF SQUARED PELVIS

UNSQUARED PELVIS
• What might be causing this collapse
• Medial column of the foot?
• Vastis Medialis?
• Gluteus Medius?


SQUARED PELVIS CORRECTION
• Look at medial column of the foot
• If it is activated move on
• If inactive, instruct them to activate it
• Does this correct the pelvic shift
• Then look at vastus medialis
• If it is activated move on
• If inactive, instruct them to activate it
• Does this correct the pelvic shift
• Check the glutes
• If it is activated move on
• If inactive, instruct them to activate it
• Does this correct the pelvic shift

BUTT GRIPPER OR ANTERIOR PELVIC SHEAR
• Occurs when someone stabilization pattern is to squeeze their deep six external
rotators
• This posteriorly rotates the pelvic but drives the hip joint anterior
• Abdominal muscle contractor is normally present as well

BUTT GRIPPER
• Leads to overactive piriformis
• Inhibition of the gluteus medius and maximus
• Inhibition of the pelvic floor and therefor overactivation of the adductors
• Can be learned behavior from being told to squeeze the glutes

SQUAT CORRECTIONS

BALL SQUATS

BALL SQUAT
The Ball Squat strengthens the gluteus muscles to stabilize the back and lower extremity.
• Setup:
1. Begin by standing feet shoulder width apart just far enough from the wall that the ball is
sandwiched between your low back and the wall.
2. Start your squat by sitting BACK and down.
3. Go down until your knees reach a 90° angle being sure that your knees do not extend
past your toes.
4. Return to the standing position focusing on squeezing your gluteus muscles.
5. Perform 3 sets of 10 repetitions 2-3 times every day.
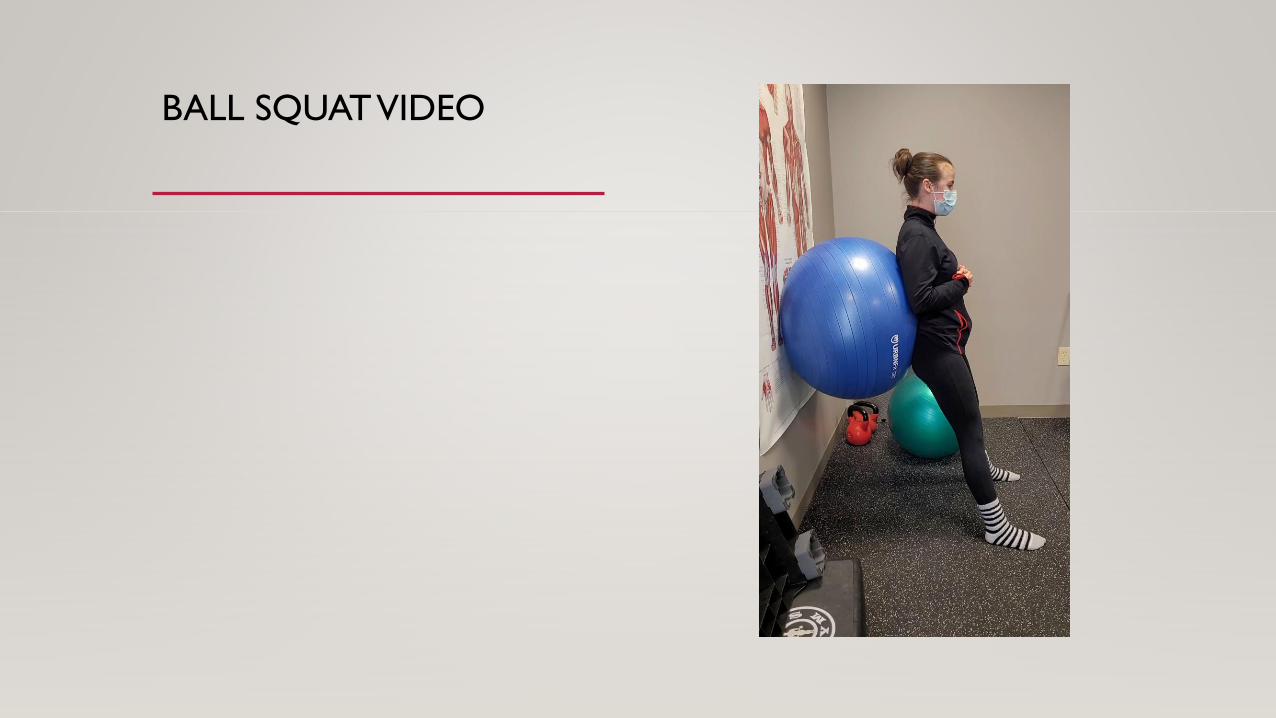
BALL SQUAT VIDEO

BALL SQUAT PROGRESSION:
1. Begin with a band around your knees, standing feet shoulder width apart just far
enough from the wall that the ball is sandwiched between your low back and the
wall.
2. Repeat setup above.
•
• Notes:
• You should be able to do 3 sets of 10 of the regular ball squats with little to
no fatigue before beginning the advanced ball squats.
• Make sure you are squatting back and down.

DOOR SQUATS
• Door squats remove the pressure placed on the knees
• Remove the ability to butt wink or posterior pelvic tilt
• Decrease the amount of dorsiflexion needed
• Train the feeling of posterior hip translation and eccentric glute and hamstring control
DOOR SQUATS
• Patient holds onto a door knob and stands in a position ready to squat
• Instruct them to widen their stance more then normal
• As the squat, the patient pushes the hip posteriorly as much as possible
• Instruct them to do back even farther, they can not fall while holding onto the door
• Once they have went as deep and back as mush as possible, they are to return using the
glutes to stand up

DOOR SQUAT VIDEO
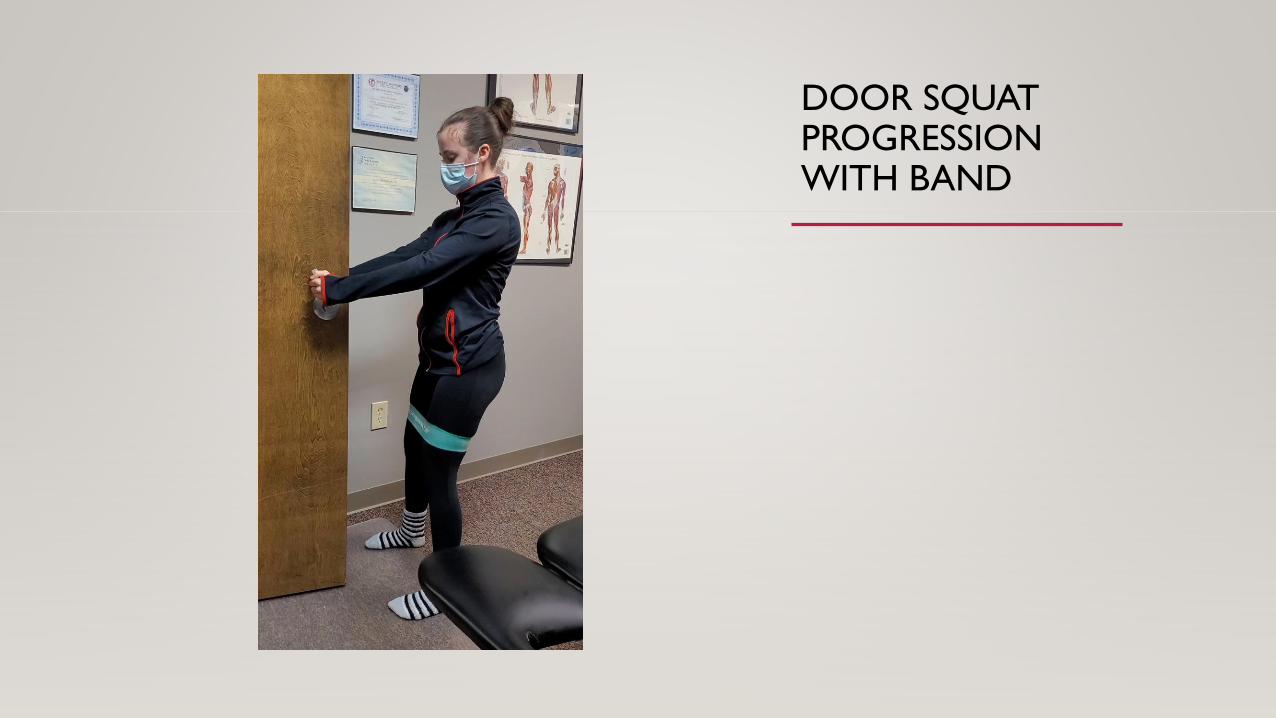
DOOR SQUAT PROGRESSION WITH BAND

INCORRECT DOORWAY SQUAT
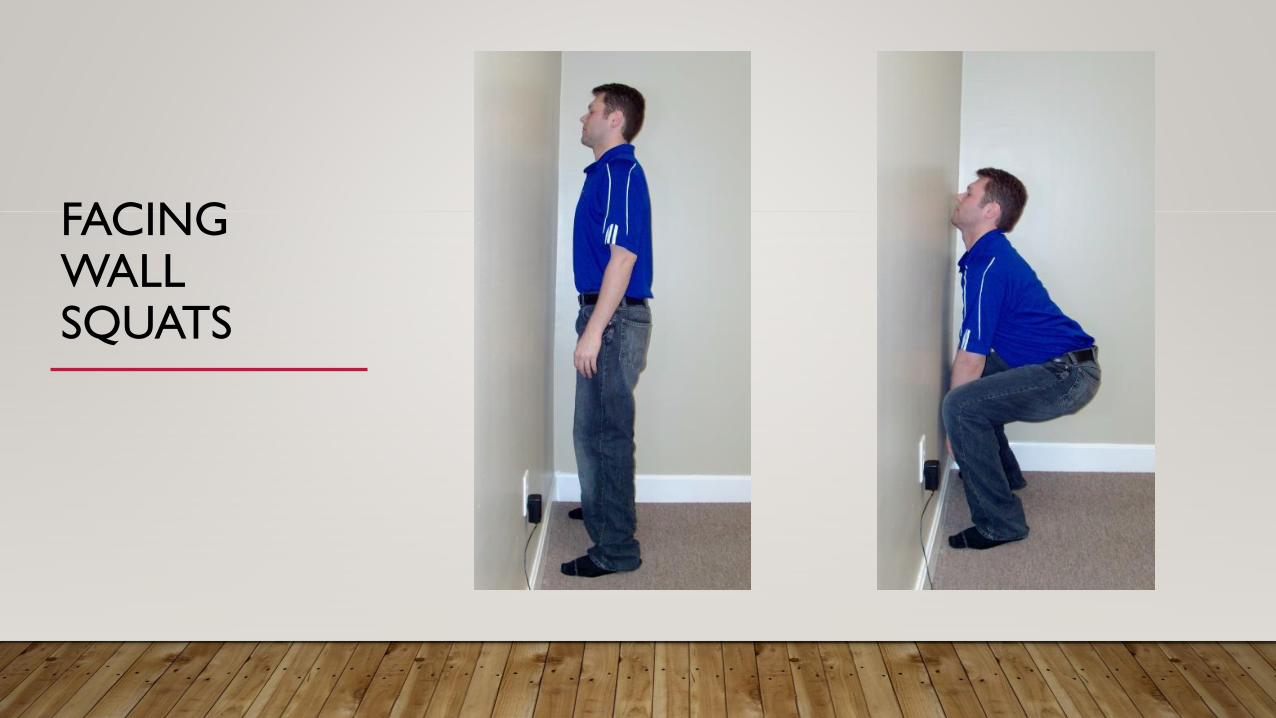
FACING WALL SQUATS

FACING WALL SQUATS
• This exercise is designed to help teach you proper squat mechanics.
• Setup:
1. Start by facing a wall, standing a few inches away.
2. Make sure your feet are slightly wider than shoulder width apart and your feet are slightly
turned outward.
3. Start to squat down without letting your knees or nose touch the wall.
4. Make sure that your knees do not move inward.
5. Go down until you start to lose your balance.
6. Return to the starting position and repeat 10 times.
7. Repeat 3-4 sets a day.

FACING WALL SQUATS VIDEO
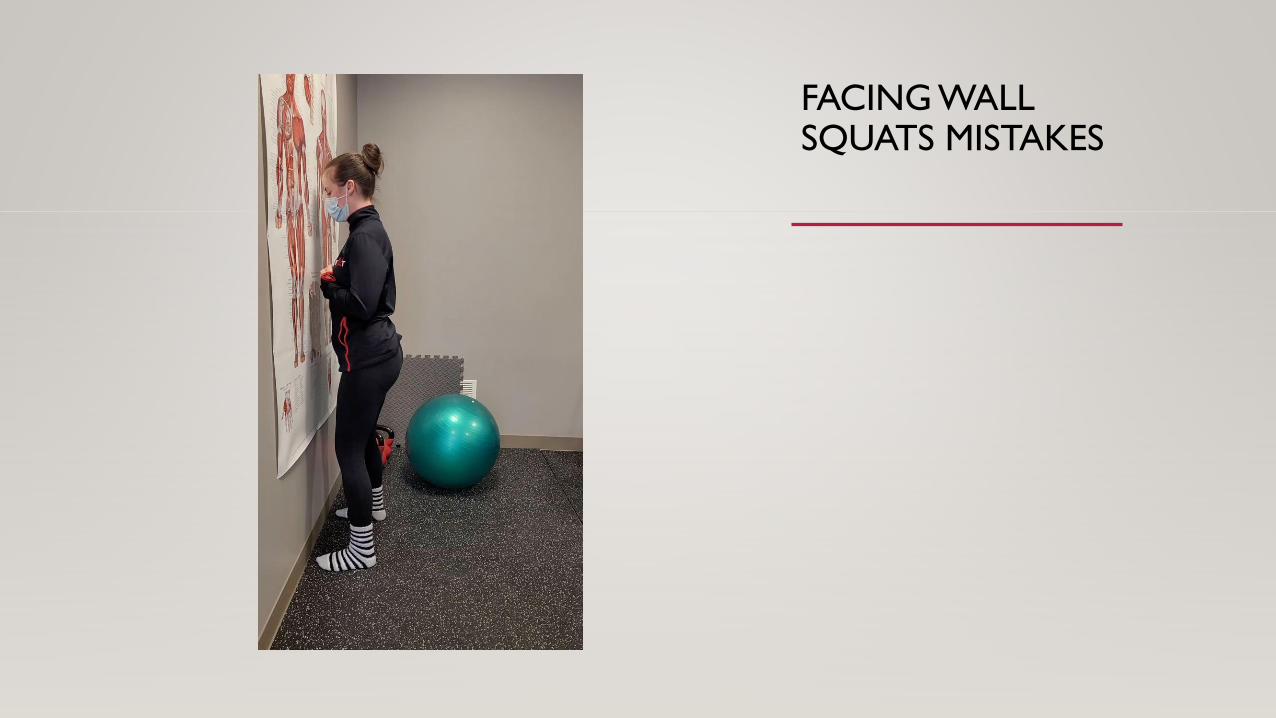
FACING WALL SQUATS MISTAKES
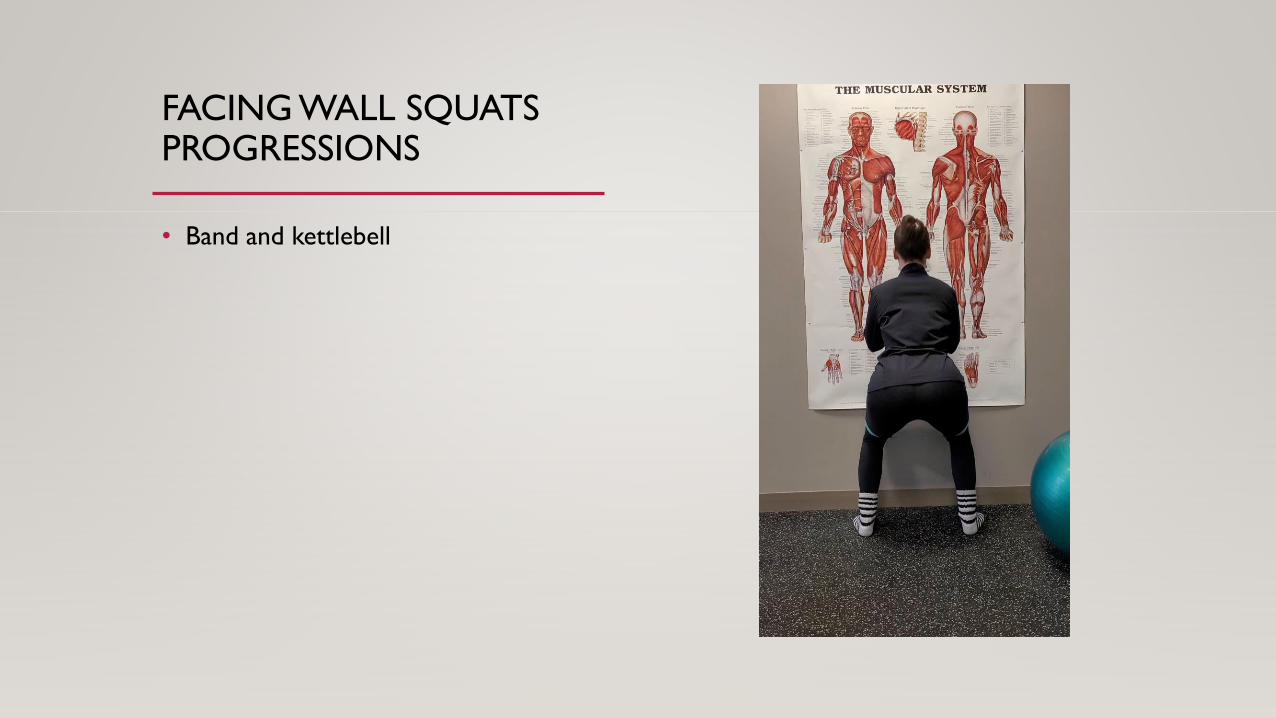
FACING WALL SQUATS PROGRESSIONS
• Band and kettlebell

SQUAT WALKS
SQUATS WALKS
• Setup:
1. Feet shoulder width apart
2. Slight bend at the hip (athletic stance).
3. Neutral spine/no bend in back.
4. Step sideways SLOWLY one foot at a time (see photos).
5. 10 steps one way, 10 steps back.
SQUATS WALKS
• Notes:
• Place bands around balls of feet
• Should feel tightness during exercise in back/lateral butt.
• Abdominal breathing with bracing throughout exercise
• Good exercise for glute muscles and stabilizing the hips/pelvis.
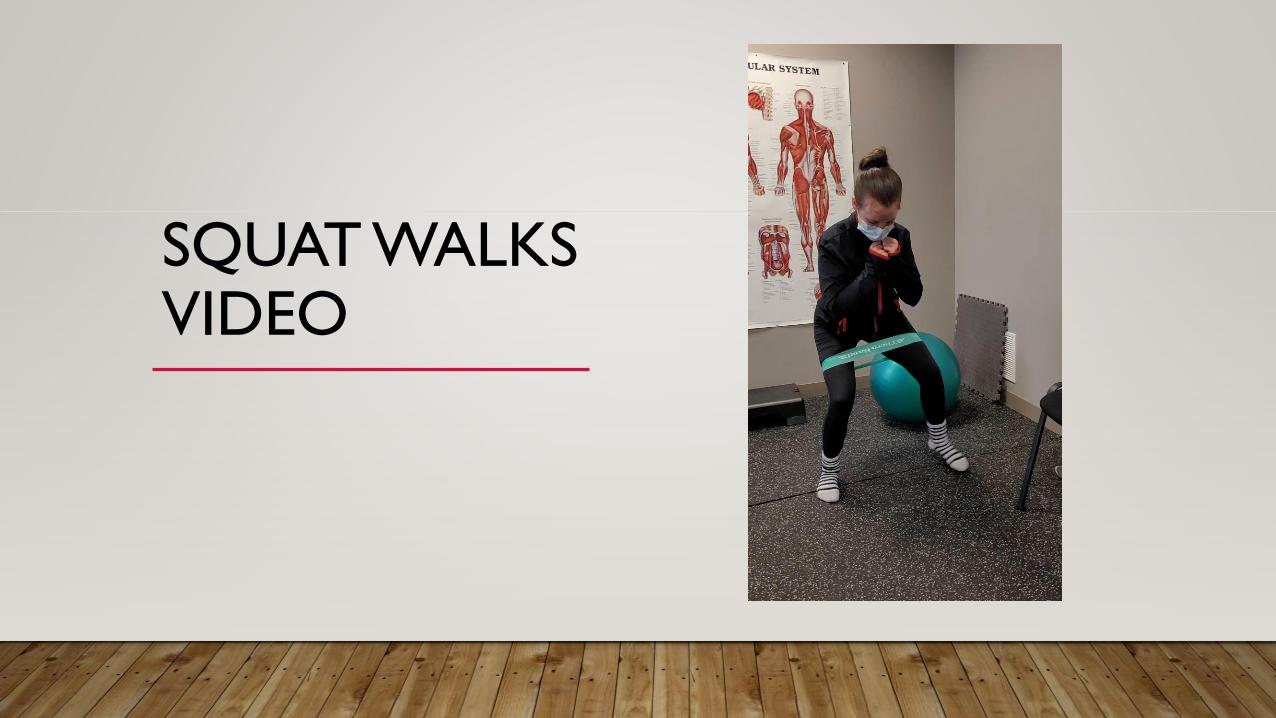
SQUAT WALKS VIDEO

THREE PAUSE SQUATS

THE BANDED 3 PAUSE SQUAT USES STRENGTHENS THE GLUTES
• Setup:
• Even weight front to back in feet. Big toes down. Tension knees out against the band.
•
1. Begin by standing feet shoulder width apart even weight front to back in feet.
2. Start by sitting your butt back and down like sitting into a chair while keeping tension out against the bands. Slowly lower about 4 inches pause -hold that position for 3 seconds and do the check list
3. Slowly lower 4 more inches or so and then pause for another 3 seconds while running through the check list
4. Slowly lower 4 more inches or so and then pause for another 3 seconds while running through the check list
5. Return to the standing position focusing on squeezing your gluteus muscles
6. Perform 3 sets of 10 reps.
• *Note that only 2 Pauses are shown in the pictures, but this is a 3 pause exercise

THREE PAUSE SQUAT VIDEO


REFERENCES
• Clinical Methods: The History, Physical, and Laboratory Examinations. 3rd edition. Walker
HK, Hall WD, Hurst JW, editors. Boston: Butterworths; 1990.
• Liebenson, Craig. (2006). Rehabilitation of the Spine – A Practitioner’s Manual. Lippincott
Williams & Wilkins; Second edition.
• Magee, D. (2013). Orthopedic Physical Assessment. Saunders; 6th edition.
• Page, P. Frank, C. Lardnar, P. (2009). Assessment and Treatment of Muscle Imbalance: The Janda
Approach. Human Kinetics: First Edition.
• Oscar, Even. (2012). Corrective Exercise Solutions. Lotus Publishing.