eTrust Access Control for UNIX and Linux Getting Access Control for UNIX and Linux This...
114
Getting Started r8 SP1 eTrust ® Access Control for UNIX and Linux
Transcript of eTrust Access Control for UNIX and Linux Getting Access Control for UNIX and Linux This...

Getting Started r8 SP1
eTrust® Access Control for UNIX and Linux

This documentation and any related computer software help programs (hereinafter referred to as the “Documentation”) is for the end user’s informational purposes only and is subject to change or withdrawal by CA at any time.
This Documentation may not be copied, transferred, reproduced, disclosed, modified or duplicated, in whole or in part, without the prior written consent of CA. This Documentation is confidential and proprietary information of CA and protected by the copyright laws of the United States and international treaties.
Notwithstanding the foregoing, licensed users may print a reasonable number of copies of the documentation for their own internal use, and may make one copy of the related software as reasonably required for back-up and disaster recovery purposes, provided that all CA copyright notices and legends are affixed to each reproduced copy. Only authorized employees, consultants, or agents of the user who are bound by the provisions of the license for the product are permitted to have access to such copies.
The right to print copies of the documentation and to make a copy of the related software is limited to the period during which the applicable license for the Product remains in full force and effect. Should the license terminate for any reason, it shall be the user’s responsibility to certify in writing to CA that all copies and partial copies of the Documentation have been returned to CA or destroyed.
EXCEPT AS OTHERWISE STATED IN THE APPLICABLE LICENSE AGREEMENT, TO THE EXTENT PERMITTED BY APPLICABLE LAW, CA PROVIDES THIS DOCUMENTATION “AS IS” WITHOUT WARRANTY OF ANY KIND, INCLUDING WITHOUT LIMITATION, ANY IMPLIED WARRANTIES OF MERCHANTABILITY, FITNESS FOR A PARTICULAR PURPOSE OR NONINFRINGEMENT. IN NO EVENT WILL CA BE LIABLE TO THE END USER OR ANY THIRD PARTY FOR ANY LOSS OR DAMAGE, DIRECT OR INDIRECT, FROM THE USE OF THIS DOCUMENTATION, INCLUDING WITHOUT LIMITATION, LOST PROFITS, BUSINESS INTERRUPTION, GOODWILL, OR LOST DATA, EVEN IF CA IS EXPRESSLY ADVISED OF SUCH LOSS OR DAMAGE.
The use of any product referenced in the Documentation is governed by the end user’s applicable license agreement.
The manufacturer of this Documentation is CA.
Provided with “Restricted Rights.” Use, duplication or disclosure by the United States Government is subject to the restrictions set forth in FAR Sections 12.212, 52.227-14, and 52.227-19(c)(1) - (2) and DFARS Section 252.227-7014(b)(3), as applicable, or their successors.
All trademarks, trade names, service marks, and logos referenced herein belong to their respective companies.
Copyright © 2006 CA. All rights reserved.
CA Product References This document references the following CA products:
eTrust® Access Control (eTrust AC)
eTrust® Single Sign-On (eTrust SSO)
eTrust® Web Access Control (eTrust Web AC)
eTrust® CA-Top Secret®
eTrust® CA-ACF2®
eTrust® Audit
Unicenter® TNG
Unicenter® Network and Systems Management (Unicenter NSM)
Unicenter® Software Delivery
Contact Technical Support For online technical assistance and a complete list of locations, primary service hours, and telephone numbers, contact Technical Support at http://ca.com/support.


Contents v
Contents
Chapter 1: Introducing All-Around Security for eBusiness 9 Purpose of This Guide.......................................................................... 9 CA Technology Services: Delivering on the Vision of Enterprise IT Management.................... 9 Education and Training: Maximizing the Business Value of CA Technology ........................ 10 eTrust Solutions .............................................................................. 10 CA: The Software That Manages eBusiness ..................................................... 10 More Information ............................................................................. 11 Is Your Distributed Computing Environment Safe? .............................................. 11
Limiting superuser Privileges .............................................................. 11 Secure Your Environment ................................................................. 12 Prevent Host-based Intrusions ............................................................. 12 Protect Your Data and Applications......................................................... 12 Centralize Security Management ........................................................... 13 Audit Actions of Specific Individuals ........................................................ 13 Promote Consistent Cross-Platform Security ................................................ 14 Distinctive Features ....................................................................... 15 LDAP Support ............................................................................ 15 Policy Management System................................................................ 16 Application Policy Generator ............................................................... 16
Chapter 2: Fortifying Operating System Security 17 The Security Requirement..................................................................... 17 Components of eTrust AC ..................................................................... 17
The Database............................................................................. 18 The Watchdog ............................................................................ 18 The Agent ................................................................................ 18 The Policy Model .......................................................................... 18 The Deployment Map Server............................................................... 19 User Interfaces ........................................................................... 20
Features of eTrust AC......................................................................... 21 Managing Users and Resources ............................................................ 22 selang ................................................................................... 22 Policy Manager ........................................................................... 22 eTrust AC Self-Defense.................................................................... 22 Program Pathing .......................................................................... 22 B1 Security Level Certification ............................................................. 22 Managing Security for Multiple Operating Systems .......................................... 23

vi Getting Started
Maintaining One Set of Users .............................................................. 23 Maintaining One Set of Groups............................................................. 23 Maintaining One Set of Access Rules ....................................................... 24 Synchronizing Passwords .................................................................. 24
Starting eTrust AC ............................................................................ 25 Necessary Users and Groups .................................................................. 26 eTrust AC Documentation ..................................................................... 26 What's Next? ................................................................................. 27
Chapter 3: Discovering the Power of Protection 29 From Monitoring System Events to Protecting Your Programs .................................... 29 What Do I Need to Know Before I Get Started? ................................................. 30 Let's Get Started ............................................................................. 30 Registering New Users and Groups............................................................. 31 Monitoring System Events..................................................................... 33 Opening an eTrust AC Window Manually........................................................ 35 Help with eTrust AC Commands ............................................................... 36 Protecting Files and Directories ................................................................ 36 Protecting Files from Unauthorized Users....................................................... 37 Protecting Files with Program Pathing .......................................................... 39 Protecting Files with File Name Patterns........................................................ 41 Protecting Directories ......................................................................... 42 Summary .................................................................................... 42
Cleaning Up .............................................................................. 43 Protecting Programs from Being Killed ......................................................... 43 Protecting Other Programs .................................................................... 44
Cleaning Up .............................................................................. 44 What's Next? ................................................................................. 45
Chapter 4: Gaining More Control of Your User Accounts 47 Limiting User Accesses and Privileges .......................................................... 47 Create Sub Admin Users ...................................................................... 48 Limit Surrogate Requests ..................................................................... 48 A Safer Surrogation Command: sesu........................................................... 49
Cleaning Up .............................................................................. 52 Reduce Usage of root (with sesudo) ........................................................... 53
Cleaning Up .............................................................................. 54 Restrict Access from Terminals ................................................................ 55
Cleaning Up .............................................................................. 56 Set Time-Of-Day and Day-Of-Week ............................................................ 56
Cleaning Up .............................................................................. 57
Contents vii
What's Next? ................................................................................. 57
Chapter 5: Protecting Network Security 59 Controlling TCP/IP Connections and Network Level Accesses..................................... 59 Protecting the Network (TCP/IP) ............................................................... 60 The Host-Group Level......................................................................... 61 The Network Level............................................................................ 62 Name Patterns ............................................................................... 63 Service-Oriented TCP/IP Rules................................................................. 63
Cleaning Up .............................................................................. 63 Blocking Back Doors and Trojan Horses ........................................................ 64 Trusted Programs............................................................................. 64 Automatic Untrusting of Changed setuid and setgid Programs ................................... 65 Preventing Abuse of Path Priorities (the _abspath Group) ....................................... 67 With and Without Conditional Access (Program Pathing)......................................... 68
Cleaning Up .............................................................................. 69 Controlling Outgoing Connections.............................................................. 70
Cleaning Up .............................................................................. 72 What's Next? ................................................................................. 73
Chapter 6: Setting Password and Audit Policies 75 Passwords, Logins, and Auditing Rules ......................................................... 75 Password Quality Policy ....................................................................... 75 Changing Passwords (sepass) ................................................................. 75 Grace Logins (segrace) ....................................................................... 76 Activating Policy Checking..................................................................... 77
Cleaning Up .............................................................................. 78 Locking Idle Stations and X Terminals.......................................................... 79 Auditing...................................................................................... 79 Using the Consolidated Audit Facility ........................................................... 81 What's Next? ................................................................................. 83
Chapter 7: Managing Your Enterprise Security with Policy Model Databases 85 From Defining Parent PMDBs to Setting PMDB Passwords........................................ 85 Managing Several Stations at Once ............................................................ 85 Creating a Policy Model Database .............................................................. 86 Pointing Subscriber Stations to the PMDB ...................................................... 88 Working with a PMDB ......................................................................... 89
Cleaning Up .............................................................................. 90 What's Next? ................................................................................. 90

viii Getting Started
Chapter 8: Centralizing Administration 91 Creating Users, PMDBs, and More.............................................................. 91 Getting Started............................................................................... 91 Create a New User............................................................................ 92 The Create User Wizard ....................................................................... 93 Let's Create a PMDB .......................................................................... 95 Working with a PMDB ......................................................................... 98 Account Policies .............................................................................. 98 Password Policies ............................................................................. 99 What's Next? ................................................................................ 100
Chapter 9: Integrating with Unicenter Security 101 Integrating eTrust AC with Unicenter Security ................................................. 101 Installing Unicenter Security Integration Tools................................................. 102 Installation Notes............................................................................ 103 What's Next? ................................................................................ 103
Chapter 10: Frequently Asked Questions 105

Introducing All-Around Security for eBusiness 9
Chapter 1: Introducing All-Around Security for eBusiness
This section contains the following topics:
Purpose of This Guide (see page 9) CA Technology Services: Delivering on the Vision of Enterprise IT Management (see page 9) Education and Training: Maximizing the Business Value of CA Technology (see page 10) eTrust Solutions (see page 10) CA: The Software That Manages eBusiness (see page 10) More Information (see page 11) Is Your Distributed Computing Environment Safe? (see page 11)
Purpose of This Guide This guide introduces you to eTrust AC. By the time you have finished reading this guide, you will have an overview of the wide scope of the product and its usability will be familiar to you. It is important to us that you feel comfortable with eTrust AC before you begin to use it.
CA Technology Services: Delivering on the Vision of Enterprise IT Management
CA Technology Services™ delivers enterprise IT management solutions to help our customers achieve more efficient operations and better manage the IT infrastructure, which drives meaningful business value and financial results. CA Technology Services leverages its global expertise and certified professionals in enterprise systems management, business service optimization, security management and storage management to maximize customers’ IT investments.
We draw from our more than 27 years of management software experience, over 1,000 technology services professionals, most of whom are CISSP-, ITIL-, and SNIA-certified, and the complementary service delivery capabilities of industry-leading service partners, to offer you best practices and time-tested, proven methodologies.

Education and Training: Maximizing the Business Value of CA Technology
10 Getting Started
Education and Training: Maximizing the Business Value of CA Technology
CA Technology Services education and training is focused on helping you realize streamlined implementations, reduced time-to-value, and improved productivity to maximize the business value of CA technology. We deliver instructor-led, self-paced, and extended learning solutions across CA’s complete, integrated, and open solutions for enterprise IT management (EIM) and partner with leading value-added education providers to extend our course offerings in enterprise systems management, security management, storage management, and business service optimization. Our dynamic team of certified and experienced professionals transfers real-time expertise in optimizing CA software products and leveraging proven IT process models that educates your organization about how to make practical application of best practices in your IT environment.
For a complete list of education and training courses, visit http://ca.com/education.
eTrust Solutions eTrust solutions enables eBusiness by delivering innovative technologies that make it easy for organizations to secure their environments. This comprehensive security suite enhances return opportunity for any eBusiness, with solutions that include risk assessment, attack detection, loss prevention and more. With eTrust, organizations have the flexibility to deploy a security solution as a standalone product, as a security suite, or fully-integrated with Unicenter NSM. Used with Unicenter NSM, eTrust solutions enable a consistent approach to building, deploying and managing security as part of the larger task of enterprise management.
CA: The Software That Manages eBusiness The next generation of eBusiness promises unlimited opportunities by leveraging existing business infrastructures and adopting new technologies. At the same time, extremely complicated management presents challenges-from managing the computing devices to integrating and managing the applications, data, and business processes within and across organizational boundaries. Look to CA for the answers. CA has the solutions available to help eBusinesses address these important issues. Through industry-leading eBusiness Process Management, eBusiness Information Management, and eBusiness Infrastructure Management offerings, CA delivers the only comprehensive, state-of-the-art solutions, serving all stakeholders in this extended global economy.

More Information
Introducing All-Around Security for eBusiness 11
More Information After reading this Getting Started, you can refer to the numerous resources available to you for additional information. Your product CD contains instructional documents that showcase your software and provide detailed explanations about the product’s comprehensive, feature-rich components.
For assistance, contact Technical Support at http://ca.com/support.
Is Your Distributed Computing Environment Safe? At most companies, critical information-such as financial transactions, customer information and confidential personnel records-resides on distributed servers. Protecting and controlling access to this data is a key business requirement.
Unfortunately, open systems do not provide adequate data security. In fact, distributed servers are susceptible to unauthorized access due to “holes” in the underlying operating systems. UNIX, Linux, Windows NT, Windows 2000, and Windows 2003 are built around the “superuser” concept, which creates vulnerabilities through a user account that has full access to applications, data and audit logs. Attempting to manually enforce security in this environment is extremely time-intensive and mostly ineffective.
Limiting superuser Privileges
The greatest security problem of open systems is the vulnerability created by the superuser, a single, privileged account that has access to all server resources. This design undermines native access control security measures. Completely protecting the superuser account is impossible when using controls in the native operating systems, because it can be hacked in so many ways.
eTrust AC overcomes this problem by providing stronger access control security based on Dynamic Security Extension (DSX) technology. Instead of granting access to resources on an all-or-nothing basis, DSX enables you to create and enforce access privileges based on functional needs.

Is Your Distributed Computing Environment Safe?
12 Getting Started
Secure Your Environment
With eTrust AC, companies can centrally manage user privileges and quickly deploy pre-configured basic security policies. eTrust AC ensures that the right people have access to the right information. It proactively secures access to data and applications located on native operating system servers throughout an organization.
eTrust AC provides reliable, non-intrusive protection through its Dynamic Security Extension (DSX) technology. DSX dynamically intercepts security-sensitive requests in real-time-without requiring any permanent changes to the operating system kernel. This provides a very high level of security without being intrusive to server processing.
Advanced capabilities in eTrust AC-such as Generic File Protection-radically improve security for native operating systems. With Generic File Protection, your organization can use wildcard options to protect groups of related files or programs. This capability makes it easy to develop powerful general access policies.
Prevent Host-based Intrusions
eTrust AC provides many key features for a Host-based Intrusion Prevention System (HIPS) which can reduce security risks of external worm attacks or malware damages. Through its Stack Overflow Protection (STOP) feature, Trojan Horse prevention function, pre-defined application security template samples, and the application behavior profiling program, eTrust AC offers administrators stronger protection of their critical servers, and more time to fix system vulnerabilities and distribute security patches.
Protect Your Data and Applications
Your organization's success depends on the integrity and privacy of its data and applications. With eTrust AC, people and programs have appropriate access to the information they need-and all unauthorized information requests are prevented and logged.
eTrust AC provides customized security policies for enhanced application security. CA is also partnering with leading software vendors, enabling eTrust AC to control access to specific applications. These “bullet-proof” solutions provide shrink-wrapped protection for business-critical applications.

Is Your Distributed Computing Environment Safe?
Introducing All-Around Security for eBusiness 13
Centralize Security Management
Policy manager enables centralized management of users, passwords and access policies. This hierarchical system provides flexibility in account creation and updates, password synchronization and policy distribution. It can be used in a local departmental environment or as an enterprise-wide access management infrastructure.
To help immediately protect vital UNIX, Linux and Windows servers, eTrust AC provides sample security best practices for specific operating systems and enterprise server applications. These best practices samples offer baseline protection for these critical applications and platforms against external threats or internal abuses.
Audit Actions of Specific Individuals
Comprehensive security must include a complete and reliable record of activity by individuals. Administrators can configure eTrust AC to audit all security-sensitive events, and they can use the advanced Tracing option to closely monitor sensitive user actions. eTrust AC audit information can be consolidated centrally across multiple systems and quickly filtered to speed inquiries and analysis.
eTrust AC has the unique ability to prohibit users from “hiding behind” the superuser account and performing untraceable actions. eTrust AC traces each action to a specific user who can be named and held accountable.

Is Your Distributed Computing Environment Safe?
14 Getting Started
Promote Consistent Cross-Platform Security
With eTrust AC, the level of security on each system is raised to meet overall business requirements. A single eTrust AC security policy can be centrally created and automatically distributed and enforced on a variety of native operating systems. The final result is a powerfully built, consistent level of server security achieved, with minimal time and effort.
Without eTrust AC, by contrast, administrators must create and maintain a separate security policy for each computing system, which requires an enormous amount of time and labor. In addition, company-wide security standards are often based on the system with the lowest level of security-an approach that fails to meet the security requirements of most organizations.
Policies can be created, managed and distributed on an enterprise-wide basis, or customized to meet the security requirements of specific applications. This complete solution can be deployed anywhere from individual departments, such as payroll or research & development, to the largest enterprises-and everything in between. Its fortified operating system security, complete audit ability and cross-platform access control secures critical processes and sensitive information on the distributed systems.
Open and extensible, this powerful solution supports all industry-standard platforms, databases and applications and includes published interfaces allowing it to be used to secure any resource. eTrust AC can communicate with CA Unicenter NSM, providing a powerful, comprehensive solution for building, deploying and managing security as part of the larger task of enterprise management.

Is Your Distributed Computing Environment Safe?
Introducing All-Around Security for eBusiness 15
Distinctive Features Centralized Administration
eTrust AC enables you to manage the administrator workstation and every other workstation or server on which eTrust AC is installed-from a single point.
Self-Protection
A self-defense mechanism prevents hackers or other users from bringing down eTrust AC services. This mechanism also safeguards eTrust AC files and audit data.
Profile Groups
eTrust AC lets you base security on roles or group membership. For example, it can limit the rights granted to the Administrator group and users who are members of that group.
User Accountability
eTrust AC has the unique ability to prohibit user from “hiding behind” the superuser account and performing untraceable actions. It traces each action to a specific user who can be named and held accountable.
Stack Overflow Protection (STOP)
STOP prevents hackers from using stack overflow exploits, which can enable them to execute arbitrary commands in order to break into systems.
Cross-Platform Support
Administrators can create, implement and maintain similar or identical security policies for UNIX, Linux, Windows NT, Windows 2000, and Windows 2003 platforms.
LDAP Support
Many organizations are moving to centralize their user data stores to Active Directory or LDAP based repositories. eTrust AC supports external users (users defined on external repositories) through eTrust Identity and Access Management. In other words, one can define users in an external directory and eTrust Identity and Access Management correlates these users to eTrust AC database. eTrust AC can also create, modify, or delete native users that reside in either the Active Directory or Security Account Manager (SAM), the Windows NT User Account database.

Is Your Distributed Computing Environment Safe?
16 Getting Started
Policy Management System
eTrust AC provides a standalone policy management system that helps administrators easily manage departmental security policies with policy set-versioning, distribution and remote download abilities, to help ensure all subscription servers obtain the latest security policies, and easy version controls.
eTrust AC lets you manage several databases from a single central computer in two ways:
Automatic rule-based policy updates
Regular rules you define in a central database (PMDB) are automatically propagated to databases in a configured hierarchy.
Advanced policy-based management and reporting
Policies (group of rules) you store in a central location can be deploy and propagated to all databases in a configured hierarchy. You can also remove deployed policy versions (undeploy) and report on deployment status, deployment deviation, and deployment hierarchy. You need to install and configure additional components to use this functionality.
Application Policy Generator
An automated policy generator program is provided to profile application behaviors and generate security policies accordingly. It creates security envelope around the applications and greatly reduces the deployment efforts required to construct these rules.

Fortifying Operating System Security 17
Chapter 2: Fortifying Operating System Security
This section contains the following topics:
The Security Requirement (see page 17) Components of eTrust AC (see page 17) Features of eTrust AC (see page 21) Starting eTrust AC (see page 25) Necessary Users and Groups (see page 26) eTrust AC Documentation (see page 26) What's Next? (see page 27)
The Security Requirement The new open and distributed computing paradigm has created an increased demand on computer security: integration among divergent platforms becomes more complex. The need to have a security solution that can address disparate systems with consistent security coverage emerges as an important item on the security list. Also, larger corporations conduct mergers and acquisitions more than ever. This has created a new breed of security requirements, including burst expansion, distribution capacity, streamlined and centralized management, and cross-platform support.
eTrust AC has built-in basic policies to give organizations immediate results right out of the box. Open and extensible, this powerful solution supports all industry-standard platforms, databases and applications, and includes published interfaces allowing it to secure any resource.
Ease of use combined with centralized user and access administration enables organizations to confidently exploit today's eBusiness opportunities. As a part of the eTrust security solution, eTrust AC can interoperate with Unicenter NSM, providing a powerful, comprehensive solution for building, deploying, and managing security as part of the larger task of enterprise management.
Components of eTrust AC eTrust AC comprises a database, a driver, and a number of daemons including the Watchdog and the Agent, and multiple interfaces.

Components of eTrust AC
18 Getting Started
The Database
The database contains definitions of:
Users and groups in your organization
System resources that need protection
Rules governing user and group access to system resources
The Watchdog
The Watchdog constantly checks that all the other eTrust AC services are running. On the rare occasion when the Watchdog discovers that another service has stopped, it immediately starts the service again.
The Agent
The Agent is responsible for communicating with eTrust AC clients through a proprietary application protocol above TCP/IP
The Policy Model
Managing tens or hundreds of databases individually is not practical, so eTrust AC supplies the Policy Model, a component that allows management of many computers from one computer. Using the Policy Model is optional, but it greatly simplifies administration at large sites.
Together with the Policy Model, you use a Policy Model database (PMDB). Like other eTrust AC databases, the PMDB contains users, groups, protected resources, and rules governing access to the resources. In addition, the PMDB contains a list of subscriber stations. A subscriber station is one linked to the PMDB so that any change to the PMDB is automatically sent to the subscriber database.
You can create a basic security policy for your organization and implement all the necessary rules on a single database - the Policy Model database. The subscribers can include Windows, UNIX, and Linux stations, ensuring uniform rules with minimal administrative effort.
The system or security administrator updates the PMDB. The PMDB then propagates all updates from the PMDB to its subscribers in batch mode, freeing the administrator for other work.

Components of eTrust AC
Fortifying Operating System Security 19
A PMDB can have two types of subscribers: another PMDB or a local database. The subscriber PMDB also contains a list of subscribers to which it propagates database updates. This feature lets you build a hierarchy of PMDBs. The local database can be used to protect the users, groups, and resources defined on the station.
The Deployment Map Server
To extend the functionality of the Policy Model, eTrust AC provides a Deployment Map Server (DMS) that sits at the core of advanced policy management and reporting. The purpose of DMS is to keep an up-to-date map of the eTrust AC deployment hierarchy and the status of policies deployed on each computer. Having this data in a central location (rather than connecting to each database in a hierarchical manner) reduces the time required for generating reports.
A DMS is a PMD node and it uses a PMDB as its data repository. It collects the data it receives from notifications from each PMD node it is configured for.

Components of eTrust AC
20 Getting Started
User Interfaces
The Policy Manager is a graphical user interface that runs on Windows systems through which all eTrust AC functions are carried out.
Note: For more information about Policy Manager, see the User Guide.
The components of Policy Manager and their relationships are shown graphically in the following diagram:

Features of eTrust AC
Fortifying Operating System Security 21
Another graphical user interface runs in UNIX or Linux-Security Administrator.
Note: For more information about Security Administrator, see the User Guide.
The components of Security Administrator are shown graphically in the following diagram:
Features of eTrust AC eTrust AC lets you manage your enterprise from one central location. eTrust AC also has the ability to protect itself. These features are described in the following sections.

Features of eTrust AC
22 Getting Started
Managing Users and Resources
After eTrust AC is installed on the workstations in your organization, you can manage all of them from one central station. To do this, use the command-line language called selang, or use the graphical user interface called Policy Manager.
selang
The command-line language, selang, can be used to enter commands that perform all the functions of eTrust AC. You can also use selang when writing scripts.
Note: For more information on selang and its commands, see the Reference Guide.
Policy Manager
Policy Manager is the Windows-based graphical user interface (GUI) for eTrust AC.
Note: For more information about the Policy Manager, see the User Guide.
eTrust AC Self-Defense
It is virtually impossible for hackers or users to bring down eTrust AC daemons, intentionally or unintentionally. When eTrust AC is running, it is also virtually impossible for unauthorized users to change or erase eTrust AC files and data.
Program Pathing
Program pathing is the ability to demand that a specific file be accessed only through a specific program. Program pathing greatly increases the security of sensitive files. eTrust AC lets you use program pathing to provide additional protection for the files in your system.
B1 Security Level Certification
eTrust AC includes the following B1 “Orange Book” features: security levels, security categories, and security labels.

Features of eTrust AC
Fortifying Operating System Security 23
Managing Security for Multiple Operating Systems
Often large organizations have UNIX, Linux, Windows NT, Windows 2000, and Windows 2003 operating systems. This complicates the task of maintaining good security. Ideally, you would develop one security policy that can be implemented on both types of systems. With eTrust AC, it is now possible to:
Develop one common security policy for UNIX, Linux, Windows NT, Windows 2000, and Windows 2003.
Implement the policy by using eTrust AC
Use one Windows (NT, 2000 or 2003) workstation to manage the security for the Windows environment and the UNIX and Linux environments
The ability to make a change and have eTrust AC propagate it to many workstations in different environments can greatly reduce administrative overhead. Some elements that are particularly important in a common security policy are mentioned in the following sections.
Maintaining One Set of Users
After eTrust AC is installed at your site, you can maintain one database that contains all the users. This means that user maintenance only needs to be done at one place. eTrust AC can propagate the additions, changes, and deletions to all the workstations using both native operating systems that should receive the updates.
Maintaining One Set of Groups
It is often convenient to group users together who work on specific projects or in specific departments or divisions in the organization. UNIX, Linux, Windows, and eTrust AC all allow you to define groups of users. You can assign authorities to groups just as you would assign authorities to users. Using groups can ease your workload because you assign authorities once for the group rather than repetitively assigning the same authorities to individual users. Each user then receives the authorities of the group.
Working with eTrust AC makes it possible to create and maintain one set of groups that can be used in any environments.
Features of eTrust AC
24 Getting Started
Maintaining One Set of Access Rules
The Policy Model lets you develop and maintain one set of access rules for native operating systems. The PMDB lets you propagate a security database, and any changes made to it, to all its subscribers. UNIX, Linux, and Windows workstations can all be subscribed to the same PMDB.
Communication between the PMDB and its subscribers usually goes in one direction: the PMDB sends changes from its database to its subscribers. A subscriber only communicates with the PMDB when it informs the PMDB that it is online and requests all the changes that were sent by the PMDB while it was down. This design minimizes network traffic, and the integrity of the subscriber is ensured.
Synchronizing Passwords
One of the main components of any good security policy is forcing users to select good passwords. It is easier if users must remember only one password that can be used throughout the system.
eTrust AC lets you enforce one set of password rules and to enable password synchronization among multiple systems.
A PMDB can propagate rules defining good passwords. The PMDB can also propagate new and changed passwords to all the subscriber stations, including mainframe computers.

Starting eTrust AC
Fortifying Operating System Security 25
Starting eTrust AC Assuming you are working in an X Windows environment, invoke eTrust AC, verify that it is correctly installed on your system, and perform the following steps to initiate important protection:
1. If you have not rebooted since installing eTrust AC, you may need to reboot now if you are installing on platforms other than HP-UX, IBM-AIX, Linux, or Sun Solaris.
2. Open two windows under root (superuser) authority.
3. In either window, enter the command:
eTrustACDir/bin/seload
Wait while the seload command starts the eTrust AC daemons.
4. When the daemons have all started, in the other window enter the command:
eTrustACDir/bin/secons -t+ -tv
eTrust AC accumulates a file of messages reporting operating system events. The secons -tv command displays the messages on the screen as well.
5. Back in the first window, where you gave the seload command, enter the command:
who
Watch the second window, where eTrust AC is writing the trace messages, to see whether eTrust AC intercepts the execution of the who command and reports on it. eTrust AC is correctly installed on your system if it reports interception of the who command.
6. If you want, enter more commands to see how eTrust AC reacts to them.
The database does not yet contain any rules for blocking access attempts. Nevertheless, eTrust AC monitors the system so that you can see how the system behaves with eTrust AC installed and running, and which events eTrust AC intercepts.
7. Shut down the daemon by entering the command:
eTrustACDir/bin/secons -s
The following message appears on the screen:
eTrustAC is now DOWN !

Necessary Users and Groups
26 Getting Started
Necessary Users and Groups You need a number of users and groups with which to practice. Make sure you have permission to modify the definitions of the users, including their group memberships. You can work with pre-existing UNIX or Linux groups, but we recommend creating new groups (see page 31) especially for eTrust AC.
If you want, you can specify one or more of your real-life users now and add more later; or you can specify fictitious users to practice with now, and later specify real users instead. However, you must specify at least one user to fill each of the following roles:
A security administrator who is in overall command of eTrust AC at your site. You may find it convenient to put all such administrators into a UNIX or Linux group of security administrators. (A recommended name for the group is secadm.)
An eTrust AC auditor, who can read and manage system security reports. The auditor can be the same user as the security administrator, though it is often a good practice to maximize accountability by keeping the jobs separate. You may find it convenient to put all such auditors into a UNIX or Linux group of security auditors (a recommended name for the group is sysaudit). Alternatively, if the auditors and administrators are the same people, you might put them into the security administrators group.
At least one regular user for you to practice on, who has neither eTrust AC administrative capabilities nor eTrust AC auditing capabilities.
A system administrator who can become root at any time, unrestricted by UNIX or Linux. You might find it convenient to put all such administrators into a UNIX or Linux group of system administrators.
eTrust AC Documentation The documentation for eTrust AC is provided as PDF files. To view PDF files, you must download and install the Adobe Reader from the Adobe website if it is not already installed on your computer.
Updated guides will be available at http://ca.com/support.
Note: A suitable version of Adobe Reader is also available on your product CD.
A full list of the eTrust AC documentation is available in the readme file.
What's Next?
Fortifying Operating System Security 27
What's Next? Now that you have a better idea of eTrust AC features and capabilities, you are ready to protect your enterprise systems' integrity and your data's confidentiality.
The following chapter guides you through protecting programs and files from users and groups.


Discovering the Power of Protection 29
Chapter 3: Discovering the Power of Protection
This section contains the following topics:
From Monitoring System Events to Protecting Your Programs (see page 29) What Do I Need to Know Before I Get Started? (see page 30) Let's Get Started (see page 30) Registering New Users and Groups (see page 31) Monitoring System Events (see page 33) Opening an eTrust AC Window Manually (see page 35) Help with eTrust AC Commands (see page 36) Protecting Files and Directories (see page 36) Protecting Files from Unauthorized Users (see page 37) Protecting Files with Program Pathing (see page 39) Protecting Files with File Name Patterns (see page 41) Protecting Directories (see page 42) Summary (see page 42) Protecting Programs from Being Killed (see page 43) Protecting Other Programs (see page 44) What's Next? (see page 45)
From Monitoring System Events to Protecting Your Programs The scope of eTrust AC is unlimited-it lets you oversee your entire enterprise. Whether your business reaches across countries or continents, you are well equipped to manage your resources with eTrust AC in charge. This flexible solution addresses the system management challenges you face today-and the ones you may encounter in the future.
In this chapter, you walk briefly through the monitoring events capabilities through new users and groups and more-the first steps to putting eTrust AC to work for you.

What Do I Need to Know Before I Get Started?
30 Getting Started
What Do I Need to Know Before I Get Started? Before you practice with eTrust AC, you should consider the following:
Ensure you have sufficient disk space to properly run the program.
Ensure that you have users and groups to practice with. Make sure you have permission to modify the definitions of the users, including their UNIX or Linux group memberships.
You should be a system administrator who can become root anytime, unrestricted by UNIX or Linux.
Let's Get Started To maintain system integrity in UNIX and Linux, you must ensure the availability of critical system services, the reliability of critical configuration files, and the accuracy of audit files. The theft of trade secrets or the manipulation of business records by unauthorized users can cause inestimable harm to your business.
We illustrate how eTrust AC protects system integrity and data confidentiality. Examples demonstrate how eTrust AC responds to system events and how you can customize access policies to protect your system resources.

Registering New Users and Groups
Discovering the Power of Protection 31
Registering New Users and Groups If you imported your UNIX or Linux users and groups at installation time, then it may not be necessary now for you to add users in order to have data to practice with. But adding users is an important practice in itself.
Note: To add a new user of any kind to the database, you use the newusr command. To add a new user group, use the newgrp command.
1. Using the following command, you create a few users you can practice with. You can substitute different user names if you want. However, do not use the names of your real users. These definitions are for practice use only.
eTrust-Lang
eTrustAC> newusr (j_doe p_jones q_smith)\ ? owner (nobody) audit(all) suspend unix (localhost) Successful created USER j_doe Successful created USER p_jones Successful created USER q_smith (localhost) Unix: ====== Successful created USER j_doe Successful created USER p_jones Successful created USER q_smith eTrustAC> ▌
In eTrust AC, as in UNIX or Linux, use the special user “nobody” for making various capabilities inaccessible. eTrust AC automatically includes the user nobody in your database.
Include the suspend parameter for safety, so that no one can log in with the fictitious user name.
Note: For an explanation of the audit parameter, see the Reference Guide.
2. Define your security administrators and auditors for eTrust AC, and your UNIX or Linux system administrators.
a. You can define groups if you have not imported the appropriate UNIX or Linux groups:
eTrust-Lang

Registering New Users and Groups
32 Getting Started
eTrustAC> newgrp secadm owner(nobody) (localhost) Successful created GROUP secadm eTrustAC> newgrp sysaudit owner(nobody) (localhost) Successful created GROUP sysaudit eTrustAC> newgrp sysadm owner(nobody) (localhost) Successful created GROUP sysadm eTrustAC> ▌
If you have previously created groups, join users with the ADMIN and AUDITOR properties into them. For example, to give the ADMIN property to users p_jones and q_smith and join them to the secadm group, enter the following commands:
eTrust-Lang
eTrustAC> chusr (p_jones q_smith) ADMIN (localhost) Successful updated USER p_jones Successful updated USER q_smith eTrustAC> join (p_jones q_smith) group(secadm) (localhost) Successful joined USER p_jones to group secadm Successful joined USER q_smith to group secadm eTrustAC> ▌
b. To the user or users who function as eTrust AC administrators, give WRITE access to your terminal. All administrators need WRITE access to the terminals at which they work. For example, to give access to the secadm group, enter the following command:
eTrustAC> auth terminal terminal-name GID(secadm) ACCESS(READ,WRITE)
Or, to give access to an individual administrator named p_jones:
eTrustAC> auth terminal terminal-name UID(p_jones) ACCESS(READ,WRITE)
Note: If you do not give a user at least read permission for at least one terminal, the user cannot log in to the network. Do not forget the “authorize terminal” command when you create new users.
3. Using the following command, create a new group named “payroll” to use while practicing. (You can substitute a different group name if you want. This group is only to help you practice using eTrust AC.)
eTrust> newgrp payroll owner(nobody) UNIX
Note: For more information about users and groups, see the Administrator Guide.
Monitoring System Events
Discovering the Power of Protection 33
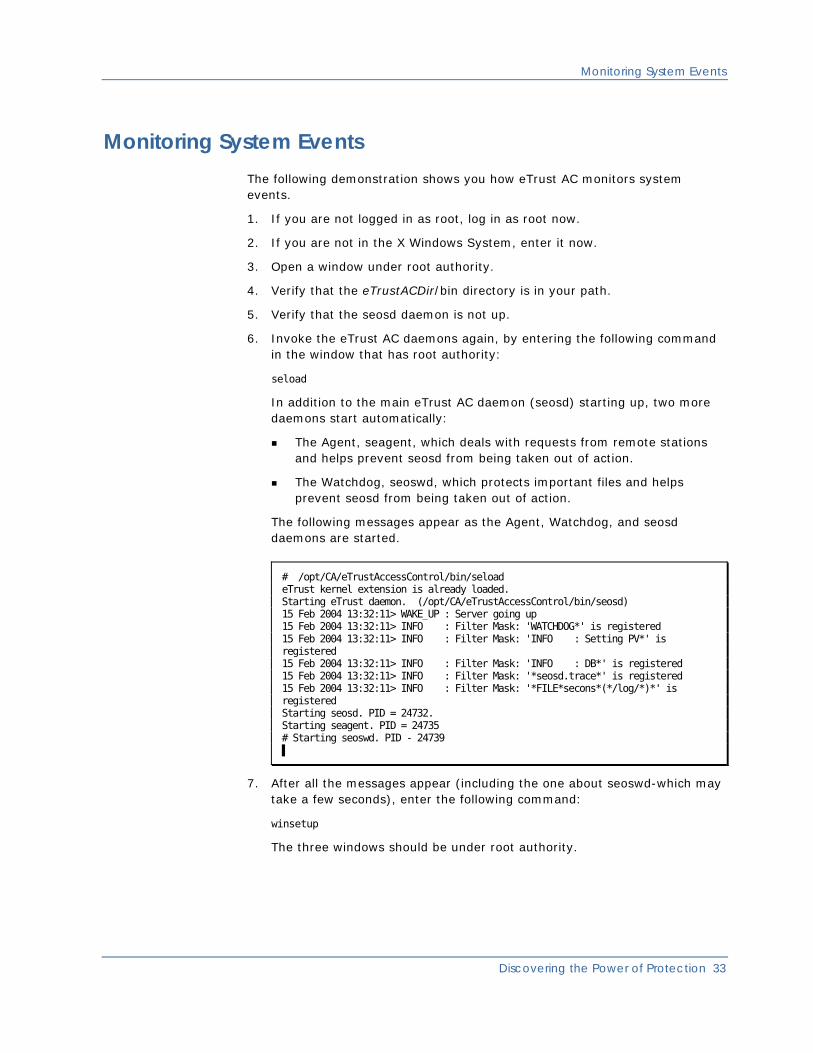
Monitoring System Events The following demonstration shows you how eTrust AC monitors system events.
1. If you are not logged in as root, log in as root now.
2. If you are not in the X Windows System, enter it now.
3. Open a window under root authority.
4. Verify that the eTrustACDir/bin directory is in your path.
5. Verify that the seosd daemon is not up.
6. Invoke the eTrust AC daemons again, by entering the following command in the window that has root authority:
seload
In addition to the main eTrust AC daemon (seosd) starting up, two more daemons start automatically:
The Agent, seagent, which deals with requests from remote stations and helps prevent seosd from being taken out of action.
The Watchdog, seoswd, which protects important files and helps prevent seosd from being taken out of action.
The following messages appear as the Agent, Watchdog, and seosd daemons are started.
# /opt/CA/eTrustAccessControl/bin/seload eTrust kernel extension is already loaded. Starting eTrust daemon. (/opt/CA/eTrustAccessControl/bin/seosd) 15 Feb 2004 13:32:11> WAKE_UP : Server going up 15 Feb 2004 13:32:11> INFO : Filter Mask: 'WATCHDOG*' is registered 15 Feb 2004 13:32:11> INFO : Filter Mask: 'INFO : Setting PV*' is registered 15 Feb 2004 13:32:11> INFO : Filter Mask: 'INFO : DB*' is registered 15 Feb 2004 13:32:11> INFO : Filter Mask: '*seosd.trace*' is registered 15 Feb 2004 13:32:11> INFO : Filter Mask: '*FILE*secons*(*/log/*)*' is registered Starting seosd. PID = 24732. Starting seagent. PID = 24735 # Starting seoswd. PID - 24739 ▌
7. After all the messages appear (including the one about seoswd-which may take a few seconds), enter the following command:
winsetup
The three windows should be under root authority.

Monitoring System Events
34 Getting Started
Note: eTrust AC provides the winsetup script that quickly sets up three windows that you need for this demonstration. Alternatively, if you prefer not to use the winsetup utility, you can also open an eTrust AC window manually (see page 35).
8. Open another window, called the workspace window, and use telnet to log in as a user who has no special privileges. For example, assuming that the user j_doe has no special privileges, enter the following commands:
telnet 127.0.0.1
login j_doe
Note: Telnet is necessary, because simply surrogating from root to a different user identity does not influence your permissions under eTrust AC. Unlike UNIX and Linux, eTrust AC maintains the user ID of the original user even after surrogation.
9. Invoke the eTrust Trace monitor by entering the following command in the eTrust-Trace window.
eTrust-Trace
$ secons -t+ -tv▌
The secons command gives you a console for supervising the daemons' activity and governing the logging-in of users.
10. Perform the following operations and watch the eTrust-Trace window to see how eTrust AC reacts:
a. In the workspace window, enter the following command:
> who
Note: Notice that in the eTrust-Trace window, eTrust AC reports the fork and exec events, which it notices as the who command is processed.
b. In the workspace window, run the following setuid program:
> su
In the eTrust-Trace window, eTrust AC reports the fork and exec(susg) events, and the results of eTrust AC authorization checks as well. By default, eTrust AC allows access to all resources. Therefore, for every authorization check, eTrust AC returns a 'P' for PERMIT, since you have not yet defined any access rules to protect the system's resources.
c. Continue the su command dialog by specifying the superuser password.
eTrust AC reports the events of sgid (set group ID to the group root belongs to) and suid (set user ID to the user root). As before, all access requests are permitted.

Opening an eTrust AC Window Manually
Discovering the Power of Protection 35
d. From another station, try to telnet and log in.
eTrust AC reports the inet requests (TCP/IP), the login event, and the execution of your initial scripts.
Now that you have seen how eTrust AC intercepts events, the following sections demonstrate how to use the most common features to protect specific entities such as files and terminals.
Note: This chapter uses the following conventions for instructions:
Commands you type in the eTrust-Console window are preceded by the “#” prompt symbol.
Commands you type in the eTrust-Lang window are preceded by the “eTrustAC>” prompt.
Commands you type in the workspace window are preceded by the “>” symbol.
Opening an eTrust AC Window Manually To open the eTrust-Console, eTrust-Trace, and eTrust-Lang windows without using the winsetup utility, follow these steps:
1. Open three windows under root authority.
2. For your convenience, set up the windows so that they have scroll bars with sufficient saved lines. For example:
xterm -sb -sl 1000
3. To make it easier to follow the instructions in this chapter, arrange the windows as shown in Monitoring System Events in this chapter.
4. In the lower right window, invoke the eTrust AC language command shell with the following command:
selang
The following command prompt appears:
eTrustAC>

Help with eTrust AC Commands
36 Getting Started
Help with eTrust AC Commands eTrust AC provides a command language to create definitions in the database. This command definition language is called selang.
Whenever you use selang commands, you can take advantage of various ease-of-use features:
The selang command language supports word completion. For the newres command, for example, you can type newr and press Tab to have selang complete the word for you.
Word completion works for file names and directory names the same as for commands. You must type only enough of the name to make it unambiguous, then Tab.
Each command has an abbreviated version. For example, typing nr is the same as typing newres; auth is the same as authorize.
Note: For more information, see the Reference Guide.
To display a list of selang commands, type help.
To display help on a particular command, enter:
help command
For example, to display help on the newusr command, enter:
help newusr
To display help text on the command currently in the command line, press Ctrl+2.
Note: In selang, you enter only one command per line. Type a backslash (\) at the end of a line to continue typing a long command on the next line. This guide uses the same convention. A backslash in an example does not mean that one must appear in the same place when you enter the command.
Protecting Files and Directories Among the most important files to protect are your system configuration files. For example, when the Internet daemon starts, it reads a file that specifies which Internet services are enabled in order to execute them on request. In many systems, that file is /etc/inetd.conf. Modifying it can, for example, cut off necessary services such as email, or make unauthorized services available on your system. In addition, every company has files of business information that should be accessible only on a need-to-know basis.
eTrust AC can be used to protect files and directories from unwanted access, even from root. The eTrust AC protection is added to the normal UNIX or Linux protection that is based on the file permission bits.

Protecting Files from Unauthorized Users
Discovering the Power of Protection 37
Protecting Files from Unauthorized Users Note: In the following exercises, you may find that you have to log off and log back in to experience certain changes to file permissions.
Following is an exercise using the /etc/inetd.conf file. While performing the exercise, keep in mind that the Internet daemon's configuration file might have a different name on your system. In the following lines, you should substitute an appropriate file name as necessary. Be careful not to use a symbolic link, though, or eTrust AC protects the link rather than the file. In Solaris, for example, /etc/inetd.conf is a symbolic link and you should specify /etc/inet/inetd.conf instead.
Note: For the exercises in this chapter, be sure your windows are set up according to the instructions in the section Monitoring System Events.
1. For safety's sake, make a backup copy of the file.
2. Use the following command to register the file in the database:
eTrust-Lang
eTrustAC> nr file /etc/inetd.conf owner(nobody) defaccess(r) (localhost) Successful created FILE /etc/inetd.conf eTrustAC> ▌
The defaccess(read) parameter-which can also be entered as defacc(r)-specifies that the default access to the file is read-only access.
Note: For explanations of the other parameters, see the Reference Guide.
You should receive the following confirmation:
>> Successfully created FILE /etc/inetd.conf
3. In the workspace window, become root.
> su root
Password: rootpassword
4. Try to modify or delete the file. Notice the response you receive. Even though you are root, you cannot manipulate the configuration file. The su command made no changes to your eTrust AC permissions. eTrust AC continues to consider you the same user that logged in.
WorkSpace
# cat >> /etc/inted.conf /etc/inted.conf: Permission denied. # ▌

Protecting Files from Unauthorized Users
38 Getting Started
root@companyname/[SOLARIS27 SUN4U]
companyname:/> rm /etc/inted.conf rm: remove /etc/inted.conf (yes/no)? y rm: /etc/inted.conf not removed: Permission denied companyname:/> ▌
Note how the eTrust-Trace window reports the events.
The eTrust Trace is a real-time log that is capable of showing literally any action taken in the system.
5. Use seaudit or seauditx in a root window to check out the audit trail.
The audit trail and the eTrust Trace are two separate facilities.
The seaudit utility is a command-line-based audit-trail reader that is part of eTrust AC. For a list of the seaudit command arguments, use the command without arguments.
The seauditx utility is a GUI-based audit-trail reader that is part of the Security Administrator.
Note: For more information about seauditx, see the User Guide.
Note: Policy Manager also has audit-trace capabilities. See the User Guide for detailed information.
Either utility shows that the audit log contains information similar to the following:
eTrust-Console
21 Mar 2004 15:36 S UPDATE FILE jhon 305 0 /etc/inetd.conf bighost.com newres file /etc/inetd.conf owner(nobody) audit(all) defaccess(read) 21 Mar 2004 15:38 D FILE jhon WRITE 69 2 /etc/inetd.conf tcsh 21 Mar 2004 15:38 D FILE jhon WRITE 69 2 /etc/inetd.conf tcsh Total Records Displayed 259 $ $ $ $
6. Now permit your security administrators to edit the file. Assuming you created a group of security administrators and named it secadm, enter following command:
eTrust-Lang
eTrustAC> authorize file /etc/inetd.conf gid(secadm) acc(update) (localhost) Successfully added secadm to /etc/inetd.conf's ACL eTrustAC> ▌

Protecting Files with Program Pathing
Discovering the Power of Protection 39
7. As one of the users in the security administration group, nondestructively try to edit the file in the text editor of your choice. For example, try to add a few words and then delete them. You should find that you are able to. In this way, you can also protect important security data-such as the audit trail-even from root.
Note: Be careful not to leave any changes in the inetd.conf file. The behavior of your system depends on its contents.
Protecting Files with Program Pathing eTrust AC provides an additional, more sophisticated technique for protecting access to a file. You can authorize access to a file only when access is being made from a specific program. This feature is called program pathing.
For example, suppose that your system has a file called /tmp/goings_on, which is a sampling of station activity. Suppose that the file is maintained automatically by a program called /bin/ps_logger.
This is how you would ensure that only the ps_logger handles the goings_on file. To perform the eTrust-Lang steps in the following procedure, you must be an eTrust AC security administrator.
1. Using the following command, register the goings_on file in the database as read-only by default.
eTrust-Lang
eTrustAC> newres FILE /tmp/goings_on defaccess(read) \ ? audit(all) (localhost) Successfully created FILE /tmp/goings_on eTrustAC> ▌
defaccess stands for “default access” and refers to the particular resource. eTrust AC uses more than one level of default access.
Note: For an explanation, see the Reference Guide.
2. Give your security-administration group (secadm, or whatever else you have named it) update access to the file, making them an exception to the read-only default.
eTrust-Lang
eTrustAC> auth FILE /tmp/goings_on access(update) \ ? gid(secadm) (localhost) Successfully added secadm to /tmp/goings_on's ACL eTrustAC> ▌

Protecting Files with Program Pathing
40 Getting Started
3. Allow all non-administrator users to update the file but only to update it by means of the program that does the logging.
eTrust-Lang
eTrustAC> auth FILE /tmp/goings_on access(update) \ ? uid(*) VIA(PGM(/bin/ps_logger )) (localhost) Successfully added * via PROGRAM /bin/ps_logger to /tmp/goings_on's ACL eTrustAC> ▌
You can protect a file even more strictly. You can restrict a file to certain users, and further restrict those users to a particular program for accessing the file. For example, if you use a temporary file named /tmp/payroll.dat and you want only members of the group named payroll to have access to it, and only through the vi program, you can make specifications like these:
eTrust-Lang
eTrustAC> newfile /tmp/payroll.dat \ owner(nobody) defacc(none) (localhost) Successfully created FILE /tmp/payroll.dat eTrustAC> auth file /tmp/payroll.dat \ ? gid(payroll) acc(update) via(pgm(/usr/bin/vi)) (localhost) Successfully added payroll via PROGRAM /usr/bin/vi to /tmp/payroll.dat's ACL eTrustAC> ▌
The first command forbids all access. The second command makes an exception for all payroll group members who are using vi.
Note: Although, in general, it is good practice to keep permissions uniform throughout a group, you can create exceptions by specifying permissions or prohibitions for any individual user in a group. For those users, such individualized rules always override the rules of the group, regardless of which rules were specified first.
You can also connect files with the Unicenter NSM calendar. Assuming you created Calendar and named it basecalendar, enter following command to connect inted.conf to the Unicenter NSM calendar:
eTrustAC> authorize file /etc/inetd.conf \
calendar(basecalendar) access(update)

Protecting Files with File Name Patterns
Discovering the Power of Protection 41
Protecting Files with File Name Patterns To specify several files at once for protection, you can use a wildcard as part of a file name pattern. The wildcards are * (meaning “zero or more characters”) and ? (meaning “any one character, other than /”).
The pattern that you specify is matched against the file's full path name so that, for example, the pattern /tmp/x* matches a file named /tmp/x1, a file named /tmp/xxx, and even a file named /tmp/xdir/a. Here is an example using this pattern:
eTrust-Lang
eTrustAC> newres file /tmp/x* owner(root) defaccess(none) (localhost) Successfully created FILE /tmp/X* eTrustAC> ▌
Note: Because file name patterns are such a powerful tool, you should not experiment freely with them.
The previous example registers as protected all files that have path names beginning with the string /tmp/x. Not only files in the /tmp directory that have names beginning with x are protected. The contents of directories that match the pattern are also protected.
Note: For a complete description of the defaccess property, see the Administrator Guide. For a complete description of the newres command, which registers a new resource in the database, see the Reference Guide.

Protecting Directories
42 Getting Started
Protecting Directories In the same way that you restricted access to a file, you can restrict access to directories.
1. Create a home directory for the user j_doe.
2. Enter the following command:
eTrust-Lang
eTrustAC> newres file /home/j_doe owner(j_doe) \ ? defaccess(NONE) (localhost) Successfully created FILE /home/j_doe eTrustAC> ▌
This command defines the directory /home/j_doe as a file protected by eTrust AC.
3. From a superuser window, try to read the directory using the ls command:
WorkSpace
# ls /home/j_doe /home/j_doe: Permission denied # ▌
The attempt should fail.
Summary In the previous examples you have used the newres command to define new resources to eTrust AC, and the authorize command to determine the access users and groups have to these resources.

Protecting Programs from Being Killed
Discovering the Power of Protection 43
Cleaning Up
To undo the changes that the example effected:
1. Remove the record /home/j_doe from the database:
eTrustAC> rmres FILE /home/j_doe
2. Remove user p_jones from the _restricted group:
eTrustAC> join- p_jones group(_restricted)
3. Remove the record of the inetd.conf file from the database:
eTrustAC> rmfile /etc/inetd.conf
4. Remove the record of the payroll.dat file, if you created it, from the database:
eTrustAC> rmfile /tmp/payroll.dat
5. Remove the record of the x* series of files from the database:
eTrustAC> rmfile /tmp/x*
6. Remove the payroll.dat file from the file system:
# rm /tmp/payroll.dat
Protecting Programs from Being Killed When issued by root in an unprotected UNIX or Linux system, the kill command can shut down any daemon-even a web server, a database server, an application server, or a security system less advanced than eTrust AC. Besides the loss of service, a kill command that shuts down a database server can irreversibly damage data integrity.
A dangerous kill command can be issued as a deliberate attack, or simply by administrator error. eTrust AC provides process protection to guard against these threats.
eTrust AC can protect against three kill signals: the regular kill signal (SIGTERM) and the two kill signals that an application cannot mask (SIGKILL and SIGSTOP). Other signals, such as SIGHUP or SIGUSR1, are passed to the process that they target, and that process decides whether to ignore the kill signal or whether to react to it in some way.
eTrust AC provides process protection to guard against kill signals that are suspect, even when they are issued from a superuser. eTrust AC enforces rules that specify who can terminate each service and when, so that service can be shut down only during acceptable times and only for specific purposes (such as backing up the system).

Protecting Other Programs
44 Getting Started
Protecting Other Programs The kill_ignore token in the seos.ini file applies only to killing eTrust AC itself. For other programs that must be protected from kill requests (for example, to protect the Internet daemon inetd), use the newres command, registering the programs as illustrated in the following example. The example protects the /bin/vi program.
If you do not have vi in your bin directory, substitute the proper vi path name in the following commands (use which vi to find it), or substitute the path name of a different editor.
1. Enter the following command in the eTrust-Lang window:
eTrust-Lang
eTrustAC> newres process /user/bin/vi owner(nobody) \ ? audit(all) defaccess(none) (localhost) Successfully created PROCESS /usr/bin/vi eTrustAC> ▌
The command creates a record that belongs to a class of records called PROCESS.
The owner nobody is assigned to the program so that not even you are authorized to kill the program while it is active. eTrust AC automatically includes the user “nobody” in your database.
2. Open vi.
3. Check whether the protection you just defined works.
a. Press Ctrl+z to suspend vi.
b. Use the kill command on the suspended program. Assuming that only vi is suspended, enter the command:
kill %1
Cleaning Up
To undo the work that the example did, remove the /bin/vi record from the PROCESS class in the database:
eTrustAC> rmres PROCESS /bin/vi

What's Next?
Discovering the Power of Protection 45
What's Next? Now that you have a better idea of eTrust AC monitoring and program protection, the following chapter guides you through setting access and account restrictions and more, giving you suggestions on how to use your new software.


Gaining More Control of Your User Accounts 47
Chapter 4: Gaining More Control of Your User Accounts
This section contains the following topics:
Limiting User Accesses and Privileges (see page 47) Create Sub Admin Users (see page 48) Limit Surrogate Requests (see page 48) A Safer Surrogation Command: sesu (see page 49) Reduce Usage of root (with sesudo) (see page 53) Restrict Access from Terminals (see page 55) Set Time-Of-Day and Day-Of-Week (see page 56) What's Next? (see page 57)
Limiting User Accesses and Privileges In this chapter, you walk through limiting surrogate requests through setting-time-of-day and week restrictions and more - the next steps to putting eTrust AC to work for you.
Note: The selang command language supports command and parameter prefixes. You need only type those characters required to specify a unique command or parameter (that is, the prefix); you do not need to type the command or parameter name in full. For example, to type the showusr command, type showu.
Note: You can enter all selang commands and parameters in either lowercase or uppercase, unless otherwise noted. User-supplied information is case-sensitive and can consist of both lowercase and uppercase letters. For example, you may specify the full name of the user whose user ID is user53 as Mike Jones

Create Sub Admin Users
48 Getting Started
Create Sub Admin Users Security administrators can create sub administrators to manage specific classes and resources.
To define a sub administrator with privileges to manage users using selang commands, use the following selang command:
eTrustAC>authorize ADMIN USER uid(sub-admin) access(R,Modify,Del,Cre,Join,PW)
To define a sub administrator with privileges to manage groups using selang commands, use the following selang command:
eTrustAC>authorize ADMIN GROUP uid(sub-admin) access(R,Modify,Del,Cre,Join,PW)
Limit Surrogate Requests A surrogate request is generated when a user tries to switch from his or her username to another username. Surrogate requests can come directly from a su command, or they can come from any setuid program. In addition, hostile users who want to become root can exploit many known bugs and weakness in existing UNIX or Linux programs to gain unauthorized root access. Once acting as root in a UNIX or Linux system that has no special protection, such users can access all other user accounts without providing passwords, can shut down servers, can modify and erase audit trails, and in general can manipulate the system and its contents.
eTrust AC protects root and other users by enforcing limits on surrogate requests. For a demonstration, follow these steps:
1. Select a username whose password you know, but not root and not your own user name. In the following commands, user001 represents the user name that you have selected.
2. Define the following rule in the selang window:
eTrust-Lang
eTrustAC> newres SURROGATE USER.usr001 defaccess(NONE) \ ? owner(usr001) (localhost) Successfully created SURROGATE USER.usr001 eTrustAC> ▌
This newres command tells eTrust AC to protect against surrogate requests for user usr001 and not to allow anyone to surrogate to usr001 unless explicitly authorized. The indication defaccess(NONE) means that the default is set to “no access.”
A Safer Surrogation Command: sesu
Gaining More Control of Your User Accounts 49
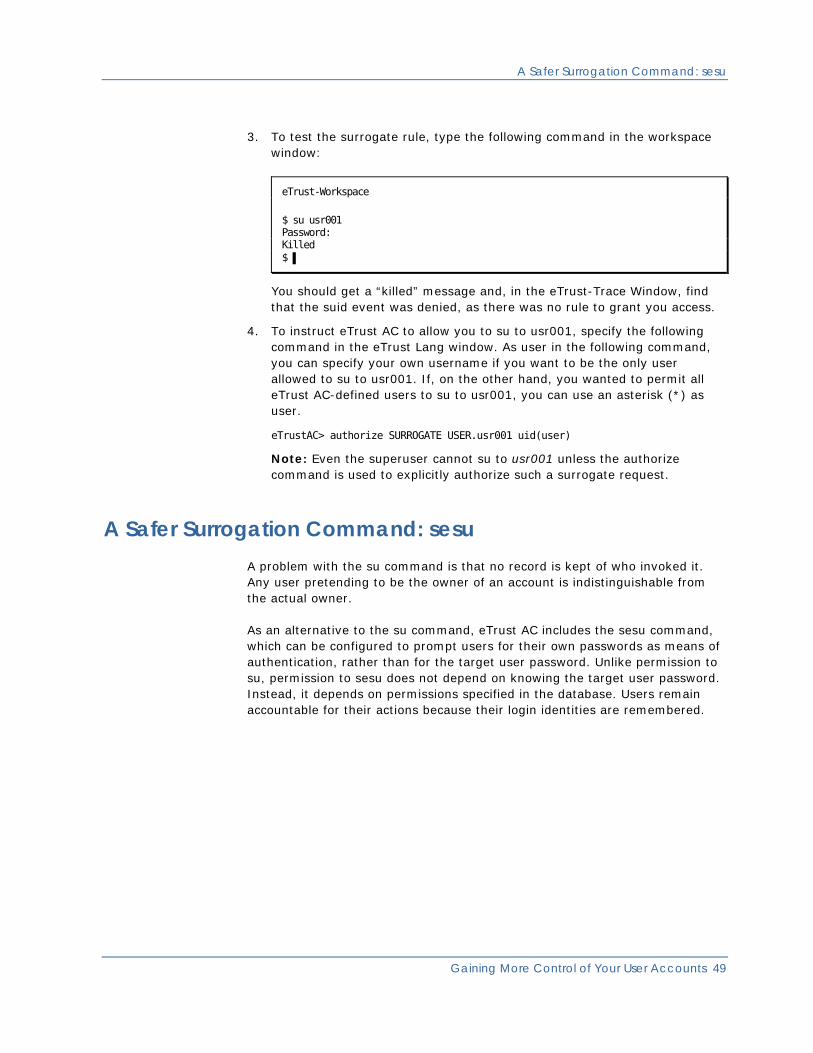
3. To test the surrogate rule, type the following command in the workspace window:
eTrust-Workspace
$ su usr001 Password: Killed $ ▌
You should get a “killed” message and, in the eTrust-Trace Window, find that the suid event was denied, as there was no rule to grant you access.
4. To instruct eTrust AC to allow you to su to usr001, specify the following command in the eTrust Lang window. As user in the following command, you can specify your own username if you want to be the only user allowed to su to usr001. If, on the other hand, you wanted to permit all eTrust AC-defined users to su to usr001, you can use an asterisk (*) as user.
eTrustAC> authorize SURROGATE USER.usr001 uid(user)
Note: Even the superuser cannot su to usr001 unless the authorize command is used to explicitly authorize such a surrogate request.
A Safer Surrogation Command: sesu A problem with the su command is that no record is kept of who invoked it. Any user pretending to be the owner of an account is indistinguishable from the actual owner.
As an alternative to the su command, eTrust AC includes the sesu command, which can be configured to prompt users for their own passwords as means of authentication, rather than for the target user password. Unlike permission to su, permission to sesu does not depend on knowing the target user password. Instead, it depends on permissions specified in the database. Users remain accountable for their actions because their login identities are remembered.

A Safer Surrogation Command: sesu
50 Getting Started
Here is an example restricting access to root so that only specific users, under specific conditions, can become root. (The procedure for restricting access to other sensitive accounts resembles the procedure shown for root in this example.)
1. Check the value of the UseInvokerPassword token in the “sesu” section of your seos.ini file. You can use the seini command, which is supplied especially for the purpose of checking the seos.ini file:
# seini -f sesu.UseInvokerPassword
This is the token that controls whether the sesu command requests the password of the invoking user as means of authentication. Unless the file has been edited, you should find that the value of the token is no.
2. If the value happens to have been changed to yes, proceed to step 4.
If the value is no, you must change it:
a. First give yourself permission to edit the file. In the selang window, type the following commands. In place of john, type your username or the name of the security administrator group that you belong to (such as secadm).
eTrust-Lang
eTrustAC> newfile /opt/CA/eTrustAccessControl/seos.ini defacc(READ) \ ? owner(nobody) (localhost) Successfully created FILE /opt/CA/eTrustAccessControl/seos.ini eTrustAC> auth FILE /opt/CA/eTrustAccessControl/seos.ini id(john) \ ? acc(update) (localhost) Successfully added john to /opt/CA/eTrustAccessControl/seos.ini's ACL eTrustAC> ▌
b. You cannot change the token while eTrust AC is running. In a UNIX or Linux window, use the following commands to shut down eTrust AC, change the token, and restart eTrust AC:
# secons -s
# seini -s sesu.UseInvokerPassword yes
# seosd
3. In order to function, sesu needs to be marked as a setuid program. If it is not yet marked as setuid (or if you are not sure), you can use this command, which marks it if necessary:
# chmod +s /opt/CA/eTrustAccessControl/bin/sesu
4. Authorize the system administration group to sesu (not to su) to root, after denying such authorization in general. (Substitute your own system administration group name for sysadm in the following example if necessary.)

A Safer Surrogation Command: sesu
Gaining More Control of Your User Accounts 51
eTrust-Lang
eTrustAC> nr surrogate USER.root defacc(N) owner(root) (localhost) Successfully created SURROGATE USER.root eTrustAC> auth surrogate USER.root gid(sysadm) access(read) \ ? via(pgm(/opt/CA/eTrustAccessControl/bin/sesu)) (localhost) Successfully added sysadm via PROGRAM /opt/CA/eTrustAccessControl/bin/sesu to USER.root's ACL eTrustAC> ▌
5. Do not continue if your newres command in step 4 did not execute successfully. To double-check that the command succeeded, use this command, which displays the attributes of the resource:
eTrust-Lang
eTrustAC> showres surrogate USER.root (localhost) Data for SURROGATE 'USER.root' ---------------------------------------------------------- Defaccess : None Program acls : Accessor Program Access sysadm (GROUP ) /opt/CA/eTrustAccessControl/bin/sesu R Audit mode : Failure Owner : root (USER ) Create time : 21-Mar-2004 17:32 Update time : 21-Mar-2004 17:33 Updated by : john eTrustAC> ▌
Note: You should find that root owns the resource, and that default access to the resource is NONE.
6. Logged in as a member of the system administration group, use su to try to become root. The command does not work.
eTrust-Workspace
$ su usr001 Password: Killed $ ▌
7. Still logged in as a member of the system administration group, use sesu to become root. The command works, but it takes your password rather than root's, and you are not permitted to do work on any eTrust AC-protected resources as root that you could not under your own identity.

A Safer Surrogation Command: sesu
52 Getting Started
8. Having become root by sesu, use the whoami and sewhoami commands.
The result shows that even though the UNIX or Linux whoami command considers you to be root, eTrust AC still remembers the identity you logged in with.
Note: In logging suspicious activity by a user who switched to root, eTrust AC records the original user login identity for you, not merely the root identity that the user switched to.
9. In a root window, use seaudit to check the audit trail. You can also check the audit trail with the Security Administrator using seauditx or Policy Manager.
For a list of seaudit command arguments, use the command without arguments.
Note: For more information about seauditx and the audit trail, see the User Guide.
Cleaning Up
To undo the changes that the example effected:
1. Remove the record USER.usr001 from the SURROGATE class of the database by entering the following command:
eTrustAC> rmres SURROGATE USER. usr001
2. If you changed the value of the UseInvokerPassword token in the seos.ini file:
a. Change the UseInvokerPassword value back:
# secons -s
# seini -s sesu.UseInvokerPassword no
# seosd
b. Remove the seos.ini file record from the database:
eTrustAC> rmfile /opt/CA/eTrustAccessControl/seos.ini

Reduce Usage of root (with sesudo)
Gaining More Control of Your User Accounts 53
Reduce Usage of root (with sesudo) In UNIX or Linux, regular users may need to perform actions that normally require superuser authority, such as the mount command. Since it is never a good idea to give regular users casual access to such powerful authority, eTrust AC lets them accomplish the necessary tasks in a different way.
For each command that you want to convert from a superuser-only command to a command that other users can invoke, you create a record in the SUDO class of the database. You do not need to give all users access to the command. If you wish, the record can specify access for only certain users.
Each time a non-root user needs to run one of those commands, the user invokes it as an argument of the sesudo command, by entering the command:
sesudo sudo-record-name
Several steps are necessary before the sesudo command can work. The first step needs to be done only once. Here is an example allowing user p_jones to use the sesudo command usels so that p_jones does not need to be a superuser to view a directory for superusers.
1. If the sesudo program is not defined in the eTrust AC database, define the sesudo program as a Trusted setuid program owned by root with the following command. (A trusted program is one that is considered safe to run provided that its characteristics do not change.) Once specified, this definition always remains in effect.
eTrustAC> newres PROGRAM \
/opt/CA/eTrustAccessControl/bin/sesudo \
defaccess(NONE)
2. Give a user the authority to use sesudo. Type the following command for user p_jones, or substitute another username for this exercise.
eTrustAC> authorize PROGRAM \
/opt/CA/eTrustAccessControl/bin/sesudo \
uid(p_jones)
3. Permit the user to surrogate by sesudo to root:
eTrustAC> authorize SURROGATE USER.root uid(p_jones) \
via(pgm(/opt/CA/eTrustAccessControl/bin/sesudo))
4. Define a record in the SUDO class for the ls command. This command gives the record the name “usels.”
eTrustAC> newres SUDO usels data('/bin/ls;;protected_dir')
This record allows specified users to use the ls command as a superuser, but only to view a directory named protected_dir ( no other access). The user cannot get any additional information about the files on this protected directory
Reduce Usage of root (with sesudo)
54 Getting Started
Note: The full path name /bin/ls is specified. A relative path name can be dangerous; a user might exploit it to run a different program.
5. Permit p_jones to access the usels record:
eTrustAC> authorize SUDO usels id(p_jones)
6. Create a directory named protected_dir, change the owner to root, and allow only root to view the directory:
chown root protected_dir
chmod 700 protected_dir
7. Now, as p_jones, try the usels command.
The usels protected_dir command should succeed, but the usels -l command should fail with the following message:
sesudo: you are not allowed to use '-l' as parameter number 1.
Cleaning Up
To undo the changes that the example effected:
1. Remove the usels record:
eTrustAC> rmres SUDO usels
2. If you have defined the sesudo program as a trusted program, remove the sesudo program record from the class of Trusted setuid programs:
eTrustAC> rmres PROGRAM /opt/CA/eTrustAccessControl/bin/sesudo
3. Remove the protected_dir directory you created.

Restrict Access from Terminals
Gaining More Control of Your User Accounts 55
Restrict Access from Terminals One of the most important features of any security system is restricting user log in to the system from specific terminals. eTrust AC not only protects against attempts to log in from untrusted remote stations, but also can limit the ability to log in as root to a small group of trusted terminals.
A spin-off of the login terminal restriction is the ability to isolate departments from one another. There is, for example, no particular reason to allow a user who belongs to the accounting department to log in from a station situated in the sales department.
To illustrate how eTrust AC protects terminals, follow these steps:
1. Select another computer attached to the station where you are running eTrust AC. In the following commands, workstat2 represents the computer that you have selected. (This could be a computer name or an IP address.)
2. Enter the following command to define a rule protecting your machine from workstat2. As userid2, specify the user ID associated with workstat2.
eTrustAC> newres TERMINAL workstat2 defaccess(NONE) \
owner(userid2)
This newres command defines workstat2 as a terminal attached to your computer
and from which only userid2 can log in. (Login for the owner of the terminal
is always permitted.)
3. From workstat2, with a user ID other than userid2, try to use telnet to log in to the computer where eTrust AC is running.
You get a “connection closed” message and, in the eTrust-Trace Window, you see the login event and the message LOGIN RESULT 'D', since there is no rule granting access for any user to that terminal.
4. Now authorize yourself to log in from terminal workstat2, by entering the following command with your own user name:
eTrustAC> authorize TERMINAL workstat2 uid(yourUsername)\
access(read)
5. Try to log in from workstat2. This time you should succeed.
Permission to use the terminal can be given to a group of users. You can also define groups of terminals, which reduces the administration effort required to define terminal access rules.
Note: For more information on protecting terminals, see the Administrator Guide.

Set Time-Of-Day and Day-Of-Week
56 Getting Started
Cleaning Up
To undo the changes that the example effected, remove the workstat2 record from the database:
eTrustAC> rmres TERMINAL workstat2
Set Time-Of-Day and Day-Of-Week The most vulnerable times for a system are usually late at night and on weekends, when few auditors or other personnel are present. Using eTrust AC, you can restrict user logins to specific times of the day and to specific days of the week.
To illustrate how eTrust AC enforces such time restrictions, follow these steps. In order to show you a user being kept off the system, the example restricts the user to a few hours when you are not likely to be performing this exercise.
1. From /etc/passwd, select a username whose password you know, but not root and not your own user name. In the following commands, user001 represents the user name that you have selected.
2. To restrict user001 to weekends between 3 a.m. and 6 a.m., specify the following command:
eTrust-Lang
eTrustAC> chusr usr001 restrictions(days(sat,sun) time(0300:0600)) (localhost) Successfully updated USER usr001 eTrustAC> ▌
3. Now, assuming you are not working on a weekend between 3 a.m. and 6 a.m., try to log in as usr001.
Your login attempt fails. The eTrust-Trace Window states the reason for denial as USER DAY/TIME CHECK.
Another method is to restrict the availability of the resource rather than the user permissions. For example, the following command disables any login from workstat2 during weekends and outside work hours. (eTrust AC automatically includes the user “nobody” in your database.)
eTrustAC> newres TERMINAL workstat2 owner(nobody) \
defaccess(r)restrictions(days(weekdays) time(0800:1800))

What's Next?
Gaining More Control of Your User Accounts 57
Cleaning Up
To undo the changes that the example effected:
1. Undo the restrictions on the user usr001:
eTrustAC> chusr usr001 \
restrictions(days(anyday)time(anytime))
2. Undo the restrictions on the terminal workstat2, if you created such restrictions:
eTrustAC> rmres TERMINAL workstat2
What's Next? Now that you have a better idea of the ability of eTrust AC to limit surrogate requests, reduce usage of root and set times and day of week access, the following chapter guides you through protecting networks, controlling outgoing connections and more, giving you suggestions on how to use your new software.


Protecting Network Security 59
Chapter 5: Protecting Network Security
This section contains the following topics:
Controlling TCP/IP Connections and Network Level Accesses (see page 59) Protecting the Network (TCP/IP) (see page 60) The Host-Group Level (see page 61) The Network Level (see page 62) Name Patterns (see page 63) Service-Oriented TCP/IP Rules (see page 63) Blocking Back Doors and Trojan Horses (see page 64) Trusted Programs (see page 64) Automatic Untrusting of Changed setuid and setgid Programs (see page 65) Preventing Abuse of Path Priorities (the _abspath Group) (see page 67) With and Without Conditional Access (Program Pathing) (see page 68) Controlling Outgoing Connections (see page 70) What's Next? (see page 73)
Controlling TCP/IP Connections and Network Level Accesses In this chapter, you walk through protecting the network's TCP/IP connection access to limiting outgoing connections from your network-the next steps to putting eTrust AC to work for you.

Protecting the Network (TCP/IP)
60 Getting Started
Protecting the Network (TCP/IP) The openness of a TCP/IP network is its most appealing feature and also, in terms of security, a major deficiency. As a network protector, eTrust AC provides the functionality of firewalls without requiring a computer specifically dedicated for that purpose. Using eTrust AC, you can permit only specific clients to receive specific TCP/IP services from the host.
To see how eTrust AC protects a station from unauthorized access from the network, perform these steps:
1. Select another computer-attached to the station you are running eTrust AC on-to define as a host. In the following commands, workstat2 represents the computer that you have selected.
Note: Before you can use the HOST class you must activate it. To activate the HOST class, issue the following selang command:
eTrustAC>setoptions class+(HOST)
On Solaris and HP-UX platforms, you must load streams before activating any TCP classes. To load streams, enter the following command:
SEOS_load -s
2. To define workstat2 as a host, use the following command:
eTrust-Lang
eTrustAC> nr HOST workstat2 (localhost) Successfully created HOST workstat2 eTrustAC> ▌
3. Enter the following commands, which permit workstat2 to receive all TCP/IP services except telnet:
eTrust-Lang
eTrustAC> authorize HOST workstat2 service(*) access(READ) (localhost) Successfully added * to workstat2's ACL eTrustAC> authorize HOST workstat2 service(telnet) acc(NONE) (localhost) Successfully added telnet to workstat2's ACL eTrustAC> ▌
4. Try to telnet from workstat2. Your attempt should be denied.
5. Try to ftp from workstat2. Since ftp is a non-telnet TCP service, the ftp request should be granted.
You can also specify TCP/IP access rules at the host-group level, the network level, and the name-pattern level.

The Host-Group Level
Protecting Network Security 61
The Host-Group Level To define a host group, create a database record in the class GHOST. Then the host group receives authorizations in the same way as a single host does.
eTrust-Lang
eTrustAC> newres GHOST gh1 mem(ws1,ws2,ws3) (localhost) Successfully created GHOST gh1 eTrustAC> authorize GHOST gh1 service(*) (localhost) eTrustAC> ▌
The previous newres command defines a group of hosts named gh1 containing stations ws1, ws2, and ws3. It then permits these three stations to receive any TCP/IP service from the local host. It is often easier to administer access rules at the group-host level than to deal individually with each station in its capacity as a host.
Just as for individual users, any particularized rules for individual hosts overrides the rules of the group. For example, if workstat2 is authorized to receive telnet services but belongs to a group that is not authorized, workstat2 remains authorized.

The Network Level
62 Getting Started
The Network Level You can also specify eTrust AC access rules at the network level. To define a network, create a database record in the class HOSTNET, as shown in the following example. Then the network receives authorization in the same way as a single host does.
Consider the following set of commands:
eTrust-Lang
eTrustAC> newres HOSTNET net3 mask(172.16.0.0) match(192.168.0.0) (localhost) Successfully created HOSTNET net3 eTrustAC> authorize HOSTNET net3 service(*) access(NONE) (localhost) Successfully added * to net3's ACL eTrustAC> authorize HOSTNET net3 service(smtp) (localhost) Successfully added smtp to net3's ACL eTrustAC> ▌
The newres command defines a record called net3 in the class HOSTNET. With its mask and match values as shown in the previous example, it specifies that any computer with an IP address whose two leftmost qualifiers are 192.168 is considered as coming from the net3 network. When a TCP/IP request is received, eTrust AC performs a logical AND operation between the IP address and the contents of operand mask to check whether it is equal to the contents of operand match. If there is a match, then the access rule for the net3 host network is triggered.
The first authorize command disables all services to clients from stations that belong to network net3. The second authorize command enables stations belonging to network net3 to provide the smtp service.
Thus, the only service that stations belonging to network net3 can use on the local machine is to send mail; all other services are unavailable.
Note: For more information on network level protection, see the Administrator Guide.

Name Patterns
Protecting Network Security 63
Name Patterns Another way to define TCP/IP access rules is through the name-pattern service using the HOSTNP (host name pattern) class. Consider the following set of commands:
eTrust-Lang
eTrustAC> newres HOSTNP ws* (localhost) Successfully created HOSTNP ws* eTrustAC> authorize HOSTNP ws* service(smtp) (localhost) Successfully added smtp to ws*'s ACL eTrustAC> authorize HOSTNP ws* service(*) access(NONE) (localhost) Successfully added * to ws*'s ACL eTrustAC> ▌
The previous command set defines an access rule for all stations whose names start with “ws”, permitting those stations to send mail to your machine but not to provide any other service. (Note that the third line does not override the second line; it leaves the second line in effect as well.)
Service-Oriented TCP/IP Rules Note: eTrust AC accommodates TCP/IP access rules that are service-oriented (rather than host-oriented like the rules mentioned previously). To define such rules, you use the TCP class. For more information, see the Administrator Guide.
Cleaning Up
To undo the changes that the example effected:
1. Undo the restrictions on the computer workstat2:
eTrustAC> rmres HOST workstat2
2. Undo the restrictions on the host group, the network, and the name pattern, if you created such restrictions:
eTrustAC> rmres GHOST gh1
eTrustAC> rmres HOSTNET net3
eTrustAC> rmres HOSTNP ws*
Blocking Back Doors and Trojan Horses
64 Getting Started
Blocking Back Doors and Trojan Horses eTrust AC can fix two weak points in UNIX and Linux security by monitoring setuid and setgid programs. The weak points involve back doors and Trojan horses.
A back door is a setuid program that is owned by root. Thus, for as long as it is running, the program serves as an inconspicuous access-a back door-to root privileges for whoever is running it.
A Trojan horse is a destructive program that masquerades as an innocent program. A hacker attacking a UNIX or Linux system can, for example, replace the su command with a rewritten version that not only performs the proper function of the command but also emails the target account-name and its password to a specified address.
To ensure that setuid and setgid programs are trustworthy, eTrust AC has a resource class called PROGRAM. In addition, eTrust AC has a user group called _abspath for extra protection against Trojan horses.
Trusted Programs A trusted program is a program that can be executed only as long as it has not been altered. Ordinarily, it is a setuid or setgid program; however, they can also be non-setuid or non-setgid programs. At a time when you are sure that the program has not been tampered with, you register it in the PROGRAM class, where eTrust AC can guard its integrity.
The record in the PROGRAM class stores various attributes of the executable file: owner, size, time of last modification, and many more. Any change in any of those attributes causes the program to lose its Trusted status, and then eTrust AC can prevent the program from running until you retrust it.
You may want to use trusted programs together with program pathing (see page 39), so that users can perform certain tasks only by means of trusted programs.
eTrust AC can help you with a script to register a whole collection of setuid and setgid programs as Trusted.
Note: For more information about how programs can receive, lose, and regain Trusted status, see protecting setuid and setgid programs in the Administrator Guide.

Automatic Untrusting of Changed setuid and setgid Programs
Protecting Network Security 65
Automatic Untrusting of Changed setuid and setgid Programs
In the following example, eTrust AC detects a change in the characteristics of a setuid program and revokes the program's trusted status, preventing the program from running.
1. Create a simple shell command script that issues a harmless command or two. For example, using vi or your favorite ASCII editor, create a file with the following lines:
xterm
#!/bin/sh ls -l ~ ~ ~ ~ ”myscript” [New file]
Note: For program pathing that specifies access by means of a shell script, the shell script must have #!/bin/sh as its first line.
2. Save the file as myscript in your /tmp directory.
3. Register the script with UNIX or Linux as a setuid program:
chmod u+xs /tmp/myscript
4. Register the script with eTrust AC as a trusted program, by giving it a record in the PROGRAM class:
eTrust-Lang
eTrustAC> newres PROGRAM /tmp/myscript defaccess(x) (localhost) Successfully created PROGRAM /tmp/myscript eTrustAC> ▌
By specifying defaccess(x), you allow all users to execute the script unless some other rule prevents them.
5. Try to execute the program:
eTrust-Lang
eTrustAC> !/tmp/myscript total 0 eTrustAC> ▌
You should succeed.

Automatic Untrusting of Changed setuid and setgid Programs
66 Getting Started
Note: In the previous command, the exclamation point (!) is an escape character enabling you to respond to the selang prompt with a command that would normally be typed at the UNIX or Linux prompt.
6. Use the touch command to change the script's timestamp. A change in the timestamp is enough to cause eTrust AC to stop trusting the program.
xterm
# touch /tmp/myscript # ▌
7. Now try to execute the program:
xterm
# touch /tmp/myscript # /tmp/myscript /tmp/myscript: cannot execute # ▌
The attempt should fail. A trusted program can be executed only if eTrust AC is sure that the program has not been tampered with. Since the timestamp of /tmp/myscript has changed, eTrust AC suspects that the program may have been tampered with. The timestamp is one of many characteristics that eTrust AC tracks.
Note: To retrust the previous program, use selang to issue the following command:
editres PROGRAM myscript trust
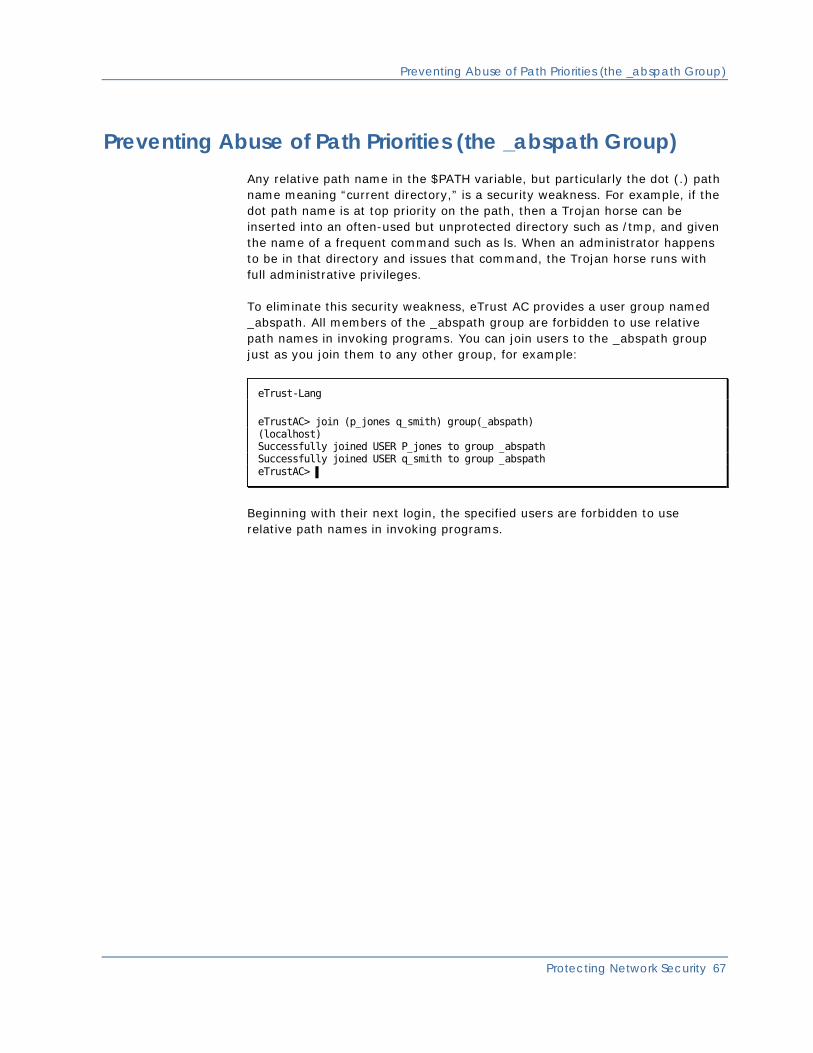
Preventing Abuse of Path Priorities (the _abspath Group)
Protecting Network Security 67
Preventing Abuse of Path Priorities (the _abspath Group) Any relative path name in the $PATH variable, but particularly the dot (.) path name meaning “current directory,” is a security weakness. For example, if the dot path name is at top priority on the path, then a Trojan horse can be inserted into an often-used but unprotected directory such as /tmp, and given the name of a frequent command such as ls. When an administrator happens to be in that directory and issues that command, the Trojan horse runs with full administrative privileges.
To eliminate this security weakness, eTrust AC provides a user group named _abspath. All members of the _abspath group are forbidden to use relative path names in invoking programs. You can join users to the _abspath group just as you join them to any other group, for example:
eTrust-Lang
eTrustAC> join (p_jones q_smith) group(_abspath) (localhost) Successfully joined USER P_jones to group _abspath Successfully joined USER q_smith to group _abspath eTrustAC> ▌
Beginning with their next login, the specified users are forbidden to use relative path names in invoking programs.

With and Without Conditional Access (Program Pathing)
68 Getting Started
With and Without Conditional Access (Program Pathing) To enable a user (and only that user) to run /bin/su, use the selang newres command as follows:
eTrust-Lang
eTrustAC> newres PROGRAM /bin/su defaccess(NONE) (localhost) Successfully created PROGRAM /bin/su eTrustAC> authorize PROGRAM /bin/su uid(john) (localhost) Successfully added john to /bin/su's ACL eTrustAC> ▌
To ensure that a user is granted superuser authority only after passing the /bin/su checks, specify the following conditional access rule settings:
eTrust-Lang
eTrustAC> newres SURROGATE USER.root defaccess(NONE) (localhost) Successfully created SURROGATE USER.root eTrustAC> authorize SURROGATE USER.root uid(john) via(pgm(/bin/su)) (localhost) Successfully added john via PROGRAM /bin/su to USER.root's ACL eTrustAC> ▌
This method (authorization by means of a specified program) is called program-pathing or conditional access and is discussed in the Administrator Guide.

With and Without Conditional Access (Program Pathing)
Protecting Network Security 69
Cleaning Up
To undo the changes that the example effected:
1. Remove the /tmp/myscript record from the PROGRAM class:
eTrustAC> rmres PROGRAM /tmp/myscript
2. Remove p_jones and q_smith from the _abspath group:
eTrustAC> join- (p_jones q_smith) group(_abspath)
3. Remove the /bin/su record from the database:
eTrustAC> rmres PROGRAM /bin/su
4. Remove the root user record from the SURROGATE class in the database:
eTrustAC> rmres SURROGATE USER.root
5. Remove the /tmp/myscript file from the file system:
eTrustAC>!rm /tmp/myscript

Controlling Outgoing Connections
70 Getting Started
Controlling Outgoing Connections The outgoing connections of each station can be managed as a further type of resource.
By limiting outgoing connections within your network, you can minimize damage from any perpetrators who manage to break in through a firewall. Legitimate Internet visitors, too, can be confined to a specific set of services and systems within your network. You may, for example, allow only email and certain necessary forms of database access.
The following scenario demonstrates how to control outgoing connections.
1. As any non-root user, log into the system.
2. Attempt to connect to a remote system, using a network service such as telnet or ftp. If your system is not connected to a network, you can simply loop back into your own system by specifying localhost as the target host. The result should resemble the following:
xterm
$ telnet localhost trying 127.0.0.1... Connected to localhost. Escape character is '̂ ]'.
UNIX(r) System V Release 4.0 (bighost) login: ▌
3. The remote system (in this case, your own host) consented to give you a login prompt.
4. Suppose that, instead, you want to forbid all outgoing connections from your station.
In an NIS environment, the client machines require access to all NIS servers and to all backup (slave) servers. For that reason, in an NIS environment you must explicitly allow such connections before using a command that, like the one in the following step, forbids all outgoing network connections.
Note: Before you can use the CONNECT class you must activate it. You must issue the selang command: eTrustAC>setoptions class+(CONNECT)

Controlling Outgoing Connections
Protecting Network Security 71
If you are in an NIS environment, permit connection to your servers by typing the following command for each of them:
eTrust-Lang
eTrustAC> newres connect name.companyname.com defaccess(read) (localhost) Successfully created CONNECT eTrustAC> ▌
5. To forbid all outgoing connections from your station (except the necessary NIS connections mentioned previously), issue this command:
eTrust-Lang
eTrustAC> chres connect _default owner(nobody) audit(all) \ ? defacc(none) (localhost) Successfully updated CONNECT _default eTrustAC> ▌
eTrust AC automatically includes the user “nobody” in your database.
6. Now try to connect out using telnet again. The result should be something like this:
xterm
$ telnet localhost trying 127.0.0.1... telnet: Unable to connect to remote host: Not owner $ ▌
7. Quit telnet and try ftp. You should again find that the connection is refused:
xterm
$ ftp localhost ftp: connect: Not owner ftp> ▌
8. Suppose you are interested, not in completely forbidding outward connections, but only in restricting them. You can change the rules to allow telnet but not other services.
Note: Use the “which telnet” command if you are not sure of the exact location of your telnet client. Then issue the following command, using that exact location (whether it is /usr/ucb/telnet, as shown, or somewhere else) and your own user ID:

Controlling Outgoing Connections
72 Getting Started
eTrust-Lang
eTrustAC> authorize connect _default uid(john) acc(read) \ ? via(pgm(/usr/ucb/telnet)) (localhost) Successfully added john via PROGRAM /usr/ucb/telnet to default's ACL eTrustAC> ▌
Note: Similarly, if you wanted to allow outward connections only to a particular host, you could use that host's name instead of the name _default in an authorize command like the previous one.
9. Now trying connecting out again using telnet and ftp. Notice the difference.
xterm
$ ftp localhost ftp: connect: Not owner ftp> quit $ telnet localhost Trying 127.0.0.1... Connected to localhost. Escape character is '̂ ]'.
SunOS 5.6 (bighost) login: ▌
Cleaning Up
When you have finished with the demonstration, delete the rules that you created:
eTrust-Lang
eTrustAC> auth- connect _default uid(john) via(pgm(/usr/ucb/telnet)) (localhost) Successfully removed john via PROGRAM /usr/ucb/telnet from \ _default's ACL eTrustAC> chres connect _default owner(root) defacc(read) audit(fail) (localhost) Successfully updated CONNECT _default eTrustAC> ▌

What's Next?
Protecting Network Security 73
What's Next? Now that you have a better idea of how eTrust AC protects network TCP/IP connections, defines a host group level and network level rules, and controls outgoing connections, the following chapter guides you through setting passwords, viewing audit logs and more, giving you suggestions on how to use your new software.


Setting Password and Audit Policies 75
Chapter 6: Setting Password and Audit Policies
This section contains the following topics:
Passwords, Logins, and Auditing Rules (see page 75) Password Quality Policy (see page 75) Changing Passwords (sepass) (see page 75) Grace Logins (segrace) (see page 76) Activating Policy Checking (see page 77) Locking Idle Stations and X Terminals (see page 79) Auditing (see page 79) Using the Consolidated Audit Facility (see page 81) What's Next? (see page 83)
Passwords, Logins, and Auditing Rules In this chapter, you walk through changing passwords, logins, policy checking, locking idle stations, and consolidated audit facilities-the next steps to putting eTrust AC to work for you.
Password Quality Policy Two executable eTrust AC programs important to password policy are sepass and segrace.
Changing Passwords (sepass) eTrust AC provides an executable program, sepass, which users should use for changing their passwords.
The sepass program verifies that the new password is not a trivial password and that old passwords are not repeated. The sepass program supports shadow passwords files. It also propagates passwords to other stations through the PMDB mechanism.
Note: For more information about the sepass utility, see the Utilities Guide.

Grace Logins (segrace)
76 Getting Started
Grace Logins (segrace) If password checking is enabled, then each time a user attempts to log in, eTrust AC checks whether the user's password has expired. After nominal expiration, the user may be graced with the opportunity to log in a few more times. The default is five such grace logins. When no more grace logins remain, login for the user is disabled.
You can use this method to force a user to change their password. Reset the user's password and give them one grace login whence they can change their password.
To allow the end user to keep track of grace logins after the expiration, insert a call to the segrace program (as explained in the following section) in the user .login, .profile, or .cshrc file. Then segrace displays a message to the user stating the number of remaining grace logins.
Note: For more information about the segrace utility, see the Utilities Guide.
Execute several separate commands to activate and implement password control. The commands are described in the following section.
Note: For more information, see the Administrator Guide.

Activating Policy Checking
Setting Password and Audit Policies 77
Activating Policy Checking To activate password policy checking, do the following:
1. Insert a call to segrace in your initial script (.login, .profile, or .cshrc) by entering the command:
segrace -d 5
This ensures that you get warnings that your password is about to expire five days before it expires.
2. Activate password control options by entering the following selang command:
setoptions class+(PASSWORD)
You are now able to view the password control rules that eTrust AC is currently programmed to carry out.
3. To display the rules currently in eTrust AC, enter:
setoptions list
The password control rules display within the eTrust AC options list.
4. Make a note of the settings so that you can restore them when you complete the exercises in this section.
After inspecting the current values in eTrust AC, you can change the values to suit the needs of your site.
5. To set the minimum length of a password, enter:
setoptions password(rules(length(8)))
6. You can set a maximum password lifetime for the entire system, and you can set values for particular users, which override the system-wide setting.
To set the system-wide password interval, enter:
setoptions password(interval(30))
To set an interval for a specific user, enter:
chusr john interval(25)
Note: The interval value for a user, if set, overrides the system-wide value set using the setoptions command.
7. You can set a system-wide default value for the number of grace logins, and you can set values for specific users which override the system-wide settings.
To set the system-wide default value for the number of grace logins, enter:
setoptions password(rules(grace(5)))

Activating Policy Checking
78 Getting Started
To set the number of grace logins for a specific user, enter the following command:
chusr john grace(7)
Note: The value set by the chusr command overrides the system value for the user specified in the command.
8. Use sepass to change passwords. Make sure your password quality policies are enforced.
9. Try to log in and see if you get the appropriate message from segrace.
Cleaning Up
To undo the changes that the example effected:
1. Return the eTrust AC options to their original values by repeating the previous commands with the default values you noted in Activating Policy Checking, step 4.
2. Deactivate password quality checking by entering:
eTrust-Lang
eTrustAC> setoptions class-(PASSWORD) (localhost) Successfully updated eTrust options eTrustAC> ▌
3. Remove the call to segrace from your initial script.

Locking Idle Stations and X Terminals
Setting Password and Audit Policies 79
Locking Idle Stations and X Terminals To extend the protection of terminals, eTrust AC provides an executable called selock that serves as a screen-saver and locker. When selock is active, the terminal (either station or X terminal) is constantly monitored for user activity. If the mouse and keyboard are not used for a predefined time period, selock blanks the screen and displays the eTrust logo randomly on the screen.
When the terminal is again accessed, a prompt requests the password of the user who invoked selock. When it receives the correct password, selock restores the original screen and returns to monitoring the terminal activity.
To test selock now, enter the command:
selock -display $DISPLAY -timeout 0 -idelay 0
This activates selock after waiting a short period of time for the terminal to become idle. After invoking the command, leave your terminal idle for about 10 seconds and watch how selock works.
Note: The DISPLAY environment variable must be set for the selock command to work. You can specify the target display directly, instead of specifying $DISPLAY.
A more typical startup command, one that should be placed in X startup files, is:
selock -display $DISPLAY -timeout 5
This command activates selock after five minutes of terminal inactivity.
Note: For more information about selock, see the Administrator Guide.
Auditing The previous quick tour of eTrust AC options has shown how the eTrust-Trace Window can be used to audit system events. The eTrust Trace messages are also accumulated in the file eTrustACDir/log/seosd.trace (or in another file as specified in the seos.ini initialization file). eTrust Trace also provides a means to filter out messages using the eTrustACDir/etc/trcfilter.init file.
eTrust Trace is not, however, designed directly for auditing. eTrust AC accumulates records in the file eTrustACDir/log/seos.audit. These records store binary data that occupies much less space and can later be filtered and printed by the seaudit utility. The records in the file seos.audit are accumulated according to the audit rules set in the database for each protected object. The security auditor can control which records are accumulated and what events are recorded.

Auditing
80 Getting Started
To list all events in the seos.audit file, enter:
xterm
host:/ > seaudit -a | more eTrust seaudit v8.0 (8.0) - audit log lister Copyright 2004 Computer Associates International, Inc. 21 Mar 2004 18:00 M START seosd 21 Mar 2004 18:00 M START seagent 21 Mar 2004 18:00 M START seoswd Total Records Displayed 3 host:/ >▌
Note: For more information on auditing capabilities, see the Administrator Guide.

Using the Consolidated Audit Facility
Setting Password and Audit Policies 81
Using the Consolidated Audit Facility eTrust AC writes the data for all the audited events in its audit file. This file usually resides on the local computer. We recommend that you do not configure eTrust AC to place the audit data in an NFS file, because doing so makes the computer dependent on the availability of the file server.
However, it is inconvenient for auditors at large sites to browse through the security events logged locally on each computer. eTrust AC solves this problem by allowing you to define a central computer where the audit files for many stations can be stored. Use the log-route utility to set up a central audit log station. The utility has other functions, as discussed in the Administrator Guide.
Each remote computer runs an “emitter” daemon that periodically sends the audit events to the central host, where a “collector” daemon is running that accumulates the events from the emitters. For example, suppose you have a station called bigcentral and two stations named workstat1 and workstat2:

Using the Consolidated Audit Facility
82 Getting Started
The emitter daemon selogrd runs at the stations.
You would use the following procedure:
1. On bigcentral, configure the collector as follows:
In the selogrd section of the eTrustACDir/seos.ini file, make sure the CollectFile token points to the collected audit file where you want all the events from all the stations to be accumulated. Assume the file name is eTrustACDir/log/seos.collecte.audit.
2. On workstat1 and workstat2, configure the emitter as follows:
In the selogrd section of the seos.ini file, ensure that the RouteFile token points to the logroute configuration file eTrustACDir/log/selogrd.cfg and that the file eTrustACDir/log/selogrd.cfg contains the following lines:
hostRule
host bigcentral
.
The previous three lines (the third line is simply a period) define a rule and tell the emitter that all events described by the rule (regardless of class, resource, accessor, and result) are to be sent to the host named bigcentral.
Note: For more information on the syntax of the configuration file, see the selogrd utility in the Utilities Guide. You can find sample files in the eTrustACDir/samples/selogrd.init directory.
3. Start the collector daemon on bigcentral by invoking the selogrcd binary.
4. Start the emitter daemon on each station by invoking the selogrd daemon.
5. Make sure that among your users, groups, and resources, some have AUDIT properties sensitive enough to put data into the audit log as you work.
After some activity on the stations has put data into the audit log, you can run the seaudit or (if you have the Security Administrator) the seauditx utility to see a list of events that have accumulated from the stations.
For seaudit, enter this command:
# seaudit -file \
/opt/CA/eTrustAccessControl/log/seos.collecte.audit -a
In the resulting list of events, the leftmost field identifies the computer on which the logged event occurred.
If you use seauditx, select Load>Collected on the File menu to view the collected audit file.
Note: For more information about seaudit, see the Utilities Guide. For more information about seauditx, see the User Guide.

What's Next?
Setting Password and Audit Policies 83
What's Next? Now that you have a better idea of how eTrust AC supervises passwords, logs, and auditing commands, the following chapter guides you through managing stations and creating PMDBs, extending security, and more, giving you suggestions on how to use your new software.


Managing Your Enterprise Security with Policy Model Databases 85
Chapter 7: Managing Your Enterprise Security with Policy Model Databases
This section contains the following topics:
From Defining Parent PMDBs to Setting PMDB Passwords (see page 85) Managing Several Stations at Once (see page 85) Creating a Policy Model Database (see page 86) Pointing Subscriber Stations to the PMDB (see page 88) Working with a PMDB (see page 89) What's Next? (see page 90)
From Defining Parent PMDBs to Setting PMDB Passwords In this chapter, you walk through managing several stations, creating Policy Model databases, working with PMDBs and more-the next steps to putting eTrust AC to work for you.
Managing Several Stations at Once You configure each eTrust AC daemon that protects a UNIX or Linux computer to run with a database that resides on the local disk of that computer. If the database resided on an NFS file system instead, then the computer would be dependent on the availability of the file server, the database would be insecure, and performance would be poor.
At large sites, with many computers and stations, managing tens or hundreds of databases is not practical. eTrust AC therefore provides a facility called Policy Model Database (PMDB) that is both very simple and very powerful, allowing management of many databases through one Policy Model.
The PMDB is a regular eTrust AC database containing users, groups, protected objects, and access policies. In addition, a PMDB contains a list of subscriber stations. Subscribers can be either other PMDBs or active eTrust AC databases. The PMDB that updates a subscriber is called the subscriber's parent. A subscriber station is one governed by the parent PMDB so that any change to the parent PMDB is automatically propagated to the subscriber databases. PMDBs reside in the directory eTrustACDir/policies, which was created automatically when you installed eTrust AC.
Note: The PMDB itself must never be the active database that serves for run time decisions.

Creating a Policy Model Database
86 Getting Started
Creating a Policy Model Database You can create a PMDB in several ways. The following example shows the interactive (dialog-based) form of the sepmdadm command. An alternative way, described in the Reference Guide, uses command-line parameters for all input. You can also use Policy Manager.
This example does the following:
Creates a PMDB named policy1 on host pmdbhost and registers the eTrust AC databases residing on hosts workstat1 and workstat2 as its subscribers.
Registers two users-adm1 and adm2-as authorized to administer the PMDB.
Specifies that PMDB administration is done from the terminal pmdbhost.
1. Log in to pmdbhost as root.
2. From the directory eTrustACDir/bin, issue the sepmdadm command with the -i parameter (for interactive).
eTrust AC displays a menu of options.
3. Select the first option: Create a master PMDB and define its subscribers.
4. Press Enter to start the script.
eTrust AC asks for the name of the Policy Model.
5. Enter: policy1
eTrust AC asks you to define subscribers.
6. Enter the fully qualified name of the subscriber hosts. Press Enter after each one. Press enter twice when you have finished.
eTrust-Console
---------------[ Subscribers ]---------------------- Enter the names of the subscriber hosts for this policy model Enter subscribers one at a time Press <ENTER> twice when done. Enter subscribers name [none] : workstat1.myfirm.com Enter subscribers name [none] : workstat2.myfirm.com Enter subscribers name [none] :
You must still point subscriber stations to the PMDB at the subscriber stations (see page 88).
7. eTrust AC asks whether you want to update the NIS and DNS tables after updates are made to users and groups in the PMDB, if you are running NIS, NIS+, OR DNS on the same machine. Enter “y” if you want the tables updated. Otherwise, just press “Enter.”

Creating a Policy Model Database
Managing Your Enterprise Security with Policy Model Databases 87
8. eTrust AC asks whether you want to define users with special attributes for the PMDB.
The administrators of a PMDB are users authorized to change the properties of the PMDB. If you do not enter a name, by default root becomes the administrator of the PMDB. Create two administrators named adm1 and adm2.
The auditors of a PMDB are users authorized to view the PMDB's audit log files. If you do not enter a name, by default root becomes the auditor of the PMDB. For this example, press Enter to accept the default.
The password managers of a PMDB are users authorized to change passwords in the PMDB. For this example, press Enter to accept the default.
9. eTrust AC asks for the fully qualified names of the terminals from which you can administer the PMDB. If you only want to work from pmdbhost, just press Enter.
10. eTrust AC reports the selections you have made and asks you to confirm them. When you confirm your selections, the PMDB is built using the answers you supplied.
After eTrust AC creates the PMDB, you return to the opening screen. Since this simple example has no subsidiary PMDBs, choose option 4 to exit the script.

Pointing Subscriber Stations to the PMDB
88 Getting Started
Pointing Subscriber Stations to the PMDB To establish a station as a subscriber to a PMDB, it is not sufficient to register the subscriber's name at the PMDB's station. There is also a procedure to perform with sepmdadm at the subscriber station.
Note: The following operations are performed at the subscriber station:
1. Enter the third option to define the parent pmd.
2. Enter “y” to bring eTrust services down. When eTrust is down, press Enter to go to the next step.
3. Enter the fully qualified name of the parent Policy Model, according to the example on the screen and press Enter.
eTrust-Console
----------------[ Parent PMD ]---------------------- Define the subscriber's parent policy model. Enter fully qualified name ([email protected]) or “none” for no model. Now enter the name of the subscriber's parent Enter parent pmd [ ] : [email protected]▌
4. If you are using a password PMDB configuration, enter the fully qualified name of the password PMDB, according to the example on the screen. For this example, just press Enter.
5. When you press Enter again, you are asked to confirm your entries. Entering “y” confirms the entries. Entering “n” takes you back to the beginning of the process.

Working with a PMDB
Managing Your Enterprise Security with Policy Model Databases 89
Working with a PMDB Here is a short demonstration of how you would work with the PMDB that governs workstat1 and workstat2. In this demonstration, the name “pmdbhost” stands for the name of the station where the PMDB resides.
1. On the master host, pmdbhost, invoke the selang language command shell.
2. Enter the following command:
hosts policy1@pmdhost
After a short delay, the message “successfully connected” appears on your screen. From this point on, the selang commands you enter are directed to the policy1 database.
3. Add two users to the PMDB, as shown here:
newusr testusr1
newusr testusr2
4. The new information takes a little while to propagate, though the time may not be noticeable on an eTrust AC network that is not large.
To ensure that propagation has taken place, invoke selang on each of the stations workstat1 and workstat2 and issue the following command on each:
showusr testusr1
showusr testusr2
Both users should be defined on both subscriber stations.
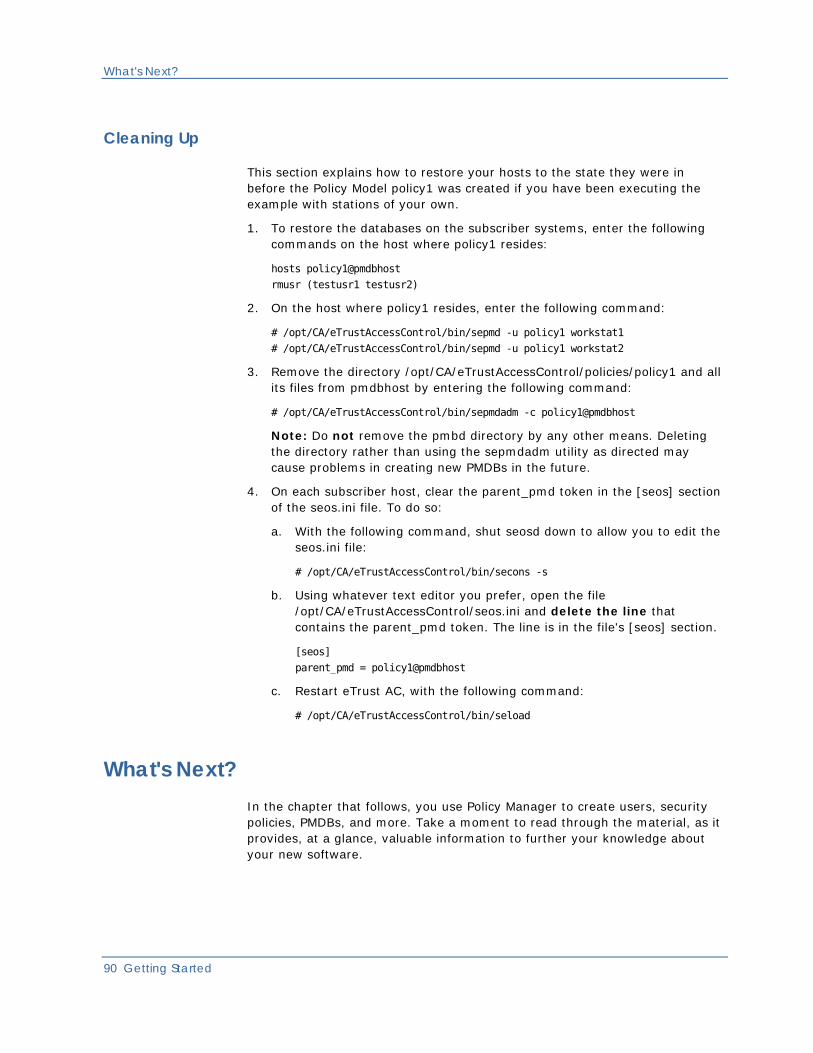
What's Next?
90 Getting Started
Cleaning Up
This section explains how to restore your hosts to the state they were in before the Policy Model policy1 was created if you have been executing the example with stations of your own.
1. To restore the databases on the subscriber systems, enter the following commands on the host where policy1 resides:
hosts policy1@pmdbhost
rmusr (testusr1 testusr2)
2. On the host where policy1 resides, enter the following command:
# /opt/CA/eTrustAccessControl/bin/sepmd -u policy1 workstat1
# /opt/CA/eTrustAccessControl/bin/sepmd -u policy1 workstat2
3. Remove the directory /opt/CA/eTrustAccessControl/policies/policy1 and all its files from pmdbhost by entering the following command:
# /opt/CA/eTrustAccessControl/bin/sepmdadm -c policy1@pmdbhost
Note: Do not remove the pmbd directory by any other means. Deleting the directory rather than using the sepmdadm utility as directed may cause problems in creating new PMDBs in the future.
4. On each subscriber host, clear the parent_pmd token in the [seos] section of the seos.ini file. To do so:
a. With the following command, shut seosd down to allow you to edit the seos.ini file:
# /opt/CA/eTrustAccessControl/bin/secons -s
b. Using whatever text editor you prefer, open the file /opt/CA/eTrustAccessControl/seos.ini and delete the line that contains the parent_pmd token. The line is in the file's [seos] section.
[seos]
parent_pmd = policy1@pmdbhost
c. Restart eTrust AC, with the following command:
# /opt/CA/eTrustAccessControl/bin/seload
What's Next? In the chapter that follows, you use Policy Manager to create users, security policies, PMDBs, and more. Take a moment to read through the material, as it provides, at a glance, valuable information to further your knowledge about your new software.

Centralizing Administration 91
Chapter 8: Centralizing Administration
This section contains the following topics:
Creating Users, PMDBs, and More (see page 91) Getting Started (see page 91) Create a New User (see page 92) The Create User Wizard (see page 93) Let's Create a PMDB (see page 95) Working with a PMDB (see page 98) Account Policies (see page 98) Password Policies (see page 99) What's Next? (see page 100)
Creating Users, PMDBs, and More In this chapter, you use Policy Manager to create a PMDB, register users, permissions, and passwords. Policy Manager is a Windows application installed on a machine without eTrust AC, from which you can remotely administer eTrust AC on UNIX, Linux, or Windows workstations.
Getting Started You can install Policy Manager on a Windows NT, Windows 2000, Windows 2003, or Windows XP computer. With it, you can do almost anything that you can do with selang commands.
Start Policy Manager from the Windows Start button. Enter your name and password in the Login window.
Enter the name of the host you want to administer and click OK.
Let's look at a couple of examples of what you can do from this GUI.

Create a New User
92 Getting Started
Create a New User As an example of how easy it is to work with the GUI, create the same users we created in the first tour: names -j_doe, p_jones, and q_smith; owner-nobody; audit-all.
1. Click the Users icon in the program bar on the left side of the GUI.
2. Click the New icon on the toolbar. Enter “j_doe” in the User Name text box. Skip the other entry options this time.
Note: Many of the options on the toolbar and menu bar are also available with a right mouse click. For example, you can open the Create New User window by putting your cursor anywhere in the Users Window and right clicking. Then select New from the context menu.
3. Click the UNIX Specific icon, and fill in your options.
4. Next, go to User Attributes panel. Enter “nobody” in the Owner text box.
5. In the Miscellaneous panel, select Audit Information.
6. Click the “All” radio button. Click OK to close each of the windows.
If you look at the lower part of the GUI, you see that the output bar shows that you successfully created a new user. Double-click the entry line and view the following window:
The selang commands generated by the GUI are displayed, along with the results. As you probably noticed, this example was too simple. We could have added a lot more parameters to the user record in the eTrust database with very little extra effort.

The Create User Wizard
Centralizing Administration 93
The Create User Wizard Let's create our next user using the Wizard.
1. Click the Wizard icon on the toolbar and select Create New User.
2. The first screen is an introduction. Read the information and click Next.
3. The second screen selects the user attributes. Since we are creating a regular user (the default), we do not change anything here. Click Next.
4. In the User Properties screen, we enter a user name, the user's full name, and a description (optional).
5. In the Unix Specific screen, you can add UNIX properties.
6. In the User Password screen, we are adding a password.
To keep things simple, the password is pjones.
7. We add p_jones to gr_534, click Finish, and check the command line to see what happened.
Note that the GUI generated three commands:
The first created the new user in eTrust.
The second created the user in UNIX.
The third joined him to a group.
Select each one in turn to see the details.

The Create User Wizard
94 Getting Started
What about the owner and the audit parameters? If you select p_jones in the user list and click Properties on the toolbar (or just double-click the name), you see the same user properties window we used to create j_doe.
Go to the user attributes panel, and you see that you are the owner-the wizard defaults to the current administrator. Use the browse button to change the owner to nobody. Then, go to the Miscellaneous-Audit information. The defaults set by the wizard are: login success, login failure, and failure. Change this to All, and click OK.
Now you have created the same user properties as in the first tour. Check your results in the command details window.
This gives you a sense of how easy it is to create new users. Creating or editing groups and resources is just as easy.
Now that we have navigated through the user creation section, let's take a look at creating PMDBs. This infrastructure enforces security for a given server even if the network connectivity is not working properly.

Let's Create a PMDB
Centralizing Administration 95
Let's Create a PMDB This example does the following:
Creates a PMDB named policy1, registers the PMDBs workstat1 and workstat2 as its subscribers.
Registers two users-adm1 and adm2-as authorized to administer the PMDB
1. Connect to 'bighost'. (bighost is not the local host) Create the user accounts for the administrators.
The administrators of a PMDB are users authorized to change the properties of the PMDB.
The auditors of a PMDB are users authorized to view the PMDB's audit log files.
The password managers of a PMDB are users authorized to change passwords in the PMDB.
In this example, the user is created with all three attributes.

Let's Create a PMDB
96 Getting Started
2. Do not forget to give them terminal permissions to administer from the workstation.
3. Now, open the Tools panel on the program bar and select Policy Model.
4. Select the New icon on the toolbar to create a new PMDB. Enter the name of the PMDB, and then select the Administrators icon. Select the New icon next to Add Policy Model Administrator, then type in the name or use the Browse button. Repeat for the second administrator.
5. Select the Terminal icon. Click the New icon and type in the name of the host, or use the “Browse” button to select a host. Click OK to create the PMDB.
Now that you have created the PMDB, you can add subscribers. A subscriber can be any existing PMDB or eTrust database.
6. Select Add Subscriber.

Let's Create a PMDB
Centralizing Administration 97
Enter the name in the form subscriber@host if the subscriber is a PMDB, or simply the name of the host computer, if the subscriber is an eTrust database.
7. Repeat for the second subscriber. The tree displays the Policy Model hierarchy.

Working with a PMDB
98 Getting Started
Working with a PMDB Here is a short demonstration of how you would work with the PMDB that governs workstat1 and workstat2.
1. Connect to the PMDB. You can use right click, connect or the Connect icon on the toolbar.
The confirmation screen verifies the connection.
Note: The target host's version shown in this sample screen may be different than the one shown on your computer. The screen on your computer will reflect the actual version of eTrust AC you have installed.
2. Add two users to the PMDB (Add1 and Add2).
The new information takes a little while to propagate, though the time may not be noticeable on an eTrust AC network that is not large.
3. To ensure propagation has taken place, connect to each of workstat1 and workstat2 and view the user list.
Both users should be defined on both subscriber stations.
Account Policies When using Policy Manager, it is a simple matter to set a default account policy. An account policy consists of password rules, login rules, and audit rules. You can set one general policy for users, and different policies for groups (on a group by group basis.) Some settings are global, but some (minimum and maximum age and grace) can be overridden in the individual user settings.

Password Policies
Centralizing Administration 99
Password Policies Before you define a password policy, you should check to see if password policy checking is activated. (This is the default setting for new installations.) You do this in selang with the setoptions list command. You do not have to leave the GUI to execute the command.
1. On the Tools menu, select Execute Command. Enter your command in the Commands and Scripts window.
2. In the output window, Scroll back up until you get to PASSWORD. If the entry is PASSWORD: No, enter the command setoptions class+(password).
3. Before you make this-or any other-change, scroll up to the top of the Output list to view the password rule defaults. Make a note of the settings so that you can restore them when you complete the exercises in this section.
4. After inspecting the current values in eTrust AC, you can change the values to suit the needs of your site.
Note: For more information, see the Administrator Guide.

What's Next?
100 Getting Started
5. To set general user account policy, the User window must be active. Select the User icon on the program bar. Now, select the Policies menu. You can set Account or Audit policies from this menu.
The Account Policies window has four tabs. The first two tabs set rules that apply to both the native operating system and the eTrust database. The Advanced Rules tabs set eTrust policies only.
Try changing some of the parameters. You can see the results by inspecting the command line details and by re-running the setoptions list command.
Advanced rules set the eTrust password policy. The Number of Logons field represents the grace login parameter.
Note: For more information about grace logins, see the Administrator Guide or the segrace utility in the Utilities Guide.
What's Next? In the chapter that follows, you learn the installation process to integrate eTrust AC with Unicenter NSM. Take a moment to read through the material, as it provides, at a glance, valuable information to further your knowledge about your new software.

Integrating with Unicenter Security 101
Chapter 9: Integrating with Unicenter Security
This section contains the following topics:
Integrating eTrust AC with Unicenter Security (see page 101) Installing Unicenter Security Integration Tools (see page 102) Installation Notes (see page 103) What's Next? (see page 103)
Integrating eTrust AC with Unicenter Security eTrust AC is fully integrated into the Unicenter enterprise management environment. The following sections describe how eTrust AC handles the integration.
Note: To have Unicenter NSM integration with eTrust AC, you must have Unicenter NSM installed on the same machine as eTrust AC.

Installing Unicenter Security Integration Tools
102 Getting Started
Installing Unicenter Security Integration Tools Two types of integration installations for UNIX and Linux environments are:
Full Integration
The full integration installation is useful for eTrust AC installations with Unicenter Security in use. The integration imports data from Unicenter Security to eTrust AC, so eTrust AC becomes the security system used on that host or group of hosts.
Minimal Integration
The minimal integration installation is useful for eTrust AC installations without Unicenter NSM or for installations that include Unicenter Security, but it is not in use.
Important! To run the migration, you must log in as root; you cannot run the su (substitute user) command to change to root after you install eTrust AC.
For full integration of Unicenter Security and eTrust AC, complete the following steps:
1. Install eTrust AC without populating the eTrust AC Database.
To avoid populating the database, accept the default of “No” when the following prompt appears on the screen:
Import users, groups and hosts now? [y/N] :
2. Run the uni_migrate_master.sh script on the master node.
Note: The master node is the machine that hosts the Unicenter Security database.
3. Run the uni_migrate_node.sh script on each satellite node (that is, every Unicenter Security-controlled machine).
4. Run the uni_migrate_node.sh script on the master node.
5. Manually edit the $CAIGLBL0000/secopts file to set the value for the SSF_SCOPE_DATA and SSF_SCOPE_KEYWORD keywords to NO.
For minimal integration of Unicenter Security and eTrust AC, complete the following steps:
1. Run the uni_migrate_node.sh script on all nodes.
2. Manually edit the $CAIGLBL0000/secopts file to set the value for the SSF_SCOPE_DATA and SSF_SCOPE_KEYWORD keywords to NO.
Note: For a complete list of Unicenter Security Integration features and how they work, see the Administrator Guide.

Installation Notes
Integrating with Unicenter Security 103
Installation Notes We do not recommend running Unicenter NSM login intercepts after
running the Unicenter Integration and Migration Installation. Once the Unicenter Integration and Migration Installation has completed successfully, Unicenter NSM login intercepts are disabled.
Unicenter NSM Data Scoping and Keyword Scoping rules (rules that target Unicenter NSM asset types with a -DT or -KW suffix) are not supported by the eTrust AC Migration process. Rules of this type are ignored during the migration process.
Unicenter Security rules that have been implemented against any of the following Unicenter Security asset types are obsolete because Unicenter Security is longer in use: CA-USER, CA-ACCESS, CA-USERGROUP, CA-ASSETGROUP, CA-ASSETTYPE, and CA-UPSNODE. Rules that target any of these asset types, or any of their derivatives, are ignored during the migration process.
The flag -e (-edit) in uni_migrate_node.sh and uni_migrate_master.sh gives you the option to see and edit the rules moving to the eTrust AC database.
If you want full or minimal Unicenter NSM integration, then you must install the Unicenter Integration and Migration package with the -uni option to the install_base script. The Unicenter Integration and Migration Installation installs the Unicenter Integration and Migration scripts and binary files in the eTrustACDir/tng directory.
Once the Unicenter Integration setup completes, Unicenter NSM User Exit support is active. eTrust AC lets you run existing Unicenter Security user exits unchanged in the eTrust AC environment. eTrust AC supports the following Unicenter Security exit points:
– EmSec_CredExit()-Unicenter Credential Authentication exit
– EmSec_PwExit()-Password Validation Exit
What's Next? In the chapter that follows, you are presented with answers to common questions about eTrust AC. Take a moment to read through the material, as it provides, at a glance, valuable information to further your knowledge about your new software.


Frequently Asked Questions 105
Chapter 10: Frequently Asked Questions
In this chapter, we highlight some of the common security policy concerns and how eTrust AC simplifies UNIX, Linux, and Windows security management and enforcement. A graphical user interface centralizes control over security policies as well as the administration of users, groups, and system resources.
Q: What is eTrust AC?
A: eTrust AC is a software package that provides protection for UNIX, Linux, and Windows servers, and access management for system administrators.
Most traditional methods of protecting UNIX and Linux systems have focused on reacting to threats, assessing vulnerabilities, or trying to limit the ways to become root. Measures taken include running frequent audit reports, using shareware tools to reveal system vulnerabilities, and installing CERT-advisory patches, as supplied by the vendors.
eTrust AC was designed in recognition of the fact that stronger UNIX or Linux security requires a fundamental change in the way UNIX or Linux grants access to system resources. eTrust AC enables you to control access to different operating OS resource based on simple and easy configurable access rules. The result is an added layer of security, which resides right next to the protected data. The solution does not change the way UNIX or Linux operates or the way administrators do their jobs.
Q: Is eTrust AC the same on each supported platform?
A: Yes. The functionality of eTrust AC is equivalent on all supported platforms. All eTrust AC interfaces provide cross-platform administration, transparent to underlying OS differences (except during the initial configuration). Naturally, when the OS has different names for resources, eTrust AC maintains consistency with the native OS.
Q: What is the eTrust AC Dynamic Security Extension (DSX) technology?
A: The DSX technology is a dynamic interception of security related syscalls. The system call (or system vector) table stores memory address pointers to system call kernel code. eTrust AC stores these address pointers and then changes them to point to the corresponding eTrust AC code.
If the access is approved the request continues on to the original syscall code, if the access is denied then the request is terminated.

What's Next?
106 Getting Started
Q: Does eTrust AC intercept every event on the system?
A: No. Certain syscalls are intercepted by eTrust AC. Once a syscall is intercepted, the eTrust AC engine determines whether to allow or disallow access to the intercepted resource based on the eTrust AC rules that were defined in the database.
eTrust AC intercepts the initial access to a file or device but not the subsequent I/O events performed on the file (like read and write).
The same is true for network connections. eTrust AC intercepts the establishment of a network socket (that is, port-IP address pairing) but not the subsequent transfer of data.
eTrust AC does not intercept the routines that allocate memory to processes.
Q: What is the CPU overhead incurred in running eTrust AC?
A: This varies depending on the function of the host itself. A mail server typically has a lower performance penalty than a system hosting a database server.
Our customer experience, including high performance demand systems, has shown a typical performance range of 1-5% additional overhead on the CPU.
Q: Where are the access rules stored?
A: The eTrust AC access rules are stored in a protected database on the localhost.
Q: Does eTrust AC include an API?
A: Yes. In fact, eTrust AC includes a number of APIs that contribute to the eTrust AC open architecture. APIs can be used for everything from access control to administration to alert notification. The eTrust AC documentation explains in detail the usage of each API, and sample programs, written in C, are included with the software. eTrust AC APIs include:
The Authorization API is used by applications to check user access to arbitrary resources. This set of API calls enables sites to centrally manage security with eTrust AC even for homegrown applications.
The Administration API is used by applications that manage aspects of Windows, UNIX, or Linux security as handled by eTrust AC.
The Auditing API allows customization of the eTrust AC audit.
The Password API enables customization of password quality checks in addition to those provided in the product.
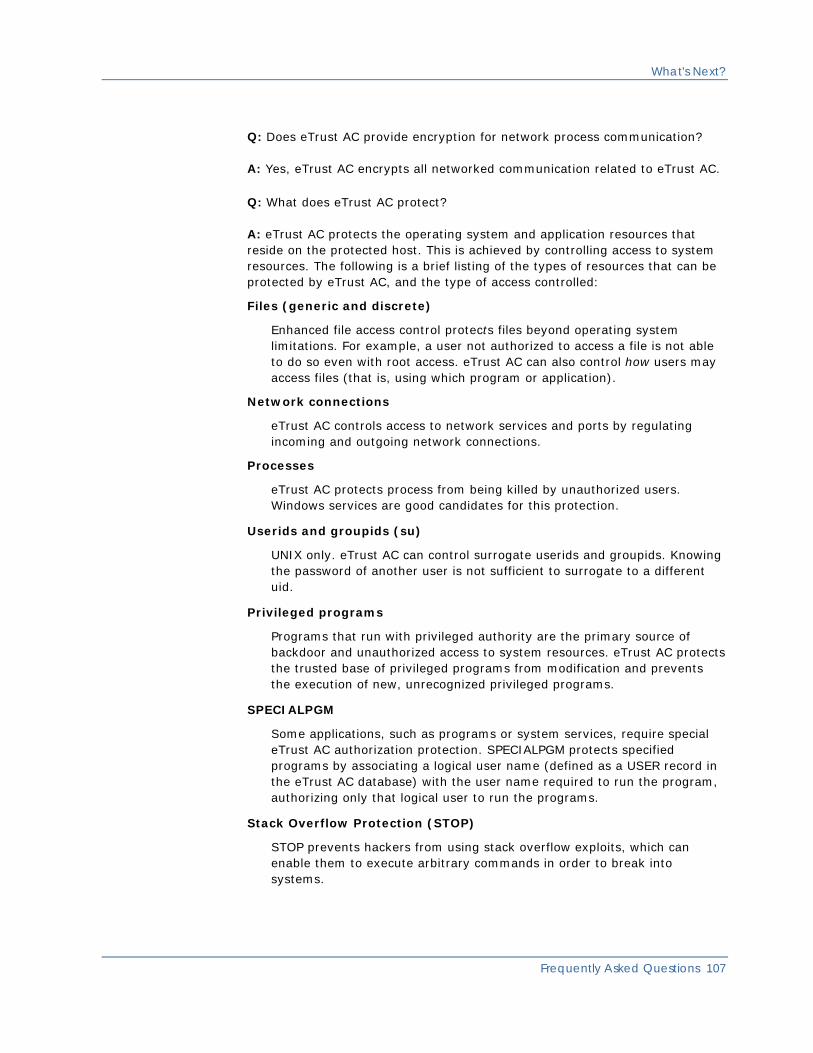
What's Next?
Frequently Asked Questions 107
Q: Does eTrust AC provide encryption for network process communication?
A: Yes, eTrust AC encrypts all networked communication related to eTrust AC.
Q: What does eTrust AC protect?
A: eTrust AC protects the operating system and application resources that reside on the protected host. This is achieved by controlling access to system resources. The following is a brief listing of the types of resources that can be protected by eTrust AC, and the type of access controlled:
Files (generic and discrete)
Enhanced file access control protects files beyond operating system limitations. For example, a user not authorized to access a file is not able to do so even with root access. eTrust AC can also control how users may access files (that is, using which program or application).
Network connections
eTrust AC controls access to network services and ports by regulating incoming and outgoing network connections.
Processes
eTrust AC protects process from being killed by unauthorized users. Windows services are good candidates for this protection.
Userids and groupids (su)
UNIX only. eTrust AC can control surrogate userids and groupids. Knowing the password of another user is not sufficient to surrogate to a different uid.
Privileged programs
Programs that run with privileged authority are the primary source of backdoor and unauthorized access to system resources. eTrust AC protects the trusted base of privileged programs from modification and prevents the execution of new, unrecognized privileged programs.
SPECIALPGM
Some applications, such as programs or system services, require special eTrust AC authorization protection. SPECIALPGM protects specified programs by associating a logical user name (defined as a USER record in the eTrust AC database) with the user name required to run the program, authorizing only that logical user to run the programs.
Stack Overflow Protection (STOP)
STOP prevents hackers from using stack overflow exploits, which can enable them to execute arbitrary commands in order to break into systems.

What's Next?
108 Getting Started
Terminals
eTrust AC controls entry-points to system access by defining who can login from which terminals and under what conditions.
User-defined resources
Using the eTrust AC Authorization API and database tools, administrators can define site-specific rules for protecting access to data from applications that hook into the eTrust AC server.
Users and groups impersonation
Windows only. eTrust AC controls impersonation of users and groups. Knowing the password of another user is not sufficient to impersonate that user.
Windows Registry
Windows only. eTrust AC restricts a user's ability to access registry keys. You can give a user one or more types of access, such as READ, WRITE, and DELETE. The access can be specified with regard to an individual registry key or to a set of similarly named registry keys.
Q: Can eTrust AC protect resources from an attacker who gets root access?
A: Yes. In fact, this is one of the primary ways in which eTrust AC enhances UNIX and Linux security. In native UNIX, users with an id of zero (0) can effectively access all system resources. User passwords and file permissions are not only ineffective at protecting against users who successfully attack root, but the rules can be modified without leaving an audit trail.
Q: How does eTrust AC manage root capabilities?
A: The greatest security threat to UNIX and Linux lies in the existence of its superuser-root-as an all-powerful user-id accessible to various individuals in an organization. eTrust AC:
Supervises access to root.
Defines and limits what root can do.
Corrects the exposure of root's unlimited powers.
Shifts privileges to accountable individuals.
Limits the damage that attackers can do through root access.
No other security solution in the market provides this revolutionary capability.

What's Next?
Frequently Asked Questions 109
Q: How are Root Responsibilities delegated on a need-to-use basis?
A: Administrators and operators need privileged root access in order to perform their job functions. Without eTrust AC, this is achieved on “all or nothing” basis by giving them the root Password. eTrust AC provides easy to apply rules to define “roles.” These roles delegate root capabilities to accountable users.
Q: Does eTrust AC file access control replace UNIX or Linux file permissions?
A: No, it enhances them. Native UNIX provides no file security against an attacker with root access and does not provide for securing files with a generic wildcard definition to determine and maintain access to groups of files.
eTrust AC provides complete file protection by intercepting every file access request and deciding if the user is authorized to access the file in the requested manner, according to its ACLs.
eTrust AC can protect the contents of entire directories, for example, /etc/* or $DIR/webserver/ht-docs/*. eTrust AC rules can also protect files such as $HOME/*/.rhosts thus protect all users' .rhosts files. You can also set a rule to protect a set of files with the same name: /app/config*. This would protect /app/config.dat and /app/config.tar, for example.
If the need arises to protect files that do not map into a directory or common naming convention, you can use the GFILE class. This class allows you to define specific files and apply a common set of access control rules to all of the files.
Additionally, with Program ACLs (PACLs), you can ensure that sensitive resources are only being accessed using approved programs. [For example, that personnel database files are only being written to using the database application.]. For operating systems that support native UNIX ACLs (Solaris and HP-UX), eTrust AC can synchronize eTrust AC ACLs with the operating system.
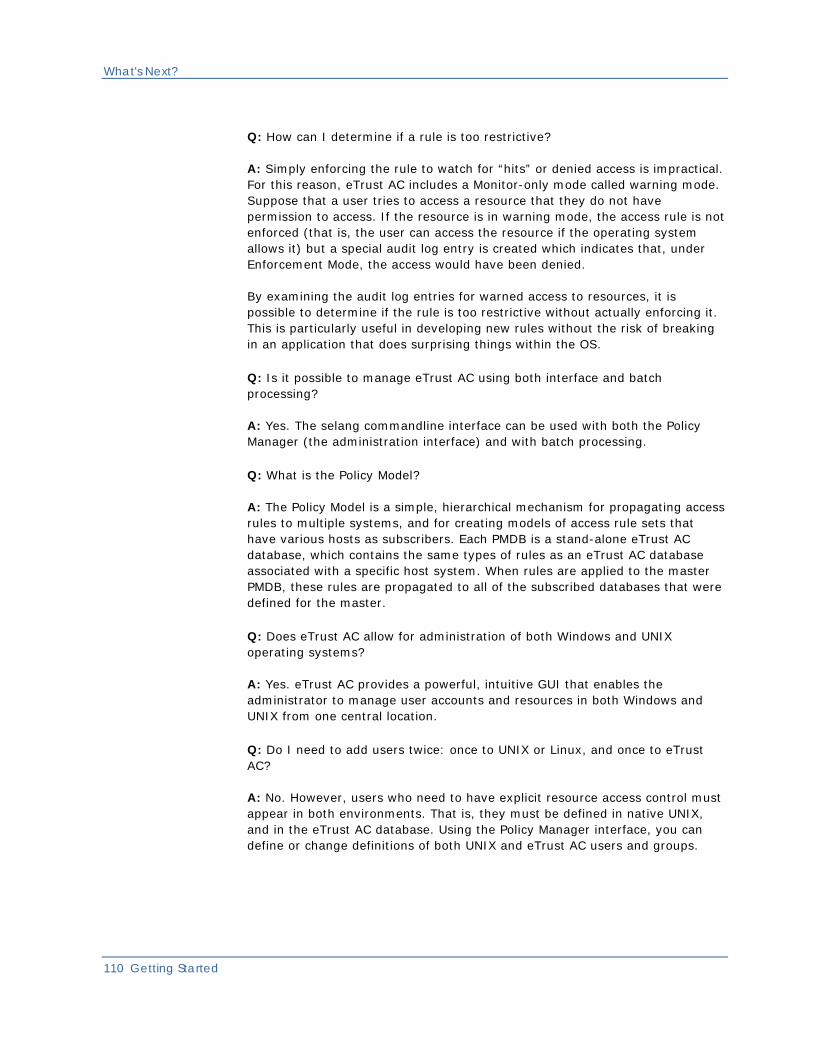
What's Next?
110 Getting Started
Q: How can I determine if a rule is too restrictive?
A: Simply enforcing the rule to watch for “hits” or denied access is impractical. For this reason, eTrust AC includes a Monitor-only mode called warning mode. Suppose that a user tries to access a resource that they do not have permission to access. If the resource is in warning mode, the access rule is not enforced (that is, the user can access the resource if the operating system allows it) but a special audit log entry is created which indicates that, under Enforcement Mode, the access would have been denied.
By examining the audit log entries for warned access to resources, it is possible to determine if the rule is too restrictive without actually enforcing it. This is particularly useful in developing new rules without the risk of breaking in an application that does surprising things within the OS.
Q: Is it possible to manage eTrust AC using both interface and batch processing?
A: Yes. The selang commandline interface can be used with both the Policy Manager (the administration interface) and with batch processing.
Q: What is the Policy Model?
A: The Policy Model is a simple, hierarchical mechanism for propagating access rules to multiple systems, and for creating models of access rule sets that have various hosts as subscribers. Each PMDB is a stand-alone eTrust AC database, which contains the same types of rules as an eTrust AC database associated with a specific host system. When rules are applied to the master PMDB, these rules are propagated to all of the subscribed databases that were defined for the master.
Q: Does eTrust AC allow for administration of both Windows and UNIX operating systems?
A: Yes. eTrust AC provides a powerful, intuitive GUI that enables the administrator to manage user accounts and resources in both Windows and UNIX from one central location.
Q: Do I need to add users twice: once to UNIX or Linux, and once to eTrust AC?
A: No. However, users who need to have explicit resource access control must appear in both environments. That is, they must be defined in native UNIX, and in the eTrust AC database. Using the Policy Manager interface, you can define or change definitions of both UNIX and eTrust AC users and groups.

What's Next?
Frequently Asked Questions 111
Q: Does eTrust AC allow for administration of Windows operating systems as well as UNIX and Linux operating systems?
A: Yes. eTrust AC provides a powerful, intuitive GUI that enables the administrator to manage user accounts and resources in multiple operating systems from one central location.
Q: Does eTrust AC support Hardware-Based Authentication, such as SecureID?
A: eTrust AC is compatible with all authentication software, since it does not interrupt the authentication process.
Q: How does eTrust AC compare with firewalls?
A: Firewalls are used to limit network access to and from outside sources using networks, hosts, users, protocols, services, and applications. As businesses increase the level of network-based connectivity, more and more data needs to pass through the firewalls.
Once behind the firewall, servers and data are vulnerable. eTrust AC protects resources on a system behind a firewall, as well as those in the DMZ.
Q: If I have a firewall, why do I need eTrust AC?
A: A firewall is important to filter both incoming and outgoing network traffic. Well-configured firewalls can greatly reduce the number of curious users who might otherwise try to penetrate the system, and they can protect the information assets from being sent out over the Internet.
However, a firewall can do nothing to provide protection once a user is inside the network. In addition, firewalls can be, and have been, circumnavigated by clever crackers.
Q: What exactly does it mean that eTrust AC provides proactive security?
A: Most security solutions tend to provide methods that are reactive in nature. The history of computer security has proven these reactionary methods to be temporary fixes only, since the methods address the security symptoms at the application level. The design of eTrust AC is such that it addresses security events at the system and system call level.
This approach is taken because all resource access requests (application or other) are handled by the system and must go through the kernel. As a security sensitive request is made eTrust AC is able to intercept and disallow the request before it can become a threat.

What's Next?
112 Getting Started
Q: What advantages does eTrust AC have over the freeware security solutions in general?
A: Freeware solutions tend to be reactionary in nature. They address the symptoms and not the cause, supplying workarounds that are unprotected from root or system attacks.
A short list of the eTrust AC advantages over freeware:
Self-protecting.
Self-checking (rules database and services\daemons)
Protects configuration files when it is running.
Less administrative overhead for installation and maintenance.
Vendor support.
Provides a means for gradual implementation. eTrust AC has the concept of warning mode. Rules can be applied without enforcement so as not to impact business as usual.
Provides a common solution as a super set of freeware solutions, and as a single point of administration for several machines and platforms.
Some of the more well-known host-based solutions are SUDO, auditing, Tripwire, and TCP wrappers. eTrust AC provides a functional superset of these solutions in a single package, addressing not the symptoms but the core issue by providing proactive security in the kernel.
Maybe the question to ask is, “If someone compromises the root account can the freeware solutions still provide protection?” The answer is no. These tools give a false sense of security. With eTrust AC the answer is yes, it can provide protection to key resources.
Q: How does eTrust AC compare with native file permissions?
A: Native file permissions only provide access for the owner, one group and the world as a whole with Read, Write, and Execute permissions. Native file access permissions can be over-ridden for any file by root access or the owner of that file.
eTrust AC extends the access modes beyond normal operating system access mode with access rights such as Update, Delete, Create, and more. eTrust AC access modes cannot be compromised by the file owner, or the root account. Where UNIX or Linux is limited to one group for access, eTrust AC can allow for several groups with different access rights.
eTrust AC also extends file access based on which programs are allowed to access files, something native UNIX or Linux does not provide.

What's Next?
Frequently Asked Questions 113
Q: Can eTrust AC provide a 100% security solution?
A: No solution offering 100% security exists. However, eTrust AC can provide a comprehensive and more reasonable software solution that previously did not exist by addressing the causes of operating system security issues. Security aspects extend beyond software control and are addressed by establishing and following common sense policies concerning and including physical access and account sharing.
Q: I have heard about hackers using tools like “rootkit” to gain access to a machine. Can eTrust AC protect against these?
A: Rootkit has been around for a while and is one of many tools that have been used to gain unauthorized access to machines. It was not the first and most certainly will not be the last. To understand how eTrust AC addresses these issues, let's examine the goal and general profile of a hacker and his tools and how eTrust AC can address them.
The hacker's goal is to obtain full control of a system by seizing the root account. eTrust AC can respond to this by restricting who may become root, and how. In the event of unauthorized root access, eTrust AC can control what may be accessed.
The following helps illustrate how the hacker threat can be defended against:
Attack Profile Hack Attack eTrust AC Defense
A) Penetration A1) Well known service flaws A1a) Disable or limit access to valid remote sources
A2) Accounts with bad passwords A2a) Disable accounts with repeated attacks
A2b) Limit sensitive accounts to local access
A2c) Enforce Password Quality Control
B) Obtain root B1) Flawed programs B1a) Limit which programs allow root access
B2) Guessing root password B2a) Limit root to local access
B2b) Limit who can become root, even if password is known
C) Retain root C1) Alter existing priv programs C1a) Protect privileged programs from tampering
C2) Introduce new priv program
C2a) Protect system from the introduction of unauthorized privileged program.
C3) Alter system log to hide penetration
C3a) Protect system logs from tampering
C3b) Provide logging separate from system.

What's Next?
114 Getting Started
In addition, eTrust AC works with new eTrust technology called Stack Overflow Protection (STOP), which protects against stack overflow, or buffer overflow attacks, further strengthening the ability of eTrust AC to protect your system.