ER200 User Manual 03-06 NHH - Robot Nordic Odense
11
ER200 USER MANUAL
Transcript of ER200 User Manual 03-06 NHH - Robot Nordic Odense

ER200 USER MANUAL

Revision: 2019-May-31 EasyRobotics ApS ER200 User-Manual (en) Page 1 of 10
Table of content 1 Introduction/intended use .......................................................................... 2
2 Safety notice ............................................................................................ 2
3 Installation ............................................................................................... 3
4 Adjustments ............................................................................................. 9
5 Dimensions ............................................................................................ 10
Information contained herein is the property of EasyRobotics ApS and shall not be reproduced in whole or in part without prior written approval of EasyRobotics ApS. The information herein is subject to change without notice and should not be construed as a commitment by EasyRobotics ApS. This manual is periodically reviewed and revised. EasyRobotics ApS assumes no responsibility for any errors or omissions in this document. Design Protected

Revision: 2019-May-31 EasyRobotics ApS ER200 User-Manual (en) Page 2 of 10
1 Introduction/intended use ER200 is designed for integrating a cobot with a MIR AGV1. It is intended for cobots with a maximum lifting capacity of 5 kg. Please read the “UR Interface - Technical documentation” from MIR before installing the ER2002.
2 Safety notice
2.1 Introduction The intension of this manual is to give a guideline of mounting a Universal Robot at the ER200 and this is not valid as a CE marking of the robot cell. A risk assessment most be full filled after the full installation is concluded including the robot, gripper and other equipment and installations at the workspace. ER200 must be correctly bolted to the MIR200 and be aware that the unit doesn’t tilt while in use. The local governmental safety rules and legislation must be followed when installing and running with a robot on the ER200.
1 Automated Guided Vehicle 2 https://www.mobile-industrial-robots.com/media/1338/mir100-ur-interface-installation-and-set-up-guide-11.pdf

Revision: 2019-May-31 EasyRobotics ApS ER200 User-Manual (en) Page 3 of 10
3 Installation
3.1 Relocate bracket for the teach pendant. Unscrew the bracket from the side of the controller and attach it to the mount. Reuse the original screws.

Revision: 2019-May-31 EasyRobotics ApS ER200 User-Manual (en) Page 4 of 10
3.2 Mounting in MIR Before mounting the ER200 to the MIR, please follow the instruction from MIR about placing extra batteries and where to drill the hole for the power cable.
Place the ER200 on top of the MIR
Remove the tabletop by loosen the three wing knobs
Fasten the four bolts in the bottom of the ER200

Revision: 2019-May-31 EasyRobotics ApS ER200 User-Manual (en) Page 5 of 10
3.3 Mounting the robot Follow the mounting guidelines of the UR3/5 manual. Attach the robot on top of the horizontal robot console. Mind the cable if connected. Guide the robot cable down through the pillar and plug it into the robot controller.
Mount the UR-robot
3.4 Mounting the controller
Guide the robot cable through this hole
Revision: 2019-May-31 EasyRobotics ApS ER200 User-Manual (en) Page 6 of 10
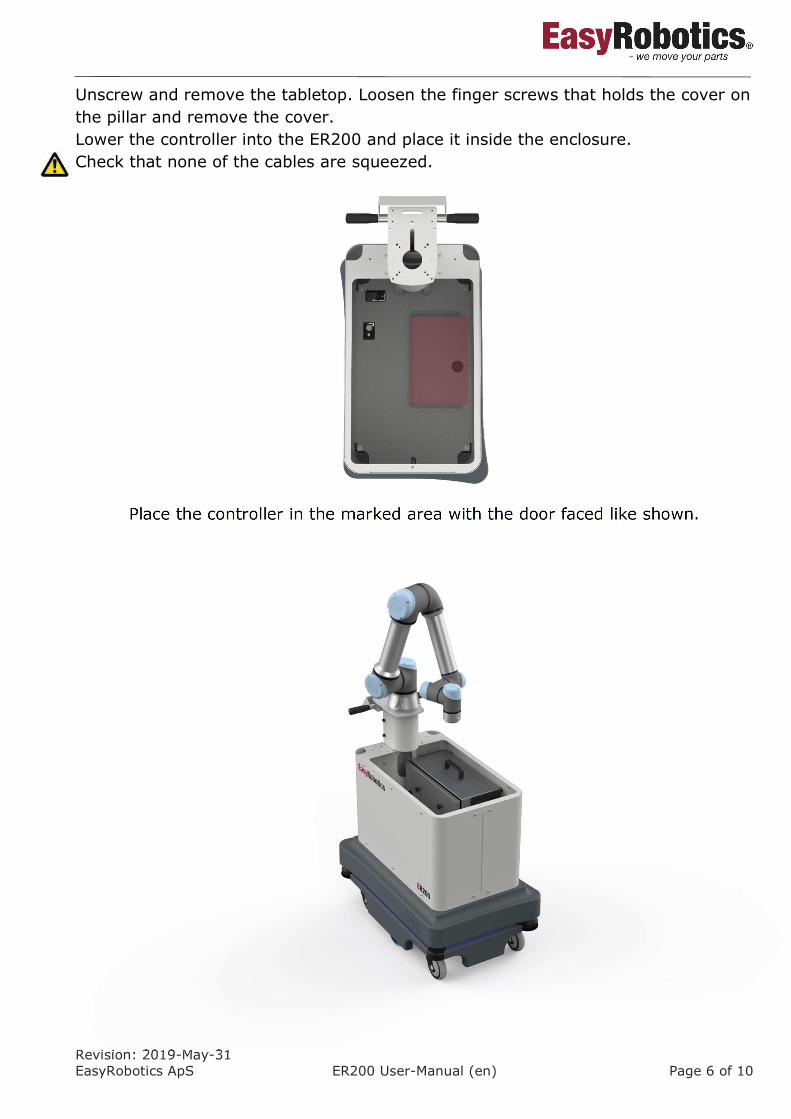
Unscrew and remove the tabletop. Loosen the finger screws that holds the cover on the pillar and remove the cover. Lower the controller into the ER200 and place it inside the enclosure. Check that none of the cables are squeezed.
Place the controller in the marked area with the door faced like shown.

Revision: 2019-May-31 EasyRobotics ApS ER200 User-Manual (en) Page 7 of 10
3.5 Mounting the teach pendant
Place the two Teach pendant holders from the controller and mount them onto the bracket
Mount the teach pendant and place the cable through the slot beside the robot.

Revision: 2019-May-31 EasyRobotics ApS ER200 User-Manual (en) Page 8 of 10
3.6 Mount the MIR top camera Place the MIR top camera on the included bracket.

Revision: 2019-May-31 EasyRobotics ApS ER200 User-Manual (en) Page 9 of 10
4 Adjustments
4.1 Adjusting the bracket for the teach pendant Turning the handles counterclockwise will loosen the bracket for rotational adjustment. Use this to achieve an ergonomic angle of the teach pendant or to park the bracket at a convenient position for transport. Tighten the handles with the bracket in the desired position.

Revision: 2019-May-31 EasyRobotics ApS ER200 User-Manual (en) Page 10 of 10
5 Dimensions
Weight: 46 kg. without robot.