Yamaha User Manual LIT-11626-21-02 Griz700 FI EPS 4WD All 1500

Electronic Payments & Statements User Guide

Optum www.optumhealthfinancial.com Page 2
COntEntSWelcome to Electronic Payments & Statements (EPS) – this guide will show you how to: 4
Get More Information about EPS on the Welcome Page – the EPS Welcome Page 5
View and Print Remittance – View Payments 6
– Payment Summary 7
– Remittance Detail 8
– Print Electronic Remittance Advice 9
– Download 835 file Save 835 file 9
– Open 835 file 10
– Claim Detail 11
Search Remittance – Payment and Claim Search 12
– Search by Date(s) of Service 13
– Search by Account number 13
– Search by Subscriber ID 14
– Search by Patient name 14
– Search by Payment number 15
– Search by Zero Payment Claims 15
– Search by national Provider Identifier (nPI) 16
– Search by Claim number 16
– Search Results 16
Payer PRAs View and Print – Printing Payer PRAs 17
Maintain Enrollment – the Maintain Enrollment Feature 20
– From the Organization Information Page 20
– Organization tab 21
– Payers tab 22
– Bank Accounts tab 22
– national Provider Identifier tab 23
– nPI Bank Accounts tab 23
– Review Edits to Organization Information 24
– Print Enrollment Form 24

Optum www.optumhealthfinancial.com Page 3
(COntEntS COntInUED)
Manage Users – Manage Users tab 25
– View and edit User 26
– Add User 27
My Profile – My Profile tab 28
– My Profile View and Edit 29
– Change Password 30
– View and Edit Security Questions 31

Optum www.optumhealthfinancial.com Page 4
Welcome to Electronic Payments & Statements With Electronic Payments and Statements (EPS) we deliver your claim payments
and Explanation of Benefits (EOB) electronically, allowing your office faster
payment, easier reconciliation, less paperwork and much greater efficiency.
Say goodbye to:
• Check clearing wait time
• Check processing fees
• Searching through files for claim and payment information
• Frustrating reconciliation tasks
And say hello to:
• Direct Deposit
• Online Payment and Claim information
• Fast and Easy information searches
• Simplified reconciliation
This Guide will Show You How to:
• Download an electronic version of your remittance advice to use with your office computer billing software
• View and print hard copies of your remittance advice
• Search for payments and claims information by Date of Service, Account number, Patient name, Payment number, and more
• Maintain your enrollment information, update office contacts, change bank account information and more
Optum www.optumhealthfinancial.com Page 5
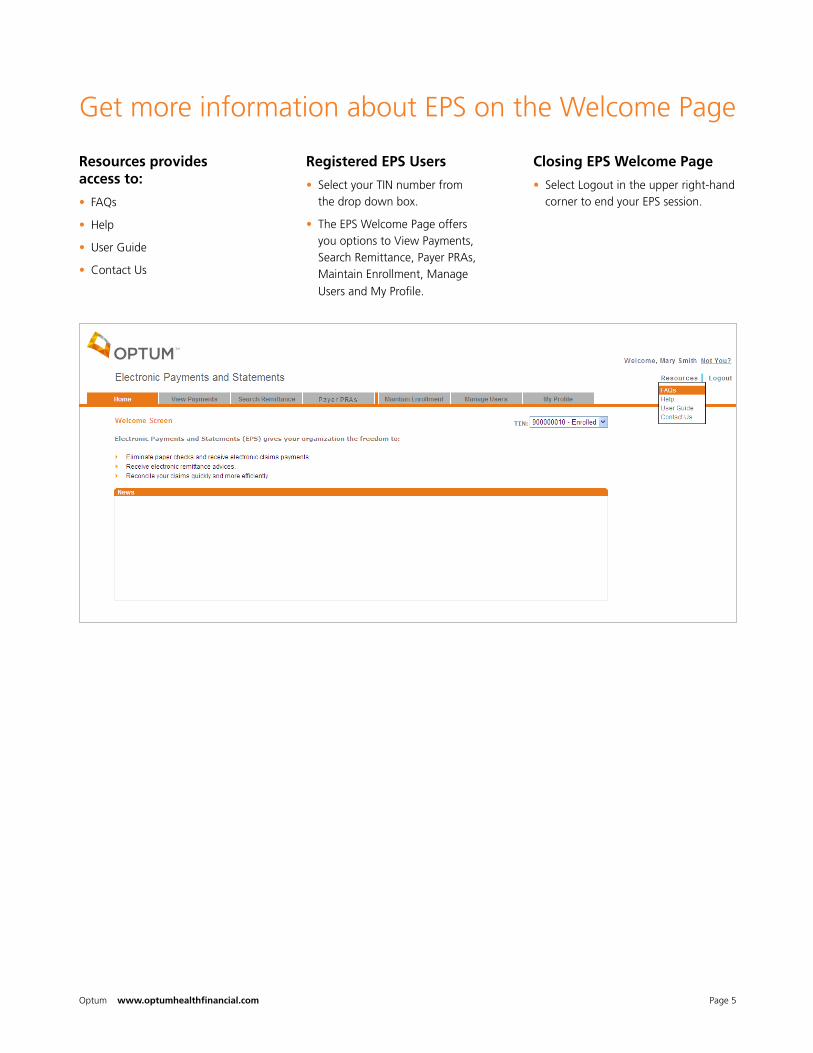
Get more information about EPS on the Welcome Page
Resources provides access to:
• FAQs
• Help
• User Guide
• Contact Us
Registered EPS Users
• Select your tIn number from the drop down box.
• the EPS Welcome Page offers you options to View Payments, Search Remittance, Payer PRAs, Maintain Enrollment, Manage Users and My Profile.
Closing EPS Welcome Page
• Select Logout in the upper right-hand corner to end your EPS session.

Optum www.optumhealthfinancial.com Page 6
View and Print Remittances
View Payments
Review summary level information for payments
• Select the View Payments tab to display the Payment Summary

Optum www.optumhealthfinancial.com Page 7
Payment Summary
• Payments display from the past 30 days as a default
• Select the Quick Search drop-down box to change payments display to the last 60 days or 90 days.
• Filter payments to view by national Provider Identifier (nPI) or tIn by choosing the appropriate selection in the ‘Filter Payments’ drop-down box located near the top of the page. (Applicable only if your organization designated payments by nPI number(s) during the EPS enrollment process. If you are already enrolled, but wish to designate future payments by nPI, please see page 19 for more information)
• Sort payments by selecting the arrow icon next to the column header. Arrow up indicates ascending order and arrow down descending order.
• View Remittance Details for a payment by locating the payment row and selecting the link for the corresponding Payment number.
• Download a 835 file for a particular payment by selecting the link Download for the corresponding payment row.
• Print an electronic remittance advice (ERA) for a particular payment by selecting the link Print Request for the corresponding payment row. Adobe® Reader® is required to use this print feature. to download Adobe Reader, select the Adobe Reader icon.
• Print the entire Payment Summary page by selecting the button Print Payment Summary. From print preview, right click your mouse and choose the print command.
• View the Deposit Status of your payment. ‘Successful ACH’ will indicate your payment was sent electronically and has been deposited into your bank account. If your pay-ment is returned, you will see a status of ‘Failed’. You will be contacted by the EPS team to correct the issue re-lating to this payment or by hovering over the Failed status, you can obtain the appropriate number to call for assistance. If no resolution to issue by third business day, EPS will mark this payment as ‘Successful Check’ and you will be receiving a paper check from your Payer’s bank.

Optum www.optumhealthfinancial.com Page 8
Remittance Detail
After selecting the link Payment Number for a payment row, the Remittance Detail page will display all claims that are included in a particular payment
• Download a 835 file for a particular payment by selecting the button Download 835
• Print an electronic remittance advice (ERA) for a particular payment by selecting the button Print Request
• Return to Payment Summary by selecting the button Return to Payment Summary
• View Additional Details for a specific claim by selecting the Claim Number link for that claim
• View the Explanation of a specific Adjustment Reason or Remark Code by selecting the code link for that claim
• View a complete list of all Adjustment Reason and Remark Codes by selecting the column header link Adj Reason Code or RMK Code
• Print either the Adj Reason Code or RMK Code list by right clicking on the page and selecting print
• View any Provider Level Adjustments (PLBs) associated with a payment by selecting the last page and scrolling to the bottom of the page
• View PLBs by scrolling or, to view the full list without scrolling, select the button Print Request and print the last page

Optum www.optumhealthfinancial.com Page 9
Print Electronic Remittance Advice
• Print an electronic remittance advice by selecting either Print or Print Request (ERAs that exceed 2500 pages can be made available for printing by clicking the Print Request link)Download dialog box will appear; select the button Open
• Adobe Reader will open and display the ERA
• Select the Print icon to print the ERA
• Adobe Reader is required to use this print feature
to download Adobe Reader, select the Adobe Reader icon located on the bottom left-hand corner of the screen
Download 835 file Save 835 file
• Download the 835 file by selecting Download 835 from the Download 835 column. Download dialog box will appear. Select Save
• the 835 file is now available to upload to your Practice Management System

Optum www.optumhealthfinancial.com Page 10
Open 835 file
• Download the 835 file by selecting the link Download 835 from the Download 835 column
• Download dialog box will appear and select the button Find
• Depending on which Windows operation System is running on your computer, a new window will open with information on software available to open your file.
• Select from software available to open your .dat file.
• Open With dialog box will appear, under Recommended Programs. Select notepad, and then select OK

Optum www.optumhealthfinancial.com Page 11
Claim Detail
After selecting the link Claim Number for a payment row, the Claim Detail page will display all service level and adjustment information for a single claim
• Each adjustment will display on a row corresponding to the appropriate service
• Print the Claim Detail by selecting the button Print Claim Detail
• Return to the Remittance Detail by selecting the button Return to Remittance Detail

Optum www.optumhealthfinancial.com Page 12
Search Remittance
Payment and claim search using Electronic Payments and Statements
• Select the link Search Remittance to display eight search options
• Search for payments and claims by Date(s) of Service, Account number, Subscriber ID, Patient name, Pay-ment number, Zero Payment Claims, national Provider Identifier (nPI), or Claim number
• Use Search Remittance to look up claim data for the past 13 months
• Select the radio button for the search option desired
• Search Criteria Definitions are available for more information by selecting Click here link
Optum www.optumhealthfinancial.com Page 13
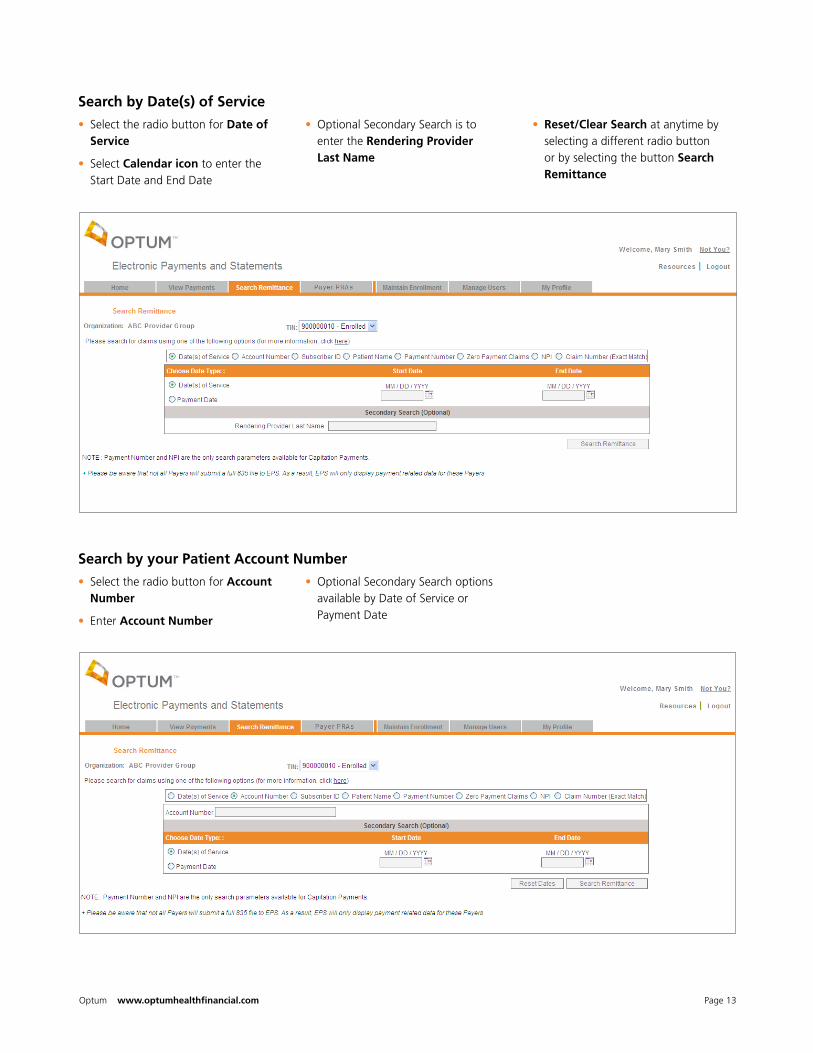
Search by Date(s) of Service
Search by your Patient Account Number
• Select the radio button for Date of Service
• Select Calendar icon to enter the Start Date and End Date
• Optional Secondary Search is to enter the Rendering Provider Last Name
• Reset/Clear Search at anytime by selecting a different radio button or by selecting the button Search Remittance
• Select the radio button for Account Number
• Enter Account Number
• Optional Secondary Search options available by Date of Service or Payment Date
Optum www.optumhealthfinancial.com Page 14
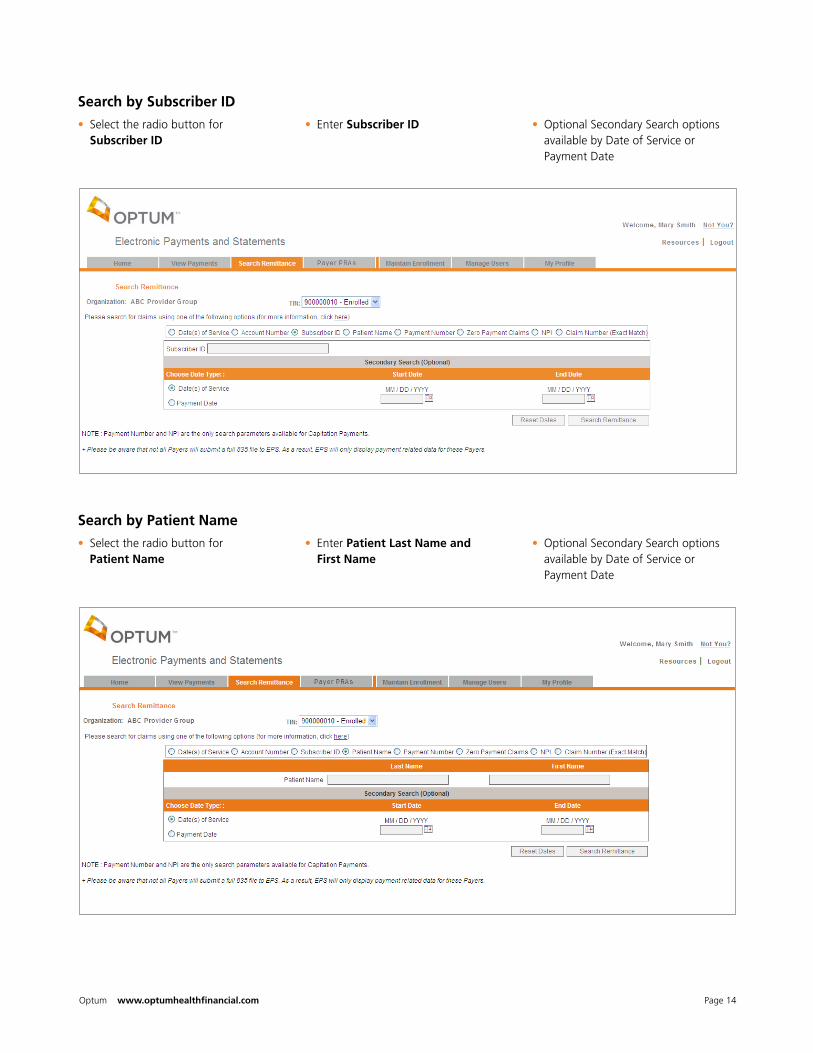
Search by Subscriber ID
Search by Patient Name
• Select the radio button for Subscriber ID
• Enter Subscriber ID • Optional Secondary Search options available by Date of Service or Payment Date
• Select the radio button for Patient Name
• Enter Patient Last Name and First Name
• Optional Secondary Search options available by Date of Service or Payment Date

Optum www.optumhealthfinancial.com Page 15
Search by Payment Number
Search by Zero Payment Claims
• Select the radio button for Payment Number
• Select radio button for Check Number or Electronic Payment Number
• Enter Payment Number
• Zero Payment Claims refers to adjustment claims or denied claims
• Select the radio button for Zero Payment Claims
• Select the radio button for either Date of Service or Payment Date
• Select the Calendar icon to enter the Start Date and End Date
• Optional Secondary Search is to enter the Patient’s Last Name

Optum www.optumhealthfinancial.com Page 16
Search by National Provider Identifier (NPI)
Search by Claim Number
• If your organization is directing payments to multiple checking accounts under a single tax Identification number (tIn), you can view payments by nPI
• Select the radio button for NPI
• Select the radio button for either the Date of Service or Payment Date
• Select the Calendar icon to enter the Start Date and End Date
• Select the radio button for Claim Number
• Enter Claim Number
Search Results
• Displays claims that match the chosen search criteria
• Select the link Payment number to view the Remittance Details
• Select the Claim number link to view the Claim Details
• Select button Print Search Results to print information
• Print preview page displays and then right click and choose the Print Command
• Select button new Search to begin a new search

Optum www.optumhealthfinancial.com Page 17
Payer PRAs View and Print
• From the EPS Welcome Page, select the Payer PRAs tab
• You may view and print up to 500 Payer PRAs at a time
• Individual PRAs for the past 15 business days are available using the Payer PRAs feature.
PRA Printing
• Locate the desired payment date • Select the link segment to open the PRA files for that payment date (Payer PRA files are available for the past 15 business days)

Optum www.optumhealthfinancial.com Page 18
• Payer PRAs processing screen displays while PRAs are downloading from the server
• Upon completion of download. Adobe Reader will launch containing up to 500 PRAs
• Select the Calendar icon to enter the Start Date and End Date

Optum www.optumhealthfinancial.com Page 19
• Select the Print icon and ‘OK’ to print the PRAs
• the Print All PRA page is still open behind in a separate window. You can print additional PRA files, if required
• to close Adobe Reader, select the Close Window “X” box on the upper right corner

Optum www.optumhealthfinancial.com Page 20
Maintain Enrollment
The Maintain Enrollment feature allows you to view or update existing enrollment details for an organization.
• to view current enrollment information for an organization select Maintain Enrollment
From the Organization Information page
• Select Edit to begin updates

Optum www.optumhealthfinancial.com Page 21
Organization Tab
• Enter changes to Organization Information. then click Continue to continue making changes, Cancel to cancel changes, or Finish if changes are complete

Optum www.optumhealthfinancial.com Page 22
Payers Tab
Bank Accounts Tab
• Update the Payment Method for a specific Payer by clicking on the button in either the Direct Deposit or Check column
• to update Organization Bank Account(s) Information, from the ‘Resources’ menu, select ‘Contact Us’ for EPS Support information
• note: Changes to Organization Bank Account(s) Information must be sub-mitted in writing
• Click Continue to continue making changes, Cancel to cancel changes or Finish if changes are complete
Optum www.optumhealthfinancial.com Page 23
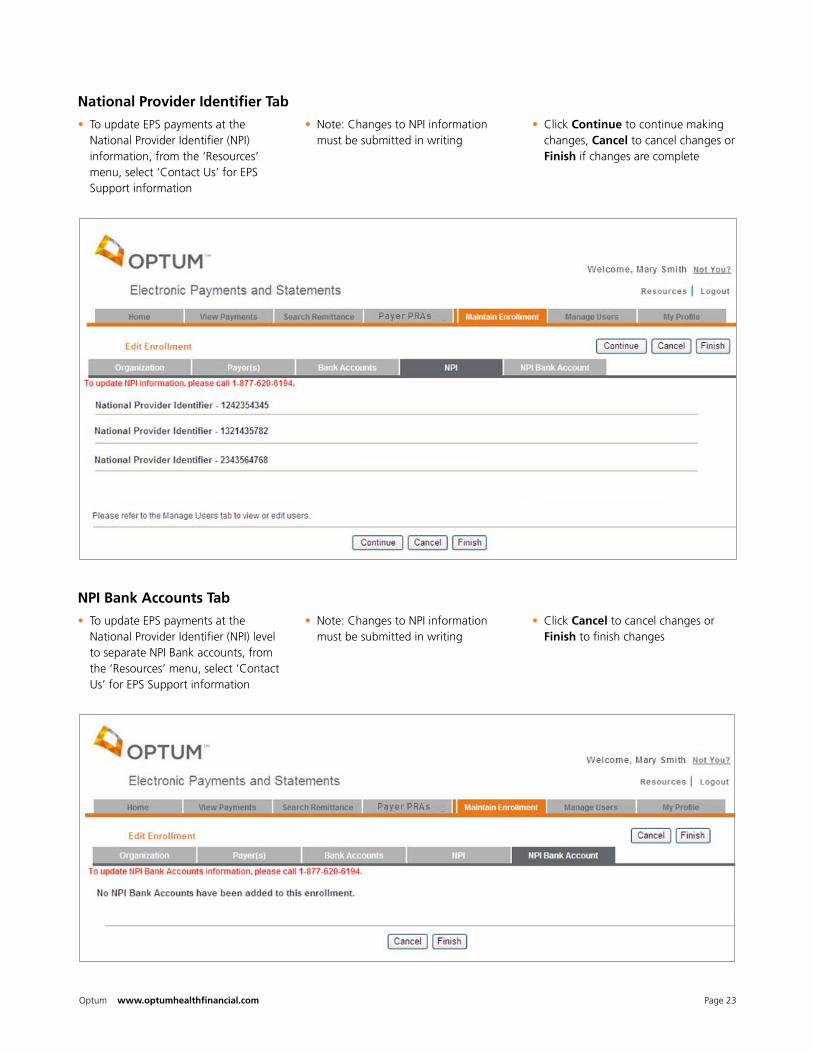
National Provider Identifier Tab
NPI Bank Accounts Tab
• to update EPS payments at the national Provider Identifier (nPI) information, from the ‘Resources’ menu, select ‘Contact Us’ for EPS Support information
• note: Changes to nPI information must be submitted in writing
• Click Continue to continue making changes, Cancel to cancel changes or Finish if changes are complete
• to update EPS payments at the national Provider Identifier (nPI) level to separate nPI Bank accounts, from the ‘Resources’ menu, select ‘Contact Us’ for EPS Support information
• note: Changes to nPI information must be submitted in writing
• Click Cancel to cancel changes or Finish to finish changes

Optum www.optumhealthfinancial.com Page 24
Review Edits to Organization Information
Print Enrollment Form
After selecting Finish on any of the previous pages, you will be returned to the Organization Information page
• If more changes are necessary, select Edit
• If information is correct, select Submit
• Click Cancel to exit Maintain Enrollment without saving any changes
• Select Print Enrollment Form
Optum www.optumhealthfinancial.com Page 25
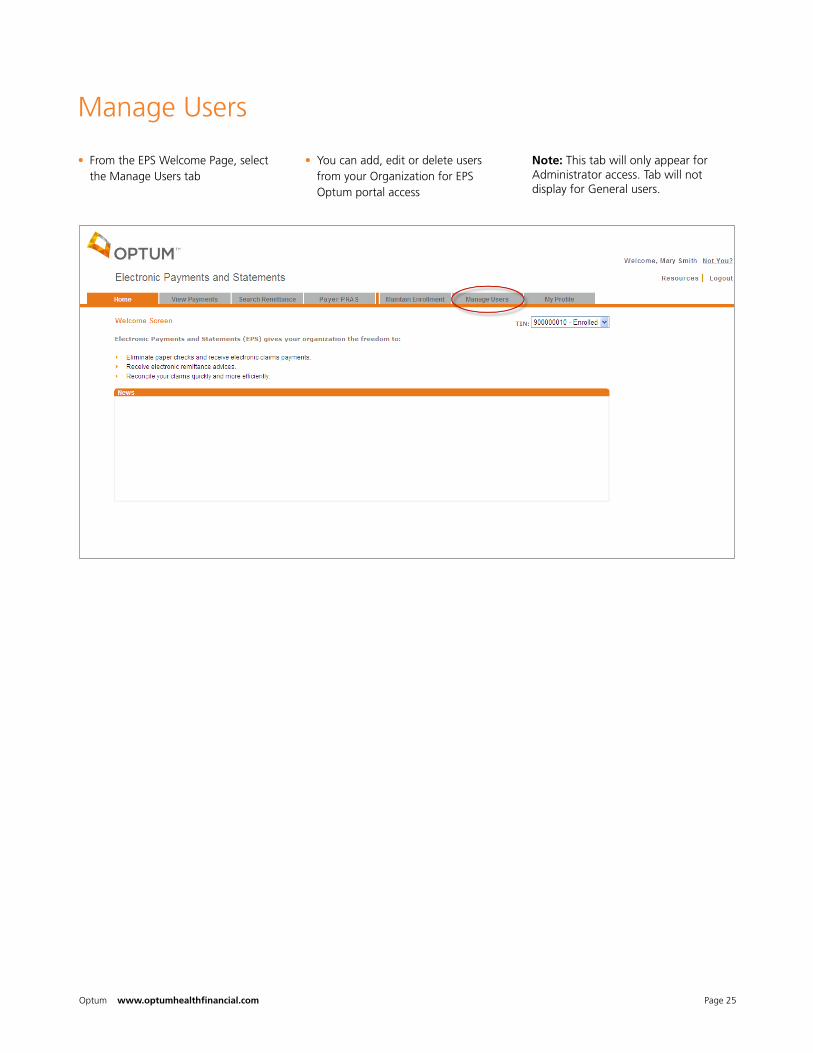
Manage Users
• From the EPS Welcome Page, select the Manage Users tab
• You can add, edit or delete users from your Organization for EPS Optum portal access
Note: this tab will only appear for Administrator access. tab will not display for General users.

Optum www.optumhealthfinancial.com Page 26
• the Manage Users feature allows the Administrator to view, add or delete their Organization’s users for EPS Optum access.
• Selection of an individual from the User List populates the user’s information within the data fields and the tIn grid below.
• Users active for EPS Optum portal access display under the User List.
• Administrator is able to view which tIn’s the user is associated to, the user’s access level (whether Administrator or General) and if they receive email notifications (for the tIn or specific tIn/nPI).
View and Edit User

Optum www.optumhealthfinancial.com Page 27
• Selection of the Add User button, allows the Administrator to add a new user to their Organization.
• Upon entry of all required data and selection of Save, pre-registration materials will be triggered for the newly added user.
• A unique User name will be created and emailed along with the pre- registration url for self-service registration to the EPS Optum portal.
• Upon the new user successfully completing their registration process, their name will then appear as an active user on the User List within the Manage Users tab.
Add User

Optum www.optumhealthfinancial.com Page 28
My Profile
• From the EPS Welcome Page, select the My Profile tab
• You can manage your own EPS Optum portal profile information.

Optum www.optumhealthfinancial.com Page 29
• View your personal information and make any updates, as necessary.
• View all the tIns you are associated with, your access level for each of these tIns and whether or not you are enabled for email notifications.
• Change your password.
• Change your security questions.
My Profile View and Edit
Optum www.optumhealthfinancial.com Page 30
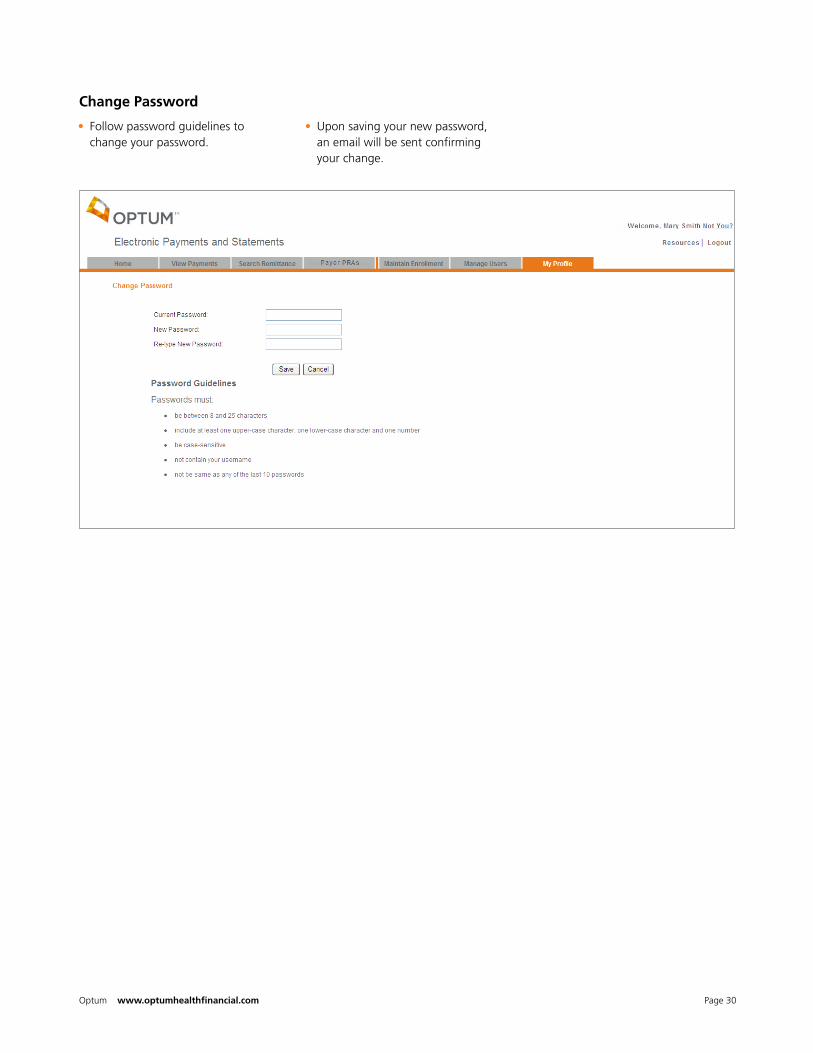
• Follow password guidelines to change your password.
• Upon saving your new password, an email will be sent confirming your change.
Change Password

Optum www.optumhealthfinancial.com Page 31
• Modify one or more of your security questions and answers.
View and Edit Security Questions