Epic 950 - TransAct · About Your Epic 950 Printer The Ithaca Epic 950TM printer represents the...
31
Epic 950 TM Spare Parts Guide P/N 95-06361 May 2010
Transcript of Epic 950 - TransAct · About Your Epic 950 Printer The Ithaca Epic 950TM printer represents the...
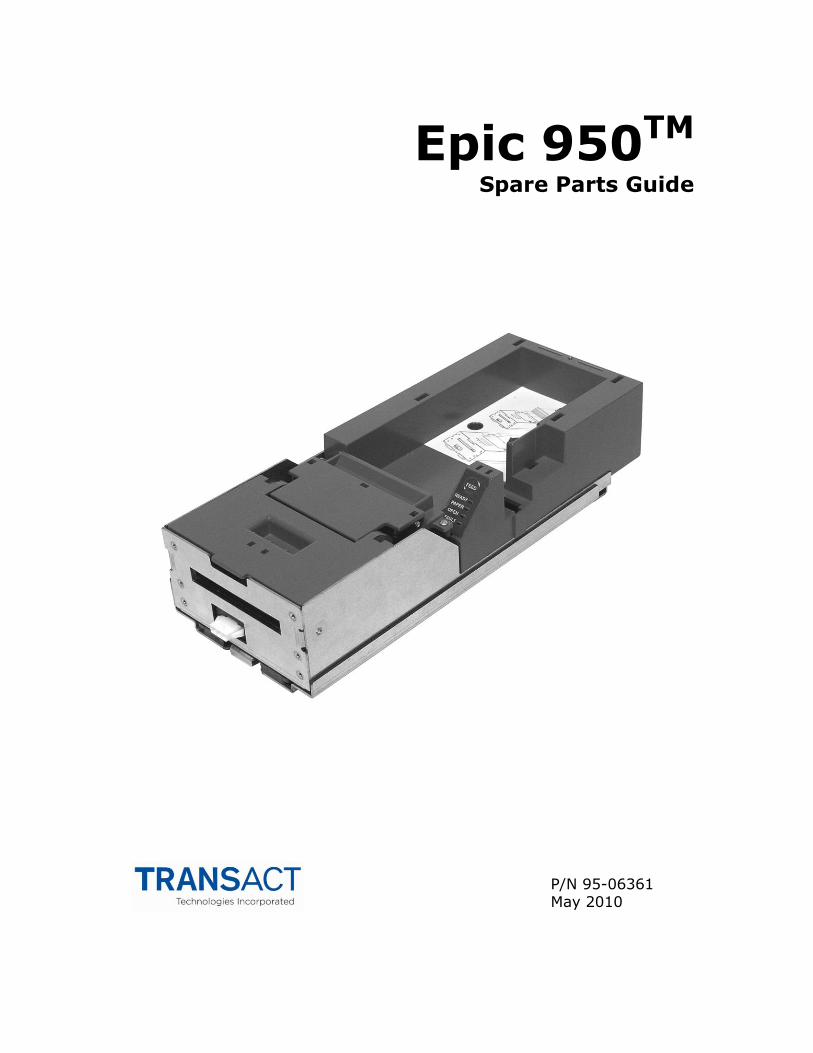
Epic 950TM Spare Parts Guide
P/N 95-06361 May 2010


i
Change History Rev A Initial release Rev B Corrected p/n in item # 18; Pg 22 updated items 2, 3 & 4 p/n’s Rev C Pg 21 added items #32 & #33 Rev D Pg 24 updated item #2 p/n Rev E Pg 21 updated items #18 & #24 p/n’s Rev F Pg 22 updated item #1 p/n’s; Pg 21 added item #34 & updated item #25
p/n; Pg 23 added item #10 & updated item #1 p/n Rev G Pg 23 updated item #10 p/n Rev H Pg 22 updated item #11 p/n (Cable) Rev J Pg 24 updated qty of item #8; updated from “Ithaca” logo to “Transact” logo Rev K Pg Updated Interface PBC option List (R95638)

ii
Disclaimer NOTICE TO ALL PERSONS RECEIVING THIS DOCUMENT: The information in this document is subject to change without notice. No part of this document may be reproduced, stored or transmitted in any form or by any means, electronic or mechanical, for any purpose, without the express written permission of TransAct Technologies, Inc. ("TransAct"). This document is the property of and contains information that is both confidential and proprietary to TransAct. Recipient shall not disclose any portion of this document to any third party. TRANSACT DOES NOT ASSUME ANY LIABILITY FOR DAMAGES INCURRED, DIRECTLY OR INDIRECTLY, FROM ANY ERRORS, OMISSIONS OR DISCREPANCIES IN THE INFORMATION CONTAINED IN THIS DOCUMENT. TransAct cannot guarantee that changes in software and equipment made by other manufacturers, and referred to in this publication, do not affect the applicability of information in this publication.
Note: Losses that can be attributed to improper installation and working procedures are not the responsibility of TransAct Technologies Inc. No part of this manual may be used to recreate any part of the Epic 950TM Printer. This manual is to be used for integration purposes only. If this manual contains any questionable information or mistakes please contact TransAct for assistance.
Copyright © 2007 TransAct Technologies, Inc. All rights reserved. Revision Level K May 2010 Printed in USA
Trademarks Some of the product names mentioned herein are used for identification purposes only and may be trademarks and/or registered trademarks of their respective companies. BANKjet, 50Plus, Insta-Load, Ithaca, "Made to Order. Built to Last", Magnetec, PcOS, POSjet, PowerPocket and TransAct are registered trademarks and Epic 950, Flex-Zone, imPort, ithaColor, iTherm, KITCHENjet, Momentum, QDT and TicketBurst are trademarks of TransAct Technologies, Inc.

iii
Table of Contents
Disclaimer ................................................................................................................... ii Copyright ..................................................................................................................... ii Trademarks ................................................................................................................. ii About Your Epic 950 Printer ........................................................................................ 1 Who Should Read This Guide? ................................................................................... 2 What Is Included in This Guide? .................................................................................. 2 Warranty Options ........................................................................................................ 2 Technical and Sales support ....................................................................................... 3
On-line Technical Support ....................................................................................... 3 Telephone Technical Support .................................................................................. 3 Return Materials Authorization and Return Policies ................................................. 3 Service Programs .................................................................................................... 4 Sales Support .......................................................................................................... 4 Contact Information ................................................................................................. 4
Epic 950 Specifications and Requirements .................................................................. 5 Standard Features ................................................................................................... 5 Optional Features .................................................................................................... 6 Printer Status LED ................................................................................................... 7
Racking/Unracking the Inner Chassis .......................................................................... 8 Loading Tickets into Feeding Mechanism .................................................................... 9 Removing Loaded Tickets ......................................................................................... 11 Cleaning the Print Head ............................................................................................ 12
Purchasing Cleaning Cards ................................................................................... 13 Printing a Self-test Ticket ........................................................................................... 13 Precautions for Disassembly ..................................................................................... 15
Necessary Tools .................................................................................................... 15 Epic 950 OEM Variations Notice ............................................................................ 15
Remove Ticket Supply Bucket from Inner Chassis .................................................... 16 Remove Printer Mechanism from the Inner Chassis .................................................. 17 Firmware Download Port ........................................................................................... 18 Spare Parts lists ........................................................................................................ 19
Complete Epic 950 Assembly ................................................................................ 19 Printer Mechanism Assembly ................................................................................ 20 Outer Chassis Assembly ....................................................................................... 22 Inner Chassis Assembly ........................................................................................ 23 Ticket Supply Bucket Assembly ............................................................................. 24

iv
Figures Figure 1. Epic 950 Printer Component Overview ............................................................. 5 Figure 2: Racking/Unracking the Inner Chassis ............................................................... 8 Figure 3: Ticket Loading and Ticket Feed Mechanism ..................................................... 9 Figure 4: Ticket Cover Shown Open for Ticket Removal ............................................... 11 Figure 5: Cleaning the Print Head ................................................................................. 12 Figure 6: Sample self-test ticket .................................................................................... 14 Figure 7: Remove Ticket Supply Bucket from the Inner Chassis ................................... 16 Figure 8: Remove Print Mechanism from the Inner Chassis .......................................... 17 Figure 9: Firmware Download Port ................................................................................ 18

Epic 950 Printer Epic 950 Spare Parts Guide
Page 1 May 2010 – Rev. K
About Your Epic 950 Printer The Ithaca Epic 950TM printer represents the very latest technology for use in gaming ticket printing applications. It features full backward compatibility for previous users of Ithaca Series 800 printers, together with a host of new features designed to improve the performance of your gaming operations, including:
TicketBurstTM, a unique buffered transport system that prints and bursts the entire ticket internally before presenting it to the operator, solving the problem of premature ticket removal.
Internal separation of tickets, providing consistently perfect single tickets accurately separated along perforation lines.
HotSwap QDTTM (Quick Disconnect Technology) lets you remove the printer without the need to disconnect power from the unit, incorporating a one-touch hot swappable design that lets you remove and replace your printer at the touch of a front-mounted latch.
Expanded status LEDs, giving you immediate visibility on printer, paper and fault status.
The ability to upgrade your firmware completely via download using the imPortTM download port, with no hardware modification required.
2-color ticket printing with user-programmable images and layout, to turn your tickets into a key part of your brand identity and marketing program.
Above all, the Epic 950 is designed for ease of programming and ease of use in your gaming operations. While supporting the full command language and macro features of the Series 800 printer, the Epic 950 introduces a new higher-level command interface which lets you quickly and easily integrate more layout and printing options than ever – while giving you the reliability, durability and uptime you have come to expect from Ithaca printers.

Epic 950 Printer Epic 950 Spare Parts Guide
Page 2 May 2010 – Rev. K
Who Should Read This Guide? This document is intended for customers ordering spare parts or those requiring information about the basic features and operation of the Epic 950 printer.
What Is Included in This Guide? This Spare Parts Guide provides a list of available spare parts and diagrams.
Warranty Options All Epic 950 Printers come with a standard 24-month standard warranty covering both parts and labor that starts upon shipment from the factory. An optional extended warranty, covering both parts and labor for an additional 12 months, may be purchased separately. For more information concerning the warranty options, please contact the Sales Department at TransAct’s Ithaca facility. You are responsible for insuring any product returned for service, and you assume the risk of loss during shipment to Ithaca C.O.D. packages are not accepted and warranty repairs are subject to the terms and conditions as stated on the Ithaca warranty policy.

Epic 950 Printer Epic 950 Spare Parts Guide
Page 3 May 2010 – Rev. K
Technical and Sales support Your Ithaca printer is backed by the resources of TransAct Technologies, a global technology firm with dedicated technical support and sales assistance. Here is how we can help you:
On-line Technical Support Our web site at www.transact-tech.com is your on-line portal to obtaining technical assistance with your Ithaca printer. Click on the Technical Support link to find documentation for your Epic 950 printer, including the Epic 950 OEM Integration Manual. Our on-line support site also includes a convenient e-mail assistance request form, where you can submit support requests 24 hours a day, and receive a return contact from a TransAct support technician during regular business hours.
Telephone Technical Support Live telephone support is available Monday through Friday from 8 AM to 8 PM Eastern US time, excluding holidays. We can provide general information about integrating Epic 950 printers with your system, technical support, documentation, or assistance in sending a printer for service. To obtain telephone support, call TransAct at (607) 257-8901 and ask for Technical Support. To help us serve you faster, please have the following information ready when you call:
The Model Number and Serial Number of the printer
A list of any other peripheral devices attached to the same port as the printer
What application software, operating system, and network (if any) you are using
What happened and what you were doing when the problem occurred
How you tried to solve the problem
Return Materials Authorization and Return Policies If the technical support person determines that the printer should be serviced at our facility, and you want to return the printer for repair, we will issue you the Returned Materials Authorization (RMA) number that is required before returning the printer. Repairs are warranted for 90 days from the date of repair or for the balance of the original warranty period, whichever is greater. Please prepare the printer being returned for repair as follows:
Pack the printer to be returned in the original packing material
Packing material may be purchased from TransAct's Ithaca Facility
Do not return any accessories unless asked to do so by a support technician

Epic 950 Printer Epic 950 Spare Parts Guide
Page 4 May 2010 – Rev. K
Write the RMA number clearly on the outside of the box
Service Programs TransAct Technologies Incorporated has a full service organization to meet your printer service and repair requirements. If your printer needs service, please contact your service provider first. If any problems still persist, you can directly contact the Technical Support Department at (607) 257-8901 or (877) 7-ITHACA for a return authorization. International customers should contact your distributor for services. TransAct offers the following service programs to meet your needs.
Extended Warranty
Depot Repair
Maintenance Contract
Internet Support
Sales Support To order supplies, receive information about other Ithaca products, or obtain information about your warranty, contact our Sales Department at the contact telephone or fax numbers listed below. To receive information on International distribution, visit our web site at www.transact-tech.com.
Contact Information TransAct Technologies Incorporated Ithaca Facility 20 Bomax Drive Ithaca, NY 14850 USA TransAct Technologies World Gaming Headquarters & Western Regional Repair Center 6700 Paradise Rd Suite D Las Vegas, NV 89119 USA Telephone (877) 7-ITHACA or (607) 257-8901 Main fax (607) 257-8922 Sales fax (607) 257-3868 Technical Support fax (607) 257-3911 Web site www.transact-tech.com

Epic 950 Printer Epic 950 Spare Parts Guide
Page 5 May 2010 – Rev. K
Epic 950 Specifications and Requirements
Figure 1: Epic 950 Printer Component Overview
1. Printer Mechanism 2. Inner Chassis Assembly 3. Printer Ticket Supply Bucket
Assembly 4. Outer Chassis Assembly
Standard Features The following features are common to the Epic 950 Printers: Key features:
Perforated fan folded tickets in a stack of 200, 400 or 600 tickets
Barcode and total ticket cash-out capabilities
TicketBurstTM – incorporating print, burst and transport zones, where the ticket is completely printed and burst before transport to operator
HotSwap QDTTM (Quick Disconnect Technology), a hot swappable printer mechanism design for easy service

Epic 950 Printer Epic 950 Spare Parts Guide
Page 6 May 2010 – Rev. K
Modular interface PCB Other standard features:
Selections of 7.5, 10, 12, 16.5 and 20 characters per inch printing
Selectable printing of Normal, Double-high, Double-wide and Double-high/Double-wide
Sensors for Burst Ticket, Ticket Low, Top-of-Form/Ticket Out, Chassis Open, and Ticket Taken
Cover Open switch
Modular printer mechanism, ticket supply bucket and sliding unit for easy maintenance
Open ticket path for ticket jam clearing
Operator interface: FEED button, status LED’s (Ready/Paper/Open/Fault)
Bezel lamp connection
imPortTM firmware and graphics download port
Print face down
Page mode printing
Audible Buzzer
Optional Features 600 count ticket capacity using optional extender walls
Dual port interface capable
RS-232 interface capable
USB interface capable
Bezels (Internal and external)

Epic 950 Printer Epic 950 Spare Parts Guide
Page 7 May 2010 – Rev. K
Printer Status LED The printer has been outfitted with a LED panel system that provides the condition of the printer by using solid or blinking status LEDs to communicate status information. The following table lists the different LED states for specific conditions within the printer.
Condition Ready LED Paper LED Open LED Fault LED
Unit Ready On Off Off Off
Cover Open On Off On Off
Chassis Open On Off Blink Off
Ticket Out On On Off Off
Ticket Low On Blink Off Off
Temperature Error Blink Off Off Blink
Paper Jam On Off Off Blink
Ram Error 2-Blink Off Off On
Checksum Error 4-Blink Off Off On

Epic 950 Printer Epic 950 Spare Parts Guide
Page 8 May 2010 – Rev. K
Racking/Unracking the Inner Chassis All Epic 950 printers use a slider/detent/latch system with latch arms to retain the Inner Chassis from accidentally being separated from the Outer Chassis. The Epic 950 is opened for service by simply pulling on the ticket cover, pulling the Inner Chassis forward from the Outer Chassis as you would a filing cabinet. If accessible, a front-mounted release lever can also be pulled on to disengage and slide the Inner Chassis.
Figure 2: Racking/Unracking the Inner Chassis
To remove the Inner Chassis, perform the following steps:
Pull on the Ticket Cover to release the rear detents, pulling the Inner Chassis towards you until its latches catch the forward detent slots in the Outer Chassis Slides.
Pull on the Release Lever and pull forward on the Inner Chassis to disconnect from the Outer Chassis (This assembly incorporates a HotSwap QDT (Quick Disconnect Technology) design, which may be removed while power is still on to the unit.).

Epic 950 Printer Epic 950 Spare Parts Guide
Page 9 May 2010 – Rev. K
To return the Inner Chassis to its base, perform the following steps:
Align the base of the Inner Chassis with the outer walls of the Outer Chassis, seating it within sidewalls A and B as shown in Figure 2.
While pulling outwards on the Release Lever, slide the Inner Chassis towards the rear of the Outer Chassis until it latches at the rear of the Outer Chassis
Loading Tickets into Feeding Mechanism When loading new ticket stacks, be sure that there is power to the printer. The first ticket of the stack must be inserted into the printer by hand. The Epic 950 printers’ ticket supply bucket is integrated with a guide to direct the ticket into the printer mechanism. Once the leading ticket enters the Top of Form sensor, the ticket will be automatically fed into the Printer Mechanism.
Figure 3: Ticket Loading and Ticket Feed Mechanism

Epic 950 Printer Epic 950 Spare Parts Guide
Page 10 May 2010 – Rev. K
Loading tickets into the ticket supply bucket: (Refer to the label on printer)
Load tickets into the ticket supply bucket, making sure that the Black Dot is positioned as shown in Figure 3.
Orient the tickets so that the Black Dot is towards the leading edge of the ticket. Feeding tickets into the Printer Mechanism: (Refer to the label on printer)
Check to ensure that the tickets have been placed in the ticket supply bucket with the proper black dot orientation.
Insert the leading ticket into the Printer Mechanism’s insertion guide area. The ticket should be inserted about a ½" into the mechanism; at this time, the machine automatically completes the feeding process.
If printer has been slid out from rack, make sure that the printer is closed.
The printer is ready to receive information.

Epic 950 Printer Epic 950 Spare Parts Guide
Page 11 May 2010 – Rev. K
Removing Loaded Tickets The Epic 950 printers have two ways to remove unused tickets from the printer mechanism:
The first way is to release the Ticket Cover by lifting and rotating backward, this will relieve pressure to the platen and tickets can be removed. This also will allow an opening that provides space to check the printer for ticket jams, or prepare the paper path for ticket replenishing.
The second way is to use the feed button, which will feed out tickets from within the printer mechanism.
Figure 4: Ticket Cover Shown Open for Ticket Removal
Unloading Tickets from the Printer by opening the Ticket Cover
1. Pull Inner Chassis away from the Outer Chassis until it stops in the open position.
2. Lift and rotate the Ticket Cover backwards, towards the rear of the printer. 3. Remove all tickets from the ticket path and check for any debris. 4. Remove any remaining tickets from the ticket supply bucket. 5. Rotate the Ticket Cover into its original closed and latched (Magnetic) position.

Epic 950 Printer Epic 950 Spare Parts Guide
Page 12 May 2010 – Rev. K
Cleaning the Print Head Two kinds of periodic cleaning operations will ensure continued high print quality from your Epic 950 printer: 1. Paper dust removal. Use a soft brush to clean the paper dust from inside the printer and chassis area. The paper dust should also be removed from the sensor optics. 2. Cleaning thermal print head. If streaking on the printed ticket is evident, the thermal print head may need to be cleaned. This can be done by inserting a thermal printer cleaning card, as shown in the instructions below:
Figure 5: Cleaning the Print Head
Detailed instructions
1. Open the cover and remove all tickets from ticket feed path. 2. Close the cover. 3. Open cleaning card pouch and remove cleaning card. 4. Insert cleaning card into feed path. 5. The cleaning card will automatically be drawn into the feed path. 6. Open the cover and then remove the cleaning card by gently pulling it back. 7. Repeat process if necessary.

Epic 950 Printer Epic 950 Spare Parts Guide
Page 13 May 2010 – Rev. K
8. Properly dispose of used cleaning card.
Purchasing Cleaning Cards Cleaning cards are available through TransAct – consult Chapter 1 for contact information by telephone or the Internet. Cards can also be purchased direct from Enefco International Ltd. at (888) 578-0141. Description: Part Number: 2.5" x 6" Thermal Cleaning Card (box of 25) 100-03322 (TransAct) 2.5" x 6" Thermal Cleaning Card (box of 25) GTP250PB (Enefco)
Printing a Self-test Ticket The Epic 950 printer has the ability to print a pre-defined self-test ticket, to test the normal printing functionality of the unit, and create a printout of the current printer configuration. To print a self-test ticket, perform the following steps:
1. Unrack the Inner Chassis. 2. Open the Ticket Cover. Do not remove the currently loaded ticket. 3. Press and hold the feed button until the Open LED goes out, then release this
button. 4. Now close the Ticket Cover, and the self-test ticket will then print. 5. Close the Inner Chassis to resume normal operation.
Figure 6 (below) shows an example of the information printed on a Self-test ticket. Your printer may print more or less information, depending on the version and revision of the printer.

Epic 950 Printer Epic 950 Spare Parts Guide
Page 14 May 2010 – Rev. K
Figure 6: Sample self-test ticket

Epic 950 Printer Epic 950 Spare Parts Guide
Page 15 May 2010 – Rev. K
Precautions for Disassembly Before disassembling any part of the printer, be sure the power is turned off. The Controller Board, Interface Board, and Slider Board can be damaged by static electricity. Observe ESD precautions. Wear a grounded wrist strap, and use a static mat or other protected work surface. If installed within a game, this printer should be removed from the game prior to commencing any disassembly operations. Consult the Operating Procedures chapter of this manual for detailed instructions on how to unrack your Epic 950 printer.
Necessary Tools The Epic 950 printer is designed to be disassembled into its major sub-assemblies with the use of a #2 Phillips Screwdriver.
Epic 950 OEM Variations Notice This Epic 950 has most likely been incorporated into another Original Equipment Manufacturer’s product. Due to this, your unit’s design may vary from the specifications and options shown here. The content of this manual is reflective of the Ithaca Epic 950 Printer, including all of its available options. TransAct does not assume support responsibility for parts other than what is shown in this manual.

Epic 950 Printer Epic 950 Spare Parts Guide
Page 16 May 2010 – Rev. K
Remove Ticket Supply Bucket from Inner
Chassis
TM
TICKET TRAY
M3 SCREWS
PRINTER MECHANISMASSEMBLY
TICKET LOWSENSOR ASSEMBLY
imPortDOWN LOADPORT
Figure 7: Remove Ticket Supply Bucket from the Inner Chassis
Loosen completely the two (2) M3 screws that retain the ticket supply bucket to the Outer Chassis.
Lift the Ticket Supply Bucket away from the Inner Chassis.
Unplug the Ticket Low Sensor Assembly and the Keypad Flex harness form the Main Controller PCB.
Repeat the steps in reverse to re-install the Ticket Supply Bucket.
TICKET SUPPLY BUCKET

Epic 950 Printer Epic 950 Spare Parts Guide
Page 17 May 2010 – Rev. K
Remove Printer Mechanism from the Inner
Chassis
PRINTERMECHANISM
PRINTER MECHANISMASSEMBLY
M3 SCREW
Figure 8: Remove Print Mechanism from the Inner Chassis
Unplug all Printer Mechanism connectors from the Controller PCB Assembly.
Remove the two (2) M3 screws on each side of the Print Mechanism and remove.
To re-install the Printer Mechanism, re-install all connectors to the Controller PCB Assembly.
Move Print Mechanism back into place and tighten M3 screws.

Epic 950 Printer Epic 950 Spare Parts Guide
Page 18 May 2010 – Rev. K
Firmware Download Port The Epic 950 printer features an imPortTM firmware and graphics download port, as shown in the figure below. This port uses a 4-pin Molex connector with an RS-232 interface. For further details on this use of this proprietary download port, please contact TransAct Technical Support.
Note that the imPortTM firmware and graphics download port is NOT a power connection port. Attempting to supply power to the unit through this port may result in damage to the unit.
Figure 9: Firmware Download Port

Epic 950 Printer Epic 950 Spare Parts Guide
Page 19 May 2010 – Rev. K
Spare Parts lists
Complete Epic 950 Assembly
No. Description (standard parts) Part No. (History)
1 Screw M3 x 0.5 Phillips Panhead 98-0611
2 Screw M3 X 8mm Phillips Panhead 98-0897
3 Assy-400 Ct Extension/Label (not shown) 95-06384 (95-05614)
3 Assy-600 Ct Extension/Label (not shown) 95-06385 (95-05615)
* Not available as a spare part

Epic 950 Printer Epic 950 Spare Parts Guide
Page 20 May 2010 – Rev. K
Printer Mechanism Assembly

Epic 950 Printer Epic 950 Spare Parts Guide
Page 21 May 2010 – Rev. K
No. Description (standard parts) Part No. (History)
1 Frame Assembly 95-05694 (95-04978, 95-04961)
2 Motor Assemble - Feed 98-04312
3 Motor Assembly - Transport 98-04312
4 Screw –M2.5x5.6mm Phps Phd (sems) 98-04991 (M068161-01)
5 Heatsink Assembly R95-04974 (95-04950)
6 Spring – Compression (Print head) M068279-01
7 Cable - Printhead 28-04036L (28-04036)
8 Platen 95-04901
9 Bearing 95-04963 (M068263-03)
10 Ring-Retaining 520-9800003
11 Ground-ESD 95-04985 (95-04945)
12 Screw-Tapping #4-24 98-7608
13 Guide-Upper Entrance 95-04967
14 Cover-Platen 95-04979 (95-04905)
15 Lever-Platen Release 95-05881 (95-05837, 95-04915)
16 Sensor-Top of Form 95-05473 (95-05149)
17 Ticket Cover 95-05924 (95-04962, 95-04981,95-04980)
18 Sensor Assembly-Ticket Taken 95-05152L (95-05152)
19 Drive Shaft Assembly 95-04903
20 Guide-Ticket Exit 95-04965
21 Gear-Idler (Transport) 95-04936
22 Gear-Drive 95-06326 (95-04949)
23 Roller Assembly-Idler 95-04914
24 Sensor Assembly-Burst 95-05150L (95-05150)
25 Gear-Idler Drive 95-05776 (M068272-01)
26 Magnet 98-6473
27 Screw-Tapping #4-24 98-04997
28 Label – Epic 950 95-05277
29 Switch-Cover Open 95-05153
30 Assy-3/3 pos harness 95-05154
31 Screw-M2x6 M068306-01
32 Washer-Spring 98-6084
33 Bracket-Burster 95-04972
34 Ring-Retaining 520-9800002
* Not available as a spare part

Epic 950 Printer Epic 950 Spare Parts Guide
Page 22 May 2010 – Rev. K
Outer Chassis Assembly
* Not available as a spare part
No. Description (standard parts) Part No. (History)
1 Assy-RS232 Interface PCB RoHs Assy-Netplex Interface PCB RoHs Assy-Dual Port RS232 Interface PCB Assy-Dual Port Netplex PCB Assy-USB/Netplex PCB RoHs Assy-I2C Interface PCB Assy-USB/Netplex IGT I/F PCB RoHs
Assy-USB WMS I/F PCB RoHs
95-04998L (95-04998) 95-05001L (95-05001) 95-05018L (95-05018) 95-05022L (95-05022) 95-05472L (95-05007) 95-05004 95-08327L
95-07133L
2 Outer Chassis 95-04894 (95-04856)
3 Rail-Slide (Left) 95-04895 (95-04883)
4 Rail-Slide (Right) 95-04896 (95-04884)
5 Nut-M3 Hex w/Lockwasher 98-0621
6 Bracket-Sensor Flag 95-04872
7 Screw-M3 x 0.5 PH 98-0611
8 Ground-Chassis 95-04879
9 Slide Intermediate 95-04857
10 Connector PCB 95-04995
11 Cable-Flex 1MM 20 Conductor 98-06499L (98-05024L, 98-05024)
12 Latch-Slider (right) 95-05636L (95-04881)
13 Latch-Slider (left) 95-05637L (95-04882)
14 Spring-Extension 95-05638L

Epic 950 Printer Epic 950 Spare Parts Guide
Page 23 May 2010 – Rev. K
** Sales of these parts restricted to approved customers only
Inner Chassis Assembly
No. Description (standard parts) Part No. (History)
1 Assy-PCB Cover 95-04863 (95-05765, 95-04863)
2 Chassis-Inner 95-04885
3 Assy-Controller PCB 95-04992
4 Screw-M3 x 0.5 PH 98-0611
5 Lever-Release 95-04866
6 Latch-Release (right) 95-04891 (95-04873)
7 Latch-Release (left) 95-04890 (95-04868)
8 Housing-Release 95-04867
9 Spring-Compression 95-04870

Epic 950 Printer Epic 950 Spare Parts Guide
Page 24 May 2010 – Rev. K
10 Cover-Dip Switch 95-06695 (95-04889)
* Not available as a spare part
Ticket Supply Bucket Assembly
No. Description (standard parts) Part No. (History)
1 Bucket-Ticket Supply (200) 95-06347 (95-04849)
2 Sensor Assembly-Paper Low 95-05151L (95-05151)
3 Assy-Keypad PCB 95-05015
4 Overlay-Keypad 95-04862
5 Label-Ticket Loading 95-04880
6 Cable-Flex 98-05023L (98-05023)
7 Holder-Keypad 95-06334
8 Screw-#4 Plastic Thread Forming 98-7608

Epic 950 Printer Epic 950 Spare Parts Guide
Page 25 May 2010 – Rev. K
* Not available as a spare part