Environmental Health and Safety (EHS) Orientation Training Faculty and Staff.
88
Environmental Health and Safety (EHS) Orientation Training Faculty and Staff
-
Upload
christian-walker -
Category
Documents
-
view
218 -
download
3
Transcript of Environmental Health and Safety (EHS) Orientation Training Faculty and Staff.

Environmental Health and Safety
(EHS)
Orientation TrainingFaculty and Staff
Introduction
The objectives for this training session are:
1. To understand why environmental health and safety is important to everyone.
2. To become familiar with Ringling College’s procedures.

This training presentation is an introduction to EHS. Specialized training is available from the department of EHS and includes:
• Hazard communication• Bloodborne pathogens• Safe lifting
and many other programs, see: http://www.ringling.edu/index.php?id=480
Introduction

About EHS and Public Safety
The departments of …
EHS and Public Safety
develop policies and procedures to ensure the college’s community and
environment remain safe and healthy.

About EHS
The responsibilities of the department of
EHS include the development, management,
and enforcement of occupational & academic
environmental health and safety programs.

About EHS
• The College’s EHS policy provides information about the organization
of EHS and the procedures.
• Employees MUST read the policy which is available on the EHS
website.

About Public Safety
Main Campus
The office of Public Safety is responsible for the safety and security of the
college’s community.
Staff are available 24 hours a day, 365 days a year. They are trained in first aid & CPR and can be contacted at x
359 7500.
EMERGENCY SERVICES• The Office of Public Safety is designed to
handle emergency situations that may occur on campus and will contact outside agencies for support when needed.
• If you need emergency police assistance pick up any campus telephone and dial 9-911. Ask the operator for the Sarasota Police Department. The call will be transferred to the Sarasota Police Station and police units will be dispatched to your emergency.
• Once the police have been dispatched, call 359-7500 to notify the Office of Public Safety.

EMERGENCY SERVICES
• If you are reporting a fire or a medical emergency dial 9-911. Explain to the operator the emergency details. The Operator will transfer you immediately to the Sarasota County Fire Department.
• After the fire department has been notified, call 359-7500 to notify the Office of Public Safety.

HOW TO REPORT AN EMERGENCY
When calling, stay calm and carefully explain the problem and location. DO NOT HANG UP, UNLESS TOLD TO DO SO.
The Dispatcher will ask you questions to provide responding emergency units with vital information. EMERGENCY HELP IS NOT BEING DELAYED. The Dispatcher is directing emergency units by radio as you are providing the requested information. COOPERATE fully with the Dispatcher.
EMERGENCY TELEPHONES
The following telephones are available to report an emergency on campus:
• Blue light phone towers are located throughout the campus
• Office telephones (call 7500 or 9-911)
• Public pay telephones (911 calls are free)
• Phones in elevators connect directly to the Office of Public Safety

Blue Light Phone TowersThe blue light phones provide a 24-hour direct phone link to the Public Safety Communication Center. Each tower has two activation buttons: one for "information" and one for "emergency." When the VOIP phone is activated, the constantly burning blue light at the top of the tower flashes. A security camera is focused on each tower, enabling the Communications Officer on duty to see the caller while talking to him or her on the phone. These call boxes are not restricted to emergency situations and may be used for non-emergency purposes.
For a map of the locations see:
http://www.ringling.edu/fileadmin/content/admissions/images/CampusMap.jpg

EMERGENCY SERVICES
Longboat Key Center for the Arts& Englewood Art Center
• If you need emergency assistance pick up any telephone and dial 911. Ask the operator for the appropriate department.
• Inform the front desk of the situation by calling 383-2345 (LBKCA) or 474-5548 (EAC)

First Aid Procedures• Do not move a seriously injured person unless they are in danger, such as being near falling objects, fire, or if a risk of explosion exists.
• Call emergency services and request an ambulance for injuries that appear serious. Give as much information as possible about the injury or illness and the condition of the person. Follow all instructions given to you.
• Stay with the person. Administer first aid if you
are trained and keep the person as calm as possible.

Bloodborne Pathogens• Bloodborne pathogens are carried by blood and other body fluids and may cause human diseases.
• Examples include HIV and Hepatitis B.
• Avoid contact with blood or body fluids.
• Wear protective equipment, especially gloves & safety glasses.
Extra training is available for “at-risk” persons.You will be notified if your position places you at risk.

Temperature Stress - Heat
• Sunburn - keep skin covered• Heat Cramps - drink diluted “Gatorade”• Heat Exhaustion - heavy sweating, cool skin
– Cool victim, seek medical attention if vomiting
• Heat Stroke - medical emergency– Hot, dry skin, rapid then weakening
pulse– Move person to cool shaded area

Fire Emergency Procedures
Upon discovering a fire, close the door to the room where the fire is located and immediately sound the building fire alarm. Pull stations are located in hallways.
All students and employees must evacuate buildings when a fire alarm sounds.
• Call the emergency services. Inform theOffice of Public Safety or the front desk andgive specific location and description of the fire.

Fire Emergency Procedures• DO NOT USE ELEVATORS - USE STAIRWAYS ONLY
• ASSIST PERSONS WITH DISABILITIES IN EXITING THE BUILDING.
• Warn occupants to leave the building. After leaving the building, warn others who may attempt to enter the building.
• Close office doors and if time permits, lock file cabinets before leaving. If you are unable to move, request assistance from those nearest you. In the event no one renders assistance, proceed to the nearest stairway landing and shout for help and wait there until help arrives. If you cannot get to a stairway, stay in a room, shut the door, and go to a window and signal for help.

Fire Emergency Procedures• Evacuate to a distance of at least 300 feet from the building or as directed by emergency personnel.
• Do not return to the building until instructed to do so.
• In order to respond effectively in an emergency situation, be aware of the location of fire alarm pull stations, extinguishing equipment, stairwell safe areas, and exit routes. Make yourself aware of these details in your work or classroom area.

Accidents and Incidents• Any accident or incident however small MUST be reported to the Office of Public Safety.
• Call 359-7500
• Investigations occur to prevent accidents from reoccurring.
Accidents and Incidents
Yesterday’s near miss could betomorrow’s serious accident.
Serious accidents can be avoided if near miss events are investigated and action taken to
remove the hazard.

Office SafetyUnderstanding potential hazards that may
be created in the office environment is essential in preventing accidents and
injuries. Some of the well-known causes of incidents in the office are :
• Floors• Walkways• Electricity
• Files• Storage
• Equipment and Machines

FLOORS
Carpets can be trip hazards. If the carpet starts to…
Wear, Tear or
Come loose
REPORT the defect to FACILITIES via the campus portal.

FLOORS• Clean up spills as soon as possible
and notify Facilities Services about any water leaks.
Wet carpets are an ideal place for mold growth.
Walk with special care over wet floors and when you have wet shoes. On rainy days, take a few extra minutes to wipe your shoe soles as soon
as you enter any building on campus.

WALKWAYS• Keep trashcans, briefcases and other items out
of walk spaces. You may know it is there, but your coworker may not!
• Report to Facilities any difference in floor levels that could cause an accident. Brightly colored
tape is a great warning of that “sudden step ahead”.
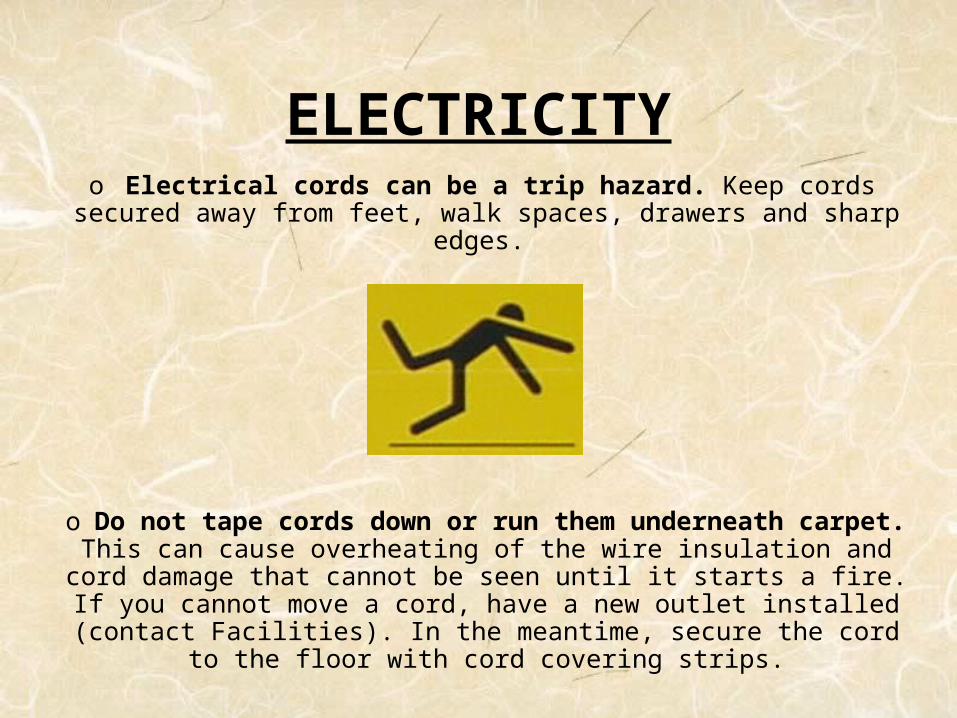
ELECTRICITYo Electrical cords can be a trip hazard. Keep cords
secured away from feet, walk spaces, drawers and sharp edges.
o Do not tape cords down or run them underneath carpet. This can cause overheating of the wire
insulation and cord damage that cannot be seen until it starts a fire. If you cannot move a cord, have a new
outlet installed (contact Facilities). In the meantime, secure the cord to the floor with cord covering strips.

ELECTRICITY
• Electrical equipment should be plugged directly into the wall outlet. Do not use
extension cords for permanent appliances and do not use power strips at all.
• Exception: Approved power strips for computer equipment.
• Keep ignitable materials away from outlets.
ELECTRICITY• Space heaters can cause burns and fires. If you must use a space heater, follow these guidelines:
1. Check the heater for proper operation: - functioning thermostat- safety tip-over switch- proper grounding or double insulation, and
a suitable guard for heating elements- If you observe arcing or unusual odors
from the heater, unplug it and ask to have it rechecked
2. Keep ignitable materials at least three feet away from the front of the heater at all times
3. Never leave a heater on and unattended

FILES SAFELY ORGANIZED
• Organize work at the desk. Keep items that will be used frequently within reach.
• Organize file cabinets to have frequently accessed files at waist or chest level.
• Place infrequently used, heavy file loads in the bottom levels and lighter loads in the top drawers.
• Do not store files on top of the cabinet.
• Open one drawer at a time. Opening two drawers at once can cause the entire cabinet to tip – right towards you!
• Likewise, do not put heavy items in the top drawer with nothing in the bottom. This can also cause the cabinet to tip.

STORAGE
• Use the proper equipment to reach high items. Step stools and ladders are small, inexpensive ways to make the job easier and safer.
• Do not store heavy objects above the head.
• Never stand on revolving chairs or chairs with castors!
• Do not stack items so high they block smoke detectors and sprinklers. Allow 18" clearance as required by the National Fire Protection Association.

EQUIPMENT & MACHINES
• Put equipment away properly when you are finished with it.
• The first time you use a new piece of equipment, read the instructions and ask someone who has used it before.
• Store sharp items such as pens and scissors pointing downward when not in use. Always carry scissors pointing downwards.

GENERALSAFETY
• Avoid picking up broken glass with your bare hands. Use a broom and a dustpan (see the procedure for sharp objects).
• Do not attempt to stop an elevator door with your hands. Take the next elevator and avoid the hand crush hazard.
• Always use handrails on the stairs.
• Do not lean too far back in your chair. Do not use desk chairs with less than 5 castors. They tip over much more easily than 5 castor chairs.
• Have broken equipment fixed or thrown away. If you leave the equipment lying around, someone may pick it up and try to use it.

GENERAL SAFETY
1.Know and use safe working procedures
2.Avoid obvious unsafe acts
3.Keep work areas clean and uncluttered
4.Report all injuries, illnesses, or near misses
Try to be better than just “generally safe”

Currently there is no specific OSHA standard for ergonomics. However, Ringling College is committed to
educating employees on ergonomics and providing a workplace free of ergonomic stressors.
Making the work fit you!
ErgonomicErgonomicss

Ergonomics is the scientific discipline concerned with the understanding of
interactions between people and elements of a system (lifting/computer
use). The ergonomics profession applies theory to optimize human well
being by making alterations to the system involved.
What is Ergonomics?

Ergonomic stressors are parts of a job that can cause discomfort or even injury if exposed for long periods of time. The three types of Ergonomic Stressors to look for are:
1. Repetition
2. Force
3. Postures - Awkward, Extreme, Static
Ergonomic Stressors

A repetitive task is performed over and over with little change in motions or muscle use.
• Typing• Assembly line work
• Sorting • Filing
RepetitionErgonomic Stressors

Force: High force tasks generate heavy exertion for the muscles involved.
ForceErgonomic Stressors
• Lifting • Grasping • Pinching
• Operating power tools
• Twisting• Hitting objects

Extreme/Awkward/Static Postures: Holding muscles outside of the Neutral Position or in a fixed position for a
long period of time.
Neutral Position: The range of motion that is considered reasonable for each joint.
PostureErgonomic Stressors
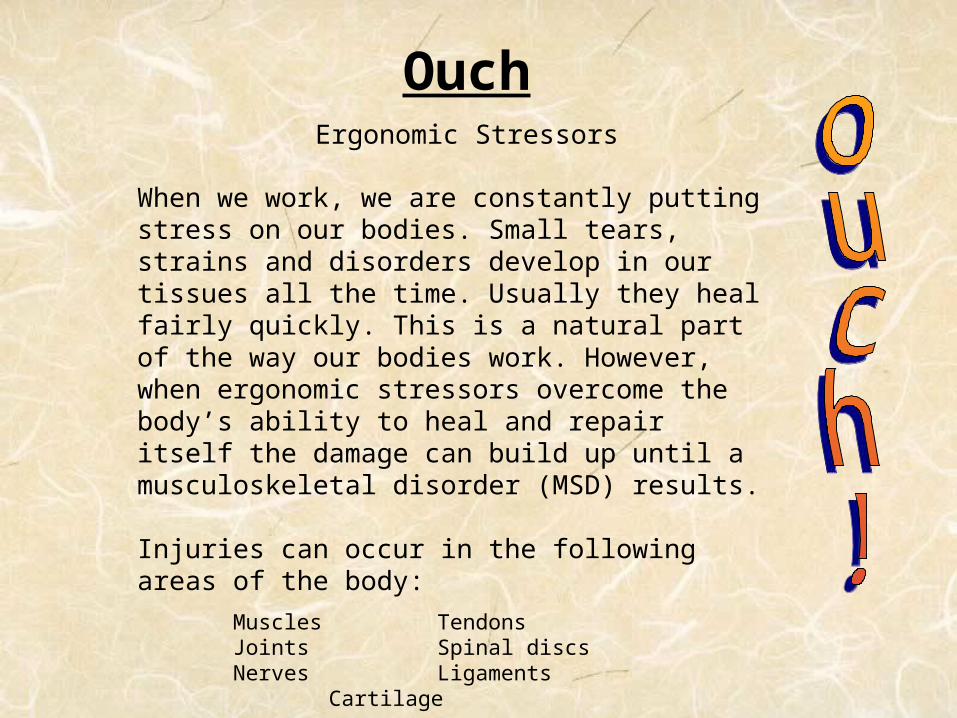
When we work, we are constantly putting stress on our bodies. Small tears, strains and disorders develop in our tissues all the time. Usually they heal fairly quickly. This is a natural part of the way our bodies work. However, when ergonomic stressors overcome the body’s ability to heal and repair itself the damage can build up until a musculoskeletal disorder (MSD) results.
Injuries can occur in the following areas of the body:
Muscles TendonsJoints Spinal discsNerves Ligaments
Cartilage
OuchErgonomic Stressors

The parts of the body susceptible to musculoskeletal disorders do not always have nerve endings designed to tell us that a musculoskeletal disorder is developing. Instead, we must rely on warning signs given to us from nearby parts of the body. For example, in Carpal Tunnel Syndrome, the hands often feel sore and tingly, like they have fallen asleep. The problem is not in the hands, however; it is in the median nerve where it passes through the wrists. The wrists may only feel mildly sore or may feel no pain at all. The following warning signs serve as a signal that ergonomic stressors are present and need to be corrected.
Warning SignsErgonomic Stressors
• Discomfort - pain. If it wakes you up at night, follows you
• Tingling - numbness home, or appears as soon as you get to
• Burning work, take notice! • Swelling • Change in color • Tightness, loss of flexibility
If you are experiencing any of these warning signs, you should immediately….
• Report the symptoms to your supervisor or department head
• Be evaluated by EHS
Let the right people know!
Ergonomic Stressors
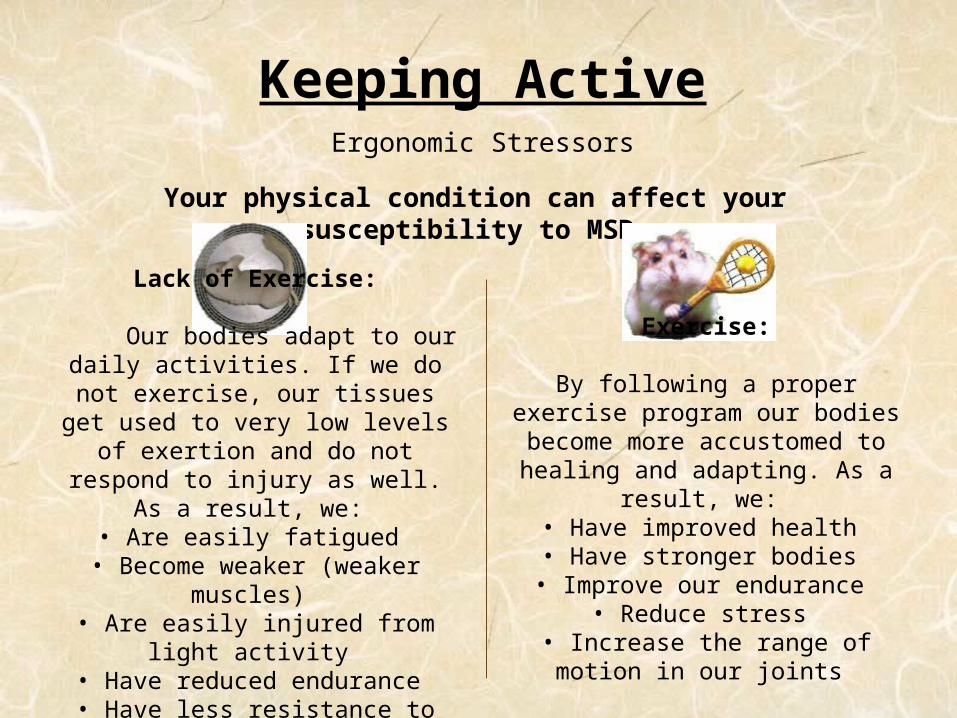
Keeping ActiveErgonomic Stressors
Your physical condition can affect your susceptibility to MSDs
Lack of Exercise:
Our bodies adapt to our daily activities. If we do not exercise, our tissues get used to very low
levels of exertion and do not respond to injury as well. As a
result, we: • Are easily fatigued
• Become weaker (weaker muscles)
• Are easily injured from light activity
• Have reduced endurance • Have less resistance to illness
Exercise:
By following a proper exercise program our bodies become
more accustomed to healing and adapting. As a result, we: • Have improved health • Have stronger bodies
• Improve our endurance • Reduce stress
• Increase the range of motion in our joints

Ergonomic stressors can occur outside of work as well.
Be on the lookout for too much exposure.
Be especially aware of activities that expose you to the same kinds of ergonomic
stressors that you encounter at work.
Ergonomic StressorsOutside of work

Safe LiftingSafe Lifting

• By age 50, approximately 85% of Americans have had one or more episodes of back pain. In working-age adults, back problems are the most frequent cause of activity limitations. Lifting incorrectly can increase the risk of developing a back injury.
• Remember the section on musculoskeletal disorders? If small tears build up in our tissues faster than they can heal, an MSD can result. This is how many back injuries are thought to occur. Tiny cracks develop in the shock-absorbing spinal disks between vertebrae during lifting. Too much lifting, especially incorrect lifting, can cause those cracks to build up faster than the disk can heal until the disk starts to bulge or rupture. Force on the spine creates those tears. The more force, the more likely a tear will occur.
Why lift safely?Safe Lifting

• If it looks heavy or awkward, it probably is; ask someone to help you, or use a mechanical device
• Think about the distance and height to the destination before lifting
• Avoid carrying more than 30 pounds by yourself
• Get help for objects with a width 18 inches or greater
• If possible, break the load down and make several trips with more manageable loads
Pre-LiftSafe Lifting

• Feet shoulder width apart
• Crouch, don’t stoop
• Get a good grip on the object
• Keep the object close to your body
• As you grip the load, keep your back straight, shoulders back, and stick your buttocks out.
• Let your legs push your body up slowly and smoothly, no jerking motions.
LiftSafe Lifting

• Elbows close to your side and at right angles
• Move smoothly avoiding quick movements
• No twisting while lifting or carrying, move your feet to pivot
• Set the load down
• Squat down
• Bending at the hips and knees
• Keep your lower back arched inwards
Carry and placement
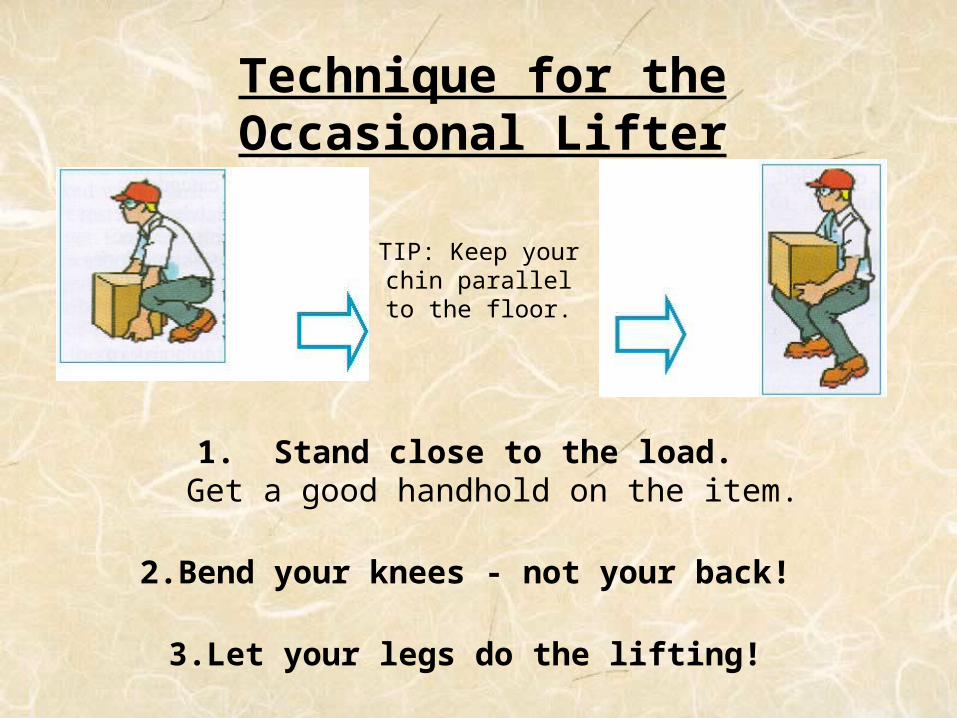
1. Stand close to the load. Get a good handhold on the item.
2.Bend your knees - not your back!
3.Let your legs do the lifting!
Technique for the Occasional Lifter
TIP: Keep your chin parallel to
the floor.

Sometimes you will encounter objects that are too heavy, large, or oddly shaped for you to safely lift unassisted. Look
for tools you can use to help you with the lift or take the time to get someone to help with the lifting. In some
situations (reaching into a deep bin for example) it may not be possible to use the ideal lifting technique. In those
situations it is more important to bring the load close to you than to bend the knees.
The right tools for the job
OR
Tip: Pushing a load is better for the back and shoulders than
pulling.
Use the right tools!
Get help with heavy or awkward
loads!

EHS provides training for employees that regularly perform manual handling as part of their job.
Contact EHS for details
http://www.ringling.edu/index.php?id=486
Remember!

Computer Computer WorkstationWorkstation
Introduction
The following section covers the basics of how to set up a computer workstation. While you read this section think about ways you can apply these rules to your
own workstation.
• Most employees use a computer as part of their day-to-day work operation.
• A computer takes up considerable space on the desktop, which pushes everything else out of place.
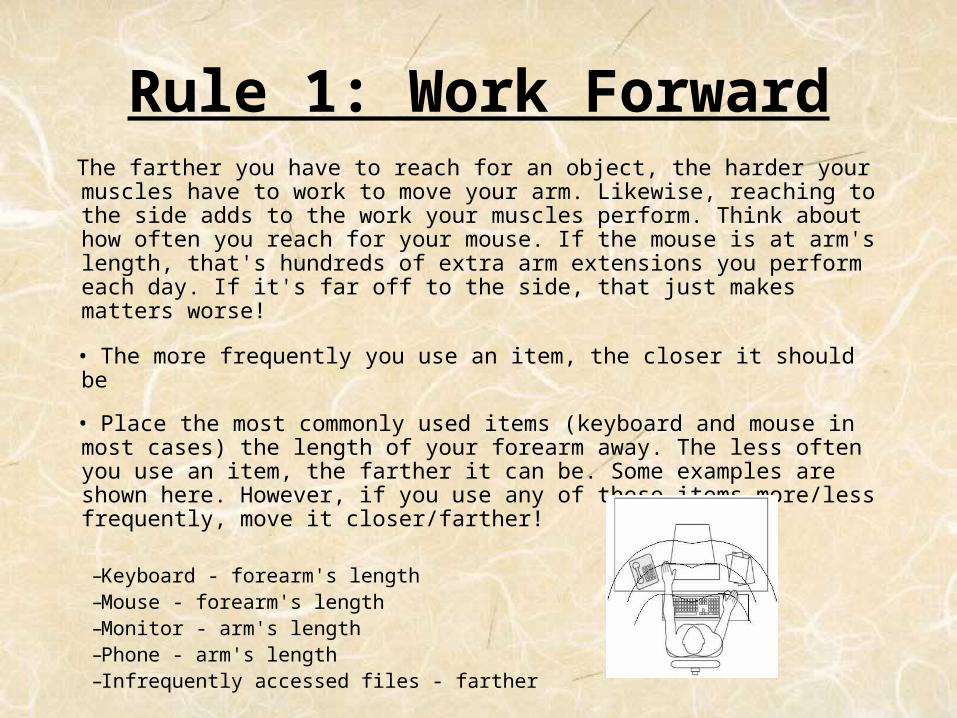
Rule 1: Work ForwardThe farther you have to reach for an object, the harder your muscles have to work to move your arm. Likewise, reaching to the side adds to the work your muscles perform. Think about how often you reach for your mouse. If the mouse is at arm's length, that's hundreds of extra arm extensions you perform each day. If it's far off to the side, that just makes matters worse!
• The more frequently you use an item, the closer it should be
• Place the most commonly used items (keyboard and mouse in most cases) the length of your forearm away. The less often you use an item, the farther it can be. Some examples are shown here. However, if you use any of these items more/less frequently, move it closer/farther!
–Keyboard - forearm's length–Mouse - forearm's length–Monitor - arm's length–Phone - arm's length–Infrequently accessed files - farther

Remember!Computer Workstation
Give your shoulder a break! Keep the mouse near the keyboard.
Special note: it is important to keep the monitor in front of you. Constantly looking to the side at a monitor can
contribute to pain in the neck and shoulders.
* When making changes to your workstation, you should adjust the chair first. Don't worry about the height of the
keyboard for the moment. Those can be adjusted later

Rule 2: Adjust your chairComputer Workstation
Seat Height Adjust the seat height so your feet can be flat on the floor with your thighs parallel to the floor. Your feet don’t have to stay flat all the time though, feel free to shift postures throughout the day.
Lumbar Support Adjust the height of the backrest so that it fits into the small of your back. Add additional lumbar support if needed (a towel or commercially available pad). Make sure adding a pad won’t make the seat pan too short!
Armrests The armrests should be just below elbow height when your elbow is relaxed. If your armrests are too low, build them up with foam or towels or remove them.

Rule 3: Good PostureThere is no perfect posture. Shifting position frequently
throughout the day is perfectly acceptable and eliminatesstatic posture. Some elements of good postures are:
• Your feet should reach the floor – Adjust the chair height if necessary – Use a footrest only as a last resort. Footrests only allow you
one place to put your feet, preventing frequent posture shifts.
• In most seated postures, keep your thighs parallel to the floor
• Find reasons to stand up frequently. 30 seconds of standing or walking every 30 minutes gives the body a chance to recover from
prolonged sitting (i.e. static posture).

Rule 3: Good PostureComputer Workstation
There is more than one acceptable posture. Switch between postures as you work to give your body
some variety. Some examples of acceptable postures are shown here.
“Classic” 90 degree
Forward tilt Reclined

Rule 4: Keyboard and Mouse
Computer Workstation• The best location for the keyboard and mouse is at or slightly below elbow height and forearm’s length from the body. This puts the muscles in the arm at a position where they are strongest. • Where possible, try to put the keyboard at the same angle as your forearms. This helps keep the wrists straight. • Use wrist rest sparingly. The idea behind wrist rests is to reduce the pressure from resting the wrists on a table top. An even better idea is to NOT rest the wrists at all while typing. Put the mouse as close to the keyboard as
possible, at the same height and distance from you.
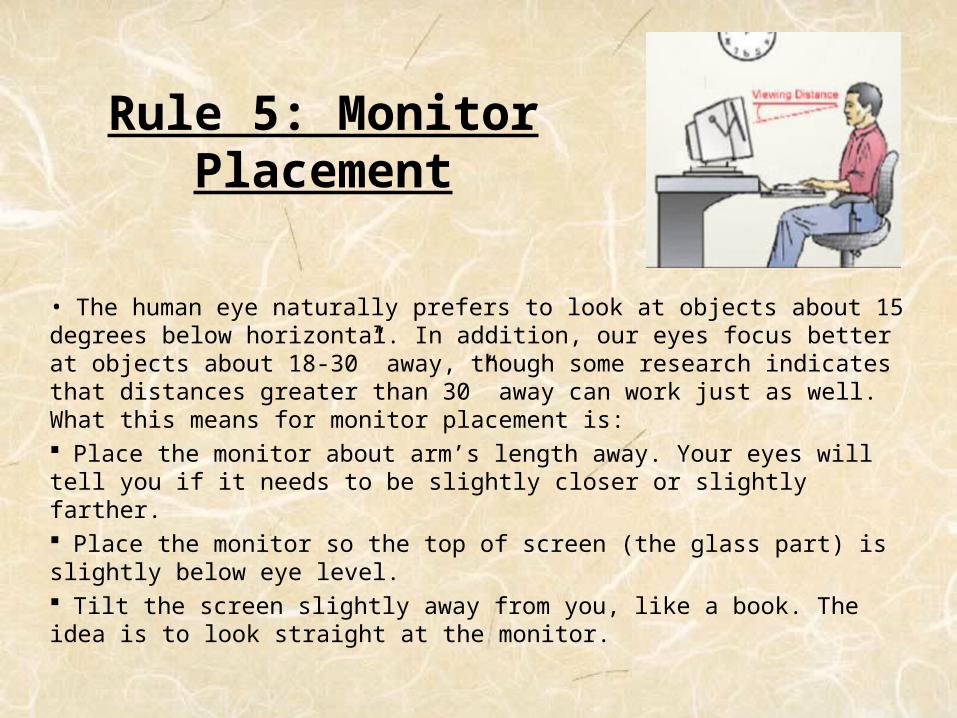
Rule 5: Monitor Placement
• The human eye naturally prefers to look at objects about 15 degrees below horizontal. In addition, our eyes focus better at objects about 18-30” away, though some research indicates that distances greater than 30” away can work just as well. What this means for monitor placement is: Place the monitor about arm’s length away. Your eyes will tell you if it needs to be slightly closer or slightly farther. Place the monitor so the top of screen (the glass part) is slightly below eye level. Tilt the screen slightly away from you, like a book. The idea is to look straight at the monitor.

Rule 6: Pay Attention to Things that Bug
YouComputer Workstation
• Think back to the MSD warning signs. One of the signs is pain that won’t go away. If there is an aspect of the workstation that irritates you or causes you discomfort when you have to deal with it, take note! There may be a way to improve the situation • If you transcribe documents (or are frequently referencing a piece of paper), keep the document in front of you as much as possible. Use a document holder.• If your hands or wrists frequently rest on a sharp edge, think about ways to avoid the edge. Reposition the keyboard. • If you have glare on your monitor screen, try to position the monitor away from light sources first. • Eyes, back, body sore?
– Take a Break! For 30 seconds per 30 minutes stand up and look out the window
– Perform some desk exercises
Desk ExercisesComputer Workstation
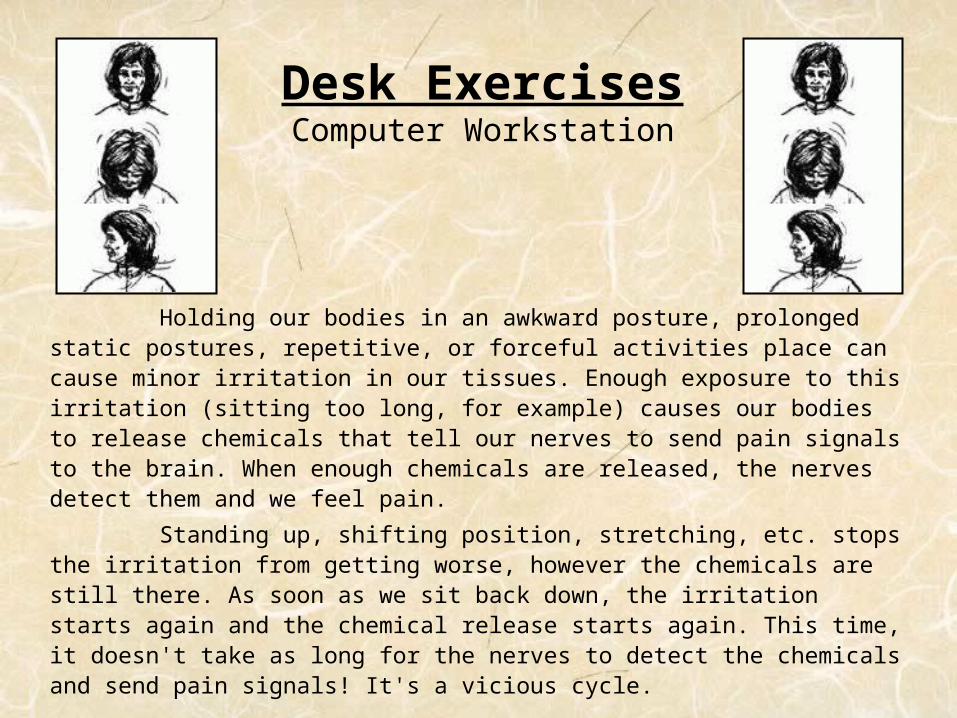
Holding our bodies in an awkward posture, prolonged static postures, repetitive, or forceful activities place can cause minor irritation in our tissues. Enough exposure to this irritation (sitting too long, for example) causes our bodies to release chemicals that tell our nerves to send pain signals to the brain. When enough chemicals are released, the nerves detect them and we feel pain.
Standing up, shifting position, stretching, etc. stops the irritation from getting worse, however the chemicals are still there. As soon as we sit back down, the irritation starts again and the chemical release starts again. This time, it doesn't take as long for the nerves to detect the chemicals and send pain signals! It's a vicious cycle.

Desk ExercisesComputer Workstation
Performing exercises at your desk can help break this cycle. Here are a few of the exercises you can use to remain pain free:
• To reduce eye strain focus on something in the distance.
• Head rolls side to side and front to back
• Arms over the head stretching side to side
• Arms over the head stretching backwards
• Stretching legs outward off the floor
• Ankle rolls

Ergo Quick Check
Ergo Quick Check is a review of the key elements to setting your computer workstation up properly.
1. Work in front-Monitor, mouse, keyboard arranged in front of you
2. Adjust your chair-Height, depth, backrest
3. Good posture-Feet on floor, thighs parallel to floor, shift posture occasionally
4. Keyboard and mouse-In lap, slightly below elbow level, same angle as forearm
5. Monitor-Arm's length, text slightly below eye level, angled like book with top farther than bottom.
6. Pay attention to warning signs!

These signs are described individually.
Safety SignsSafety SignsThere are five types of signs that are commonly displayed…
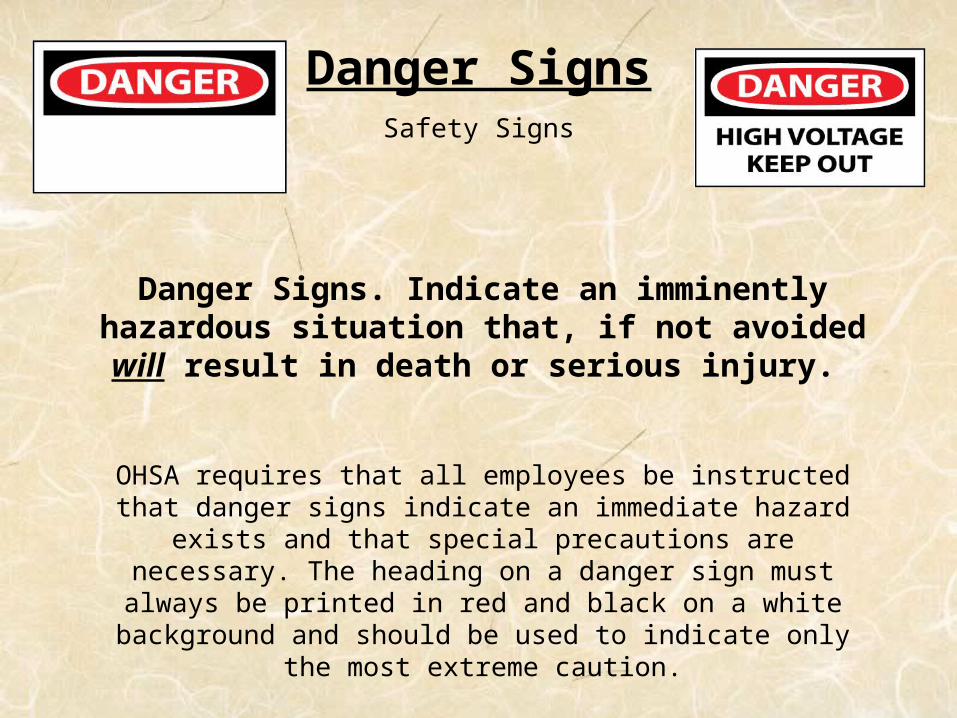
Danger SignsSafety Signs
Danger Signs. Indicate an imminently hazardous situation that, if not avoided will
result in death or serious injury.
OHSA requires that all employees be instructed that danger signs indicate an immediate hazard exists and
that special precautions are necessary. The heading on a danger sign must always be printed in red and black on a white background and should be used to indicate only the
most extreme caution.

Warning SignsSafety Signs
Warning Signs. Indicate a potentially hazardous situation that, if not avoided could result in death or serious injury.
These signs should be used only in situations where the hazard is not as extreme as the hazard which merits a
danger sign, but where adequate warning is still required to avoid a potentially lethal accident. Warning sign
headings must always be black print on a Safety Orange field.

Caution SignsSafety Signs
Caution Signs. Indicate a potentially hazardous situation that, if not avoided, may result in minor or moderate injury.
OSHA regulations state, employees should be instructed that caution signs indicate a possible hazard for which
proper precaution should be taken. Caution sign headings must always have black print on a safety yellow
heading.

Notice SignsSafety Signs
Notice Signs. Indicate a statement of company policy related directly or
indirectly to the safety of personnel or the protection of property.
Notice signs must always have blue print on a white field.

Safety Instruction SignsSafety Signs
Safety Instruction Signs. (Think/Be Careful/Safety First and other Safety Instruction Signs) indicate general
instructions relating to safe work practices, reminders of proper safety procedures, and
the location of safety equipment
OSHA requires their use where there is a need for general instructions and suggestions relative to safety
measures. General safety sign headings should be printed green on white.

The OSHA Hazard Communication standard (Right to know law) requires that employees be informed of the hazards of chemicals that they may work with or are present in their work area. The four elements of this program are:
• Labeling • Hazardous Inventory List
• (M)SDS • Training
Each of these elements will be reviewed in more detail.
Hazard Hazard CommunicatCommunicat
ionion

Labeling:
All containers of hazardous chemicals must be labeled
with at least three items:
• the name of the chemical, • any hazard warnings associated with the product and,
• the name and address of the manufacturer.
The name of the chemical must be spelled out completely, no molecular formulas are allowed.

Hazard Signs
All hazardous materials must be labeled in a manner that warns of any hazards the chemical may
present.
The signs above are the most common labeling systems. The diamond shaped label is the National Fire Protection
Agency (NFPA) sign. The rectangular label is the Hazardous Material Information System (HMIS) sign.

Hazard Signs
The similarities are the most important aspects of the signs.
Both systems have three color-coded fields to indicate the hazards associated with the material:
• Flammability (red)
• Health (blue)
• Reactivity (yellow)
Both use a system of five numbers from 0-4 to indicate the severity of the hazard
0 = no hazard
4 = most hazardous

Hazard Signs
There are three main differences:
• They differ in layout – NFPA uses four diamonds; HMIS uses vertically stacked bars.
• They differ in interpretation of the fourth white field - specific hazard in NFPA system ; protective equipment in the HMIS system.
• Possibly the most significant difference, however, has to do with the intended audience for each of the systems. The HMIS was devised as a hazard communication tool with employees who must handle hazardous chemicals in the workplace as the intended audience. The NFPA system was designed to alert fire fighters arriving on the scene of a fire to the hazards associated with materials. Therefore, the numbers assigned in the NFPA system assume that a fire is present. No such assumption holds in the HMIS system. For this reason , the numbers that are assigned to the flammability, health, and reactivity hazards may differ between the NFPA and HMIS systems, even for the exact same chemical.
BOTH systems can be used to illustrate the hazardous properties of a chemical, and both should be understood as
different companies will use each system.
Hazardous Inventory List
ALL applicable Departments and
Program areas must maintain a current
Chemical Inventory List that is reviewed and
updated at least annually.

(Material) Safety Data Sheets (M)SDS
(M)SDSs contain the identity of the chemical, the manufacturer’s name, address, and phone number and
information regarding the physical and chemical characteristics of the chemical such as toxicity,
flammability, corrosiveness.
It also contains information on the physical and health hazards such as exposure hazards; exposure limits;
precautions and controls; and emergency and first aid treatment for exposures.
A (M)SDS must be available for every chemical in the program area or department.
(Material) Safety Data Sheets must be accessible 24 hours a day. MSDSs are
prepared and distributed by the chemical manufacturer or distributor to provide important information concerning the
chemical in question.

Training
All employees who work with chemicals or have chemicals in their work area are required to have hazardous communication training initially upon employment and when any new chemicals are introduced in their workplace thereafter. The Supervisor of employees who will be working with hazardous material will provide more in-depth training.
The training will cover:•The hazardous communication standard and program•The physical and health hazards in the workplace•How to detect the presence or release of hazardous chemicals•How to protect oneself from chemical hazards•Emergency procedures
This training is mandatory for all employees handling hazardous materials.
EHS is available to assist any department, supervisor, and/ or employee with information concerning the College’s Hazard Communication Program, (Material) Safety Data Sheets, etc.
Please feel free to contact EHS.

Personal Protective Equipment (PPE)
• PPE is an easy way to protect users from hazardous materials.
• Required when engineering or administrative controls are inadequate.
• Must be properly selected, worn and maintained.
• Training is required.

Eye andFace Protection
• Safety Glasses (minimum requirement)
• Goggles - better protection for chemicals, splashes, dusts, or projectiles.
• Face Shield - better for splashes or projectiles

Head Protection
• Hard Hats (Safety Helmets)– Class A - Limited voltage protection– Class B - High voltage protection– Class C - No voltage protection– Class D - Firefighter’s helmet
• Bump Caps– Not recommended
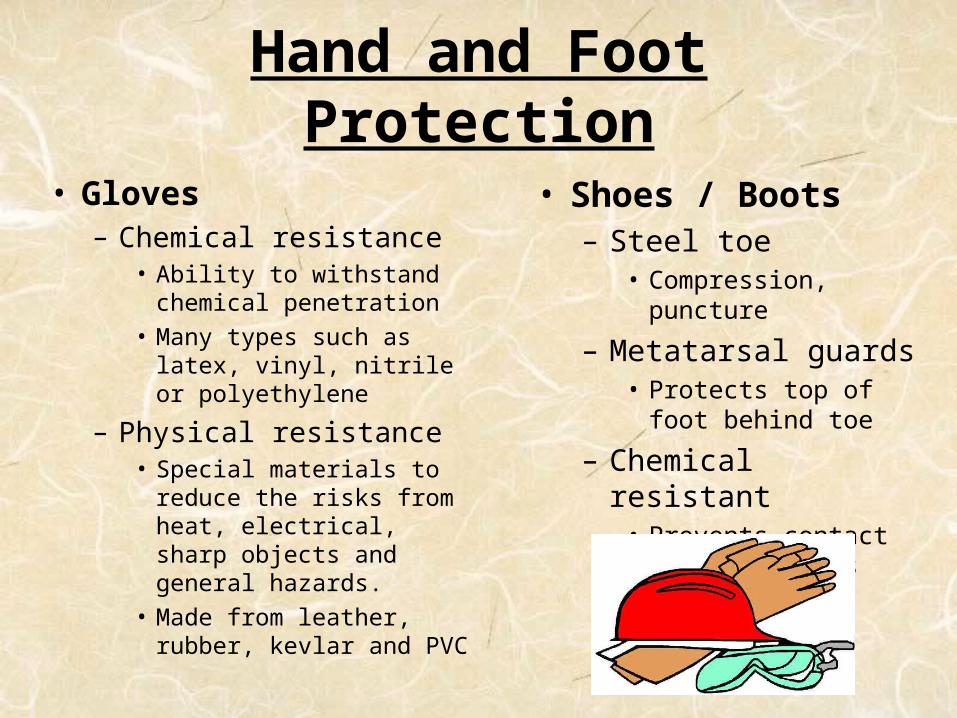
Hand and Foot Protection
• Gloves– Chemical resistance
• Ability to withstand chemical penetration
• Many types such as latex, vinyl, nitrile or polyethylene
– Physical resistance • Special materials to
reduce the risks from heat, electrical, sharp objects and general hazards.
• Made from leather, rubber, kevlar and PVC
• Shoes / Boots– Steel toe
• Compression, puncture
– Metatarsal guards• Protects top of
foot behind toe
– Chemical resistant
• Prevents contact with chemicals

Hearing Protectors
• Designed to prevent temporary or permanent hearing loss from power tools, hammering or drilling.
• Ear Plugs - preferred (NRR* 20-30 dB)• Ear Muffs - 2nd choice (NRR* 15-30 dB)• Double Hearing Protectors (plugs and muffs)
(NRR* 30-40 dB) used for levels over 115 dB
• (*NRR = Noise Reduction Rating - an approximate decibel reduction provided by the hearing protector)

Respiratory Protection
•Air Purifying-Dust masks-Half face-Full face
Respirators are required when protection from engineering (e.g. ventilation) or administrative (e.g. chemical substitution) controls do not protect the user.

Employees’ Responsibilities
Each employee must comply with the College’s EHS policy, procedures and rules.
This includes: wearing required protective devices.
: reporting hazards, accidents and
incidents.
: operating equipment and using materials in a safe manner.

Local Procedures
EHS is responsible for College wide policies and procedures.
Individual departments and program areas (both academic and administrative) are responsible for their own environmental, health and safety procedures.
These procedures are provided to employees by the appropriate supervisor.

Orientation Quiz and Q&A
Now take the quiz. The Office of Human Resources will record the results of the
quiz in your personnel file.
Click on the link below to take the quiz.
If the link does not work with your browser, copy the link below into your browser:
http://www.proprofs.com/quiz-school/story.php?title=NzkyMTAyRFL3
If you have any questions regarding environmental health and safety,
contact the Director of EHS at 941-309-0027
You have completed the EHS orientation program.