Embroidered Denim Bag - Janome · Embroidered Denim Bag By: Jane Spolar of Quilt Poetry This little...
10
Embroidered Denim Bag By: Jane Spolar of Quilt Poetry This little bag is a quick project and when completed will accessorize your casual summer wardrobe. What’s more fun than finding a use for some of those old jeans you’ve been saving to recycle? The front pocket features an embroidery design I created and then digitized with Creative DRAWings®, part of the Artistic Suite Version 7. The embroidery uses only one thread color and is very zippy to stitch out. I hope you enjoy making this bag on your Janome as much as I enjoyed creating it for you! Skill level - Intermediate Janome Supplies: - Janome Memory Craft 9900 or Janome Horizon Memory Craft 15,000 - Embroidery Foot P - SQ14a hoop for the 9900 or the SQ14 for the 15,000 - Zipper Foot E - Zig Zag Foot A - Optional Dual Feed Foot for the 15,000 Fabric and Notions: - An assortment of denim pieces - 1/2 yd. print cotton fabric for lining - 1/2 yd. sturdy cotton for interlining - Purse handles - Zipper: I used a 9” trouser zipper - Fusible woven or knit interfacing: I used Pellon® Easy-Knit® - Sticky or Fusible stabilizer: (to hold the pocket in the embroidery hoop) I used Sulky® Totally Stable™ - Medium Cutaway stabilizer: I used Floriani® Medium Cutaway Stabilizer - All Purpose Thread for sewing the bag - 35wt. Embroidery Thread to compliment your denim
Transcript of Embroidered Denim Bag - Janome · Embroidered Denim Bag By: Jane Spolar of Quilt Poetry This little...

Embroidered Denim BagBy: Jane Spolar of Quilt Poetry
This little bag is a quick project and when completed will accessorize your casual summer wardrobe. What’s more fun than finding a use for some of those old jeans you’ve been saving to recycle?
The front pocket features an embroidery design I created and then digitized with Creative DRAWings®, part of the Artistic Suite Version 7. The embroidery uses only one thread color and is very zippy to stitch out.
I hope you enjoy making this bag on your Janome as much as I enjoyed creating it for you!
Skill level - Intermediate
Janome Supplies: - Janome Memory Craft 9900 or Janome Horizon Memory Craft 15,000 - Embroidery Foot P - SQ14a hoop for the 9900 or the SQ14 for the 15,000 - Zipper Foot E - Zig Zag Foot A - Optional Dual Feed Foot for the 15,000
Fabric and Notions: - An assortment of denim pieces - 1/2 yd. print cotton fabric for lining - 1/2 yd. sturdy cotton for interlining - Purse handles - Zipper: I used a 9” trouser zipper - Fusible woven or knit interfacing: I used Pellon® Easy-Knit® - Sticky or Fusible stabilizer: (to hold the pocket in the embroidery hoop) I used Sulky® Totally Stable™ - Medium Cutaway stabilizer: I used Floriani® Medium Cutaway Stabilizer - All Purpose Thread for sewing the bag - 35wt. Embroidery Thread to compliment your denim

Instructions:(Use ½” seams) 1. Gather together your saved denim to determine what you have to work with. I found that I had a nice blank pocket and some large pieces from the back legs of men’s jeans.
(You can always purchase new denim for the project – depending upon the width of the fabric you’ll need approximately 2/3 yd.)
2. Determine what size you would like your bag to be. Cut two identical pieces, one for the front and one for the back. (I cut my denim pieces 12½” x 12½” with 1½” x 1½” squares cut out of the bottom corners – see hint below.)
Hint: The corners cut out of the bottom of the bag pieces will determine how wide your finished bag will be:
I wanted my bag to be relatively small, 2” wide finished. I divided the width in half (two sides) and added ½” seam allowances to determine that each cutout corner needed to be 1½” square. If for example, you would like your bag to be 3” wide, you would divide 3” in half and add a ½” seam allowance making your corner cutouts 2” each.

3. Cut lining, interfacing and interlining the same size as the denim outer pieces:
- Cut two pieces lining fabric.
- Cut four pieces fusible interfacing. Apply the interfacing to the wrong side of each of the denim and the lining pieces. Follow the manufacturers’ instructions for the best adhesion.
- Cut two pieces firm cotton fabric such as a twill or lightweight canvas for interlining. Interlining makes the bag a little more stable without adding a lot of bulk. The interlining fabric will be sewn along with the denim -- treat the two pieces, (one layer of interlining and one layer of denim), as a single layer of fabric.
4. Prepare the pocket for embroidery as follows:
- Remove a pocket with a seam ripper. Remove stitches from the folded under edges of the pocket and press the pocket open. (If you don’t have one to recycle, just create a patch pocket large enough to hold the embroidery motif which measures 5.33” x 4.94”.) - Attach the opened pocket to a piece of sticky or fusible stabilizer large enough to hoop easily. (I didn’t have any sticky stabilizer on hand so I used fusible stabilizer. I made sure to use anon-stickTeflonpressingsheetoverthe topwhenfusingthepockettothestabilizer.)
You may also find it helpful to secure the pocket edges with some painters tape.
- Hoop along with a second layer of cutaway stabilizer underneath. 5. Download the .jef file to a flash drive and open in your machine in embroidery mode. (If you’ve never loaded a design from a flash drive see the instructions in your machines Instruction Manual.)
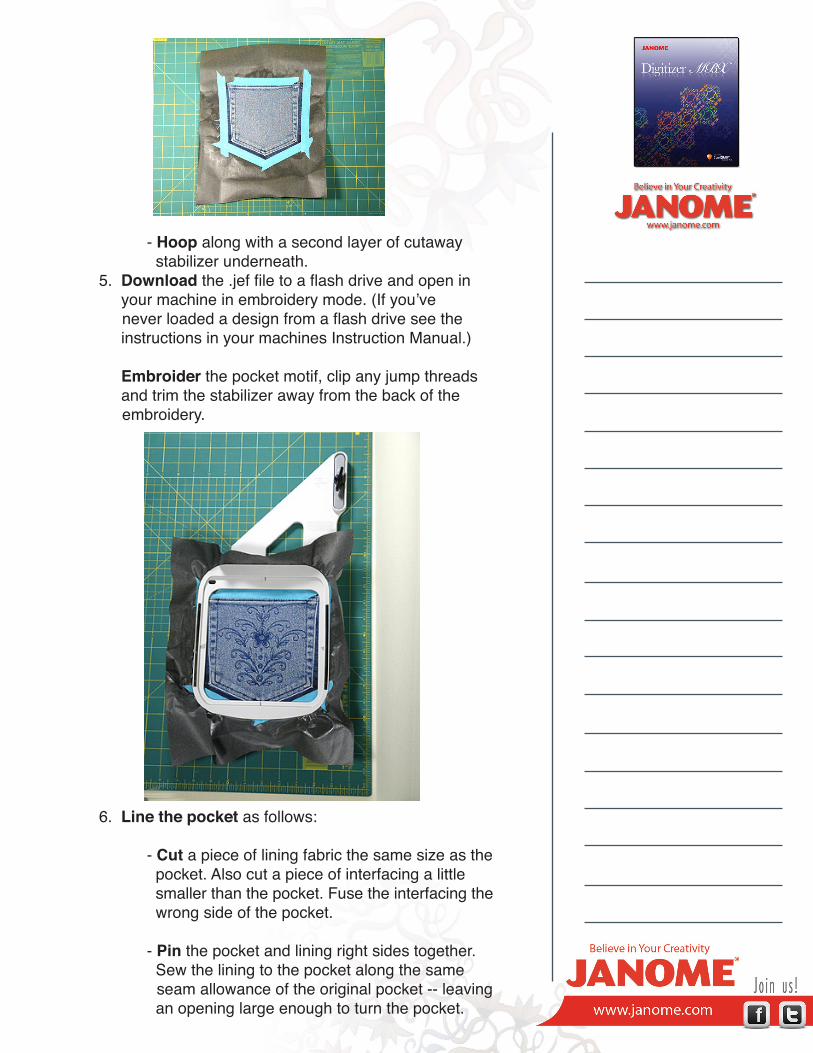
Embroider the pocket motif, clip any jump threads and trim the stabilizer away from the back of the embroidery.
6. Line the pocket as follows:
- Cut a piece of lining fabric the same size as the pocket. Also cut a piece of interfacing a little smaller than the pocket. Fuse the interfacing the wrong side of the pocket.
- Pin the pocket and lining right sides together. Sew the lining to the pocket along the same seam allowance of the original pocket -- leaving an opening large enough to turn the pocket.
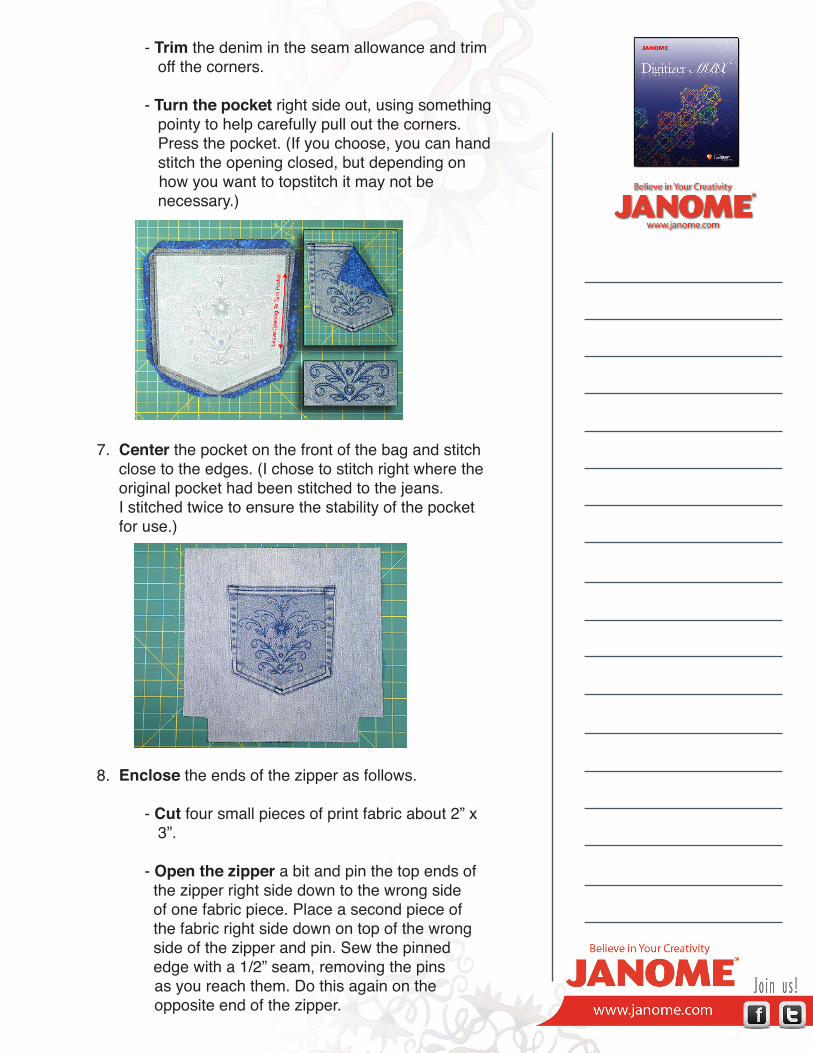
- Trim the denim in the seam allowance and trim off the corners.
- Turn the pocket right side out, using something pointy to help carefully pull out the corners. Press the pocket. (If you choose, you can hand stitch the opening closed, but depending on how you want to topstitch it may not be necessary.)
7. Center the pocket on the front of the bag and stitch close to the edges. (I chose to stitch right where the original pocket had been stitched to the jeans. I stitched twice to ensure the stability of the pocket for use.)
8. Enclose the ends of the zipper as follows.
- Cut four small pieces of print fabric about 2” x 3”.
- Open the zipper a bit and pin the top ends of the zipper right side down to the wrong side of one fabric piece. Place a second piece of the fabric right side down on top of the wrong side of the zipper and pin. Sew the pinned edge with a 1/2” seam, removing the pins as you reach them. Do this again on the opposite end of the zipper.

9. Press the fabric away from the zipper. Turn the raw edges in 1/2” and press. Stitch closed about 1/8” from the edge. Trim the fabric even with the sides of the zipper.
10. Make handle extensions to fit your handles. (I decided I wanted my handles to be about 4” or 5” away from the bag top. I also wanted to include denim in the extensions but not where I would attach them to the top of the bag.) I made mine as follows; adapt yours to your wishes and the size of your bag handles.

I cut four 5” pieces of the denim and eight 4½” of the print fabric – all 2” wide to fit finished into the approximately 1/2” wide openings of my handles. I then sewed the print pieces to each end of the four denim pieces. The seams were pressed towards the print fabric. I trimmed the denim in the seam allowances.
Once the handle extension units were sewn, I pressed each of them lengthwise down the center. Then I opened out the pieces and pressed the edges 1/2” in to meet the center. I then refolded to the center fold and gave each piece a good press. I topstitched about 1/8” inside each edge of the extensions.
11. Attach the extensions to the bag handles. Fold in half and slip them through the handle rings. Stitch across the extension below the handle rings and also below the seam. Stitch a couple of times for security.
(Hint: This is a lot of bulk to sew across. YoumayfindithelpfultouseaJean-A-Ma-JigbyDritzbehindthepressurefoot.)
12. Baste the raw edges of the handles to the top edge of each outer bag piece. (Remember to use the denim and the interlining as one piece of fabric.)

13. Attach the zipper to the bag following steps below.
- Lay the zipper wrong side down within the 1/2” seam allowances on the front of the bag. With the zipper foot, stitch very close to the edge of the zipper. (You’ll find it helpful to always have the zipper pull away from the area currently being stitched. Make sure to stitch very close to the edge of the zipper tape, so you can move the pull as needed.)
- Lay the front of the bag right side down on top of the lining which is facing right side up. The zipper and handles will be in between the two layers. Stitch again exactly on top of the same seam.
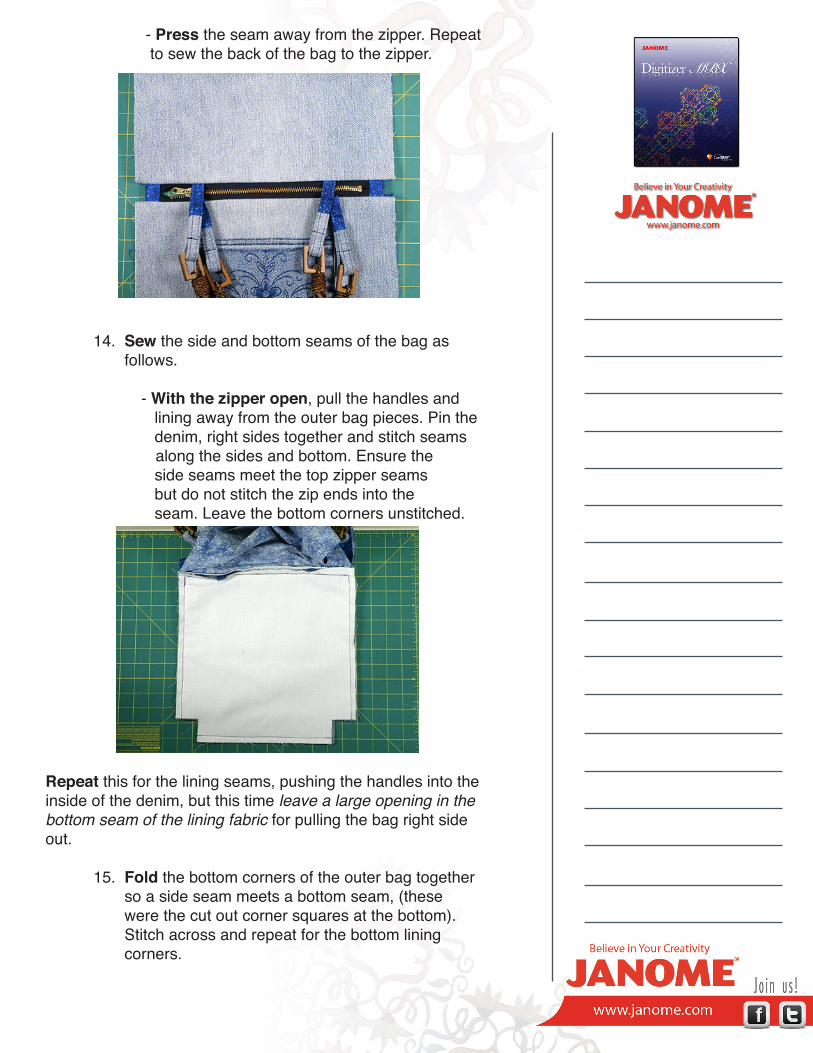
- Press the seam away from the zipper. Repeat to sew the back of the bag to the zipper.
14. Sew the side and bottom seams of the bag as follows.
- With the zipper open, pull the handles and lining away from the outer bag pieces. Pin the denim, right sides together and stitch seams along the sides and bottom. Ensure the side seams meet the top zipper seams but do not stitch the zip ends into the seam. Leave the bottom corners unstitched.
Repeat this for the lining seams, pushing the handles into the inside of the denim, but this time leavealargeopeninginthebottomseamoftheliningfabric for pulling the bag right side out.
15. Fold the bottom corners of the outer bag together so a side seam meets a bottom seam, (these were the cut out corner squares at the bottom). Stitch across and repeat for the bottom lining corners.

16. Turn the bag right side out through the opening in the bag lining. Stitch the opening closed either by hand or machine.
17. Push the lining to the inside of the bag, pulling all corners and seams neatly and press. Topstitch beneath the handles and the zipper to help keep the lining nicely inside the bag. Your bag is complete and ready to use! Enjoy!
Visit www.QuiltPoetry.com to see my quilt patterns and fabric collections.