Electronic Freight Billing System - Ryder
12
L.E.A.P.S Electronic Freight Billing System Installation Guide Ryder | Revision V2.0 June 6th 2013 Reviser: N. West 1
Transcript of Electronic Freight Billing System - Ryder

L.E.A.P.S
Electronic Freight Billing System
Installation Guide
Ryder | Revision V2.0 June 6th 2013 Reviser: N. West 1

FAQ:
What is LEAPS?
LEAPS (Logistics Electronic Automated Processing System) is a freight invoicing program that sits locally on a user’s PC and allows users to submit invoices bills to Ryder. The program creates an EDI 210 file from the user’s data and allows the bills to be automatically entered into Ryder’s system without the need of paper documentation.
Why use LEAPS?
LEAPS allows a user to submit their invoices directly to Ryder for processing. This saves the user time as the handling and transportation of paper documentation is eliminated, as well as expedites the payment time for freight invoices.
Who can use LEAPS?
Any user who has a PC (Apple products are not compatible), an internet connection and freight bills that need to be submitted for a Ryder TM Client.
How much does LEAPS Cost?
Absolutely Nothing! LEAPS is completely free to install and use. This makes it the perfect solution for a user who does not have EDI Capability but would still like to submit their invoices electronically.
Ryder | Revision V2.0 June 6th 2013 Reviser: N. West 2

LEAPS INSTALLATION INSTRUCTIONS
1. Open up your Internet Browser and go to the following website: http://www.ryder.com/supply-chain/ryder-edi-specifications.aspx
2. Download the LEAPS installation files by clicking the zip file link next to “Download LEAPS Software”
Ryder | Revision V2.0 June 6th 2013 Reviser: N. West 3

3. You will be presented with a file download dialog. Select “Open”
4. Once the download completes you will be presented with a folder with four items in it. Double click the “setup” (not SETUP.LST)
Ryder | Revision V2.0 June 6th 2013 Reviser: N. West 4
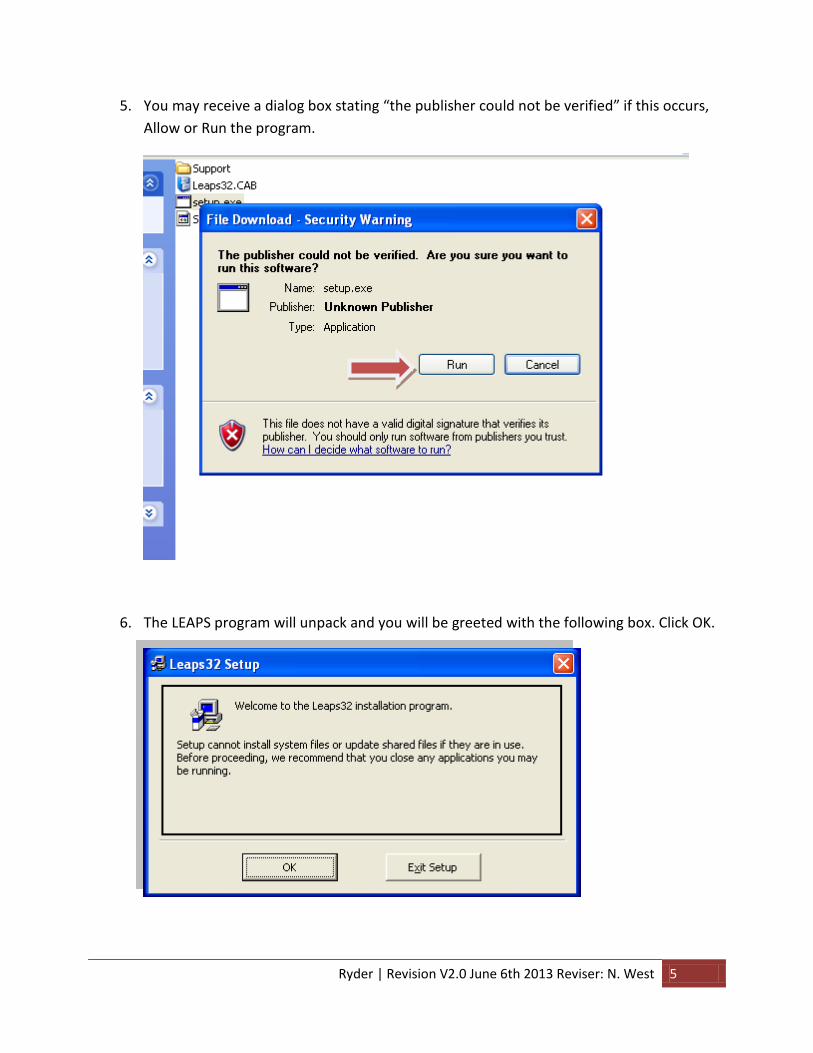
5. You may receive a dialog box stating “the publisher could not be verified” if this occurs, Allow or Run the program.
6. The LEAPS program will unpack and you will be greeted with the following box. Click OK.
Ryder | Revision V2.0 June 6th 2013 Reviser: N. West 5

7. The next screen you will see the option to click to install or Change Directory
8. Click the installation button to begin installing the LEAPS Program
Ryder | Revision V2.0 June 6th 2013 Reviser: N. West 6

9. You will be asked to choose a Program Group, Leaps32 is highlighted by default, if that is not the case, make sure to select Leaps32. Then press continue.
10. The installation process will then begin. You may receive a few “Version Conflict” messages as shown below…each time that occurs click “yes” to keep the file. If you are presented with a message saying a file is in use select “Ignore”
Ryder | Revision V2.0 June 6th 2013 Reviser: N. West 7

11. The next step is to create a shortcut for the program on your desktop. Click your Start Menu and navigate to or search for run and click it.
12. At this point you should see a box like the one below. In this box copy the following
C:\LEAPS32
And click Enter.
Ryder | Revision V2.0 June 6th 2013 Reviser: N. West 8

13. This should open up the C:\LEAPS32 folder. You will see several files. Right click on the top file named Leaps32 with a Black Square Icon and select Send To Desktop to Create Shortcut *do not close this folder we will be using it again shortly*
This will create the following shortcut on your PC’s desktop.
Ryder | Revision V2.0 June 6th 2013 Reviser: N. West 9

14. Once those files have been copied into the C:\LEAPS32 folder, close all open folders and web pages and double click the LEAPS32 Shortcut
15. The first time this program is installed you will be asked to select a configuration file. You will be presented with the dialog box below. Click the only file shown called LEAPS32.ini and select Open.
Ryder | Revision V2.0 June 6th 2013 Reviser: N. West 10

16. You will now be presented with the LEAPS32 Box, Enter your company’s information and SCAC code. Currency should be USD and StandardDeliveryDays should be Unchecked
17. LEAPS has now been installed. You should see the default LEAPS32 screen as shown
Ryder | Revision V2.0 June 6th 2013 Reviser: N. West 11

18. To begin a new invoice click File New and you will be presented with a blank invoice page and you are ready to input your invoice.
Ryder | Revision V2.0 June 6th 2013 Reviser: N. West 12