Electric Bear Fence for the Sierra...
17
Electric Bear Fence for the Sierra Foothills ©Randy Oliver 2014 ScientificBeekeeping.com Black bears are common where I keep bees in the Sierra Foothills. They can smell bee hives from a great distance, and will readily demolish them to consume the brood combs and honey. We are happy to coexist with bears, and train the local bears to avoid the white wires surrounding our apiaries. Once trained, we have virtually no problem with bears so long as we maintain our fences. We run bear fences around a few dozen apiaries. Over the years, I’ve developed this quick, inexpensive, and reliable design. We are especially fond of the Parmak solar chargers, as they are reliable and effective, and only require a few hours of sun exposure each day to maintain their charge. Tools Post driver for ground rod and posts Hand sledge for ground rod Electrician’s pliers for twisting copper wires Big screwdriver and/or wrench for ground clamp For battery –powered only: Wire strippers, wire crimpers, wire antioxidant,electrical tape, wire nuts Weed shears or weed whacker Pruning shears and saw for clearing brush? Pick or hoe to bury ground wire Fence tester (or green blade of grass) Materials If AC current available: 120V 5-mile charger, or Solar (recommended if no AC power) Parmak DF-SP-LI charger (very good), or (For shady remote areas): Zareba 4612-A plus a 12V deep cycle marine battery and battery clamps. 5' heavy-duty (1.25 weight) tee posts (1 for every 8’ of fence perimeter plus gate ends) 2 pinlock (Zareba YPL25TP) plastic insulators per post Alum high voltage wire (optional) 8’ Ground rod and ground rod clamp Ground wire 12 ga copper Poly fence wire 1/8” white (for night visibility), e.g. Parmak #859 2 True Value #59 springs (soft and long) pc of 12g copper wire to twist for spring hooks Elect fence sign Empty hive, lid, bottom to hold charger and battery (if not solar)
Transcript of Electric Bear Fence for the Sierra...

Electric Bear Fence for the Sierra Foothills
©Randy Oliver 2014
ScientificBeekeeping.com
Black bears are common where I keep bees in the Sierra Foothills. They can smell bee hives
from a great distance, and will readily demolish them to consume the brood combs and honey. We
are happy to coexist with bears, and train the local bears to avoid the white wires surrounding our
apiaries. Once trained, we have virtually no problem with bears so long as we maintain our fences.
We run bear fences around a few dozen apiaries. Over the years, I’ve developed this quick,
inexpensive, and reliable design. We are especially fond of the Parmak solar chargers, as they are
reliable and effective, and only require a few hours of sun exposure each day to maintain their
charge.
Tools
Post driver for ground rod and
posts
Hand sledge for ground rod
Electrician’s pliers for twisting
copper wires
Big screwdriver and/or wrench for
ground clamp
For battery –powered only: Wire
strippers, wire crimpers, wire
antioxidant,electrical tape, wire
nuts
Weed shears or weed whacker
Pruning shears and saw for
clearing brush?
Pick or hoe to bury ground wire
Fence tester (or green blade of
grass)
Materials
If AC current available: 120V 5-mile
charger, or
Solar (recommended if no AC
power) Parmak DF-SP-LI charger
(very good), or
(For shady remote areas): Zareba
4612-A plus a 12V deep cycle
marine battery and battery clamps.
5' heavy-duty (1.25 weight) tee
posts (1 for every 8’ of fence
perimeter plus gate ends)
2 pinlock (Zareba YPL25TP) plastic
insulators per post
Alum high voltage wire (optional)
8’ Ground rod and ground rod
clamp
Ground wire 12 ga copper
Poly fence wire 1/8” white (for night
visibility), e.g. Parmak #859
2 True Value #59 springs (soft and
long)
pc of 12g copper wire to twist for
spring hooks
Elect fence sign
Empty hive, lid, bottom to hold
charger and battery (if not solar)
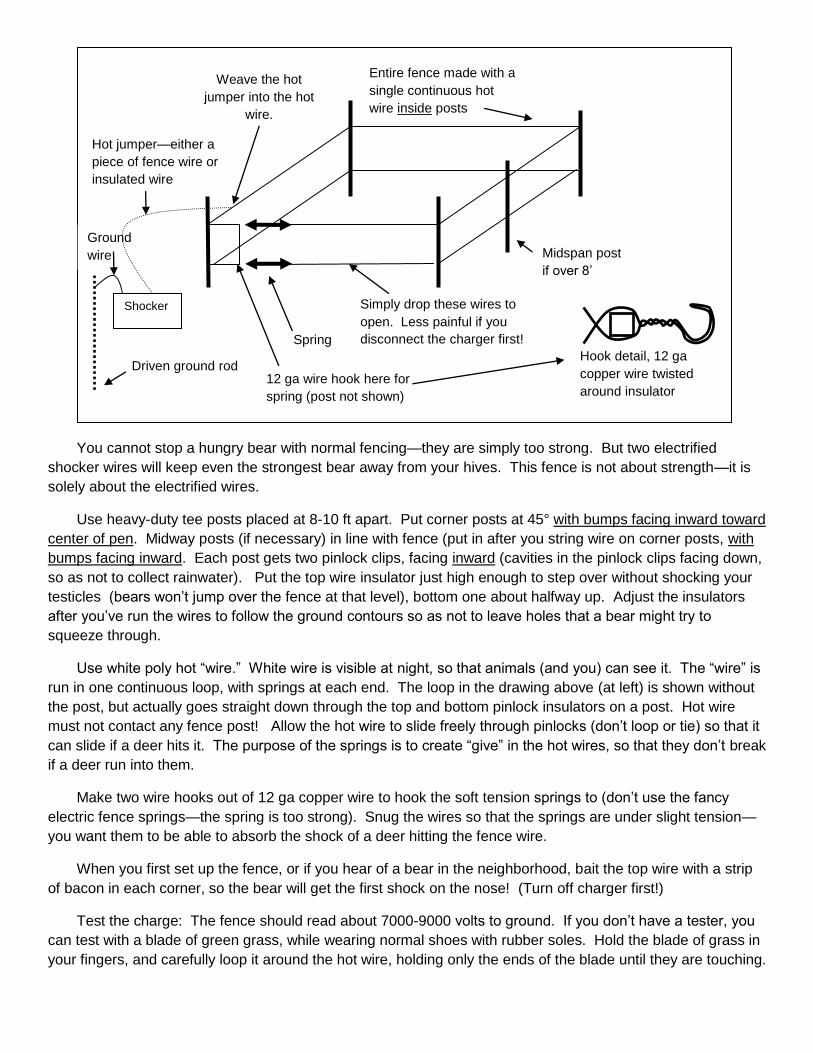
You cannot stop a hungry bear with normal fencing—they are simply too strong. But two electrified
shocker wires will keep even the strongest bear away from your hives. This fence is not about strength—it is
solely about the electrified wires.
Use heavy-duty tee posts placed at 8-10 ft apart. Put corner posts at 45° with bumps facing inward toward
center of pen. Midway posts (if necessary) in line with fence (put in after you string wire on corner posts, with
bumps facing inward. Each post gets two pinlock clips, facing inward (cavities in the pinlock clips facing down,
so as not to collect rainwater). Put the top wire insulator just high enough to step over without shocking your
testicles (bears won’t jump over the fence at that level), bottom one about halfway up. Adjust the insulators
after you’ve run the wires to follow the ground contours so as not to leave holes that a bear might try to
squeeze through.
Use white poly hot “wire.” White wire is visible at night, so that animals (and you) can see it. The “wire” is
run in one continuous loop, with springs at each end. The loop in the drawing above (at left) is shown without
the post, but actually goes straight down through the top and bottom pinlock insulators on a post. Hot wire
must not contact any fence post! Allow the hot wire to slide freely through pinlocks (don’t loop or tie) so that it
can slide if a deer hits it. The purpose of the springs is to create “give” in the hot wires, so that they don’t break
if a deer run into them.
Make two wire hooks out of 12 ga copper wire to hook the soft tension springs to (don’t use the fancy
electric fence springs—the spring is too strong). Snug the wires so that the springs are under slight tension—
you want them to be able to absorb the shock of a deer hitting the fence wire.
When you first set up the fence, or if you hear of a bear in the neighborhood, bait the top wire with a strip
of bacon in each corner, so the bear will get the first shock on the nose! (Turn off charger first!)
Test the charge: The fence should read about 7000-9000 volts to ground. If you don’t have a tester, you
can test with a blade of green grass, while wearing normal shoes with rubber soles. Hold the blade of grass in
your fingers, and carefully loop it around the hot wire, holding only the ends of the blade until they are touching.
Entire fence made with a
single continuous hot
wire inside posts
Hook detail, 12 ga
copper wire twisted
around insulator
Ground
wire
Hot jumper—either a
piece of fence wire or
insulated wire
Shocker
Driven ground rod
Weave the hot
jumper into the hot
wire.
Spring
Simply drop these wires to
open. Less painful if you
disconnect the charger first!
12 ga wire hook here for
spring (post not shown)
Midspan post
if over 8’

Then slide your fingers toward the wire. You should feel a very slight shock at about 1½ inches, stronger at 1”,
very noticeable (but not painful) at ¾”.
Testing the fence voltage with a blade of grass. Be sure to have shoes on with rubber soles (do not be
kneeling on the ground when you try this). At this point, you should feel the pulses without them being too
uncomfortable.
If you feel no shock, the wire is grounding out, battery is dead, or the soil is too dry to make a good
ground. In the latter case, either water the soil, or lay chicken wire on the soil, with a ground wire jumper
attached to it—Caution: the shock will then be intense! You can also run intermediate grounded wires in some
situations, but this is not usually necessary—a shock through the entire body is the best deterrent (don’t just
believe me—get on your knees and see how it feels when you touch it with your nose)!
Fence maintenance. There is little maintenance with the solar chargers—we love ‘em!
Battery-powered units will last over a month if the hot wire is not grounded out.
If you hear pops, then the hot wire is arcing to a ground. Check the insulators and charger. Weed whack
regularly to keep weeds from touching the hot wires!
It helps to bury the ground wire so that you don’t hit it with the weed whacker.
Leave low weeds in summer to make a better ground than dry dirt.
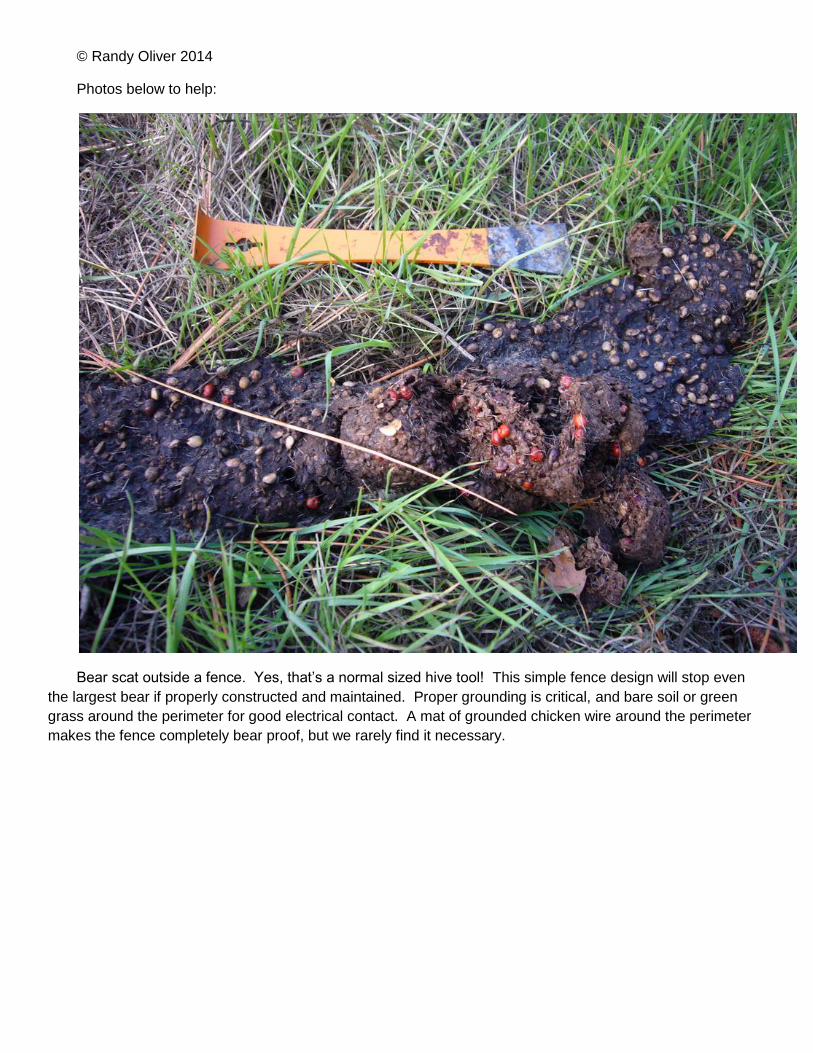
© Randy Oliver 2014
Photos below to help:
Bear scat outside a fence. Yes, that’s a normal sized hive tool! This simple fence design will stop even
the largest bear if properly constructed and maintained. Proper grounding is critical, and bare soil or green
grass around the perimeter for good electrical contact. A mat of grounded chicken wire around the perimeter
makes the fence completely bear proof, but we rarely find it necessary.
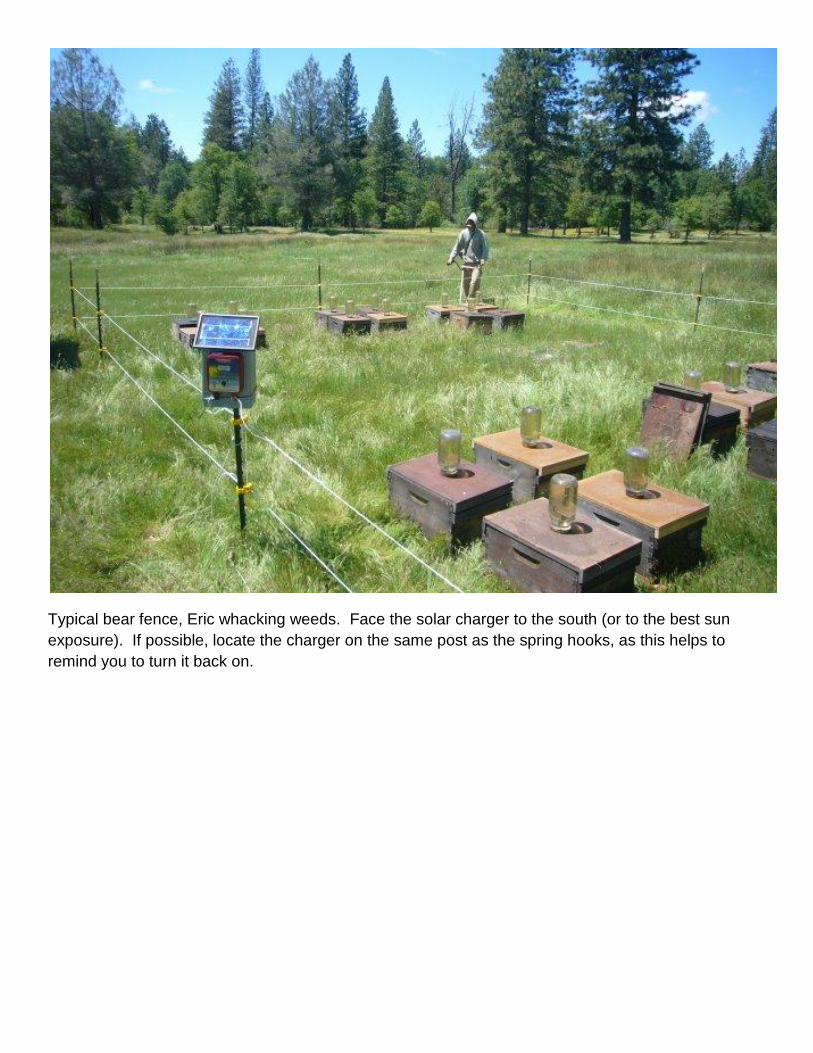
Typical bear fence, Eric whacking weeds. Face the solar charger to the south (or to the best sun
exposure). If possible, locate the charger on the same post as the spring hooks, as this helps to
remind you to turn it back on.
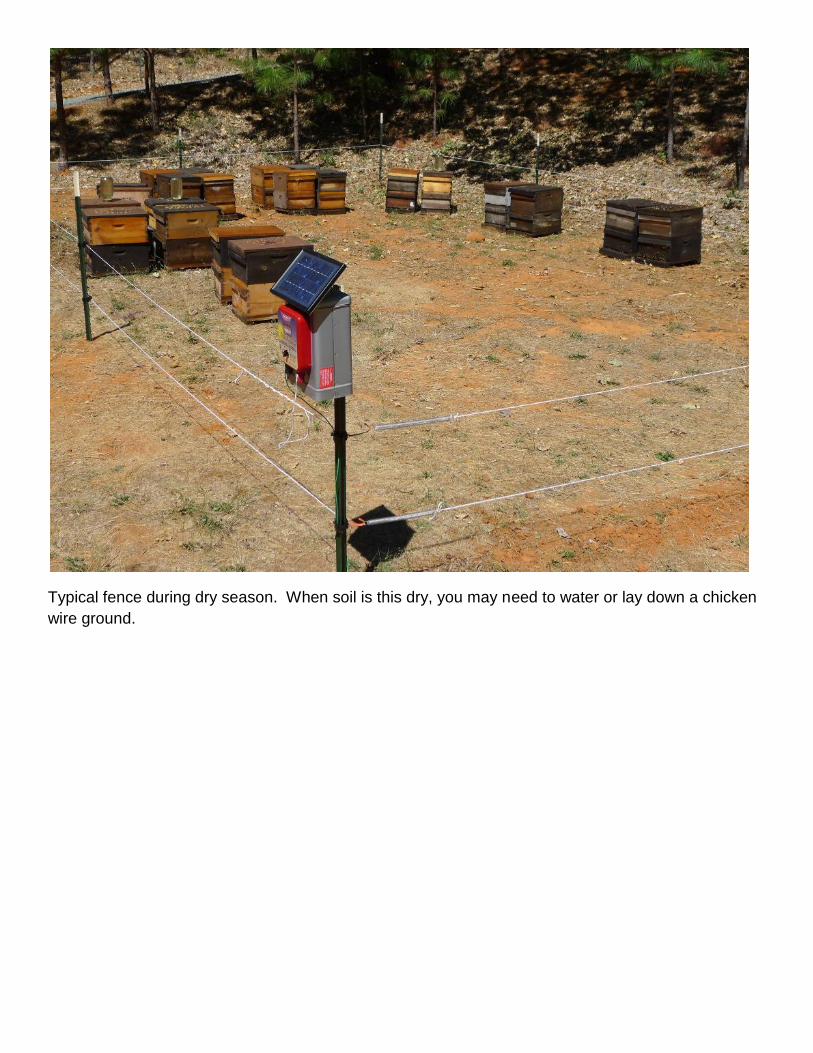
Typical fence during dry season. When soil is this dry, you may need to water or lay down a chicken
wire ground.
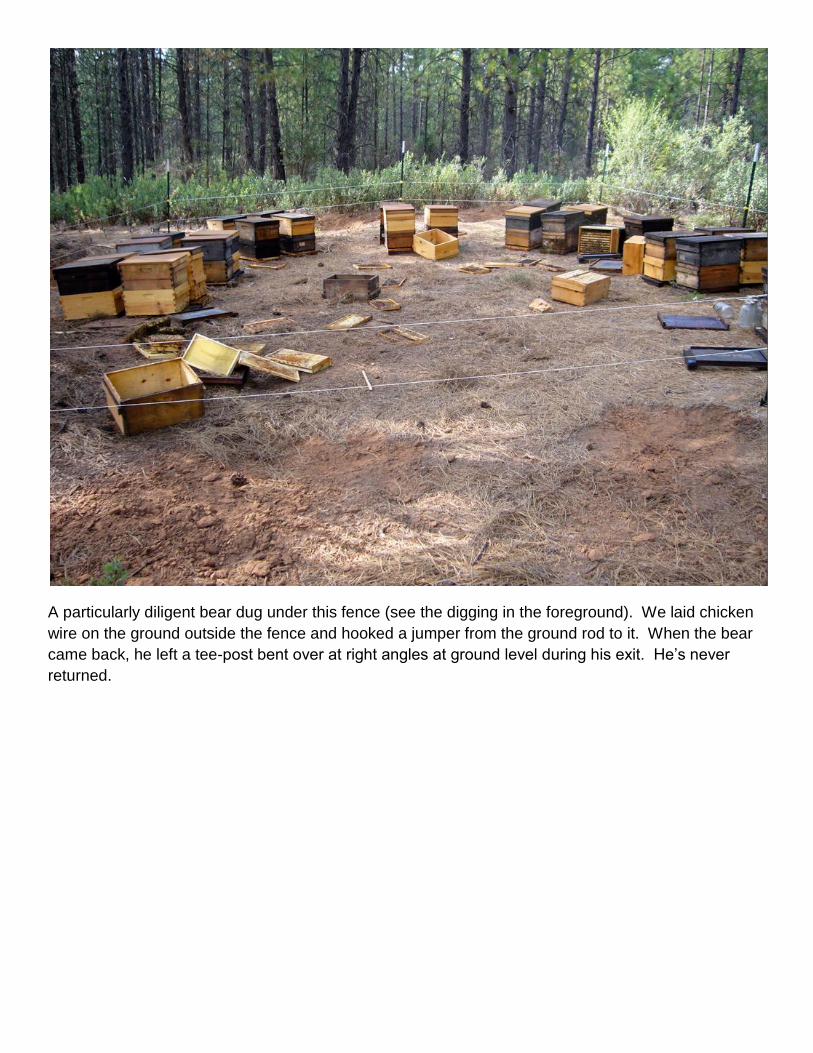
A particularly diligent bear dug under this fence (see the digging in the foreground). We laid chicken
wire on the ground outside the fence and hooked a jumper from the ground rod to it. When the bear
came back, he left a tee-post bent over at right angles at ground level during his exit. He’s never
returned.

Typical fence after weed whacking the blackberry vines around the perimeter.
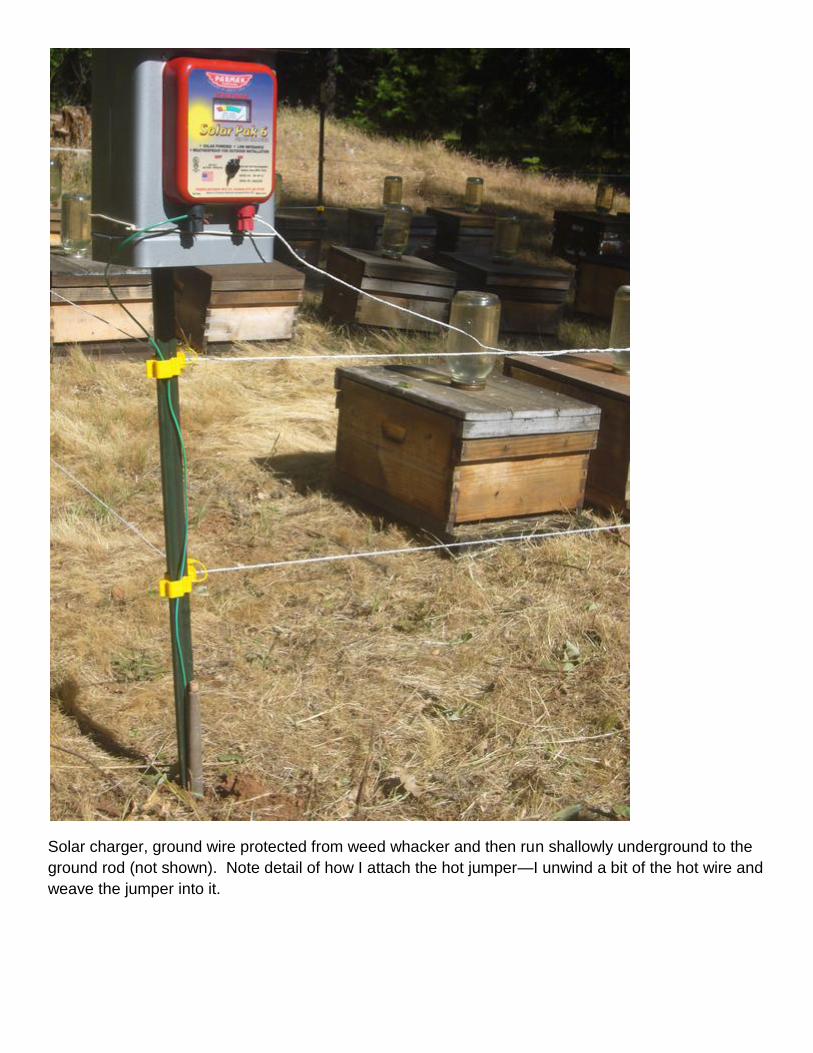
Solar charger, ground wire protected from weed whacker and then run shallowly underground to the
ground rod (not shown). Note detail of how I attach the hot jumper—I unwind a bit of the hot wire and
weave the jumper into it.
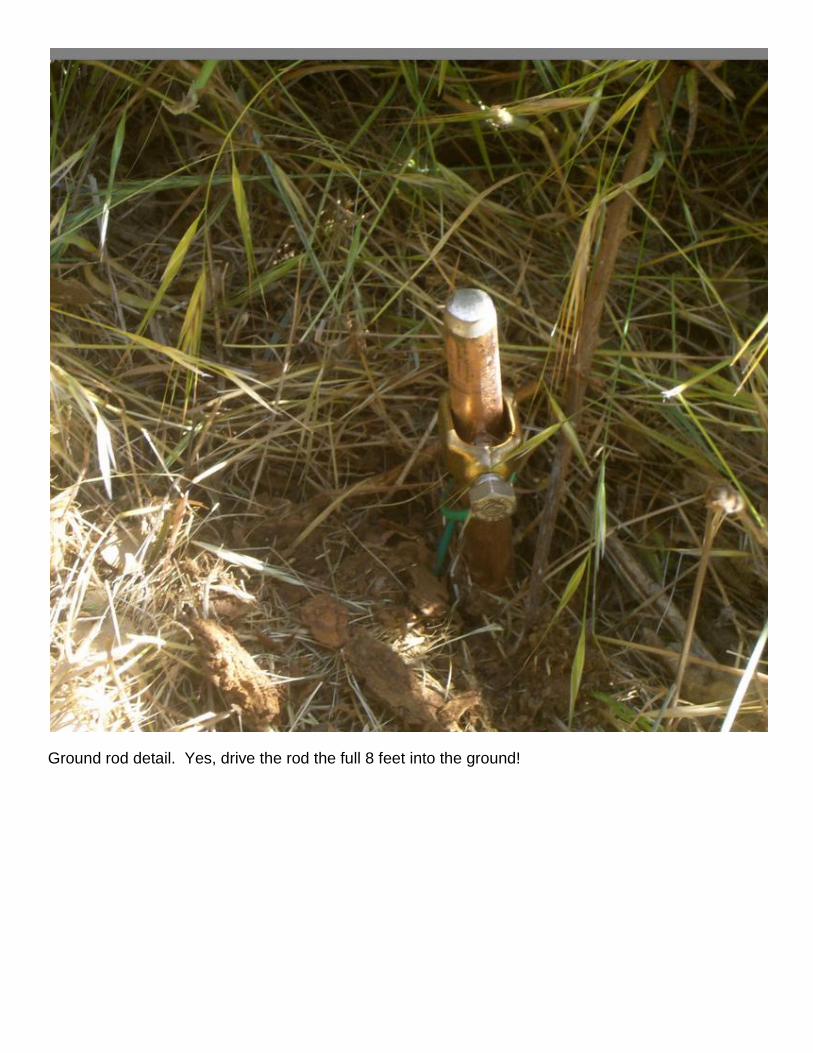
Ground rod detail. Yes, drive the rod the full 8 feet into the ground!

Corner detail. The orange 12-ga hook is twisted to the insulator, and must not contact the fencepost.

Corner details—be sure to use heavy duty posts so that the pinlock clips snap on securely (they are
loose on light-duty posts).
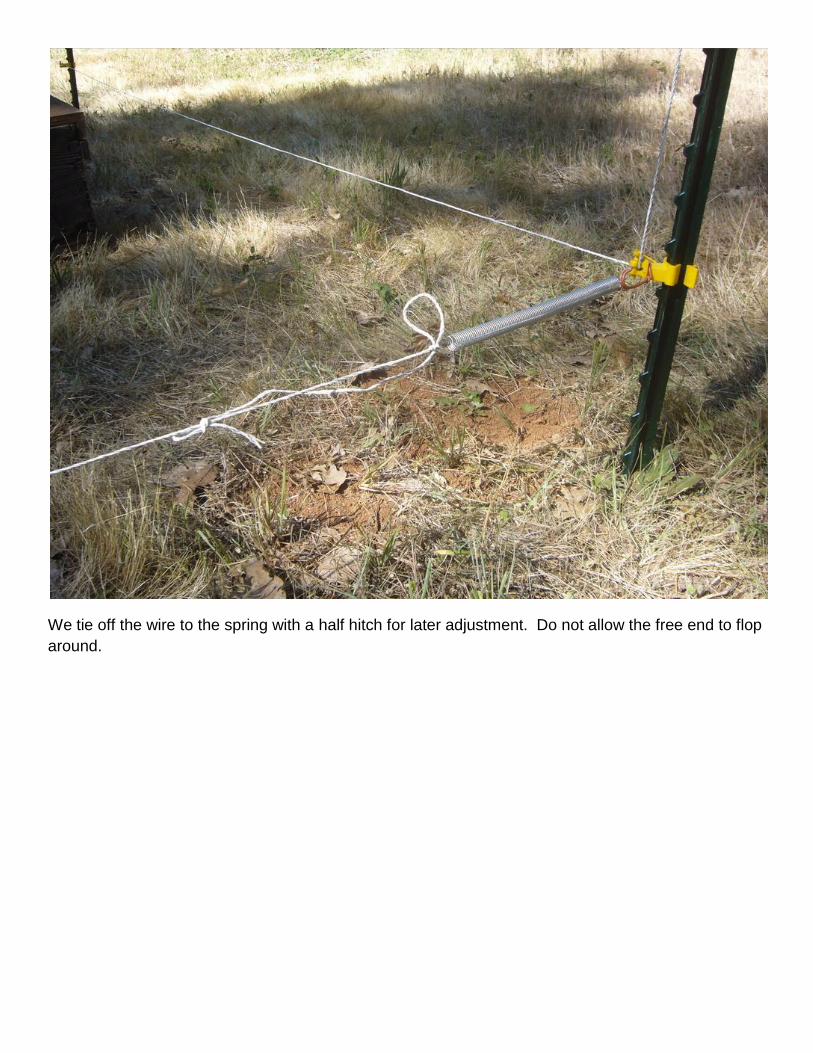
We tie off the wire to the spring with a half hitch for later adjustment. Do not allow the free end to flop
around.
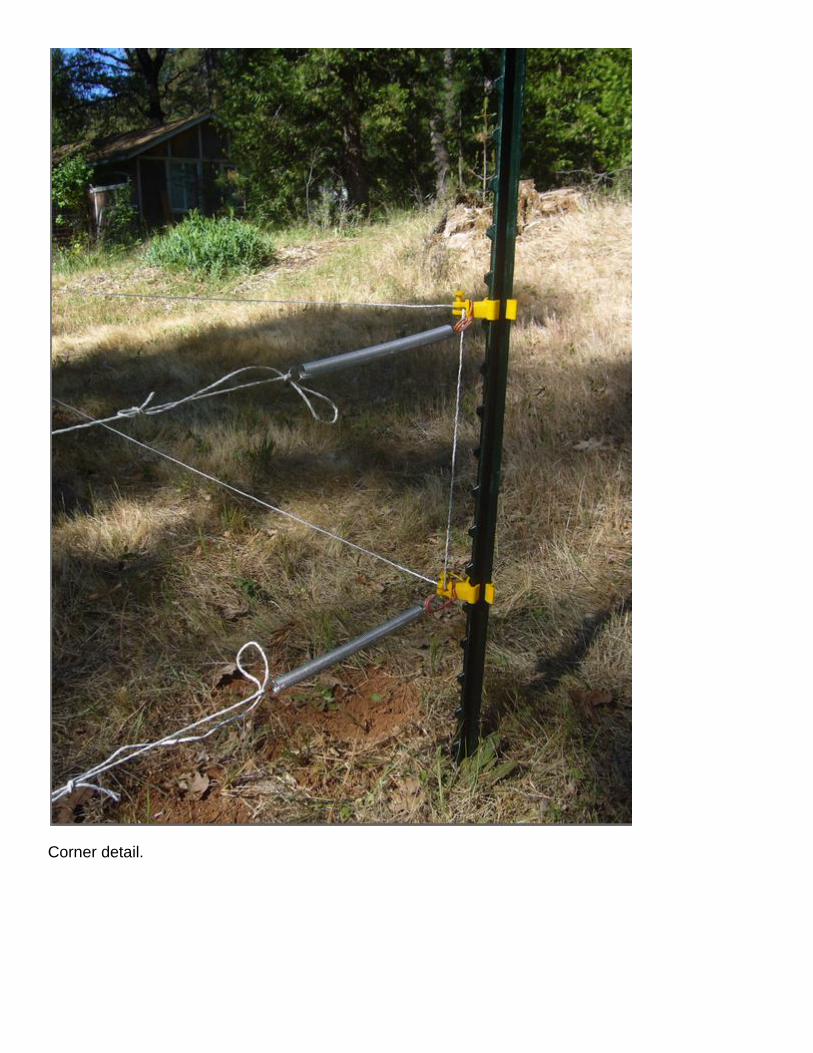
Corner detail.
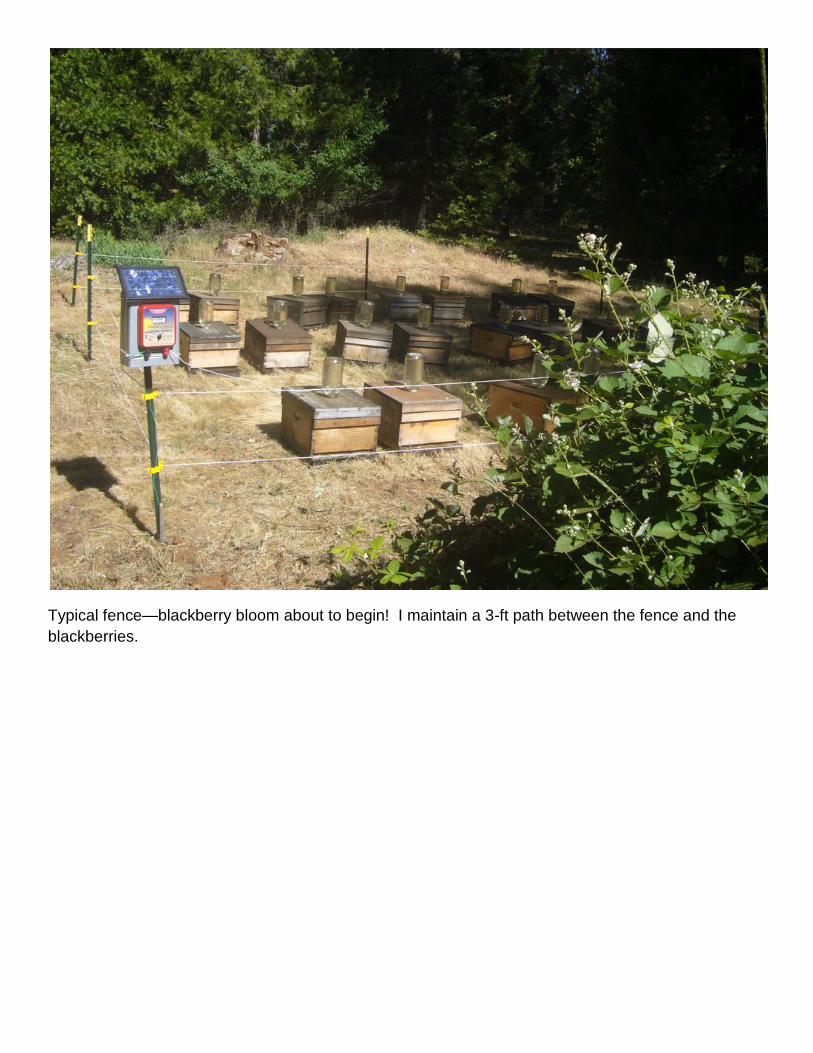
Typical fence—blackberry bloom about to begin! I maintain a 3-ft path between the fence and the
blackberries.
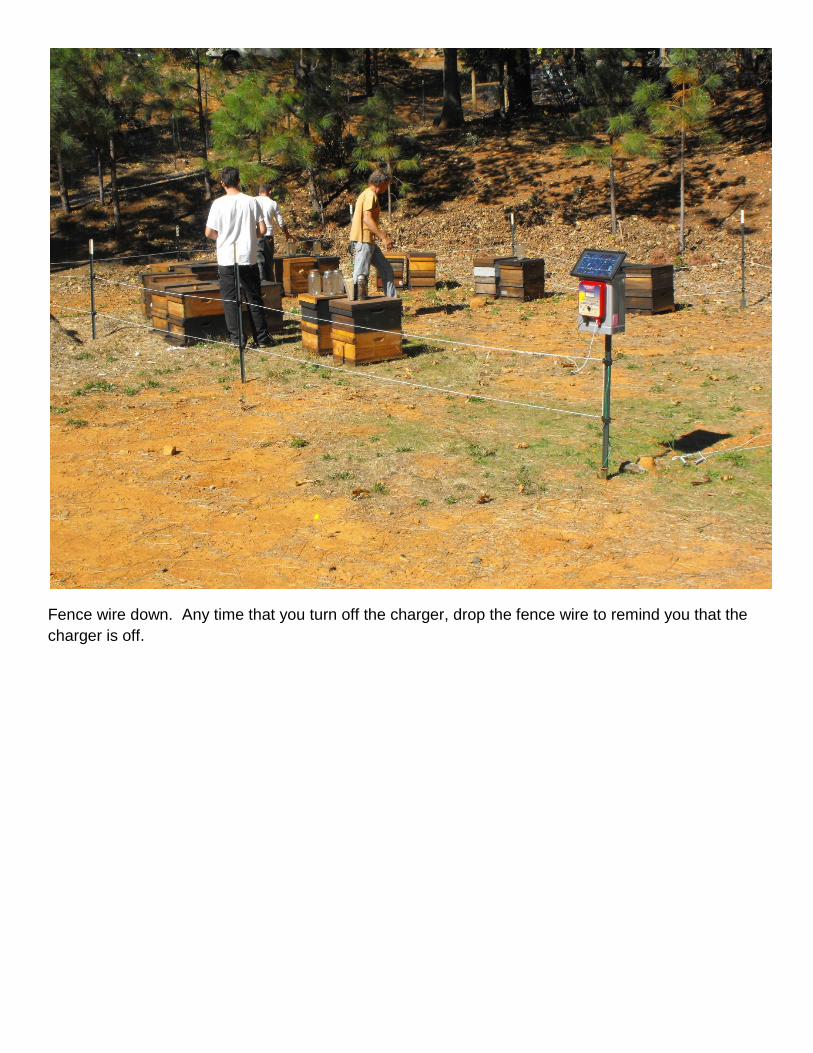
Fence wire down. Any time that you turn off the charger, drop the fence wire to remind you that the
charger is off.
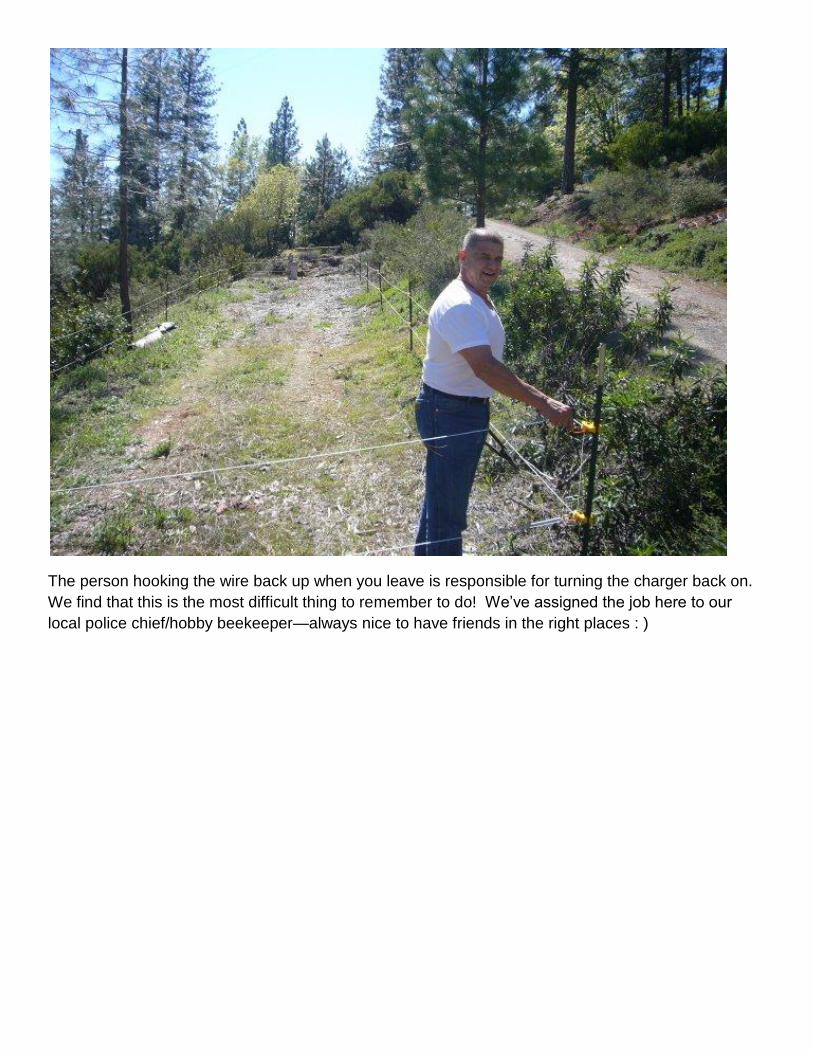
The person hooking the wire back up when you leave is responsible for turning the charger back on.
We find that this is the most difficult thing to remember to do! We’ve assigned the job here to our
local police chief/hobby beekeeper—always nice to have friends in the right places : )