EJBCA with GemSAFE Toolbox Part3 SSL€¦ · Introduction This document is a continuation form 2...
26
EJBCA with GemSAFE Toolbox Part3 SSL
-
Upload
trinhtuong -
Category
Documents
-
view
232 -
download
8
Transcript of EJBCA with GemSAFE Toolbox Part3 SSL€¦ · Introduction This document is a continuation form 2...

EJBCA with GemSAFE Toolbox Part3 SSL

Introduction
This document is a continuation form 2 documents namely “EJBCA with GemSAFE Toolbox Part1 workstation logon” and “EJBCA with GemSAFE Toolbox Part2 sign and encrypt email”. This is the last document in the series.
The way to request SSL server certificate from EJBCA was described in sequential manner. But most of the EJBCA setting and configuration were described in the previous documents.
2

Table of Content
EJBCA with GemSAFE Toolbox Part3 SSL......................................................................................1Introduction.........................................................................................................................................2Table of Content..................................................................................................................................3
1 -- Create SSL Certificate Profile..............................................................................................42 -- Create SSL End Entity profile..............................................................................................93 -- Create SSL End Entity........................................................................................................134 -- Install IIS............................................................................................................................145 -- Send SSL Certificate Request............................................................................................166 -- Fetch SSL Certificate..........................................................................................................217 -- Configure IIS......................................................................................................................238 -- Test SSL..............................................................................................................................25
3

1 -- Create SSL Certificate Profile
1. Go to EJBCA Administration GUI2. Click “Edit Certificate Profiles”3. Type "SSL" in the text box under “Add Profile”. Click “Add”4. Choose “SSL” under “Current Certificate Profiles”
5. Click “Edit Certificate Profiles”6. Set SSL certificate’s profile’s parameters
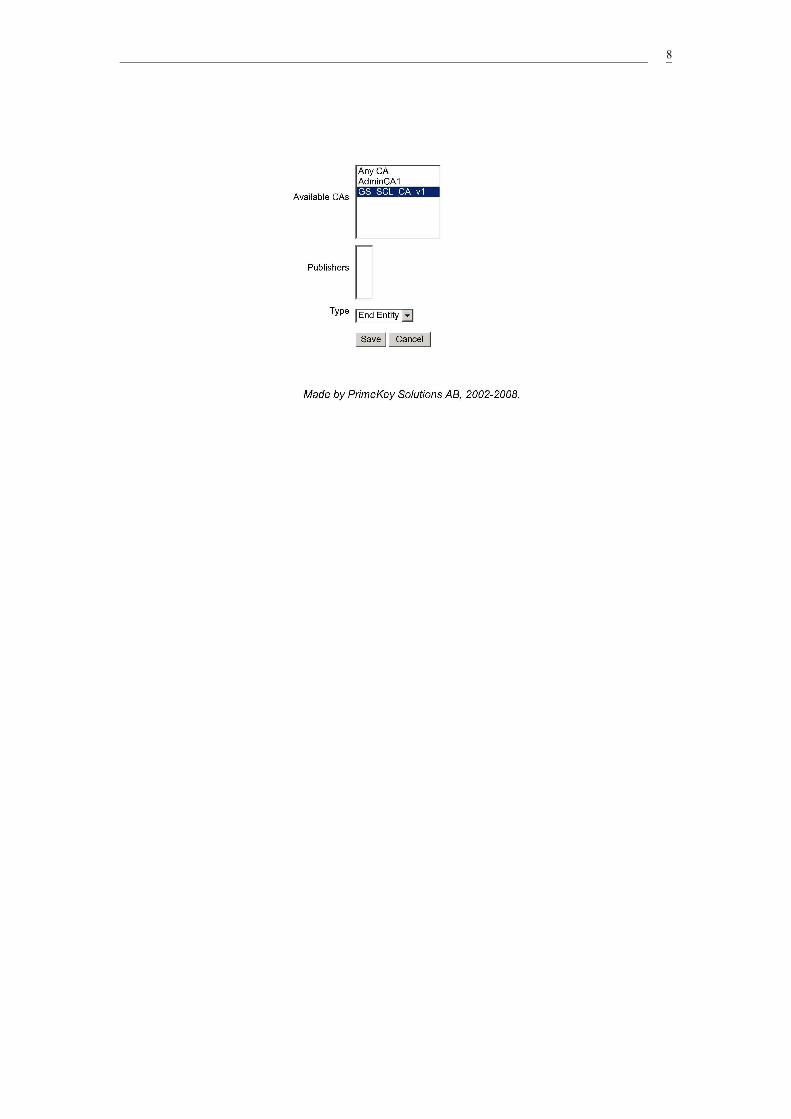
a) Under key usage, select “Key agreement”b) Under available CAs, Select only “GS_SCL_CA_v1”
7. leave all other setting by default and click “Save”8. The following is the screen capture of the settings
4

5

6

7
8

2 -- Create SSL End Entity profile
1. Go to EJBCA Administration GUI2. Click “Edit End Entity Profiles”3. Type "SSL" in the text box under “Add Profile”. Click “Add”4. Choose “SSL” under “Current End Entity Profiles”
5. Click “Edit Certificate Profile”6. Set SSL certificate’s profile’s parameters
a) Under “Email Domain (Use only the domain part of the address, without the '@' char)” uncheck “Use”
b) Under “Default Certificate Profile” choose “SSL”c) Under “Available Certificate Profile” choose “SSL”d) Under “Default CA” choose “GS_SCL_CA_v1”e) Under “Available CAs” choose only “GS_SCL_CA_v1”
7. leave all other setting by default and click “Save”8. The following is the screen capture of the settings
9

10

11
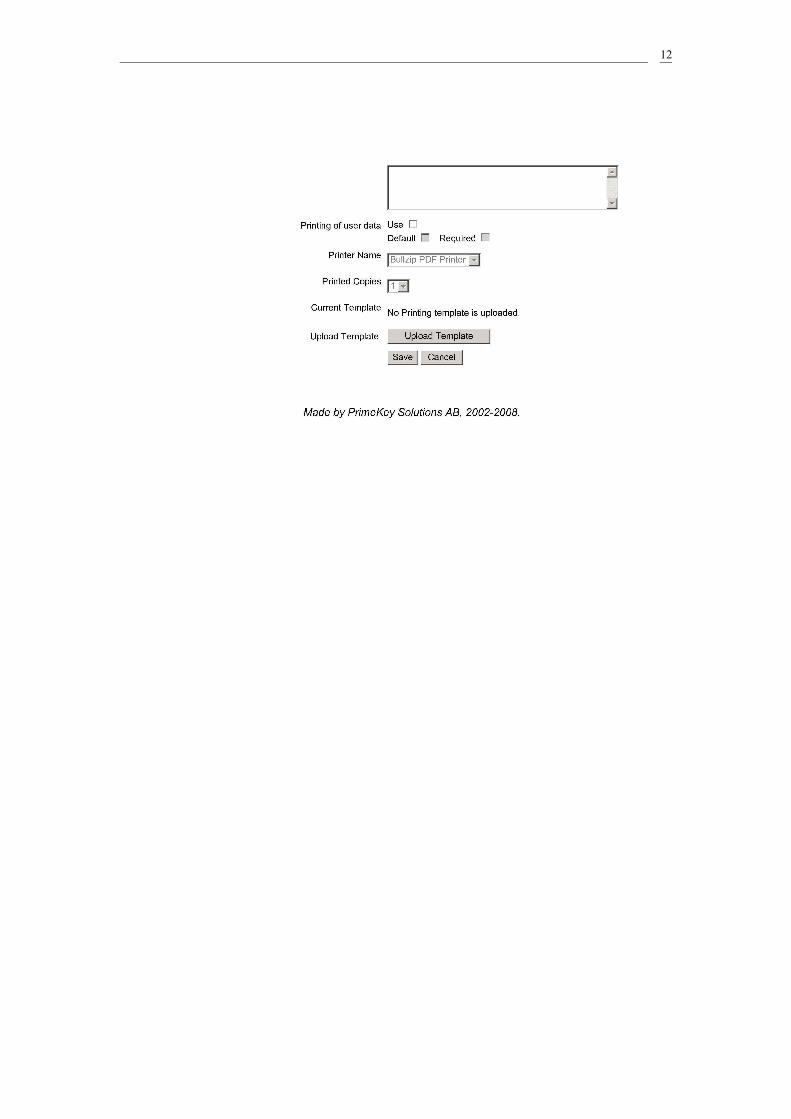
12

3 -- Create SSL End Entity
1. Go to EJBCA Administration GUI2. Click “Add Edit Entity”3. Set SSL end entity’s parameters
a) End Entity Profile=SSLb) User Name=SSL1c) Password=foo123d) Confirm Password=foo123e) CN, Common Name=SSL1
4. leave all other setting by default and click “Add End Entity”5. The following is the screen capture of the settings
13
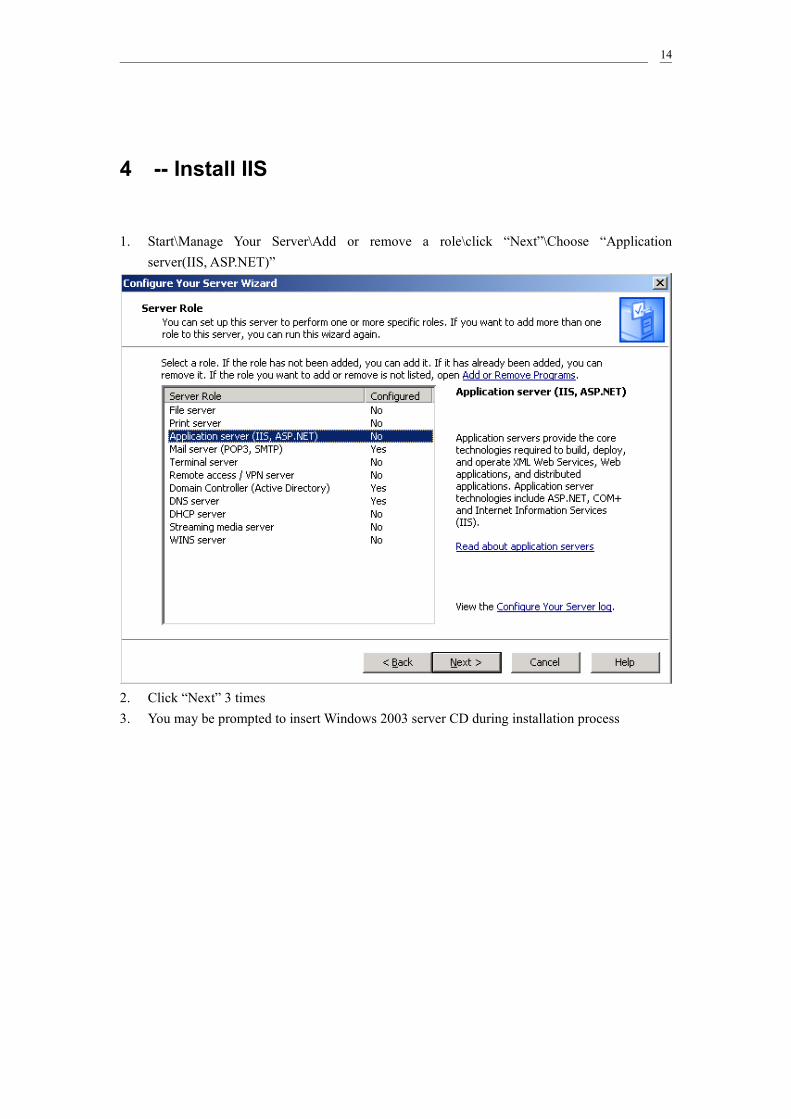
4 -- Install IIS
1. Start\Manage Your Server\Add or remove a role\click “Next”\Choose “Application server(IIS, ASP.NET)”
2. Click “Next” 3 times3. You may be prompted to insert Windows 2003 server CD during installation process
14

4. Click “Finish”
15
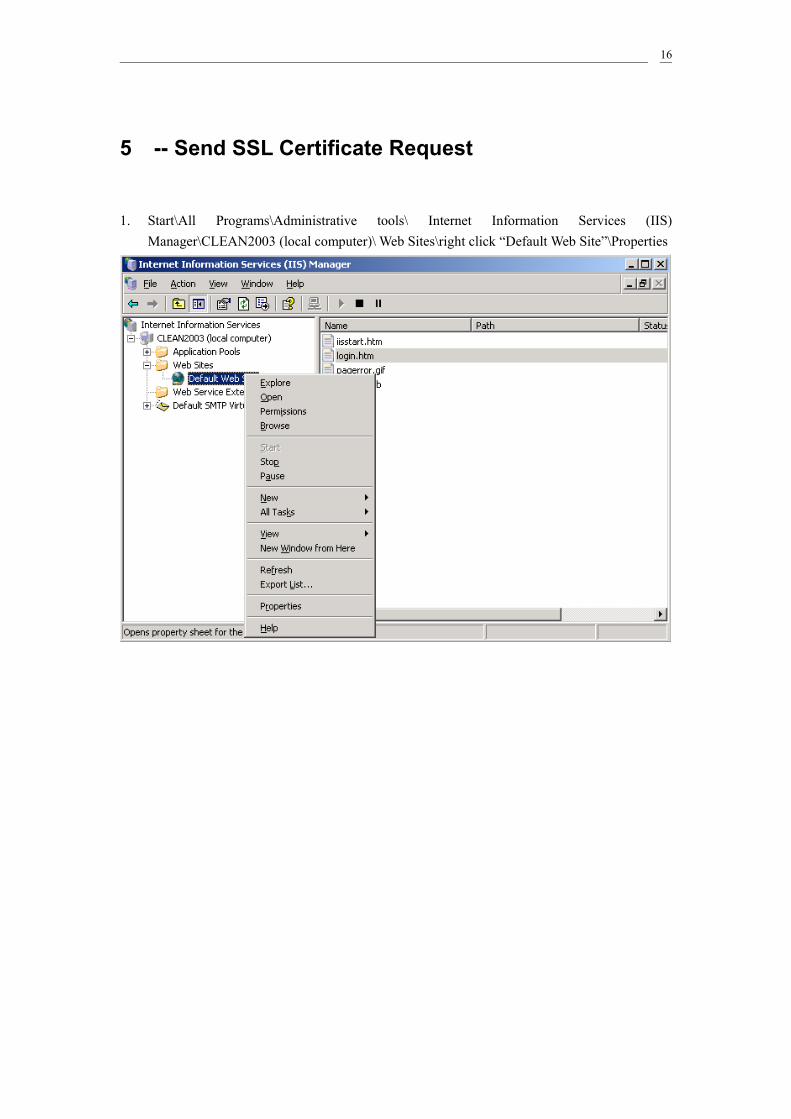
5 -- Send SSL Certificate Request
1. Start\All Programs\Administrative tools\ Internet Information Services (IIS) Manager\CLEAN2003 (local computer)\ Web Sites\right click “Default Web Site”\Properties
16

2. Directory Security\Server Certificate…3. Click “Next” 4 times4. “Organization”= Gemalto5. “Organization Unit”=FSID
17

6. Click “Next”7. Input website’s “common name”, here I use “testing.company.cn” as example
8. Click “Next”9. “Country/Region”=(CN) China10. “State”=Beijing11. “City/locality”=Beijing
12. Click “Next”13. Save the certificate request at desktop
18

14. Click “Next” 2 times15. Click “Finish”16. A text file will be created at desktop17. Open the text file, “certreq.txt”, copy the content, which is started by “-----BEGIN NEW
CERTIFICATE REQUEST-----” and ended by “-----END NEW CERTIFICATE REQUEST-----”
18. Go to EJBCA public webpage\Create Server Certificate19. User name=SSL120. Password=foo123
19

21. Paste the request to the text area below22. Select “Result type” as “PKCS7”
23. Click “OK”24. A page of result will be shown.
20

6 -- Fetch SSL Certificate
1. Copy the result and save it in a text file at desktop with a name of SSL1.text2. Change the text file extension from txt to cer so SSL1.text becomes SSL1.cer3. Go to Start\All Programs\Administrative tools\ Internet Information Services (IIS) Manager\
CLEAN2003 (local computer)\ Web Sites\right click “Default Web Site”\Properties\ Directory Security\Server Certificate…
21

4. Click “Next >” 2 times
5. Browse to SSL1.cer6. Click “Next >”3 times7. Click “Finish”
22

7 -- Configure IIS
1. Go to Start\All Programs\Administrative tools\ Internet Information Services (IIS) Manager\CLEAN2003 (local computer)\ Web Sites\right click “Default Web Site”\Properties\ Directory Security\Secure Communications\Edit
2. Check “require secure Channel (SSL)”3. Check “require 128-bit encryption”
4. Click “OK”5. Go to “Authentication and access control”\Edit…6. Uncheck the “anonymous access”7. User name:= TESTING\Administrator8. Password=foo1239. Check the “Basic authentication (password is sent in clear text)”10. Choose “Yes” to the warning11. Default Domain= testing.company.cn12. realm= testing.company.cn
23

13. Click “OK” 2 times
24

8 -- Test SSL
1. Open Internet Explorer, go to http://testing.company.cn/ 2. You will not be able to access the default webpage
3. Then try again with https://testing.company.cn/
4. Click “Yes”
25
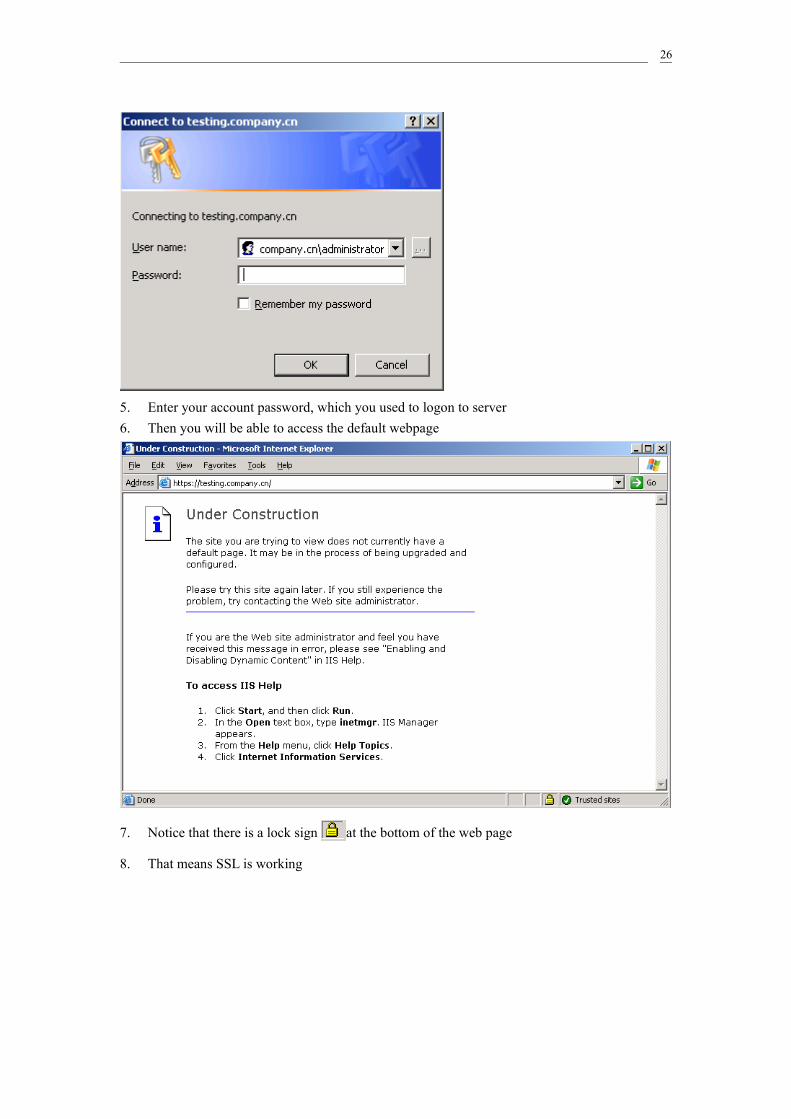
5. Enter your account password, which you used to logon to server6. Then you will be able to access the default webpage
7. Notice that there is a lock sign at the bottom of the web page
8. That means SSL is working
26