
Edexcel BTEC Level 2 First Award in Sport
155
Edexcel BTEC Level 2 First Award in Sport (Equivalent to 1 GCSE)
Transcript of Edexcel BTEC Level 2 First Award in Sport

Edexcel BTEC Level 2 First Award in Sport
(Equivalent to 1 GCSE)

Unit 1: Fitness for Sport & Exercise Externally Assessed
Unit 2: Practical Sports Performance Internally Assessed
Unit 5: Training for Personal Fitness Internally Assessed
Unit 6: Leading Sports Activities Internally Assessed

Fitness for Sport & Exercise All sports performers want to be the best they can be. To reach optimal levels requires years of dedication to training, including successfully overcoming any barriers such as injury.
Working closely with their coach, the performer will gain an appreciation and understanding of the different fitness components, training principles, training methods and fitness tests to improve their sports performance.
Sports performers train regularly to improve and maintain their fitness levels and performance. Their training programmes are tailored to their specific training needs and their sport.
Before different training methods can be explored, the sports performer needs to find out about their baseline fitness levels and what measures need to be improved. Fitness tests are essential; they help to identify areas that need improving and to track fitness improvements and progress over time.
Fitness for Sport & Exercise
Learning aims
In this unit you will:
A - know about the components of fitness and the principles of training
B - explore different fitness training methods
C - investigate fitness testing to determine fitness levels.
Externally Assessed = EXAM
Friday 25th April 2014
Unit 1: Fitness for Sport & Exercise WALT:
1. Understand what the learning aims of this unit are. 2. Understand the components of physical fitness . 3. Understand the components of skill related fitness. 4. Understand which sports use which components. 5. Understand why fitness components are important
for successful participation in sports.

WALT:
1. Understand what the learning aims of this unit are.
A - know about the components of fitness and the principles of training
B - explore different fitness training methods
C - investigate fitness testing to determine fitness levels.
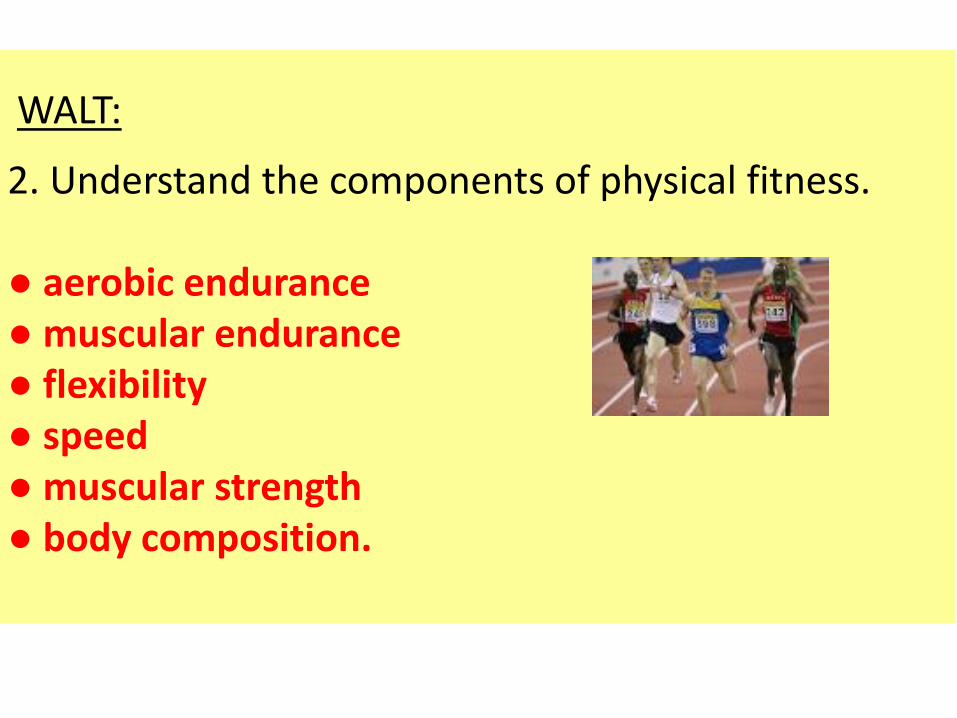
WALT:
2. Understand the components of physical fitness.
● aerobic endurance ● muscular endurance ● flexibility ● speed ● muscular strength ● body composition.
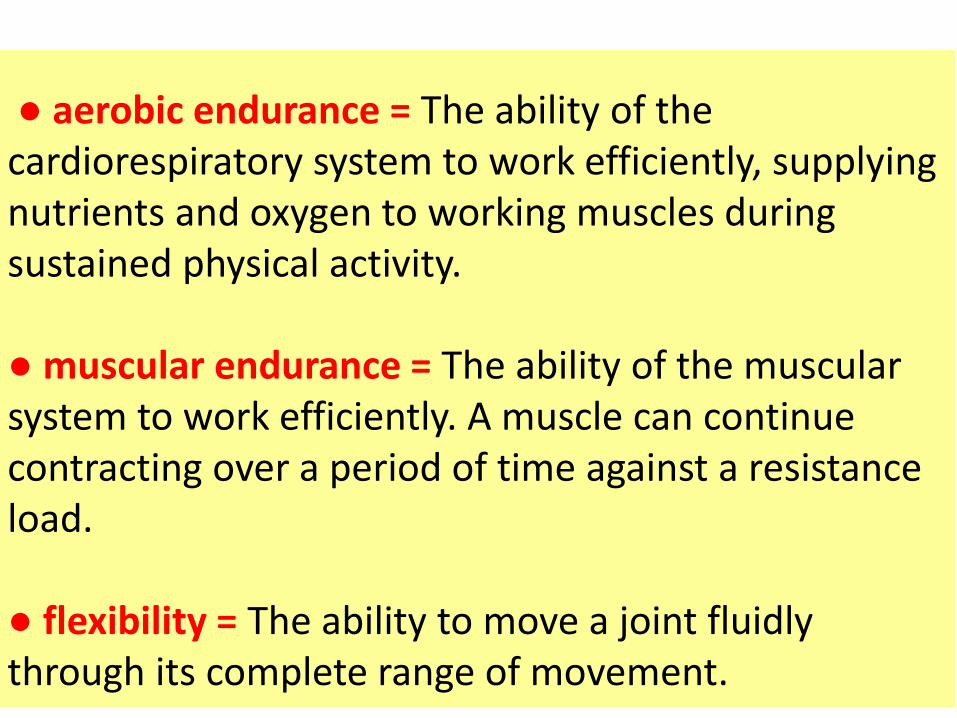
● aerobic endurance = The ability of the cardiorespiratory system to work efficiently, supplying nutrients and oxygen to working muscles during sustained physical activity. ● muscular endurance = The ability of the muscular system to work efficiently. A muscle can continue contracting over a period of time against a resistance load. ● flexibility = The ability to move a joint fluidly through its complete range of movement.
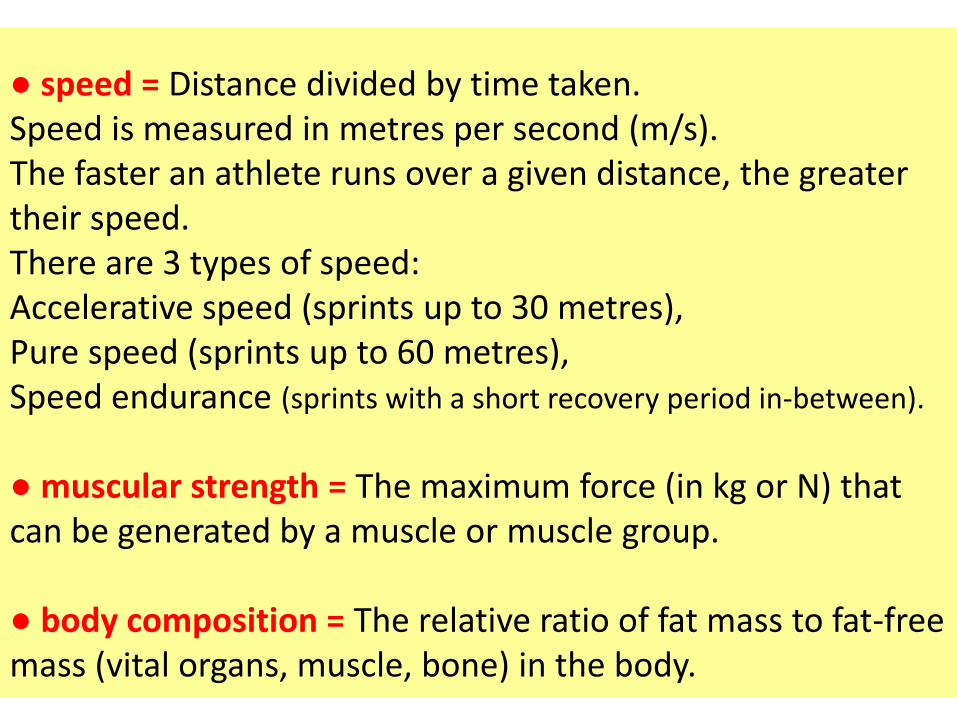
● speed = Distance divided by time taken. Speed is measured in metres per second (m/s). The faster an athlete runs over a given distance, the greater their speed. There are 3 types of speed: Accelerative speed (sprints up to 30 metres), Pure speed (sprints up to 60 metres), Speed endurance (sprints with a short recovery period in-between).
● muscular strength = The maximum force (in kg or N) that can be generated by a muscle or muscle group. ● body composition = The relative ratio of fat mass to fat-free mass (vital organs, muscle, bone) in the body.
WALT:
3. Understand the components of skill related fitness.
● agility ● balance ● coordination ● power ● reaction time

● agility = The ability of a sports performer to change direction quickly without losing balance or time. ● balance = The ability to maintain centre of mass over a base of support ● coordination = The smooth flow of movement needed to perform a complex motor task efficiently and accurately. ● power = The product of strength x speed It is expressed as the amount of work done in a unit of time. ● reaction time = The time taken for a sports performer to respond to a stimulus and to initiate their response.

WALT:
4. Understand which sports use which components. Which components of fitness are needed in : http://www.youtube.com/watch?v=Bo_hEDAndb8 http://www.youtube.com/watch?v=v46NeH3eYIM http://www.youtube.com/watch?v=37KDCSwomH4 http://www.youtube.com/watch?v=X7bj_LUIY7Y http://www.youtube.com/watch?v=xUzszvsnVes
WALT:
5. Understand why fitness components are important for successful participation in sports.
a) Why does a marathon runner need: ● aerobic endurance ● muscular endurance ● flexibility ● speed ● muscular strength ● body composition ● agility ● balance ● coordination ● power ● reaction time
WALT:
5. Understand why fitness components are important for successful participation in sports.
b) Why does a 100m swimmer need: ● aerobic endurance ● muscular endurance ● flexibility ● speed ● muscular strength ● body composition ● agility ● balance ● coordination ● power ● reaction time

WALT:
5. Understand why fitness components are important for successful participation in sports.
c) Why does a tennis player need: ● aerobic endurance ● muscular endurance ● flexibility ● speed ● muscular strength ● body composition ● agility ● balance ● coordination ● power ● reaction time

WALT:
5. Understand why fitness components are important for successful participation in sports.
d) What would happen to a footballers performance if they did not have any:
● aerobic endurance ●flexibility ● speed
WALT:
5. Understand why fitness components are important for successful participation in sports.
e) What would happen to a netballers performance if they did not have any:
● agility ●balance ● co-ordination

Fitness components are important for successful participation in sports because:
● being able to successfully meet the physical and skill related demands of the sport in order to reach optimal performance
● being able to perform efficiently
The importance of a Warm Up
1. Increase Body Temperature
2. Increase Blood Flow to the working muscles
3. Stretch muscles and improve the range of movement at a joint – reduce risk of injury
4. Concentrate the mind on training/performing
The importance of a cool down
1. Remove waste products – lactic acid
2. Repay the oxygen debt to your working muscles. Your body demands oxygen after strenuous exercise.
3. Reduce risk of blood pooling in your veins. Blood pooling is extra blood in the veins and can cause dizziness and make you feel weak

Outline of Warm up and Cool Down Key Terms
Heart Raising activity
Replicate movements (sidesteps, backwards…)
Stretching – Static – Dynamic/Active - passive
Game activity – Tag game
Gentle activity
Light exercise
Stretching – Static – Dynamic/Active - passive

What is your aerobic endurance like?
TEST: 12 minute cooper run.
HOW: Run as far as possible in 12 minutes.

The astro turf width (from white line to white line)
= 55.3m
So if you complete 32 widths in 12 minutes…
55.3m x 32 widths = 1769.6m

Age
Excellent
Above Average
Average
Below Average
Poor
13-14 >2700m 2400-2700m 2200-2399m 2100-2199m <2100m
15-16 >2800m 2500-2800m 2300-2499m 2200-2299m <2200m
17-19 >3000m 2700-3000m 2500-2699m 2300-2499m <2300m
20-29 >2800m 2400-2800m 2200-2399m 1600-2199m <1600m
30-39 >2700m 2300-2700m 1900-2299m 1500-1999m <1500m
40-49 >2500m 2100-2500m 1700-2099m 1400-1699m <1400m
>50 >2400m 2000-2400m 1600-1999m 1300-1599m <1300mFemale Athletes
Age
Excellent
Above Average
Average
Below Average
Poor
13-14 >2000m 1900-2000m 1600-1899m 1500-1599m <1500m
15-16 >2100m 2000-2100m 1700-1999m 1600-1699m <1600m
17-20 >2300m 2100-2300m 1800-2099m 1700-1799m <1700m
20-29 >2700m 2200-2700m 1800-2199m 1500-1799m <1500m
30-39 >2500m 2000-2500m 1700-1999m 1400-1699m <1400m
40-49 >2300m 1900-2300m 1500-1899m 1200-1499m <1200m
>50 >2200m 1700-2200m 1400-1699m 1100-1399m <1100m
Maless
Femaless

Lesson 2
Topic A4:
WALT: Understand exercise intensity and how it can be determined.

What is intensity?
How hard an individual is training.
How hard an individual will train.
How hard an individual can train.
What are the differences between these 3 statements?
How can you measure intensity?
1. Borg Scale - 1970 Rate of perceived
exertion (RPE)
2. Heart rate training zones

1. Borg Scale - 1970 Rate of perceived exertion (RPE)
The Borg Scale is a simple method of rating perceived exertion (RPE) and can be used by coaches to gauge an athlete's level of intensity when training or competing.
Perceived exertion is an individual's rating of exercise intensity, formed by assessing their body's physical signs such as heart rate, breathing rate and perspiration/sweating.
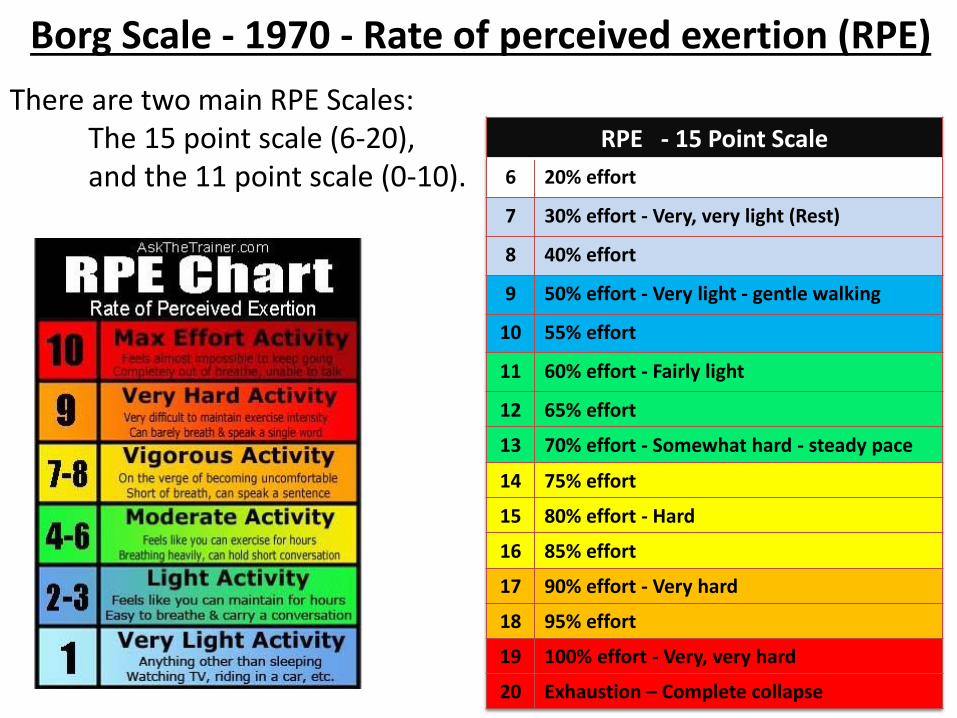
Borg Scale - 1970 - Rate of perceived exertion (RPE)
There are two main RPE Scales: The 15 point scale (6-20), and the 11 point scale (0-10).
RPE - 15 Point Scale
6 20% effort
7 30% effort - Very, very light (Rest)
8 40% effort
9 50% effort - Very light - gentle walking
10 55% effort
11 60% effort - Fairly light
12 65% effort
13 70% effort - Somewhat hard - steady pace
14 75% effort
15 80% effort - Hard
16 85% effort
17 90% effort - Very hard
18 95% effort
19 100% effort - Very, very hard
20 Exhaustion – Complete collapse

Borg Scale - 1970 – Rate of perceived
exertion (RPE)
We are going to use the 15 point
scale (6-20).
RPE - 15 Point Scale
6 20% effort
7 30% effort - Very, very light (Rest)
8 40% effort
9 50% effort - Very light - gentle walking
10 55% effort
11 60% effort - Fairly light
12 65% effort
13 70% effort - Somewhat hard - steady pace
14 75% effort
15 80% effort - Hard
16 85% effort
17 90% effort - Very hard
18 95% effort
19 100% effort - Very, very hard
20 Exhaustion – Complete collapse
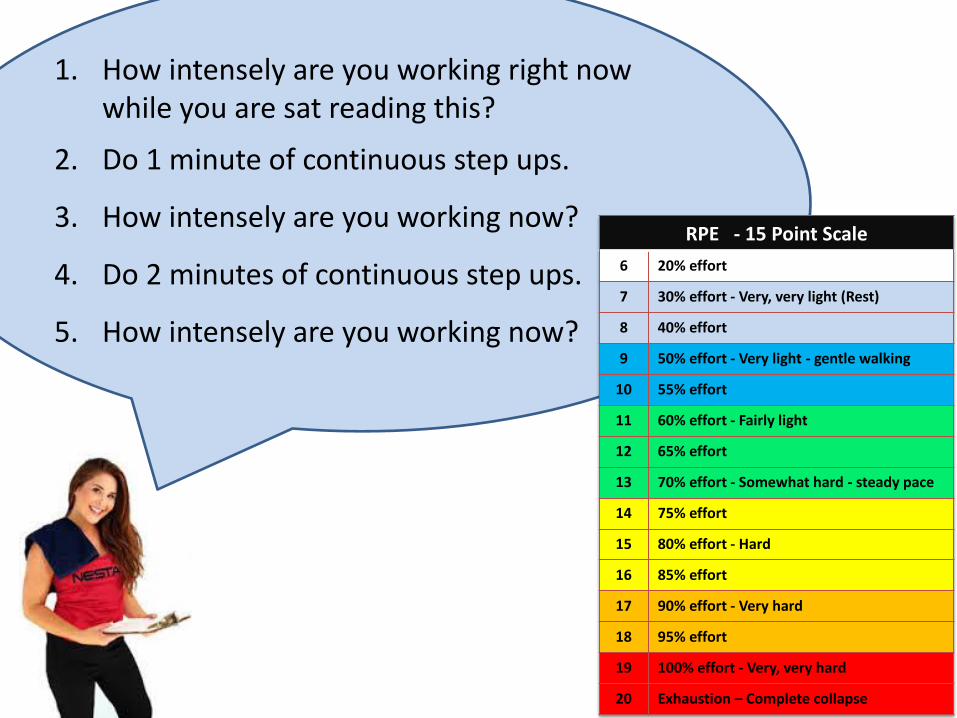
1. How intensely are you working right now while you are sat reading this?
2. Do 1 minute of continuous step ups.
3. How intensely are you working now?
4. Do 2 minutes of continuous step ups.
5. How intensely are you working now?
RPE - 15 Point Scale
6 20% effort
7 30% effort - Very, very light (Rest)
8 40% effort
9 50% effort - Very light - gentle walking
10 55% effort
11 60% effort - Fairly light
12 65% effort
13 70% effort - Somewhat hard - steady pace
14 75% effort
15 80% effort - Hard
16 85% effort
17 90% effort - Very hard
18 95% effort
19 100% effort - Very, very hard
20 Exhaustion – Complete collapse
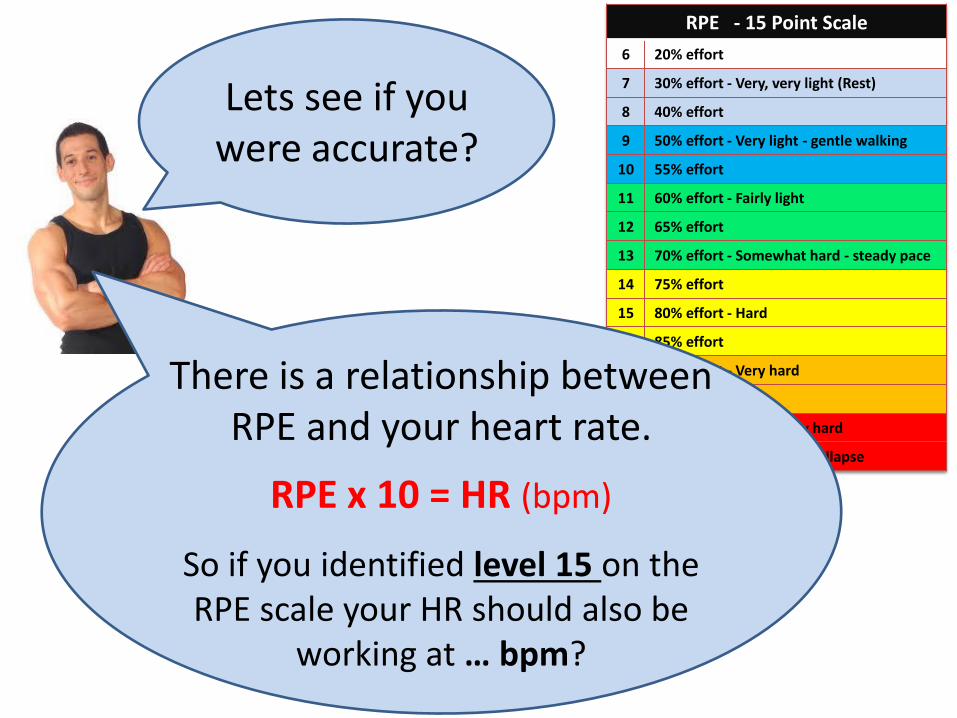
Lets see if you were accurate?
RPE - 15 Point Scale
6 20% effort
7 30% effort - Very, very light (Rest)
8 40% effort
9 50% effort - Very light - gentle walking
10 55% effort
11 60% effort - Fairly light
12 65% effort
13 70% effort - Somewhat hard - steady pace
14 75% effort
15 80% effort - Hard
16 85% effort
17 90% effort - Very hard
18 95% effort
19 100% effort - Very, very hard
20 Exhaustion – Complete collapse
There is a relationship between RPE and your heart rate.
RPE x 10 = HR (bpm)
So if you identified level 15 on the RPE scale your HR should also be
working at … bpm?

All you need to check your pulse is a stop watch. Sit down quietly and do not get distracted. You can measure your pulse rate anywhere an artery comes close to the skin, such as in your wrist, neck, temple area. You can easily measure your pulse on the inside of your wrist, below your thumb or you can measure your pulse in the carotid artery in your neck, on either side of your windpipe. •Gently place 2 fingers on the artery. •Do not use your thumb because it has its own pulse that you may feel.
•Count the beats for 30 seconds; then double the result to get the number of beats per minute.
How do you measure your heart rate?

Lets practice
Resting heart rate: •Sit still, do not move or
talk for 2 minutes.
•Find your pulse.
•Count the beats for 30 seconds; then double the result to get the number of beats per
minute.
Increased heart rate: •Complete 1 minute of
step ups.
•Find your pulse immediately .
•Count the beats for 30 seconds; then double the result to get the number of beats per
minute.

How high should you let your heart
rate go?
Calculation of Maximum Heart Rate The easiest and best known method to calculate your maximum heart rate (HRmax) is to use the formula
HRmax = 220 – Age It is possible to exceed this number of beats per minute without any danger, as long as you are quite fit and do not have heart disease or are at risk for a heart attack. What it may do, though, is leave you with an injury. Exercising above 85% of your target heart rate could bring you sore joints and muscles. It puts you at risk for overtraining.

Quick check!
You should be able to answers these questions.
What is intensity? What is the Borg Scale?
What does RPE stand for? What does level 20 on the scale represent? What is the relationship between RPE and
heart rate? I measure my heart rate by…
My resting heart rates is… My maximum heart rate is…

Lets see if you were accurate?
RPE - 15 Point Scale
6 20% effort
7 30% effort - Very, very light (Rest)
8 40% effort
9 50% effort - Very light - gentle walking
10 55% effort
11 60% effort - Fairly light
12 65% effort
13 70% effort - Somewhat hard - steady pace
14 75% effort
15 80% effort - Hard
16 85% effort
17 90% effort - Very hard
18 95% effort
19 100% effort - Very, very hard
20 Exhaustion – Complete collapse
Repeat the 2 minute step up test working at RPE level 15 again.
RPE x 10 = HR (bpm)
Take your heart rate immediately if you are accurate it should now be at
150 bpm.

How can you measure intensity?
1. Borg Scale - 1970 Rate of perceived
exertion (RPE)
2. Heart rate training zones

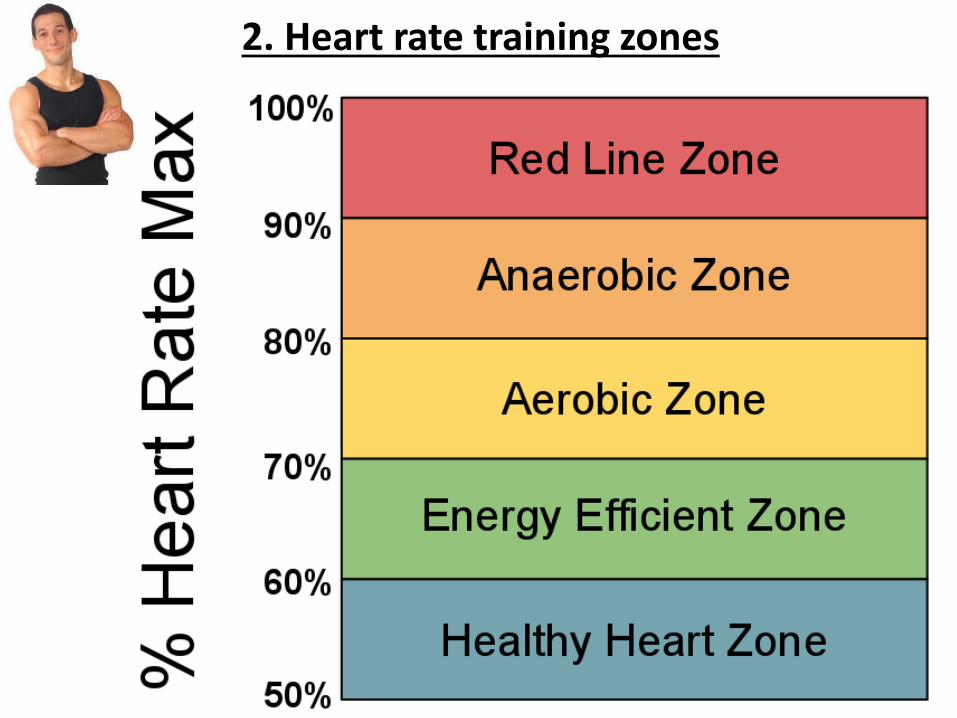
2. Heart rate training zones
Heart rate training zones are calculated by taking into consideration
your Maximum Heart Rate (HRmax)
and
your Resting Heart Rate (HRrest).
Athletes who use a heart rate monitor as a training aid need to identify their actual maximum heart rate in order to determine their appropriate training zones.
2. Heart rate training zones

2. Heart rate training zones
The Energy Efficient or Recovery Zone - 60% to 70% Training within this zone develops basic endurance and aerobic capacity. All easy recovery running should be completed at a maximum of 70%.
Another advantage to running in this zone is that while you are happily fat burning you may lose weight and you will be allowing your muscles to re-energise with glycogen, which has been expended during those faster paced workouts.

2. Heart rate training zones
The Aerobic Zone - 70% to 80% Training in this zone will develop your cardiovascular system. The body's ability to transport oxygen to, and carbon dioxide away from, the working muscles can be developed and improved. As you become fitter and stronger from training in this zone it will be possible to run some of your long weekend runs at up to 75%, so you will get the benefits of fat burning and improved aerobic capacity. How does it feel to work in this zone? We need 12 volunteers to work hard for 5 minutes. 2 will try to get their heart rates up to 70-80% on the treadmill. 2 will try to get their heart rates up to 70-80% on the bikes. 2 will try to get their heart rates up to 70-80% on the x-trainers. 6 will try to get their heart rates up to 70-80% on the rowers.

2. Heart rate training zones
The Anaerobic Zone - 80% to 90% Training in this zone will develop your lactic acid system. In this zone, your individual anaerobic threshold (AT) is found. During these heart rates, the amount of fat being utilised as the main source of energy is greatly reduced and glycogen stored in the muscle is predominantly used. One of the by-products of burning this glycogen is lactic acid. There is a point at which the body can no longer remove the lactic acid from the working muscles quickly enough. This is your anaerobic threshold (AT). Your muscles will stop working at this point. Through the correct training, it is possible to delay the AT by being able to increase your ability to deal with the lactic acid for a longer period of time or by pushing the AT higher.
2. Heart rate training zones
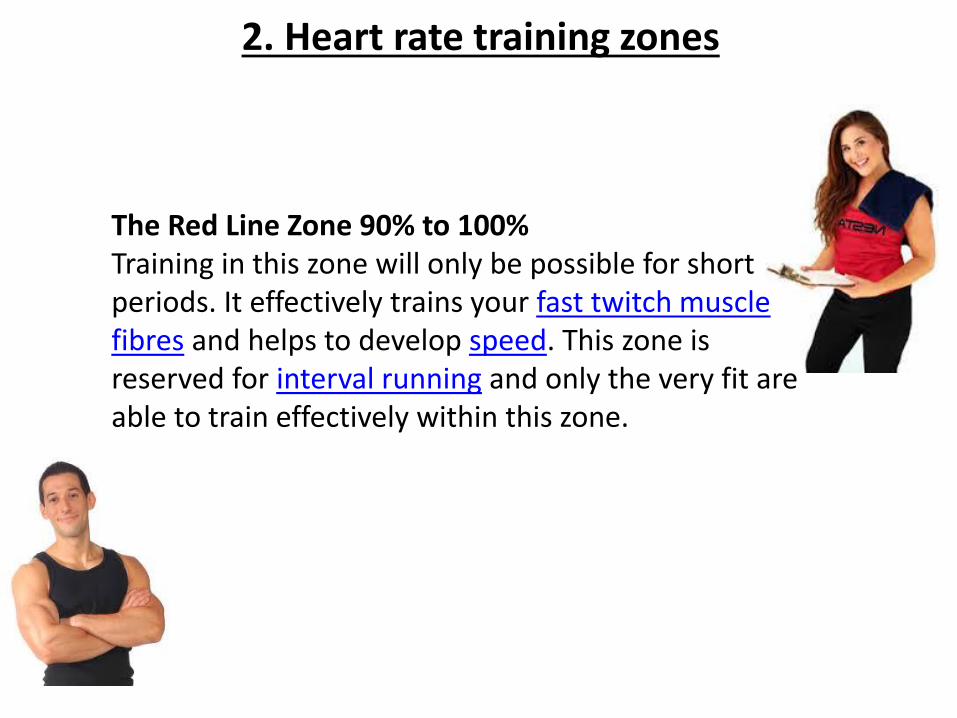
The Red Line Zone 90% to 100% Training in this zone will only be possible for short periods. It effectively trains your fast twitch muscle fibres and helps to develop speed. This zone is reserved for interval running and only the very fit are able to train effectively within this zone.

2. Heart rate training zones You might be asked what is a Training Threshold?
Training can only be effective if the body’s systems are put under stress.
So, there must be a suitable element of overload (added stress) in any training programme.
This means that we have to be able to work out the safe yet effective level that an individual should train at. This is known as the training threshold.
Physical work done below this level will have little or no effect on the improvement of fitness. However, work done too far above this level can lead to injury.
KEY POINT - A training threshold rate is a safe and effective level to work at.

Starter
Activity: Complete a circuit training session and record your exercise HR at pre-determined time intervals. Followed by analysis of HR data according to HR training zones.

Circuit training. (Designed to improve cardio-vascular endurance)
1 minute on each station
Treadmill
Bike
Rower Resistance 1
Rower Resistance 5
Rower Resistance 10
Star jumps
Astride jumps Mountain climbers
Squat jumps
Twist jumps
Spotty dogs Heart Rate
Heart Rate
Heart Rate
Heart Rate
Hamstring curl kicks
Step ups
Burpees
Split squats
Sit ups
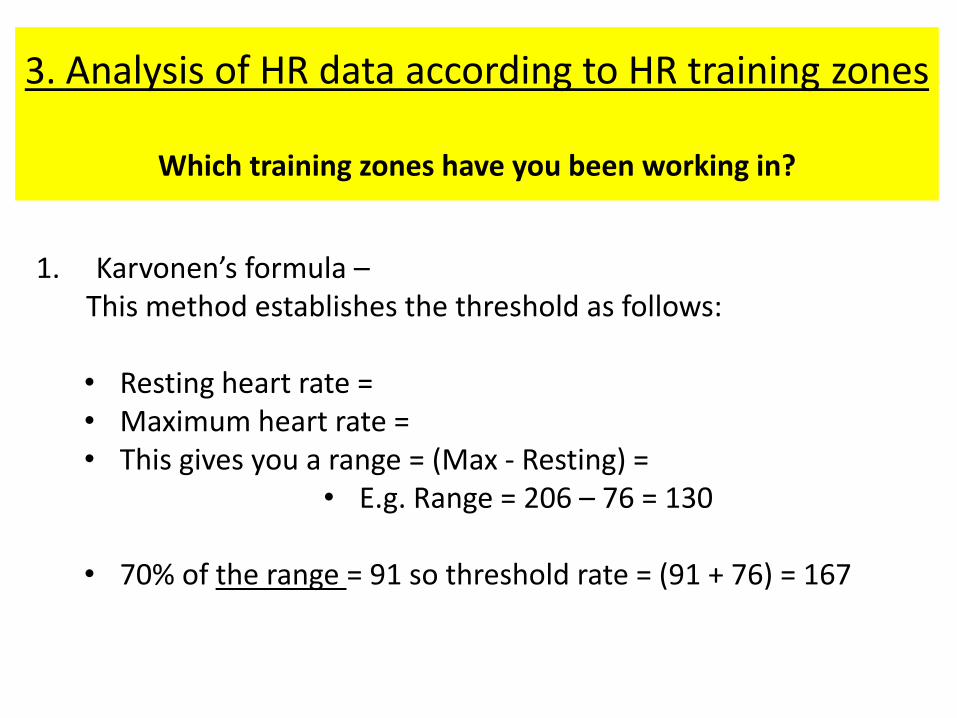
3. Analysis of HR data according to HR training zones
Which training zones have you been working in?
1. Karvonen’s formula – This method establishes the threshold as follows:
• Resting heart rate = • Maximum heart rate = • This gives you a range = (Max - Resting) =
• E.g. Range = 206 – 76 = 130
• 70% of the range = 91 so threshold rate = (91 + 76) = 167
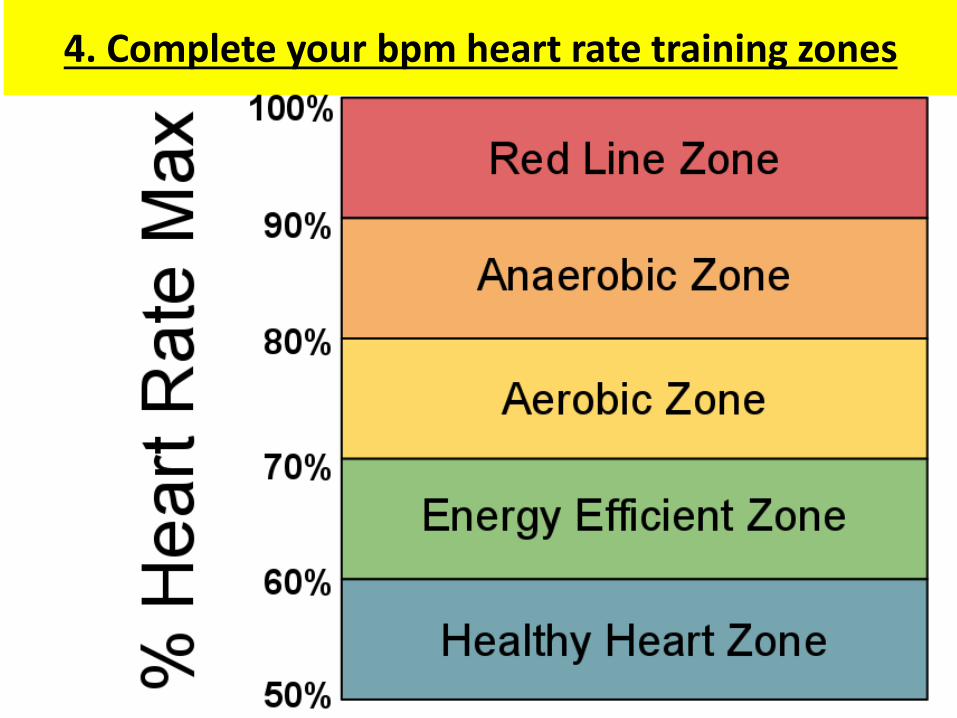
4. Complete your bpm heart rate training zones

5. Add to your circuit station sheet now.
Star jumps.
Spotty dogs.
Heart rate = 167 bpm = training zone = AEROBIC 70 – 80 %
Topic A5 & A6:
WALT: Understand the basic principles of training (FITT). Understand the additional principles of training.
Complete your principles of training work
sheet as we go.

Complete your principles of training work
sheet as we go.

The basic principles of training (FITT):
Definition
Application to training methods
Frequency:
The number of training sessions
completed over a period of time,
usually per week.
Intensity: How hard an individual will train.
Time: How long an individual will train
for.
Type:
How an individual will train by
selecting a
training method to improve a
specific
component of fitness and/or their
sports performance.

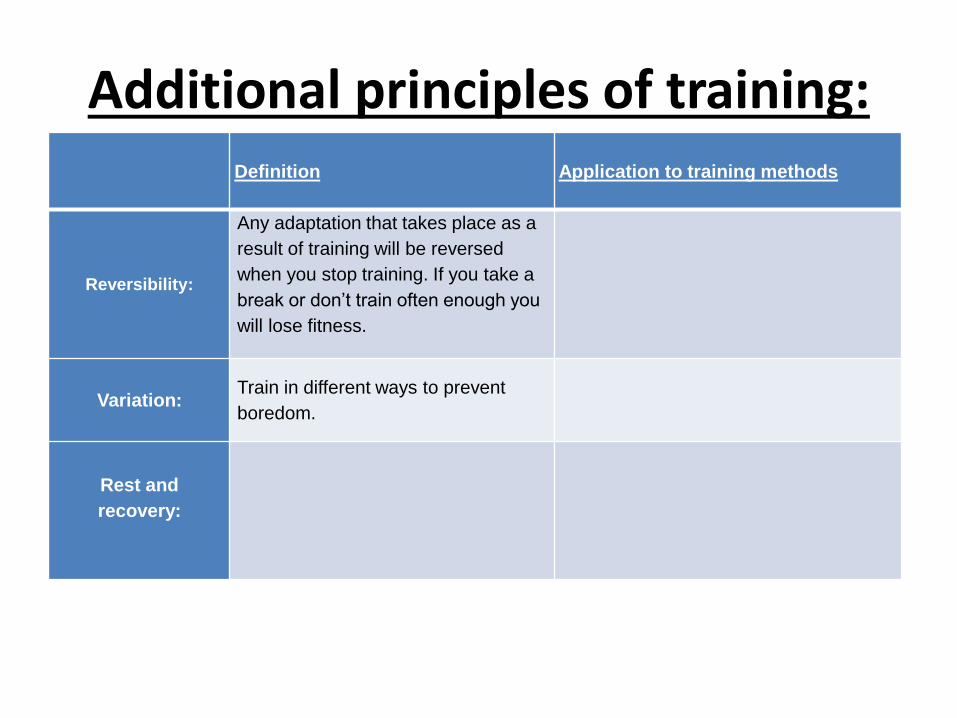
Additional principles of training:
Definition
Application to training methods
Progressive
overload:
Progressive overload is the gradual increase
of stress or force upon the body during
exercise. Fitness can only be improved by
training more than you normally do. You must
work hard.
Specificity:
Training should be relevant and appropriate
to the sport for which the individual is training
in order to be effective.
Individual
differences/needs:
A successful training programme will meet
individual needs which are personal fitness
needs based on age, gender, fitness level
and the sport for which we are training.
Adaptation:
Additional principles of training:
Definition
Application to training methods
Reversibility:
Any adaptation that takes place as a
result of training will be reversed
when you stop training. If you take a
break or don’t train often enough you
will lose fitness.
Variation: Train in different ways to prevent
boredom.
Rest and
recovery:

Lesson 4 The principles of training continued.
Friday 16th May 2014

STARTER
Quick recap from last lesson. You should be able to answers these questions.
What is intensity? What is the Borg Scale & what does RPE stand for?
What is the Karvonen’s formula? What does FITT stand for?
What does progressive overload mean? What does specificity mean?
What does individual differences mean? What does adaptation mean? What does reversibility mean?
What does variation mean? What does rest and recovery mean?

Create your own circuit. Question 1 = What is it specific for?
Design it to improve muscular strength for a rugby player
Which exercises improve leg strength?
• Squats • Jump squats • Split squats • Lunges • Reverse lunges • Left leg raises • Right leg raises • Calf raises
Which exercises improve chest and
arm strength?
• Push ups • Tricep dips • Lateral raises • Bicep curls • Shoulder press • Upright rows • Frontal raises • Long arm plank
Which exercises improve torso
strength?
• Crunches • V-sits • Reverse curls • Dorsal raises • Forearm plank • Left side plank • Right side plank • Reverse plank
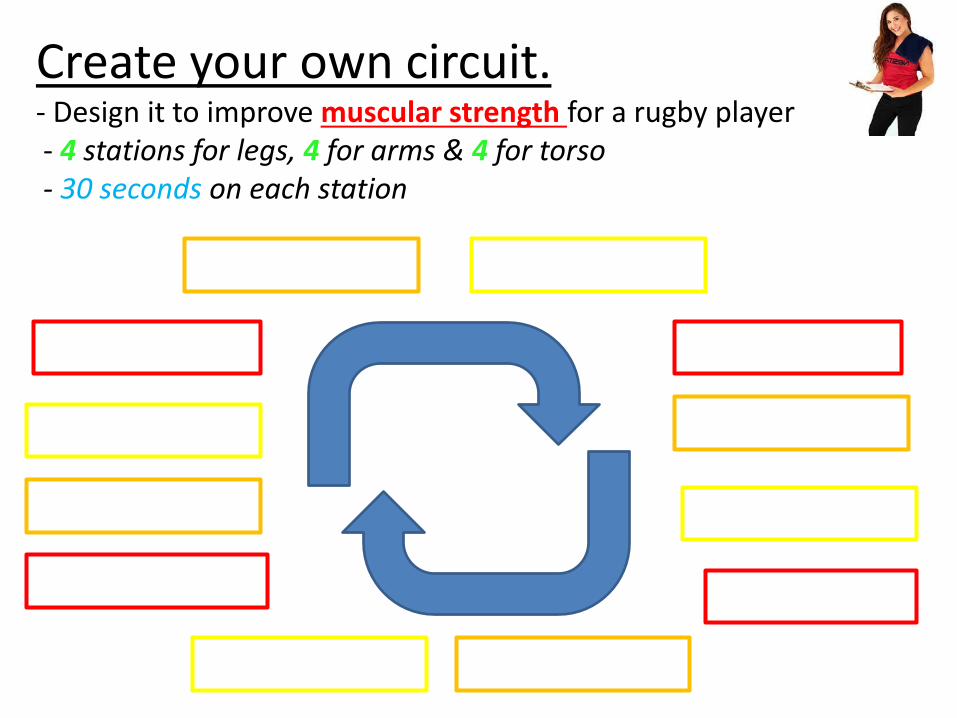
Create your own circuit. - Design it to improve muscular strength for a rugby player - 4 stations for legs, 4 for arms & 4 for torso - 30 seconds on each station

Applying the principles of training. How could you apply them to this circuit ?
Frequency -
Intensity -
Time -
Type -
Progressive overload -
Specificity -
Individual differences -
Adaptation -
Reversibility -
Variation -
Rest and recovery -
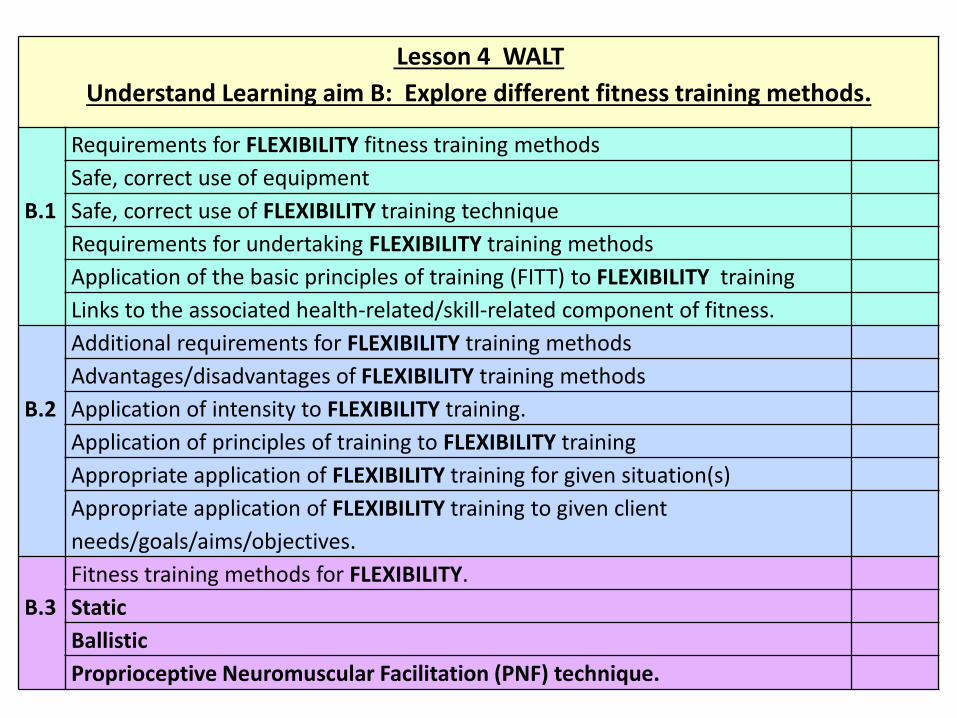
Lesson 4 WALT
Understand Learning aim B: Explore different fitness training methods.
B.1
Requirements for FLEXIBILITY fitness training methods
Safe, correct use of equipment
Safe, correct use of FLEXIBILITY training technique
Requirements for undertaking FLEXIBILITY training methods
Application of the basic principles of training (FITT) to FLEXIBILITY training
Links to the associated health-related/skill-related component of fitness.
B.2
Additional requirements for FLEXIBILITY training methods
Advantages/disadvantages of FLEXIBILITY training methods
Application of intensity to FLEXIBILITY training.
Application of principles of training to FLEXIBILITY training
Appropriate application of FLEXIBILITY training for given situation(s)
Appropriate application of FLEXIBILITY training to given client
needs/goals/aims/objectives.
B.3
Fitness training methods for FLEXIBILITY.
Static
Ballistic
Proprioceptive Neuromuscular Facilitation (PNF) technique.

Reminder:
What is Flexibility?
The maximum range of movement at a joint.
Lets find out how to train/improve it.

B.1
Requirements for FLEXIBILITY fitness training methods
Safe, correct use of equipment
Safe, correct use of FLEXIBILITY training technique
Requirements for undertaking FLEXIBILITY training methods
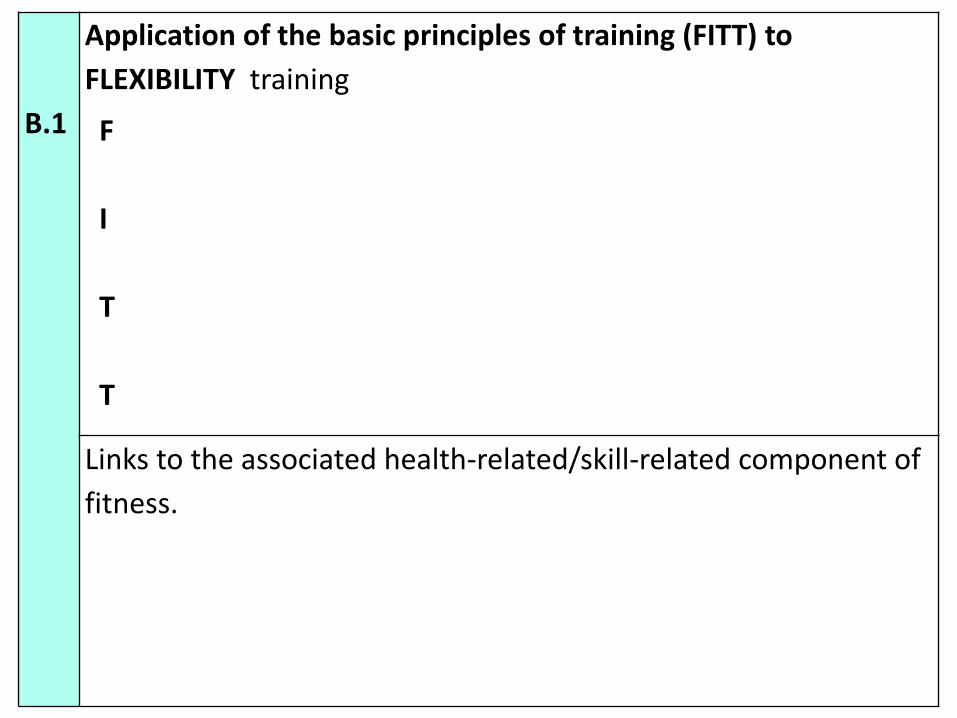
B.1
Application of the basic principles of training (FITT) to
FLEXIBILITY training
F
I
T
T
Links to the associated health-related/skill-related component of
fitness.

B.2
Additional requirements for FLEXIBILITY training methods
Advantages/disadvantages of FLEXIBILITY training methods

B.2
Application of intensity to FLEXIBILITY training.
Application of principles of training to FLEXIBILITY training
Progressive overload –
Specificity –
Individual differences –
Adaptation –
Reversibility –
Variation –
Rest and recovery –

B.2
Appropriate application of FLEXIBILITY training for a 14 year old gymnast
Appropriate application of FLEXIBILITY training for a 57 year old swimmer
Appropriate application of FLEXIBILITY training to given client
needs/goals/aims/objectives.
B.3
Fitness training methods for FLEXIBILITY.
Static
Ballistic
Proprioceptive Neuromuscular Facilitation (PNF) technique.

Lets go outside
and learn
so that when we come back in we can fill in all
those boxes!

B.1
Requirements for FLEXIBILITY fitness training methods
Safe, correct use of equipment Flexibility training does not require any equipment but your partner during PNF
training must be trustworthy and sensible or they will cause you injury.
Safe, correct use of FLEXIBILITY training technique The temperature of the joint and muscles should be warm
You should not over exert the stretch as this will cause injury
Requirements for undertaking FLEXIBILITY training methods The body responds best to a stretching program when it is warm and the muscles and
joints have been exercised through their current range of movement.
The temperature of the place where one is training (a warmer temperature is more
conducive to increased flexibility)
Age (pre-adolescents are generally more flexible than adults) Gender (females are generally more flexible than males) Clothing restrictions if it is too tight One's commitment to achieving flexibility

B.1
Application of the basic principles of training (FITT) to
FLEXIBILITY training
F
I
T
T
Links to the associated health-related/skill-related component of
fitness.
Strength
Speed
CV endurance
Agility

B.2
Additional requirements for FLEXIBILITY training methods
Advantages/disadvantages of FLEXIBILITY training methods
Advantages :
- Develops more movement to allow technical performance
-Helps to preventing injury
- It is easy to carry out and can be done anywhere, no equipment is required.
- Static methods produce fewer injuries than ballistic methods.
- For maximum results in the shortest possible time PNF technique is the best.
Disadvantages :
- When you perform a stretch correctly, you will feel mild discomfort
- if your PNF partner is not sensible they can push your muscles to far and cause injury.

B.2
Application of intensity to FLEXIBILITY training.
Application of principles of training to FLEXIBILITY training
Progressive overload –
Specificity –
Individual differences –
Adaptation –
Reversibility –
Variation –
Rest and recovery –

B.2
Appropriate application of FLEXIBILITY training for a 14 year old gymnast
Appropriate application of FLEXIBILITY training for a 57 year old swimmer
Appropriate application of FLEXIBILITY training to given client
needs/goals/aims/objectives.
B.3
Fitness training methods for FLEXIBILITY.
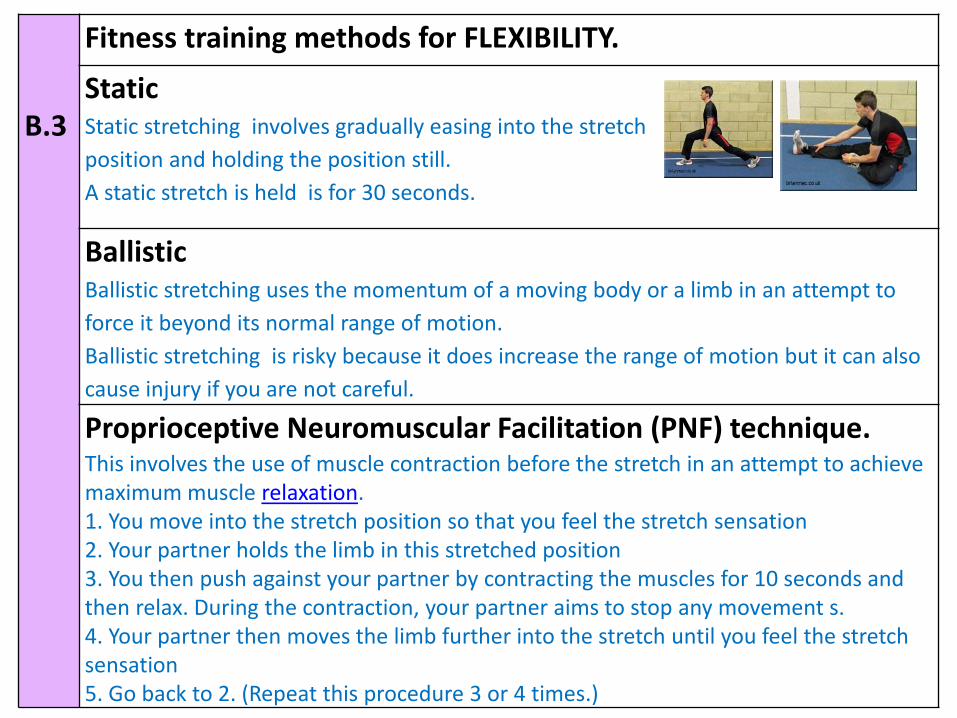
Static Static stretching involves gradually easing into the stretch
position and holding the position still.
A static stretch is held is for 30 seconds.
Ballistic Ballistic stretching uses the momentum of a moving body or a limb in an attempt to
force it beyond its normal range of motion.
Ballistic stretching is risky because it does increase the range of motion but it can also
cause injury if you are not careful.
Proprioceptive Neuromuscular Facilitation (PNF) technique. This involves the use of muscle contraction before the stretch in an attempt to achieve maximum muscle relaxation. 1. You move into the stretch position so that you feel the stretch sensation 2. Your partner holds the limb in this stretched position 3. You then push against your partner by contracting the muscles for 10 seconds and then relax. During the contraction, your partner aims to stop any movement s. 4. Your partner then moves the limb further into the stretch until you feel the stretch sensation 5. Go back to 2. (Repeat this procedure 3 or 4 times.)

Lesson 5 The principles of training continued.
Friday 23rd May 2014

STARTER
Quick recap from last lesson. You should be able to answers these questions.
What is intensity? What is the Borg Scale & what does RPE stand for?
What is the Karvonen’s formula? What does FITT stand for?
What does progressive overload mean? What does specificity mean?
What does individual differences mean? What does adaptation mean? What does reversibility mean?
What does variation mean? What does rest and recovery mean?

Last lesson you created your own circuit.
It was specific for improving muscular
strength for a rugby player.

You chose to include 12 stations from the following lists.
Which exercises improve leg strength?
• Squats • Jump squats • Split squats • Lunges • Reverse lunges • Left leg raises • Right leg raises • Calf raises
Which exercises improve chest and
arm strength?
• Push ups • Tricep dips • Lateral raises • Bicep curls • Shoulder press • Upright rows • Frontal raises • Long arm plank
Which exercises improve torso
strength?
• Crunches • V-sits • Reverse curls • Dorsal raises • Forearm plank • Left side plank • Right side plank • Reverse plank

Have a look at your circuit because you will be doing it in a few minutes.

Applying the principles of training. How could you apply them to this circuit ?
Frequency -
Intensity -
Time -
Type -
Progressive overload -
Specificity -
Individual differences -
Adaptation -
Reversibility -
Variation -
Rest and recovery -
Did you fill this section out in enough detail?
“Think exam style answers”.
Which is a better answer for Time…
A) Make it longer
B) Increase the length of each station to ensure progression or increase the length of the training session by completing the
circuit twice.

LETS DO IT!

Lesson 5 WALT
Understand Learning aim B: Explore different fitness training methods.
B.1
Requirements for MUSCULAR STRENGTH, MUSCULAR ENDURANCE & POWER fitness
training methods
Safe, correct use of equipment
Safe, correct use of training technique
Requirements for undertaking these training methods
Application of the basic principles of training (FITT)
Links to the associated health-related/skill-related component of fitness.
B.2
Additional requirements for MUSCULAR STRENGTH, MUSCULAR ENDURANCE & POWER
training methods
Advantages/disadvantages of these training methods
Application of intensity to MUSCULAR STRENGTH, MUSCULAR ENDURANCE & POWER training.
Application of principles of training
Appropriate application for given situation(s)
Appropriate application of to given client needs/goals/aims/objectives.
B.3
Fitness training methods for MUSCULAR STRENGTH, MUSCULAR ENDURANCE & POWER.
Circuit training
Weight Training Isometric Contracions
Plometrics

Reminder:
What is Muscular Strength?
The maximum force (in kg or N) that can be generated by a
muscle or muscle group.

B.1
Requirements for MUSCULAR STRENGTH fitness training methods
Safe, correct use of equipment
Safe, correct use of MUSCULAR STRENGTH training technique
Requirements for undertaking MUSCULAR STRENGTH training
methods

B.1
Application of the basic principles of training (FITT)
F
I
T
T
Links to the associated health-related/skill-related component of
fitness.
Power
Speed
CV endurance
Agility
B.2
Additional requirements for MUSCULAR STRENGTH training
methods
Advantages/disadvantages of MUSCULAR STRENGTH training
methods
Advantages :
Disadvantages :

B.2
Application of intensity to MUSCULAR STRENGTH training.
Application of principles of training to MUSCULAR STRENGTH
training
Progressive overload –
Specificity –
Individual differences –
Adaptation –
Reversibility –
Variation –
Rest and recovery –
B.2
Appropriate application of MUSCULAR STRENGTH training for a 14 year old
gymnast
Appropriate application of MUSCULAR STRENGTH training for a 57 year old
swimmer
Appropriate application of MUSCULAR STRENGTH training to
given client needs/goals/aims/objectives.
B.3
Fitness training methods for MUSCULAR STRENGTH .

Lesson 5 WALT
Understand Learning aim B: Explore different fitness training methods.
B.1
Requirements for MUSCULAR STRENGTH, MUSCULAR ENDURANCE & POWER fitness
training methods
Safe, correct use of equipment
Safe, correct use of training technique
Requirements for undertaking these training methods
Application of the basic principles of training (FITT)
Links to the associated health-related/skill-related component of fitness.
B.2
Additional requirements for MUSCULAR STRENGTH, MUSCULAR ENDURANCE & POWER
training methods
Advantages/disadvantages of these training methods
Application of intensity to MUSCULAR STRENGTH, MUSCULAR ENDURANCE & POWER training.
Application of principles of training
Appropriate application for given situation(s)
Appropriate application of to given client needs/goals/aims/objectives.
B.3
Fitness training methods for MUSCULAR STRENGTH, MUSCULAR ENDURANCE & POWER.
Circuit training
Weight Training Isometric Contracions
Plometrics
Reminder:
What is Muscular Endurance?
The ability of the muscular system to work efficiently. A
muscle can continue contracting over a period of time against a
resistance load.

Create your own circuit. Question 1 = What is it specific for?
Design it to improve muscular endurance for a rugby player
Which exercises improve leg strength?
• Squats • Jump squats • Split squats • Lunges • Reverse lunges • Left leg raises • Right leg raises • Calf raises
Which exercises improve chest and
arm strength?
• Push ups • Tricep dips • Lateral raises • Bicep curls • Shoulder press • Upright rows • Frontal raises • Long arm plank
Which exercises improve torso
strength?
• Crunches • V-sits • Reverse curls • Dorsal raises • Forearm plank • Left side plank • Right side plank • Reverse plank

Create your own circuit. - Design it to improve muscular endurance for a rugby player - 4 stations for legs, 4 for arms & 4 for torso - ____ seconds on each station

Applying the principles of training. How could you apply them to this circuit ?
Frequency -
Intensity -
Time -
Type -
Progressive overload -
Specificity -
Individual differences -
Adaptation -
Reversibility -
Variation -
Rest and recovery -

B.1
Requirements for MUSCULAR ENDURANCE fitness training methods
Safe, correct use of equipment
Safe, correct use of MUSCULAR ENDURANCE training technique
Requirements for undertaking MUSCULAR ENDURANCE training
methods

B.1
Application of the basic principles of training (FITT)
F
I
T
T
Links to the associated health-related/skill-related component of
fitness.
Power
Speed
CV endurance
Agility

B.2
Additional requirements for MUSCULAR ENDURANCE training
methods
Advantages/disadvantages of MUSCULAR ENDURANCE training
methods
Advantages :
Disadvantages :
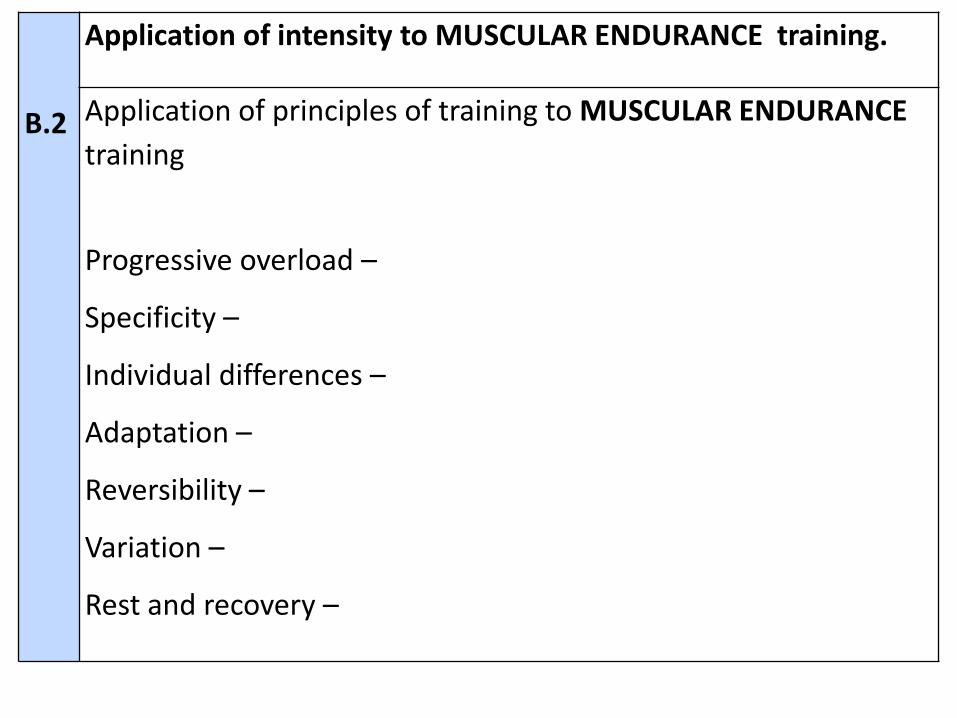
B.2
Application of intensity to MUSCULAR ENDURANCE training.
Application of principles of training to MUSCULAR ENDURANCE
training
Progressive overload –
Specificity –
Individual differences –
Adaptation –
Reversibility –
Variation –
Rest and recovery –

B.2
Appropriate application of MUSCULAR ENDURANCE training for a 14 year old
gymnast
Appropriate application of MUSCULAR ENDURANCE training for a 57 year old
swimmer
Appropriate application of MUSCULAR ENDURANCE training to
given client needs/goals/aims/objectives.

B.3
Fitness training methods for MUSCULAR ENDURANCE .

LETS DO IT!
Lesson 6 The principles of training continued.
Friday 6th June 2014

First we need to check your understanding so far. - Complete the mid unit exam (in silence). Secondly lets make sure you have finished lesson 5’s WALT. Part of your homework was to create a power circuit and fill out the paperwork that goes with it. If you have not stuck this in your book yet – do it now. (There are spare worksheets in my purple box if you have not filled these in do it now!)
Lets check you got it right :
What is Power?
The product of strength x speed
It is expressed as the amount of work done in a unit of time.

Create your own circuit. Question 1 = What is it specific for?
Design it to improve power for a rugby player
Which exercises improve leg power?
• Squats • Jump squats • Split squats • Jump Lunges • Calf raises
Which exercises improve chest and
arm power?
• Push ups • Tricep dips • Lateral raises • Bicep curls • Shoulder press • Upright rows • Frontal raises
Which exercises improve torso
power?
• Crunches • V-sits • Reverse curls • Dorsal raises

Create your own circuit. - Design it to improve power for a rugby player - 4 stations for legs, 4 for arms & 4 for torso - ____ seconds on each station
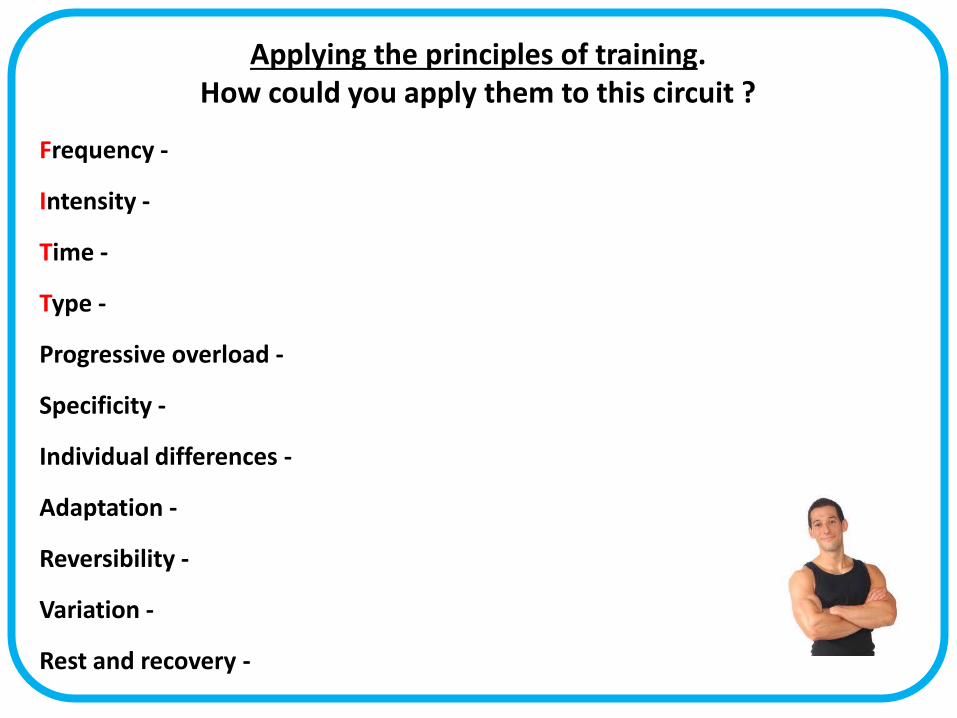
Applying the principles of training. How could you apply them to this circuit ?
Frequency -
Intensity -
Time -
Type -
Progressive overload -
Specificity -
Individual differences -
Adaptation -
Reversibility -
Variation -
Rest and recovery -

B.1
Requirements for POWER fitness training methods
Safe, correct use of equipment
Safe, correct use of POWER training technique
Requirements for undertaking POWER training methods
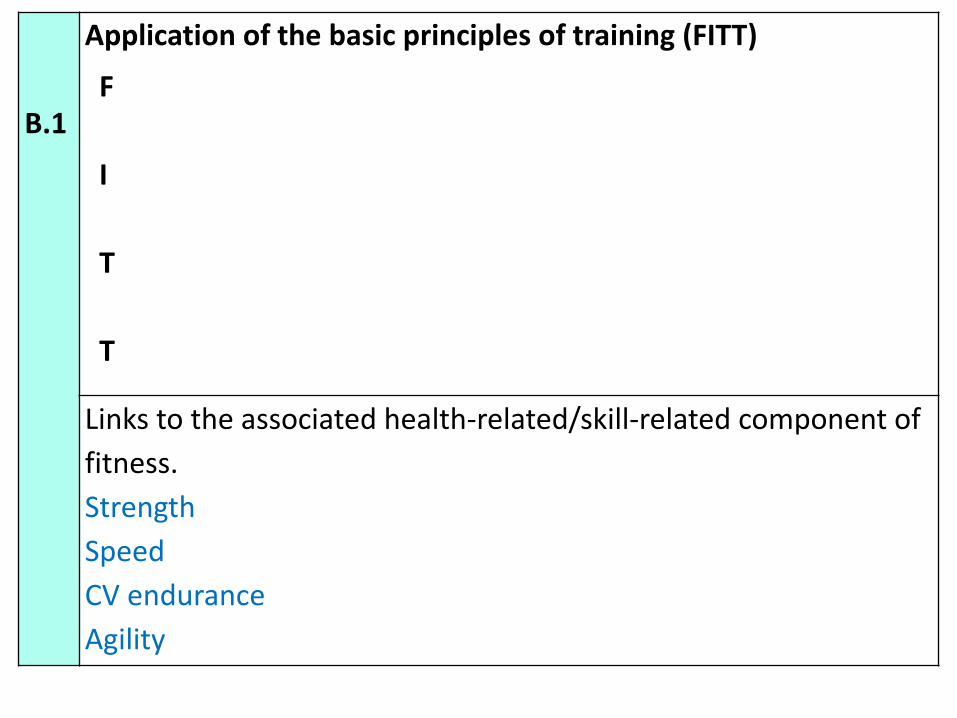
B.1
Application of the basic principles of training (FITT)
F
I
T
T
Links to the associated health-related/skill-related component of
fitness.
Strength
Speed
CV endurance
Agility

B.2
Additional requirements for POWER training methods
Advantages/disadvantages of POWER training methods
Advantages :
Disadvantages :
B.2
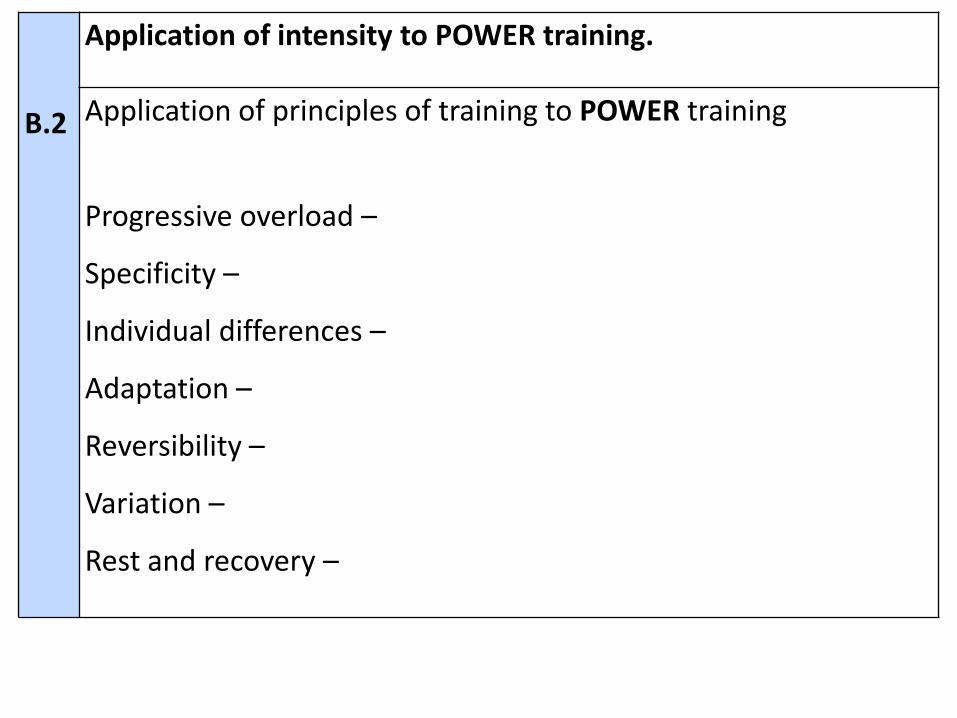
Application of intensity to POWER training.
Application of principles of training to POWER training
Progressive overload –
Specificity –
Individual differences –
Adaptation –
Reversibility –
Variation –
Rest and recovery –

B.2
Appropriate application of POWER training for a 14 year old gymnast
Appropriate application of POWER training for a 57 year old swimmer
Appropriate application of POWER training to given client
needs/goals/aims/objectives.

B.3
Fitness training methods for POWER .

Todays new training methods: Aerobic Endurance Plyometrics
Reminder:
Aerobic Endurance?
The ability of the cardiorespiratory system to work efficiently,
supplying nutrients and oxygen to working muscles during sustained
physical activity.

Remember this Circuit? This was the first circuit we did. We used it to measure our heart rates. (Designed to improve cardio-vascular endurance)
1 minute on each station
Treadmill
Bike
Rower Resistance 1
Rower Resistance 5
Rower Resistance 10
Star jumps
Astride jumps Mountain climbers
Squat jumps
Twist jumps
Spotty dogs Heart Rate
Heart Rate
Heart Rate
Heart Rate
Hamstring curl kicks
Step ups
Burpees
Split squats
Sit ups

You know what is coming now… Yes you were correct, completing the paperwork.

B.1
Requirements for AEROBIC ENDURANCE fitness training methods
Safe, correct use of equipment
Safe, correct use of AEROBIC ENDURANCE training technique
Requirements for undertaking AEROBIC ENDURANCE training
methods

B.1
Application of the basic principles of training (FITT)
F
I
T
T
Links to the associated health-related/skill-related component of
fitness.
Power
Speed
Agility
Strength

B.2
Additional requirements for AEROBIC ENDURANCE training
methods
Advantages/disadvantages of AEROBIC ENDURANCE training
methods
Advantages :
Disadvantages :
B.2
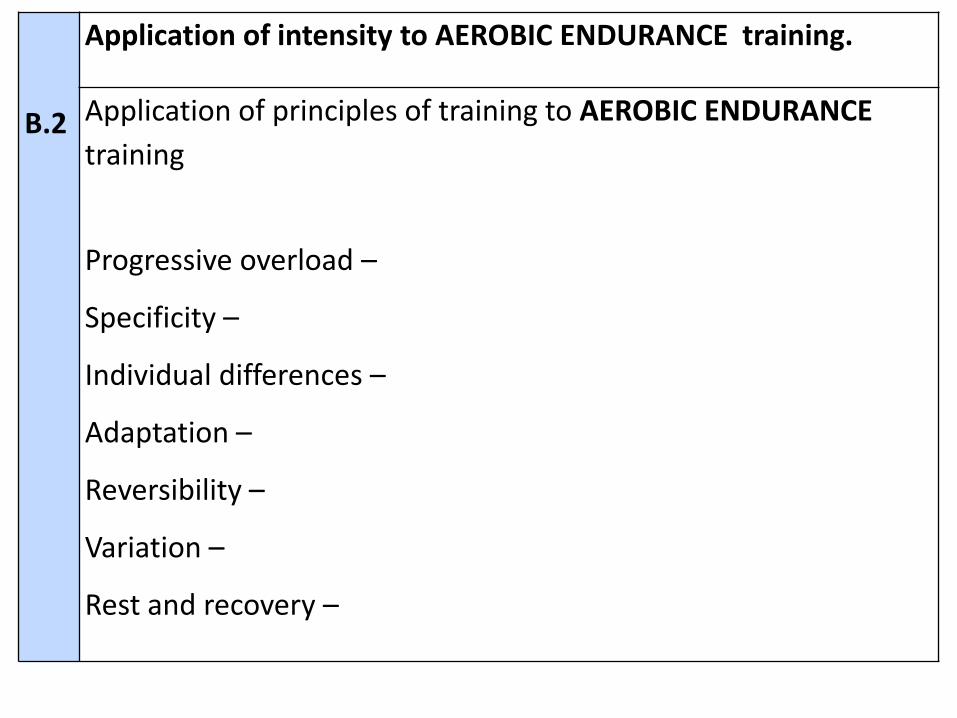
Application of intensity to AEROBIC ENDURANCE training.
Application of principles of training to AEROBIC ENDURANCE
training
Progressive overload –
Specificity –
Individual differences –
Adaptation –
Reversibility –
Variation –
Rest and recovery –

B.2
Appropriate application of AEROBIC ENDURANCE training for a 14 year old
gymnast
Appropriate application of AEROBIC ENDURANCE training for a 57 year old
swimmer
Appropriate application of AEROBIC ENDURANCE training to
given client needs/goals/aims/objectives.

B.3
Fitness training methods for AEROBIC ENDURANCE .
Circuit Training
Continuous Training
Interval Training
Reminder:
Plyometrics?
This type of training develops sport-specific explosive power and
strength. Types of exercises include lunging, bounding, hopping and
jumping.

No more circuits! Lets go outside and complete some plyometric training.

You know what is coming now… Yes you were correct, completing the paperwork.

B.1
Requirements for PLYOMETRIC training methods
Safe, correct use of equipment
Safe, correct use of PLYOMETRIC training technique
Requirements for undertaking PLYOMETRIC training methods

B.1
Application of the basic principles of training (FITT)
F
I
T
T
Links to the associated health-related/skill-related component of
fitness.
Power
Speed
Agility
Strength

B.2
Additional requirements for PLYOMETRIC training methods
Advantages/disadvantages of PLYOMETRIC training methods
Advantages :
Disadvantages :

B.2
Application of intensity to PLYOMETRIC training.
Application of principles of training to PLYOMETRIC training
Progressive overload –
Specificity –
Individual differences –
Adaptation –
Reversibility –
Variation –
Rest and recovery –

B.2
Appropriate application of PLYOMETRIC training for a 14 year old gymnast
Appropriate application of PLYOMETRIC training for a 57 year old swimmer
Appropriate application of PLYOMETRIC training to given client
needs/goals/aims/objectives.

B.3
Explain how to do PLYOMETRIC training.

FANTASTIC! YOU HAVE NOW COMPLETED ALL OF THE
FOLLOWING WORK SHEETS: 1. FLEXIBILITY
2. MUSCULAR STRENGTH 3. MUSCULAR ENDURANCE
4. MUSCULAR POWER 5. AEROBIC ENDURANCE VIA CIRCUITS
6. PLYOMETRICS
OVER THE NEXT 3 WEEKS YOU ONLY HAVE 4 MORE TO GO 1. FREE WEIGHTS
2. AEROBIC ENDURANCE VIA OTHER METHODS 3. SPEED
THEN YOU CAN PRACTICE APPLYING ALL OF THE INFORMATION TO EXAM QUESTIONS!
Fitness Testing.
Friday 18th July 2014
WALT: Understand the methods for testing the components of fitness.
Understand the requirements for administration of each fitness test.
Understand the importance of fitness testing to sports performers and coaches.
Interpret our fitness test results.

Sit and reach test. Flexibility

Grip dynamometer test. Strength
Multi-stage fitness test (Bleep test)
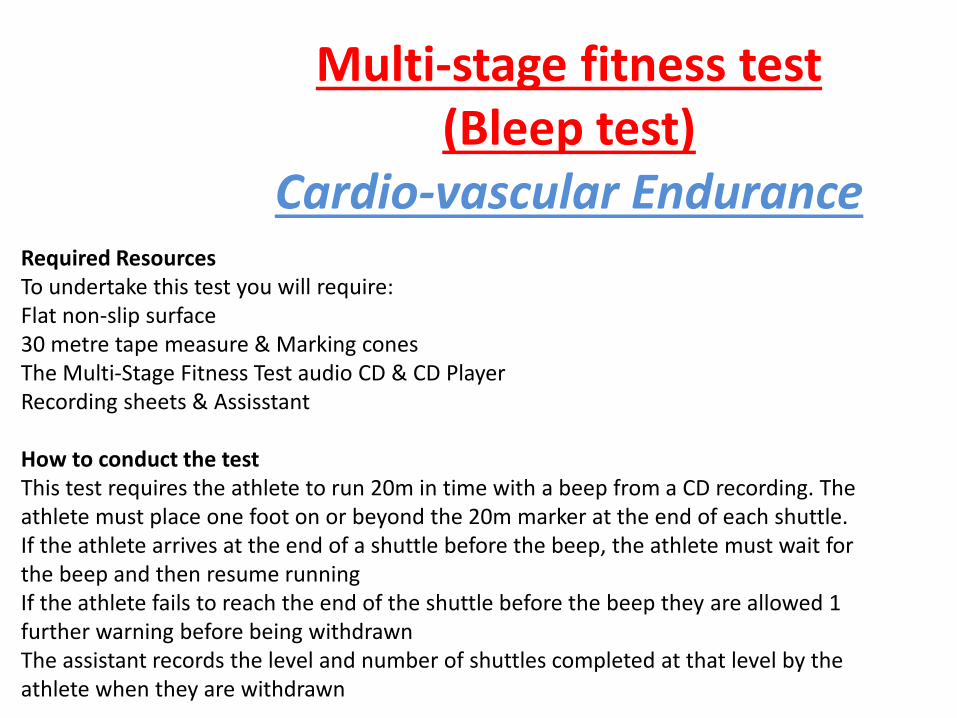
Cardio-vascular Endurance Required Resources To undertake this test you will require: Flat non-slip surface 30 metre tape measure & Marking cones The Multi-Stage Fitness Test audio CD & CD Player Recording sheets & Assisstant How to conduct the test This test requires the athlete to run 20m in time with a beep from a CD recording. The athlete must place one foot on or beyond the 20m marker at the end of each shuttle. If the athlete arrives at the end of a shuttle before the beep, the athlete must wait for the beep and then resume running If the athlete fails to reach the end of the shuttle before the beep they are allowed 1 further warning before being withdrawn The assistant records the level and number of shuttles completed at that level by the athlete when they are withdrawn

Multi-stage fitness test (Bleep test)
Cardio-vascular Endurance
http://www.thebeeptest.com/safety.html
Safety
Multi-stage fitness test (Bleep test)
Cardio-vascular Endurance
Demonstration: http://www.youtube.com/watch?v=OKKBUNt-L7w

Multi-stage fitness test
Normative data MALE
Age Excellent Above Average Average Below Average Poor
14 - 16 L12 S7 L11 S2 L8 S9 L7 S1 < L6 S6
17 - 20 L12 S12 L11 S6 L9 S2 L7 S6 < L7 S3
21 - 30 L12 S12 L11 S7 L9 S3 L7 S8 < L7 S5
31 - 40 L11 S7 L10 S4 L6 S10 L6 S7 < L6 S4
41 - 50 L10 S4 L9 S4 L6 S9 L5 S9 < L5
FEMALE
Age Excellent Above Average Average Below Average Poor
14 - 16 L10 S9 L9 S1 L6 S7 L5 S1 < L4 S7
17 - 20 L10 S11 L9 S3 L6 S8 L5 S2 < L4 S9
21 - 30 L10 S8 L9 S2 L6 S6 L5 S1 < L4 S9
31 - 40 L10 S4 L8 S7 L6 S3 L4 S6 < L4 S5
41 - 50 L9 S9 L7 S2 L5 S7 L4 S2 < L4 S1

Definition of VO2 max. Fitness can be measured by the volume of oxygen you can consume while exercising at your maximum capacity. VO2 max is the maximum amount of oxygen in millilitres, one can use in one minute per kilogram of body weight. Those who are fit have higher VO2 max values and can exercise more intensely than those who are not as well conditioned. Numerous studies show that you can increase your VO2 max by working out at an intensity that raises your heart rate to between 65 and 85% of its maximum for at least 20 minutes three to five times a week. A mean value of VO2 max for male athletes is about 3.5 litres/minute and for female athletes it is about 2.7 litres/minute.

Forestry step test. Cardio-vascular Endurance

35m sprint test. Speed
Required Resources To undertake this test you will require: Flat non-slip surface Measuring tape Stopwatch Assistant Cones How to conduct the test This test requires the athlete to conduct 3 x 35 metre time trails. The athlete warms up for 10 minutes The athlete takes up a sprint start position The assistant gives the commands “On Your Marks, Set, GO” and starts the stopwatch The athlete sprints the 35 metres The assistance stops the stopwatch when the athlete’s torso crosses the finishing line and records the time The athlete conducts 3 x 35metre sprints with a 5 minute recovery between each sprint The assistant uses the fastest time to assess the athlete’s performance

35m sprint test. Speed
Demonstration: http://www.youtube.com/watch?v=j6NKc_fSOus
Normative Data The following table provides ratings for the 35m sprint test
Rating Male Female
Excellent < 4.80 < 5.30
Good 4.80 - 5.09 5.30 - 5.59
Average 5.10 - 5.29 5.60 - 5.89
Fair 5.30 - 5.60 5.90 - 6.20
Poor > 5.60 > 6.20

Illinois agility test. Speed & Agility
Required Resources
To undertake this test you will require:
•Flat non-slip surface
•8 cones
•Stopwatch Assistant
How to conduct the test
This test requires the athlete to run the red line
route in the diagram below as fast as possible.
•The athlete lies face down on the floor at the “Start” cone
•The assistant gives the command “GO” and starts the stopwatch.
•The athlete jumps to his/her feet and negotiates the course around
the cones following the red line route shown in the diagram to the finish
•The assistant stops the stopwatch and records the time when the
•athlete passes the “Finish” cone

Illinois agility test. Speed & Agility
Demonstration: http://www.youtube.com/watch?v=Ys_jWY7J4nE
Normative data for the Illinois Agility Run Test The following are national norms for 16 to 19 year olds
Gender Excellent Above Average Average Below Average Poor
Male <15.2 secs 15.2 - 16.1 secs 16.2 - 18.1 secs 18.2 - 19.3 secs >19.3 secs
Female <17.0 secs 17.0 - 17.9 secs 18.0 - 21.7 secs 21.8 - 23.0 secs >23.0 secs

Vertical jump test. Anaerobic power
Required Resources To undertake this test you will require: Wall Tape measure Step Ladder Chalk Assistant
Demonstration: http://www.youtube.com/watch?v=0eNvh39Pi2Y
Vertical jump test. Anaerobic power
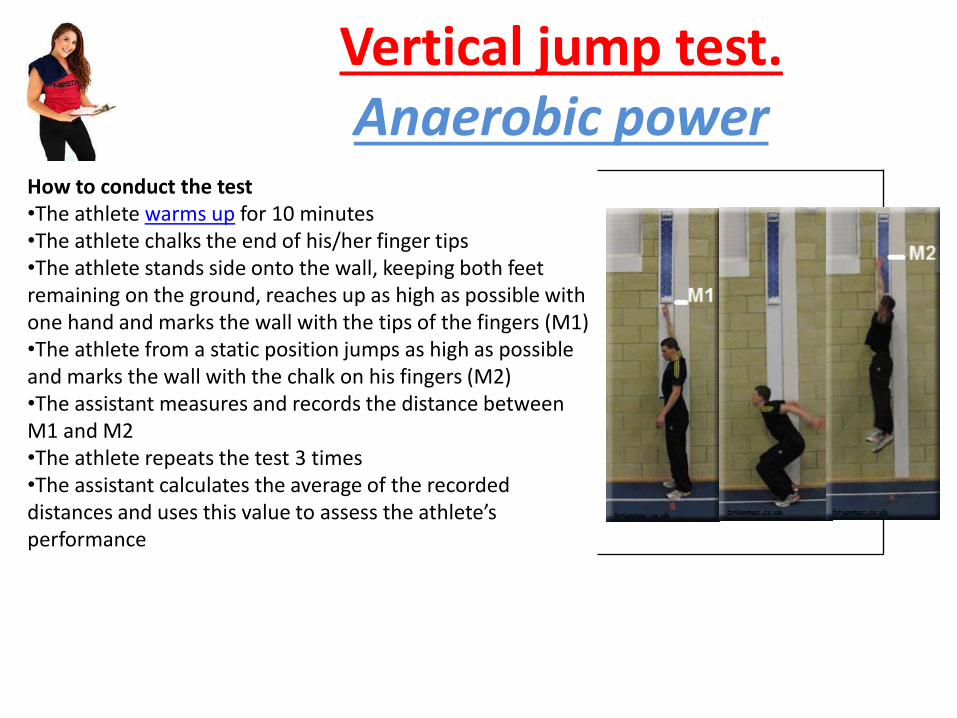
How to conduct the test •The athlete warms up for 10 minutes •The athlete chalks the end of his/her finger tips •The athlete stands side onto the wall, keeping both feet remaining on the ground, reaches up as high as possible with one hand and marks the wall with the tips of the fingers (M1) •The athlete from a static position jumps as high as possible and marks the wall with the chalk on his fingers (M2) •The assistant measures and records the distance between M1 and M2 •The athlete repeats the test 3 times •The assistant calculates the average of the recorded distances and uses this value to assess the athlete’s performance
One-minute press-up test. Muscular endurance

One-minute sit-up test. Muscular endurance

Body Mass Index (BMI) Body fat percentage

Bioelectrical Impedance Analysis (BIA).
Body fat percentage
Skin fold test Body fat percentage

Determining percent body fat using
the Jackson-Pollock (J-P) nomogram.