ebook2 - Angieslistcontent.angieslist.com/PDF/eBookFinal.pdf35. Hardwood Flooring 35. Wood floor...
105
® ® ® ® 2013 Homeowner’s Guide www.angieslist.com
Transcript of ebook2 - Angieslistcontent.angieslist.com/PDF/eBookFinal.pdf35. Hardwood Flooring 35. Wood floor...

®®
®®
2 0 1 3Homeowner’s Guide
www.angieslist.com

2013 Homeowner’s Guide 1
3. Introduction Letter From Angie 4. Aspects of Owning a New Home 4. A Guide to Moving 4. Preparation and planning 6. Hiring a moving company 7. Contracts and costs 7. Some common moving mistakes
8. Appliance Repair 8. Repair vs. replace 10. Preventative maintenance tips 12. Hiring an appliance repair company
13. Handyman Service 13. What is a handyman? 13. Benefits of hiring a handyman 14. Handyman-ready jobs 15. Handyman hiring tips
16. Electricity and the Home 16. Common electrical problems and troubleshooting 18. Hiring an electrician 19. Inspector’s checklist
21. Heating and Cooling 21. Measuring heat efficiency 22. Natural gas furnaces 22. Electric heat 22. Measuring AC efficiency 23. HVAC maintenance 23. Filters and tune-ups 24. Seasonal checklist 25. How to hire an HVAC expert 25. Checking licenses 26. Water Heaters 27. Regular maintenance 27. Common problems 28. Relighting the pilot 29. Buying tips
30. A Guide to Plumbing 31. Home water supply 31. Finding the shut-off valve 31. Water pressure 32. Reading a water meter 32. Get an accurate water bill 33. Drain clogs 34. Avoiding sewer clogs 35. Hiring a plumber 35. Checking licensing
®®
Table of ContentsTable of Contents

35. Hardwood Flooring 35. Wood floor care 37. Common problems 38. Professional maintenance 39. Hiring tips
40. Ceramic Tile 41. Advantages of tile 41. Disadvantages of tile 41. Installation 42. Types of ceramic tile
43. Carpet Cleaning 43. The benefits of cleaning 46. How often? 47. Why hire?
48. Kitchen Remodeling 48. Creating a vision for kitchen remodeling 49. Deciding what you can afford 50. Features to consider 55. Hiring a contractor
58. Bathroom Remodeling 58. Before you remodel 61. Bathroom remodeling tips 62. Features to consider 69. Hiring tips
71. Interior Painting 72. Choosing colors 74. Types of paint 75. Tools and supplies 75. Hiring a professional
76. Exterior Painting 76. Pick the right paint 77. Color choices 78. Preparation 79. Hiring a house painter
80. Windows 80. Replacement windows 82. Choosing a contractor 83. Window restoration and repair
84. Gutter Systems 84. Gutter cleaning and maintenance 85. Hiring a gutter cleaning service 85. Gutter repair and replacement 86. Install yourself or hire?
87. Roofing 87. How leaks form 88. Roof inspections 89. Do you need a new roof? 90. Hiring a roofer
91. Landscaping 91. Planning your landscaping 93. Tips on hiring help
93. Lawn and Yard Work 93. Top 9 mowing tips 95. 11 great lawn care tools 100. Hiring a lawn care service
101. Tree Service 101. Planting trees 102. Hiring a tree service 103. Tree watering
2013 Homeowner’s Guide 2
®®

Here at Angie’s List,
We believe that information is valuable – especially if it’s information you can believe. That’s why we’ve been working for nearly two decades to make sure homeowners like you have access to important, trustworthy details about the services you need for your home. We also know few things are more important than protecting your family and investments, and we’ve created this homeowner’s guide with the goal of helping you do just that. Inside, you’ll find our most complete guide to home maintenance for today’s savvy homeowner. From the basement to the roof, we’ll help you prevent costly repairs, plan your next remodeling project and troubleshoot common problems without wasting unnecessary time and money. We’ll also answer the big question in every homeowner’s mind: When does it pay to hire, and how do I know which professionals are actually worth it? Whether you need help with the basics or beyond, Angie’s List has the answers you’re looking for. Visit AngiesList.com for even more helpful tips you can use for health, auto and pet services, or just call us at 1-888-944-LIST to speak with someone on our team who’d be happy to help. Remember – reliable know-how is the homeowner’s most powerful tool. You’ve just picked it up. Now put it to work. Sincerely,
Be a Homeownership ProBe a Homeownership Pro
2013 Homeowner’s Guide 3
®®

Aspects of Owning a New Home
A Guide to MovingA Guide to MovingMoving every possession you own from one house to another is a major undertaking filled with potential pitfalls. Here's what you need to know to organize a move, whether you’re hiring a moving company or doing it yourself.
Preparation and PlanningPreparation and PlanningThe first thing to decide is how much of the moving work you’ll do yourself and how much will be handled by professional movers. Before you decide how much to do yourself, call some moving companies to get estimates for what they charge for different levels of service.
Weed out your stuff: Start making stacks of what to toss or donate. Organizations like Goodwill and AmVets will accept a variety of clothing and household goods.
Collect supplies: If you’re doing your own packing, you'll need lots of boxes, among other supplies. The best boxes are the ones that reams of copier paper come in because they’re sturdy, have lids and are easily stackable.
2013 Homeowner’s Guide 4
®®
Yes, there's a real Angie!
Angie Hicks launched the company that would become Angie’s List in suburban Columbus, Ohio, in 1995. Angie went door-to-door recruiting members and collecting reviews and in the first year she signed up more than 1,000 homeowners. (Not bad for an econ major!)
In 1998 Angie's List moved to Indianapolis, which still serves as the growing company's headquarters. Today, more than 1.7 million members check Angie's List before they hire!

Identify high-priority items: During a move there are two kinds of high-priority items:
Change your utilities and services: Contact service providers for utilities such as water, gas, electric, telephone, cable and internet services to inform them of the impending move.
Postal Change of Address: A change of address kit is available through your local post office branch office.
2013 Homeowner’s Guide 5
®®
1
2
Your most prized possessions, like family photos, birth certificates, passports, etc. Plan on packing these yourself and transporting them in your car so they are never out of your control. Ordinary household items can be replaced if lost or damaged. If it's priceless to you, then you should carry it.
Things you need every day, such as a handful of dishes, toiletries, the dog’s dish, your car keys, etc. These may not be highly valuable, but you don't want to lose track of where they are. Pack these yourself and keep the box handy so you can get in and out of it whenever necessary. Also, keep cleaning supplies handy so you can finish up in the old house and take the cleaning materials with you to the new house.

Get recommendations from friends and co-workers, or join Angie’s List to read reviews and rankings from past customers.
Check out the company with the American Moving and Storage Association, which has a certification program called “ProMover.”
Ask for the company’s U.S. Department of Transportation registration number. You can then search a federally registered mover’s complaint history at protectyourmove.gov.
40% discount
Hiring a Moving CompanyHiring a Moving CompanyYou may choose to do all your own packing, but you may want to consider whether you will do all the actual moving, or if you’ll hire a moving company. If you decide to move yourself, you'll need to rent a truck, a couple of two-wheeler handcarts and some furniture pads. Then you'll need to recruit friends to help and probably feed them. You may want to compare that effort to the cost of hiring movers. One important note when you’re talking to moving companies is to be aware of the differences between in-state moves and those that cross state lines. Avoid scams: Because the moving industry is plagued by rogue operators who will quote a low price and then demand much more before they’ll unload, it’s important to check out any company you’re considering trusting with your possessions. Here are some tips:
2013 Homeowner’s Guide 6
®®

Contracts and CostsContracts and CostsAccording to 2012 estimates provided by the AMSA, the average cost of an interstate move was about $4,300, based on an average weight of 7,400 pounds and distance of 1,225 miles. The average intrastate move cost $2,300, based on the same weight and a crew of four. Prices may fluctuate, depending on where you live, and there are tips you can consider for lowering your moving cost.
Some Common Moving MistakesSome Common Moving MistakesHere are some common moving mistakes that people make:
2013 Homeowner’s Guide 7
®®
Forgetting to contact service providers
Failure to complete change of address forms
Not having insurance coverage on your property
Not completing proper move-out procedures
Forgetting to complete an inspection of moved property

Repair vs. ReplaceRepair vs. Replace
Appliance RepairAppliance RepairPreventive maintenance is crucial to ensuring long-lasting and healthy appliances. Here are tips on when to repair or replace an appliance, preventive maintenance and tips for hiring a repair service.
When it comes to repairing appliances, every device eventually reaches a point of diminishing returns. If it's cheaper to fix an appliance than replace it, the smart money is usually on the fix. However, it doesn't make sense to fix a device that is likely to break down again in the near future or become technologically obsolete. Here are some considerations.
®®
AgeThe age of an appliance needs to be considered when deciding whether to repair or replace. Most appliances have an average life cycle and once an appliance passes that point, it’s usually a good idea to replace. Antiques and some high-end appliances are the exceptions to the rule, as they may be extremely expensive to replace.
WarrantyDetermine if your appliance is under warranty because you might be able to have it repaired at a reduced rate or free of charge. Warranties are important because replacement parts are expensive and can even cost more than the cost of purchasing a new appliance. Make sure your warranty is covered by a factory-authorized appliance repair shop.
2013 Homeowner’s Guide 8

PriceAppliance repair professionals say when the price of the repair totals more than half the cost to purchase a new appliance, you’re better off replacing the appliance.
Time to repair Appliance is under warranty Appliance is an antique that would be difficult to replace The repairs are minor and will extend the life of the appliance for several years
Time to replace Appliance is not under warranty The repairs are extensive and add up to more than half of the product’s original cost Appliance is technologically obsolete
2013 Homeowner’s Guide 9
®®

Preventative Maintenance TipsPreventative Maintenance Tips
Appliance repair professionals say homeowners should read the operational manuals that come with appliances and follow instructions for proper use and preventive maintenance.
®®
Washing machine
Make sure not to overload the machine, or it could prematurely wear out. Set the water level to an appropriate setting based on the amount of clothes in the washer. Failure to do so can put additional stress on the motor. Check pockets before placing clothes in the washer. Many problems are caused when foreign objects become lodged within the washer. Appliance repairmen suggest replacing the washer fill hose every five years.
Preventive Maintenance Tips for Household Appliances
2013 Homeowner’s Guide 10
Clothes dryer
Clean out the vent trap after each load to improve efficiency and reduce the chance of fire. Have the outside vent inspected annually
Refrigerator Clean the condenser coils. When these coils become caked with dust, the fridge has to work harder which puts more stress on the unit and increases energy consumption. Use a vacuum to remove dust, pet hair and dirt.

Check the door seal. The fridge’s door seal is responsible for keeping food cold and maximizing efficiency. Replace the seal if needed.
Oven
Instead of using the self-cleaning function, appliance repairmen recommend cleaning up spills as they occur and using drip pans to catch spills.
Dishwasher
Clean your dishwasher’s filter to remove hard water deposits and debris. Run the dishwasher while empty using a small amount of distilled white vinegar to remove soap buildup. Check the spinning arms and make sure the spray holes are free of debris.
Garbage disposal
Keep the blades sharp by running cold water and sending a cup of ice down the disposal. Run cold water for 10 seconds before inserting food into the disposal and for 30 seconds after each use. Cold water helps solidify grease and fat so they can be chopped up by the disposal.
2013 Homeowner’s Guide 11
®®

®®
Research potential hires.
Get at least three estimates and compare the bids based on price, parts, labor and warranty. You also want to research how long the company has been in business, check reviews on Angie’s List and speak with past clients.
Inquire about costs. Expect to pay up to $100 for a typical service call. Additional parts and labor charges will apply if you hire the company for a repair, but many companies will deduct the service charge.
Check skill level. It’s important to hire an appliance repair company whose employees have the training to complete the job. Ask if the employees are factory trained or certified in appliance repair.
Is the work under warranty?
Check to see if the repair service guarantees its work, and determine how long. Most warranties vary from 90 days to one year.
Tips for hiring an appliance repair service
Hiring an Appliance Repair CompanyHiring an Appliance Repair CompanyHome appliances are expensive, and you want to ensure the company you hire is reputable and has the skills required to complete the fix in a timely and efficient manner.
2013 Homeowner’s Guide 12

2013 Homeowner’s Guide 13
®®
Handyman ServiceHandyman ServiceNot all home repair jobs require the help of a general contractor or specialized service provider. A handyman can be hired for a variety of small home improvement projects. The following guide explains how a handyman can fix your to-do list while saving time and money along the way.
What is a Handyman?What is a Handyman?A handyman, or handyman company, typically charges the client by the hour plus material costs, regardless of the task at hand. Many homeowners will compile a list of repairs and hire a handyman to complete the list in a single visit.
There is no national standard or regulation for handymen. Licensing and regulation vary by state. New Jersey, for example, requires handymen who work for a profit to register with the state and carry insurance. California requires handymen to carry a license from the State Contractors License Board to work on any project that exceeds $500 in labor and material costs.
Bene!ts of Hiring a HandymanBene!ts of Hiring a HandymanYou’ve got an ever increasing to-do list of home improvements like changing out a bathroom faucet, replacing missing shingles on the roof and painting a kitchen wall. You could hire a plumber, roofer and painter who all would have conflicting schedules of availability and their own service charges, or you could hire a handyman to complete all three projects in one day for a single hourly rate.
A homeowner can save money on home improvement projects by hiring a handyman because it eliminates the need for multiple service providers and contractors. Many handymen charge by the hour so a homeowner only pays for one worker who can complete a wide range of projects.

A service charge from a plumber or roofer to come to your home could equal or even surpass the price to hire a handyman for a few hours.
Hiring a handyman also prevents waste and overcharging, as the handyman will only charge you for hours worked. A contractor or specialist is more likely to price a job based on the estimated amount of time it will take to complete it. Handymen are able to keep their rates low because they don't have to pay additional workers and have lower overhead costs than contractors or large companies.
Handyman-ready JobsHandyman-ready JobsHandymen are best utilized for small, “honey-do” types of home repair work. The following projects are ideal for most handymen.
2013 Homeowner’s Guide 14
®®
Minor plumbing work
Caulking
Decks and porches
Gutter cleaning and maintenance
Home exterior repairs
Painting and touch-ups
Hanging window treatments, pictures and mirrors and installing light fixtures

®®
Handyman Hiring TipsHandyman Hiring TipsHomeowners should take the time to interview several candidates before making a hiring decision. A handyman will be working closely with you in your home so you want to pick one that you feel comfortable with. The following handyman hiring tips can help ensure you pick the right candidate.
2013 Homeowner’s Guide 15
1
2
3
Define the project. Start by compiling a list of the home repairs you would like completed. Remember, a handyman is best utilized for small jobs such as installing light fixtures, patching drywall and interior painting. If the job requires pulling a permit, or moving plumbing or electrical wiring, you should consider hiring a contractor.
Shop around. Check Angie’s List reviews and interview a minimum of three handymen. Ask about years of experience and areas of specialization, and request references from homeowners who worked with the handyman in the past. Make sure the potential handyman has the skills and experience to complete your project.
Watch out for scams. You want to avoid handymen who contact you with unsolicited phone calls or visits to your home. You should also avoid any handyman who refuses to guarantee the price of the job or asks for payment upfront. Reputable handymen don’t expect to get paid before the project is completed.

Electricity and the HomeElectricity and the HomeAlthough the potential dangers of electrocution and fire should make most homeowners wary of do-it-yourself electrical projects, there are troubleshooting tips that can help.
Common Electrical Problems and TroubleshootingCommon Electrical Problems and Troubleshooting
Electrical outlet doesn't work: First check the circuit breaker. If no breakers are tripped and the outage is confined to one outlet, the outlet may have burned out. If an outlet shows any sign
®®
2013 Homeowner’s Guide 16
4
5
6
Get it in writing. Insist on a written agreement laying out the job details, costs and a payment schedule. Be clear about the times you expect the work to be started and completed. It’s extremely important to get all guarantees in writing.
Ask for a guarantee. Many handymen will guarantee their work for up to one year. Ask about guarantees before you make a hiring decision, and of course, make sure the guarantee is in writing.
Inspect the work. Inspect the completed work before making payment. Make sure that everything has been done to your satisfaction and at the agreed upon price. Most handymen will be happy to explain the finished work because they want you to be satisfied.

®®
of blackening around the outlet plugs, do not use it. Even if one plug is working, you should replace the entire outlet immediately to avoid the possibility of starting a fire.
Electrical outlets sparks: While it can be scary when you see a spark fly from an outlet, sometimes it's normal. For example, when power is suddenly diverted to an appliance, a quick draw on the available power will occur, causing a brief spark. Once the electrons are flowing freely, a spark should have no reason to form. This is normal, and it's comparable to static electricity.
If too much heat builds up in an outlet, however, it can actually melt the insulation that surrounds the wires. As the wires become exposed, the chance for an electrical fire increases. When a connection is made, the electrons can leap to the wrong area and cause a serious spark. This is known as a short circuit and can actually cause an electrical fire.
Exposure to water can also cause an outlet to spark and short out. Installation of a special outlet known as a ground fault circuit interrupter (GFCI) will shut down the circuit if it comes into contact with moisture.
Flickering lights: This is a sign of a poor connection — one that may lead to a broken connection. You’ll need to call an electrician to hunt down the source and correct it.
On-again/off-again recessed lights: These light fixtures contain a built-in mechanism to prevent overheating, which means they will sometimes turn themselves off. Once the fixture has cooled, it turns back on. This usually results from a bad match between your light bulb and fixture or the ceiling insulation touching the fixture.
Appliances cause the circuit breaker to trip: High-wattage items running at the same time can overload the circuit. To solve this problem, move the appliances to a different circuit or have an electrician install a separate circuit.
2013 Homeowner’s Guide 17

Ask about education. A reputable company will require staff to attend monthly training courses and be up-to-date on the National Electrical Code, which is amended every three years.
Inquire about costs. Highly rated electricians on Angie's List tell us that replacing just the panel can cost anywhere from $1,200 to $2,000. Rewiring a whole house can run from $8,000 to $15,000 for a 1,500- to 3,000-square-foot home.
Don't forget permits. A permit is usually required in most counties and from the power company any time you're replacing a home's main electrical equipment or doing a significant amount of rewiring. The cost of the permit is often included in your electrician's bill, but be sure to ask. With the permit comes an inspection to ensure the work meets code.
®®
Frequent light bulb burnout:If you find yourself constantly changing light bulbs, you might be using a bulb with a higher wattage than your light fixture can handle. Check your light fixtures to make sure you’re using bulbs with the correct wattage.
Make sure you familiarize yourself with how household electricity works and learn more about what every homeowner should know before tackling home electrical projects.
2013 Homeowner’s Guide 18
Hiring an ElectricianHiring an ElectricianFor most electrical projects, hiring a qualified professional is the safest bet. You’ll want to follow these tips when hiring a qualified electrician.

Inspector’s ChecklistInspector’s ChecklistWhen you hire an electrician to perform an inspection on your home's electrical system, make sure these steps are covered:
Always check licensing. If your state requires electricians to be licensed, check that the license is current. Poor wire connections, overloaded circuits, improper grounding and broken safety elements on an electrical panel are just a few of the problems that can arise from bad workmanship.To check the licensing for an electrician, refer to the Angie’s List License Check tool.
Have one handy. Most homeowners call electricians in an emergency or if they're building or remodeling, so it's important to research a contractor and find a skilled electrician before you need one.
Electric meter.The electrician should check the electric meter for defects such as insecure installation, broken meter seals and rust at the bottom of the box that could indicate the presence of water. Sometimes water can follow the service entrance cable from the meter box to the main panel.
®®
2013 Homeowner’s Guide 19

Wires.The electrician should inspect outside wires for fraying or other damage. He or she should also look for unprotected wires anywhere inside the home, especially in attics, basements and crawl spaces. Wires resting on heat ducts or pipes present an unsafe situation and will be reported.
Main panel box. The electrical panel houses circuit breakers, which are designed to prevent electric current from exceeding safe levels. An electrician will check for insufficient clearance, improperly sized circuit breakers, oxidation or corrosion, aluminum branch wiring, overheated components and the presence of moisture. Inspecting these panels can be dangerous, and you should never remove an electrical panel yourself.
Ground Fault Circuit Interrupter (GCFI) outlets. GFCI outlets should be placed in basements, garages, kitchens and bathrooms. These outlets contain small circuit breakers that shut off when overloaded or if a short circuit occurs. An electrician can ensure these outlets are wired correctly and test other outlets in the home for looseness or reversed polarity.
Wall switches. An electrician will test all wall switches for reversed polarity and ungrounded circuits, looking out for discolored, loose or damaged switch plates and unsafe wiring.
®®
2013 Homeowner’s Guide 20

2013 Homeowner’s Guide 21
®®
Heating and CoolingHeating and Cooling
Measuring Heat Ef!ciencyMeasuring Heat Ef!ciencyWhen comparing energy sources for home heating, the scientific unit of measurement is known as the "AFUE rating." This refers to a measurement of annual fuel use efficiency — the ratio of how much heat output a furnace system will produce compared to the amount of energy it consumes.
Air Supply Duct(to rooms)
EvaporatorCoil
RefrigerantFilled Tubing Fan
Compressor
AirHandling
Unit
FilterBlower
Return Air Duct(from rooms)
CondenserCoil
HVAC Diagram

For example, a heating system that carries an 80% AFUE rating means that 80% of the energy it uses translates directly to heat output, while the remaining 20% of energy is lost to inefficiencies like heat loss or escape. Federal regulations now require that this efficiency indicator be included with every new furnace sold so consumers can compare energy efficiency.
Natural Gas FurnacesNatural Gas FurnacesThe most common type of home heating system in the United States burns natural gas or propane to produce heat. According to the DOE, older natural gas systems typically achieve a 68% to 72% AFUE, while newer, highly efficient natural gas furnaces can achieve AFUE ratings as high as 90% to 97%.
Electric HeatElectric HeatElectric-based heating can achieve 100% AFUE, since all the electrical power is converted directly to heat. However, because the electricity supplied is produced primarily by burning coal, natural gas or fossil fuels, electric furnaces aren't necessarily an environmentally friendly heating choice.
Measuring AC Ef!ciencyMeasuring AC Ef!ciencyJust as the energy efficiency of heating systems can be measured as a ratio of heat created compared to energy used, a similar metric can be applied to cooling systems.
In this case the acronym is "SEER," which stands for "seasonal energy efficiency ratio." The SEER ratio of a cooling system is calculated by dividing the appliance's cooling output in BTUs for an entire season by its total electrical energy use for the same period. An air conditioner with a higher SEER number is more efficient than a device with a lower SEER number.
2013 Homeowner’s Guide 22
®®

2013 Homeowner’s Guide 23
®®
HVAC MaintenanceHVAC MaintenanceYou can help your heating and cooling systems work more efficiently and last longer by tending to regular maintenance. Some things — like changing the furnace filter — can easily be done by the homeowner, but an HVAC expert should be brought in for tune-ups and more complex maintenance. Get your heating system checked in the fall and your cooling system in the spring so they are in top shape before heavy use.
Filters and Tune-upsFilters and Tune-upsWhat's the best defense your home has against the cold of winter? It's an efficient and effective home heating system.
Changing the filter: To maintain a unit's peak efficiency, Energy Star recommends changing the air filters every three months at a minimum.
During high usage months in the winter or summer, check your air filters at least once a month and change them as needed.
Tuning up the system: Energy Star recommends scheduling your system tune-up done by a professional around the beginning of daylight savings time in the fall and its end in the spring. It's an easy way to remember to have your system serviced before the peak heating and cooling seasons.

Seasonal ChecklistSeasonal ChecklistCheck out this Energy Star list of maintenance items a HVAC professional should inspect or service with each tune-up:
Check the thermostat settings
Inspect electrical connections and test voltage on system components
Lubricate moving parts
Inspect the condensate drain
®®
2013 Homeowner’s Guide 24
1234
Inspect the condensate drain5Check system start-up and shutdown controls for proper operation6Check, clean or replace the air filter7

How to Hire an HVAC ExpertHow to Hire an HVAC ExpertIt's essential that the HVAC service provider you hire is well-trained to deal with the inherent safety issues in heating systems — electricity, natural gas, oil — or cooling units that use toxic refrigerants such as Freon.
Many states that license HVAC contractors require that the applicant have a minimum amount of on-the-job or training experience, typically 2 to 5 years, working with HVAC systems.
Checking LicensesChecking LicensesMany states require HVAC contractors to be licensed and many state governments offer license look-up websites where you can search a database of professional license holders, or at least find a number to call to check the status of a HVAC contractor's license.
It's also often the case that individual cities and municipalities have their own specific requirements for HVAC contractors, so check with your local building department or code office for more information.
®®
2013 Homeowner’s Guide 25

2013 Homeowner’s Guide 26
®®
Water HeatersWater Heaters
Standard storage-tank water heaters typically need to be replaced after about a decade, but they can last years longer with some homeowner maintenance. And when the time comes to buy a new water heater, there are other options besides the standard tank style.
Gas Input
Cold Water Input
HotWaterOutput
Vent
Fan
Cold water enters a system ofcoiled tubes like a radiatorwhere the water is quickly
heated and piped out as hotwater is called for.
A high-intensity burner (gas or electric) quickly heats the water coils above.
How a Tankless Water Heater Works

Regular MaintenanceRegular MaintenanceIt's easy to forget about the water heater as long as it's working, but you can extend its lifespan with periodic maintenance.
Some experts recommend draining the tank once a year. Others suggest draining one quart of water every three months. In either case, you’re trying to remove sediment that slows heat transfer and lowers efficiency. Be aware that hard water can increase the amount of sediment in your heater. Check the owner's manual for specific maintenance advice from the manufacturer.
Common ProblemsCommon ProblemsNo hot water: Check the pilot light. You can re-light it yourself (see instructions in the next section), but this can be dangerous so it's best to have someone with experience do this.
Water not hot enough: Check the gauge on the water heater, but only turn it up one notch at a time and then test later that day. You could scald yourself if you push it up too high. If it's already set on high and the water still isn't hot enough, call a plumber. The problem is sometimes a faulty "dip tube" (which brings cold water into the tank).
Hot water runs out too soon: Did one of your kids recently become a teenager? Do you have more people living in your home? Usually running out of hot water just means the capacity is too small for current needs.
Making noises: Because sound is magnified by the metal pipes, water heaters can start sounding like they are possessed by evil spirits. These noises may start and stop with water usage. If the problem persists, call a plumber.
®®
2013 Homeowner’s Guide 27

Relighting the PilotRelighting the PilotNatural gas water heaters installed before 2002 must be lit with a match or other flame source. Look for a diagram in the owners manual for guidance, but here are the basic steps:
Newer water heaters are easier to re-light because they have an electric spark generator. Turn the gas valve to “pilot” and press down. Then, press the pilot light ignition button. You should hear a click. Turn the gas valve to ON and the burner should light.
Remove the outer and inner doors at the bottom of the tank.
Follow the gas lines to locate the pilot.
Turn the control knob to "pilot."
Press down and hold the pilot button while you light with a match or other flame source.
®®
2013 Homeowner’s Guide 28
1234
Keep the pilot button down for one minute and turn the temperature control all the way down.5Release the button and look to see if the small blue flame of the pilot remains lit.6Turn the temperature back up and you should see the burner ignite.7

®®
2013 Homeowner’s Guide 29
Buying TipsWhen buying a standard water heater, the main decision is capacity. Was your last one big enough? Has your family size changed?
Look for the Energy Star label. Energy-saving features may increase initial cost, but could save you in the long run. Some models may be eligible for state and federal tax credits and/or utility company rebates.
Consider alternatives to the standard tank heater such as tankless heaters or solar heaters. Both would cost more to install than conventional heaters, but may save money in the long run.

Drain Pipe Diagram
A Guide to PlumbingA Guide to PlumbingPlumbing quick tip: When bathroom drains get clogged, don't pour in chemicals. Instead, try 1/2 cup of baking soda followed by 1/2 cup of white vinegar. Let it work for 20 minutes, then flush with a tea kettle’s amount of scalding water.
®®
2013 Homeowner’s Guide 30
Pipes shownin red are
for venting
Pipes shownin blue aredrains

®®
2013 Homeowner’s Guide 31
Home Water SupplyHome Water SupplyFor most homeowners, access to fresh water is as easy as turning on the faucet. But how does the water get to your home? If you live in an area served by municipal utilities, it’s likely your home is connected to city water. If you live in a more rural area, your home may be supplied by a private well system. Either way, you should know where the water line runs across your property and where the main shutoff valve is placed.
Water PressureWater PressureHomeowners sometimes experience low pressure when they're using water in several ways simultaneously, such as taking a shower while running the washing machine and watering the lawn. But when low pressure occurs for no apparent reason, the cause may be the water supply itself.
Finding the Shut-off ValveFinding the Shut-off ValveIf your home is supplied by municipal water, the water meter and main shutoff valve are often in an underground metal hatch near the street or along an easement between properties, so walk along your property line and look for a metal lid, which looks like a small manhole cover, marked "water meter" or "water."
You can usually remove the water meter hatch cover by unscrewing a single bolt. Underneath, you'll find a rotating valve similar to an outdoor spigot, or a valve with a metal flange. The latter may require a pipe wrench to operate. In either case, to shut down the water supply, turn the valve until it stops.
You may also find a primary water shutoff valve inside your home’s basement or crawlspace. This would be near the spot where the main water line enters your house.

®®
2013 Homeowner’s Guide 32
Homes with low water pressure may exhibit signs such as low flow in showers and faucets, as well as appliances such as dishwashers or water heaters taking excessive time to finish cycles. Sources of low water pressure can originate at the main water line or within the home’s water supply plumbing.
Reading a Water MeterReading a Water MeterNewer homes generally have either an odometer-style or digital meter, while older homes may have multi-dial meters. For odometer-style and digital meters, the number displayed indicates the total cubic feet of water your home has received since it was first connected to city water. A cubic foot of water is about 7.5 gallons.
The dial-style meter displays the same number, just differently. Add each dial's indicated total, from the highest multiplier to the lowest, to arrive at your home's total amount of water received.
Most utilities bill water users in 100-cubic-feet units, so round to that and calculate your usage by subtracting your last meter reading from the current readout. Do this for two months and compare to the usage amount cited your water bill. If your number is significantly lower you may be overpaying on your water bill.
Get an Accurate Water BillGet an Accurate Water BillIf you think the water company's estimate is higher than your actual usage you can get a credit on a future bill. Here's what to do:

Drain ClogsDrain ClogsHomeowners can often fix drain clogs themselves if the problem is confined to specific fixtures such as a sink drain or toilet. However, when all drains are affected – or when water going down one drain backs up in another drain – that generally means the main drain is clogged. Call a plumber who specializes in clearing drains.
If it’s a blockage from something flushed down a toilet, clear the drain with a plumber’s auger or snake. However, in older neighborhoods, the blockage may be caused by tree roots. Older sewer lines were made from fired clay and as pipes age and weaken, tree roots creep in. Drain experts are often able to bore through roots to clear the drain, but in many cases the original pipe is so deteriorated that the new passageway eventually collapses. When this happens the drain line usually must be replaced. Keep in mind that there are a variety of ways to repair or replace sewer lines, including what’s called “trenchless,” or no-dig repair.
Contact your water company to determine why the bill was estimated. Ask for an actual reading the next month.
Is your meter obstructed or otherwise difficult to get to? If so, clear the way.
If you have a large or aggressive dog, keep it away from the path the meter reader must take.
Consider reducing your water bill by cutting back on usage.
®®
2013 Homeowner’s Guide 33

Inspect in advance: If you’re buying a home, considering having the sewer pipes inspected.
Consider a video viewing: Have a professional examine your line with a camera. Then you can budget for future repairs or replacement.
Rout it out: If roots are already in your sewer lateral, you may buy some time until the need for a more involved repair by having them cleared.
Consider coverage: The majority of homeowner insurance policies won't pay for sewer pipe replacement; however, you might find one that does if you shop around.
Plan ahead: Before an emergency arises, talk to your plumber about whether a trenchless or traditional method of sewer pipe replacement is best for your situation. Keep this potential repair in mind when spending on landscaping or other projects that would be affected by excavation.
®®
2013 Homeowner’s Guide 34
When lines become clogged and damaged, the homeowner is usually responsible for any repairs starting at the connection point to the city sewer system and including the lateral lines and all drain plumbing in the home. Any maintenance, repairs and unclogging of these lines must be done by the homeowner, often with the help of a plumbing service.
Avoiding Sewer ClogsAvoiding Sewer ClogsHomeowners can reduce the risk of drain clogs by not allowing anything in the drain that isn’t easily broken down, such as cotton swabs, gauze, tampons, sanitary pads, diapers and paper towels.

®®
2013 Homeowner’s Guide 35
Hiring a PlumberHiring a PlumberWhen hiring a plumber, especially for an expensive project for which you have time to plan, make sure the plumber you hire is fully qualified and licensed in your state. A plumber may be an apprentice in training, a journeyman or a highly qualified master plumber depending on training and experience. Be aware that plumbers often specialize in certain areas. The same plumber you hire to fix a bathroom leak may not be the best one to work on a different matter.
Wood Floor CareWood Floor CareOne of the biggest keys to hardwood flooring’s longevity is ensuring that the floor is properly maintained. Following the installation of your hardwood floors, follow these tips by the Wood Floor Covering Association to keep it beautiful for years to come:
Hardwood FlooringHardwood Flooring
Checking LicensingChecking LicensingBe aware that plumbers must be licensed, though licensing rules vary by state.
Since hardwood flooring is susceptible to dents, walk on it with care when wearing high heels.
Place flannel coasters under furniture legs to avoid scratching when moving the chairs away from the dining table or rearranging rooms.

Avoid direct sunlight. Protect the wood with window treatments on windows.
Too much moisture can cause warping. If the kitchen floor is hardwood, place rugs in front of the sink and stove to protect the wood area.
Grit from foot traffic can scratch the wood. Place rugs at entrances and encourage visitors to remove their shoes. Move area rugs frequently so the floor doesn’t begin to wear in other areas.
Cleaning wood flooring is easy. Sweep or vacuum once a week and use a damp mop with mild soap as needed, but your mop should not dripping wet. Wood floors can be damaged if overly saturated.
If there’s a spill, clean it up immediately with a dry towel.
Use a damp towel to clean tougher stains.
®®
2013 Homeowner’s Guide 36

Common ProblemsCommon ProblemsIf you own a home with hardwood floors, look out for these common issues:
®®
2013 Homeowner’s Guide 37
Buckling and CrowningThis is caused when the original installer did not provide enough space between the wood planks for expansion with humidity. Eventually, the planks may swell into each other and become raised. These raised areas not only look uneven compared to the rest of the floor, they also attract more wear and tear.
Scratches, Dents and DingsThese are some of the most common hardwood flooring issues and they generally occur over time as the floor is used and its protective finish wears off. This can be avoided by not wearing shoes in the house and by installing protective pads on furniture legs.
FadingA floor's exposure to UV rays from sunlight can cause noticeable differences in the floor's color over time. Blocking sunlight by lowering the shades or closing shutters can help prevent this fading.
WarpingWhen exposed to or saturated in water, wood can swell and warp. Prevent water from coming in contact with wood floors by using area rugs below sinks and near entry doors, and by placing houseplant pots or containers on top of water-collecting dishes.

®®
2013 Homeowner’s Guide 38
Professional MaintenanceProfessional MaintenanceIf your floors have begun to show wear patterns from foot traffic or appear dull, it’s probably a good indicator it’s time to hire a professional to improve their appearance. Most hardwood floors should be periodically maintained by adding an extra finish layer, known as recoating, every three to seven years. Recoating involves scuffing the existing finish layer to promote adhesion, then adding a new layer of finish. If the floor’s finish is still intact, a maintenance coat will help it last another five years and may save you up to 60 percent versus the cost of sanding and refinishing the floor.
When floors become worn to the point that the top layer of finish no longer covers the wood grain or when deep scratches are present, hiring a professional to complete a more comprehensive – and expensive – sanding and recoating may be your best option.
A flooring contractor will also be able to provide advice or repairs for other hardwood flooring issues such as fading from UV exposure, stains from water, pets or other contaminates, and broken, chipped or damaged hardwood strips. Flooring specialists can often repair badly damaged wood floors even if some of the original boards are too far gone to be saved.

®®
2013 Homeowner’s Guide 39
Hiring TipsHiring Tips
Licensing, bonding and insurance: Although it’s likely that many jurisdictions don’t require that flooring contractors hold licenses, some municipalities may. A valid license also means it’s more likely that your contractor is in good standing both legally and financially. Insurance and/or bonding are likely more important characteristics in a qualified flooring contractor. Because flooring can represent a significant investment and because maintenance requires heavy machinery that can easily damage a floor, it’s important to make sure your contractor holds the proper insurance policies.
Industry accreditation: Accreditations from trade organizations such as the National Wood Flooring Association can indicate that a flooring contractor is serious about his work and willing to take continuing education courses. Membership in trade organizations can often also indicate that a flooring professional is well versed in industry standards for workmanship and work site conditions, as well as trained in proper installation techniques.
Experience: Always ask a contractor about his or her background and experience in the field. The answer may surprise you.
References: A well-qualified contractor should be able to provide references for recent customers or a portfolio of recently completed work. Don't forget to actually call recent references to see if they were satisfied with the work and the contractor’s performance.
Check Angie's List: If you're a member of Angie's List, you can find out which local hardwood flooring pros have received consistently high grades from past customers.
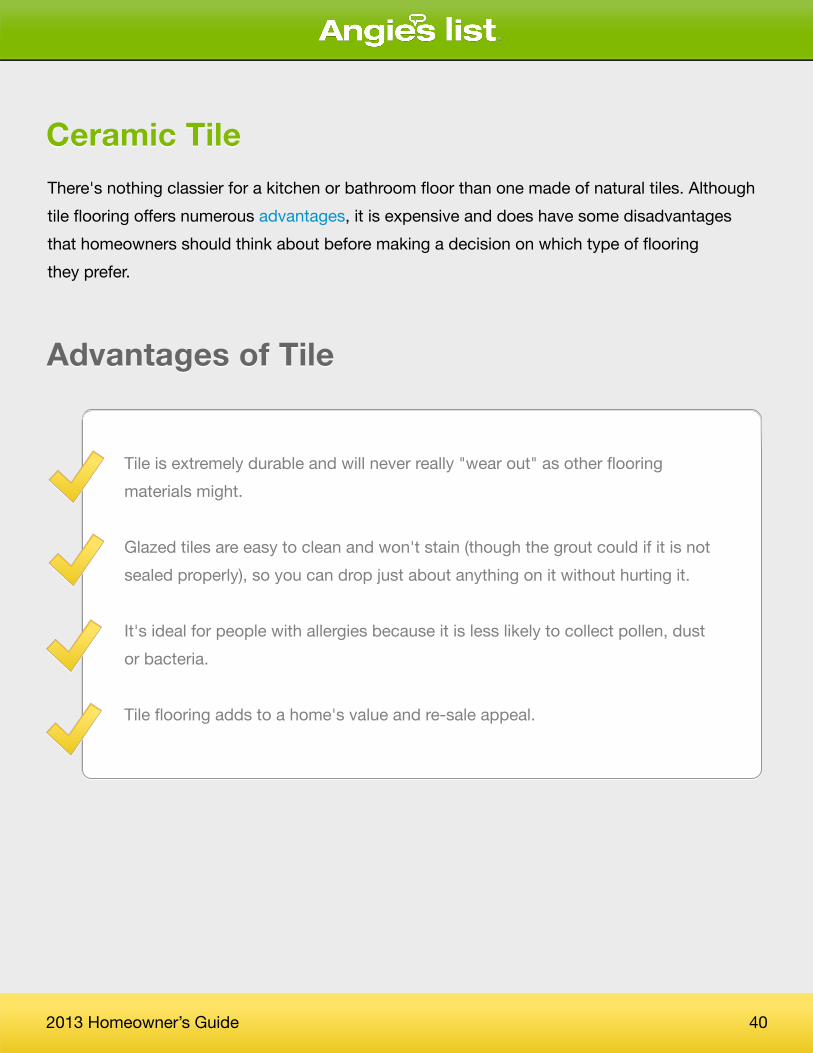
Advantages of TileAdvantages of Tile
Ceramic TileCeramic TileThere's nothing classier for a kitchen or bathroom floor than one made of natural tiles. Although tile flooring offers numerous advantages, it is expensive and does have some disadvantages that homeowners should think about before making a decision on which type of flooring they prefer.
®®
Tile is extremely durable and will never really "wear out" as other flooring materials might.
Glazed tiles are easy to clean and won't stain (though the grout could if it is not sealed properly), so you can drop just about anything on it without hurting it.
It's ideal for people with allergies because it is less likely to collect pollen, dust or bacteria.
Tile flooring adds to a home's value and re-sale appeal.
2013 Homeowner’s Guide 40

®®
2013 Homeowner’s Guide 41
Disadvantages Of TileDisadvantages Of Tile
InstallationInstallation
Tile must be installed over a firmly supported subfloor to prevent chipping and cracking. The subfloor should be, at minimum, a 5/8-inch thick exterior grade of plywood that is topped by a ½-inch cement backer board. However, the necessary thickness will depend on the tile. For instance, stone will need twice the stiffness of ceramic, since it is heavier.
It's cold. If you come downstairs to the kitchen barefoot on a winter morning that tile floor may be uncomfortably cold compared to vinyl, wood or other bare floor options.
It's hard. If you drop a glass, even relatively close to the floor, it's going to shatter. Floor hardness can also be an issue if you spend a lot of time on your feet cooking. You may need a small mat to place where you most frequently stand.
If a ceramic tile is later damage and needs to be replaced, you may find it impossible to get an exact match. That's why installers will advise you to hold onto any extra pieces left over in the initial installation.
If the grout is not sealed properly it will discolor with wear, and if something is spilled on it the grout may stain.

®®
2013 Homeowner’s Guide 42
The purpose of the cement backer board is to create a stable base. If the tile is laid directly onto the subfloor or on a hardwood floor, cracks may develop in the grout lines and tile as the plywood expands.Although professional installation will usually produce a superior result, laying floor tile can be done as a do-it-yourself project.
Types of Ceramic TileTypes of Ceramic TileUnglazed ceramic tiles: Two popular unglazed ceramic floor tiles are quarry tile and porcelain. Quarry tile is less expensive than porcelain, but the selection of colors and sizes is limited. While unglazed porcelain is more expensive, the selection of sizes, colors and textures is broader. Porcelain is considered to be the most water-resistant and durable type of tile. Unglazed tiles are the same color all the way through, so a small chip is less noticeable than it would be on a glazed tile. Many people also prefer the more natural look of unglazed ceramic tile, and it is less likely to be slippery.
Terra cotta is another ceramic that is sometimes used in floor tiles, however it is not ideal for this purpose because it is much more porous and therefore needs to be sealed repeatedly yet still remains less durable than other ceramic tiles.
Glazed ceramic tiles: Adding a glaze to ceramic tiles dramatically changes its appearance, and any color imaginable is a possibility. Depending on the glaze, the finish may appear glossy, satin or textured. Glazes are applied either as a single or a double layer. With single-glaze tiles, the coating is applied before the tile is actually fired. With double-glaze, the clay is first fired at a relatively low temperature called "bisque," which is about 400 degrees Fahrenheit. Then the glaze is applied and the tile is fired again, very rapidly up to about 2,000 degrees. The bisque firing stage gives the tile sufficient strength to withstand the rapid temperature increase that some glazes require.

Carpet CleaningCarpet CleaningChoosing carpet over other flooring options certainly offers its share of benefits. Keeping carpet clean though is an unavoidable part of adding it to your home.
The Bene!ts of CleaningThe Bene!ts of CleaningBeyond vacuuming regularly, you may also benefit from having your carpets professionally cleaned at least once a year. Not only will it improve the look of your carpets, a professional cleaning can actually improve your home’s indoor air quality. Consider the top three ways the service can lead to a healthier home:
®®
2013 Homeowner’s Guide 43
These factors also affect the durability of glazed tiles, which is why some manufacturers provide a hardness rating that ranges from light or least durable, to medium, medium-heavy, heavy and, extra heavy or most durable. Generally, single-glazed tiles are more durable than both double-glazed and unglazed. Single-glazed tiles are usually more vivid in color, while double-glazed tiles have more visible patterns.
For more information on tile flooring, please visit: http://www.angieslist.com/flooring/tile-flooring.htm.

2013 Homeowner’s Guide 44
®®
1
3
2
Carpet cleaning eliminates trapped pollutants.According to the Environmental Protection Agency, a dirty carpet can retain several sources of indoor air pollutants, including pet dander, cockroach allergens, lead, particle pollution and everyday dirt and dust. Toxic airborne gases can adhere to these particles and get trapped within the carpet.
Professional carpet cleaning services kill these bacteria through special shampooing formulas and can remove deeply trapped pollutants with high-powered vacuums.
Carpet cleaning can clear out dust mite infestations.Many homes have dust mite infestations, yet most homeowners aren't aware of the infestation because the creatures are microscopic. Many professional carpet cleaning companies utilize a technique known as steam cleaning, which exposes your carpet to high temperatures that are fatal to dust mites.
Carpet cleaning can help prevent mold growth.Especially in areas with high humidity levels, dirty carpets are at a high risk of developing mold growth.
Having your carpets cleaned regularly can prevent mold and mildew growth because professional carpet cleaners have high-powered drying tools that annihilate moisture. Failing to remove mold from carpets can lead to respiratory and other health issues.

2013 Homeowner’s Guide 45
®®
1
2
Steam cleaningAlso known as hot water extraction, steam cleaning is a common method of cleaning carpets. In this process, hot water is heated to boiling and injected into the carpet under pressure. The hot water effectively loosens the dirt, and the carpet-cleaning machine immediately draws moisture and dirt away. Heavily soiled carpet often requires the use of detergent. Steam cleaning is effective in removing odors and killing bacteria and dust mites. There are few drawbacks to this method, other than drying time.
Carpet shampooingCarpet shampooing is the original carpet-cleaning method used by professional cleaners. In this process, a foamy chemical is distributed on the carpet and scrubbed in with a motorized circular brush. This method works best for heavily soiled, low-pile carpet. Since no extraction process is involved, the carpet must be thoroughly vacuumed to remove soil and residue. Many carpet cleaning professionals recommend steam cleaning as a more effective option than carpet shampooing.
Carpet cleaning methods - Carpet cleaning professionals use a wide range of cleaning methods when tackling dirty rugs and carpets. Cost, degree of carpet soiling, environmental conditions and fiber type typically influence the selection of a carpet-cleaning method. Here are the benefits of the four most common professional carpet cleaning processes used today.

How Often Should You Clean?How Often Should You Clean?
According to the Institute of Inspection, Cleaning and Restoration (IIRC), all carpets should be cleaned at least once a year. In low-traffic areas, carpets can go 12 to 18 months between cleanings, but high-traffic areas may need to be professionally cleaned on a quarterly basis.
Households with pets, smokers, children and heavy foot traffic should have their carpets professionally cleaned two to four times each year. Dust mites, pet dander and allergens are
2013 Homeowner’s Guide 46
®®
3
4
Carpet dry cleaningThe dry-cleaning method uses virtually no water. A technician sprinkles a small amount of an absorbent compound over the carpet and uses a mechanized brush to work it through the carpet, dissolving soil. The soil and residue are then drawn up by a commercial vacuum cleaner. The dry-cleaning method dries carpet more quickly than any other cleaning method. Easily damaged natural-fiber carpets, such as sisal and hemp, benefit from the dry-cleaning process.
Bonnet cleaningThough this method of carpet cleaning is sometimes referred to as a dry-cleaning method, it really isn’t. Bonnet cleaning uses a cleaning product, occasionally mixed with carbonated water, and spreads it as a mist over the surface of the carpet. A circular rotating buffer or "bonnet" with an absorbent covering is run over the soiled area. When the covering becomes soiled, it’s replaced with a clean one. While the top one-third of the carpet is cleaned, soil which has settled to the bottom of the pile remains behind. This cleaning method should be viewed as a temporary measure between more intensive cleanings.

Not all carpets and rugs are cut from the same cloth
You eliminate the need to rent or buy carpet cleaning equipment
Retail carpet cleaners don’t have sanitizing systems
Professionals have more understanding of stains and what it takes to remove them
Some professional cleaners use low-moisture equipment and techniques
Physical exertion
Risk of insufficient cleaning
Why Hire?Why Hire?
There are several measures homeowners can take to reduce the need to clean their carpets including reducing foot traffic, vacuuming frequently and spot-treating stains. However, there are certain advantages to hiring a pro.
®®
2013 Homeowner’s Guide 47
only part of the problem. While dust and bacteria trigger asthma attacks and allergic reactions, the dirt, sand and abrasive particles shorten the life of your carpet and result in premature wear.Carpet cleaning costs are determined by the square footage of the area being cleaned or the number of stairs in the home. Always insist on an in-home estimate to get the best rate possible and remember that even a small area may cost around $79 to be cleaned. Always be careful when you hear promotions for carpet cleaning, and never go with an estimate that sounds too good to be true.

Creating a Vision for Kitchen RemodelingCreating a Vision for Kitchen Remodeling
Kitchen RemodelingKitchen RemodelingYour kitchen is arguably the most important room in your home. It should be attractive, stylish, comfortable and functional. Remodeling a kitchen can dramatically enhance the appeal of your home to potential buyers.
To achieve the dream kitchen dream kitchen that you want, first you should have a clear vision of what you want the end result to look like.
®®
Analyze the existing space. Take plenty of measurements with a tape measure and get a clear idea of the dimensions of your current layout.
Pros vs. cons. Decide what you like about your current kitchen’s features and what you’d like to see changed.
Set your goals. Make a list of all your kitchen remodeling goals. Include everything from simple, easy-to-accomplish tasks like organization and decorative elements to over-the-top, impossibly expensive overhauls.
Create a collection of ideas. Print out or save photos of great kitchen setups from websites, clip photos from decorating or remodeling magazines or snap photos of kitchens you come across at the homes of friends and family, restaurants or home shows.
2013 Homeowner’s Guide 48

Make the budget a percentage of your home value. Aim to spend no more than 20 percent of the total market value of your home on your kitchen remodeling project.
Set a buffer. Take the total that you came up with and set aside 20 percent of it, or an additional 20 percent, for contingency expenses.
Deciding What You Can AffordDeciding What You Can AffordOne of the most important parts of any remodeling plan is deciding how much to spend. Without a clear budget, you’ll have trouble determining whether you’re making a sound investment. Come up with a firm number for the overall remodel first. If you try to make budget determinations feature by feature or appliance by appliance, you can quickly exhaust your budget.
Here are a few tips for setting a budget and making a kitchen remodel a sound investment:
®®
Prioritize your goals. Determine your top priorities. Be practical and realistic. Don't assume that you’ll suddenly start making more regular use of your kitchen if it has pricey, stainless steel appliances.
Don’t forget remodeling takes time. A kitchen remodel will take time and likely prevent you from using your kitchen for whole days or weeks. Be sure you and your family plan adequately to anticipate for periods without the use of your kitchen.
2013 Homeowner’s Guide 49

Features to ConsiderFeatures to ConsiderWhen planning your kitchen remodel, you’ll want to start by considering the five basic kitchen designs, the choice of which largely depends on the amount of space the kitchen contains:
®®
Have realistic expectations. Remember that you won't see a return on your investment, if any, until the time comes to sell your home. Anything that improves the style and usability of your home is generally worth it, though, as well-designed, attractive kitchens tend to impress home buyers.
2013 Homeowner’s Guide 50
1
23
One WallKitchens with the smallest amount of space will have one wall dedicated to cabinets and large appliances.
Galley. A galley kitchen utilizes a small amount of room by maximizing the workspace. A galley kitchen has two parallel walls of cabinetry with a walkway in between.
U-shape. This model features three walls of cabinets and appliances. You’ll often see it in smaller areas, but it can also work in a large kitchen space. Often, homeowners who choose the U shape will incorporate an island if adequate floor space is available.

Whichever design works best in each kitchen, you should remember the basic kitchen triangle, a designer’s term for the space between those items most often used in the kitchen: the refrigerator, the sink and the stove.
Once you have decided on the general layout of your kitchen, you will need to make decisions about the various components that will go into it. This is where the big spending is going to happen, so you need to choose wisely.
CabinetsThe cost of new cabinets will depend on your choices. Stock cabinets that are prefabricated generally cost a minimum total of around $4,000 for an average 10-foot-by-12-foot kitchen. Semi-customized cabinets offer a higher number of choices, but can also easily be double the cost of stock cabinets. Prices of fully customized cabinetry generally start between $15,000 to $20,000, but these prices don’t factor in countertops or labor.
®®
2013 Homeowner’s Guide 51
4
5
G-shape. Similar to the U-shape, this design allows for a fourth workspace that is generally a peninsula. This workspace functions similarly to an island but is often used instead due to limitations of floor space.
L-shape. One of the most popular designs, two perpendicular walls of kitchen workspace permit for a more open, roomier kitchen. Eat-in kitchens often employ the L-shape design, which also often allows for the additional workspace that an island provides.

Granite and marbleOne of the most popular choices, both marble and granite are prized for their solid durability and are cut from veins of naturally occurring stone. Heat-resistant and easy to clean, a granite countertop can cost $70 to $150 per square foot. Marble countertops are relatively more porous and softer than granite countertops, meaning they’re less resistant to stains and scratches.
®®
2013 Homeowner’s Guide 52
An easier and less expensive way to update a kitchen is to install new cabinet doors and fronts, a process known as cabinet refacing. You can also give drawers a facelift with new drawers or with drawer fronts. Prices for drawer fronts start at about $15.
You can also give your kitchen a new appearance by refinishing, restaining or restoring your existing cabinets. Cleaning and refinishing cabinets takes time, but is far less expensive than replacing the cabinets. The cost of refinishing cabinets for an average sized kitchen can start at about $500.
New hardware can also transform the way a kitchen looks. You can replace old, outdated handles and knobs easily and inexpensively. The cost of knobs and drawer pulls vary significantly. Expect to spend $2 to $10 per knob and $5 to $25 per drawer pull.
CountertopsCountertops are the focal point of any kitchen and play a large role in a bathroom’s design. In addition to being stylish and attractive, countertops need to be functional and practical. You can choose from the following materials:

Synthetic stoneBrand-name products like Caesarstone, Silestone and Corian have many of the same advantages of natural stone countertops, but they’re easier to clean and more resistant to the chipping, pitting or cracking.
LaminateOne of the least expensive and affordable countertop options, laminate countertops are generally made from paper pressed between plastic resins using heat which is then bonded to a firmer material like particleboard or plywood. Commonly referred to by the most popular brand name, Formica, they run approximately $10 to $30 per square foot. Laminate countertops are not always easy to clean, can be easily damaged and are not heat or scratch resistant.
Butcher-blockThis versatile home design trend can lend warmth to your modern kitchen or an authentic feel to a vintage farmhouse. At approximately $40 to $60 per square foot, they’re also affordable. If they’re scratched or burned, the damaged wood can be sanded down with ease and reoiled. Because wood is naturally porous, wooden countertops require regular maintenance.
TileTiles come in a variety of materials: ceramic, natural stone, recycled glass or handmade porcelain. Cost will vary depending on the size of the tiles, size of the countertop and quality of material. Individual tiles can be replaced easily and affordably, but the grout between them can stain.
®®
2013 Homeowner’s Guide 53

Sinks and FaucetsInstalling a new sink or faucet is relatively easy if you're just replacing one fixture with a similar one without changing its location in the kitchen. If you're relocating a sink or installing an entirely new one, professional help will be necessary, which can cost several hundred dollars.
Depending on the quality and the material, you can purchase a new kitchen sink for less than $60 or for as much as nearly $6,000. When shopping for a new sink, look at features like extensions, sprayers and soap dispensers. They're only worth it if you'll actually use them.
Unless you want to buy a sink-faucet combination package, which can range from about $100 to $1,000, you’ll likely have to select a new kitchen sink faucet separately from the sink. As with sinks, the price range here is fairly broad, from under $20 on the low end to more than $1,000 on the high end.
FlooringLaminate flooring is an economical choice, but engineered hardwood floors are becoming increasingly popular. You should also consider vinyl, linoleum and ceramic tile.
ConcreteAn increasingly popular option, rocks, shells or colored glass can be added to the concrete to add texture or unique. This option will likely cost you more per square footage compared to laminate and tile. Concrete countertops are extremely durable but also lend a nice aesthetic alternative to more conventional kitchen countertops.
®®
2013 Homeowner’s Guide 54

Who will be in charge?It may be tempting to act as your own general contractor and hire each kitchen remodeling specialist on your own. While you can easily accomplish this for smaller scale kitchen improvements and reap some cost savings, there are some drawbacks, especially for more involved projects.
A general contractor, especially one who has experience with kitchen remodeling’s multiple phases or features, will have the first-hand experience to deal with unforeseen issues that may arise during the project. A seemingly impossible task to a first-time DIY remodeler, such as moving a plumbing drain or relocating an oven’s gas line, can make relatively simple work for a general contractor.
Hiring a ContractorHiring a ContractorBecause so many homeowners choose to remodel their kitchens, chances are you can find a remodeling contractor who specializes in kitchens. For improvements to just one room or area of the house, a kitchen remodel can involve a surprising number of specialists, depending on its scope. You or your general contractor may end up hiring everyone from cabinet craftsmen to electricians to plumbers to flooring specialists and countertop installation contractors.
Here a few tips for deciding who to hire for a kitchen remodel:
®®
2013 Homeowner’s Guide 55
LightingWith a combination of track lighting, recessed lighting and other options, it's possible to make even a compact kitchen look and feel roomy and elegant. Be practical about where switches are installed, too. You should place them in places that are intuitive to make it as easy as possible to get around in the kitchen.

Time can prove to be another drawback to acting as your own contractor for a kitchen remodel. While you may save money by hiring multiple specialists yourself, scheduling each segment can present an issue, especially if delays pop up. A general contractor or kitchen remodeling specialist will have experience planning out a project to minimize delays and will likely have network of reliable subcontractors.
Getting EstimatesIt’s always a good idea to get at least three estimates before hiring a contractor or kitchen remodeler. To find a good contractor in your area, search Angie's List for contractor reviews posted by other Angie's List members in your community.
If you’re remodeling based upon plans, sketches or 3D models, make sure you share them with each estimating contractor to ensure you can make apples-to-apples comparisons among estimates.
When interviewing contractors, be sure to ask about their experience in this particular remodeling specialty. Will they use subcontractors or do they have in-house employees perform the work?
Always make sure to ask for proof of a company’s insurance and bonding, if necessary, as well as their contractor or trade license if required.
Be sure to ask for and actually verify references from previous kitchen remodeling jobs. Call their referrals and ask about their projects. Were they happy with their remodels? Were there any delays or hiccups along the way? How well did the contractor and his or her employees or subcontractors communicate? Did they clean up the job site daily?
®®
2013 Homeowner’s Guide 56

These types of questions will help you make comparisons among contractors based on what characteristics you consider important in a hiring relationship.
The ContractAs with any home remodeling contract, a kitchen remodeling contract should include several fundamentals:
A detailed project description including materials to be used, brand names of products and quality level of the materials to be used.
Information about who will be responsible for pulling permits and submitting paperwork for inspections, if necessary. Some kitchen remodeling improvements such as moving plumbing, natural gas or electrical wiring may require permits. In many cases, this will be the contractor’s responsibility. Be sure to get it in writing.
Start and finish dates for phases and overall project should be included in the contract. Some homeowners will include daily penalties to the contractor’s payment for every day a project phase goes over deadline.
The contract should spell out payment amounts and due dates. State and municipal laws regarding home improvement contracts vary, but as a general rule, never pay more than a third of a project’s overall cost as down payment or deposit.
Make sure you have the contractor’s insurance coverage information and property damage liability.
®®
2013 Homeowner’s Guide 57
Before You RemodelBefore You Remodel
Bathroom RemodelingBathroom RemodelingRemodeling a home’s bathroom can give you a lot bang for your buck. And, according to real estate experts, you can recoup up to 80 percent of your costs when you sell your home.
Evaluate the SpaceThe first step to planning a bathroom remodel is evaluating the existing space. If you’re planning on updating or renovating an existing bathroom, what would you like to see improved? Do you want to update the look of the bathroom by changing details like lighting and mirrors, or are you interested in a major overhaul? Answering these question will help give you a clearer idea of what you want the finished product to look like.
Warranties and guarantees for craftsmanship and the final product should be clearly defined. This can offer a homeowner an avenue to have repairs made if portions of the remodeling project breaks or is damaged due to deficient or incomplete workmanship weeks or months down the road.
A lien waiver for material suppliers or subcontractors is a contract term that can help you avoid a mechanic’s lien if the remodeler fails to pay vendors or workers. Once the work is complete to your satisfaction and you’ve paid in full, signing a lien waiver or release to indicates the contractor is responsible for any remaining material supplier or subcontractor bills can limit your exposure to mechanics’ liens.
®®
2013 Homeowner’s Guide 58

Make ComparisonsWhether a bathroom remodel pays off in terms of improved resale value often depends on what comparable homes in your neighborhood feature in their bathrooms. For example, if every home in the neighborhood features just one bathroom, you could improve your home’s sales appeal by adding a second bathroom where one previously didn’t exist.
Think about your future plans.Much of what you decide to take on during your bathroom renovation work should depend on your future plans. If you plan on moving out of your home in the next five to seven years, a modest project that updates that bathroom for mainstream tastes may be a better option. If you plan on staying in the home for more than decade or for the rest of your life, building the custom bathroom of your dreams can make more sense.
Create a budgetBathroom remodels are expensive, so make sure you spend wisely. Take an objective look at your budget and take a realistic approach about what you can afford. Invest in high quality workmanship and high quality materials. Don’t skimp on items like the faucet, sink or toilet, for example, because this is a highly utilized area and you want things that are going to hold up. Cheapest isn’t always best.
If you’re trying to do your bathroom on a budget, consider choosing just a couple of elements to remodel. Maybe you keep the floor but change out the sink to meet your budget.
Another good idea when creating a bathroom renovation budget: accounting for unexpected repairs. In any remodeling project, it’s a good idea to pad your budget with about 10 to 20 percent more money than you need for unforeseen problems that may be uncovered when work starts. This is especially true with bathroom remodels.
®®
2013 Homeowner’s Guide 59

Even a small leak from a feature like a toilet or a shower can cause large amounts of damage that can go unnoticed until floor or wall coverings are removed during a remodeling project. It's often essential to the home and the homeowner's health that water-damaged or moldy structural elements such as the framing or subfloor be repaired prior to covering it again during the renovation process.
Other typical unforeseen problems can include out-of-date, inadequate or unsafe wiring or plumbing systems. An experienced bathroom remodeling contractor may be able to anticipate the possibility of these types of repairs, but it's usually impossible to know what's lurking beneath the surface until you look.
Determine what you want and get professional advice.Once you’ve decided how much you can afford to invest, it’s a good idea to do some window shopping for the materials, fixtures and features you’d like to include in the remodeling project. Material costs can add up quickly, but they’re only a portion of your total budget. Unless you’re an experienced DIY renovator, you’ll need to hire an experienced contractor to install bathroom features like plumbing lines, sinks, faucets, toilets, ceramic tile and flooring.
Now might be a good time to visit with a bathroom remodeling contractor who has a showroom or offers bathroom remodeling design services. Visualizing your project before it gets underway can help define your expectations of the overall project and illustrate how different design and layout choices will work. For instance, if you were interested in changing the location of the toilet, shower or sink, an experienced bathroom remodeler can help you determine whether these layout changes would be prohibitively expensive for your budget.
®®
2013 Homeowner’s Guide 60

Be prepared for inconvenience.If and when you start a bathroom remodeling project, don’t forget that you likely won’t be able to use all or some features of your bathroom for significant periods of time. Be patient, as you and your family may have to utilize your home’s other bathrooms or find alternative bathrooms outside the home if you only have one bathroom.
Prevent water damage.On a daily basis, your home’s bathroom or bathrooms see the most water use, putting it and its underlying features at greater risk for water damage. When remodeling the bathroom, prevent structural damage and mold problems by making sure it’s waterproof. This can mean making sure your contractor uses tile-backing waterproof drywall (also known as green board) where possible, completely seals the floor and shower surround and applies sufficient waterproof caulk around tubs, shower pans and shower fixtures. Because grout is porous, make sure the contractor seals that, too.
Toast your toes.If your bathroom remodel includes removing the old floor and installing a new one, use the opportunity to think about installing a radiant heating flooring system. Not only will it keep your feet warm and cozy, it can also be a great feature to distinguish your home from others if and when you decide to sell it.
Bathroom Remodeling TipsBathroom Remodeling Tips
®®
2013 Homeowner’s Guide 61

Features to ConsiderFeatures to ConsiderDespite traditionally being one of the smaller rooms in a home, you have a myriad of choices when renovating or remodeling bathroom features. Your remodeling project may include all or some of these features, so remember to plan where you invest your money wisely. This is by no means an exhaustive list of all the bathroom features available, but a quick guide to help familiarize you with some common remodeling components.
Think about cleaning when choosing materials.If your bathroom renovation includes installing brand-new tiles, take the time to consider each choice’s maintenance needs and long-term durability. Often used for showers, natural stone and travertine can actually be quite fragile and require special cleaning products. Other materials, such as porcelain tile, may be more durable and easier to clean.
Focus on what’s important.For features that you’ll use every day — cabinets, sink, faucet, shower head and toilet — consider spending more to get high-quality items. Look for good bargains on decorative items that you can easily replace, such as cabinetry knobs, drawer pulls or lighting.
Make it timeless.While it may be tempting to remodel your bathroom to the latest trend or cutting-edge design, if you’re remodeling for resale, try to stick with more traditional or mainstream design and material choices. A bathroom design that’s quickly dated can hurt, not help, your home’s resale appeal.
2013 Homeowner’s Guide 62
®®

1
2
Drop-inThis sink requires that the countertop or vanity have an adequately sized or custom-cut hole to ensure the sink can be dropped in and that the sink’s rim, which supports the sink by resting its lip over the surface, sits flush against the surface.
Under-mountUnlike drop-in sinks, under-mount sinks are installed directly beneath the countertop surface so that the sink’s bowl begins beneath the surface.
One-pieceThese sinks often feature pedestal setups where the sink, typically porcelain, is supported by a matching porcelain pedestal base.
SinksWhen selecting sinks, you’ll face an almost endless supply of styles, features and accessories. Some bathrooms even have two separate sinks. If you’re installing a new sink, you’ll first want to measure your available space to see what will fit best. A good rule of thumb is that the space in front of the sink and its cabinet or pedestal needs to be about 30 inches to allow for clearance.
Most sinks come in one of two styles, complete sink systems that feature an integrated faucet, spout or handle or sinks that feature three-hole setups to allow you to select your own sink fixtures. When choosing a sink that can receive differing types of hardware, purchase or select the fixture first to ensure it will fit in the new sink.
Depending on what style of vanity or countertop the sink will be installed in, you have several mounting options available.
®®
2013 Homeowner’s Guide 63

The type of sink you choose will directly influence the type of material you pick for your new sink. For instance, vessel sinks often appear in a more unique variety of materials such as glass, hammered bronze, marble, copper and even wood. The most traditional material for a bathroom sink is vitreous porcelain. Cultured marble is another option for many sink types.
Faucets and Other Bathroom FixturesUpdating your sink’s hardware or other bathroom fixtures — such as the tub handles, control knobs or shower head — is a great way to give your bathroom a newer look without spending a lot of money on a total remodel. Several finishes are available for sink faucet fixtures and other bathroom fixtures, including chrome, brushed nickel, oil-rubbed bronze, steel and brass. You should choose styles and finish carefully because of the strong impact faucets make to overall decor.
3
4
VesselThese sinks are designed to appear much like a bowl or another freestanding vessel resting on a countertop. Vessel sinks often come prepackaged with their own integrated faucet system or vanity.
Wall-mountedThese sinks offer a good option for working with the tighter confines of a smaller bathroom. However, depending on the model, they may require installing the water supply or drain lines so that they’re hidden behind the wall, which can make their installation more difficult and expensive.
®®
2013 Homeowner’s Guide 64

CountertopsIf your bathroom update or remodel includes installing new countertops, you’ll want to pick a winner. You certainly have many choices of material. As your first decision, you’ll likely pick a natural material such as granite or marble, or a synthetic one like manufactured quartz or Formica. Granite and marble countertops are popular choices and can provide an upscale look to a new bathroom, but they come with some drawbacks. Granite and marble countertops are often more expensive choices. Because they’re porous, natural stone countertops can also be susceptible to stains if they’re not sealed on a regular basis.
Synthetic stones such as manufactured quartz or other brand names such as Silestone or Caesarstone can offer the look and feel of natural stone at a reduced cost and with less maintenance. The most cost-friendly options include laminate countertops and ceramic tile countertops.
BathtubsBecause the time and cost of installing a new bathtub can be prohibitive, most homeowners typically replace this bathroom feature only during larger bathroom remodels. However, changing the look of a bathtub by changing a few key features can dramatically alter its appearance. For instance, adding a new tile bathtub surround or adding new fixtures will cost much less than completely replacing the entire unit. Refinishing an existing bathtub can achieve the look of a brand-new tub and will consume much less time and money than replacing one.
If you do decide to replace or renovate an existing bathtub or bathtub surround, plan to budget accordingly. Depending on the style, size and material you choose, a bathtub itself can range from a few hundred dollars to many thousands of dollars. When purchasing a new bathtub unit, don’t forget the additional costs of hardware, fixtures and installation, which is a job best left toa professional because faulty installation can result in water damage and mold or mildew growth.
®®
2013 Homeowner’s Guide 65

Conventional bathtubs come in a range of materials including enamel-on-steel, cast iron, acrylic and fiberglass gel coat. More exotic options include composite materials, wood and cultured marble. Installation options include freestanding bathtubs, bathtubs installed into alcoves and those installed on platforms.
Soaking or garden tubs are deeper than conventional bathtubs, allowing the bather to immerse almost completely in the water. Walk-in tubs may be an especially good idea if you’re remodeling a bathroom to include safety features for an older resident or someone with limited mobility. Whirlpool or Jacuzzi-style tubs feature multiple nozzles throughout the tub, which can provide a massaging effect.
ShowersLike installing a new bathtub, converting or updating a shower space is a major undertaking with a bathroom remodel. If you’re planning to renovate or alter your home’s shower, don’t forget that hiring a plumber may be necessary for any drain or water supply pipe alterations. The range of configurations for shower enclosures and surrounds are almost endless, but here are a few setups to think about with your bathroom remodel.
One-piece shower units consist of almost every necessary shower component — drain pan, shower walls, glass door, plumbing and fixtures — all in a prepackaged, self-contained unit. These may be good product options if you’re seeking to install a new shower in an area such as a basement, as the one-piece configuration may cut down on time spent preparing the installation site or replumbing existing drain or supply lines. But if the unit begins to leak water or deteriorate overall, you may need to replace the entire system rather than just one component.
You can add glass shower doors and frames to an existing shower enclosure or bathtub/shower unit to give it new appeal while limiting the need for a whole-shower renovation. Be sure to think about all your options, including the metal frame materials, as they may corrode over time due to the constant exposure to water and steam. You may also need to clean glass shower walls and doors more often to prevent soap scum and mineral buildups.
®®
2013 Homeowner’s Guide 66

Synthetic shower surrounds offer many of the same easy installation benefits of one-piece shower units and maintenance is very easy. Generally made of vinyl, plastic, acrylic or PVC, the panels can be applied over existing flat walls and are available in many patterns and colors.
Tile offers you the most in terms of decorative choices when building a new shower area. Tiles can be made of porcelain, granite and other stones, ceramic materials or even glass. With a huge array of colors, sizes and patterns, the design choices are nearly infinite. Hire an experienced, professional tile setter to get the best results and don’t forget that you need to clean and seal grout on a regular basis to prevent mildew growth.
Glass block can wall off a shower area for privacy. While you take a shower, its patterns obscure your form from others while still allowing light to penetrate into the stall and more natural light into the room. If your bathroom features a window near the shower area, glass block is a great way to provide privacy and natural light.
ToiletsNothing can add new functionality to a bathroom like new toilet, especially if your current setup features an outdated or inefficient model. While it may be tempting, changing the location of the toilet can incur more expense than it’s worth since it would take a significant amount of time and effort to plumb new sewer drain lines.
When shopping for new toilets, don’t forget to measure both the new unit and your existing space. Since all new toilets manufactured since the 1990s in the United States are required to use less than 1.6 gallons of water per flush, replacing an older toilet with a new one is an effective way to reduce your home’s overall water use.
Lighting and MirrorsWall lighting, effective for eliminating shadows by the mirror, is generally used in conjunction with overhead lights. Wall lighting is particularly useful for illuminating areas that require extra light. Sconces installed on either side of the mirror provide additional light for grooming.
®®
2013 Homeowner’s Guide 67

Strip lights installed over the mirror also ensure adequate, even light for grooming tasks.
These lights are available in a number of modern designs. You can place recessed lighting anywhere, and it’s especially useful for lower ceilings. Recessed lights can be bright or dim and angled to highlight wall decorations.
Mirrors framed in wood add a warm and sophisticated note, whereas mirrors in new shapes and pieced together in artistic groupings offer a contemporary touch. If you have a smaller bathroom, you can add multiple mirrors to convey the illusion of more space.
Wall CoveringsYou bathroom’s wall coverings need to be durable because of moisture, heat and cleaning requirements. Many homeowners choose gloss and semigloss paint and vinyl wallpaper for their water-repelling qualities. Wallpaper styles change quickly, and finding matching wallpaper down the road may be difficult.
FlooringMany bathrooms employ tile flooring due to its durability and waterproof characteristics. Much like any other tile option, you can choose from an endless array of patterns, sizes and textures. You’ll need to clean these floors regularly and seal the grout to prevent mildew from forming.
Vinyl flooring and linoleum floors are also waterproof, durable and easy-to-clean. Although possible, some flooring choices that may be used in other parts of the home may not work well in the bathroom, such as carpeting and wood flooring.
®®
2013 Homeowner’s Guide 68

Clearly define your project.Before you start having conversations with bathroom remodeling contractors, read remodeling magazines, check out materials and products at showrooms and retail stores and research the Internet for designs or materials that interest you. By providing a rough idea of what you want the finished product to look like, the contractor can more accurately estimate the time and cost necessary to achieve your goal.
Talk about it.Talk to your neighbors, friends and family about their projects. Use Angie’s List to find local bathroom remodeling professionals and read consumer reviews on their work.
Verify references.When you do start speaking with potential contractors, ask for names of customers from recent projects. Make the effort to speak with the customers and ask them about their projects. Did the contractor meet their expectations? Were there any delays or miscommunications? How did they handle changes the customer requested? Would they hire the contractor again?
Get written estimates.Get at least three written estimates that clearly define the project and what materials will be used. Having an estimate in writing can help provide you recourse should something go wrong.
2013 Homeowner’s Guide 69
®®
Hiring TipsHiring Tips

Check them out.Make sure you can get hold of a contractor when you need him or her. Be cautious of businesses that list only a post office box address but no street address or that use an answering service. Don’t hire unsolicited, door-to-door contractors or those who can’t prove their qualifications. Never hire a contractor that insists you pay cash up front.
License for HireSome states or cities have no licensing requirements for contractors, which can make it difficult for homeowners to check up on contractors before they hire. Don’t rely on the contractor’s word to know whether his or her license is valid. Verify it through appropriate agencies or use Angie’s List License Check Tool. Bathroom remodeling work often requires electrical and plumbing work — two of the most often regulated trades — so make sure you hire a qualified, legitimate professional.
Verify insurance and bonding.Ask your potential hire for proof of insurance or bonding. Contractors who operate aboveboard should be prepared to share this information. Taking the extra step of calling the insurance or bond company to verify that a policy is active and paid up can offer you greater peace of mind.
Setting a Budget and Payment GuidelinesFor most bathroom remodeling projects, you can typically expect to pay about 10 percent or more of the total value of the project as a deposit. Never pay more than a third of the total cost of the project of the down payment, and never pay in cash. Be aware that especially in bathroom remodeling, contractors will frequently find hidden problems. Adding an additional 10 to 20 percent to your overall remodeling budget can help reduce the strain of these types of problems.
2013 Homeowner’s Guide 70
®®

Interior PaintingInterior PaintingPainting is one of easiest and least expensive ways to dramatically change the look of a room. It's also one of the more accessible do-it-yourself projects, though a professional painter will likely do a better and more long-lasting job.
The Fine PrintDon’t assume your contract covers all your needs. Know the details of the contract, as well as how any change orders will be handled. Check that your contract includes a lien waiver, covering payments to all subcontractors who worked on theproject. Never sign a blank contract.
Knocking Out The Punch ListBefore you sign off and make the final payment to a contractor, make sure you develop a punch list and ensure that the work is complete to your satisfaction. This is how the contractor will deal with the list of small items remaining to be completed at the end of the job. A good rule of thumb is to determine the cost of those items, double it, then withhold that amount from the final payment, until the contractor completes the punch list.
Plan for StressThis one of the most overlooked, but critical considerations. How will the project change your routine, especially with the bathroom? Where will materials be stored? What are the working hours for the crew?
2013 Homeowner’s Guide 71
®®

BlackBlack can be a dramatic choice for trim and accents. With the right furniture and décor, black is ideal for living rooms, bedrooms and kitchens.
GrayAnyone who is tired of white walls should consider gray. Gray is versatile, since it blends well with most furnishings and accessories. It’s an ideal backdrop for bursts of color.
Choosing ColorsChoosing ColorsPicking the right color for interior spaces requires imagination and creativity. Virtually any color will look good on a surface as long as it is applied correctly, but choosing the right color involves examining an interior space with a critical eye.
Most ceilings are painted white to brighten rooms and focus attention on the walls. Lighter ceiling colors can also make a room appear larger and more open. Deviating from white or light-colored ceilings is a great way to change the overall appearance of a house, but be aware that the room may appear darker and walls may seem shorter.
Begin the process of picking a wall color by studying catalogs, paint chips and paint samples, all of which are available at paint stores and most hardware stores. Factor in the room’s existing flooring, curtains, blinds, furniture and decorations. Be sure the wall color will coordinate with those, as well as any trim. Also, consider a room’s use. For instance, a bathroom may require a different approach than a living room.
Be aware, too, that every color has certain properties and emotional effects. Some popular colors for interior painting include:
®®
2013 Homeowner’s Guide 72

BrownThis classic earth tone is effective in living and work areas. Terracotta and dark mustard brown combinations are suited to Latin American and Santa Fe-style décor. Brown hues are great for interior spaces that get lots of sunlight. Lighter browns, such as beige and taupe, are great neutrals.
GreenThe impact of green depends on its tone or hue. Maritime greens are ideal for studios and offices, as they inspire concentration, while cool forest greens are well-suited for bedrooms and bathrooms.
RedRed creates drama. Flat red is modern and inviting, cherry red has a youthful vibe and darker red is warm and welcoming.
PinkPink is soft and romantic, often used in baby girls’ rooms. It can also work in makeup rooms, bathrooms and bedrooms. Use care with hot pink, especially in rooms that get lots of sunlight, as it can make the room feel dark.
YellowSimilar to gray, yellow is versatile. Pale yellows in sunlit rooms with flowery decor are inviting, especially in the morning. Darker yellows add warmth even in winter. Bright yellows reduce the amount of illumination needed in a space and are ideal for any room.
®®
2013 Homeowner’s Guide 73

Types of PaintTypes of PaintThere are paint types to suit every situation. Here are common categories:
Primer: Priming is part of preparing a surface for paint. Primer is an undercoat that helps paint properly adhere. Failing to use primer on a porous surface, such as wood or concrete, can lead to eventual peeling away of paint.
Matte: This is a flat finish with little or no gloss. It reduces glare and is good for hiding small imperfections. It is generally not washable or recommended for bathrooms. Flat enamel is more durable and can be used in high-traffic areas such as hallways.
Eggshell: Has a slight sheen and can be cleaned more easily than a matte, or flat, finish.
OrangePastel oranges are great for interior spaces where skin is likely to be exposed, such as bedrooms and bathrooms. Bright orange is lively, and darker and burnt-orange tones complement southwestern décor.
BlueBaby blue is a popular choice for baby boys’ rooms, while cyan hues can create an underwater mood with the right accessories. A light blue ceiling can conjure images of a cloudless sky and increase the sense of space. Pale and medium blues can create a cooling effect.
®®
2013 Homeowner’s Guide 74

Tools and SuppliesTools and SuppliesThere are many supplies needed for a well-done paint project. You will undoubtedly need a variety of brushes, rollers, paint trays and stirring sticks. It’s also a good idea to have drop cloths, painter’s tape, a can opener, putty knife, sandpaper, goggles and gloves.
Foam brushes are inexpensive and can be used multiple times if properly cleaned. Foam brushes and rollers are easy to use and great at holding paint and preventing drips.Their shape can make them effective on corners and edges. For delicate paint work, however, edging pads and edging rollers are highly recommended.
Why to Consider Hiring a ProfessionalWhy to Consider Hiring a ProfessionalA properly informed and supplied do-it-yourselfer can do a great interior paint job. However, hiring a professional crew can save time and result in a more perfect job. Pros have the right supplies and are expected to leave no smudges or drips behind.
Satin: Has a smooth, velvety appearance with some gloss. If applied correctly, satin-finish paint can withstand washing. Can be good for doors, playrooms, trim, kitchens, bathrooms and other spaces that get lots of use.
Glossy: Highly reflective and dramatic. It requires careful preparation, as it does little to hide imperfections.
®®
2013 Homeowner’s Guide 75

Exterior PaintingExterior PaintingHomes with painted wood siding can be beautiful, but require periodic maintenance. Even brick or stone homes may have wood trim around windows and doors, or perhaps a porch, where some painting is needed.
Pick the Right PaintPick the Right PaintThe materials of the home’s facade should be considered. When painting flat surfaces like siding or wood, you can opt for standard outdoor paint. When painting a textured surface like stucco or brick, “elastomeric” paint is a much better choice. This type of paint can stretch more than normal paint, which allows it to bridge over small gaps and crevices, painting smoothly over texture.
Climate is another factor to consider. Exposure to sunlight, wind, rain and other weather can all wear out paint. Oil-based paint is durable against wind, rain and temperature changes, but sunlight tends to degrade it. Latex paint is the more durable option for very sun-drenched and relatively dry climate areas.
Areas that are subject to a lot of moisture, like the skirting around houses, may require mold-resistant paint, like outdoor paint with fungicide added. Another specialty paint to consider is a flame-resistant brand. Paint that resists fire rather than combusting could be a life saver for homeowners in wildfire-prone areas.
When hiring, be aware that most states don’t require painters to be licensed or certified. Check out references and be sure the painter is bonded and carries insurance in case employees or clients are injured.
®®
2013 Homeowner’s Guide 76

Color ChoicesColor ChoicesIf you plan to repaint your new home now or in the future, choosing a new color scheme can have a dramatic effect - positive or negative - on its appearance. Selecting a color scheme that complements your home’s and its surroundings is a great way to increase curb appeal. If your new home is in a community with a homeowners association, it’s a good idea to know that the HOA’ s color approval process is before repainting your home.
Take surrounding landscaping into consideration.If you have ornamental or colorful trees, shrubbery or floral selections around your home you should figure their colors into the color scheme selection that is made. Homes that have a great deal of trees can make the property darker and cast shadows onto the home. Individuals will want to avoid darker colors for these situations.
Accentuate the home's attractive details.Entryways, windows, shutters and other details on the home can be painted to make their design noticeable. However features such as gutters, downspouts, external air conditioning systems, unevenly proportioned windows and protruding garage doors should not be completed to draw attention to them as this will provide a negative results.
Consider colors of the home that cannot be changed.Roofing shingles, paving blocks, concrete surfaces, stones and other such features are prime examples of the permanent features to consider when selecting your exterior color scheme for the home. Homeowners can work off of these colors to make a home that looks uniform and luxurious when the exterior painting is complete.
Though buying high-quality, specialty paint and getting a professional painter to apply it can be expensive, the investment will pay off with a high-quality, long-lasting paint job. Low-quality paint often lasts half as long as high-quality paint and even shorter if it's not applied properly.
®®
2013 Homeowner’s Guide 77

PreparationPreparationHomeowners often do their own painting because it's a more accessible skill than, say, roofing or electrical repair. But one of the most common mistakes amateur house painters make is failing to properly prepare the surface to be painted. If there is any peeling paint — and there usually is somewhere — it's essential to scrape it off before apply new layers. Each spot where paint has peeled loose needs to be scraped thoroughly until you can no longer get the sharp corner of a putty knife under any of the surrounding edges of paint. Then the bare spot needs to be sanded until the paint edges are smooth.
After scraping all loose paint, use a pressure washer to remove dirt, debris and mold that are common on all homes. Any area on the home’s exterior that shows signs of rot or damage should be replaced before painting begins. Any bare wood from peeling or repairs should be primed before it is painted.
In addition to preparing the painting surface, you also need to protect the surrounding area from paint splatter or other damage from the work. Cover air conditioning units, landscaping and other surfaces close to the work area with drop cloths, old sheets or blankets. Windows and doors should be taped off, while accessories such as light fixtures, doorbells, shutters, mailboxes and other detailed features might be simply removed and put back on after the job is done.
Using color to mitigate flawsUtilizing two shades of a single color can make a home appear more appropriately sized when the home may be too large or too tall. To accomplish this effect individuals will want to place the darker tone on the upper level of the home’s exterior. Smaller windows can appear more proportionately sized by trimming them in a lighter tone of paint. Darker colors make a space or feature appear smaller. The same effect can be obtained for homes positioned further away from a curb. By using lighter tones the home will not feel camouflaged.
®®
2013 Homeowner’s Guide 78
1
2
3
Do you have the equipment? Painting a house is not a one-ladder job. You'll need a minimum of two extension ladders and scaffolding. These can be rented, but that's another cost to factor in.
Do you want to take the risk? Working on scaffolding is dangerous. Professionals have experience and know what safety precautions to take. Painting is monotonous work and after a few hours up on a scaffold it's easy to lose track of just how narrow that board is.
Will you do the preparation? It takes a disciplined approach to properly scrape away all of those little peeling spots. If you're not going to do this correctly, don't do it yourself. There's no point in putting in all of this work if the paint is just going to start peeling again a few years later.
®®
Hiring a House PainterHiring a House PainterEven if you think you'll probably do the job yourself, it's good preparation to seek estimates from professional house painters. Then you'll have a financial point of comparison and you may benefit from what a professional painter has to say about the condition of your home, color choices and types of paint available.
If you have a one-story house with minimal peeling and you have plenty of time, you can probably do the job yourself and save money. If the house is taller or needs significant preparation it may be wiser to hire someone to do it for you. Consider these points:
2013 Homeowner’s Guide 79

Poor window energy efficiency
Windows are unattractive: faded, worn or appear outdated
Windows are bowed, sagging or bent, creating pockets of air infiltration
Windows leak during rainfall
Windows accumulate condensation or frost between panes
2013 Homeowner’s Guide 80
®®
WindowsWindows
Replacement WindowsReplacement WindowsReplacing your home's windows can help reduce money spent on poor energy efficiency, update and improve the appearance of your home, add resale value and make routine window cleaning easier.
When to Replace Home WindowsDepending on the material, if you live in an older home and your home’s windows are at least 15 to 30 years old, you may be noticing signs of increased wear and tear and thinking about replacing them.
Common reasons to replace older windows include:

According to a 2007 study published by the National Association of Home Builders, aluminum windows are expected to last between 15 and 20 years, while wooden windows should last upwards of 30 years. Since they’re considered more durable than wood or metal windows, vinyl and fiberglass windows may last even longer. If your home’s windows are 15 to 30 years old or more, you may be experiencing some of the conditions noted above.
Upgrading your home’s overall energy efficiency is a common reason for installing new windows. According to the U.S. Department of Energy, heat loss from inefficient windows can account for 10 to 25 percent of your home’s heating bills.
If your home’s heating or cooling bills are too high and continue to increase year over year, installing new windows can be one step towards improved efficiency. Homeowners who replace single-pane windows with energy efficient windows will immediately notice a significant reduction in their heating and cooling bills.
While certain smaller steps can be taken to mitigate energy loss from inefficient windows, including repairing ill-fitting sashes and frames, adding spray foam or caulk to fill in voids or holes, and installing plastic wrap during colder months, installing modern highly energy-efficient windows can help you do an end-run around high utility bills.
Another selling point that may attract many homeowners to replacing their home's windows is ease of cleaning. Features like tilt-out sashes in double-hung windows can make routine window cleaning much more convenient.
Cost vs. Value of New WindowsIf you’re thinking replacing windows to add to your home’s overall resale value, it’s an investment you should consider carefully, as it’s significantly expensive – especially for the most energy efficient windows. For the average-sized U.S. home, installing an entire set of all brand-new windows can easily cost more than $10,000 total.
®®
2013 Homeowner’s Guide 81

It’s important to note that many homeowners consider replacing windows to add to their home’s resale value. While few, if any, home improvement investments net a positive return, homeowners who install new windows can reasonably expect to recoup about 60 percent of that investment in terms of improving their home’s overall resale value
Historical or Homeowners Association ConsiderationsIs your home in a historic district or one subject to HOA covenants? If you’re thinking about replacing your home’s windows that should be one of the first questions you answer. If you live in a historic district that restricts or prohibits changes or alterations to a home’s historical exterior, you may be bound by covenants that may prevent you from installing new windows.
Since a new window installation will alter the aesthetic of your home’s exterior, homeowners associations may also have some regulatory control of installing new windows. While an HOA’s policies or bylaws might not necessarily strictly prohibit window replacement, it may limit your selection of choices in window styles, colors or patterns.
If you’re unable to change your windows, many window companies and other contractors may be able to restore older windows to a like-new appearance – and often at much lower cost than window replacement. If you live in particularly older home with historic windows, consider hiring a window restoration specialist to improve and preserve the windows.
Choosing a ContractorChoosing a Contractor
Because the cost of replacement windows can vary widely depending on energy efficiency, material and style choices, getting at least three contractors' estimates before committing should provide you with a good range of choices.
®®
2013 Homeowner’s Guide 82

Window Restoration and RepairWindow Restoration and Repair
When window replacement isn't an option due to cost or preservation concerns, repairing or restoring your home's windows can return them to their former glory.
Older windows that are drafty, sagging and refuse to open often suffer from lack of maintenance rather than poor workmanship. Windows made a century ago are often constructed of hardwood and will function almost indefinitely with a little maintenance every few decades.
Sometimes windows are merely painted shut. In these cases, the homeowner may break the bond between casing and window sash by making several light passes over the seam with a utility knife. Inserting a putty knife blade into the seam and working it around the sash will separate the paint from the window.
As with any home improvement hiring decision, ask for references and take the time to check them. If a replacement window contractor has done a number of installations in your area, take the time to visit a recent job site to view the quality of their installation. Verify that the contractor has the necessary license if required and ask for proof of insurance or bonding.
Window contractors in particular might be certified by manufacturers to install or perform warranty work on window products. If you want to purchase a particular manufacturer or brand of windows, ask your potential contractors if they've undertaken any manufacturer's training or certifications.
It's also a good idea to plan window replacement for a relatively mild month of the year. Although most professional window installers can finish their work in a few days or a week, planning the project for warmer weather can help you avoid being stranded in a house with no windows in the middle of winter.
®®
2013 Homeowner’s Guide 83

Gutter SystemsGutter SystemsA clean and properly functioning gutter system can save you from costly damage to your home. Here's what you need to know about installing new gutters, hiring a gutter cleaning service and whether gutter guards or screens are worth installing.
Gutter Cleaning and MaintenanceGutter Cleaning and MaintenanceHow often gutters need to be cleaned depends on the part of the country and whether there are nearby trees. If you live in the desert, you may be able to go several years between cleanings, but for those who live where autumn leaves fall, it's important to clean gutters at least twice a year.
The most important time is in late fall after all or most of the leaves have come down. Most deciduous trees also drop debris in the spring, so an early summer cleaning is important as well. Those who live in heavily wooded areas may find it necessary to clear their gutters three or four times a year.
Cracked and missing pieces of glazing, the hard sealant lining the outside of the glass, are common in older windows. In these instances, homeowners should carefully pry loose the old glazing with a utility knife, clean with a putty knife and apply new glazing with a glazing tool. Oil-based primer should be applied after one week of temperatures above 40 degrees Fahrenheit.
Broken rope pulleys in window frames are another problem owners of older homes face. Replacing the rope involves removing the sash, detaching the old cord from its weight, attaching a new cord of the same diameter and reinstalling the sash. The window stops must be reattached with finishing nails, and touch-up paint may be required. Properly maintained, rope and pulley systems are more durable than many modern spring methods and should last for many years.
®®
2013 Homeowner’s Guide 84

Hiring a Gutter Cleaning ServiceHiring a Gutter Cleaning ServiceMany homeowners hire professionals to clean their gutters. Cost will vary depending on the size of the house, but a ballpark estimate would be around $175. This can be a particularly good choice for homeowners who have gutters that are difficult to reach, or who no longer feel physically comfortable doing the job themselves.
But there's another group of homeowners who ought to consider hiring a service — those who for whatever reason just don't get around to doing the job themselves. If you want to do it yourself, that's fine — as long as you actually get around to it. Otherwise, hire a pro and get it over with.
Gutter Repair and ReplacementGutter Repair and ReplacementCompanies that install new gutters often also make small repairs on existing gutters — though you should expect to hear a sales pitch arguing that new gutters are the way to go. If you just want yours repaired, make several calls and get at least three estimates. Gutter cleaning can also be a good job for a handyman, who may be more likely to give you a good price than someone who is motivated to sell you a new system.
So when you search Angie's List to find a service provider in your area, be sure to check both categories — "gutter repair" and "handyman."
Homeowners can clean their own gutters using an extension ladder and by scooping the leaves out by hand or with a short broom. Smaller debris can be washed out with a garden hose so the gutters are sparkling clean (at least for a while).
®®
2013 Homeowner’s Guide 85

Install Yourself or Hire?Install Yourself or Hire?Gutters need to have a slight incline or "fall" to allow water to drain towards the downspout — typically about half an inch for every 10 feet. However, it should appear to the observer to follow a perfectly straight horizontal line along the roofline.
If you install gutters yourself, you will need to buy them in sections from the hardware store and join them together to stretch the length of your roof. This means there will be visible seams that can leak. You also run the risk of creating a wavy effect over several sections while trying to span 40 feet or more of roof line. Even if this is not noticeable to the naked eye, you may create places where water pools and does not drain. One advantage professional installers have over you (in addition to their skills and experience) is that they can manufacture sections of gutter on-site to match the exact length needed.
If you’re considering doing the job yourself, first add up the total footage of gutter you need, including downspouts. Don't forget to include the number of endcaps, elbows, spikes and so on. Go to the hardware store and figure out how much it will cost for the materials. Remember that this will be a two-person and two-ladder job.
Before you start buying materials, calll three installation companies and get estimates. Naturally, this will be more than your materials-only total, but you can then decide whether the difference is worth it to have the job done professionally. Search Angie's List to find installers in your area that have received the best recommendations from past customers.
®®
2013 Homeowner’s Guide 86

2013 Homeowner’s Guide 87
®®
Roo!ngRoo!ng
How Leaks FormHow Leaks FormIf a roof is old or has sustained weather damage, there are common areas that tend to be culprits for leaking water. Keep an eye out for problems and take preventive measures to fix them before serious structural damage, or mold and mildew occurs.
Anatomy of a Roof
1. Chimney
2. Flashing
3. Underlayment
4. Sheathing/Deck
5. Gutter
6. Downspout
7. Truss
8. Fascia
9. Soffit
10. Ridge vent
11. Vent pipe
12. Shingles
1
2
34
56
789
10
1112

Leaks at joints: Joints between the roof and the chimney or between two sloped sections of a roof are highly susceptible to leaking.
Broken or cracked shingles: Water can seep through the roof and into your home if your roof has cracked or broken shingles. Once it gets through the shingles, water can cause the wooden decking to rot. Shingles usually deteriorate on the southern face of the roof first due to sun exposure, so inspect that side first.
Leaks along flashing: Roofers use flashing in areas where something sticks up through the roofline — the chimney, vent stacks, etc. Over the years, these can become weak spots where rain begins to find its way under the shingles. Caught early enough, a small gap can be resealed. Left untended, it could become a major leak requiring repairs all the way down to the rafters.
Small leaks: Even the smallest leak can result in wood rot and mold growth. When mold takes root inside a home, it can cause serious health problems.
Roof InspectionsRoof InspectionsAlthough not a substitute for a professional roof inspection, there are some tell-tale signs you can look for. The National Roofing Contractors Association recommends checking your roof during the fall and spring for potential problems. You should also assess your roof after a major storm.
Here are some of the ways roofs leak:
®®
2013 Homeowner’s Guide 88

Look for shingles that are buckling, curling or blistering; this indicates the end of the shingles' life expectancy. Following a storm, check your yard for shingles that might have blown off the roof.
Spot any loose material or wear around chimneys, pipes and other penetrations.
Check for deposits of shingle granules in your gutters and downspouts, which is an indicator the roof has hail damage. Granules give shingles added weight and protect them from ultraviolet rays.
How old is the existing roof? If installed properly and with good materials? An asphalt shingle roof should last 20 to 25 years, sometimes longer. If you've lived there for many years and don't know when the roof was last replaced, it may be time for an inspection. For more information on the different types of roofing shingles, visit the Angie’s List Guide to Types of Roofing.
Go outside and look at the roof. Are the shingle lines still straight or can you see sags or other irregularities? A sag would indicate that the sheathing underneath is rotting.
Do You Need a New Roof?Do You Need a New Roof?There are several factors that can influence the condition of a roof such as age, weather and shingle type. Here are some tips to help decide if it’s time for a roof replacement.
®®
2013 Homeowner’s Guide 89

Go outside and look at the roof. Are the shingle lines still straight or can you see sags or other irregularities? A sag would indicate that the sheathing underneath is rotting.
When you clean your gutters (which you should be doing twice a year), do you find a lot of asphalt granules in the gutter?
Do you see cracked, curled or misshapen shingles? As shingles age, they begin to deteriorate.
Go up in the attic, preferably during or immediately after a good rain, and look for evidence of leaks.
Hiring a RooferHiring a RooferInstalling a new roof may be the single biggest investment you ever make on your home. If all goes well, it's an investment that should last 20 to 30 years. But that also makes it a big risk because while there are many honest, knowledgeable roofers, there are also crooked and incompetent roofers.
When hiring a roofer or other service provider (especially on an expensive job):
If you notice some of these warning signs, it’s time for a professional inspection.
®®
2013 Homeowner’s Guide 90

Choosing a ContractorChoosing a Contractor
Ask the contractor to show you proof of licensing, workers’ compensation and liability insurance. Write down or copy the contractor license number, which you can then verify with your state's official license board.
Ask for references of past customers in your neighborhood or nearby — and call them. Any contractor who acts offended when asked for references or licensing proof should be seen with suspicion.
See if the contractor is listed in the Chamber of Commerce directory, and how long he or she has been a member.
Be particularly wary of someone who knocks at your door offering a deal — especially if it’s after a major storm that has caused damage in your area. Although some honest contractors seek work in this way, it’s also a common tactic employed by roofing scammers.
LandscapingLandscaping
Landscaping your property can be a major undertaking, but it can add curb appeal and value to your home. Planning ahead will give you ample time to decide exactly how you want your yard to look, and allow you to research potential companies so you can make an educated hiring decision.
Here are some tips to consider:
®®
2013 Homeowner’s Guide 91

Decide which parts of the property you want to landscape. You don't have to do the whole yard at once. Break it up into projects or phases. This makes the tasks more manageable and affordable.
Think how you'll use the landscape. Will it be for outdoor entertaining? Are you trying to gain privacy or dampen noise?
Collect landscape images that appeal to you. Try sketching a rough idea of what you have in mind. Visit garden centers and make a list of plants that interest you. Present these materials to the landscapers under consideration and listen to his or her advice. Sometimes, designs or plants may look good but aren't well-suited to your particular property.
Decide if you're going to do the job or hire a pro. If your property slopes, has drainage issues or other kinds of potential engineering problems, hiring a landscape architect or designer may be your best option.
Here are some tips to consider:
®®
2013 Homeowner’s Guide 92

Top 9 Mowing TipsTop 9 Mowing Tips
Lawn and Yard WorkLawn and Yard Work
Many homeowners strive for the perfect, emerald-green lawn, but it takes more than simply pushing a mower around the yard.
Follow these tips to find the right expert for your needs:
Have an idea of what your ideal landscape looks like. This will help the professional understand what you're looking for; however, be open to ideas. They know what will work best for your space.
Get recommendations from others. If you join Angie's List, you can search for landscapers in your area and read the reviews and ratings submitted by other Angie's List members who have used those companies.
Make sure the landscaper you hire meets state and local certifications and licensing requirements, if applicable.
Obtain a signed copy of any contracts and work orders.
Be prepared to go on site visits. If possible, ask the homeowners about their experience with the landscaper.
2013 Homeowner’s Guide 93
®®
Tips On Hiring HelpTips On Hiring Help

1
23
4
5
6
Change directions: Alternate your mowing pattern each time you cut the grass. This will prevent ruts from forming, and it will encourage the grass to grow tall and straight.
Mow dry grass: Cutting wet grass can clog your mower’s intake and leave deep tire tracks in your yard.
Sharpen the blade: Have the blade sharpened at least once a year. A dull blade rips the grass, creating an uneven look, damaging your lawn and leaving it exposed to diseases and parasites.
Overlap: It's tempting to get the most out of every pass and minimize the amount of overlap, but it's not the best technique. Overlapping every pass by three inches or more will result in a smooth and even lawn.
Tall grass is good: As grass grows taller, its roots go deeper, resulting in a healthier lawn that requires less watering. The grass will also fill in nicely, providing a great safety net against weeds. Cutting the grass too short causes stress on your lawn. Over time, repeatedly cutting it short will result in turf that has bare spots and is highly susceptible to cold, extreme heat, pests and diseases.
The one-third rule: Never cut the grass by more than a third of its height at any one time. If the grass has gotten too tall, cut it back by one-third, wait a few days and then cut it again.
Consider the following mowing tips to improve the look of your lawn:
®®
2013 Homeowner’s Guide 94

11 Great Lawn Care Tools11 Great Lawn Care Tools
You don't necessarily need to own all of these — for example, a rototiller can be rented when needed — but here's a primer on each tool and its uses.
For help starting a stubborn lawn mower, please visit: http://www.angieslist.com/articles/help-my-lawn-mower-wont-start.htm
7
8
9
Don't be stupid: Choose a mower with a safety handle that will shut down the mower when released. Never allow people to ride on the mower deck as this can result in serious injury. Wait until the blade has completely stopped spinning before going near the deck to remove clogs.
Clear the lawn: Your mower has the power to turn any rock or stick into a flying projectile that can harm nearby people. Clear the lawn of toys and other objects before cutting. Watch for objects buried in the grass as you are cutting to avoid problems.
Mow early in the day: When possible, cut the grass early in the day - as soon as the dew has dried. This will give the grass time during the day to gather fresh nutrients.
®®
2013 Homeowner’s Guide 95

1
2
3
Lawn MowersTypes: Manual reel, gas push, electric push, riding, lawn tractor, zero radius and roboticPurpose: Used to cut grass. Lawn tractors can be utilized as a multipurpose vehicle for hauling, plowing and other outdoor lawn and gardening tasks, as well.Maintenance: The blades on all lawn mower models must be sharpened to provide desired results and even cutting services. All mowers except for the manual reel require regular oil changes and tune-ups to ensure the engine is properly functioning.
EdgersTypes: Electric, gas poweredPurpose: Cuts a trench along walkways, driveways, around flower beds and other landscaping, giving the lawn a more pedicured look.Maintenance: The motors on these pieces of equipment require regular maintenance to ensure that they are well lubricated and operational.
WeedeatersType: Electric, battery-powered and gasolinePurpose: Removes grass and weeds in areas that are hard to reach with the lawn mower. These areas include around trees, under bushes and against buildings and walkways.Maintenance: The strings on weed eaters need to be changed or refilled. Spark plugs must be checked and replaced. Most models require you to oil the motor, as well as the rotating mechanism for the string at the bottom.
®®
2013 Homeowner’s Guide 96

4
5
6
Leaf BlowersTypes: Gas, electricPurpose: Provides an easier method of removing leaves and other lightweight debris from the lawn for easier clean up. It can also be used to blow water from paved areas, rain gutters and snow from driveways.Maintenance: Electric leaf blowers require minimal engine maintenance. Gas powered leaf blowers require regular tune ups and maintenance to keep up with the demands of a two and four cycle engine.
AeratorsTypes: Core/plug, spike, gas-powered and manualPurpose: Used to control the lawn thatch and reduce soil compaction so that water and nutrients can reach the roots of the grass and other vegetation within the yard.Maintenance: When you are finished using the aerator, the spikes should be rinsed off with a garden hose and allowed to dry. This will help to prevent rusting. Gas powered aerators will need seasonal tune ups performed.
Fertilizer SpreadersTypes: Rotary, drop and sprayerPurpose: Used to evenly distribute fertilizer over lawn and gardening surfaces.Maintenance: When you have finished using the fertilizer spreader, you should spray the holding compartment out with a garden hose. It is important to ensure that excess fertilizer is not left stored with the equipment, as this can cause explosion hazards. Make sure sprayer model spreaders are not clogged by flushing clean water through the nozzles.
®®
2013 Homeowner’s Guide 97

7
8
9
RakesTypes: Various shapes for different tasks.Purpose: Used to remove leaves and debris from the lawn, under bushes, in flower beds and other areas where debris may gatherMaintenance: Spray the rake with a garden hose when you have finished using it and before storing it. If the forks for the rake are connected to the handle with a screw or rivet, you will want to inspect this prior to using it.
ShovelsType: Various shapes and sizes for different tasks.Purpose: To remove soil, grass and other materials.Maintenance: Spray the shovel or spade with a garden hose after using it. If the head of the shovel or spade is connected to the handle with a rivet or screw, inspect this before using the tool.
PrunersType: Manual, gas, electricPurpose: Used to remove dead or undesired limbs, leaves and branches from bushes, trees, flowers and other plants around the yard for a more manicured look.Maintenance: Remove dirt and debris from the blades when not in use and prior to storing to prevent rusting or damage. Blades must be sharpened periodically for desired results.
®®
2013 Homeowner’s Guide 98

10
11
Grubbing HoeType: ManualPurpose: Acts as an aerator between dirt pathways and in between landscaped areas or vegetation.Maintenance: Spray the blade of the grubbing hoe with a garden hose to remove dirt and debris. The blade must be periodically sharpened.
RototillerType: Manual, gas, electricPurpose: Similar to an aerator, a rototiller is able to work through harder surfaces and in a larger patterned area. Rototillers are generally used in gardening areas and flower beds at the beginning of planting season.Maintenance: Blades should be sprayed off with a garden hose to remove excessive dirt and debris. Blades often need to be sharpened and the motor should be tuned up each year.
®®
2013 Homeowner’s Guide 99

While some homeowners take great personal pleasure in caring for their beloved lawns, for others it’s just a big chore. If you're thinking of hiring a lawn care company, consider the following tips:
Get an on-site estimate: Having the company come to your house and assess your lawn and its needs will ensure you receive the right treatment and maintenance plan for growing a healthy lawn.
Avoid quick fixes: If your lawn is in distress, stay away from self-proclaimed magicians who claim to work miracles. Repairing a damaged lawn takes time.
Chemical check: If you're considering a chemical treatment to be applied to your lawn, make sure the professional you hire is certified to apply such chemicals.
Do your homework: Make sure the company is insured, and look for someone with good recommendations from past customers. By joining Angie's List, you'll be able to search for lawn care companies in your town and see the reviews and ratings given to them by other Angie's List members.
2013 Homeowner’s Guide 100
®®
Hiring a Lawn Care ServiceHiring a Lawn Care Service

Trees will thrive as long as they are planted in the right location. A certified arborist can help determine what trees will work best in your yard -- and your geographic region -- and can help come up with a variety of trees to beautify your landscape.
In the eastern U.S., homeowners often plant silver maples because they grow relatively quickly. However, they also have shallow root systems that can damage patios, driveways and sidewalks. The wood is also less dense and therefore more prone to break during a storm. Red oak and sugar maple trees, on the other hand, tend to hold up better — but take longer to mature.
Pear, mulberry and other fruit-bearing trees should be kept away from driveways, patios and sidewalks because the fruit will be a nuisance and stain the pavement.
Disease resistance is another factor to consider, but difficult to predict with any certainty. Dutch elms died out by the millions in the mid-20th Century and in recent years ash trees have been devastated by infestations of the emerald ash borer.
Planting TreesPlanting Trees
Tree ServiceTree Service
Trees grow slowly so you can't afford to make a mistake by planting them in the wrong location or overlooking something that puts them at risk. Planting and general care of trees can be taken care of by most homeowners, but a tree service expert should be consulted if trees are showing signs of disease or poor health. Removing large limbs or cutting down a dead tree is inherently dangerous and should be done by someone with experience -- particularly if the tree is near a home or other structure.
2013 Homeowner’s Guide 101
®®

Don't hire just anyone with a chainsaw and a pickup truck. Tree work is dangerous and requires specialized tools. Consider the following tips for hiring a tree service:
Decide what you need: Figure out what type of work you need done – trimming service only or do you have dead trees that need to be removed? The most important thing to look for is low hanging or dead limbs that can fall under the weight of severe storms. Low-hanging limbs can provide easy access to your attic for squirrels and other pests.
Don't procrastinate: If you have old trees or low-hanging limbs, don't wait until bad weather strikes. Taking care of the issue immediately minimizes the risk to your home and family.
Compare your options: Check Angie's List reviews to find the best tree service companies in your area. Customers give service providers letter grades (A-to-F) so you'll be able to pick an A-rated service. Discount coupons are often available to Angie's List members.
Check qualifications: Make sure the company is equipped to handle your specific job. For instance, if you need a large tree removed, are they experienced in stump grinding and other necessary aspects of the job?
Consider a certified arborist: If you have trees that are aged or diseased, an arborist can help determine what special care you might need to keep the trees and your yard in good shape. Many quality tree services have certified arborists on staff.
2013 Homeowner’s Guide 102
®®
Hiring a Tree ServiceHiring a Tree Service

Tree roots require a thorough, deep soaking so a sprinkler isn't always the best method for watering. It might be more efficient to use a hose or 5-gallon bucket to drench the drip line of a tree. The drip line is the entire area on the ground directly below a tree's canopy. It's where a majority of the tree's feeder roots reside.
Most arborists agree that mature trees require the equivalent of 1 to 1.5 inches of rain per week during the growing season.
Some arborists say you should add 10 gallons of water for every inch of tree diameter. Another option is to apply 1/2 gallon of water for every square foot of soil under the drip line. Ideally, a tree with a 20-foot drip line should get about 150 gallons of water per week.
Tree Watering TipsTree Watering Tips
Ask for proof of insurance: Make sure the company's policy adequately covers property damage and injuries that could occur on your property.
Disposal: Find out how the debris will be handled. Will the company remove it or are you responsible for removing it? Do you want the firewood and/or mulch?
Put it in writing: Make sure you and the contractor agree to the terms of service, and you both get a copy of the contract in writing.
2013 Homeowner’s Guide 103
®®

Watering early in the morning or after the sun is set will reduce evaporation and help the water soak deep into the soil. If you do use a sprinkler, make sure you're not wasting water by spraying outside of the tree’s drip line, or hosing down your sidewalk or driveway. To measure how much water you're using, place an empty tuna can or similar container inside the spray area. When it’s full, you’ve watered enough.
Mulch also helps to preserve moisture around the tree's root system. Ideally, you should add 3 to 4 inches of mulch. However, if you pile it too high or create a "mulch volcano" around the tree, you could do more harm than good. Excessive moisture around tree roots can block oxygen and lead to root rot.
For more information on watering trees during drought conditions, please visit: http://www.angieslist.com/articles/help-your-trees-survive-drought.htm
2013 Homeowner’s Guide 104
®®