EAS Best Practices V1 - FEMA.govcable$systems,$satellite$digital$...
33
An Emergency Alert System Best Practices Guide – Version 1.0 The EAS Best Practices Guide was created in partnership with EAS Participants to support incremental improvements by providing basic guidelines for EAS operation and maintenance. The Emergency Alert System (EAS) is a public alert and warning system that leverages the communications assets of EAS Participants including terrestrial broadcasters, cable television systems, wireless cable systems, satellite digital audio radio service (SDARS) providers, direct broadcast satellite (DBS) services and wireline video service providers to allow the President of the United States the capability to address the American public during a national emergency. This system must be available under all conditions. The system is also used by State and local authorities to deliver important emergency information, such as AMBER alerts. The National Weather Service (NWS) regularly uses the system to disseminate emergency weather alerts and advisories. In 2006, Executive Order 13407 (E.O. 13407), established that it “is the policy of the United States to have an effective, reliable, integrated, flexible, and comprehensive system to alert and warn the American people in situations of war, terrorist attack, natural disaster, or other hazards to public safety and wellbeing (public alert and warning system), taking appropriate account of the functions, capabilities, and needs of the private sector and of all levels of government in our Federal system, and to ensure that under all conditions the President can communicate with the American people.” As part of larger efforts to strengthen the nation’s preparedness and resiliency, FEMA and the Federal Communications Commission (FCC) announced that they will conduct the first nationwide test of the Emergency Alert System on November 9, 2011. Similar to the way local emergency alert system tests are conducted, the Nationwide EAS Test will involve television stations (including digital television, cable, satellite audio and television services) and broadcast radio stations across the U.S. and several U.S. territories. The EAS has never been tested on a national level, and conducting this test is an opportunity to assess the system’s capabilities at all levels. The Test plays a key role in determining if the public is able to receive timely and critical emergency information as part of a larger effort to assess national preparedness for all hazards. FEMA operates and maintains the nationallevel EAS; conducts tests and exercises, and ensures the nationallevel EAS keeps pace with emerging technologies. EXECUTIVE SUMMARY Originating EAS Messages Guidelines for originating effective alerts EAS Plans Best Practices for planning and monitoring Installation and Configuration “Back to Basics” ideas for installation and operation Sample Diagrams Sample diagrams for reference [email protected] www.fema.gov/emergency/ipaws Description of the EAS A brief EAS history and description Intent and Purpose Why an EAS Best Practices Guide? Contents Emergency Alert System
Transcript of EAS Best Practices V1 - FEMA.govcable$systems,$satellite$digital$...

An Emergency Alert System Best Practices Guide – Version 1.0
The EAS Best Practices Guide was created in partnership with EAS Participants to support incremental improvements by providing basic guidelines for EAS operation and maintenance.
The Emergency Alert System (EAS) is a public alert and warning system that leverages the communications assets of EAS Participants including terrestrial broadcasters, cable television systems, wireless cable systems, satellite digital audio radio service (SDARS) providers, direct broadcast satellite (DBS) services and wireline video service providers to allow the President of the United States the capability to address the American public during a national emergency. This system must be available under all conditions. The system is also used by State and local authorities to deliver important emergency information, such as AMBER alerts. The National Weather Service (NWS) regularly uses the system to disseminate emergency weather alerts and advisories.
In 2006, Executive Order 13407 (E.O. 13407), established that it “is the policy of the United States to have an effective, reliable, integrated, flexible, and comprehensive system to alert and warn the American people in situations of war, terrorist attack, natural disaster, or other hazards to public safety and well-‐being (public alert and warning system), taking appropriate account of the functions, capabilities, and needs of the private sector and of all levels of government in our Federal system, and to ensure that
under all conditions the President can communicate with the American people.”
As part of larger efforts to strengthen the nation’s preparedness and resiliency, FEMA and the Federal Communications Commission (FCC) announced that they will conduct the first nationwide test of the Emergency Alert System on November 9, 2011. Similar to the way local emergency alert system tests are conducted, the Nationwide EAS Test will involve television stations (including digital television, cable, satellite audio and television services) and broadcast radio stations across the U.S. and several U.S. territories.
The EAS has never been tested on a national level, and conducting this test is an opportunity to assess the system’s capabilities at all levels. The Test plays a key role in determining if the public is able to receive timely and critical emergency information as part of a larger effort to assess national preparedness for all hazards.
FEMA operates and maintains the national-‐level EAS; conducts tests and exercises, and ensures the national-‐level EAS keeps pace with emerging technologies.
EXECUTIVE SUMMARY
Originating EAS Messages Guidelines for originating effective alerts
EAS Plans Best Practices for planning and monitoring
Installation and Configuration “Back to Basics” ideas for installation and operation
Sample Diagrams Sample diagrams for reference
[email protected] www.fema.gov/emergency/ipaws
Description of the EAS A brief EAS history and description
Intent and Purpose Why an EAS Best Practices Guide?
Contents
Emergency Alert System
2
An Emergency Alert System Best Practices Guide – Version 1.0 Intent and Purpose
FEMA understands that improving the EAS at all levels will take time. FEMA, the FCC and NOAA’s vision for improving the EAS is incremental. Although the Test will use an Emergency Action Notification (EAN) code and will not include EAS origination by State, County, territorial or tribal authorities, it is important that we also make improvements at other levels. This first version of the EAS Best Practices Guide is designed to assist EAS message originators, disseminators, and other participants with the basics of operating and managing the EAS. This Guide can also be leveraged to provide a framework for training personnel on the use and operation of the EAS at all levels of origination and distribution. The success of the EAS is dependent upon strong partnerships between EAS originators and alert disseminators. It is also important that Federal agencies work closely in cooperation with State, local, territorial, and tribal governments. This is the approach FEMA, the FCC and NOAA has taken to revive the EAS dialogue and seek improvements. FEMA is working with the FCC and NOAA to communicate, educate, and inform EAS participants, emergency management agencies and organizations, and the public of the importance of the EAS, and the need to improve the system. Efforts are underway to promote partnerships with the EAS community continue an ongoing dialogue and promote activities that support incremental improvements to the system. This EAS Best Practices guide seeks to document EAS challenges, ideas, and technical solutions to support a better understanding and more effective use of the EAS. The Guide will be frequently updated to reflect lessons learned from ongoing EAS tests and exercises, as well as reflect continued dialogue and engagement with EAS Participants.
Emergency Alert System
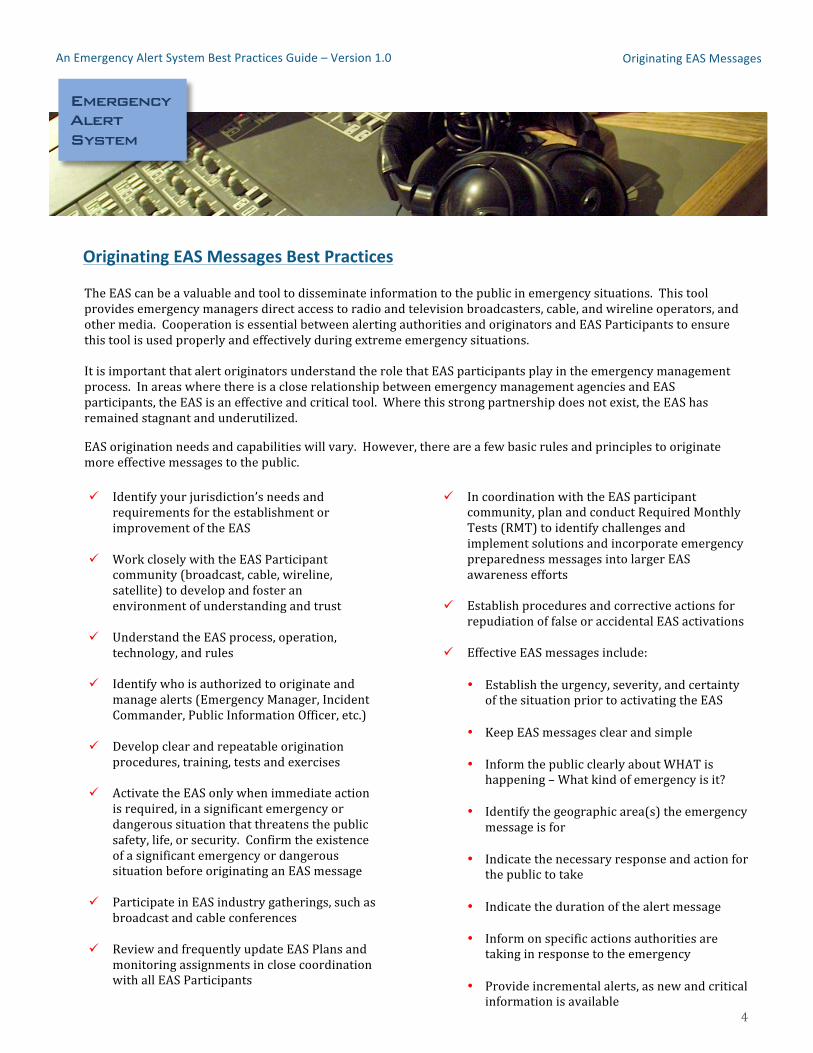
A series of meetings, conferences, workshops, webinars, virtual roundtables, and websites have been supporting open and frank discussion on improving this important alert and warning tool. Many practical ideas have been exchanged as many communities begin to revisit the EAS. A number of EAS tests and exercises have been conducted to better inform the process of effectively testing the EAS and to identify areas for improvement. In the near future, the Common Alerting Protocol (CAP) will be added to the EAS to support more effective transport and distribution of alert messages. It is important that the EAS is ready to support these improvements.
The Guide will be frequently updated to reflect lessons learned from ongoing EAS tests and exercises, as well as reflect continued dialogue and engagement with EAS Participants. Due to the cooperative nature of this document, we strongly urge the EAS Community to offer their observations and solutions to enhance the Guide with diverse perspectives.
Intent and Purpose

3
An Emergency Alert System Best Practices Guide – Version 1.0 Brief Description and History of the EAS
The Emergency Alert System (EAS) leverages the capabilities of participating analog and digital radio, television, cable, satellite, and wireline providers working in concert to distribute alert and warning messages to the public. The alert messages can be originated by emergency management authorities at all levels of government to warn the public of imminent emergencies. The EAS was created in 1994. It is the latest in a series of alert and warning systems that began with the Control of Electromagnetic Radiation (CONELRAD) program, established by President Harry Truman in 1951. The CONELRAD was replaced in 1963 by the Emergency Broadcast System (EBS), which remained in place until 1994. The Federal Communications Commission (FCC) created the EAS in 1994 and began enforcing requirements that mandated that all broadcast stations have EAS equipment installed by 1997. In 2001, cable systems were required to have EAS equipment installed to override all program channels with a national-‐level EAS message, also known as an Emergency Action Notification (EAN). The Primary Entry Point (PEP) concept first surfaced in the mid-‐1980s.
Emergency Alert System
Primary Entry Points are broadcast stations located throughout the country with a direct connection to FEMA and resilient transmission capabilities. These stations provide the initial broadcast of a Presidential EAS message. FEMA is increasing the number of PEP facilities to provide direct coverage to at least 90% of the American public.
Even in today’s world of seamless technology and portable communications devices, the Government maintains a system of radio stations to support public alert and warning (A&W). In addition to the PEP System’s primary role to broadcast and relay the President’s message in a dire emergency, PEP stations are designed with a much higher-‐level of resiliency. These “hardened” radio stations provide the nation with last-‐resort mass communications capabilities under all conditions, as required by the President of the United States.
Broadcast radio receivers are ubiquitous. These radio receivers can receive one or more of the approximately 14,355 full power radio stations broadcasting throughout the country. Over-‐the-‐air radio broadcasts are one-‐way, omni-‐directional transmissions. In the aftermath of a national, catastrophic event, alerting authorities can leverage operational area capabilities to transmit crucial information to the public through as many methods as possible. However, broadcast radio may be the most effective method since it is possible that terrestrial Internet Protocol (IP) networks and other pathways could be inoperable, especially at “last-‐mile” delivery to the public. Prolonged power outages are expected in most catastrophic scenarios, negatively affecting IP networks and other communications. The national EAS program provides the nation with an unparalleled, survivable communications network, available under the direst conditions.
A Brief History
4
An Emergency Alert System Best Practices Guide – Version 1.0 Originating EAS Messages
ü Identify your jurisdiction’s needs and requirements for the establishment or improvement of the EAS
ü Work closely with the EAS Participant community (broadcast, cable, wireline, satellite) to develop and foster an environment of understanding and trust
ü Understand the EAS process, operation, technology, and rules
ü Identify who is authorized to originate and manage alerts (Emergency Manager, Incident Commander, Public Information Officer, etc.)
ü Develop clear and repeatable origination procedures, training, tests and exercises
ü Activate the EAS only when immediate action is required, in a significant emergency or dangerous situation that threatens the public safety, life, or security. Confirm the existence of a significant emergency or dangerous situation before originating an EAS message
ü Participate in EAS industry gatherings, such as broadcast and cable conferences
ü Review and frequently update EAS Plans and monitoring assignments in close coordination with all EAS Participants
Emergency Alert System
ü In coordination with the EAS participant community, plan and conduct Required Monthly Tests (RMT) to identify challenges and implement solutions and incorporate emergency preparedness messages into larger EAS awareness efforts
ü Establish procedures and corrective actions for repudiation of false or accidental EAS activations
ü Effective EAS messages include:
• Establish the urgency, severity, and certainty
of the situation prior to activating the EAS • Keep EAS messages clear and simple • Inform the public clearly about WHAT is
happening – What kind of emergency is it? • Identify the geographic area(s) the emergency
message is for • Indicate the necessary response and action for
the public to take • Indicate the duration of the alert message
• Inform on specific actions authorities are
taking in response to the emergency
• Provide incremental alerts, as new and critical information is available
Originating EAS Messages Best Practices
The EAS can be a valuable and tool to disseminate information to the public in emergency situations. This tool provides emergency managers direct access to radio and television broadcasters, cable, and wireline operators, and other media. Cooperation is essential between alerting authorities and originators and EAS Participants to ensure this tool is used properly and effectively during extreme emergency situations. It is important that alert originators understand the role that EAS participants play in the emergency management process. In areas where there is a close relationship between emergency management agencies and EAS participants, the EAS is an effective and critical tool. Where this strong partnership does not exist, the EAS has remained stagnant and underutilized.
EAS origination needs and capabilities will vary. However, there are a few basic rules and principles to originate more effective messages to the public.

5
An Emergency Alert System Best Practices Guide – Version 1.0 EAS Plans
ü Identify your jurisdiction’s needs and requirements for the establishment and/or improvement of the EAS
ü Work closely with the EAS participant community, and the Counties, where appropriate, to establish procedures within a State/local EAS Plan – establish a State Emergency Communications Committee (SECC) made up from representatives of the EAS participant communities, as well as NWS
ü Before drafting a plan, understand and document the EAS process, technology, nomenclature, and rules – seek support from States who have effective, well-‐exercised plans
ü Divide the State into Operational Areas that align with County and local level jurisdictions to simplify the process of message relay and management
ü Work with nearby States, to identify areas where it may be beneficial to carry adjacent EAS messages in the State’s EAS network
ü Identify the authorized originators, assure they are properly equipped and define their areas
ü Local Primary (LP) and State Primary (SP) stations are the first link to and the primary contact with the originators, clearly communicate their added responsibilities
Emergency Alert System
ü Select LP, SP, and relays based on coverage, staffing, and on their capability and willingness to participate fully in the EAS process
ü Plans should include cross monitoring and multiple sources for added reliability – and should include provisions for distribution of messages within local operational areas, when State-‐wide activation is not necessary
ü Monitoring assignments should be reviewed regularly for any necessary adjustments
ü The EAS Plan, monitoring assignments and necessary instructions should be published in handouts, websites, and all other means – originators should work with EAS Participants to train frequently
ü Provide EAS participants with clear instructions on the installation, configuration and operation of EAS equipment – identify the necessary Organization Codes and Event Codes
ü In coordination with EAS Participants, plan and conduct Required Monthly Tests (RMT) to identify challenges and implement solutions
ü Communicate with State EAS participants often – provide feedback after tests and exercises are conducted to implement solutions
ü Communicate EAS significance and importance to the public
EAS Plans Best Practices
EAS Plans are one of the most important components for effective alerts and warnings. A well-‐written Plan specifies procedures agreed upon by the EAS participants, allowing designated Federal, State and local government officials to issue alerts to the public. EAS Plans allow for the cooperative management of the system for activation in cases of immediate threat to health, life and safety in extreme emergencies. Unlike the national-‐level system, participation in State and local-‐level EAS is voluntary. Even so, a great majority of FCC licensees participate in the EAS at the State and local level. This level of commitment has benefitted the public over the years as evidenced by the many lives saved in severe weather emergencies and child abduction incidents. Over the years, the EAS has contributed to many of the over 500 successful child abduction recoveries nationwide. The contents and procedures of an EAS Plan will vary from State to State. However, there are a few basic steps that are essential for the successful drafting and implementation of an EAS Plan.
6
An Emergency Alert System Best Practices Guide – Version 1.0 Installation and Configuration -‐ Monitoring
Challenges to AM Reception
§ Weak signals are the source of most AM reception issues. This is true for receivers that are farther away from the source, or when a suitable antenna is not used
§ Selection and use of low quality receivers for signal reception contribute to reception problems
§ Overloading – this is caused mainly when a high-‐powered transmitter is in the same location as the receiving device
§ A long list of man-‐made and natural sources
cause radio interference and reception problems. These sources include the following: − Atmospheric Interference – lightning,
fading, reflection, refraction, etc.
− Electric Noise Sources – light dimmers/switches, fluorescent ballasts, overhead power lines (worn or defective power line insulators), computers and other digital processing equipment, monitors and displays, electric motors (compressors, blowers, fans, etc.)
− RF sources, such as cellular telephones, STL links, RPU equipment, and others may cause interference to AM reception
Emergency Alert System
Challenges to FM Reception
§ Weak signals contribute significantly to FM reception problems. This is also true for receivers that are far away from the source, or when a proper antenna is not used
§ Use of low quality receivers as message source for EAS devices
§ Channel Interference – this is caused, for example, when a distant and weaker signal is “over-‐powered” by a closer, more powerful signal on an adjacent channel
§ Distorted Audio – some sources of EAS messages may over process, or over modulate the audio and introduce distortion. This distortion may prevent EAS devices form decoding the AFSK tones
Installation and Configuration – Monitoring EAS Sources
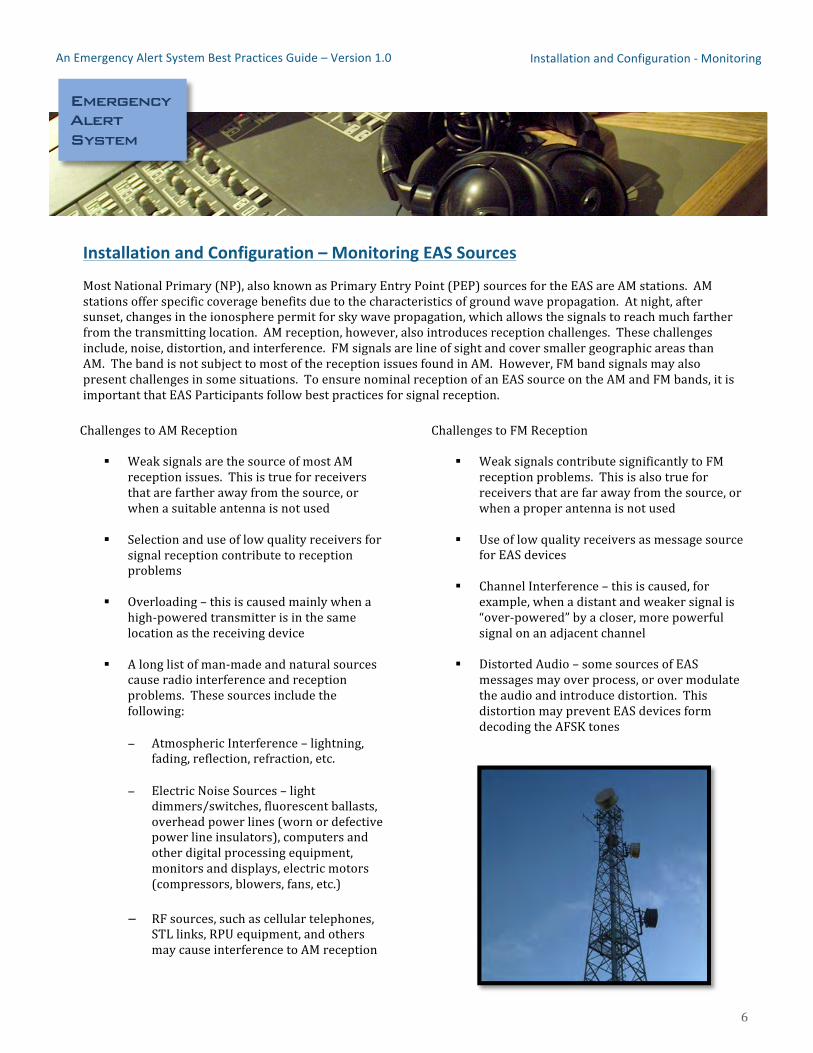
Most National Primary (NP), also known as Primary Entry Point (PEP) sources for the EAS are AM stations. AM stations offer specific coverage benefits due to the characteristics of ground wave propagation. At night, after sunset, changes in the ionosphere permit for sky wave propagation, which allows the signals to reach much farther from the transmitting location. AM reception, however, also introduces reception challenges. These challenges include, noise, distortion, and interference. FM signals are line of sight and cover smaller geographic areas than AM. The band is not subject to most of the reception issues found in AM. However, FM band signals may also present challenges in some situations. To ensure nominal reception of an EAS source on the AM and FM bands, it is important that EAS Participants follow best practices for signal reception.

7
An Emergency Alert System Best Practices Guide – Version 1.0 Installation and Configuration -‐ Reception
Antenna Selection and Installation
ü Evaluate your signal acquisition needs and select an antenna suitable for the local conditions -‐ mountainous areas, buildings and obstructions, high concentration of RF sources or noise, etc.
ü Avoid placing antenna indoors and near sources of interference
ü Whenever possible, make use of an exterior antenna for better performance. Select an antenna for the proper band and with nominal gain for your requirement
ü Select an exterior directional antenna for locations with high station density
ü For AM, a tuned whip or tuned loop antenna may prove useful
ü Observe proper grounding and properly secure the antenna to minimize movement in high winds
ü Use high-‐quality, low-‐loss coax to reduce signal loss and interference
Emergency Alert System
AM/FM/VHF Receivers and Tuners
ü Select a high quality radio tuner with the following features: • Antenna Terminals -‐ Essential for reception.
Choose a receiver/tuner with AM and FM antenna terminals. Select a receiver/tuner with balanced antenna terminals and use 75Ω coaxial cable to minimize interference
• Sensitivity -‐ Choose a receiver/tuner with a low decibel femtowatt (dBf). This is a measure of how well the receiver/tuner picks up signals. The lower this measurement is, the better the sensitivity
• Audio Out Interface – A receiver/tuner with good audio output levels is desirable. Make sure to check the audio levels driving the monitor input of the EAS device for nominal levels and no distortion
• Station Preset Memory – A receiver/tuner with non-‐volatile memory presets is very helpful to prevent retuning source stations if power outages occur
ü Select a tuner/receiver with non-‐volatile memory to preserve station/channel presets
ü Observe good audio engineering practices by ensuring proper grounding, audio phasing, impedance, and levels.
ü Use high-‐quality shielded audio cable between receiver/tuner and EAS device
Installation and Configuration – Reception Best Practices
It is important that EAS participants can receive a clear signal from their sources. This may be simple to achieve in locations where those sources are nearby. It can be significantly more challenging to receive these important EAS messages in remote locations, rural areas, and locations that are susceptible to interference from man-‐made or atmospheric sources.
The best practices listed are basic in nature to most broadcast engineers, however, many are often forgotten and have led to widespread challenges in observed State and Territorial EAS Tests.

8
An Emergency Alert System Best Practices Guide – Version 1.0 Installation and Configuration– EAS Devices
EAS Device Basic Installation and Configuration
ü Select a location for the EAS device that is suitable for the type of operation desired. For manual operation, place the device near the operator position so that it is visible and audible
ü Bench test the unit to make sure it was not damaged in shipping -‐ check audio inputs and outputs, as necessary
ü Install the unit in the desired location
ü Connect EAS source monitor inputs as indicated in the State/local area EAS Plan – tune/select the frequencies or sources per the State EAS Plan
ü Connect the output of the EAS device to your audio air chain – if the device requires an audio switch, connect per device instructions – properly ground connections and verify audio quality and amplitude
ü Follow the manufacturer’s instructions to configure the following items:
• Configure your State and local area FIPS Code
• Set the correct date, time and UTC offset/time zone, and daylight savings setting, as desired
• Set station Originator Code (ORG) to “Broadcast or Cable”
• Set call sign or identification code
• Set attention tone duration
Emergency Alert System
Installation and Configuration – EAS Devices Best Practices
Understanding how to install and configure an EAS device is essential. EAS devices are installed in different locations, including radio stations, DTV stations, cable head ends, wireline service providers, and satellite facilities. There are significant differences between these types of locations and facilities; however, EAS device configuration is similar. Review and follow manufacturer instructions.
• Set for Automatic or Manual forwarding – if facility is unattended, set to Automatic
• Configure the appropriate event codes – this is not required for an EAN, but is necessary for live codes and RMTs
• Adjust the audio inputs and outputs of the EAS device for best audio quality and amplitude
• If connecting to a crawl or character generator (CG), test that the data is properly driving the generators – adjust the speed and timing of the crawl so that it is readable and set it to appear on screen for the duration of the EAS event – choose size and color for optimum readability
• If switching external equipment, verify that all necessary contact closures are operating properly and are activating ancillary equipment, as desired
• Conduct an RWT or RMT to verify that the system is operating properly along with all ancillary devices
• Monitor your EAS sources and let them know if you are not receiving RWTs or RMTs – inform them if there are problems with audio quality or amplitude
• Perform regular checks in between RWTs and RMTs to make sure equipment is operating properly
• Regularly review EAS logs and take action if tests are not received or conducted
9
An Emergency Alert System Best Practices Guide – Version 1.0 Installation and Configuration – Quick Checklist
EAS Checklist
PEP Station or Source _______________________________________
EAS Monitoring Assignment #1_____________________________
EAS Monitoring Assignment #2_____________________________
EAS Monitoring Assignment #3_____________________________
EAS Monitoring Assignment #4_____________________________
Emergency Alert System
Installation and Configuration – Quick Checklist
This checklist is designed to provide EAS participants with a basic guideline in preparation of the Nationwide EAS Test and to receive and relay day-‐to-‐day EAS messages. Several State EAS Plans provide a similar list as a guide for EAS participants.
ü EAS device is powered and fully functional
ü Monitoring device or tuner is receiving the assigned source per the State EAS Plan
ü Audio from the monitoring device is properly connected to the EAS device and quality is nominal
ü EAS device has been properly configured
ü EAS device is connected to the facility’s air chain and is ready to broadcast alerts
ü EAS device is set to Automatic relay
ü EAS device is set to log alerts and tests
ü Logs are filed, as required
ü Facility personnel are trained in EAS procedures and device operations
ü A copy of the State EAS Plan is available for reference
10
An Emergency Alert System Best Practices Guide – Version 1.0 Installation and Configuration – Sample Diagrams
Emergency Alert System
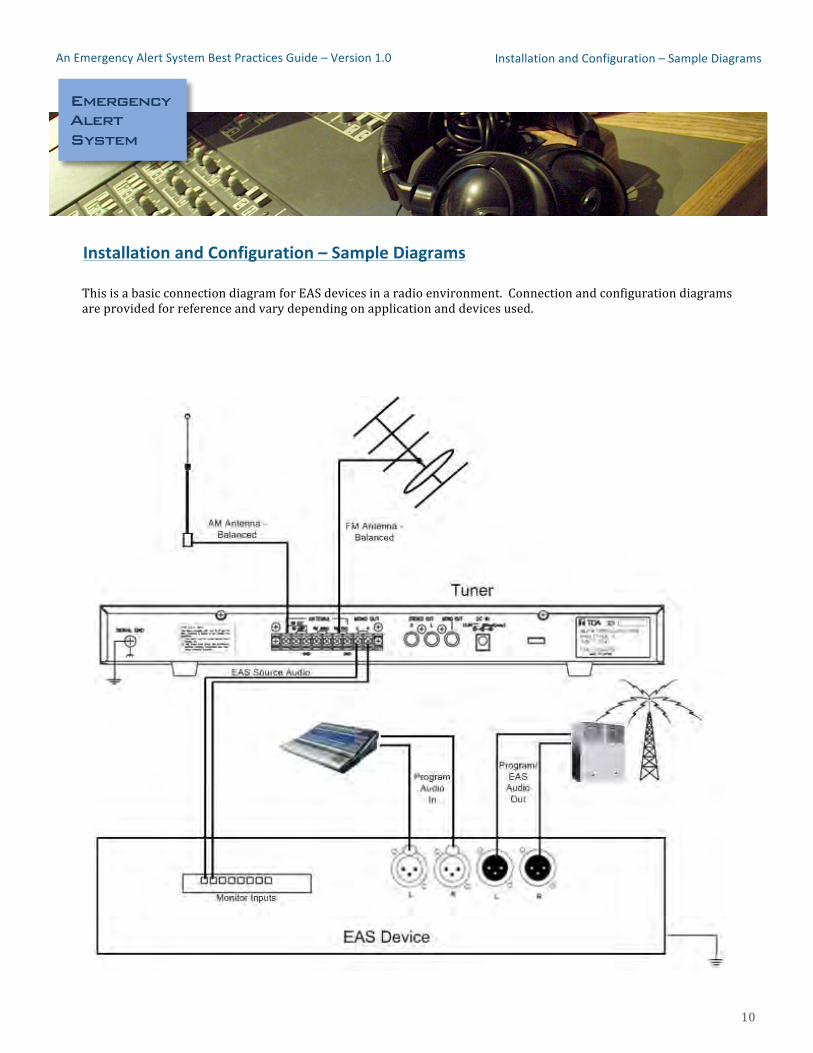
Installation and Configuration – Sample Diagrams
This is a basic connection diagram for EAS devices in a radio environment. Connection and configuration diagrams are provided for reference and vary depending on application and devices used.
11
An Emergency Alert System Best Practices Guide – Version 1.0 Installation and Configuration – Sample Diagrams
Emergency Alert System
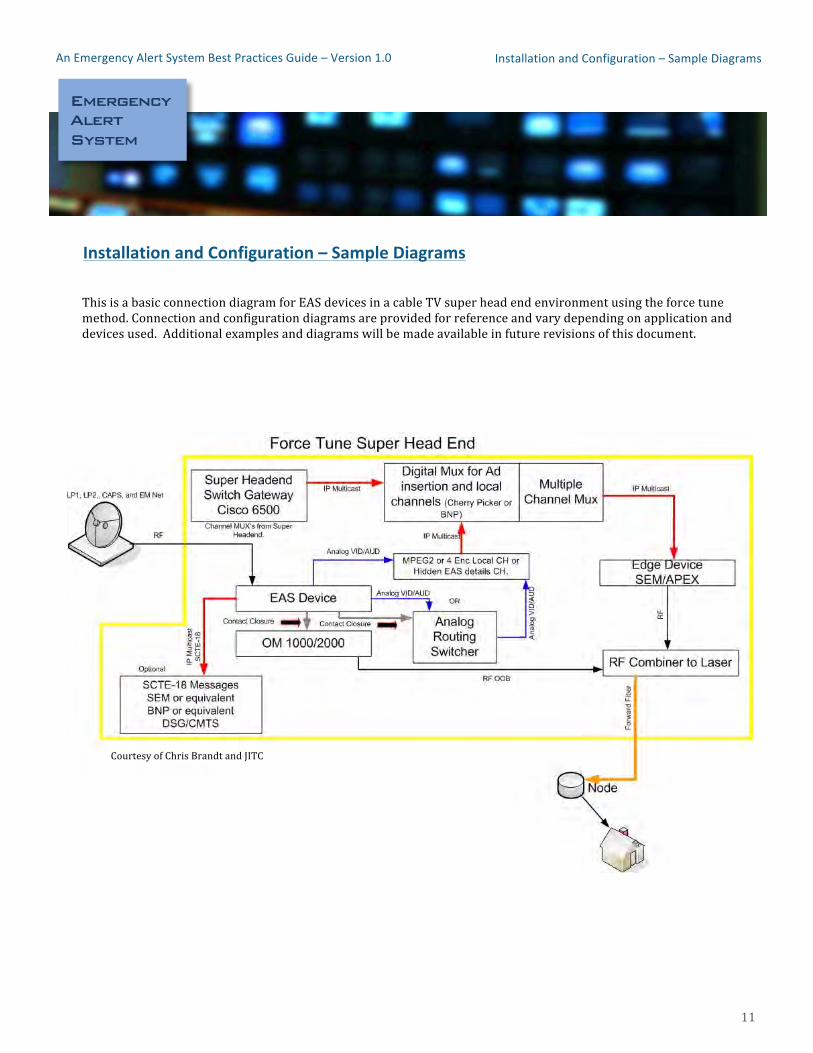
Installation and Configuration – Sample Diagrams
This is a basic connection diagram for EAS devices in a cable TV super head end environment using the force tune method. Connection and configuration diagrams are provided for reference and vary depending on application and devices used. Additional examples and diagrams will be made available in future revisions of this document.
Courtesy of Chris Brandt and JITC
12
An Emergency Alert System Best Practices Guide – Version 1.0 Installation and Configuration – Sample Diagrams
Emergency Alert System
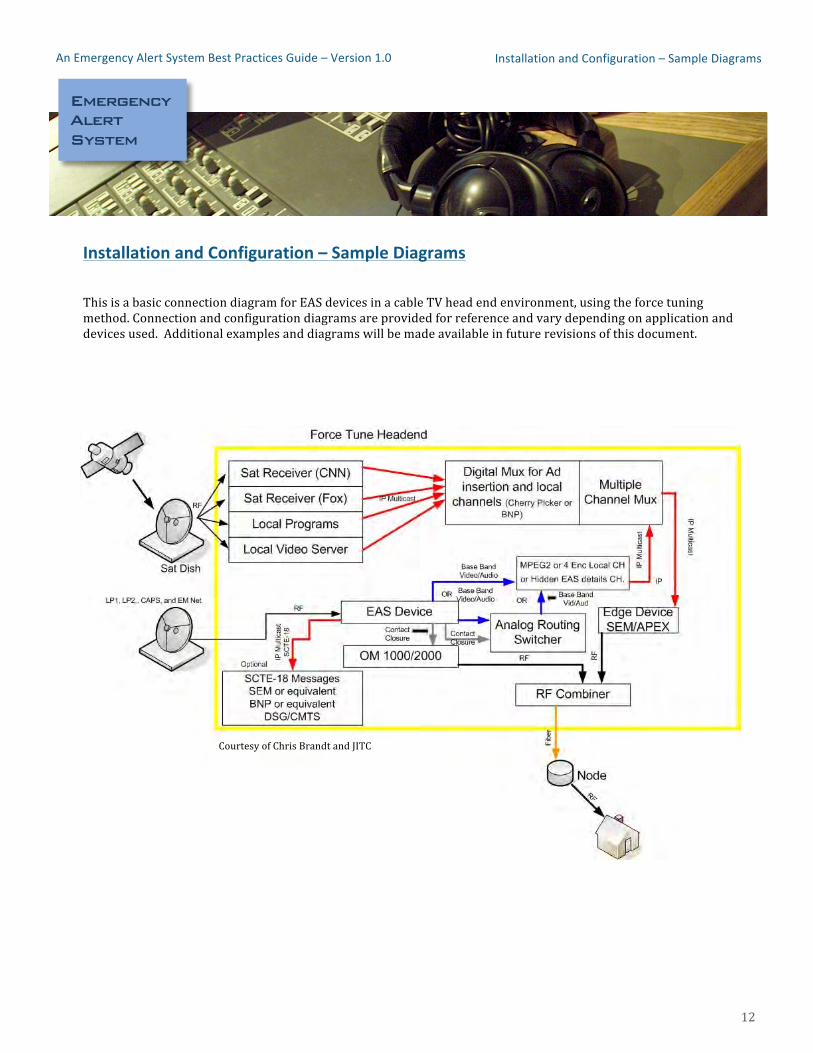
Installation and Configuration – Sample Diagrams
This is a basic connection diagram for EAS devices in a cable TV head end environment, using the force tuning method. Connection and configuration diagrams are provided for reference and vary depending on application and devices used. Additional examples and diagrams will be made available in future revisions of this document.
Courtesy of Chris Brandt and JITC
13
An Emergency Alert System Best Practices Guide – Version 1.0 Installation and Configuration – Sample Diagrams
Emergency Alert System
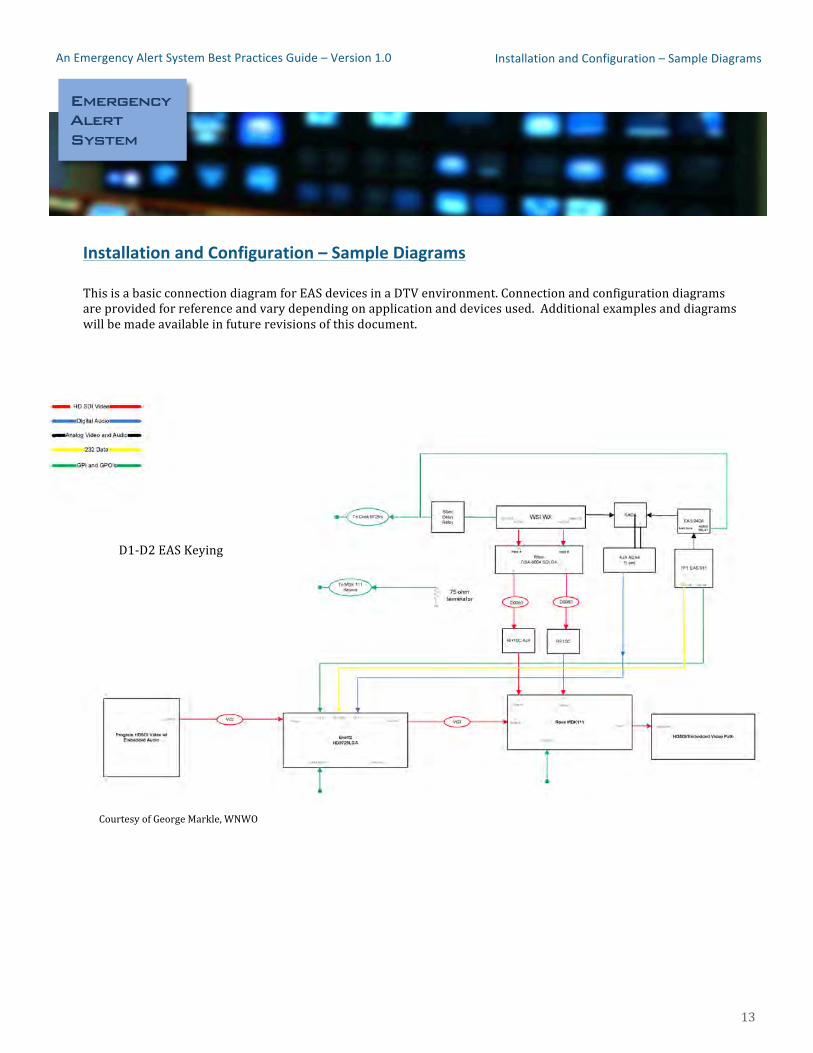
Installation and Configuration – Sample Diagrams
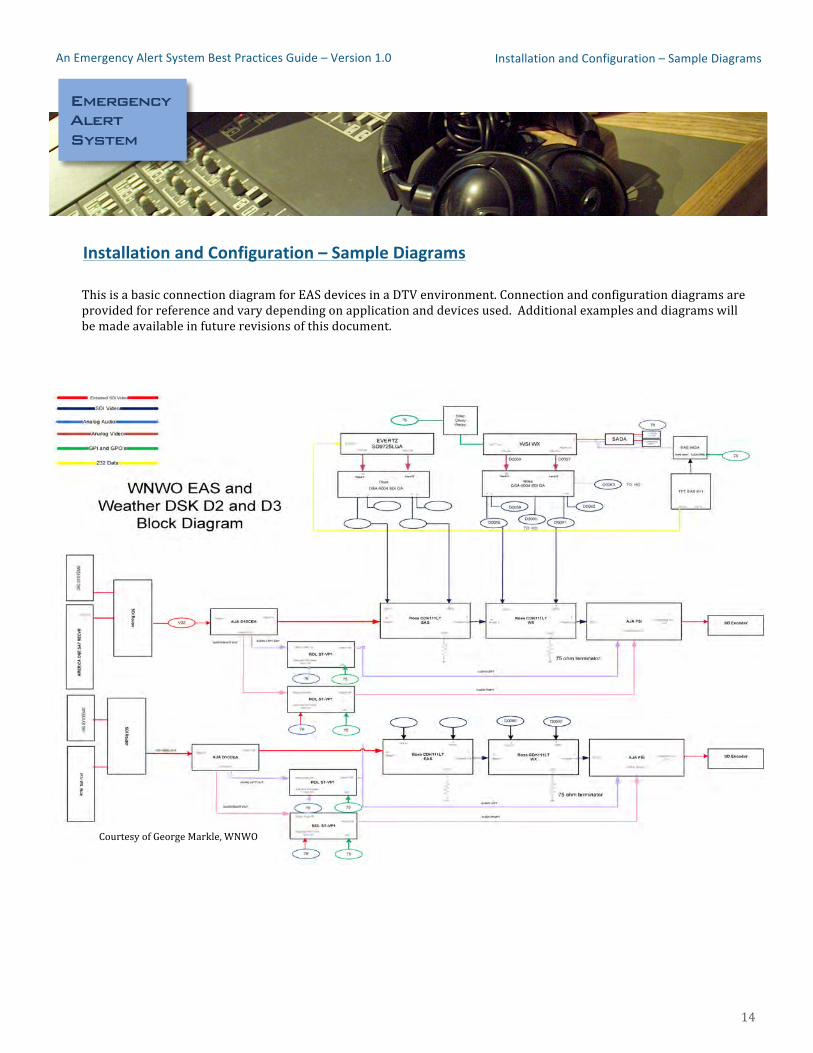
This is a basic connection diagram for EAS devices in a DTV environment. Connection and configuration diagrams are provided for reference and vary depending on application and devices used. Additional examples and diagrams will be made available in future revisions of this document.
Courtesy of George Markle, WNWO
D1-‐D2 EAS Keying
14
An Emergency Alert System Best Practices Guide – Version 1.0 Installation and Configuration – Sample Diagrams
Emergency Alert System
Installation and Configuration – Sample Diagrams
This is a basic connection diagram for EAS devices in a DTV environment. Connection and configuration diagrams are provided for reference and vary depending on application and devices used. Additional examples and diagrams will be made available in future revisions of this document.
Courtesy of George Markle, WNWO
15
An Emergency Alert System Best Practices Guide – Version 1.0 Glossary of Terms
Emergency Alert System
Glossary of Terms
Audio Frequency Shift Keying (AFSK) – a digital data format that is represented in the frequency of an audio tone and an encoded signal for transmission over radio or telephone. Best Practices -‐ recognized industry standards and methods of correctly running businesses or providing services. Control of Electromagnetic Radiation (CONELRAD) – Originally called the “Key Station System,” the CONtrol of ELectromagnetic RADiation (CONELRAD) was established in August 1951. Participating stations tuned to 640 & 1240 kHz AM and initiated a special sequence and procedure designed to warn citizens. Common Alerting Protocol (CAP) – is an eXtensible Markup Language (XML) standard adopted by the international standards-‐making body, the Organization for the Advancement of Structured Information Systems (OASIS). CAP will be used with the EAS to provide participants the capability to receive alerts via IP. Emergency Broadcast System (EBS) – EBS was initiated to address the nation through audible alerts. It did not allow for targeted messaging. The system was upgraded in 1976 to provide for better and more accurate handling of alert receptions. Originally designed to provide the President with an expeditious method of communicating with the American Public, it was expanded for use during peacetime at state and local levels. Emergency Alert System (EAS) – is a public alert and warning system that leverages the communications assets of EAS Participants (including terrestrial broadcasters, cable television systems, wireless cable systems, satellite digital audio radio service (SDARS) providers, direct broadcast satellite (DBS) services, and wireline video service providers) to allow the President of the United States the capability to address the American public during a national emergency. EAS messages-‐ composed of 4 parts: Digitally encoded header; attention Signal; audio announcement; digitally encoded end-‐of-‐message marker.
Local Primary (LP) – radio stations that serve as key EAS monitoring sources for other stations. Each LP station must monitor other EAS message sources according to the individual state EAS plan. National Primary (NP) – also known as Primary Entry Point Stations designated to relay national-‐level EAS messages. See Primary Entry Point Stations. Primary Entry Point (PEP) Stations – private/commercial radio broadcast stations that cooperatively participate with FEMA to provide emergency alert and warning information to the public prior to, during, and after incidents and disasters. The FEMA PEPs also serve as the primary source of initial broadcast for a Presidential or national EAS message. Required Monthly Test (RMT) – a once a month test of EAS capabilities originated by State Primary or Local Primary stations identified in the EAS Plan. State Primary (SP) – radio stations that serve as the entry point for State messages, which can originate from the Governor or a designated representative. State Relay (SR) – radio stations that serve as designated relay points for state and national EAS messages as set forth in each individual state EAS plan.
16
An Emergency Alert System Best Practices Guide – Version 1.0 Acknowledgements
Emergency Alert System
Acknowledgements
Over the course of several months and with the strong support of industry throughout the many webinars, virtual roundtables, contributions to the idea sharing website, and the State-‐wide EAS Tests in Alaska, U.S. Virgin Islands, Puerto Rico, Nevada, and other areas, FEMA IPAWS was able to collect significant data and observations to inform the recommendations and best practices contained in the Emergency Alert System (EAS) Best Practices Guide. The first version of the Guide is a “getting back to basics” approach with an understanding that the system varies widely in use and complexity. To form best practices, FEMA IPAWS considered and sought to document the diverse perspectives and viewpoints of the EAS Community. This Guide also acknowledges that the information contained in the first version can only evolve in parallel with frequent and multiple-‐level EAS testing and through the close partnership of the EAS community. On behalf of the FEMA IPAWS Program Management Office, thank you to the EAS Community for their continued support:
Federal Communications Commission (FCC) National Oceanic and Atmospheric Administration (NOAA)
Society of Broadcast Engineers (SBE) Society of Cable Telecommunications Engineers (SCTE)
American Cable Association (ACA) National Cable and Telecommunications Association (NCTA)
Tennessee Association of Broadcasters (TAB) Washington Military Department Emergency Management Division (WMDEM)
Primary Entry Point Administrative Council (PEPAC) National Association of Broadcasters (NAB)
National Alliance of State Broadcasters Associations (NASBA) Broadcast Warning Working Group (BWWG) Texas Association of Broadcasters (TAB) Maine Association of Broadcasters (MAB) Michigan Association of Broadcasters (MAB)
U.S. Virgin Islands Broadcasters U.S. Virgin Islands Territorial Emergency Management Agency (VITEMA)
Ohio Broadcasters Association (OAB) Connecticut Broadcasters Association (CAB)
North Carolina Emergency Management Division (NCEMD) North Carolina Broadcasters Association (NCBA) Puerto Rico Association of Broadcasters (PRAB)
Puerto Rico Emergency Management Agency (PREMA) Alaska Broadcasters Association (ABA)
NV Washoe County of Emergency Management International Association of Emergency Managers (IAEM) National Emergency Management Association (NEMA)
Alaska Division of Homeland Security and Emergency Management (ADHS & EM) Nevada Broadcasters Association (NVBA)
Other State Broadcaster Associations and Emergency Management Agencies A National Dialogue on the Emergency Alert System Website Community Members
17
An Emergency Alert System Best Practices Guide – Version 1.0 EAS Device Appendix
Emergency Alert System
EAS Device Appendix – Read This First!
The following appendix includes basic EAS setup information for sample devices tested at the IPAWS Test Laboratory located at the Joint Interoperability Test Command (JITC). The tests were conducted to verify receipt and relay of an EAN by commonly used EAS devices. This information is provided for reference only and specific instructions may vary depending on model and software/firmware versions. It is recommended that all EAS participants review their product manuals or contact their equipment manufacturer for questions and detailed configuration information. All EAS devices are required to receive and relay an EAN per FCC rules.
The instructions in this appendix assume that the EAS devices are already installed. If a new device is being installed, refer to the manufacturers’ installation instructions.
If your device is not included in this Appendix, refer to your manual or contact the device manufacturer for more information.
18
An Emergency Alert System Best Practices Guide – Version 1.0 EAS Device Appendix
Emergency Alert System
EAS Device Appendix – Burk
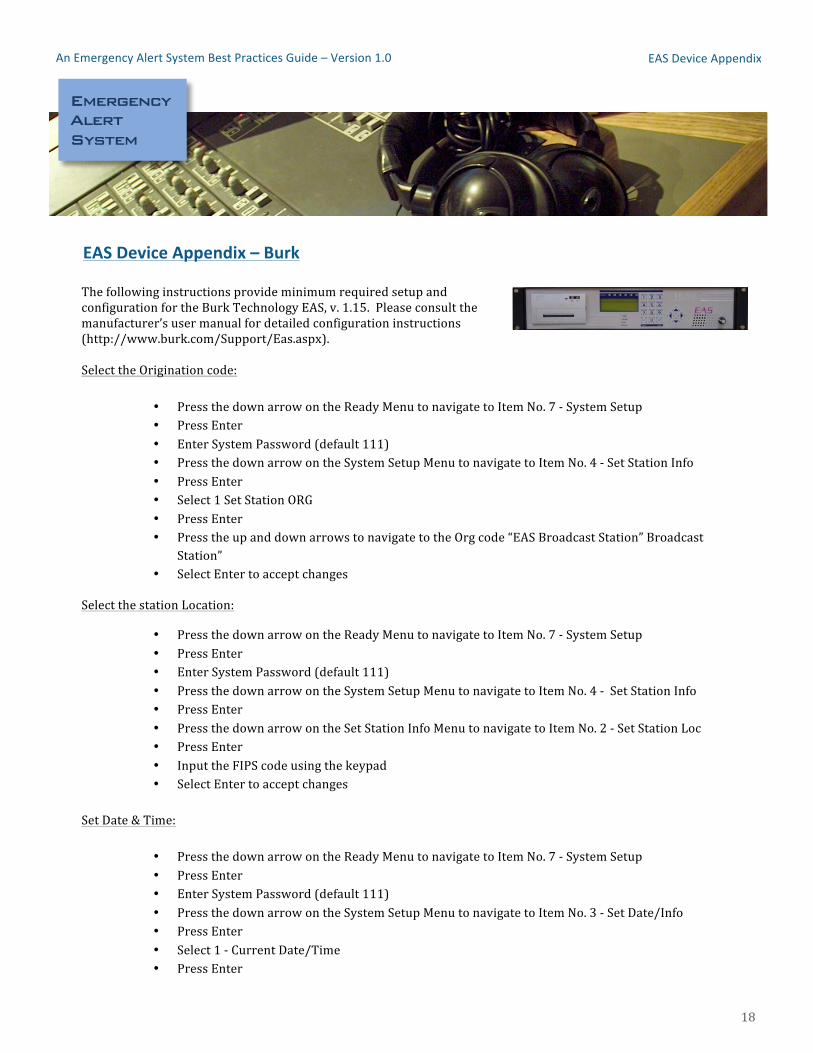
The following instructions provide minimum required setup and configuration for the Burk Technology EAS, v. 1.15. Please consult the manufacturer’s user manual for detailed configuration instructions (http://www.burk.com/Support/Eas.aspx). Select the Origination code:
• Press the down arrow on the Ready Menu to navigate to Item No. 7 -‐ System Setup • Press Enter • Enter System Password (default 111) • Press the down arrow on the System Setup Menu to navigate to Item No. 4 -‐ Set Station Info • Press Enter • Select 1 Set Station ORG • Press Enter • Press the up and down arrows to navigate to the Org code “EAS Broadcast Station” Broadcast
Station” • Select Enter to accept changes
Select the station Location:
• Press the down arrow on the Ready Menu to navigate to Item No. 7 -‐ System Setup • Press Enter • Enter System Password (default 111) • Press the down arrow on the System Setup Menu to navigate to Item No. 4 -‐ Set Station Info • Press Enter • Press the down arrow on the Set Station Info Menu to navigate to Item No. 2 -‐ Set Station Loc • Press Enter • Input the FIPS code using the keypad • Select Enter to accept changes
Set Date & Time:
• Press the down arrow on the Ready Menu to navigate to Item No. 7 -‐ System Setup • Press Enter • Enter System Password (default 111) • Press the down arrow on the System Setup Menu to navigate to Item No. 3 -‐ Set Date/Info • Press Enter • Select 1 -‐ Current Date/Time • Press Enter
19
An Emergency Alert System Best Practices Guide – Version 1.0 EAS Device Appendix
Emergency Alert System
EAS Device Appendix – Burk (Continued)
• To adjust the date and time use the left and right arrows to move to different fields and the up and down arrows to change the fields
• Select Enter to accept changes Set Time Zone
• Press the down arrow on the Ready Menu to navigate to Item No. 7 -‐ System Setup • Press Enter • Enter System Password (default 111) • Press the down arrow on the System Setup Menu to navigate to Item No. 3 -‐ Set Date/Info • Press Enter • Press the down arrow on the Set Date/Time Menu to navigate to Item No. 2 -‐ Set Time Zone • Press Enter • To adjust the time zone use the up & down arrows to find the appropriate time zone • Select Enter to accept changes
Set Daylight Savings
• Press the down arrow on the Ready Menu to navigate to Item No. 7 -‐ System Setup • Press Enter • Enter System Password (default 111) • Press the down arrow on the System Setup Menu to navigate to Item No 3 -‐ Set Date/Info • Press Enter • Press the down arrow on the Set Date/Time Menu to navigate to Item No. 3 -‐ Set DST Flag • Press Enter • Press the right arrow to turn daylight savings on or off • Select Enter to accept changes.
20
An Emergency Alert System Best Practices Guide – Version 1.0 EAS Device Appendix
Emergency Alert System
EAS Device Appendix – DASDEC II
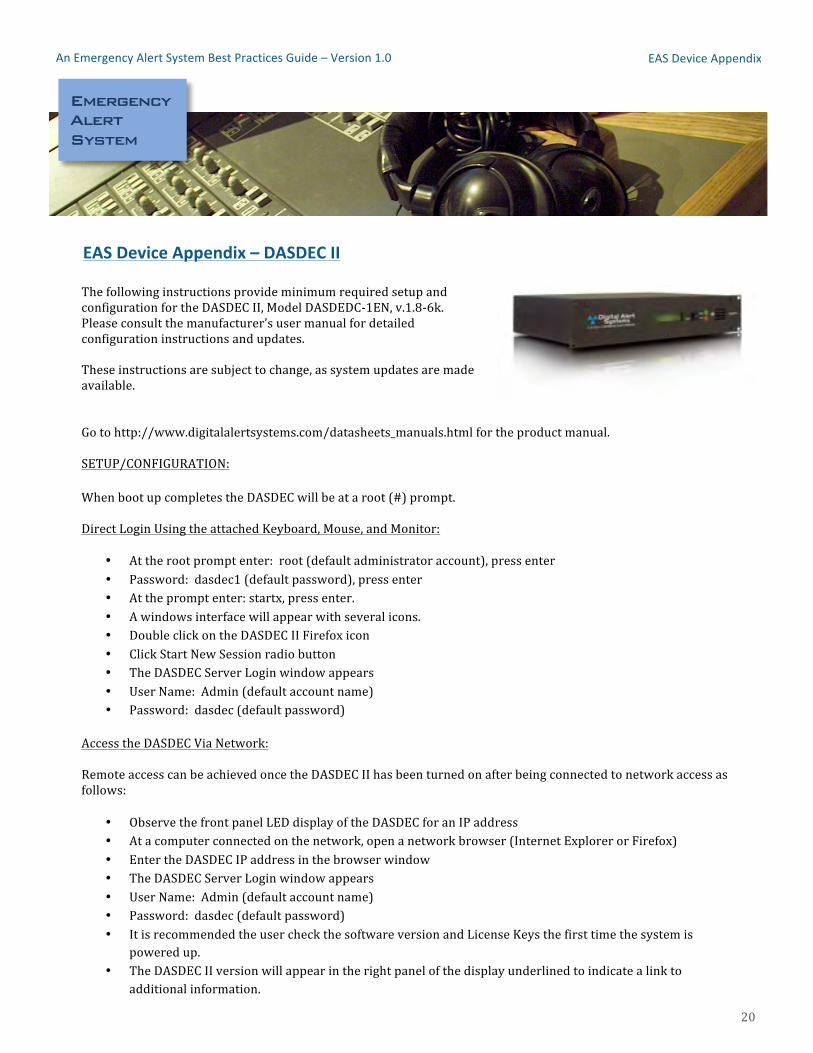
The following instructions provide minimum required setup and configuration for the DASDEC II, Model DASDEDC-‐1EN, v.1.8-‐6k. Please consult the manufacturer’s user manual for detailed configuration instructions and updates. These instructions are subject to change, as system updates are made available. Go to http://www.digitalalertsystems.com/datasheets_manuals.html for the product manual. SETUP/CONFIGURATION:
When boot up completes the DASDEC will be at a root (#) prompt. Direct Login Using the attached Keyboard, Mouse, and Monitor:
• At the root prompt enter: root (default administrator account), press enter • Password: dasdec1 (default password), press enter • At the prompt enter: startx, press enter. • A windows interface will appear with several icons. • Double click on the DASDEC II Firefox icon • Click Start New Session radio button • The DASDEC Server Login window appears • User Name: Admin (default account name) • Password: dasdec (default password)
Access the DASDEC Via Network: Remote access can be achieved once the DASDEC II has been turned on after being connected to network access as follows:
• Observe the front panel LED display of the DASDEC for an IP address • At a computer connected on the network, open a network browser (Internet Explorer or Firefox) • Enter the DASDEC IP address in the browser window • The DASDEC Server Login window appears • User Name: Admin (default account name) • Password: dasdec (default password) • It is recommended the user check the software version and License Keys the first time the system is
powered up. • The DASDEC II version will appear in the right panel of the display underlined to indicate a link to
additional information.
21
An Emergency Alert System Best Practices Guide – Version 1.0 EAS Device Appendix
Emergency Alert System
EAS Device Appendix – DASDEC II (Continued)
• Clicking on the Version number (e.g., Software Version 1.8-‐6k) will display the version release date. • Select Setup tab at the top of the page • Click Server radio button • Click Upgrade tab • Verify the current DASDEC server software version on this tab • Select Setup tab at the top of the page • Click the Server radio button if not already in this window • Click on the Main/License tab • Verify the License Key configuration for the DASDEC (Usable License Keys will be green. Unusable License
Keys will be red). Ensure all of the capabilities that are required or desired are green.
Set FIPS Code:
• Click Setup tab • Click Encoder radio button • Select General tab • Scroll down to Configure Available FIPS for Encoder Alert Origination Interfaces • Select the State for FIPS Code from States pull-‐down menu • Select the Counties from the Counties pull-‐down menu • Click Add • Selected Counties will appear in the window to the right • Click Decoder Radio Button • Select Forwarding tab • Scroll down to Configure FIPS Code Filters for Decoder Auto-‐Forwarding & Manual Forwarding Blocking:
• If “Allow All FIPS Code” is checked, all alerts with a FIPS code will be auto forwarded • If “Allow All FIPS Code” is not checked State and County(s) will need to be selected for auto forwarding.
This will require the below steps to be executed: o Select a State in the “Choose FIPS State” pull down menu o Select ALL (000) or the desired county in the “Choose FIPS Counties” pull down menu o Click the ADD button to the right of the Choose FIPS State to add the selections to the Current
Decoder Auto-‐Forwarded FIPS window Set Call Letters:
• Click Setup tab • Click Encoder radio button • Enter Station Call Letters in the EAS Station ID field • A red box with a link to EAS Station ID field for Forwarding will appear. • If the red box did not appear the following steps are necessary:
o Remaining in the Setup tab, click Decoder Radio Button o Enter Station Call Letters in the Forwarding EAS Station ID field
22
An Emergency Alert System Best Practices Guide – Version 1.0 EAS Device Appendix
Emergency Alert System
EAS Device Appendix – DASDEC II (Continued)
Set Time:
• Click Setup tab • Click Time radio button • Set Current Date and Time using pull down menus in “Date and Time” fields • Choose Time Zone from the “Server Time Zone” pull-‐down menu • Click Submit Date/Time/Timezone Changes • The user may be forced to log back in to the DASDEC user interface.
Set Internal Radio Tuner Mode and Frequency:
• If internal radio tuners are enabled on your DASDEC II, Select the Encoder radio button, then select the Radio Tuners tab. The radio frequencies should be in accordance with local monitoring assignments per your State EAS Plan.
• In the first radio turner (1) select FM, AM, or NOAA Weather Radio. Repeat this step for the second (2) and third (3) radio tuners.
• Enter the desired monitor frequency in the field immediately below the FM/AM/NOAA Weather Radio selection. Repeat this step for the second (2) and third (3) radio tuners.
A standard DASDEC II will run two EAS decoder channels from the Main audio device and two from the Auxiliary Audio device. It will decode EAS out of the box, once the Master license key is valid.

23
An Emergency Alert System Best Practices Guide – Version 1.0 EAS Device Appendix
Emergency Alert System
EAS Device Appendix – Gorman-‐Redlich
The following instructions provide minimum required setup and configuration to receive an Emergency Action Notification using the Gorman-‐Redlich (GR) EAS-‐1CG, software version 20.7. Please note that GR devices are configured by the manufacturer at the time of consumer order. The following instructions will allow you to confirm your GR settings.
These instructions are subject to change as system updates are made available. Go to http://www.gorman-‐redlich.com/downloads.html for the product manual.
Confirm Software Version:
• Via the front panel Set Audio Input Level:
• Select Menu • Enter technician passcode: 2345 (default) • Scroll to “Set Input Level” select enter • Select channel (factory default is 5) • Select exit when finished
Set Monitoring Sources:
• Select Menu • Enter technician passcode: 2345 (default) • Scroll to “Set Scanning” • Select the amount of inputs to scan in accordance with your State EAS Plan. • Select exit when finished
Set Date & Time:
• Select Menu • Enter technician passcode: 2345 (default) • Scroll to “Set Time/Date” • Confirm correct date and time • Adjust using the up or down arrows, press enter to select different field • Select exit when finished
Set Time Zone:
• Select Menu • Enter technician passcode: 2345 (default) • Scroll to “Station Setup” select enter • Scroll to “Station Time Zone” • Use arrows to adjust time zone • Select exit when finished
24
An Emergency Alert System Best Practices Guide – Version 1.0 EAS Device Appendix
Emergency Alert System
EAS Device Appendix – Gorman-‐Redlich (Continued)
Set Daylight Savings Time:
• Select Menu • Enter technician passcode: 2345 (default) • Scroll to “Station Setup” select enter • Scroll to “Daylight Time” • Use arrows to adjust • Select exit when finished
Set Call Letters:
• Select Menu • Enter technician passcode: 2345 (default) • Scroll to “Station Setup” • Scroll to “Call Letter Entry” to confirm call letters • To amend, press the correct letter, then press 1, 2, or 3. If you need a number then you would press 4 as the
second button. For example, for the letter “B” press 1 then 2; for the number “1” press 1 then 4 • Select exit when finished
Set Originator Code:
• Select Menu • Enter technician passcode: 2345 (default) • Scroll to “Station Setup” select enter • Scroll to “Originator Code” • Use arrows to adjust, if necessary • Select exit when finished
Set County:
• Select Menu • Enter technician passcode: 2345 (default) • Scroll to “Station Setup” select enter • Scroll to “County Entry” • Please consult Section X:8 of the User’s Manual for county codes • Select exit when finished
25
An Emergency Alert System Best Practices Guide – Version 1.0 EAS Device Appendix
Emergency Alert System
EAS Device Appendix – Sage Model 1822
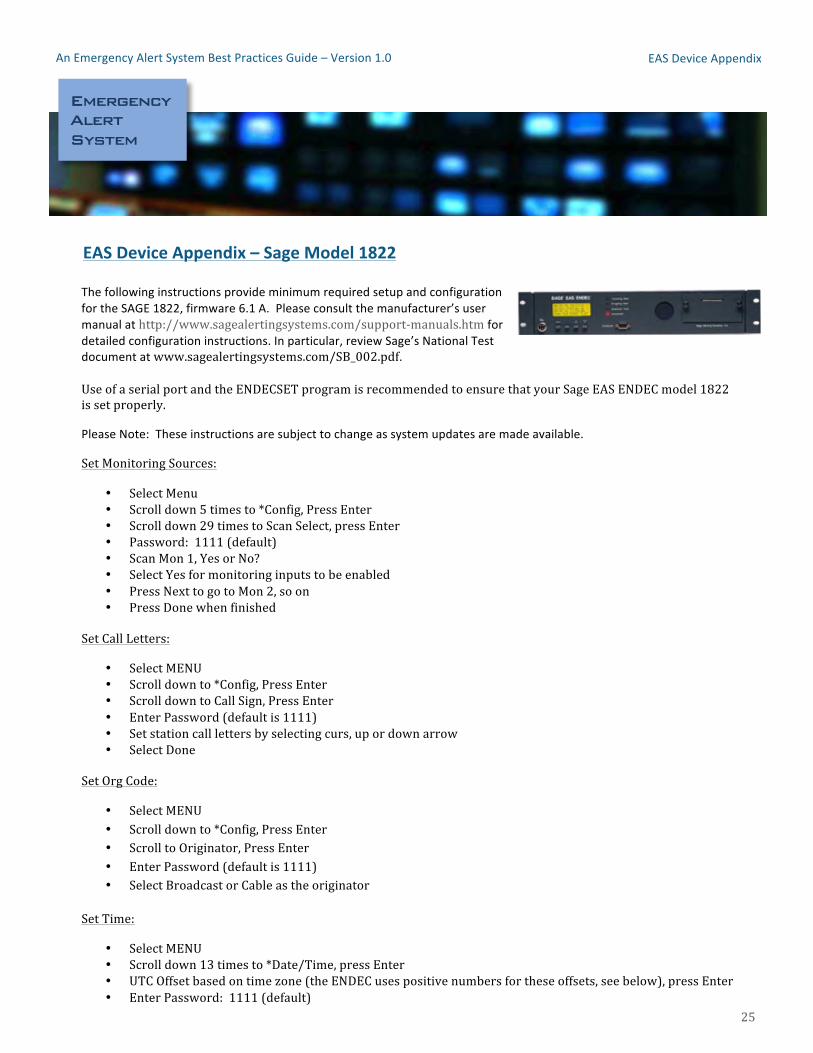
The following instructions provide minimum required setup and configuration for the SAGE 1822, firmware 6.1 A. Please consult the manufacturer’s user manual at http://www.sagealertingsystems.com/support-‐manuals.htm for detailed configuration instructions. In particular, review Sage’s National Test document at www.sagealertingsystems.com/SB_002.pdf. Use of a serial port and the ENDECSET program is recommended to ensure that your Sage EAS ENDEC model 1822 is set properly.
Please Note: These instructions are subject to change as system updates are made available.
Set Monitoring Sources:
• Select Menu • Scroll down 5 times to *Config, Press Enter • Scroll down 29 times to Scan Select, press Enter • Password: 1111 (default) • Scan Mon 1, Yes or No? • Select Yes for monitoring inputs to be enabled • Press Next to go to Mon 2, so on • Press Done when finished
Set Call Letters:
• Select MENU • Scroll down to *Config, Press Enter • Scroll down to Call Sign, Press Enter • Enter Password (default is 1111) • Set station call letters by selecting curs, up or down arrow • Select Done
Set Org Code:
• Select MENU • Scroll down to *Config, Press Enter • Scroll to Originator, Press Enter • Enter Password (default is 1111) • Select Broadcast or Cable as the originator
Set Time:
• Select MENU • Scroll down 13 times to *Date/Time, press Enter • UTC Offset based on time zone (the ENDEC uses positive numbers for these offsets, see below), press Enter • Enter Password: 1111 (default)
26
An Emergency Alert System Best Practices Guide – Version 1.0 EAS Device Appendix
Emergency Alert System
EAS Device Appendix – Sage Model 1822 (Continued)
• Adjust using the up or down arrow • Select Done • *Date/Time, press Enter • Scroll down 1 time to set Daylight Enabled, press Enter • Select Yes or No depending on applicability • Scroll down 1 time to set Year, Press More or Less to adjust, Select Done • Scroll down 1 time to set Month, Press Enter, Press More or Less to adjust, select done • Scroll down 1 time to set Day, Press Enter, Press More or Less to adjust, select done • Scroll down 1 time to set Hour, Press Enter, Press More or Less to adjust, select done • Scroll down 1 time to set Min, Press Enter, Press More or Less to adjust, select done • Scroll down 1 time to set Sec, Press Enter, Press More or Less to adjust, select done
UTC Offset:
The number of hours you must add to the local time to get UTC time, -‐12 to +12. Always enter this with respect to standard time, not daylight savings time. Eastern Standard Time +5 Central Standard Time +6 Mountain Standard Time +7 Pacific Standard Time +8 Alaskan Standard Time +9 Hawaiian Standard Time +10 ** Locations east of the International Date Line use negative numbers. Set Local Area:
• Select MENU • Scroll down 4 times to *Presets, press Enter • Scroll down 2 times to Local Area, press Enter • Enter Password: 1111 (default) • Select New • Scroll to correct State, Select Pick • Set location by choosing correct location(s), Select Pick • Select Done • Updating Locations, Select Done
Adjusting Line Out Level (if necessary):
• Select MENU • Scroll down 13 times to *Levels, Press Enter • Scroll down 1 time to Line Out, Press Enter • Enter Password: 1111 (default) • Use up and down arrow to adjust to appropriate level

27
An Emergency Alert System Best Practices Guide – Version 1.0 EAS Device Appendix
Emergency Alert System
EAS Device Appendix – Sage Digital Model 3644
The following instructions provide minimum required setup and configuration for the SAGE 3644, firmware 1.0 v. 74. Please consult the manufacturer’s user manual for detailed configuration instructions. See www.sagealertingsystems.com. In particular, review Sage’s National Test document at www.sagealertingsystems.com/SB_002.pdf.
Use of a web browser and the ENDECSETD program is recommended to ensure that your Sage Digital ENDEC model 3644 is set properly.
Please Note: These instructions are subject to change as system updates are made available.
Set Call Letters:
• Select MENU • Scroll down 5 times to *Config, press Enter • Scroll down 3 times to Call Sign, press Enter • Enter Password (default is 1111) • Set station call letters using the curs, up or down arrow • Select Done
Set Time:
• Select MENU • Scroll down 17 times to *Date/Time, press Enter • UTC Offset based on time zone (the ENDEC uses positive numbers for these offsets, see below), press Enter • Enter Password: 1111 (default) • Adjust using the up or down arrow • Select Done • *Date/Time, press Enter • Scroll down 1 time to set Daylight Enabled • Select Yes or No depending on applicability • *Date/Time, press Enter • Scroll down 2 times to set Year, Press More or Less to adjust, Select Done • Scroll down 1 time to set Month, Press Enter, Press More or Less to adjust, select done • Scroll down 1 time to set Day, Press Enter, Press More or Less to adjust, select done • Scroll down 1 time to set Hour, Press Enter, Press More or Less to adjust, select done • Scroll down 1 time to set Min, Press Enter, Press More or Less to adjust, select done • Scroll down 1 time to set Sec, Press Enter, Press More or Less to adjust, select done
28
An Emergency Alert System Best Practices Guide – Version 1.0 EAS Device Appendix
Emergency Alert System
EAS Device Appendix – Sage Digital Model 3644 (Continued)
UTC Offset:
The number of hours you must add to the local time to get UTC time, -‐12 to +12. Always enter this with respect to standard time, not daylight savings time.
Eastern Standard Time +5 Central Standard Time +6 Mountain Standard Time +7 Pacific Standard Time +8 Alaskan Standard Time +9 Hawaiian Standard Time +10 ** Locations east of the International Date Line use negative numbers.
Set Local Area:
• Select MENU • Scroll down 4 times to *Presets, press Enter • Scroll down 2 times to Local Area, press Enter • Enter Password: 1111 (default) • Select New • Scroll to correct State, Select Pick • Set location by choosing correct location(s), Select Pick • Select Done • Updating Locations, Select Done
Adjusting Line Out Level (if necessary):
• Select MENU • Scroll down 13 times to *Levels, press Enter • Scroll down 1 time to Line Out, press Enter • Enter Password: 1111 (default) • Use up and down arrow to adjust to appropriate volume
**If this is the first configuration of a new SAGE ENDEC, turn it off/on when finished to clear the blinking Automatic light.
29
An Emergency Alert System Best Practices Guide – Version 1.0 EAS Device Appendix
Emergency Alert System
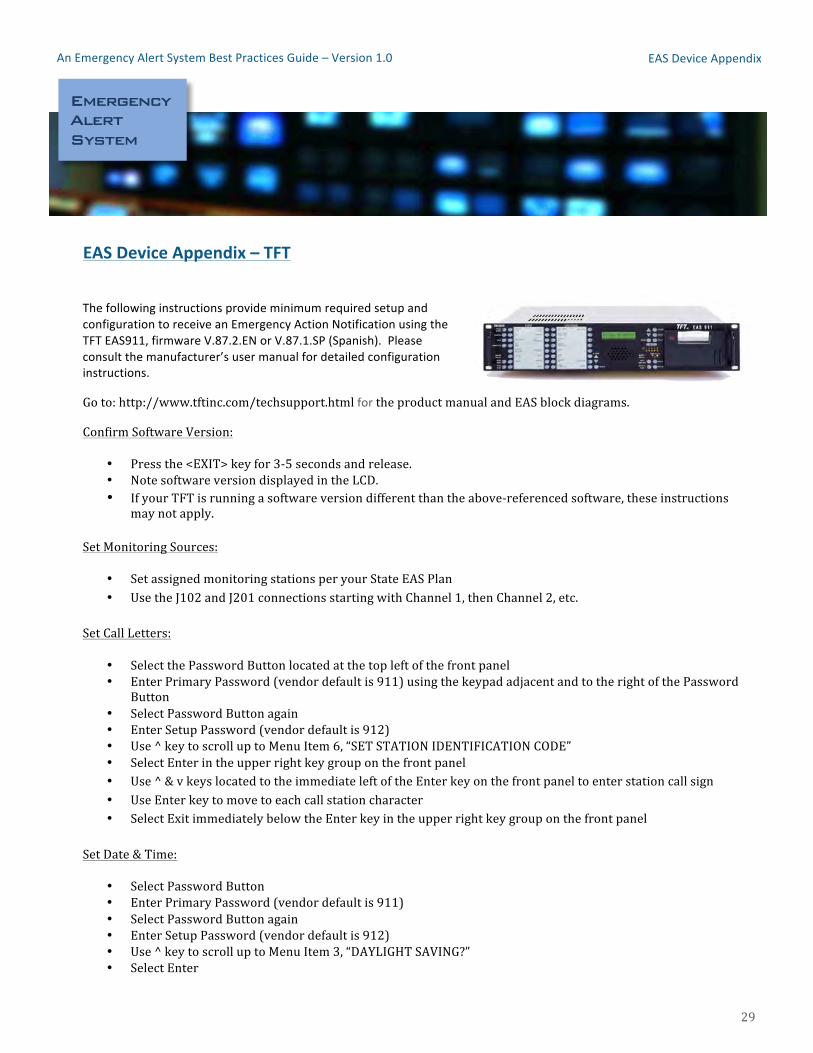
EAS Device Appendix – TFT
The following instructions provide minimum required setup and configuration to receive an Emergency Action Notification using the TFT EAS911, firmware V.87.2.EN or V.87.1.SP (Spanish). Please consult the manufacturer’s user manual for detailed configuration instructions.
Go to: http://www.tftinc.com/techsupport.html for the product manual and EAS block diagrams.
Confirm Software Version:
• Press the <EXIT> key for 3-‐5 seconds and release. • Note software version displayed in the LCD. • If your TFT is running a software version different than the above-‐referenced software, these instructions
may not apply. Set Monitoring Sources:
• Set assigned monitoring stations per your State EAS Plan • Use the J102 and J201 connections starting with Channel 1, then Channel 2, etc.
Set Call Letters:
• Select the Password Button located at the top left of the front panel • Enter Primary Password (vendor default is 911) using the keypad adjacent and to the right of the Password
Button • Select Password Button again • Enter Setup Password (vendor default is 912) • Use ^ key to scroll up to Menu Item 6, “SET STATION IDENTIFICATION CODE” • Select Enter in the upper right key group on the front panel • Use ^ & v keys located to the immediate left of the Enter key on the front panel to enter station call sign • Use Enter key to move to each call station character • Select Exit immediately below the Enter key in the upper right key group on the front panel
Set Date & Time:
• Select Password Button • Enter Primary Password (vendor default is 911) • Select Password Button again • Enter Setup Password (vendor default is 912) • Use ^ key to scroll up to Menu Item 3, “DAYLIGHT SAVING?” • Select Enter
!
30
An Emergency Alert System Best Practices Guide – Version 1.0 EAS Device Appendix
Emergency Alert System
EAS Device Appendix – TFT (Continued)
• Select Enable or Disable • Select Enter • Use v key to scroll up to Menu Item 2, “SET STATION TIME ZONE” • Select Enter in the upper right key group on the front panel • Use ^ & v keys to adjust the UTC (Universal Time, Coordinated) offset the appropriate number of hours to
reflect the proper Time Zone (+ values in the US) • Select Enter • Use v key to scroll up to Menu Item 1, “SET CURRENT DATE/TIME” • Select Enter for Menu Item 1, “SET CURRENT DATE/TIME” • Select Enter • Use ^ & v keys to adjust month, day, year • Select Enter to move to day and time fields • Select Exit when complete • Select Exit twice when complete (to back out entirely)
** Performing the steps above in the prescribed order ensures the UTC Offset is set correctly, prior to setting the Time. Set Originator Code:
• Select Password Button • Enter Primary Password (vendor default is 911) • Select Password Button again • Enter Setup Password (vendor default is 912) • Use ^ key to scroll up to Menu Item 4, “SET STATION ORG CODE” • Select Enter • Use ^ & v keys to move up and down • Use the Enter key to select the appropriate Org Code • Select Exit when complete
Set FIPS Code:
• Select Password Button • Enter Primary Password (vendor default is 911) • Select Password Button again • Enter Setup Password (vendor default is 912) • Use ^ key to scroll up to Menu Item 5, “SET STATION FIPS CODE” • Select Enter • Input FIPS code for the county/parish/area of the city of license using the numeric keypad (select Enter
after each digit) • Select Exit when complete
31
An Emergency Alert System Best Practices Guide – Version 1.0 EAS Device Appendix
Emergency Alert System
EAS Device Appendix – TFT (Continued)
Set to Auto-‐Forward: **Please set to auto-‐forward to forward an EAN (code used in Nationwide EAS Test). The yellow light under “AUTO” should be lit. If not please do the following:
• Select Mode in the lower right key group on the front panel • Enter Primary Password (vendor default is 911) • Observe the yellow light under “AUTO to ensure it is illuminated.
Additional Notes:
• It is important to set the EAS911 to “Auto” just prior to the National EAS Test. If the unit is set to “Man”, the unit itself will take no action when the National EAS Test is received. An operator must forward the message manually if the unit is in “Man” mode.
• No changes in Setup need to be made to Setup Menu Items 10, 11, and 12 for the purposes of the National EAS Test. The proper settings for the National EAS Test are already resident in the EAS911’s internal program.
32
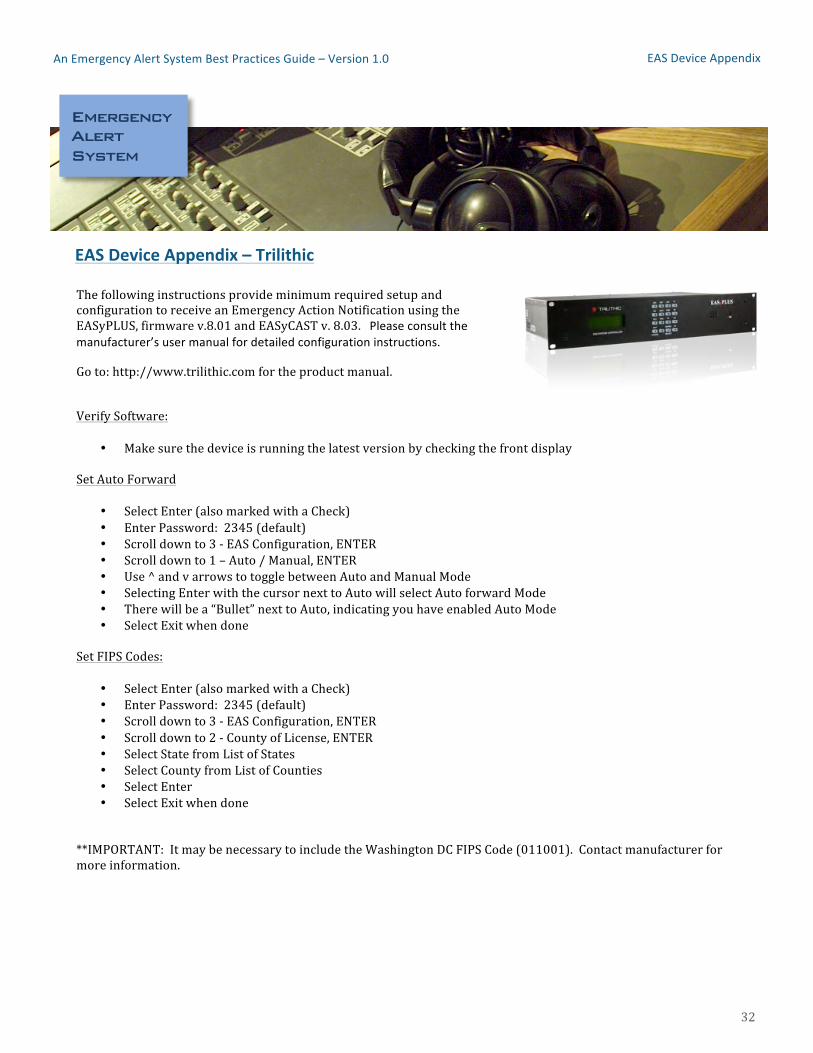
The following instructions provide minimum required setup and configuration to receive an Emergency Action Notification using the EASyPLUS, firmware v.8.01 and EASyCAST v. 8.03. Please consult the manufacturer’s user manual for detailed configuration instructions.
Go to: http://www.trilithic.com for the product manual.
Verify Software:
• Make sure the device is running the latest version by checking the front display
Set Auto Forward
• Select Enter (also marked with a Check) • Enter Password: 2345 (default) • Scroll down to 3 -‐ EAS Configuration, ENTER • Scroll down to 1 – Auto / Manual, ENTER • Use ^ and v arrows to toggle between Auto and Manual Mode • Selecting Enter with the cursor next to Auto will select Auto forward Mode • There will be a “Bullet” next to Auto, indicating you have enabled Auto Mode • Select Exit when done
Set FIPS Codes:
• Select Enter (also marked with a Check) • Enter Password: 2345 (default) • Scroll down to 3 -‐ EAS Configuration, ENTER • Scroll down to 2 -‐ County of License, ENTER • Select State from List of States • Select County from List of Counties • Select Enter • Select Exit when done
**IMPORTANT: It may be necessary to include the Washington DC FIPS Code (011001). Contact manufacturer for more information.
EAS Device Appendix – Trilithic
Emergency Alert System
An Emergency Alert System Best Practices Guide – Version 1.0 EAS Device Appendix
33
Set Call Letters:
• Select Enter (also marked with a Check) • Enter Password: 2345 (default) • Scroll down to 3 -‐ EAS Configuration, ENTER • Scroll down to 3 -‐ Call Ltrs: • Use ^ and v arrows to select each character • Selecting Enter after setting the character saves the character and moves to next character position • When complete select ENTER again to exit out of command • Select Exit when done
Set Time:
• Select Enter (also marked with a Check) • Enter Password: 2345 (default) • Scroll down to 2 – Setup, ENTER • Select 1-‐ Date/Time, ENTER • Select 1 -‐ Time Zone, ENTER • Set Time Zone, ENTER • Select 2 -‐ Set Date and Time • Select Enter
EAS Device Appendix – Trilithic (Continued)
Emergency Alert System
An Emergency Alert System Best Practices Guide – Version 1.0 EAS Device Appendix