e-snaps Training Series - Maine Homeless Planning · Web viewe-snaps Training Series. Conditional...
33
e-snaps Training Series Conditional Award Recipients: Issues and Conditions Instructional Guide
Transcript of e-snaps Training Series - Maine Homeless Planning · Web viewe-snaps Training Series. Conditional...

e-snaps Training Series
Conditional Award Recipients: Issues and Conditions Instructional Guide
2014, Version 1


Issues and Conditions
Table of Contents
Introduction............................................................................................................................2
Objectives.......................................................................................................................................2
Overview of the Post-Award Process..............................................................................................2
Overview of this Instructional Guide..............................................................................................3
What’s New in e-snaps in 2013.......................................................................................................4
Accessing e-snaps...................................................................................................................5
Existing Users..................................................................................................................................5
New e-snaps Users.........................................................................................................................6
Adding and Deleting Registrants.....................................................................................................6
Add a Registrant................................................................................................................7
Delete a Registrant............................................................................................................9
Edit Registrant Information...............................................................................................9
Accessing the Issues and Conditions Form.............................................................................10
Submissions..................................................................................................................................10
Completing the Issues and Conditions Form..........................................................................12
Reference Submissions.................................................................................................................12
Acknowledgment..........................................................................................................................14
Additional Issues and Conditions..................................................................................................15
Adjustments.................................................................................................................................17
Adjustment Formlets....................................................................................................................18
Attachments.................................................................................................................................20
Submission Summary...................................................................................................................21
Submitting Issues and Conditions..........................................................................................22
Exporting to PDF...........................................................................................................................23
Issues and Conditions Page 1 of 14
Issues and Conditions
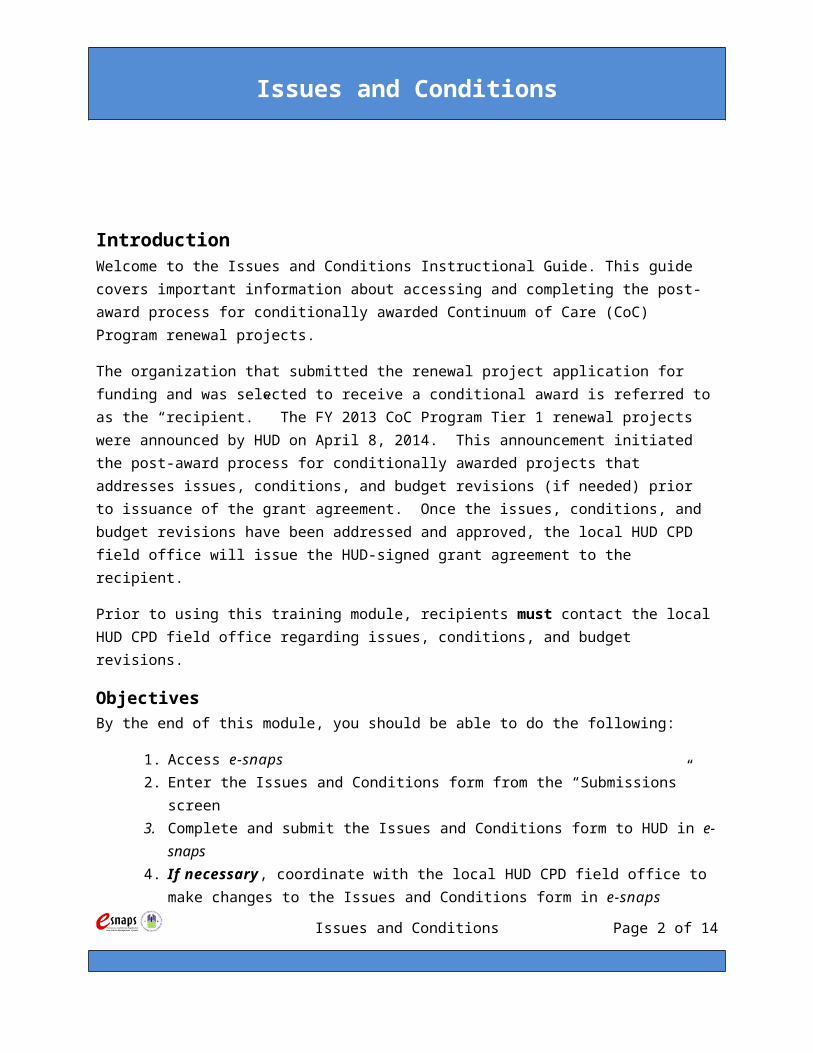
IntroductionWelcome to the Issues and Conditions Instructional Guide. This guide covers important information about accessing and completing the post-award process for conditionally awarded Continuum of Care (CoC) Program renewal projects.
The organization that submitted the renewal project application for funding and was selected to receive a conditional award is referred to as the “recipient.” The FY 2013 CoC Program Tier 1 renewal projects were announced by HUD on April 8, 2014. This announcement initiated the post-award process for conditionally awarded projects that addresses issues, conditions, and budget revisions (if needed) prior to issuance of the grant agreement. Once the issues, conditions, and budget revisions have been addressed and approved, the local HUD CPD field office will issue the HUD-signed grant agreement to the recipient.
Prior to using this training module, recipients must contact the local HUD CPD field office regarding issues, conditions, and budget revisions.
ObjectivesBy the end of this module, you should be able to do the following:
1. Access e-snaps2. Enter the Issues and Conditions form from the “Submissions” screen3. Complete and submit the Issues and Conditions form to HUD in e-snaps4. If necessary, coordinate with the local HUD CPD field office to make changes to the Issues
and Conditions form in e-snaps
Overview of the Post-Award ProcessAll conditionally awarded recipients must go through the “Post-Award” process before a grant agreement can be executed. This process includes the acknowledgement and resolution of issues and conditions, and any HUD required budget changes, all of which will be completed using e-snaps, a web-based portal accessible at www.hud.gov/esnaps.
The post-award process contains the following elements:
HUD verifies and submits issues and conditions to recipients using e-snaps. HUD notifies recipients when the Issues and Conditions form is ready in e-snaps. Recipients acknowledge issues and conditions directly in e-snaps. As necessary, recipients adjust a limited amount of project information from the renewal project
application in e-snaps to resolve the issues and conditions issued by HUD or to reconcile budget changes made by HUD when assessing the project application.
Issues and Conditions Page 2 of 14

Issues and Conditions
Recipients attach supporting documentation (e.g., current date/correctly completed HUD form 2880, Subrecipient nonprofit documentation) for the resolution of issues and conditions in e-snaps.
The local HUD CPD field office reviews the resolution of issues and conditions in e-snaps for approval.
Note: Significant changes to the project and grant consolidations cannot be requested during Post-Award. Additional guidance will be provided at a later date for grant amendments and grant consolidations as these can only occur after the initial grant agreement has been executed. This will be important for recipients that completed amendments with their local HUD CPD field office after the final HUD-approved Grant Inventory Worksheet (GIW) was issued or that requested a budget change through the application. In general, budgets were adjusted by HUD during application assessment to correspond to the amounts and budget line item distributions on the final HUD-approved GIW. HUD did not increase total award amounts where the applicant request represented a reduction to the project’s annual renewal amount listed on the GIW.
Overview of this Instructional GuideThe organization of materials in this instructional guide corresponds with the different parts of the post-award process, and the instructional steps follow the progression of screens in e-snaps.
Accessing e-snaps. All e-snaps users must have a username and password in order to log into e-snaps. In order to see an organization's Issues and Conditions form, the e-snaps user needs to be associated as a "registrant" with the organization's e-snaps account.
o The “Accessing e-snaps” section of this guide highlights key information for existing registered users and for the addition and removal of registered users.
o For detailed instructions on accessing e-snaps, see page 5 of this instructional guide.
Accessing the Issues and Conditions Form. The steps discussed in this section allow recipients to access the issues and conditions screens in e-snaps. The steps will include filtering projects and form types, and identifying the correct form for the correct project in the “Submissions” folder.
Issues and Conditions. After accessing the issues and conditions in e-snaps, recipients will review and complete four sections: “Referenced Submissions,” “Acknowledgment,” “Adjustments,” and “Attachments.”
o Referenced Submissions. The recipient will be able to access and review the project application and the HUD award.
Issues and Conditions Page 3 of 14

Issues and Conditions
o Acknowledgment. Requires the acknowledgement of issues and conditions placed on the grant and includes a detailed description of the action(s) required to resolve issues and conditions.
o Adjustments. Provides an opportunity to update information from the project application in order to resolve issues and conditions or to reconcile budget changes made by HUD before grant agreement.
o Attachment. Provides an opportunity to attach documentation, as necessary, concerning the resolution of issues and conditions.
After providing all of the required information, the recipient will submit the form to the local HUD CPD field office for review in e-snaps.
What’s New in e-snaps in 2013The resolution of issues, conditions, and budget changes was incorporated into e-snaps for last year’s FY 2012 CoC Program Competition. This year the process has been updated to include new fields from the FY 2013 application, as well as other very minor technical updates that are referenced in the body of this guide.
Issues and Conditions Page 4 of 14

Issues and Conditions
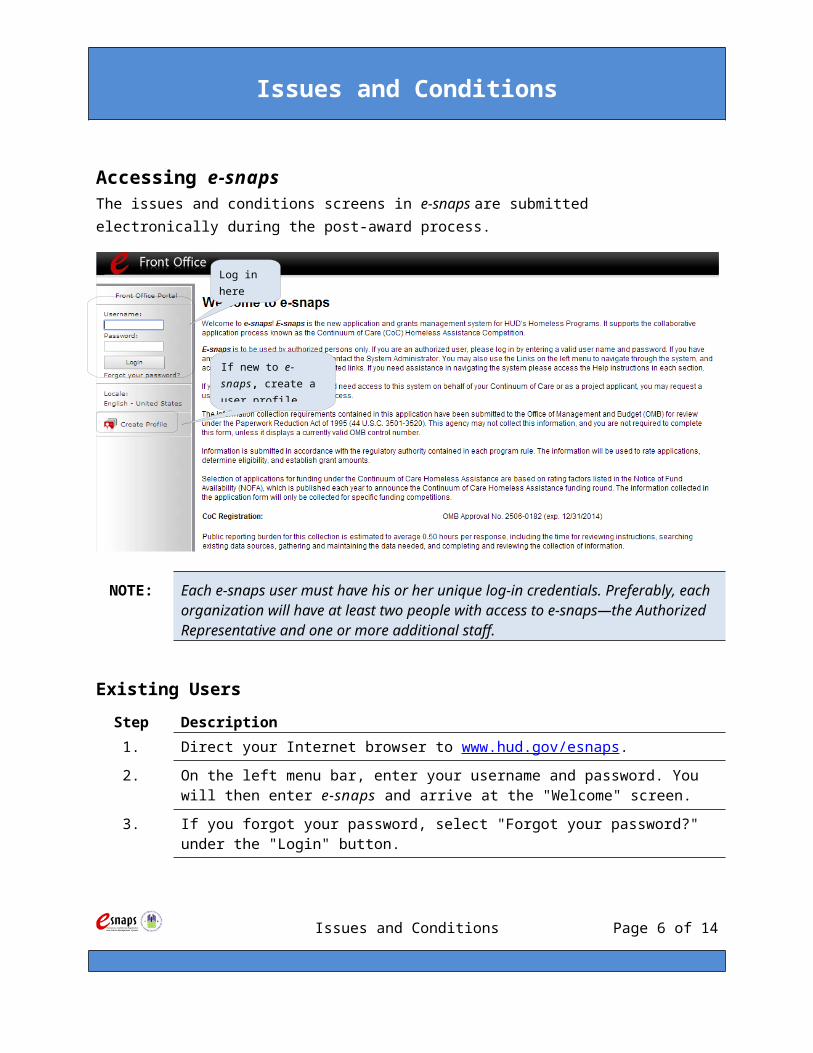
Accessing e-snapsThe issues and conditions screens in e-snaps are submitted electronically during the post-award process.
NOTE: Each e-snaps user must have his or her unique log-in credentials. Preferably, each organization will have at least two people with access to e-snaps—the Authorized Representative and one or more additional staff.
Existing Users
Step Description1. Direct your Internet browser to www.hud.gov/esnaps.
2. On the left menu bar, enter your username and password. You will then enter e-snaps and arrive at the "Welcome" screen.
3. If you forgot your password, select "Forgot your password?" under the "Login" button.
Issues and Conditions Page 5 of 14
Log in here
If new to e-snaps, create a user profile here
Issues and Conditions
New e-snaps Users
Step Description1. Create an e-snaps username and password by selecting the "Create Profile" link.
2. Log in as instructed under “Existing Users” above.
For a refresher on how to navigate through the e-snaps system, the "Introduction to e-snaps Features and Functions" training module is available on the OneCPD website.
Adding and Deleting RegistrantsHaving a user profile enables a person to access e-snaps. However, only people who have been associated with the organization as registrants (also referred to as registered users) have the ability to enter information in the Project Applicant Profile and the Issues and Conditions forms associated with the organization.
Anyone who currently has access to an organization’s e-snaps account (i.e., who can see the organization’s Project Applicant Profile, prior years project applications, APRs, etc.) can add or remove other registrants by following the instructions provided below.
Issues and Conditions Page 6 of 14
First, Select Applicants
Second, select Registrant

Issues and Conditions
Step Description1. Select "Applicants" on the left menu bar.
2.On the "Applicants" screen, click "Registrant" located to the left of the “Applicant Name.”
NOTE Before anyone can be added as a registrant in e-snaps, the individual must have an e-snaps user profile with a username and password. The person responsible for adding the new registrant will use the person’s username and email address to “register”, or “associate,” the new user with the project applicant’s records in e-snaps.
Add a Registrant
Step Description1. Select the "Add Registrant" at the top left of the list.
Issues and Conditions Page 7 of 14
Add a Registrant

Issues and Conditions
Step Description1. Enter the username and email address of the registrant.
There is a "Group" field. This item is NOT being used this year. You do not need to do anything with this field.
2. Select the "Add Registrant" button.
3. Select the "Back to List" button to return to the "Registrants" screen, where you will see the name of the person added.
4. On the "Registrants" screen, select the "Back to List" button to return to the "Applicants" screen.
NOTE If there is no current user to add or delete a registrant, or if a new organization has taken over the grant and needs to connect their user account for access to this or any other step related to the project, please email the organization name, new user name(s) and new user email(s) to the local HUD CPD field office. HUD may contact you and the Collaborative Applicant for confirmation of the submitted information and need for access.
Issues and Conditions Page 8 of 14
Enter username and email address

Issues and Conditions
Delete a RegistrantDeleting the user will remove that user from the Project Applicant Profile. This person will still be able to access e-snaps, but he/she will no longer be able to access the organization’s Project Applicant Profile, project applications, and APRs.
Step Description1. Select "Delete" next to the person's name.
2. Select the "Back to List" button to return to the "Applicants" screen.
Edit Registrant InformationTo edit a registrant's information, delete the person first and then add the person again.
Step Description1. Select "Delete" next to the person's name.
2. Follow the instructions above for adding the person again with the correct information.
Issues and Conditions Page 9 of 14

Issues and Conditions
Accessing the Issues and Conditions FormAfter receiving an email from the local HUD CPD field office alerting you that the issues and conditions form is ready, and after successfully logging in to e-snaps, recipients are ready to access the issues and conditions screens. This section identifies the steps for accessing the Issues and Conditions form from the “Submissions” screen.
Remember, the "Applicant" field with the dropdown menu located at the top left side of the screen identifies the Applicant Profile in which you are working. There are two types of Applicant Profiles – CoC Applicant Profile and Project Application Profile.
For this process you must be working in the Project Applicant Profile.
SubmissionsRecipients must access the Issues and Conditions form from the "Submissions" screen.
Step Description1. Select "Submissions" on the left menu bar.
2. The "Submissions" screen appears.
3. Locate the project that has been conditionally awarded. Option: Use the "Submissions Filters." Select the appropriate project from the “Applicant Project Name” field. Then select the "Filter" button to find your
Issues and Conditions Page 10 of 14
Select Submissions.
Make sure to select the Project Applicant in the “Applicant” field
Select the project name here
Issues and Conditions
project.
Option: Select "Clear Filters" on the top left of the "Submissions Filters" box. Then, review the "Funding Opportunity Name / Step Name" column for “Renewal Project Application FY2013"/”C1.9a.”
Step Description3. Select the orange folder to the left of the “Project Name” with the Step Name "C1.9a
Renewal Application Issues and Conditions".
Issues and Conditions Page 11 of 14
Access the Issues and Conditions

Issues and Conditions
Completing the Issues and Conditions FormCompleting the issues and conditions screens that make up the Issues and Conditions form in e-snaps is a straightforward process. This section identifies the steps for completing the screens.
NOTE: Some data will automatically populate from the Project Applicant Profile.
Review the populated data. If it is not correct, you will need to edit the Project Applicant Profile, making sure to select the "Complete" button after making your edits so that the data can be pulled forward again.
Please note that the Project Name and Applicant Name cannot be changed prior to issuance of the grant agreement. If there is a problem with the Project Name or Applicant Name, please contact the local HUD CPD field office as soon as possible.
To edit the Project Applicant Profile, recipients must first exit the “Issues and Conditions Form” and enter the Applicant Profile from the e-snaps home screen. For more information on how to edit the Project Applicant Profile, please review the Project Applicant Profile training module located on the e-snaps training page, https://www.onecpd.info/resource/2958/instructions-for-updating-the-project-applicant-profile/
When working in the Issues and Conditions form, e-snaps users may return to the main screen by selecting "Back to Submissions List" at the bottom of the left menu bar. From this screen, users may access “Applicant,” ‘Funding Opportunity Registration,” “Projects,” and “Submissions” on the left menu bar.
Reference SubmissionsThe following steps provide instruction on reviewing the “Reference Submission" screen, and accessing both the original project application and the HUD conditional award.
Step Description
Issues and Conditions Page 12 of 14
Click to view reference submissions

Issues and Conditions
1 Click on the orange folder under the “View” column to open each submission. The “Reference Submission” selected will open in the same active window.
2.
Recipients are not required to review submissions as this is for informational purposes only.The following two submissions are available for review:
Renewal Project Application – A copy of the application that was submitted by the project applicant and reviewed by HUD.
HUD Renewal Review – The information populated in this section is based on HUD’s project application review. HUD may have corrected one or more of the following:
Grant Number – A project’s grant number was corrected when the applicant entered an incorrect expiring grant number. HUD confirmed the grant number through either the final HUD-approved GIW or via LOCCS.
Reallocation Status – In some instances a project application indicated it was being reduced through reallocation, but upon review of the CoC Application, there was no reallocation noted for the project. If this was the case, HUD corrected the reallocation status on the application to indicate that funds from the project were not being reallocated.
Component Type – In some cases, the applicant selected an incorrect component type for the application (e.g., the selection was SH for Safe Haven and should have been PH for Permanent Housing). Component types were verified using the final HUD-approved GIW and LOCCS.
Rental Assistance Type – In some cases, the project applicant selected an incorrect rental assistance type (e.g., project selected PRA but is in fact a TRA project).
Rapid Re-housing Housing (RRH) Designation – In some cases, the project applicant indicated the project was a rapid re-housing project. Only those projects approved for RRH designation during the GIW process were permitted to select RRH on the project application. Additionally, the 23 original Rapid Re-housing for Families Demonstration projects were only permitted to select TH (Transitional Housing) per the FY 2008 CoC Homeless Assistance Grants Programs NOFA.
Project Budget – Many projects had incorrect costs listed within their budget forms. Per the CoC Program interim rule, these ineligible costs (e.g., food on the Operating budget) require correction prior to grant agreement. Additionally, many requests provided insufficient detail for HUD to determine whether the costs were eligible, and the recipient will need to provide the Quantity AND Detail to the local HUD CPD field office before grant agreement. Finally changes to leasing, rental assistance and operating budgets may be the result of changes in local market conditions from the time of application to the time of award. In most cases, the budgets will need to be corrected in consultation with the local HUD CPD field office. It is important to note that HUD only made changes to the total amount for each budget line item,
Issues and Conditions Page 13 of 14

Issues and Conditions
and so projects with ineligible costs will need to adjust the rows within the affected budgets using the screens described later in this form.
After completing a review of the reference submissions, recipients need to click “Back to Recipient Issues and Conditions” at the bottom of the left menu bar to return to the issues and conditions screens.
AcknowledgmentThe following steps provide instruction on reviewing the "Acknowledgment” screen. This screen replaces the issues and conditions letter that was mailed to conditionally awarded recipients in past competition years. This screen is designed to allow recipients to view the issues and conditions placed on the project as well as to review comments, known as “alerts,” provided to the recipient by HUD. Recipients should review the details of each issue and/or condition indicated, and must acknowledge that all identified issues and conditions have been reviewed and resolved before submitting this form.
Issues and Conditions Page 14 of 14
Alerts regarding the project application are listed here.

Issues and Conditions
Step Description
1 Review “Alerts” and/or comments from HUD entered into the text box at the top of the screen.
2.
Recipients must acknowledge all conditions placed on the conditionally awarded project before the local HUD CPD field office can issue a grant agreement:
Review the “HUD Award” column to determine if a box has been checked. If the box is checked, review the corresponding condition details
associated with the checked box. Upon review and understanding of the condition, check the box in the
column “Recipient Acknowledgement” to indicate that you have reviewed and understand the condition. The condition will need to be resolved prior to issuance of a grant agreement.
If you need additional clarification regarding a condition issued by HUD, or if you are
Issues and Conditions Page 15 of 14
If this column is checked it indicates a condition(s) issued by HUD during application review.
Check the corresponding box in this column to acknowledge the condition issued by HUD.
A “Warning” will appear until the condition(s) are acknowledged.
All “Housing First” projects will include a standard condition

Issues and Conditions
unsure of what is needed to resolve a condition; contact your local HUD CPD field office representative for further guidance.
3 After completing the review and acknowledging all conditions, recipients should click “Save and Next” at the bottom of the screen to continue to the next step.
NOTE:If a recipient does not acknowledge all indicated conditions a warning message will appear and the recipient will be unable to submit this form. Recipients that did not receive conditions on their awards do not need to complete items on this screen.
Additional Issues and ConditionsThe following steps provide instruction on reviewing the fields on the "Additional Issues and Conditions" screen. This screen will only be visible if HUD placed non-standard issues or conditions on the award. Recipients should review the detail of each additional issue and condition, and must acknowledge all issues and conditions before submitting this form.
If there are no additional issues and/or conditions, the following screens will not appear and recipients will continue to the next section, “Adjustments.”
Step Description
1 Review the list of issues and conditions under the column, “Condition/Issue Title.”
Select the magnifying glass to view each additional issue and/or condition, if listed.
2.
Once each additional issue and condition has been acknowledged, the word “Yes” will appear in each row under the column, “Condition/Issue Acknowledged.” Recipients must acknowledge all issues and conditions placed on the conditional award.
3 After completing the review and acknowledging all issues and conditions, recipients should click “Next” at the bottom of the screen to continue to the next screen.
Issues and Conditions Page 16 of 14

Issues and Conditions
Step Description
1.
In the text box labeled “Condition/Issue Details:” review the issue and/or condition placed on the conditionally awarded project.
Upon review and understanding of the additional issue or condition, click on the checkbox titled “By clicking here, Recipient acknowledges this Condition/Issue:” to indicate that you have reviewed and understand the additional issue or condition.
If you need additional clarification regarding the additional issues and/or conditions issued by HUD, or you are unsure what is needed to resolve the additional issues and/or conditions, contact your local HUD CPD field office representative for further guidance.
Repeat this process until all additional issues and/or conditions have been acknowledged.
3After completing the review and acknowledgment of additional issue(s) and/or condition(s), recipients should click “Save and Back to List” at the bottom of the screen to return to the list of additional issues and/or conditions.
NOTE:If a recipient fails to acknowledge all issues and conditions a warning message will appear and the recipient will be unable to submit this form. Recipients that did not receive additional issues and/or conditions on their award will not see this screen.
AdjustmentsThe following steps provide instruction on reviewing the the "Adjustments" screen.
Issues and Conditions Page 17 of 14
Click here to check the box and Acknowledge.

Issues and Conditions
2. Check the box next to each formlet that needs to be updated in support of the resolution of issues, conditions, or alerts or the reconciliation of budget changes made by HUD.
For example, no CoC’s were approved to serve “Homeless persons as defined under other federal statutes” in the FY 2013 CoC Program Competition. Therefore, if a percentage was entered for “Homeless persons as defined under other federal statutes” on the project application, the value was automatically set to zero during the HUD review before award. The recipient must now adjust formlet “5C. Outreach” to add that percentage to another eligible category and indicate from where homeless participants will enter the program. The percentages should total 100 and “Homeless persons as defined under other federal statutes” will no longer be an option.
Click “Save and Next” to continue.
NOTE:
The forms in this process are populated directly from the project application. Recipients should only select formlets containing information that must be edited to resolve issues and/or conditions, or to reconcile budget changes required by HUD. Recipients cannot use this form to initiate new requests that do not relate to an issue, condition, or HUD required budget change. If unsure of which forms to edit, contact your local HUD CPD field office.
Adjustment FormletsThe “Adjustment Formlets” listed on the “Adjustments” screen and available in a section of the left menu bar below the “Attachments” link are identical to the screen names used in the project applications. These formlets can only be edited if they have been selected on the “Adjustments” screen.
Issues and Conditions Page 18 of 14
Once checked and saved, cannot be unchecked!
Grey shaded areas are not available for adjustment.
Not shaded - available for adjustment. Click the box to check and then click “Save.”

Issues and Conditions
All other formlets are read-only and cannot be edited. The rows, columns, and fields are also identical to the project application with the following general exceptions:
Certain formlets from the project application are visible, while others are hidden:
Visible at C1.9a Hidden and C1.9a4B. Housing Type 1A. Application Type5A. Households 1B. Legal Applicant5B. Subpopulations 1C. Application Details5C. Outreach 1D. Congressional District(s)7B. Leased Units (visible for reference only) 1E. Compliance7C. Leased Structures 1F. Declaration7D. Short-Term/Medium-Term Rental Assistance 2A. Subrecipients7E. Long-Term Rental Assistance 3A. Project Detail7F. Supportive Services Budget 3B. Description7G. Operating Budget 4A. Services7H. HMIS Budget 4B. Supportive Services Only (SSO)7I. Match/Leverage 4C. HMIS Participation7J. Summary Budget 6A. Standard Performance Measures
6B. Additional Performance Measures7A. Funding Request8A. Attachments9A. Appeals
The recipient will not be able to adjust all of the fields on the visible formlets. HUD identified the fields that may be changed before grant agreement to satisfy an issue, condition, or HUD required budget change and has prevented all other field from being edited.
Fields in sections 4 and 5 contain open number and text boxes that can be adjusted by directly editing the text brought forward from the application.
Fields in section 7, the budget section, are presented in three columns or sections. The first is read only and represents data from the application, “Renewal Submission.” The second is read only and represents data from the “HUD Award.” The third can be edited to represent the adjusted value required to resolve issues and/or conditions or to reconcile budget changes made by HUD, “Adjustment.”
The forms follow the same rules as they did during the project application process. If one form is adjusted it may affect the visibility of the fields available on other formlets.
Only those formlets that were checked on the “Adjustments” screen can be changed. All other forms are read only. Recipients can return to the “Adjustments” screen at any time to select additional formlets that HUD identified for correction. Recipients cannot, however, uncheck a formlet once is has been selected for adjustment. If a formlet is selected in error, simply skip the formlet without actually making adjustments.
Issues and Conditions Page 19 of 14

Issues and Conditions
Adjustments should only be made during the post-award process to those items that are necessary to resolve an issue and/or condition, or to reconcile a budget change made by HUD. All adjustments must be discussed with the local HUD CPD field office in advance of the submission of this form to prevent inaccurate adjustments. If the local HUD CPD field office representative identifies an adjustment that had not been previously approved, the representative will reject the change and send the form back to the recipient which will cause a delay in the issuance of the grant agreement.
NOTE:
For projects with multiple rental assistance types: During post award, the very limited number of recipients permitted to consolidate FY 2012 grant awards with different rental assistance types (PRA, SRA, TRA) may use the detailed rental assistance formlets to select a unique rental assistance type for each part of the project. The recipient may select only one rental assistance type per detailed rental assistance formlet. Under no circumstance other than the one provided for here should a recipient change the rental assistance type field on a detailed rental assistance formlet to indicate multiple rental assistance types. Only recipients approved to consolidate more than one rental assistance type in FY 2012 are eligible to use this functionality.
Attachments
The "Attachments" screen allows the recipient to attach up to ten (10) documents. These items are available for the recipient to upload documentation for the local HUD CPD field office representative to review with the purpose of confirming resolution by the recipient of issues and/or conditions or the reconciliation of budget changes made by HUD. Documents should also be uploaded that will clarify any adjustments made to project information.
Step Description1. Select one of the links under the column “Document Type”.
2. The "Attachment Details" screen appears.
Issues and Conditions Page 20 of 14
Select one of the available links

Issues and Conditions
NOTE: If there are more than 10 documents to attach, zip several files together and upload them to the same “Attachment” link.
Step Description
1. Enter the name of the document in the "Document Description" field (e.g., HUD form 2880).
2. Select "Choose File" to the right of the "File Name" label to upload the file. The allowable formats are: zip, xls, xlsx, tif, jpeg, wpd, pdf, img, rtf, pptx, ppt, txt, bmp, jpg, png, zipx, doc, docx, ZIP*, gif, tiff
3. Select "Save & Back to List" to return to the "Attachments" screen.
4. On the "Attachments" screen, select "Next."
The maximum file size is 5 MB.
Submission SummaryOnce the required information has been entered, including required attachments, the recipient must select the "Submit" button on the "Submission Summary" screen.
The "Submission Summary" screen shows all of the issues and conditions screens. In the "Last Updated" column, the system will identify the following:
A date if the screen is complete. "No Input Required" if there is no input required. "Please Complete" if more information is needed.
You will be able to go back to any screen by clicking on the screen name on the left menu or on the screen name in the Submissions list. Remember to select "Save" after making changes or those changes will be lost.
The "Submit" button is located at the bottom of the screen. Once the Issues and Conditions form has been submitted, recipients must notify the local HUD CPD field office by email.
Issues and Conditions Page 21 of 14
Enter a Description and select Choose File.

Issues and Conditions
The following image shows the "Submission Summary" screen with items that still need to be completed. Note that the "Submit" button is grey-shaded and cannot be selected.
Step Description1. For item(s) that state "Please Complete,” either select the link under the "Page" column
or select the appropriate screen link from the left menu bar.
2. Complete the required information on the screen and be sure to click “Save” before navigating off the page.
3. When the "Submit" button is active (no longer grey-shaded) you will be able to click “Submit.”
Submitting Issues and ConditionsThe following image shows the "Submission Summary" screen with all items completed. Note that the "Submit" button is active and can be selected.
Issues and Conditions Page 22 of 14
Inactive “Submit” button
Review "Last Updated" column

Issues and Conditions
Step Description1. If you are not already on the "Submission Summary" screen, select it on the left menu bar.
2. Select the "Submit" button.
3. The "Submit" button will be grey. Below it there will be text stating, "This e. Form has been submitted".
4. Important: Send an email to your local HUD CPD field office representative as soon as you have submitted the form notifying him/her that you have completed step C1.9a.
Sample email to the local HUD field office
Dear [insert local HUD CPD field office representative’s name],
I have completed the Issues and Conditions form, C1.9a Renewal Application Issues and Conditions, in e-snaps for project number [insert grant number]. The form is now available in e-snaps for your review.
Sincerely,
[insert your name]
Exporting to PDF
Issues and Conditions Page 23 of 14
Active "Submit" button
Review "Last Updated" column

Issues and Conditions
Recipients can obtain a hard copy of the issues and conditions screens using the "Export to PDF" button located at the bottom of the “Submission Summary” screen under the navigation buttons “Back” and “Next.”
Step Description1. Click on "Export to PDF."
2. On the "Configure PDF Export" screen, select the screens you would like included.
3. Click "Export to PDF.”
Guide CompletionCongratulations! You have completed the e-snaps Issues and Conditions Instructional Guide. Note that additional training guides are available to assist recipients in logging into and completing forms in e-snaps. Please check the e-snaps training page at http://www.onecpd.info/e-snaps/ for these guides.
Issues and Conditions Page 24 of 14
Click to obtain a PDF copy of the Issues and Conditions form