Dunning - FHLform, or by any means. Reverse engineering, disassembly, or decompilation of this...
80
Dunning February 28, 2018 2017.2
Transcript of Dunning - FHLform, or by any means. Reverse engineering, disassembly, or decompilation of this...

Dunning
February 28, 2018 2017.2

Copyright © 2005, 2018, Oracle and/or its affiliates. All rights reserved.
This software and related documentation are provided under a license agreement containingrestrictions on use and disclosure and are protected by intellectual property laws. Except as expresslypermitted in your license agreement or allowed by law, you may not use, copy, reproduce, translate,broadcast, modify, license, transmit, distribute, exhibit, perform, publish, or display any part, in anyform, or by any means. Reverse engineering, disassembly, or decompilation of this software, unlessrequired by law for interoperability, is prohibited.
The information contained herein is subject to change without notice and is not warranted to be error-free. If you find any errors, please report them to us in writing.
If this is software or related documentation that is delivered to the U.S. Government or anyonelicensing it on behalf of the U.S. Government, then the following notice is applicable:
U.S. GOVERNMENT END USERS: Oracle programs, including any operating system, integrated software,any programs installed on the hardware, and/or documentation, delivered to U.S. Government endusers are "commercial computer software" pursuant to the applicable Federal Acquisition Regulationand agency-specific supplemental regulations. As such, use, duplication, disclosure, modification,and adaptation of the programs, including any operating system, integrated software, any programsinstalled on the hardware, and/or documentation, shall be subject to license terms and licenserestrictions applicable to the programs. No other rights are granted to the U.S. Government.
This software or hardware is developed for general use in a variety of information managementapplications. It is not developed or intended for use in any inherently dangerous applications, includingapplications that may create a risk of personal injury. If you use this software or hardware in dangerousapplications, then you shall be responsible to take all appropriate fail-safe, backup, redundancy, andother measures to ensure its safe use. Oracle Corporation and its affiliates disclaim any liability for anydamages caused by use of this software or hardware in dangerous applications.
Oracle and Java are registered trademarks of Oracle and/or its affiliates. Other names may betrademarks of their respective owners.
Intel and Intel Xeon are trademarks or registered trademarks of Intel Corporation. All SPARCtrademarks are used under license and are trademarks or registered trademarks of SPARCInternational, Inc. AMD, Opteron, the AMD logo, and the AMD Opteron logo are trademarks orregistered trademarks of Advanced Micro Devices. UNIX is a registered trademark of The Open Group.
This software or hardware and documentation may provide access to or information about content,products, and services from third parties. Oracle Corporation and its affiliates are not responsiblefor and expressly disclaim all warranties of any kind with respect to third-party content, products,and services unless otherwise set forth in an applicable agreement between you and Oracle. OracleCorporation and its affiliates will not be responsible for any loss, costs, or damages incurred due toyour access to or use of third-party content, products, or services, except as set forth in an applicableagreement between you and Oracle.
If this document is in public or private pre-General Availability status:
This documentation is in pre-General Availability status and is intended for demonstration andpreliminary use only. It may not be specific to the hardware on which you are using the software.Oracle Corporation and its affiliates are not responsible for and expressly disclaim all warranties of anykind with respect to this documentation and will not be responsible for any loss, costs, or damagesincurred due to the use of this documentation.
If this document is in private pre-General Availability status:
The information contained in this document is for informational sharing purposes only and should beconsidered in your capacity as a customer advisory board member or pursuant to your pre-GeneralAvailability trial agreement only. It is not a commitment to deliver any material, code, or functionality,

and should not be relied upon in making purchasing decisions. The development, release, and timingof any features or functionality described in this document remains at the sole discretion of Oracle.
This document in any form, software or printed matter, contains proprietary information that is theexclusive property of Oracle. Your access to and use of this confidential material is subject to the termsand conditions of your Oracle Master Agreement, Oracle License and Services Agreement, OraclePartnerNetwork Agreement, Oracle distribution agreement, or other license agreement which hasbeen executed by you and Oracle and with which you agree to comply. This document and informationcontained herein may not be disclosed, copied, reproduced, or distributed to anyone outside Oraclewithout prior written consent of Oracle. This document is not part of your license agreement nor can itbe incorporated into any contractual agreement with Oracle or its subsidiaries or affiliates.
For information about Oracle's commitment to accessibility, visit the Oracle Accessibility Programwebsite at http://www.oracle.com/pls/topic/lookup?ctx=acc&id=docacc
Oracle customers that have purchased support have access to electronic support through My OracleSupport. For information, visit http://www.oracle.com/pls/topic/lookup?ctx=acc&id=info or visit http://www.oracle.com/pls/topic/lookup?ctx=acc&id=trs if you are hearing impaired.
Sample Code
Oracle may provide sample code in SuiteAnswers, the Help Center, User Guides, or elsewhere throughhelp links. All such sample code is provided "as is” and “as available”, for use only with an authorizedNetSuite Service account, and is made available as a SuiteCloud Technology subject to the SuiteCloudTerms of Service at www.netsuite.com/tos.
Oracle may modify or remove sample code at any time without notice.
No Excessive Use of the Service
As the Service is a multi-tenant service offering on shared databases, Customer may not use theService in excess of limits or thresholds that Oracle considers commercially reasonable for the Service.If Oracle reasonably concludes that a Customer’s use is excessive and/or will cause immediate orongoing performance issues for one or more of Oracle’s other customers, Oracle may slow down orthrottle Customer’s excess use until such time that Customer’s use stays within reasonable limits. IfCustomer’s particular usage pattern requires a higher limit or threshold, then the Customer shouldprocure a subscription to the Service that accommodates a higher limit and/or threshold that moreeffectively aligns with the Customer’s actual usage pattern.
Beta Features
Oracle may make available to Customer certain features that are labeled “beta” that are not yetgenerally available. To use such features, Customer acknowledges and agrees that such beta featuresare subject to the terms and conditions accepted by Customer upon activation of the feature, or in theabsence of such terms, subject to the limitations for the feature described in the User Guide and asfollows: The beta feature is a prototype or beta version only and is not error or bug free and Customeragrees that it will use the beta feature carefully and will not use it in any way which might result inany loss, corruption or unauthorized access of or to its or any third party’s property or information.Customer must promptly report to Oracle any defects, errors or other problems in beta featuresto [email protected] or other designated contact for the specific beta feature. Oracle cannotguarantee the continued availability of such beta features and may substantially modify or ceaseproviding such beta features without entitling Customer to any refund, credit, or other compensation.Oracle makes no representations or warranties regarding functionality or use of beta features andOracle shall have no liability for any lost data, incomplete data, re-run time, inaccurate input, workdelay, lost profits or adverse effect on the performance of the Service resulting from the use of betafeatures. Oracle’s standard service levels, warranties and related commitments regarding the Serviceshall not apply to beta features and they may not be fully supported by Oracle’s customer support.These limitations and exclusions shall apply until the date that Oracle at its sole option makes a betafeature generally available to its customers and partners as part of the Service without a “beta” label.

Table of ContentsDunning ............................................................................................................................... 1
Dunning Overview ............................................................................................................. 2Understanding Dunning Terminology ............................................................................... 3Understanding Customer Level Dunning and Invoice Level Dunning ..................................... 5Considerations When Setting Up the Dunning Letters SuiteApp ........................................... 8Dunning Limitations and Best Practices .......................................................................... 12
Enabling Dunning ............................................................................................................ 13Prerequisites for Dunning ............................................................................................. 13
Dunning Setup Tasks ........................................................................................................ 14Customizing Roles to Use the Dunning Features .................................................................. 15Using the Dunning Tab ..................................................................................................... 19Scheduling the Dunning Evaluation Workflow ...................................................................... 20Configuring Subsidiaries for Dunning ................................................................................. 21Setting Up Dunning Procedures ......................................................................................... 21Understanding Dunning Letter Templates ........................................................................... 22
Best Practices for Creating and Using Dunning Templates ................................................. 23Customizing Dunning Letter Templates ........................................................................... 24Creating Dunning Letter Email Templates ........................................................................ 26Creating Dunning Letter PDF Templates .......................................................................... 27Identifying Invoice Fields for Inclusion in Dunning Templates ............................................. 31Including Fields from the Transaction Saved Search in Dunning Templates ........................... 32Including Information from NetSuite Records in Dunning Templates ................................... 33Creating Dunning Template Records ............................................................................... 37
Understanding Dunning Levels .......................................................................................... 44Creating Dunning Level Rules ............................................................................................ 44Creating Dunning Procedures ............................................................................................ 45Defining Dunning Selection Criteria .................................................................................... 47Specifying the Basis for Determining the Dunning Level ........................................................ 47Adding Dunning Levels to a Dunning Procedure ................................................................... 48Setting the Priority Order of Dunning Procedures ................................................................. 49Assigning Dunning Procedures .......................................................................................... 49
Assigning a Dunning Procedure to a Customer ................................................................ 50Assigning a Dunning Procedure to an Invoice .................................................................. 52Bulk Assigning Dunning Procedures ............................................................................... 54
Sending and Printing Dunning Letters ................................................................................ 57Specifying Dunning Delivery Methods ............................................................................. 58Defining Dunning Letter Recipients ................................................................................ 58Bulk Updating Customer Records for Dunning ................................................................. 59Attaching Statements and Invoices to Dunning Letters ...................................................... 60Sending Dunning Letters Automatically ........................................................................... 61Sending Dunning Letters Manually ................................................................................. 62Printing Dunning Letters ............................................................................................... 63Resending a Dunning Letter .......................................................................................... 65
Managing Dunning ........................................................................................................... 65Assigning Dunning Managers ........................................................................................ 66Pausing and Resuming Dunning .................................................................................... 66Using the Dunning Dashboard ....................................................................................... 68
Dunning Letters Error Codes ............................................................................................. 70

Dunning 1
Dunning
Dunning■ Dunning Overview
■ Understanding Dunning Terminology
■ Understanding Customer Level Dunning and Invoice Level Dunning
■ Considerations When Setting Up the Dunning Letters SuiteApp
□ Dunning Roles
□ Dunning Permissions and Access
□ Edit Permissions for the Dunning Subtab on Customer and Invoice Records
■ Dunning Limitations and Best Practices
■ Enabling Dunning
■ Prerequisites for Dunning
■ Dunning Setup Tasks
■ Customizing Roles to Use the Dunning Features
■ Using the Dunning Tab
■ Scheduling the Dunning Evaluation Workflow
■ Configuring Subsidiaries for Dunning
■ Setting Up Dunning Procedures
■ Understanding Dunning Letter Templates
□ Best Practices for Creating and Using Dunning Templates
□ Customizing Dunning Letter Templates
▬ Customizing the Sample Dunning Template Files
▬ Customizing the List of Invoices in the Dunning Template File
▬ Including Fields from the Transaction Saved Search in Dunning Templates
▬ Including Information from NetSuite Records in Dunning Templates
□ Creating Dunning Template Records
▬ Supported Languages for Dunning
▬ Selecting a Default Language on a Dunning Template Record
▬ Creating a Multi-Language Dunning Template Record
▬ Creating a Single Language Dunning Template Record
▬ Creating a Dunning Template Record
□ Creating Dunning Letter Email Templates
□ Creating Dunning Letter PDF Templates
■ Understanding Dunning Levels
■ Creating Dunning Level Rules
■ Creating Dunning Procedures
■ Defining Dunning Selection Criteria
■ Specifying the Basis for Determining the Dunning Level
■ Setting the Priority Order of Dunning Procedures
■ Assigning Dunning Procedures
□ Assigning a Dunning Procedure to a Customer
□ Assigning a Dunning Procedure to an Invoice

Dunning Overview 2
Dunning
□ Bulk Assigning Dunning Procedures
■ Managing Dunning
□ Assigning Dunning Managers
□ Pausing and Resuming Dunning
□ Using the Dunning Dashboard
■ Sending and Printing Dunning Letters
□ Specifying Dunning Delivery Methods
□ Defining Dunning Letter Recipients
□ Bulk Updating Customer Records for Dunning
□ Attaching Statements and Invoices to Dunning Letters
□ Sending Dunning Letters Automatically
□ Sending Dunning Letters Manually
□ Printing Dunning Letters
□ Resending a Dunning Letter
Dunning OverviewDunning is a systematic method of tracking overdue invoices and persistently sending letters tocustomers to demand payment.
The Dunning Letters SuiteApp enables you to set up an automated dunning process in NetSuite to helpmanage the collection of your accounts receivable, and send reminder letters before payment is due.
Before installing and setting up the Dunning Letters SuiteApp, be sure to read the following topics:
■ Understanding Customer Level Dunning and Invoice Level Dunning
■ Understanding Dunning Terminology
■ Dunning Limitations and Best Practices
■ Considerations When Setting Up the Dunning Letters SuiteApp
■ Dunning Setup Tasks
To set up your automated dunning process, you must create dunning procedures and assign them tocustomers or invoices.
Dunning procedures define the escalation points or dunning levels, and the time that must elapsebefore a dunning letter is sent to a customer. Dunning levels define the thresholds for overdueamounts and days overdue, as well as the letter templates to use for each level. You can createdunning letter templates in various languages.
The Dunning Letters SuiteApp provides dunning evaluation workflows that an administrator must setup to run on a schedule. The system generates dunning letters according to the dunning evaluationresults. When the system runs the dunning evaluation workflow, it determines which customers andinvoices will be dunned. Only posting invoices are evaluated. Then, depending on the preferences seton your dunning procedures, the system would email letters automatically, or enable you to email orprint letters manually. The letter template that the system uses depends on the dunning level of thecustomer or invoice after dunning evaluation.
Use the Dunning Email Sending Queue for sending letters by email manually. Use the Dunning PDFPrinting Queue to generate PDF files for one or more letters. Automatic generation of PDF dunningletters is not supported. Dunning PDF letters can only be generated manually from the Dunning PDFPrinting Queue. After generating the PDF letters, you can download them from the file cabinet for

Dunning Overview 3
Dunning
printing. The PDF files are also saved on the Communication subtab of the customer record, on thecontact record if the contact is specified as a dunning letter recipient.
You can pause dunning to deal with a customer’s queries regarding an invoice, or to permit additionaltime for payment to be received before sending another letter. Then, you can resume dunningto enable the system to run the dunning evaluation workflow. All automated and manual actionsconcerning the dunning process are tracked in the system notes.
To help you keep track of the current dunning status of all accounts, you can display the followingcharts and lists on the Dunning dashboard: Dunning Overdue Receivables, Dunning OverdueReceivables by Age, Dunning Overdue Receivables by Customer, Dunning Average Time to Pay, Total A/R Overdue, Customers with Paused Dunning, Invoices with Paused Dunning, and Recently Sent/PrintedDunning Letters.
To purchase the Dunning Letters SuiteApp, contact your NetSuite account manager.
Note: Dunning letters sent by email do not affect your company’s contracted email volume.
Understanding Dunning TerminologyClick the links for more information.
Term Definition Related Help Topics
Dunning Letter Also known as a debt chasing letter. In NetSuite,dunning letters can be sent by email or generatedas a PDF for printing.
Sending and PrintingDunning Letters
CustomerDunning
Also referred to as customer level dunning.See Customer Level Dunning for a detailedexplanation.
Differences betweenCustomer Dunning andInvoice DunningAssigning a DunningProcedure to a CustomerBulk Assigning DunningProcedures
Invoice Dunning Also referred to as invoice level dunning.See Invoice Level Dunning for a detailedexplanation.
Differences betweenCustomer Dunning andInvoice DunningAssigning a DunningProcedure to an InvoiceBulk Assigning DunningProcedures
Dunning Director A custom role included in the Dunning LettersSuiteApp. It is based on the standard Accountantrole.
Dunning RolesDunning Permissions andAccessEdit Permissions forthe Dunning Subtab onCustomer and InvoiceRecords
DunningManager
A custom role included in the Dunning LettersSuiteApp. It is based on the standard A/R Clerk role.
Assigning DunningManagersDunning RolesDunning Permissions andAccessEdit Permissions forthe Dunning Subtab on

Dunning Overview 4
Dunning
Term Definition Related Help Topics
Customer and InvoiceRecords
DunningEvaluationWorkflow
Scheduled workflow that determines whichcustomers and invoices need to be dunned, andsends dunning letters by email automatically.
■ Customer Dunning WF Schedule is used forcustomer dunning
■ Invoice Dunning WF Scheduler is used for invoicedunning
Scheduling the DunningEvaluation Workflow
DunningProcedure
Defines the escalation points or dunning levels, andthe time that must elapse before a dunning letter issent to a customer.
Setting Up DunningProcedures
Dunning Level Defines the thresholds for overdue amountsand days overdue, as well as the dunning lettertemplates to use for each level.
Understanding DunningLevels
Dunning LevelRule
Defines the days overdue and the outstandingamount thresholds in various currencies.
Creating Dunning LevelRulesSpecifying the Basis forDetermining the DunningLevelAdding Dunning Levels to aDunning Procedure
DunningSelection Criteria
Filters the customers and invoices to which adunning procedure can be assigned automaticallyon the customer or invoice record.
Defining Dunning SelectionCriteria
DunningRecipient
A contact added to the Dunning Recipient subtab ofa customer record.
Defining Dunning LetterRecipients
DunningTemplate Record
A custom record that specifies the PDF and emailtemplate files to use for each language and dunninglevel for a particular dunning procedure. On adunning procedure record, you specify the dunningtemplate records to use.
Creating DunningTemplate Records
Dunning EmailTemplate
Template file used for dunning letters that will besent by email.
Creating Dunning LetterEmail Templates
Dunning PDFTemplate
Template file used for dunning letters that will begenerated as a PDF for printing.
Creating Dunning LetterPDF Templates
Dunning PauseReason
A custom record that defines a reason fortemporarily stopping the dunning process for acustomer or invoice.
Pausing and ResumingDunningCreating Reasons forPausing Dunning
DunningEvaluation Result
A custom record created after the dunningevaluation determines that a particular customeror invoice must be sent a dunning letter. A dunningevaluation result is created for each customer orinvoice that will be dunned. These are the recordslisted in the Dunning Email Sending Queue andDunning PDF Printing Queue.
Scheduling the DunningEvaluation Workflow

Dunning Overview 5
Dunning
Term Definition Related Help Topics
Important: Editing the dunningevaluation result may cause errors in thesending of dunning letters.
Understanding Customer Level Dunning and InvoiceLevel DunningTo set up your automated dunning process, you must create dunning procedures and assign them tocustomers or invoices.
Customer level dunning is the recommended standard way to use the Dunning Letters SuiteApp.
Use invoice level dunning only if you want to treat one or more invoices of a customer according todifferent rules, or using a different template.
Before you set up your accounts to use the Dunning Letters SuiteApp, read the following topics tounderstand the differences between customer level dunning and invoice level dunning:
■ Differences between Customer Dunning and Invoice Dunning
■ Customer Level Dunning
■ Invoice Level Dunning
Differences between Customer Dunning and Invoice Dunning
Customer Level Dunning Invoice Level Dunning
If Allow Override box ischecked on the customer’sdunning procedure:
If Allow Override boxis not checked on thecustomer’s dunningprocedure:
If Allow Overridebox is checked onthe customer’sdunning procedure:
If Allow Overridebox is not checkedon the customer’sdunningprocedure:
■ Invoice dunning isallowed.
■ System sends adunning letter with alloverdue invoices of thecustomer attached.Non-overdue invoicesare also attached to thedunning letter if theymeet any one of thedunning level criteria.
■ System evaluates onlyinvoices without adunning procedureassigned.
■ System uses theCustomer Dunning WFScheduler workflow for
■ Invoice dunning is notallowed.
■ System sends adunning letter with alloverdue invoices of thecustomer attached.Non-overdue invoicesare also attached to thedunning letter if theymeet any one of thedunning level criteria.
■ System evaluatesall invoices of thecustomer (with orwithout a dunningprocedure assigned).
■ System uses theCustomer Dunning WFScheduler workflow for
■ Invoice dunningis allowed.
■ System sends adunning letterto a customerfor only oneparticularinvoice.
■ System uses theInvoice DunningWF Schedulerworkflow forevaluatingspecific invoices.
■ Systemevaluatesthe invoiceswith dunning
■ Invoice dunningis not allowed.

Dunning Overview 6
Dunning
Customer Level Dunning Invoice Level Dunning
evaluating all invoicesof the customer.
evaluating all invoicesof the customer.
proceduresindividually.
For more information, see Customer Level Dunning and Invoice Level Dunning.
Example of Customer Dunning Letter
Example of Invoice Dunning Letter
Customer Level DunningCustomer level dunning is the recommended standard way to use the Dunning Letters SuiteApp.
In customer level dunning, you are sending a dunning letter with all overdue invoices of the customerattached. Non-overdue invoices are also attached to the dunning letter if they meet any one of thedunning level criteria.
To understand the differences between customer level dunning and invoice level dunning, seeDifferences between Customer Dunning and Invoice Dunning.
To set up customer level dunning:
1. Create a customer dunning procedure:
a. Create a new dunning procedure record. See Creating Dunning Procedures.
b. In the Applies To field, select Customer.
c. Check the Allow Override box if you want to enable the system to use invoice leveldunning for those invoices that have a dunning procedure. Otherwise, leave the AllowOverride box clear.
d. Complete the required fields.
e. Save the dunning procedure record.
2. Assign the dunning procedure to the customer:
a. Edit or create a new customer record.
b. Assign the dunning procedure to the customer. See Assigning a Dunning Procedure to aCustomer.
c. Assign at least one dunning recipient. See Defining Dunning Letter Recipients.

Dunning Overview 7
Dunning
d. Select the method of sending dunning letters to this customer (printing or email, or both).See Specifying Dunning Delivery Methods.
e. Assign the appropriate dunning manager for the customer. See Assigning DunningManagers.
f. Complete the required fields.
g. Save the customer record.
Invoice Level DunningAlthough customer level dunning is the recommended standard way to use the Dunning LettersSuiteApp, some companies need the ability to dun an invoice separately.
Invoice level dunning is used when a company wants to treat one or more invoices of a customeraccording to different rules, or using a different template.
In invoice level dunning, you are sending a dunning letter to a customer for only one particular invoice.
The reasons and criteria for using invoice dunning vary. For example, a company may want to send adunning letter for an invoice that is above a particular value. Another company may want to use invoicelevel dunning for a certain service. You may also want to use a different template for invoices closed bya certain sales rep, or for invoices that use certain payment terms.
To understand the differences between customer level dunning and invoice level dunning, seeDifferences between Customer Dunning and Invoice Dunning.
To set up invoice level dunning:
1. Create a customer dunning procedure:
a. Create a new dunning procedure record. See Creating Dunning Procedures.
b. In the Applies To field, select Customer.
c. Check the Allow Override box to enable the system to use invoice level dunning for thoseinvoices that have a dunning procedure.
Note: Customer dunning will still proceed even if the Allow Override box ischecked. See Differences between Customer Dunning and Invoice Dunning.
d. Complete the required fields.
e. Save the dunning procedure record.
2. Assign the dunning procedure to the customer:
a. Edit or create a new customer record.
b. On the Setup subtab under the Dunning subtab, select the customer dunning procedure.See Assigning a Dunning Procedure to a Customer.
c. Assign at least one dunning recipient. See Defining Dunning Letter Recipients.
d. Select the method of sending dunning letters to this customer (printing or email, or both).See Specifying Dunning Delivery Methods.
e. Assign the appropriate dunning manager for the customer. See Assigning DunningManagers.
f. Complete the required fields.
g. Save the customer record.
3. Create an invoice dunning procedure:

Dunning Overview 8
Dunning
a. Create a new dunning procedure record. See Creating Dunning Procedures.
b. In the Applies To field, select Invoice.
c. Complete the required fields.
d. Save the dunning procedure.
4. Assign the invoice dunning procedure to the customer’s invoices that you want to dunseparately:
a. Edit or create a new invoice.
b. On the Setup subtab under the Dunning subtab, select the invoice dunning procedure.See Assigning a Dunning Procedure to an Invoice.
c. Save the invoice record.
Important: To enable the system to perform the dunning evaluation foran invoice, make sure that the customer dunning procedure assigned on thecustomer record has the Allow Override box checked.
Considerations When Setting Up the Dunning LettersSuiteAppBefore setting up your account to use the Dunning Letters SuiteApp, read the following topics forguidance:
■ Dunning Strategy
■ Dunning Letter Formats
■ Dunning Roles
Dunning StrategyConsiderations:
■ Deciding on whether to use customer dunning or invoice dunning
The Dunning Letters SuiteApp supports customer level dunning and invoice level dunning.
In customer level dunning, you are sending a dunning letter with all overdue invoices of thecustomer attached. Non-overdue invoices are also attached to the dunning letter if they meet anyone of the dunning level criteria.
In invoice level dunning, you are sending a dunning letter to a customer for only one particularinvoice.
Customer level dunning is the recommended standard way to use the Dunning Letters SuiteApp.
Use invoice level dunning only if you want to treat one or more invoices of a customer according todifferent rules, or using a different template.
For more information, see Differences between Customer Dunning and Invoice Dunning.
■ Defining dunning escalation levels (thresholds for overdue amounts and days overdue)
To set up your automated dunning process, you must create dunning procedures and assign themto customers or invoices.
Dunning procedures define the escalation points or dunning levels, and the time that must elapsebefore a dunning letter is sent to a customer. Dunning levels define the thresholds for overdueamounts and days overdue, as well as the letter templates to use for each level.

Dunning Overview 9
Dunning
For more information, see Adding Dunning Levels to a Dunning Procedure.
Dunning Letter Formats
Considerations:
■ Deciding on whether to print dunning letters or send dunning letters by email
On a dunning procedure record, each dunning level that you add must be associated with a dunningletter template record. The dunning template record is where you add template files for yourdunning letters.
The type of template you create depends on your customers’ preferences for receiving dunningletters. Create email templates for letters to be sent by email, and PDF templates for letters to beprinted.
For more information, see the following topics:
□ Customizing Dunning Letter Templates
□ Creating Dunning Letter Email Templates
□ Creating Dunning Letter PDF Templates
■ Deciding on the languages of the dunning letter templates
The dunning letter template record can have email and PDF template files in a single language, orseveral template files in various languages.
For more information, see the following topics:
□ Best Practices for Creating and Using Dunning Templates
□ Supported Languages for Dunning
□ Selecting a Default Language on a Dunning Template Record
Dunning Roles
Considerations:
■ Determining permissions needed by employees to perform dunning tasks
■ Deciding whether to use standard roles or custom roles
■ Determining who should be assigned the Dunning Director or Dunning Manager roles
The following roles can use the dunning features:
■ Administrator
■ Accountant
■ A/R Clerk
■ Dunning Director (default role based on the standard Accountant role)
■ Dunning Manager (default role based on the standard A/R Clerk role)
Note: The default Dunning Director and Dunning Manager roles are included in the DunningLetters SuiteApp.
The default Dunning Director or Dunning Manager role can access only the assigned employee’ssubsidiary.

Dunning Overview 10
Dunning
For example, if you are using the default Dunning Director role, dunning procedures that you createcan only be assigned to your subsidiary. However, you can create various sets of dunning proceduresfor each subsidiary.
Customized roles can also use dunning if they have been granted the required permissions and accessto the dunning pages.
For more information, see the following topics:
■ Dunning Permissions and Access
■ Edit Permissions for the Dunning Subtab on Customer and Invoice Records
■ Customizing Roles to Use the Dunning Features
Dunning Permissions and Access
The following table shows the permissions and access levels for dunning records and functionality:
Record or Functionality Dunning Director/Accountant/Administrator
Dunning Manager or A/R Clerk
Dunning Configuration Edit View
Dunning Level Rule Full View
Dunning Pause Reason Full Full
Dunning Procedure Full View
Dunning ProcedurePriority
Edit View
Dunning Template Full Edit
Dunning Procedure BulkAssignment
Allowed Not allowed
Dunning Bulk UpdateCustomer Records
Allowed Not allowed
Dunning Email SendingQueue
Allowed Allowed
Dunning PDF PrintingQueue
Allowed Allowed
Assigning DunningManagers
Allowed Not allowed
Assigning a DunningProcedure to an Invoice
Allowed Allowed
Note: Only thedunning managerassigned to the invoicecan edit the DunningProcedure field on theDunning subtab of theinvoice record.
Assigning a DunningProcedure to a Customer
Allowed Allowed

Dunning Overview 11
Dunning
Record or Functionality Dunning Director/Accountant/Administrator
Dunning Manager or A/R Clerk
Note: Only thedunning managerassigned to thecustomer can edit theDunning Procedurefield on the Dunningsubtab of the customerrecord.
Defining Dunning LetterRecipients
Allowed Allowed
Pausing Dunning Allowed Allowed
Resuming Dunning Allowed Allowed
See also Dunning Roles.
Edit Permissions for the Dunning Subtab on Customer andInvoice RecordsThe Dunning subtab is available on customer records and invoice records in accounts that have theDunning Letters SuiteApp. Edit permissions depend on the user’s logged in role, and on whether thelogged in user is the assigned dunning manager for the record. The following table shows the editpermission differences:
Field or Box onthe DunningSubtab on theCustomer orInvoice Record
Dunning Director/Accountant/Administrator
Dunning ManagerAssigned to theCustomer orInvoice
Dunning ManagerNot Assigned tothe Customer orInvoice
DunningProcedure
Yes Yes No
Dunning Level Yes No No
Dunning Manager Yes No No
Pause Dunning Yes Yes No
Dunning PauseReason
Yes Yes No
Dunning PauseReason Detail
Yes Yes No
Allow Letters to bePrinted
Yes Yes No
Allow Letters to beEmailed
Yes Yes No
Do Not SendLetters ToCustomer Email
Yes Yes No
Dunning Recipient Yes Yes No

Dunning Overview 12
Dunning
To use customized roles, see Customizing Roles to Use the Dunning Features.
Dunning Limitations and Best PracticesBefore using the Dunning Letters SuiteApp, be aware of the current limitations and best practicerecommendations.
Dunning Letters SuiteApp LimitationsThe Dunning Letters SuiteApp currently has the following limitations:
■ Only accounts with the Multiple Currencies feature enabled can use the Dunning Letters SuiteApp.
■ The Custom Statement Form field on the dunning template page currently cannot filter transactionforms by type. The dropdown list includes all transaction forms.
■ The Dunning Manager field and Default Dunning Manager fields currently cannot filter employeesby role. The dropdown list includes all active employees.
■ The maximum number of dunning levels that you can add to a dunning procedure is 15.
■ The NetSuite file size limit for generated PDFs is 5MB. If attachments exceed the limit, the systemsplits them into various files in the same folder in the file cabinet. See Printing Dunning Letters. Forinformation about storage space, see the help topic Working with the File Cabinet.
■ When printing letters using the Dunning PDF Printing Queue, the system can print only up to 100letters at one time.
■ When sending email using the Dunning Email Sending Queue, the system can send only up to 100letters at one time.
■ Creating and updating dunning procedures can be done through the user interface or throughCSV import. The Dunning Letters SuiteApp currently does not support the importing of dunningprocedures using web services or SuiteScript.
■ The Dunning Letters SuiteApp cannot detect bounced email messages. If a customer requests youto resend a dunning letter, you can go to the Communication subtab on the customer or invoicerecord to access the dunning letter and forward it. See Resending a Dunning Letter.
■ The Recently Sent/Printed Dunning Letters portlet uses the NetSuite server time for recording thedate and time.
Best Practices for DunningWhen using the Dunning Letters SuiteApp, be guided by the following recommendations:
1. A limitation prevents the Dunning Letters SuiteApp from showing the sublists on the dunningforms when you select the -New- option in the dropdown list or when you click the plus icon tocreate a new record.
Therefore, when you set up your account to use the Dunning Letters SuiteApp, NetSuiterecommends the following:
■ Always use the Dunning Setup menu to go to the pages for creating new dunning records.
■ Do not select the -New- option in the dropdown lists to create a new record.
■ If you are logged in with the Administrator role, do not click the plus icon beside the field tocreate a new record.
This guideline applies to the following:
■ Dunning Procedure field on the customer or invoice record
■ Dunning Level Rule field on the dunning procedure record

Dunning Overview 13
Dunning
■ Dunning Template field on the dunning procedure record
■ Dunning Pause Reason field on the customer or invoice record
2. When creating saved searches to use for dunning, use only standard NetSuite fields for yoursearch filters. Using fields provided by other SuiteApps cause errors when those fields arechanged or removed.
3. In General Preferences, the recommended number of rows to show in list segments is not morethan 250. Longer list segments cause errors. See the help topic Setting General Preferences.
4. NetSuite recommends that you update your customer records using the Bulk Update CustomerRecords page. This should be performed as a one-time setup task after assigning dunningprocedures to customer and invoice records to avoid disrupting the dunning process. See BulkUpdating Customer Records for Dunning.
5. Before you create dunning template records, be sure to read Best Practices for Creating andUsing Dunning Templates.
Enabling DunningContact your NetSuite account representative to purchase the Dunning Letters SuiteApp and to havethe bundle shared with your account so that you can install it.
Before installing the Dunning Letters SuiteApp, verify that your account has the prerequisite featuresenabled. See Prerequisites for Dunning.
To install the Dunning Letters SuiteApp:
1. Go to Customization > SuiteBundler > Search and Install Bundles.
2. In the Keywords field, enter the bundle ID, 62340.
3. Click Search.
4. Click the Dunning Letters SuiteApp link in the Name column.
5. On the Bundle Details page, click Install.
Note: The Install button is only available if the SuiteApp has been shared explicitly withyour account.
For more information about installing SuiteApps, see the help topic Installing a Bundle.
The Dunning Letters SuiteApp is a managed bundle developed by NetSuite. After you install theSuiteApp, your accounts are automatically upgraded when an update to the SuiteApp is available.
If you uninstall the SuiteApp, NetSuite deletes the SuiteApp and all its customization objects from youraccount.
Prerequisites for DunningBefore installing the Dunning Letters SuiteApp, make sure the following features are also enabled inyour NetSuite account:
Feature Enable Features Subtab
Custom Records SuiteCloud
Advanced PDF/HTML (Beta) Templates SuiteCloud

Enabling Dunning 14
Dunning
Feature Enable Features Subtab
Client SuiteScript SuiteCloud
Server SuiteScript SuiteCloud
SuiteFlow SuiteCloud
Multiple Currencies Company
Multi-Language Company
To enable features, go to Setup > Company > Enable Features.
For more information, see the help topic Enabling Features.
Dunning Setup TasksBefore using the Dunning Letters SuiteApp, set up tasks must be completed.
The following diagram and table show the setup tasks for dunning.
Setup Tasks Users Help Topics
Assign Dunning Roles toEmployees
Administrator Dunning RolesDunning Permissions andAccessEdit Permissions for theDunning Subtab on Customerand Invoice Records

Dunning Setup Tasks 15
Dunning
Setup Tasks Users Help Topics
Customizing Roles to Use theDunning Features
Schedule the DunningEvaluation Workflow
Administrator Scheduling the DunningEvaluation Workflow
Create DunningTemplates
Administrator or Dunning Director(with knowledge of FreeMarker),Implementation Partner, NetSuiteProfessional Services
Configuring MultipleLanguagesSetting Customer RecordPreferencesCreating Dunning TemplateRecordsBest Practices for Creatingand Using DunningTemplatesCreating Dunning LetterEmail TemplatesCreating Dunning Letter PDFTemplates
Configure Subsidiaries forDunning
Dunning Director, Accountant Configuring Subsidiaries forDunning
Create Dunning LevelRules
Dunning Director, Accountant Creating Dunning Level Rules
Create DunningProcedures
Dunning Director, Accountant Creating Dunning Procedures
Set the DunningProcedure Priority
Dunning Director, Accountant Setting the Priority Order ofDunning Procedures
Assign DunningProcedures
Dunning Director, Accountant Assigning DunningProcedures
Bulk Update CustomerRecords
Dunning Director, Accountant Bulk Updating CustomerRecords for Dunning
Define Dunning LetterRecipients on CustomerRecords
Dunning Manager Defining Dunning LetterRecipients
Create Dunning PauseReasons
Dunning Manager Creating Reasons for PausingDunning
Customizing Roles to Use the Dunning FeaturesCustom roles can be given permission to use the dunning features.
Important: If you add dunning permissions to a custom role, you must also select eitherDunning Director or Dunning Manager in the Dunning Role field of the Role page. A customrole without appropriate permissions, and is not assigned either a Dunning Director or DunningManager role, will not be able to access the dunning pages and records.
For steps to customize roles to use the dunning features, read the following topics:
■ Granting Dunning Director Permissions to a Custom Role
■ Granting Dunning Manager Permissions to a Custom Role

Customizing Roles to Use the Dunning Features 16
Dunning
The system checks for discrepancies between the custom role and the Dunning Director or DunningManager role.
In the following example, an error message will appear when the custom role tries to create or modifya dunning procedure, because only a dunning director can create or modify a dunning procedure.
Example
■ The custom role is specified as Dunning Manager on the Role page.
■ The custom role was given full access to the Dunning Procedure permission.
Granting Dunning Director Permissions to a Custom RolePerform the following steps to give a custom role the same access as the Dunning Director role.
To grant dunning director permissions to a custom role:
1. View the permissions and access levels of the Dunning Director role:
a. Go to Setup > Users/Roles > Manage Roles.
b. Click the Dunning Director link (from bundle 62340).
c. Click the Permissions tab, and click the following subtabs to view permissions and accesslevels of the Dunning Director role:
■ Transactions
■ Reports
■ Lists
■ Setup
■ Custom Record
Note: NetSuite discourages the use of the Show Role Differences feature tocompare the dunning role permissions with your custom role permissions becausesome of the permissions do not show.
d. Click the Forms tab, and click the Custom Record subtab to view permissions and accesslevels of the Dunning Director role.
e. Click the Searches tab, and click the Custom Record subtab to view permissions andaccess levels of the Dunning Director role.
See the help topic Reviewing Permissions Assigned to Roles.
2. Edit your custom role by performing the following steps:
a. Go to Setup > Users/Roles > Manage Roles.
b. Click the Edit link next to the name of the custom role.
c. Add the Dunning Director permissions and access levels. Refer to Step 1c, Step 1d, andStep 1e.
For information about adding permissions and setting access levels, see the help topicCustomizing or Creating NetSuite Roles.
d. Make sure the appropriate dunning role is assigned. In the Dunning Role field, selectDunning Director.
e. Click Save.
3. Add your custom role to the script audience of each of the following Suitelets intended fordunning directors:

Customizing Roles to Use the Dunning Features 17
Dunning
■ Dunning Procedure Bulk Assignment
■ Dunning Queue Print
■ Dunning Queue Send
■ Dunning Queue Remove
■ Dunning Queue Form Send
■ Dunning Queue Form Print
■ Bulk Update Customer Records for Dunning
■ Bulk Update Process Service SU
a. Go to Customization > Scripting > Script Deployments.
b. Click the Edit link next to the script deployment.
c. On the Audience tab, select the custom role to which you want to give access. This willallow the script to run using the custom role.
Important: Do not replace the existing audience. Only add your custom role tothe audience. For more information about using the Audience tab, see the helptopic Defining Script Audience.
d. Click Save.
4. Add your custom role to the audience list of the appropriate center:
a. Go to Customization > Centers and Tabs > Center Tabs.
b. Click the Edit link of the center type that you want the role to access.
Note: If the custom role is based on an accounting role, add the custom role tothe Accounting center. If the custom role is not based on an Accountant or A/RClerk role, add the custom role to the Dunning Center, not the Accounting center.
Name Center Type
Dunning Dunning Center
Dunning Accounting Center
c. On the Center Tab page, click the Audience subtab.
d. Select the custom role to give access to.
Important: Do not replace the existing audience. Only add your custom role tothe audience. For more information about using the Audience tab, see the helptopic Defining Script Audience.
e. Click Save.
Granting Dunning Manager Permissions to a Custom RolePerform the following steps to give a custom role the same access as the Dunning Manager role.
To grant dunning manager permissions to a custom role:
1. View the permissions and access levels of the Dunning Manager role:

Customizing Roles to Use the Dunning Features 18
Dunning
a. Go to Setup > Users/Roles > Manage Roles.
b. Click the Dunning Manager link (from bundle 62340).
c. Click the Permissions tab, and click the following subtabs to view permissions and accesslevels of the Dunning Manager role:
■ Transactions
■ Reports
■ Lists
■ Setup
■ Custom Record
d. Click the Forms tab, and click the Custom Record subtab to view permissions and accesslevels of the Dunning Manager role.
e. Click the Searches tab, and click the Custom Record subtab to view permissions andaccess levels of the Dunning Manager role.
See the help topic Reviewing Permissions Assigned to Roles.
2. Edit your custom role by performing the following steps:
a. Go to Setup > Users/Roles > Manage Roles.
b. Click the Edit link next to the name of the custom role.
c. Add the Dunning Manager permissions and access levels. Refer to Step 1c, Step 1d, andStep 1e.
For information about adding permissions and setting access levels, see the help topicCustomizing or Creating NetSuite Roles.
d. Make sure the appropriate dunning role is assigned. In the Dunning Role field, selectDunning Manager.
e. Click Save.
3. Add your custom role to the script audience of each of the following Suitelets intended fordunning managers:
■ Dunning Queue Print
■ Dunning Queue Send
■ Dunning Queue Remove
■ Dunning Queue Form Send
■ Dunning Queue Form Print
a. Go to Customization > Scripting > Script Deployments.
b. Click the Edit link next to the script deployment.
c. On the Audience tab, select the custom role to which you want to give access. This willallow the script to run using the custom role.
Important: Do not replace the existing audience. Only add your custom role tothe audience. For more information about using the Audience tab, see the helptopic Defining Script Audience.
d. Click Save.
4. Add your custom role to the audience list of the appropriate center type from bundle 62340:
a. Go to Customization > Centers and Tabs > Center Tabs.
b. Click the Edit link of the center type that you want the role to access.

Customizing Roles to Use the Dunning Features 19
Dunning
Note: If the custom role is based on an accounting role, add the custom role tothe Accounting center. If the custom role is not based on an Accountant or A/RClerk role, add the custom role to the Dunning Center, not the Accounting center.
Name Center Type
Dunning Dunning Center
Dunning Accounting Center
c. On the Center Tab page, click the Audience subtab.
d. Select the custom role to give access to.
Important: Do not replace the existing audience. Only add your custom role tothe audience. For more information about using the Audience tab, see the helptopic Defining Script Audience.
e. Click Save.
Using the Dunning TabIn accounts where the Dunning Letters SuiteApp is installed, the Dunning tab is available to DunningDirector, Dunning Manager, Accountant, and A/R Clerk roles.
The Dunning tab provides links to the following:
■ Dunning Overview – To display the Dunning dashboard. See Using the Dunning Dashboard.
■ Setup
□ Setup > Bulk Update Customer Records – See Bulk Updating Customer Records for Dunning.
□ Setup > Dunning Configurations – See Configuring Subsidiaries for Dunning.
□ Setup > Dunning Level Rules – See Creating Dunning Level Rules.
□ Setup > Dunning Templates – See Understanding Dunning Letter Templates.
□ Setup > Dunning Procedures – See Creating Dunning Procedures.
□ Setup > Dunning Bulk Assignment – See Bulk Assigning Dunning Procedures.
□ Setup > Dunning Procedure Priority – See Setting the Priority Order of Dunning Procedures.
□ Setup > Dunning Pause Reasons – Creating Reasons for Pausing Dunning.
■ Letters
□ Email – See Sending Dunning Letters Manually.
□ PDF – See Printing Dunning Letters.
■ Customer – To see the Customers list, to create a customer record, and to search for customers
■ Invoice – To see the Invoices list, to create an invoice record, and to search for invoices
■ Document
□ Email Template – See Creating Dunning Letter Email Templates.
For information about permissions to access to the dunning pages, see Dunning Permissions andAccess

Scheduling the Dunning Evaluation Workflow 20
Dunning
Scheduling the Dunning Evaluation WorkflowAfter installing the Dunning Letters SuiteApp, an administrator must set up the dunning evaluationworkflows to run on a schedule. The workflows automate the sending of dunning letters. Duringautomated dunning, the system searches for customers and invoices with overdue amounts.Depending on the dunning procedures and dunning levels that you have set up, the system determineswhich customers and invoices will be dunned, and automatically sends the dunning letters by email.Letters that are intended to be emailed manually or printed are shown on the Dunning Email SendingQueue and the Dunning PDF Printing Queue.
The Dunning Letters SuiteApp provides the following default dunning evaluation workflows that anadministrator can copy and modify to specify the execution schedule and set the Release Status fieldto Released:
■ Customer Dunning WF Scheduler
■ Invoice Dunning WF Scheduler
Note: Customer dunning means that the dunning procedure is assigned to the customer,and the Allow Override box is clear on the dunning procedure record. Invoice dunning meansthat the Allow Override box is checked on the dunning procedure assigned to the customer,and a dunning procedure is assigned to the invoice. Customer dunning is used to evaluate allinvoices of the customer. Invoice dunning is for evaluating a specific invoice. See UnderstandingCustomer Level Dunning and Invoice Level Dunning.
Important: Whenever a user defines a new schedule or edits an existing schedule, the datesand times used in the schedule are saved in the time zone of the current user. Even if the userlater changes the time zone preference, without changing the schedule, the schedule keeps theoriginal date and time, and the original time zone.
Note: NetSuite recommends that you schedule the workflows to run outside your normalbusiness hours. This is to ensure that users in your company are not updating customer andinvoice records during the dunning evaluation. To avoid sending debt chasing email messages tocustomers on weekends, schedule the workflow to run only on weekdays.
To schedule the dunning evaluation workflow:
1. Go to Customization > Scripting > Workflows (Administrator).
2. To schedule the dunning evaluation workflow for customers, click the View link of the CustomerDunning WF Scheduler workflow.
To schedule the dunning evaluation workflow for invoices, click the View link of the InvoiceDunning WF Scheduler workflow.
3. Place your cursor over Actions, and select Make Copy.
4. Click Edit.
5. Enter a new name for the workflow.
6. Under Initiation, choose Scheduled.
7. In the Saved Search field, select the saved search on which to run the workflow.
The saved search provided by the Dunning Letters SuiteApp is selected by default. Thispredefined saved search contains a list of customers of invoices that have been assigned a

Scheduling the Dunning Evaluation Workflow 21
Dunning
dunning procedure. You can use your own saved search, but you must make sure that yoursaved search does not have any customer or invoice that does not have a dunning procedure.
8. Make sure that the Repeat box is checked, otherwise the workflow will run for only one time.
9. In the Frequency field, select the frequency with which you want the workflow to run. Afterselecting a frequency, you must define a start date, end date, execution time, and additionalschedule details.
For more information about workflow scheduling options, see the help topic Initiating aWorkflow on a Schedule.
10. After defining the schedule, if you are ready to run the workflow, set the Release Status field toReleased.
11. Click Save.
Configuring Subsidiaries for DunningAfter you install the Dunning Letters SuiteApp in your account, NetSuite creates a dunningconfiguration record for each active subsidiary. When you make an inactive subsidiary active, a dunningconfiguration record is automatically created for it. Each new subsidiary that you create will alsoautomatically have a corresponding dunning configuration record created by the system.
The dunning configuration record is created with the following default settings:
■ Automatically Assign to New Customers box is checked – This means that each new customerrecord created for the subsidiary is automatically assigned a dunning procedure.
■ Automatically Assign to New Invoices box is checked – This means that each new invoice createdfor the subsidiary is automatically assigned a dunning procedure.
Modifying a dunning configuration record is optional. Modify a subsidiary’s dunning configurationrecord if you do not want to automatically assign a dunning procedure when new customers orinvoices are created for that subsidiary.
To view or edit a subsidiary’s dunning configuration record, go to Dunning > Setup > DunningConfiguration.
To disable automatic assignment of dunning procedures to customers or invoices of a subsidiary, clearthe appropriate box on the dunning configuration record.
If you delete a subsidiary, its dunning configuration record is also deleted.
For more information about automatic assignment of dunning procedures, read the following topics:
■ Assigning a Dunning Procedure Automatically Upon Customer Record Creation
■ Assigning a Dunning Procedure Automatically Upon Invoice Record Creation
Setting Up Dunning ProceduresAs part of automating the dunning process, you must first create dunning procedures and then assignthem to customers and invoices. In a dunning procedure, you define the escalation points or dunninglevels, the letter templates to use for each dunning level, and the minimum number of days interval forsending letters. Dunning levels define the thresholds for overdue amounts and days overdue.
Setting up dunning procedures involves the following steps:

Setting Up Dunning Procedures 22
Dunning
1. Create dunning templates. A template is assigned to each dunning level in a dunningprocedure. You must create dunning templates and dunning template records before you candefine dunning levels in a dunning procedure. See the following topics:
■ Creating Dunning Letter Email Templates
■ Creating Dunning Letter PDF Templates
■ Creating Dunning Template Records
Note: Creating templates requires knowledge of XML and FreeMarker.
2. Create dunning level rules. A dunning level rule defines the thresholds of a dunning level. Youmust create dunning level rules before you can add dunning levels to a dunning procedure. SeeCreating Dunning Level Rules.
3. Create dunning procedures. A dunning procedure defines the dunning levels or escalationpoints that determine how and when a customer or invoice will be dunned. See CreatingDunning Procedures.
a. (Optional) Define selection criteria. You can define selection criteria to filter the invoicesand customers to which the dunning procedure can be applied. See Defining DunningSelection Criteria.
b. Define dunning levels. Each dunning procedure must have at least one dunning level.For each dunning level, you must assign a dunning letter template record. See AddingDunning Levels to a Dunning Procedure.
4. (Optional) Set the dunning procedure priority. After creating dunning procedures, you mustorder them according to priority if you are using automatic assignment or semiautomaticassignment of dunning procedures. In cases where more than one dunning procedure canbe assigned to a customer or invoice automatically or semiautomatically, the system will usethe dunning procedure with the highest priority. See Setting the Priority Order of DunningProcedures.
When the dunning procedures have been set up, assign them to customers or invoices. See AssigningDunning Procedures.
Understanding Dunning Letter TemplatesThe dunning letter template record is where you select the template files to use for your dunning emailletters and dunning PDF letters.
On a dunning procedure record, each dunning level that you add must be associated with a dunningletter template record.
The dunning letter template record consists of a single template file or several template files in variouslanguages.
The type of template you create depends on your customers’ preferences for receiving dunning letters.Create email templates for letters to be sent by email, and PDF templates for letters to be printed.
For more information, see the following topics:
■ Customizing Dunning Letter Templates
□ Customizing the Sample Dunning Template Files
□ Customizing the List of Invoices in the Dunning Template File
■ Creating Dunning Letter Email Templates

Understanding Dunning Letter Templates 23
Dunning
■ Creating Dunning Letter PDF Templates
■ Creating Dunning Template Records
□ Best Practices for Creating and Using Dunning Templates
□ Supported Languages for Dunning
□ Selecting a Default Language on a Dunning Template Record
□ Creating a Multi-Language Dunning Template Record
□ Creating a Single Language Dunning Template Record
□ Creating a Dunning Template Record
Best Practices for Creating and Using Dunning TemplatesThe Dunning Letters SuiteApp provides three samples of dunning letter PDF templates in increasinglevels of urgency. Use the content of the sample templates as a basis for creating new templatesby copying the content from the sample files to your custom templates. For more information, seeCustomizing Dunning Letter Templates.
When you create dunning letter templates, you have the following options for how you want to showthe list of invoices in customer level dunning:
■ Mark the invoices that have dunning procedures assigned so that your customers can identify thoseinvoices for which they may receive separate dunning letters
■ Hide the invoices that have dunning procedures assigned
For more information, see Customizing the List of Invoices in the Dunning Template File.
To help you decide how you want to set up your dunning template records, be sure to read thefollowing topics:
■ Supported Languages for Dunning
■ Selecting a Default Language on a Dunning Template Record
The Dunning Letters SuiteApp requires the Multi-Language feature. Before creating dunning templaterecords, you must first add the languages to your company general preferences and select a languageon customer records. See the following topics:
■ Configuring Multiple Languages
■ Setting Customer Record Preferences
Before you can create a dunning template record, you must first create the template files. Creatingtemplate files requires knowledge of XML and FreeMarker.
■ Create FreeMarker templates for dunning PDF letters and upload them to the file cabinet. SeeCreating Dunning Letter PDF Templates.
■ Create NetSuite email templates for dunning letters that will be sent by email. Email templates arecreated at Documents > Templates > Email Templates > New. See Creating Dunning Letter EmailTemplates.
To create dunning template records, follow the detailed steps in Creating a Dunning Template Record.
You can choose to create a dunning template record containing multiple languages or a singlelanguage. See the following topics:

Understanding Dunning Letter Templates 24
Dunning
■ Creating a Multi-Language Dunning Template Record
■ Creating a Single Language Dunning Template Record
When you create a dunning template record:
■ You can choose to attach invoices and statements to the dunning letter.
■ You add templates to the Email subtab if you want to send letters by email. You must add atemplate for each language and select a default language.
■ You add templates to the PDF subtab to add template files for printed dunning letters. You mustadd a template for each language and select a default language.
NetSuite recommends that you do not inactivate any dunning template record. Inactivating dunningtemplates that are currently being used will cause errors in the dunning evaluation. If you have adunning template record that you do not want to use, NetSuite recommends that you delete it. SeeDeleting a Dunning Template Record.
Customizing Dunning Letter TemplatesRead the following topics for guidance on customizing dunning letter templates:
■ Customizing the Sample Dunning Template Files
■ Customizing the List of Invoices in the Dunning Template File
■ Including Fields from the Transaction Saved Search in Dunning Templates
■ Including Information from NetSuite Records in Dunning Templates
Customizing the Sample Dunning Template Files
The Dunning Letters SuiteApp provides three samples of dunning letter PDF templates in increasinglevels of urgency. Use the content of the sample templates as a basis for creating new templatesby copying the content from the sample files to your custom templates. Consolidated sampletemplates are located in the following file cabinet folder: SuiteBundles > Bundle 62340 > Templates >Consolidated.
Template Name Subject
Level 1 Default Template – English First Notice - Overdue Payments
Level 2 Default Template – English Second Notice - Overdue Payments
Level 3 Default Template – English Third Notice - Overdue Payments
Important: The templates included in the SuiteApp are samples intended to help you createcustom templates. Copy the content of the sample template into a new file that you cancustomize. Creating templates requires knowledge of XML and FreeMarker.
In the sample templates provided by the Dunning Letters SuiteApp, be aware of the following:
■ In customer level dunning, the sample letter template shows the following:
□ The customer’s total overdue amount

Understanding Dunning Letter Templates 25
Dunning
Note: The overdue balance is sourced from the Overdue Balance field of the customerrecord, and is shown in the customer’s primary currency.
□ A list of the customer’s posting invoices that are overdue, and that do not have due dates,regardless of whether the invoices have dunning procedures assigned.
Note: You can customize your template to modify what shows in the list. SeeCustomizing the List of Invoices in the Dunning Template File.
■ In invoice level dunning, the sample letter template shows the following:
□ The customer’s total overdue amount
Note: The overdue balance is sourced from the Overdue Balance field, and is shown inthe customer’s primary currency.
□ Only one invoice in the list
Note: Customer dunning is used to evaluate all invoices of the customer. Invoice dunning isused for evaluating a specific invoice. See Understanding Customer Level Dunning and InvoiceLevel Dunning.
Before creating custom templates, be sure to read Best Practices for Creating and Using DunningTemplates.
Use NetSuite email templates for dunning letters that will be sent by email. See Creating DunningLetter Email Templates.
Use FreeMarker templates for dunning PDF letters. See Creating Dunning Letter PDF Templates.
To show NetSuite fields on a dunning letter template, a predefined transaction search is alreadyprovided. See Including Fields from the Transaction Saved Search in Dunning Templates.
To create dunning letter templates, read the following topics:
Customizing the List of Invoices in the Dunning Template File
In the sample templates provided by the Dunning Letters SuiteApp, if you use customer level dunning,the dunning letter shows a list of all the overdue invoices of the customer, including those invoices thathave dunning procedures assigned.
Invoices that have dunning procedures assigned are marked with an asterisk.
You can customize your template to modify what shows in the list:
■ Marking Invoices That Have Dunning Procedures Assigned
Marking invoices enables your customers to identify the invoices for which separate dunning letterscan be sent.
The sample template shows all invoices to be dunned, and uses an asterisk to mark the invoicesthat have dunning procedures assigned.
The following sample code snippet checks for invoices that have dunning procedures assigned, andmarks them with an asterisk:
<#if invoice.custbody_3805_dunning_procedure != "">*</#if>

Understanding Dunning Letter Templates 26
Dunning
You can add some text to explain what the asterisk means. For example, you can add text sayingthat the customer receive separate dunning letters for those marked invoices.
You can use a different way of marking the invoices, if you do not want to use an asterisk.
■ Showing all Invoices
The following sample code snippet includes all invoices to be dunned:
<#list invoicelist as invoice>
<tr> <td>${invoice.tranid}</td>
<td>${invoice.memo}</td>
<td>${invoice.trandate}</td>
<td>${invoice.duedate}</td>
<td>${invoice.currency}</td> <td>${invoice.fxamountremaining?string.number}</td>
</tr>
</#list>
■ Hiding Invoices With Dunning Procedures
You can hide the invoices that have dunning procedures if you do not want them included in the list.
The following sample code snippet includes only those invoices that do not have a dunningprocedure assigned:
<#list invoicelist as invoice> <#if invoice.custbody_3805_dunning_procedure == "">
<tr> <td>${invoice.tranid}</td>
<td>${invoice.memo}</td>
<td>${invoice.trandate}</td> <td>${invoice.duedate}</td>
<td>${invoice.currency}</td> <td>${invoice.fxamountremaining?string.number}</td>
</tr>
</#if></#list>
Creating Dunning Letter Email Templates
Note: Creating templates requires knowledge of XML and FreeMarker.
If you are logged in with the Administrator role, you can create email template records at Documents >Templates > Email Templates > New.
Non-administrators can create dunning email template records by going to Dunning > Document >Email Template.
You can create dunning letter email templates in the following ways:
■ Enter content directly on the Template subtab of email template record.
■ Use a word processing application or a text editor to create your template file, and upload it to theemail template record.

Understanding Dunning Letter Templates 27
Dunning
■ Use FreeMarker code to create scriptable templates.
■ Copy the content of the sample templates provided by the Dunning Letters SuiteApp and paste it toa new email template.
Note: Consolidated files of the three sample dunning XML templates are available in thefollowing file cabinet folder: SuiteBundles > Bundle 62340 > Templates > Consolidated.
To create a new dunning email template by copying the content from theconsolidated XML template file:
1. Download the consolidated XML file from the file cabinet, and use a text editor to open the fileand copy the content.
2. Go to Documents > Templates > Email Templates > New.
3. In the Name field, enter a name for the template.
4. In the Description field, enter text that describes the template.
5. In the Record Type field, select Custom Record
6. On the Template subtab, in the Create Template from field, choose Text Editor.
7. Click the Source icon .
8. In the text area, paste the content from the downloaded file.
9. Edit the content as needed. You can return to the standard editing mode any time by clicking theSource icon again.
10. Click Save. This email template is now available for selection when you create or edit a dunningtemplate record.
For more information about creating email templates, read the following topics:
■ Creating New Email Templates
■ Scriptable Templates
After creating email template records you can add them to a dunning template record. See CreatingDunning Template Records.
Creating Dunning Letter PDF Templates
Note: Creating templates requires knowledge of XML and FreeMarker.
FreeMarker templates are used for dunning PDF letters. These templates must be uploaded to the filecabinet.
Sample templates are located in the following file cabinet folder: SuiteBundles > Bundle 62340 >Templates > PDF Templates. You can copy the content from the sample files to create your customtemplates.
FreeMarker templates for dunning PDF letters consist of three separate XML files:
■ Header template – Optional. You can use the same header template file for multiple dunningtemplate records. See Creating the Dunning PDF Header Template.
■ Footer template – Optional. You can use the same header template file for multiple dunningtemplate records. See Creating the Dunning PDF Footer Template.

Understanding Dunning Letter Templates 28
Dunning
■ Body template – See Creating the Dunning PDF Body Template
When creating dunning template files, remember the following guidelines:
■ The content of the templates must be well-formed XML or XHTML elements. Each element musthave a closing tag, for example <elem> </elem>.
■ Each template must have a parent element of <div>.
■ Each sourced data must be enclosed in a <span> element.
For recommendations on naming dunning PDF template files, see File Naming Guidelines for DunningPDF Templates.
File Naming Guidelines for Dunning PDF Templates
NetSuite recommends the following file naming and organization guidelines for the FreeMarkertemplate files used for the dunning letter PDF.
Dunning PDF Template File Naming Guidelines
■ Use a descriptive name
■ Include the dunning level
■ Include the two-letter language code
■ Include the two-letter country code
■ Add the file name extension .xml
Examples
■ dunningbody_level1_en_US_pdf.xml
■ dunningheader_level1_en_US_pdf.xml
■ dunningfooter_level1_en_US_pdf.xml
Dunning PDF Template File Organization
Place your template files in the appropriate file cabinet folders provided by the Dunning LettersSuiteApp:
■ SuiteBundles > Bundle 62340 > Templates > PDF Templates > header
■ SuiteBundles > Bundle 62340 > Templates > PDF Templates > footer
■ SuiteBundles > Bundle 62340 > Templates > PDF Templates > body
Creating the Dunning PDF Header Template
Note: Creating templates requires knowledge of XML and FreeMarker.
FreeMarker templates are used for dunning PDF letters.
Header templates must be enclosed in <div></div> tags.

Understanding Dunning Letter Templates 29
Dunning
Example
<div>
<!-- put header information here -->
</div>
Information from the company information record and subsidiary record can be displayed in theheader, but you must use a specific format, as described in the following table.
Record Description Usage
Subsidiary Contains information fromthe subsidiary record.
Prefix with customer.subsidiaryif obtaining information from thesubsidiary record.
companyInformation Contains information fromthe company informationrecord.
Prefix with companyInformationif obtaining information from thecompany information record.
All fields included in the NetSuite records browser can be displayed in the header. See the help topicUsing the SuiteScript Records Browser.
In addition to the fields on supported records, you can also use additional fields that are not exposedto SuiteScript. See the help topic Synthetic Fields for Scriptable Templates.
Custom fields can also be displayed.
The following examples show the correct format for fields in the dunning header template:
■ logoURL
■ companyname or name
■ addresstext
Note: These fields can be added to both PDF and email template types.
logoURL
<span><img src="${companyInformation.logoUrl}"/></span>
Displays the company logo.
If the logo is too big, it overlap elements on the template body. Be aware of the logo sizerecommended by NetSuite. For more information, see the help topic Uploading Your Logo.
Note: Subsidiary logo cannot be displayed because of a current limitation of FreeMarker.
companyname or name
<span>${companyInformation.companyname}</span>
<span>${customer.subsidiary.name}</span>
Displays the company name.

Understanding Dunning Letter Templates 30
Dunning
Data is sourced from the subsidiary name in a OneWorld account or the company name in theCompany Information page in a non-OneWorld account.
addresstext
<span>${companyInformation.addresstext}</span>
Displays the company billing address.
Note: Subsidiary billing address cannot be displayed because of a current limitation ofFreeMarker.
Creating the Dunning PDF Footer Template
Note: Creating templates requires knowledge of XML and FreeMarker.
FreeMarker templates are used for dunning PDF letters.
Footer templates must be enclosed in <div></div> tags.
Example
<div>
<!-- insert footer information here --></div>
You can use header elements for the footer. Information from the company information record andsubsidiary record can be displayed in the footer. See Creating the Dunning PDF Header Template.
You can also add some fields from the Big Faceless Organization (BFO). The following examples showthe correct format for these fields in the dunning footer template:
■ pagenumber
■ totalpages
Note: These fields use BFO tags and can be added to a PDF template type only. The data isrendered by BFO. For more information, download the BFO user guide.
pagenumber
<span><pagenumber/></span>
Displays the current page number.
totalpages
<span><totalpages/></span>
Displays the total number of pages.

Understanding Dunning Letter Templates 31
Dunning
Creating the Dunning PDF Body Template
Note: Creating templates requires knowledge of XML and FreeMarker.
FreeMarker templates are used for dunning PDF letters.
Body templates must be enclosed in <div></div> tags.
Example
<div><!-- insert body information here -->
</div>
You can use header elements for the body. Information from the company information record andsubsidiary record can be displayed in the body. See Creating the Dunning PDF Header Template.
For information on fields that you can include in the dunning body template, read the following topics:
■ Including Fields from the Transaction Saved Search in Dunning Templates
■ Including Information from NetSuite Records in Dunning Templates
Identifying Invoice Fields for Inclusion in DunningTemplatesWhen creating dunning email and PDF templates in FreeMarker, you can include data sourced frominvoice fields. Several invoice fields are already available for inclusion in dunning templates, these arelisted in the topic, Including Fields from the Transaction Saved Search in Dunning Templates.
If you want more invoice fields to be available for inclusion in dunning templates, you must firstidentify those invoice fields by entering their field IDs in the Email Template Invoice Fields page. Afterentering the field IDs, the corresponding invoice fields can be included in a template by indicating themin FreeMarker tags. For more information, see Including Fields from the Transaction Saved Search inDunning Templates.
To identify invoice fields for inclusion in dunning templates:
1. If you are an administrator, go to Setup > Dunning > Email Template Invoice Fields.
If you are using other roles, go to Dunning > Setup > Email Template Invoice Fields.
2. On the Email Template Invoice Fields page, in the Invoice Field ID, enter the ID of the invoicefield whose data you want to include in email and PDF templates.
Make sure that the field ID you enter is valid and not listed in the Current Invoice Fields in theEmail Template. Otherwise, an error is displayed, which means the field ID you entered is alreadyavailable for inclusion in dunning templates, or no such field ID exists.
Field IDs can be viewed by clicking the label of a field on a record. The displayed field-level helpindicates the field ID at the bottom of the popup window. For more information on field IDs, seethe help topic Enabling the Show Internal IDs Preference.
3. After entering the field ID, click Add Invoice Field. Continue adding invoice field IDs as necessary.
The invoice fields of the IDs you entered can be included in any dunning email or PDF templateyou will create or edit using FreeMarker.

Understanding Dunning Letter Templates 32
Dunning
Including Fields from the Transaction Saved Search inDunning Templates
Note: Creating templates requires knowledge of XML and FreeMarker.
The Dunning Letters SuiteApp includes a predefined transaction saved search, namedcustomsearch_base_dunning_invoice. You can add fields from this saved search to both PDF and emailtemplate types.
You can use any of the fields from the customer record, contact record, and invoice record. Forinvoice dunning, only one invoice is being dunned, so the values are retrieved from the invoice record.However, for customer dunning, the following fields are added from a search result because multipletransactions are being dunned:
Invoice Tags for Customer Dunning
Tag Name
${invoice.internalid} Internal ID
${invoice.memo} Memo
${invoice.trandate} Date
${invoice.duedate} Due Date/Receive By
${invoice.type} Type
${invoice.statusref} Status
${invoice.subsidiary} Subsidiary
${invoice.daysoverdue} Days Overdue
${invoice.amount} Amount
${invoice.amountremaining} Amount Remaining
${invoice.tranid} Document Number
${invoice.refnumber} Reference Number
${invoice.billaddress1} Billing Address 1
${invoice.billaddress2} Billing Address 2
${invoice.billcountry} Billing Country
${invoice.customer.internalid} Customer : Internal ID
${invoice.currency} Currency
${invoice.fxamountremaining} Amount Remaining (Foreign Currency)
${invoice.otherrefnum} Purchase Order Number
${invoice.createdfrom} Sales Order Number
The following examples show the correct format for the fields in the dunning template:
■ amountremaining
■ duedate
■ tranid

Understanding Dunning Letter Templates 33
Dunning
Note: You must define the invoice prefix when declaring the list using FreeMarker syntax.
amountremaining
<span>${invoice.amountremaining}</span>
Displays the remaining unpaid invoice amount in the subsidiary currency. In the sample templateincluded in the Dunning Letters SuiteApp, this field is hidden.
duedate
<span>${invoice.duedate}</span>
<#list invoicelist as invoice>
Displays the lapsed due date of the unpaid invoice amount.
tranid
<span>${invoice.tranid}</span>
Displays the transaction reference number.
fxamountremaining
<span>${invoice.fxamountremaining}</span>
Displays the transaction amount remaining.
currency
<span>${invoice.currency}</span>
Displays the transaction currency.
Including Information from NetSuite Records in DunningTemplates
Note: Creating templates requires knowledge of XML and FreeMarker.
When creating a dunning template, you can include the following information from NetSuite records:
Record Description Usage
contact Contains information fromthe contact record.
Prefix with contact if obtaininginformation from the contact record.

Understanding Dunning Letter Templates 34
Dunning
Record Description Usage
employee Contains information fromthe employee record.
Prefix with employee if obtaininginformation from the employee record.
customer Contains information fromthe customer record.
Prefix with customer if obtaininginformation from the customer record.
companyInformation Contains information fromthe company informationrecord.
Prefix with companyInformation ifobtaining information from the companyinformation record.
invoice Contains information fromthe invoice record.
Prefix with invoice if obtaininginformation from the invoice record.This is applicable to dunning proceduresassigned to invoices.
invoicelist Contains information fromthe invoice search result.
This is a special sublist search that canbe embedded in the dunning template.This is applicable to dunning proceduresassigned to customers.
If you add fields from other record types, no data will be retrieved for those fields.
The following examples show the correct format for the fields in the dunning template:
■ Contact
□ firstname
□ lastname
□ middlename
■ Employee (Dunning Manager or Dunning Director)
□ firstname
□ lastname
□ middlename
■ Customer
□ companyname
□ lastname
□ middlename
□ firstname
□ overduebalance
■ Invoice
□ amountremaining
□ currency
■ Invoice List
Contact■ firstname
■ lastname
■ middlename

Understanding Dunning Letter Templates 35
Dunning
Note: These fields can be added to both PDF and email template types. The data is sourcedfrom the contact record.
firstname
<span>${contact.firstname}</span>
Displays the contact’s first name.
lastname
<span>${contact.lastname}</span>
Displays the contact’s last name.
middlename
<span>${contact.middlename}</span>
Displays the contact’s middle name.
Employee■ firstname
■ lastname
■ middlename
Note: These fields can be added to both PDF and email template types. The data is sourcedfrom the employee record.
firstname
<span>${employee.firstname}</span>
Displays the first name of the dunning manager or dunning director.
lastname
<span>${employee.lastname}</span>
Displays the last name of the dunning manager or dunning director.
middlename
<span>${employee.middlename}</span>

Understanding Dunning Letter Templates 36
Dunning
Displays the middle name of the dunning manager or dunning director.
Customer■ companyname
■ lastname
■ middlename
■ firstname
■ overduebalance
Note: These fields can be added to both PDF and email template types. The data is sourcedfrom the customer record.
companyname
<span>${customer.companyname}</span>
Displays the customer name. Applicable only if the customer is a company.
lastname
<span>${customer.lastname}</span>
Displays the customer’s last name. Applicable only if the customer is an individual.
middlename
<span>${customer.middlename}</span>
Displays the customer’s middle name. Applicable only if the customer is an individual.
firstname
<span>${customer.firstname}</span>
Displays the customer’s first name. Applicable only if the customer is an individual.
overduebalance
<span>${customer.overduebalance}</span>
Displays the customer’s overdue balance.
Invoice■ amountremaining

Understanding Dunning Letter Templates 37
Dunning
■ currency
Note: These fields can be added to both PDF and email template types. The data is sourcedfrom the invoice record.
amountremaining
<span>${invoice.amountremaining}</span>
Displays the remaining unpaid invoice amount. Applicable only to dunning procedures assigned toinvoices.
currency
<span>${invoice.currency}</span>
Displays the currency of the invoice. Applicable only to dunning procedures assigned to invoices.
Invoice ListIn addition to NetSuite records, you can also add information from invoice search results. To use theinvoice sublist, you must enclose it within <span></span> tags.
Example
<span>
<#if invoicelist?has_content><#list invoicelist as invoice>
<!-- insert invoice search information here --></#list>
</#if>
</span>
Search columns that you have added to the predefined transaction saved search(customsearch_dunning_invoice) can be added to the invoice sublist. See Including Fields from theTransaction Saved Search in Dunning Templates.
Creating Dunning Template RecordsOn a dunning procedure, each dunning level that you add must be associated with a dunning lettertemplate record. The dunning letter template record is where you select the template files to use foryour dunning email letters and dunning PDF letters. This is how the system knows which template touse to send a dunning letter to a customer.
To create dunning template records, read the following topics:
■ Understanding Dunning Letter Templates
■ Best Practices for Creating and Using Dunning Templates
■ Supported Languages for Dunning
■ Selecting a Default Language on a Dunning Template Record

Understanding Dunning Letter Templates 38
Dunning
■ Creating a Multi-Language Dunning Template Record
■ Creating a Single Language Dunning Template Record
■ Creating a Dunning Template Record
■ Creating Dunning Letter Email Templates
■ Creating Dunning Letter PDF Templates
■ Including Fields from the Transaction Saved Search in Dunning Templates
■ Including Information from NetSuite Records in Dunning Templates
Supported Languages for DunningThe Dunning Letters SuiteApp currently supports the following languages:
■ Arabic
■ Bulgarian
■ Bengali
■ Chinese (Simplified)
■ Chinese (Traditional)
■ Croatian
■ Czech
■ Danish
■ Dutch
■ English (International)
■ English (U.S.)
■ Estonian
■ French
■ French (Canada)
■ Finnish
■ German
■ Greek
■ Hebrew
■ Hungarian
■ Icelandic
■ Indonesian
■ Italian
■ Korean
■ Latvian
■ Lithuanian
■ Norwegian
■ Polish
■ Portuguese (Brazilian)
■ Portuguese (Portugal)

Understanding Dunning Letter Templates 39
Dunning
■ Romanian
■ Russian
■ Slovak
■ Slovenian
■ Spanish
■ Swedish
■ Thai
■ Turkish
■ Vietnamese
Read Selecting a Default Language on a Dunning Template Record to understand the system behavior.
Selecting a Default Language on a Dunning Template RecordThe dunning template record requires a default language for the PDF template and a default languagefor the email template so that the system can send a dunning letter even if there is no languagetemplate that matches the customer’s language.
Note: The customer’s language is defined in the Language field of the customer record.
On the dunning template record, in the Language column, the first language that you add isautomatically assigned as the default language. If you add more languages, you can change the defaultlanguage for the dunning template record by clicking the appropriate box in the Default column.
Be aware of the following system behavior when using dunning template records:
■ If the customer’s language is supported by the Dunning Letters SuiteApp, the system uses thelanguage template that matches the customer’s language.
■ If the customer’s language is supported by the Dunning Letters SuiteApp but there is no templatefor it, the default language template will be used.
■ If the customer’s language is not supported by the Dunning Letters SuiteApp and there is notemplate for it, the default language template will be used.
■ If the customer’s language is not supported by the Dunning Letters SuiteApp and there is a templatefor it, the default language template will be used.
■ If the Language field of the customer record is blank, the default language template will be used.
Example 1 – Multi-Language Dunning Template Record
Language Template Default
German – supported language
Greek – unsupported language Yes
Dutch – unsupported language
■ If the customer’s language is German, the system uses the German template.
■ If the customer’s language is Greek, the system uses the default template (Greek).
■ If the customer’s language is Dutch, the system uses the default template (Greek).

Understanding Dunning Letter Templates 40
Dunning
■ If the customer’s language is a supported language, for example English (U.S.), but there is notemplate for it, the system uses the default template (Greek).
■ If the Language field of the customer is blank, the system uses the default template (Greek).
Example 2 – Single Language Dunning Template Record(Supported Language)
Language Template Default
French – supported language Yes
■ If the customer’s language is French, the system uses the French template.
To ensure you do not send a French letter to non-French customers, this French dunning templaterecord must not be assigned to the dunning procedure of non-French customers.
Creating a Multi-Language Dunning Template RecordTo create a multi-language dunning template record, refer to the following guide:
1. Add languages to your company general preferences page. See the help topic ConfiguringMultiple Languages.
2. In the Language field of customer records, select the customer’s preferred language. See thehelp topic Setting Customer Record Preferences.
3. Create a dunning template record and add a template for each language. See Creating aDunning Template Record.
4. Create a dunning procedure and assign the dunning template record you created in Step 3. SeeCreating Dunning Procedures.
5. Assign the dunning procedure you created in Step 4 to the customer who should receivedunning letters based on this template. See Assigning a Dunning Procedure to a Customer.
Be sure to read the following topics:
■ Supported Languages for Dunning
■ Selecting a Default Language on a Dunning Template Record
Creating a Single Language Dunning Template RecordTo create a single language dunning template record, refer to the following guide:
1. Add languages to your company general preferences page. See the help topic ConfiguringMultiple Languages.
2. In the Language field of customer records, select the customer’s preferred language. See thehelp topic Setting Customer Record Preferences.
3. Create a dunning template record that contains only one language. See Creating a DunningTemplate Record.
4. Create a dunning procedure and assign the dunning template record you created in Step 3. SeeCreating Dunning Procedures.
5. Assign the dunning procedure you created in Step 4 to the customer who should receivedunning letters based on this template. See Assigning a Dunning Procedure to a Customer.

Understanding Dunning Letter Templates 41
Dunning
Be sure to read the following topics:
■ Supported Languages for Dunning
■ Selecting a Default Language on a Dunning Template Record
Creating a Dunning Template Record
Important: Dunning template records must be created from the user interface only. This isbecause there are validations that are not supported in CSV import. Using CSV import to createdunning template records can result in errors such as missing default templates, multipledefault templates, and multiple items with the same language.
Before creating a dunning template record, be sure to read the following topics:
■ Understanding Dunning Letter Templates
■ Best Practices for Creating and Using Dunning Templates
■ Supported Languages for Dunning
■ Selecting a Default Language on a Dunning Template Record
■ Creating a Multi-Language Dunning Template Record
■ Creating a Single Language Dunning Template Record
Perform the following steps to create a dunning template record.
To create a dunning template record:
1. Go to Dunning > Setup > Dunning Templates > New.
2. Enter a name for the dunning template record.
3. (Optional) Enter a description for the dunning template record.
4. If you want to attach open invoices to dunning letters that use this template, check the AttachCopies of Invoices box. Attached copies of invoices are generated using the layout specified onthe transaction form. For information about using custom layouts, see the help topic CustomForms.
When the Attach Copies of Invoices box is checked, the following option becomes available:
■ Only Overdue Invoices – For customer dunning, check this box if you want to attach to thedunning letter only posting invoices with due date and days overdue greater than 0. If you donot check this box, all open and posting invoices will be attached to the dunning letter. Forinvoice dunning, only the invoice being dunned will be attached.
For more information, see Attaching Statements and Invoices to Dunning Letters.
5. If you want to attach a customer statement to dunning letters that use this template, check theAttach Statement box.
When the Attach Statement box is checked, the following options become available:
■ Only Open Transactions on the Statement – Check this box to show only open transactionson the statement.
■ Custom Statement Form – Select the statement form that you want to use for generatingthe statement. If you leave this field blank, the statement will be generated using the systempreferred statement form and the layout specified on the custom form. For informationabout using custom forms, see the help topic Custom Forms.
■ Statement Start Date – Enter the number of days relative to the day of dunning evaluation,when the coverage of the statement will start. For example, if you enter 3, starting from three

Understanding Dunning Letter Templates 42
Dunning
days after the dunning evaluation day and until the Statement Date, all customer transactionswithin this period will be included in the statement. Entering negative numbers is also valid.For example, if you enter -30, starting from 30 days before the dunning evaluation day untilthe Statement Date, all customer transactions within this period will be included in thestatement. If you leave this field blank, all transactions in the customer's history will appearon the statement.
■ Statement Date – Enter the number of days relative to the day of dunning evaluation,marking the last day when customer transactions will be included in the statement. The dateon that day will be the Statement Date indicated on the statement to be attached to thedunning letter. For example, if you enter 3, all customer transactions from the StatementStart Date until 3 days after the dunning evaluation day, will be included in the statement. Ifyou enter -3, all customer transactions from the Statement Start Date until 3 days before thedunning evaluation day, will be included in the statement. The default value is 0, which is theday of dunning evaluation. If you leave the value as zero, all customer transactions from theStatement Start Date up to the dunning evaluation day will be included in the statement.
Note: When the Dunning Letters SuiteApp is updated, the existing settings orparameters of the Dunning templates are retained. If you have not changed Dunningtemplate settings since installation of the bundle, the default parameters in thetemplates are kept.
Note: In invoice dunning, customer statements cannot be attached to the dunningletter. For more information, see Attaching Statements and Invoices to Dunning Letters.
6. Click the Email subtab to add template files for sending dunning letters by email.
The Dunning Email Template subtab is for the NetSuite email templates. The Dunning XMLEmail Template subtab is for XML-based dunning email templates.
a. In the Language column, select the language of the template file you want to add. Thefirst language that you add is automatically assigned as the default language. If you addmore languages, you can change the default language for the dunning template record.
For more information, see the following topics:
■ Supported Languages for Dunning
■ Selecting a Default Language on a Dunning Template Record.
b. In the Email Template column, select the email template to use for the language.
c. Click Add.
d. Repeat these steps to add template files in various languages.
e. In the Default column, check the box for the template that you want to use as the default.The system automatically assigns the first row as the default language. If you havetemplates in various languages, you can change the default language.
Note: A dunning template record must have a default template for each type(PDF and Email). The system will display an error message when you try to savethe dunning template record with a missing default template. A missing defaulttemplate error may be caused by clearing the Default box of the default languageor by deleting the row for the default language.
For more information, see the following topics:
■ Supported Languages for Dunning
■ Selecting a Default Language on a Dunning Template Record.
7. Click the PDF subtab to add template files for the dunning PDF.

Understanding Dunning Letter Templates 43
Dunning
a. In the Language column, select the language of the template. The first language that youadd is automatically assigned as the default language. If you add more languages, you canchange the default language for the dunning template record.
For more information, see the following topics:
■ Supported Languages for Dunning
■ Selecting a Default Language on a Dunning Template Record.
b. In the Subject column, enter text to show on the subject line of the letter.
c. (Optional) In the Header column, select the file to use for the header.
d. In the Body Document column, select the file to use for the body of the letter.
e. (Optional) In the Footer Document column, select the file to use for the footer.
f. Click Add.
g. Repeat these steps to add PDF template files in various languages.
h. In the Default column, check the box for the template that you want to use as the default.The system automatically assigns the first row as the default language. If you havetemplates in various languages, you can change the default language.
Note: A dunning template record must have a default template for each type(PDF and Email). The system will display an error message when you try to savethe dunning template record with a missing default template. A missing defaulttemplate error may be caused by clearing the Default box of the default languageor by deleting the row for the default language.
For more information, see the following topics:
■ Supported Languages for Dunning
■ Selecting a Default Language on a Dunning Template Record.
8. When you are finished adding the template files, click Save. You can now assign this dunningtemplate record to a dunning procedure.
Viewing Saved Dunning TemplatesSaved dunning templates can be viewed and edited at Dunning > Setup > Dunning Templates.
Editing a Dunning Template RecordYou can edit a dunning template record if you want to do the following:
■ Modify the attachment preferences
■ Add a language template
■ Delete a language template
To edit a dunning template record, go to Dunning > Setup > Dunning Templates, and click the Edit linkof a dunning template record.
Deleting a Dunning Template RecordYou can delete a dunning template record if it is not associated with any dunning level.
In Edit mode, you can delete a template by placing your cursor over Actions on the template record,and clicking Delete.

Understanding Dunning Letter Templates 44
Dunning
Tracking Changes to a Dunning Template RecordYou can track actions or changes to a dunning template record in the System Notes of the record.
On a dunning template record, click the Notes subtab and then click System Notes.
The System Notes logs changes to the fields of a dunning template such as the name, description, andthe options to attach copies of invoices or attach a statement.
The System Notes in dunning template records is automatically enabled upon installation of theDunning Letters SuiteApp.
For more information on using System Notes, see the help topic System Notes Overview.
Understanding Dunning LevelsDunning levels define the thresholds for overdue amounts and days overdue, as well as the lettertemplates to use for each level.
Setting up dunning levels involves the following:
1. Creating Dunning Level Rules
2. Specifying the Basis for Determining the Dunning Level
3. Adding Dunning Levels to a Dunning Procedure
Creating Dunning Level RulesBefore you can add dunning levels to a dunning procedure, you must first create dunning level rules.
A dunning level rule record defines the days overdue and the outstanding amount thresholds.
The number of days overdue is based on the Due Date field on the transaction record, and cannot bebased on any other date field.
Amounts can be defined in multiple currencies. As a best practice, a dunning level rule must defineamounts for all currencies used by your customers.
Note: When you have created a dunning level rule, you can use it for multiple dunningprocedures. However, if you edit a dunning level rule that is already being used in multipledunning procedures, the changes you make can affect the dunning procedures defined byothers.
For information about determining the dunning level of a customer or invoice, see Specifying the Basisfor Determining the Dunning Level.
To create a dunning level rule:
Important: Creating and updating dunning level rules must be done through the userinterface only. The Dunning Letters SuiteApp currently does not support the importing ofdunning level rules using CSV, web services, or SuiteScript.
1. Go to Dunning > Setup > Dunning Level Rule > New.
2. In the Name field, enter a name for the dunning level rule.
3. In the Days Overdue field, enter the number of days that must be overdue before a dunningletter can be sent. If you do not enter a value in this field, the system will set it to zero. If youwant to send a reminder letter before the due date, enter a negative number from -1 up to -99.

Creating Dunning Level Rules 45
Dunning
For example, if you want to create a dunning level rule for sending reminder letters three daysbefore payment is due, enter -3.
4. In the Currency column, select a currency. Only currencies included in the Currencies list foryour subsidiary are available for selection.
5. In the Minimum Invoice Amount column, enter the minimum invoice amount for the selectedcurrency. If you do not enter a value in this field, the system will set it to zero. You cannot enter anegative amount.
6. In the Total Overdue Balance field, enter the total overdue amount for the selected currency. Ifyou do not enter a value in this field, the system will set it to zero. You cannot enter a negativeamount.
7. In the Default column, the first currency that you add is automatically assigned as the defaultcurrency. If you add more currencies, you can change the default currency for the dunninglevel rule. A default currency is required to enable the system to handle situations in which atransaction uses a currency not defined in the dunning level rule. If a transaction uses a currencythat is not defined in the dunning level rule, the system converts the dunning level rule amountin the default currency to the currency of the invoice using the exchange rate between the twocurrencies on the last day of the previous month.
8. Click Save.
Saved dunning level rules can be viewed on the Dunning Level Rule List page. To view the list and toaccess a dunning level rule for editing, go to Dunning > Setup > Dunning Level Rule.
Creating Dunning ProceduresBefore you create dunning procedure records, the following tasks must be completed:
■ Create dunning letter templates – See the following topics:
□ Creating Dunning Letter Email Templates
□ Creating Dunning Letter PDF Templates
□ Creating Dunning Template Records
■ Create dunning level rules – See Creating Dunning Level Rules.
To create a dunning procedure:
Important: Creating and updating dunning procedures must be done through the userinterface only. The Dunning Letters SuiteApp currently does not support the importing ofdunning procedures using CSV, web services, or SuiteScript.
1. Go to Dunning > Setup > Dunning Procedure > New.
2. Complete the following fields:
a. Name – Enter a name for this dunning procedure.
b. Description – Enter a description for this dunning procedure.
c. Applies To – Select whether this dunning procedure should evaluate all invoices of acustomer, or specific invoices one by one. For more information, see UnderstandingCustomer Level Dunning and Invoice Level Dunning.
Important: The Applies To field cannot be edited after the dunning procedurehas been saved.
■ Select Customer if you want to evaluate all invoices of a customer and send onedunning letter that contains a list of overdue invoices.

Creating Dunning Procedures 46
Dunning
If you select Customer, you must also either check or clear the Allow Override box.(See next step.)
For more information, see Customer Level Dunning.
■ Select Invoice if you want to evaluate specific invoices one by one and send a dunningletter for each of those invoices separately.
For more information, see Invoice Level Dunning.
d. Allow Override – If you check this box, an invoice level dunning procedure can overridethis procedure. An invoice level dunning procedure will be used if an invoice meets thecriteria for that procedure, regardless of the customer level dunning procedure assigned.
For more information, see Invoice Level Dunning.
e. Sending Schedule – Specify how you want dunning letters to be sent. Select one of thefollowing:
■ Select Automatic if you want the system to send letters by email automatically.
■ Select Manual if you want dunning letters to be printed or sent manually by email.
f. Minimum Dunning Interval – Enter the minimum interval days for sending dunningletters using this dunning procedure.
This will prevent sending letters more often than a specified number of days to the samecustomer. The minimum dunning interval does not trigger the dunning evaluation or thesending of the letters. It is one of the criteria used in dunning evaluation. The frequencyof dunning evaluation depends on the schedule of the dunning evaluation workflow. Adunning letter is sent on the next scheduled evaluation after the minimum interval dayshave passed.
g. Disable Minimum Dunning Interval – Check this box to disregard the value in theMinimum Dunning Interval field. If the Disable Minimum Dunning Interval box ischecked, the system can send multiple dunning letters in a day to a single customer, ifthere is a change in the dunning level of a customer or invoice during dunning evaluation.
h. Default Dunning Manager – The creator of the dunning procedure record appears inthis field by default. You can select a various default dunning manager for this dunningprocedure. The dunning manager is the employee that controls dunning for the customeror invoice and whose name appears as the sender of the dunning letter. For moreinformation, see Assigning Dunning Managers.
i. Assign Automatically to New Records – Check this box to enable the system toautomatically assign the dunning procedure to customers or invoices upon recordcreation. For invoices, dunning procedures are automatically assigned according to thespecified selection criteria, saved search, and dunning procedure priority. For customers,dunning procedures are automatically assigned according to the subsidiary, saved search,and dunning procedure priority.
3. Define the selection criteria for this dunning procedure. See Defining Dunning Selection Criteria.
4. In the Determine Dunning Level By field, select the basis for determining the dunning level. SeeSpecifying the Basis for Determining the Dunning Level.
5. Add dunning levels to the dunning procedure. Each dunning procedure must have at least onedunning level. For each dunning level, you must assign a dunning letter template record. SeeAdding Dunning Levels to a Dunning Procedure.
6. Click Save.
After creating dunning procedures, you must order them according to priority. In cases wheremore than one dunning procedure can be assigned to a customer or invoice automatically orsemiautomatically, the system will use the dunning procedure with the highest priority. To set thepriority order, see Setting the Priority Order of Dunning Procedures.

Creating Dunning Procedures 47
Dunning
To see a list of saved dunning procedures, go to Dunning > Setup > Dunning Procedure. You can clickthe View and Edit links on the Dunning Procedure List page.
Important: Inactivating dunning procedures is not recommended because it can cause errorsin the automatic assignment and semiautomatic assignment of dunning procedures. Deletinga dunning procedure is possible only if the dunning procedure is not assigned to any customeror invoice. When you delete a dunning procedure, the system removes it from the DunningProcedures list and the Dunning Priorities list.
Defining Dunning Selection CriteriaYou can define dunning selection criteria to filter the customers and invoices to which the dunningprocedure can be assigned.
For automatic assignment to new invoices – Dunning procedures are assigned according to thesubsidiary, department, location, class, saved search, and dunning procedure priority.
For automatic assignment to new customers – Dunning procedures are automatically assignedaccording to the subsidiary, saved search, and dunning procedure priority.
To define dunning selection criteria for a dunning procedure:
1. Edit or create a new dunning procedure record and complete the fields in the Dunning SelectionCriteria section:
a. If you are using OneWorld, select the subsidiaries to which the dunning procedure applies.You must select at least one subsidiary.
b. If your account has Departments, Locations, or Classes enabled, select the departments,locations, and classes to which the dunning procedure applies.
Note: If Classes, Departments, or Locations (C/D/L) are used as selection criteriain a dunning procedure, make sure the invoices that you will assign the dunningprocedure to, have C/D/L checked in the main invoice record. C/D/L defined only asline item parameters have no effect on dunning assignment or eligibility. Dunningprocedures use the C/D/L classification defined in the main invoice record whenapplying the selection criteria, not line item parameters.
c. (Optional) If you have set up saved searches for dunning, select the saved search to whichthe dunning procedure applies. If you chose Customer in the Applies To field, the SavedSearch (Customer) dropdown list is enabled. If you chose Invoice, then the Saved Search(Invoice) dropdown list is enabled. For information about saved searches, see the helptopic Saved Searches.
2. Click Save.
Specifying the Basis for Determining the DunningLevelOn a dunning procedure, in the Determine Dunning Level By field, you must specify what NetSuite willuse as the basis for determining the dunning level. You can select one of the following:
■ Minimum Invoice Amount AND Total Overdue Balance – Evaluates both the minimum invoiceamount and the total overdue balance. To reach a dunning level, both the total overdue amount

Specifying the Basis for Determining the Dunning Level 48
Dunning
on the customer record and the minimum invoice amount must be equal to or greater than thethreshold amount for the dunning level.
■ Minimum Invoice Amount OR Total Overdue Balance – Determines the dunning levels separatelyfor the minimum invoice amount and the total overdue balance, and chooses the one with thehigher dunning level.
When determining the dunning level of an invoice, the value for Min. Days Overdue refers to the daysoverdue of the invoice that is being evaluated.
When determining the dunning level of a customer, the value for Min. Days Overdue refers to theoldest invoice of the customer.
Example
A customer has 10 overdue invoices (five days overdue), and each invoice amount is $10.
Dunning Level Min. Days Overdue Min. Invoice Amount Total Overdue Balance
1 1 $10 $100
2 3 $30 $100
If the AND operator is used, the customer’s dunning level is 1.
If the OR operator is used, the customer’s dunning level is 2.
Adding Dunning Levels to a Dunning ProcedureEach dunning procedure must have at least one dunning level. Dunning levels dictate which dunningletter template to use for a particular dunning level rule. Typically, a friendly reminder is used whena customer is only a few days late. When the overdue amount or days overdue exceed a certainthreshold, a more aggressive letter is used.
You can add a maximum of 15 dunning levels to a dunning procedure. For each dunning level, youmust assign a dunning letter template record.
Before you can add dunning levels to a dunning procedure, you must first create dunning level rulerecords. See Creating Dunning Level Rules.
To add dunning levels to a dunning procedure:
1. Edit or create a new dunning procedure record.
2. Click the Levels subtab.
3. Add levels by performing the following steps:
a. In the Dunning Level Rule column, select dunning level rule to apply to the level. Thefollowing columns are automatically filled in when you select a dunning level rule:
■ Currencies
■ Default Currency
■ Minimal Invoice Amount
■ Total Overdue Balance
■ Days Overdue
b. In the Template column, select the dunning template record to be used for the dunninglevel.

Adding Dunning Levels to a Dunning Procedure 49
Dunning
4. Click Add to save the level.
5. Repeat steps 3–4 for additional levels. You can create a maximum of 15 levels for one dunningprocedure.
Note: The first row is the lowest level. Subsequent levels must have a greater value forDays Overdue than the previous level. You can insert a level between two levels if thenumber of days overdue is greater than the previous level and less than the subsequentlevel. Only the last level can be deleted.
6. Click Save.
To edit a dunning level in a dunning procedure:
1. On the Dunning Procedure page, click the value in the Dunning Level Rule column to select avarious rule, or click the value in the Template column to select a various template.
2. To change the order of the levels, drag the level to the desired row. The first row is the lowestlevel. Subsequent levels must have a greater value in the Days Overdue field than the previouslevel.
3. Click OK.
4. Click Save to save the dunning procedure.
To delete a dunning level from a dunning procedure:
1. On the Dunning Procedure page, click the level that you want to delete.
2. Click Remove.
3. Click Save to save the dunning procedure.
Setting the Priority Order of Dunning ProceduresAfter creating dunning procedures, NetSuite recommends that you order them according to priority. Incases where more than one dunning procedure can be assigned to a customer or invoice automaticallyor semiautomatically, the system will use the dunning procedure with the highest priority.
To set the priority order of dunning procedures:
1. Go to Dunning > Setup > Dunning Procedure Priority.
2. On the Dunning Priorities List page, click either the Customer Dunning Procedures subtab orthe Invoice Dunning Procedures subtab.
Note: By default, in view mode, the dunning procedures list is ordered by priority. ThePriority column shows the values 1, 2, 3, and so on, with 1 being the highest priority.
3. To change the priority order, click Edit.
4. Drag and drop the dunning procedure to the desired position or click Move Up, Move Down,Move to Top or Move to Bottom.
5. Click Save.
Assigning Dunning ProceduresDunning procedures can be assigned at the customer level or at the invoice level.

Assigning Dunning Procedures 50
Dunning
Note: Customer dunning is used to evaluate all invoices of the customer. Invoice dunning isfor evaluating a specific invoice. See Understanding Customer Level Dunning and Invoice LevelDunning.
For information about how to assign dunning procedures, read the following topics:
■ Assigning a Dunning Procedure to a Customer
□ Assigning a Dunning Procedure Automatically Upon Customer Record Creation
□ Assigning a Dunning Procedure to a Customer Manually or Semiautomatically
■ Assigning a Dunning Procedure to an Invoice
□ Assigning a Dunning Procedure Automatically Upon Invoice Record Creation
□ Assigning a Dunning Procedure to an Invoice Manually
■ Bulk Assigning Dunning Procedures
Assigning a Dunning Procedure to a CustomerYou can assign a dunning procedure to a customer in the following ways:
■ Assigning a Dunning Procedure Automatically Upon Customer Record Creation
■ Assigning a Dunning Procedure to a Customer Manually or Semiautomatically
■ Bulk Assigning Dunning Procedures
Note: You cannot use mass update to assign dunning procedures.
Important: If a customer does not have a dunning procedure assigned to it, the system willnot send dunning letters to that customer. The system uses the dunning procedure assignedto the customer even if a dunning procedure has been assigned to an invoice. However, if thedunning procedure that was assigned to the customer has the Allow Override box checked,then the system uses the dunning procedure that was assigned to the invoice.
Assigning a Dunning Procedure Automatically Upon CustomerRecord CreationYou can set up dunning procedures that can be assigned automatically by the system when a customerrecord is created through the user interface.
Note: You cannot use mass update to assign dunning procedures.
The system determines which dunning procedures can be assigned to customers based on thefollowing information that you define on the dunning procedure record:
■ Subsidiary
■ Location
■ Department
■ Class
■ Saved search

Assigning Dunning Procedures 51
Dunning
If the system finds more than one dunning procedure that can be assigned, the dunning procedurewith the highest priority will be assigned to the customer. See Setting the Priority Order of DunningProcedures.
Note: If Class, Department or Location (C/D/L) are used as selection criteria in a dunningprocedure, make sure the invoices of the customer that you will assign the dunning procedureto, have C/D/L checked in the main invoice record. C/D/L defined only as line item parametershave no effect on dunning assignment or eligibility. Dunning procedures use the C/D/Lclassification defined in the main invoice record when applying the selection criteria, not lineitem parameters.
Upon automatic assignment of the dunning procedure to the customer, the system populates theDunning Manager field on the customer record with the name of the default dunning manager thatwas saved on the dunning procedure record.
Automatic assignment of dunning procedures to new customer records is enabled by defaultfor all subsidiaries. To disable automatic assignment of dunning procedures to new customersof a subsidiary, you must modify the subsidiary’s dunning configuration record. See ConfiguringSubsidiaries for Dunning. On the dunning configuration record, if the Automatically Assign to NewCustomers box is not checked for the subsidiary, no dunning procedure can be automatically assignedto new customers of that subsidiary even if the Assign Automatically to New Records box is checkedon dunning procedure records.
To assign a dunning procedure automatically upon creation of a customer record:
1. Edit or create a new dunning procedure record.
2. Make sure that Customer is selected in the Applies To field.
Note: The Applies To field cannot be edited when the dunning procedure has alreadybeen saved.
3. Click the Assign Automatically to New Records box to make this dunning procedure availablefor automatic assignment to a customer upon creation of the customer record.
4. Complete the other fields on the form if you are creating a new record.
5. Click Save.
The system can now assign this dunning procedure automatically to a customer upon creation of thecustomer record.
Assigning a Dunning Procedure to a Customer Manually orSemiautomaticallyThe ability to assign a dunning procedure manually or semiautomatically to a customer depends onyour role:
Task Role Level
Select a dunning procedure manually on a new customerrecord
Dunning Director
Assign a dunning procedure to a customersemiautomatically
Dunning Director
Edit the customer’s automatically assigned dunningprocedure
Dunning Director
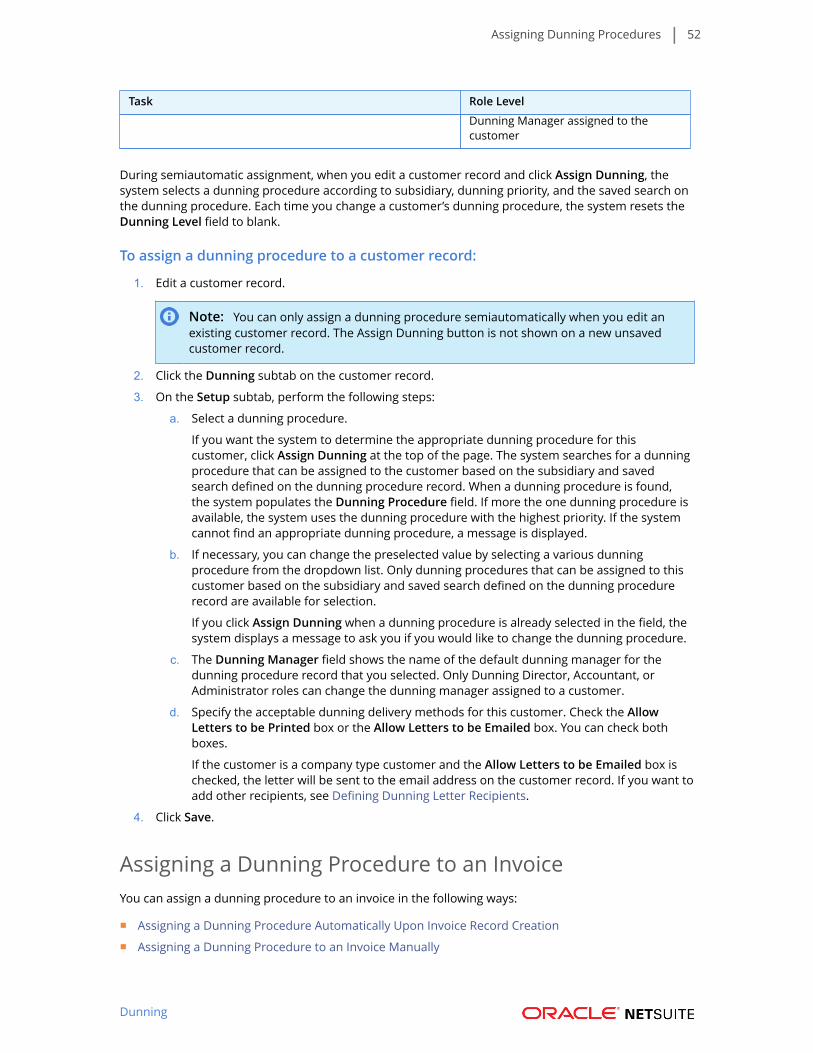
Assigning Dunning Procedures 52
Dunning
Task Role Level
Dunning Manager assigned to thecustomer
During semiautomatic assignment, when you edit a customer record and click Assign Dunning, thesystem selects a dunning procedure according to subsidiary, dunning priority, and the saved search onthe dunning procedure. Each time you change a customer’s dunning procedure, the system resets theDunning Level field to blank.
To assign a dunning procedure to a customer record:
1. Edit a customer record.
Note: You can only assign a dunning procedure semiautomatically when you edit anexisting customer record. The Assign Dunning button is not shown on a new unsavedcustomer record.
2. Click the Dunning subtab on the customer record.
3. On the Setup subtab, perform the following steps:
a. Select a dunning procedure.
If you want the system to determine the appropriate dunning procedure for thiscustomer, click Assign Dunning at the top of the page. The system searches for a dunningprocedure that can be assigned to the customer based on the subsidiary and savedsearch defined on the dunning procedure record. When a dunning procedure is found,the system populates the Dunning Procedure field. If more the one dunning procedure isavailable, the system uses the dunning procedure with the highest priority. If the systemcannot find an appropriate dunning procedure, a message is displayed.
b. If necessary, you can change the preselected value by selecting a various dunningprocedure from the dropdown list. Only dunning procedures that can be assigned to thiscustomer based on the subsidiary and saved search defined on the dunning procedurerecord are available for selection.
If you click Assign Dunning when a dunning procedure is already selected in the field, thesystem displays a message to ask you if you would like to change the dunning procedure.
c. The Dunning Manager field shows the name of the default dunning manager for thedunning procedure record that you selected. Only Dunning Director, Accountant, orAdministrator roles can change the dunning manager assigned to a customer.
d. Specify the acceptable dunning delivery methods for this customer. Check the AllowLetters to be Printed box or the Allow Letters to be Emailed box. You can check bothboxes.
If the customer is a company type customer and the Allow Letters to be Emailed box ischecked, the letter will be sent to the email address on the customer record. If you want toadd other recipients, see Defining Dunning Letter Recipients.
4. Click Save.
Assigning a Dunning Procedure to an InvoiceYou can assign a dunning procedure to an invoice in the following ways:
■ Assigning a Dunning Procedure Automatically Upon Invoice Record Creation
■ Assigning a Dunning Procedure to an Invoice Manually

Assigning Dunning Procedures 53
Dunning
■ Bulk Assigning Dunning Procedures
Note: You cannot use mass update to assign dunning procedures.
Important: The system uses the dunning procedure assigned to the customer even if adunning procedure has been assigned to an invoice. However, if the dunning procedure thatwas assigned to the customer has the Allow Override box checked, then the system uses thedunning procedure that was assigned to the invoice.
Assigning a Dunning Procedure Automatically Upon InvoiceRecord Creation
You can set up dunning procedures that can be assigned automatically by the system when a invoicerecord is created through the user interface.
Note: You cannot use mass update to assign dunning procedures.
The dunning procedure to be assigned to a new invoice is determined by the selection criteria andsaved search defined on the dunning procedure record, and by dunning procedure priority. Uponautomatic assignment of the dunning procedure to the invoice, the system also populates the DunningManager field on the invoice record with the name of the default dunning manager that was saved onthe dunning procedure record.
Automatic assignment of dunning procedures to new invoice records is enabled by default for allsubsidiaries. To disable automatic assignment of dunning procedures to new invoices of a subsidiary,you must modify the subsidiary’s dunning configuration record. See Configuring Subsidiaries forDunning. On the dunning configuration record, if the Automatically Assign to New Invoices box is notchecked for the subsidiary, no dunning procedure can be automatically assigned to new invoices ofthat subsidiary even if the Assign Automatically to New Records box is checked on dunning procedurerecords.
To assign a dunning procedure automatically upon creation of an invoice record:
1. Edit or create a new dunning procedure record.
2. Make sure that Invoice is selected in the Applies To field.
Note: The Applies To field cannot be edited when the dunning procedure has alreadybeen saved.
3. Click the Assign Automatically to New Records box to make this dunning procedure availablefor automatic assignment to an invoice upon creation of the invoice record.
4. Complete the other fields on the form if you are creating a new record.
5. Click Save.
The system can now assign this dunning procedure automatically to an invoice upon creation of theinvoice record.
Assigning a Dunning Procedure to an Invoice Manually
The ability to assign a dunning procedure manually to an invoice depends on your role:
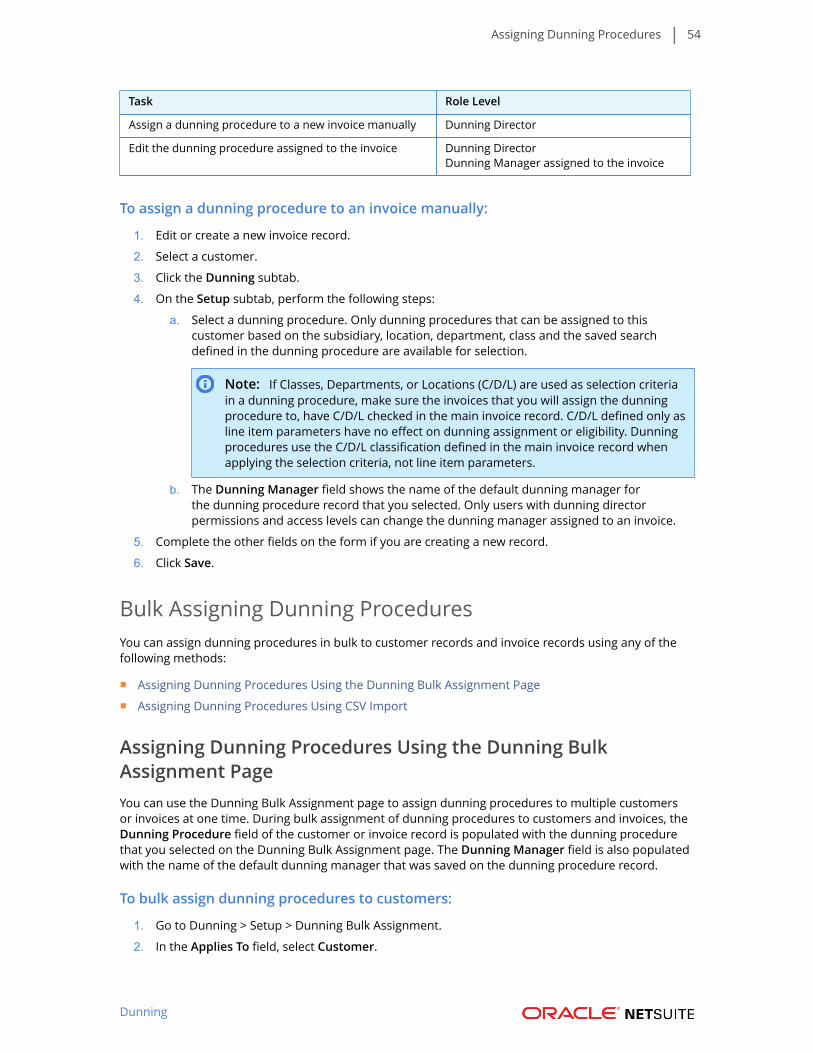
Assigning Dunning Procedures 54
Dunning
Task Role Level
Assign a dunning procedure to a new invoice manually Dunning Director
Edit the dunning procedure assigned to the invoice Dunning DirectorDunning Manager assigned to the invoice
To assign a dunning procedure to an invoice manually:
1. Edit or create a new invoice record.
2. Select a customer.
3. Click the Dunning subtab.
4. On the Setup subtab, perform the following steps:
a. Select a dunning procedure. Only dunning procedures that can be assigned to thiscustomer based on the subsidiary, location, department, class and the saved searchdefined in the dunning procedure are available for selection.
Note: If Classes, Departments, or Locations (C/D/L) are used as selection criteriain a dunning procedure, make sure the invoices that you will assign the dunningprocedure to, have C/D/L checked in the main invoice record. C/D/L defined only asline item parameters have no effect on dunning assignment or eligibility. Dunningprocedures use the C/D/L classification defined in the main invoice record whenapplying the selection criteria, not line item parameters.
b. The Dunning Manager field shows the name of the default dunning manager forthe dunning procedure record that you selected. Only users with dunning directorpermissions and access levels can change the dunning manager assigned to an invoice.
5. Complete the other fields on the form if you are creating a new record.
6. Click Save.
Bulk Assigning Dunning ProceduresYou can assign dunning procedures in bulk to customer records and invoice records using any of thefollowing methods:
■ Assigning Dunning Procedures Using the Dunning Bulk Assignment Page
■ Assigning Dunning Procedures Using CSV Import
Assigning Dunning Procedures Using the Dunning BulkAssignment PageYou can use the Dunning Bulk Assignment page to assign dunning procedures to multiple customersor invoices at one time. During bulk assignment of dunning procedures to customers and invoices, theDunning Procedure field of the customer or invoice record is populated with the dunning procedurethat you selected on the Dunning Bulk Assignment page. The Dunning Manager field is also populatedwith the name of the default dunning manager that was saved on the dunning procedure record.
To bulk assign dunning procedures to customers:
1. Go to Dunning > Setup > Dunning Bulk Assignment.
2. In the Applies To field, select Customer.

Assigning Dunning Procedures 55
Dunning
3. In the Dunning Procedure field, select the dunning procedure you want to assign to multiplecustomers.
4. In the list displayed, select customers by checking the box next to the customer name.
Click Mark All to select all customers on the page. To clear all boxes, click Unmark All.
Important: The list displays customers to which the selected dunning procedureis not assigned. This includes customers that do not have dunning procedures, andcustomers that already have a different dunning procedure assigned. This can alsoinclude customers with paused dunning. Bulk assignment will change the dunningprocedure and dunning manager assigned to them. For customers with paused dunning,changing the dunning procedure will not change the value of the Pause Dunning box.NetSuite discourages bulk assigning dunning procedures to customers with pauseddunning. To limit the customers displayed in the list, you can add a saved search thatdefines the selection criteria for assigning the dunning procedure. See Defining DunningSelection Criteria.
5. Click Assign to Customers.
Note: If a high number of records is selected, NetSuite processes the bulk assignmentusing a script in the background. The system sends you an email notification whenprocessing has been completed.
To bulk assign dunning procedures to invoices:
1. Go to Dunning > Setup > Dunning Bulk Assignment.
2. In the Applies To field, select Invoice.
3. In the Dunning Procedure field, select the dunning procedure you want to assign to multipleinvoices.
4. In the list displayed, select invoices by checking the box next to the customer name.
Click Mark All to select all invoices on the page. To clear all boxes, click Unmark All.
Important: The list displays invoices to which the selected dunning procedure is notassigned. This includes invoices that do not have dunning procedures, and invoices thatalready have a different dunning procedure assigned. This can also include invoiceswith paused dunning. Bulk assignment will change the dunning procedure and dunningmanager assigned to them. For invoices with paused dunning, changing the dunningprocedure will not change the value of the Pause Dunning box. NetSuite discouragesbulk assigning dunning procedures to invoices with paused dunning. To limit the invoicesdisplayed in the list, you can add a saved search that defines the selection criteria forassigning the dunning procedure. See Defining Dunning Selection Criteria.
5. Click Assign to Invoices.
Note: If a high number of records is selected, NetSuite processes the bulk assignmentusing a script in the background. The system sends you an email notification whenprocessing has been completed.
Assigning Dunning Procedures Using CSV ImportOnly the Administrator role should assign dunning procedures to customer records and invoice recordsby importing data from a CSV file.

Assigning Dunning Procedures 56
Dunning
The following dunning fields can be updated using a CSV import:
Customer Record Invoice Record
■ Dunning Procedure
■ Allow Letters to be Printed
■ Allow Letters to be Emailed
■ Pause Dunning
■ Do Not Send Letters to Customer Email
■ Dunning Pause Reason
■ Dunning Pause Reason Details
■ Dunning Manager
■ Dunning Procedure
■ Allow Letters to be Printed
■ Allow Letters to be Emailed
■ Pause Dunning
■ Dunning Pause Reason
■ Dunning Pause ReasonDetails
■ Dunning Manager
Important: Dunning fields should are intended for customer records and invoice recordsonly. However, the system shows dunning fields by default on sales orders and othertransactions. NetSuite recommends that you customize transaction forms to hide the dunningfields on transaction forms except invoices.
The Dunning Letters SuiteApp includes sample CSV files that you can use as a guide for updating thedunning fields on customer records and invoice records. You can download the files from the filecabinet:
■ SuiteBundles > Bundle 62340 > Templates > Sample CSV Import > Customer
■ SuiteBundles > Bundle 62340 > Templates > Sample CSV Import > Invoice
The following table shows the differences between using the user interface and using a CSV dataimport for updating customer records and invoice records.
When editing dunning fields using the UI, the system gives access to dunning fields based on roles.
When using CSV import, NetSuite recommends that you use the Administrator role.
Scenario (invoice or customer recordis assigned a dunning procedure)
Using the UI Using CSV Import
Unpausing dunning for the customeror invoice record (clearing the PauseDunning box)
The dunning evaluation istriggered after the recordis saved.
The dunning evaluation is nottriggered.
Saving a customer or invoice recordwithout checking either or both AllowLetters To Be Emailed and AllowLetters To Be Printed fields
The system shows anerror message.
The CSV import fails.
Saving a customer or invoice recordwithout a dunning manager
The Dunning Managerfield is populated whenyou select a dunningprocedure.
The value for the DunningManager field is sourced fromthe dunning procedure recordupon saving the record.The CSV import fails if thevalue for the DunningManager field is set to null.
Saving a customer record withoutdunning recipients
The system shows anerror message.
The CSV import fails.

Assigning Dunning Procedures 57
Dunning
To prevent data import errors when assigning dunning procedures to customers and invoices usingCSV, be aware of the following:
■ When importing data, all fields must have a value.
■ In invoice dunning, the customer record must also have a dunning procedure and the AllowOverride box must be checked, otherwise invoice dunning evaluation will not be triggered for thatrecord.
■ If the value for a Dunning Manager field is set to null, the CSV import will fail.
■ If the customer record does not have dunning recipients, the CSV import will fail.
■ Either or both Allow Letters To Be Emailed and Allow Letters To Be Printed fields must be set to T(true) if a dunning procedure is assigned to a customer.
■ If the Dunning Procedure field value is set for the first time, and the Dunning Manager field is leftblank, the value of the Dunning Manager field on the customer record will be automatically sourcedfrom the Dunning Manager field on the dunning procedure record.
■ Changing the value of the Pause Dunning field on the customer record is from T to F does nottrigger the dunning evaluation workflow.
Sending and Printing Dunning LettersYou can choose to send dunning letters either automatically or manually.
You can also choose to either email or print letters for a customer, or send both email and printedletters to a customer. The system produces the letters in the customer’s language as defined on thecustomer record, if a dunning template in that language exists. Otherwise, the system uses the defaulttemplate defined on the dunning template record.
The system generates dunning letters according to the dunning evaluation results. The lettertemplate that the system uses depends on the dunning level of the customer or invoice after dunningevaluation.
The dunning manager assigned to the customer or invoice can manually print or email dunning lettersusing the Dunning Email Sending Queue and the Dunning PDF Printing Queue. The dunning manager’sname also appears as the sender of the dunning letter.
The Dunning Email Sending Queue shows invoices and customers that have dunning procedures withthe Sending Schedule field set to Manual.
The Dunning PDF Printing Queue shows invoices and customers that have dunning procedures withthe Sending Schedule field set to either Manual or Automatic.
If there are multiple recipients for a customer, each recipient is shown in a separate row.
For more information about sending dunning letters, read the following topics:
■ Specifying Dunning Delivery Methods
■ Bulk Updating Customer Records for Dunning
■ Defining Dunning Letter Recipients
■ Attaching Statements and Invoices to Dunning Letters
■ Sending Dunning Letters Automatically
■ Sending Dunning Letters Manually
■ Printing Dunning Letters
■ Recently Sent/Printed Dunning Letters

Sending and Printing Dunning Letters 58
Dunning
Specifying Dunning Delivery MethodsDunning delivery methods are defined on the Dunning subtab of the customer record.
Check one or both of the following:
Allow Letters to be Printed – Check this box to enable the system to generate PDF letters that you canprint for sending to the customer by post.
Allow Letters to be Emailed – Check this box to enable the system to send dunning letters by email tothe customer.
■ If the dunning procedure assigned to the customer or invoice has the Sending Schedule field setto Automatic, the system sends letters by email automatically according to the dunning evaluationresults.
■ If the dunning procedure assigned to the customer or invoice has the Sending Schedule field set toManual, use the Dunning Email Sending Queue to manually email the letters.
See also:
■ Defining Dunning Letter Recipients
■ Bulk Updating Customer Records for Dunning
Defining Dunning Letter RecipientsDunning letters can be sent to the customer’s email address and to the dunning recipients defined onthe customer record.
The following preferences are available on the Setup subtab under the Dunning subtab of thecustomer record:
■ Allow Letters to be Emailed
■ Do Not Send Letters to Customer Email
The Dunning Recipients subtab under the Dunning subtab is where you can add contacts. If the DoNot Send Letters to Customer Email box is checked on the Setup subtab, you must add at least onecontact that has an email address to the Dunning Recipient subtab.
Different dunning recipients cannot be assigned to different dunning levels.
To be able to save a customer record with the Allow Letters to be Emailed box checked, the followingconditions must be true:
■ The Dunning Recipient subtab has at least one contact with an email address.
■ The Email field on the customer record has an email address.
Note: The customer’s email address is required only if the Do Not Send Letters toCustomer Email box is not checked.
To define dunning letter recipients:
1. Edit or create a customer record.
2. Click the Dunning subtab
3. Click the Setup subtab.
4. If you want to send dunning letters to this customer by email, check the Allow Letters to beEmailed box.

Sending and Printing Dunning Letters 59
Dunning
5. Set the value of the Do Not Send Letters to Customer Email box.
If you want dunning letters to be sent to the customer’s email address:
■ Make sure that the Do Not Send Letters to Customer Email box is not checked.
■ Make sure that the Email field of the customer record has an email address.
If the Do Not Send Letters to Customer Email box is checked:
■ The system will not send dunning letters to the customer’s email.
■ The Dunning Recipient subtab must have at least one contact with an email address.
Note: If there are contacts on the Dunning Recipient subtab, the system will also sendletters to those contacts, regardless of whether the Do Not Send Letters to CustomerEmail box is checked or not.
6. To add the contacts to whom dunning letters will be sent:
a. Click the Dunning Recipient subtab.
b. Select at least one contact with an email address.
c. Click Add. You can add as many contacts as needed.
7. Click Save.
See also:
■ Specifying Dunning Delivery Methods
■ Bulk Updating Customer Records for Dunning
Bulk Updating Customer Records for Dunning
Note: NetSuite recommends that you use the bulk update feature outside of your normalbusiness hours. This is to ensure that other users in your company are not updating customerrecords during the bulk update process.
You can use the bulk update feature provided by the Dunning Letters SuiteApp to update the customfields for dunning on customer records. The bulk update applies the changes to all customer records.
If you are using a OneWorld account, the updates will apply to all customer records with dunningprocedures associated with the selected subsidiary.
Important: When you click Update on the Bulk Update Customer Records for Dunning page,the system shows a message asking if you are sure you want to proceed with the bulk update. Ifyou click OK on the message, the bulk update will start, and it cannot be reversed.
In non-OneWorld accounts, only one bulk update at a time can be performed.
In OneWorld accounts, the system prevents you from performing a bulk update if a bulk update isalready in progress for the same subsidiary.
To perform a bulk update of dunning fields on customer records:
1. Go to Dunning > Setup > Bulk Update Customer Records.
2. If you are using a OneWorld account, select the subsidiary to which you want to apply the bulkupdate.
3. Select values for the following bulk update fields:

Sending and Printing Dunning Letters 60
Dunning
■ Allow Letters to be Emailed
■ Allow Letters to be Printed
■ Do Not Send Letters to Customer Email
For each bulk update field, the following values are available:
■ Unchanged – Select this value if you want to retain the current value on the customerrecords.
■ Checked – Select this value if you want to check the box on all customer records that belongto the selected subsidiary.
■ Not Checked - Select this value if you want to clear the box on all customer records thatbelong to the selected subsidiary.
4. Click Update.
You will receive an email notification after the bulk update has been completed.
The email notification indicates the number of customer records that were updated. If the emailnotification shows that not all records were updated, the likely cause is a validation error. Thesystem will not update a record if doing so will break a validation rule.
Following are the validation rules:
■ On the Bulk Update Customer Records for Dunning page, the following bulk update fieldscannot both be set to Not Checked:
□ Allow Letters to be Emailed
□ Allow Letters to be Printed
■ A customer record cannot be updated with the Allow Letters to be Emailed box checked ifthe Email field of the customer record is blank or the Dunning Recipient subtab does nothave at least one contact.
■ A customer record cannot be updated with the Do Not Send Letters to Customer Emailbox checked if the Dunning Recipient subtab of customer record does not have at least onecontact.
■ A customer record cannot be updated with the Do Not Send Letters to Customer Email boxnot checked if the Email field is blank.
Attaching Statements and Invoices to Dunning LettersWhen creating dunning template records, you can choose to attach customer statements and invoicesto dunning letters.
When you email a dunning letter, attachments are included in the same message.
When you print a dunning letter, the system includes the attachments in the same file cabinet folderwhere the letter is stored.
On the Dunning Template page, the following options are available:
■ Attach Statement – Check this box if you want to attach a customer statement to each dunningletter that uses the dunning template.
When the Attach Statement box is checked, the following additional options become available:
□ Only Open Transactions on the Statement – Check this box if you want to include only opentransactions on the customer statement.
□ Custom Statement Form – Select a custom statement form to use for generating the statement.If you leave this field blank, the statement will be generated using the system preferred

Sending and Printing Dunning Letters 61
Dunning
statement form and the layout specified on the custom form. For information about usingcustom forms, see the help topic Custom Forms.
□ Statement Start Date – Enter the number of days relative to the day of dunning evaluation,when the coverage of the statement will start. For example, if you enter 3, starting from threedays after the dunning evaluation day and until the Statement Date, all customer transactionswithin this period will be included in the statement. Entering negative numbers is also valid.For example, if you enter -30, starting from 30 days before the dunning evaluation day until theStatement Date, all customer transactions within this period will be included in the statement. Ifyou leave this field blank, all transactions in the customer's history will appear on the statement.
□ Statement Date – Enter the number of days relative to the day of dunning evaluation, markingthe last day when customer transactions will be included in the statement. The date on that daywill be the Statement Date indicated on the statement to be attached to the dunning letter. Forexample, if you enter 3, all customer transactions from the Statement Start Date until 3 daysafter the dunning evaluation day, will be included in the statement. If you enter -3, all customertransactions from the Statement Start Date until 3 days before the dunning evaluation day, willbe included in the statement. The default value is 0, which is the day of dunning evaluation. Ifyou leave the value as zero, all customer transactions from the Statement Start Date up to thedunning evaluation day will be included in the statement.
Note: When the Dunning Letters SuiteApp is updated, the existing settings orparameters of the Dunning templates are retained. If you have not changed Dunningtemplate settings since installation of the bundle, the default parameters in the templatesare kept.
Note: In invoice dunning, customer statements cannot be attached to the dunning letter.
■ Attach Copies of Invoices – Check this box if you want to attach copies of invoices to each dunningletter that uses the dunning template. Attached copies of invoices are generated using the layoutspecified on the transaction form. For information about using custom layouts, see the help topicCustom Forms.
When the Attach Copies of Invoices box is checked, the following additional option becomesavailable:
□ Only Overdue Invoices – For customer dunning, check this box if you want to attach to thedunning letter only posting invoices with due date and days overdue greater than 0. If you do notcheck this box, all open and posting invoices will be attached to the dunning letter. For InvoiceDunning, only the invoice being dunned will be attached.
For more information about creating dunning template records, see Creating Dunning TemplateRecords.
Sending Dunning Letters AutomaticallyTo send dunning letters automatically by email to customers, make sure that the following conditionsexist:
■ On the customer record or invoice record, the Allow Letters to be Emailed box is checked.
■ On the dunning procedure record, the Sending Schedule field is set to Automatic.
When the dunning evaluation workflow runs, the system evaluates the transactions using the dunningevaluation rules that you defined, and sends dunning letters by email automatically for transactionsfound in the dunning evaluation results.
Letters will not be sent when:

Sending and Printing Dunning Letters 62
Dunning
■ dunning is paused
■ the minimum dunning interval is not met
■ there is no change in the dunning level during dunning evaluation
Sending Dunning Letters ManuallyTo manually send dunning letters by email, use the Dunning Email Sending Queue on the Dunningdashboard.
When the dunning evaluation runs, the dunning letters that are ready for sending are shown in theDunning Email Sending Queue, if the following conditions exist:
■ On the customer record or invoice record, the Allow Letters to be Emailed box is checked.
■ On the dunning procedure record, the Sending Schedule field is set to Manual.
Dunning letters remain in the queue until the email is sent, or until you remove the record from thequeue.
To manually send dunning letters by email:
1. Go to Setup > Dunning > Dunning Email Sending Queue.
2. On the Dunning Email Sending Queue page, you can search for the dunning letters you wantto send by email. Use any of the following filters to make the search more specific or to narrowdown the results to be displayed.
Filter Description
Customer Select the customer to whom the dunning letters you want tosend are addressed.
Subsidiary Select the subsidiary of the customers to whom the letters youwant to send are addressed.
Dunning Procedure Select the dunning procedure used for the letters you want tosend.
Dunning Level Select the dunning level used for the letters you want to send.
Apply To Select either customer or invoice dunning.
Last Letter Sent Start Date Enter the date when all letters last sent on that date and later willbe displayed.
Last Letter Sent End Date Enter the date when all letters last sent on that date and earlierwill be displayed.
Evaluation Start Date Enter the date when all letters whose dunning evaluation startedon that date and later will be displayed.
Evaluation End Date Enter the date when all letters whose dunning evaluation startedon that date and earlier will be displayed.
If you do not select any value in the filters, all dunning letters that are ready for sending aredisplayed in the list.
Click Search to display the dunning letters that you want to send by email.
3. Use the Pagination Options to navigate to the search results page you want to view, or controlthe number of letters displayed per page.

Sending and Printing Dunning Letters 63
Dunning
Field Description
Page No. Select the page number to display.
Letters Per Page Select the number of letters to display per page.The options on this field are dependent on the number of searchresults.
Total Pages Indicates the total number of pages that display the letters.
Total Letters in Queue Indicates the total number of letters in queue.
4. Check the boxes of the dunning letters that you want to send. Click Mark All to select all recordsdisplayed. Click Unmark All to clear all boxes.
5. Click Send. After sending, the system removes the sent letters from the queue and adds them tothe Recently Sent/Printed Dunning Letters portlet on the Dunning dashboard.
If you want to remove a letter from the queue without sending it, check its box and click Remove. Onthe Dunning Evaluation Results page, the status of the letter is set to Removed.
Important: You will not be able to send or print the dunning letters that you removed. Thisaction cannot be undone.
Printing Dunning LettersTo print dunning letters, you must first generate the PDF files using the Dunning PDF Printing Queueon the Dunning dashboard. After generating the PDF files, you can go to the File Cabinet to downloadand print the letters, including the invoices and statements associated with them. The PDF files are alsosaved on the Communication subtab on the customer record.
When the dunning evaluation runs, dunning letters that are ready for printing are shown in theDunning PDF Printing Queue if the Allow Letters to be Printed box is checked on the customer orinvoice record.
To print dunning letters:
1. Go to Setup > Dunning > Dunning PDF Printing Queue.
2. On the Dunning PDF Printing Queue page, you can search for the dunning letters you want toprint. Use any of the following filters to make the search more specific or to narrow down theresults to be displayed.
Filter Description
Customer Select the customer to whom the dunning letters you want tosend are addressed.
Subsidiary Select the subsidiary of the customers to whom the letters youwant to send are addressed.
Dunning Procedure Select the dunning procedure used for the letters you want tosend.
Dunning Level Select the dunning level used for the letters you want to send.
Apply To Select either customer or invoice dunning.

Sending and Printing Dunning Letters 64
Dunning
Filter Description
Last Letter Sent Start Date Enter the date when all letters last sent on that date and later willbe displayed.
Last Letter Sent End Date Enter the date when all letters last sent on that date and earlierwill be displayed.
Evaluation Start Date Enter the date when all letters whose dunning evaluation startedon that date and later will be displayed.
Evaluation End Date Enter the date when all letters whose dunning evaluation startedon that date and earlier will be displayed.
If you do not select any value in the filters, all dunning letters that are ready for printing aredisplayed in the list.
Click Search to display the dunning letters that you want to print to PDF.
3. Use the Pagination Options to navigate to the search results page you want to view, or controlthe number of letters displayed per page.
Field Description
Page No. Select the page number to display.
Letters Per Page Select the number of letters to display per page.The options on this field are dependent on the number of searchresults.
Total Pages Indicates the total number of pages that display the letters.
Total Letters in Queue Indicates the total number of letters in queue.
4. Check the boxes of the dunning letters that you want to print to PDF. Click Mark All to select allletters displayed. Click Unmark All to clear all boxes.
5. Click Print to generate the dunning letters in PDF format. Attachments specified in the dunningtemplate are also generated. After generating the PDF, the letter is removed from the queue,and added to the Recently Sent/Printed Dunning Letters portlet on the Dunning dashboard. Thesystem also sends you an email notification with a link to the location of the generated PDF filesin the File Cabinet.
6. To print the generated PDF files, go to Documents > Files > File Cabinet, and the click theDunning Letters PDF Files folder to open it.
A folder is created for every batch that you print. A folder contains the PDF letters in the batchyou generated along with their attachments. If an attachment exceeds the limit of 5MB, thesystem splits the attachment into separate files.
The folder name is based on the format Batch#_mmmdd_yyyy. If you print multiple batches in aday, the Batch# is incremented.
In a folder, click the Download link of a PDF letter to open and print it.
The file name of a PDF letter is based on the following format:
ID_type_CustName
, where:
■ ID is a sequence of numbers identifying a letter.
■ type can have the following values:
□ DL - indicates that the file is a dunning letter,
□ Inv - indicates that the file is an invoice,

Sending and Printing Dunning Letters 65
Dunning
□ Sta - indicates that the file is a statement.
■ CustName is the first 8 characters of the customer name.
An email notification is sent to the active administrator, indicating that PDF generation is completed.The email has a link to the folder where the PDF files are stored. If a PDF file exceeds the limit of 5MB, itis split into separate files, which the recipient is informed of in the email.
You can download letters and attachments from the File Cabinet if you want to reprint them. You canalso go to the Communication subtab on the customer record to access them.
If you want to remove a letter from the queue without generating the PDF, check its box and clickRemove. On the Dunning Evaluation Results page, the status of the letter is set to Removed.
Important: You will not be able to send or print the dunning letters that you removed. Thisaction cannot be undone.
Resending a Dunning LetterCurrently, the Dunning Letters SuiteApp cannot detect bounced email messages.
Email messages you send from NetSuite records are saved on the Messages subtab for each contactreceiving the message as well as on the record you send the email from.
If a customer requests you to resend a dunning letter, you can go to the Communication subtab on thecustomer or invoice record to access the dunning letter and forward it.
To resend a dunning letter from a customer or invoice record:
1. Go to the customer or invoice record.
2. Click the Communication subtab.
3. On the Messages subtab, click the View link on the line for the recipient.
4. Click Forward.
5. On the Recipients subtab, select the contact in the Recipient field, or enter an alternative emailaddress for the contact.
6. Click Send, or if you use the Mail Merge feature, click Merge & Send.
For more information, see the help topic Sending Email from Records.
Managing DunningIf you are using a Dunning Manager or A/R Clerk role, you can manage the dunning process onlyfor customers and invoices to which you are the assigned dunning manager. The Dunning Director,Accountant, and Administrator roles do not have such restrictions.
For information about the functionality allowed for each dunning role, see the following topics:
■ Dunning Roles
■ Dunning Permissions and Access
■ Edit Permissions for the Dunning Subtab on Customer and Invoice Records
To help you manage dunning, you can keep track of the current dunning status of accounts byusing the Dunning dashboard. You can also use the Dunning dashboard to send letters manually tocustomers, and to print dunning letters.
You can pause dunning if you want to address a customer’s queries regarding an invoice, or to permitadditional time for payment to be received before sending another letter. You can resume dunning

Managing Dunning 66
Dunning
to allow the system to run the dunning evaluation workflow. All automated and manual actionsconcerning the dunning process are tracked in the system notes.
For more information, read the following topics:
■ Assigning Dunning Managers
■ Using the Dunning Tab
■ Scheduling the Dunning Evaluation Workflow
■ Pausing and Resuming Dunning
■ Using the Dunning Dashboard
■ Sending and Printing Dunning Letters
Assigning Dunning ManagersA dunning procedure must have a default dunning manager.
When a dunning procedure is assigned to a customer or invoice during automatic assignment and bulkassignment, the default dunning manager on the dunning procedure is also automatically assigned tothe customer or invoice.
During manual assignment or when you change the dunning procedure assigned to the record, be sureto verify the value in the Dunning Manager field. You can change this value if you are using a DunningDirector, Accountant, or Administrator role.
Only Dunning Director, Accountant, or Administrator roles can create and assign dunning procedures,and edit the assigned dunning manager on a customer or invoice record.
If you are logged in with a Dunning Manager or A/R Clerk role, you can edit the Dunning Procedurefield on the Dunning subtab of the customer or invoice record only if you are the dunning managerassigned to the customer or invoice.
On a dunning procedure record, the Default Dunning Manager field is in the Primary Informationsection. On a customer or invoice record, the Dunning Manager field is on the Dunning subtab.
For more information about roles for dunning, see the following topics:
■ Dunning Roles
■ Dunning Permissions and Access
■ Edit Permissions for the Dunning Subtab on Customer and Invoice Records
■ Customizing Roles to Use the Dunning Features
Pausing and Resuming DunningYou can pause dunning for a particular invoice or customer when you want to temporarily stop sendingdunning letters to resolve queries or disputes regarding an invoice. You can resume dunning to enablethe automated dunning process to start again for the invoice or customer.
You can pause dunning for a particular invoice or customer if there is a dunning procedure assigned toit.
Pausing DunningWhen you pause dunning, you can indicate the reason for temporarily stopping the dunning processfor the particular customer or invoice. Default reasons are provided by the Dunning Letters SuiteApp.To set up additional reasons and reason details, see Creating Reasons for Pausing Dunning.

Managing Dunning 67
Dunning
To pause dunning for a customer or invoice record:
1. Edit a customer record or invoice record.
2. Click the Dunning subtab.
3. On the Setup subtab, perform the following steps:
a. Check the Pause Dunning box.
b. Select a reason for pausing dunning.
c. Select a reason detail that further explains why you want to pause dunning for this record.
d. Click Save.
4. Click Save to save the current dunning setup.
Resuming Dunning
If dunning has been paused for a customer or invoice, you can clear the Pause Dunning box on theDunning subtab to enable the automated dunning process to start again for the invoice or customer.When you resume dunning, the dunning evaluation will resume as scheduled. A dunning letter may besent to the customer depending on the dunning evaluation result.
To resume dunning for a customer or invoice record:
1. Edit a customer record or invoice record.
2. Click the Dunning subtab.
3. On the Setup subtab, clear the Pause Dunning box.
Note: Clearing the Pause Dunning box will immediately trigger the dunning evaluationworkflow. NetSuite may send a dunning letter to the customer depending on the dunningevaluation result. The Dunning Pause Reason and Dunning Pause Reason Detail fieldsare also cleared.
4. Click Save to save the current dunning setup.
Creating Reasons for Pausing Dunning
When pausing dunning for a customer or invoice, you can specify a reason and a reason detail toindicate why dunning was paused. Before you can select a reason and a reason detail, you must createdunning pause reason records.
Examples
Dunning Pause Reason Dunning Pause Reason Detail
Billing – Client requests to bill a various entity
Contract – Cancellation or amendment of contract
Query Sales
Contract – Unclear language
Billing – Billing accuracy
Billing – Invoice not sent to correct party
Query Finance
VAT – VAT charge disputed

Managing Dunning 68
Dunning
To create reasons for pausing dunning:
1. Go to Dunning > Setup > Dunning Pause Reason > New.
2. Enter a name for this reason.
3. Enter a description for this reason.
4. If you want to make this reason unavailable for use, check the Inactive box. Inactive reasons willnot be available in dropdown fields and lists.
5. (Optional) To add details for this reason, do the following steps:
a. In the Dunning Pause Reason Detail column, enter a reason detail.
b. In the Description column, enter text to describe the reason detail.
c. Click Add.
d. Repeat steps a – c to add more reason details.
6. Click Save.
To edit a dunning pause reason:
1. Go to Dunning > Setup > Dunning Pause Reason.
2. Click the Edit link of the reason.
3. Make your changes to the record. You can edit the name and description. You can also edit,remove, or add dunning pause reason details on the Dunning Pause Reason Detail subtab.
4. Click Save.
Using the Dunning DashboardDunning managers can keep track of the current dunning status of all accounts by using the Dunningdashboard.
To display the Dunning dashboard, log in with the Dunning Director or Dunning Manager role, and goto Dunning > Dunning Overview.
You can display the following predefined portlets on the Dunning dashboard:
■ Dunning Overdue Receivables
■ Dunning Overdue Receivables by Age
■ Dunning Overdue Receivables by Customer
■ Dunning Average Time to Pay
■ Total A/R Overdue
■ Customers with Paused Dunning
■ Invoices with Paused Dunning
■ Recently Sent/Printed Dunning Letters
■ Dunning Links
Dunning Overdue ReceivablesOverdue Receivables is a bar graph that shows the overdue receivables for the past 12 months.
Dunning Overdue Receivables by AgeOverdue Receivables by Age is a bar graph that shows the amounts receivable according to the numberof days overdue (1–30 days, 31–60 days, 61–90 days, and >90 days).

Managing Dunning 69
Dunning
Dunning Overdue Receivables by CustomerOverdue Receivables by Customer is a bar graph that shows five customers that have the most overdueA/R and the amounts they owe.
Dunning Average Time to PayAverage Time to Pay is a bar graph that shows the average time to pay in days for the past 12 months.
Total A/R OverdueThe Total A/R Overdue portlet shows results of a custom saved search of customers with overduebalances, and the dunning procedure assigned to each customer in the list.
When you log in using the Dunning Director role, you can see all customers and invoices with overduebalances.
When you log in using the Dunning Manager role, you can see only the overdue invoices andcustomers assigned to you.
Customers with Paused DunningThe Customers with Paused Dunning portlet shows a list of customers for which the sending ofdunning letters was temporarily stopped. The Reason and Reason Detail columns indicate whydunning was paused. You can click a customer name to view the customer record. To resume dunning,go to the customer record, clear the Pause Dunning box on the Dunning subtab, and save the record.For more information, see Pausing and Resuming Dunning.
Invoices with Paused DunningThe Invoices with Paused Dunning portlet shows a list of invoices for which the sending of dunningletters was temporarily stopped. The Reason and Reason Detail columns indicate why dunning waspaused. You can click an invoice number to view the invoice record. To resume dunning, go to theinvoice record, clear the Pause Dunning box on the Dunning subtab, and save the record. For moreinformation, see Pausing and Resuming Dunning.
Recently Sent/Printed Dunning LettersThe Recently Sent/Printed Dunning Letters portlet shows a list of dunning letters that were recentlyprinted or sent by email.
Note: The Recently Sent/Printed Dunning Letters portlet uses the NetSuite server time forrecording the date and time.
Dunning LinksThe Dunning Links portlet contains shortcuts to pages related to dunning:
■ Setup
□ Dunning Configuration
□ Dunning Template
□ Dunning Level Rule
□ Dunning Procedure

Managing Dunning 70
Dunning
□ Dunning Procedure Priority
□ Dunning Bulk Assignment
□ Dunning Pause Reason
■ Customers
■ Invoices
■ Letters
Dunning Letters Error CodesWhen you use the dunning features provided by the Dunning Letters SuiteApp, error messages areshown on the UI or in the script execution log.
Dunning User ErrorsThe following error messages are shown on the UI:
Error Code Message Cause Action
DUNNING_PERMISSION_ERROR
You do not haveprivileges to view thispage.
You tried to accessthe Bulk UpdateCustomer Recordspage and theDunning BulkAssignment pageusing a role thatdoes not havethe requiredpermission.Only DunningDirector rolescan access theBulk Update andBulk Assignmentpages.
Make sure you are loggedin using the DunningDirector, Accountant, orAdministrator role. If youare using a custom role,an administrator mustgrant the role the requiredpermission.See Dunning Permissionsand Access.
FOR_DUNNING_DIRECTOR_ACCOUNTANT_ADMIN_ACCESS_ONLY
Only the Administrator,Dunning Director, andAccountant roles cancreate and modify thistype of record.
You tried to createor edit one ofthe followingdunning customrecords using arole that does nothave the requiredpermission:
■ DunningConfiguration
■ Dunning LevelRule
■ DunningPriority
Make sure you are loggedin using the DunningDirector, Accountant, orAdministrator role. If youare using a custom role,an administrator mustgrant the role the requiredpermission.See Dunning Permissionsand Access.

Dunning Letters Error Codes 71
Dunning
Error Code Message Cause Action
■ DunningProcedure
DUNNING_DELETE_PERMISSION_FOR_ADMIN_ONLY
Only the Administratorrole can delete this typeof record.
You tried todelete one ofthe followingdunning customrecords using arole that does nothave the requiredpermission:
■ DunningConfiguration
■ DunningEvaluationResult
■ DunningPriority
Make sure you are loggedin using the Administratorrole.See Dunning Permissionsand Access.
DUNNING_FOR_ADMINISTRATOR_ACCESS_ONLY
Only the Administratorrole can create andmodify this type ofrecord.
You tried to createor modify thefollowing dunningcustom recordusing a role thatdoes not havethe requiredpermission:
■ DunningEvaluationResult
Make sure you are loggedin using the Administratorrole.See Dunning Permissionsand Access.
DUNNING_DELETE_PERMISSION_FOR_ADMIN_DD_ACCOUNTANT_ONLY
Only the Administrator,Dunning Director, andAccountant roles candelete this type ofrecord.
You tried to deletethe followingdunning customrecord using arole that does nothave the requiredpermission:
■ DunningTemplate
Make sure you arelogged in using theAdministrator, DunningDirector, or Accountantrole. If you are usinga custom role, anadministrator must grantthe role the requiredpermission.See Dunning Permissionsand Access.
DUNNING_PROC_TYPE_MODIFICATION_NOT_ALLOWED
You are not allowed toedit dunning proceduretype.
You tried toedit the AppliesTo field onthe dunningprocedurerecord. The fieldindicates whetherthe dunningprocedure isintended tobe assigned to
Create a new dunningprocedure with thedesired dunningprocedure type.

Dunning Letters Error Codes 72
Dunning
Error Code Message Cause Action
customers or toinvoices.After the dunningprocedure recordhas been saved,the Applies Tofield can no longerbe edited.
DUNNING_CUSTOMER_BULK_UPDATE_SS_DEPLOYMENT_NOT_FOUND
No deployment foundfor Customer DunningBulk Update SS.
There is nodeployment forthe Customer BulkUpdate scheduledscript.
An administratormust create a scriptdeployment for thescheduled script, Dunningbulk Updater – Customer,with the following details:
■ ID: customdeploy_3805_bulk_updater_cust
■ STATUS: Not Scheduled
■ EXECUTE AS ROLE:Administrator
DUNNING_CUSTOMER_VALIDATION_FAILED
The error messageshown depends on thespecific field or recordwhere the validationerror occurred. Theerror message can beany of the following:
■ The followingdunning letterrecipients do nothave an emailaddress on theircontact records:{CONTACTNAMES}.
■ The record cannotbe saved. TheAllow Letters ToBe Emailed box ischecked, but thereis no email addressor dunning recipientto send letters to. Tosave this record, thefollowing conditionsmust be true:
□ The DunningRecipients subtabhas at least onecontact with anemail address.
□ The Email fieldon the customer
These errors arevalidation errorsthat can occurwhen creating orediting records.
Edit the fields or subtabsthat contain invalid ormissing values.

Dunning Letters Error Codes 73
Dunning
Error Code Message Cause Action
record has anemail address.
Note: The customer'semail address isrequired only if theDo Not Send Lettersto Customer Emailbox is not checked.
■ There is no emailaddress on thecustomer record, andthere is no dunningletter recipientspecified for thiscustomer. Enteran email addresson the customerrecord, or select onthe Dunning subtabat least one dunningletter recipientthat has an emailaddress.
■ The record cannotbe saved. TheAllow Letters ToBe Emailed box ischecked, but there isno dunning recipientto send lettersto. To save thisrecord, the DunningRecipients subtabmust have at leastone contact with anemail address.Note: The customer'semail address isrequired only if theDo Not Send Lettersto Customer Emailbox is not checked.
Script Errors for DunningErrors can be encountered when the system runs the dunning scripts. For these errors, contactSupport. Be sure to provide details such as the error code and error message found in the scriptexecution log.
Error Code Message Cause Action
DUNNING_METRICS_COLLECTOR_CLASS_NOT_IMPLEMENTED
Please implement aMetricsCollector.
The MetricsCollectorimplementing class ismissing.

Dunning Letters Error Codes 74
Dunning
Error Code Message Cause Action
DUNNING_UNAUTHORIZED_USE_OF_ABSTRACT_PARSER_CLASS
Please use a subclass ofAbstractParser.
AbstractParser class used isunauthorized.
DUNNING_AUTO_ASSIGN_PROCEDURE_SEARCH_HANDLER_CLASS_NOT_IMPLEMENTED
Please implement a logic forhandling the results.
AutoAssignProcedureSearchHandler implementing classis missing.
DUNNING_QUEUE_ACTION_CLASS_NOT_IMPLEMENTED
Please implement a dunningqueue action.
DunningQueueActionimplementing class ismissing.
DUNNING_STATEMENT_GENERATION_INPUT_REQUIRED
Method dunning.app.StatementGenerator.generateStatement requires aninput parameter of typeDunningLevelStatementGeneratorInput.
Input parameter for methoddunning.app.StatementGenerator.generateStatement ismissing.
DUNNING_FORM_TITLE_MISSING
Provide a form title usingsetTitle.
Form title is not set in theFormBuilder class.
DUNNING_CURRENCY_CONVERTER_PARAMETER_REQUIRED
CurrencyConverter Input isa mandatory constructorparameter.
The constructor parameterof the CurrencyConverterclass (currency wrapper)may be null or undefined.
DUNNING_SEARCH_COLUMN_WRAPPER_PARAMETER_REQUIRED
SearchColumn requiresa columnDefinitionconstructor parameter.
The constructor parameterof the SearchColumn classmay be null or undefined.
DUNNING_SEARCH_FILTER_WRAPPER_PARAMETER_REQUIRED
SearchFilter requires afilterDefinition constructorparameter.
The constructor parameterof the SearchFilter class maybe null or undefined.
DUNNING_MESSAGE_LOADER_ERROR
An error has occurred in theMessageLoader class.
The MessageLoader classmay be sending the requestto an incorrect messageloader service.
DUNNING_HOME_FOLDER_CREATION_ERROR
An error has occurred increating dunning lettershome folder in the filecabinet.
An error occurred duringthe creation of the homefolder for the dunning letterfiles in the file cabinet.The record type and fieldname/value pairs may beincorrect.
DUNNING_PDF_SUBFOLDER_CREATION_ERROR
An error has occurred increating dunning letters pdfsubfolder in the file cabinet.
An error occurred duringthe creation of the PDFsubfolder for the dunningletter PDF files in the filecabinet. The record type andfield name/value pairs maybe incorrect.
DUNNING_TEMPLATE_BUILDER_RECORD_ADDITION_ERROR
An error has occurred whileadding a record to thetemplate builder.
Failure in adding a recordto the template builder. Thens_wrapper.TemplateRenderer.addRecord method hasinvalid parameters.
DUNNING_TEMPLATE_BUILDER_SEARCHRESULT_ADDITION_ERROR
An error has occurred whileadding a search result to thetemplate builder.
Failure in adding the searchresult to the templatebuilder. The ns_wrapper.TemplateRenderer.addSearchResults method has invalidparameters.

Dunning Letters Error Codes 75
Dunning
Error Code Message Cause Action
DUNNING_LOCALIZATION_VARIABLE_LIST_LOADER_ERROR
An error has occurred in theLocalizationVariableListLoader class.
The LocalizationVariableListLoader class may besending the request toan incorrect localizationvariable loader service.
DUNNING_FIELD_API_WRAPPER_SUBMITFIELD_ERROR
An error has occurredin Field API Wrapper -ns_wrapper.api.field.submitField.
The parameters supplied tothe ns_wrapper.api.field.submitField method may beincorrect.
DUNNING_REC_API_WRAPPER_ATTACHREC_ERROR
An error has occurredin Record API Wrapper -ns_wrapper.api.record.attachRecord.
The parameters supplied tothe ns_wrapper.api.record.attachRecord method may beincorrect.
DUNNING_SUBLIST_API_WRAPPER_COMMIT_LINEITEM_ERROR
An error has occurredin Sublist API Wrapper -ns_wrapper.api.sublist.commitLineItem.
The parameters supplied tothe ns_wrapper.api.sublist.commitLineItem methodmay be incorrect.
DUNNING_MAILER_ERROR
An error has occurred insending email.
The object parametersupplied to the suite_l10n.communication.Mail constructor may beincorrect.
DUNNING_TEMPLATE_BUILDER_MESSAGE_RENDER_ERROR
An error has occurred whilerendering the message.
The object parametersupplied to the dunning.app.TemplateBuilder constructor may beincorrect.
DUNNING_TEMPLATE_BUILDER_SUBJECT_RENDER_ERROR
An error has occurred whilerendering the subject.
The object parametersupplied to the dunning.app.TemplateBuilder constructor may beincorrect.
DUNNING_PARSER_ERROR
An error has occurred inAbstractParser class.
The doParse method in thesubclasses of AbstractParserhas invalid parameters.
DUNNING_CUSTOMER_VALIDATION_FAILED
The error message showndepends on the specificfield or record where thevalidation error occurred.The error message can beany of the following:
■ The following dunningletter recipients do nothave an email addresson their contact records:{CONTACTNAMES}.
■ The record cannot besaved. The Allow LettersTo Be Emailed box ischecked, but there isno email address ordunning recipient tosend letters to. To savethis record, the followingconditions must be true:□ The Dunning
Recipients subtabhas at least one
These errors are validationerrors that can occur whencreating or editing records.
Edit thefields orsubtabsthat containinvalid ormissingvalues.
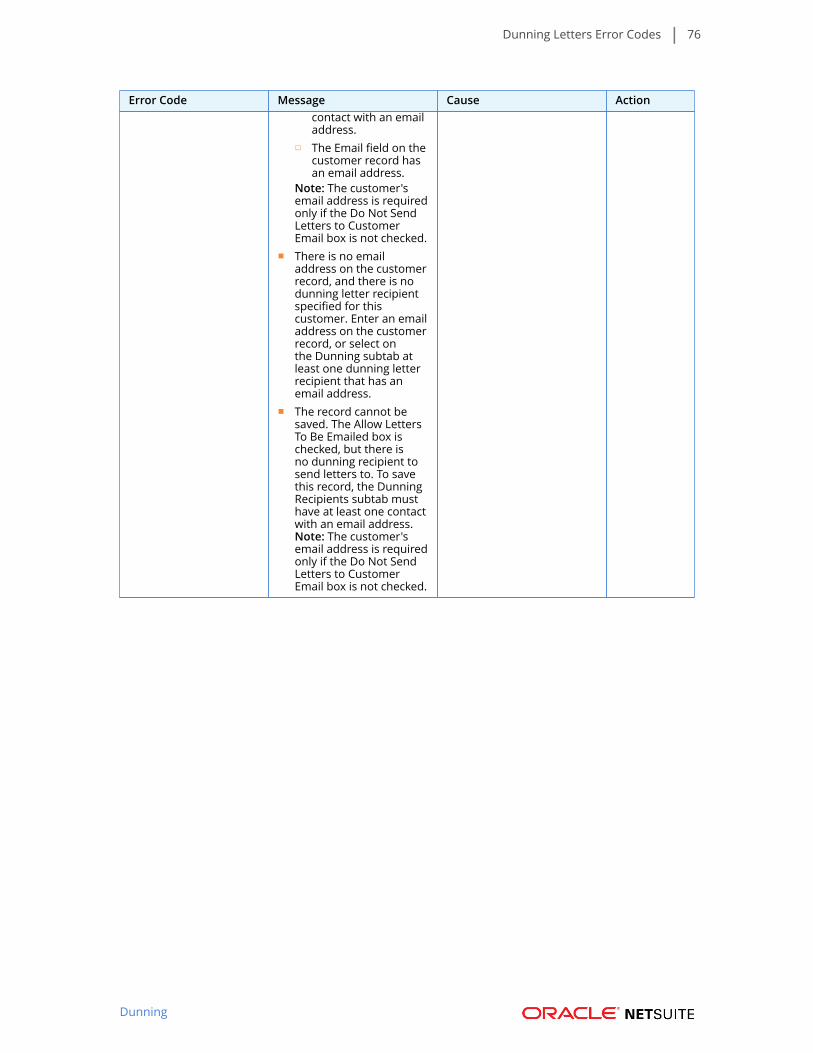
Dunning Letters Error Codes 76
Dunning
Error Code Message Cause Actioncontact with an emailaddress.
□ The Email field on thecustomer record hasan email address.
Note: The customer'semail address is requiredonly if the Do Not SendLetters to CustomerEmail box is not checked.
■ There is no emailaddress on the customerrecord, and there is nodunning letter recipientspecified for thiscustomer. Enter an emailaddress on the customerrecord, or select onthe Dunning subtab atleast one dunning letterrecipient that has anemail address.
■ The record cannot besaved. The Allow LettersTo Be Emailed box ischecked, but there isno dunning recipient tosend letters to. To savethis record, the DunningRecipients subtab musthave at least one contactwith an email address.Note: The customer'semail address is requiredonly if the Do Not SendLetters to CustomerEmail box is not checked.