DQ 951HF1 Analyst UserGuide En
64
Informatica Data Quality Analyst (Version 9.5.1 HotFix 1) User Guide
Transcript of DQ 951HF1 Analyst UserGuide En

8/11/2019 DQ 951HF1 Analyst UserGuide En
http://slidepdf.com/reader/full/dq-951hf1-analyst-userguide-en 1/64
Informatica Data Quality Analyst (Version 9.5.1 HotFix 1)
User Guide

8/11/2019 DQ 951HF1 Analyst UserGuide En
http://slidepdf.com/reader/full/dq-951hf1-analyst-userguide-en 2/64
Informatica Data Quality Analyst User Guide
Version 9.5.1 HotFix 1March 2013
Copyright (c) 1998-2013 Informatica Corporation. All rights reserved.
This software and documentation contain proprietary information of Informatica Corporation and are provided under a license agreement containing restrictions on use anddisclosure and are also protected by copyright law. Reverse engineering of the software is prohibited. No part of this document may be reproduced or transmitted in any form, by means (electronic, photocopying, recording or otherwise) without prior consent of Informatica Corporation. This Software may be protected by U.S. and/or international Patents aother Patents Pending.
Use, duplication, or disclosure of the Software by the U.S. Government is subject to the restrictions set forth in the applicable software license agreement and as provided in DFA227.7202-1(a) and 227.7702-3(a) (1995), DFARS 252.227-7013©(1)(ii) (OCT 1988), FAR 12.212(a) (1995), FAR 52.227-19, or FAR 52.227-14 (ALT III), as applicable.
The information in this product or documentation is subject to change without notice. If you find any problems in this product or documentation, please report them to us inwriting.
Informatica, Informatica Platform, Informatica Data Services, PowerCenter, PowerCenterRT, PowerCenter Connect, PowerCenter Data Analyzer, PowerExchange, PowerMMetadata Manager, Informatica Data Quality, Informatica Data Explorer, Informatica B2B Data Transformation, Informatica B2B Data Exchange Informatica On Demand,Informatica Identity Resolution, Informatica Application Information Lifecycle Management, Informatica Complex Event Processing, Ultra Messaging and Informatica Master DManagement are trademarks or registered trademarks of Informatica Corporation in the United States and in jurisdictions throughout the world. All other company and prodnames may be trade names or trademarks of their respective owners.
Portions of this software and/or documentation are subject to copyright held by third parties, including without limitation: Copyright DataDirect Technologies. All rights reservCopyright © Sun Microsystems. All rights reserved. Copyright © RSA Security Inc. All Rights Reserved. Copyright © Ordinal Technology Corp. All rights reserved.Copyright
Aandacht c.v. All rights reserved. Copyright Genivia, Inc. All rights reserved. Copyright Isomorphic Software. All rights reserved. Copyright© Meta Integration Technology, Incrights reserved. Copyright © Intalio. All rights reserved. Copyright © Oracle. All rights reserved. Copyright © Adobe Systems Incorporated. All rights reserved. Copyright © DataInc. All rights reserved. Copyright © ComponentSource. All rights reserved. Copyright © Microsoft Corporation. All rights reserved. Copyright © Rogue Wave Software, Inc. All rigreserved. Copyright © Teradata Corporation. All rights reserved. Copyright © Yahoo! Inc. All rights reserved. Copyright © Glyph & Cog, LLC. All rights reserved. Copyright ©
Thinkmap, Inc. All rights reserved. Copyright © Clearpace Software Limited. All rights reserved. Copyright © Information Builders, Inc. All rights reserved. Copyright © OSS NokaInc. All rights reserved. Copyright Edifecs, Inc. All rights reserved. Copyright Cleo Communications, Inc. All rights reserved. Copyright © International Organization for Standardization 1986. All rights reserved. Copyright © ej-technologies GmbH. All rights reserved. Copyright © Jaspersoft Corporation. All rights reserved. Copyright © isInternational Business Machines Corporation. All rights reserved. Copyright © yWorks GmbH. All rights reserved. Copyright © Lucent Technologies. All rights reserved. Copyr(c) University of Toronto. All rights reserved. Copyright © Daniel Veillard. All rights reserved. Copyright © Unicode, Inc. Copyright IBM Corp. All rights reserved. Copyright ©
MicroQuill Software Publishing, Inc. All rights reserved. Copyright © PassMark Software Pty Ltd. All rights reserved. Copyright © LogiXML, Inc. All rights reserved. Copyrigh2003-2010 Lorenzi Davide, All rights reserved. Copyright © Red Hat, Inc. All rights reserved. Copyright © The Board of Trustees of the Leland Stanford Junior University. A ll rigreserved. Copyright © EMC Corporation. All rights reserved. Copyright© Flexera Software. All rights reserved. Copyright © Jinfonet Software. All rights reserved. Copyright © ApInc. All rights reserved.
This product includes software developed by the Apache Software Foundation (http://www.apache.org/), and other software which is licensed under the Apache License, Vers2.0 (the "License"). You may obtain a copy of the License at http://www.apache.org/licenses/LICENSE-2.0. Unless required by applicable law or agreed to in writing, softwadistributed under the License is distributed on an "AS IS" BASIS, WITHOUT WARRANTIES OR CONDITIONS OF ANY KIND, either express or implied. See the License forspecific language governing permissions and limitations under the License.
This product includes software which was developed by Mozilla (http://www.mozilla.org/), software copyright The JBoss Group, LLC, all rights reserved; software copyright1999-2006 by Bruno Lowagie and Paulo Soares and other software which is licensed under various versions of the GNU Lesser General Public License Agreement, which mayfound at http:// www.gnu.org/licenses/lgpl.html. The materials are provided free of charge by Informatica, "as-is", without warranty of any kind, either express or implied, includbut not limited to the implied warranties of merchantability and fitness for a particular purpose.
The product includes ACE(TM) and TAO(TM) software copyrighted by Douglas C. Schmidt and his research group at Washington University, University of California, Irvine, Vanderbilt University, Copyright (©) 1993-2006, all rights reserved.
This product includes software developed by the OpenSSL Project for use in the OpenSSL Toolkit (copyright The OpenSSL Project. All Rights Reserved) and redistribution of software is subject to terms available at http://www.openssl.org and http://www.openssl.org/source/license.html.
This product includes Curl software which is Copyright 1996-2007, Daniel Stenberg, <[email protected]>. All Rights Reserved. Permissions and limitations regarding this software subject to terms available at http://curl.haxx.se/docs/copyright.html. Permission to use, copy, modify, and distribute this software for any purpose with or wi thout fee is hergranted, provided that the above copyright notice and this permission notice appear in all copies.
The product includes software copyright 2001-2005 (©) MetaStuff, Ltd. All Rights Reserved. Permissions and limitations regarding this software are subject to terms availablhttp://www.dom4j.org/ license.html.
The product includes software copyright© 2004-2007, The Dojo Foundation. All Rights Reserved. Permissions and limitations regarding this software are subject to terms availaat http://dojotoolkit.org/license.
This product includes ICU software which is copyright International Business Machines Corporation and others. All rights reserved. Permissions and limitations regarding thsoftware are subject to terms available at http://source.icu-project.org/repos/icu/icu/trunk/license.html.
This product includes software copyright © 1996-2006 Per Bothner. All rights reserved. Your right to use such materials is set forth in the license which may be found at httpwww.gnu.org/software/ kawa/Software-License.html.
This product includes OSSP UUID software which is Copyright © 2002 Ralf S. Engelschall, Copyright © 2002 The OSSP Project Copyright © 2002 Cable & Wireless DeutschlaPermissions and limitations regarding this software are subject to terms available at http://www.opensource.org/licenses/mit-license.php.
This product includes software developed by Boost (http://www.boost.org/) or under the Boost software license. Permissions and limitations regarding this software are subjecterms available at http:/ /www.boost.org/LICENSE_1_0.txt.
This product includes software copyright © 1997-2007 University of Cambridge. Permissions and limitations regarding this software are subject to terms available at http://www.pcre.org/license.txt.
This product includes software copyright © 2007 The Eclipse Foundation. All Rights Reserved. Permissions and limitations regarding this software are subject to terms availablhttp:// www.eclipse.org/org/documents/epl-v10.php.
This product includes software licensed under the terms at http://www.tcl.tk/software/tcltk/license.html, http://www.bosrup.com/web/overlib/?License, http://www.stlport.org/dlicense.html, http:// asm.ow2.org/license.html, http://www.cryptix.org/LICENSE.TXT, http://hsqldb.org/web/hsqlLicense.html, http://httpunit.sourceforge.net/doc/license.htmlhttp://jung.sourceforge.net/license.txt, http://www.gzip.org/zlib/zlib_license.html, http://www.openldap.org/software/release/license.html, http://www.libssh2.org, http://slf4j.orlicense.html, http://www.sente.ch/software/OpenSourceLicense.html, http://fusesource.com/downloads/license-agreements/fuse-message-broker-v-5-3-license-agreement;http://antlr.org/license.html; http://aopalliance.sourceforge.net/; http://www.bouncycastle.org/licence.html; http://www.jgraph.com/jgraphdownload.html; http://www.jcraft.com
jsch/LICENSE.txt; http://jotm.objectweb.org/bsd_license.html; http://www.w3.org/Consortium/Legal/2002/copyright-software-20021231; http://www.slf4j.org/license.html; httnanoxml.sourceforge.net/orig/copyright.html; http://www.json.org/license.html; http://forge.ow2.org/projects/javaservice/, http://www.postgresql.org/about/licence.html, http:/

8/11/2019 DQ 951HF1 Analyst UserGuide En
http://slidepdf.com/reader/full/dq-951hf1-analyst-userguide-en 3/64
www.sqlite.org/copyright.html, http://www.tcl.tk/software/tcltk/license.html, http://www.jaxen.org/faq.html, http://www.jdom.org/docs/faq.html, http://www.slf4j.org/license.htmhttp://www.iodbc.org/dataspace/iodbc/wiki/iODBC/License; http://www.keplerproject.org/md5/license.html; http://www.toedter.com/en/jcalendar/license.html; http://www.edankert.com/bounce/index.html; http://www.net-snmp.org/about/license.html; http://www.openmdx.org/#FAQ; http://www.php.net/license/3_01.txt; http://srp.stanford.elicense.txt; http://www.schneier.com/blowfish.html; http://www.jmock.org/license.html; http://xsom.java.net; and http://benalman.com/about/license/; https://github.com/CreateJS/EaselJS/blob/master/src/easeljs/display/Bitmap.js; http://www.h2database.com/html/license.html#summary.
This product includes software licensed under the terms at http://www.tcl.tk/software/tcltk/license.html, http://www.bosrup.com/web/overlib/?License, http://www.stlport.org/dlicense.html, http:// asm.ow2.org/license.html, http://www.cryptix.org/LICENSE.TXT, http://hsqldb.org/web/hsqlLicense.html, http://httpunit.sourceforge.net/doc/ license.htmlhttp://jung.sourceforge.net/license.txt , http://www.gzip.org/zlib/zlib_license.html, http://www.openldap.org/software/release/license.html, http://www.libssh2.org, http://slf4j.olicense.html, http://www.sente.ch/software/OpenSourceLicense.html, http://fusesource.com/downloads/license-agreements/fuse-message-broker-v-5-3- license-agreementhttp://antlr.org/license.html; http://aopalliance.sourceforge.net/; http://www.bouncycastle.org/licence.html; http://www.jgraph.com/jgraphdownload.html; http://www.jcraft.com
jsch/LICENSE.txt; http://jotm.objectweb.org/bsd_license.html; . http://www.w3.org/Consortium/Legal/2002/copyright-software-20021231; http://www.slf4j.org/license.html; htnanoxml.sourceforge.net/orig/copyright.html; http://www.json.org/license.html; http://forge.ow2.org/projects/javaservice/, http://www.postgresql.org/about/licence.html, http:/www.sqlite.org/copyright.html, http://www.tcl.tk/software/tcltk/license.html, http://www.jaxen.org/faq.html, http://www.jdom.org/docs/faq.html, http://www.slf4j.org/license.htm
http://www.iodbc.org/dataspace/iodbc/wiki/iODBC/License; http://www.keplerproject.org/md5/license.html; http://www.toedter.com/en/jcalendar/license.html; http://www.edankert.com/bounce/index.html; http://www.net-snmp.org/about/license.html; http://www.openmdx.org/#FAQ; http://www.php.net/license/3_01.txt; http://srp.stanford.elicense.txt; http://www.schneier.com/blowfish.html; http://www.jmock.org/license.html; http://xsom.java.net; and http://benalman.com/about/license/; https://github.com/CreateJS/EaselJS/blob/master/src/easeljs/display/Bitmap.js; http://www.h2database.com/html/license.html#summary; and http://jsoncpp.sourceforge.net/LICENSE.
This product includes software licensed under the Academic Free License (http://www.opensource.org/licenses/afl-3.0.php), the Common Development and Distribution Lice(http://www.opensource.org/licenses/cddl1.php) the Common Public License (http://www.opensource.org/licenses/cpl1.0.php), the Sun Binary Code License AgreementSupplemental License Terms, the BSD License (http:// www.opensource.org/licenses/bsd-license.php) the MIT License (http://www.opensource.org/licenses/mit-license.php) athe Artistic License (http://www.opensource.org/licenses/artistic-license-1.0).
This product includes software copyright © 2003-2006 Joe WaInes, 2006-2007 XStream Committers. All rights reserved. Permissions and limitations regarding this software subject to terms available at http://xstream.codehaus.org/license.html. This product includes software developed by the Indiana University Extreme! Lab. For further informaplease visit http://www.extreme.indiana.edu/.
This Software is protected by U.S. Patent Numbers 5,794,246; 6,014,670; 6,016,501; 6,029,178; 6,032,158; 6,035,307; 6,044,374; 6,092,086; 6,208,990; 6,339,775; 6,640,26,789,096; 6,820,077; 6,823,373; 6,850,947; 6,895,471; 7,117,215; 7,162,643; 7,243,110, 7,254,590; 7,281,001; 7,421,458; 7,496,588; 7,523,121; 7,584,422; 7676516; 7,7842; 7,721,270; and 7,774,791, international Patents and other Patents Pending.
DISCLAIMER: Informatica Corporation provides this documentation "as is" without warranty of any kind, either express or implied, including, but not limited to, the impliedwarranties of noninfringement, merchantability, or use for a particular purpose. Informatica Corporation does not warrant that this software or documentation is error free. Th
information provided in this software or documentation may include technical inaccuracies or typographical errors. The information in this software and documentation is subjecchange at any time without notice.
NOTICES
This Informatica product (the "Software") includes certain drivers (the "DataDirect Drivers") from DataDirect Technologies, an operating company of Progress Software Corpora("DataDirect") which are subject to the following terms and conditions:
1. THE DATADIRECT DRIVERS ARE PROVIDED "AS IS" WITHOUT WARRANTY OF ANY KIND, EITHER EXPRESSED OR IMPLIED, INCLUDING BUT NOT LIMIT
TO, THE IMPLIED WARRANTIES OF MERCHANTABILITY, FITNESS FOR A PARTICULAR PURPOSE AND NON-INFRINGEMENT.
2. IN NO EVENT WILL DATADIRECT OR ITS THIRD PARTY SUPPLIERS BE LIABLE TO THE END-USER CUSTOMER FOR ANY DIRECT, INDIRECT, INCIDENT
SPECIAL, CONSEQUENTIAL OR OTHER DAMAGES ARISING OUT OF THE USE OF THE ODBC DRIVERS, WHETHER OR NOT INFORMED OF THE
POSSIBILITIES OF DAMAGES IN ADVANCE. THESE LIMITATIONS APPLY TO ALL CAUSES OF ACTION, INCLUDING, WITHOUT LIMITATION, BREACH OF
CONTRACT, BREACH OF WARRANTY, NEGLIGENCE, STRICT LIAB ILITY, MISREPRESENTATION AND OTHER TORTS.
Part Number: DQ-AUG-95100-HF1-0001
8/11/2019 DQ 951HF1 Analyst UserGuide En
http://slidepdf.com/reader/full/dq-951hf1-analyst-userguide-en 4/64
Table of Contents
Preface . . . . . . . . . . . . . . . . . . . . . . . . . . . . . . . . . . . . . . . . . . . . . . . . . . . . . . . . . . . . . . . . . . . . . . . . . . . v
Informatica Resources. . . . . . . . . . . . . . . . . . . . . . . . . . . . . . . . . . . . . . . . . . . . . . . . . . . . . . v
Informatica MySupport Portal. . . . . . . . . . . . . . . . . . . . . . . . . . . . . . . . . . . . . . . . . . . . . . . v
Informatica Documentation. . . . . . . . . . . . . . . . . . . . . . . . . . . . . . . . . . . . . . . . . . . . . . . . . v
Informatica Web Site. . . . . . . . . . . . . . . . . . . . . . . . . . . . . . . . . . . . . . . . . . . . . . . . . . . . . v
Informatica How-To Library. . . . . . . . . . . . . . . . . . . . . . . . . . . . . . . . . . . . . . . . . . . . . . . . v
Informatica Knowledge Base. . . . . . . . . . . . . . . . . . . . . . . . . . . . . . . . . . . . . . . . . . . . . . . vi
Informatica Multimedia Knowledge Base. . . . . . . . . . . . . . . . . . . . . . . . . . . . . . . . . . . . . . . . vi
Informatica Marketplace. . . . . . . . . . . . . . . . . . . . . . . . . . . . . . . . . . . . . . . . . . . . . . . . . . vi
Informatica Global Customer Support. . . . . . . . . . . . . . . . . . . . . . . . . . . . . . . . . . . . . . . . . . vi
Chapter 1: Intr oduction to Informatica Data Quality Analyst. . . . . . . . . . . . . . . . . . . . . . . . . 1
Informatica Data Quality Analyst Overview. . . . . . . . . . . . . . . . . . . . . . . . . . . . . . . . . . . . . . . . . 1
Informatica Analyst. . . . . . . . . . . . . . . . . . . . . . . . . . . . . . . . . . . . . . . . . . . . . . . . . . . . . . . . . 1
Informatica Analyst Navigator. . . . . . . . . . . . . . . . . . . . . . . . . . . . . . . . . . . . . . . . . . . . . . . 2
Informatica Analyst Views. . . . . . . . . . . . . . . . . . . . . . . . . . . . . . . . . . . . . . . . . . . . . . . . . 2
Contents View. . . . . . . . . . . . . . . . . . . . . . . . . . . . . . . . . . . . . . . . . . . . . . . . . . . . . . . . . 3
Properties View. . . . . . . . . . . . . . . . . . . . . . . . . . . . . . . . . . . . . . . . . . . . . . . . . . . . . . . . 3
Security View. . . . . . . . . . . . . . . . . . . . . . . . . . . . . . . . . . . . . . . . . . . . . . . . . . . . . . . . . 3
Logging In to Infor matica Analyst. . . . . . . . . . . . . . . . . . . . . . . . . . . . . . . . . . . . . . . . . . . . . . . . 4
Chapter 2: Pro jects. . . . . . . . . . . . . . . . . . . . . . . . . . . . . . . . . . . . . . . . . . . . . . . . . . . . . . . . . . . . . . . . 5
Projects Overview. . . . . . . . . . . . . . . . . . . . . . . . . . . . . . . . . . . . . . . . . . . . . . . . . . . . . . . . . 5
Creating a Project. . . . . . . . . . . . . . . . . . . . . . . . . . . . . . . . . . . . . . . . . . . . . . . . . . . . . . 6
Duplicating a Project. . . . . . . . . . . . . . . . . . . . . . . . . . . . . . . . . . . . . . . . . . . . . . . . . . . . . 6
Renaming a Project. . . . . . . . . . . . . . . . . . . . . . . . . . . . . . . . . . . . . . . . . . . . . . . . . . . . . 7
Deleting a Project. . . . . . . . . . . . . . . . . . . . . . . . . . . . . . . . . . . . . . . . . . . . . . . . . . . . . . 7
Rules and Guidelines for Projects. . . . . . . . . . . . . . . . . . . . . . . . . . . . . . . . . . . . . . . . . . . . 7
Folders. . . . . . . . . . . . . . . . . . . . . . . . . . . . . . . . . . . . . . . . . . . . . . . . . . . . . . . . . . . . . . . . 7
Creating a Folder. . . . . . . . . . . . . . . . . . . . . . . . . . . . . . . . . . . . . . . . . . . . . . . . . . . . . . . 8
Renaming a Folder. . . . . . . . . . . . . . . . . . . . . . . . . . . . . . . . . . . . . . . . . . . . . . . . . . . . . . 8
Duplicating a Folder. . . . . . . . . . . . . . . . . . . . . . . . . . . . . . . . . . . . . . . . . . . . . . . . . . . . . 8
Moving a Folder. . . . . . . . . . . . . . . . . . . . . . . . . . . . . . . . . . . . . . . . . . . . . . . . . . . . . . . . 8
Deleting a Folder. . . . . . . . . . . . . . . . . . . . . . . . . . . . . . . . . . . . . . . . . . . . . . . . . . . . . . . 9
Viewing a Project or Folder. . . . . . . . . . . . . . . . . . . . . . . . . . . . . . . . . . . . . . . . . . . . . . . . . . . 9
Objects. . . . . . . . . . . . . . . . . . . . . . . . . . . . . . . . . . . . . . . . . . . . . . . . . . . . . . . . . . . . . . . . 9
Object Pr operties. . . . . . . . . . . . . . . . . . . . . . . . . . . . . . . . . . . . . . . . . . . . . . . . . . . . . . 10
Viewing an Object. . . . . . . . . . . . . . . . . . . . . . . . . . . . . . . . . . . . . . . . . . . . . . . . . . . . . 11
Table of Contents i

8/11/2019 DQ 951HF1 Analyst UserGuide En
http://slidepdf.com/reader/full/dq-951hf1-analyst-userguide-en 5/64
Duplicating an Object. . . . . . . . . . . . . . . . . . . . . . . . . . . . . . . . . . . . . . . . . . . . . . . . . . . 12
Renaming an Object. . . . . . . . . . . . . . . . . . . . . . . . . . . . . . . . . . . . . . . . . . . . . . . . . . . . 12
Moving an Object. . . . . . . . . . . . . . . . . . . . . . . . . . . . . . . . . . . . . . . . . . . . . . . . . . . . . . 12
Deleting an Object. . . . . . . . . . . . . . . . . . . . . . . . . . . . . . . . . . . . . . . . . . . . . . . . . . . . . 12
Metadata Bookmarks. . . . . . . . . . . . . . . . . . . . . . . . . . . . . . . . . . . . . . . . . . . . . . . . . . . . . . 13
Creating a Metadata Bookmark. . . . . . . . . . . . . . . . . . . . . . . . . . . . . . . . . . . . . . . . . . . . . 13
Opening a Metadata Bookmark. . . . . . . . . . . . . . . . . . . . . . . . . . . . . . . . . . . . . . . . . . . . . 13
Tags. . . . . . . . . . . . . . . . . . . . . . . . . . . . . . . . . . . . . . . . . . . . . . . . . . . . . . . . . . . . . . . . . 14
Creating and Assigning a Tag. . . . . . . . . . . . . . . . . . . . . . . . . . . . . . . . . . . . . . . . . . . . . . 14
Viewing Tags. . . . . . . . . . . . . . . . . . . . . . . . . . . . . . . . . . . . . . . . . . . . . . . . . . . . . . . . . 14
Search. . . . . . . . . . . . . . . . . . . . . . . . . . . . . . . . . . . . . . . . . . . . . . . . . . . . . . . . . . . . . . . . 15
Search Syntax. . . . . . . . . . . . . . . . . . . . . . . . . . . . . . . . . . . . . . . . . . . . . . . . . . . . . . . . 15
Search Filters. . . . . . . . . . . . . . . . . . . . . . . . . . . . . . . . . . . . . . . . . . . . . . . . . . . . . . . . 16
Search Results. . . . . . . . . . . . . . . . . . . . . . . . . . . . . . . . . . . . . . . . . . . . . . . . . . . . . . . 17
Performing a Search. . . . . . . . . . . . . . . . . . . . . . . . . . . . . . . . . . . . . . . . . . . . . . . . . . . . 17
Importing Metadata Manager Tables. . . . . . . . . . . . . . . . . . . . . . . . . . . . . . . . . . . . . . . . . . 17
Searching Ob jects Example. . . . . . . . . . . . . . . . . . . . . . . . . . . . . . . . . . . . . . . . . . . . . . . 18Security. . . . . . . . . . . . . . . . . . . . . . . . . . . . . . . . . . . . . . . . . . . . . . . . . . . . . . . . . . . . . . . 18
Project Permissions. . . . . . . . . . . . . . . . . . . . . . . . . . . . . . . . . . . . . . . . . . . . . . . . . . . . 18
Rules and Guidelines for Security. . . . . . . . . . . . . . . . . . . . . . . . . . . . . . . . . . . . . . . . . . . 20
Job Status. . . . . . . . . . . . . . . . . . . . . . . . . . . . . . . . . . . . . . . . . . . . . . . . . . . . . . . . . . . . . 20
Monitoring Job Status. . . . . . . . . . . . . . . . . . . . . . . . . . . . . . . . . . . . . . . . . . . . . . . . . . . 21
Business Terms. . . . . . . . . . . . . . . . . . . . . . . . . . . . . . . . . . . . . . . . . . . . . . . . . . . . . . . . . . 22
Managing Business Terms in Metadata Manager Business Glossary. . . . . . . . . . . . . . . . . . . . . 2 2
Looking Up a Business Term in Business Glossary Desktop. . . . . . . . . . . . . . . . . . . . . . . . . . 22
Chapter 3: Data Objects. . . . . . . . . . . . . . . . . . . . . . . . . . . . . . . . . . . . . . . . . . . . . . . . . . . . . . . . . . 23Data Objects Over view. . . . . . . . . . . . . . . . . . . . . . . . . . . . . . . . . . . . . . . . . . . . . . . . . . . . . 23
Flat Fi les. . . . . . . . . . . . . . . . . . . . . . . . . . . . . . . . . . . . . . . . . . . . . . . . . . . . . . . . . . . . . . 24
Flat File Options. . . . . . . . . . . . . . . . . . . . . . . . . . . . . . . . . . . . . . . . . . . . . . . . . . . . . . . 24
Flat File Datatypes. . . . . . . . . . . . . . . . . . . . . . . . . . . . . . . . . . . . . . . . . . . . . . . . . . . . . 25
Datetime Datatypes. . . . . . . . . . . . . . . . . . . . . . . . . . . . . . . . . . . . . . . . . . . . . . . . . . . . 25
Adding a Delimited Flat File. . . . . . . . . . . . . . . . . . . . . . . . . . . . . . . . . . . . . . . . . . . . . . . 27
Adding a Fixed-width Flat File. . . . . . . . . . . . . . . . . . . . . . . . . . . . . . . . . . . . . . . . . . . . . . 27
Synchronizing a Flat File Data Object. . . . . . . . . . . . . . . . . . . . . . . . . . . . . . . . . . . . . . . . . 28
Rules and Guidelines for Flat Files. . . . . . . . . . . . . . . . . . . . . . . . . . . . . . . . . . . . . . . . . . . 29
Tables. . . . . . . . . . . . . . . . . . . . . . . . . . . . . . . . . . . . . . . . . . . . . . . . . . . . . . . . . . . . . . . . 29
Database Connection Properties. . . . . . . . . . . . . . . . . . . . . . . . . . . . . . . . . . . . . . . . . . . . 29
Deleting a Database Connection. . . . . . . . . . . . . . . . . . . . . . . . . . . . . . . . . . . . . . . . . . . . 30
Adding a Table. . . . . . . . . . . . . . . . . . . . . . . . . . . . . . . . . . . . . . . . . . . . . . . . . . . . . . . 30
Synchronizing a Relational Data Object. . . . . . . . . . . . . . . . . . . . . . . . . . . . . . . . . . . . . . . . 31
Rules and Guidelines for Tables. . . . . . . . . . . . . . . . . . . . . . . . . . . . . . . . . . . . . . . . . . . . 31
Viewing Data Objects. . . . . . . . . . . . . . . . . . . . . . . . . . . . . . . . . . . . . . . . . . . . . . . . . . . . . . 32
ii Table of Contents
8/11/2019 DQ 951HF1 Analyst UserGuide En
http://slidepdf.com/reader/full/dq-951hf1-analyst-userguide-en 6/64
Editing Data Objects. . . . . . . . . . . . . . . . . . . . . . . . . . . . . . . . . . . . . . . . . . . . . . . . . . . . . . . 33
Chapter 4: Exception Record Management. . . . . . . . . . . . . . . . . . . . . . . . . . . . . . . . . . . . . . . . 34
Exception Record Management Overview. . . . . . . . . . . . . . . . . . . . . . . . . . . . . . . . . . . . . . . . . 34
Exception Management Process Flow. . . . . . . . . . . . . . . . . . . . . . . . . . . . . . . . . . . . . . . . . . . . 35
Reserved Column Names . . . . . . . . . . . . . . . . . . . . . . . . . . . . . . . . . . . . . . . . . . . . . . . . . . . 36
Exception Management Operations. . . . . . . . . . . . . . . . . . . . . . . . . . . . . . . . . . . . . . . . . . . . . 36
Importing a Database for Exception Management. . . . . . . . . . . . . . . . . . . . . . . . . . . . . . . . . 36
Viewing and Editing Bad Records. . . . . . . . . . . . . . . . . . . . . . . . . . . . . . . . . . . . . . . . . . . 37
Updating Bad Record Status. . . . . . . . . . . . . . . . . . . . . . . . . . . . . . . . . . . . . . . . . . . . . . . 37
Viewing and Filtering Duplicate Record Clusters . . . . . . . . . . . . . . . . . . . . . . . . . . . . . . . . . . 37
Editing Duplicate Record Clusters. . . . . . . . . . . . . . . . . . . . . . . . . . . . . . . . . . . . . . . . . . . 38
Consolidating Duplicate Record Clusters. . . . . . . . . . . . . . . . . . . . . . . . . . . . . . . . . . . . . . . 38
Viewing the Audit Trail. . . . . . . . . . . . . . . . . . . . . . . . . . . . . . . . . . . . . . . . . . . . . . . . . . . 38
Chapter 5: Ref erence Tables. . . . . . . . . . . . . . . . . . . . . . . . . . . . . . . . . . . . . . . . . . . . . . . . . . . . . . 40
Reference Tables Overview. . . . . . . . . . . . . . . . . . . . . . . . . . . . . . . . . . . . . . . . . . . . . . . . . . 40
Reference Table Structure. . . . . . . . . . . . . . . . . . . . . . . . . . . . . . . . . . . . . . . . . . . . . . . . 41
Managed and Unmanaged Reference Tables. . . . . . . . . . . . . . . . . . . . . . . . . . . . . . . . . . . . 41
Reference Table Properties. . . . . . . . . . . . . . . . . . . . . . . . . . . . . . . . . . . . . . . . . . . . . . . . . . 41
General Reference Table Properties. . . . . . . . . . . . . . . . . . . . . . . . . . . . . . . . . . . . . . . . . . 42
Reference Table Column Properties. . . . . . . . . . . . . . . . . . . . . . . . . . . . . . . . . . . . . . . . . . 42
Create Reference Tables. . . . . . . . . . . . . . . . . . . . . . . . . . . . . . . . . . . . . . . . . . . . . . . . . . . . 43
Creating a Reference Table in the Reference Table Editor. . . . . . . . . . . . . . . . . . . . . . . . . . . . 43
Create a Reference Table from Profile Data. . . . . . . . . . . . . . . . . . . . . . . . . . . . . . . . . . . . . . . . 44
Creating a Reference Table from Profile Columns. . . . . . . . . . . . . . . . . . . . . . . . . . . . . . . . . 44
Creating a Reference Table from Column Values. . . . . . . . . . . . . . . . . . . . . . . . . . . . . . . . . 44Creating a Reference Table from Column Patterns. . . . . . . . . . . . . . . . . . . . . . . . . . . . . . . . 45
Create a Reference Table From a Flat File. . . . . . . . . . . . . . . . . . . . . . . . . . . . . . . . . . . . . . . . . 46
Analyst Tool Flat File Properties. . . . . . . . . . . . . . . . . . . . . . . . . . . . . . . . . . . . . . . . . . . . 46
Creating a Reference Table from a Flat File. . . . . . . . . . . . . . . . . . . . . . . . . . . . . . . . . . . . . 47
Create a Reference Table from a Database Table. . . . . . . . . . . . . . . . . . . . . . . . . . . . . . . . . . . . 48
Creating a Database Connection for a Reference Table. . . . . . . . . . . . . . . . . . . . . . . . . . . . . 48
Creating a Reference Table from a Database Table. . . . . . . . . . . . . . . . . . . . . . . . . . . . . . . . 48
Reference Table Updates. . . . . . . . . . . . . . . . . . . . . . . . . . . . . . . . . . . . . . . . . . . . . . . . . . . . 49
Managing Columns. . . . . . . . . . . . . . . . . . . . . . . . . . . . . . . . . . . . . . . . . . . . . . . . . . . . . 49
Managing Rows. . . . . . . . . . . . . . . . . . . . . . . . . . . . . . . . . . . . . . . . . . . . . . . . . . . . . . . 50
Finding and Replacing Values. . . . . . . . . . . . . . . . . . . . . . . . . . . . . . . . . . . . . . . . . . . . . . 50
Exporting a Reference Table. . . . . . . . . . . . . . . . . . . . . . . . . . . . . . . . . . . . . . . . . . . . . . . 51
Enable and Disable Edits to an Unmanaged Reference Table. . . . . . . . . . . . . . . . . . . . . . . . . 51
Audit Trail Events. . . . . . . . . . . . . . . . . . . . . . . . . . . . . . . . . . . . . . . . . . . . . . . . . . . . . . . . . 52
Viewing Audit Trai l Events. . . . . . . . . . . . . . . . . . . . . . . . . . . . . . . . . . . . . . . . . . . . . . . . 52
Rules and Guidelines for Reference Tables. . . . . . . . . . . . . . . . . . . . . . . . . . . . . . . . . . . . . . . . 53
Table of Contents iii

8/11/2019 DQ 951HF1 Analyst UserGuide En
http://slidepdf.com/reader/full/dq-951hf1-analyst-userguide-en 7/64
Index. . . . . . . . . . . . . . . . . . . . . . . . . . . . . . . . . . . . . . . . . . . . . . . . . . . . . . . . . . . . . . . 54
iv Table of Contents

8/11/2019 DQ 951HF1 Analyst UserGuide En
http://slidepdf.com/reader/full/dq-951hf1-analyst-userguide-en 8/64
Preface
The Informatica Data Quality Analyst User Guide is written for data quality analysts. It describes how to use
Informatica Analyst. This guide assumes that you have an understanding of data quality concepts, flat file and
relational database concepts, and the database engines in your environment.
Informatica Resources
Informatica MySupport Portal
As an Informatica customer, you can access the Informat ica MySupport Portal at http://mysupport.informatica.com.
The site contains product information, user group information, newsletters, access to the Informatica customer
support case management system (ATLAS), the Informatica How-To Library, the Informatica Knowledge Base, the
Informatica Multimedia Knowledge Base, Informatica Product Documentation, and access to the Informatica user
community.
Informatica Documentation
The Informatica Documentation team takes every effort to create accurate, usable documentation. If you have
questions, comments, or ideas about this documentation, contact the Informatica Documentation team through email
at [email protected]. We will use your feedback to improve our documentation. Let us know if we
can contact you regarding your comments.
The Documentation team updates documentation as needed. To get the latest documentation for your product,
navigate to Product Documentation from http://mysupport.informatica.com.
Informatica Web Site
You can access the Informatica corporate web site at http://www.informatica.com. The site contains information about
Informatica, its background, upcoming events, and sales offices. You will also find product and partner information.
The services area of the site includes important information about technical support, training and education, and
implementation services.
Informatica How-To Library
As an Informatica customer, you can access the Informatica How-To Library at http://mysupport .informatica.com. The
How-To Library is a collection of resources to help you learn more about Informatica products and features. It includes
articles and interactive demonstrations that provide solutions to common problems, compare features and behaviors,
and guide you through performing specific real-world tasks.
v

8/11/2019 DQ 951HF1 Analyst UserGuide En
http://slidepdf.com/reader/full/dq-951hf1-analyst-userguide-en 9/64
Informatica Knowledge Base
As an Informatica customer, you can access the Informat ica Knowledge Base at http: //mysupport .informatica.com.
Use the Knowledge Base to search for documented solutions to known technical issues about Informatica products.
You can also find answers to frequently asked questions, technical white papers, and technical tips. If you have
questions, comments, or ideas about the Knowledge Base, contact the Informatica Knowledge Base team through
email at [email protected].
Informatica Multimedia Knowledge Base
As an Informatica customer, you can access the Informat ica Multimedia Knowledge Base at
http://mysupport.informatica.com. The Multimedia Knowledge Base is a collection of instructional multimedia files that
help you learn about common concepts and guide you through performing specific tasks. If you have questions,
comments, or ideas about the Multimedia Knowledge Base, contact the Informatica Knowledge Base team through
email at [email protected].
Informatica Marketplace
The Informatica Marketplace is a forum where developers and partners can share solutions that augment, extend, or enhance data integration implementations. By leveraging any of the hundreds of solutions available on the
Marketplace, you can improve your productivity and speed up time to implementation on your projects. You can
access Informatica Marketplace at http://www.informaticamarketplace.com.
Informatica Global Customer Support
You can contact a Customer Support Center by telephone or through the Online Support. Online Support requires a
user name and password. You can request a user name and password at http://mysupport.informatica.com.
Use the following telephone numbers to contact Informatica Global Customer Support:
North America / South America Europe / Middle East / Africa Asia / Australia
Toll Free
Brazil: 0800 891 0202
Mexico: 001 888 209 8853
North America: +1 877 463 2435
Toll Free
France: 0805 804632
Germany: 0800 5891281
Italy: 800 915 985
Netherlands: 0800 2300001
Portugal: 800 208 360
Spain: 900 813 166
Switzerland: 0800 463 200
United Kingdom: 0800 023 4632
Standard Rate
Belgium: +31 30 6022 797
France: +33 1 4138 9226
Germany: +49 1805 702 702
Netherlands: +31 306 022 797
United Kingdom: +44 1628 511445
Toll Free
Austra lia: 1 800 151 830
New Zealand: 09 9 128 901
Standard Rate
India: +91 80 4112 5738
vi Preface

8/11/2019 DQ 951HF1 Analyst UserGuide En
http://slidepdf.com/reader/full/dq-951hf1-analyst-userguide-en 10/64
C H A P T E R 1
Introduction to Informatica Data
Quality Analyst
This chapter includes the following topics:
¨ Informatica Data Quality Analyst Overview, 1
¨ Informatica Analyst, 1
¨ Logging In to Informatica Analyst, 4
Informatica Data Quality Analyst Overview
Informatica Analyst is a web-based application client that analysts can use to perform data quality and data integration
tasks in an enterprise. Use the Analyst tool to collaborate with Informatica Developer users on data solutions.
The Analyst Service manages the Analyst tool. The Analyst tool uses projects to store folders and objects. The
Analyst tool stores projects, folders, and objects in the Model repository. You can use the Analyst tool to connect to the
Model repository database and create, update, or delete projects.
You can import data objects such as tables and flat files into projects and folders. The Analyst Service manages the
connection to the directory that stores uploaded flat files that you use as data sources in the Analyst tool. The Content
Management Service manages the connection to the database that stores reference tables that you create or import
in the Analyst tool.
You can use the data objects to create mapping specifications to define business logic that transforms and moves
data from a sour ce to a target.
Informatica Analyst
The Analyst tool has a web-based interface that you can use to perform data integration and data quality tasks.
The Analyst tool interface has tabs, headers, views, and a Navigator. Use the Navigator to browse projects and
perform tasks on projects and folders.
When you log in to the Analyst tool, the Browse: Projects tab appears. The tab displays views and the Navigator. The
tab also displays the icons and the Actions menus that you can use to perform tasks in the Navigator and in views.
1

8/11/2019 DQ 951HF1 Analyst UserGuide En
http://slidepdf.com/reader/full/dq-951hf1-analyst-userguide-en 11/64
When you click the link for an object in a view, the object opens in a tab. After you perform a search, the Analyst tool
displays the search results in a tab. You can keep multiple tabs open in the Analyst tool interface. You can navigate
between tabs.
The Analyst tool has the following header items:
¨ Log Off. Log out of the Analyst tool.
¨ Manage. Set user preferences to open metadata bookmarks in the Analyst tool or Developer tool and to delete
database connections. Monitor the status of Analyst tool jobs for objects such as profiles, scorecards, reference
tables, and mapping specifications. Manage Metadata Manager business terms.
¨ Help. Access help for the current tab.
¨ Search. Search for folders in projects. Search for objects in the Model repository and the Metadata Manager
repository.
Informatica Analyst Navigator
Use the Navigator to browse projects and folders and their contents. After you log in to the Analyst tool, the Navigator
appears in the left pane.
When you select a project in the Navigator, you can select a view to view the project contents, descriptive informationabout the project, and permissions on the project.
The Navigator displays the following types of objects:
¨ Projects. Highest object in the Navigator hierarchy. It is the top-level container for all projects that you create.
¨ Folders. Child object of a project. Organize domain objects within a project in folders.
Refresh the Navigator to get the latest version of all objects in the Navigator. Multiple users can add projects and
folders that appear in the Navigator.
The Navigator has an Actions menu that you can use to perform tasks on projects and folders. You can also right-click
projects and folders to perform the same tasks.
Use the Navigator to perform the following tasks:
¨ Create projects and folders.
¨ Manage projects and folders.
¨ Refresh the projects and folders that appear in the Navigator.
Informatica Analyst Views
The Analyst tool has views for the projects and folders that you select in the Navigator. Objects that open in tabs also
have views. Use the Actions menu or right-click objects to perform tasks related to the view. You can also click icons
in the view panels to perform the common tasks related to the view.
The Contents View and the Properties View are the views for the top-level Projects container. The Projects container
contains the projects that you create in the Navigator.
After you select a project or folder, the Analyst tool interface displays the fol lowing views:
¨ Contents view. Displays project or folder contents and properties for selected objects.
¨ Properties view. Displays project or folder properties.
¨ Security view. Displays user permissions on the project.
2 Chapter 1: Introduction to Informatica Data Quality Analyst

8/11/2019 DQ 951HF1 Analyst UserGuide En
http://slidepdf.com/reader/full/dq-951hf1-analyst-userguide-en 12/64
Contents View
Use the Contents view to view project and folder information. In the Contents view, you can create and add data
objects and profiles to projects and folders. You can perform project and folder management tasks.
After you select a project or folder in the Navigator, click the Contents view to view project or folder contents.
The Contents view displays project or folder contents in the Contents panel. When you select an object in the
Contents panel, the Analyst tool displays the object properties in the Properties panel.
You can perform the following tasks in the Contents view:
¨ Open an object.
¨ Duplicate projects, folders, and objects.
¨ Rename projects, folders, and objects.
¨ Move folders and objects.
¨ Delete projects, folders, and objects.
¨ Add a flat file to a project or folder .
¨ Add a relat ional table to a project or folder.
¨ Create a custom profile.
¨ Create a reference table.
¨ Create bad record or duplicate record tables.
¨ Close all tabs.
Properties View
Use the Properties view to view descriptive information about the project or folder.
After you select a project or folder in the Navigator, click the Properties view to view the project or folder
properties.
In the Properties view, you can view the project or folder name and description.
Security View
Use the Security view to view and assign project-level permissions to users.
After you select a project in the Navigator, click the Security view to view user permissions on the project. In the
Security view, you can assign the read, write, and grant permissions to users. You can also add users and assign
permissions to them.
The Security view displays the following information in the Project-level permissions panel:
¨ User. User name for the user who is assigned permissions on the project.
¨ Security domain. Name of the security domain that the user belongs to. Security domain can be LDAP or
Native.
¨ Permission. Permissions assigned to the user. Permissions can include read, write, or grant permission.
Informatica Analyst 3

8/11/2019 DQ 951HF1 Analyst UserGuide En
http://slidepdf.com/reader/full/dq-951hf1-analyst-userguide-en 13/64
Logging In to Informatica Analyst
Use the Analyst tool URL to log in to the Analyst tool interface. When you log in to the Analyst tool, you must specify
the user name, password, and the native domain or the LDAP security domain.
1. Start a Microsoft Internet Explorer or Mozilla Firefox browser.
2. In the Address field, enter the URL for the Analyst tool:
http[s]://<host name>:<port number>/AnalystTool
3. On the login page, enter your user name and password.
4. Select Native or the name of a specific security domain.
The Security Domain field appears when the Informatica domain contains an LDAP security domain. If you do not
know the security domain that your user account belongs to, contact the Informatica domain administrator.
5. Cl ick Login.
The welcome screen appears.
6. Click Close to exit the welcome screen and access the Analyst tool.
4 Chapter 1: Introduction to Informatica Data Quality Analyst

8/11/2019 DQ 951HF1 Analyst UserGuide En
http://slidepdf.com/reader/full/dq-951hf1-analyst-userguide-en 14/64

8/11/2019 DQ 951HF1 Analyst UserGuide En
http://slidepdf.com/reader/full/dq-951hf1-analyst-userguide-en 15/64
The following table describes the tasks you can perform on a project:
Task Description
Manage projects Manage and share project contents. You can create, duplicate,
rename, and delete a project. You can view project contents.
Manage folders Organize project content in folders. You can create, duplicate,
rename, move, and rename folders within projects.
Manage objects You can view object contents, duplicate, rename, move, and
delete objects in a project or in a folder within a project.
Search projects You can search for folders or objects in projects. You can view
search results and select an object from the results to view its
contents.
Assign permissions You can add users to a project . You can assign the read, wri te,
and grant permissions to users on a project to restrict or provide
access to objects within the project.
Creating a Project
Create a project to store data objects and object types in the Analyst tool. You can create folders in projects. Use
projects to manage the folders and objects in the project.
1. In the Navigator, select Projects.
2. Click Actions > New Project.
The New Project window appears.
3. Enter a name for the project and an optional description.
4. Click Unshared if you do not want to share the project or Shared if you want to share the project with other users.
Default is Unshared.
5. Click OK.
The project appears in the Navigator.
Duplicating a Project
You can duplicate project contents in another project that you create. Duplicate a project to use the same project
contents to perform different project tasks. Duplicating a project does not duplicate the user permissions on the
project. The owner of the project gets all permissions by default on the duplicate project.
1. In the Navigator, select the project that you want to duplicate.
2. Click Actions > Duplicate.The Duplicate window appears.
3. Enter the project name and an optional description.
4. Click OK.
The Analyst tool duplicates the project contents in the project.
6 Chapter 2: Projects

8/11/2019 DQ 951HF1 Analyst UserGuide En
http://slidepdf.com/reader/full/dq-951hf1-analyst-userguide-en 16/64
Renaming a Project
You can rename a project after you create it. Rename a project according to business usage and naming convention.
You may need to rename a project because the name is incorrect or the project has a different use.
1. In the Navigator, select the project that you want to rename.
2. Click Actions > Rename.
The Rename window appears.
3. Enter a name.
4. Click OK.
The Analyst tool renames the project in the Navigator.
Deleting a Project
Delete a project when the project and its contents become redundant.
1. In the Navigator, select the project that you want to delete.
2. Click Actions > Delete.
3. In the Delete Project window, click Yes.
The Analyst tool deletes the project from the Navigator.
Rules and Guidelines for Projects
This section describes the rules and guidelines for working with projects.
Use the following rules and guidelines when you work with projects:
¨ You cannot move a project in the Navigator.
¨ You can move folders within a project but you cannot move a folder into one of its own child folders in a project.
¨ You cannot duplicate a project in another project with the same name.
¨ You cannot duplicate a folder within a project to another folder in a different project.
Folders
Use folders to organize project contents. You can create a folder to group objects for a particular task in a project. You
can create a folder in a project or in another folder.
Create folders to group objects based on business needs. For example, a project requires data analysis for data
stored in multiple relational databases across an organization. Each region has a relational database. You can create
folders named East and West to store the project metadata for each region.
Folders appear under projects in the Navigator. A folder can contain other folders and objects.
You can perform the following tasks on a folder:
¨ Create a folder.
¨ View a folder.
¨ Rename a folder.
Folders 7

8/11/2019 DQ 951HF1 Analyst UserGuide En
http://slidepdf.com/reader/full/dq-951hf1-analyst-userguide-en 17/64
¨ Duplicate a folder.
¨ Move a folder.
¨ Delete a folder.
Creating a Folder Create a folder to store objects created in the Analyst tool.
1. In the Navigator, select the project or folder where you want to create a folder.
2. Click Actions > New Folder .
The New Folder window appears.
3. Enter the folder name and optional description.
4. Click OK.
The Analyst tool creates the folder in the Navigator.
Renaming a Folder You can rename a folder after you create it. Rename a folder to change its name according to business usage or
naming convention.
1. In the Navigator, select the project and the folder in the project that you want to rename.
2. Click Actions > Rename.
The Rename window appears.
3. Enter the folder name.
4. Click OK.
The Analyst tool renames the folder in the Navigator.
Duplicating a Folder
You can duplicate a folder within a project. Duplicate a folder to organize or enhance the contents of a folder or to use
the contents of a folder to perform different tasks.
1. In the Navigator, select the project and the folder in the project that you want to duplicate.
2. Click Actions > Duplicate.
The Duplicate window appears.
3. Navigate to the location where you want to duplicate the folder.
Optionally, enter the location.
4. Enter the folder name.
5. Click OK.
The Analyst tool duplicates the folder in the project in the Navigator.
Moving a Folder
You can move a folder within a project. Move folders to organize project content into a hirearchy of folders.
8 Chapter 2: Projects
8/11/2019 DQ 951HF1 Analyst UserGuide En
http://slidepdf.com/reader/full/dq-951hf1-analyst-userguide-en 18/64
1. In the Navigator, select the folder in the project you want to move.
2. Click Actions > Move.
The Move window appears.
3. Navigate to the location in the project where you want to move the folder.
Optionally, enter the location.
4. Click OK.
The Analyst tool moves the folder in the project in the Navigator.
Deleting a Folder
Delete a folder if the folder contents become redundant.
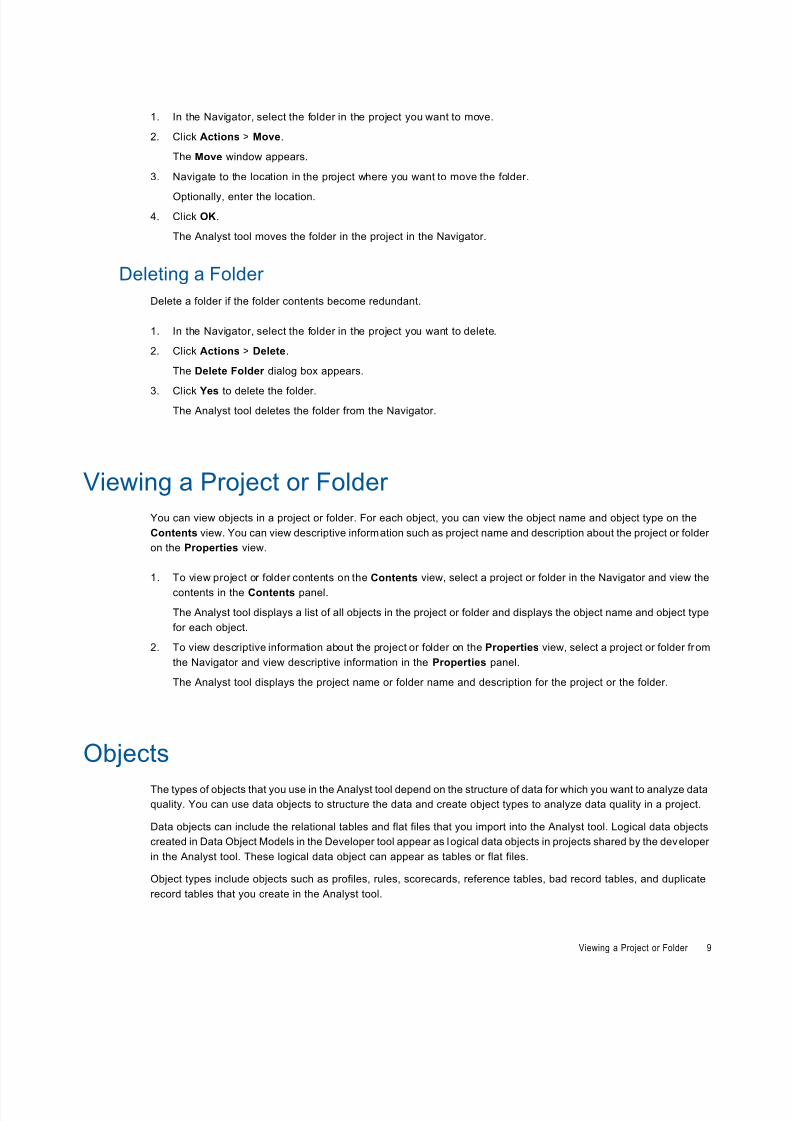
1. In the Navigator, select the folder in the project you want to delete.
2. Click Actions > Delete.
The Delete Folder dialog box appears.
3. Click Yes to delete the folder.
The Analyst tool deletes the folder from the Navigator.
Viewing a Project or Folder
You can view objects in a project or folder. For each object, you can view the object name and object type on the
Contents view. You can view descriptive information such as project name and description about the project or folder
on the Properties view.
1. To view project or folder contents on the Contents view, select a project or folder in the Navigator and view the
contents in the Contents panel.
The Analyst tool displays a list of all objects in the project or folder and displays the object name and object type
for each object.
2. To view descriptive information about the project or folder on the Properties view, select a project or folder from
the Navigator and view descriptive information in the Properties panel.
The Analyst tool displays the project name or folder name and description for the project or the folder.
Objects
The types of objects that you use in the Analyst tool depend on the structure of data for which you want to analyze data
quality. You can use data objects to structure the data and create object types to analyze data quality in a project.
Data objects can include the relational tables and flat files that you import into the Analyst tool. Logical data objects
created in Data Object Models in the Developer tool appear as logical data objects in projects shared by the developer
in the Analyst tool. These logical data object can appear as tables or flat files.
Object types include objects such as profiles, rules, scorecards, reference tables, bad record tables, and duplicate
record tables that you create in the Analyst tool.
Viewing a Project or Folder 9

8/11/2019 DQ 951HF1 Analyst UserGuide En
http://slidepdf.com/reader/full/dq-951hf1-analyst-userguide-en 19/64
You can store objects in projects or folders. You can associate objects with tags. You can search for objects by name
or by tag.
You can perform the following common tasks on object types and data objects:
¨ View an object.
¨ Duplicate an object.
¨ Rename an object.
¨ Move an object.
¨ Delete an object.
Note: You cannot duplicate, rename, move, or delete a logical data object.
Object Properties
The following table describes the objects that you can store in a project and the viewable object properties:
Object Data Object / Object Type Object Properties
Relational Tables Data Object - Name. Name of the table in the model
repository.
- Location. Location of the table in the
project or folder.
- Connection. Name of the database
relational connection.
- Schema. Name of the database
schema.
- Table Name. Name of the relational
table source.
Flat Files Data Object - Location. Location of the flat file in the
project or folder.
- File Path. File path of the flat file on a
network drive.
- Uploaded. File path of the uploadedflat file.
- File Name. Name of the flat file.
Logical data object Data Object - Name. Name of the table in the model
repository.
- Location. Location of the table in the
project or folder.
- Data Object Model. Name of the Data
Object Model from which the logical
data object was created.
- Logical Data Object Name. Logical
data object table name.
Profiles Object Type - Location. Location of the profile in the
project or folder.- Name. Name of the profile.
Rules Object Type - Location. Location of the rule in the
project or folder.
- Name. Name of the rule.
10 Chapter 2: Projects

8/11/2019 DQ 951HF1 Analyst UserGuide En
http://slidepdf.com/reader/full/dq-951hf1-analyst-userguide-en 20/64
Object Data Object / Object Type Object Properties
Scorecards Object Type - Location. Location of the scorecard in
the project or folder.
- Name. Name of the scorecard.
Reference Tables Object Type - Name. Name of the table in the model
repository.
- Location. Location of the table in the
project or folder.
- Connection. Name of the database
relational connection.
- Schema. Name of the database
schema.
- Table Name. Name of the reference
table.
Bad Record Tables Object Type - Name. Name of the table in the model
repository.
- Location. Location of the table in the
project or folder.- Connection. Name of the database
relational connection.
- Schema. Name of the database
schema.
- Table Name. Name of the bad record
table.
Duplicate Record Tables Object Type - Name. Name of the table in the model
repository.
- Location. Location of the table in the
project or folder.
- Connection. Name of the database
relational connection.
- Schema. Name of the database
schema.
- Table Name. Name of the duplicaterecord table.
Viewing an Object
You can view object properties for each object in a project or folder. You can open the object to preview data in a tab.
You can preview the contents of data objects and object types to view the structure of data and analyze data quality
results.
1. In the Navigator, select the project or folder that contains the object you want to view.
2. In the Contents panel, select the object you want to view.
The Analyst tool displays the name, type, and location of the object in the project or folder in the Properties
panel. You can view connection name, Data Object Model name, table name, and schema name for table objects.
Addit ional ly, you can view the file path for flat fi le objects.
3. Click Actions > Open.
The Analyst tool opens the object contents for preview in a tab. You can preview column metadata for tables and
flat files and data quality results for other object types.
Objects 11
8/11/2019 DQ 951HF1 Analyst UserGuide En
http://slidepdf.com/reader/full/dq-951hf1-analyst-userguide-en 21/64
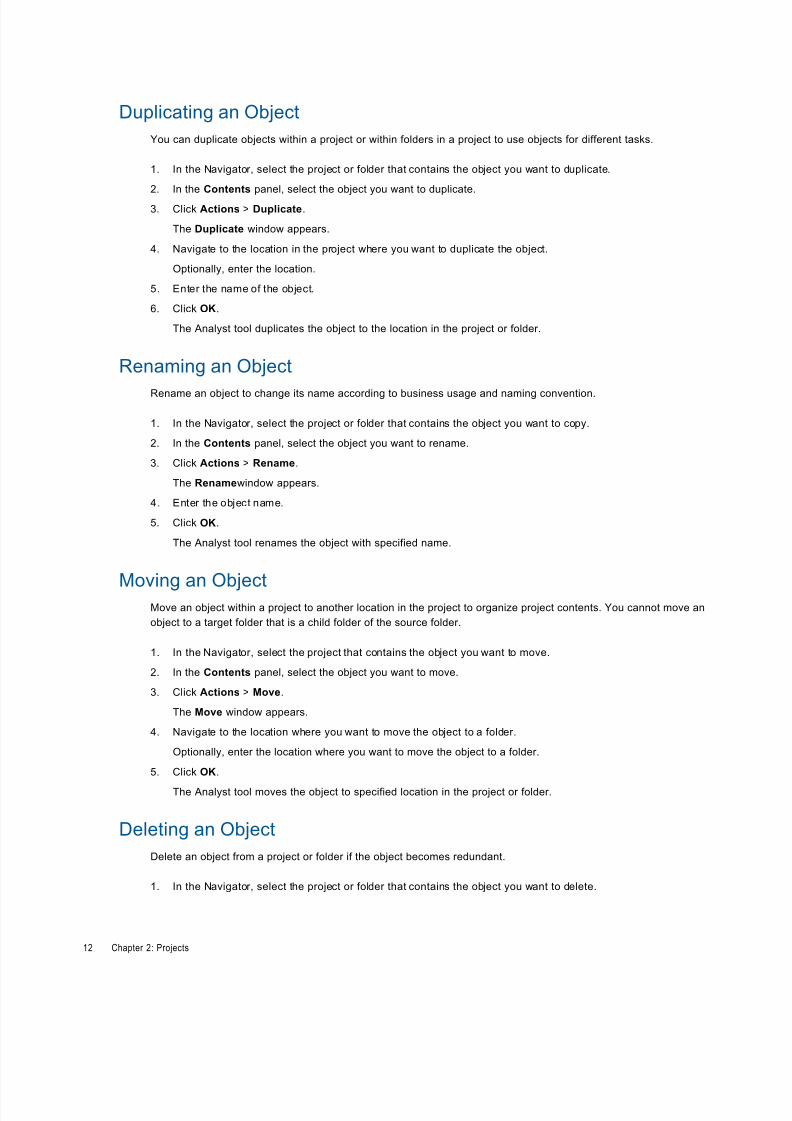
Duplicating an Object
You can duplicate objects within a project or within folders in a project to use objects for different tasks.
1. In the Navigator, select the project or folder that contains the object you want to duplicate.
2. In the Contents panel, select the object you want to duplicate.
3. Click Actions > Duplicate.
The Duplicate window appears.
4. Navigate to the location in the project where you want to duplicate the object.
Optionally, enter the location.
5. Enter the name of the object.
6. Click OK.
The Analyst tool duplicates the object to the location in the project or folder.
Renaming an Object
Rename an object to change its name according to business usage and naming convention.
1. In the Navigator, select the project or folder that contains the object you want to copy.
2. In the Contents panel, select the object you want to rename.
3. Click Actions > Rename.
The Renamewindow appears.
4. Enter the object name.
5. Click OK.
The Analyst tool renames the object with specified name.
Moving an ObjectMove an object within a project to another location in the project to organize project contents. You cannot move an
object to a target folder that is a child folder of the source folder.
1. In the Navigator, select the project that contains the object you want to move.
2. In the Contents panel, select the object you want to move.
3. Click Actions > Move.
The Move window appears.
4. Navigate to the location where you want to move the object to a folder.
Optionally, enter the location where you want to move the object to a folder.
5. Click OK.
The Analyst tool moves the object to specified location in the project or folder.
Deleting an Object
Delete an object from a project or folder if the object becomes redundant.
1. In the Navigator, select the project or folder that contains the object you want to delete.
12 Chapter 2: Projects

8/11/2019 DQ 951HF1 Analyst UserGuide En
http://slidepdf.com/reader/full/dq-951hf1-analyst-userguide-en 22/64
2. In the Contents panel, select the object you want to delete.
3. Click Actions > Delete.
4. In the Delete Object dialog box, click Yes.
The Analyst tool deletes the object from the project or folder.
Metadata Bookmarks
A metadata bookmark is a link to an object in a Model repository. Use a metadata bookmark to share an object with
other Analyst tool users.
Because the Analyst tool is a web-based tool, you can access objects through a link to the object in the the Analyst
tool. Each object you view in the Analyst tool has a unique URL. You can share an object with other Analyst tool users
by sharing the URL for the object. You can create a metadata bookmark for any object that you can open in the Analyst
tool.
The following example shows a metadata bookmark for a relational table:http://styx:8080/AnalystTool/com.informatica.at.AnalystTool/index.jsp#p=lewis&i=U:VeP2HpstEd66x8vkMFuKtQ&c=com.informatica.metadata.relational.datasource.RelationalDataSource
To share a metadata bookmark, open the object you want to share in the Analyst tool. Copy the link location in the
location bar. You can then send the link in an email or add it to a document. You can also bookmark the link in your
browser to access it again.
To access a metadata bookmark, you can click the link or copy and paste the link into the location bar in a browser.
When you access a metadata bookmark, the Analyst tool prompts you to log in if you are not al ready logged in, and
then displays the object.
To access a metadata bookmark, you must have the following permissions:
¨ Permission to use the the Analyst tool.
¨ Permission to access the project that contains the object.
Creating a Metadata Bookmark
Create a metadata bookmark to share an object in Informatica Analyst with other users.
1. In the Analyst tool, open the object that you want to create a metadata bookmark for.
2. Copy the URL in the location bar of the browser.
You can then paste the bookmark into an email or a document and distribute the email or document to other
users.
Opening a Metadata BookmarkOpen a metadata bookmark to access an object in the Analyst tool.
1. Click an active link for a metadata bookmark or copy and paste the link into the location bar in a browser.
If you are not already logged in, the Analyst tool displays the login page.
2. Log in to the Analyst tool.
The Analyst tool displays the object in a tab.
Metadata Bookmarks 13
8/11/2019 DQ 951HF1 Analyst UserGuide En
http://slidepdf.com/reader/full/dq-951hf1-analyst-userguide-en 23/64
Tags
A tag is metadata that defines an object in the Model repository based on business usage. Create tags to group
objects according to their business usage.
After you create a tag, you can associate the tag with one or more objects. You can remove the association between a
tag and an object. You can use a tag to search for objects associated with the tag in the Model repository. The Analyst
tool displays a glossary of all tags. You can delete redundant tags.
For example, an analyst creates a tag named XYZCorp_CustomerOrders and applies it to tables that contain
information for the customers orders from the XYZ Corporation. The analyst can search by the XYZ_CustomerOrders
tag to identify the tables associated with the tag.
Note: Tags associated with an object in the Analyst tool appear as tags for the same objects in the Developer tool.
Creating and Assigning a Tag
Create a tag to add metadata that defines an object based on business usage. Assign the tag to an object to associate
the object with this metadata definition.
1. Click Actions > Show Tags.
2. On the Tags panel, click New.
3. Enter a name and an optional descripton.
The Analyst tool adds the tag to the glossary.
4. To assign a tag to an object, select an object in the Navigator and select the tag and click Assign.
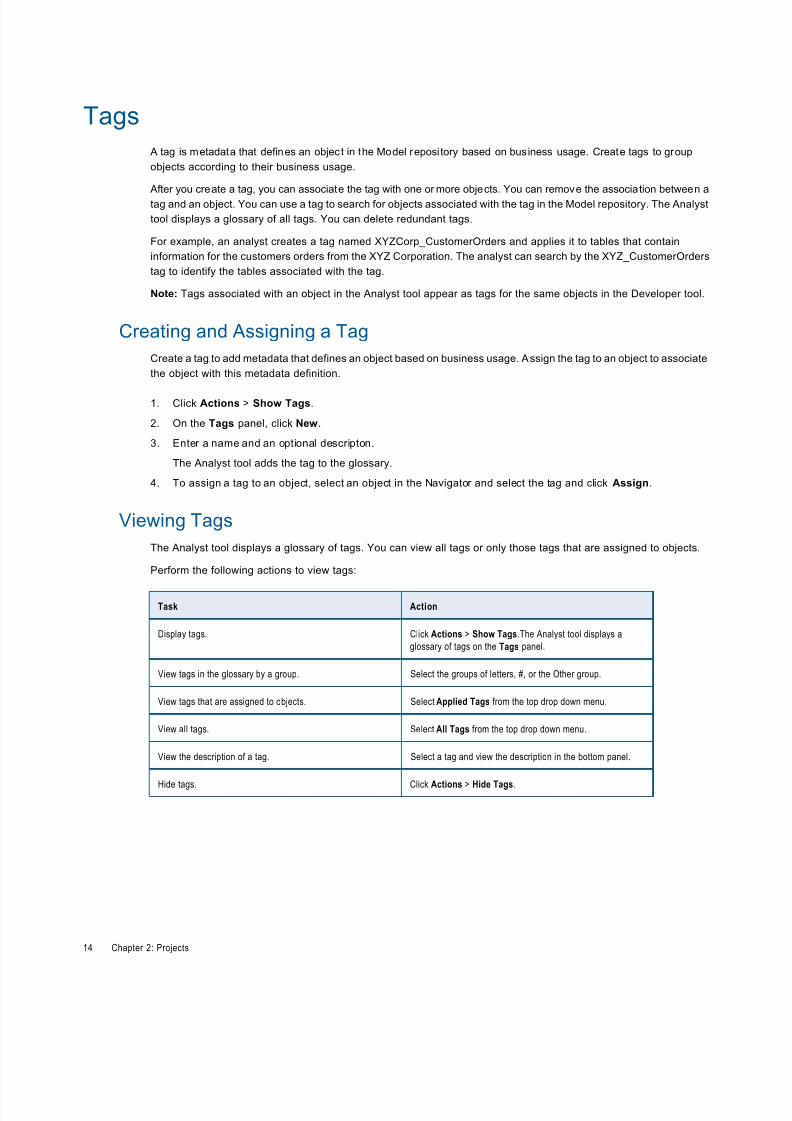
Viewing Tags
The Analyst tool displays a glossary of tags. You can view all tags or only those tags that are assigned to objects.
Perform the following actions to view tags:
Task Action
Display tags. Click Actions > Show Tags.The Analyst tool displays a
glossary of tags on the Tags panel.
View tags in the glossary by a group. Select the groups of letters, #, or the Other group.
View tags that are assigned to objects. Select Applied Tags from the top drop down menu.
View all tags. Select All Tags from the top drop down menu.
View the description of a tag. Select a tag and view the description in the bottom panel.
Hide tags. Click Actions > Hide Tags.
14 Chapter 2: Projects

8/11/2019 DQ 951HF1 Analyst UserGuide En
http://slidepdf.com/reader/full/dq-951hf1-analyst-userguide-en 24/64
Search
You can search for objects and folders in the Analyst tool. Search folders to find objects for a particular task such as
profiling data or creating business rules.
You can search for data objects, object types, and folders by name in the Analyst tool. You cannot search for projects
by name.
The Model Repository Service uses a search engine to index the metadata in the Model repository . To correctly index
the metadata, the search engine uses a search analyzer appropriate for the language of the metadata that you are
indexing. The Analyst tool uses the search engine to perform searches on objects in the Model repository.
You can search for objects in the Model repository by object name or by a tag. If you have Metadata Manager, you can
search for objects in the Metadata Manager repository by object name or by a Metadata Manager business term. You
can select a Metadata Manager object from the search results and import it into the Analyst tool.
You can create a search query and filter the search results. You can view search results and select an object from the
search results and view its contents in another tab.
You can search in different languages. To search in a different language, an administrator must change the search
analyzer and configure the Model reposi tory to use the search analyzer. You can change the search analyzer in the
Model Repository Service. After you change the search analyzer, you must restart the Model Repository Service and
re-index the search index. For more information about changing the search analyzer, see the Informatica
Administrator Guide .
Search Syntax
Use search syntax to create a search query and filter search results.
The following table describes the search syntax you can use in a search:
Search Syntax Description
Keywords Use an exact keyword match in the search.
Cases Use upper case and lower case text in the search.
Wildcards Use wildcard characters in the search.
Logical Operators Use logical operators in the search.
Keyword Matches
Use a keyword match to search for folders and objects that match the keyword.
Enclose a search query in quotation marks (" ") to search for an exact keyword match. The Analyst tool returns objects
with the name that matches the keyword exactly.
Note: You cannot use wildcards or special characters in a search.
Search 15

8/11/2019 DQ 951HF1 Analyst UserGuide En
http://slidepdf.com/reader/full/dq-951hf1-analyst-userguide-en 25/64
Wildcards
Use wildcards to define one or more characters in a search. Use wildcards as a prefix, suffix, or infix in a search.
The following table describes the wildcards you can use in a search:
Wildcard Description
* Represents characters. For example when you search for
customer*, the Analyst tool can return customer,
customer_name, and CustomerID.
? Represents a single character. For example when you search
for Customer?, the Analyst tool can return Customer1,
Customer2, and CustomerA.
Operators
Use boolean search operators to logically combine search terms. All boolean operators must be upper case.
The following table describes the search operators you can use in a search:
Operator Description
AND Includes both search t erms. For example, sales data AND data
sales.
OR Includes either one of the search terms. For example, sales data
OR sales.
NOT Excludes a search term. For example, sales data NOT data
sales. The NOT operator requires two operands.
Search Filters Apply a fil ter to the search query to ref ine search resul ts based on an object name, tag, or a Metadata Manager
business term.
When you select a filter and apply i t to a search query, the Analyst tool returns search results based on the filter . You
can perform an advanced search to further refine the search results.
When you search for objects by name or by a tag, the Analyst tool returns search results for objects in the Model
repository. You can perform an advanced search to search by object name, tag, or object type.
When you search for objects by a Metadata Manager business term, the Analyst tool returns search results for objects
associated with the business term in the Metadata Manager repository. You can select a Metadata Manager object
from the search results and import the object into the Analyst tool. You can perform an advanced search to search by
object name, business term, or object type. You must have Metadata Manager to search for objects by a Metadata
Manager business term.
Note: If the tag name is the same as a business term name, the Analyst tool returns search results for objects
associated with the tag and the business term from the Model repository and the Metadata Manager repository.
16 Chapter 2: Projects

8/11/2019 DQ 951HF1 Analyst UserGuide En
http://slidepdf.com/reader/full/dq-951hf1-analyst-userguide-en 26/64
The following table describes the search filters that you can use to perform a search:
Search Filter Description
Search by Name Search for objects by name.
Search by Tag / Business Term Search for objects associated with a tag in the Model repository
or objects associated with a business term in the Metadata
Manager repository.
Advanced Search Search for ob jects in the Model re posito ry by ob ject name, tag,
or object type. Search for objects in the Metadata Manager
repository by object name, business term, or object type.
Search Results
View search results to get specific objects or folders in the Analyst tool or objects in the Metadata Manager repository.
You can import the Metadata Manager objects in the search results as data objects in the Analyst tool.
After you perform a search, the Analyst tool displays the search results on the Search Results tab. The Analyst tooldisplays objects that appear in the Model reposi tory on the Projects tab. The Analyst tool displays objects that appear
in the Metadata Manager repository on the External Tables tab. If you do not have Metadata Manager, the Analyst
tool does not display any Metadata Manager objects.
Select an object from the search results to view the object properties. You can perform an advanced search to further
refine the search results.
Performing a Search
Perform a search to search for folders in the Analyst tool or objects in the Model repository and Metadata Manager
repository.
1. In the Search header box, enter a keyword search or select a search filter.
The Analyst tool returns the results of the search in the Search Results tab.
2. To perform an advanced search, select the Projects tab or the External Tables tab.
3. In the Advanced Search panel, select a filter and select the object types.
Importing Metadata Manager Tables
After you search for Metadata Manager objects by a business term, you can import the objects into the Model
repository.
Before you perfom this task, verify the following prerequisite:
¨ License to access Metadata Manager.
¨ Perform a search by business term.
1. On the Search Results tab, select the External Tables tab.
2. Select a Metadata Manager table.
3. Right-click the table and select Add Import.
The New Tables window appears. Follow the steps to import the Metadata Manager table into the Analyst
tool.
Search 17

8/11/2019 DQ 951HF1 Analyst UserGuide En
http://slidepdf.com/reader/full/dq-951hf1-analyst-userguide-en 27/64
Searching Objects Example
An analyst wants to search for customer financial data related to bank transactions across tables in the Model
repository and the Metadata Manager Repository. The analyst uses the business term "finance" to search for tables
that contain customer financial data. The analyst performs an advanced search to filter search results to display tables
in the Metadata Manager repository associated with the business term finance.
1. In the Search box, select the Search by Tag / Business Term filter.
2. Enter the business term named "finance".
3. Select the External Tables tab.
4. In the Advanced Search panel, select Tables as the object type.
Security
Manage permissions on projects in the Analyst tool to control access to projects. You can add users to a project and
assign permissions for users on a project.
Even if a user has the privilege to perform certain actions, the user may also requi re permission to perform the action
on a particular object.
When you create a project, you are the owner of the project by default. The owner has all permissions, which you
cannot change. The owner can assign permissions to users.
The following table describes the permissions you can assign for users on a project.
P er mi ss io n Gr an ts u se rs t he a bi li ty t o
Read Read on project, view projects and objects in projects.
Write Modi fy projects, crea te, edit, and delet e obj ects in proj ects.
Grant Grants users the abi li ty to manage the read, wr ite, and grant permissions on a projec t.
Project Permissions
Assign project permissions to users or groups. Project permissions determine whether a user or group can view
objects, edit objects, or assign permissions to others.
You can assign the following permissions:
Read
The user or group can open, preview, export, validate, and deploy all objects in the project. The user or group can
also view project details.
Write
The user or group has read permission on all objects in the project. Additionally, the user or group can edit all
objects in the project, edit project details, and delete all objects in the project.
Grant
The user or group has read permission on all objects in the project. Additionally, the user or group can assign
permissions to other users or groups.
18 Chapter 2: Projects
8/11/2019 DQ 951HF1 Analyst UserGuide En
http://slidepdf.com/reader/full/dq-951hf1-analyst-userguide-en 28/64
Users assigned the Administrator role for a Model Repository Service inherit all permissions on all projects in the
Model Repository Service. Users assigned to a group inherit the group permissions.
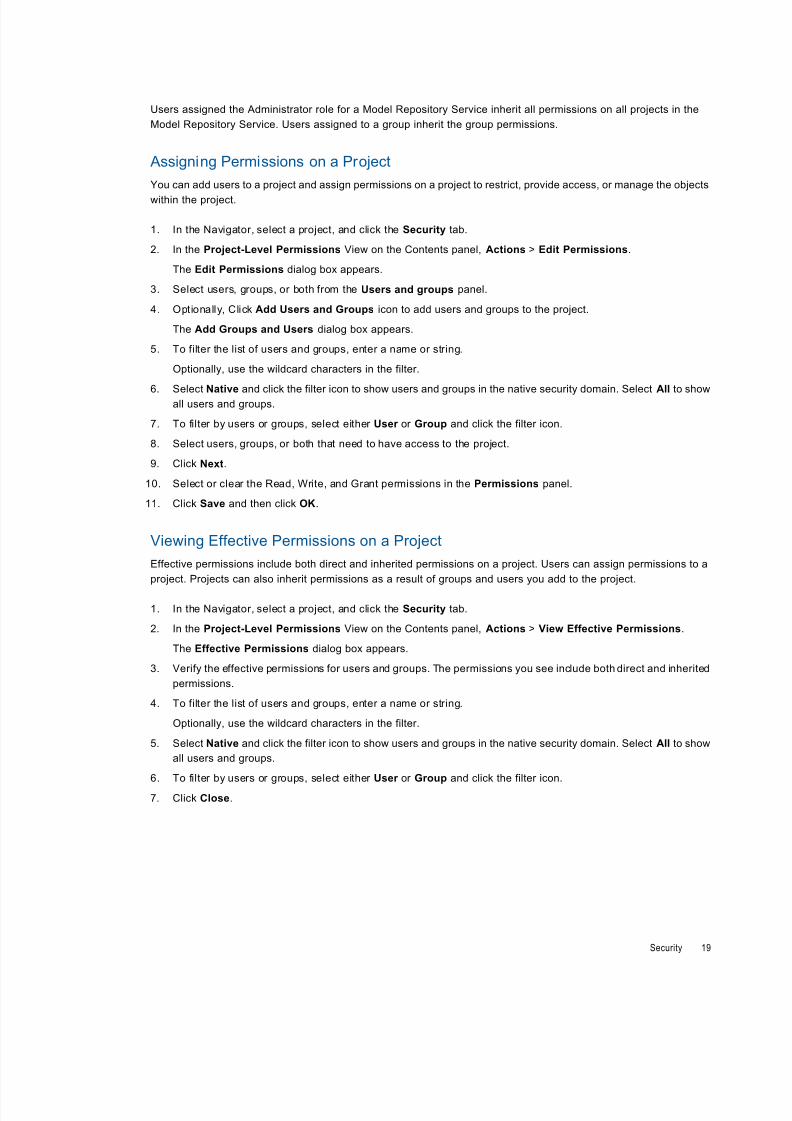
Assigning Permissions on a Project
You can add users to a project and assign permissions on a project to restrict, provide access, or manage the objects
within the project.
1. In the Navigator, select a project, and click the Security tab.
2. In the Project-Level Permissions View on the Contents panel, Actions > Edit Permissions.
The Edit Permissions dialog box appears.
3. Select users, groups, or both from the Users and groups panel.
4. Optionally, Click Add Users and Groups icon to add users and groups to the project.
The Add Groups and Users dialog box appears.
5. To filter the list of users and groups, enter a name or string.
Optionally, use the wildcard characters in the filter.
6. Select Native and click the filter icon to show users and groups in the native security domain. Select All to showall users and groups.
7. To filter by users or groups, select either User or Group and click the filter icon.
8. Select users, groups, or both that need to have access to the project.
9. Click Next.
10. Select or clear the Read, Write, and Grant permissions in the Permissions panel.
11. Click Save and then click OK.
Viewing Effective Permissions on a Project
Effective permissions include both direct and inherited permissions on a project. Users can assign permissions to a
project. Projects can also inherit permissions as a result of groups and users you add to the project.
1. In the Navigator, select a project, and click the Security tab.
2. In the Project-Level Permissions View on the Contents panel, Actions > View Effective Permissions.
The Effective Permissions dialog box appears.
3. Verify the effective permissions for users and groups. The permissions you see include both direct and inherited
permissions.
4. To filter the list of users and groups, enter a name or string.
Optionally, use the wildcard characters in the filter.
5. Select Native and click the filter icon to show users and groups in the native security domain. Select All to show
all users and groups.
6. To filter by users or groups, select either User or Group and click the filter icon.
7. Click Close.
Security 19

8/11/2019 DQ 951HF1 Analyst UserGuide En
http://slidepdf.com/reader/full/dq-951hf1-analyst-userguide-en 29/64
Rules and Guidelines for Security
Rules and guidelines for managing security.
Use the following rules and guidelines to manage security:
¨ A user can have the pr ivilege to create a project but can view only those projects on which the user is assigned
permissions.
¨ A user with the privilege to create a project but not the permission to view a project can create a project with a name
that already exists. The Analyst tool displays a message stating that the project already exists.
¨ When you assign the permission to view a project to a user, the user needs to refresh the Navigator to view the
project. An administrator can view all projects.
¨ A user with an active Analyst tool browser session can continue to browse projects after the Read and Write
permissions for the user on the project are removed in the Developer tool.
¨ An unauthor ized user can bypass Analyst tool security by copy ing the Analyst tool URL from the Administrator tool
to gain full access to the Analyst tool.
Job Status
You can monitor the status of Analyst tool jobs for objects such as profiles, scorecards, reference tables, and mapping
specifications. You can monitor data preview for all objects and monitor drill down operations on profiles.
You can monitor the status of each Analyst tool job on the Job Status tab. After you select a job, you can view error or
information messages and the general properties for the job on the bottom panel.
You can perform the following tasks to monitor jobs:
¨ Search for a job. Enter a job property as a search filter to search for a job.
¨ Clear search filters for a job.
¨ Refresh a job.
¨ Abort a job.
¨ View Analyst tool logs events for a job.
¨ View the context of a job. View other jobs that started around the same time as the selected job.
¨ Get notifications for new jobs.
The following table descibes the job status properties:
Property Description
Job ID Identifier for the job.
Name Name of the job.
Type Job type. The Analyst tool displays the following job types:
- Profi le
- Scorecard
- Previ ew
- Mappi ng
- Reference Table process
- Custom
20 Chapter 2: Projects
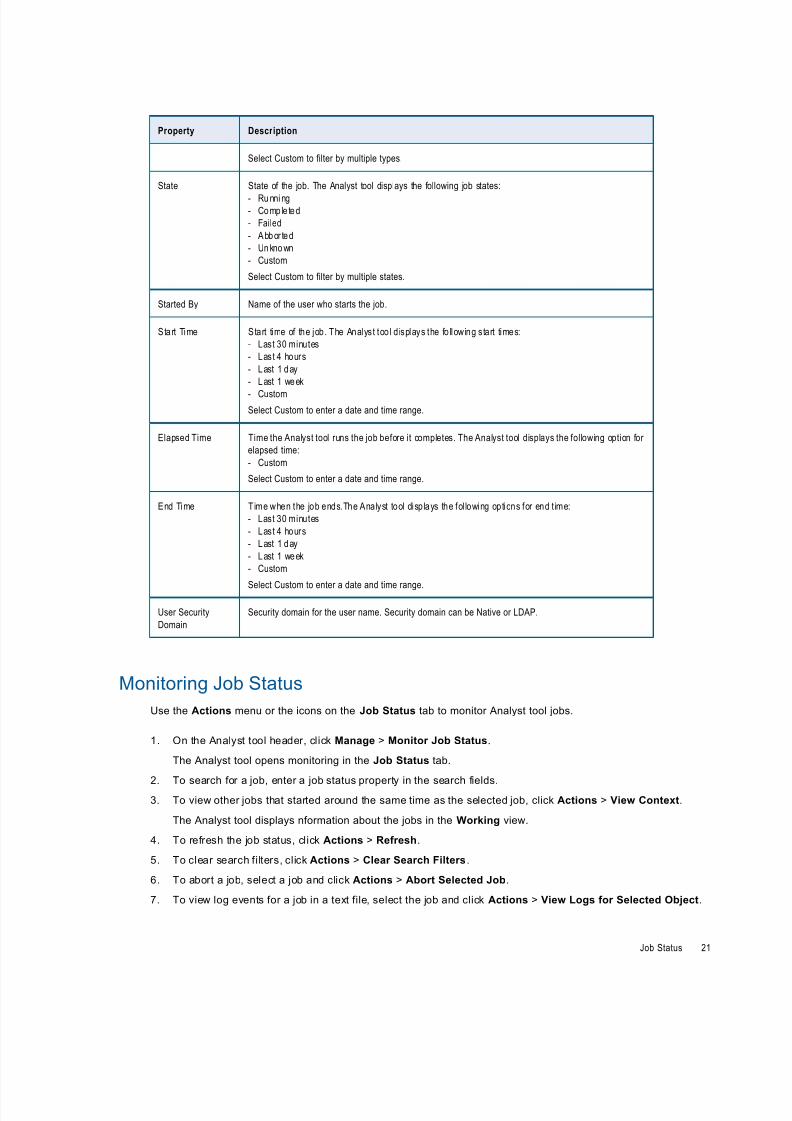
8/11/2019 DQ 951HF1 Analyst UserGuide En
http://slidepdf.com/reader/full/dq-951hf1-analyst-userguide-en 30/64
Property Description
Select Custom to filter by multiple types.
State State of the job. The Analyst tool displays the following job states:
- Ru nni ng- Comple ted
- Failed
- Abbor ted
- Un kno wn
- Custom
Select Custom to filter by multiple states.
Started By Name of the user who starts the job.
Start Time Start time of the job. The Analys t tool d isplays the fo llowing s tart times:
- Last 30 minutes
- Last 4 hours
- Last 1 day
- Last 1 week
- Custom
Select Custom to enter a date and time range.
Elapsed Time Time the Analyst tool runs the job before it completes. The Analyst tool displays the following option for
elapsed time:
- Custom
Select Custom to enter a date and time range.
End Time Time when the job ends.The Analyst tool displays the fol lowing options for end t ime:
- Last 30 minutes
- Last 4 hours
- Last 1 day
- Last 1 week
- Custom
Select Custom to enter a date and time range.
User Security
Domain
Security domain for the user name. Security domain can be Native or LDAP.
Monitoring Job Status
Use the Actions menu or the icons on the Job Status tab to monitor Analyst tool jobs.
1. On the Analyst tool header, click Manage > Monitor Job Status.
The Analyst tool opens monitoring in the Job Status tab.
2. To search for a job, enter a job status property in the search fields.3. To view other jobs that started around the same time as the selected job, click Actions > View Context.
The Analyst tool displays nformation about the jobs in the Working view.
4. To refresh the job status, click Actions > Refresh.
5. To clear search filters, click Actions > Clear Search Filters.
6. To abort a job, select a job and click Actions > Abort Selected Job.
7. To view log events for a job in a text file, select the job and click Actions > View Logs for Selected Object.
Job Status 21
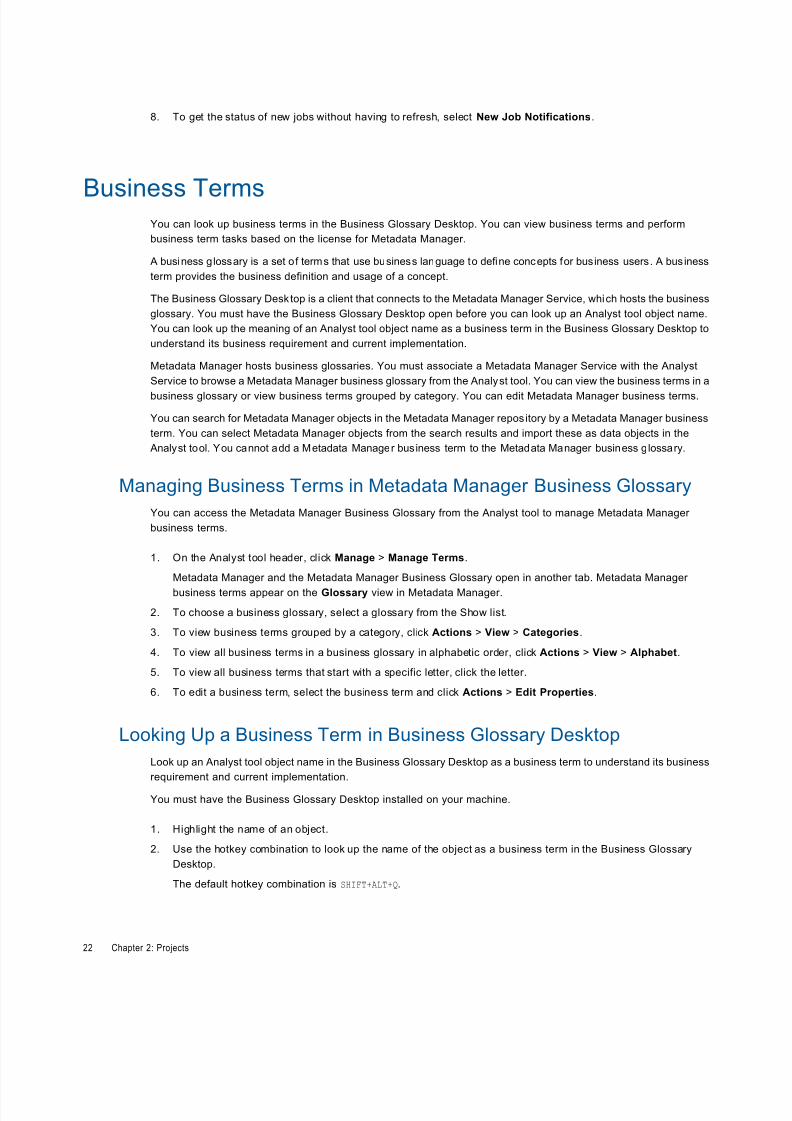
8/11/2019 DQ 951HF1 Analyst UserGuide En
http://slidepdf.com/reader/full/dq-951hf1-analyst-userguide-en 31/64
8. To get the status of new jobs without having to refresh, select New Job Notifications.
Business TermsYou can look up business terms in the Business Glossary Desktop. You can view business terms and perform
business term tasks based on the license for Metadata Manager.
A business glossary is a set of terms that use business language to define concepts for business users. A bus iness
term provides the business definition and usage of a concept.
The Business Glossary Desktop is a client that connects to the Metadata Manager Service, which hosts the business
glossary. You must have the Business Glossary Desktop open before you can look up an Analyst tool object name.
You can look up the meaning of an Analyst tool object name as a business term in the Business Glossary Desktop to
understand its business requirement and current implementation.
Metadata Manager hosts business glossaries. You must associate a Metadata Manager Service with the Analyst
Service to browse a Metadata Manager business glossary from the Analyst tool. You can view the business terms in a
business glossary or view business terms grouped by category. You can edit Metadata Manager business terms.
You can search for Metadata Manager objects in the Metadata Manager repos itory by a Metadata Manager business
term. You can select Metadata Manager objects from the search results and import these as data objects in the
Analyst tool. You cannot add a Metadata Manager business term to the Metadata Manager business glossary.
Managing Business Terms in Metadata Manager Business Glossary
You can access the Metadata Manager Business Glossary from the Analyst tool to manage Metadata Manager
business terms.
1. On the Analyst tool header, click Manage > Manage Terms.
Metadata Manager and the Metadata Manager Business Glossary open in another tab. Metadata Manager
business terms appear on the Glossary view in Metadata Manager.
2. To choose a business glossary, select a glossary from the Show list.
3. To view business terms grouped by a category, click Actions > View > Categories.
4. To view all business terms in a business glossary in alphabetic order, click Actions > View > Alphabet.
5. To view all business terms that start with a specific letter, click the letter.
6. To edit a business term, select the business term and click Actions > Edit Properties.
Looking Up a Business Term in Business Glossary Desktop
Look up an Analyst tool object name in the Business Glossary Desktop as a business term to understand its business
requirement and current implementation.
You must have the Business Glossary Desktop installed on your machine.
1. Highlight the name of an object.
2. Use the hotkey combination to look up the name of the object as a business term in the Business Glossary
Desktop.
The default hotkey combination is SHIFT+ALT+Q.
22 Chapter 2: Projects
8/11/2019 DQ 951HF1 Analyst UserGuide En
http://slidepdf.com/reader/full/dq-951hf1-analyst-userguide-en 32/64
C H A P T E R 3
Data Objects
This chapter includes the following topics:
¨ Data Objects Overview, 23
¨ Flat Files, 24
¨ Tables, 29
¨ Viewing Data Objects, 32
¨ Editing Data Objects, 33
Data Objects Overview
Data objects represent the metadata sources from which you want to extract metadata to analyze in an Analyst tool
project. You can import data objects such as tables and flat files to analyze the structure of the data in a project.
Data objects appear when you select the project or folder that contains the object in the Analyst tool. Any table or flat
file that you add to a project in the Analyst tool also appears in the Developer tool. A table appears under the name of
the connection for the table. A flat file appears with the file object name.
Logical data objects created in Data Object Models in the Developer tool appear as logical data objects in projects
shared by the developer in the Analyst tool. These appear as Logical Data Objects in the Analyst tool. You cannot
rename, move, or delete logical data objects. You can view logical data objects and create profiles and scorecards for
logical data objects.
SAP and mainframe data objects imported in the Developer tool appear as SAP and mainframe tables in projects
shared by the developer in the Analyst tool. You can view SAP and mainframe tables and create profiles and
scorecards for these tables.
A developer can add parameters to relational table or flat file data objects in the Developer tool. You can view the
parameterized data objects in the Analyst tool after the developer shares these data objects with the Analyst tool. You
can preview data in the parameterized data objects and profile data for these objects.
Use table and flat file objects to profile source data and perform data analysis tasks. You can add data objects by
importing them into the Analyst tool. You can store data objects in projects and folders in the Navigator.
Before you can import a data object you must access the metadata source to extract the metadata that you analyze in
the data object. The Analyst tool requires a connection to the source relational table to extract metadata for the table
data object. The Analyst tool requires the network path or browse location to locate the source flat file to extract
metadata for the flat file data object.
After you add tables and files, you can create a profile for the source data that the tables and files represent. When you
run the profile, the Analyst tool connects to the database table or flat file.
23

8/11/2019 DQ 951HF1 Analyst UserGuide En
http://slidepdf.com/reader/full/dq-951hf1-analyst-userguide-en 33/64
You can perform the following tasks on data objects :
¨ Add data objects. Add tables and flat files by importing tables and flat files into projects and folders in the
Navigator.
¨ View data objects. View object properties and column metadata for tables, flat files, and logical data objects.
¨ Duplicate data objects. Duplicate tables and flat files to use them for different tasks.
¨ Rename data objects. Rename tables and flat files according to their business usage and naming convention.
¨ Move data objects. Move tables and flat files in a project or folders in a project.
¨ Delete data objects. Delete tables and flat files when they become redundant.
Note: If you delete a data object that other object types reference, the Analyst tool displays a message that lists the
object types being referenced. Determine the impact of deleting the data object before you choose to delete it.
¨ Edit data objects. Edit tables and flat files to change the name or description while viewing tables and flat files.
Flat Files
A flat file data object contains the metadata for a flat file in the Analyst tool. Use flat files to profile source data. When
you add a flat file, the Analyst tool connects to the network path location or the location where you upload the source
flat file to extract metadata.
You can add flat files in the Analyst tool by importing the flat files into projects or folders. Before you import a flat fi le,
you can choose to browse a file from your local machine. The Analyst tool uploads a copy of the flat file to a directory in
the Informatica Services installation directory that the Analyst tool can access. Or, you can point the Analyst tool to a
network location. The Analyst tool uses the location you specify to access the source flat file.
You can specify the directory where you upload flat files in the flat file cache when you configure the Analyst Service in
the Administrator tool. For more information about specifying the flat file cache, see the Informatica Administrator
Guide.
You can import parameterized flat files into the Analyst tool. A developer can add parameters to flat files in the
Developer tool, or to flat files in the Analyst tool that are shared with the Developer tool. The developer cannot add
parameters to uploaded flat files.
Use the Add Flat File Wizard to import flat files into the Analyst tool. To add a flat file in the Analyst tool, select the flat
file, configure the file options, and configure the column data types. After you add the flat file, you can preview the flat
file properties and column metadata in the flat file.
After you import a flat file, the Analyst tool infers the Numeric or String datatypes for flat file columns based on the first
10,000 rows.
Flat File Options
When you import a flat file, you can configure the flat file options for each column in Add Flat File wizard. The options
that you configure determine how the wizard reads the data from the source flat file.
The following table describes the flat file options that you configure the in the Add Flat File wizard:
Options Description
Delimiters Character used to separate columns of data. Use the Other field
to enter a different delimiter. Delimiters must be printable
24 Chapter 3: Data Objects

8/11/2019 DQ 951HF1 Analyst UserGuide En
http://slidepdf.com/reader/full/dq-951hf1-analyst-userguide-en 34/64
Options Description
characters and must be different from t he escape character and
the quote character if selected. You cannot select non-printing
multibyte characters as delimiters.
Text Qualifier Quote character that defines the boundaries of text strings.
Choose No Quote, Single Quote, or Double Quotes. If you select
a quote character, the wizard ignores delimiters within pairs of
quotes.
Column Names Option to import column names from the first line. Select this
option if column names appear in the first row. The wizard uses
data in the first row in the preview for column names. If the first
row contains numeric characters, the wizard uses COLUMNx as
the default column name. If the first row contains special
characters, the wizard converts the special characters to
underscore and uses the valid characters in the column name.
The wizard skips the following special characters in a column
name: ".+-=~`!%^&*()[]{}'\";:?,< >\\|\t\r\n. Default is not
enabled.
Values Option to start value import from a line. Indicates the row number
in the preview at which the wizard starts reading when it imports
the file.
Flat File Datatypes
When you import a flat file, you can configure the datatypes for the data in each column in the Add Flat File wizard.
The datatypes you configure determine how the wizard imports the data from the source flat file.
You can configure the following data types for the data in each column in the Add Flat File wizard:
¨ bigint. You can specify the format in the Numeric Format window. You can use the default or specify another
numeric format and choose to make this the default numeric format.
¨ datetime. You can specify the format in the Datetime Format window. You can use the default or specify another
datetime format and choose to make this the default datetime format.
¨ double. You can specify the format in the Numeric Format window. You can use the default or specify another
numeric format and choose to make this the default numeric format.
¨ int. You can specify the format in the Numeric Format window. You can use the default or specify another numeric
format and choose to make this the default numeric format.
¨ nstring. You cannot specify a format.
¨ number. You can specify the format in the Numeric Format window. You can use the default or specify another
numeric format and choose to make this the default numeric format.
¨ string. You cannot specify a format.
Datetime Datatypes
When you import a flat file, you can configure the datatypes for file columns in the Add Flat File wizard. When you
configure the datetime dataype, you can specify the format in the Datetime Format window. You can use the default
or specify another datetime format and choose to make this the default datetime format.
Flat Files 25

8/11/2019 DQ 951HF1 Analyst UserGuide En
http://slidepdf.com/reader/full/dq-951hf1-analyst-userguide-en 35/64
The following table describes the datetime format strings to specify as part of the date:
Format String Description
AM, a .m., P M, p.m. Merid ian indica tor. Use any of these format strings to specif y AM
and PM hours. AM and PM return the same values as do a.m.
and p.m.
DAY Name of day, including up to nine characters (for example,
Wednesday). The DAY format string is not case sensitive.
DD Day of month (1-31).
DDD Day of year (001-366, including leap years).
DY Abbreviated three-character name for a day (for example, Wed).
The DY format string is not case sensitive.
HH, HH12 Hour of day (1-12).
HH24 Hour of day (0-23), where 0 is 12AM (midnight).
J Modified Julian Day.
MI Minutes (0-59).
MM Month (01-12).
MONTH Name of month, including up to nine characters (for example,
August ). Case does not matter.
MON Abbreviated three-character name for a month (for example,
Aug). Case does no t mat ter.
MS Milliseconds (0-999).
NS Nanoseconds (0-999999999).
RR Four-digit year (for example, 1998, 2034). Use when source
strings include two-digit years.
SS Seconds (0-59).
SSSSS Seconds since midnight.
US Microseconds (0-999999).
Y The current year with the last digit of the year replaced with the
string value.
YY The current year with the last two digits of the year replaced with
the string value.
26 Chapter 3: Data Objects
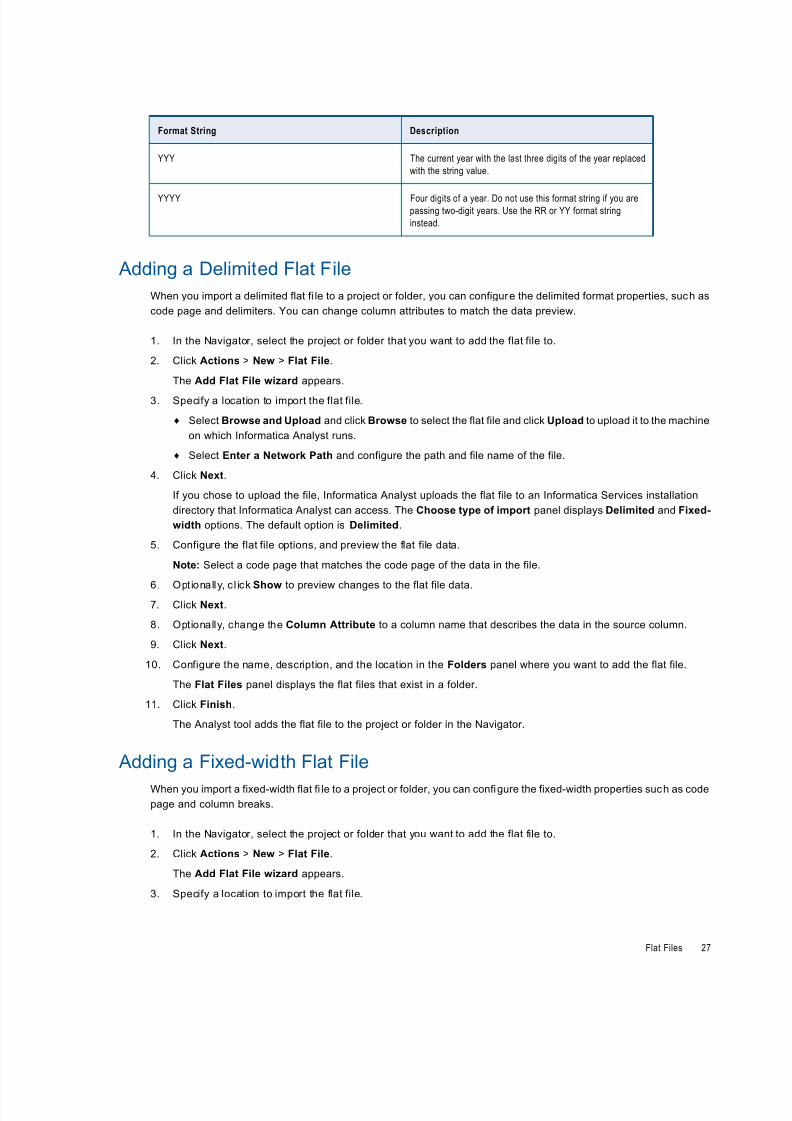
8/11/2019 DQ 951HF1 Analyst UserGuide En
http://slidepdf.com/reader/full/dq-951hf1-analyst-userguide-en 36/64
Format String Description
YYY The current year with the last three digits of the year replaced
with the string value.
YYYY Four digits of a year. Do not use this format string if you arepassing two-digit years. Use the RR or YY format string
instead.
Adding a Delimited Flat File
When you import a delimited flat fi le to a project or folder, you can configure the delimited format properties, such as
code page and delimiters. You can change column attributes to match the data preview.
1. In the Navigator, select the project or folder that you want to add the flat file to.
2. Click Actions > New > Flat File.
The Add Flat File wizard appears.
3. Specify a location to import the flat file.
¨ Select Browse and Upload and click Browse to select the flat file and click Upload to upload it to the machine
on which Informatica Analyst runs.
¨ Select Enter a Network Path and configure the path and file name of the file.
4. Click Next.
If you chose to upload the file, Informatica Analyst uploads the flat file to an Informatica Services installation
directory that Informatica Analyst can access. The Choose type of import panel displays Delimited and Fixed-
width options. The default option is Delimited.
5. Configure the flat file options, and preview the flat file data.
Note: Select a code page that matches the code page of the data in the file.
6. Opt ionally, c l ick Show to preview changes to the flat file data.7. Click Next.
8. Optionally, change the Column Attribute to a column name that describes the data in the source column.
9. Click Next.
10. Configure the name, description, and the location in the Folders panel where you want to add the flat file.
The Flat Files panel displays the flat files that exist in a folder.
11. Click Finish.
The Analyst tool adds the flat file to the project or folder in the Navigator.
Adding a Fixed-width Flat File
When you import a fixed-width flat fi le to a project or folder, you can configure the fixed-width properties such as code
page and column breaks.
1. In the Navigator, select the project or folder that you want to add the flat file to.
2. Click Actions > New > Flat File.
The Add Flat File wizard appears.
3. Specify a location to import the flat file.
Flat Files 27

8/11/2019 DQ 951HF1 Analyst UserGuide En
http://slidepdf.com/reader/full/dq-951hf1-analyst-userguide-en 37/64
¨ Select Browse and Upload and click Browse to select the flat file and click Upload to upload it to the machine
on which Informatica Analyst runs.
¨ Select Enter a Network Path and configure the path and file name of the file.
4. Click Next.
If you chose to upload the file, Informatica Analyst uploads the flat file to an Informatica Services installationdirectory that Informatica Analyst can access. The Choose type of import panel displays Delimited and Fixed-
width options. The default option is Delimited.
5. Select Fixed-width.
6. Click Next.
The fixed-width properties page appears.
7. Configure the flat file properties.
8. Opt ionally, c l ick Show to preview changes to the flat file data.
9. To set a column break, click within the Preview panel. To remove a column break, double-cl ick the column break.
To move column breaks, drag them.
Optionally, click Edit Breaks and use the Edit Breaks dialog box to manage column breaks.
10. Click Next.
11. Optionally, change the Column Attribute to a column name that describes the data in the source column.
12. Click Next.
13. Configure the name, description, and the location in the Folders panel where you want to add the flat file.
The Flat Files panel displays the flat files that exist in a folder.
14. Click Finish.
The Analyst tool adds the flat file to the project or folder in the Navigator.
Synchronizing a Flat File Data Object
You can synchronize the changes to an external flat file data source with its data object in Informatica Analyst. Use the
Synchronize Flat File wizard to synchronize the data objects.
1. In the Contents panel, select a flat file data object.
2. Click Actions > Synchronize.
The Synchronize Flat File dialog box appears in a new tab.
3. Verify the flat file path in the Browse and Upload field.
4. Click Next.
A synchronizat ion status message appears.
5. When you see a Synchronization complete message, click OK.
The message displays a summary of the metadata changes made to the data object. To view the details of the
metadata changes, use the Properties view.
28 Chapter 3: Data Objects

8/11/2019 DQ 951HF1 Analyst UserGuide En
http://slidepdf.com/reader/full/dq-951hf1-analyst-userguide-en 38/64
Rules and Guidelines for Flat Files
Use the following rules and guidelines while working with flat files:
¨ Upload small files. Use the option to upload small files to an Informatica Services installation directory on the
machine where the Analyst tool runs. The Analyst tool accesses this location to extract flat file metadata that does
not change frequently. When you use small files of sizes up to 10MB, the Analyst tool accesses a copy of the file inthe Informatica Services installation directory. If you modify the original file, you need to upload the file again.
¨ Upload large files. Use the option to enable the Analyst tool to connect to a network path location for large files.
The Analyst tool accesses this location to extract flat file metadata that changes frequently. The network path
location should be a shared directory or file system that the Analyst tool can access. When you use large file sizes
greater than 10MB, the Analyst tool can connect to the flat file in the network path. If you modify the original flat file,
you must refresh the flat file in the Analyst tool. Refreshing metadata for a large flat file can take time.
¨ Blank data rows. The Analyst tool does not import the blank rows above the first data row, blank middle rows, and
blank rows after the last data row when importing a flat file.
¨ Previewing data. After a preview, you can change the row number at which the Add Flat File wizard starts reading
when it imports the file. This row number corresponds wi th the preview. If you choose to import column names from
the first line, refresh the preview to update the row numbers for the preview data.
Tables
A table object contains the metadata for a relational database source in the Analyst tool . Use tables to prof ile source
data. When you add a table, the Analyst tool uses a database connection to connect to the source database to extract
metadata.
You can add tables in the Analyst tool by importing the tables into projects or folders. Before you import a table, you
select or create a database connection and select the database table that you want to add. You can add multiple
tables from a connection as data objects. You can also search for a table or table schema when you import a table.
Use the Add Table wizard to add a table to the project or folder.
You can use the database connection that the staging database uses to select a table. You can create another
database connection to connect to the source table when you import a table. An administrator creates the connection
to the staging database that stores bad record or duplicate record tables for the Analyst tool before configuring the
Analyst Service. For more information about configur ing the staging database, see the Informatica Administrator
Guide.
Database Connection Properties
You can use the database connection that the staging database uses to select a table. When you import a table, you
can create another database connection to connect to the source relational table. You can delete redundant database
connections.
The following table describes the database connection properties that you can configure for a database connection:
Property Description
Name Name of the connection. The name is not case sensitive and must be unique within the domain. I t cannot
exceed 128 characters, contain spaces, or contain the following special characters:
Tables 29

8/11/2019 DQ 951HF1 Analyst UserGuide En
http://slidepdf.com/reader/full/dq-951hf1-analyst-userguide-en 39/64
Property Description
~ ` ! $ % ^ & * ( ) - + = { [ } ] | \ : ; " ' < , > . ? /
ID Str ing tha t the Data In tegrat ion Service uses to ident if y the connect ion. The ID is not case sensi ti ve . I t must be
255 characters or less and must be unique in the domain. You cannot change this property afte r you create theconnection. Default value is the connection name.
Descript ion Descrip tion of th e co nnectio n.
Database Type Type of relational database. You can select an Oracle, Microsoft SQL Server, or IBM DB2 database.
User Name User name used for authentication when you connect to the relational database.
Password Password for the database user name.
Connection String Connection string used to access data from the database.
IBM DB2: <database name>
Microsoft SQL Server: <server name>@<database name>
ODBC: <data source name>
Oracle: <database name listed in TNSNAMES entry>
Data Access
Connection String
JDBC connection URL used to access metadata from the database.
IBM DB2: jdbc:informatica:db2://<host name>:<port>;DatabaseName=<database name>
ODBC: n/a
Oracle: jdbc:informatica:oracle://<host_name>:<port>;SID=<database name>
Microsoft SQL Server: jdbc:informatica:sqlserver://<host name>:<port>;DatabaseName=<database name>
Code Page Code page use to read from a source database or write to a target database or f i le.
Deleting a Database Connection
Delete database connections that become redundant. You must have the Write permission on the database
connection to delete the connection.
1. In the Informatica Analyst header, click Manage > Connections.
The Manage Connections dialog box appears.
2. Select the connection and click Delete.
3. Click Close.
Adding a Table
Use the Add Tables wizard to add a table to a project. Add the tables that you want to profile data for. To add a table,
select or create a connection, select the schema and tables, and add the table.
1. In the Navigator, select the project or folder that you want to add the table to.
2. Click Actions > New > Table.
The Add Tables wizard appears.
3. Select a connection.
4. Opt ionally, c l ick Manage Connections to create and configure a connection.
30 Chapter 3: Data Objects

8/11/2019 DQ 951HF1 Analyst UserGuide En
http://slidepdf.com/reader/full/dq-951hf1-analyst-userguide-en 40/64
5. In the Manage Connections window, click the New Connection icon to configure a connection.
6. Configure the database connection properties.
7. Choose to create a simple or advanced connection.
8. Configure the additional database connection properties and click OK.
9. Click Close.
10. Optionally, unselect Show Default Schema Only to show all schemas associated with the selected
connection.
11. Select the table that you want to add or enter a table name in the Tables search box and click Go to search by
table name. Click Clear to remove the search results and display all tables.
12. Optionally, enter a table schema name in the Schema search box and click Go to search by table schema name.
Click Clear to remove the search results and display all schemas.
13. Optionally, click the Properties View to view the properties and column metadata for the table. Or, click the Data
Preview View to view the columns and data for the table.
14. Click Next.
The wizard displays the table to add to your folder or project.
15. Click Finish.
Synchronizing a Relational Data Object
You can synchronize the changes to an external relational data source with its data object in Informatica Analyst.
External data source changes include adding, changing, and removing columns and changes to rules.
1. In the Contents panel, select a relational data object.
2. Click Actions > Synchronize.
A message prompts you to confirm the action.
3. To complete the synchronization process, click OK. Click Cancel to cancel the process.
If you click OK, a synchronization status message appears.4. When you see a Synchronization complete message, click OK.
The message displays a summary of the metadata changes made to the data object. To view the details of the
metadata changes, use the Properties view.
Rules and Guidelines for Tables
Use the following rules and guidelines while working with tables:
¨ The Analyst tool displays the first 100 rows by default when you preview the data for a table. The Analyst tool may
not display all the data columns in a wide table.
¨ The Analyst tool can import wide tables with more than 30 columns for profiling data. When you import a wide table,
the Analyst tool does not display all the columns in the data preview. The Analyst tool displays the first 30 columns
in the data preview. However, you can include all the columns in the wide tables and flat files for profiling.
¨ You can import tables and columns with lowercase and mixed-case characters.
¨ You can import tables that have special characters in the table or column name. When you import a table that has
special characters in the table or column name, the Analyst tool converts the special character to an underscore
character in the table or column name. You can use the following special characters in table or column names:
" $ . + - = ~ ` ! % ^ & * ( ) [ ] { } ' \ " ; : / ? , < > \ \ | \ t \ r \ n
Tables 31

8/11/2019 DQ 951HF1 Analyst UserGuide En
http://slidepdf.com/reader/full/dq-951hf1-analyst-userguide-en 41/64
¨ You can import tables and columns with Microsoft SQL92 or Microsoft SQL99 reserved words such as "concat" into
the Analyst tool.
¨ You can use an ODBC connection to import Micorsoft SQL Server, MySQL, Teradata, and Sybase tables in the
Analyst tool. The OBDC connection requires a user name and password.
¨ When you use a Microsoft SQL Server connection to access tables in a Microsoft SQL Server database, the
Analyst tool does not display the synonyms for the tables.
¨ When you preview relational table data from an Oracle, IBM DB2, IBM DB2 for zOS, IBM DB2/iOS, Microsoft SQL
Server, and ODBC database, the Analyst tool cannot display the prev iew if the table, view, schema, synonym, and
column names contain mixed case or lower case characters. To preview data in tables that reside in case sensitive
databases, set the Support Mixed Case Identifiers attribute to true in the connections for Oracle, IBM DB2, IBM
DB2 for zOS, IBM DB2/iOS, Microsoft SQL Server, and ODBC databases in the Developer tool or Administrator
tool.
¨ You can view comments for the source database table after you import the table into the Analyst tool. To view
source table comments, use an additional parameter in the JDBC connection URL used to access metadata from
the database. In the Metadata Access String option in the database connection properties, use CatalogOptions=1
or CatalogOptions=3. For example, use the following JDBC connection URL for an Oracle database connection:
Oracle: jdbc:informatica:oracle:// <host_name>:<port>;SID=<database name>;CatalogOptions=1
Viewing Data Objects
View data objects to preview data object properties and column metadata.
1. In the Navigator, select the project or folder that contains the table or file data object.
2. Click Actions > Open to open the data object.
The data object appears in a new tab. The Analyst tool retrieves the first 100 rows for the data object and displays
it on the Data Preview view.
3. Optionally, select Columns and select a column to include in the preview. Default includes all columns for preview.
If you choose not to include a column, the Analyst tool refreshes the preview and does not include the column in
the preview.
4. Optionally, click the Properties view to view the table and file properties in the Properties panel.
The Analyst tool displays the table name, description, location, connection name, and database schema name for
the table data object. The Analyst tool displays the file name, location, upload file path, or network path for the flat
file data object.
5. Optionally, view the column metadata for each column in the Columns panel.
You can view column name and datatype for each column in the table or flat file. You can view if the column is
nullable and the key for each column in the table. Nullable and key properties are relational database
properties.
6. Optionally, click the Refresh button to refresh the metadata for the data object.
32 Chapter 3: Data Objects

8/11/2019 DQ 951HF1 Analyst UserGuide En
http://slidepdf.com/reader/full/dq-951hf1-analyst-userguide-en 42/64
Editing Data Objects
You can edit the name and description properties of tables and flat files while viewing the tables and flat files.
1. In the Navigator, select the project or folder that contains the table of flat file data object you want to edit.
2. Click Actions > Open to open the data object.
The data object opens in a new tab.
3. Click the Properties view to view the table or flat file properties in the Properties panel.
4. Click Actions > Edit to edit the data object.
The Edit window appears.
5. Enter a name and an optional description.
6. Click OK.
Editing Data Objects 33

8/11/2019 DQ 951HF1 Analyst UserGuide En
http://slidepdf.com/reader/full/dq-951hf1-analyst-userguide-en 43/64
C H A P T E R 4
Exception Record Management
This chapter includes the following topics:
¨ Exception Record Management Overview, 34
¨ Exception Management Process Flow, 35
¨ Reserved Column Names , 36
¨ Exception Management Operations, 36
Exception Record Management Overview
An exception is a record that contains unresolved data quality issues. The record may contain er rors, or i t may be an
unintended duplicate of another record. You can use the Analyst tool to review and edit exception records that are
identified by a mapping that contains an Exception transformation.
You can review and edit the output from an Exception transformation in the Analyst tool or in the Informatica Data
Director for Data Quality web application. You use Informatica Data Director for Data Quality when you are assigned a
task as part of a workflow.
You can use the Analyst tool to review the following exception types:
Bad records
You can edit records, delete records, tag them to be reprocessed by a mapping, or profile them to analyze the
quality of changes made to the records.
Duplicate records
You can consolidate clusters of similar records to a single master record. You can consolidate or remove
duplicate records, extract records to form new clusters, and profile duplicate records.
The Exception transformation creates a database table to store the bad or duplicate records. The Model repository
stores the data object associated with the table. The transformation also creates one or more tables for the metadata
associated with the bad or duplicate records.
To review and update the bad or duplicate records, import the database table to the staging database in the Analyst
tool. The Analyst tool uses the metadata tables in the database to identify the data quality issues in each record. You
do not use the data object in the Model repository to update the record data.
34
8/11/2019 DQ 951HF1 Analyst UserGuide En
http://slidepdf.com/reader/full/dq-951hf1-analyst-userguide-en 44/64
Exception Management Process Flow
The Exception transformation analyzes the output of other data quality transformations and creates tables that
contain records with different levels of data quality.
After the Except ion transformation creates an exception table, you can use the Analyst tool or Informatica Data
Director for Data Quality to review and update the records in the table.
You can configure data quality transformations in a single mapping, or you can create mappings for different stages in
the process.
Use the Developer tool to perform the following tasks:
Create a mapping that generates score values for data quality issues
Use a Match transformation in cluster mode to generate score values for duplicate record exceptions.
Use a transformation that writes a business rule to generate score values for records that contain errors. For
example, you can define an IF/THEN rule in a Decision transformation. Use the rule to evaluate the output of
other data quality transformations.
Use an Exception transformation to analyze the record scores
Configure the Exception transformation to read the output of other transformations or to read a data object from
another mapping. Configure the transformation to write records to database tables based on score values in the
records.
Configure target data objects for good records or automatic consolidation records
Connect the Exception transformation output ports to the target data objects in the mapping.
Create the target data object for bad or duplicate records
Use the Generate bad records table or Generate duplicate record table option to create the database object
and add it to the mapping canvas. The Developer tool auto-connects the bad or duplicate record ports to the data
object.
Run the mapping
Run the mapping to process exceptions.
Use the Analyst tool or Informatica Data Director for Data Quality to perform the following tasks:
Review the exception table data
You can use the Analyst tool or Informatica Data Director for Data Quali ty to review the bad or duplicate record
tables.
¨ Use the Analyst tool to import the exception records into a bad or duplicate record table. Open the imported
table from the Model repository and work on the exception data.
¨ Use Informatica Data Director for Data Quality if you are assigned a task to review or correct exceptions as
part of a Human task.
Note: The exception tables you create in the Exception transformation include columns that provide metadata to
Informatica Data Director for Data Quality. The columns are not used in the Analyst tool. When you import thetables to the Analyst tool for exception data management, the Analyst tool hides the columns.
Exception Management Process Flow 35
8/11/2019 DQ 951HF1 Analyst UserGuide En
http://slidepdf.com/reader/full/dq-951hf1-analyst-userguide-en 45/64
Reserved Column Names
When you create a bad record or consolidation table, the Analyst tool generates columns for use in its internal tables.
Do not import tables that use these names. If an imported table contains a column with the same name as one of the
generated columns, the Analyst tool will not process it.
Reserve the following column names for bad record or consolidation tables:
¨ checkStatus
¨ rowIdentifier
¨ acceptChanges
¨ recordGroup
¨ masterRecord
¨ matchScore
¨ any name beginning with DQA_
Exception Management Operations
You can perform one or more of the following operations in the Analyst tool:
Import database tables
Configure a connection to a database and impor t the bad record or duplicate tables. If you ran a mapping with an
Exception transformation that created bad record or duplicate tables, you do not need to import the tables.
Manage bad records
Identify problem records and fix data quality issues.
Consolidate duplicate records
Merge groups of duplicate records into a single record.
View the audit trail
Review the changes made in the bad or duplicate record tables before writing the changes to the source
database.
Importing a Database for Exception Management
Complete the following steps to import a table that contains bad or duplicate records to the staging database. You
import the table even if the Model repository contains a data object that identifies the table.
1. Log in to the Analyst tool.
2. Select Actions > New > Data Quality Table.
The Import DQA Table wizard opens.
3. Specify the type of data in the tables: bad records or duplicate records.
4. Select or create a database connection.
To create a database connection, click Manage Connections.
5. Select the table that contains the exception record data.
You do not need to import a related data quality issue table when you import the exception record table.
36 Chapter 4: Exception Record Management

8/11/2019 DQ 951HF1 Analyst UserGuide En
http://slidepdf.com/reader/full/dq-951hf1-analyst-userguide-en 46/64
6. Click Finish.
Viewing and Editing Bad Records
Complete these steps to view and edit bad records:
1. Log in to the Analyst tool.
2. Select a project.
3. Select a bad records table.
4. Optionally, use the menus to filter the table records. You can filter records by value in the following columns:
Priority, Quality Issue, Column, and Status.
5. Click Show to view the records that match the filter criteria.
6. Double-click a cell to edit the cell to edit the cell value.
7. Click Save to save the rows you updated.
Saving changes to a record is the first step in processing the record in the Analyst tool. After you save changes to a
record, you can update the record status to accept, reprocess, or reject the record.
Updating Bad Record Status
For each record that does not require further editing, perform one of the following actions:
Select one or more records by clicking the check box next to each record. Select all the records in the table by clicking
the check box at the top of the first column.
Note: The Analyst tool does not display records that you have taken action on.
¨ Click Accept.
Indicates that the record is acceptable for use.
¨ Click Reject.
Indicates that the record is not acceptable for use.¨ Click Reprocess.
Selects the record for reprocessing by a data quality mapping. Select this option when you are unsure if the record
is valid. Rerun the mapping with an updated business rule to recheck the record.
Viewing and Filtering Duplicate Record Clusters
Complete these steps to view and filter duplicate clusters:
1. Log in to the Analyst tool.
2. Select a project.
3. Select a duplicate record table.
4. The first cluster in the table opens.
The Analyst tool also displays the number of clusters in the table. Click a number to move to a cluster.
5. Optionally, use the Filter option to filter the cluster list.
In the Filter Clusters dialog box, select a column and enter a filter string. The Analyst tool returns all clusters with
one or more records that contain the string in the column you select.
Exception Management Operations 37

8/11/2019 DQ 951HF1 Analyst UserGuide En
http://slidepdf.com/reader/full/dq-951hf1-analyst-userguide-en 47/64
Editing Duplicate Record Clusters
Edit clusters to change how the Analyst tool consolidates potential duplicate records.
You can edit clusters in the following ways:
To remove a record from a cluster:
Clear the selection in the Cluster column to remove the record from the cluster . When you delete a record from acluster, the record assumes a unique cluster ID.
To create a new cluster from records in the current cluster:
Select a subset of records and click the Extract Cluster button. This action creates a new cluster ID for the
selected records.
To edit the record:
Select a record field to edit the data in that field.
To select the fields that populate the master record:
Click the selection arrow in a field to add its value to the corresponding field in the Final Record row. An arrow
indicates that the field provides data for the master record.
To specify a master record:
Click a cell in the Master column for a row to select that row as the master record.
Consolidating Duplicate Record Clusters
When you have processed a cluster, complete this step to consolidate the cluster records to a single record in the
staging database.
u In the cluster you processed, click the Consolidate Cluster button.
The Analyst tool performs the following updates on cluster records:
¨ In the staging database, the Analyst tool updates the master record with the contents of the Final record and sets
the status to Updated.
¨ The Analyst tool sets the status of the other selected records to Consolidated.
¨ The Analyst tool sets the status of any cleared record to Reprocess.
Viewing the Audit Trail
The Analyst tool tracks changes to the exception record database in an audit trail.
Complete the following steps to view audit trail records:
1. Select the Audit Trail tab.
2. Set the f ilter options.
3. Click Show.
38 Chapter 4: Exception Record Management

8/11/2019 DQ 951HF1 Analyst UserGuide En
http://slidepdf.com/reader/full/dq-951hf1-analyst-userguide-en 48/64
The following table describes record statuses for the audit trail.
Record Status Description
Updated Edited during bad record processing, or selected as the
Master record during consolidation.
Consolidated Consolidated to a master record during consolidation.
Rejected Rejected during bad record processing.
Accepted Accepted during bad record p rocessi ng.
Reprocess Marked for reprocessing during bad record processing.
Rematch Removed from a cluster during consolidation.
Extracted Extracted from a cluster into a new cluster during
consolidation.
Exception Management Operations 39
8/11/2019 DQ 951HF1 Analyst UserGuide En
http://slidepdf.com/reader/full/dq-951hf1-analyst-userguide-en 49/64
8/11/2019 DQ 951HF1 Analyst UserGuide En
http://slidepdf.com/reader/full/dq-951hf1-analyst-userguide-en 50/64
Reference Table Structure
Most reference tables contain at least two columns. One column contains the correct or required versions of the data
values. Other columns contain different versions of the values, including alternative versions that may appear in the
source data.
The column that contains the correct or required values is called the valid column. When a transformation reads areference table in a mapping, the transformation looks for values in the non-valid columns. When the transformation
finds a non-valid value, it returns the corresponding value from the valid column. You can also configure a
transformation to return a single common value instead of the valid values.
The valid column can contain data that is formally cor rect, such as ZIP codes. It can contain data that is relevant to a
project, such as stock keeping unit (SKU) numbers that are unique to an organization. You can also create a valid
column from bad data, such as values that contain known data errors that you want to search for.
For example, a Developer tool user creates a reference table that contains a list of valid SKU numbers in a retail
organization. The user adds the reference table to a Labeler transformation and creates a mapping with the
transformation. The user runs the mapping on a product database table. When the mapping runs, the Labeler creates
a column that identifies the product records that do not contain valid SKU numbers.
Reference Tables and the Parser Transformation
You create a reference table with a single column when you want to use the table data in a pattern-based parsing
operation. You configure the Parser transformation to perform pattern-based parsing, and you import the data to the
transformation configuration.
Managed and Unmanaged Reference Tables
Reference tables store metadata in the Model repository. Reference tables can store column data in the reference
data warehouse or in another database.
When the reference data warehouse stores the column data, Informatica services identify the table as a managed
reference table. When another database stores the column data, Informatica services identify the table as an
unmanaged reference table. The Content Management Service stores the database connection for the reference data
warehouse.
You can edit reference table data in the Developer tool and Analyst tool. Before you edit the data, verify that the
Content Management Service grants you edit privileges on reference table data. Use the Security options in the
Administrator tool to review or update the Content Management Service priv ileges.
To edit data in an unmanaged reference table, verify also that you configured the reference table to permit edits. You
can select the editable table option when you create the reference table.
Note: You can edit unmanaged reference table data in the Developer tool and Analyst tool. You can edit unmanaged
reference table metadata in the Analyst Tool.
Reference Table PropertiesYou can view and edit reference table properties in the Analyst tool. A reference table displays general properties that
describe the repository object and column properties that describe the column data.
To view the properties, open the reference table and select the Properties view.
To edit the properties, open the reference table and select the Edit Table option.
Reference Table Properties 41

8/11/2019 DQ 951HF1 Analyst UserGuide En
http://slidepdf.com/reader/full/dq-951hf1-analyst-userguide-en 51/64
General Reference Table Properties
The general properties include information about the users who created and updated the reference table. The general
properties also identify the table location and the current valid column in the table.
The following table describes the general properties:
Property Description
Name Name of the reference table.
Description Optional description of the reference table.
Location Project that contains the reference table in the Model
repository.
Valid Column Column that contains the valid reference data.
Created on Creation date for the reference table.
Created By User who created the reference table.
Last Modified Date of the most recent update to the reference table.
Last Modified By User who most recently edited the reference table.
Connection Name Connection name of the database that stores the reference table
data.
Type Reference table type. The reference table can be managed or
unmanaged.
If the table is unmanaged, the property indicates if users can edit
the table data.
Reference Table Column Properties
The column properties contain information about the column metadata.
The following table describes the column properties:
Property Description
Name Name of each column.
Data Type The datatype for the data in each column. You can select one of
the following datatypes:
- bigint
- date/ time- deci mal
- double
- i nteger
- string
You cannot select a double data type when you create an empty
reference table or create a reference table from a flat file.
42 Chapter 5: Reference Tables

8/11/2019 DQ 951HF1 Analyst UserGuide En
http://slidepdf.com/reader/full/dq-951hf1-analyst-userguide-en 52/64
Property Description
Precision Precision for each column. Precision is the maximum number of
digits or the maximum number of characters that the column can
accommodate.
The precision values you configure depend on the data type.
Scale Scale for each column. Scale is the maximum number of digits
that a column can accommodate to the right of the decimal poi nt.
Appli es to decimal col umns.
The scale values you configure depend on the data type.
Description Optional description for each column.
Nullable Indicates if the column can contain null values.
Create Reference TablesUse the reference table editor, profile results, or a flat file to create reference tables. Create reference tables to share
reference data with developers in the Developer tool.
Use the following methods to create a reference table:
¨ Create a reference table in the reference table editor.
¨ Create a reference table from profile column data or profile pattern data.
¨ Create a reference table from flat file data.
¨ Create a reference table from data in another database table.
Creating a Reference Table in the Reference Table Editor Use the New Reference Table Wizard and the reference table editor view to create a reference table. You use the
reference table editor to define the table structure and add data to the table.
1. In the Navigator, select the project or folder where you want to create the reference table.
2. Click Actions > New > Reference Table.
The New Reference Table Wizard appears.
3. Select the option to Use the reference table editor .
4. Click Next.
5. Enter the table name, and optionally enter a description and default value.
The Analyst tool uses the default value for any table record that does not contain a value.
6. For each column you want to include in the reference table, click the Add New Column icon and configure the
properties for each column.
Note: You can reorder or delete columns.
7. Optionally, enter an audit note for the table.
The audit note appears in the audit trail log.
8. Click Finish.
Create Reference Tables 43

8/11/2019 DQ 951HF1 Analyst UserGuide En
http://slidepdf.com/reader/full/dq-951hf1-analyst-userguide-en 53/64
Create a Reference Table from Profile Data
You can use profile data to create reference tables that relate to the source data in the profile. Use the reference tables
to find different types of information in the source data.
You can use a profile to create or update a reference table in the following ways:
¨ Select a column in the profile and add it to a reference table.
¨ Browse a profile column and add a subset of the column data to a reference table.
¨ Select a column in the profile and add the pattern values for that column to a reference table.
Creating a Reference Table from Profile Columns
You can create a reference table from a profile column. You can add a profile column to an existing reference table.
The New Reference Table Wizard adds the column to the reference table.
1. In the Navigator, select the project or folder that contains the profile with the column that you want to add to a
reference table.
2. Click the profile name to open it in another tab.
3. In the Column Profiling view, select the column that you want to add to a reference table.
4. Click Actions > Add to Reference Table.
The New Reference Table Wizard appears.
5. Select the option to Create a new reference table.
Optionally, select Add to existing reference table, and click Next. Navigate to the reference table in the project
or folder, preview the reference table data and click Next. Select the column to add and click Finish.
6. Click Next.
7. The column name appears by default as the table name. Optionally enter another table name, a description, and
default value.
The Analyst tool uses the default value for any table record that does not contain a value.8. Click Next.
9. In the Column Attributes panel, configure the column properties for the column.
10. Optionally, choose to create a description column for rows in the reference table.
Enter the name and precision for the column.
11. Preview the column values in the Preview panel.
12. Click Next.
13. The column name appears as the table name by default. Optionally, enter another table name and a
description.
14. In the Save in panel, select the location where you want to create the reference table.
The Reference Tables: panel lists the reference tables in the location you select.
15. Optionally, enter an audit note.
16. Click Finish.
Creating a Reference Table from Column Values
You can create a reference table from the column values in a profile column. Select a column in a profile and select the
column values to add to a reference table or create a reference table to add the column values.
44 Chapter 5: Reference Tables

8/11/2019 DQ 951HF1 Analyst UserGuide En
http://slidepdf.com/reader/full/dq-951hf1-analyst-userguide-en 54/64
1. In the Navigator, select the project or folder that contains the profile with the column that you want to add to a
reference table.
2. Click the profile name to open it in another tab.
3. In the Column Profiling view, select the column that you want to add to a reference table.
4. In the Values view, select the column values you want to add. Use the CONTROL or SHIFT keys to selectmultiple values.
5. Click Actions > Add to Reference Table.
The New Reference Table Wizard appears.
6. Select the option to Create a new reference table.
Optionally, select Add to existing reference table, and click Next. Navigate to the reference table in the project
or folder, preview the reference table data and click Next. Select the column to add and click Finish.
7. Click Next.
8. The column name appears by default as the table name. Optionally enter another table name, a description, and
default value.
The Analyst tool uses the default value for any table record that does not contain a value.
9. Click Next.
10. In the Column Attributes panel, configure the column properties for the column.
11. Optionally, choose to create a description column for rows in the reference table.
Enter the name and precision for the column.
12. Preview the column values in the Preview panel.
13. Click Next.
14. The column name appears as the table name by default. Optionally, enter another table name and a
description.
15. In the Save in panel, select the location where you want to create the reference table.
The Reference Tables: panel lists the reference tables in the location you select.
16. Optionally, enter an audit note.
17. Click Finish.
Creating a Reference Table from Column Patterns
You can create a reference table from the column patterns in a profile column. Select a column in the profile and select
the pattern values to add to a reference table or create a reference table to add the pattern values.
1. In the Navigator, select the project or folder that contains the profile with the column that you want to add to a
reference table.
2. Click the profile name to open it in another tab.
3. In the Column Profiling view, select the column that you want to add to a reference table.
4. In the Patterns view, select the column patterns you want to add. Use the CONTROL or SHIFT keys to select
multiple values
5. Click Actions > Add to Reference Table.
The New Reference Table Wizard appears.
6. Select the option to Create a new reference table.
Create a Reference Table from Profile Data 45

8/11/2019 DQ 951HF1 Analyst UserGuide En
http://slidepdf.com/reader/full/dq-951hf1-analyst-userguide-en 55/64
Optionally, select Add to existing reference table, and click Next. Navigate to the reference table in the project
or folder, preview the reference table data and click Next. Select the column to add and click Finish.
7. Click Next.
8. The column name appears by default as the table name. Optionally enter another table name, a description, and
default value.
The Analyst tool uses the default value for any table record that does not contain a value.
9. Click Next.
10. In the Column Attributes panel, configure the column properties for the column.
11. Optionally, choose to create a description column for rows in the reference table.
Enter the name and precision for the column.
12. Preview the column values in the Preview panel.
13. Click Next.
14. The column name appears as the table name by default. Optionally, enter another table name and a
description.
15. In the Save in panel, select the location where you want to create the reference table.
The Reference Tables: panel lists the reference tables in the location you select.
16. Optionally, enter an audit note.
17. Click Finish
Create a Reference Table From a Flat File
You can import reference data from a CSV file. Use the New Reference Table wizard to import the file data.
You must configure the properties for each flat file that you use to create a reference table.
Analyst Tool Flat File Properties
When you import a flat file as a reference table, you must configure the properties for each column in the file. The
options that you configure determine how the Analyst tool reads the data from the file.
The following table describes the properties you can configure when you import file data for a reference table:
Properties Description
Delimiters Character used to separate columns of data. Use the Other field
to enter a different delimiter.
Delimiters must be printable characters and must be different
from the escape character and the quote character if selected.
You cannot select non-printing multibyte characters as
delimiters.
Text Qualifier Quote character that defines the boundaries of text strings.
Choose No Quote, Single Quote, or Double Quotes.
If you select a quote character, the wizard ignores delimiters
within pairs of quotes.
46 Chapter 5: Reference Tables

8/11/2019 DQ 951HF1 Analyst UserGuide En
http://slidepdf.com/reader/full/dq-951hf1-analyst-userguide-en 56/64
Properties Description
Column Names Imports column names from the first line. Select this option if
column names appear in the first row.
The wizard uses data in the first row in the preview for column
names.
Default is not enabled.
Values Option to start value import from a line. Indicates the row number
in the preview at which the wizard starts reading when it imports
the file.
Creating a Reference Table from a Flat File
When you create a reference table data from a flat file, the table uses the column structure of the file and imports the
file data.
1. In the Navigator, select the project or folder where you want to create the reference table.
2. Click Actions > New > Reference Table.
The New Reference Table Wizard appears.
3. Select the option to Import a flat file.
4. Click Next.
5. Click Browse to select the flat file.
6. Click Upload to upload the file to a directory in the Informatica services installation directory that the Analyst tool
can access.
7. Enter the table name. Optionally, enter a description and default value.
The Analyst tool uses the default value for any table record that does not contain a value.
8. Select a code page that matches the data in the flat file.
9. Preview the data in the Preview of file panel.
10. Click Next.
11. Configure the flat file properties.
12. In the Preview panel, click Show to update the preview.
13. Click Next.
14. On the Column Attributes panel, verify or edit the column properties for each column.
15. Optionally, create a description column for rows in the reference table. Enter the name and precision for the
column.
16. Optionally, enter an audit note for the table.
17. Click Finish.
Create a Reference Table From a Flat File 47

8/11/2019 DQ 951HF1 Analyst UserGuide En
http://slidepdf.com/reader/full/dq-951hf1-analyst-userguide-en 57/64
Create a Reference Table from a Database Table
When you create a reference table from a database table, you connect to the database and import the table data.
Before you import reference table data from a database table, verify that the Informatica domain contains a
connection to the database. If the domain does not contain a connection to the database, you can define one in the
Analyst tool.
Use the Manage Connections options to define a database connection. You can find the Manage Connections
options on the Analyst tool header. The options also appear in the New Reference Table wizard.
Creating a Database Connection for a Reference Table
You can use the New Reference Table wizard to define a database connection. When you define the database
connection, you can select the table that contains the data values for the reference table.
1. In the Navigator, select the project or folder to store the reference table object.
2. Click Actions > New > Reference Table.
The New Reference Table wizard appears.
3. Select the option to Connect to a relational table.
4. Select Unmanaged Table if you want to create a table that does not store data in the reference data
warehouse.
If you want to perform edit operations on an unmanaged reference table, select the Editable option.
5. Click Next.
6. Click Manage Connections.
The Manage Connections window opens.
7. To create a database connection, click New.
Enter the connection properties for the database that contains the reference table data.
8. Click OK.
The database connection appears in the list of available connections.
Creating a Reference Table from a Database Table
To create the reference table, connect to a database and import the data.
1. In the Navigator, select the project or folder to store the reference table object.
2. Click Actions > New > Reference Table.
The New Reference Table Wizard appears.
3. Select the option to Connect to a relational table.
4. Select Unmanaged Table to create a table that does not store data in the reference data warehouse.
To perform edit operations on an unmanaged reference table, select the Editable option.
Click Next.
5. Select the database connection from the list of established connections.
Click Next.
6. On the Tables panel, select a table.
7. Verify the table properties in the Properties panel.
48 Chapter 5: Reference Tables
8/11/2019 DQ 951HF1 Analyst UserGuide En
http://slidepdf.com/reader/full/dq-951hf1-analyst-userguide-en 58/64
Optionally, click Data Preview to view the table data.
Click Next.
8. On the Column Attributes panel, select the Valid column.
Optionally, specify an audit comment to write to the audit trail when a user updates the reference table.
If you create a managed reference table, you can perform the following actions on the Column Attributespanel:
¨ Edit the reference table column names.
¨ Add a metadata column for row-level descr iptions.
9. Click Next.
10. Enter a name and optionally a description for the reference table.
11. On the Folders panel, verify the project or folder to store the reference table.
The Reference Tables panel lists the reference tables in the folder that you select.
12. Click Finish.
Reference Table Updates
The business data that a reference table contains can change over time. Review and update the data and metadata in
a reference table to verify that the table contains accurate information. You update reference tables in the Analyst tool.
You can update the data and metadata in a managed reference table and an unmanaged reference table.
You can perform the following operations on reference table data and metadata:
Manage columns
Use the Edit column properties dialog box to add columns, delete columns, and edit column properties.
Manage rows
Use the Add Row dialog box to add data rows of data to a reference table. Use the Edit Row or Edit Multiple
Rows dialog box to update the row data.
Edit reference data values
You can edit a reference data value in the reference table view.
Replace data values
Use the Find and Replace option to replace data values that are no longer accurate or relevant to the
organization. You can find a value in a column and replace it with another value. You can replace all values in a
column with a single value.
Export a reference table
Export a reference table to a comma-separated values (CSV) file, dictionary file, or Excel file.
Enable or disable edits on an unmanaged table
Update an unmanaged reference table to enable or disable edits to table data and metadata.
Managing Columns
Use the Edit column properties dialog box to manage the columns in a reference table. You can also set table
properties in the Edit column properties dialog box.
Reference Table Updates 49

8/11/2019 DQ 951HF1 Analyst UserGuide En
http://slidepdf.com/reader/full/dq-951hf1-analyst-userguide-en 59/64
1. In the Navigator, select the project or folder that contains the reference table that you want to edit.
2. Click the reference table name to open it in a tab. The Reference Table tab appears.
3. Click Actions > Edit Table or click the Edit Table icon.
The Edit column properties dialog box appears. Use the dialog box options to perform the following
operations:¨ Change the valid column in the table.
¨ Delete a column from the table.
¨ Change a column name.
¨ Update the descriptive text for a column.
¨ Update the editable status of the reference table.
¨ Update the audit note for the table. The audit note appears in the audit log for any action that you perform in
the Edit column properties window.
4. When you complete the operations, click OK.
Managing RowsYou can add, edit, or delete rows in a reference table.
1. In the Navigator, select the project or folder that contains the reference table.
2. Click the reference table name to open it. The table opens in the Reference Table tab.
3. Edit the data rows. You can edit the data rows in the following ways:
¨ To add a row, select Actions > Add Row.
In the Add Row window, enter a value for each column. Optionally, enter an audit note.
Click OK to apply the changes.
¨ To edit a data value, double-click the value in the reference table and update the value
After you edit the data, use the row-level options to accept or reject the edit.
¨ To edit multiple rows, select the rows to edit and select Actions > Edit.
In the Edit Multiple Rows window, enter a value for each column in the row. Optionally, enter an audit
note.
Click OK to apply the changes.
¨ To delete rows, select the rows to delete and click Actions > Delete.
In the Delete Rows window, optionally enter an audit note.
Click OK to delete the data.
Note: Use the Developer tool to edit row data in a large reference table. For example, if a reference table contains
more than 500 rows, edit the table in the Developer tool.
Finding and Replacing ValuesYou can find and replace data values in a reference table. Use the find and replace options when a table contains one
or more instances of a data value that you must update.
1. In the Navigator, select the project or folder that contains the reference table.
2. Click the reference table name to open it. The table opens in the Reference Table tab.
50 Chapter 5: Reference Tables

8/11/2019 DQ 951HF1 Analyst UserGuide En
http://slidepdf.com/reader/full/dq-951hf1-analyst-userguide-en 60/64
3. Click Actions > Find and Replace.
The Find and Replace toolbar appears.
4. Enter the search criteria on the toolbar:
¨ Enter a data value in the Find field.
¨ Select the columns to search. By default, the operation searches all columns.
¨ Enter a data value in the Replace With field.
5. Search the columns you select for the data value in the Find field.
Use the following options to replace values one by one or to replace all values:
¨ Use the Next and Previous options to find values one by one.
¨ To replace a value, select Replace.
¨ Use the Highlight All option to display all instances of the value.
¨ To replace all instances of the value, select Replace All.
Exporting a Reference Table
Export a reference table to a comma-separated file, dictionary file, or Microsoft Excel file.
1. In the Navigator, select the project or folder that contains the reference table.
2. Click the reference table name to open it. The table opens in the Reference Table tab.
3. Click Actions > Export Data.
The Export data to a file window appears.
4. Configure the following options:
Option Description
File Name File name for the exported data.
File Format Format of the exported file. You can select the following formats:
¨ csv. Comma-separated file.
¨ xls. Microsoft Excel file.
¨ dic. Informatica dictionary file.
Export field names as first row Column name option. Select the option to indicate that the first row of the file contains the
column names.
Code Page Code page of the reference data. The default code page is UTF-8.
5. Click OK to export the file.
Enable and Disable Edits to an Unmanaged Reference TableYou can configure an unmanaged reference table to enable or disable updates to data values and to columns in the
table.
Before you change the editable status of the reference table, save the table.
1. In the Navigator, select the project or folder that contains the reference table.
2. Click the reference table name to open it in a tab.
Reference Table Updates 51
8/11/2019 DQ 951HF1 Analyst UserGuide En
http://slidepdf.com/reader/full/dq-951hf1-analyst-userguide-en 61/64
3. Click Actions > Edit Table or click the Edit Table icon.
The Edit column properties window appears.
4. Select or clear the Editable option.
When you change the editable status of the reference table, the properties dialog box closes.
Audit Trail Events
Use the Audit Trail view for a reference table to view audit trail log events.
The Analyst tool creates audit trail log events when you make a change to a reference table and enter an audit trail
note. Audit trail log events provide information about the reference tables that you manage.
You can configure query options on the Audit Trail tab to filter the log events that you view. You can specify filters on
the date range, type, user name, and status. The following table describes the options you configure when you view
audit trail log events:
Option Description
Date Start and end dates for the log events to search for. Use the calender to choose dates.
Type Type of audit trail events. You can filter and view the following events types:
- Data. Events related to data in the reference table. Events include creating, editing, deleting, and
replacing all rows.
- Metadata. Events related to reference table metadata. Events include creating reference tables,
adding, deleting, and editing columns, and updating valid columns.
User User who edited the reference table and entered the audit trail comment. The Analyst tool generates
the list of users from the Analyst tool users configured in the Administrator tool.
Stat us S tatus of th e audi t trai l l og events. Sta tus corresponds to the act ion perf ormed in the refe ren ce ta ble
editor.
Audit trail log events also include the audit tra il comments and the column values that were inserted, updated, or
deleted.
Viewing Audit Trail Events
View audit trail log events to get more information about changes made to a reference table.
1. In the Navigator, select the project or folder that contains the reference table that you want to view the audit trail
for.
2. Click the reference table name to open it in a tab. The Reference Table tab appears.
3. Click the Audit Trail view.
4. Configure the filter options.
5. Click Show.
The log events for the specified query options appear.
52 Chapter 5: Reference Tables
8/11/2019 DQ 951HF1 Analyst UserGuide En
http://slidepdf.com/reader/full/dq-951hf1-analyst-userguide-en 62/64
Rules and Guidelines for Reference Tables
Use the following rules and guidelines while working with reference tables in the Analyst tool:
¨ When you import a reference table from an Oracle, IBM DB2, IBM DB2/zOS, IBM DB2/iOS, or Microsoft SQL
Server database, the Analyst tool cannot display the preview if the table, view, schema, synonym, or column
names contain mixed case or lowercase characters.
To preview data in tables that reside in case-sensi tive databases, set the Support Mixed Case Identifiers attribute
to true. Set the attribute to true in the connections for Oracle, IBM DB2, IBM DB2/zOS, IBM DB2/iOS, and Microsoft
SQL Server databases in the Developer tool or Administrator tool.
¨ When you create a reference table from inferred column patterns in one format, the Analyst tool populates the
reference table with column patterns in a different format.
For example, when you create a reference table for the column pattern X(5), the Analyst tool displays the following
format for the column pattern in the reference table: XXXXX.
¨ When you import an Oracle database table, verify the length of any VARCHAR2 column in the table. The Analyst
tool cannot import an Oracle database table that contains a VARCHAR2 column with a length greater than
1000.
¨ To read a reference table, you need execute permissions on the connection to the database that stores the tabledata values. For example, if the reference data warehouse stores the data values, you need execute permissions
on the connection to the reference data warehouse. You need execute permissions to access the reference table
in read or write mode. The database connection permissions apply to all reference data in the database.
Rules and Guidelines for Reference Tables 53

8/11/2019 DQ 951HF1 Analyst UserGuide En
http://slidepdf.com/reader/full/dq-951hf1-analyst-userguide-en 63/64
I N D E X
A Analyst tool
find and replace reference data values 50
Bbusiness term
looking up a business term 22
Ccolumn properties
reference tables in Analyst tool 41
contents view
Informatica Analyst interface 3
creating a reference table from column patterns
reference tables 45
creating a reference table from column values
reference tables 45
creating a reference table from profile columns
reference tables 44
creating a reference table manually
reference tables 43
Ddata objects
deleting an object 23
editing data objects 33
flat files 23
renaming an object 23
tables 23
viewing an object 23
viewing data objects 32
database connection
deleting a database connection 30
database connection properties
tables 29
datetime datatypes
flat files 26
Eexporting a reference table
reference tables 51
Fflat file options
flat files 24
flat file properties
reference tables in Analyst tool 41
flat files
adding a fixed-width flat file 27
adding a flat file 27
data objects 23
datetime datatypes 26
editing data objects 33
flat file datatypes 25
flat file options 24
synchronizing a flat file data object 28
viewing data objects 32
folderscreating a folder 8
deleting a folder 9
duplicating a folder 8
moving a folder 9
renaming a folder 8
viewing folders contents 9
Iimporting a reference table
reference tables 47
Informatica Analyst
Informatica Analyst interface 1
Navigator 2
Informatica Analyst interface
contents view 3
Informatica Analyst 1
Informatica Analyst views 2
log in 4
properties view 3
security view 3
Informatica Analyst views
Informatica Analyst interface 2
J job status
monitoring job status 21
projects 20
Mmanaging columns
reference tables 50
managing rows
reference tables 50
metadata bookmark
creating a metadata bookmark 13
opening a metadata bookmark 13
54
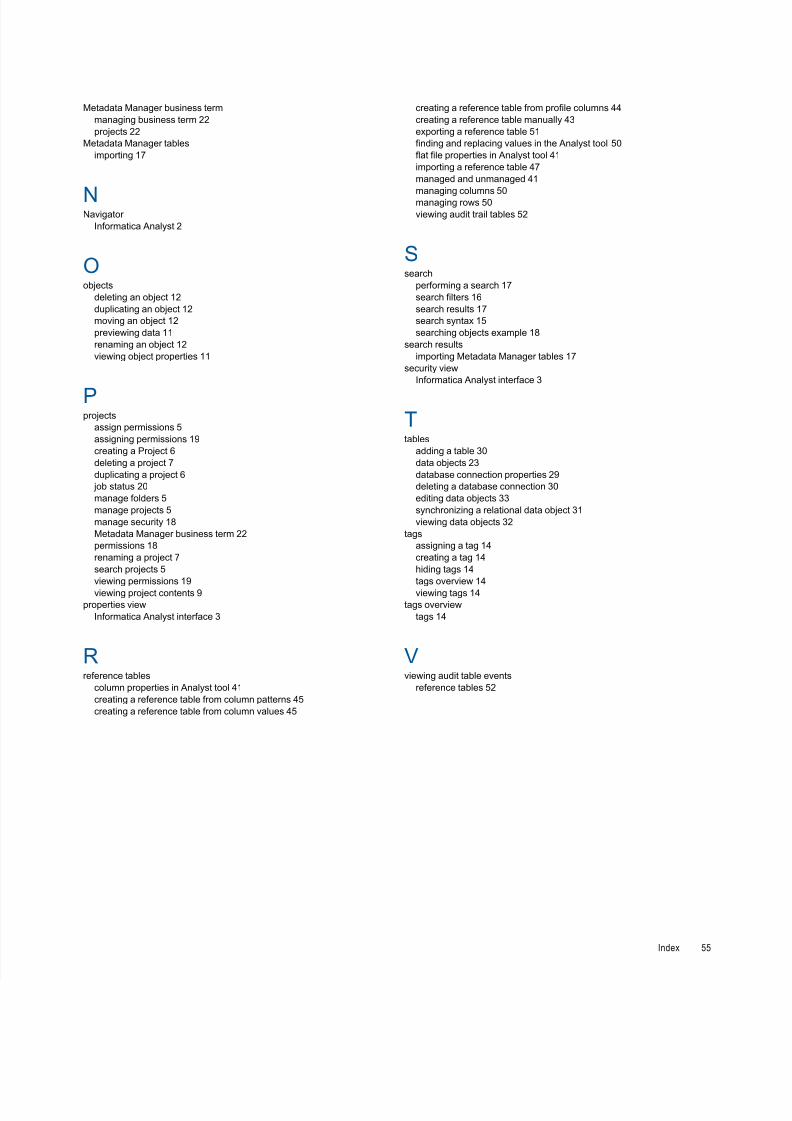
8/11/2019 DQ 951HF1 Analyst UserGuide En
http://slidepdf.com/reader/full/dq-951hf1-analyst-userguide-en 64/64
Metadata Manager business term
managing business term 22
projects 22
Metadata Manager tables
importing 17
NNavigator
Informatica Analyst 2
Oobjects
deleting an object 12
duplicating an object 12
moving an object 12
previewing data 11
renaming an object 12
viewing object properties 11
Pprojects
assign permissions 5
assigning permissions 19
creating a Project 6
deleting a project 7
duplicating a project 6
job status 20
manage folders 5
manage projects 5
manage security 18
Metadata Manager business term 22
permissions 18
renaming a project 7
search projects 5
viewing permissions 19
viewing project contents 9
properties view
Informatica Analyst interface 3
Rreference tables
column properties in Analyst tool 41
creating a reference table from column patterns 45
creating a reference table from column values 45
creating a reference table from profile columns 44
creating a reference table manually 43
exporting a reference table 51
finding and replacing values in the Analyst tool 50
flat file properties in Analyst tool 41
importing a reference table 47
managed and unmanaged 41
managing columns 50
managing rows 50
viewing audit trail tables 52
Ssearch
performing a search 17
search filters 16
search results 17
search syntax 15
searching objects example 18
search results
importing Metadata Manager tables 17
security view
Informatica Analyst interface 3
Ttables
adding a table 30
data objects 23
database connection properties 29
deleting a database connection 30
editing data objects 33
synchronizing a relational data object 31
viewing data objects 32
tags
assigning a tag 14
creating a tag 14
hiding tags 14
tags overview 14
viewing tags 14
tags overview
tags 14
Vviewing audit table events
reference tables 52