Document Part No.: APEM26487/140711
37
Transcript of Document Part No.: APEM26487/140711


Trend Micro Incorporated reserves the right to make changes to this document and tothe product described herein without notice. Before installing and using the product,review the readme files, release notes, and/or the latest version of the applicabledocumentation, which are available from the Trend Micro website at:
http://docs.trendmicro.com/en-us/enterprise/safesync-for-enterprise.aspx
© 2014 Trend Micro Incorporated. All Rights Reserved. Trend Micro, the Trend Microt-ball logo, and SafeSync are trademarks or registered trademarks of Trend MicroIncorporated. All other product or company names may be trademarks or registeredtrademarks of their owners.
Document Part No.: APEM26487/140711
Release Date: October 2014
Protected by U.S. Patent No.: Patents pending.

This documentation introduces the main features of the product and/or providesinstallation instructions for a production environment. Read through the documentationbefore installing or using the product.
Detailed information about how to use specific features within the product may beavailable at the Trend Micro Online Help Center and/or the Trend Micro KnowledgeBase.
Trend Micro always seeks to improve its documentation. If you have questions,comments, or suggestions about this or any Trend Micro document, please contact us [email protected].
Evaluate this documentation on the following site:
http://docs.trendmicro.com/en-us/survey.aspx


1
Welcome to the Trend Micro™ SafeSync for Enterprise™ Quick Start Guide. Thisdocument discusses the tasks you need to perform before using SafeSync.
Note
For a more comprehensive guide to SafeSync, read the Administrator's Guide.
Topics include:
• Quick Start Widget on page 2
• Activating or Renewing SafeSync on page 2
• Configuring SafeSync Web Console Settings on page 4
• Adding and Editing Policies on page 6
• Adding and Editing Plans on page 8
• Adding Domain Accounts on page 9
• Adding Manual Accounts on page 13
• Inviting End Users on page 13
• Changing Account Settings on page 14
• Configuring System Settings on page 16
• Configuring System Notifications on page 29
• Forwarding Logs to a Syslog Server on page 31

SafeSync for Enterprise Quick Start Guide
2
Quick Start Widget
You can access the task list from the Quick Start widget on the SafeSync dashboard.
FIGURE 1. The Quick Start Widget
Activating or Renewing SafeSync
SafeSync needs to be activated after installation.
Procedure
1. Go to Administration > License Information.

3
The License Information screen appears.
FIGURE 2. The License Information screen
2. Under SafeSync for Enterprise, click Specify New Activation Code.

SafeSync for Enterprise Quick Start Guide
4
The New Activation Code screen appears.
FIGURE 3. The New Activation Code screen
3. Type the Activation Code.
4. Click OK.
Configuring SafeSync Web Console SettingsUse the Web Consoles tab to configure the network settings of the end-user web portaland the SafeSync administrator’s web console.
Procedure
1. Go to Administration > System Settings.

5
The System Settings screen appears.
FIGURE 4. The System Settings screen
2. On the Web Consoles tab, specify the network information for SafeSync end usersto access the web console.
Important
• The administrator’s web console also uses the same IP address with a differentport, for example https://192.168.100.1:3443. Once administratorsmodify the IP address and click Save, SafeSync saves the changes and redirectsto the logon screen.
• The DNS server requires three DNS records to function. To activate the servicefor SafeSync users, add three DNS records to the DNS server and map them tothe IP address of the user console.
For more information, see the SafeSync for Enterprise Installation Guide.
3. Click Save.

SafeSync for Enterprise Quick Start Guide
6
Adding and Editing Policies
SafeSync uses a first match rule when processing policies and plans. For user accountsthat match multiple policies and plans, SafeSync applies the policy or plan with thehighest priority to the account.
For example, Tom Smith belongs to both the HR and Recruitment domains in ActiveDirectory. The administrator assigns the HR domain with policy “A” and assigns theRecruitment domain with policy “B”. Policy “A” has a higher prioirty than policy “B”.Since the administrator selected Assign by priority under policy for Tom's personalaccount, the highest priority policy is assigned. As a result, Tom inherits policy “A”.
Use policies to restrict the following settings.
TABLE 1. Policy Settings
RESTRICTION DESCRIPTION
Upload control • Maximum upload size in MB
• Blocked file types
NoteSafeSync identifies files based on the file extensions,not the true-file type. If a blocked file’s file extension ischanged, the blocked file will be unblocked.
Sharing control • Usage of shareable links
• Creation of team folders
Download control • Download of malicious files
Adding Policies
Procedure
1. Go to Policies.
2. Click Add.

7
The Add Policy screen appears.
3. Specify the name and description for the new policy.
4. Specify the maximum upload size in MB.
5. Specify the types of files to block.
Click the common audio files and common video files links to automaticallypopulate the Blocked file types field with common media extensions.
6. Select Use shareable links to allow end users to share files using shareable links.
SafeSync uses shareable links to allow users to share files uploaded to SafeSync. Auser creates a shareable link to a file and then sends the link to another person whocan then download the file directly from SafeSync.
7. Select Require users to sign in when accessing shareable links to enforce additionalsecurity on the people allowed to access SafeSync files.
8. Select Allow users to create team folders to allow end users to create new teamfolders.
SafeSync provides team folders to allow groups of SafeSync users to access andmodify shared files.
9. Select Allow users to download files detected as being malicious to allow users todownload files that that SafeSync detected as containing malware threats..
WARNING!
Enabling this feature may open your network up to a malware outbreak or a targetedattack. Only enable this feature for specific users who are aware of the possiblesecurity risks that could occur.
10. Click Save.
SafeSync adds the new policy at the top of the list. Reorder the policies as required.
SafeSync for Enterprise Quick Start Guide
8
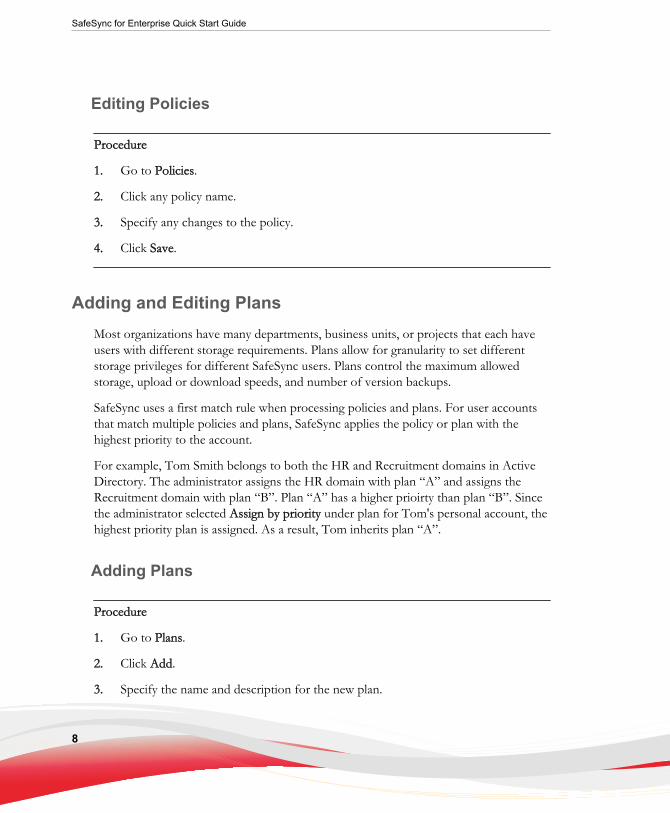
Editing Policies
Procedure
1. Go to Policies.
2. Click any policy name.
3. Specify any changes to the policy.
4. Click Save.
Adding and Editing PlansMost organizations have many departments, business units, or projects that each haveusers with different storage requirements. Plans allow for granularity to set differentstorage privileges for different SafeSync users. Plans control the maximum allowedstorage, upload or download speeds, and number of version backups.
SafeSync uses a first match rule when processing policies and plans. For user accountsthat match multiple policies and plans, SafeSync applies the policy or plan with thehighest priority to the account.
For example, Tom Smith belongs to both the HR and Recruitment domains in ActiveDirectory. The administrator assigns the HR domain with plan “A” and assigns theRecruitment domain with plan “B”. Plan “A” has a higher prioirty than plan “B”. Sincethe administrator selected Assign by priority under plan for Tom's personal account, thehighest priority plan is assigned. As a result, Tom inherits plan “A”.
Adding Plans
Procedure
1. Go to Plans.
2. Click Add.
3. Specify the name and description for the new plan.

9
4. Specify the storage limit in MB, GB, or TB.
5. Specify the maximum upload and download speeds.
6. Select the number of version backups to keep.
Tip
Saving more versions requires more storage space. Trend Micro recommends settingthis to the lowest number required by your organization.
SafeSync allows you to save version backup copies of files for version controlpurposes. Use the SafeSync End-User Portal to restore a file to a previous version.
7. Click Save.
SafeSync adds the new plan at the top of the list. Reorder the plans as required.
Editing Plans
Procedure
1. Go to Plans.
2. Click any plan name in the Name column.
3. Specify any changes to the plan.
4. Click Save.
Adding Domain Accounts
Configure domain accounts after synchronizing SafeSync with your Active Directory.SafeSync uses the Active Directory structure to allow you to specify which SafeSyncpolicies and plans to apply to users and domain groups.

SafeSync for Enterprise Quick Start Guide
10
Important
You cannot modify Active Directory domain user accounts or groups using the SafeSyncweb console.
Configuring Active Directory Integration
Procedure
1. Go to Administration > Active Directory Integration.
The Active Directory Integration screen appears.
FIGURE 5. The Active Directory Integration screen
2. Select Enable Active Directory integration.
11
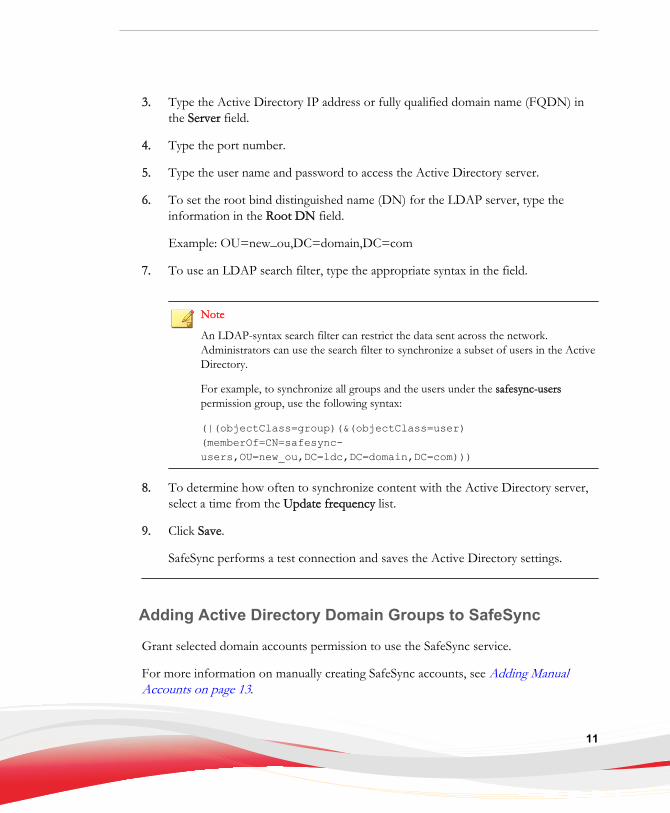
3. Type the Active Directory IP address or fully qualified domain name (FQDN) inthe Server field.
4. Type the port number.
5. Type the user name and password to access the Active Directory server.
6. To set the root bind distinguished name (DN) for the LDAP server, type theinformation in the Root DN field.
Example: OU=new_ou,DC=domain,DC=com
7. To use an LDAP search filter, type the appropriate syntax in the field.
Note
An LDAP-syntax search filter can restrict the data sent across the network.Administrators can use the search filter to synchronize a subset of users in the ActiveDirectory.
For example, to synchronize all groups and the users under the safesync-userspermission group, use the following syntax:
(|(objectClass=group)(&(objectClass=user)(memberOf=CN=safesync-users,OU=new_ou,DC=ldc,DC=domain,DC=com)))
8. To determine how often to synchronize content with the Active Directory server,select a time from the Update frequency list.
9. Click Save.
SafeSync performs a test connection and saves the Active Directory settings.
Adding Active Directory Domain Groups to SafeSync
Grant selected domain accounts permission to use the SafeSync service.
For more information on manually creating SafeSync accounts, see Adding ManualAccounts on page 13.

SafeSync for Enterprise Quick Start Guide
12
Note
You must configure the Active Directory and end-user portal connection settings beforemanaging users, plans, or policies.
For more information, see Configuring Active Directory Integration on page 10 andConfiguring SafeSync Web Console Settings on page 4.
Procedure
1. Go to Users.
2. From the left-hand users directory, click .
The Add Accounts screen appears.
FIGURE 6. The Add Accounts screen
3. Select groups from the Active Directory Groups pane and click .
SafeSync adds the selected groups to the SafeSync Groups pane.
4. Click OK.

13
SafeSync lists the users and groups in the left-hand Active Directory user directory.Click any user or group to view detailed information in the center pane.
Adding Manual Accounts
Procedure
1. Go to Users.
2. Add a new account by:
• Clicking the add icon ( ) in the the Manual Accounts list.
• Clicking Manual Accounts and then clicking the Add button above the tablethat appears.
The Add User screen appears.
3. Specify the new account details and which plan and policy to apply.
a. Specify the user name, email address, description, and password.
b. Select a policy or plan from the drop-down lists.
4. Click Add.
SafeSync adds the account to the Manual Accounts list.
Note
SafeSync automatically enables all newly-created accounts.
Inviting End Users
Invite end users to use SafeSync.

SafeSync for Enterprise Quick Start Guide
14
Procedure
• Get the End-User Portal URL.
• 1. Go to Administration > System Settings > Web Consoles.
2. Click the link beside End-user console.
• 1. Locate Step 7 on the Quick Start widget.
2. Click Access end user portal.
• Get the SafeSync Client Download page URL.
• 1. Locate Step 7 on the Quick Start widget.
2. Click Install SafeSync on your devices.
Changing Account SettingsUse the My Account screen to update the following information:
• Email address: Specify an email address for SafeSync to send regular log reports.
• Password: Change the account password.
Tip
Trend Micro recommends changing the logon password every 30 to 90 days.

15
FIGURE 7. The My Account screen
Changing the Administrator Account Settings
Procedure
1. Go to Administration > Account Settings.

SafeSync for Enterprise Quick Start Guide
16
The Account Settings screen appears.
FIGURE 8. The Account Settings screen
2. Type a new email address for the administrator account.
3. To change the administrator password:
a. Type a new password in the New password field.
b. Type the same password in the Confirm password field.
Tip
Leave the password fields blank to keep using the old password.
4. Click Save.
Configuring System Settings
Use the System Settings screen to perform the following tasks:

17
TABLE 2. System Settings Tabs
TAB TASKS
Web Consoles Configure the network settings for the administrator web consoleand end-user portal.
For more information, see Configuring SafeSync Web ConsoleSettings on page 4.
Proxy Server Configure the proxy server settings.
For more information, see Configuring Proxy Server Settings onpage 17
SMTP Server Specify the SMTP server settings.
For more information, see Configuring SMTP Server Settings onpage 19
SSL Certificate Paste the SSL certificate text and upload the private key file.
For more information, see Updating SSL Certificate Informationon page 21
Add-Ins Enable the add-ins and decrypt encrypted files.
For more information, see Understanding SafeSync Add-Ins onpage 22
Language Specify the administrator web console language.
For more information, see Configuring the Web ConsoleLanguage on page 28
Configuring Proxy Server Settings
If the network requires that SafeSync uses a proxy server, configure the proxy settings toregister and activate SafeSync.
Procedure
1. Go to Administration > System Settings > Proxy Server.

SafeSync for Enterprise Quick Start Guide
18
The Proxy Server screen appears.
FIGURE 9. The Proxy Server tab
2. Select Use a proxy server for the connection.
3. Type the IP address or fully qualified domain name (FQDN) of the proxy server inthe Server field.
4. Type the port number.
5. Select the protocol:
• HTTP
• SOCKS 4/5
6. If the proxy server requires authentication, select Proxy server authentication.

19
7. Provide the authentication credentials in the User name and Password fields.
8. Click Save.
SafeSync tests the connection and saves the proxy server settings.
Configuring SMTP Server Settings
Use the SMTP Server tab to set up an email server to send log reports.
Procedure
1. Go to Administration > System Settings > SMTP Server.

SafeSync for Enterprise Quick Start Guide
20
The SMTP Server screen appears.
FIGURE 10. The SMTP Server tab
2. Select Use an SMTP server to send logs.
3. Type the IP address or fully qualified domain name (FQDN) of the SMTP serverin the Server field.
4. Type the port number.
5. Type the sender’s email address in the Sender field.
SafeSync uses this address as the sender address (a requirement for some SMTPservers).
6. If the SMTP server requires authentication, select SMTP server authentication.
7. Type the user name and password.

21
8. Click Save.
SafeSync performs a test connection and saves the SMTP server settings.
Updating SSL Certificate Information
When importing certificates, the following must be considered:
• Certificates must use the PEM file format.
• Whenever available, intermediate certificates must be included when importing thecertificate. The typical sequence of the certificate chain is:
Server Certificate > Intermediate Certificate > Root Certificate
• The certificate chain must be copied into the administrator console all at once andin the proper sequence.
• Whenever available, Certificate Attributes must be included.
• Third-party certificates must use the following format:*.<subdomain>.<your_domain>.com
Procedure
1. Go to Administration > System Settings > SSL Certificate.

SafeSync for Enterprise Quick Start Guide
22
The SSL Certificate screen appears.
FIGURE 11. The SSL Certificate tab
2. Copy and paste the SSL certificate text in the field under Step 1: Paste thecertificate text.
3. Under Step 2: Choose the private key file, click Browse and select the private keyfile.
4. Click Update.
Understanding SafeSync Add-Ins
Licensed SafeSync users can enable the following add-ins:

23
• Outlook Extension: Users can prevent unintentional data leakage by securing theiremail file attachments. Users can either upload the files to SafeSync and include ashareable link in email messages, or use the auto-encryption option to automaticallyencrypt file attachments.
Note
The encryption feature is only available after enabling Shared Protection Extension.
When the auto-encryption option is enabled, all attachments are automaticallyencrypted and the only people who can open the attachments are the SafeSyncusers who are the original recipients of the email.
Note
Encrypted attachments have the file extension .spt.

SafeSync for Enterprise Quick Start Guide
24
• Shared Protection Extension: Users can create auto-encryption folders. All filesadded to these folders are encrypted automatically. When users create an auto-encrypted team folder, SafeSync prompts the users to identify who can access thefolder. Users can also create auto-encrypted personal folders which are onlyaccessible by users who created them.
Auto-encryption folders help protect confidential documents, such as those createdby Human Resources or Finance professionals, from being accessed byunauthorized users.
Note
Encrypted files have the file extension .spt.
Activating SafeSync Add-Ins
Important
You must first activate SafeSync for Enterprise before activating the add-ins.
Procedure
1. Go to Administration > License Information.

25
The License Information screen appears.
FIGURE 12. The License Information screen
2. In the purchased add-in section, click Specify Activation Code.
The New Activation Code screen appears.
3. Type the Activation Code for the add-in.
4. Click OK.
SafeSync activates and enables the feature.
For more information on managing add-ins, see Configuring SafeSync Add-Ins onpage 26.

SafeSync for Enterprise Quick Start Guide
26
Configuring SafeSync Add-Ins
Note
Activate SafeSync add-ins on the License Information screen.
For more information, see Activating SafeSync Add-Ins on page 24.
Procedure
1. Go to Administration > System Settings > Add-Ins.
2. To enable or disable an add-in, select Enable [add-in name] from the add-insection.
3. To specify how frequently authentication is required for files encrypted usingShared Protection Extension:
• Drag the slider from Low to High to indicate how frequently users have toauthenticate themselves in order to open and use encrypted files

27
• Turn on Force authentication to require users to provide authenticationcredentials in order to access encrypted files.
Note
The number of days before users must provide authentication credentialsautomatically changes based on the selected protection level. Manually changingthe number of days automatically sets the protection level to Custom.
Administrators can also choose to turn off authentication. After turning offauthentication, SafeSync does not require users to provide authenticationcredentials to access encrypted files.
Decrypting all Encrypted Files
If the file encryption license expires or the organization simply wants to stop using fileencryption, administrators can use the Decryption Utility to decrypt all encrypted filesand disable file encryption.
Tip
Decrypting all SafeSync files may take some time to complete. Trend Micro recommendsstarting the decryption process after work hours. If necessary, cancel the decryptionprocess and restart it at a more convenient time.
Procedure
1. Go to Administration > System Settings > Add-Ins.
2. Click the Decrypt all encrypted SafeSync files link.

SafeSync for Enterprise Quick Start Guide
28
The Decrypt Files screen appears.
3. Click OK to begin the decryption process.
Configuring the Web Console LanguageSafeSync allows you to change the display language of the web console at any time forusers in different regions.
Procedure
1. Go to Administration > System Settings > Language.
The Language screen appears.
FIGURE 13. The Language tab

29
2. Select the preferred language from the list.
3. Click Save.
The SafeSync web console automatically refreshes in the new language. You do notneed to log on to the SafeSync server again.
Configuring System NotificationsUse the System Notifications screen to set up license information updates and systemstatus alerts.
Configuring System Notification Settings
Procedure
1. Go to Administration > System Notifications.

SafeSync for Enterprise Quick Start Guide
30
The System Notifications screen appears.
FIGURE 14. The System Notifications screen
2. Under License Information, select one of the following:
• Administrator: SafeSync uses the Account Settings configuration to sendemail notifications to the configured administrator account. Click Change toopen the Account Settings screen and modify the account settings.
• Other recipients: SafeSync sends email notifications to the email accountsspecified.
3. Under System Status Alert, select one of the following:

31
• Administrator: SafeSync uses the Account Settings configuration to sendemail notifications to the configured administrator account. Click Change toopen the Account Settings screen and modify the account settings.
• Other recipients: SafeSync sends email notifications to the email accountsspecified.
4. Under Delivery Frequency, specify how often SafeSync sends notifications.
Note
SafeSync only sends email notifications after detecting problems with the SafeSyncservice. If all services are functioning properly, SafeSync does not send anynotification messages.
5. Click Save.
Forwarding Logs to a Syslog ServerUse the Log Settings screen to configure automatic log deletion based on time.
Procedure
1. Go to Logs > Log Settings > Syslog Server.

SafeSync for Enterprise Quick Start Guide
32
The Syslog Server tab appears.
FIGURE 15. The Syslog Server tab
2. Select Forward all logs to the following syslog server.
3. Type the IP address or fully qualified domain name (FQDN) in the Server field.
4. Type the port number.
5. Specify the following:
• Severity level
• Event format
6. Click Save.