DINE & BREAKFAST CLUB USE AND CARE MANUAL Eagles - Owners Manual... · Extinguishing the Burner...
15
DINE & BREAKFAST CLUB/ USE AND CARE MANUAL Models: TEBC30-B Part No: 18524B 07/10
Transcript of DINE & BREAKFAST CLUB USE AND CARE MANUAL Eagles - Owners Manual... · Extinguishing the Burner...
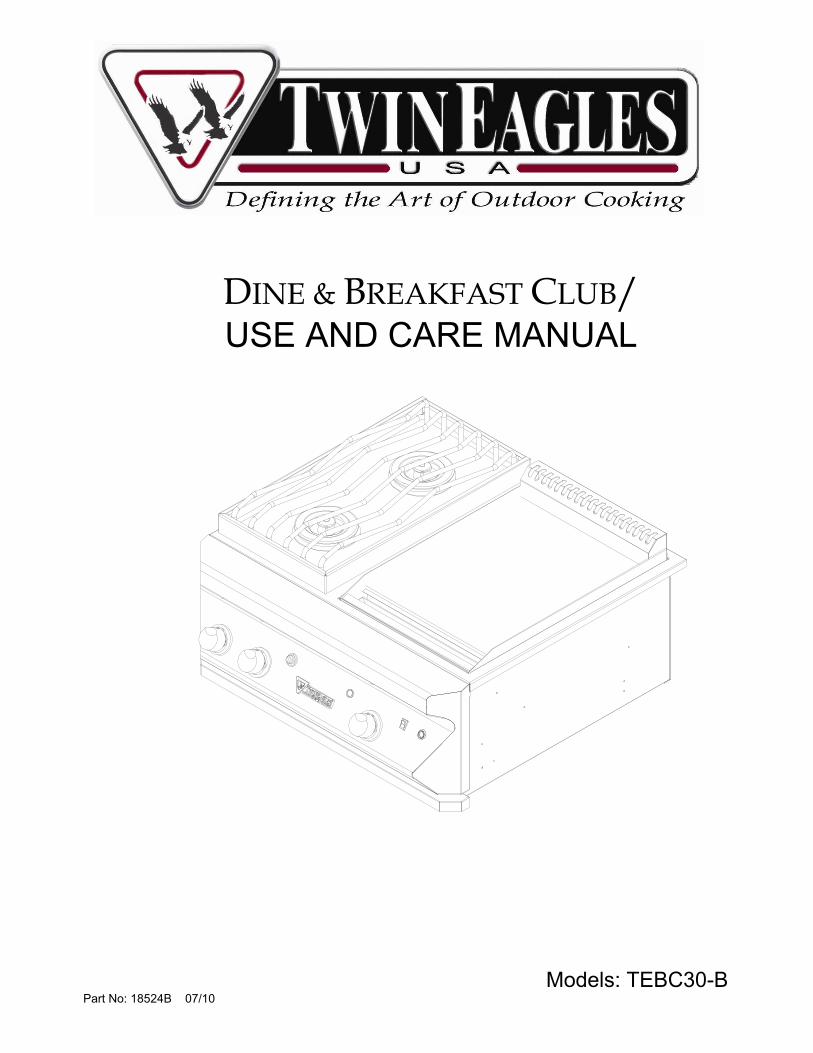
DINE & BREAKFAST CLUB/USE AND CARE MANUAL
Models: TEBC30-B Part No: 18524B 07/10

TABLE OF CONTENT
SAFETY ............................................................................................................................ 2
Warnings to Consumer ....................................................................................... 2
General Safety Requirements.............................................................................. 2
FOR YOUR RECORDS .................................................................................................... 3
Locate the model and serial number.................................................................. 3
Complete Warranty Information Below ............................................................. 3
INSTALLATION OF DINE & BREAKFAST CLUB .......................................................... 4
Location ................................................................................................................ 4
Location of Dine & Breakfast Club ..................................................................... 4
CUT OUT DIMENSIONS FOR BUILT-IN APPLICATIONS............................................... 5
Free Standing Applications ................................................................................ 5
NATURAL GAS CONNECTION ........................................................................................ 6
LIQUID PROPANE GAS CONNECTION............................................................................ 7
Procedure for LP Gas Cylinder Connection........................................................ 8
OPERATION ...................................................................................................................... 8
Gas Leak Test ....................................................................................................... 8
Lighting Instructions ............................................................................................ 9
Manual Lighting Instructions................................................................................ 9
Replacing the Battery ........................................................................................... 9
Extinguishing the Burner Flame ......................................................................... 9
CLEANING & MAINTENANCE.......................................................................................... 10
General Overview.................................................................................................. 10
Griddle Plate .......................................................................................................... 10
Grease Collector .................................................................................................... 10
Top Burner Grates.................................................................................................. 10
Spider and Insect Warning .................................................................................... 10
EXPLODED VIEW ……………………………………………………………………….…………. 11
SERVICE PARTS LIST ………………………………………………………….………………… 12
CUSTOMER SERVICE ...................................................................................................... 13
WARRANTY – TWIN EAGLES DINE & BREAKFAST CLUB ™........................................ 14

SAFETY
Warnings to Consumer
Do not operate this appliance without having carefully read this manual. For future reference, have this manual available while using this appliance and always follow the instructions provided.
Do not attempt to make conversions or modifications to your cooking appliance without first obtaining written instructions from Twin Eagles, Inc.
This appliance is not intended for commercial use.
The use of alcohol, prescription or non-prescription drugs may impair your ability to properly assemble or safely operate this appliance.
General Safety Requirements 1. In the U.S., installation of this appliance must conform to local codes or, in the absence of local codes, the
National Fuel Gas Code, ANSI Z223.1 (latest edition). In Canada, operation of this product should be in accordance with the CAN/CGA-B149.1, National Gas Installation Code or CAN/CGA-B149.2, Propane Installation Code.
2. The outdoor cooking gas appliance and its individual shutoff valve must be disconnected from the gas supply piping system during any pressure testing of that system at test pressures in excess of 1/2 psi (3.5 kPa).
3. The outdoor cooking gas appliance must be isolated from the gas supply piping system by closing its individual manual shutoff valve during any pressure testing of the gas supply piping system at test pressures equal to or less than 1/2 psi (3.5 kPa).
4. The LP-Gas supply cylinder to be used must be constructed and marked in accordance with the specifications for LP Gas cylinders of the U.S. Department of Transportation (DOT) or the National Standard of Canada, CAN/CSA-B339, Cylinders, Spheres and Tubes for the Transportation of Dangerous Goods.
5. California Proposition 65 – WARNING The burning of gas cooking fuel generates some byproducts that are on the list of substances, which are known by the State of California to cause cancer or reproductive harm. California law requires businesses to warn customers of potential exposure to such substances. To minimize exposure to these substances, always operate this unit according to the use and care manual, ensuring you provide good ventilation when cooking with gas.
2
FOR YOUR SAFETY
If you smell gas:
1. Shut off gas to the appliance. 2. Extinguish any open flame. 3. If odor continues, immediately call your gas supplier or your fire department.
FOR YOUR SAFETY
1. Do not store or use gasoline or other flammable vapors and liquids in the vicinity of this or any other appliance. 2. An LP cylinder not connected for use shall not be stored in the vicinity of this or any other appliance.
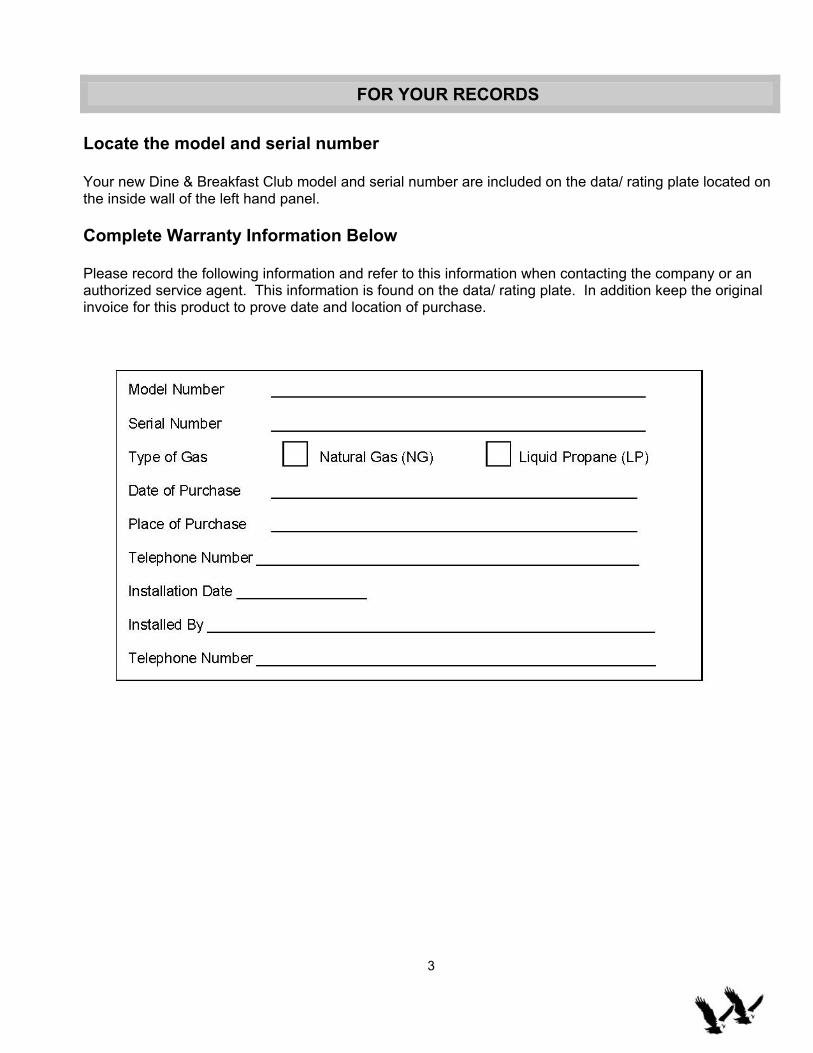
FOR YOUR RECORDS
Locate the model and serial number
Your new Dine & Breakfast Club model and serial number are included on the data/ rating plate located on the inside wall of the left hand panel.
Complete Warranty Information Below
Please record the following information and refer to this information when contacting the company or an authorized service agent. This information is found on the data/ rating plate. In addition keep the original invoice for this product to prove date and location of purchase.
3

INSTALLATION OF DINE & BREAKFAST CLUB
Safe and satisfactory operation of the Dine & Breakfast Club depends upon its proper installation. The installation, adjustments and service of the Dine & Breakfast Club must be performed only by a qualified installer and service technician. This is necessary to insure proper operation and also to prevent accidents.
Location When determining a suitable location take into account concerns such as exposure to wind, proximity to traffic paths and keeping any gas supply lines as short as possible. Locate the Dine & Breakfast Club only in a well ventilated area. For free standing configurations allow 12” from the sides and rear to combustible construction while in operation.
WarningThis appliance should not be located closer than 12” to any adjacent combustible surface or under any overhead unprotected combustible construction.
The appliance is design-certified for use outdoors only and is not intended to be installed in or on recreational vehicles and/or boats. This appliance must be on a level, stable surface in an area clear of combustible material. An asphalt surface may not be acceptable for this purpose.
Electrical SpecificationThe appliance should only be taken apart by a qualified technician, or electrical shock may occur. It is rated at120V, 60Hz, 450W and 4A.
Location of Dine & Breakfast Club Proper location and use is essential to insure safe and continued trouble-free operation. Any alterations made to the appliance will void the product’s warranty.
The Dine & Breakfast Club must be located outdoors only. As with any gas appliance, harmful carbon monoxide is produced during the combustion process that should not be allowed to accumulate in a confined space. Also, since hot air rises above the Dine & Breakfast Club while in operation, covered locations should be avoided. Do not locate the Dine & Breakfast Club where an overhang or awning may cover it.
Minimum clearances to combustible surfaces must be maintained when operating this appliance, and are as follows:
The determination of whether a location is combustible or non-combustible construction is made by the local fire marshal, building inspector or the local safety authority having jurisdiction.
4
Wall Clearance Sides 12” Back 12”

CUT OUT DIMENSIONS FOR BUILT-IN APPLICATIONS
WARNING: The Dine & Breakfast Club must be installed in a NON-COMBUSTIBLE ENCLOSURE
ONLY.
Twin Eagles Dine & Breakfast Club is ETL – approved for residential installation. Cutout must include a 4” (10.2cm) x 4” (10.2cm) opening for a side or bottom gas connection in two locations. The openings are indicated by the square, dashed cut outs in the diagram above. All dimensions shown are for planning purposes only. Twin Eagles, Inc. reserves the right to change specification without notice.
Free Standing Applications
The Twin Eagles Dine & Breakfast Club may be installed into the Twin Eagles 30” freestanding base (TPGB-30P). The free standing configurations allow 12” from the sides and rear to combustible construction while in operation.
5

NATURAL GAS CONNECTION
The regulator supplied is set for 4” water column and is for use with Natural gas only.
The outdoor cooking gas appliance and its individual shutoff valve must be disconnected from the gas supply piping system during any pressure testing of that system at test pressures in excess of 1/2 psi (3.5 kPa).
The outdoor cooking gas appliance must be isolated from the gas supply piping system by closing its individual manual shutoff valve during any pressure testing of the gas supply piping system at test pressures equal to or less than 1/2 psi.
A typical natural gas installation is shown above. Make sure the factory supplied regulator is used and installed with the arrow mark on the regulator pointing in the same direction as the gas flow going from the supply line to the Dine & Breakfast Club. The regulator is preinstalled onto the end of the manifold. Use only the regulator provided as original equipment with your Dine & Breakfast Club. Use only pipe sealants that are approved for use with natural and LP gases. An installer supplied gas shutoff valve must be installed in an accessible place.
6

LIQUID PROPANE GAS CONNECTION
NoticeAll gas installations, conversions, and/or adjustments must be performed by an authorized service agent.
NoticeIf your Infrared Dine & Breakfast Club is for Liquid Propane application, a factory supplied L.P regulator is set for 11” WC and is for use with L.P. gas only. The factory-supplied regulator and hose must be used with a 20 lb. L.P. cylinder. For plumb-in installation (system L.P. installation), the regulator must be changed and a main gas shutoff valve must be installed. Contact your Twin Eagles dealer for a system L.P. regulator.
Warning The gas supply hose should be inspected prior to each use. Do not use a gas hose that has abrasions, cuts, or excessive wear.
The gas supply must be turned off at the LP Gas supply cylinder and the LP Gas supply cylinder must be disconnected from the regulator when this outdoor cooking gas appliance is not in use.
When your Dine & Breakfast Club is stored indoors, remove and store the LP Gas cylinder outdoors in a protected, cool, and dry location out of reach of children. The cylinder should not be stored in a building, garage, or any other enclosed area.
Caution Store the cylinder in an upright position so that the cylinder valve is at the top. This will ensure proper vapor withdrawal.
The cylinder used must include a collar to protect the cylinder valve.
Store any spare or extra gas cylinder(s) at least 15 feet from the Dine & Breakfast Club, other open flame, heat-producing appliance(s) or heat source in a cool, well-ventilated outdoor location.
NOTE: An enclosure for a propane gas cylinder shall be vented by openings on the level of the cylinder valve and at floor level. The effectiveness of the opening(s) for purposes of ventilation shall be determined with the propane gas supply cylinder in place. This shall be accomplished by one of the following:
a. One side of the enclosure shall be completely open; or, b. For an enclosure having four sides, a top and a bottom:
At least two ventilation openings at cylinder valve level shall be provided in the sidewall, equally sized, spaced at 180 degrees (3.14 rad), and unobstructed. Each opening shall have a total free area of not less than ½ square inch per pound (7.1cm²/kg) of stored fuel capacity and not less than a total free area of 10 square inches (64 cm²).
Ventilation opening(s) shall be provided at floor level and shall have total free area of not less than ½ square inch per pound (7.1 cm²/kg) of stored fuel capacity and not less than a total free area of 10 square inches (64.5 cm²). If ventilation openings shall be at floor level and are in a sidewall, there shall be at least two openings. The bottom of the openings shall be at floor level and the upper edge no more that 5 inches (127 mm) above the floor. The openings shall be equally sized, spaced at 180 degrees (3.14 rad) and unobstructed.
c. Every opening shall have minimum dimensions so as to permit the entrance of 1/8 inch (3.2 mm) diameter rod.
7

LP GAS CONNECTION – (CONTINUED)
Procedure for LP Gas Cylinder Connection (20 lbs) 1. Turn Hand Wheel on cylinder clockwise until it stops to ensure the Cylinder Valve is fully closed. 2. Turn all of the burner knobs to the OFF position. Connect the 3/8” Flare end of the hose to the 3/8” Flare end of the brass coupling on the unit using a 3/4” open wrench. Do not apply pipe sealant. 3. Connect the regulator to the LP cylinder. Do not use any tools. Hand-tighten the regulator. 4. Check for leaks using a soapy water solution. 5. See figure above for a typical LP gas hook up. 6. To disconnect after use, turn the burner knob to the OFF position. Close the Cylinder Valve by turning the Hand Wheel counter-clockwise until it stops. 7. Disconnect the regulator from the LP cylinder after use.
OPERATING INSTRUCTIONS
Gas Leak Test Open flame should not be used in the area around the Dine & Breakfast Club during this test. This procedure should be carried out each time the gas connection is disconnected.
1. Ensure that the burner knobs are in the OFF position. 2. Open one burner knob slowly. Apply heavy soapy water or similar solution to all connections including those made at the factory. 3. Inspect all connections for presence of bubbles. If bubbles appear, close shut-off valve and tighten connections. Repeat steps 1 and 2 above until bubbles cease.
8

OPERATING INSTRUCTIONS – (CONTINUED)
Lighting Instructions (Top Burners) 1. Remove the covers from the Top Burners. 2. Ensure the Gas Supply Cylinder Valve is closed and the burner knobs are set to the off position. 3. Open the valve on the gas supply cylinder. 4. Press in and rotate one of the burner knobs counterclockwise to the “HI” position. 5. Press in and hold the ignition button. You should here a continuous clicking sound indicating that a spark is being provided to the burner. (If clicking sound is weak, replace battery.) 6. If ignition does not take place within 4 seconds, turn the burner knob to the off position, leave the cover off, and wait 5 minutes to repeat lighting procedure. 7. Repeat steps 4-6 to light the second side burner. 8. CAUTION: Do not leave the Dine & Breakfast Club unattended while cooking.
Lighting Instructions (Griddle Plate) 1. Remove the cover from the Griddle Plate. 2. Ensure the Gas Supply Cylinder Valve is closed and the burner knob is set to the off position. 3. Ensure that the grease tray is completely installed. 4. Open the valve on the gas supply cylinder. 5. Flip the rocker switch to the simulated light position. 6. Press in and rotate the thermostat knob counterclockwise to the desired temperature setting, a burner on light should glow when the griddle thermostat is turned on until it reaches the temperature the thermostat knob was set too. 7. CAUTION: Do not leave the Dine & Breakfast Club unattended while cooking.
Manual Lighting Instructions If the electronic ignition does not light the top burner, the burner can be lit manually using a long match (or taper).1. Remove the cover from the top burner. 2. Ensure the Gas Supply Cylinder Valve is closed and the burner knob is set to the off position. 3. Place a lit match (or taper) over the burner near the igniter. 4. Press in and rotate the burner knob counterclockwise slowly to the “HI” setting. Make sure match (or taper) is lit before turning the knob. 5. If ignition does not take place within 4 seconds, turn the burner knob to the off position, leave the cover off, and wait 5 minutes to repeat lighting procedure. 6. CAUTION: Do not leave the Dine & Breakfast Club unattended while cooking.
CAUTION: THE GRIDDLE PLATE CAN NOT BE LIT MANUALLY
Replacing the Battery 1. Unscrew the ignition button and remove the old battery. 2. Replace with a new 1.5 Volt AAA battery.
Extinguishing the Burner Flame 1. Depress and rotate burner knob to OFF. 2. Natural Gas: Turn the gas off at the installer supplied gas shut-off valve. 3. Liquid Propane: Close the valve on the gas supply cylinder.
9

CLEANING AND MAINTENANCE
General Overview Proper care, maintenance, and cleaning will help ensure a long life of your Dine & Breakfast Club. Periodic cleaning will help avoid accumulations of flammable grease, fats, and other debris. Some debris and residue may remain on the side burner grates and the griddle plate. To remove this residue after cooking simply dip a brass-bristle in tap water and scrub the hot grate.
Caution: Always allow the Dine & Breakfast Club to cool before cleaning. Do not allow water to make contact with the burner surface or griddle surface, at any time.
Griddle Plate Rub the surface of a hot griddle with unsalted solid shortening, vegetable oil or spray it with a non-stick cooking spray. Thoroughly wipe it with a rough cloth to remove food particles and other residue. Special griddle cleaners are commercially available which may be used to remove heavy soil build-up. Follow manufacturer’s directions exactly. Rinse the griddle with room temperature water after using these cleaners. Dry and coat lightly with cooking oil. Using hot soapy water to clean the griddle will remove the cooked-in seasoning and will require re-seasoning by coating lightly with cooking oil.
Caution: Never flood a hot griddle with cold water! This promotes griddle warping and can cause the griddle plate to crack if continued over a period of time.
Grease Tray The grease tray collects grease, liquid and food particles. It is highly recommended to clean the pan after every use to avoid any possibility of a grease fire. Allow the tray and its contents to cool before cleaning.The grease tray is located in front of the griddle plate assembly. Slightly tilt the grease tray forward and lift the tray to remove it from the griddle plate assembly. Wipe the grease tray clean with a cloth and a hot soapy solution. Make sure the grease tray is fully inserted back into the Dine & Breakfast Club again.
Top Burner Grates
Wipe up all spill-over as soon as possible after they occur and before they get a chance to burn in and cook solid. The Burner Grates may also be removed and cleaned with a brass or stainless steel bristle brush and soapy water. Standard oven cleaner may be used for deeper cleaning. Rinse the Burner Grate thoroughly with clean water before using.
Spider and Insect Warning
Spiders and other insects can nest in the burners and orifices of this and any other outdoor products, which causes the gas to flow from the front of the burner. This can create a dangerous condition that can cause a fire behind the valve panel, damaging the Dine & Breakfast Club and making it unsafe to operate.
Inspect the burners once a year, or if the Dine & Breakfast Club has not been used for more than a month or if any of the following conditions occur:
1. The smell of gas in conjunction with the burner flames appearing yellow. 2. The grill does not reach temperature. 3. The grill heats unevenly. 4. The burner makes popping noises.
10

EXPLODED VIEW – DINE & BREAKFAST CLUB
11

REPLACEMENT PARTS LIST – DINE & BREAKFAST CLUB
Item No. Part
Number Description TEBC30-B
1 S20256 Side Cooker Cover 1
2 S20255Y Wind Guard 1
3 S13806 S-Grate 1
4 S13309 Enameled Cap 2
5 S13308 Enameled Ring 2
6 S13307 Aluminum Bowl 2
7 S13306 Base with Electrode, LP 2
8 S13320 Base with Electrode, NG 2
9 S15110-45 Orifice, #45 NG 1
10 S15110-55 Orifice, #55 LP 1
11 S20917 Valve Support 1
12 S21745-3 Drip Pan Handle 1
13 S16185 Transformer, 12V 2A 1
14 S15111 Bi-metal Thermovalve 1
15 S12408 19” Stainless Steel Flex Tubing 1
16 S16256 Wire Harness, End Blue LED 1
17 S16253 Wire Harness, LED No Light 1
18 S16257 Wire Harness, Middle Blue LED 1
19 S13154 Knob, Chrome w/ Valox Insert 3
20 S13128P Knob Bezel 2
21 S16106 2-Spark Ignition Module 1
22 S13147 Twin Eagles Emblem 1
23 S16113 Pilot Light, RED 1
24 S13136 Thermostat Bezel 1
25 S16131 Rocker Switch 1
26 S16132 Switch Cover Cap Seal 1
27 S16196 Illuminated Switch 1
28 S20940Y Front Panel Assembly 1
29 S20929 Thermostat Bracket 1
30 S15312 Thermostat, Harper Wyman 1
31 S16192 LED Holder 3
32 S15101 Gas Valve 2
33 S12703 Manifold 1
34 S12610 Bushing Reducer 1
35 S12603 Elbow, Mixer 3/8 CC x 1/8 MIP 1
36 S12609 Nut and Sleeves, 1/8 FIP X 5/16 CC 2
37 S20924 Chord Bracket 1
38 S16163 Power Cord 1
39 S15309 Regulator, LP With Hose (LP Model Only) 1
40 S12602 Coupling, Brass 3/8 Flare x 1/2 FIP (LP Model Only) 1
41 S15303 Regulator, NG 1
42 S16139 Igniter, Hot Surface 1
43 S20908 Igniter Bracket 1
44 S13301 U-Burner S/S 0.75 Wall 1
45 S11903Y Griddle Plate Assembly 1
46 S20927Y Flue cover Assembly 1
47 S20915Y Drip Pan Assembly 1
48 S13305 Burner LP (Complete) 1
49 S13319 Burner, NG (Complete) 1
50 S13117 Griddle Cover Handle 1
51 S20921 Griddle Cover 1
52 S14121 Screw, 6-32 x 1/4, Stainless Steel Thread cutting 6
Non-Shown Parts
S13137 Thermostat Knob Valox Insert (For griddle plate knob only) 1
S13313 Center Orifice,# 82, NG 2
S13314 Outside Orifice, #175, NG 2
S13317 Center Orifice, #50, LP 2
S13318 Outside Orifice, #100, LP 2
S16285Y Breakfast Club Wire Harness 1
12

CUSTOMER SERVICE
Before calling for service …
Many operating problems are minor, and can be corrected without a technician. Refer to the Operation and Cleaning & Maintenance sections before calling a service technician.
For additional assistance regarding the use and care of your Dine & Breakfast Club, please contact:
Twin Eagles Services
13231 E. 166th
Street
Cerritos, CA 90703
(562) 802-3488 E-mail: [email protected]
Please have the model and serial number handy when calling for service
13

TWIN EAGLES WARRANTY
ONE-YEAR FULL WARRANTY: Twin Eagles warrants the outdoor Dine & Breakfast Club and all of their component
parts, to be free from defects in materials and workmanship under normal residential use for
a period of one year from the original date of purchase. Twin Eagles will repair or replace,
at its option, any part, which fail or is found to be defective during the warranty period, at
no cost to the original purchaser. Warranty service must be performed by a Twin Eagles
authorized representative during normal business hours.
WARRANTY LIMITATIONS & EXCLUSIONS
This warranty shall apply only to the products purchased and located in the continental United States and Canada. The warranty
coverage begins on the original date of purchase and proof of date of purchase is required. In order to activate the warranty, we
require that you send in the attached warranty registration card. This warranty applies only to the original owner and may not be
transferred.
This warranty does not apply to damages resulting from negligence, alteration, misuse, abuse, accident, natural disaster, loss of
electrical power to the product for any reason, improper installation or improper operation, unauthorized adjustments or
calibrations, dings, dents, scratches, or damages due to harsh cleaning chemicals. This warranty does not apply to rust, corrosion,
discoloration, surface scratches, weather and atmospheric related staining and oxidation which are normal conditions and to be
expected with any outdoor products unless the affected component becomes inoperable. This warranty does not apply to
commercial use, or to products with altered or removed serial numbers. Twin Eagles shall not be liable for incidental,
consequential, special or contingent damages resulting from its breach of this written warranty or any implied warranty.
WARRANTY SERVICE & REPLACEMENT PARTS: Call your authorized selling dealer or call Twin Eagles directly at 800-
789-2206. Be prepared to furnish the following information: Purchaser’s name, model and serial number of the appliance, date of
purchase and the accurate description of the problem. Twin Eagles will not pay for service calls for correcting an installation
problem. Owner shall be responsible for proper installation, providing normal care and maintenance, providing proof of purchase
upon request and making the appliance accessible for service. In the event of any warranty replacement, all removal, replacement,
installation and shipping costs are the responsibility of the grill owner.
Some states do not allow limitations on how long an implied warranty lasts, or the exclusions of or limitations on consequential
damages. This warranty gives you specific legal rights and you may have other rights, which vary from state to state
14