Digital Photo Frame Owner’s Manual - Vivitar Manual.pdf3 Introduction: Thank you for purchasing...
23
DPF-30 Digital Photo Frame Owner’s Manual © 2009 Vivitar, Inc. All rights reserved. All other trademarks are the property of their respective companies.
-
Upload
vuongxuyen -
Category
Documents
-
view
220 -
download
5
Transcript of Digital Photo Frame Owner’s Manual - Vivitar Manual.pdf3 Introduction: Thank you for purchasing...

DPF-30 Digital Photo Frame Owner’s Manual
© 2009 Vivitar, Inc. All rights reserved. All other trademarks are the property of their respective companies.

2
Table of Contents
Package Contents ……………………………..…………………………………… 3
Computer System Requirements for Windows………………………………………. 4
A Quick Look at Your Device ……………………………………….. 5
Preparing Your Device for Use ……………………………………….. 6
Starting Your Digital Photo Frame ………………………………………... 7
Exploring the Settings Options ……………………………................. 8
Loading Photos from Your Computer ………………………………………... 15
Using Photo Viewer Software …………………………………… 17 Digital Photo Frame Maintenance ..………………………………………… 19
Appendix A: Technical Specifications ………………………………………… 20

3
Introduction: Thank you for purchasing the Digital Photo Frame. Please read this manual carefully FIRST in order to get the most out of your device. Package Contents:
• Photo Frame • USB cable • User’s Manual with Warranty Information

4
Computer System Requirements for Windows Your Digital Photo Frame can be used with computers running Windows XP and Windows Vista. In order to load photos from your PC to your Digital Photo Frame you will need the following minimum system configuration: Windows XP Users -Pentium 4 Processor or higher (recommended), 1.6 GHZ, .Windows XP Service Pack 2 -512MB RAM -150MB Free Hard Disk Drive Space -CD/DVD ROM Drive -Available USB Port -Direct X 9 Capable Graphics Card -1024x768 Screen Resolution Windows Vista Users -One Gigabyte (GHz) processor -512MB RAM -150MB Free Hard Disk Drive Space -CD/DVD ROM Drive -Available USB Port -Direct X 9 Capable Graphics Card -1024x768 Screen Resolution

5
A Quick Look at Your Device
6
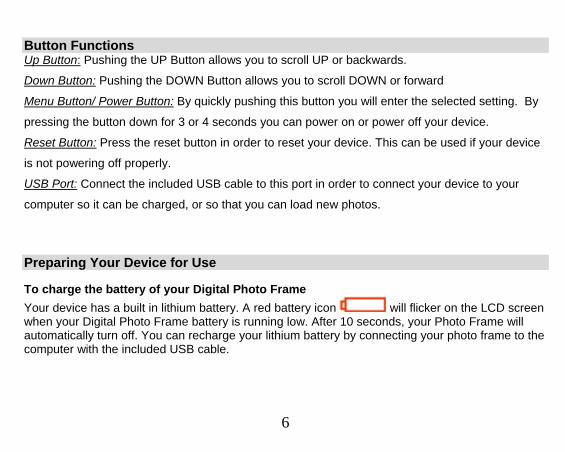
Button Functions Up Button: Pushing the UP Button allows you to scroll UP or backwards.
Down Button: Pushing the DOWN Button allows you to scroll DOWN or forward
Menu Button/ Power Button: By quickly pushing this button you will enter the selected setting. By
pressing the button down for 3 or 4 seconds you can power on or power off your device.
Reset Button: Press the reset button in order to reset your device. This can be used if your device
is not powering off properly.
USB Port: Connect the included USB cable to this port in order to connect your device to your
computer so it can be charged, or so that you can load new photos.
Preparing Your Device for Use To charge the battery of your Digital Photo Frame Your device has a built in lithium battery. A red battery icon will flicker on the LCD screen when your Digital Photo Frame battery is running low. After 10 seconds, your Photo Frame will automatically turn off. You can recharge your lithium battery by connecting your photo frame to the computer with the included USB cable.

7
Starting Your Digital Photo Frame Powering on Your Photo Frame: Press and hold the Menu Button/Power Button for about 3 seconds to power on your Digital Photo Frame. Note: Please make sure that your Photo Frame has sufficient battery power in order to operate properly. Powering Off Your Photo Frame When your Photo Frame is turned on, press and hold the Menu Button/Power Button for about 3 seconds. On your LCD screen the message “Power Off” will appear, and your Digital Photo Frame will power off. Viewing Different Photos On Your Photo Frame
If multiple photos are loaded on your Photo Frame, you can press the or button to scroll through the different photos on your LCD screen.
8
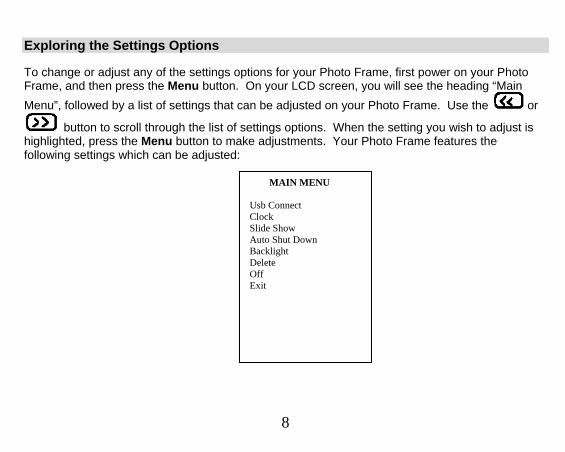
Exploring the Settings Options To change or adjust any of the settings options for your Photo Frame, first power on your Photo Frame, and then press the Menu button. On your LCD screen, you will see the heading “Main Menu”, followed by a list of settings that can be adjusted on your Photo Frame. Use the or
button to scroll through the list of settings options. When the setting you wish to adjust is highlighted, press the Menu button to make adjustments. Your Photo Frame features the following settings which can be adjusted:
MAIN MENU Usb Connect Clock Slide Show Auto Shut Down Backlight Delete Off Exit

9
1. USB CONNECT A. Press the Menu button to enter the settings menu.
B. Once in the settings menu, press or repeatedly until USB CONNECT is highlighted. C. Press the Menu button to enter this setting.
D. Navigate or to select between YES and NO. E. Press Menu to confirm. USB CONNECT SETTINGS Yes: When YES is selected, you can load pictures from your computer onto your Digital Photo Frame once your device is connected to your computer using the included USB cable. NO : When NO is selected, you will be unable to load photos onto your Digital Photo Frame, as your computer will not look for the device when it is plugged in. NOTE: The USB CONNECT option must be set to YES in order to load photos from your computer. 2. CLOCK A. Press the Menu button to enter the settings menu.
B. Once in the settings menu, press or repeatedly until CLOCK is highlighted.

10
C. Press the Menu button to enter this setting.
D. Press or to select the DISPLAY CLOCK, ANALOG CLOCK, SET CLOCK or ALARM CLOCK.
E. Press the Menu to confirm. DISPLAY CLOCK By choosing the DISPLAY CLOCK option, your frame will display the date, time and day of the week ANALOG CLOCK The ANALOG CLOCK allows the time to be displayed as an analog clock image on the screen. SET CLOCK The SET CLOCK allows you to adjust the Display Clock so that it displays accurate time
and date information. To do so, press or to choose the correct date or time setting, and press the Menu to confirm these settings. ALARM CLOCK
ON: When ON is selected, the alarm can be set by pressing or to enter the time that you’d like your alarm to go on and then the Menu button to confirm.

11
OFF: When OFF is selected, any alarm that has been set will be turned off. CANCEL: When CANCEL is selected, no alarm will be set or turned off, and you’ll come to the main menu of the Frame. 3. SLIDE SHOW A. Press the Menu button to enter the settings menu.
B. Press or repeatedly until SLIDE SHOW is highlighted. C. Press the Menu button to enter this setting.
D. Navigate or to select ON, OFF or CANCEL. E. Press the Menu to confirm. SLIDE SHOW SETTINGS The SLIDE SHOW SETTINGS allow you to choose the number of seconds that each of your photos will be displayed. You can choose anywhere between 1-15 seconds. Press the
or button repeatedly to toggle through the amount of seconds you’d like to select, and press the Menu button to enter the setting. NOTE: By selecting 0 seconds, you will turn the slide show off. Your Photo Frame will only display one photo without periodically switching to others.
12
4. AUTO SHUT DOWN A. Press the Menu button to enter the settings menu.
B. Press the or button repeatedly until AUTO SHUT DOWN is highlighted. C. Press the Menu button to confirm. AUTO OFF SETTINGS The AUTO OFF SETTINGS allow you to choose the number of minutes until your Photo Frame automatically shuts off in order to save battery power. You can choose anywhere between 1-30
minutes. Press the or button repeatedly to toggle through the amount of minutes you’d like to select, and press the Menu button to enter the setting. NOTE: By selecting 0 seconds, your Photo Frame will not automatically turn off automatically. To turn it off, you will have to manually turn off your Photo Frame.

13
5. DELETE A. Press the Menu button to enter the settings menu.
B. Press the or button repeatedly until DELETE is highlighted. C. Press the Menu button to confirm. DELETE ONE SETTING YES: The current displaying photo in your Photo Frame will be deleted. NO: The current displaying photo will not be deleted. CANCEL: No photo will be deleted, and you will go back to the main menu.
NOTE: You can use the or buttons to highlight YES, NO or Cancel. You can press the Menu to enter this setting. DELETE ALL SETTING YES: All photos in your Photo Frame will be deleted. NO: All photos will not be deleted. CANCEL:When CANCEL is selected, all the photos will not been deleted, and you will go back to the main menu.
NOTE: You can use the or buttons to highlight YES, NO or Cancel. You can press the Menu to enter this setting. 6. OFF

14
A. Press the Menu button to enter the settings menu.
B. Navigate the or button repeatedly until OFF is highlighted. C. Press the Menu button to confirm. OFF SETTING When OFF is selected, the Photo Frame will be power off. 7.BACKLIGHT A. Press the Menu button once to enter the settings menu. B. Press the or button repeatedly until BACKLIGHT is highlighted. C. Press the Menu button to enter this setting. D. Press the or button to make adjustments to the BACKLIGHT setting when applicable. 8. EXIT A. Press the Menu button once to enter the settings menu.
B. Press the or button repeatedly until EXIT is highlighted. C. Press the Menu button to confirm. EXIT SETTING

15
When EXIT is selected, your LCD screen will go back to showing stored photos. Loading Photos from Your Computer onto Your Digital Photo Frame In order to load photos from your computer, simply connect your Photo Frame to your computer by inserting one end of the included USB connection cable to the USB port on your Photo Frame, and the other end to an available USB port on your computer. Make sure that you have the USB Connect setting on your Photo Frame selected. To do so, follow the steps below: USB CONNECT A. Press the Menu button once so that the Main Menu appears on your Photo Frame.
B. Press the or button repeatedly until USB CONNECT is highlighted. C. Press the Menu button to confirm USB CONNECT SETTINGS YES: When YES is selected, you can connect your Photo Frame to your computer in order to load photos on to your Photo Frame. NO: When NO is selected, your computer will not recognize your Photo Frame and you will not be able to load photos from your computer.
You can use the or buttons to highlight YES or NO. You can press the Menu to enter this setting.

16
NOTE: The USB CONNECT option must be set to YES in order to load photos from your computer onto your photo frame. When your Photo Frame is connected to your computer, and the USB CONNECT option is properly set, the LCD Screen of your Photo Frame will display “USB CONNECT”.
17
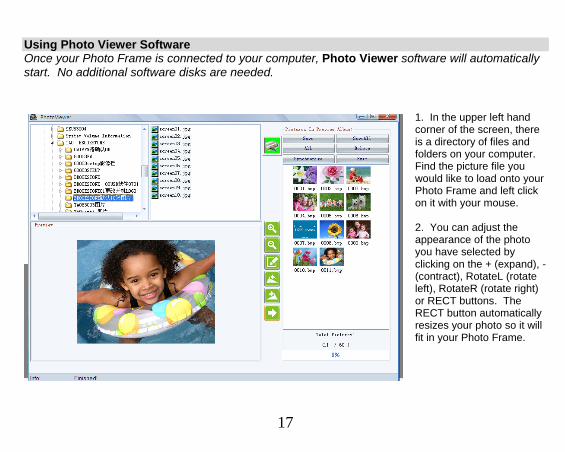
Using Photo Viewer Software Once your Photo Frame is connected to your computer, Photo Viewer software will automatically start. No additional software disks are needed.
1. In the upper left hand corner of the screen, there is a directory of files and folders on your computer. Find the picture file you would like to load onto your Photo Frame and left click on it with your mouse. 2. You can adjust the appearance of the photo you have selected by clicking on the + (expand), - (contract), RotateL (rotate left), RotateR (rotate right) or RECT buttons. The RECT button automatically resizes your photo so it will fit in your Photo Frame.

18
3. Click on the ADD button to add the photo to the right hand column. All photos listed on the right hand column can be added to your Photo Frame by clicking on the DOWNLOAD button. In the upper right hand corner of the screen you also have options to SAVE (this saves a selected photo from your Photo Frame to your computer), SAVEALL (this saves all photos on your Photo Frame to your computer), EXIT (this exits the Photo Viewer program), ALL (this highlights all the photos on your Photo Frame), and DELETE (this deletes any unwanted photos from your Photo Frame). 4. The setting button allows you to change the text color and background color seen on the LCD screen of your Photo Frame. NOTE: Do not unplug your Photo Frame while photos are being transferred. TROUBLESHOOTING TIP: If your photo frame software does not automatically run when your device is plugged in and set to the USB Connect setting please do the following: In Windows, go to your START menu, and select MY COMPUTER if you are using Windows XP, or COMPUTER if you are using Windows Vista. An extra drive letter will appear, labeled with the name of your photo frame’s software. Double click this drive to run your software.

19
Digital Photo Frame Maintenance
Your Photo is a product of superior design and craftsmanship and should be treated with care. Carefully read the following tips: · To avoid possible damage, you should not put excessive pressure on the LCD display screen.
Also do not drop, knock or shake it. · Do not store in hot or cold areas. High or low temperatures can shorten the life of the electronic
devices, and warp or melt certain plastics. · If your Photo Frame needs to be cleaned, unplug it first. Wipe it with a slightly damp cloth.
However, ever use harsh chemicals, cleaning solvents, or strong detergents. Note: Wipe the screen only with a soft dry cloth when the power is off. · Keep it dry. Avoid exposing to precipitation, humidity and liquid as it may cause damage to your
Photo Frame. · If there is something wrong with your Photo Frame, take it to the nearest qualified service facility. · Don’t place your hands or fingers on the LCD panel. Don’t put hard and sharp solids on the
screen.

20
Appendix: Technical Specifications Product Type: Portable Digital Photo Frame Image Storage Capacity:60Photos Image Format: BMP, JPG, Display: 2.4 inch LCD screen Power Supply: Internal Rechargeable Battery PC interface: USB 1.1 Working Temperature: 0-40°C

21
This device complies with the part 15 of the FCC rules. Operation is subject to the following two conditions: (1) this device may not cause harmful interference , and (2) this device must accept any interference received, including interference that may cause undesired operation. Caution: Changes or modifications not expressly approved by the party responsible for
compliance could void the user's authority to operate the equipment. Note: This equipment has been tested and found to comply with the limits for a Class B digital
device, pursuant to Part 15 of the FCC Rules, These limits are designed to provide reasonable protection against harmful interference in a residential installation. This equipment generates. Uses and can radiate radio frequency energy and, if not installed and used in accordance with instructions. May cause harmful interference to radio or television reception, which can be determined by turning the equipment off and on, the user is encouraged to try to correct the interference by one or more of the following measures: ---- Reorient or relocate the receiving antenna. ---- Increase the separation between the equipment and receiver. ---- Connect the equipment into an outlet on a circuit different from that to which the receiver
is connected. ---- Consult the dealer or experienced radio/ TV technician for help.

22
LIMITED 1-YEAR WARRANTY Vivitar warrants this quality product to be free of defects in material and workmanship for a period of one year from the date of purchase. During the period, Vivitar will repair or replace the product at no charge for parts or labor. TIME PERIOD OF THIS WARRANTY The time period of this warranty starts from the date of the original purchase and expires on the first anniversary date of purchase. WHAT IS NOT COVERED BY THIS WARRANTY No express or implied warranty is made for any defects in this product which result from accident, abuse, misuse, failure to operate the product in accordance with relevant instructions, neglect, immersion in or exposure to chemicals or liquids, extremes of climate, fungus, excessive wear and tear/cosmetic damage and defects resulting from other extraneous causes such as unauthorised disassembly, repair or modification. This warranty shall not extend to any incidental or consequential damages arising from the purchase, use or inability to use this product even if Vivitar has been advised of such damages. The laws of some countries and some States thereof do not allow the limitation of incidental or consequential damages, so the above limitation or exclusion may apply to you.

23
WHAT TO DO WHEN SERVICE IS NEEDED STEP 1. Package the product and relevant accessories carefully, using ample padding materials and a sturdy mailing container to prevent damage in transit. STEP 2. Include in package: a) Evidence of date and place of original purchase (for example, a copy of your sales receipt). b) Detailed description of your problem. c) When possible, a sample evidencing the problem. STEP 3. Return item (insured) to: Vivitar Service Department 195 Carter Drive Edison NJ 08817 When service is complete, the product will be returned to you prepaid. In the event the product is deemed to be not faulty or the defect is a result in wear and tear, Vivitar may levy a handling charge for the return of the product. For further queries, please visit our website www.vivitar.com. This warranty gives you specific legal rights. You may also have other rights which vary from country and State to State thereof.