Dietitian's Guide to the Electronic Health Record (EHR)
47
Transcript of Dietitian's Guide to the Electronic Health Record (EHR)


4
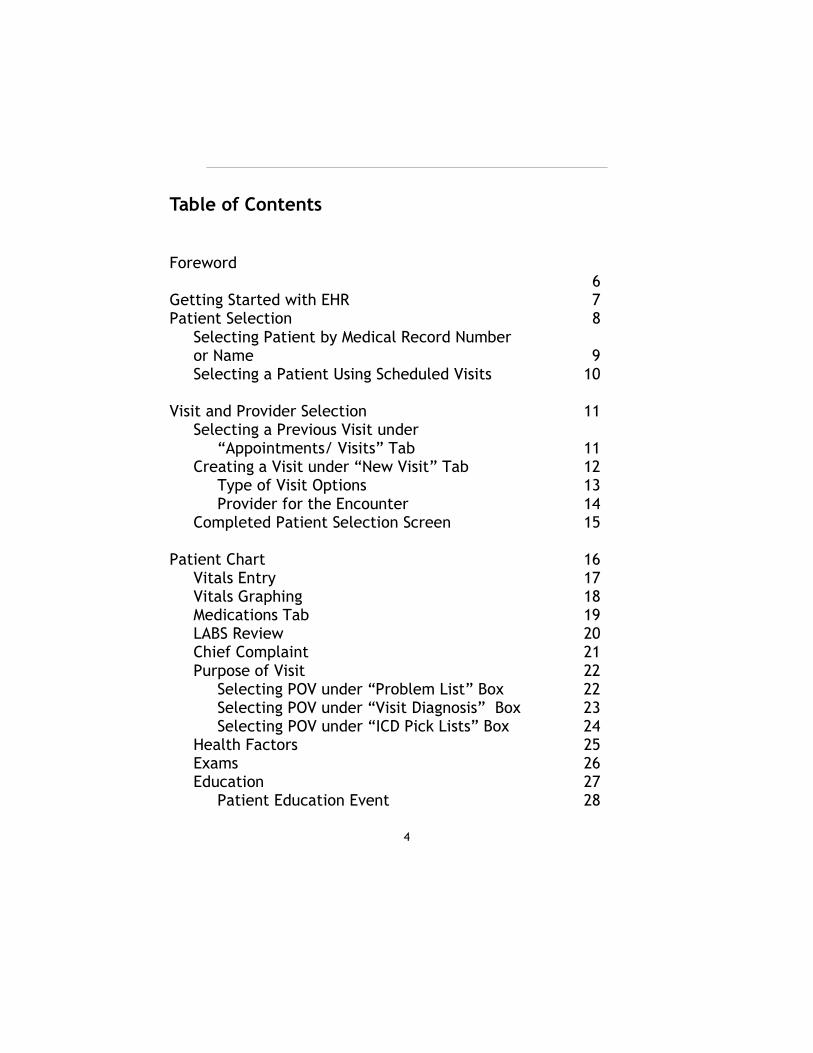
Table of Contents
Foreword 6 Getting Started with EHR 7 Patient Selection 8 Selecting Patient by Medical Record Number or Name 9 Selecting a Patient Using Scheduled Visits 10 Visit and Provider Selection 11 Selecting a Previous Visit under “Appointments/ Visits” Tab 11 Creating a Visit under “New Visit” Tab 12 Type of Visit Options 13 Provider for the Encounter 14 Completed Patient Selection Screen 15 Patient Chart 16 Vitals Entry 17 Vitals Graphing 18 Medications Tab 19 LABS Review 20 Chief Complaint 21 Purpose of Visit 22 Selecting POV under “Problem List” Box 22 Selecting POV under “Visit Diagnosis” Box 23 Selecting POV under “ICD Pick Lists” Box 24 Health Factors 25 Exams 26 Education 27 Patient Education Event 28
5
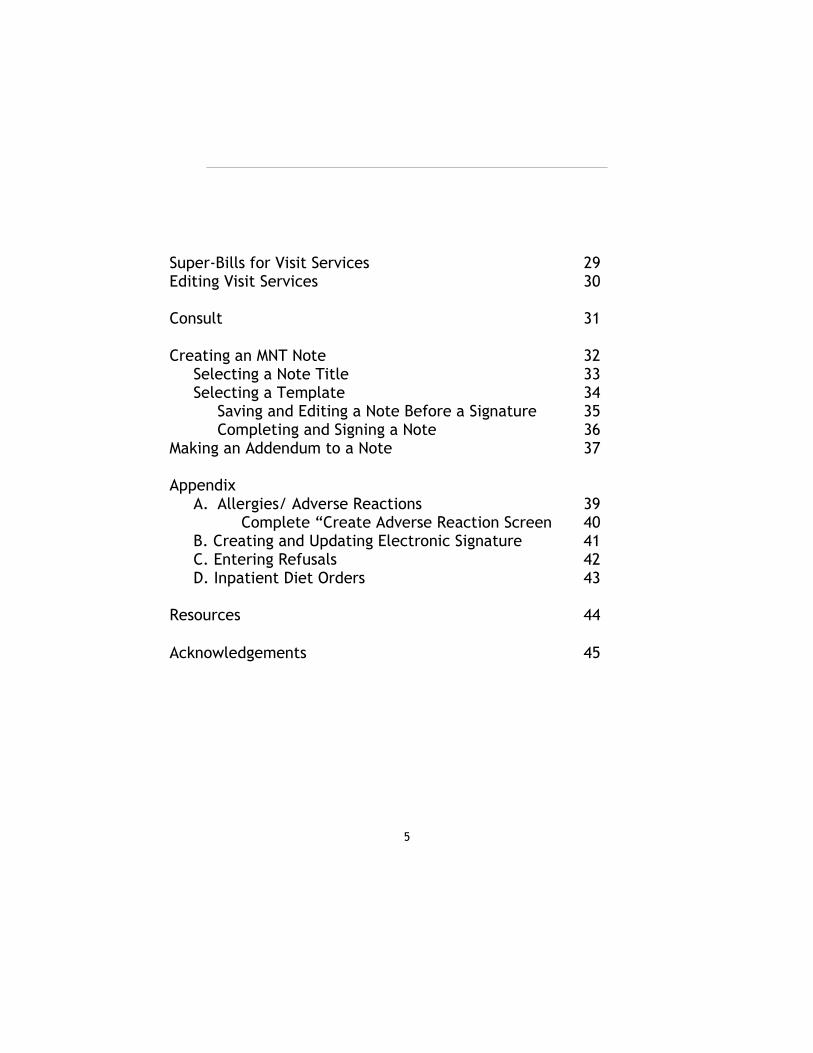
Super-Bills for Visit Services 29 Editing Visit Services 30 Consult 31
Creating an MNT Note 32 Selecting a Note Title 33 Selecting a Template 34 Saving and Editing a Note Before a Signature 35 Completing and Signing a Note 36 Making an Addendum to a Note 37 Appendix
A. Allergies/ Adverse Reactions 39 Complete “Create Adverse Reaction Screen 40 B. Creating and Updating Electronic Signature 41 C. Entering Refusals 42 D. Inpatient Diet Orders 43
Resources 44
Acknowledgements 45
6
In 2005, the Indian Health Service (IHS), Tribal, and Urban health systems began converting all paper medical charts to an electronic health record (EHR) system. Complete conver-sion to EHR continues to this day in Indian health facilities. The purpose of this guide is to provide Registered Dietitians (RD) and Nutrition Professionals (NP) an overview of the EHR and an introduction to the new Nutrition Care Process Medi-cal Nutrition Therapy template. The guide will provide the RD/NP, step-by-step instructions on how to use EHR most ef-ficiently for your practice. It will also provide helpful remind-ers for those with experience using the EHR, and provide new tips. It is strongly recommended that you select a “Demo,Patient” when orienting to the EHR system while reviewing this guide. This will allow “real-time” training on EHR, enhancing your learning experience. This guide uses the “Demo patient” for illustrating EHR features. Any information that you enter on the “Demo,Patient” is not stored as collective data for future reports. It is important to note that EHR screens may look different at each facility. The screen shots shown in this guide come from several Indian health facilities. Nonetheless, the procedure of maneuvering and charting in the EHR system is the same. We hope that you will find this guide helpful in your practice. Sincerely, The Medical Nutrition Therapy Action Team (MAT)
Foreword

7
Getting Started with EHR
Logging into EHR 1. Login to EHR with your Access Code and Verify Code.
TIP: Usually the EHR login is the same as the user RPMS login.

8
Patient Selection NOTE: This guide uses “Demo,Patient” for illustration purposes. However, for a real patient, please find instructions on the fol-lowing pages on how to select a patient. When getting started in EHR the first step is to select a patient before reviewing or entering patient data.
Selecting a Patient 1. Click on the “Patient Not Selected” box. This first screen may
vary in appearance at the various sites.

9
Selecting Patient by Medical Record Number or Name
1. Enter the patient’s medical record number or name in the blank field below the word “Patients”.
A. Medical record number example: 1234 NOTE: entering medical record numbers often require leading zeros if has too few numbers (minimum is 4 num- bers possibly.) MR# 12, so example to enter in space is 0012. B. Name example: Smith,Joe NOTE: Patient name must be entered with the last name followed by a comma and then the first name. Do “NOT” put a space between the comma and the first name.

10
Selecting a Patient using Scheduled Visits This step allows one to display patients who have an appointment in a specific clinic on a specific day. 1. From the “Patient Lists”, select the option (for example De-
fault, Providers, Teams, Specialties, Clinics, etc) that will dis-play your scheduled visits for the day. TIP: This is one of the advantages of using the RPMS Scheduling Package.
A. The example shown in the center below displays the four scheduled patients listed under the “Patients (Outpatient Roz (Dietician))” box. 2. To select the patient (example: Demo,Patient Elder Mike),
highlight the patient’s name and click the “OK” button.

11
Visit and Provider Selection Once the patient is selected, the next step is to select the visit. 1. Click in the “Visit not selected” box.
2. To select a visit, there are two options:
A. Select visit on the “Appointments/Visits” tab B. Create a visit in the “New Visit” tab
A. Selecting a Previous Visit under “Appointments/
Visits” Tab 1. Select your clinic visit under the “Appointments/Visits” tab as shown below (KHC—Dietary)

12
B. Creating a Visit under “New Visit” Tab 1. Select the “Visit Location”, “Date of Visit”, “Time of Visit”,
and “Type of Visit” as displayed below. 2. Check the “Create a Visit Now” box. 3. The system will default to your name as the “Encounter Pro-
vider”. Click “OK”
NOTE: The next two pages will further address the “Type of Visit” and the “Encounter Providers” tabs.

13
Type of Visit Options 1. Use the Type of Visit option box if your patient activity is dif-
ferent than an Ambulatory visit (ie: Chart Review, Telephonic, Historical, etc)
2. The Type of Visit options are available by clicking on the drop
down arrow. Select “OK”
14
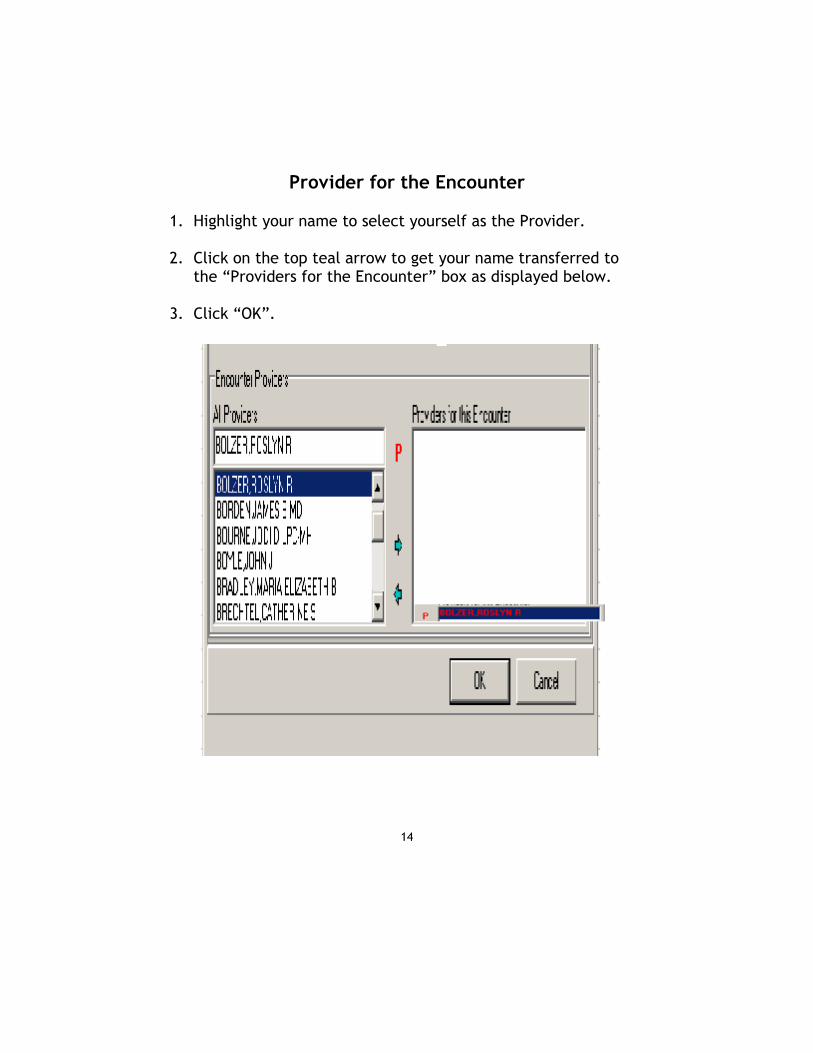
Provider for the Encounter 1. Highlight your name to select yourself as the Provider. 2. Click on the top teal arrow to get your name transferred to
the “Providers for the Encounter” box as displayed below. 3. Click “OK”.

15
Completed Patient Selection Screen
This screen displays: A. The selected patient B. The visit type and provider
You are now ready to begin documenting the patient visit.

16
Patient Chart
The “COVER SHEET” of EHR is a good place to start when review-ing a patient’s information before a patient visit or chart review. Click on “COVER SHEET”. This page will provide a quick summary of the patient’s current medical status, including:
Active Problem List Medication List Lab Orders Appointments/Visits Consult Orders Reminders Adverse Reactions Alerts
NOTE: This EHR screen may look different at your facility.

17
Vital Entry
Note: This entry option may be under the tab called “Triage” or “Vital Signs”.
This is where you can find the patient’s vitals including anthropo-metric data. If you have vitals to enter:
1. Click on the empty white box next to the vital that was measured, for example: 69” for height and 150# for weight as shown below. When finished, click “Update”.

18
Vitals Graphing To display the graph: 1. Click on “Vital display” tab next to “Vital entry”. 2. Click on the vital that you are interested in, example:
weight. 3. Now a graph will automatically display this patient’s weight
changes over time. TIP 1: The range of display may be changed by selecting a dif-ferent time frame. TIP 2: This is an outstanding tool to help patients see a particu-lar vitals' trend.

19
Medications Tab The “Medications” tab is where the patient’s medications can be found. Here it will show the status of the medications, when it was issued, last filled and when the prescription will expire. TIP: Clicking on the “Active Only” icon will show only the active medications.
20
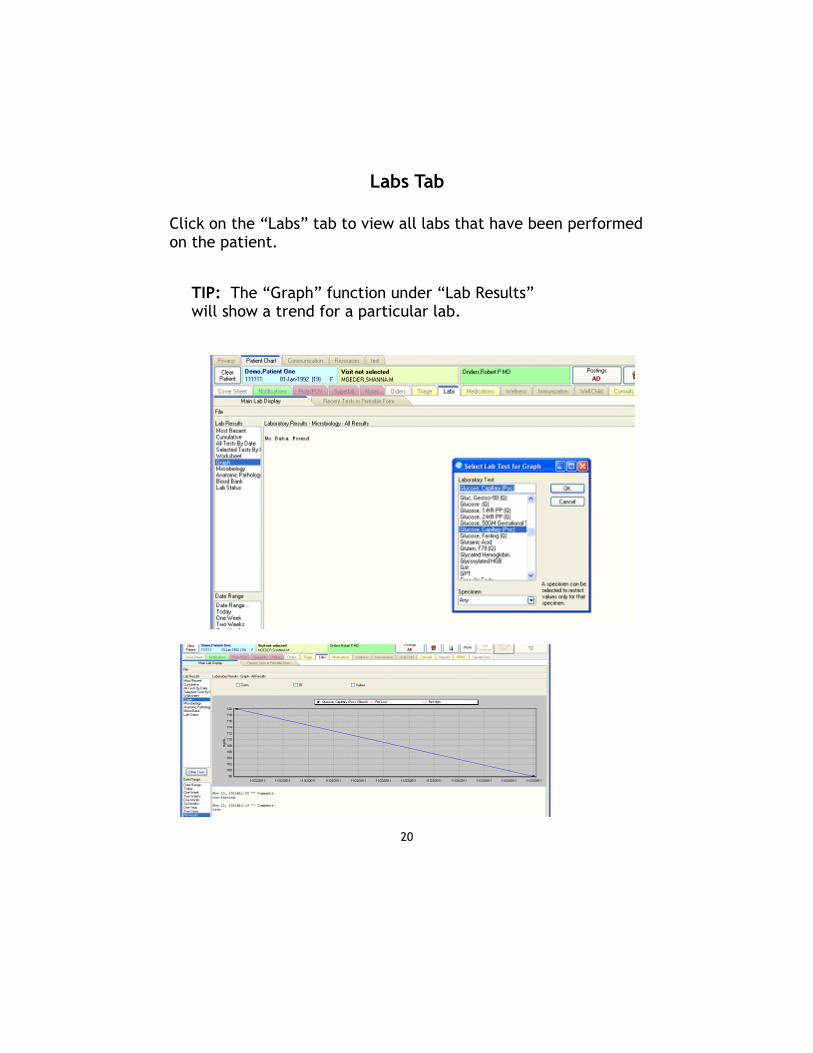
Labs Tab
Click on the “Labs” tab to view all labs that have been performed on the patient.
TIP: The “Graph” function under “Lab Results” will show a trend for a particular lab.

21
The “Chief Complaint” box, located in the “Triage” tab, is where additional patient health concerns can be documented if not cov-ered under the ‘Problem List’ section. NOTE: Information entered in ‘Chief Complaint’ section will self-populate into the MNT note.
Chief Complaint
Adding Chief Complaint 1. Click on “Add” to enter information. 2. Type narrative in text box or select symptom in box below. TIP: This list can be defaulted to your specific needs. Consult with your local Clinical Application Coordinator (CAC). 3. Click “OK”.

22
Purpose of Visit The Purpose of Visit (POV) is located under the “Prob/POV” tab. The POV can be entered in several ways:
A. Problem List B. Visit Diagnosis C. ICD Pick Lists
A. Selecting POV under the “Problem List” box 1. Highlight the appropriate POV in “Problem List” section. 2. Select “Set as Today’s POV”. This will automatically move it
over as the POV for this visit. TIP: The first POV selected will be marked as the Primary POV.

23
B. Selecting POV under “Visit Diagnosis” box 1. Click on “Add” under “Visit Diagnosis” box.
2. Type the POV in the “ICD” field and select the “…” icon next to the field. 3. Verify POV, click “OK”. Exit task by clicking “Save”.
24
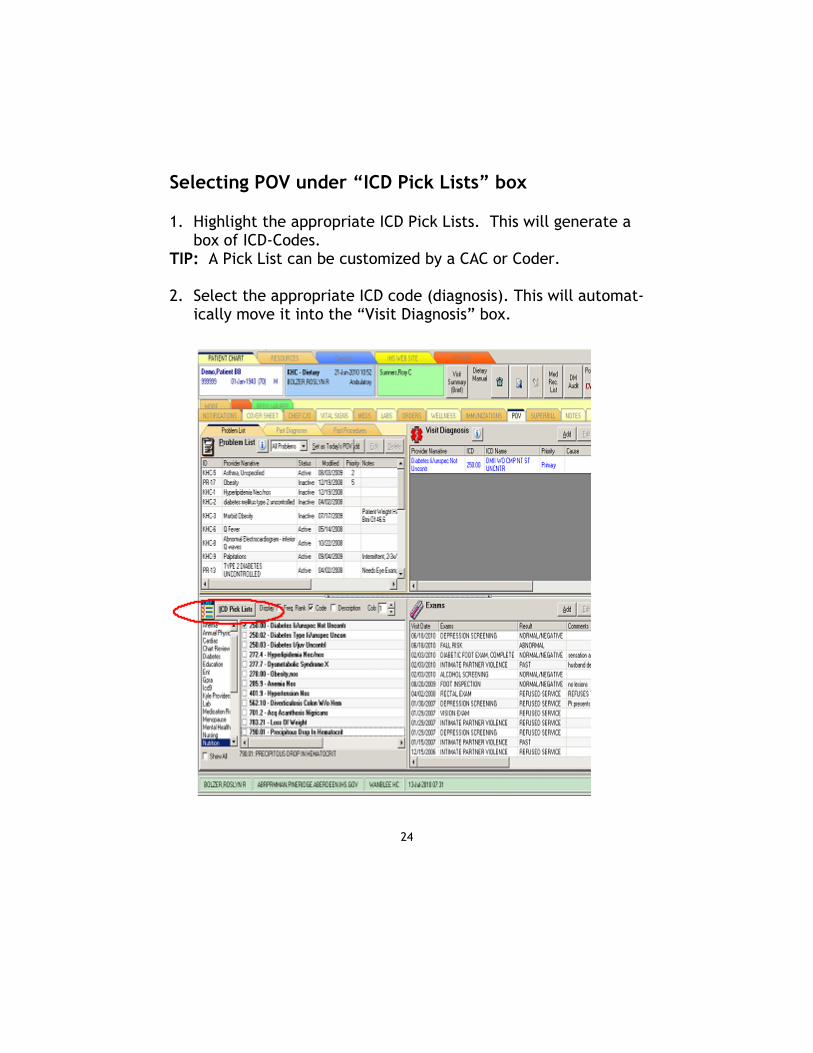
Selecting POV under “ICD Pick Lists” box 1. Highlight the appropriate ICD Pick Lists. This will generate a
box of ICD-Codes. TIP: A Pick List can be customized by a CAC or Coder. 2. Select the appropriate ICD code (diagnosis). This will automat-
ically move it into the “Visit Diagnosis” box.

25
Health Factors 1. Click the “Wellness” tab that contains “Health Factors” box. 2. Click “Add” in the “Health Factors” box. 3. To expand sub category list, double click factor, or click (+)
sign next to health factor. 4. Identify appropriate sub category. 5. Click “Add”.

26
Exams 1. Click “Wellness” tab that contains “Exams” box. 2. Click “Add” to remark on an exam performed. 3. Double click exam performed. 4. Select exam result or insert comment. 5. Add comments as needed. 6. Click “Add”.
27
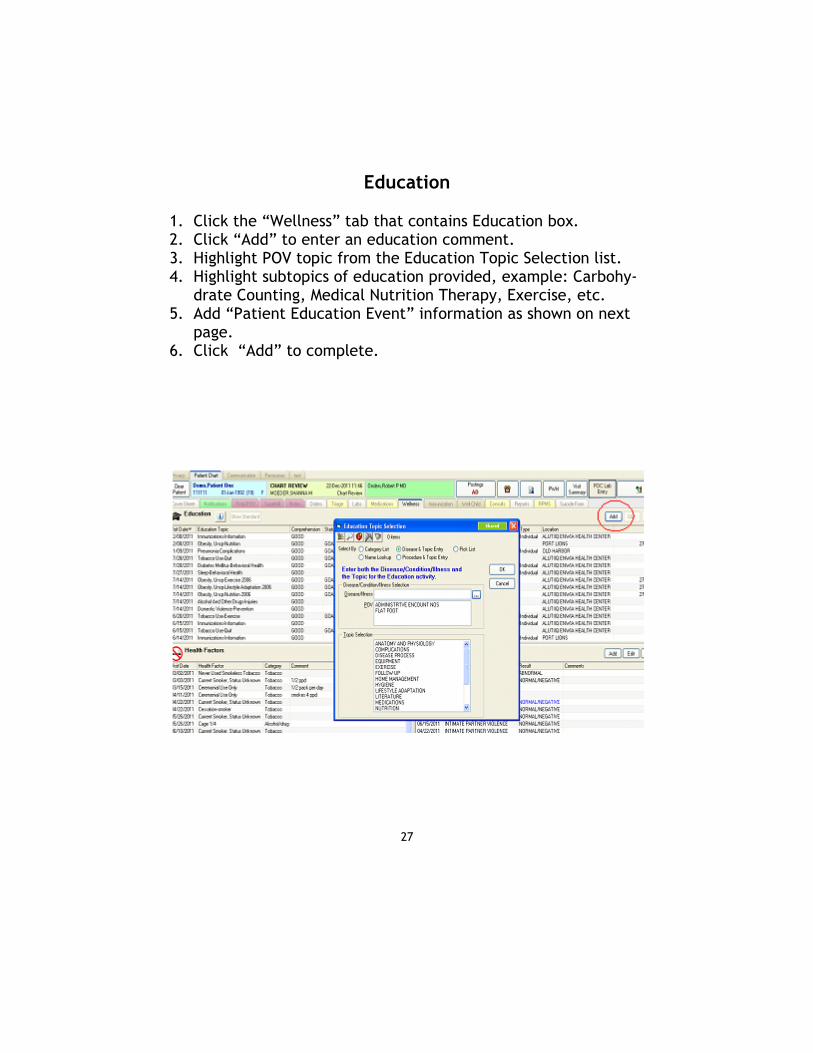
Education 1. Click the “Wellness” tab that contains Education box. 2. Click “Add” to enter an education comment. 3. Highlight POV topic from the Education Topic Selection list. 4. Highlight subtopics of education provided, example: Carbohy-
drate Counting, Medical Nutrition Therapy, Exercise, etc. 5. Add “Patient Education Event” information as shown on next
page. 6. Click “Add” to complete.

28
Patient Education Event 1. Select type of training. 2. Select appropriate comprehension level. 3. Enter time spent on education. 4. Enter comment if needed. 5. Document readiness to learn. 6. Document status or outcome of goals. 7. Select the appropriate patient learning health factors, exam-
ple barriers to learning or learning preference, Click “Add”.
8. Select “Add” to complete Education Event.

29
Super-Bills for Visit Services This step is important for billing the services that are provided to the ambulatory (face-to-face time) patient. 1. Click “Services/Superbill” tab. 2. Highlight the appropriate “Super-Bill” for the services provid-
ed, for example “Nutrition.” This will generate a box of MNT CPT codes for reimbursement to select from.
3. Select the appropriate CPT code. This action will generate a
super-bill for visit services. The example below shows CPT code 97802-Medical Nutrition Therapy, Individual, Initial Visit.

30
Editing Visit Services
The MNT CPT codes default to 1 unit which is 15 minutes of time for Initial and Follow-up visits and 30 minutes for a Group visit. 1. To modify the units of time spent with the patient during the
visit, highlight the CPT code under “Visit Services”, and select “Edit”. This will bring up the “Edit Procedure for Current Vis-it” box.
A. Check the primary diagnosis. B. Change the units in the “Quantity” box to reflect the time
spent with the patient. For example, 2 units represent a 30-minute visit with the individual patient. A. Click “Save”.

31
Consult
All MNT or DSMT consults will be displayed on the “NOTIFICATIONS” screen. 1. Click “NOTIFICATIONS” tab. 2. Double click on the consult. Automatically the Consults tab
will open, showing the active consult. TIP: The Notification screen is a temporary message center, so once the consult is opened, it will no longer appear in the Notifi-cations tab. The provider’s consult order for nutrition services will still be available by clicking on the “Consult” tab.

32
Creating an MNT Note
Congratulations you have made it through EHR and are ready to
create an MNT note. The steps that you have just completed are
important for documentation and reimbursement and will also
self-populate key elements in the MNT note when using the MNT
Nutrition Care Process (NCP) template.
Creating a MNT Note:
1. Click “Notes” Tab. 2. Select “New Note”. 3. The “Progress Note Properties” box will open.

33
Selecting a Note Title
Each health service has a distinctive title name for example, “Nutrition” or “Medical Nutrition Therapy”. 1. Select the appropriate note title:
A. Select “NUTRITION” if there is no provider consult order. B. Select “NUTRITION CONSULT” if a provider consult order
was received.
TIP: For follow-up appointments related to this consult, continue to use “NUTRITION CONSULT” for the note title until the patient is discharged or a new consult is sent to dietitian.

34
Selecting a Template
1. Select the current EHR MNT Nutrition Care Process (NCP) Template. 2. Begin your MNT documentation. TIP: Work with your CAC to set up your Templates folder.

35
Saving and Editing a Note Before a Signature
If you get interrupted while documenting, you have the options to stop and Save or Edit your note for later completion. To Save a note: 1. Select “Action” from the menu bar or right click. 2. Select “Save without Signature”. To Edit a note: 1. Select “Action” from the menu bar or right click. 2. Select “Edit Progress Note”. 3. Resume documentation until note is complete.

36
Completing and Signing a Note 1. Once the note is completed, review your note and edit as
needed before signing your note. Ensure note contains all in-formation required for MNT reimbursement.
2. There are 3 options for signing the note:
A. Click on sign icon at the top of your screen. B. Right click and choose the “Sign Note Now” option. C. On the menu bar, select “Action” and choose “Sign Note
Now”.
3. “Sign Document” box will open. Enter your e-signature. TIP: If you do not have an e-signature, contact your CAC or Infor-mation Technology department or use “eSig” on EHR menu bar if available.
37
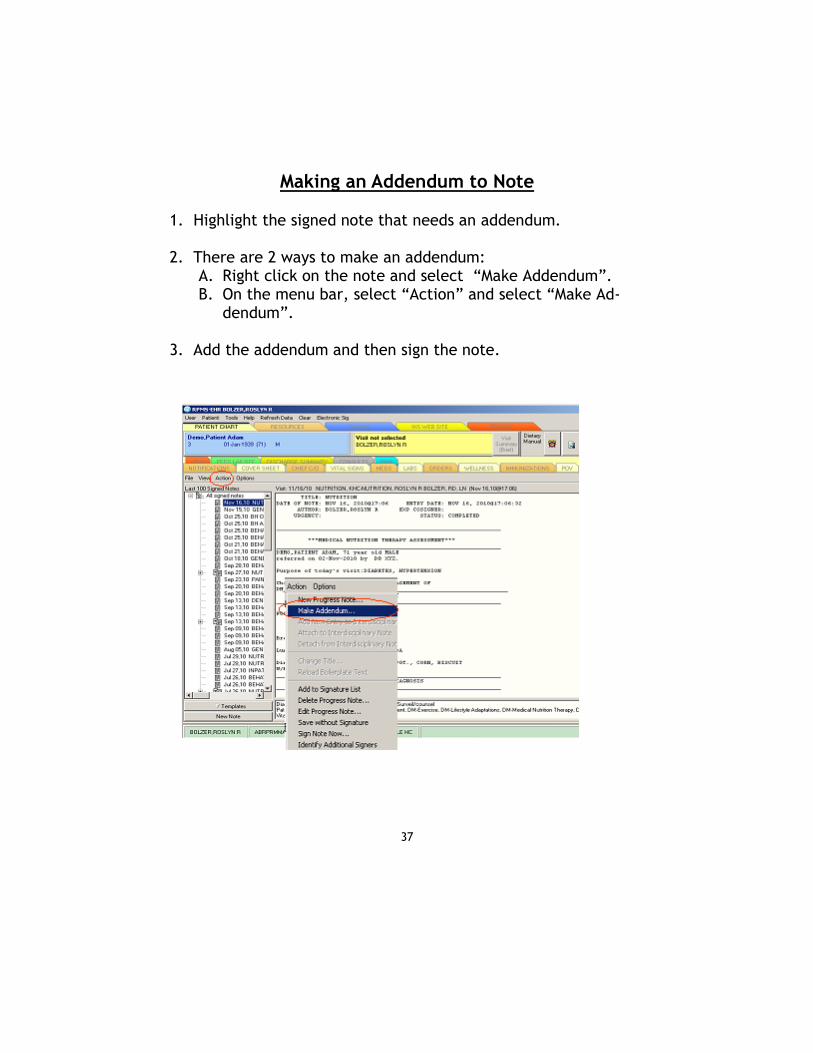
Making an Addendum to Note 1. Highlight the signed note that needs an addendum. 2. There are 2 ways to make an addendum:
A. Right click on the note and select “Make Addendum”. B. On the menu bar, select “Action” and select “Make Ad-
dendum”. 3. Add the addendum and then sign the note.

38
APPENDIX
A. Allergies/Adverse Reactions Complete “Create Adverse Reaction Screen B. Creating and Updating Electronic Signature C. Entering Refusals D. Inpatient Diet Orders

39
A. Allergies/Adverse Reactions
The Adverse Reactions box can be found on the “Cover Sheet” tab. If authorized to enter a new Food and/or Drug allergy, right click on the “Adverse Reactions” box to enter a “New Adverse Reaction”.
The following example is for entering a food allergy for soy-beans 1. Enter “Soybeans” in the Causative Agent box, click Search. 2. Highlight the appropriate Causative Agent (SOYBEANS), click
OK. 3. Complete the “Create Adverse Reaction” screen by entering
patient’s comments as demonstrated on the next page.

40
Complete “Create Adverse Reactions” Screen
1. Compete the following Fields: A. Event Code (FOOD ALLERGY). B. Source of Information (PATIENT). C. Signs/Symptoms Available (RASH).
2. Click “OK”. NOTE: You will have to perform an additional e-signature to ap-prove adding this Adverse Reaction. TIP: The final step of this process may require that the Pharmacist verify the allergy. Once the allergy is verified, the status will be changed from unverified to verified.
41
B. Creating and Updating Electronic Signature
Setting up new or editing e-signature for user: 1. Login to RPMS. 2. Type tbox at the “Select IHS Core Option”, hit “Enter/
Return” on keyboard. 3. Type in: Electronic Signature code Edit, hit “Enter/Return” 4. Complete the following commands:
A. INITIAL: DD// B. SIGNATURE BLOCK PRINTED NAME: DEBBIE DIETITIAN//
C. SIGNATURE BLOCK TITLE: RD, CDE// D. OFFICE PHONE: E. VOICE PAGER: F. DIGITAL PAGER: G. SIGNATURE CODE:
i. Creating New Signature Code: If the user does not have a signature code or you have cleared their e-signature in the system, create a signature code. The system will prompt you to create a signature code.
ii. Editing your Current Signature Code: If the user has an existing e-signature, they will then need to enter it or if they have forgotten it, IT will need to clear it.
TIP: Remember that the system only will accept caps and num-ber for this signature. But once it is set, the code is not case sen-sitive.
Note: Once everything is completed it will return user back to the “User’s Toolbox Option” screen.
42
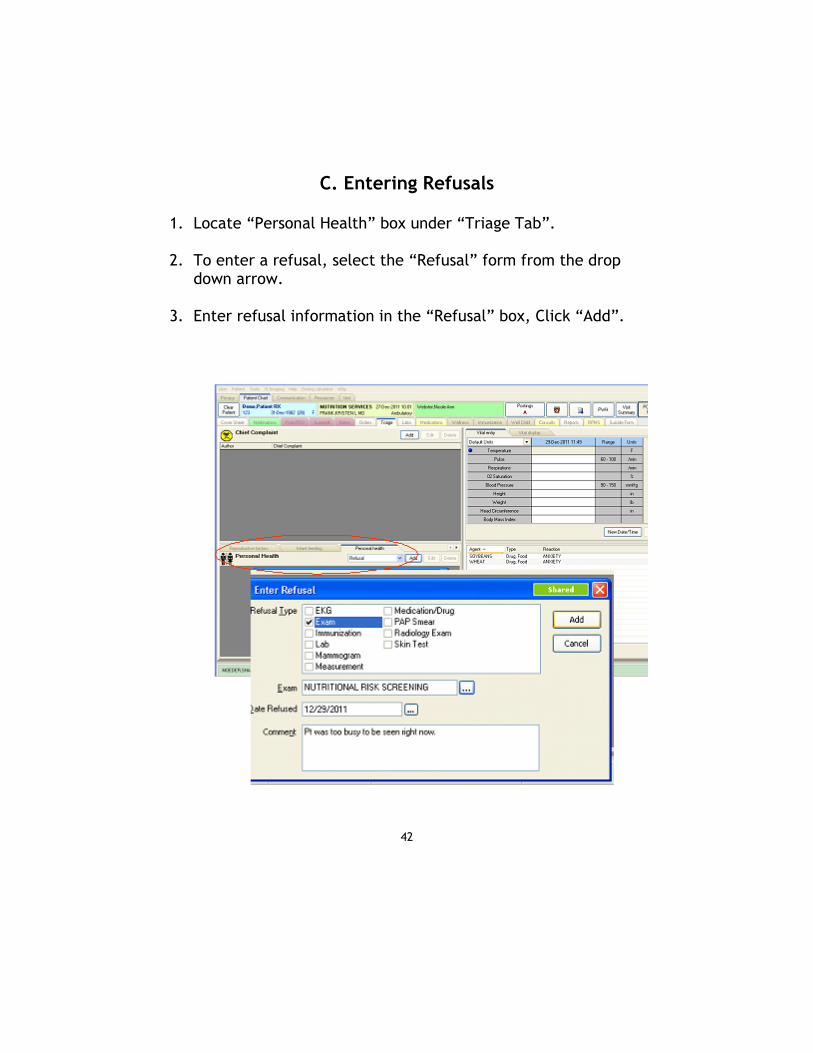
C. Entering Refusals
1. Locate “Personal Health” box under “Triage Tab”. 2. To enter a refusal, select the “Refusal” form from the drop
down arrow. 3. Enter refusal information in the “Refusal” box, Click “Add”.

43
D. Inpatient Diet Orders
Below are screen shots of inpatient diet orders. TIP: Working with the CAC and Clinical Director will ensure that diets are ordered according to facility procedures.

46
Writers (continued):
CAPT Karen Bachman-Carter, MPH, RD
Area Diabetes Consultant, IHS Navajo Area, Shiprock, NM
CDR Susan Jones, MS, RD, LD, CNSD, CPS
Senior Clinical Dietitian, Tuba City Regional Health Care Corporation, Tuba City, AZ
Stefanie McLain, MS, RD, LD
Diabetes Program Dietitian, IHS Lawton Service Unit, Anadarko, OK
Kelli Wilson, MS, RD, LD
Training Facilitator, IHS Division of Diabetes Treatment and Prevention, Albuquerque, NM

47
Acknowledgements
Reviewers and Contributors:
Brenda Broussard, MPH, MBA, RD, CDE, BC-ADM Nutrition Consultant, The Hill Group, Albuquerque, NM
LT Casey L. Cavanaugh, MS, RD, CLE Public Health Nutritionist for Pediatrics and the Diabetes Center of Excellence, Phoenix Indian Medical Center, Phoenix, AZ
Jennifer Johns, RD Public Health Nutritionist, IHS Chinle Service Unit, Chinle, AZ
LT Thelma Lucero, RD Public Health/Clinical Dietitian, Phoenix Indian Medical Center, Phoenix, AZ
Carrie Thrasher, MPH, RD Outpatient Dietitian, IHS Chinle Service Unit, Chinle, AZ