development of uclinux platform for cal poly super project
75
DEVELOPMENT OF UCLINUX PLATFORM FOR CAL POLY SUPER PROJECT by Brian Estrada Patrick Mariano Senior Project COMPUTER ENGINEERING DEPARTMENT California Polytechnic State University San Luis Obispo 2008
Transcript of development of uclinux platform for cal poly super project

DEVELOPMENT OF UCLINUX PLATFORM
FOR CAL POLY SUPER PROJECT
by
Brian Estrada Patrick Mariano
Senior Project
COMPUTER ENGINEERING DEPARTMENT California Polytechnic State University
San Luis Obispo 2008

2
TABLE OF CONTENTS
Section Page Acknowledgements..............................................................................................................4 I. Introduction......................................................................................................................5 II. Background.....................................................................................................................6 III. Requirements.................................................................................................................9 IV. System Architecture and Design.................................................................................11
A. Xilinx EDK System Block Diagram.......................................................................11 B. Xilinx EDK Address Mappings..............................................................................15 C. Boot Loader and Kernel Hierarchy.........................................................................16
V. Installing uClinux on a Spartan 3E Starter Board.........................................................18 A. Development Environment vs. Operational Environment......................................18 B. Installing the Xilinx ISE & EDK on a Linux Workstation.....................................19 C. Installing PetaLinux on a Linux Workstation….....................................................20 D. Configuring uClinux for a Spartan 3E Starter Board.............................................22 E. Clearing Flash Memory and Resetting UBoot Environment Variables.................34
VI. Modifying uClinux......................................................................................................35 A. Installing Independent Drivers into uClinux..........................................................35 B. Creating User Applications for uClinux.................................................................35
VII. Testing........................................................................................................................37 A. Signal Out Test Application...................................................................................39 B. Signal IO Test Application.....................................................................................40
VIII. Recommendations for Future Expansion..................................................................41 A. Adding a Monitor and Keyboard............................................................................41 B. External I/O Signal Multiplexer.............................................................................41
IX. Conclusion...................................................................................................................43 Appendices A: Bibliography.................................................................................................................44 B: How Tos........................................................................................................................45
1. Writing Makefiles........................................................................................45 2. Using Apt-get...............................................................................................54
C: Software Versions.........................................................................................................58 D: Readmes........................................................................................................................59
1. PetaLinux.....................................................................................................60 2. MicroBlaze..................................................................................................63 3. User Applications........................................................................................66 4. Linux Kernel 2.6.xx.....................................................................................67
E: Analysis of Senior Project Design.................................................................................74
3
LIST OF FIGURES Figures Page Figure 1: Xilinx Spartan 3E Starter Board Hardware Features.................................6 Figure 2: FSBoot Memory Components..................................................................12 Figure 3: Additional FSBoot Memory Space..........................................................13 Figure 4: MicroBlaze Soft Core Processor..............................................................13 Figure 5: FSBoot Supported Peripherals.................................................................14 Figure 6: FSBoot Memory Address Mappings........................................................15 Figure 7: Three Stage Boot Flow Process...............................................................17 Figure 8: Kermit .kermrc Script File.......................................................................21 Figure 9: Instance of Kermit Console Running in Shell..........................................22 Figure 10: Setup Commands to Instantiate the PetaLinux Config Menu................22 Figure 11: Main Configuration Menu for PetaLinux..............................................23 Figure 12: Vendor/Product Selection Menu............................................................24 Figure 13: Kernel Selection Menu...........................................................................24 Figure 14: Saving PetaLinux Configuration Changes.............................................25 Figure 15: Returning to the Kernel Selection Menu................................................26 Figure 16: User Settings Menu................................................................................26 Figure 17: System Settings Menu............................................................................27 Figure 18: Kernel Images in /tftpboot/ Directory....................................................28 Figure 19: Updating Bitstream for Reference Design.............................................29 Figure 20: Digilent Adept Suite Program ExPort....................................................30 Figure 21: FS-BOOT Executing at Startup.............................................................30 Figure 22: UBoot Default Environment..................................................................31 Figure 23: Transferring Files to UBoot...................................................................32 Figure 24: UBoot Configuration Script Output.......................................................32 Figure 25: Automatically Booting Into uClinux......................................................33 Figure 26: GPIO Test Application...........................................................................38 Figure 27: Signal Out Test Application...................................................................39 Figure 28: Signal IO Test Application.....................................................................40

4
ACKNOWLEDGEMENTS
We would like to thank Dr. James Harris and Dr. Ali Shaban for giving us the opportunity to
work on a project that not only challenged us, but made us aware of the issues of sustainability in
our field, issues that will surely not go away anytime soon. Being immersed so thoroughly in a
project that has the potential for future change has been an invaluable experience.

5
I. Introduction The Cal Poly Sustainable Power for Electronic Resources (SuPER) Project aims to
provide a sustainable, low cost source of electrical power to regions without access to electricity.
The SuPER system utilizes solar panels to power household necessities such as lighting and
refrigeration. The projected cost of the system is $500 with an expected mean time before failure
of 20 years. The system consists of a Photovoltaic (PV) cell, a DC to DC converter, a battery and
a system controlling computer.
Dr. James Harris started the SuPER project with his whitepaper [1] written in the summer
of 2005. Since then, he, along with Dr. Ali Shaban, has been working with EE and CPE students
to design and build a functional prototype of the SuPER system. The current system is at Phase 1,
which includes all four main components of the system controlled and monitored by a laptop.
The project hopes to move into Phase 2 which will include an improved DC-DC converter being
developed by Joe Witts and an improved control system described in this paper.
This report outlines the porting of the control system to an FPGA in order to reduce
power consumption and system cost. It first provides an overview of the project and its
objectives. Afterwards, it covers the software design and architecture of the project with an
emphasis on the Xilinx EDK. Then it provides a step by step procedure to install uClinux on the
Spartan-3E development board and also how to create user applications for it. It also includes our
testing simulations with uClinux running user created applications. The appendices contain
helpful documents about Linux in general, the Microblaze soft-core processor, and user
applications for uClinux.

6
II. Background As of the spring of 2008, the SuPER system utilizes a laptop to control the system,
control the system, collect data from the sensors on the system, and provide a pulse width
modulation signal. It does this by executing a main program that executes modular functions to
perform the separate tasks. The SuPER control system is written using the C programming
language and runs on the Red Hat Enterprise Linux operating system. Currently, the laptop
draws 3A of current at 20V and is required to constantly read sensor data and control the PWM
output to the PIC.
In his thesis, Eran Tal stated that the laptop would not be part of the final design of the
SuPER system and would be replaced with an FPGA [3]. This is ideal due to the considerably
lower power consumption of FPGAs compared to a computer. The FPGA can be programmed
using the C programming language through vendor supplied development tools. In addition to
the FPGA, development boards, such as the Nexys series by Digilent contain various onboard IO
devices. The devices included with the Spartan 3E Development Board are shown below. Some
of these devices include Analog to Digital converters, RS-232 headers, and Ethernet ports. Also,
the manufacturer sells various IO devices that interface with the FPGA through generic IO ports
available on the development boards.
Figure 1: Xilinx Spartan 3E Starter Board Hardware Features

7
Another advantage to utilizing a development board, specifically one of the Digilent
boards, is that all EE and CPE majors should be familiar with designing applications for a board
due to the required CPE 329 course. This will ensure that students interested in furthering this
part of the SuPER project have some experience with the hardware. Since the project will be
ongoing for a number of years, familiarity with the hardware and firmware writing aspects of this
part of the system will facilitate a smooth transition between graduating seniors and new SuPER
project recruits.
In order to transfer the control and status monitoring program to a development board,
the code needs to be modified to account for the different architecture. One approach is to use the
Xilinx Embedded Development Kit and port the code using the appropriate IP cores and
functions. However, this approach requires the code to be compiled every time a change is made
to any part of the program.
Another solution presents itself in uClinux. uClinux is an open source Linux distribution
[4] built specifically for embedded systems such as a Digilent development board. Since uClinux
is open source, anyone interested in it can view its source code, modify it, and use it in user
applications. The uClinux image is small enough to fit on a development board’s internal flash
memory, which eliminates the need to donwload an image to the board every time the system
starts up. The controlling and monitoring code was written to run on Linux, therefore porting the
code should take considerably less effort than the previous approach. A drawback to this solution
is that uClinux is not officially supported by any companies. However, much like other open
source software communities, there are mailing lists [5] and message boards dedicated to
uClinux and even one specifically targeted towards the Microblaze softcore processor. Another
drawback is that interfacing with any extra IP cores not already supported by uClinux proves to

8
be challenging. IP cores such as the SPI and UART are not available and must instead be written
by the system developers. When solutions to these problems are found, it will be relatively easy
to port software between the laptop running Red Hat Enterprise Linux and the development
board running uClinux.
uClinux has been in development for many years, and has been developed for numerous
platforms by various programmers. This makes finding information and documentation on the
OS sometimes hard to find due to its scattered nature. The Petalogix group have developed their
own distribution of uClinux called Petalinux. The Petalinux distribution is designed to run on
embedded systems using the Microblaze softcore processor. Petalogix was founded by Dr. John
Williams, who also frequenctly answeres questions on the uClinus Microblaze port mailing list.
The mailing list [5] is a great resource to uClinux developers for obtaining and sharing ideas on
uClinux related topics.

9
III. Requirements In his thesis Eran Tal [3] outlines the functions that the control system needs to perform
for whole system:
• Monitor battery status
• Monitor the charging of the battery
• Adjust the PWM output to the DC-DC converter to ensure maximum power
efficiency
• Ensure proper current flow direction
• Acquire and log sensor data
The laptop currently accomplishes these tasks using USB interfaces to the sensors and devices.
One of the advantages to using a development board is the numerous amounts of IO devices
contained on the board. They also have generic IO pins to interface external devices.
The development board used for this project is the Spartan-3e Starter Board from
Digilent Inc. Initially, it was planned to do the project using the Nexys2 board, but time
constraints and lack of documentation steered us towards the Spartan-3e board. The Starter
Board contains more onboard devices than the Nexys2, but the Nexys2 has more 6-pin headers.
The 6-pin headers are designed to interface with Digilent’s Peripheral Modules (PMOD) but, the
individual pins can be used for general purpose IO. The Spartan-3e board has an onboard ADC
and DAC. These can be used to generate the PWM signal needed to drive the DC-DC converter.
The Spartan-3e FPGA will interface directly with the sensors in order to obtain data from them.
This includes the voltage, current, and temperature sensors. As for data logging, the Spartan-3e
has 16 MB of flash storage. This limits the number of logs that the FPGA itself can store. An
external memory interface can be added to give the system more memory to store its logged data.

10
The scope of this project is to install uClinux on an FPGA and provide a foundation for
future students to continue this aspect of the project. We will first follow the procedures outlined
by the guides on the Petalinux website to get the OS running on the FPGA with the OS image
downloaded to the flash memory. Then we will work on interfacing with either the onboard ADC
or a PMOD ADC in order to generate an adjustable PWM signal. We may be able to use the
obp_timer IP core to generate the PWM if we can interface with the memory map of the core
through a program running on uClinux.
We will also examine the input data needed to be logged by the control system to
determine a method to interface with the devices. The control system requires an estimated
combination of 32 inputs or outputs. This is a substantial amount of sensors and data to obtain,
and there are two basic methods for managing that many inputs. One approach is to input
directly to the general purpose IO ports on the board. This would require a separate board
interfacing with the onboard 100-pin header in order to be able to connect the 32 inputs directly.
Another option is to connect the inputs to a MUX type device. A program would select each
input and take sensor data from it. The system itself is not very time sensitive; therefore readings
can be updated at a rate of 0.1 seconds. The onboard clock runs at 50MHz so it can easily handle
the required sensor sampling frequency.

11
IV. System Architecture and Design
Of course, one of the most important parts of embedded system development is design.
Spending time to thoroughly analyze the architecture of uClinux and to provide only the services
needed by an embedded system like a Spartan 3E FPGA and its associated development board
was top priority for the uClinux and Petalogix development teams. Because of this, large
amounts of documentation are available on the Internet detailing every aspect of the boot loaders
and kernels in the uClinux and Petalinux projects [4]. In this section, we will explain how the
various components work together and detail their key roles in the entire architecture.
Xilinx EDK System Block Diagram
One of the main tools that programmers use to develop embedded systems for Xilinx
FPGAs is the Xilinx Embedded Development Kit. This kit not only lets you fine tune every
aspect of your system, but also provides a quick system builder that can create premade systems
that are easy to build using the many available system modules.
The First Stage Boot Loader, or FSBoot, was created entirely in this EDK. FSBoot was
designed by PetaLogix as the primary bootstrap mechanism for the initial MicroBlaze CPU boot.
More specifically, its main purpose is to pull in a main boot loader from an outside source. In
this senior project, UBoot is the main system boot loader, which will be discussed later in the
report. While it may seem like a waste to use two boot loaders to load in the uClinux kernel onto
the Spartan 3E Starter Board, there are several benefits to using FSBoot to pull in UBoot at the
start.

12
First, FSBoot was written specifically for Xilinx FPGAs. Thus, its code footprint is very
small, and it fits comfortably on board block RAM, while the large UBoot and uClinux kernel
images sit in memory. Secondly, UBoot did not have a method for being transferred over to a
Xilinx development board, so a transfer agent was implemented into FSBoot. Specifically, the
serial connection on the Spartan 3E Starter Board became the primary means of downloading
images, such as the UBoot image, to the board through FSBoot. Lastly, FSBoot could take
advantage of the flash memory on the board by allowing itself to be bound to flash memory
instead of block RAM. Now, whenever the corresponding download.bit initiator file was pushed
to the board using Digilent ExPort, it would simply run FSBoot from flash memory without the
need to transfer the FSBoot image to the board every time. This, of course, was a huge
convenience for developers since the bootloaders didn’t have to be redownloaded every time the
kernel changed, as it was usually done in the past.
One of tools that the Xilinx EDK provides developers is a system block diagram, which
displays a high level model of the entire project design. In this case, we will describe the main
components of the FSBoot system block diagram, which are broken up into the three main
classes of memory, processor, and peripherals.
Figure 2: FSBoot Memory Components
The first main class is the system memory. In fact, FSBoot actually contains several
different types of memory, one of which is shown above in Figure 2. The BRAM, or block RAM,

13
is the Spartan 3E Starter Board’s onboard RAM, and is used primarily for storing system data
like hardware configuration information. Also, it has extremely high data rates due to its built in
synchronous FIFOs. It is also very scalable as each module of the block RAM ranges from
18Kbit to 36Kbit in size and can be cascaded to grow even larger. Specific to FSBoot and many
other systems that integrate with the MicroBlaze soft core processor are the data and instruction
memory controllers at the bottom. They simply guide each type of data to the respective memory
spaces in the MicroBlaze processor, which will be discussed below.
Figure 3: Additional FSBoot Memory Space
Extra memory addressing was also built into FSBoot, in case more sophisticated second
stage boot loaders outside of UBoot were needed. FSBoot can access DDR SDRAM chips
provided the board supports them. While the Spartan 3E Starter Board does not have this
capability, the Virtex boards do, so this addition is welcome.
Figure 4: MicroBlaze Soft Core Processor

14
The second main system class is, of course, the processor. FSBoot, written for Xilinx
development boards, took the route of using the MicroBlaze soft core processor. This was simply
a design decision, since the uClinux kernel was actually compatible with MicroBlaze and
PowerPC. In our senior project, however, we welcome this choice since we are intimately
familiar with development systems for it. It also doesn’t hurt that it was designed by Xilinx
specifically for their FPGAs, making it very fast and reliable on their boards. The processor
incorporates RISC based architecture and includes a 5 stage pipeline that simply completes one
instruction per cycle. It is also highly configurable. Nearly everything, from its cache sizes to its
bus interfaces, can be customized. While it has optional support for the EDK memory
management unit IP core, we did not opt to use it in this project.
As can be seen in Figure 4, it is literally the bridge between the system peripherals
(green), and the system memory (blue). The processor can link its data and instruction on-chip
peripheral bus to the main CoreConnect OPB bus for access to a wide range of different modules,
some of which will be described below. Also, MicroBlaze links to the data and instruction
memory bus controllers above it, for fast access to block RAM.
Figure 5: FSBoot Supported Peripherals

15
The last main system class is FSBoot’s supported peripherals. Since FSBoot is still only a
boot loader, the only peripheral needed would be the interface in which it could download the
UBoot image. The primary interface is the UART, but it also supports network transfer of binary
images, so an Ethernet GPIO is also included.
Xilinx EDK Address Mappings
The final requirement for the FSBoot system design is the memory addresses in which all
peripherals are mapped. Figure 6 below details the address locations for these major system
components:
• Flash memory
• Ethernet
• Rotary decoder
• LEDs
• Switches
• DTE serial port
• DDR SDRAM slot
Figure 6: FSBoot Memory Address Mappings

16
The most important thing to note is that the designers of FSBoot maxed out the flash memory at
sixteen megabytes. This is due to the total of FSBoot, UBoot, and kernel images equaling about
six megabytes, not including all the user created drivers and applications that could be added in
the future.
Boot Loader and Kernel Hierarchy
After FSBoot completes its boot process, UBoot is pushed to the board as per our
instructions in the next section and then completely takes over control of the board. UBoot is the
secondary boot loader chosen specifically because of its reliability and ability to adapt to nearly
any embedded architecture. In addition to MicroBlaze and PowerPC, it can also handle x86,
MIPS, and ARM architectures. It is this versatility that compelled the uClinux developers to
integrate it into their tool chain.
Although UBoot has several commands that could be run in its command prompt, one
being a command to erase all flash memory that we will use frequently in kernel development,
the main use is to bind the uClinux kernel to flash memory. Again, a serial connection is the
primary choice to pull the kernel image from the local workstation to the board. Once transfer
completes, UBoot clears the flash memory, assigns the image a checksum and Ethernet MAC
address if network transfer was enabled, and binds the image to a user specified location in flash.
We detail the entire three stage boot process below in Figure 7:

17
Figure 7: Three Stage Boot Flow Process

18
V. Installing uClinux on a Spartan 3E Starter Board Embedded system development is unique in that it combines both software and hardware
development in parallel. Part of the difficulty, then, is finding a balanced work setup that can
speed up the development process of both the software and hardware aspects of an embedded
systems project. The same can be said for installing a Linux variant on a development board like
the Spartan 3E Starter Board. There are many different development setups one can pick from,
but only one reliable and economical choice.
Development Environment vs. Operational Environment
Another unique aspect of this project is that the environment in which the board will
operate may be completely different from the actual development environment. The current
operational environment of the control system code for the SuPER Project is on Linux. We tried
not to eliminate this environment completely when designing the uClinux system, mainly to
accommodate future SuPER Project participants who may not be as familiar with non-Windows
operating systems. This, however, posed a problem. Since uClinux was obviously a Linux
variant, we had to simultaneously develop our code in a Linux environment and test it in a Linux
environment as well.
Our solution involved virtualization of a Linux operating system in a Windows
environment. The most obvious virtualization solution on Windows is Microsoft’s very own
Virtual PC, which is freely available through the Cal Poly Microsoft Developer Network
program. We, however, had more experience with VMWare from the various computer labs on
campus, so decided to work with that.

19
While our blended development environment of both Linux and Windows operating
systems worked very well for compiling and testing, it was not very usable in operation, since
the operator would have to switch between the two operating systems constantly. The operational
environment, then, had to be purely Linux, for the benefit and convenience of the operator and
new users. Lastly, the Digilent Adept software, which downloads data to a Digilent development
board, was written exclusively for Windows, and can only be bypassed by purchasing a $200
cable from Xilinx that works with Linux.
Installing the Xilinx ISE & EDK on a Linux Workstation
The first step to configuring the entire blended OS development environment for this
project was choosing the correct Linux distribution that worked both with uClinux and the Xilinx
ISE and EDK. The choices came down to either Red Hat Enterprise Linux or CentOS 3. Red Hat
Enterprise Linux, however, is not free, so CentOS 3 became our development OS. In VMWare,
installing CentOS 3 was trivial. We simply downloaded a CD image off the Internet and installed
from there.
Installing the Xilinx ISE and EDK is also simple, but there are some things to note during
and after the initial installation. First, the recommended path prefix for uClinux is
/opt/pkg/xilinx , so install the ISE and EDK in version tagged folders under this directory as
follows:
ISE: /opt/pkg/xilinx/ise9.1
EDK: /opt/pkg/xilinx/edk9.1

20
Second, all web updates must be installed immediately after the initial installation. Lastly, before
launching an instance of the EDK, change to the directories in which the ISE and EDK were
installed in a shell client and run the following commands:
[root@localhost ise9.1]# source settings.sh
[root@localhost edk9.1]# source settings.sh
These commands assume that the user is using bash shell. A corresponding settings.csh
works for those using C shell. Also, these source commands must be run for each instance of the
EDK created.
Installing PetaLinux on a Linux Workstation
While uClinux is the Linux variant that we installed on the Spartan 3E Starter Board,
there have been several versions of the distribution over the years. The PetaLinux project was
created to organize the various versions and their precompiled counterparts. The entire
PetaLinux project must be installed on the same workstation and same OS as the Xilinx ISE and
EDK.
The current PetaLinux tarball is available at http://developer.petalogix.com/ and
must simply be extracted in a folder convenient to development, like the user’s home folder. In
addition to PetaLinux, several extra tasks must also be completed to compliment PetaLinux and
the Xilinx EDK. First, a folder named tftpboot must be created at root level of the OS as
follows:
$ su Password: ******** # mkdir /tftpboot # chmod -R 777 /tftpboot

21
This folder will contain all kernel and boot loader images that PetaLinux creates during the
compilation process. This folder name is tied to the PetaLinux setup process, so we recommend
against changing it. Second, like in the case of the Xilinx EDK, every instance of the PetaLinux
setup process must begin with a source command as follows:
$ cd petalinux $ source ./settings.sh
Again, a corresponding settings.csh for C shell users is also included. Lastly, the main
interface for downloading data to the Spartan 3E Starter Board, the RS232 serial port, requires
some type of serial console to communicate with CentOS 3. For this project, we chose the free
Kermit console program, available at http://www.columbia.edu/kermit/ck80.html . After
installation, a script file with all Kermit settings named .kermrc must be created in the user
home directory ~/ exactly as pictured in Figure 8:
Figure 8: Kermit .kermrc Script File
To launch Kermit, change directory to the Kermit installation folder, then type the following
command:
$ ./wermit –c

22
Figure 9 shows what the user terminal should look like with Kermit running:
Figure 9: Instance of Kermit Console Running in Shell
Configuring uClinux for a Spartan 3E Starter Board
Begin by connecting the serial, power, and JTAG cable to the Spartan 3E Starter Board.
The serial cable should be connected to the DTE serial port on the Spartan 3E. Again, before
working with PetaLinux, make sure to always source the settings.sh script in the main
PetaLinux directory. Next, open a terminal and change directories to software/petalinux-
dist . Then run the make menuconfig command as shown in Figure 10:
Figure 10: Setup Commands to Instantiate the PetaLinux Config Menu

23
The main menu for PetaLinux should appear as in Figure 11:
Figure 11: Main Configuration Menu for PetaLinux
In the Vendor/Product Selection menu, PetaLinux offers selections for the Xilinx ML401,
Spartan 3E-500, Spartan 3E-1600, and their various revisions. In Figure 12, we have chosen the
Revision D version of our Spartan 3E Starter Board:

24
Figure 12: Vendor/Product Selection Menu
Return to the main menu and select the Kernel Selection. In our project, we selected the Linux
2.6.x kernel as shown below in Figure 13:
Figure 13: Kernel Selection Menu

25
Exit out of the entire PetaLinux setup screen and save the changes:
Figure 14: Saving PetaLinux Configuration Changes
Change to the directory of the reference designs for the Spartan 3E-500 Revision D and enable
PetaLinux auto configuration by issuing the following commands:
$ cd ../../hardware/reference_designs/Xilinx-Spart an3E500-RevD-edk91 $ petalinux-copy-autoconfig
Return to the PetaLinux Setup menu by changing back to the software/petalinux-dist
directory and using the same make menuconfig command. Select the Kernel Selection menu and
press Y while Customize Vendor/User Settings is highlighted:

26
Figure 15: Returning to the Kernel Selection Menu
Save and exit the PetaLinux Setup menu once again and it will automatically switch to the User
Settings menu:
Figure 16: User Settings Menu

27
Enter the System Settings submenu and make sure all options are set as in Figure 17:
Figure 17: System Settings Menu
Exit and save all configuration changes.
Finally, issue a make all command to compile the kernel images. As with any code,
every change made to the kernel, either by hand or through the PetaLinux Setup menu, must be
followed by a compile. After the compilation completes, your /tftpboot/ folder should include
the files shown in Figure 18:

28
Figure 18: Kernel Images in /tftpboot/ Directory
Before moving on to the actual Spartan 3E configuration and downloading of the
kernel images, be sure to create the download.bit file for the Spartan 3E-500 Revision D board
by opening and updating the reference design that’s located in the hardware directory of the
PetaLinux folder:

29
Figure 19: Updating Bitstream for Reference Design
The download.bit file is the only file required on the Windows side of your development
environment, so transfer it from your virtual machine to Windows as soon as you can.
Continue by starting an instance of Kermit Console in CentOS to prepare for ExPort
file transfer. Switch to Windows and run the Digilent Adept Suite program ExPort for
downloading data to Xilinx FPGAs. Find the download.bit file created above and download it
to the Spartan 3E Starter Board:

30
Figure 20: Digilent Adept Suite Program ExPort
The Kermit window should show the First Stage Boot Loader executing, as shown in Figure 21.
Press S after the bit file finishes downloading:
Figure 21: FS-BOOT Executing at Startup

31
On a separate terminal session, input the following command to transfer the second stage boot
loader UBoot to the board:
$ cat /tftpboot/u-boot.srec > /dev/ttyS0
In the Kermit window, a spinning character should appear to confirm that the image is indeed
being transferred. Since this is the first time that you should be setting up UBoot, it should
default to the UBoot environment and shell as shown in Figure 22:
Figure 22: UBoot Default Environment
The UBoot environment variables specific to the Spartan 3E Starter Board were compiled into a
separate script file alongside the uClinux compilation, so the next step is to transfer that script to
the board and bind it to flash memory. Input the following command into UBoot to load the
script. A follow up message should appear just after the command confirming that the board is
ready for transfer:
U-Boot> loadb 0x24000000 ## Ready for binary (kermit) download to 0x2400000 0 at 115200 bps...

32
Next, press and hold the Control and \ buttons down on your keyboard, and then press C. This
will escape out to the Kermit shell, allowing you to send files to the running UBoot. Run the
following command to transfer the UBoot script to the board:
C-Kermit> send /bin /tftpboot/ub.config.img
Typing connect in the Kermit window will connect you back to the running UBoot session and
show you the amount of bytes transferred to the board, as shown in Figure 23:
Figure 23: Transferring Files to UBoot
Issue the following command to run the script:
U-Boot> autoscr $(fileaddr)
The script should output configuration lines as shown in Figure 24:
Figure 24: UBoot Configuration Script Output

33
Input the loadb command with a 0x24000000 starting address in the UBoot shell. Enter the
Kermit session and transfer the UBoot binary image to the board using this command:
C-Kermit> send /bin /tftpboot/u-boot-s.bin
Connect back to UBoot after the transfer completes and issue the following commands to bind
the image to flash memory:
U-Boot> protect off $(bootstart) +$(bootsize) U-Boot> erase $(bootstart) +$(bootsize) U-Boot> cp.b $(clobstart) $(bootstart) $(filesize)
Finally, transfer the kernel image image.ub to the board using Kermit and bind it to flash with
the following commands:
U-Boot> protect off $(kernstart) +$(kernsize) U-Boot> erase $(kernstart) +$(kernsize) U-Boot> cp.b $(clobstart) $(kernstart) $(filesize)
Now, whenever the download.bit file is downloaded to the board using ExPort, the board will
automatically boot into uClinux, as shown in Figure 25 below:
Figure 25: Automatically Booting Into uClinux

34
When prompted for a username, enter root . For the password, again input root . After the login,
a generic shell should be available to you for browsing the uClinux file system and running
applications.
Clearing Flash Memory and Resetting UBoot Environment Variables
Since every kernel change requires a recompile, retransferring a newly updated kernel
to the Spartan 3E Starter Board is a common task. Unfortunately, however, this retransfer
requires you to clear the flash memory and start fresh. Without UBoot, this would require
manually finding the start and end memory addresses that the kernel occupies and freeing every
block. Thankfully, UBoot has a built in command for clearing all environment variables. Simply
issue:
U-Boot> run eraseenv
Be sure to execute this command before transferring over an updated kernel image. Also, the
entire process of running the UBoot configuration script and binding the UBoot binary image to
flash must be completed again as well.

35
VI. Modifying uClinux While an embedded operating system like uClinux comes standard with well known Unix
applications like mkdir , touch , and vi , the main benefit is to be able to write applications that
have specific goals. Of these independently developed applications, the most exciting and
challenging are those that interface directly with the hardware, which is at the heart of embedded
system design. Our final task in our senior project, then, was to create an application that could
create a pulse width modulated signal. This required not only the application itself, but the SPI
drivers for uClinux. In this section, we will describe the general process to create both drivers
and applications.
Installing Independent Drivers into uClinux
Creating a new driver for uClinux is unfortunately not well documented. Most new
drivers begin as an idea on a forum or mailing list of some kind and are then integrated into a
new kernel release by the uClinux developers. Alternatively, writing a kernel driver
independently can be achieved with sufficient knowledge of the architecture. Also, if the driver
is emulating a module from another embedded system, such as an independently written SPI
driver for uClinux that tries to mimic the Xilinx SPI interface in the EDK, much of the work is
already done. All that is left is to port the existing code to something compatible with uClinux
and its cross compiler. This is especially easy with EDK modules since they are often written in
C or C++.

36
Creating User Applications for uClinux
uClinux stores all user applications in the ‘$PETALINUX/software/user-apps’
directory. This is where any custom user applications can be placed. In order to create a template
for a new application, the following commands must be issued in a command prompt after
uClinux is installed:
$ cd $PETALINUX/software/user-apps $ petalinux-new-app my_new_app New application template successfully created in so ftware/user-apps/my_new_app See my_new_app/README for what to do next.
In this example, replace my_new_app with the desired application name. This command will
create a new directory for the application in $PETALINUX/software/user-apps/my_new_app. In
order to add an already existing application to uClinux, enter the exact same commands into the
prompt. After adding the application, copy the application’s source files to the newly created
directory and edit the Makefile to include the new application in its build rules. This Makefile
automatically adds the necessary flags to the compilation process in order to include the libraries
needed to run the application on the Spartan 3E architecture. This entire compilation process is
handled by the uClinux cross compiler provided by the uClinux developers, which is executed
during the kernel build process. This cross compiler allows C code written in a Linux
development environment running on Intel architecture to run as intended on a different
architecture, like the Xilinx Spartan 3E.
After an application is added, it must be installed into the root filesystem. In order to do
this, it must first be installed into the romfs of the target system, which is then added to the
kernel image at the image build process. To install the application, enter the following
commands into the prompt:
$ cd $PETALINUX/software/user-apps/my_existing_app $ make romfs

37
VII. Testing
After consulting with the uClinux Microblaze mailing list, we discovered that there were
a few tests included with the uClinux distribution we used. These test included using General
Purpose Input and Outputs (GPIO) to interface with various peripherals on the Spartan-3E starter
board. One of the tests took input from the onboard switches and turned on the appropriate LEDs
corresponding to flipped switches. Another test measured the direction and amount of turns that
the user turned the onboard rotary switch. We decided to perform two tests to provide a proof of
concept for general purpose input and output on the starter board.
One of the functions the FPGA will provide is a PWM signal. Since a PWM requires
voltage swings from Vcc to ground and nothing in between, we decided to use GPIOs and a
general purpose pins order to test. One of the next steps of the project in general will be to use an
SPI core along with the onboard DAC to generate the signal. However, we had difficulties trying
to interface with the SPI core through uClinux. We decided to simulate an output using a logic
high signal. The other function will be to read sensor data from the various SuPER system
sensors. We simulated this using two general purpose pins on the board; one that reads a signal
and one that outputs a signal.

38
The following code was provided in the uClinux source distribution. It outlines the
process of reading from switches and writing to leds using GPIOs. We used this example as a
basis for the test programs we wrote.
Figure 26: GPIO Test Application

39
Test 1: Signal Out
This test simply outputs a logic high to a general purpose pin defined in the constraints
file.
Figure 27: Signal Out Test Application
After recompiling the uClinux image, we downloaded it to the board and verified that the test
program functions correctly and outputs a logic high signal at 3.3 V. Call this application by
running this command in uClinux:
$ sigout <signal rate in Hertz> <duty cycle in perc ent>

40
Test 2: Signal In and Out
This test checks for a logic high or low on an input pin and outputs the corresponding
signal to another pin.
Figure 28: Signal IO Test Application
After recompiling the uClinux image, we downloaded it to the board and verified that the test
program functions correctly. The program took an input at 3.3 V or ground and outputted the
same logic level to another pin.

41
VIII. Recommendations for Future Expansion
uClinux is flexible enough to support every piece of hardware on the Spartan 3E Starter
Board. As long as drivers are written for it, every single hardware feature can be utilized for
expanding the system’s capabilities. In this section, we will explore two possible expansions that
will enhance the functionality of the system and make the system more convenient and easy to
use.
Adding a Monitor and Keyboard
As our project stands now, our board must interface with a laptop through a serial cable
to interact with a keyboard and screen. Of course, this eliminates the power saving benefits of the
standalone board since the laptop is still running. We were testing a possible solution during the
middle of the project using the PS2 interface for an external keyboard and VGA port for a text
mode display on a Nexys 2 development board, but ran into problems with the VGA text mode
implementation. At that time, there was simply no text mode available for the VGA connection
on Xilinx development boards. We feel, however, that adding this functionality will not only
make the system more independent, but also more convenient to end users, since a laptop will
not be required at runtime to run the control system.
External I/O Signal Multiplexer Another aspect of our project that we began discussing near the end was some way to
control all of the signals that the original control system managed with only one development
board. Due to the small number of I/O ports on the Spartan 3E Starter Board, it became obvious

42
that some kind of signal multiplexing had to occur somewhere in the I/O process. There were
two approaches that we talked about at meetings that could solve this particular problem, one
being an internal solution and the other being external. Ideally, an internal solution would be
preferred since less external circuitry would equate to a larger mean time to failure. But an
external solution has the benefit of modularity, which also makes it easy to debug, since it can
essentially be tested independently from the board.
An elegant external solution would be required here, since simply chaining more and
more converters from the board’s 6-pin headers is not practical and not very scalable. Any type
of large mux would do the job, since the board clock moves slowly enough that signal
synchronization would be a nonissue. Digilent provides a PMOD switch that could help in
designing this mux. It would still be a challenge, though, especially with the large amount of I/O
signals we have for the control system. While this type of project fits perfectly with an Electrical
Engineer, a Computer Engineer could also assist with an internal solution.

43
IX. Conclusion
The scope of this project involved replacing the current control system of the SuPER
Project, which is running on a laptop, with a low power development board running uClinux.
The benefit, as stated, would not only drastically reduce power consumption in the SuPER
Project by removing the laptop and replacing it with a device that only uses about one Watt of
power, but would also increase the mean time to failure since a development board like the
Spartan 3E Starter Board has far less parts than a laptop.
We first began our project with a Nexys 2 board, but soon realized after a few weeks that
uClinux was highly specific in which interfaces it needed to boot, most specifically an Ethernet
jack and a serial connection. We then moved on to the Spartan 3E Starter Board, which had both
of these hardware features, for development. After about three weeks, we had a generic build of
uClinux autobooting and running correctly on the board.
We then concluded our project with the design of test applications that could interface
with hardware on the board, such as the LEDs and switches, and generate PWM signals based on
a given duty cycle. This report heavily addresses not only the process of getting uClinux booting
on the board, but also the architecture of its boot loaders and the modification of its kernel.
Our main source of error was the lack of documentation on a variety of topics dealing
with uClinux, which included, but were not limited to, binding uClinux to flash, downloading
images through a network interface, and compiling drivers specific to certain board hardware
devices, like the LEDs and switches. Our best resource during the project was the uClinux
mailing list, which not only contained a wealth of information, but also introduced us to the main
developers and other very helpful engineers that work with uClinux and embedded systems on a
daily basis. We only hope that our report adds new knowledge to that fantastic repository.

44
APPENDIX
Bibliography
[1] Harris, James G. “White Paper for Sustainable Power for Electrical Resources – SuPER”
[http://courseware.ee.calpoly.edu/~jharris/research/super_project/white_paper_susper.pdf]
[2] Sheffield, Tyler “Cal Poly SuPER System Simulink Model and Status and Control System”
[http://courseware.ee.calpoly.edu/~jharris/research/super_project/ts_thesis.pdf]
[3] Tal, Eran “SuPER System Prototype Design and Implementation”
[http://courseware.ee.calpoly.edu/~jharris/research/super_project/et_thesis.pdf]
[4] Petalinux
[http://www.petalogix.com/]
[5] uClinux Microblaze Port list archive
[http://www.itee.uq.edu.au/~listarch/microblaze-uclinux/archive/2008/05/]
[6] Spartan-3E Starter Board User Guide
[http://digilentinc.com/Data/Products/S3EBOARD/S3EStarter_ug230.pdf]
[7] Makefile Howto
[http://www.wlug.org.nz/MakefileHowto]
[8] APT Howto
[http://www.debian.org/doc/manuals/apt-howto/ch-apt-get.en.html#s-install]

45
HOWTOS
Editing Makefiles (from [7])
Makefiles are easy. In fact, to build a simple program that doesn't depend on any libraries, you
don't even need a makefile. make(1) is smart enough to figure it all out itself. For instance, if you
have a file "foo.c" in the current directory:
$ ls foo.c $ make foo cc foo.c -o foo
make(1) will detect the type of file and compile it for you, automatically naming the executable
the same as the input file (gcc(1) foo.c will give you a file called a.out unless you manually
specify a name for it). If you need libraries, you can specify them by setting the LDFLAGS
variable on the command line.
Of course, most useful projects contain more than one file. A makefile describes the
dependencies between files. It is called Makefile (with a capital M). Each line will typically
consist of a filename, a colon and a list of dependencies. for instance, a simple make file to link
together two object files foo.o and bar.o might look like:
program: foo.o bar.o
Each filename (before the colon) is called a target. You can make a specific target by executing
$ make target
make is smart enough to use the first rule in the Makefile as the default action, so:

46
$ ls Makefile foo.c bar.c $ make cc bar.c -c -o bar.o cc foo.c -c -o foo.o cc foo.o bar.o -o program
Dynamic updating
Occasionally you might want to specify something special to happen, for a specific file. This can
be done by providing some rules to build that target. This is done indented, on the next line after
the dependencies are listed. Our sample make file again:
program: foo.o bar.o bar.c: echo 'char *builddate="' `date` '";' >bar.c
Note that the line that begins "echo" must be indented by one tab. If this isn't done make(1) will
abort with a weird error message like "Missing delimiter". The echo line makes a one line C file
with a variable called "builddate", set to the current date and time. This is a useful thing to do for
your program if you wanted to know when this particular version was compiled. (Not that this is
the only way, or in fact the best way to get this information, but it's a good example.)
Running this would produce:
$ make echo 'char *builddate="' `date` '"' >bar.c cc -c -o bar.o bar.c cc -c -o foo.o foo.c cc foo.o bar.o -o program
Phony targets
You can have "phony" targets -- targets which don't actually create a file, but do something.
These are created like normal targets: for instance, to add a "all" target to our makefile we'd add
(probably at the top, so it becomes the default target):

47
all: foo
This rule won't run if there exists a file called "all" in the directory (if someone was stupid
enough to create one somehow). So we can tell make(1) that this is a phony target and should be
rebuilt always this is by using the target .PHONY. so, we can add to our Makefile:
.PHONY: all
To add a clean target is fairly simple too, add:
clean: rm -f bar.o bar.c foo.o foo.c
and add clean to the list of phony targets:
.PHONY: all clean
Selective building
Why use a makefile, instead of a script to rebuild everything from scratch?
If you have a rule that reads
objectfile.o: foo.c foo.h bar.c bar.h Makefile
then make(1) will check the last modification date of objectfile.o against the last modification
date of all the files that follow it (foo.c, foo.h, bar.c, bar.h and the Makefile itself). If none of
these things have changed, then it won't recompile objectfile.o.
Build lines like this with careful reference to #includes in your source - if your foo.h #includes
bar.h, it has to be on the Makefile line - otherwise, changes to bar.h won't cause a recompile of
objectfile.o and you might get confused as to why your constants aren't what you thought they
should be.

48
Or, you could have make determine all your header file dependencies for you! If foo.h #includes
bar.h, and bar.h #includes another.h, which #includes etc.h, it could very quickly become
difficult to keep track of it all. Not to mention it may result in huge dependency lines! Instead,
you can have a header file as a target and list its #included files as its dependencies. Then use the
'touch' command to update the timestamp. For example, if foo.c #includes foo.h, and both foo.h
and bar.c #include bar.h, we could use this Makefile:
executable: foo.o bar.o $(CC) foo.o bar.o -o executable foo.o: foo.c foo.h Makefile bar.o: bar.c bar.h Makefile foo.h: bar.h touch foo.h bar.h:
So if you edit bar.h to change some constants or function definitions, Make will see that foo.h
needs to be updated and 'touch' it. Then it will know it must also update foo.o in (in addition to
bar.o) since foo.h appears new. This way each target only lists files that it is directly dependent
on. Let make figure out the rest -- that's what it's supposed to do!
Makefiles in subdirectories
With larger projects you often have subdirectories with their own Makefile. To allow make to
run these Makefiles with the options passed to make use the $(MAKE) variable. This variable
actually callse a second make process to make the Makefile in the subdirectory. To specify the
Makefile's subdirectory use the -C option of make.
Example Makefile:
all: Documentation/latex/refman.pdf install: Documentation/latex/refman.pdf
cp Documentation/latex/refman.pdfDocume ntation/!KeithleyMeter.pdf Documentation: Doxyfile Makefile src/keit hleyMeter.cc hdr/keithleyMeter.h

49
# Dosen't use all the options you passed to make make clean # make the Documentation folder /Applications/Doxygen.app/Contents/Resource s/doxygen Documentation/latex/refman.pdf: Documentation # Uses the options you passed to make $(MAKE) -C Documentation/latex clean: rm -rf Documentation
For a counter-argument against having separate make processes for sub-directories (and instead
using makefile fragments but only one make process), see Recursive Makefile considered
harmful (PDF)
Rules
The real power from makefiles comes when you want to add your own "rules" for files. If we
have a program called "snozzle" that takes a ".snoz" file and produces a ".c" file we can add:
%.c: %.snoz snozzle $< -o $@
$< expands to the first dependency, and $@ the target. So, if foo.c is built from foo.snoz we can
now:
$ ls Makefile foo.snoz $ make snozzle foo.snoz -o foo.c cc -c -o foo.o foo.c echo 'char *builddate="' `date` '"' >bar.c cc -c -o bar.o bar.c cc foo.o bar.o -o foo rm foo.c
Note that foo.c is removed by make at the end -- make(1) removes intermediate files itself when
it's done. Smart, eh?

50
Environment Variables
The only other major thing left to mention about Make is environmental variables. It uses
$(variable) as an expando. thus the rule:
%c: %.snoz snozzle $(SNOZFLAGS) $<
would let you specify the arguments to snozzle. This is useful if you call snozzle in multiple
places, but want to be able to make one change to update the flags.
make(1) uses these variables for its compilers. The compiler it uses for compiling C is "CC",
You can set the environment variable "CC" to your own favourite C compiler if you so wish.
CFLAGS is used for the flags to the C compiler. Thus setting CFLAGS to "-g -Wall" will
compile all programs with debugging (-g) and with all warnings enabled (-Wall). Environment
variables can be defined in make by using "VARIABLE=value" for example:
CFLAGS=-g -Wall
So, our full make file would become:
CFLAGS=-g -Wall SNOZFLAGS=--with-extra-xyzzy all: program clean: rm -f foo.c foo.o bar.c bar.o .PHONY: clean all program: foo.o bar.o bar.c: echo 'char *builddate="' `date` '";' >bar.c %.c: %.snoz snozzle $(SNOZFLAGS) $< -o $@
• CPPFLAGS command line flags to cpp
• CFLAGS command line flags to cc
51
• CXXFLAGS command line flags to c++
• LDFLAGS command line flags to ld
• ASFLAGS command line flags to as
If you specify your own command line you will have to explicitly include these variables in it.
You can also check if an environment variable has been set and initialise it to something if it has not. ie.
DESTDIR ?= /usr/local
will set DESTDIR to /usr/local if it is not already defined
To append to the environment variables use the += operator:
CFLAGS += -g -Wall
This allows the user to specify system specific optimizations in their shell environment.
Note : As you may have noticed, make uses $ to identify variables - both environment and defined in the file. To put a literal $ in a makefile, use $$. However, bash also uses $ to identify variables, and will consume the $ when it is passed to whatever program you're running. To therefore pass a literal $ to a program you must use \$$ - note the single \, not double. - OrionEdwards
An example makefile
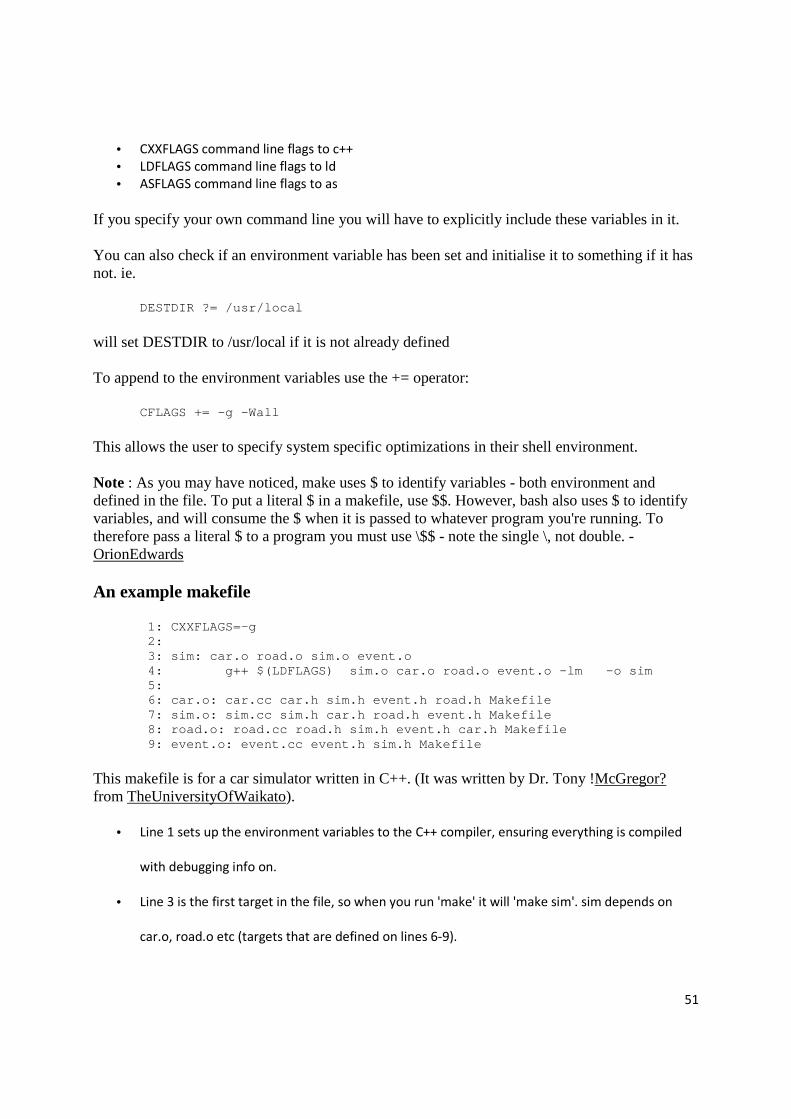
1: CXXFLAGS=-g 2: 3: sim: car.o road.o sim.o event.o 4: g++ $(LDFLAGS) sim.o car.o road.o event .o -lm -o sim 5: 6: car.o: car.cc car.h sim.h event.h road.h Makefi le 7: sim.o: sim.cc sim.h car.h road.h event.h Makefi le 8: road.o: road.cc road.h sim.h event.h car.h Make file 9: event.o: event.cc event.h sim.h Makefile
This makefile is for a car simulator written in C++. (It was written by Dr. Tony !McGregor? from TheUniversityOfWaikato).
• Line 1 sets up the environment variables to the C++ compiler, ensuring everything is compiled
with debugging info on.
• Line 3 is the first target in the file, so when you run 'make' it will 'make sim'. sim depends on
car.o, road.o etc (targets that are defined on lines 6-9).
52
• Line 4 is indented; because we want to add extra smarts to the compiling of sim (we want to link
to the math library libm.a); so when 'make sim' is executed and the .o's are up to date, that line
will be executed.
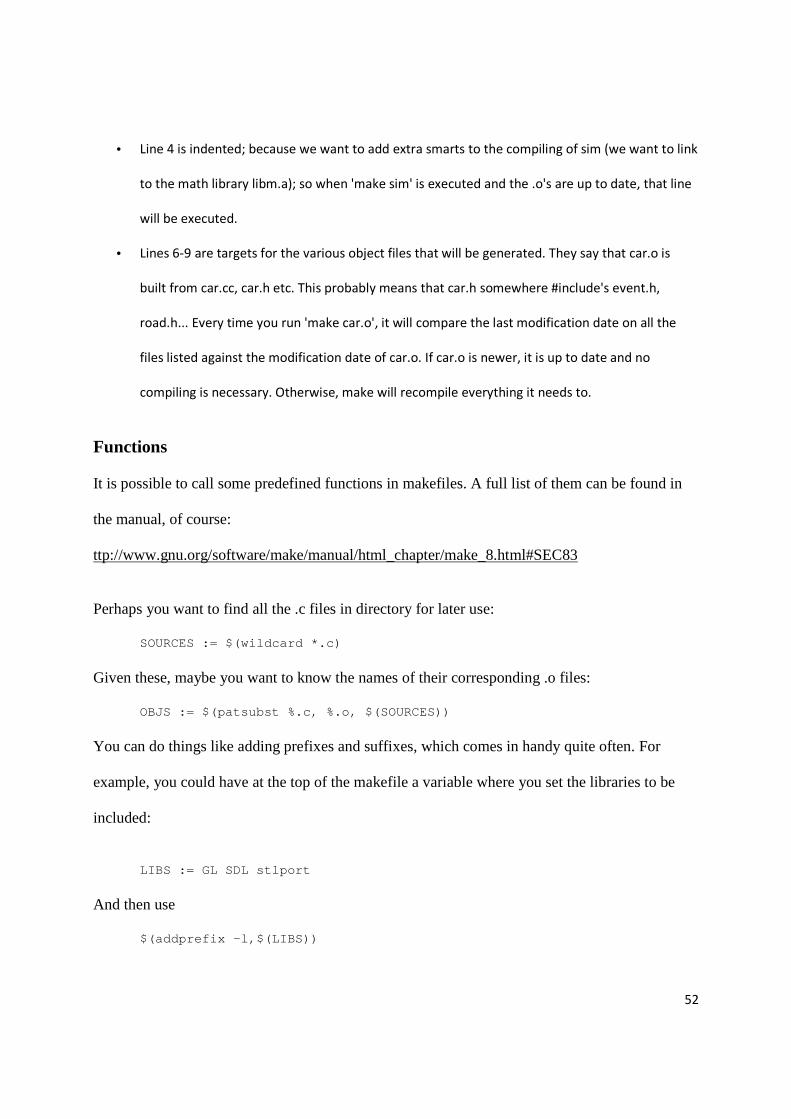
• Lines 6-9 are targets for the various object files that will be generated. They say that car.o is
built from car.cc, car.h etc. This probably means that car.h somewhere #include's event.h,
road.h... Every time you run 'make car.o', it will compare the last modification date on all the
files listed against the modification date of car.o. If car.o is newer, it is up to date and no
compiling is necessary. Otherwise, make will recompile everything it needs to.
Functions
It is possible to call some predefined functions in makefiles. A full list of them can be found in
the manual, of course:
ttp://www.gnu.org/software/make/manual/html_chapter/make_8.html#SEC83
Perhaps you want to find all the .c files in directory for later use:
SOURCES := $(wildcard *.c)
Given these, maybe you want to know the names of their corresponding .o files:
OBJS := $(patsubst %.c, %.o, $(SOURCES))
You can do things like adding prefixes and suffixes, which comes in handy quite often. For
example, you could have at the top of the makefile a variable where you set the libraries to be
included:
LIBS := GL SDL stlport
And then use
$(addprefix -l,$(LIBS))

53
in a later rule to add a -l prefix for every library mentioned in LIBS above.
Finding files in multiple directories is a good example of the usage of foreach
DIRS := src obj headers FILES := $(foreach dir, $(DIRS), $(wildcard $(dir)/ *))
Automatic dependency calculation
If you are creating a Makefile for C/C++ gcc can calculate dependency information for you. The
quickest way to get this going is to add the -MD flag to your CFLAGS first. You will then need
to know the names of the .d files in your makefile. I do something like this:
DEPS := $(patsubst %.o,%.d,$(OBJS))
Then near the end of the makefile, add an
-include $(DEPS)
It might also help to make a 'deps' target:
deps: $(SOURCES) $(CC) -MD -E $(SOURCES) > /dev/null
'-E' tells gcc to stop after preprocessing. When using -E, the processed C file is sent to STDOUT.
Therefore to avoid the mess on the screen, send it to /dev/null instead. Using this command all of
the *.d files will be made.

54
Install Software packages using apt-get (from [8])
1. Updating the list of available packages
The packaging system uses a private database to keep track of which packages are installed,
which are not installed and which are available for installation. The apt-get program uses this
database to find out how to install packages requested by the user and to find out which
additional packages are needed in order for a selected package to work properly.
To update this list, you would use the command apt-get update . This command looks for the
package lists in the archives found in /etc/apt/sources.list .
It's a good idea to run this command regularly to keep yourself and your system informed about
possible package updates, particularly security updates.
2. Installing packages
Finally, the process you've all been waiting for! With your sources.list ready and your list of
available packages up to date, all you have to do is run apt-get to get your desired package
installed. For example, you can run:
# apt-get install xchat
APT will search it's database for the most recent version of this package and will retrieve it from
the corresponding archive as specified in sources.list . In the event that this package
depends on another -- as is the case here -- APT will check the dependencies and install the
needed packages. See this example:

55
# apt-get install nautilus Reading Package Lists... Done Building Dependency Tree... Done The following extra packages will be installed : bonobo libmedusa0 libnautilus0 The following NEW packages will be installed: bonobo libmedusa0 libnautilus0 nautilus 0 packages upgraded, 4 newly installed, 0 to r emove and 1 not upgraded. Need to get 8329kB of archives. After unpackin g 17.2MB will be used. Do you want to continue? [Y/n]
The package nautilus depends on the shared libraries cited, therefore APT will get them from
the archive. If you had specified the names of these libraries on the apt-get command line,
APT would not have asked if you wanted to continue; it would automatically accept that you
wanted to install all of those packages.
This means that APT only asks for confirmation when it needs to install packages which weren't
specified on the command line.
The following options to apt-get may be useful:
-h This help text. -d Download only - do NOT install or unpack a rchives -f Attempt to continue if the integrity check fails -s No-act. Perform ordering simulation -y Assume Yes to all queries and do not promp t -u Show a list of upgraded packages as well
Multiple packages may be selected for installation in one line. Files downloaded from the
network are placed in the directory /var/cache/apt/archives for later installation.
You can specify packages to be removed on the same command line, as well. Just put a '-'
immediately after the name of the package to be removed, like this:
# apt-get install nautilus gnome-panel- Reading Package Lists... Done Building Dependency Tree... Done The following extra packages will be installed : bonobo libmedusa0 libnautilus0

56
The following packages will be REMOVED: gnome-applets gnome-panel gnome-panel-data g nome-session The following NEW packages will be installed: bonobo libmedusa0 libnautilus0 nautilus 0 packages upgraded, 4 newly installed, 4 to r emove and 1 not upgraded. Need to get 8329kB of archives. After unpackin g 2594kB will be used. Do you want to continue? [Y/n]
See section Removing packages, Section 3.3 for more details on package removal.
If you somehow damage an installed package, or simply want the files of a package to be
reinstalled with the newest version that is available, you can use the --reinstall option like
so:
# apt-get --reinstall install gdm Reading Package Lists... Done Building Dependency Tree... Done 0 packages upgraded, 0 newly installed, 1 rein stalled, 0 to remove and 1 not upgraded. Need to get 0B/182kB of archives. After unpack ing 0B will be used. Do you want to continue? [Y/n]
3. Removing packages
If you no longer want to use a package, you can remove it from your system using APT. To do
this just type: apt-get remove package . For example:
# apt-get remove gnome-panel Reading Package Lists... Done Building Dependency Tree... Done The following packages will be REMOVED: gnome-applets gnome-panel gnome-panel-data g nome-session 0 packages upgraded, 0 newly installed, 4 to r emove and 1 not upgraded. Need to get 0B of archives. After unpacking 14 .6MB will be freed. Do you want to continue? [Y/n]
As you can see in the above example, APT also takes care of removing packages which depend
on the package you have asked to remove. There is no way to remove a package using APT
without also removing those packages that depend on it.
57
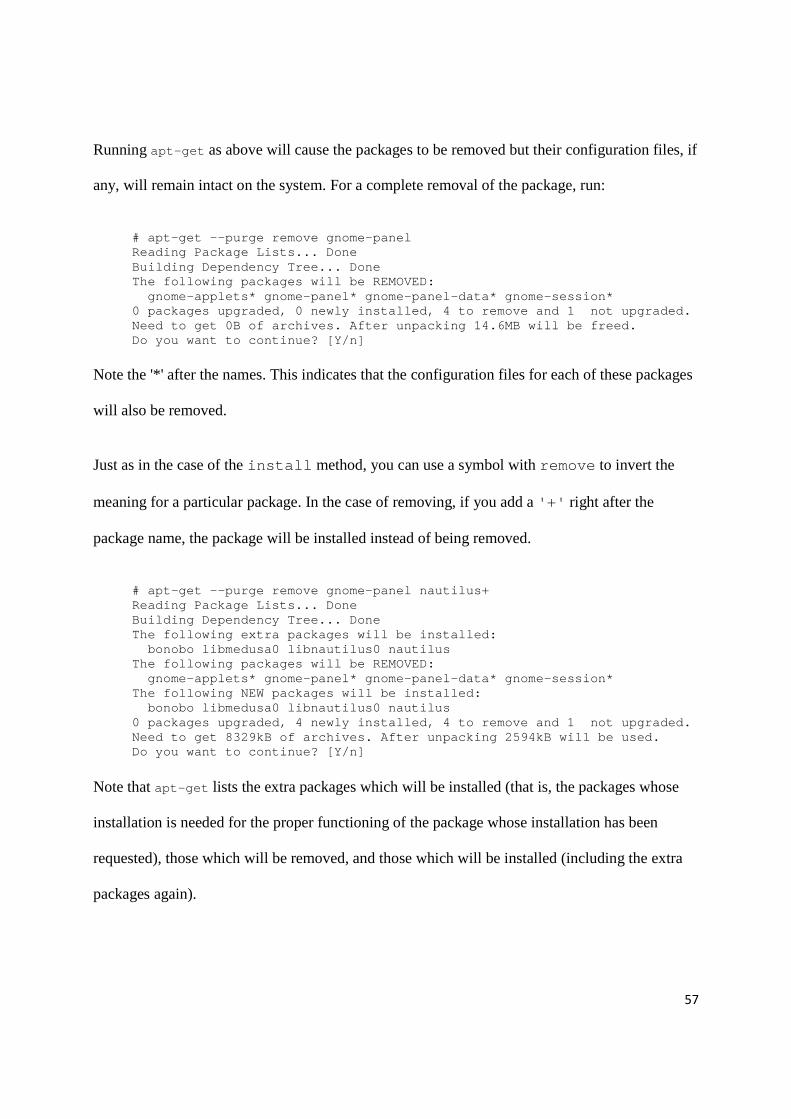
Running apt-get as above will cause the packages to be removed but their configuration files, if
any, will remain intact on the system. For a complete removal of the package, run:
# apt-get --purge remove gnome-panel Reading Package Lists... Done Building Dependency Tree... Done The following packages will be REMOVED: gnome-applets* gnome-panel* gnome-panel-data * gnome-session* 0 packages upgraded, 0 newly installed, 4 to r emove and 1 not upgraded. Need to get 0B of archives. After unpacking 14 .6MB will be freed. Do you want to continue? [Y/n]
Note the '*' after the names. This indicates that the configuration files for each of these packages
will also be removed.
Just as in the case of the install method, you can use a symbol with remove to invert the
meaning for a particular package. In the case of removing, if you add a '+' right after the
package name, the package will be installed instead of being removed.
# apt-get --purge remove gnome-panel nautilus+ Reading Package Lists... Done Building Dependency Tree... Done The following extra packages will be installed : bonobo libmedusa0 libnautilus0 nautilus The following packages will be REMOVED: gnome-applets* gnome-panel* gnome-panel-data * gnome-session* The following NEW packages will be installed: bonobo libmedusa0 libnautilus0 nautilus 0 packages upgraded, 4 newly installed, 4 to r emove and 1 not upgraded. Need to get 8329kB of archives. After unpackin g 2594kB will be used. Do you want to continue? [Y/n]
Note that apt-get lists the extra packages which will be installed (that is, the packages whose
installation is needed for the proper functioning of the package whose installation has been
requested), those which will be removed, and those which will be installed (including the extra
packages again).

58
Software Versions
This project uses the following software versions for development [4][5]:
1. Xilinx EDK 9.1.02i 2. PetaLinux-v0.30-rc1 3. Linux Kernel 2.6 4. U-Boot-2.34.5 5. gcc-3.4.1

59
READMES
Attached to this report are these README files [4]:
1. README_PetaLinux.txt 2. README_MicroBlaze.txt 3. README_userapps.txt 4. README_Linux26xx.txt

60
PetaLinux-dist/distribution =========================== Contents -------- 1) Instructions for compiling 2) Changing the applications/kernel-options/librari es 3) Documentation 1) Instructions for Compiling ----------------------------- 1. You will need a cross-compiler package for you r target. Many binary tool packages exists specifically for compilin g uClinux. Install that in the standard way first. For example, i f you are targeting m68k or ColdFire systems then you can use the m68k- elf-tools binary packages of www.uclinux.org. 2. If you have not un-archived the source package then do that now. It is a gziped tar image, so do: tar xvzf uClinux-dist-XXXXXXXX.tar.gz This will dump the source into a "uClinux-dist " directory. You can do this into any directory, typically use your own user login. (I don't recommend devloping as root, i t is a bad pactice, and it will bite you one day!) 3. Cd into the source tree: cd uClinux-dist 4. Configure the build target: make xconfig You can also use "make config" or "make menuco nfig" if you prefer. The top level selection is straight forward if you know the vendor of the board you want to compile for. You can cho ose also to modify the underlying default kernel and application conf iguration if you want. At first it is suggested that you use the defa ult configuration for your target board. It will almost certainly wo rk "as is". You can also select between different kernel v ersions and libraries, at this top level. Not all kernel versions sup port all boards, as a general rule choose 2.4.x. Also typically you would use glibc only on target processors that support virtual memory (x86, SH4, XSCALE). Most MMUless processors use uClibc. If you cho ose a combination that

61
doesn't have a default configuration file then the xconfig step will issue a message letting you know. Based on what platform you choose in this step the build will generate an appropriate default application set. Sometimes a number of questions will appear af ter you 'Save and Exit'. Do not be concerned, it just means that some n ew config options have been added to the source tree that do not have defaults for the configuration you have chosen. If this happen s the safest option is to answer 'N' to each question as they appear. 5. Build the dependencies: make dep 6. Build the image: make Thats it! The make will generate appropriate binary images for the target hardware specified. All generated files will be placed und er the "images" directory. The exact files vary from target to target, typic ally you end up with something like an "image.bin" file. How to load and run the generated image will depe nd on your target system hardware. There are a number of HOWTO documents u nder the Documentation directy that describe how to load and run the ima ge on specific boards. Look for a file named after your target board. 2) Changing the Applications/Kernel/Libraries --------------------------------------------- You can modify the kernel configuration and appli cation set generated for your target using the config system. You can conf igure by running one of the following three commands: make xconfig - graphical X11 based co nfig make menuconfig - text menu based config make config - plain text shell scrip t based config Xconfig is by far the simplest to use, I would re ccomend using that if you can. The key options under the "Target Platform Select ion" menu are the following: Customize Kernel Settings Selecting this option run the standard Linux kernel config. Customize Vendor/User Settings Selecting this option will run a config ure process allowing you to enable or disable individual app lications and libraries.

62
Use the online "Help" if unsure of what a config uration option means. When you 'Save and Exit' the build system will r un you through the configs you have selected to customise. 3) Documention -------------- There is an assortment of documentaion files unde r the Documentaion directory. The more interresting ones are: SOURCE -- file at the top level gives a bri ef run down of the structure of this source distribu tion package. Documentation/Adding-User-Apps-HOWTO -- description of how to add a new a pplication into the config and build setup of the dis tribution. Documentation/Adding-Platforms-HOWTO -- description of how to add a new v endor board config to the distribution. Documentation/<BOARD>-HOWTO -- describes building and loading fo r a particular board.

63
The Microblaze Platform ======================= (c) 2005 John Williams <[email protected]> Any new platforms added to Microblaze should use th e auto-configuration architecture. This is a mechani sm whereby the EDK tools (specifically libgen) are used to output a co nfiguration file - auto-config.in - that completely specifies all para meters of the target hardware. By including this file into the u Clinux kernel build, we avoid the tedious and error-prone task of setting these parameters manually. There is already a generic auto-configured platform in the source tree - uclinux-auto. Use this as a starting point to cr eate your own. The process is best described by example. Here, we wil l add support for a hypothetical new platform, which we will call NewPl atform. 1. Create a vendors subdirectory for the new platfo rm. These live in the uClinux-dist tree. For example, a new Xilin x board directory might be created under uClinux-dist/vendors/Xili nx/NewPlatform. $ cd uClinux-dist/vendors/Xilinx $ cp -rf uclinux-auto NewPlatform 2. Create a new kernel directory for the board. Ag ain, this is based on the uclinux-auto platform: $ cd uClinux-dist/linux-2.4.x/arch/microblaze/pla tforms $ cp -rf uclinux-auto NewPlatform 3. Add your new platform to the list of supported p latforms. First, edit the file "linux-2.4.x/arch/microblaze/Board s.mk". Add your new board like this: ifdef CONFIG_NEWPLATFORM PLATFORM := NewPlatform endif A few points here - you must set the PLATFORM varia ble to exactly the same name as the directory you created under the arch/microblaze/platforms subdirectory. The CONFIG _NEWPLATFORM is a kernel configuration variable that will be set, whe n your new platform is being targeted. This variable name can be just about anything, but it makes sense to base it on the actual name of you r platform - and always include the CONFIG_ prefix. Remember this v ariable, we'll use it in the next step. 4. Add your new platform to the kernel configuratio n process. Edit the file linux-2.4.x/arch/microblaze/config.in. Add your new platform in the "Platforms" list. It will look a bit like this: #### Microblaze processor-specific config comment 'Platform'

64
choice 'Platform' \ "uclinux-auto CONFIG_UCLINUX_AUTO \ ... MBVanilla CONFIG_MBVANILLA \ Egretv0.1 CONFIG_EGRET01 \ SUZAKU CONFIG_SUZAKU" uclinux-auto Add a new line like this: NewPlatform CONFIG_NEWPLATFORM \ Don't forget that trailing backslash character, to continue the line. Then, just below, add a snippet like this: if [ "$CONFIG_NEWPLATFORM" = "y" ]; then define_int HZ 100 source arch/microblaze/platform/NewPlatform/aut o-config.in fi This will cause the auto-config.in file to be read from the new kernel platform directory. 5. You are now ready to build your new platform. F rom the uClinux-dist directory, launch the uClinux menu c onfiguration tool: $ make menuconfig Enter the Vendor/Product menu, and select your new platform. Enter the Kernel/Library/Defaults selection, and ch oose "Customize Kernel Settings". Enter the "Processor Type and features" submenu, an d select your new platform from the "Platforms" list. Exit the menu config, and save your new configurati on. The build tools will clean out any existing kernel builds, then the kernel configuration menu will launch. Before the menu launches, you may be prompted to provide values for any undefined kernel configuration parameters, just press enter to accep t the default. e.g.: netperf (CONFIG_USER_NETPERF_NETPERF) [N/y/?] (NEW) Pressing enter will accept the default (No). Once the menu launches, go into the "Processor Type and Features" submenu. Change the Platform setting to your new p latform - "NewPlatform" in this case. Exit the menus and save your changes. This is important - launch the menuconfig again, an d again go into the kernel configuration submenu: $ make menuconfig

65
(Kernel/Library/Defaults Selection) [X] Customize Kernel Settings Exit and save again. Once the kernel configuration menu re-appears, simply exit and save. This second invocation of the kernel configuration menu is required to pickup the changes with your new platform. Failing to do this step may cause strange behaviour, so don't forget! Your new platform is now ready to build. You may n ow wish to look more closely at the kernel and vendor configuration s, enabling any particular options or applications that you require . It may also be a good idea to save the default settings for this new platform. You can do this under the main config menu -> Kernel/Librar y/Defaults -> Update Default Vendor Settings option. Now you are ready to build your new kernel and file system image. From uClinux-dist: $ make dep $ make all For a first build, it is advised to use only the ge neric uClinux MTD mapping. In the kernel config menu, under "Memory Technology Devices Settings" -> "Mapping drivers for chip access", sel ect only the "Generic uClinux RAM/ROM filesystem support".

66
PetaLinux User Applications directory ===================================== This directory houses your own Linux applications, as well as a couple of examples. To create a new application, use the petalinux-new- app script, as follows: $ petalinux-new-app myappname This will create a new directory user-apps/myappnam e, complete with a placeholder C file and Makefile. Now all you need to do is create or import your application source code into this directory, a nd use the auto-generated Makefile to cross-compile it and install it into yo ur PetaLinux root filesystem image. Easy!

67
Linux kernel release 2.6.xx <http://kernel.org/> ================================================ These are the release notes for Linux version 2.6. Read them carefully, as they tell you what this is all about, explain ho w to install the kernel, and what to do if something goes wrong. WHAT IS LINUX? Linux is a clone of the operating system Unix, wr itten from scratch by Linus Torvalds with assistance from a loosely-kni t team of hackers across the Net. It aims towards POSIX and Single UNIX Sp ecification compliance. It has all the features you would expect in a mod ern fully-fledged Unix, including true multitasking, virtual memory, shar ed libraries, demand loading, shared copy-on-write executables, proper memory management, and multistack networking including IPv4 and IPv6 . It is distributed under the GNU General Public Li cense - see the accompanying COPYING file for more details. ON WHAT HARDWARE DOES IT RUN? Although originally developed first for 32-bit x8 6-based PCs (386 or higher), today Linux also runs on (at least) the Compaq Al pha AXP, Sun SPARC and UltraSPARC, Motorola 68000, PowerPC, PowerPC64, A RM, Hitachi SuperH, Cell, IBM S/390, MIPS, HP PA-RISC, Intel IA-64, DEC VAX , AMD x86-64, AXIS CRIS, Cris, Xtensa, AVR32 and Renesas M32R architecture s. Linux is easily portable to most general-purpose 32- or 64-bit architectures as long as they have a paged memory management un it (PMMU) and a port of the GNU C compiler (gcc) (part of The GNU Compiler Co llection, GCC). Linux has also been ported to a number of architectures wit hout a PMMU, although functionality is then obviously somewhat limited. Linux has also been ported to itself. You can now run the kernel as a userspace application - this is called UserMode L inux (UML). DOCUMENTATION: - There is a lot of documentation available both i n electronic form on the Internet and in books, both Linux-specific a nd pertaining to general UNIX questions. I'd recommend looking i nto the documentation subdirectories on any Linux FTP site for the LDP (Linux Documentation Project) books. This README is not meant to be documentation on the system: there are much better sources available. - There are various README files in the Documentat ion/ subdirectory: these typically contain kernel-specific installa tion notes for some drivers for example. See Documentation/00-INDEX for a list of what is contained in each file. Please read the Chan ges file, as it contains information about the problems, which m ay result by upgrading your kernel.

68
- The Documentation/DocBook/ subdirectory contains several guides for kernel developers and users. These guides can b e rendered in a number of formats: PostScript (.ps), PDF, and H TML, among others. After installation, "make psdocs", "make pdfdocs ", or "make htmldocs" will render the documentation in the requested f ormat. INSTALLING the kernel: - If you install the full sources, put the kernel tarball in a directory where you have permissions (eg. your h ome directory) and unpack it: gzip -cd linux-2.6.XX.tar.gz | tar xvf - or bzip2 -dc linux-2.6.XX.tar.bz2 | tar xvf - Replace "XX" with the version number of the late st kernel. Do NOT use the /usr/src/linux area! This area ha s a (usually incomplete) set of kernel headers that are used by the library header files. They should match the library, and not g et messed up by whatever the kernel-du-jour happens to be. - You can also upgrade between 2.6.xx releases by patching. Patches are distributed in the traditional gzip and the newe r bzip2 format. To install by patching, get all the newer patch fil es, enter the top level directory of the kernel source (linux- 2.6.xx) and execute: gzip -cd ../patch-2.6.xx.gz | patch -p1 or bzip2 -dc ../patch-2.6.xx.bz2 | patch -p1 (repeat xx for all versions bigger than the vers ion of your current source tree, _in_order_) and you should be ok. You may want to remove the backup files (xxx~ or xxx.orig), and make su re that there are no failed patches (xxx# or xxx.rej). If there are, either you or me has made a mistake. Unlike patches for the 2.6.x kernels, patches fo r the 2.6.x.y kernels (also known as the -stable kernels) are not incr emental but instead apply directly to the base 2.6.x kernel. Please read Documentation/applying-patches.txt for more info rmation. Alternatively, the script patch-kernel can be us ed to automate this process. It determines the current kernel versi on and applies any patches found. linux/scripts/patch-kernel linux The first argument in the command above is the l ocation of the kernel source. Patches are applied from the cur rent directory, but an alternative directory can be specified as the second argument. - If you are upgrading between releases using the stable series patches

69
(for example, patch-2.6.xx.y), note that these " dot-releases" are not incremental and must be applied to the 2.6.x x base tree. For example, if your base kernel is 2.6.12 and you w ant to apply the 2.6.12.3 patch, you do not and indeed must not f irst apply the 2.6.12.1 and 2.6.12.2 patches. Similarly, if you are running kernel version 2.6.12.2 and want to jump to 2.6.12.3, y ou must first reverse the 2.6.12.2 patch (that is, patch -R) _ before_ applying the 2.6.12.3 patch. You can read more on this in Documentation/apply ing-patches.txt - Make sure you have no stale .o files and depende ncies lying around: cd linux make mrproper You should now have the sources correctly instal led. SOFTWARE REQUIREMENTS Compiling and running the 2.6.xx kernels require s up-to-date versions of various software packages. Consult Documentation/Changes for the minimum version nu mbers required and how to get updates for these packages. Bewa re that using excessively old versions of these packages can c ause indirect errors that are very difficult to track down, so don't assume that you can just update packages when obvious proble ms arise during build or operation. BUILD directory for the kernel: When compiling the kernel all output files will per default be stored together with the kernel source code. Using the option "make O=output/dir" allow you t o specify an alternate place for the output files (including .config). Example: kernel source code: /usr/src/linux-2.6.N build directory: /home/name/build/kernel To configure and build the kernel use: cd /usr/src/linux-2.6.N make O=/home/name/build/kernel menuconfig make O=/home/name/build/kernel sudo make O=/home/name/build/kernel modules_inst all install Please note: If the 'O=output/dir' option is use d then it must be used for all invocations of make. CONFIGURING the kernel: Do not skip this step even if you are only upgra ding one minor version. New configuration options are added in each release, and odd problems will turn up if the configuration f iles are not set up as expected. If you want to carry your existing configuration to a new version with minimal work, use "make oldconf ig", which will only ask you for the answers to new questions. - Alternate configuration commands are:
70
"make config" Plain text interface. "make menuconfig" Text based color menus, radioli sts & dialogs. "make xconfig" X windows (Qt) based configurat ion tool. "make gconfig" X windows (Gtk) based configura tion tool. "make oldconfig" Default all questions based on the contents of your existing ./.config file and asking about new config symbols. "make silentoldconfig" Like above, but avoids cluttering the screen with questions already answered. "make defconfig" Create a ./.config file by usin g the default symbol values from arch/$ARCH/defconfig. "make allyesconfig" Create a ./.config file by setting symbol values to 'y' as much as possible. "make allmodconfig" Create a ./.config file by setting symbol values to 'm' as much as possible. "make allnoconfig" Create a ./.config file by sett ing symbol values to 'n' as much as possible. "make randconfig" Create a ./.config file by sett ing symbol values to random values. The allyesconfig/allmodconfig/allnoconfig/randco nfig variants can also use the environment variable KCONFIG_ALLCON FIG to specify a filename that contains config options that the u ser requires to be set to a specific value. If KCONFIG_ALLCONFIG=f ilename is not used, "make *config" checks for a file named "all{yes/ mod/no/random}.config" for symbol values that are to be forced. If thi s file is not found, it checks for a file named "all.config" to conta in forced values. NOTES on "make config": - having unnecessary drivers will make the kernel bigger, and can under some circumstances lead to problems: probi ng for a nonexistent controller card may confuse your oth er controllers - compiling the kernel with "Processor type" set h igher than 386 will result in a kernel that does NOT work on a 386. The kernel will detect this on bootup, and give up. - A kernel with math-emulation compiled in will st ill use the coprocessor if one is present: the math emulatio n will just never get used in that case. The kernel will be slightly larger, but will work on different machines regardless o f whether they have a math coprocessor or not. - the "kernel hacking" configuration details usual ly result in a bigger or slower kernel (or both), and can even make the kernel less stable by configuring some routines to acti vely try to break bad code to find kernel problems (kmalloc( )). Thus you should probably answer 'n' to the questions for "development", "experimental", or "debugg ing" features. COMPILING the kernel: - Make sure you have at least gcc 3.2 available. For more information, refer to Documentation/Cha nges. Please note that you can still run a.out user pr ograms with this kernel.

71
- Do a "make" to create a compressed kernel image. It is also possible to do "make install" if you have lilo i nstalled to suit the kernel makefiles, but you may want to check your particular lilo setup first. To do the actual install you have to be root, bu t none of the normal build should require that. Don't take the name o f root in vain. - If you configured any of the parts of the kernel as `modules', you will also have to do "make modules_install". - Keep a backup kernel handy in case something goe s wrong. This is especially true for the development releases, si nce each new release contains new code which has not been debugged. Make sure you keep a backup of the modules corresponding to that kern el, as well. If you are installing a new kernel with the same versio n number as your working kernel, make a backup of your modules di rectory before you do a "make modules_install". Alternatively, before compiling, use the kernel config option "LOCALVERSION" to append a unique suffix to the regular kernel version. LOCALVERSION can be set in the "General Setup" m enu. - In order to boot your new kernel, you'll need to copy the kernel image (e.g. .../linux/arch/i386/boot/bzImage aft er compilation) to the place where your regular bootable kernel is found. - Booting a kernel directly from a floppy without the assistance of a bootloader such as LILO, is no longer supported. If you boot Linux from the hard drive, chances a re you use LILO which uses the kernel image as specified in the file / etc/lilo.conf. The kernel image file is usually /vmlinuz, /boot/vml inuz, /bzImage or /boot/bzImage. To use the new kernel, save a co py of the old image and copy the new image over the old one. Then, you MUST RERUN LILO to update the loading map!! If you don't, you wo n't be able to boot the new kernel image. Reinstalling LILO is usually a matter of running /sbin/lilo. You may wish to edit /etc/lilo.conf to specify a n entry for your old kernel image (say, /vmlinux.old) in case the new one does not work. See the LILO docs for more information. After reinstalling LILO, you should be all set. Shutdown the system, reboot, and enjoy! If you ever need to change the default root devi ce, video mode, ramdisk size, etc. in the kernel image, use the 'rdev' program (or alternatively the LILO boot options when appropr iate). No need to recompile the kernel to change these parameters. - Reboot with the new kernel and enjoy. IF SOMETHING GOES WRONG: - If you have problems that seem to be due to kern el bugs, please check the file MAINTAINERS to see if there is a partic ular person associated with the part of the kernel that you are having trouble with. If there

72
isn't anyone listed there, then the second best thing is to mail them to me ([email protected]), and possibly to any other relevant mailing-list or to the newsgroup. - In all bug-reports, *please* tell what kernel yo u are talking about, how to duplicate the problem, and what your setu p is (use your common sense). If the problem is new, tell me so, and if the problem is old, please try to tell me when you first notice d it. - If the bug results in a message like unable to handle kernel paging request at address C0000010 Oops: 0002 EIP: 0010:XXXXXXXX eax: xxxxxxxx ebx: xxxxxxxx ecx: xxxxxxxx ed x: xxxxxxxx esi: xxxxxxxx edi: xxxxxxxx ebp: xxxxxxxx ds: xxxx es: xxxx fs: xxxx gs: xxxx Pid: xx, process nr: xx xx xx xx xx xx xx xx xx xx xx or similar kernel debugging information on your screen or in your system log, please duplicate it *exactly*. The dump may look incomprehensible to you, but it does contain inf ormation that may help debugging the problem. The text above the dump is also important: it tells something about why the kern el dumped code (in the above example it's due to a bad kernel point er). More information on making sense of the dump is in Documentation/ oops-tracing.txt - If you compiled the kernel with CONFIG_KALLSYMS you can send the dump as is, otherwise you will have to use the "ksymo ops" program to make sense of the dump (but compiling with CONFIG_KAL LSYMS is usually preferred). This utility can be downloaded from ftp://ftp.<country>.kernel.org/pub/linux/utils/k ernel/ksymoops/ . Alternately you can do the dump lookup by hand: - In debugging dumps like the above, it helps enor mously if you can look up what the EIP value means. The hex value as such doesn't help me or anybody else very much: it will depend on your particular kernel setup. What you should do is take the he x value from the EIP line (ignore the "0010:"), and look it up in the kernel namelist to see which kernel function contains the offending address. To find out the kernel function name, you'll nee d to find the system binary associated with the kernel that exhibited the symptom. This is the file 'linux/vmlinux'. To extract the nameli st and match it against the EIP from the kernel crash, do: nm vmlinux | sort | less This will give you a list of kernel addresses so rted in ascending order, from which it is simple to find the funct ion that contains the offending address. Note that the address given by the kernel debugging messages will not necessarily match ex actly with the function addresses (in fact, that is very unlike ly), so you can't just 'grep' the list: the list will, however, gi ve you the starting point of each kernel function, so by looking for the function that

73
has a starting address lower than the one you ar e searching for but is followed by a function with a higher address you will find the one you want. In fact, it may be a good idea to inc lude a bit of "context" in your problem report, giving a few l ines around the interesting one. If you for some reason cannot do the above (you have a pre-compiled kernel image or similar), telling me as much abo ut your setup as possible will help. Please read the REPORTING-B UGS document for details. - Alternately, you can use gdb on a running kernel . (read-only; i.e. you cannot change values or set break points.) To do this, first compile the kernel with -g; edit arch/i386/Makefile appropri ately, then do a "make clean". You'll also need to enable CONFIG_PROC_F S (via "make config"). After you've rebooted with the new kernel, do "g db vmlinux /proc/kcore". You can now use all the usual gdb commands. The command to look up the point where your system crashed is "l *0xXXXXXXX X". (Replace the XXXes with the EIP value.) gdb'ing a non-running kernel currently fails bec ause gdb (wrongly) disregards the starting offset for which the ker nel is compiled.

74
Analysis of Senior Project Design
Summary of Functional Requirements
This project required a working demo of a pulse width modulated signal created by a
Spartan 3E Starter Board running uClinux. This first required that we set up a three stage booting
system consisting of FSBoot, UBoot, and the uClinux kernel. After we verified that uClinux
could autoboot on the board, we began testing simply user applications like switch recognition
and LED blinking. After that, we began compiling an independently developed SPI driver into
uClinux and developing an application that could create a pulse width modulated signal using
this interface.
Primary Constraints
Our biggest challenge was the severe lack of documentation on compiling and integrating
drivers into uClinux. We were able to find information on this subject on the uClinux mailing list,
but the code provided was simply a quick port of an outdated PowerPC driver that had gone
untested for months. This lack of information was frustrating, especially since we were under
time constraints, whereas the uClinux developers were not.
Economic
The only cost we incurred during this project was the cost of the Spartan 3E Starter Board.
This money was refunded back to us a few weeks before the end of the project. The SuPER
Project as a whole, however, will have a dramatic impact on the economy if it went into effect.
With a shift in reliance to solar energy and less on fossil fuels, whose prices are at an all time

75
high, dramatic savings could be garnered from the SuPER Project and our low power
contributions to it.
Environment and Sustainability
The SuPER Project would have a tremendous impact on the environment if put into effect.
With the world focusing on sustainability, global warming, and pollution, solar energy is one of
the solutions to the world’s environmental problems. With solar energy, less fossil fuel is
consumed and less pollution is released into the air, which reduces the risk of global warming
and pollution.
Social and Political
There are only positive social and political implications associated with this project. The
world is focusing on becoming more energy efficient and turning to alternative energy sources,
and this project encompasses both aspects.
Development
We worked mainly with free and open source software such as CentOS, uClinux, and
other Linux variants like Fedora for development of this project. For embedded system
development, PetaLogix provided their implementation of a uClinux cross compiler for free to
the public.