Developing Safe And Effective Pitching Mechanics … · Developing Safe And Effective Pitching...
24
Developing Safe And Effective Pitching Mechanics For Youth
Transcript of Developing Safe And Effective Pitching Mechanics … · Developing Safe And Effective Pitching...

Developing Safe
And Effective
Pitching Mechanics
For Youth
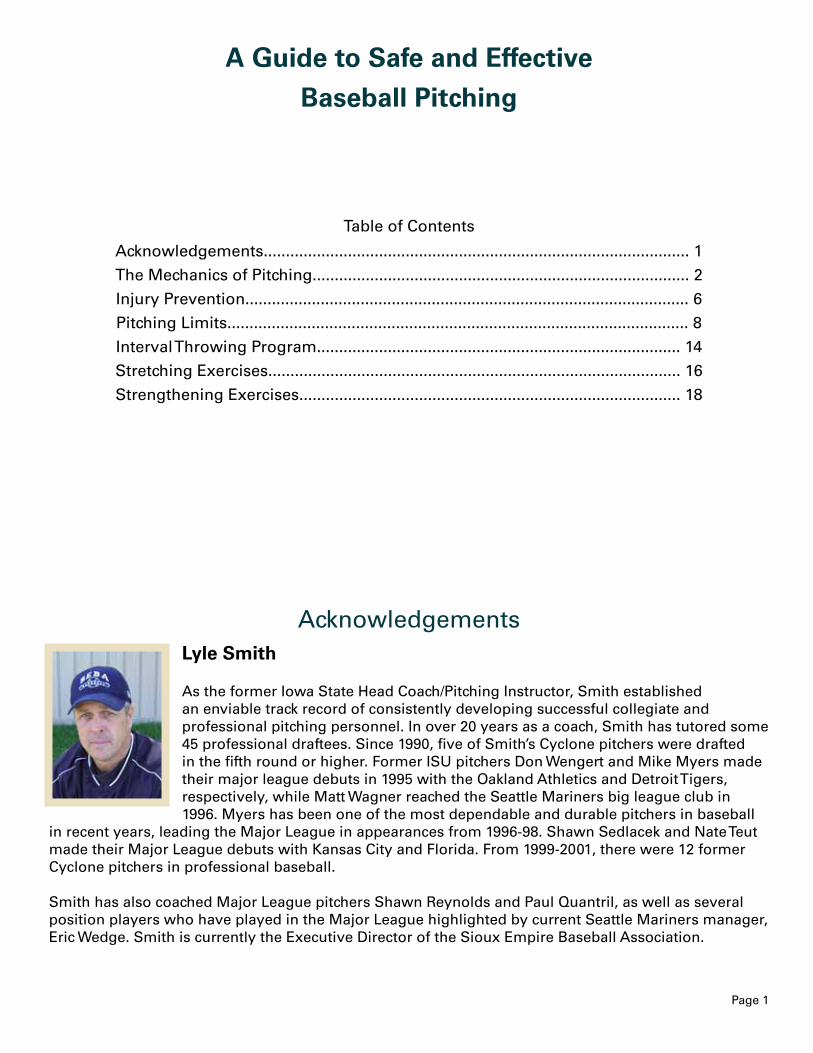
Table of Contents
Acknowledgements................................................................................................ 1
The Mechanics of Pitching..................................................................................... 2
Injury Prevention.................................................................................................... 6
Pitching Limits........................................................................................................ 8
Interval Throwing Program.................................................................................. 14
Stretching Exercises............................................................................................. 16
Strengthening Exercises...................................................................................... 18
AcknowledgementsLyle Smith
As the former Iowa State Head Coach/Pitching Instructor, Smith established an enviable track record of consistently developing successful collegiate and professional pitching personnel. In over 20 years as a coach, Smith has tutored some 45 professional draftees. Since 1990, five of Smith’s Cyclone pitchers were drafted in the fifth round or higher. Former ISU pitchers Don Wengert and Mike Myers made their major league debuts in 1995 with the Oakland Athletics and Detroit Tigers, respectively, while Matt Wagner reached the Seattle Mariners big league club in 1996. Myers has been one of the most dependable and durable pitchers in baseball
in recent years, leading the Major League in appearances from 1996-98. Shawn Sedlacek and Nate Teut made their Major League debuts with Kansas City and Florida. From 1999-2001, there were 12 former Cyclone pitchers in professional baseball.
Smith has also coached Major League pitchers Shawn Reynolds and Paul Quantril, as well as several position players who have played in the Major League highlighted by current Seattle Mariners manager, Eric Wedge. Smith is currently the Executive Director of the Sioux Empire Baseball Association.
A Guide to Safe and Effective
Baseball Pitching
Page 1
THE MECHANICS OF PITCHING
Throwing a baseball is a function of balance, direction and weight transfer. Apitcher must coordinate the delivery in a method that is mechanically efficient, then master an acceptable throwing motion through practice and repetition. Repetition will eventually reinforce muscle memory and replace the conscious mental effort of pitching a baseball. In other words, correct pitching technique will become subconscious rather than something the pitcher has to think about.
Development of pitching skill requires time and practice. It is an in-between game, or bullpen task. Very few pitchers are capable of changing their mechanics under game conditions. Learning and reinforcement of proper throwing mechanics in a noncompetitive environment will transfer to the competitive environment.
For the purposes of explanation, the pitching delivery will be divided into four phases. The following phases and their accompanying explanations should facilitate better understanding and provide a clearer image of correct pitching mechanics.
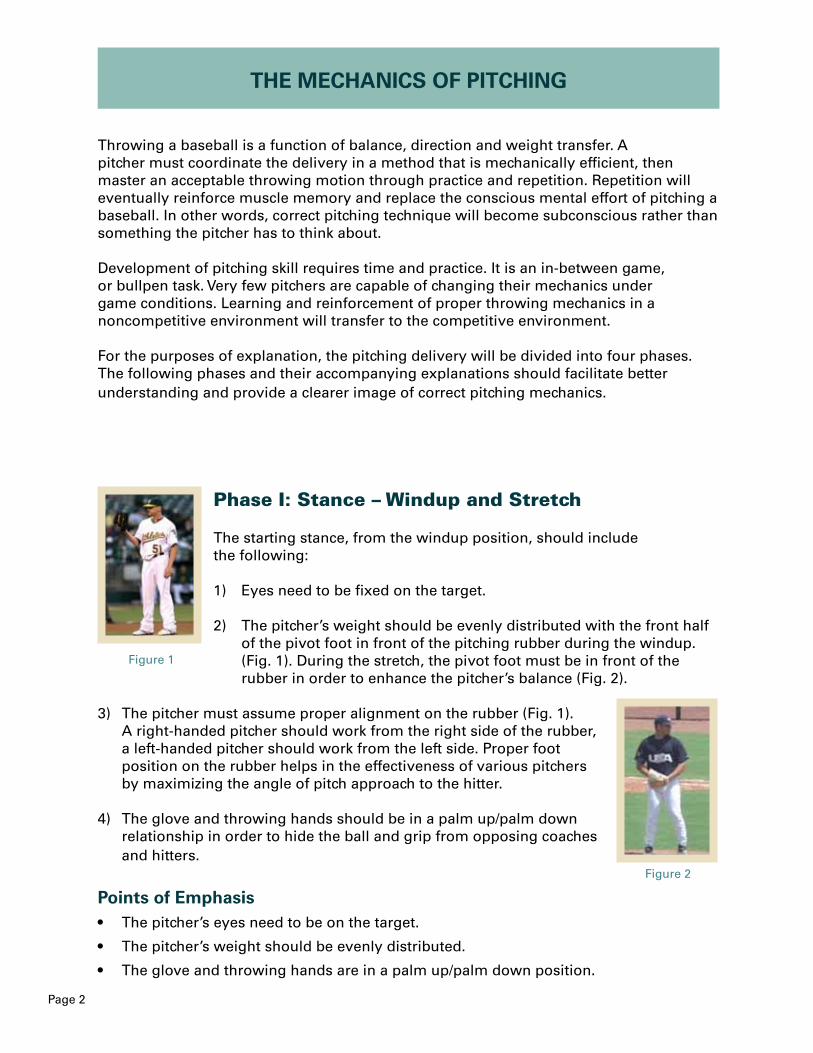
Phase I: Stance – Windup and Stretch
The starting stance, from the windup position, should include the following: 1) Eyes need to be fixed on the target.
2) The pitcher’s weight should be evenly distributed with the front half of the pivot foot in front of the pitching rubber during the windup. (Fig. 1). During the stretch, the pivot foot must be in front of the rubber in order to enhance the pitcher’s balance (Fig. 2).
3) The pitcher must assume proper alignment on the rubber (Fig. 1). A right-handed pitcher should work from the right side of the rubber, a left-handed pitcher should work from the left side. Proper foot position on the rubber helps in the effectiveness of various pitchers by maximizing the angle of pitch approach to the hitter.
4) The glove and throwing hands should be in a palm up/palm down relationship in order to hide the ball and grip from opposing coaches and hitters.
Points of Emphasis• The pitcher’s eyes need to be on the target.
• The pitcher’s weight should be evenly distributed.
• The glove and throwing hands are in a palm up/palm down position.
Page 2
Figure 1
Figure 2
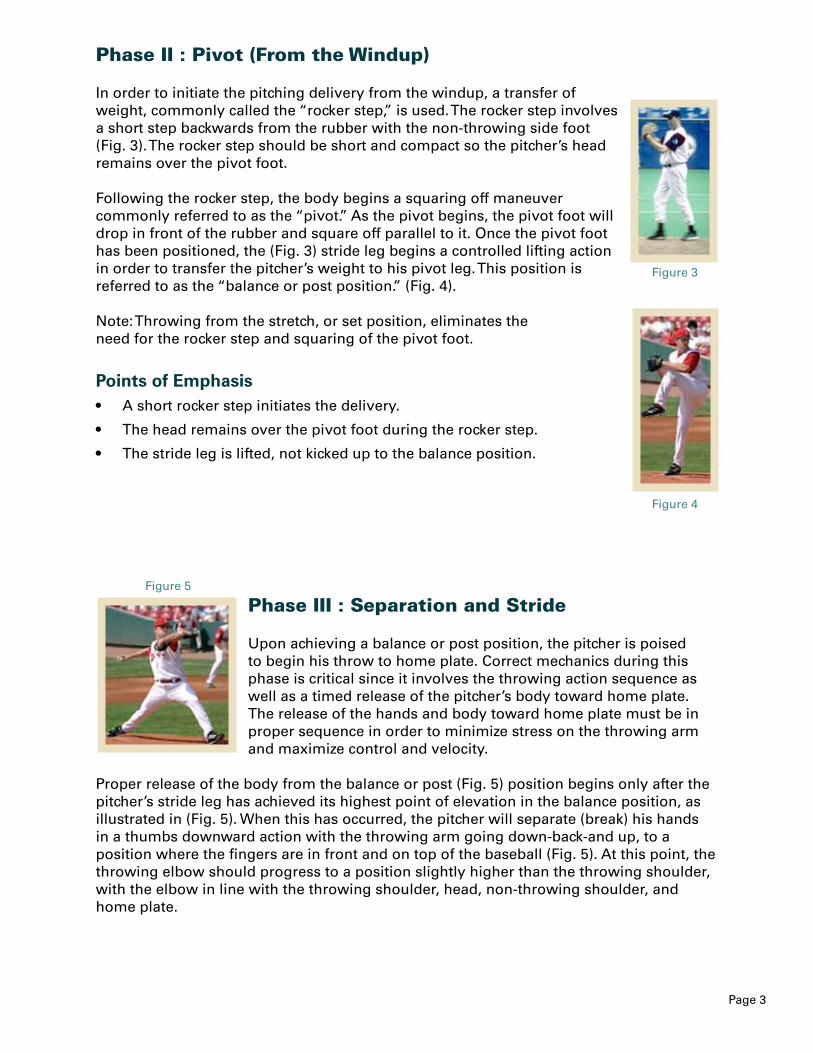
Phase II : Pivot (From the Windup)
In order to initiate the pitching delivery from the windup, a transfer of weight, commonly called the “rocker step,” is used. The rocker step involves a short step backwards from the rubber with the non-throwing side foot (Fig. 3). The rocker step should be short and compact so the pitcher’s head remains over the pivot foot.
Following the rocker step, the body begins a squaring off maneuver commonly referred to as the “pivot.” As the pivot begins, the pivot foot will drop in front of the rubber and square off parallel to it. Once the pivot foot has been positioned, the (Fig. 3) stride leg begins a controlled lifting action in order to transfer the pitcher’s weight to his pivot leg. This position is referred to as the “balance or post position.” (Fig. 4).
Note: Throwing from the stretch, or set position, eliminates theneed for the rocker step and squaring of the pivot foot.
Points of Emphasis• A short rocker step initiates the delivery.
• The head remains over the pivot foot during the rocker step.
• The stride leg is lifted, not kicked up to the balance position.
Phase III : Separation and Stride
Upon achieving a balance or post position, the pitcher is poised to begin his throw to home plate. Correct mechanics during this phase is critical since it involves the throwing action sequence as well as a timed release of the pitcher’s body toward home plate. The release of the hands and body toward home plate must be in proper sequence in order to minimize stress on the throwing arm and maximize control and velocity.
Proper release of the body from the balance or post (Fig. 5) position begins only after the pitcher’s stride leg has achieved its highest point of elevation in the balance position, as illustrated in (Fig. 5). When this has occurred, the pitcher will separate (break) his hands in a thumbs downward action with the throwing arm going down-back-and up, to a position where the fingers are in front and on top of the baseball (Fig. 5). At this point, the throwing elbow should progress to a position slightly higher than the throwing shoulder, with the elbow in line with the throwing shoulder, head, non-throwing shoulder, and home plate.
Page 3
Figure 3
Figure 4
Figure 5

The action of the front (non-throwing) arm during the throwing action will be opposite of the throwing arm in that it travels in a down-forward-and-up motion. This action efficiently counter balances the body and will provide the needed leverage to effectively assist the throwing shoulder, as it accelerates forward in preparation to release toward home plate. If done in correct fashion, upon foot strike of the stride leg, the relationship of the stride leg, throwing arm, front arm, and body will resemble a “T” position with both the lead elbow and throwing elbow as high as the shoulders (Fig. 6).
The stride to home plate begins in conjunction of the hands. It is important that the pitcher does not drive, push, or collapse the pivot leg during the stride. A controlled “fall” toward home plate with the head, lead knee, lead elbow, and lead shoulder will produce a greater downhill pitch trajectory and minimize stress on the throwing arm and shoulder. The drop and drive that many pitchers exhibit diminishes the height of pitch release and creates added stress to the shoulder area. Pitching in a downhill plane allows all pitches
to move in two planes, forward-and down or high-to-low, as they approach the hitter. It is far more difficult for a hitter to hit a pitch that is traveling toward him as well as moving down through the strike zone.
Pitching in a downhill plane can be effectively achieved if the following mechanical adjustments to the balance position, stride, and ball release are followed:
Page 4
• Keep a firm back pivot leg. The pivot leg must not collapse in the balance position, nor prior to the stride toward home plate.
• Perform a controlled “fall” toward home plate. Do not drop and drive with the leg pivot; this will diminish the height of ball release.
• Develop pitches that travel in a downward plane. The fingers of the pitching hand stay behind the ball prior to release of the fastball. On breaking balls, the fingers rotate over the ball on a curve ball, and through the ball on a slider. Rotation around the baseball is incorrect and places additional stress on
the elbow.
Stress can also be minimized during the stride if the pitcher lands with the front kneebent during foot strike. A stiff-legged landing of the stride creates increased negative force upon the body, arm, and shoulder by substantially reducing the amount of weight transferred from the pivot or balanced position to the final follow-through.
Points of Emphasis• Achieve a comfortable balance or post position.
• Break the hands in a thumbs-down position.
• Execute a controlled “fall” toward home plate with the head, lead knee, elbow, and
lead shoulder.
• Upon foot strike of the stride leg, the arms and body should form a “T” position.
• Minimize stress by landing with a bent front knee during foot strike.
• Make it your goal to throw all pitches in a downhill plane toward home plate.
Figure 6
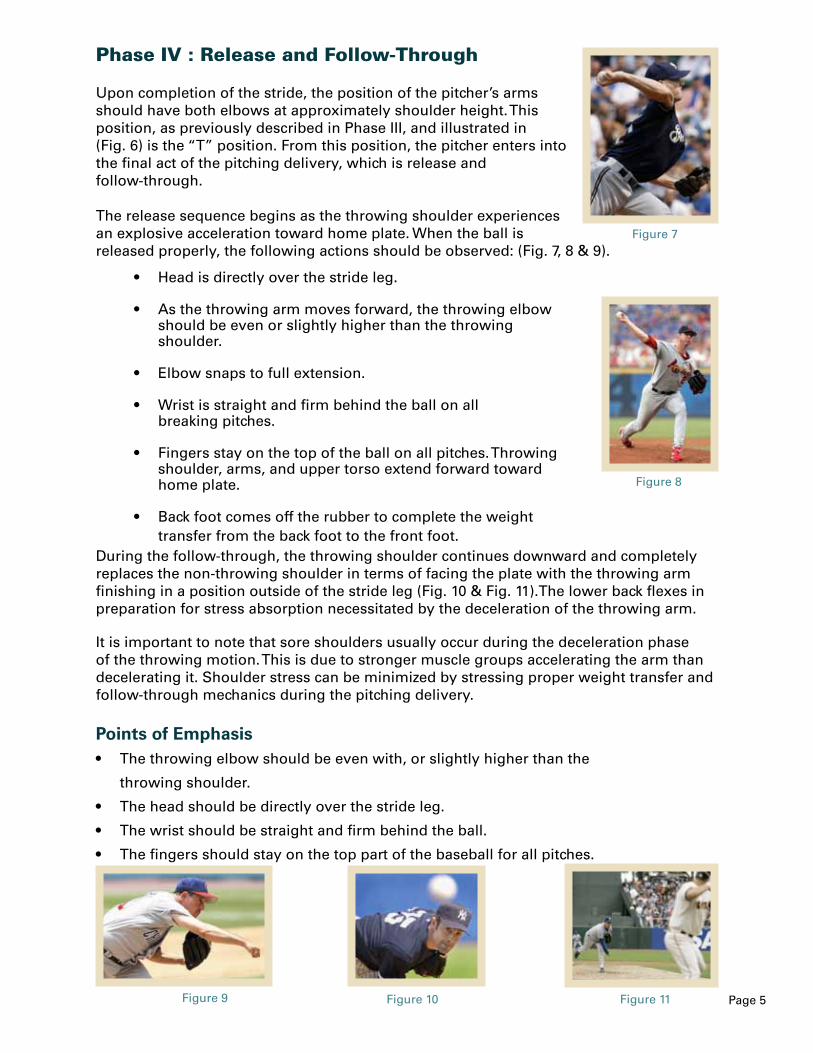
Phase IV : Release and Follow-Through
Upon completion of the stride, the position of the pitcher’s arms should have both elbows at approximately shoulder height. This position, as previously described in Phase III, and illustrated in(Fig. 6) is the “T” position. From this position, the pitcher enters into the final act of the pitching delivery, which is release andfollow-through.
The release sequence begins as the throwing shoulder experiences an explosive acceleration toward home plate. When the ball is released properly, the following actions should be observed: (Fig. 7, 8 & 9).
Page 5
During the follow-through, the throwing shoulder continues downward and completely replaces the non-throwing shoulder in terms of facing the plate with the throwing arm finishing in a position outside of the stride leg (Fig. 10 & Fig. 11).The lower back flexes in preparation for stress absorption necessitated by the deceleration of the throwing arm.
It is important to note that sore shoulders usually occur during the deceleration phase of the throwing motion. This is due to stronger muscle groups accelerating the arm than decelerating it. Shoulder stress can be minimized by stressing proper weight transfer and follow-through mechanics during the pitching delivery.
Points of Emphasis• The throwing elbow should be even with, or slightly higher than the
throwing shoulder.
• The head should be directly over the stride leg.
• The wrist should be straight and firm behind the ball.
• The fingers should stay on the top part of the baseball for all pitches.
• Head is directly over the stride leg.
• As the throwing arm moves forward, the throwing elbow should be even or slightly higher than the throwing shoulder.
• Elbow snaps to full extension.
• Wrist is straight and firm behind the ball on all breaking pitches.
• Fingers stay on the top of the ball on all pitches. Throwing shoulder, arms, and upper torso extend forward toward home plate.
• Back foot comes off the rubber to complete the weight transfer from the back foot to the front foot.
Figure 7
Figure 8
Figure 9 Figure 10 Figure 11
Page 6
INJURY PREVENTION
Education is a vital part of injury prevention. Usually sound advice is obtained from a learned coach or manager but leagues and associations have a responsibility to teach rules, set regulations, and demonstrate proper technique.
The mastery of proper biomechanics is a strong enhancement of natural skill and a powerful deterrent to injury.
An athlete must learn “how to play the game.” That education includes rules, technique, strategy, and sportsmanship as well as a broad understanding of those habits that enhance performance or limit athletic success or increase the potential for injury.
Athletes should not use non-prescribed drugs, tobacco in any form, anabolic steroids, or alcohol. They should control their weight, as neither too heavy or too lean is safe. Strength training, if performed haphazardly, or without proper supervision, can cause skeletal damage. Just as learning technique is vital, of equal importance for the athlete is education in substance abuse, wholesome nutrition, and good hygiene.
A coach should be conscious of the factors that may cause injury: overuse, lack of flexibility, insufficient strength or coordination, lack of concentration, recklessness,and burnout.
By far, the principal predisposing factor is overuse. Overuse is defined as a repetitive action significant enough to produce microscopic damage to muscle, tendon, bone, and ligament that leads to inflammation, swelling, tenderness, and pain. When an athlete’s joints are naturally loose, overuse injuries may be exaggerated.
The inability to concentrate prevents an athlete from learning the correct fundamentals and techniques. Recklessness, or the attitude of “it can’t happen to me, I am invincible,” can override good sense and physical capability and lead directly to injury. However, smart and aggressive safe play should not be confused with irresponsible risk taking. Lastly, even young athletes are not immune to burnout, the mental tiredness or physical weakness that occurs when an athlete trains and competes all year round. Coaches, trainers, and managers should be aware that a structured conditioning program which includes some rest and rehabilitation is best.
Predisposing Factors
Page 7
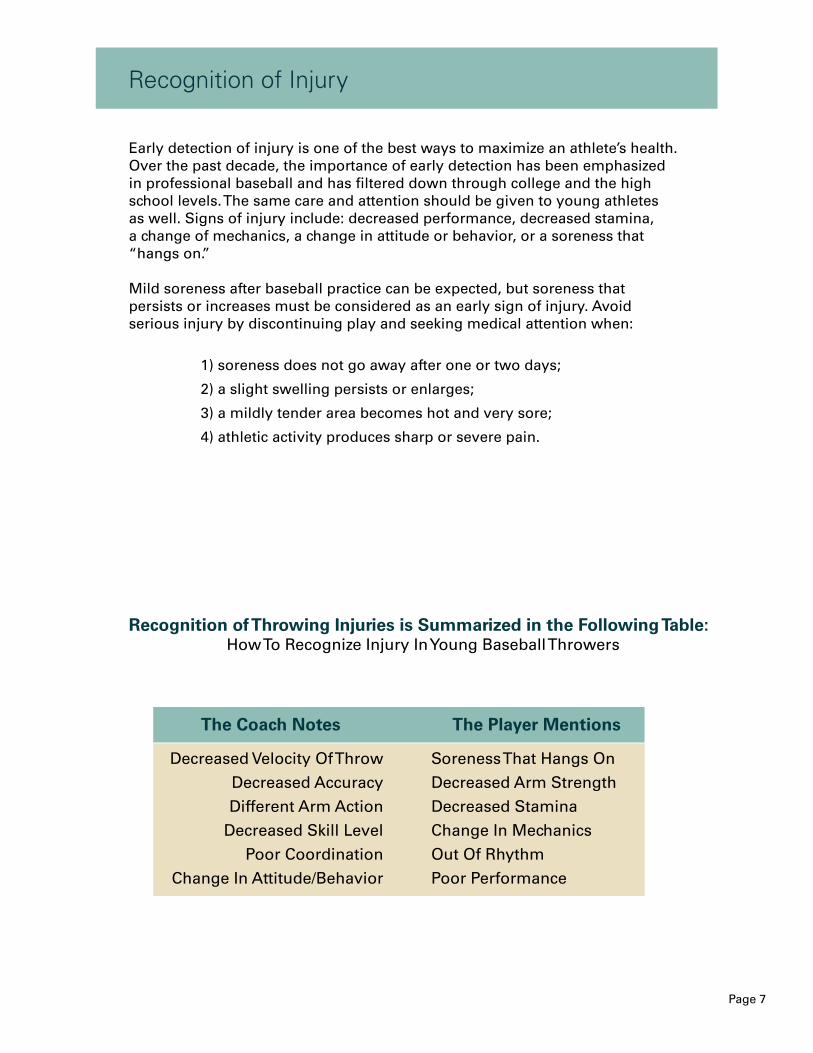
Recognition of Throwing Injuries is Summarized in the Following Table:How To Recognize Injury In Young Baseball Throwers
Decreased Velocity Of Throw
Decreased Accuracy
Different Arm Action
Decreased Skill Level
Poor Coordination
Change In Attitude/Behavior
Soreness That Hangs On
Decreased Arm Strength
Decreased Stamina
Change In Mechanics
Out Of Rhythm
Poor Performance
The Coach Notes The Player Mentions
Early detection of injury is one of the best ways to maximize an athlete’s health.Over the past decade, the importance of early detection has been emphasized in professional baseball and has filtered down through college and the high school levels. The same care and attention should be given to young athletes as well. Signs of injury include: decreased performance, decreased stamina, a change of mechanics, a change in attitude or behavior, or a soreness that “hangs on.”
Mild soreness after baseball practice can be expected, but soreness that persists or increases must be considered as an early sign of injury. Avoid serious injury by discontinuing play and seeking medical attention when:
1) soreness does not go away after one or two days;
2) a slight swelling persists or enlarges;
3) a mildly tender area becomes hot and very sore;
4) athletic activity produces sharp or severe pain.
Recognition of Injury

Page 8
The most critical element in maintaining the health of young throwers is to carefully monitor the number of pitches thrown in games. Overuse is the main element to injury in pitchers on all levels. Coaches, managers and parents must be informed as to what constitutes an appropriate workload for their respective athletes.
The below chart attempts to provide coaches, managers, parents, and athletes with a guide of appropriate pitch count limits based on age. It is important to note that the chart is not absolute. Athletes vary in size, strength, coordination, and mastery of correct mechanics. Coaches should always be attentive to the signs of potential injury that were discussed previously.
The following guide was constructed by Dr. James Andrews, one of the nation’shighly respected authorities on arm care, in conjunction with input from college and professional coaches, Physical Therapists, and Athletic Trainers.
Most professional/college starting pitchers utilize a four day rest/preparation period between starts. For young pitchers, it is important that they receive bullpen work between starts in order to work on improving their mechanics. Coaches must realize that pitchers are not all alike. Some pitchers will recover more quickly after a start than others. In addition, on the youth level, most young pitchers also play another position.
Novice coaches at times believe taking a day off from pitching while playing a position such as shortstop or catcher will provide sufficient recovery time for their pitchers. The contrary is true. If a pitcher has thrown 50% of their recommended pitch count, coaches are strongly encouraged to provide at least one day of non-throwing activity for their pitchers. Most college and professional pitchers use the following pitching schedule in order to ensure adequate recovery time and mechanical work in order to prepare for their next start. It is important to note there are variations to this routine. For example, some pitchers prefer to have a day of long catch before their bullpen day, while others may flip-flop their bullpen day with their long catch day.
Pitching Limits
Age
8-1011-1213-1415-1617-18
Maximum Pitches per Game
52 (+ or -) 1568 (+ or -) 1878 (+ or -) 1891 (+ or -) 18106 (+ or -) 6
Maximum Games per Week
22222
Page 9
Pitching Workout Schedule
Monday – Game DayGame Day Start – Pitcher throws in game and follows appropriate pitch count limit.
Tuesday – Day 1 After StartNo Throwing. Heavy distance running of at least 30 minutes. Running allows the body to remove lactic acid that accumulates in muscles during pitching activity. Pitcher practices his delivery on the side or in the bullpen. (Dry mechanics do not involve throwing a baseball.)
Wednesday – Day 2 After StartLong Catch Day or Bullpen Day. Many coaches have pitcher fielding drill sessions on this day. Sprint work/foul pole runs are recommended.
Thursday – Day 3 After StartBullpens should be limited to 30-50 pitches at 60-70%. Work is done on all pitches. Concentration on location and proper mechanics is important. Pitchers should work out of stretch 60-70% of the time during this activity. Conditioning should concentrate on sprint work.
Friday – Day 4 After StartMost pitchers do little throwing on the day prior to their start. Concentration on doing some delivery work, spin some breaking balls, etc. can be done in the outfield. Light sprint work.
Saturday – Game DayGame Day Start. Schedule repeats itself.
Drills to Improve Throwing Arm Action(Double Leg & Sway Drills)
Of all the skills that are required to play the game of baseball, throwing is by far the most important skill that needs to be mastered by young players. The game of baseball dictates that a player throws with a certain degree of arm strength and accuracy. How well a young player throws, to a large degree, dictates how long he may be able to play the game of baseball.
The following statement especially holds true when young players begin to make the transition from 65’ bases to 80’ and eventually 90’ bases. For the majority of young players and their coaches, developing throwing skill has been more or less an after-thought. They fail to see how important it is to be able to throw well.
If a player cannot throw well, he will be limited and eventually be passed by other athletes who can. To illustrate this point, on the collegiate level, the majority of all position players will be capable of throwing in the upper 70’s to low 80’s. Obviously, for pitchers, the greater the velocity the better.
The following two throwing drills are utilized by many collegiate and high school programs across the country. They are both excellent drills in the sense that they isolate and reinforce the proper mechanics of throwing a baseball. It is highly recommended the following drills be incorporated into each practice and game day by coaches and players. Coaches and parents alike can assist young players in becoming good throwers. It does takes time, consistent attention to good throwing mechanics, and daily practice opportunities for players to work upon and develop their arms.
Page 10
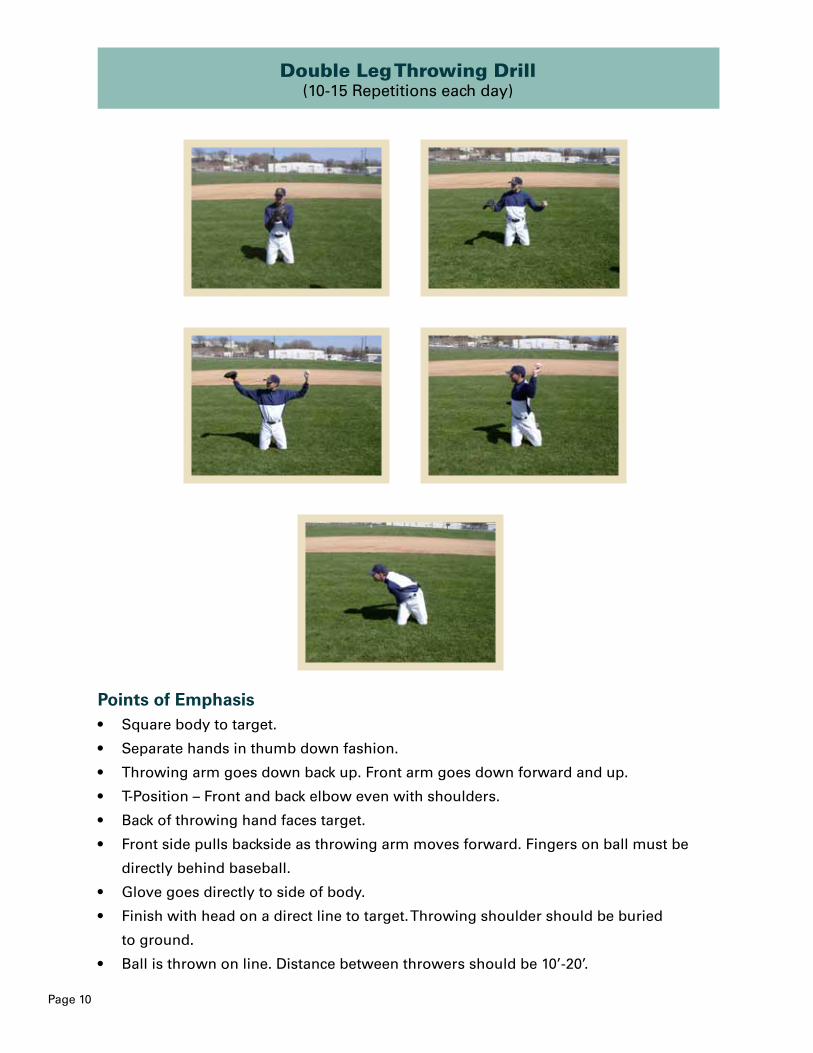
Points of Emphasis• Square body to target.
• Separate hands in thumb down fashion.
• Throwing arm goes down back up. Front arm goes down forward and up.
• T-Position – Front and back elbow even with shoulders.
• Back of throwing hand faces target.
• Front side pulls backside as throwing arm moves forward. Fingers on ball must be
directly behind baseball.
• Glove goes directly to side of body.
• Finish with head on a direct line to target. Throwing shoulder should be buried
to ground.
• Ball is thrown on line. Distance between throwers should be 10’-20’.
Double Leg Throwing Drill(10-15 Repetitions each day)
Page 11
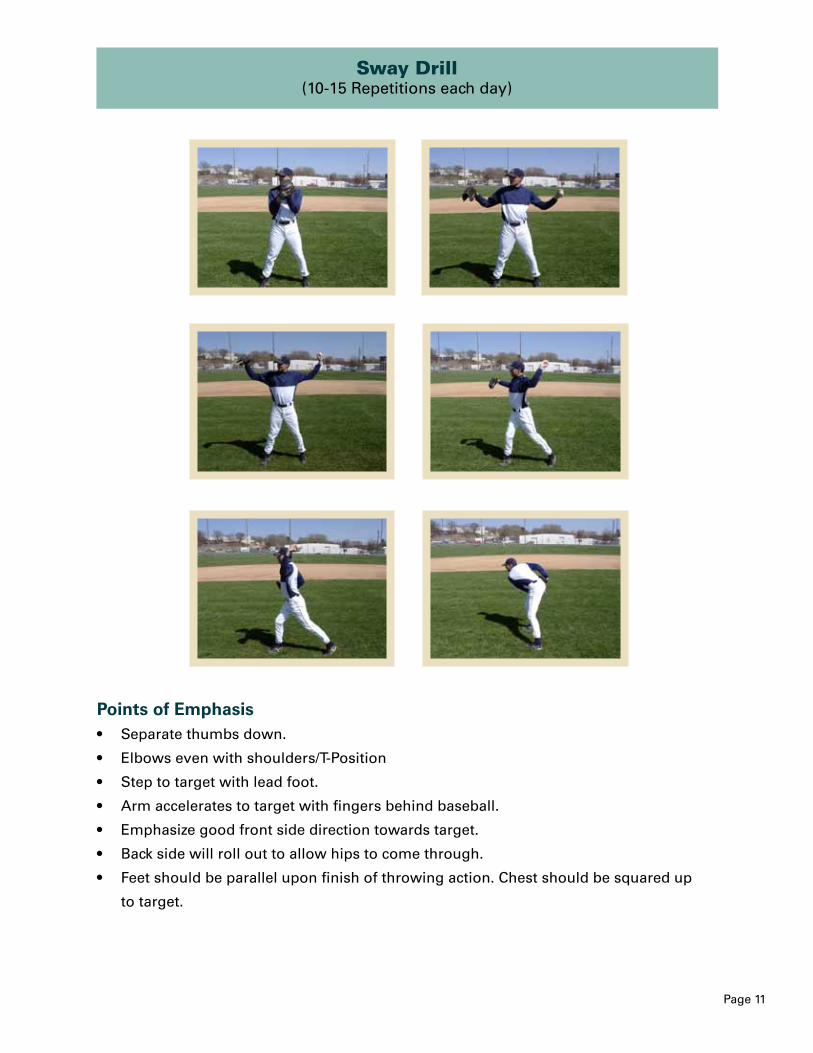
Sway Drill(10-15 Repetitions each day)
Points of Emphasis• Separate thumbs down.
• Elbows even with shoulders/T-Position
• Step to target with lead foot.
• Arm accelerates to target with fingers behind baseball.
• Emphasize good front side direction towards target.
• Back side will roll out to allow hips to come through.
• Feet should be parallel upon finish of throwing action. Chest should be squared up
to target.
Page 12
INTERVAL THROWING PROGRAM
The Interval Throwing Program (ITP) is designed to gradually return motion, strength, and confidence in the throwing arm by slowly progressing through graduated throwing distances. The program is set up to minimize the chance of injury and emphasizes pre-throwing warm-up and stretching. In development of the interval-throwing program, the following factors are considered most important:
1. The act of throwing a baseball involves the entire body. Any return to throwing
must include attention to the entire body.
2. The chance of injury is lessened by a graduated progression of interval throwing.
3. Proper warm-up is essential.
4. Most injuries occur as a result of fatigue.
5. Proper throwing mechanics lessen the incidence of injury.
Because there is an individual variability in athletes, there is no timetable for completion of the program. Most athletes, by nature, are highly competitive and wish to return to competition at the earliest possible moment. While this is a necessary quality of athletes, a controlled throwing program is essential to lessen the chance of injury in preseason practice. Players should progress gradually so that they are not throwing “too hard, too fast, too far or too quickly,” predisposing themselves to injury.
The interval throwing program will vary from athlete to athlete. It is designed so that each level is achieved without pain or complication before the next level is started. Because of this design, the (ITP) may be used for different levels of skills and abilities from those in little league to the professional levels. Example: One athlete may wish to use alternate days throwing while another may have to throw every third or fourth day due to fatigue, pain or swelling. “Listening to your body is an excellent indication when to slow down, stop or continue.”
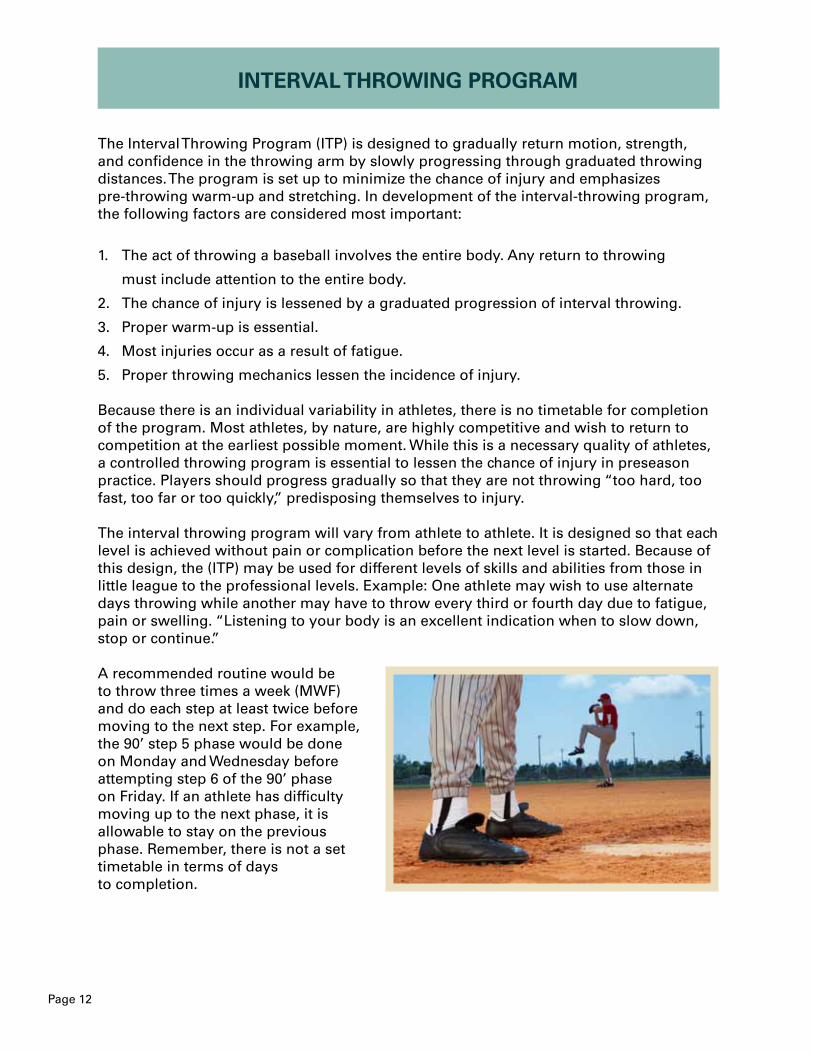
A recommended routine would be to throw three times a week (MWF) and do each step at least twice before moving to the next step. For example, the 90’ step 5 phase would be done on Monday and Wednesday before attempting step 6 of the 90’ phase on Friday. If an athlete has difficulty moving up to the next phase, it is allowable to stay on the previous phase. Remember, there is not a set timetable in terms of daysto completion.
Page 13
It is important that the following concepts be kept in mind when utilizing the program.
1. Warm-up – Jogging increases blood flow to the muscles and joints, increasing flexibility. Since warm-up varies from player to player, you should jog until you break a sweat and then proceed to stretching.
2. Stretch - All muscle groups should be stretched prior to throwing. Do this in a systematic fashion, beginning with the legs, trunk, back, neck, and arms.
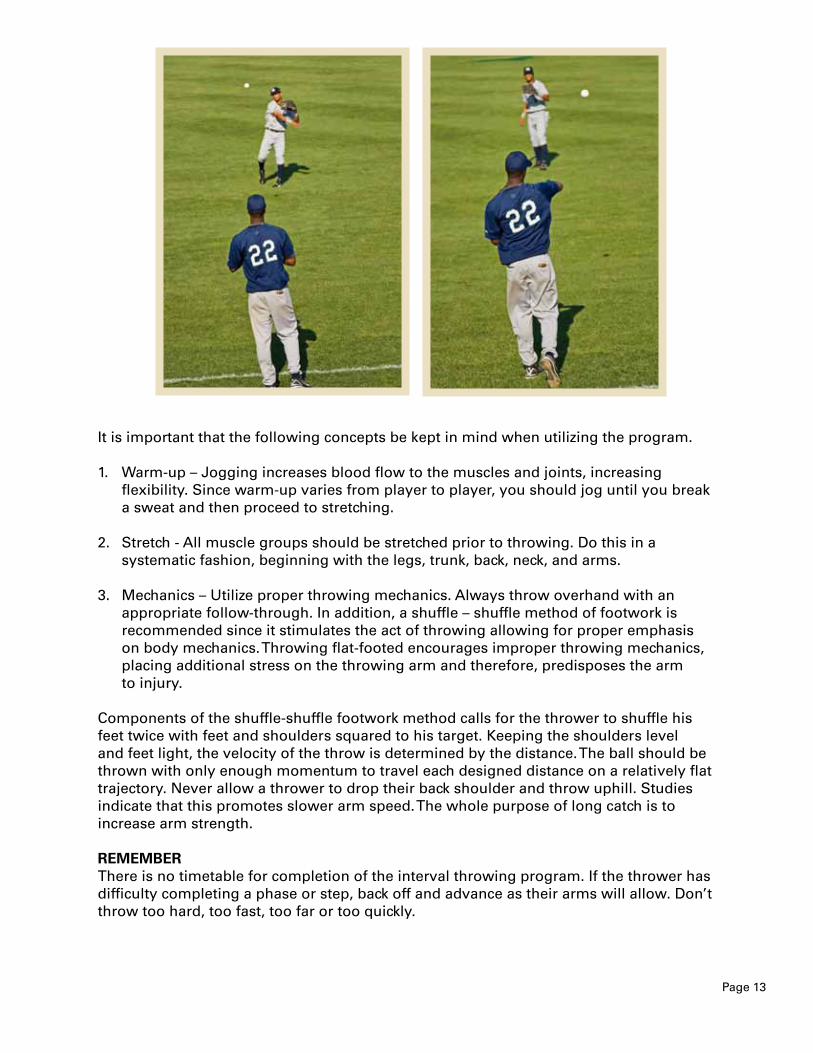
3. Mechanics – Utilize proper throwing mechanics. Always throw overhand with an appropriate follow-through. In addition, a shuffle – shuffle method of footwork is recommended since it stimulates the act of throwing allowing for proper emphasis on body mechanics. Throwing flat-footed encourages improper throwing mechanics, placing additional stress on the throwing arm and therefore, predisposes the arm
to injury.
Components of the shuffle-shuffle footwork method calls for the thrower to shuffle his feet twice with feet and shoulders squared to his target. Keeping the shoulders level and feet light, the velocity of the throw is determined by the distance. The ball should be thrown with only enough momentum to travel each designed distance on a relatively flat trajectory. Never allow a thrower to drop their back shoulder and throw uphill. Studies indicate that this promotes slower arm speed. The whole purpose of long catch is to increase arm strength.
REMEMBERThere is no timetable for completion of the interval throwing program. If the thrower has difficulty completing a phase or step, back off and advance as their arms will allow. Don’t throw too hard, too fast, too far or too quickly.
Page 14
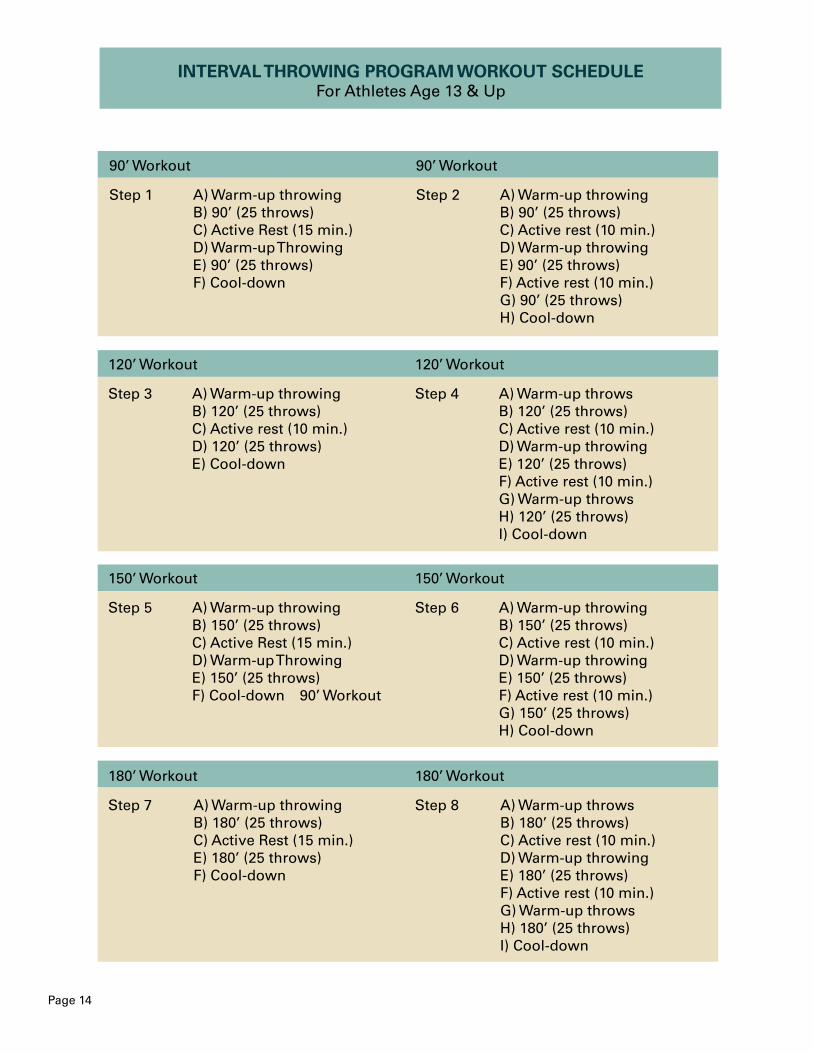
INTERVAL THROWING PROGRAM WORKOUT SCHEDULEFor Athletes Age 13 & Up
90’ Workout
Step 1 A) Warm-up throwing B) 90’ (25 throws) C) Active Rest (15 min.) D) Warm-up Throwing E) 90’ (25 throws) F) Cool-down
90’ Workout
Step 2 A) Warm-up throwing B) 90’ (25 throws) C) Active rest (10 min.) D) Warm-up throwing E) 90’ (25 throws) F) Active rest (10 min.) G) 90’ (25 throws) H) Cool-down
120’ Workout
Step 3 A) Warm-up throwing B) 120’ (25 throws) C) Active rest (10 min.) D) 120’ (25 throws) E) Cool-down
120’ Workout
Step 4 A) Warm-up throws B) 120’ (25 throws) C) Active rest (10 min.) D) Warm-up throwing E) 120’ (25 throws) F) Active rest (10 min.) G) Warm-up throws H) 120’ (25 throws) I) Cool-down
150’ Workout
Step 5 A) Warm-up throwing B) 150’ (25 throws) C) Active Rest (15 min.) D) Warm-up Throwing E) 150’ (25 throws) F) Cool-down 90’ Workout
150’ Workout
Step 6 A) Warm-up throwing B) 150’ (25 throws) C) Active rest (10 min.) D) Warm-up throwing E) 150’ (25 throws) F) Active rest (10 min.) G) 150’ (25 throws) H) Cool-down
180’ Workout
Step 7 A) Warm-up throwing B) 180’ (25 throws) C) Active Rest (15 min.) E) 180’ (25 throws) F) Cool-down
180’ Workout
Step 8 A) Warm-up throws B) 180’ (25 throws) C) Active rest (10 min.) D) Warm-up throwing E) 180’ (25 throws) F) Active rest (10 min.) G) Warm-up throws H) 180’ (25 throws) I) Cool-down
page 15
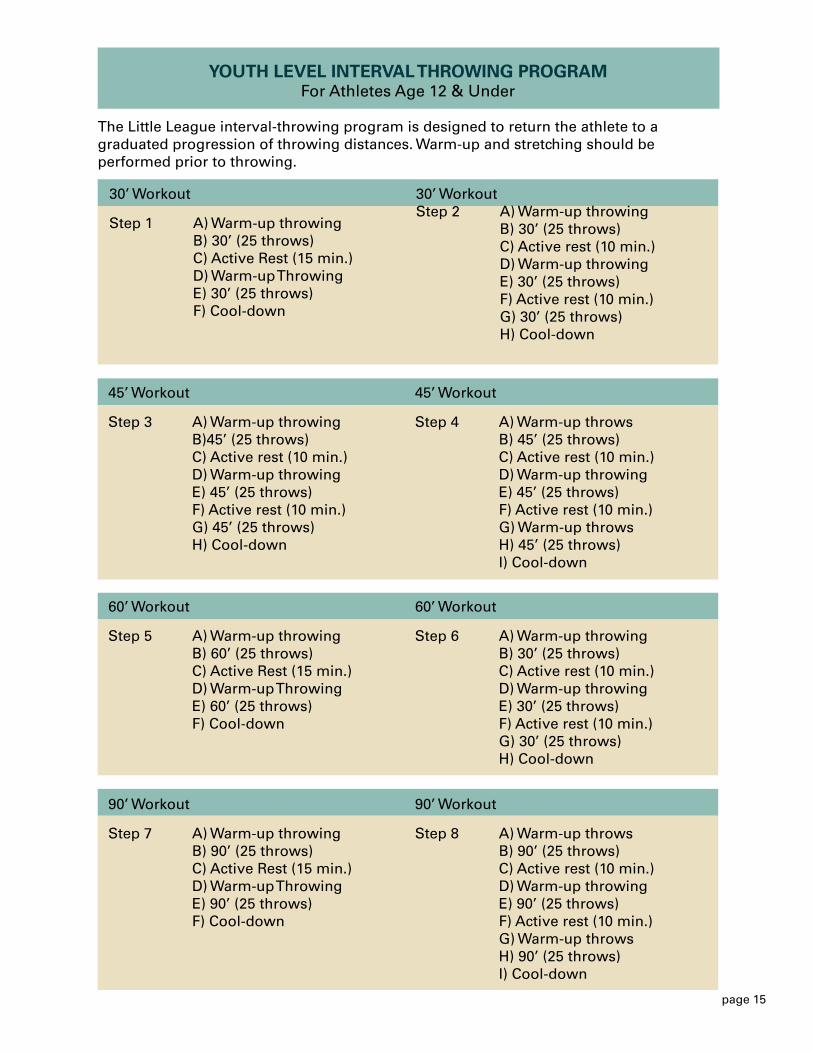
YOUTH LEVEL INTERVAL THROWING PROGRAMFor Athletes Age 12 & Under
The Little League interval-throwing program is designed to return the athlete to agraduated progression of throwing distances. Warm-up and stretching should beperformed prior to throwing.
30’ Workout
Step 1 A) Warm-up throwing B) 30’ (25 throws) C) Active Rest (15 min.) D) Warm-up Throwing E) 30’ (25 throws) F) Cool-down
30’ WorkoutStep 2 A) Warm-up throwing B) 30’ (25 throws) C) Active rest (10 min.) D) Warm-up throwing E) 30’ (25 throws) F) Active rest (10 min.) G) 30’ (25 throws) H) Cool-down
45’ Workout
Step 3 A) Warm-up throwing B)45’ (25 throws) C) Active rest (10 min.) D) Warm-up throwing E) 45’ (25 throws) F) Active rest (10 min.) G) 45’ (25 throws) H) Cool-down
45’ Workout
Step 4 A) Warm-up throws B) 45’ (25 throws) C) Active rest (10 min.) D) Warm-up throwing E) 45’ (25 throws) F) Active rest (10 min.) G) Warm-up throws H) 45’ (25 throws) I) Cool-down
60’ Workout
Step 5 A) Warm-up throwing B) 60’ (25 throws) C) Active Rest (15 min.) D) Warm-up Throwing E) 60’ (25 throws) F) Cool-down
60’ Workout
Step 6 A) Warm-up throwing B) 30’ (25 throws) C) Active rest (10 min.) D) Warm-up throwing E) 30’ (25 throws) F) Active rest (10 min.) G) 30’ (25 throws) H) Cool-down
90’ Workout
Step 7 A) Warm-up throwing B) 90’ (25 throws) C) Active Rest (15 min.) D) Warm-up Throwing E) 90’ (25 throws) F) Cool-down
90’ Workout
Step 8 A) Warm-up throws B) 90’ (25 throws) C) Active rest (10 min.) D) Warm-up throwing E) 90’ (25 throws) F) Active rest (10 min.) G) Warm-up throws H) 90’ (25 throws) I) Cool-down
Page 16
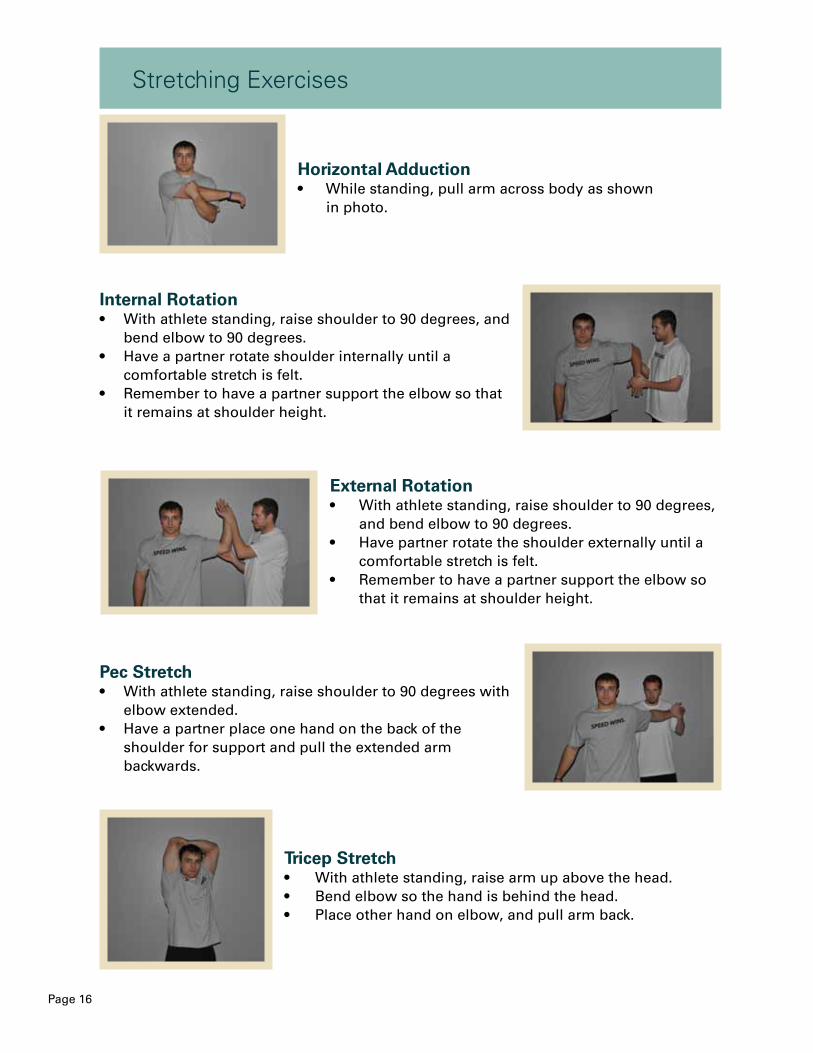
Horizontal Adduction• While standing, pull arm across body as shown in photo.
Internal Rotation• With athlete standing, raise shoulder to 90 degrees, and
bend elbow to 90 degrees.• Have a partner rotate shoulder internally until a
comfortable stretch is felt.• Remember to have a partner support the elbow so that
it remains at shoulder height.
External Rotation• With athlete standing, raise shoulder to 90 degrees,
and bend elbow to 90 degrees.• Have partner rotate the shoulder externally until a
comfortable stretch is felt.• Remember to have a partner support the elbow so
that it remains at shoulder height.
Pec Stretch• With athlete standing, raise shoulder to 90 degrees with
elbow extended.• Have a partner place one hand on the back of the
shoulder for support and pull the extended arm backwards.
Tricep Stretch• With athlete standing, raise arm up above the head.• Bend elbow so the hand is behind the head.• Place other hand on elbow, and pull arm back.
Stretching Exercises
Page 17
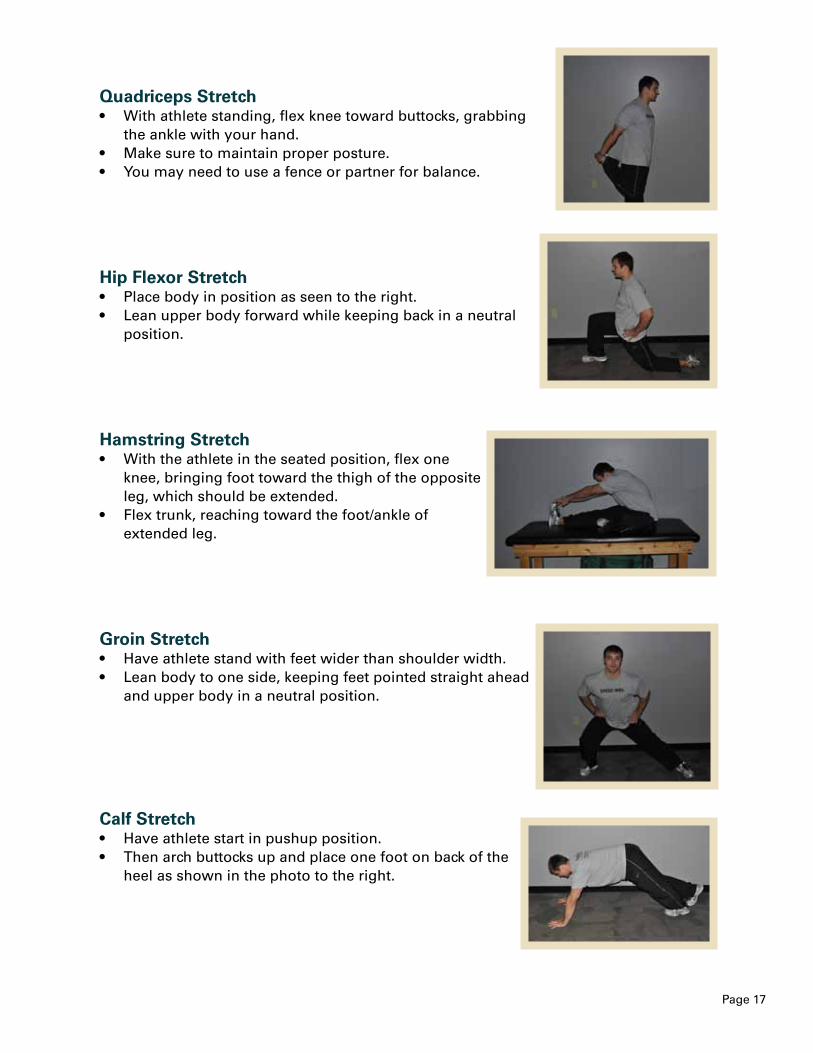
Quadriceps Stretch• With athlete standing, flex knee toward buttocks, grabbing
the ankle with your hand.• Make sure to maintain proper posture.• You may need to use a fence or partner for balance.
Hip Flexor Stretch• Place body in position as seen to the right.• Lean upper body forward while keeping back in a neutral
position.
Hamstring Stretch• With the athlete in the seated position, flex one
knee, bringing foot toward the thigh of the opposite leg, which should be extended.
• Flex trunk, reaching toward the foot/ankle of extended leg.
Groin Stretch• Have athlete stand with feet wider than shoulder width. • Lean body to one side, keeping feet pointed straight ahead
and upper body in a neutral position.
Calf Stretch• Have athlete start in pushup position.• Then arch buttocks up and place one foot on back of the
heel as shown in the photo to the right.
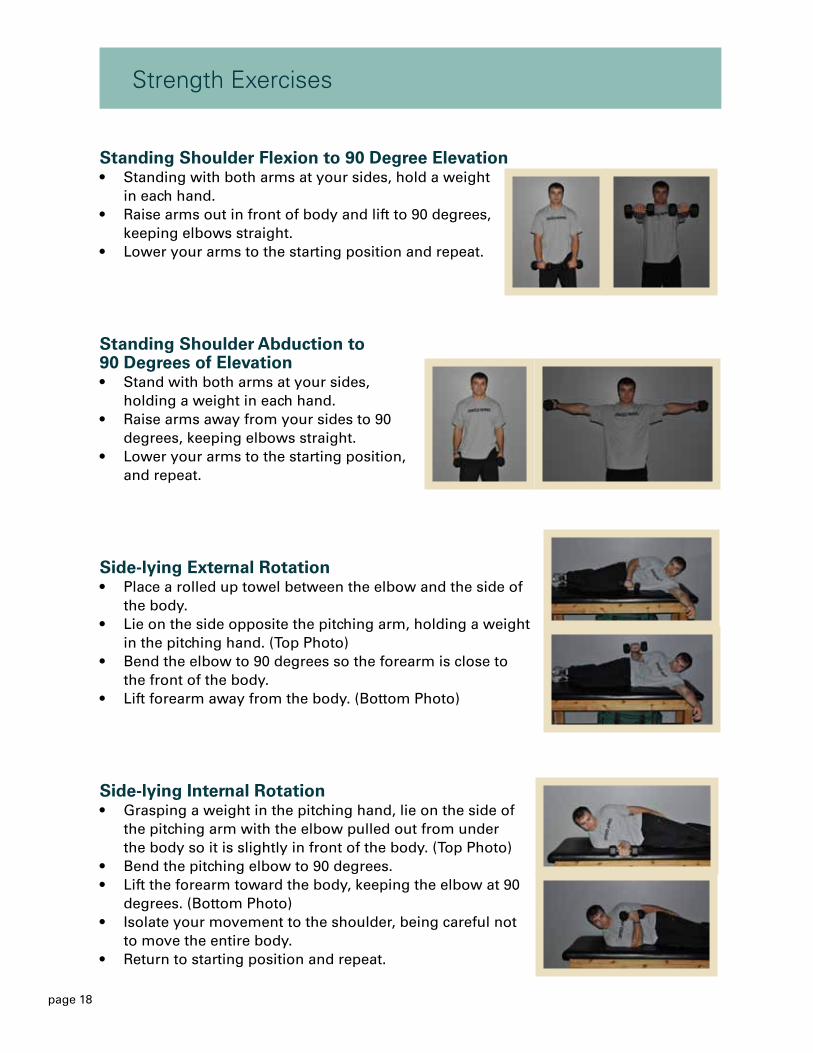
Standing Shoulder Flexion to 90 Degree Elevation• Standing with both arms at your sides, hold a weight
in each hand.• Raise arms out in front of body and lift to 90 degrees,
keeping elbows straight.• Lower your arms to the starting position and repeat.
Standing Shoulder Abduction to90 Degrees of Elevation• Stand with both arms at your sides,
holding a weight in each hand.• Raise arms away from your sides to 90
degrees, keeping elbows straight. • Lower your arms to the starting position,
and repeat.
Side-lying External Rotation• Place a rolled up towel between the elbow and the side of
the body. • Lie on the side opposite the pitching arm, holding a weight
in the pitching hand. (Top Photo)• Bend the elbow to 90 degrees so the forearm is close to
the front of the body.• Lift forearm away from the body. (Bottom Photo)
Side-lying Internal Rotation• Grasping a weight in the pitching hand, lie on the side of
the pitching arm with the elbow pulled out from under the body so it is slightly in front of the body. (Top Photo)
• Bend the pitching elbow to 90 degrees.• Lift the forearm toward the body, keeping the elbow at 90
degrees. (Bottom Photo)• Isolate your movement to the shoulder, being careful not
to move the entire body.• Return to starting position and repeat.
page 18
Strength Exercises
page 19
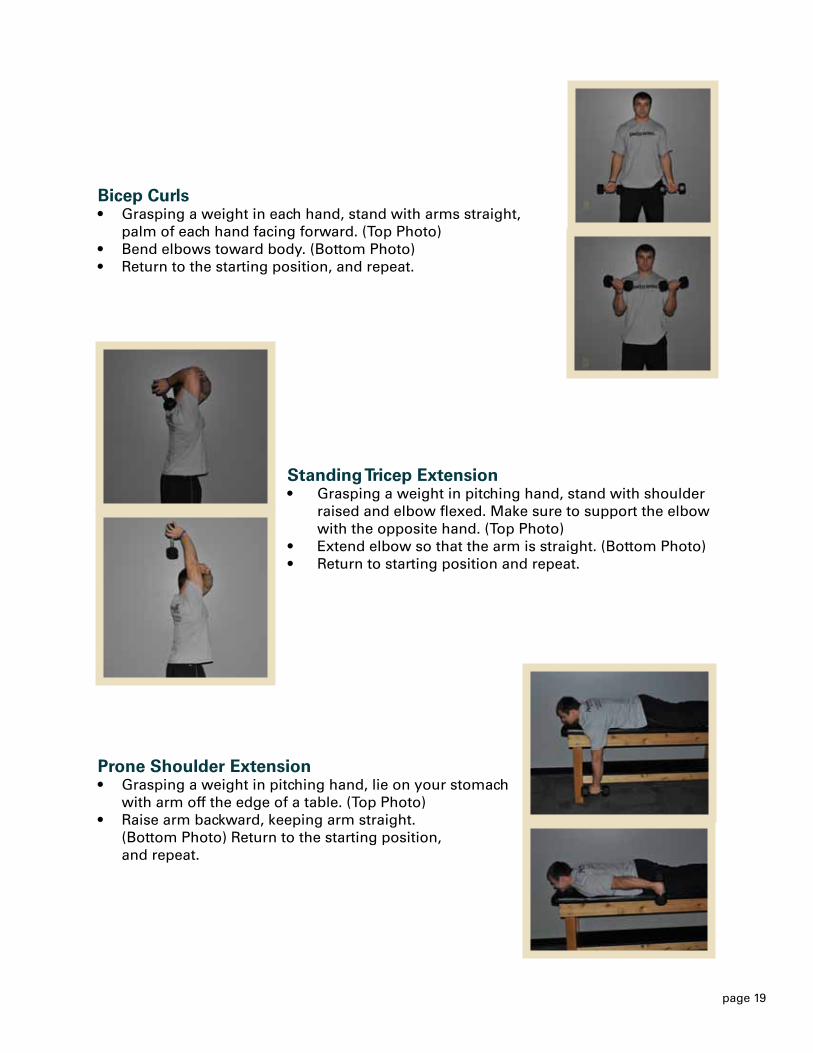
Bicep Curls• Grasping a weight in each hand, stand with arms straight,
palm of each hand facing forward. (Top Photo)• Bend elbows toward body. (Bottom Photo)• Return to the starting position, and repeat.
Standing Tricep Extension• Grasping a weight in pitching hand, stand with shoulder
raised and elbow flexed. Make sure to support the elbow with the opposite hand. (Top Photo)
• Extend elbow so that the arm is straight. (Bottom Photo)• Return to starting position and repeat.
Prone Shoulder Extension• Grasping a weight in pitching hand, lie on your stomach
with arm off the edge of a table. (Top Photo)• Raise arm backward, keeping arm straight. (Bottom Photo) Return to the starting position, and repeat.

Prone Rows• Grasping a weight in pitching hand, lie on your stomach with
arm off the edge of a table. (Top Photo)• Raise arm backward, bending elbow at 90 degrees.
(Bottom Photo)• Return to starting position and repeat.
Prone Horizontal Abduction• Grasping a weight in pitching hand, lie on your stomach with
arm off the edge of a table. (Top Photo)• Raise arm up so that it is level with the shoulder. (Bottom Photo)• Return to starting position and repeat.
Wrist Flexion• Grasping a weight in pitching hand, sit with arm
supported on leg. (Left Photo)• Curl wrist upward. (Right Photo)• Return to starting position and repeat.
Wrist Extension• Grasping a weight in pitching hand, sit with
arm on leg. (Left Photo)• Curl wrist upward. (Right Photo) Return to
starting position and repeat
page 20
page 21
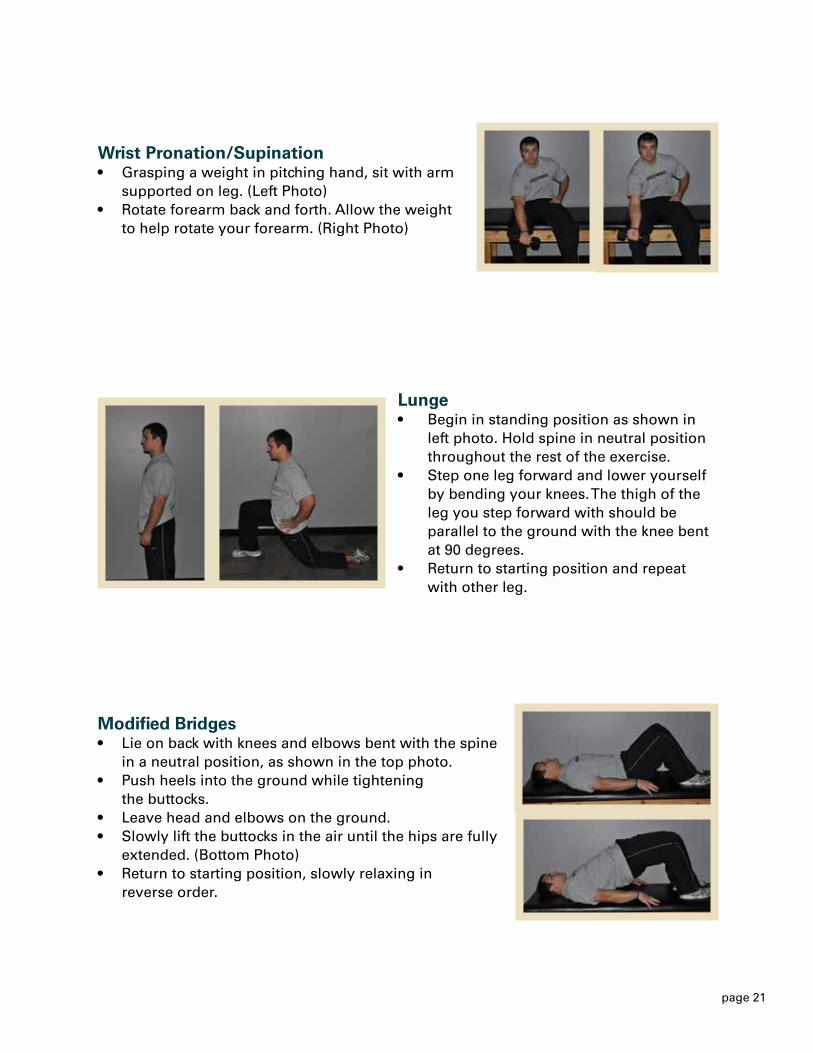
Wrist Pronation/Supination• Grasping a weight in pitching hand, sit with arm
supported on leg. (Left Photo)• Rotate forearm back and forth. Allow the weight
to help rotate your forearm. (Right Photo)
Lunge• Begin in standing position as shown in
left photo. Hold spine in neutral position throughout the rest of the exercise.
• Step one leg forward and lower yourself by bending your knees. The thigh of the leg you step forward with should be parallel to the ground with the knee bent at 90 degrees.
• Return to starting position and repeat with other leg.
Modified Bridges• Lie on back with knees and elbows bent with the spine
in a neutral position, as shown in the top photo.• Push heels into the ground while tightening the buttocks.• Leave head and elbows on the ground.• Slowly lift the buttocks in the air until the hips are fully
extended. (Bottom Photo)• Return to starting position, slowly relaxing in reverse order.

Push-ups• Begin with arms fully extended, spine held in
neutral position, and weight supported by toes and hands as shown in the top photo.
• Slowly lower body down until the arms are at 90 degrees of flexion, making sure that the spine stays in a neutral position. (Bottom Photo)
• Return to the starting position, making sure to keep the spine in a neutral position.
Pushup plus Reach Rotation• For this exercise, the athlete will perform
a standing pushup, and then continue to raise one arm up while rotating the torso. The athlete will extend this arm up until it reaches a vertical position with the fingertips reaching for the sky. The athlete then will return to the starting position and repeat the procedure for the other arm.
Lateral Lunges• For this exercise, the athlete will spread his or
her feet apart to a wide but comfortable stance, with the toes pointing forward. From here, the athlete will lower his body into a squat of one leg, keeping a stable posture, and being sure not to extend the knee of the supporting leg ahead of the toes. The athlete should go to a position as deep as his flexibility allows, and also should focus on pushing his hips backward into a sitting position while descending.
Page 22

Get out of the pen and develop a perfectpitch at the Avera Sports Institute
From warm-up towind-down, we’ll teachyou the right way tothrow a perfect game.Don’t risk striking out...call us today at 605-322-FAST (3278)or visit us atwww.AveraSports.org
ASPI-17302-REVDE0211
For more information,stop by or contact:
Avera Sports Institute1601 West 44th PlaceSioux Falls, SD 57105605-322-FAST (3278)