Design: Kimberley Duval - Walmart.comi.walmart.com/i/rb/4182.pdf · Design: Kimberley Duval...
91
-
Upload
duongkhuong -
Category
Documents
-
view
229 -
download
4
Transcript of Design: Kimberley Duval - Walmart.comi.walmart.com/i/rb/4182.pdf · Design: Kimberley Duval...


By: Matthew Rorie Design: Kimberley Duval
Oblivion Guide - Part One
It's been a long time coming, but the journey from Morrowind to Oblivion was worth the wait. Fans of the Elder Scrolls have had to wait almost four years for a sequel to Morrowind, the sprawling, epic game set in the land of Vvardenfell. Luckily for them, and for anyone interested in quality role-playing games, Oblivion has finally arrived, and it's even bigger and better than its predecessor.
Unlike Morrowind, Oblivion is set in Cyrodiil, the heartland of the Empire of Tamriel, which in turn is just a single continent on the planet of Nirn. With sixteen square miles of land to explore, there's going to be plenty of randomly generated dungeons to explore, along with a huge number of structured quests, including those found as a part of the game's main storyline, the four main guilds you can join, as well as dozens of other miscellaneous quests you can take part of.
In part one of GameSpot's Game Guide to Oblivion, we're going to be covering the basics of character creation and going over the game's main storyline, as well as offer up a bunch of general tips to get you started with the game. In particular, those of you who are interested in crafting a character that remains powerful throughout the game, or are confused by the odd levelling system in Oblivion, should check out our Character Creation and Levelling Up chapter; it should help answer some of your questions about how to obtain the maximum possible attribute bonus at each level up.
In addition, take note that this is only part one of our guide; we should have plenty more information in the future, including details on the guild quests, more character creation tips, and more! In the meantime, if there's anything you'd like to add, or a feature you'd like to see included, feel free to drop us a line via the feedback link.
Races
There are ten main races to be found in Cyrodiil, some fairly standard human-esque races, some more traditional fantasy archetypes, and some that are a bit more outlandish. Your choice of race doesn't affect what you can choose to do in the game, but each race does have a few particular strengths, so if you know what kind of character you want to play in the game, such as by focusing on spellcasting or fighting with melee weapons, then you can give yourself a head start by picking a race with complementary skills and ability scores. But, again, your choice of race doesn’t close off any paths to you, so if you want to make a Breton but focus on your heavy armor and sword skills, you'll be free to do so; you'll just start a bit behind (skill-wise) Redguard character with the same focus.

Argonian
The reptilian Argonians have an odd collection of skill bonuses, making them a bizarre jack-of-all-trades trades race. Their primary attributes are Agility and Speed, which make them decent thief/stealth characters, but apart from that they're somewhat undistinguished unless you intend to select the race for role-playing purposes.
Skill Bonuses
● Alchemy +5● Athletics +10● Blade +5● Hand To Hand +5● Illusion +5 ● Mysticism +5● Security +10
Special Abilities
● Resist Disease (magnitude 75, permanent) ● Immune to Poison (magnitude 100, permanent) ● Water Breathing (permanent)
Breton
Oh so pretty...and oh so crazy.

The Bretonian race is well known as having spawned numerous famous spellcasters, and indeed most of their skills rotate around the magical arts. Breton mages aren't of the fire-and-brimstone type, though, preferring to use subtler magical energies to effect their ultimate goals. As such, the fan-favorite Destruction skill is a no-show in their bonuses, but you'll be able to use all sorts of other spells as you like, with some large bonuses to them to boot. Without being able to emphasize Destruction, though, you'll be a little bit behind offensively when compared to a Dark Elf or High Elf mage. Defensively, however, your ability to Resist Magicka will make most spellcasting enemies a piece of cake for Breton mages.
Skill Bonuses
● Alchemy +5● Alteration +5● Conjuration +10● Illusion +5● Mysticism +10● Restoration +10
Special Abilities
● Fortified Majicka (magnitude 50, permanent) ● Resist Magicka (magnitude 50, permanent) ● Shield (temporary physical damage barrier, once/day)
Dark Elf
Dark Elf is an excellent race for players that want to make a character that emphasizes a mix of spellcasting and combat. Most of their bonuses are for combat-oriented skills, including a good variety of weapon skills, with Destruction magic getting a large bonus for when you want to take your opponents down at range. While not as physically powerful as a Nord or a Redguard, the balance between strength and magical abilities makes for a well-rounded combat character. And the Resist Fire ability is a big help against the many fire-wielding enemies in the game.
Skill Bonuses
● Athletics +5● Blade +10● Blunt +5● Destruction +10● Light Armor +5● Marksman +5● Mysticism +5
Special Abilities

● Ancestor Guardian (Summon Ghost once per day for 60 seconds) ● Resist Fire (magnitude 75, permanent)
High Elf
The High Elf is arguably the best pure spellcasting race, especially if you're of an offensive bent. With all of the skill bonuses save for Alchemy being focused on spellcasting skills, you're going to have a broad array of magicks boosted, including Destruction for pure offensive combat. Especially noteworthy are the special abilities on offer here; with Fortified Magicka, you'll be able to spend a lot more time casting spells as opposed to taking on enemies in combat. If you can match yourself up with an appropriate birthsign, you can become an extremely specialized mage character, which can be interesting if you have no interest in stealth or combat gameplay.
Skill Bonuses
● Alchemy +5● Alteration +10● Conjuration +5● Destruction +10● Illusion +5 ● Mysticism +10
Special Abilities
● Fortified Majicka (magnitude 100, permanent) ● Resist Disease (magnitude 75, permanent) ● Weakness to Fire, Frost, and Shock (magnitude 25, permanent)
Imperial
Imperials are fairly run-of-the-mill humans, without any particularly exceptional skill bonuses or special abilities. They're the most personable of all the races, though, typically well-liked by everyone, with the gift of a golden tongue. Although talking your way through the entire game would be a difficult task, to say the least, an Imperial character is probably your best bet if you're attempting to play a character that can Persuade his or her way past characters that are reluctant to help you. You'll probably have the ability to avoid a lot of sticky situations, or just make your trip a bit easier, with an Imperial character that focuses on Speechcraft to help out in conversations. Since you can supplement that with their built-in Voice of the Emperor ability to Charm characters once per day, which can be further supplemented by Charm spells if need be, there should be few critical characters in the game that you can't charm off their feet. This is a more subtle skill than being able to crack everyone's head with an axe, but is still valuable nonetheless.
Skill Bonuses

● Blade +5● Blunt +5● Hand To Hand +5● Heavy Armor +5 ● Mercantile +10● Speechcraft +10
Special Abilities
● Star of the West (Absorb Fatigue, magnitude 100, once per day) ● Voice of the Emperor (Charm, magnitude 30, once per day)
Khajiit
The Khajit are well-known as a slave race, at least in the lands of Hammerfell. Freed Khajit are appreciated as thieves, with a suite of skill bonuses well-suited to assassin work, as well. They're typically capable of running farther and jumping higher than other races, and with extra Sneaking and Security they'll be capable of infiltrating areas they're really not meant to enter. Wood Elves are usually going to be better in stealth combat than Khajit, but if you want to try a pure stealth avoidance archetype, then a Khajit might be right up your alley. Your Eye of Fear ability will cause pesky or too-powerful enemies to run away, while Eye of Night will let you see in the dark without having to resort to torches, which attract the attention of enemies.
Skill Bonuses
● Acrobatics +10● Athletics +5● Blade +5● Hand To Hand +10● Light Armor +5 ● Security +5● Sneak +5
Special Abilities
● Eye of Fear (Demoralize, magnitude 100, once a day) ● Eye of Night (Night-Eye, 30 seconds, repeatable)
Nord
If you're going for pure melee, then this race from the northern reaches is going to be ideal for you. With the highest strength of any race (for the women, at any rate; several classes start with 50 strength for men), you're going to be able to carry more loot and whack enemies harder than anyone else in Tamriel. Your skill bonuses are also obviously applicable to the heavy work of an armor-wielding warrior, with a bevy of fine bonuses to your core skills and some smaller bonuses

to Restoration and Armorer, which come in handy when you're not in the thick of battle.
Skill Bonuses
● Armorer +5● Blade +10● Block +5● Blunt +10● Heavy Armor +10● Restoration +5
Special Abilities
● Nordic Frost (Magnitude 50 frost damage, once per day) ● Resist Frost (Magnitude 50, permanent)
Orc
Although Orcs are well thought of in Tamriel (the female of the species is the only female member of a race that's actually considered uglier than the male, which is reflected in the exceedingly poor Personality score), they do one thing well: fight. With their Berserk ability, they'll be able to flip on the adrenaline once per day, allowing them to gain extra health, strength, and fatigue, at the cost of a massive agility penalty. While this only lasts for a minute or so, it'll help you take down the tough enemies that charge at you, since you'll be able to stand in one spot and go to town on them. Note, however, that they have the fewest number of skill bonuses, and don't get any extra points in Blade, so you'll be forced to skill it up yourself if you want to be handy with a sword.

If you choose to be an Orc, you'll pay the price, literally; merchants will charge you more than they will other characters.
Skill Bonuses
● Armorer +10● Block +10● Blunt +10● Hand To Hand +5● Heavy Armor +10
Special Abilities
● Berserk (Fortify Health 20, Fortify Strength 50, Fortify Fatigue 200, Drain Agility 100, lasts 60 seconds, can be cast once per day)
● Resist Magicka (Magnitude 25, permanent)
Redguard
Another of the melee-oriented races, Redguards are designed for combat and nothing but. While an Armorer boost would probably be preferred over the Athletics skill bonus that they get, the rest of the skills here are welcome for fighters. The Adrenaline Rush ability will give you a huge edge in difficult fights, with no apparent drawbacks, and while resisting poison and disease isn't all that sexy, it'll help you avoid the ill effects of eating Alchemy ingredients while attempting to raise your score.
Skill Bonuses
● Athletics +10● Blade +10● Blunt +10● Light Armor +5● Heavy Armor +5 ● Mercantile +5
Special Abilities
● Adrenaline Rush (Fortify: Agility 50, Speed 50, Strength 50, Endurance 50, Health 25, lasts sixty seconds, castable once per day)
● Resist Poison (Magnitude 75, permanent) ● Resist Disease (Magnitude 75, permanent)
Wood Elf
Wood Elves are among the most skilled stealth warriors in all of Tamriel, and their skill bonuses show it. With huge bonuses to Sneak and Marksman, you'll be creeping up on enemies and felling them from the shadows with your ranged weapons like an assassin. With another large bonus to Alchemy, you'll also be able to supplement your ranged attacks with deadly poisons. Add in some Illusion magic to make yourself invisible, and you'll be one of the deadliest soldiers in the land, of a sort; when it comes to a straight fight, you'll have some problems.
Skill Bonuses
● Acrobatics +5● Alchemy +10● Alteration +5● Light Armor +5● Marksman +10● Sneak +10
Special Abilities
● Beast Tongue (Command Creature, magnitude 20, lasts sixty seconds once per day) ● Resist Disease (Magnitude 75, permanent)
Skills
There are numerous different skills in Oblivion, all of which you can dabble in or specialize in as is your wont. We're going to leave the character creation aspects of choosing skills aside for now and focus on simply describing the skills and how they affect the game, but suffice to say that you can and probably will want to try your hand at numerous different skills through the course of a

game, unless you're role-playing a warrior with a huge disdain for magic, or something like that.
Note that your character has a proficiency number for each skill, with a higher number indicating that your character is more talented in that particular skill. To increase your skill's proficiency, you have to use it over and over again; you can cast repeated healing spells on yourself to increase your Restoration skill, or make a billion potions to increase your Alchemy skill. Each skill also has a rank associated with it, which indicates a different level of power, which in turn lets you unlock new abilities related to that power.
Skill Score Mastery Level0-24 Novice 25-49 Apprentice50-74 Journeyman75-99 Expert 100 Master
For the purposes of organizational clarity, we'll repeat the game manual's classification of skills into Combat, Magic, and Stealth, but these are pretty fuzzy terms. The main area where this taxonomy comes into play is in character creation, where you choose a class that has a "focus" in one of these areas; that area's skills will get an immediate ten point bonus to their starting numbers and will rank up a bit more quickly than other skills will. Again, though, you aren't constrained in your choice of skills, and if you're a Combat specialist that wants to use Alchemy to make potions and Illusion magic to light up dank dungeons, then you'll be free to do so.
Also note that there are special NPCs in the game world that you can pay for training. Each character will accept a certain amount of gold to increase your skill's rating by one point. Training is expensive, however, and can only be purchased five times per level. We've noted the general locations of each of these trainers underneath their specific skills. The low-level trainers will train you between ranks one and 40; the mid-level trainers work between 40 and 70; and the high-level trainers work from 70 to 100. The high-level trainers will usually require you to perform a quest of some sort before they'll agree to train you, however.
Combat Skills
Armorer
Relevant Attribute: Endurance Low Trainers: Eitar, in a house in Leyawiin; Tadrose Helas, Bravil Fighter's Guild Medium Trainers: Rohssan, A Fighting Chance shop in Imperial Market District; Rasheda in Fire and Steel in Chorrol High Trainer: Gin-Wulm, wanders in the Imperial Market District much of the time
Armorer is more or less a critical skill for every character to learn, unless you're playing a hard-core pacifist character that attempts to never kill anything, or a nudist character that runs around
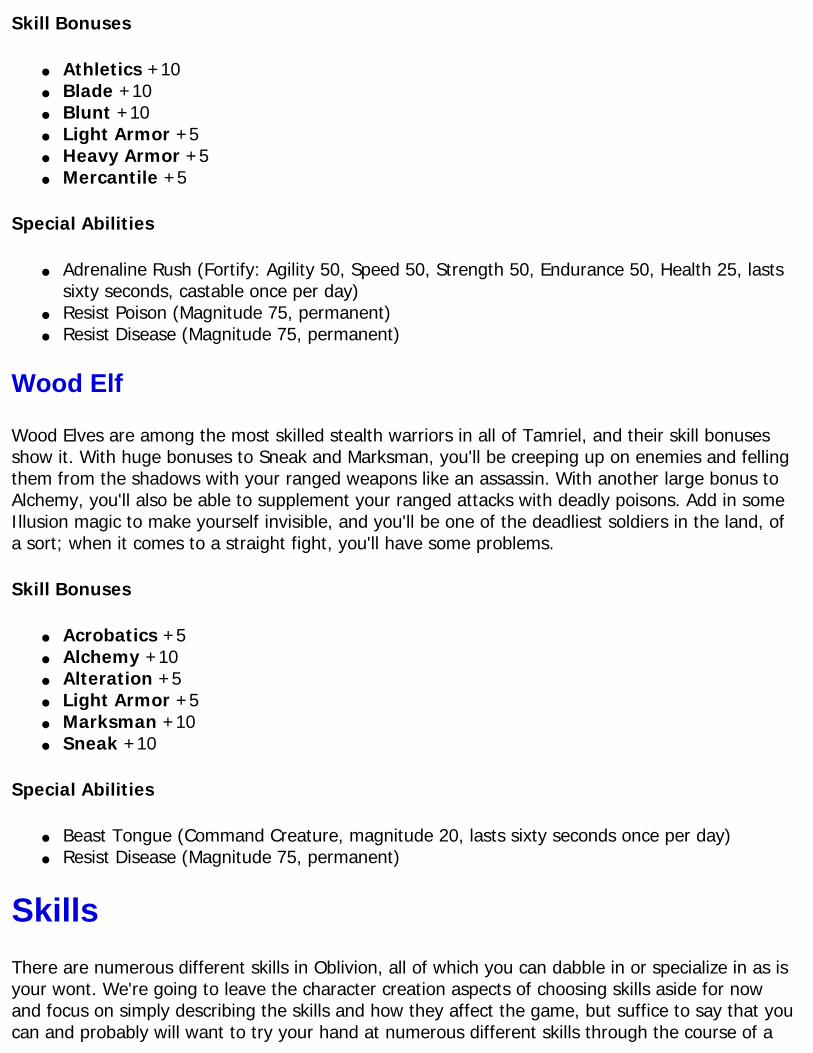
and beats up everything with his or her fists. Almost every other character, though, will use some kind of armor or weapon, or will take damage from enemy blows, and that results in equipment that gets broken or worn over time.
With the Armorer skill, you can use repair hammers to repair your equipment in the middle of a dungeon, or out in a field, or anywhere else it might be convenient, provided that you actually have the hammers to use. (Early on in the game, the 20 gold or so per hammer will be a big goldsink for you, but they're pretty much necessary.) It's important to keep your equipment in tip-top shape, because as it takes damage, it also loses efficacy. It's not a situation where your equipment is either working or not, in other words; a sword that's been damaged 50% will be doing around 50% of its maximum damage. So you'll want to stop and pause frequently to repair your armor.
Just letting people hit you will be the easiest way to flex your Armorer muscles, but you can also repair your enemy's equipment.
This isn't a difficult thing to do, luckily; if you're a warrior, just bind a repair hammer to one of your hotkeys and pull it up whenever it's convenient. From there, it's just a matter of pressing a button over and over until all of your equipment is repaired. Until you get to Apprentice level, you're going to be breaking hammers like a madman, but after you do hit Apprentice, you should be able to complete most dungeon jaunts with five-ten hammers and not have to worry too much about running out.
If you set Armorer as a Minor Skill, you'll probably want to train yourself up to level 50 to gain the ability to repair magical items, if you don't manage to get there through normal use of the skill. If you're really desperate to increase your Armorer rating, head into Bandit-infested dungeons, and pick up all of the armor and weapons that they drop when you kill your foes. Keep on doing this

until you become overencumbered, then repair everything that pops up in your repair menu and drop anything that isn't valuable enough to keep carrying.
Mastery Level AbilityNovice Cannot repair magical items. Apprentice Still can't repair magical items, but hammers last twice as long. Journeyman Can repair magical items.
Expert Can actually make items better by "repairing" them to 125% of their base statistics. This adds damage to weapons and protection to armor.
Master Never breaks hammers, so you can get by with only one hammer.
Athletics
Relevant Attribute: Speed Low Trainers: Uuras in Skingrad; Mahei in Leyawiin Medium Trainers: Hauls-Ropes-Faster, usually found in the Fo'c'sle inn in Anvil's dock district during the day, but you'll have to pick the lock on his room High Trainer: Rusia Bradus, Anvil's main section
The harsh truth is that very, very few players of Oblivion are going to be hyped up about the ability to pump up their Athletics score. Although it has some subtle benefits for your character, the ability to run and swim faster just isn't necessarily all that sexy. Although you do regenerate fatigue more quickly when you increase your Athletics, that alone isn't going to be worth specializing in the skill, especially since it's pretty much always increasing just from running around and swimming. It'll go up on its own fairly naturally as you play the game.
Mastery Level AbilityNovice Slow Fatigue regeneration while running. Apprentice 25% faster Fatigue regeneration while running.Journeyman 50% faster Fatigue regeneration while running.Expert 75% faster Fatigue regeneration while running.Master Running doesn't reduce fatigue regeneration.
Blade
Relevant Attribute: Strength Low Trainers: Naspia Cosa, Castle Cheydinhal; Right-Wind, Bruma Fighters Guild Medium Trainers: Sherina, Leyawiin Fighters Guild; Rhano, Anvil Fighters Guild High Trainer: Alix Lencola, Faregyl Inn, south of Imperial City on the Green Road, on a little dead-end road near the end of a river
Ah, the blade. This is pretty much the classic fantasy role-playing skill, allowing you to use bladed
weapons of all makes and models. (Although, not really; note that axes are for some reason considered to be Blunt weapons.)
Increasing your Blade skill lets you deal more damage with bladed weapons. Pretty simple! Note that warrior characters should only pick ONE of the three weapons-related skills as a Major Skill, for reasons that we make clear in our chapter on levelling up.
Mastery Level AbilityNovice Basic Power Attack available by holding down the attack button. Apprentice Standing Power Attack becomes available; hold down button while standing still.
JourneymanLeft and Right Power Attacks available; hold down attack button while moving left or right. Chance to disarm your opponent. (Grab their weapon immediately, or they'll just pick it up again!)
Expert Backward Power Attack, chance to knockdown enemy. Master Forward Power Attack, chance to paralyze enemy.
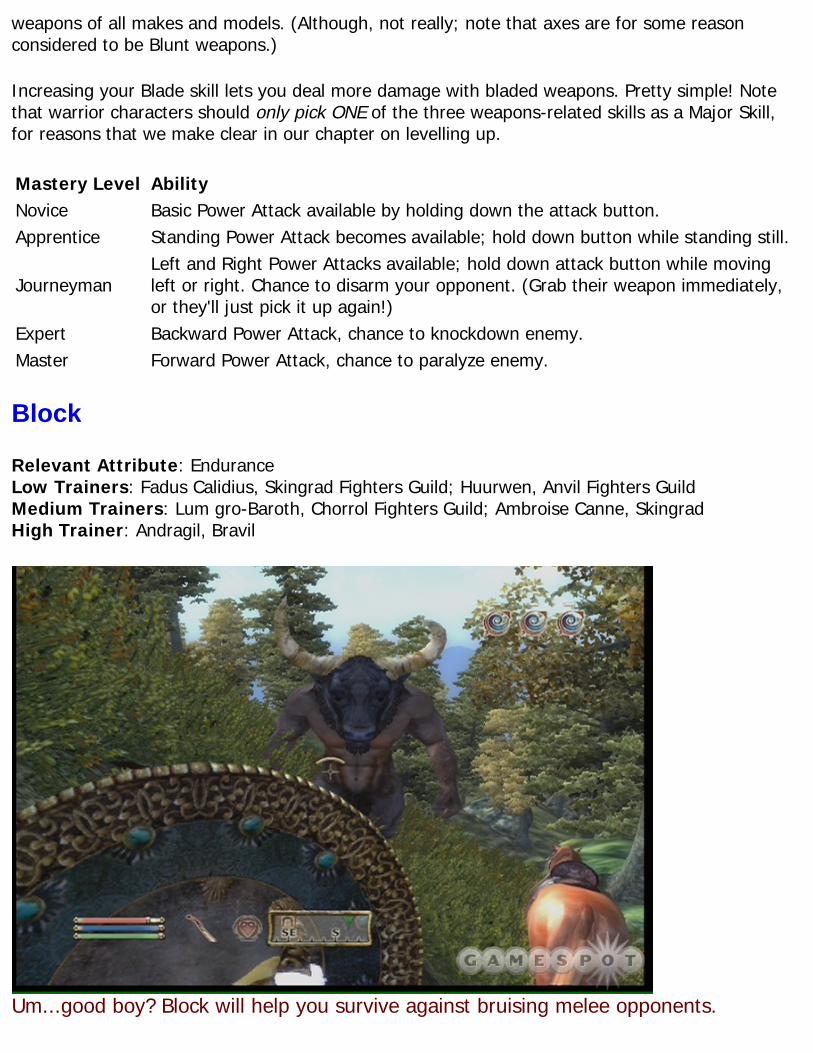
Block
Relevant Attribute: Endurance Low Trainers: Fadus Calidius, Skingrad Fighters Guild; Huurwen, Anvil Fighters Guild Medium Trainers: Lum gro-Baroth, Chorrol Fighters Guild; Ambroise Canne, Skingrad High Trainer: Andragil, Bravil
Um...good boy? Block will help you survive against bruising melee opponents.

The Block ability determines your character's proficiency in the art of shielding him or herself from blows. Anything can be used to block, whether it's a bow held sideways across the body, the short end of a warhammer, a shield, or even your bare hands, but the shield is definitely the emphasis here. Shields are generally the most well-armored piece of equipment you can own, and can deflect much more damage than other types of blockable items. The abilities here also emphasize the ability to block with shields. Although characters with two-handed weapons are still technically able to block, if you're focusing on defensive measures, then there's nothing like a good shield at your side.
Mastery Level AbilityNovice Blocking drains fatigue, take full damage when blocking with only your hands. Apprentice Blocking no longer drains fatigue.
JourneymanWeapons and shields no longer take damage when blocking, enemies occasionally recoil when striking your hands when blocking in hand-to-hand combat.
Expert Can perform a knockback counterattack with shield only, giving chance to stagger the enemy.
Master Knockback counterattacks have a further chance to disarm the opponent.
Blunt
Relevant Attribute: Strength Low Trainers: Bugak gro-Bol, Southern Books in Leyawiin; Vigdis, Anvil Fighters Guild Medium Trainers: Christophe Marane, Brina Cross Inn near Anvil; Azzan at Anvil Fighters Guild High Trainer: Irene Metrick, Imperial City Elven Gardens District
The always amusingly-named Blunt skill is a favorite of Redman and Method Man, as well as mace-wielding warriors everywhere. Blunt weapons are typically more effective on skeletons than blades, for what it's worth, but deciding between the two is still a mostly personal preference. Even though you should only pick one as a Major Skill, though, you can (and should) still attempt to use the other type of weapon as often as possible, to increase your Strength bonus at level-ups.
Mastery Level AbilityNovice Basic Power Attack available by holding down the attack button. Apprentice Standing Power Attack becomes available; hold down button while standing still.
JourneymanLeft and Right Power Attacks available; hold down attack button while moving left or right. Chance to disarm your opponent. (Grab their weapon immediately, or they'll just pick it up again!)
Expert Backward Power Attack, chance to knockdown enemy. Master Forward Power Attack, chance to paralyze enemy.
Hand To Hand

Relevant Attribute: Strength Low Trainers: Nahsi, Bravil Fighters Guild; Rufrius Vinicius, Anvil Fighters Guild Medium Trainers: Davela Hlaren, Imperial Bridge Inn, Silverfish River; Ra'qanar, Castle Cheydinhal High Trainer: Helvius Cecia, Bruma (house or in the Thieves Guild)
Hand to hand combat is the domain of a relatively small number of martial artists in Cyrodiil, but it can still be a powerful tool in the hands of those skilled in it. Or it can just be about running around and punching dudes in the face. Your choice.
The main difference between Hand to Hand combat and the other two weapons styles (Blade and Blunt) is that Hand to Hand also deals damage to an opponent's Fatigue, as well as their health, meaning that you'll occasionally be able to knock your opponent right the hell out and pound on them while they're lying on the ground (which never gets old). You can help this process along by poisoning them with a Fatigue-draining arrow or a Drain Fatigue or Damage Fatigue spell. In trade, you'll probably lose a bit of maximum damage when compared to a real weapons skill, and of course you won't ever be able to enchant your fists with a Sigil Stone or something like that for extra power.
Mastery Level AbilityNovice Basic Power Attack available by holding down the attack button. Apprentice Standing Power Attack becomes available; hold down button while standing still.
JourneymanLeft and Right Power Attacks available; hold down attack button while moving left or right. Chance to disarm your opponent. (Grab their weapon immediately, or they'll just pick it up again!)
Expert Backward Power Attack, chance to knockdown enemy, has a chance to perform a knockback attack while blocking.
Master Forward Power Attack, chance to paralyze enemy, has a chance to disarm opponent after a knockback attack while blocking.
Heavy Armor
Relevant Attribute: Endurance Low Trainers: Brodras, Leyawiin Fighters Guild; Bumph gra-Gash, Bruma Guild Medium Trainers: Varnado, Best Defense shop, Imperial Market District; Valus Odiil, Chorrol High Trainer: Pranal, Roxey Inn, on the road directly north of Imperial Prison Sewer/Vilverin

Like with Armorer, boosting your Heavy Armor skill means getting hit a lot.
Your Heavy Armor skill increases the amount of protection you gain when you wear Iron, Steel, Dwarven, Orcish, Ebony, and Daedric armor. The only way to increase your Heavy Armor skill is to get hit by something while wearing it, so this is a skill that will naturally increase as you engage in firefights. Since you'll likely want to get this as high as possible to take advantage of the added defense, this is a good selection as a Major Skill for most warriors. It'll still go up fairly slowly, but if you want it to increase, you can always let a Mud Crab or Rat hit away at you while using a low-level Restoration skill to restore your health.
Mastery Level AbilityNovice Heavy armor degrades at 150% of the normal rate. Apprentice Heavy armor degrades at a normal rate. Journeyman Heavy armor degrades at 50% of the normal rate.
Expert Equipped heavy armor only counts as half its normal weight for the purpose of encumbrance.
Master Equipped heavy armor weighs nothing for the purpose of encumbrance.
Magic Skills
Note that Magical skills don't really have set benefits or extra powers based on your Mastery Level. Instead, the ability to use new and more powerful spells is dictated by your Master Level. When you're a Novice in Alteration, for instance, you might be able to cast a spell that lets you open Very Easy locks; you'll have to rank up to Apprentice before you can cast a spell that opens Easy locks.

Almost everyone can use magic for simple effects, but although you can definitely increase your skill in a school of magic by simply casting low-level spells over and over again, the higher-level spells will eventually become prohibitively expensive for anyone but magic specialists, since most warriors and stealth characters probably won't have been heavily investing in Intelligence, which is required to obtain enough magicka to actually cast the high-level spells.
Alchemy
Relevant Attribute: Intelligence Low Trainers: Felen Relas, Anvil Mages Guild; S'drassa, Leyawiin Mages Guild Medium Trainers: Ardaline, Bravil Mages Guild; Brotch Calus, Bruma High Trainer: Sinderion, West Weald Inn in Skingrad
First off, alchemy should never be a Major Skill, unless you plan to use it solely for the purpose of levelling up, and never intend to actually make potions. The reason for this is that you simply level up too quickly if you actually use Alchemy a lot; you're going to wind up with a lot of ingredients if you pick up whatever you find in your travels, and if you save them up and use a bunch of them at one go, then you can often gain four or five points in alchemy in one sitting, which can cause you to level up before you've managed to gain any points in your primary attributes. This warning can be tempered somewhat for character
Weynon Priory has a good set of novice alchemy equipment, if you can find a quiet time to lift it.
We'll explain the reasoning behind this shortly, but first, a description of what Alchemy is...to
begin with, here's a list of what you get for increasing your skill level in Alchemy. Of course, increasing your skill level will also make your potions more effective: they'll have bigger effects that last longer, and so on and so forth.
Mastery Level AbilityNovice Sees only one alchemical properties of an ingredient. Apprentice Sees only two alchemical properties of an ingredient.Journeyman Sees only three alchemical properties of an ingredient.Expert Sees all four alchemical properties of an ingredient. Master Can make potions with only one ingredient.
Alchemy is essentially the art of taking ingredients and making them into potions of various effects. In order to perform alchemy, you'll need, at a bare minimum, a mortar and pestle (which counts as one item) and two ingredients which have the same alchemical effect. That'll net you a potion, although it might not be a very good one. If you want to make better potions, you'll want to add more equipment, including an alembic, a calcinator, and a retort. Although it's possible to make a potion with any combination of these equipment pieces (the mortar and pestle is always required, however), it's not too difficult to acquire all of them, and having them all while you make your potions will definitely improve their quality. Unfortunately they can be cumbersome to lug around, with a full set weighing around twenty pounds, so if you intend to partake of alchemical goodness, you'll want to buy a house early on with a storage unit so you can store your equipment there and use it when you've collected a bunch of ingredients.
Collecting Ingredients
Speaking of ingredients, there are a lot of them. A LOT of them. As you wander around Cyrodiil's beautiful landscapes, you'll find plenty of plants and mushrooms lining the roads or located under the trees. If you look at these ingredients, you'll see a hand icon indicating that you can interact with them; if you do, you'll usually pick up some kind of ingredient from it. (Sometimes you'll be told that you can't find anything when searching a plant; your chance at being successful depends on the plant, apparently.) Ingredients grow back a few days after you search a plant, so you don't have to worry about deforesting Cyrodiil and running out of ingredients.
Other sources for ingredients are creatures and shops. Many creatures will drop ingredients, such as rat meat from rats, bonemeal from skeletons, and daedra hearts from dead Daedra. (Eww!) Shops, such as The Finest Ingredient in the Imperial Market District, will also sell ingredients, sometimes rare ones. You can also find huge amounts of normal food (which acts as a good low-level ingredient for practicing alchemy), such as wheat, bread, fruit, and rice, throughout every city and town in Cyrodiil, especially in storehouses and people's basements. Pick up all of this that you can, make a bunch of potions to increase your Alchemy skill, then sell all of the potions; you win in every way imaginable.
Tip: Note that you can increase your Alchemy skill by simply eating the ingredients that you pick up. You'll gain whatever the first effect they have is, and obviously the item will be consumed. This is a good way to make space in your bag if you're about to go overweight, but is less efficient

at increasing your skill than making potions is.
In your travels, you're going to be picking up a lot of ingredients; check your encumbrance every so often. When you're about to stop moving because you have so much stuff in your bag, head back to your house and indulge in a little alchemy to convert everything into potions, then sell off the potions you don't actually want or need.
Making Potions
In order to increase your Alchemy skill, you'll want to make as many potions as you possibly can. At low levels of skill, the easiest potions to make are Restore Fatigue potions. Almost every kind of household food, such as onions, bread, lettuce, and so on, will have Restore Fatigue as their first property, allowing you to loot kitchens all across town and convert your proceeds into Restore Fatigue potions. They won't be particularly good potions, but they'll definitely help increase your skill, and you'll be making so many of them that you'll gain a good amount of money from selling them.
Multiple ingredients means multiple potion effects!
Note that all ingredients that you find will have more than one alchemical property. As you increase your skill in Alchemy, you'll be able to see more of the hidden properties of your potions. At low levels of Alchemy skill, your ingredients basically only have the properties that you can see, so if you want to be able to use a more diverse array of ingredients in your potions, you'll have to rank yourself up, but doing so will help ensure that you'll be able to make the kinds of potions that you want with the ingredients that you actually have. Unlocking more effects will also allow you to use more ingredients in your poisons, adding multiple effects that occur simultaneously.

Note that a lot of ingredients actually have negative effects, such as Damage Health (always popular). Making a potion with a negative effect actually turns it into a poison (which appear in your inventory as green bottles instead of the purplish color of potions). Poisons can't be ingested, so they can't really hurt you. Instead, they can be activated in your inventory and applied to a weapon, allowing you to spread the love to the next enemy you hit, giving you a bit more oomph when facing off against boss-level enemies.
Alteration
Relevant Attribute: Willpower Low Trainers: Dovyn Aren, Elven Gardens District; Deetsan, Cheydinhal Mages Guild Medium Trainers: Athragar, Chorrol Mages Guid; Abhuki, Faregyl Inn, south of Imperial City on the Green Road, on a little dead-end road near the end of a river High Trainer: Tooth-in-the-Sea, on the river's coast just north of Bravil, near the Flooded Mine. If he's not sleeping on his little cot, come back after 7 PM.
Alteration spells aren't really going to make you stop and say "Wow!" when you hear their effects; it'll be more along the lines of "Well, that might be kind of useful." No one's going to specialize in Alteration to the exclusion of other magics, in other words.
With Alteration, you'll be able to temporarily carry more items and heavier items, gain more armor, breathe water or walk across the surface of water, or temporarily gain protection from fire, frost, or electrical attacks. Two of the more notable spell classifications are Burden, which adds to your target's encumbrance temporarily (which can in effect paralyze them and prevent them from moving if you over-encumber them) and Open, which opens locks of various difficulties based on your proficiency in Alteration.
Like we said, not very exciting. Useful, perhaps, but just like no one ever says they want to grow up and be a lab assistant, it's unlikely that an Alteration-focused character archetype is going to be very exciting to play as.
Conjuration
Relevant Attribute: Intelligence Low Trainers: Sulinus Vassinus, Skingrad Mages Guild; Fathis Aren, Castle Bravil Medium Trainers: Arentus Falvius, Bruma's chapel; Alberic Litte, Chorrol Mages Guild High Trainer: Olyn Seran, Shrine of Molag Bal, woods west of the Imperial City
Conjuration is the art of summoning powerful equipment to supplement your battle abilities, summoning creatures to fight for you, and controlling the undead to prevent them from attacking you.
Bound item spells, when cast, cause Daedric armor and items to spring into being, automatically equipped and usable. The Mythic Dawn cultists you see in the game make constant use of these spells, and you see what it does for their abilities in combat. The more skilled you become at

Conjuration, the better the items that you'll be able to summon.
Likewise, the more skilled you are, the better the creatures that you'll be able to bind to your cause. While summoning Scamps and Skeletons isn't likely to get your Conjurer homeboys all that excited, the ability to eventually summon in Dremora Lords should cause most of your enemies to shake in their boots. Also note that you can use these summoned creatures as Soul Trap victims, giving you an unlimited and easy supply of souls.
Lastly, the undead powers will let you strike fear in the hearts of undead enemies, making them likely to run away and leave you alone for a little while, as you either make your escape or prepare for their return.
Even if you don't cast Destruction magic, you can expect to see a lot of it come your way through the course of the game.
Destruction
Relevant Attribute: Willpower Low Trainers: J'skar, Bruma Mages Guild; Chanel, Castle Chorrol Medium Trainers: Marc Gulitte, Anvil Mages Guild; Delphine Jend, Bravil Guild High Trainer: Andaren, remote shrine in the Imperial Reserve
When most people think of combat mages, Destruction is the school that comes to mind. It doesn't focus on opening locks or lighting up dank dungeons; it's all about causing harm to your enemies. As such, it'll be a mainstay of most pure mages, as their primary tool for dealing damage.

Most of the Destruction spells are fairly straightforward. As the archetypal mage power, you'll be able to use fire, frost, and shock magic to deal damage to your enemies, making sure to match up your spells with their weaknesses. Zombies take extra damage from fire magic, for instance, while a Flame Atronach will obviously take more damage from frost spells. If you're up against a boss or tough enemy, you can supplement your attack spells with a Weakness spell, which will increase their vulnerability to a certain kind of elemental damage for a short time.
In addition, you can also attempt to drain an attribute of an enemy, which will cause it to steadily deteriorate over a set amount of time, or attempt to disintegrate their weapons or armor.
If you want to become a combat magician, then you might not want to have Destruction as a Major Skill, simply because you'll be using it so often that you may wind up levelling up more quickly than you'd like.
Illusion
Relevant Attribute: Personality Low Trainers: Jantus Brolus, Bruma; Hil the Tall, Cheydinhal's Chapel Medium Trainers: Kud-Ei, Bravil Mages Guild; Carahil, Anvil Mages Guild High Trainer: Martina Floria, Arcane University
The effects of Illusion magic are too numerous to describe in detail here, but for that reason, they're going to be useful to almost every type of character. Stealthy attackers will enjoy the ability to cast Night Eye on themselves to see in the dark, while straight-ahead warriors will opt for the more obvious Light effect to light up dark dungeon corridors without having to constantly bring up a torch. (These effects are so obviously useful that characters probably shouldn't have Illusion magic as a Major Skill; you're going to use them a lot.)
For pure mages, though, the primary benefits of Illusion are those that allow you to manipulate your enemies into not attacking you, whether through paralysis or simply by charming them to the point that they just don't really want to harm you. You can even go so far as to cause your enemies to fight for you with properly advanced magicks.
Beyond enemy manipulation and the effects listed above, though, you'll also be able to cause yourself to turn Invisible with Illusion magic, which will help you sneak past enemies that you don't wish or are unable to fight. The Chameleon effect is also quite handy. The difference between Invisibility and Chameleon is mostly that Invisibility ends if you happen to attack or use an object, whereas Chameleon does not. Chameleon offers less than total concealment, though.
Mysticism
Relevant Attribute: Intelligence Low Trainers: Angalmo, Chorrol Mages Guild; Druja, Skingrad Mages Guild Medium Trainers: Boderi Farano, Arcane University; Ita Rienus, Bravil Mages Guild

High Trainer: Dagail, Leyawiin Mages Guild
Mysticism, like Alteration, isn't necessarily a very exciting branch of magic, although it is going to be something that almost every character will have to dabble in, if only for the sake of casting Soul Trap.
First, though, a word on the other effects of Mysticism. Among other effects, Mysticism controls the ability to dispel magical effects (either harmful effects cast on yourself, or beneficial effects cast on your enemy), and the ability to either reflect harmful spells back to your enemy or absorb them as pure Magicka. The Telekinesis effect will let you manipulate remote objects; this would be a bit more exciting if it let you pick up a head of lettuce and beat someone to death with it. Life Detection allows you to see living objects in your immediate area, even through doors and solid rock, which is helpful for characters that like to sneak through dungeons, or anyone who wants to see where characters in buildings are while you're attempting to lockpick a door while remaining undetected.
The most useful effect for most characters in Mysticism, though, will be Soul Trap, which is going to be required if you want to create new enchanted items or recharge enchanted weapons. You need to be at least an Apprentice of Mysticism to cast Soul Trap, and you'll need around 65 Magicka, as well, so you'll want to buy something like Minor Life Detection when you create a character and repeatedly cast it as you travel around the world. This will both increase your Mysticism skill and allow you to boost your Intelligence score when you level up, even if you're a hearty warrior.
When you unlock Soul Trap, you'll be able to cast it on enemy creatures to steal their soul when they die. The basic sequence of events goes like this: get an empty soul gem and keep it in your inventory. Attack a creature. When it's almost dead, cast Soul Trap on it. Between casting the spell and when the spell wears off (20 seconds at Soul Trap's lowest level), kill the creature to steal the soul. Stolen souls automatically go into the smallest appropriate soul gem in your inventory. (Souls rank anywhere from Petty to Greater, depending on the relative difficult of the creature you kill.)
When you have a captured soul in your inventory, you can either use it immediately to restore the charges on one of your magical items, or bring it to the Arcane University in the Imperial City to enchant a regular item (this is only an option if you're a Mage's Guild member, however). Magical weapons are going to make your job a hell of a lot easier later in the game, especially as a warrior, so it's in your best interest to learn Soul Trap and get used to capturing the souls of creatures that you kill.
Restoration
Relevant Attribute: Willpower Low Trainers: Marie Palielle, Skingrad Chapel; Cirroc, Bruma Chapel Medium Trainers: Marz, Bravil Chapel; Ohtesse, Cheydinhal's Chapel High Trainer: Oleta, Kvatch Chapel or the camp outside Kvatch

Almost everyone will find something to like in Restoration, if only because it's the skill that'll let you heal yourself up good as new, even if there are enemies around. While everyone can heal themselves completely just by Waiting for one hour, this option won't be available when enemies are too close to your position. While you can often just run back in the direction from which you came to make enough distance between yourself and foes for you to rest, having a healing spell at your disposal will allow you to keep moving on through your dungeon, since magicka regenerates fairly quickly. Note that the lower-level healing spells are generally more efficient than the higher-level ones, by which we mean that they'll typically give you back more health for the amount of magicka that you expend on them. Higher-level spells will obviously heal you more quickly, but warriors and non-magic specialists can probably get by with casting the lowest-level spells over and over again.
In addition to healing spells, though, Restoration offers up a bevy of other effects, some useful, some not so much. The bulk of the spells here are of the Absorb variety, allowing you to transfer attributes and skill points from your enemies to yourself. Theoretically these are useful, but in most instances we found ourselves killing our foes too quickly to get much advantage from the Absorb spells; if they're going to die within 10 or 15 seconds anyway, you may as well just concentrate on your Destruction spells and kill them straight out.
Beyond that, there are plenty of Fortify spells, which temporarily give one of your primary attributes a small boost. These spells can be handy, especially if you use Fortify Personality to gain the upper hand with merchants or people that have information you need.
Stealth Skills
Acrobatics
Relevant Attribute: Speed Low Trainers: Ida Vlinorman, Elven Gardens District; Quill-Weave, Anvil Medium Trainers: Tsrava, Leyawiin (inside J'Bari's House); Ganredhel, Cheydinhal High Trainer: Aerin, camp east of Azura's Shrine
Acrobatics is something of the ugly stepsister of skills; it doesn't have much in the way of concrete usage in Oblivion, besides the obvious advantages of being able to jump higher and farther than normal. Really, though, jumping isn't all that required in the game, and you're certainly never going to need to attack while jumping around, even if you wanted to.
That said, there's no reason not to increase your Acrobatics skill, especially since it's fairly easy to do so; all you have to do is jump around everywhere you go. Just keep hitting that jump button! This will obviously reduce your fatigue to almost nothing, so it's unwise to do in dungeons or in the wilderness, where you might have to engage in combat, but when you're tooling around in a city, feel free to jump the night away and improve your Acrobatics with minimal effort. (Your Fatigue loss may effect your ability to Persuade, though, so be wary of that.)
Mastery Level Ability

Novice Cannot attack while jumping or falling. Apprentice Can make normal attacks while jumping or falling.
Journeyman Gains the ability to Dodge blows (if you fight Scamps, you'll see them do this a lot).
Expert Fatigue loss for jumping reduced by 50%.Master Gains the ability to jump across the surface of water. Just like in Remo Williams!
Light Armor
Relevant Attribute: Speed Low Trainers: Olfand, Nord Winds, Bruma; Dul gro-Shug, Elven Gardens District Medium Trainers: Luciana Galena, Bravil; Ahdarji, Leyawiin High Trainer: J'Bari, Leyawiin
Your Light Armor skill increases the amount of protection you gain when you wear Fur, Leather, Chainmail, Mithril, Elven, and Glass armor. The only way to increase your Heavy Armor skill is to get hit by something while wearing it, so this is a skill that will naturally increase as you engage in firefights. Since you'll likely want to get this as high as possible to take advantage of the added defense, this is a good selection as a Major Skill for most thieve or stealthy characters. It'll still go up fairly slowly, but if you want it to increase, you can always let a Mud Crab or Rat hit away at you while using a low-level Restoration skill to restore your health.
Mastery Level AbilityNovice Light armor degrades at 150% of the normal rate. Apprentice Light armor degrades at a normal rate. Journeyman Light armor degrades at 50% of the normal rate. Expert Light armor doesn't encumber the user.
Master If all of your armor is Light Armor, you gain a 50% bonus to your overall armor rating.
Marksman
Relevant Attribute: Agility Low Trainers: Edla Dark-Heart, Bruma (Regner's house); Shameer, Skingrad Medium Trainers: Reman Broder, Skingrad; Pinarus Inventius, Anvil High Trainer: Alawen, campgrounds east of Anvil

Oh, yeah...venison for dinner again.
Marksman is the skill that determines the amount of damage you're capable of dealing with bows. As you increase your skill level here, you'll unlock new abilities to use with your bow, such as the handy zoom mode. The biggest benefit, though, will be the simple addition of damage, so keep using your bows to increase your skill and look for bigger and better bows. Like weapons, bows can come with damage-causing enchantments, or can be given them via Sigil Stones or enchantment altars.
If you're at all decent at Sneaking, then you should always try to approach your target in sneak mode before letting loose your first arrow. Doing so will let you take advantage of the 2x or 3x multiplier that you get from sneaking. Just be sure to stand up when the battle is joined, or you'll fire much more slowly than you would otherwise.
Mastery Level AbilityNovice Take fatigue damage while holding back a drawn bow. Apprentice Takes no fatigue while holding back a drawn bow. Journeyman Can zoom in on targets by holding Block while bow is drawn.
Expert Gains a chance to knock down an enemy with successful arrow shot.
Master Gains a chance to paralyze a target with successful shots.
Mercantile
Relevant Attribute: Personality

Low Trainers: Mach-Na, Cheydinhal; Foroch, Gottshaw Inn northwest of Kvatch Medium Trainers: Seed-Neeus, Northern Goods & Trade in Chorrol; Margarte, Leyawiin High Trainer: Palonirya, Divine Elegance shop in Imperial Market District
The Mercantile ability affects the price that you get from vendors when you attempt to either sell to or buy from them. The higher your Mercantile score, the better the prices that you'll be able to negotiate.
In order to increase your Mercantile score, you'll have to use the Haggle mechanic while in the shopkeeper interface. When you haggle, you'll be able to continually attempt to rachet up your selling price for items sold to the merchant. Each time you sell an item at above market price, you'll gain a small amount to your Mercantile score. It's possible to attempt to sell an item for too much cash, though, in which case the merchant will reject your offer and become slightly less favorable to your future offers.
The thing you want to do here is grab a huge stack of something cheap of disposable and attempt to sell them one by one. Arrows are perfect for this, since you'll often find a bunch of them in dungeon crawls, and they don't weigh very much. When you have a large amount of them, find a merchant and start selling them one by one, increasing your haggling percentage by two or three points after each sale. When they reject your first offer, knock your percentage down by two points and start selling selling selling!
Each time you sell an individual item, your Mercantile skill will gain a small increase. Thus, the best way to get big increases in your Mercantile skill are to get huge amounts of arrows and sell them one by one. (Selling them as one stack counts as one transaction for Mercantilism's purposes.) It's laborious, sure, but it works. Since iron arrows are dirt cheap, you can sell a huge stack of them, buy them back, then repeat the process as often as you like to increase your Mercantile score.
Mastery Level AbilityNovice Value of sold items is affected by the condition of the item. Apprentice Condition no longer affects value of items. Journeyman Can buy and sell any kind of item to any vendor.
Expert Can invest in a shop, permanently raising that vendor's cash amount by 500 gold.
Master All shops in the world increase their maximum purchase price by 500 gold.
Security
Relevant Attribute: Agility Low Trainers: Malintus Ancrus, Chorrol; Samuel Bantien, Talos Plaza District Medium Trainers: Mandil, Othrelos' house in Elven Gardens District; Dro'Shanji, Bravil High Trainer: J'baana, imprisoned in Imperial Prison District

Once you get the Daedric lockpick, your Security skill becomes almost irrelevant.
Security denotes your character's proficiency at picking locks. Locks in Oblivion are represented by a mini-game, wherein you have to attempt to pick the lock with a flimsy pick by flipping the tumblers within. If you don't flip a tumbler correctly, though, you'll break your pick and will likely wind up resetting a few of the lock's tumblers. Locks are rated anywhere from very easy (one tumbler) to very hard (five tumblers).
In order to flip a tumbler, you have to first tap it upwards with your pick, then hit another button to snap it into place as it hits the top of the lock. Each tumbler, when lifted, will either move up swiftly or slowly. What you want to do when attempting to pick a lock is keep tapping the tumbler over and over again until you notice it taking the slowest path upwards; when it just hits the top of the lock, tap the button to snap it into place, and it should remain in position, allowing you to move onto the next tumbler. If you attempt to lock it when the tumbler is moving too fast, you'll usually snap your lockpick and drop a few of the tumblers, requiring you to start over from near the beginning of the lock, depending on your skill level.
As you increase your skill in security, tumblers will rotate more slowly, making them much more easy to snap into place, and fewer tumblers will drop if you do happen to screw one of them up. Note that, at level 10, an item becomes available through one of the Daedric quests that makes lockpicking much, much easier; it's worth seeking out as soon as you hit that milestone.
Mastery Level AbilityNovice As many as four tumblers fall when a pick is broken.
Apprentice As many as three tumblers fall when a pick is broken.

Journeyman As many as two tumblers fall when a pick is broken. Expert As many as one tumblers fall when a pick is broken. Master No tumblers fall when a pick is broken.
Speechcraft
Relevant Attribute: Personality Low Trainers: Alga, Bruma (Honmund's house); Uravasa Othelas, Bravil's Chapel Medium Trainers: Varon Vamori, Bravil; Gruiand Garrana, Cheydinhal's Chapel High Trainer: Tandilwe, Temple of the One, Imperial City Temple District
Speechcraft denotes your character's ability to persuade and influence other NPCs through the Persuasion interface. With a high Speechcraft score, most characters will respond more favorably to you in conversation, and you'll have a better chance of increasing their disposition towards you when attempting to Persuade them, and you'll be able to raise their disposition higher than a character with a low Speechcraft score.
In order to raise your Speechcraft, you just have to attempt to use the Persuasion mini-game as often as you can. Even getting negative results will raise your skill in Speechcraft, so try to take the time to Persuade anyone you meet that offers you the opportunity to do so, even if they're just an average joe that doesn't have anything important to tell you.
Mastery Level AbilityNovice Can offer bribes to most characters to increase Disposition. Apprentice Once per Persuasion, can rotate wedges without selecting a response. Journeyman Disposition decays 50% slower during Persuasion minigame.
Expert Disposition loss from most negative reaction in Persuasion reduced from 150% to 100%.
Master Cost of bribes cut in half.
Sneak
Relevant Attribute: Agility Low Trainers: Glistel, in Malintus Ancrus' House in Chorrol; City-Swimmer, Bravil Medium Trainers: Othrelos, Elven Gardens District; Mirabelle Money, Anvel Waterfront (Fo'c's'le) High Trainer: Marana Rian, Temple District
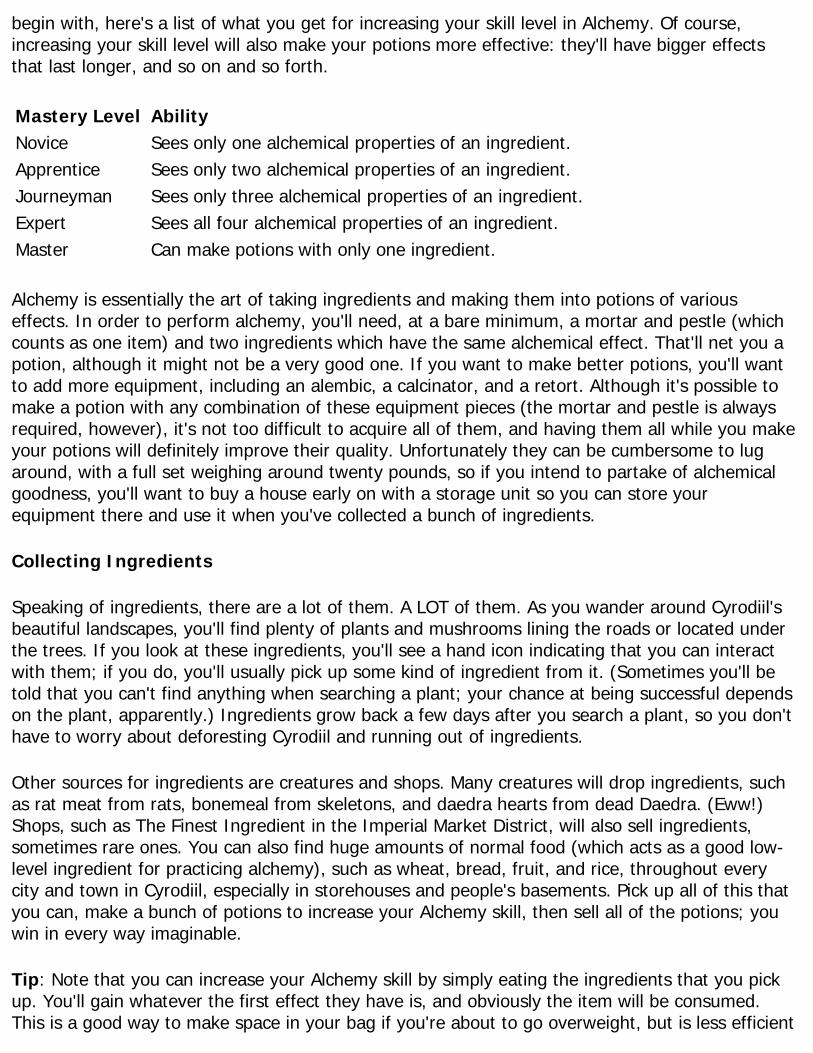
Sneak is going to be a critical skill for stealth characters. With a high Sneak skill, you'll be able to avoid combat, deal massive damage to enemies before they're aware of your presence, and make your way into heavily-guarded areas. Sneaking won't turn you invisible, but if you can remain undetected, then you'll gain some large advantages in combat.

It's dark and I've got Chameleon on. Even these ghosts won't be able to detect me! Heck, even I can't detect me.
To sneak, enter sneak mode, and your primary cursor will be ringed with an eye icon. While the eye icon is bright, someone is either watching you or is aware of your presence; if it's greyed-out, though, you can rest assured that you're temporarily undetected. Remaining that way requires you to stay out of your enemy's line of sight (which doesn't necessarily mean that you have to stand behind them all the time) and to stay quiet. The amount of noise you make depends on the weight of the boots that you're wearing and how fast you're moving. Wearing heavy armor boots while attempting to run while Sneaking will let people hear you from a good distance away, while walking slowly while wearing light armor boots or (preferably) no boots at all will let you make much less noise. You should also stick to the shadows whenever possible, as the amount of light cast on you will directly affect the chance that your enemies will detect you. Invisibility or a Chameleon effect will likewise greatly reduce the chances of detection.
Mastery Level Ability
Novice When undetected in Sneak mode, one-handed and hand-to-hand attacks deal 4x damage, bow attacks deal 2x damage.
Apprentice When undetected in Sneak mode, one-handed and hand-to-hand attacks deal 6x damage, bow attacks deal 3x damage.
Journeyman No penalty to detection chance when wearing boots. Expert No penalty to detection chance for moving while in Sneak mode.
Master Opponent is considered to have no armor when struck while undetected and in Sneak mode.

Character Creation and Levelling Up
One of the most unique aspects of Oblivion is the way it handles experience and levels. While in most RPGs, you want to level up as quickly as possible to gain an advantage over your enemies, that's not always going to be the case in Oblivion. In fact, the game can become quite difficult if you simply attempt to level up as quickly as possible, because of one simple fact: as you level up, so do your enemies.
Levelling Effects
Here's a small list of things that are affected when you level up. There are probably more effects than these, but these are the important ones.
● Enemies increase in level. You'll run into harder enemies the higher level you are, with better spells and equipment and more health. Their skills will increase as well, so Sneaking and Speechcraft will become more difficult if you don't consistently improve these skills between levels.
● Loot and treasure is better quality. At level one, it'll be difficult to find magical items, but they become more common as you level up.
● Quest rewards are increased in quality. If you complete a quest at level five in one game, then play again and complete it at level 15, you'll get better quest rewards for the same quest. (Although some quests, like the Daedric quests, have rewards that are always the same.)
● Locks on chests and doors become more difficult. A door that had a two-tumbler lock at level five might wind up having five at level fifteen.
The biggest effect, though, is the effect that levelling has on your foes. If you charge through the game's main storyline and attempt to gain levels as quickly as possible, you'll probably start encountering enemies that are going to be very tough to beat. You can still level up quickly if you wish, but it's more important to level up smartly.
How Levelling Works
When you create a character in Oblivion, you choose a class (or create one) that has seven skills as Major Skills. These skills, when improved, cause your character to gain levels. You can contrast this to the system in most games, where you have to run around and kill monsters to gain experience, which then causes you to level up; in Oblivion, it's not who you kill that matters, it's what you do. (Although what you do will probably still involve killing a whole mess of enemies.)

Constant use of your Major Skills, such as Blunt and Heavy Armor, which are about to get a workout in this screenshot, will cause you to level more quickly.
Anyway, so you have these seven Major Skills. In order to gain one level, you need to increase them by ten points total, spread out through any number of the skills. Let's say that you're a warrior character, and thus you have Heavy Armor, Blunt, and Block as Major Skills, along with a few others. If you increase Heavy Armor by ten points, then you'll gain a level; if you increase Blunt and Block five points each, then you'll also gain a level, and so on. Note that, unlike Morrowind, your Minor Skills have no impact on the rate at which you level, no matter how much you raise them between levels.
The crux of the matter here is that increasing your skills also allows you to raise your attributes when you level up. When you rest and level, you'll be given the opportunity to raise your attributes by anything from one to five points. The number of points by which you can increase an attribute depends on how many points you increased the skills that relate to that attribute.
Skill Points Gained in Skills Related to an Attribute
Number of Points You Can Raise the Attribute At Level-Up
0-1 12-4 25-7 38-9 410+ 5
Obtaining Maximum Attribute Points at Level-up

Now, here's where things get kind of complicated. Although raising your Minor Skills doesn't count towards your levelling rate, it does count towards the attribute gain you can add when you level up. The best way to explain this is through an example, or perhaps multiple examples.
Let's suppose that you wanted to raise your Strength attribute by five points at your next level-up. The related attributes for Strength are Blunt, Blade, and Hand-To-Hand. In order to get the full five points at your next level up, then, you'll have to increase those three skills by a combined ten points. This can be done in a number of ways, obviously; if you're focusing on bladed weapons, then you can increase Blade by ten points, or you can spread those ten points out between all three skills.
Note that this is true regardless of whether your Blunt, Blade, and Hand-To-Hand skills are Major or Minor skills or a combination of both. Even a pure wizard can raise his or her Strength by five points at each level-up if they devote enough time to raising these skills. Strength is more important for warriors, though, who'll want to make sure that they manage to get four or five points added to it at each level up. The balance you have to strike here is between having levelling up rapidly, which occurs when you consistently use all of your Major Skills quite often, and gaining large attribute bonuses, which occurs when you slow down your levelling and spread out your skill point increases.
Things become even more complicated when you consider that most characters will have at least two attributes that they'll want to increase at each level up: wizards will be focusing on Intelligence and Willpower; thieves on Agility and Speed; and warriors on Strength and Endurance. If you're going to try and increase both of these attributes by a full five points each, that means you'll have to increase the relevant skills by 20 points. Since you can only increase your Major Skills by 10 points between each level-up, that means at least some of those skills are going to have to be Minor Skills.
Power-Levelling In Action
We're going to give you an example of how all this comes together, drawn from our warrior character. His Major Skills were Blade, Heavy Armor, Alteration, Conjuration, Destruction, Mercantile, and Security. His two favored attributes were Strength and Endurance.

With a little effort and some slow leveling, you can consistently raise your major attributes by five points at each level-up.
The basic process to increase both of these attributes by five points per level went something like this. We almost never used bladed weapons at all, preferring to stick to blunt weapons. For long portions of the game, we used a two-handed mace weapon, switching to Hand-To-Hand combat for weaker enemies. Thus, for our Strength attribute, we used Minor skills exclusively to increase it, with Blade seeing occasional use when we found powerful swords. Since we were attempting to level up slowly, though, the fact that Blunt and Hand-To-Hand didn't count towards increasing our level made them preferable, and it wasn't difficult to get at least eight or ten points in both of them between each level, allowing us to consistently raise our Strength by four or five points.
Endurance was a bit easier, since Armorer was a Minor Skill. Even though Minor Skills increase a bit more slowly than Major Skills do, if you use something as often as you do the Armorer skill, you're going to be increasing it naturally quite a bit. Heavy Armor also went up fairly quickly as a Major Skill, since we almost always used heavy armor and took quite a bit of damage in melee combat. It didn't go up so rapidly that we thought we were levelling up too quickly, though. Block is the third Endurance skill, and as a Minor Skill, we could use it as often as we liked to without worrying about levelling up because of it.
The rest of the Major Skills that we chose were either never used (such as the magical skills; we still used Illusion for things like Light and Mysticism for Soul Trap) or were used to let us gradually gain points towards the next level, without going too fast, as in the case of Mercantile and Security.

With a smooth levelling curve, you won't have to be frightened the first time you see a Frost Atronach. Well, ok, maybe not AS frightened...
So, in our experience, if you want to level up quickly, you can add all of the skills that you want to use most often to your Major Skill category, but the drawback to this is that you won't be able to raise your attributes as high when you do level up. If you don't mind levelling up a bit more slowly, you can shift your most-used skills into your Minor Skills selection, increase them between each level-up, and gain four or five points in your primary attributes each time you level. Doing so will keep you fairly strong in relation to your enemies as you proceed through the game.
Caveats
Keep in mind that each of your attributes is capped at 100, so if you increase your levels slowly but with high attribute additions at each level-up, you'll probably cap out an attribute or two at around level 10. After this point, you'll still be able to increase your skills (and they'll still count towards your levelling-up if they're Major Skills), but you won't be able to add to the attributes that they relate to. At this point, you might find it enjoyable to focus on some of your other minor skills and attempt to start playing around with magic or thieving abilities, or learn how to use a bow, or something like that, if only to start gaining higher additions to attributes that you've been neglecting.
Also note that levelling slowly will mean that you won't find much magical loot until you hit level three or so. Still, if you've off-loaded your most-used abilities into your Minor Skills category, you should be able to raise them enough to make yourself much more powerful than the foes you face. For instance, a Blade specialist can get through much of the early game and reach Cloud Ruler Temple while still at level one, and use the Akaviri Katana to cut through the bulk of the

enemies you face for the next few hours of gameplay. Spellcasters can likewise advance through the ranks of their chosen professions, with the only limitation being the amount of magicka available to them. It's not unheard of for casters at level two or three to become capable of summoning Dremoras to do their fighting for them.
General Tips
This is just a compendium of general (and sometimes specific) tips that you may find useful. We'll update this section with more goodies as we uncover them!
Magic And Magical Item Tips
Buying New Spells
If you want to achieve better effects with your spells, you'll need to buy more and better spells as you play through the game. Doing so can be accomplished at most of the Mages Guild houses, but each has its own specialization. Here's a list of where to go when you need a specific kind of spell:
Alteration: Cheydinhal Mages Guild Conjuration: Chorrol Destruction: Skingrad Illusion: Bravil Mysticism: Leyawiin Restoration: Anvil
In addition to these choices, the Bruma Mages Guild will have spells from most of the schools on display. Many of the clerics in the Chapels in each of the smaller cities will also have Restoration spells for sale.
Recharging Magical Items

If you can obtain the Umbra sword, then you won't have any need for Soul Trap; it casts it upon your target with each hit.
As you level up, you're going to find more and more magical items. Warriors and archers will find magical weapons to be especially helpful, as they'll let you deal extra damage, absorb stats and skills from your opponents, or produce any number of harmful magical effects. The catch? Magical weapons come with a certain number of charges, and when those charges run out, your magical weapon will be just another hunk of metal.
In order to recharge your magical weapons (and staffs, for you wizards out there), you're going to need two things: the Soul Trap spell, and a Soul Gem large enough to hold the soul of the creature that you're going to kill. You can find Soul Trap at the Leyawiin Mages Guild, and Soul Gems are fairly common pickups in dungeons or in magically-oriented shops throughout the land. There are five varieties in all, ranging in size from Petty to Grand. Each creature that you encounter (you can't capture souls from humanoid characters or Dremora, unless you're practicing some pretty dark Necromancy) also has a certain-sized soul, ranging from Petty (Rats, Mudcrabs) to Grand (Liches, Minotaur Lords).
If you cast Soul Trap on a creature prior to killing it, its soul will automatically be placed in the smallest available Soul Gem in your inventory. If you Soul Trap a Rat and have a Petty Soul Gem in your inventory, then, it'll go into that. If the only Soul Gem you have is a Grand Soul Gem, though, it'll go into that, essentially wasting the extra space in the Soul Gem. (Soul Gems can't be reused after they're used, and a soul can't be removed when it's inserted.)
Tip: If you don't want to have to keep finding and destroying Soul Gems to recharge your magical items, you can use Azura's Star, which you'll likely find as a part of the game's main quest. Azura's Star is a Grand Soul Gem that isn't destroyed when used; you can fill it up with any kind of soul,

charge an item, then fill it again. Lather, rinse, repeat.
When you've captured a soul into a Soul Gem, you can "equip" the Soul Gem in your inventory to use it to recharge a magical item. Depending on the size of the soul, you'll get a set number of charges to restore, with larger souls being worth more charges. Of course, the more powerful your weapon, the more charges it'll take to completely restore it, so as you gain more powerful items, you'll have to capture larger souls just to stay even.
Armor and jewelry cannot be recharged, because their magical effects are constant and ongoing. They don't fade over time nor can their effects be reduced.
Random Generation of Magical Items
Saving your game before the room that leads to the Sigil Stone will let you reload until you find one that you like.
Here's something you may not know: the loot that you find in most dungeons is randomly generated when you enter a level. Most dungeons of two or three levels have a "boss" encounter somewhere near the end, with a harder-than-average enemy nearby, as well as a chest that offers up a chance to find significantly better loot than you normally would. Since the items in these chests are randomly made when you enter the level, you can give yourself an opportunity to play through a level multiple times with the game's save/load system and see if you can't find something that appeals to you more than whatever you get the first time through.
As an example of this, take the Sigil Stones at the top of citadels in the Planes of Oblivion. Each citadel has numerous rooms leading up to the top, but the top room that contains the Sigil Stone

is always the same configuration, consisting of a set of bone stairs leading up to a fleshy ramp to the Sigil Stones. The Sigil Stones themselves are often of considerable power, offering anyone, even non-magicians, the chance to enchant equipment with some powerful effects. You can add magical damage to a weapon, or add a Strength buff to a piece of armor, and so on. They're powerful items, but the effect you get when you pluck the Sigil Stone is randomized among around 20 different possible types of stone, so you'll sometimes get something that might not be of much use to you.
The solution to this little riddle is save your game just before you head into the citadel's final room. If you make a save just outside the door, you can run into the final room, check the treasure chests (which themselves often have great items) and nab the Sigil Stone. If you don't like what you get, just reload your savegame and try again! It's important that your savegame occur before you enter the room, though, as that's when the loot is generated.
This can be applied to any dungeon, really, but most dungeons and caves have somewhat larger last levels, making it more of a pain to reload your save and play through the content that you skipped. Used judiciously at the top of citadels, though, it can let you get some killer Sigil Stones with which to enchant your equipment.
Commerce Tips
How Do I Sell Stolen Goods?
Ongar will sell you an almost unlimited number of lockpicks.
One thing you'll notice as you play through Oblivion is that most merchants will refuse to buy your

stolen goods, which are denoted in your inventory with red hand icons by them. It's not a matter of them refusing to buy the items; they simply don't show up in your sell list at all.
Well, again, the Thieves' Guild is going to be your answer to this problem. If you've got "hot" goods that you wish to "move" at a "fence", then "peep" Ongar in "Bruma". You only have to complete one of Armand's quests to unlock bartering with Ongar, and he'll buy almost anything, stolen or not. If you sell a lot of stolen goods to him, though, he'll pass along word of your good deeds to Armand, which will in turn unlock new missions for you. The more expensive the items you sell, the more advanced quests you'll be able to perform for the Thieves' Guild.
Another benefit to selling stolen items to Ongar is that you'll be able to immediately buy them back from him. You'll lose plenty of money on the transaction, obviously, but selling and re-buying will strip the stolen status from the goods that you do this with. So if you have a nice piece of equipment that you want to use, but are afraid of having it taken from you if you get captured by guards, simply sell it and buy it back. This will eliminate the paper trail of ownership, allowing you to keep it even if you get run into jail.
Getting More Lockpicks
Whether you're playing as a thief, a warrior, or a mage, or something in between, lockpicks are going to be pretty handy to you. While Alteration mages might be able to pop open locks with a simple spell, most other characters are going to need to pick their way through the many locks that stand between you and sweet, sweet loot.
Unfortunately, learning the intricacies of picking locks can lead to a whole lot of broken lockpicks, especially early on in the game, forcing many players to bypass locked doors and chests in dungeons. Since most merchants won't sell lockpicks, you'll need to find an alternate source for these valuable tools.
In the early game, there are two relatively easy ways to obtain lockpicks. One is off the bodies of vanquished foes. If you explore the countryside a bit, you'll find many caves, forts, ruins, and the like. When you stumble across a location that's infested with bandits, then you can kill them to grab the occasional lockpick off their bodies, but the enemy of choice for lockpicks are goblins, which will be much more likely to die with lockpicks on their corpses.
Tip: If you want to do away with the need for lockpicks altogether, you can perform the Daedric quest at the Shrine of Nocturnal when you're level 10 to obtain an unbreakable lockpick. You can find the shrine along the road northeast of Leyawiin.
A much simpler way to get lockpicks is to obtain them from the Thieves' Guild. The Thieves' Guild can be difficult to find, but there are a couple of ways to join. You can either be caught stealing something, then spend a night in jail, after which you'll be approached with a membership offer, or you can read one of the Wanted: Gray Fox posters scattered around the Imperial City, then speak to a beggar while their Disposition to you is above 70, and they'll tell you how to reach a Thieves' Guild contact.

Regardless, you'll likely wind up meeting Armand Christophe at midnight in the Waterfront district of the Imperial City. He'll assign you a task that must be completed before you can join the Thieves' Guild. (If you need help with this task, bribe a beggar until you reach Disposition 70 or higher and ask them for help - or just wait for our walkthrough for the Thieves' Guild quests.) Although you're not technically a member of the Thieves Guild yet, Armand will agree to sell you lockpicks at five gold apiece, and he appears to have an unlimited number of them. You will, however, have to buy them one at a time, which can be a pain.
When you do complete Armand's task, though, he'll point you to the location of Ongar the World-Weary in Bruma, one of the Thieves' Guild fences. Ongar should have a replenishable supply of 100 lockpicks for your purchasing needs.
Gold Glitches
As of this writing, there are a few different glitches to take advantage of in Oblivion in order to obtain almost unlimited gold. These are likely to vanish in the PC version of the game after the first patch is issued, and it seems likely that the 360 version of the game will also eventually obtain some form of update. For the meantime, though, you can take advantage of these to obtain a good amount of gold early in the game, when you need it most.
One of the easiest methods to obtain unlimited gold is to approach a merchant while riding on horseback. If you're on horseback while you talk to a merchant, you'll be able to sell them your equipped weapon over and over again; you'll gain the cash, but the weapon will remain in your inventory to sell again. The easiest place to do this is in the camp outside of Kvatch. The female orc merchant there is one of the few merchants in the game that dwells outside of a city's walls, and is thus one of the few merchants you can actually speak to while on horseback. She only has 200 gold to offer you for your weapon, but if you repeatedly sell it to her, that should fill you up as far as you want to go in no time at all.
The second method, which is a bit more complicated and involves an actual crime, takes place in the Talos Plaza District of the Imperial City. Scout around a bit, then check your map to find Dorian's House, just to the south of the central plaza. Head inside and speak to Dorian himself, then bribe him with as much gold as you can. When you can't bribe him any more, kill him, then loot his body. Don't select the Take All option, though; take each item individually, leaving the gold for last. When you try to take the gold off of him, you'll receive it, but the gold will remain on the body, allowing you to take it as many times as you like. Who knew a little murder could be so profitable...
Item Storage
As you progress through Oblivion, you're probably going to pick up an awful lot of stuff that you want to keep, but don't necessarily want to carry around with you all the time. These items can be anything from alchemy ingredients that you're saving, a quest item that you know you'll need later on, or heavy weapons that you don't need at the moment. You'll need a safe place to store this stuff...but where?

Unlike in Morrowind, items you drop on the ground will usually remain there for quite a while, but they won't stay there permanently. (Although the time it takes them to disappear, even when dropped in heavily-trafficked areas like the Market District, may be as good as forever for most cases.) So if you can find an out-of-the-way spot and need to dump some items for short-term storage, feel free to dump away.
Feel free to dump your stuff on the street if you like - it takes a while for it to disappear.
Treasure chests and crates are a tempting source of storage, but you have to be careful; if you take the items inside a chest, they'll respawn within a few days or so, which may overwrite whatever you deposited into the container.
Merchants are another good source of temporary storage, albeit a conceivably expensive one. If you have a bunch of cheap items that you need to have held for you for a while, just dump them at a merchant and buy them back when they're needed. You'll lose money on both the sale and the buy-back, though, making this an unattractive choice for anything besides very cheap items.
In the end, your best bet for storage will be to buy your own house. You can buy a house in most of the cities on the map by speaking to the Count or Countess when their disposition is high towards you, but the cheapest is in the Imperial City's Waterfront district. If you speak to the woman in the Office of Imperial Commerce in the Market District, she'll offer to sell you the house for 2,000 gold. It isn't much to look at, but if you buy a Storage Area from the Three Brothers Trade Goods store, you'll get three chests which can hold an unlimited amount of items.
Combat Tips

Enemy Weaknesses
Keep in mind that some enemies are resistant to certain types of damage or weapons. Here are some of the most common enemies and their special weaknesses:
Ghosts, Will-O-The-Wisps: Cannot be harmed by normal weapons; use silver or magical weapons. Zombies, Liches: Weak to fire. Dremora (Humanoid Daedra): Weak to shock. Skeletons: Blunt weapons. Trolls: Weak to fire.
Umbra
One of the most powerful weapons in the game is in the hands of Umbra, a soldier located in an Ayleid ruin to the southwest of the Imperial City. If you explore the countryside, you should be able to find Vindasel on the shore directly to the southwest of the Waterfront district, near where the road forks. Heading into this single-level dungeon will let you meet up with Umbra face to face.
Umbra is part of the Clavicus Vile Daedric quest that will become available when you hit level 20, but most of the time you'll probably want to kill her and keep her sword for yourself, which you can (attempt to) do at any level. The Umbra sword is arguably the most powerful weapon in the game in terms of pure attack power. It doesn't have any magical damage effects to add to its damage, but it does have a very useful Soul Trap enchantment which will automatically cast Soul Trap on anything you hit, making it easy to capture souls, especially if you have Azura's Star along for the ride.

Umbra is a fiercesome threat, but she offers great rewards.
The catch? Umbra (the sword and the warrior have the same name) can be monstrously tough to defeat. She's decked out with the sword itself, which is obviously going to be doing a lot of damage to you, as well as a full set of ebony armor. So, how do you beat her?
Killing Umbra
Well, there are a variety of tricks to use. Some players have had success beating her as low as at level one, by attacking her, then quickly escaping the ruins (and we mean quickly; she's one of the fastest characters in the game) and leading her back to the Talos Plaza District of the Imperial City. The guards there will usually interpret her as a threat and kill her (but not before she finished quite a few of them off). This might land you in jail, however, leaving you with nothing to show for your efforts.
If you're a warrior, then you'll probably need to wait until you're around level nine or so to go into straight combat with her. Bring along a good shield and a one-handed weapon enchanted with a +15 magical damage Sigil Stone (or better), along with as many health potions as you can find. Bring along any powerful scrolls you have, especially anything that can disintegrate armor or weapons; this is going to be a long fight, so spells like these will actually be useful for once. When you've opened up with your most powerful attack, settle in for a slugfest. Block her attacks so that she recoils, hit her a couple of times, then repeat as often as it takes for her to go down, using health potions as needed to stay alive.
Tip: Don't forget that the game has a difficulty slider. If you're having an obscenely difficult fight with Umbra, but really want her loot, consider shifting the difficulty slider all the way to the left.

Jumping atop this pillar here will let you fire at Umbra without her touching you.
Mages and archers will have a harder time taking Umbra down, since she's so damn fast and hits so damn hard. Your best bet here is to simply become inaccessible to her, by jumping up onto the broken pillar before attacking her. Doing so is tricky, but can be accomplished if you grab the wicker basket near the table and place it atop it, then jump from the ground and attempt to quickly jump off the basket onto the pillar. If you attack Umbra from there, she won't be able to reach you, allowing you to do your damage over time.
If you're looking for a bit of an edge, you can try to purchase the Apotheosis staff from Rindir's Staffs, which does 99 magical damage in one shot. It should only take one or two blasts from the staff to off Umbra, but of course buying the Apotheosis will be prohibitively expensive for most players until you're well into the game. A less expensive option is the Greater Staff of Ruin, which will disintegrate Umbra's sword completely with a couple of applications, which should hopefully prevent her from dealing quite as much damage as she normally would, but you'll have to repair it afterwards, which can cost a pretty penny if you're not skilled in the Armorer ability.
Miscellaneous Tips
Vampirism: Stamp It Out
Those of you who played Morrowind may have had the unfortunate experience of becoming a vampire, and the same situation is available in Oblivion. Contracting vampirism can either be a blessing or a curse, according to your play style.

If you're interested in playing around with vampirism, then the first thing you'll need to do is to contract porphyric hemophilia, which can be done by fighting with any current vampire. You'll encounter a few vampires in the game's main storyline, and there are also other vampire lairs out in the wilderness. Like goblins and bandits, they'll have taken up residence in caves, Ayleid ruins, and the like, but they appear much less frequently than other types of enemies.
If you fight a vampire long enough, you'll get the porphyric hemophilia disease, which will temporarily weaken you. If you don't want to become a vampire, then simply use a Cure Disease spell or potion on yourself as soon as possible. If you want to become a creature of the night, though, you can simply let the disease run its course, wait a few days, then go to sleep. When you wake up, you'll be a vampire.
Becoming a vampire will have a few benefits, such as bonuses to some of your attributes and skills. You'll also be able to feed on sleeping characters, draining their blood to stay somewhat sane. This is obviously considered to be a crime, though, so be sure no one's watching.
If you feed, then you'll remain incognito as a vampire, but if you go a little while without feeding, then you'll gain more special abilities, as well as further bonuses to your attributes and skills. Unfortunately, the longer you go without feeding, the more vampiric you'll look, to the point that no one will want to speak to you, making it difficult to gain quests or engage merchants in bartering.
We'll have a full chapter on Vampirism in the next section of this guide, but for now, know that if you ever wish to embark on the quest to cure Vampirism, you should talk to one of the priests at a chapel. They'll refer you to Raminus Polus at the Arcane University, or you may be able to cut to the chase and speak directly to Count Hassildor of Skingrad. We'll detail the specifics of the quest in the next part of the guide, but hopefully this pointer will get you where you need to go if you seek a cure for your affliction.
Main Quest Walkthrough
Imperial Prison

Those Rats just knocked down a wall! They're super-Rats! Get the hell out of there!
You begin your journey through the land of Oblivion as a prisoner. Although your origins are humble, you'll be hobnobbing with Emperors soon enough...just let the initial conversations take their course, and be ready for a fight when it comes your way.
After the Emperor arrives with his guards, follow them down the steps until they get ambushed by a group of Mythic Dawn assassins. There isn't much you can do to help the Blades here, but feel free to get punchy with your fists if you like. Captain Renault goes down no matter what you do, leaving behing a shortsword on her body and Renault's Akaviri Katana. Pick this latter weapon up and equip it; it'll be a fine weapon for the bulk of the upcoming dungeon. (If you're more skillful at Blunt weapons, be sure to check the attributes of the other weapons that you find as you proceed and equip one of them.)
When the Emperor and the Blades move on, you'll get your first taste of combat, as some Rats burrow out of a wall and attack you. From here on, you're going to have a long trip to reach the end of this first dungeon, with plenty of tutorials to guide you. We're not going to walk you through every single thing that occurs, but we will point out interesting events that will occur.
In the first rat-infested room, you'll find a number of chests, as well as a skeletal body with a bow, a shield, and some leather armor. Equip the armor and grab anything else of interest to you. There'll still be rats in the area, so a shield will help you block their attacks and counter with your own. If you're looking to be a marksman, then of course the bow will be right up your alley; be sure to equip the arrows as well, though!
Grab everything you possibly can, and try your hand at the lockpicking game to improve your Security skill. The Goblin Shaman by the door has a number of items, including the key that will
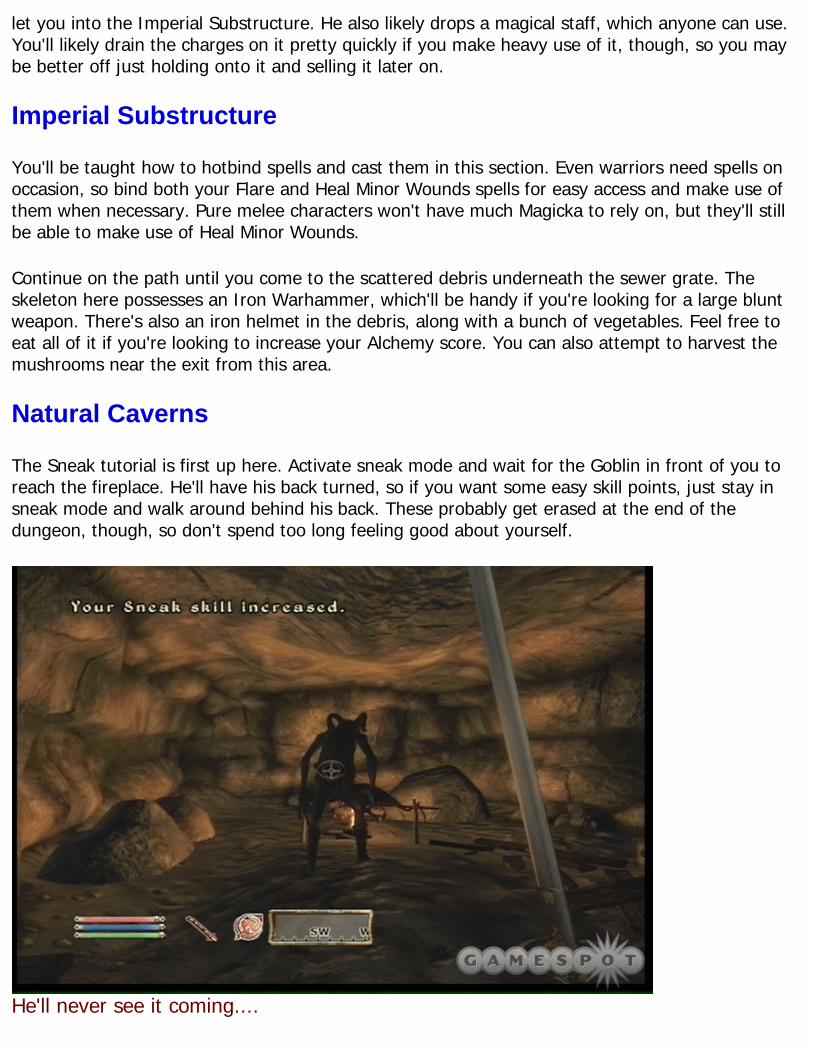
let you into the Imperial Substructure. He also likely drops a magical staff, which anyone can use. You'll likely drain the charges on it pretty quickly if you make heavy use of it, though, so you may be better off just holding onto it and selling it later on.
Imperial Substructure
You'll be taught how to hotbind spells and cast them in this section. Even warriors need spells on occasion, so bind both your Flare and Heal Minor Wounds spells for easy access and make use of them when necessary. Pure melee characters won't have much Magicka to rely on, but they'll still be able to make use of Heal Minor Wounds.
Continue on the path until you come to the scattered debris underneath the sewer grate. The skeleton here possesses an Iron Warhammer, which'll be handy if you're looking for a large blunt weapon. There's also an iron helmet in the debris, along with a bunch of vegetables. Feel free to eat all of it if you're looking to increase your Alchemy score. You can also attempt to harvest the mushrooms near the exit from this area.
Natural Caverns
The Sneak tutorial is first up here. Activate sneak mode and wait for the Goblin in front of you to reach the fireplace. He'll have his back turned, so if you want some easy skill points, just stay in sneak mode and walk around behind his back. These probably get erased at the end of the dungeon, though, so don't spend too long feeling good about yourself.
He'll never see it coming....

Since the goblin can't hear you, though, feel free to stay in sneak mode and get behind it before whacking it with your weapon or bow. Sneak mode attacks get damage multipliers. Be sure to grab the Mortar and Pestle near the goblin if you intend to work on your Alchemy skill. Feel free to select it in your inventory and use it to try and make some rudimentary potions or poisons. Not everything you make will be all that great, but you'll eventually be capable of creating some powerful potions if you hone your skills.
There are a few traps in this area, including a log trap that you can use to kill a couple of goblins at the bottom of a ramp. After that, you'll come out to a larger cavern with multiple Goblins in it, including a Goblin Shaman. Kill everything in sight, and poke around for chests. The Shaman's staff is a particularly noteworthy prize, as it's worth almost twenty times its weight.
Imperial Subterrane
You'll meet the Emperor again here, and be tasked with choosing a birthsign. Don't sweat over this choice overmuch at the moment; you'll be able to change your mind again in the future if you don't like what you selected.
D'oh!.
The Sanctum
Your primary goal here is to just stick with the Emperor. There's nothing you can actually do to protect him here; although you're backed up into a corner with him, someone will walk out of the wall behind him and stab him in the back before you can even move. Fun! Before he gets axed, though, Septim will hand you the Amulet of Kings and give you your first major storyline quest:

Deliver the Amulet.
After grabbing the Amulet of Kings, talk to Baurus to get more details on the quest. He'll unfortunately take the Akaviri Katana from you, but hopefully you have another weapon on you regardless.
The Sewers
Kill you way through the sewers until you reach the sewer gate. But it is VERY IMPORTANT that you save your game before you hit the gate leading outside. (It's in a cylindrical pipe with a little bit of light at the end of it.) Since you get the chance to re-choose your race, class, and birthsign here, you can load a save at this point, make an entirely new character each time, and be able to skip all the tutorial stuff without worry. If you like playing through the tutorials, then by all means feel free to start over from the beginning, but if you intend to play through the game for a little while before deciding your permanent character archetype, then a savegame here will be all you need to do so.
Quest: Deliver the Amulet
Prince of Destruction, huh? Doesn't sound like he's all that.
Well, here you are, alone in the big bad world. You're now free to go anywhere, do anything, see anything...intimidating, isn't it? There's plenty of stuff to do, some large cities to explore, and a quest to be undertaken.

If you're interested in heading directly along the questline, then by all means, head straight to Weynon Priory to find Jauffre. You can either walk there and work on your skills in the meantime (by casting low-level spells, jumping around to buff your Acrobatics, fighting anything you see to start working on combat skills, or just exploring to see what pops up), or you can just warp directly there with direct movement, which is accomplished by opening your world map, finding the Priory (which is near Chorrol on your map, to the west of the Imperial City), and selecting "Travel".
If you want to travel around a bit, then you may want to check out the Imperial City Market District. There are plenty of shops to visit, and if you have a little Security skill, you should be able to lockpick your way into a lot of storerooms and private quarters above and below the shops to see what kind of loot you need. You can sell all of the stuff that you lugged out of the sewers, as well, or attempt to get a particular merchant to like you with the Persuade and Speechcraft options. If you wait until two or three in the morning, then you may be able to lockpick the shops themselves and steal the loot they have on display.
Weynon Priory
When you reach the Priory, head into the Weynon House (the large building with the tunnel running through it) and find Jauffre. Depending on the time of day, he may move around the house, but most of the time, he'll be upstairs behind his desk.
After talking to Jauffre and delivering the Amulet into his caretaking, Jauffre will task you with finding Martin, the Emperor's illegitimate son. Since Septim's three legitimate sons were all killed at the same time as the Emperor, Martin is the heir to the throne, even if he himself is unaware of his origins. Jauffre will task you with traveling to the Chapel of Akatosh in the city of Kvatch and tracking down Martin, then bringing him back to Jauffre in the Weynon Priory.
Before you leave, ask Jauffre and the other brothers in the chapel for Assistance in their dialogue. They'll all have items to give you, with Maborel offering up his horse, of all things! You can use it to make your way to Kvatch, if you wish; or you can just use quick transit to warp directly to the camp outside the city.
Quest: Find the Heir
Kvatch
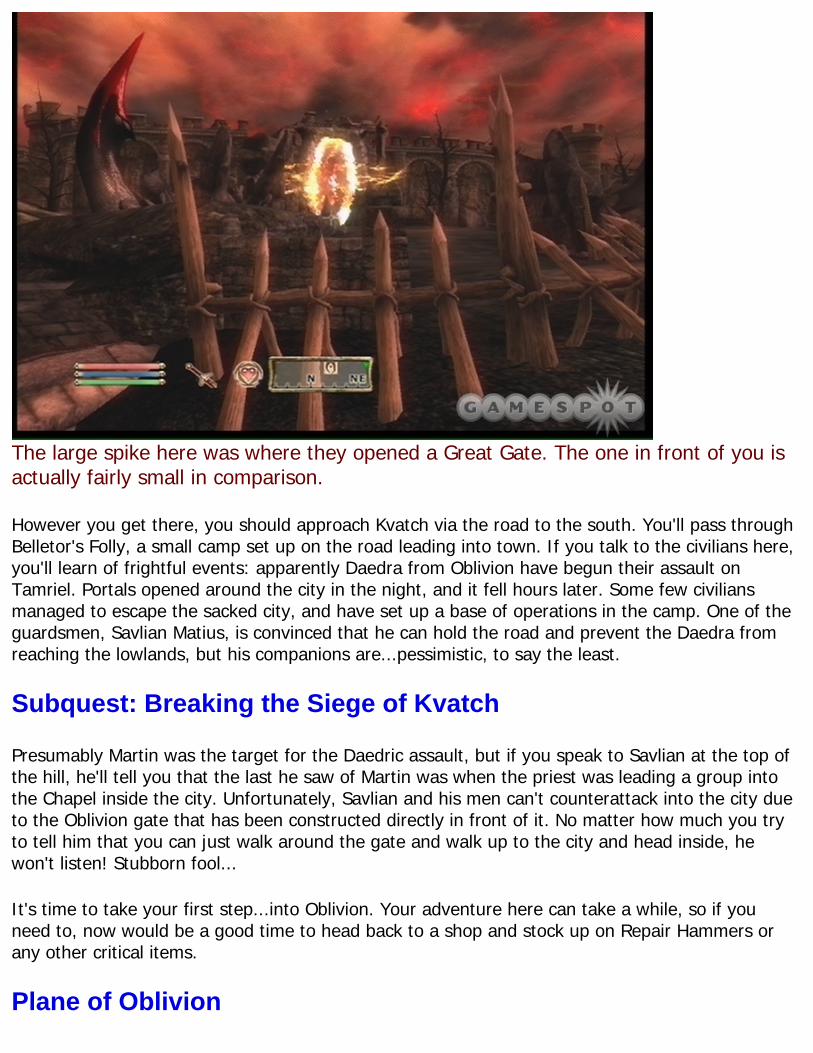
The large spike here was where they opened a Great Gate. The one in front of you is actually fairly small in comparison.
However you get there, you should approach Kvatch via the road to the south. You'll pass through Belletor's Folly, a small camp set up on the road leading into town. If you talk to the civilians here, you'll learn of frightful events: apparently Daedra from Oblivion have begun their assault on Tamriel. Portals opened around the city in the night, and it fell hours later. Some few civilians managed to escape the sacked city, and have set up a base of operations in the camp. One of the guardsmen, Savlian Matius, is convinced that he can hold the road and prevent the Daedra from reaching the lowlands, but his companions are...pessimistic, to say the least.
Subquest: Breaking the Siege of Kvatch
Presumably Martin was the target for the Daedric assault, but if you speak to Savlian at the top of the hill, he'll tell you that the last he saw of Martin was when the priest was leading a group into the Chapel inside the city. Unfortunately, Savlian and his men can't counterattack into the city due to the Oblivion gate that has been constructed directly in front of it. No matter how much you try to tell him that you can just walk around the gate and walk up to the city and head inside, he won't listen! Stubborn fool...
It's time to take your first step...into Oblivion. Your adventure here can take a while, so if you need to, now would be a good time to head back to a shop and stock up on Repair Hammers or any other critical items.
Plane of Oblivion

Ilend is quite unlikely to survive your adventures in Oblivion, unfortunately.
After defeating the few Scamps near the portal here, you'll come across Ilend Vonius, one of the soldiers dispatched to shut down the Oblivion gate. You can choose to send him back immediately if you wish, or keep him along for the ride; he seems to automatically heal himself when he's struck, so he'll be a handy ally should you choose to keep him around. He'll tell you about another member of his party that was dragged off to the nearby tower; it's up to you to rescue him!
Since you don't really have anything more specific to do here, take Ilend up on his task. The direct way to the tower, across the bridge, has been barricaded, so head to the west and follow the path there. Note that there is one trap that Ilend will usually fall victim too. When you hit the long, tilted bridge, just past the first Fleshy Pod, tell him to "Wait Here", then move ahead until you trigger the landslide. When all of the rocks have fallen, get Ilend to follow you again and move on.
As you make your way towards the base of the tower, watch out for landmines; small, circular objects that stick up out of the ground. When you trigger one of them, it'll explode, and probably kill Ilend, as we found to our dismay. You can trigger them from afar by hitting them with a Flare spell, or perhaps an arrow.
Tip: Note that there are some unique alchemy ingredients in Oblivion, such as bloodgrass, harrada, and spiddal sticks. Collect anything you see, as these aren't available in Tamriel, except for rare plants of bloodgrass outside Oblivion Gates.
The main tower is in the center of the plane, but if you're running low on good equipment, you can head south and poke around the southern tower there, the Blood Well. Inside, you can ride the corpse smasher up to the upper levels, then flip the switch at the top of the tower to unlock the main gate that was closed earlier. Doing so will let you access the corpses of the remaing

Kvatch soldiers and loot their equipment, and will also let you easily reach the Oblivion gate again, should you need to return to Tamriel for supplies or to rest up to gain a level. There's also a Sump of Misery on the northern end of the island, but there's nothing critical inside.
This guy seriously needs a good astringent.
When you're ready to move on, enter the Blood Feast area in the central of the three connected towers. Be sure you're at full health, though, as there are a pair of Scampers within, as well as a Daedra Churl. The Churl will attack with damaging lightning spells, then rush in with his heavy mace, so be ready for both types of attack.
Although there are two doors here, they both lead to the same place, so head up into the Corridors of Dark Salvation. Both of the Citadel Hall Doors here are locked, so take the door back to the Plane of Oblivion, which leads to Reaper's Sprawl.
Head to the top of the Reaper's Sprawl to find Menien Goneld, who knows a bit about how this place works. Apparently the Dremora nearby has the Sigel Keep Key, so kill him and nab it off his body. Return to the Corridors of Dark Salvation. The locked door on the south end of the room, near the spike trap, leads to some gold, but the door on the north is the one that leads further up the tower.
If you follow this path aways, you'll come to a door leading back to the Blood Feast. You can head into it, or follow the path to its end to find a door leading on to the third tower (which has nothing in it). Head into the Blood Feast's upper levels, use the runed portal to warp higher, and keep going until you reach the Sigillum Sanguis. At the top of this chamber is the Sigil Stone; activating it will shut down the Oblivion gate and instantly warp you back to Kvatch.

Kill them all! For Kvatch!
Heading Into KvatchM
With the Oblivion gate out of the way, Savlian Matius will want to immediately head into Kvatch and rescue any citizens left alive inside the city. You can head right in, if you'd like, but you'd be wise to Wait for a little while if you're not fully healed. The fight inside the city can be difficult, as there are plenty of Clannfear Runts that will be attacking you while Scamps and a Dremora Churl will be fighting from a distance, but Savlian is a powerful fighter and should be capable of handling anything you can't. You may want to focus on the Clannfears while he takes on the Dremora.
When you reach the church, you'll find Brother Martin inside. If you let Savlian talk to the female soldier inside, he'll tell her to round up the civilians and head down to the camp at the base of the cliff. If you let her complete her orders, Brother Martin will be relocated to the camp, and you'll have to walk down to find him. Alternately, you can just talk to him before he leaves and get him to come along with you.
Quest: Weynon Priory
Brother Martin does accompany you if you choose to instantly travel back to the Priory, so that would be a good first place to go. When you warp in or otherwise approach, you'll learn of terrible deeds: you've arrived just in time to interrupt a Mythic Dawn attack on the Priory. These cultists seem to know an awful lot about the workings of the Empire and of the Blades. After killing the cultists, you'll be asked to head into the chapel to rescue Jauffre.

Tip: If you want to take the opportunity to loot the Priory, tell Martin to wait outside and enter the building before rescuing Jauffre. There's little of value, but Alchemists can find a retort, alembic, and calcinator on Jauffre's shelves.
Head into the chapel to find Jauffre. After killing the cultists, he'll ask you to head back into the chapel with him to find the Amulet of Kings. Unsurprisingly, it's gone. With that information in hand, he'll ask you to take Martin to the Cloud Ruler Temple, near Bruma, an ancient and secretive Blades fortress.
Both Jauffre and Martin will head to the stables at this point and hop on horseback. If you wish to ride with them to the Cloud Ruler Temple, feel free to do so. They'll both dismount and attack anything that attempts to attack you, but neither of them will accompany you into dungeons, so you won't be able to zerg your way through any longish quests while they're along. You can also, of course, just instantly warp to the Temple, should you wish to do so.
However you do it, get Martin to Cloud Ruler Temple. Speak to him and Jauffre after the welcoming ceremony. Jauffre will welcome you into the Blades, and tell you to find Baurus in the Imperial City to see if he has any leads on the assassins. You need to retrieve the Amulet of Kings so that Martin can restore the Dragonfires if you want to have any chance of stopping the Daedric incursions into Tamriel!
You'll have a rude awakening when you reach the Priory again.
Feel free to wander around the castle and loot everything you see; nothing is considered stealing here. There's plenty of armor and weapons in the west wing, and there's an armory in the basement of the east wing. The east wing also has a bit of a library; check the Modern Heretics
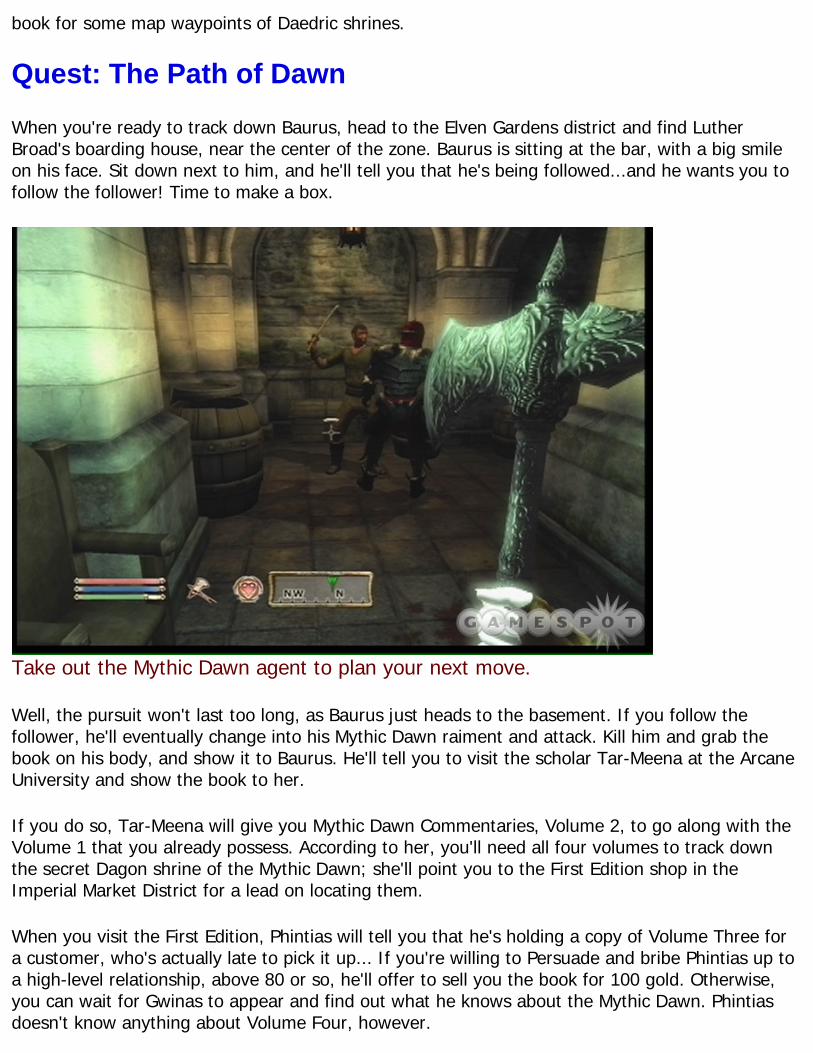
book for some map waypoints of Daedric shrines.
Quest: The Path of Dawn
When you're ready to track down Baurus, head to the Elven Gardens district and find Luther Broad's boarding house, near the center of the zone. Baurus is sitting at the bar, with a big smile on his face. Sit down next to him, and he'll tell you that he's being followed...and he wants you to follow the follower! Time to make a box.
Take out the Mythic Dawn agent to plan your next move.
Well, the pursuit won't last too long, as Baurus just heads to the basement. If you follow the follower, he'll eventually change into his Mythic Dawn raiment and attack. Kill him and grab the book on his body, and show it to Baurus. He'll tell you to visit the scholar Tar-Meena at the Arcane University and show the book to her.
If you do so, Tar-Meena will give you Mythic Dawn Commentaries, Volume 2, to go along with the Volume 1 that you already possess. According to her, you'll need all four volumes to track down the secret Dagon shrine of the Mythic Dawn; she'll point you to the First Edition shop in the Imperial Market District for a lead on locating them.
When you visit the First Edition, Phintias will tell you that he's holding a copy of Volume Three for a customer, who's actually late to pick it up... If you're willing to Persuade and bribe Phintias up to a high-level relationship, above 80 or so, he'll offer to sell you the book for 100 gold. Otherwise, you can wait for Gwinas to appear and find out what he knows about the Mythic Dawn. Phintias doesn't know anything about Volume Four, however.

More Oblivion Gates are opening in the wilderness at this point. Feel free to explore them if you wish.
The way to play this is to talk to Phintias, then wait for one hour for Gwinas to appear. Wait for him to buy the book and start to walk away before talking to him. You may want to try Persuading him a bit before launching into your conversation on the book. Ask him about the Mythic Dawn, then tell him he's in way over his head. If you tell him that the Mythic Dawn were the ones that assassinated the Emperor, he'll be so flustered that he'll give you the book for free and pass along a note detailing the location of a meet he had set up to purchase Volume Four, as well.
Read the three volumes in your possession, if you wish; when you want to pick up the fourth volume, head to the Elven Gardens and head back to Luther Broad's boarding house. Baurus should be outside and waiting for you; after speaking to him, he'll offer to accompany you to the sewer entrance.
The Elven Gardens Sewers

Do your best to gang up on the same target with Baurus here.
You're going to have to walk for quite a while before you reach the meeting point, but at least Baurus knows the way. Stick close to him to ensure that he doesn't fall behind. When you reach the doorway leading to the Sunken Sewers, Baurus will tell you that there's both a door leading to the meeting place, as well as a set of steps leading up to a vantage spot overlooking the meeting spot. If you want to try out both options, save your game before selecting one.
Regardless of your choice, actually, you're going to have to get into a fight. If you choose to sit in on the meeting, Raven will talk to you, but Baurus will be detected by a couple of his cronies; if you choose to observe, then it'll be the other way around. If you want both yourself and Baurus to survive the fight, you should probably choose to observe. If you're good at sneaking, you can land a powerful blow on Raven from behind, perhaps with a poisoned arrow or something similar. Otherwise, you can just drop down when he comes out the door and have you and Baurus gang up on him while the two other Mythic Dawn cultists are still rushing to the fight. Raven is a powerful fighter and can take a bunch of damage, so it'll be best to take him down quickly if at all possible. If you're lucky, you can sometimes kill him before he can change into his Daedric armor.
Regardless, you're going to have to kill Raven and his two guards if you want to move on. Technically, it might not be necessary to kill all of them - you may be able to kill Raven, grab his book, and then run away - but killing the three of them isn't impossible. Baurus has a limited ability to heal himself, but he will die if he takes too much damage. If possible, try to gang up with Baurus and hit the same target he's hitting to take down your foes more quickly than you would be able to separately, preferably starting with Raven, as he's the toughest of the trio.
If you poke around the rest of the sewers, you'll find the hidden Mythic Dawn base, where there's a small amount of stuff to steal. Don't worry about the chest here too much; for a Very Hard lock,

there isn't much inside of it.
With the Sunken Sewers key that you obtained from the Mythic Dawn cultists, you can open the gate to the Talos District Sewers. There are lots of goblins here, so if they overwhelm you, you can just backtrack through the path you and Baurus took to reach the sewers to re-emerge in the Elven Gardens. If you do go through the Talos sewers, though, keep an eye on the red mark on your compass and you'll eventually find a path leading up to the surface again.
Back To Tar-Meena
Return to Tar-Meena with the fourth book. She doesn't have much to say immediately; she simply recommends that you read the books carefully and see what you can find out about the Mythic Dawn cult. She also lets you know that if you return in a day's time, she'll have a hint for you. Feel free to try and decipher the code that is embedded into the book, if you wish; otherwise, just wander around and adventure for a day, or just wait for 24 hours or so, then speak to Tar-Meena again.
When you do, she says that she thinks that the first words in each paragraph link together to form a hidden meaning. If you examine the books' first words of each paragraph, you'll receive the following messages.
● Greetings reader, enter every night enter my palace endlessly roaring offering red-drink● Whosoever answers your whisper hides enraptured recorded enslaved● The oath-breakers woe every reader that once understood chim he endeth starlight● May I deathlessly deny all your suns under nothing
Well, that's pretty much nonsense, but if you take the first letter of each paragraph and make a message out of it, you'll receive the sentence "Green emperor way where tower touches middle sun". That might not mean much to you if you haven't been exploring, but Tar-Meena will clue you in: you should go to the Green Emperor Way at noon and see what happens.

This tomb will clue you in to the location of the Lake Arrius Caverns.
Imperial Palace
Head to the cemetary here and check your compass for a tomb that'll be marked in green. (If you don't have a marker, find the Tomb of Prince Camarril, just to the south of the western entrance to the district.) If you wait around until it's noon, the markings on the tomb will light up, and you'll be able to click them to reveal the location of the hidden rebel base - er, the hidden Mythic Dawn shrine - on your overland map. It's up near Cheydinhal, so head to the West Gate of that city and walk outside to pick up your horse.
If you wish to add the Shrine of Azura to your list of teleport locations, it can be found in the hills to the north of the Lake Arrius Caverns, where the Mythic Dawn shrine is located. It's tough to find if you don't have the map marker, but if you poke around to the north of the "N" in the word "County" on your map, you may be able to locate it.
Quest: Dagon Shrine
After entering the shrine, you'll be presumed to be an initiate of the Mythic Dawn - after all, who else would be likely to wander into this remote cave?
The doorkeeper will let you in to speak to Harrow, one of the mucky-mucks in the cult. Now, at this point, you have a couple of options: you can hand over all of your possessions to Harrow, who'll give you back a Mythic Dawn Robe to wear, or you can start chopping heads and work your way into the cave to retrieve the Amulet of Kings the old-fashioned way.

Violent Way
Get everyone's attention from here, then drop down and grab the book before making a break for it.
So you want to kill a whole mess of cultists? Well, have we got an opportunity for you. The goal at this point is to just start chopping: kill the doorkeeper, Harrow, then walk into the caves behind them and start dealing with all of the cultists in the small chambers beyond. Note that the Acolytes don't change into full armor when you attack them, but also that they'll run away when they're near death. Annoying, that. Feel free to loot the Mythic Dawn's storehouse if you can pick the Hard lock; there isn't anything tremendously exciting.
When you exit into the Dagon Shrine, no one will initially be on your case, so feel free to sneak around a bit. Your goal is to disrupt the sacrifice meeting here, steal the Mysterium Xarxes (since Mankar disappears into Oblivion when he spots you), and make it out alive. Then you must defeat the dread Xenium Kinneget and replace the Scepter Rune of Obnoxium! Well, no, we're kidding about that last part.
If you sneak around to the southern overhang that looks over the cultists spread out below, you can get their attention with a Flare spell or something similar, wait for the bulk of them to run up the stairs to the north and circle around to get you, then drop down to the floor, free the prisoner on the altar (optional, but the Right Thing to do), grab the book off the podium, and head out the north exit to the Shrine Living Quarters. Obviously, things are going to start moving pretty fast, so now would be a good time to take off all your heavy armor and take any potions or cast any spells that add to your speed or fortify your health.

When you grab the Xarxes, all of the cultists that you distracted earlier on will be back on your case, and probably coming down the steps. If you don't want to run directly past them, try hiding behind the shrine here and waiting for the bulk of them to approach. They'll zap you with lightning, obviously, but if you wait for them to get close you'll have an easier time getting up the stairs and heading to the Living Quarters exit, which was locked before, but will be open to you now. When you pass through to the Living Quarters, re-equip all of your armor and weapons and turn around, facing the door. Usually, no more than two of your pursuers will follow you through the door; if they're Acolytes, you stand a good chance of killing them or forcing them to run, which might give you a breather you can exploit and let you take your time when traversing the Living Quarters and making your way to the exit.
Undercover Option
If you decide to go undercover, there's something you can do to prevent Harrow from taking all your loot: drop it. In the exterior area before the doorkeeper, just drop everything you own on the ground, including your armor, weapons, potions, etc. Most of the stuff should be easily pick-up-able later on, but especially small items, like rings, should be dropped somewhere separate from the rest of your loot, preferably in a well-lit area of the room, since they'll be tough to find later on. With all of your stuff on the ground, you can talk to Harrow, give him a whole bunch of nothing, then walk back to your loot and pick it all up.
The only thing that Harrow will keep in this instance is...drumroll...all of your gold. You'll be able to kill him later to get it back, but this can be difficult, especially if you're a stealth character, so if you're worried about your roll getting taken permanently, invest it beforehand in something, like expensive equipment or training.
They'll Never See You Coming...

'Do you MIND? I'm trying to speechify here!'
If you go undercover, then feel free to loot the area through which you initially walk, then follow Harrow into the Shrine. After Mankar disappears, you'll be approached by his daughter Ruma and told to offer the red-drink to Dagon, by killing the sacrificial victim that lies on the altar. Good or evil, tell her you'll do it and grab the silver dagger on the podium.
This is where the decision trees start blossoming. You can choose to kill the victim, if you wish, which will cause the cultists around the shrine to disperse and make the job of stealing the Xarxes much easier, but that's kind of mean. What did he ever do to you? It's a perfectly valid choice if you don't mind role-playing an evil character, though; the act doesn't appear to add to your Infamy or anything like that.
Otherwise, you can attempt to free the prisoner and grab the Xarxes before making your escape, at which point things start playing out similarly to the course described above in the violent option. If you choose to do this, the same rules apply: try to get on top of the rocky overlook here, attack the cultists to get them to follow you, drop down and grab the Xarxes, then make a break for it through the Living Quarters. If you have any magical weapons capable of dealing extra damage, it might be worth your while to try and quickly kill Harrow to grab your gold off of his body before making your escape.
Living Quarters Escape
If you don't manage to shake your escape, then it'll be one heck of a run through the Living Quarters to get free, as there are plenty more cultists and acolytes waiting to disrupt your progress. If you do turn around and kill your pursuers, though, then you may be able to actually

wait an hour or so if you kill the first guard that you run across in the Living Quarters. Doing so will be a big help to your health, and will let you repair your armor as well; you may even be able to return to the Shrine and kill Ruma Camoran, Markan's daughter. There's no special point to doing so, but she does drop a nice Staff of Frost that sells for a bunch of cash.
It's going to be tough to get out of the Caverns with all this pursuit.
Regardless, start making your way through the Living Quarters. (We're going to assume that you're able to take your time and fight your way through, but if you're unable to shake your pursuit, just get the hell out of there and try to stay alive while running.) There will likely be a bunch of Acolytes nearby, who aren't difficult to kill, but have an annoying tendency to run away when you'd most like them to stay and die. If you want to try and prevent this, note that there's a door near the entrance from the Shrine; if you lure the Acolytes through, then close the door, you may be able to wedge them into the first small room and prevent them from escaping.
Check around the first little storeroom to try and find any magical items that you might like; one of the crates on the floor will often have a magical ring or necklace in it. The path here branches off in two directions, one to the southwest (towards another little storeroom with more chests and crates in it), and one to the northwest, which leads towards the exit. You should be able to fight most of the way through the area without running into more than two guards at a time, but the kitchen area will likely have a few Acolytes in it. If you get into a scrap, try to hit the Acolytes enough to convince them to run away before dealing with the guards.
Continuing past the shrine will lead you to the mess hall, where an intimidatingly large number of foes are arrayed against you. Most of them are Acolytes, though, so feel free to goad them into running away before taking on the guards. There are two exits from the area, with one leading to the Antechamber and one leading back to Lake Arrius Caverns. The Antechamber is an optional

exit, since you won't be able to make it out of the caverns from there; if you head to the Cavern exit, you'll be able to flip a switch to open a secret door and escape from there. Regardless, if you've been fighting your way through the bulk of the enemies thus far, you've probably cleaned out most of the cavern; feel free to go back and kill any remaining enemies if you like. Some of the Acolytes will drop nice magical jewelry, and one of them will drop the key to the storehouse in the Antechamber.
After escaping with the Mysterium, one way or another, return to the Cloud Ruler Temple and give it to Martin. He'll take it and begin translating it, and tell you to speak to Jauffre, who has a new quest for you.
Quest: Spies
Jearl and Saveri aren't exactly subtle about their Mythic Dawn leanings.
According to Jauffre, suspicious folks have been sighted on the roads near the Cloud Ruler Temple. The Blades lack the manpower to search out these spies, so he leaves the matter in your capable hands. If you speak to Steffan, upstairs in the West Wing, he'll tell you that the spies are often spotted near the runestone at dusk. Jauffre will also tell you to speak to Captain Burd in Bruma, the nearby city.
If you head to the runestone on the road outside of the castle (it should be marked on your map), then advance your clock to a dusky hour, say 11:00 PM, the cultists Jearl and Saveri Faram will appear and attack you. Killing them both will net you some items, as well as a Basement Key and Jearl's Key. No more clues are apparent after doing so, though, so you'll have to head to Burd. He's located in the Bruma Castle, on the west side of town. Follow the markers on your map until

you reach him.
Burd will tell you about Jearl, which gives you the prompt to tell him that she was a Mythic Dawn agent. (If you missed her at the Runestone, presumably you'll have to track her down and kill her at this point.) He'll give you permission to head to her house, so track it down, search it, then head down into the basement with the key you picked off of her body. You'll find a document marked Jearl's Orders there; grab it and pick it up. You can head through the Bruma Caverns nearby to reach the exterior again, or just head out of the house. Either way, get back to Cloud Ruler Temple and talk to Jauffre.
Quest: Blood of the Daedra
Martin is going to attempt to open a portal to Mankar's Paradise, but in order to do so, he'll need some ingredients. First on the list is a Daedric artifact. Martin can't tell you where to get one, but he will clue you into the fact that a Daedric cult would be the best option for tracking one down. Unfortunately, there are only 15 Daedric artifacts in the game (each accompanied by a specific quest), and whichever one you wind up with will be destroyed by Martin's ritual. If you want to go along with the game's suggestion, you can find the Star of Azura and offer it up to Martin. Unfortunately, the Star of Azura is somewhat too awesome to really sacrifice in this manner; if you want to use magical weapons or equipment, then you're definitely going to want to hold onto it. We recommend obtaining the Wabbajack from Sheogorath and offering that to Martin, but this will require you to either pickpocket someone successfully or pick a Very Hard lock.
Tip: Short walkthrough for Sheogorath: Get Ri'bassa, the shaman, above disposition 60 and ask him about the three plagues. Either pickpocket the innkeeper while she's asleep for the key to the display case while she's asleep, or just pick the lock and grab the large orange piece of cheese. Place it in the pot above the fire outside and wait for the plague of rats, then wait a little while before picking up the rat poison that gets placed on the stairs and putting that in the trough in the sheep pen. When all of the sheep are poisoned, you've effectively beaten the quest.
If you read the book Modern Heretics in the library (it's the large purple book on the third bookshelf from the left, but may also be near Martin), it will tell you the location of the Shrine of Azura, a much more modest shrine than was found in Morrowind. Talk to some of the followers there to learn that you'll need to offer Azura Glow Dust in order to speak to her. If you're attempting this quest as part of the game's main storyline, then you should be able to walk north from the shrine a bit to find some Will O The Wisps, at least in the nighttime hours, which drop Glow Dust when killed. Alternately, you may be able to find it in a shop inventory, say at the Finest Ingredients shop in the Imperial City.

A plague of dogs is one of the weirder things you'll encounter in Sheogorath's quest.
As mentioned, though, there are 14 other Daedric artifacts to be found, and while many of them are powerful, not all of them will be useful to you. Here's a short list of what you can do and what they offer you in return, as well as whom you can speak to to find the location of the Daedric Shrine required to start the quest. You couldn't have spoken to them before now, as the options to get the Shrine locations were unlocked when you read the Modern Heretics book.
Shrine Location Giver Requirements for Worship Reward
Azura Modern Heretics Book. Glow Dust; Level 2 Star of Azura (reusable Grand Soul Gem)
BoethiaBora in Bora's Goods shop in western Cheydinhal.
Draeda Heart, level 20 Goldbrand (fire-enchanted sword)
Clavicus Vile
None - shrine is southwest of Imperial City, in one of the loops formed by the Red Ring Road.
500 Gold, level 20 Masque of Clavicus Vile (+20 Personality Mask)
HircineOntus Vanin, southwestern Talos Plaza.
Wolf or Bear Pelt, level 17 Savior's Hide (magical Light Armor)
Malacath Thaurron in Mage's Guild of Anvil. Troll Fat, level 10 Volendrung (Paralyze,
Drain Health hammer)

Mephala
Ontus Vanin, or Luther Broad at his boarding house in Elven Gardens District.
Nightshade, level 15. Nightshade is difficult to find, but if you visit Camoran's Paradise in the main quest you should find some.
Ebony Blade (sword with Silence and Absorb Health)
Meridia None, found west of Skingrad.
Bonemeal or ectoplasm, level 10
Ring of Khajiiti (Chameleon, Fortify Speed)
Molag Bal Lion Pelt, level 17 Mace of Molag Ball (Drain Strength and Magicka)
Namira None, found east-southeast of Bruma.
Personality under 20. (Find or buy a lot of Cheap Wine to reduce your score here. There's plenty in the Chapel Hall in Bruma.) Level 5
Ring of Namira (Reflect Damage and Reflect Spell)
Nocturnal Alves Uvenim, Leyawiin Mages Guild Level 10
Skeleton Key (unbreakable lockpick, adds 40 to Security score)
Peryite
None, and difficult to find. Lies along the southern bank of the Silverfish River, to the east of Bravil.
Level 10Spell Breaker (shield with Reflect Spell enchantment)
Sanguine Fadus Calidius, Skingrad Fighter's Guild.
Cyrodiilic Brandy (can be bought at the Main Ingredient in the Imperial Market District) Level 8
Sanguine Rose (staff that can summon Daedra)
Sheogorath
Around halfway between Brasil and Leyawiin. Follow road south from Brasil, cross the river, then head off-road, southwest of Camp Nowhere.
Lettuce, Lesser Soul Gem, and Yarn; Level 2
Wabbajack (Staff that can transmute creature into any other creature for 20 seconds)
VaerminaOntus Vanin in southwestern Talos Plaza yet again.
Grand Black Soul Gem (very difficult to come by unless you take part in the Mage's Guild Quests), Level 5
Skull of Corruption (staff that creates a clone of a target that is hostile to your target)
Now might be a good time to actually do a few of these quests and gain the items given to you as a result of completing them, depending on the level you have currently obtained. The Skeleton Key from Nocturnal is incredibly useful, as you might imagine. If you do want to go ahead and do Azura's quest only, though, here's a short walkthrough for it.
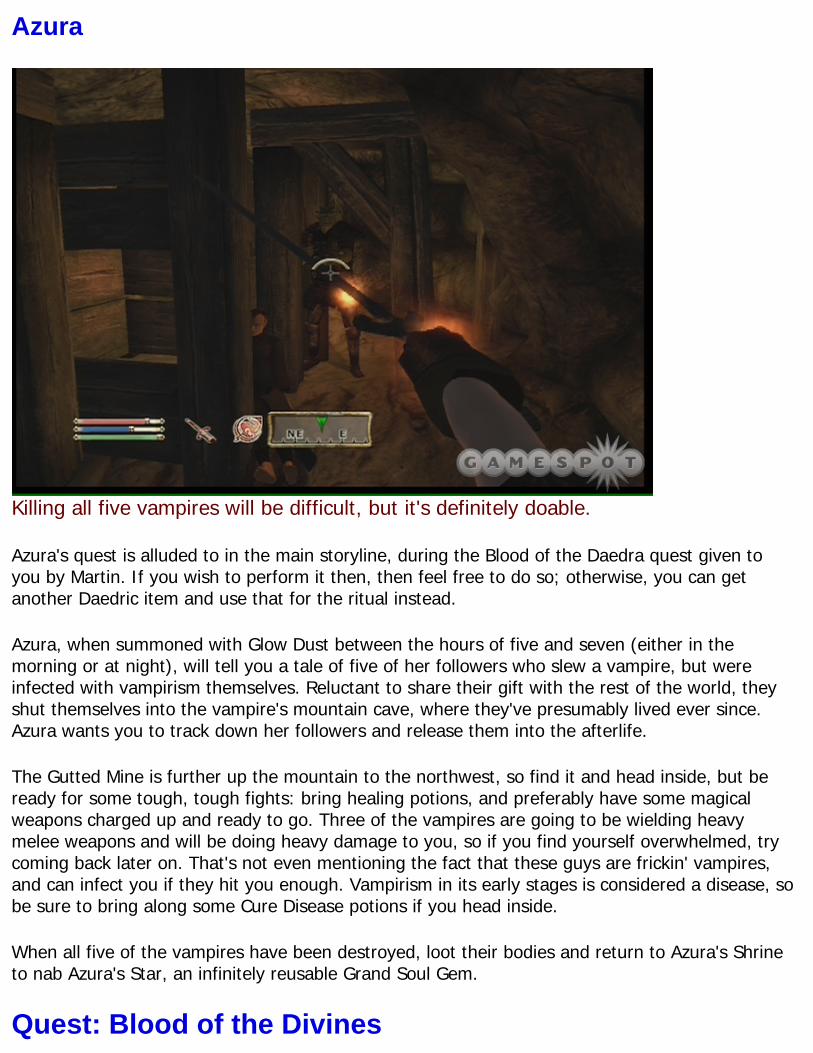
Azura
Killing all five vampires will be difficult, but it's definitely doable.
Azura's quest is alluded to in the main storyline, during the Blood of the Daedra quest given to you by Martin. If you wish to perform it then, then feel free to do so; otherwise, you can get another Daedric item and use that for the ritual instead.
Azura, when summoned with Glow Dust between the hours of five and seven (either in the morning or at night), will tell you a tale of five of her followers who slew a vampire, but were infected with vampirism themselves. Reluctant to share their gift with the rest of the world, they shut themselves into the vampire's mountain cave, where they've presumably lived ever since. Azura wants you to track down her followers and release them into the afterlife.
The Gutted Mine is further up the mountain to the northwest, so find it and head inside, but be ready for some tough, tough fights: bring healing potions, and preferably have some magical weapons charged up and ready to go. Three of the vampires are going to be wielding heavy melee weapons and will be doing heavy damage to you, so if you find yourself overwhelmed, try coming back later on. That's not even mentioning the fact that these guys are frickin' vampires, and can infect you if they hit you enough. Vampirism in its early stages is considered a disease, so be sure to bring along some Cure Disease potions if you head inside.
When all five of the vampires have been destroyed, loot their bodies and return to Azura's Shrine to nab Azura's Star, an infinitely reusable Grand Soul Gem.
Quest: Blood of the Divines

The undead Blades should all have nice magical equipment.
After obtaining the Daedric Artifact for Martin (or after enough time has passed since he gave you that quest), he'll tell you of another item he'll need to open the gate: the blood of a divine. Gods don't normally shed blood, but at least one of them was once mortal: Tiber Septim, the founder of the Empire. His armor is enshrined in the catacombs of Sancre Tor, as Jauffre will tell you when you ask. You'll have to go there and find the armor, even though no one has ever visited the catacombs and come out alive....
Get to Sancre Tor. It's probably easier to head north from Chorrol than it is to leave from the Cloud Ruler Temple, but either way you're going to have to get pretty high up on a hill, so bring a horse along. (If you find yourself crossing a lot of wooden bridges way up in the mountains, odds are you're heading towards Hermaeus Mora's Daedric shrine, which you're exceedingly unlikely to be able to use at this point.) When you reach the castle, take the stairs near the door to search the chests upstairs, then head inside. Be sure to bring along either a magical or silver weapon when you enter Sancre Tor, as there'll probably be ghosts inside, depending on your level.
(Maybe it was just us, but the dagger by the skeleton immediately after you enter the tomb was magical in our case, so be sure to check it out before moving on.) Fight your way through your enemies until you reach a Skeleton Blade, who wields Blades weapons and armor. Kill him to free his enslaved ghost, which will tell you of the vicious Underking, who rose and defiled the temple in the tomb. In order to cleanse the temple and pay homage to Tiber Septim, you'll have to free the spirits of the other Blades trapped in their skeletons. Search all of the treasure chests in the area before heading into the Entry Hall.

Free the Skeletal Blades
There are three more cursed Blades scattered around Sancre Tor, so track them down (they appear in red on your radar) and free them all by killing them. Be sure to check their equipment to see if it's magical before moving on, as much of it will be if you're beyond level five or so.
Jearl and Saveri aren't exactly subtle about their Mythic Dawn leanings.
When you've killed all of the Blades, head to the Catacombs, where their spirits will open the way to the tomb of Tiber Septim. There's nothing special you have to do here; just grab the armor and get the heck out of dodge. If you like, feel free to wear the armor yourself; it weighs nothing and looks pretty snazzy. Give the armor to Martin and he'll refer you back to Jauffre for your next quest.
Quest: Bruma Gate
As promised, an Oblivion Gate has opened outside of Bruma, and Jauffre wants you to help the Bruma guard shut it down. Not much to say here: you're going to have Burd along, as well as a couple of grunts, but the grunts are unlikely to make it through the experience alive, and Burd himself will probably also bite it eventually, although he can heal himself like many other important characters. Beyond that, there's nothing mysterious here, and nothing you haven't probably done already: just take the path around to the base of the tower, enter it, head to the top, and grab the Sigil Stone before getting out of town. Nothing to it!
Afterwards, return to Jauffre and give him the update. He'll ask you to find some Aid for Bruma.

Quest: Aid for Bruma
This is a multi-objective quest. Your goal is to speak to the leaders of each of the other major cities in Cyrodiil, as well as the Elder Council in the Imperial City, and ask them to aid Bruma with extra troops so that they can withstand more Daedric assaults. Obviously enough, most of the leaders of the cities have their own problems, so you shouldn't expect this to be a simple matter of just talking to different people and having that be that.
Elder Council
Speaking to the lead counsellor (Orato?) doesn't actually lead anywhere; he explains that the Imperial army is tied up in the provinces, and asks you to go to the cities and gain their aid directly. Since you've already been doing that, resist the urge to strike him down and simply walk away.
If you go to the leaders of Anvil, Skingrad, Chorrol, Bravil, Leyawiin, and Cheydinhal, they'll all tell you the same thing: they'd like to help, but they've got their own Oblivion Gates right outside of town. In order to win their support for Bruma, you'll have to head into each of the gates, grab the Sigil Stones, and shut them down. You should've done this a few times by now, so just get into the central towers (which can sometimes be a tall task), scale them, and shut the gates down, then return to the various Counts and Countesses to enlist their aid for Bruma.
Some of these planes are a bit more difficult than the others; we've described them below.
Cheydinhal: The Wayward Knight
Cheydinhal's gate has a subquest that goes along with it, so we'll go ahead and discuss it here. If you speak to Amminus Gregori outside the Oblivion Gate, he'll tell you that the Count's son passed through the gate with a group of wannabe adventurers and hasn't returned. If you're heading into the gate anyway, maybe you could keep an eye out for the kid?
Inside the gate here, you'll pass through two sets of Daedra caves, lovingly called "The Bowels", before you reach Farwil and his much more sensible friend Bremman, all that remain of the Knights of the Thorn. Farwil won't hear any talk of retreat, and insists that you lead the way to the citadel of the plane so that you can capture the sigil stone and shut the gate down. There are a lot of Dremora in the citadel here, so you'll probably need their help; just try to rest every so often to let Farwil and Bremman get their health back. The goal is to keep them alive, so save often and reload if they happen to bite it. Both of your wards can move quite quickly, though, so be careful not to hit them in the back when they run past you towards an enemy.

So all your friends are dead...why are you smiling?
After you rescue Farwil, speak to the Count again, and he'll offer you either a sword or a staff as a reward. If Farwil dies, you can bring back his signet ring to the Count as proof of his death, but presumably you won't be rewarded for doing so. Regardless, you've shut the gate, and that's all that really matters.
Chorrol
Your goal in Chorrol is to close the Oblivion Gate that's popped up outside of town. Note that the central tower in this plane of Oblivion can be kind of weird; apparently you are supposed to enter one of the smaller sub-towers surrounding the main citadel, then use those towers to open a bunch of gates that'll let you access the central citadel's lower level, but we found it easier to scale one of the minitowers, head across to the citadel, then jump over the railing of the platform you're on and drop down to the platform below you. This will place you on the path to the citadel's rooftop, via the Rending Halls.
Note that immediately after you enter this Plane of Oblivion, though, there'll be a large tower half-melted in the lavapit behind you. If you head northwest from the Oblivion Gate and find the fallen gate that spans the lava pit, you'll eventually be able to reach the Fume Vaults, which will let you access the fallen citadel, which has some nice loot if you explore it a bit.
Skingrad
Find Mercator Hosidus in the Skingrad County Hall and speak to him; the Count of Skingrad will be inaccessible to you behind some difficult locked doors, but if you speak to Hosidus, he'll alert the

Count and grant you an audience. Again, your task here is to exit the city, look for the Oblivion Gate, and shut it down.
Now, these planes could be random, so don't fret if the advice here seems misleading, but for us, the Skingrad Plane of Oblivion had one large tower that was initially inaccessible, and two slightly smaller towers with broken bridges leading to it. If you unlock the switches at the top of the two smaller towers, the bridges about halfway down the smaller towers will extend to the larger tower, allowing you to head outside and reach the top of the tower directly to shut down the Gate.
Kvatch: The Battle for Castle Kvatch
Now, this is odd: while you have Aid for Bruma as your active quest, Kvatch will be marked on your map, indicating that you have something to do there. The Battle for Castle Kvatch quest will still be active, if you didn't perform it after rescuing Martin from the Chapel of Akatosh earlier, so we'll cover it now.
After clearing out a few of the enemies from the courtyard in front of the castle, you'll be tasked by Savlian to head back to the chapel and find a key to the Guard House from Berich Inian. Inian has the key, but he doesn't give it to you; instead, he offers to take you to the Guard House himself. You'll have to head through the Chapel Undercroft to get there. (There may also be some Imperial guardsman in the chapel by this point, so feel free to invite them along for the ride, if you wish.)
You'll have plenty of help in the battle for Castle Kvatch.
Fight your way through the Undercroft and Kvatch to reach the guard tower; there's some heavy
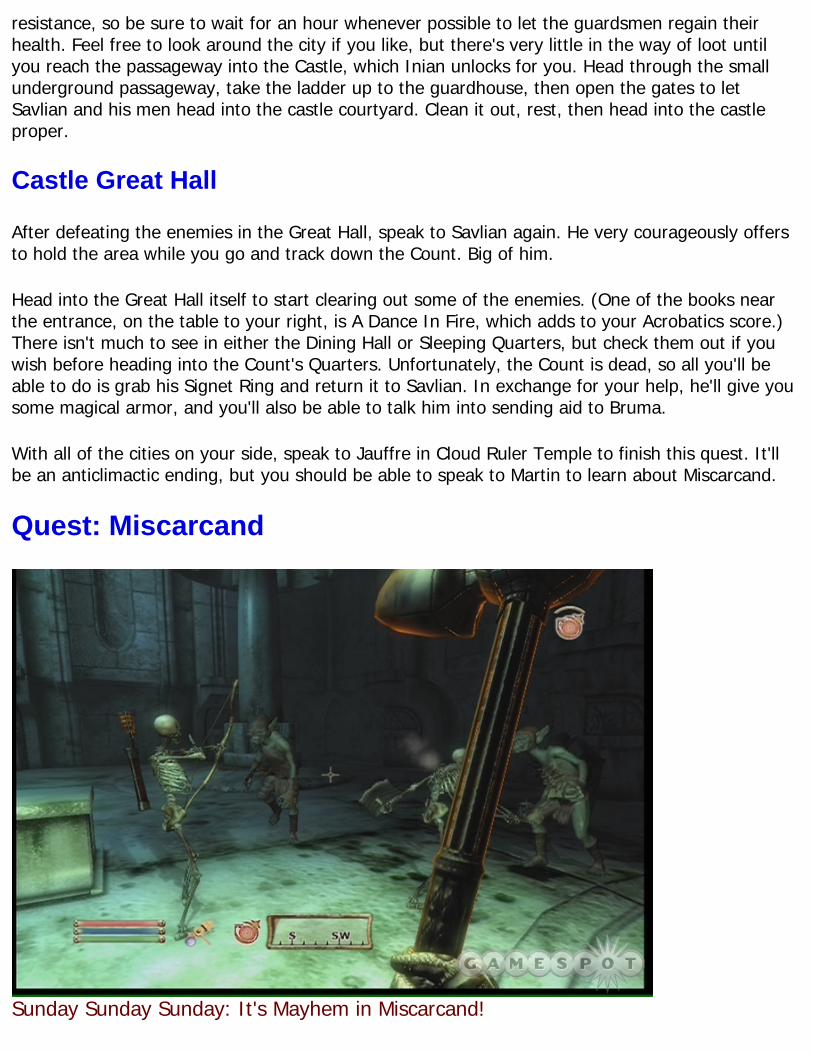
resistance, so be sure to wait for an hour whenever possible to let the guardsmen regain their health. Feel free to look around the city if you like, but there's very little in the way of loot until you reach the passageway into the Castle, which Inian unlocks for you. Head through the small underground passageway, take the ladder up to the guardhouse, then open the gates to let Savlian and his men head into the castle courtyard. Clean it out, rest, then head into the castle proper.
Castle Great Hall
After defeating the enemies in the Great Hall, speak to Savlian again. He very courageously offers to hold the area while you go and track down the Count. Big of him.
Head into the Great Hall itself to start clearing out some of the enemies. (One of the books near the entrance, on the table to your right, is A Dance In Fire, which adds to your Acrobatics score.) There isn't much to see in either the Dining Hall or Sleeping Quarters, but check them out if you wish before heading into the Count's Quarters. Unfortunately, the Count is dead, so all you'll be able to do is grab his Signet Ring and return it to Savlian. In exchange for your help, he'll give you some magical armor, and you'll also be able to talk him into sending aid to Bruma.
With all of the cities on your side, speak to Jauffre in Cloud Ruler Temple to finish this quest. It'll be an anticlimactic ending, but you should be able to speak to Martin to learn about Miscarcand.
Quest: Miscarcand
Sunday Sunday Sunday: It's Mayhem in Miscarcand!
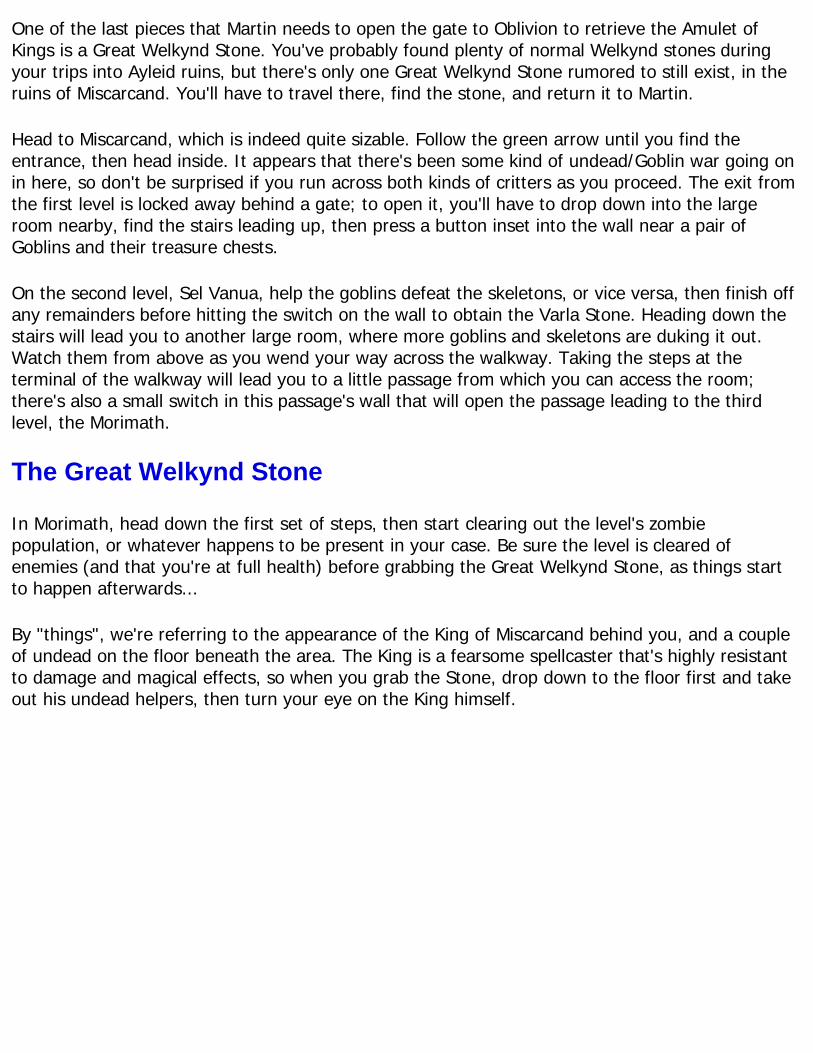
One of the last pieces that Martin needs to open the gate to Oblivion to retrieve the Amulet of Kings is a Great Welkynd Stone. You've probably found plenty of normal Welkynd stones during your trips into Ayleid ruins, but there's only one Great Welkynd Stone rumored to still exist, in the ruins of Miscarcand. You'll have to travel there, find the stone, and return it to Martin.
Head to Miscarcand, which is indeed quite sizable. Follow the green arrow until you find the entrance, then head inside. It appears that there's been some kind of undead/Goblin war going on in here, so don't be surprised if you run across both kinds of critters as you proceed. The exit from the first level is locked away behind a gate; to open it, you'll have to drop down into the large room nearby, find the stairs leading up, then press a button inset into the wall near a pair of Goblins and their treasure chests.
On the second level, Sel Vanua, help the goblins defeat the skeletons, or vice versa, then finish off any remainders before hitting the switch on the wall to obtain the Varla Stone. Heading down the stairs will lead you to another large room, where more goblins and skeletons are duking it out. Watch them from above as you wend your way across the walkway. Taking the steps at the terminal of the walkway will lead you to a little passage from which you can access the room; there's also a small switch in this passage's wall that will open the passage leading to the third level, the Morimath.
The Great Welkynd Stone
In Morimath, head down the first set of steps, then start clearing out the level's zombie population, or whatever happens to be present in your case. Be sure the level is cleared of enemies (and that you're at full health) before grabbing the Great Welkynd Stone, as things start to happen afterwards...
By "things", we're referring to the appearance of the King of Miscarcand behind you, and a couple of undead on the floor beneath the area. The King is a fearsome spellcaster that's highly resistant to damage and magical effects, so when you grab the Stone, drop down to the floor first and take out his undead helpers, then turn your eye on the King himself.
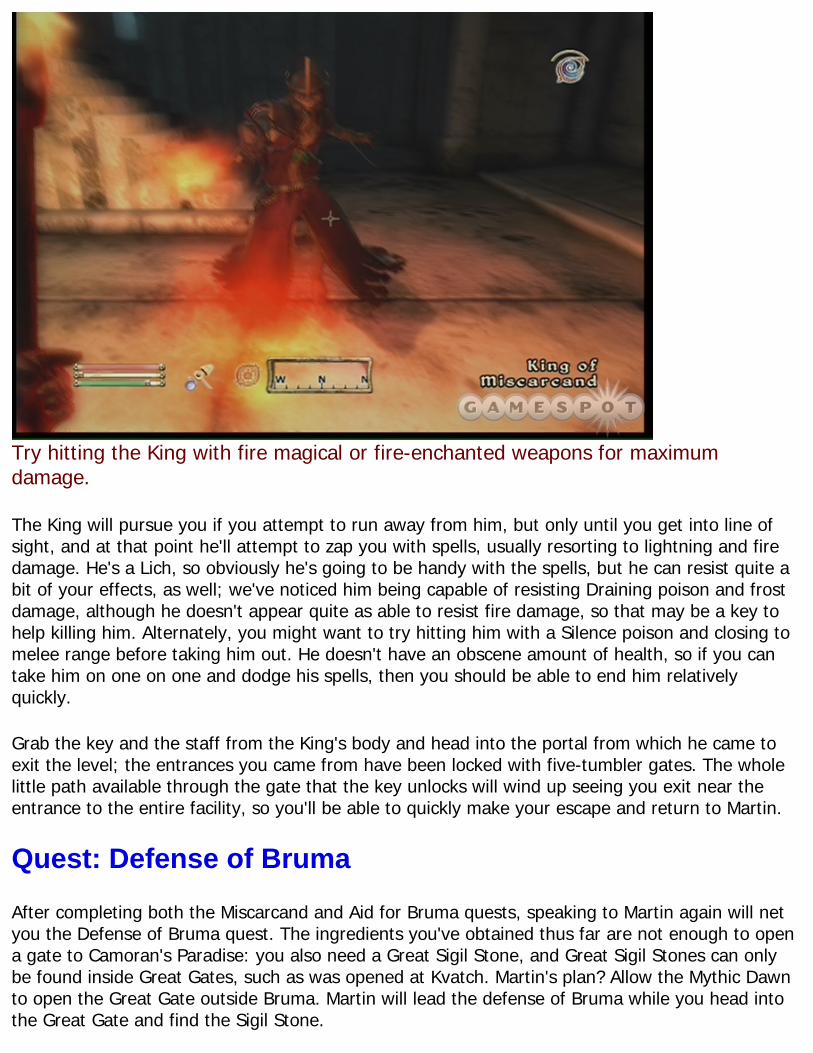
Try hitting the King with fire magical or fire-enchanted weapons for maximum damage.
The King will pursue you if you attempt to run away from him, but only until you get into line of sight, and at that point he'll attempt to zap you with spells, usually resorting to lightning and fire damage. He's a Lich, so obviously he's going to be handy with the spells, but he can resist quite a bit of your effects, as well; we've noticed him being capable of resisting Draining poison and frost damage, although he doesn't appear quite as able to resist fire damage, so that may be a key to help killing him. Alternately, you might want to try hitting him with a Silence poison and closing to melee range before taking him out. He doesn't have an obscene amount of health, so if you can take him on one on one and dodge his spells, then you should be able to end him relatively quickly.
Grab the key and the staff from the King's body and head into the portal from which he came to exit the level; the entrances you came from have been locked with five-tumbler gates. The whole little path available through the gate that the key unlocks will wind up seeing you exit near the entrance to the entire facility, so you'll be able to quickly make your escape and return to Martin.
Quest: Defense of Bruma
After completing both the Miscarcand and Aid for Bruma quests, speaking to Martin again will net you the Defense of Bruma quest. The ingredients you've obtained thus far are not enough to open a gate to Camoran's Paradise: you also need a Great Sigil Stone, and Great Sigil Stones can only be found inside Great Gates, such as was opened at Kvatch. Martin's plan? Allow the Mythic Dawn to open the Great Gate outside Bruma. Martin will lead the defense of Bruma while you head into the Great Gate and find the Sigil Stone.

He asks you to head to Bruma and inform the Countess of his decision. Well, he's just giving you all the plum assignments today, isn't he? "Oh, well, could you go and grab the Great Sigil Stone and place yourself in unimaginable peril? But before you go, go and tell the Countess that we're probably going to get her city destroyed."
Head to Bruma, the streets of which are now littered with the soldiers from other towns. Speak to the Countess and tell her about Martin's plan. Although she's upset, she'll agree to speak to Martin in the Chapel. You'll have to walk her there, but when you do finally unite Narina and Martin, they'll agree to the plan, which will have Narina's troops cease destroying the lesser Oblivion Gates around the city. In order to open a Great Gate, the enemy will have to open three smaller gates.
Tip: Note that you're about to enter a realm where you can't rest at all. If you're normally reliant on resting to restore your health, bring along extra healing potions.
Escort Martin out of town to meet up with the Imperial defense squadron. How many soldiers does it take to defend a city? Apparently the answer is thirteen.
Defending The Town
If you get swamped by Daedra, you're unlikely to survive the battle here.
When you first exit the city, there'll only be one lesser Gate open. Soon enough, though, two more will pop open, and all of them will start discharging Daedra, and plenty of them. Ostensibly, your job here is to protect Martin until the Great Gate opens up, but really, most of the enemies here

are going to make a beeline for you, so your real objective should be to just stay alive.
Do so by remaining behind the main line of battle and keeping your blocking up, preferably with a shield. The numerous soldiers in the area will be able to handle the foes that attack you, allowing you to loot their bodies and see if they've dropped anything magical. Just be sure to heal yourself when you take damage, as the number of enemies that will be attacking will multiply with each successive gate that opens up. The Dremora will be particularly painful to you if you let them get close, so just avoid them as best you can while the soldiers in the area cut them down.
As soon as the Great Gate opens up, book it for the entrance and pop inside.
Quest: Great Gate
After entering the Great Gate, you'll have fifteen minutes to reach the top of the citadel and shut down the gate. Why the specific amount of time? Because the daedric siege engine is crawling towards the gate! After fifteen minutes, it'll emerge from the gate, and even if you shut down the Gate, it'll still be able to destroy most of Bruma. Thus the fifteen minute timer. Save your game as soon as you enter the Plane, then. You should be able to get past most of the enemies and scale the tower (it's slightly smaller than most citadels) within the timeframe, but if not, then you'll be able to reload and try again.
With a running start, you should be able to make this jump.
At the outset of the level, the large gate in front of you will open up, revealing the siege engine off in the distance and a couple of opponents in the foreground. The siege engine will begin firing Flares at you, so keep your weapons sheathed (and preferably unequipped) while you run past

your enemies into the tower on your right, to the northeast. (It should be highlighted on your compass in red.) Ignore your foes if they follow you into the tower; just ride the Corpse Smasher up to the walkways and walk all the way to the top of the tower here, killing anything in your path. The door at the top of the tower will lead you over a walkway to the next tower to the north.
The top level of this tower has two doors; one heading south (through which you just entered) and one heading west. Ignore the western one and head down to the mid level of the tower, just above where the Corpse Smasher would normally reach its maximum height. There's another door here leading north, and that's the one you want to come to. It leads to what will probably appear to be an intimidatingly long jump, but it should be doable for almost every character, if you can get up enough speed. You need to jump from the platform you're on to the one farther ahead. If you unequip your weapon (and we mean actually putting it in your inventory, not just sheathing it or slinging it onto your back or whatever) and all of your armor (especially if you're wearing heavy armor), then you should be able to make the jump. Just be sure to save your game before attempting it!
Tip: If you're really having a hard time making this jump, return to the tower behind you, head to the top, take the western door, go to the tower there, then exit out the north. It leads to the same place, but takes a bit longer.
Save your game after grabbing the Great Sigil Stone and reload if the Stone you get back in Bruma isn't worth picking up.
After making the jump here, make your way to the tower directly north of you; you'll probably have to circle behind it to reach the gray road that leads from east to west. This last minitower features a switch at the top of it, so scale the tower, flip the switch to open the gate, then return

to the bottom of the tower and exit. The gate nearby will be swinging open, revealing the path to the Citadel.
After killing the Sigil Keeper on the first floor and grabbing his key, head into the Vaults of End Times. Flip the switch after reaching the top of the ramp to drop the blade traps in front of you, then run under them as they're rising. You'll come to three doors: to your right (north) is a door leading to a treasure chest; to the west are a pair of magicka and health regenerators, and to the south is the exit to the upper levels of the citadel.
We said that the citadel here was small, and indeed, the next interior section you'll enter will be the Sigil Stone sanctuary. Kill the guards (or just run past them, but don't neglect to check the Punished for treasure), then get to the Great Sigil Stone and activate it.
Tip: Although you can't use the Great Sigil Stone to enhance your weaponry or armor, you will be getting a Sigil Stone from this quest after you teleport back to Bruma. Save your game after activating the Great Sigil Stone so that you can reload if you don't like what you've obtained.
After you reappear in Bruma, survey the battlefield. The siege engine, cut in half by the collapse of the Great Gate, collapses itself, discharging a Sigil Stone onto the battlefield. Martin, who now has everything he needs to complete the portal to Cameron's Paradise, asks you to meet him in Cloud Ruler Temple when you're ready to go. Jauffre may have died, no matter what you do in the Plane of Oblivion, so feel free to mourn him before looting his corpse. Old coot didn't even manage to carry any magical items.
Quest: Paradise
Although the entrance to Camoran's Paradise isn't the end of the game, you won't be able to return through the portal to the "real world" for a while, so before you head through, you should take your time to explore a bit, if you wish, build some skills, or do anything else you like before you head through. Once you enter Paradise, you're going to be there for a bit, so now's the time to take care of anything that's nagging at you.
When you're ready, head up to the Cloud Ruler Temple, where Martin is charging up the portal. Speak to him, and he'll open it up for you, allowing you to step through to another Daedric portal of hellacious heat and lava.

'Fight back! C'mon, you can take him!'
Savage Garden
Only...not so much. Camoran's Paradise really is a paradise! It's got lush grasses, blue water, a few naked slaves that get beat up on by monsters, and so on. A guy could really make a home for himself here.
If you speak to one of the Ascended Immortals (who are really Mythic Dawn cultists transported here to be "tempered" to prepare them for the eventual rule of Tamriel), you'll learn a bit about the geography of this place. You're in the Savage Garden now, and to reach Mankar, you'll have to pass through the Forbidden Grotto (after you obtain the Bands of the Chosen), to the Terrace of Dawn, which in turn leads to Carac Agaialor, Mankar's palace.
You can follow the path near your starting point here to move on, but if you're at all interested in alchemy, take some time to explore; there are numerous little gardens of plants that you can pick. There are going to be plenty of enemies, as well, though, so be sure to rest often.
As you make your way to the northeast (either heading north or east from the starting point will get you there), you'll come to a single bridge that's watched over by a Dremora named Kathutet, who holds the Bands of the Chosen. You have a choice: you can kill him to take the Bands of the Chosen (he's not difficult), or perform a service for him in exchange for the item.
Freeing Anaxes
If you choose to perform the service for him (which is slightly more interesting than just killing

him, which you'll be able to do later anyway), he'll tell you of a Xivilai named Anaxes, who was trapped in a cave by the Ascended Immortals in the area. Follow the marker on your compass to the cave and head inside.
To free Anaxes from his trap, activate the two logs that are holding the boulder nearby into place. That's all that's required to free him. If you want to get the Bands of the Fallen, return to Kathutet and tell him of your deed, and he'll (presumably) hand them over. We admit to taking a scorched earth policy here; we killed Anaxes ourselves after freeing him, and when Kathutet heard of this, he attacked us as well. His Bands of the Chosen give him a 50% weakness to fire damage, so whip out something with that attribute and pop him but good.
We can see why these guys never take off those cool-looking helmets.
With the Bands of the Chosen in your inventory (don't equip them just yet), head into the cave behind Kathutet and listen to Mankar's little spiel while you chop your way through the enemies within. When you reach the door to the Forbidden Grotto, equip the Bands of the Chosen to get inside. You're unable to unequip them for the moment, leaving you with a 50% weakness to fire for the moment.
Forbidden Grotto
As you travel through the Grotto, you'll meet Eldamil. Tell him about your intent to kill Mankar, and he'll offer to help you: he says he knows how to take off the Bands of the Chosen, which now act as a kind of tracking device which prevents you from leaving the Forbidden Grotto. Since you can't take them off yourself, they'll act as a kind of prison for you.

Now, if you wish, you can just kill Eldamil, kill his Dremora overseers and grab the keep off of Orthe, then make your way to the exit and pop through, where Eldamil will be waiting for you and pop the Bands of the Chosen off, as if nothing had happened. Guess they're not called Immortals for nothing!
If you kill off Orthe and his friends, you can grab their weapons. It'll be good to have a non-magical weapon for an upcoming fight.
If you want to do things the Right Way, though, agree to Eldamil's plan, which will see you hopping into a lava pit. Eldamil will save you from your death at the last minute, though, and open a passage which will let you avoid Orthe and his two lieutenants. If you wish, you can jump back across the lava pit and use Eldamil's diversion as an excuse to attack the Dremora and steal their equipment, if you wish.
Regardless, make your way to the end of the area to reach the next level of the Grotto. Eldamil will take your Bands of the Chosen off at this point, so equip your normal wristguards. Eldamil will ask to accompany you on your quest to kill Cameron, so feel free to bring him along if you like, although he's unlikely to survive very long. But hey, he's immortal, so one more death isn't going to bug him overmuch. In fact, if he does die, he'll regenerate a short while later.
Kill the Xivilai near the exit and get your loot before return to Paradise. Another small portion of exterior world awaits you before you enter Carac Agaialor, so feel free to pick up as much Nightshade and other herbs as you wish before speaking to Ruma and Raven (if you happened to kill them earlier) and entering the castle.
Carac Agaialor

Mankar and his cult have been killing people for centuries, and even managed to off the Emperor. Time to repay the favor.
Finally - your shot at Mankar Camoran. As you enter the temple here, he'll be seated on his throne, and his children will move to flank him. Feel free to listen to his little spiel, if you wish; when it's over, he'll sit down, and his children will move to attack you.
If you've been acquiring magical items and working your way up through the levels steadily (but not too quickly), then Ruma and Raven should be mere appetizers for you. Raven will shift into his Mythic Dawn attire when attacked, while Ruma will prefer to wield spells or a dagger if pressed. Deal with them both, and Mankar will pop up from his chair, apparently only mildly irritated that you've killed his kids - again.
But hey, why should he care? They'll come back to life a few seconds after they're killed, making this a race against time. After you kill his children, you have to immediately move on Mankar and take him out as well, or the kids will rejoin the fight. If you kill them multiple times, then you'll be able to loot their bodies as often as you like, but things can get a bit tricky between Mankar, both of the kids, and the Dremora that Mankar will be summoning in. Mankar is highly resistant (or reflective) of magical damage, so you may want to use non-magical means of attacking him.
With Mankar dead, loot his body, grab the Amulet of Kings and his robe, and wait for the portal to kick you out to the Cloud Ruler Temple, where you'll be able to give the Amulet to Martin.
Quest: Light the Dragonfires!
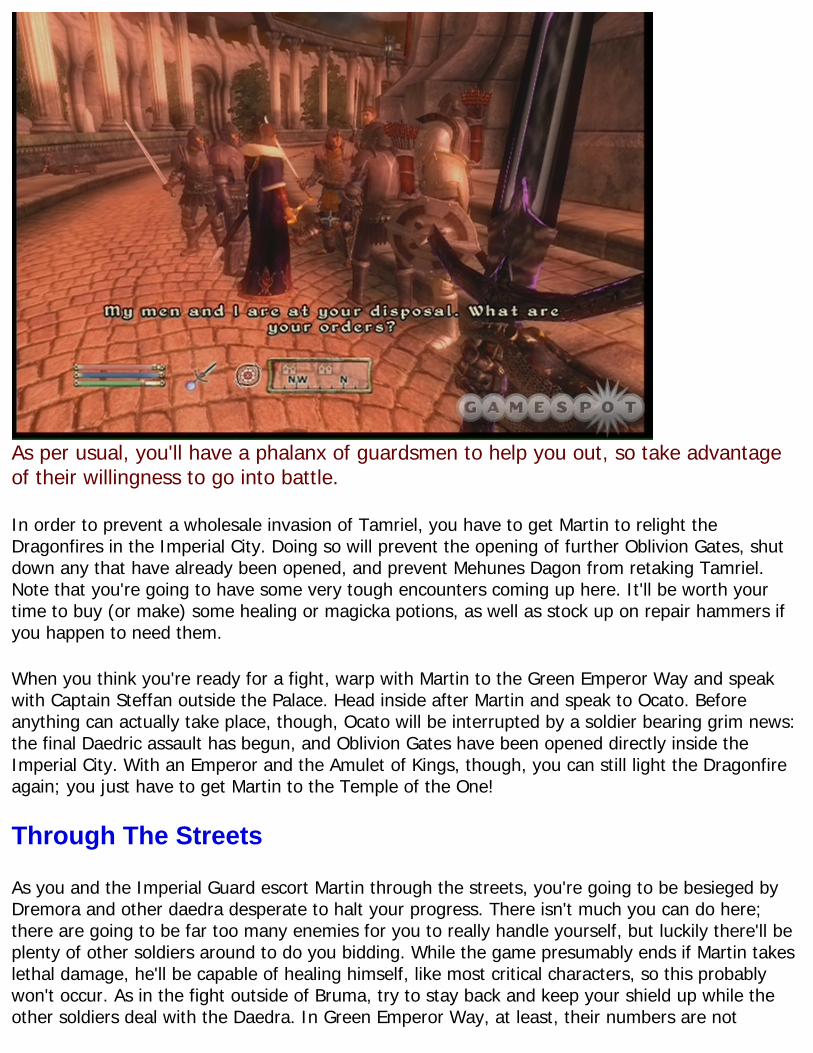
As per usual, you'll have a phalanx of guardsmen to help you out, so take advantage of their willingness to go into battle.
In order to prevent a wholesale invasion of Tamriel, you have to get Martin to relight the Dragonfires in the Imperial City. Doing so will prevent the opening of further Oblivion Gates, shut down any that have already been opened, and prevent Mehunes Dagon from retaking Tamriel. Note that you're going to have some very tough encounters coming up here. It'll be worth your time to buy (or make) some healing or magicka potions, as well as stock up on repair hammers if you happen to need them.
When you think you're ready for a fight, warp with Martin to the Green Emperor Way and speak with Captain Steffan outside the Palace. Head inside after Martin and speak to Ocato. Before anything can actually take place, though, Ocato will be interrupted by a soldier bearing grim news: the final Daedric assault has begun, and Oblivion Gates have been opened directly inside the Imperial City. With an Emperor and the Amulet of Kings, though, you can still light the Dragonfire again; you just have to get Martin to the Temple of the One!
Through The Streets
As you and the Imperial Guard escort Martin through the streets, you're going to be besieged by Dremora and other daedra desperate to halt your progress. There isn't much you can do here; there are going to be far too many enemies for you to really handle yourself, but luckily there'll be plenty of other soldiers around to do you bidding. While the game presumably ends if Martin takes lethal damage, he'll be capable of healing himself, like most critical characters, so this probably won't occur. As in the fight outside of Bruma, try to stay back and keep your shield up while the other soldiers deal with the Daedra. In Green Emperor Way, at least, their numbers are not

infinite, so stay back and let your allies deal with the Dremora that are attacking. When everything is dead, the men will confer with the Emperor and agree to help escort him to the Temple of the One.
After you into the Temple District, immediately save your game: things are going to get somewhat tricky here. Two Oblivion Gates are open in this area, and both will be issuing forth daedra as you attempt to maneuver through the area. The key here is speed: don't bother fighting the enemies or worrying about Martin. Just sheathe your weapon and head around the circular path to the right, where you encounter...Mehunes Dagon!
'No! Those guards were three days from retirement!'
That's right, the dark Daedric prince of destruction and the bloody scourge has finally come home to roost. As soon as you notice him and get the journal entry regarding his presence, Martin will make a beeline towards you and attempt to speak to you. His plan? Well, the Dragonfires won't help now that Mehunes has entered Tamriel, but Martin has an idea. It still involves getting into the Palace of the One, however.
Unfortunately, that involves getting past Dagon himself, and the guy isn't exactly easy to maneuver past, since he's around 50 feet tall and can deal an exceedingly large amount of damage with his axe or by stomping on you with his feet. Before you attempt to run past him (on the left), be sure you're at full health. If you've got a good amount of Endurance to begin with, then you might not need to do anything other than just run past him. It's unlikely that he'll be able to kill you in one hit, so just unequip your weapon and blast past him, using a potion of speed if you happen to have one.
Tip: If you don't find yourself capable of running past Dagon, then you can attempt to stagger

him by hitting him with a Power Attack or some kind of powerful spell. It's difficult to actually land a weapon attack on him, though, so warriors are better off just running past him.
'Dammit! What'd I say about hickies?'
Dagon will attempt to stomp on Martin, too, as he runs past, but with his auto-healing mechanism in place, he should survive the blow. With that done, go into the Temple and let Martin do his thing. From this point on, the game is on auto-play, so enjoy the "ending"!
Obviously enough, the final cinematic doesn't mean that you have to stop playing; there are probably still plenty of quests to undertake out in the world. What it does mean is that the game's main storyline has been completed, and that all of the Oblivion Gates in the world will have shut permanently; no more Sigil Stones or Daedra Hearts for you!
If you're looking for more information on the various side-quests in Oblivion, then stay tuned to GameSpot; we'll have details on many more aspects of the game in the coming weeks.
Xbox 360 Achievements
Unlockable How to UnlockApprentice, Fighters Guild (10) Reached Apprentice rank in the Fighters Guild.Apprentice, Mages Guild (10) Reached Apprentice rank in the Mages Guild.Arch-Mage, Mages Guild (50) Completed the Mages Guild Questline.Assassin, Dark Brotherhood (10) Reached Assassin rank in the Dark Brotherhood.

Associate, Fighters Guild (10) Joined the Fighters Guild.Associate, Mages Guild (10) Joined the Mages Guild.Bandit, Thieves Guild (10) Reached Bandit rank in the Thieves Guild.Bloodletter, Arena (10) Reached Bloodletter rank in the Arena.Brawler, Arena (10) Reached Brawler rank in the Arena.Cat Burglar, Thieves Guild (10) Reached Cat Burglar rank in the Thieves Guild.Champion of Cyrodiil (110) Completed the Main Questline.Champion, Arena (10) Reached Champion rank in the Arena.Champion, Fighters Guild (10) Reached Champion rank in the Fighters Guild.Closed an Oblivion Gate (50) Closed an Oblivion Gate, Main Quest.Conjurer, Mages Guild (10) Reached Conjurer rank in the Mages Guild.Defender, Fighters Guild (10) Reached Defender rank in the Fighters Guild.Delivered Daedric Artifact (50) Delivered Daedric Artifact, Main Quest.Destroyed the Great Gate (50) Destroyed the Great Gate, Main Quest.Eliminator, Dark Brotherhood (10) Reached Eliminator rank in the Dark Brotherhood.Escaped the Imperial Sewers (50) Escaped the Imperial Sewers, Main Quest Beginning.Evoker, Mages Guild (10) Reached Evoker rank in the Mages Guild.Footpad, Thieves Guild (10) Reached Footpad rank in the Thieves Guild.Gladiator, Arena (10) Reached Gladiator rank in the Arena.Grand Champion, Arena (50) Completed the Arena Questline.Guardian, Fighters Guild (10) Reached Guardian rank in the Fighters Guild.Guildmaster, Thieves Guild (50) Completed the Thieves Guild Questline.Hero, Arena (10) Reached Hero rank in the Arena.Journeyman, Fighters Guild (10) Reached Journeyman rank in the Fighters Guild.Journeyman, Mages Guild (10) Reached Journeyman rank in the Mages Guild.Listener, Dark Brotherhood (50) Completed the Dark Brotherhood Questline.Located the Shrine of Dagon (50) Located the Shrine of Dagon, Main Quest.Magician, Mages Guild (10) Reached Magician rank in the Mages Guild.Master Thief, Thieves Guild (10) Reached Master Thief rank in the Thieves Guild.Master, Fighters Guild (50) Completed the Fighters Guild Questline.Master-Wizard, Mages Guild (10) Reached Master-Wizard rank in the Mages Guild.Murderer, Dark Brotherhood (10) Join the Dark Brotherhood.Myrmidon, Arena (10) Reached Myrmidon rank in the Arena.Pickpocket, Thieves Guild (10) Joined the Thieves Guild.Pit Dog, Arena (10) Joined the Arena in the Imperial City.Protector, Fighters Guild (10) Reached Protector rank in the Fighters Guild.Prowler, Thieves Guild (10) Reached Prowler rank in the Thieves Guild.Shadowfoot, Thieves Guild (10) Reached Shadowfoot rank in the Thieves Guild.

Silencer, Dark Brotherhood (10) Reached Silencer rank in the Dark Brotherhood.Slayer, Dark Brotherhood (10) Reached Slayer rank in the Dark Brotherhood.Speaker, Dark Brotherhood (10) Reached Speaker rank in the Dark Brotherhood.Swordsman, Fighters Guild (10) Reached Swordsman rank in the Fighters Guild.Warder, Fighters Guild (10) Reached Warder rank in the Fighters Guild.Warlock, Mages Guild (10) Reached Warlock rank in the Mages Guild.Warrior, Arena (10) Reached Warrior rank in the Arena.Wizard, Mages Guild (10) Reached Wizard rank in the Mages Guild.