
DESIGN AND DEVELOPMENT OF FINGER -VEIN CAPTURE …eprints.utem.edu.my/18260/1/Design And Development...
24
i DESIGN AND DEVELOPMENT OF FINGER -VEIN CAPTURE DEVICE USING ARDUINO MICROCONTROLLER MUHAMMAD FAIZ BIN KALAM This Report is submitted in Partial Fulfilment of Requirements for the Bachelor Degree of Electronic Engineering (Industrial Electronics) With Honors Fakulti Kejuruteraan Elektronik dan Kejuruteraan Komputer Universiti Teknikal Malaysia Melaka JUNE 2016
Transcript of DESIGN AND DEVELOPMENT OF FINGER -VEIN CAPTURE …eprints.utem.edu.my/18260/1/Design And Development...

i
DESIGN AND DEVELOPMENT OF FINGER -VEIN CAPTURE DEVICE USING
ARDUINO MICROCONTROLLER
MUHAMMAD FAIZ BIN KALAM
This Report is submitted in Partial Fulfilment of Requirements for the Bachelor
Degree of Electronic Engineering (Industrial Electronics) With Honors
Fakulti Kejuruteraan Elektronik dan Kejuruteraan Komputer
Universiti Teknikal Malaysia Melaka
JUNE 2016

ii

iii

iv

v
This thesis is dedicated to my father, who taught me that the best kind of knowledge to have is
that which is learned for its own sake. It is likewise dedicated to my mother, who taught me that
even the largest task can be achieved if it is executed one step at a time.

vi
ACKNOWLEDGEMENT
This is Projek Sarjana Muda (PSM) report which is complete with the support from Dr.
Syafeeza Binti Ahmad Radzi who is my supervisor and always give support and encouraged
me to finish My PSM . Furthermore, the project is completely finish when I obtain the supply
of electronic components, etching machine, tools and applications as well as labs from my
faculty, Fakulti Kejuruteraan Elektronik dan Kejuruteraan Komputer (FKEKK). Next, the
greatest support is come from my family, especially my beloved parent who gave a moral,
spiritual and economic support until the project finish. Last but not least, my colleagues is
always give a favour in idea, discuss about the project and all the effort to finish my PSM.

vii
ABSTRACT
The project is focusing on design and developing a finger-vein capturing device by
using Arduino Microcontroller. It is a device that will capture the human finger vein
image and will be controller by Arduino Microcontroller. This is for Biometric purpose
is such as authentication, verification and identification. The concept of this project is
a near-infrared light (NIR) will be emitted by a bank of NIR Light Emitting Diodes
(LEDs) which will penetrate the finger and are absorbed by the haemoglobin in the
blood. The areas in which the NIR rays are absorbed (i.e. Veins) thus appear as dark
regions in an image conveyed by a CCD camera located on the opposite side of the
finger. The brightness of the NIR will be control automatically by using Arduino
Microcontroller to get the clear image and suitable image. The image captured is
analysed by using Mean Square Error (MSE) and Peak Signal-to-Noise Ratio (PSNR).

viii
ABSTRAK
Projek ini adalah untuk membina satu model “Reka Bentuk dan Membangunkan Peranti
Penangkap Corak Saluran Darah Jari dengan menggunakan Arduino Microcontroller”.
Peranti ini adalah alat yang digunakan dalam menangkap imej saluran darah jari manusia
dengan menggunakan kawalan Arduino Microcontroller. Ini adalah bagi tujuan keselamatan
biometric khususnya dalam pengesahan, pengiktirafaan, dan juga pengambilalihan. Konsep
yang membolehkan cahaya berhampiran inframerah, Near Infrared (NIR) menembusi jari dan
akan diserap oleh hemogoblin dalam darah tubuh badan kita. Kawasan yang sinar NIR diserap
adalah saluran darah jari akan muncul sebagai kawasan gelap dalam imej ditangkap oleh
camera CCD yang terletak bertentangan dengan kedudukan jari. Keterangan cahaya NIR akan
dikawal secara automatik dari Arduino Microcontroller bagi mendapatkan imej yang lebih
jelas dan mendapatkan imej yang sesuai. Imej yang ditangkap dianalisis dengan
menggunakan Error Mean Square (MSE) dan Peak Signal-to-Noise
ix
TABLE OF CONTENTS
CHAPTER CONTENTS PAGES
PROJECT TITLE i
CONFIRMATION REPORT STATUS ii
RECOGNITION iii
SUPERVISOR AFFIRMATION iv
DEDICATION v
ACKNOWLEDGEMENT vi
ABSTRACT vii
ABSTRAK viii
TABLE OF CONTENTS ix – xvi
LIST OF TABLES xvii
LIST OF FIGURES xviii
LIST OF ABBRIVATION xxiii

x
CHAPTER CONTENTS PAGES
I INTRODUCTION
1.1 Project Introduction
1.2 Project Objectives
1.3 Problem Statements
1.4 Scopes of Works
1 - 4 1 - 2
2
3
4
II LITERATURE REVIEWS
2.1 Theory of Biometrics
2.2 Theory of Finger-vein Biometrics
2.3 Features and Comparisons between Finger-vein
2.4 Features of finger vein
2.5 Disadvantages of other Biometrics Traits
2.5.1 Comparison among six major biometric
methods
2.5.2 Comparisons of Five Major Biometrics
Methods
2.6 Types of Sensors being used in Camera
2.6.1 Charge-coupled Device (CCD) Image
Sensor
2.6.2 Complementary Metal-oxide
Semiconductor (CMOS) Image Sensor
2.7 Finger-vein Pattern Imaging Methods
2.7.1 Light Reflection Method
2.7.2 Light Transmission Method
2.7.3 Side lighting method
5 - 21 5 - 7
6
7
8
8
9
9
10
10
12
13
14
15
16

xi
2.8 Mean Square Error (MSE) and Peak Signal-to-
Noise Ratio (PSNR) 17
2.9 Summary of Previous Studies 18
2.10 Summary 21
III METHODOLOGY
3.1 Introduction
3.2 Methodology
3.2.1 Finger Vein Pattern Imaging Methods
3.2.2 Building the Finger Vein Capturing
Device’s Prototype
3.2.3 NIR Illuminating Circuit Design and Simulation
3.2.4 Using Arduino Microcontroller
3.2.5 Programming in the Arduino Uno
3.2.6 The design of the circuit
3.2.7 NIR Illuminating Circuit Construction and
Testing on Arduino
3.2.7.1 NIR Illuminating Circuit
Etching and Soldering
3.2.8 Modification of Suitable CCD Webcams
3.2.9 Evaluating and Initial Capture of a Finger-vein
Image
3.2.10 Developing the Finger-vein Image Analysis
Methods
3.2.11 Determine the Standard Finger-vein Image
3.2.12 Determine the Best Finger-vein Image
3.2.13 Developing the Finger-vein Capturing Device’s
GUI
3.2.14 Correct Methods in Using Finger-vein
Capturing Device
22 - 44
22
23
23
25
26
26
27
29
31
33
37
37
38
39
39
42

xii
3.2.6 Analysing and Collecting Results 44
3.2.7 Testing and Troubleshooting 44
IV RESULTS, ANALYSIS AND DISCUSSIONS
4.1 Simulation of NIR Illuminating Circuit
4.2 The Body of the Prototype was built
4.2.1 The final product of Finger-Vein
Image Capturing Device Prototype
4.2.2 The GUI Layout for the Finger- vein
Capturing Device Designed
4.2.2.1 The Finger-vein Capturing Device
Prototype’s Webcam was Configured
4.2.2.2 The Configure Webcam was
Previewed in the GUI
4.2.2.3 The Finger-vein Images was
Captured
4.2.2.4 The Finger-vein Images were
Saved to the Particular Directories
4.2.2.5 The Standard Finger-vein Image from
“Capture” Directory was Determined
4.2.2.6 The Best Finger-Vein Images from
the “Database” Directory was determined
4.2.3 Step in Using Finger-vein
Capturing Device and Its GUI
4.2.3.1 The Finger-vein Capturing Device’s
Prototype was Connected to the Computer
via USB Port
45 – 94
45
51
52
53
54
55
55
56
57
58
60
59

xiii
4.2.3.2 The GUI Named
“FingerVeinCapture_GUI” was Run from MATLAB
60
4.2.3.3 The correct Video Input Device was selected 61
4.2.3.4 The Finger-vein Capturing Device ID was Selected
62 4.2.3.5 The suitable Video Format and Resolution were selected
62
4.2.3.6 The Finger-Vein Image was Previewed from the GUI
63
4.2.3.7 The Finger-vein Image was Captured 64
4.2.3.8 The Captured Finger-vein Image was Saved 65
4.2.3.9 The Total of First 9 Finger-Vein
Images of Different Brightness were
Captured and saved
4.2.3.10 The Standard Finger-vein
Image is Determined 69
4.2.3.11 The Total of Second 9 Finger-Vein
Images of Different Brightness
were Captured and Saved 70
4.2.3.12 The Best Finger-vein Image is
Determined 72
4.2.3.13 The Finger-vein Images
Analysis 74
4.2.3.14 User was Required to Enter
the User Number 74
4.2.3.15 The First Nine Captured
Finger-vein Images from “Capture”
folder was Read into MATLAB 75

xiv
4.2.3.16 The Finger-Vein Images
were Cropped
4.2.3.17 The Finger-Vein Images
75
were Converted to Type Double
4.2.3.18 The Finger-Vein Images
Channel were Reduced from RGB to Grayscale
76
77
4.2.3.19 The Mean Value among the
First Nine Finger-vein Images was Determined
77
4.2.3.20 The MSE of the Nine
Captured Finger-vein Images to the
Mean Value were Determined
78
4.2.3.21 The PSNR of the First Nine
Captured Finger Vein Images was
determined
79
4.2.3.22 The Minimum MSE and
Maximum PSNR were Determined
80
4.2.3.23 The User Number, Minimum
MSE and Maximum PSNR were
Displayed
81
4.2.3.24 The Standard Finger-vein
Image was Determined based on the
Mean Value
81
4.2.4 Find the Best Finger-Vein Images 82
4.2.4.1 The Command Window was
Cleared and Global Variables were
Declared 83
4.2.4.2 The Other Nine Captured
Finger-vein Images from “Database”
folder was Read into MATLAB 83

xv
4.2.4.3 The Finger-vein Images were Cropped 84
4.2.4.4 The Finger-vein Images were
Converted to Type Double 84
4.2.4.5 The Finger-vein Images channel were Reduced 85
from RGB to Grayscale
4.2.4.6 The MSE of the Secondly
Captured Nine Finger-vein Images to
the Standard Image were Determined 86
4.2.4.7 The PNSR of the Secondly Captured Nine
Finger Vein Images was determined 87
4.2.4.8 The minimum MSE and
Maximum PSNR were Determined 88
4.2.4.9 The User Number, Minimum 88
MSE and Maximum PSNR were Displayed
4.2.4.10 The Best Finger-vein Image was Determined 89
4.2.4.11 Normalized Histograms were 90
Calculated for Both Standard Image and Best Image
4.2.4.12 The standard Finger-vein Image and
the Best Finger-vein Image Together with
Their Histograms were Displayed 90

xvi
V CONCLUSIONS
5.1 Conclusions 92
5.2 Novelty and Inventiveness 93
5.3 Future Recommendation 93
5.4 Potential of Commercialization 94
CHAPTER CONTENTS PAGES
REFERENCES 95

xvii
LIST OF TABLES
No.
2.3
Title
Importance features of Finger-vein
Pages
8
2.5.1 Comparisons among six major biometric methods 9
2.5.2 Comparison of Five Major Biometrics Methods 9
2.9 Comparison of Previous Studies in terms of
Methods Used, Strength, Weakness and Result
18
3.22 The six button the GUI and the function 40
4.1 First 9 captured Finger-vein Images with 9 67 4.2
Different PWM Levels of User 1
Database Finger-vein Images PWM Levels of User
71 4.3
1
MSE Values for each Firstly 9 “ Capture” Finger-
81 4.4
vein Images of User 1
The PSNR for each Firstly Captured Nine Finger-
82 4.5
vein Images were determined
The MSE Values for Each Nine “Database” Finger-
90 4.6
vein Images of User 1
The PSNR Values for Each Nine “Database”
91 Finger-vein Images of User 1

xviii
LIST OF FIGURE
No.
2.6
Title
CCD and CMOS image sensors Convert Light into
Electron
Pages
10
2.6.2 Part of a CMOS sensor 12
2.7.1 Light Reflection Method 14
2.7.2 Light Transmission Method 15
2.7.3 Side lighting method 16
2.9 Flow Chart in Building the Finger-vein Capturing
Device Prototype
25
3.3 NIR Illuminating ISIS Circuit Design and
Simulation for Arduino Microcontroller
26
3.4 The technical specification in the Arduino Uno 27
3.5 The example interface and coding of the Arduino 28 3.6
Microcontroller
The supply of the 5V
29
3.8 The design of the Arduino Uno as the PWM
controller
30
3.9 NIR LED testing 30
3.10 The layout of the PCB of the Circuit 31
3.11 Combination circuit with Arduino 32
3.12 The position of NIR LEDs, position of finger and 33 3.13
Camera C170
Logitech HD Webcam C170
34
3.14 Sensor holder removed 34
3.15 The IR filter removed 35
xix
3.16 Black photo-film 35
3.17 Stick the black photo-film at the front lens casing 36
3.18 Stream show the camera after modified 36
3.19 The first image of Finger-vein image before build 37 3.20
the prototype
The flowchart of the Developing Finger-vein image
38 3.21
method
The flowchart in Developing Finger-vein
39 3.22
Capturing Device’s GUI
The six button of the Finger-vein capturing Device
40 3.23
design in “guide” MATLAB
Correct Methods in Using Finger-vein Capturing
42 3.24
Device
The data base of the Finger-vein “standard image”
43 3.25
and “best image”
The Database and Capture folder
44
4.1 Step 1 for the value of 30(PWM) 46
4.2 Step 2 for the value of 60(PWM) 46
4.3 Step 3 for the value of 90(PWM) 47
4.4 Step 4 for the value of 120(PWM) 47
4.5 Step 5 for the value of 150(PWM) 48
4.6 Step 6 for the value of 180(PWM) 48
4.7 Step 7 for the value of 210(PWM) 49
4.8 Step 8 for the value of 240(PWM) 49
4.9 Step 9 for the value of 255(PWM) 50
4.10 The step of the brightness can be obtain in
downward and upward
50
4.11 Push button 1 and 2 51
4.12 The arrangement of the component in the body of 52 4.13
Finger-vein Capture Device
Finger-vein Capture Device Prototype
52
4.14 Layout of Finger-veinCapture_GUI.fig 53
4.15 Codes for button “Configure Cam” 54

xx
4.16 Codes for button “Preview” 55
4.17 Codes for button “Capture Image” 56
4.18 Codes for button “Save As” 57
4.19 Codes for button “Analyze Images” 58
4.20 Codes for button “Find Best Image” 59
4.21 USB Connection Using Finger-vein Capturing 60 4.22
Device Prototype and Computer
FingerVeinCaptured_GUI
61
4.23 Video Input Device Selection 62
4.24 Device ID Selection 62
4.25 Video Format & Resolution selection 63
4.26 Finger-vein Images was Previewed Live from the 64 4.27
Prototype in the GUI
Finger-vein Images Captured and Previewed in the
65 4.28
GUI
The Captured Finger-vein Images of User 1 are
66 4.38
saved
The standard Finger-vein Images of User 1 is
70 4.48
determined
The Best Finger-vein Image is determined for User
74 4.49
1
Cropped Finger-vein Image and Histograms of the
74 4.50
Standard Images and Best Image of User 1
Dialogue Box is popped out Asking User to Enter
75 the User Number
4.51 The First 9 Captured Finger-vein Images from User
were read from “Capture” Folder
76
4.52 The First 9 Captured Finger-vein Images are
cropped after being read
77
4.53 The First 9 Cropped Finger-vein Images were
converted to Type Double
78
xxi
4.54 The First 9 Captured Finger-vein Images were
reduced Channel from RGB to Grayscale after
79
4.55
being converted to Type Double
The Mean Value is determined among the First 9
80 4.56
Finger-vein Images
The MSE for each of the Firstly Captured Nine
80 Finger-vein Images to the Mean Value were
determined
4.57 The PSNR for each Firstly Captured Nine Finger-
vein Images were determined
82
4.58 The Minimum MSE and Maximum PSNR were
Displayed
83
4.59 Displaying the User Number, Min MSE and Max
PSNR
83
4.60 Standard Image of User 1 is determined 84
4.61 Results in GUI Showing which User, Min MSE , 84 MAX PSNR and finally Standard Finger-vein
Image
4.62
Command Window is cleared & Global Variables
85
4.63
were declared
Secondly Nine Captured Finger-vein Images from
86 4.64
User in “Database” Folder is read into MATLAB
The secondly Captured Nine Finger-vein Images
87 were cropped
4.65 The secondly Captured Nine Finger-vein Images
were converted to Type Double
88
4.66 The secondly Captured Nine Finger-vein Images
were reduced Channel from RGB to Grayscale
89
4.67 The MSE for each Secondly Captured Nine Finger-
vein Images to the Standard Finger-vein Image
90
were determined

xxiii
4.68 The PSNR for each Secondly Captured Nine
Finger-vein Images to the Standard Finger-vein
91
4.69
Images were determined
The Min MSE and Max PSNR for “Database”
92 4.70
Finger-vein Images of User 1
Results showing User Number, Min MSE and Max
92 4.71
PSNR of “Database” finger-vein Images of User 1
Best Finger-vein Image of User 1 is determined
93
4.72 Result in GUI showing which User, Min MSE,
Max PSNR and finally Best Finger-vein Image
93
4.73 Normalized Histogram of Standard Image and Best
Image
94
4.74 Function in MATLAB to calculate and Display the
Normalized Histogram of the Standard Finger-vein
95
4.75
Image and the Best Finger-vein Image
The Standard Finger-vein Image and the Best
95 Finger-vein Image Together with Their Histograms
are displayed
xxiii
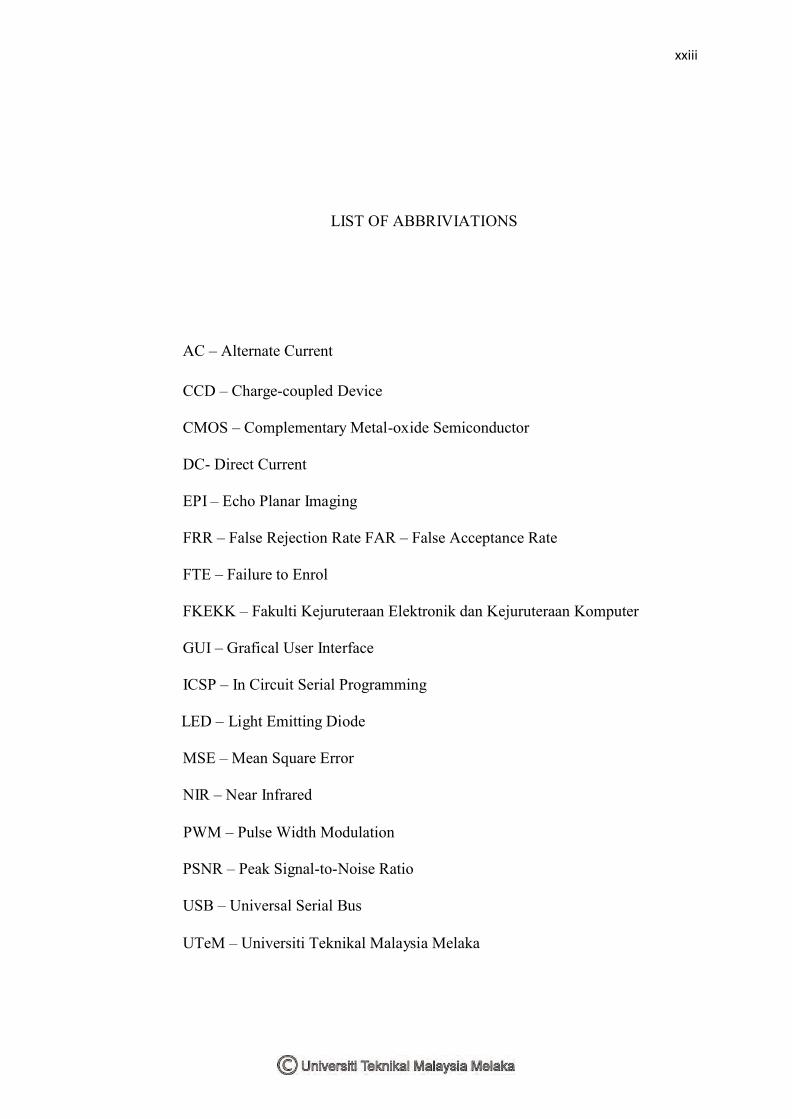
LIST OF ABBRIVIATIONS
AC – Alternate Current
CCD – Charge-coupled Device
CMOS – Complementary Metal-oxide Semiconductor
DC- Direct Current
EPI – Echo Planar Imaging
FRR – False Rejection Rate FAR – False Acceptance Rate
FTE – Failure to Enrol
FKEKK – Fakulti Kejuruteraan Elektronik dan Kejuruteraan Komputer
GUI – Grafical User Interface
ICSP – In Circuit Serial Programming
LED – Light Emitting Diode
MSE – Mean Square Error
NIR – Near Infrared
PWM – Pulse Width Modulation
PSNR – Peak Signal-to-Noise Ratio
USB – Universal Serial Bus
UTeM – Universiti Teknikal Malaysia Melaka
1 1
CHAPTER I
INTRODUCTION
1.1 Project introduction
This project is focusing on designing and developing a low-cost and solely
standalone finger-vein capturing device controlled by the Arduino Microcontroller.
This device is used for biometric security purposes such as authentication,
recognition and acquisition. This device can capture image of finger-vein and the
concept of capturing image produce when a near-infrared light (NIR) will be
emitted from a bank of NIR Light Emitting Diodes (LEDs) which then penetrate
through the finger and then absorbed by the haemoglobins in the blood. The areas
in which the rays are absorbed (i.e. Veins) thus appeared as dark areas in the image.
Then, the image is taken by a Charged-Couple Device (CCD) camera located on
the opposite side of the finger. But the problem or the issue had been arise was that
the body temperature of each person varies one another. Hence, the shadows may
be created when the NIR pass through the finger. Arduino Uno microcontroller was
used to control the output of the Pulse Width Modulation (PWM) from the light
intensity of the NIR to suit different person's body


![Finger-vein biometric identi cation using convolutional neural … · resulted in an accuracy of 98% and processing time was 0.015 s. In 2011, Wu and Liu [14] proposed a nger-vein](https://static.fdocuments.us/doc/165x107/6036661dddddec49195b2339/finger-vein-biometric-identi-cation-using-convolutional-neural-resulted-in-an-accuracy.jpg)

![Multi-instance Finger Vein Recognition Using Local Hybrid ... · the uniqueness of the vein pattern such as stability and its ability to remain unchanged as people age [1]. Finger](https://static.fdocuments.us/doc/165x107/5fca39c72e6d5b456d11a1ac/multi-instance-finger-vein-recognition-using-local-hybrid-the-uniqueness-of.jpg)


