Dell Wyse ThinOS Version 9Dell Wyse Management Suite is the next generation management solution that...
126
Dell Wyse ThinOS Version 9.0 Administrator’s Guide
Transcript of Dell Wyse ThinOS Version 9Dell Wyse Management Suite is the next generation management solution that...

Dell Wyse ThinOS Version 9.0Administrator’s Guide

Notes, cautions, and warnings
NOTE: A NOTE indicates important information that helps you make better use of your product.
CAUTION: A CAUTION indicates either potential damage to hardware or loss of data and tells you how to avoid the
problem.
WARNING: A WARNING indicates a potential for property damage, personal injury, or death.
© 2020 Dell Inc. or its subsidiaries. All rights reserved. Dell, EMC, and other trademarks are trademarks of Dell Inc. or itssubsidiaries. Other trademarks may be trademarks of their respective owners.
March 2020
Rev. A00

1 Introduction................................................................................................................................. 8Supported platforms............................................................................................................................................................. 8What's new in ThinOS 9.0?..................................................................................................................................................8What's new in Wyse Management Suite 2.0?...................................................................................................................9Feature comparison between ThinOS 9.0 and ThinOS 8.6............................................................................................. 9Other documents you may need.........................................................................................................................................11
2 Upgrading the ThinOS firmware................................................................................................... 12Register ThinOS devices to Wyse Management Suite................................................................................................... 13
Register ThinOS devices using Wyse Device Agent..................................................................................................13Register ThinOS devices by using DHCP option tags............................................................................................... 13
Download the ThinOS firmware......................................................................................................................................... 14Add ThinOS firmware to the repository............................................................................................................................ 14Upgrade ThinOS 8.6 to ThinOS 9.x................................................................................................................................... 14Upgrade ThinOS 9.x to later versions............................................................................................................................... 15Upload and push ThinOS 9.0 application packages.........................................................................................................15Firmware installation using Dell Wyse USB Imaging Tool................................................................................................16
3 Getting started with ThinOS 9.0.................................................................................................. 17Configure ThinOS using First Boot Wizard....................................................................................................................... 17Configure account privileges for ThinOS......................................................................................................................... 22
Configure account privileges using Admin Policy Tool..............................................................................................22Configure account privileges using Wyse Management Suite.................................................................................23
Connect to a remote server...............................................................................................................................................24Connecting a display........................................................................................................................................................... 24Connecting a printer........................................................................................................................................................... 25Desktop overview................................................................................................................................................................25Using the taskbar................................................................................................................................................................ 25Classic desktop features.................................................................................................................................................... 26
Desktop guidelines.........................................................................................................................................................26Using the shortcut menu..............................................................................................................................................26Using the desktop menu............................................................................................................................................... 27Configure the Connection Manager............................................................................................................................27
Configuring thin client settings and connection broker settings...................................................................................28Configure ThinOS using Admin Policy Tool......................................................................................................................28
Configure the Admin Policy Tool................................................................................................................................. 28Admin Policy Tool feature list.......................................................................................................................................29
Locking the thin client.........................................................................................................................................................30Shut down and restart........................................................................................................................................................30Battery information.............................................................................................................................................................. 31Login dialog box features....................................................................................................................................................32View the system information............................................................................................................................................. 32Sleep mode...........................................................................................................................................................................33
Enable sleep manually....................................................................................................................................................33
Contents
Contents 3

4 Configuring the global connection settings...................................................................................35
5 Configuring connectivity.............................................................................................................36Configuring the network settings......................................................................................................................................36
Configure the general settings.....................................................................................................................................36Configure the DHCP options settings.........................................................................................................................37Configure the ENET settings....................................................................................................................................... 38Configure the WLAN settings......................................................................................................................................40Configure the proxy settings........................................................................................................................................42
Configuring the remote connections................................................................................................................................ 43Configure the broker setup.......................................................................................................................................... 43Configure the General Options.................................................................................................................................... 44Configure the authentication settings........................................................................................................................ 45
Configuring the central configurations............................................................................................................................. 49Configure the Wyse Management Suite settings..................................................................................................... 49
Configure the VPN Manager..............................................................................................................................................51
6 Configuring the connection broker—Citrix................................................................................... 53Citrix Workspace app feature matrix................................................................................................................................ 53Configure the Citrix broker setup......................................................................................................................................54
Classic mode vs Workspace mode..............................................................................................................................56Automatically configure using DNS for email discovery ................................................................................................58Citrix HDX RealTime Optimization Pack for Skype for Business.................................................................................. 58
Install the Citrix package on ThinOS........................................................................................................................... 59Set up the Skype for Business application................................................................................................................. 59Using the Skype for Business application...................................................................................................................59Verify the Skype for Business connection status......................................................................................................60Citrix RTME call statistics............................................................................................................................................. 61
Cisco Jabber Softphone for VDI........................................................................................................................................ 61Install the JVDI package on ThinOS.............................................................................................................................61Setting up the Cisco Jabber Softphone for VDI........................................................................................................62Using Cisco Jabber........................................................................................................................................................62Using Device Selector...................................................................................................................................................63Verify the Cisco Jabber connection status................................................................................................................ 63Cisco Jabber call statistics........................................................................................................................................... 64Limitations...................................................................................................................................................................... 64
Citrix ADC.............................................................................................................................................................................64Citrix two-factor authentication..................................................................................................................................64Configure Citrix ADC using LDAP and RSA............................................................................................................... 65Configuring Citrix ADC using DUO..............................................................................................................................65Configure Citrix ADC using CensorNet MFA authentication...................................................................................65Citrix ADC Native OTP................................................................................................................................................. 66Citrix Federated Authentication Service SAML with Microsoft Azure Active Directory..................................... 66Configure Citrix NetScaler using Okta........................................................................................................................68
Citrix Cloud services............................................................................................................................................................68Getting started with Citrix Cloud................................................................................................................................ 68
Citrix HDX Adaptive transport (EDT)...............................................................................................................................69Enable HDX Adaptive Transport..................................................................................................................................69
4 Contents

HDX Adaptive Display V2................................................................................................................................................... 69Enable HDX Adaptive Display V2.................................................................................................................................69
Browser Content Redirection............................................................................................................................................ 70Enable Browser Content Redirection..........................................................................................................................70
HTML5 Video Redirection.................................................................................................................................................. 70Windows Media Redirection............................................................................................................................................... 71
Enable Windows Media Redirection.............................................................................................................................71QUMU Video Optimization Pack for Citrix........................................................................................................................71Keyboard enhancements on Windows VDA.....................................................................................................................72Citrix Self-Service Password Reset.................................................................................................................................. 72
Before resetting a password or unlocking an account..............................................................................................72Use the Account Self-Service......................................................................................................................................72Unlock an account......................................................................................................................................................... 73
Citrix SuperCodec................................................................................................................................................................73Anonymous logon................................................................................................................................................................ 73Configure the Citrix session properties.............................................................................................................................74Using multiple displays in a Citrix session......................................................................................................................... 74USB Printer Redirection..................................................................................................................................................... 75Configure the Citrix UPD printer ...................................................................................................................................... 75
7 Configuring the thin client local settings.......................................................................................77Configuring the system preferences.................................................................................................................................77
Configure the general system preferences................................................................................................................ 77Set the time and date....................................................................................................................................................78Set the custom information..........................................................................................................................................79Configuring power and sleep mode.............................................................................................................................79
Configure the display settings............................................................................................................................................ 81Using the On-Screen Display (OSD)...........................................................................................................................84Port preferences on the Wyse 5470 Thin Client.......................................................................................................84Vertical Synchronization............................................................................................................................................... 84
Configuring the peripherals settings................................................................................................................................. 84Configure the keyboard settings................................................................................................................................. 84Configure the mouse settings......................................................................................................................................86Configure the audio settings........................................................................................................................................ 87Configure the serial settings........................................................................................................................................ 88Configure the camera device.......................................................................................................................................89Configure the Bluetooth settings................................................................................................................................ 90Secure Digital cards.......................................................................................................................................................92
Configuring the printer settings........................................................................................................................................ 92Configure the ports settings........................................................................................................................................ 92Configure the LPDs settings........................................................................................................................................93Configure the SMBs settings.......................................................................................................................................94Using the printer setup options................................................................................................................................... 95Using the Help................................................................................................................................................................96
Reset to factory defaults................................................................................................................................................... 96
8 Using the system tools................................................................................................................97Simplified Certificate Enrollment Protocol....................................................................................................................... 99
Requesting certificate manually...................................................................................................................................99
Contents 5

Trusted Platform Module version 2.0.............................................................................................................................. 101
9 Using Wyse Management Suite.................................................................................................. 102Functional areas of Wyse Management Suite console................................................................................................. 102Managing groups and configurations.............................................................................................................................. 102
Create a default device policy group......................................................................................................................... 102Edit an unmanaged group........................................................................................................................................... 104Remove a group........................................................................................................................................................... 104
Edit the ThinOS 9.x policy settings..................................................................................................................................104Managing devices.............................................................................................................................................................. 105
Search a device using filters on the Devices page.................................................................................................. 106Managing Jobs................................................................................................................................................................... 106
Schedule a device command job................................................................................................................................ 107Managing rules................................................................................................................................................................... 107
Editing a registration rule............................................................................................................................................ 108Create unmanaged device auto assignment rules .................................................................................................. 108Edit an unmanaged device auto assignment rule.....................................................................................................108Disable or delete a rule................................................................................................................................................ 109Save the rule order...................................................................................................................................................... 109Create a rule for alert notification..............................................................................................................................109Edit an alert notification rule.......................................................................................................................................109
Managing Events................................................................................................................................................................ 110Search an event or alert using filters......................................................................................................................... 110
Managing users................................................................................................................................................................... 110Add a new admin profile................................................................................................................................................111Create auto assignment rules for unmanaged devices............................................................................................ 112Add a user...................................................................................................................................................................... 112Bulk import end users................................................................................................................................................... 112
Portal administration...........................................................................................................................................................112Accessing file repository.............................................................................................................................................. 112
10 Troubleshooting your thin client................................................................................................ 114Capture an HTTP log using ThinOS................................................................................................................................. 117System crashes, freezes, or restarts abruptly................................................................................................................ 117Broker agent login failure................................................................................................................................................... 117Citrix desktop and application crashes abruptly..............................................................................................................117Cisco Jabber and Skype for Business call failure............................................................................................................118Request a log file using Wyse Management Suite......................................................................................................... 118View audit logs using Wyse Management Suite............................................................................................................. 118System log and trace information.....................................................................................................................................118Upgrade or conversion troubleshooting and logs........................................................................................................... 119How to debug with new support beyond ThinOS 8?.................................................................................................... 121How to debug with same support in ThinOS 8?............................................................................................................ 121Common log files and locations.........................................................................................................................................121
11 Frequently Asked Questions...................................................................................................... 122ThinOS-related questions................................................................................................................................................. 122
How do I upgrade from ThinOS 8.6 to 9.0?............................................................................................................. 122What should I do if the package installation fails?................................................................................................... 122
6 Contents

Is Wyse Management Suite 2.0 the only way to manage ThinOS 9.0?................................................................122Is USB Imaging Tool method a possible option for upgrading to ThinOS 9.0?.................................................... 122Can ThinOS 9.0 be installed on a PCoIP device?.................................................................................................... 122Does ThinOS 9.0 support zero desktop?..................................................................................................................122Does ThinOS 9.0 support ThinOS configurations using INI files?..........................................................................122iPhone cannot be redirected to the Citrix Desktop session................................................................................... 122Android smartphone is not displayed in the session when redirected or mapped............................................... 123Does Citrix Workspace app replace Citrix Receiver on ThinOS?...........................................................................123What is Workspace mode on ThinOS 9.0?...............................................................................................................123Can I enable Flash content to be rendered using a local Flash Player on ThinOS 9.0?...................................... 123How do I verify if HDX Enlightened Data Transport Protocol is active?.............................................................. 123How do I check if HTML5 Video Redirection is working?...................................................................................... 123How do I check if QUMU Multimedia URL Redirection is working?..................................................................... 124How do I check if Windows Media Redirection is working?...................................................................................124Is persistent logging supported in ThinOS 9.0?....................................................................................................... 124Is tls.txt file included in network traces on ThinOS 9.0?........................................................................................ 124Will ThinOS 9.0 device reboot automatically when the system crashes?............................................................ 124
Wyse Management Suite-related questions.................................................................................................................. 124What takes precedence between Wyse Management Suite and ThinOS UI when conflicting settings are
enforced?..................................................................................................................................................................125How do I import users from a .csv file?.................................................................................................................... 125How do I use Wyse Management Suite file repository?......................................................................................... 125How do I check the version of Wyse Management Suite.......................................................................................126
Contents 7

IntroductionThin clients running Dell Wyse ThinOS firmware are designed solely for optimal thin client security and performance. These efficientpurpose-built thin clients offer ultrafast access to applications, files, and network resources within Virtual Desktop Infrastructure (VDI)environments. With zero attack surface, unpublished API, and encrypted data Wyse ThinOS is virus and malware resistant.
Wyse ThinOS requires a management software to configure, operate, and update thereby eliminating the need for IT support to visit ortouch the physical devices. Dell Wyse Management Suite is the next generation management solution that enables you to centrallyconfigure, monitor, manage, and optimize your ThinOS-based thin clients. As the number of devices grows, the Wyse Management Suiteoffers process automation and helps lower costs for large deployments of thin clients. With secure HTTPS-based communications andactive directory authentication for role-based administration, Wyse Management Suite keeps your thin clients always up-to-date. Themobile application enables IT to view critical alerts, notifications on the dashboard, and send real-time commands.
This guide is intended for administrators of thin clients running Wyse ThinOS and using Wyse Management Suite to manage thin clients. Itprovides information and detailed system configurations to help you design and manage a ThinOS environment using Wyse ManagementSuite.
Supported platformsThe Dell Wyse ThinOS 9.0 firmware is supported on the following Dell Wyse thin clients:
• Wyse 3040 Thin Client• Wyse 5070 Thin Client• Wyse 5470 Thin Client• Wyse 5470 All-in-One Thin Client
NOTE: Wyse 3040 Thin Client is for users who work mostly on tasks with limited multimedia requirements. It is not
applicable for using multimedia such as BCR, HTML 5 video redirection, Window multimedia redirection, RTOP video
call, or JVDI video call. It is recommended to use Wyse 5070, 5470 AIO, or 5470 thin clients for high multimedia
requirements.
What's new in ThinOS 9.0?ThinOS 9.0 is a Citrix-specific release. Other broker agent connections such as VMware, RDP, and Amazon WorkSpaces are notsupported. You must use either Wyse Management Suite or the local Admin Policy Tool to manage your systems as INI parameters are notsupported in ThinOS 9.0. This section provides information about the new and enhanced features that are delivered in ThinOS 9.0.
• ThinOS enhancements
• Notification messages when firmware or packages are deployed using Wyse Management Suite, see Upgrading the ThinOSfirmware
• Enhanced user interface with modern desktop and icons, see Desktop overview.• Supports a local admin console (Admin Policy Tool), see Configure the Admin Policy Tool.• Integrates Citrix Workspace app into ThinOS 9.0.
• Citrix updates
• Supports the workspace mode, see Configure the Citrix broker setup.• Supports Browser Content Redirection, see Browser Content Redirection.• Supports Adaptive Transport with EDT, see Citrix HDX Adaptive transport.• Supports Adaptive Display V2, see Citrix HDX Adaptive Display V2.• Supports NetScaler Native OTP, see Citrix NetScaler Native OTP.• Supports Federated Authentication (SAML/Azure AD), see Citrix Federated Authentication Service SAML with Microsoft Azure
Active Directory.• Supports auto configure using DNS for email discovery, see Automatically configure using DNS for email discovery.• Supports desktop viewer or toolbar in a Citrix session, see Workspace mode.• Supports Unicode Keyboard Layout Mapping with Windows VDA, see Keyboard enhancements.
• Management software
1
8 Introduction

• Supports Wyse Management Suite version 2.0
What's new in Wyse Management Suite 2.0?This section provides information about the new and enhanced features that are delivered in Wyse Management Suite 2.0.
• ThinOS 9.0 support
• Provision to upgrade ThinOS 8.6 to ThinOS 9.0, see Upgrade ThinOS 8.6 to ThinOS 9.x.• Provision to upload and push ThinOS 9.0 application packages, see Upload and push ThinOS 9.0 application packages.• Provision to create Select groups for ThinOS 9.0, see Managing groups and configurations.
• Wyse Management Suite enhancements
• Enhanced user interface to configure ThinOS 9.0 settings, see Edit the ThinOS 9.x policy settings.
Feature comparison between ThinOS 9.0 andThinOS 8.6The following table provides a feature comparison between ThinOS 9.0 and ThinOS 8.6 local configurations:
Table 1. Feature comparison
Category Feature ThinOS 9.0 ThinOS 8.6
Operating System Signoff, Lock, shut down,reboot
Supported Supported
Sleep mode Supported Supported
Reset to factory defaultsettings
Supported Supported
First Boot Wizard Supported Supported
System Information Supported Supported
Classic desktop mode Supported Supported
Zero desktop mode Not supported Supported
Workspace mode Supported Not applicable
Broker setup Supported Supported
Connection Manager Supported Supported
Global Connection Settings Supported Supported
Certificate Management Supported Supported
SCEP Supported Supported
Screensaver Supported Supported
Locale Limited support¹ Supported
Locking the terminal Supported Supported
Date and time Supported Supported
Troubleshooting options Limited support¹ Supported
Connected devices list Limited support¹ Supported
VNC Limited support¹ Supported
Network IPv4 Supported Supported
IPv6 Supported Supported
Introduction 9

Category Feature ThinOS 9.0 ThinOS 8.6
Ethernet speed Supported Supported
Wired IEEE802.1xAuthentication
Limited support¹ Supported
Dual NIC Limited support¹ Supported
Proxy Supported Supported
VPN Supported Supported
Wireless Supported Supported
Display Resolution Supported Supported
Rotation Supported Supported
Multi screen mirror/extendedmode
Supported Supported
Peripherals Keyboard and keyboardlayouts
Supported Supported
Mouse, mouse speed, swapleft and right
Supported Supported
Serial ports Supported Supported
Camera Supported Supported
Audio (headset/DP audio) Limited support¹ Supported
Touchscreen Limited support¹ Supported
Printer Limited support¹ Supported
Bluetooth Limited support¹ Supported
ThinPrint Not supported Supported
Broker agent Citrix Supported Supported
VMware Not supported Supported
Microsoft Remote Desktop Not supported Supported
Dell vWorkspace Not supported Supported
Amazon Web Services orWorkSpaces
Not supported Supported
Teradici Cloud Access Not supported Supported
Authentication Smart card Limited support¹ Supported
Imprivata OneSign Supported Supported
SECUREMATRIX Not supported Supported
HealthCast Not supported Supported
Management Wyse Management Suite Supported Supported
Admin Policy Tool Limited support¹ Not available
Usage of INI parameters Not supported Supported
BIOS update using WyseManagement Suite
Not supported Supported
BIOS configuration usingAdmin Policy Tool
Not supported Not available
10 Introduction

Category Feature ThinOS 9.0 ThinOS 8.6
BIOS configuration usingWyse Management Suite
Not supported Not available
Firmware upgrade using WyseManagement Suite
Supported Supported
Firmware upgrade using USBImaging Tool
Supported Supported
Package update using WyseManagement Suite
Supported Supported
Package removal using WyseManagement Suite
Supported Supported
DHCP scope options Limited support¹ Supported
Security TPM Supported Supported
Secure Boot Not supported Supported
FIPS Limited Supported—only on WLAN Not supported
¹For feature limitations see the Dell Wyse ThinOS 9.0 Release Notes.
Other documents you may needIn addition to this Guide, you can access the following guides available at www.dell.com/support/manuals.
• The Dell Wyse ThinOS Version 9.0 Migration Guide provides information about downloading the ThinOS 9.0 firmware from the Dellsupport site, and how to upgrade from ThinOS 8.6 firmware to ThinOS 9.0.
• The Dell Wyse ThinOS Version 9.0 Release Notes provides information about new features, fixed issues, and known issues in thisrelease.
• The Dell Wyse Management Suite 2.0 Administrator's Guide provides information about configuration, and maintenance of the ThinOS9.0-based thin clients by using the Wyse Management Suite console.
Introduction 11

Upgrading the ThinOS firmwareIt is recommended to use the Wyse Management Suite version 2.0 to upgrade your ThinOS firmware to 9.0. You can also use the USBImaging Tool version 3.3.0 to install the ThinOS 9.0 Merlin image on your thin client. If you are using ThinOS v8.5 or earlier versions, youmust first upgrade your device to ThinOS v8.6 before installing ThinOS 9.0. ThinOS 9.0 displays a change group notification message onthe device after you change the group in Wyse Management Suite. A new firmware or package message is also displayed when you deploya new firmware or package using Wyse Management Suite.
NOTE: You cannot upgrade ThinOS PCoIP version as ThinOS 9.0 does not support PcoIP devices.
CAUTION: All device settings are erased after you upgrade from ThinOS 8.6 to 9.0 except the Wyse Management Suite
server settings. You must back up your device settings before you start the upgrade process. Once upgraded to ThinOS
9.0, you can downgrade to ThinOS 8.6 only by using Merlin image.
The overall upgrade process using Wyse Management Suite includes the following tasks:
1. Register your thin client to Wyse Management Suite.
• Register ThinOS devices using Central Configuration. See Register ThinOS devices using Wyse Device Agent.• Register ThinOS devices using DHCP option tags. See Register devices by using DHCP option tags.
NOTE: You must not disable the on-board NIC on the Wyse Thin Client. If disabled, the Wyse Management Suite
server cannot identify the thin client.
2. Download the ThinOS 9.0 operating system image. See Download the ThinOS firmware.3. Upload the ThinOS 9.0 firmware to the Wyse Management Suite repository. See Add ThinOS firmware to repository.4. Upgrade the ThinOS firmware from 8.6 to 9.x. See Upgrade ThinOS 8.6 to ThinOS 9.x.5. Upgrade the ThinOS firmware from 9.x to later versions. See Upgrade ThinOS 9.x to later versions.6. Deploy the application package using Wyse Management Suite. See Upload and push ThinOS 9.0 application packages.
Table 2. Firmware images
Platform ThinOS firmware image
Wyse 3040 Thin Client A10Q_wnos
Wyse 5070 Thin Client—Celeron processor X10_wnos
Wyse 5070 Thin Client—Pentium processor X10_wnos
Wyse 5070 Extended Thin Client—Pentium processor X10_wnos
Wyse 5470 Thin Client X10_wnos
Wyse 5470 All-in-One Thin Client X10_wnos
Table 3. Package information
Name Description Package installation
Citrix The package is introduced to support Citrix Workspace App version19.12.0.19 with RTME 2.8 client integrated.
Upload the new package using Wyse ManagementSuite.
JVDI The package is introduced to support Cisco Jabber 12.8. Upload the new package using Wyse ManagementSuite.
NOTE: If the package fails to update, or if the thin client does not work after upgrading to the new firmware, remove all
packages and reboot the thin client. Reinstall the package after the reboot.
2
12 Upgrading the ThinOS firmware

Register ThinOS devices to Wyse ManagementSuite
Register ThinOS devices using Wyse Device Agent
Steps
1. From the desktop menu of the thin client, go to System Setup > Central Configuration.The Central Configuration window is displayed.
2. Enter the Group Registration Key as configured by your administrator for the wanted group.
3. Select the Enable WMS Advanced Settings check box.
4. In the WMS server field, enter the Wyse Management Server URL.
5. In the Group Registration Key field, enter the group registration key as configured by your Wyse Management Suite administratorfor your group. To verify the setup, click Validate Key. If the key is not validated, verify the group key and Wyse Management Suiteserver URL which you have provided. Ensure that ports mentioned are not blocked by the network. The default ports are 443 and1883.
NOTE: If the Group Token parameter is not specified, the device is moved to the unmanaged group or quarantine
group.
6. Enable or disable CA validation based on your license type. For public cloud, select the Enable CA Validation check box, and forprivate cloud, select the Enable CA Validation check box if you have imported certificates from a well-known certificate authorityinto your Wyse Management Suite server.
To enable the CA validation option in the private cloud, you must install the same self-signed certificate on the ThinOS device as well.If you have not installed the self-signed certificate in the ThinOS device, do not select the Enable CA Validation check box. You caninstall the certificate to the device by using Wyse Management Suite after registration, and then enable the CA validation option.
7. Click OK.The device is registered to Wyse Management Suite.
Register ThinOS devices by using DHCP option tags
About this task
You can register the devices by using the following DHCP option tags:
Table 4. Registering device by using DHCP option tags
Option Tag Description
Name—WMS
Data Type—String
Code—165
Description—WMS Server FQDN
This tag points to the Wyse Management Suite server URL. For example,wmsserver.acme.com:443, where wmsserver.acme.com is fully qualified domainname of the server where Wyse Management Suite is installed.
Name—MQTT
Data Type—String
Code—166
Description—MQTT Server
This tag directs the device to the Wyse Management Suite Push Notification server(PNS). For a private cloud installation, the device gets directed to the MQTT serviceon the Wyse Management Suite server. For example,wmsservername.domain.com:1883.
Name—CA Validation
Data Type—String
Code—167
Description—Certificate Authority Validation
You can enable or disable CA validation option if you are registering your devices withWyse Management Suite on private cloud.
Enter True, if you have imported the SSL certificates from a well-known authority forhttps communication between the client and Wyse Management Suite server.
Upgrading the ThinOS firmware 13

Option Tag Description
Enter False, if you have not imported the SSL certificates from a well-knownauthority for https communication between the client and Wyse Management Suiteserver.
Name—Group Registration Key
Data Type—String
Code—199
Description—Group Registration Key
This tag directs to the Group Registration Key for the Wyse Management Suiteagent.
Download the ThinOS firmwareAbout this task
This section describes the steps to download the ThinOS firmware from Dell support site.
Steps
1. Go to www.dell.com/support.
2. In the Enter a Service Tag, Serial Number, Service Request, Model, or Keyword field, type the model number of your device,and press Enter or click the search icon.
3. On the product support page, click Drivers & downloads.
4. Select the operating system as ThinOS 9.0.
5. From the list, locate the ThinOS 9.0 image entry and click the download icon.
Add ThinOS firmware to the repositorySteps
1. Log in to Wyse Management Suite using your tenant credentials.
2. In the Apps & Data tab, under OS Image Repository, click ThinOS.
3. Click Add Firmware file.The Add File screen is displayed.
4. To select a file, click Browse and go to the location where your file is located.
5. Enter the description for your file.
6. Select the check box if you want to override an existing file.
7. Click Upload.
NOTE:
• The uploaded firmware can be used only to upgrade ThinOS 8.6 to ThinOS 9.0.
• The file is added to the repository when you select the check box but it is not assigned to any of the groups or
devices. To deploy firmware to a device or a group of devices, go to the respective device or group configuration
page.
Upgrade ThinOS 8.6 to ThinOS 9.xPrerequisites
• The ThinOS conversion image must be added to the ThinOS firmware repository. For more information, see Add ThinOS firmware torepository.
• Create a group in Wyse Management Suite with a group token. Use this group token to register the ThinOS 8.6 devices.• The thin client must be registered to Wyse Management Suite.
14 Upgrading the ThinOS firmware

Steps
1. Go to the Groups & Configs page, and select a group.
2. From the Edit Policies drop-down menu, click ThinOS.The Select ThinOS Configuration Mode window is displayed.
3. Select Advanced Configuration Mode.
4. Go to Firmware Upgrade, and click Configure this item.
5. Clear the Disable Live Upgrade and Verify Signature options.
6. From the Platform Type drop-down list, select the platform.
7. From the Firmware to auto-deploy drop-down list, select the firmware added to the repository.
8. Click Save & Publish.The firmware is deployed to the thin client. The conversion process takes 15-20 s, and the thin client restarts automatically.
NOTE: After you upgrade the firmware, the device is automatically registered to Wyse Management Suite. The
configurations of 8.6 build are not inherited after you upgrade the firmware.
Upgrade ThinOS 9.x to later versionsPrerequisites
• The thin client must be registered to Wyse Management Suite.• Create a group in Wyse Management Suite with a group token. Use this group token to register the ThinOS 9.x devices.
Steps
1. Go to the Groups & Configs page, and select a group.
2. From the Edit Policies drop-down menu, click ThinOS 9.x.The Configuration Control | ThinOS window is displayed.
3. Click Advanced.
4. In the Firmware field, select OS Firmware Properties.
5. Click Browse to browse and upload the firmware.
NOTE: You can upload only five firmware packages in a batch.
6. From the Select the ThinOS Firmware to deploy drop-down menu, select the uploaded firmware.
7. Click Save & Publish.The thin client downloads the firmware and restarts. The firmware version is upgraded.
Upload and push ThinOS 9.0 application packagesPrerequisites
• Create a group in Wyse Management Suite with a group token. Use this group token to register the ThinOS 9.0 devices.• Register the thin client to Wyse Management Suite.
Steps
1. Go to the Groups & Configs page, and select a group.
2. From the Edit Policies drop-down menu, click ThinOS 9.x.The Configuration Control | ThinOS window is displayed.
3. Click Advanced.
4. In the Firmware field, click Application Package Properties.
5. Click Choose Files to browse and upload the application package.
6. From the Select the ThinOS Package(s) to deploy drop-down menu, select the package.
7. Click Save & Publish.The thin client restarts and the application package is installed.
Upgrading the ThinOS firmware 15

Firmware installation using Dell Wyse USB ImagingToolUse the Dell Wyse USB Imaging Tool version 3.3.0 to install the ThinOS 9.0 Merlin image on your thin client. For information aboutinstallation instructions, see the Dell Wyse USB Imaging Tool version 3.3.0 User's Guide at downloads.dell.com/wyse/USBFT/3.1.0/
16 Upgrading the ThinOS firmware

Getting started with ThinOS 9.0This chapter helps you to quickly learn the basics and get started with your ThinOS 9.0-based thin client.
Configure ThinOS using First Boot WizardA First Boot Wizard application runs the first time when you start a thin client with ThinOS. The thin client starts the First Boot Wizardapplication before you enter the ThinOS desktop. Use this application to perform tasks, such as, configuring system preferences, settingup the Internet connectivity, loading USB configurations, configuring management software, and configuring broker connections.
Prerequisites
If you are an existing thin client user, and you have upgraded to the ThinOS version 9.0 or later, reset your thin client to factory defaultsettings to enter the First Boot Wizard.
About this task
This section describes how to configure ThinOS using First Boot Wizard.
Steps
1. Connect your thin client to an Ethernet using a wired connection.
NOTE: If you want to use a wireless connection, you can connect to Wi-Fi on the How do You Connect? screen at a
later stage.
2. Turn on your thin client.
The thin client checks for a wired network connection. If the network connection is successful, a welcome screen is displayed.
Figure 1. Welcome screen
3
Getting started with ThinOS 9.0 17

The thin client validates the IP address from Dynamic Host Configuration Protocol (DHCP). If the DHCP contains the WyseManagement Suite configurations, then the ThinOS desktop is loaded without entering the First Boot Wizard. If the DHCP validationfails, or if you have not connected to an Ethernet, then follow step 3.
NOTE: To exit the First Boot Wizard, press Ctrl + Esc.
3. On the Select Your Language screen, select a language from the Language drop-down list to start ThinOS in the regional language.
Figure 2. Select Your Language
4. Click .
5. On the Select Your Keyboard screen, select a keyboard layout from the list.
18 Getting started with ThinOS 9.0

Figure 3. Select Your Keyboard
6. Click .
7. On the Select Your Time Zone screen, select a time zone from the list to set the time zone for your thin client.
Figure 4. Select Your Time Zone
The time server with IP addresses or host names is also displayed.
Getting started with ThinOS 9.0 19

8. Click .
9. On the How do You Connect? screen, do either of the following:
• Local network (Ethernet)—Click this option if you have connected the thin client to an Ethernet using a wired connection.• Wi-Fi Network—Click this option if you want to select a wireless network. From the list, select a wireless network, and click
Connect.
NOTE: The option to define a wireless connection is not available on thin clients without a WLAN module.
• My computer does not connect to the Internet—Click this option if you do not want to establish a network connection usingthe First Boot Wizard screen. You can connect to either wired or wireless connection after you boot to the ThinOS desktop.
Figure 5. How do You Connect?
10. Click .
11. On the How would you like to import ThinOS configuration? screen, do either of the following:
• From Wyse Management Suite—Click this option if you want to use Wyse Management Suite to manage your thin clients.
To register your thin client to Wyse Management Suite, enter the group registration key and the Wyse Management Suite serverURL. Select the CA validation check box if you want to enable the CA validation feature. The CA validation is required when youimport certificates into your Wyse Management Suite server. By default, the CA Validation check box is selected to improve thesecurity when using the Wyse Management Suite cloud.
• From USB—Click this option if you want to import system settings from the USB drive.• Not import any configuration now—Click this option if you do not want to import any ThinOS configurations using the First
Boot Wizard screen.
20 Getting started with ThinOS 9.0

Figure 6. How would you like to import ThinOS configuration?
12. Click .
13. On the Connect to VDI broker screen, enter the Citrix server address.
Figure 7. Connect to VDI broker
Getting started with ThinOS 9.0 21

The broker enables you to connect to full desktops using Citrix Virtual Apps and Desktops or individual applications using Citrix VirtualApps from a centralized host through Citrix Workspace App.
To enable the Citrix Workspace based layout of published applications and desktops on the thin client, select the Workspace Modecheck box.
14. Click Done to exit the First Boot Wizard.
Figure 8. Done
The device exists from the First Boot Wizard mode, and the ThinOS desktop is displayed.
Configure account privileges for ThinOSAccount privilege is used to control the user permission to access Admin Policy Tool and System Menu options. You can change a userprivilege to High, Customize, or None from the Admin Policy Tool or the Wyse Management Suite console. When you set the userprivilege to Customize, you can manually select and enable or disable the options in the ThinOS system menu.
The Administrator Mode menu in the Admin Policy Tool is disabled by default. You can enable the administrator mode in the Admin PolicyTool or the Wyse Management Suite server, and configure an Administrator username and password. The Administrator Mode menu isdisabled again when a user enters the administrator mode.
Configure account privileges using Admin Policy Tool
About this task
This section describes how to configure account privileges using Admin Policy Tool.
Steps
1. From the desktop menu, click System Setup > Admin Policy Tool.The Configuration Control || ThinOS window is displayed.
22 Getting started with ThinOS 9.0

Figure 9. Admin policy tool
2. Click the Standard tab or the Advanced tab.
3. Expand Privacy & Security.
4. Click Account Privileges.
5. Click the Enable Admin Mode slider switch if you want to enable the Administrator mode. When enabled, you must specify the Adminusername and password.
6. From the Privilege Level drop-down list, select a privilege level—None, Customize, or High.
When you set the user privilege to Customize, you can manually select options that you want to enable or disable in the ThinOSsystem menu.
7. Click Save & Publish.
Configure account privileges using Wyse ManagementSuite
About this task
This section describes how to configure account privileges using Wyse Management Suite.
Steps
1. Go to the Groups & Configs tab and select your desired group.
2. Click Edit Policies.
3. Select ThinOS 9.x from the drop down list.The Configuration Control | ThinOS window is displayed.
Getting started with ThinOS 9.0 23

Figure 10. Configuration Control | ThinOS
4. Click the Standard tab or the Advanced tab .
5. Expand Privacy & Security.
6. Click Account Privileges.
7. Click the Enable Admin Mode slider switch if you want to enable the Administrator mode. When enabled, you must specify the Adminusername and password.
8. From the Privilege Level drop-down list, select a privilege level—None, Customize, or High.
When you set the user privilege to Customize, you can manually select options that you want to enable or disable in the ThinOSsystem menu.
9. Click Save & Publish.
Connect to a remote serverAbout this task
This section describes how to manually connect to a remote server.
Steps
1. From the desktop menu, click System Setup > Remote Connections.The Remote Connections dialog box is displayed.
2. Click the Broker Setup tab and configure the Citrix broker. See, Configuring a Citrix broker setup.
3. Click OK and restart the thin client.After the thin client restarts, the Login dialog box is displayed.
4. Enter the username, password, and domain.After authentication is successful, your desktop is presented with your assigned connection that is defined by the broker server.
Connecting a displayDepending on your thin client model, connections to displays can be made using VGA (analog) port, DisplayPort (digital), Mini DisplayPort,USB Type-C port, HDMI, and the proper Dell monitor cables/splitters/adapters.
For more information about ports and connectors, see the hardware documentation of the respective thin clients.
24 Getting started with ThinOS 9.0
Connecting a printerTo connect a local printer to your thin client, ensure that you obtain and use the correct adapter cables. Before use, you may need toinstall the driver for the printer by following the printer driver installation instructions. For information about connecting to a printer, seeConfiguring the printer setup.
Desktop overviewThinOS boots to the desktop screen. This is the default screen that is displayed after you log in to the thin client—without autostart ofany connections or applications.
Figure 11. Desktop
The ThinOS desktop consists of the following screen elements:
• Desktop menu —Displays the main menu that provides access to all the ThinOS configurations.• Taskbar—Contains the system tray area that displays the date, time, and notification icons.• Connection and application shortcuts—Provides quick access to available server connections and published applications.• Broker login window—Enables you to log in to the Citrix broker session using your login credentials.
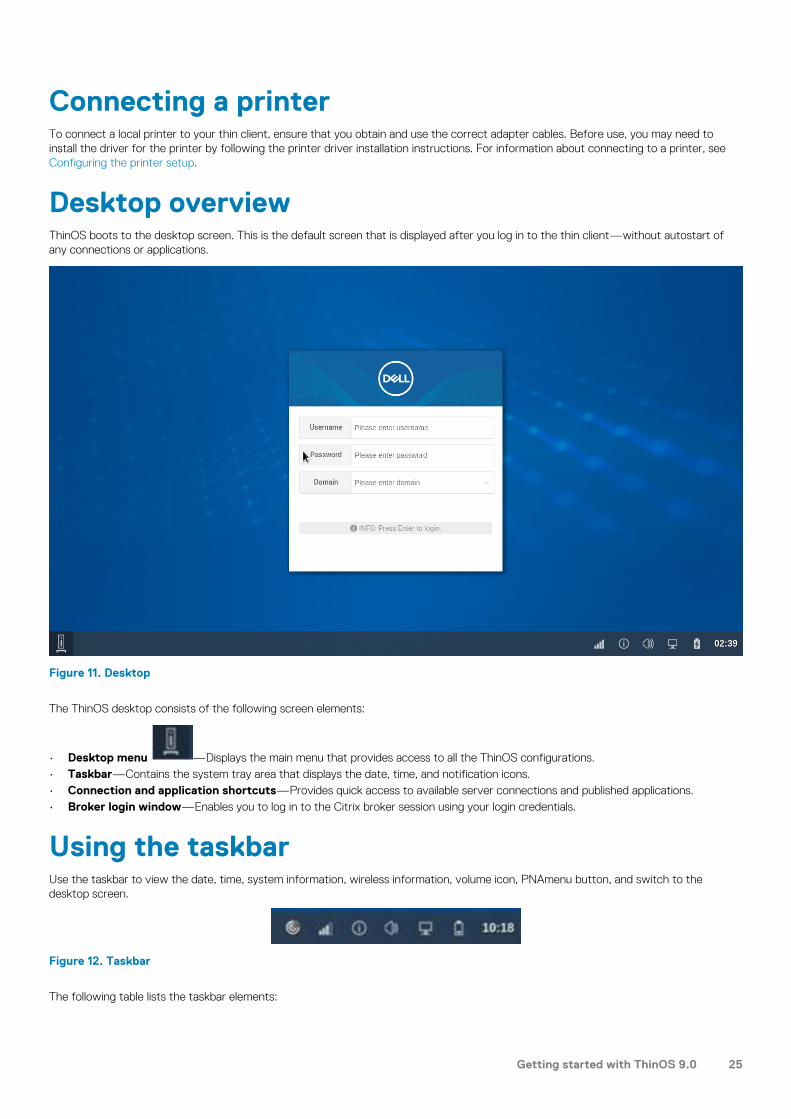
Using the taskbarUse the taskbar to view the date, time, system information, wireless information, volume icon, PNAmenu button, and switch to thedesktop screen.
Figure 12. Taskbar
The following table lists the taskbar elements:
Getting started with ThinOS 9.0 25

Table 5. Taskbar - System tray elements
Element Description
Date and time Displays the date and time.
Battery Displays the battery percentage.
Show desktop Click this icon to switch between the desktop screen and the activedialog boxes.
Volume icon Click this icon to increase or decrease the speaker volume or mute thespeaker.
System Information Click this icon to view the system information such as general systemdetails, copyright, event logs, Wyse Management Suite status, networkconnections, and so on.
Wireless icon Click this icon to open the wireless scanning window that lists all theavailable wireless connections.
PNA menu button Click this icon to use the following options:
• Refresh• Disconnect• Reconnect• Logoff• Manage Security Question—This option is available when you
enable SSPR at the server end.
NOTE: The PNA menu button is displayed only after you login to the Citrix broker with classic mode.
Classic desktop featuresThis section includes information about desktop guidelines, shortcut menu, desktop menu, and Connection Manager.
Desktop guidelinesThe classic desktop has a Dell Wyse default background with a horizontal taskbar at the bottom of the screen.
Use the following guidelines:
• Icons representing available server connections and published applications are displayed on the desktop. If you pause the mousepointer over an icon, the information about the connection is displayed. Right-click an icon to open the Connection Settings dialog boxthat displays additional information about the connection. The number of icons that can be displayed on the desktop depends on thedesktop resolution and administrator configuration.
• A server connection and published application can be opened by double-clicking a desktop icon. You can also go to the desktop icon byusing the tab key and press Enter to initiate the connection.
• Right-clicking on the desktop provides a shortcut menu.• Clicking the desktop menu button, or clicking anywhere on the desktop, opens the desktop menu.
Using the shortcut menu
About this task
This section describes how to use the shortcut menu on your thin client.
26 Getting started with ThinOS 9.0

Steps
1. Right-click on your desktop.The shortcut menu is displayed.
2. On the shortcut menu, you can view and use the following options:
a) Administrator Mode—Lets you select the account privileges. This option is disabled by default. You must enable the option fromWyse Management Suite server or Admin Policy Tool.
b) Hide all windows—Brings the full desktop to the foreground.c) Copy to clipboard—Copies an image of the full screen, current window, or event log to the clipboard. The clipboard contents
can be pasted to an Independent Computing Architecture (ICA) session. You can copy the full screen or current window toclipboard, and can export the screenshots using the Export Screenshot option in the Troubleshooting dialog box.
d) Purge clipboard—Discards the contents of the clipboard to free up memory. If there are no contents in the clipboard, the Purgeclipboard option is disabled.
e) Lock Terminal—Puts the thin client in a locked state when the user has logged in to the system with a password. The thin clientcan only be unlocked using the same password.
f) Performance Monitor—Opens the performance monitor.
Using the desktop menu
About this task
This section describes how to use the desktop menu on your thin client.
Steps
1. Click or click anywhere on your desktop.The desktop menu is displayed.
2. On the desktop menu, use the following options to configure the thin client:
• System Setup—Provides access to the following local system setup dialog boxes:
• Network Setup—Allows selection of DHCP or manual entry of network settings, and server locations. This menu selection isdisabled for Low-privileged users.
• Remote Connections—Allows you to configure the Broker agent connection.• Central Configuration—Allows you to configure the Wyse Management Suite server settings.• VPN Manager—Allows you to configure the VPN connection.• System Preferences—Allows you to configure general settings such as screensaver, locale, and time and date.• Display—Allows you to configure the monitor resolution and refresh rate.• Peripherals—Allows you to select the peripherals settings such as audio, keyboard, mouse, serial, camera, and Bluetooth
settings.• Printer Setup—Allows you to configure network printers and local printers that are connected to the thin client.• Admin Policy Tool—Allows you to configure all the ThinOS settings similar to configuring settings using Wyse Management
Suite.• System Information—Provides the device information.• System Tools—Provides information about devices, certificates, and packages.• Troubleshooting options—Displays the performance monitor graphs, trace and event log settings, and other options that are
useful for troubleshooting your thin client.• Shutdown—Allows you to shut down the system, or restart the operating system.
Configure the Connection ManagerThe Connection Manager has a list of connection entries and command buttons available for use with the connections.
About this task
This section describes how to configure the Connection Manager settings.
Getting started with ThinOS 9.0 27

Steps
1. Go to System Setup > Remote Connections, and configure the Citrix broker setup.
2. Log in to the Citrix broker.
3. On the taskbar, click .The Connection Manager dialog box is displayed.
NOTE: Nonprivileged users can view the Connection Manager but they cannot make changes.
4. In the Connection Manager dialog box, and use the following guidelines:
• Select a connection from the list, and click Connect to establish the Citrix connection.• Click Properties to open the Connection Settings dialog box for the selected connection.
All users can view and edit definitions for the selected connection. Edits are not permanently retained when the user signs-off.• Click Sign-off to log off from the thin client.• If you want to reset a selected virtual connection, select a connection from the list, and click Reset VM.• Click the Global Connection Settings tab to open and configure settings that affect all the connections available in the list.
Configuring thin client settings and connectionbroker settingsYou can either use the ThinOS local UI or the Wyse Management Suite to do the following:
• Set up your thin client hardware, look and feel, and system settings
• For configuring these settings using ThinOS local UI, see Configuring connectivity and Configure the thin client local settings.• For configuring these settings using Wyse Management Suite, see Edit the ThinOS 9.x policy settings.
• Configure the connection broker settings
• For configuring these settings using ThinOS local UI, see Configuring the connection brokers.• For configuring these settings using Wyse Management Suite, see Edit the ThinOS 9.x policy settings.
Configure ThinOS using Admin Policy ToolThinOS 9.0 does not support FTP, HTTP, HTTPS file server, and INI parameter settings. You can configure these settings using a localmanagement tool called Admin Policy Tool.
NOTE: After you reset the thin client to factory default settings, the device starts the First Boot Wizard application by
default. You can use the Admin Policy Tool to change the default settings for First Boot Wizard.
Configure the Admin Policy Tool
Steps
1. From the desktop menu, click System Setup > Admin Policy Tool.The Configuration Control | ThinOS window is displayed.
2. Click the Standard tab or the Advanced tab.
The Standard tab lists all the common settings. The Advanced tab lists all the advanced settings.
3. Expand the options that you want to configure.
4. In the respective fields, click the option that you want to configure.
5. Click Save & Publish.
28 Getting started with ThinOS 9.0

Admin Policy Tool feature listThe following table contains the list of features that are supported by the Admin Policy Tool:
Table 6. Admin Policy Tool
Feature Sub-Feature ThinOS 9.0 Additional information
Region & LanguageSettings
Region & Language Supported Not available
Privacy & Security SCEP Supported Not available
Privacy & Security Device Security Supported You must restart the client for all changes to take effect.
Privacy & Security Account Privileges Supported ThinOS 9.0 only supports the privilege control of desktop left andright-click menu.
Privacy & Security Certificates Supported Not available
Broker & Session Global SessionSettings
Supported Not available
Broker & Session Citrix BrokerSettings
Supported Not available
Broker & Session Citrix SessionSettings
Supported Not available
Login Experience 3rd PartyAuthentication
Supported You must restart the client for the OneSign server changes to takeeffect.
Login Experience Smart card Settings Supported You must restart the client for all changes to take effect.
Login Experience Login Settings Supported Not available
Login Experience Session Settings Supported Not available
Personalization Shortcut Keys Supported If you configure fast disconnect and fast connect settings, you mustrestart the client for changes to take effect.
Personalization Device Info Supported Not available
Personalization Desktop Supported You must restart the client for all changes to take effect. DesktopBackground Image can be configured only using Wyse ManagementSuite.
Personalization Screen Saver Supported Not available
Peripheral Management RFIdeas Reader Supported Not available
Peripheral Management Printers Supported Not available
Peripheral Management Audio Supported You must restart the client for all changes to take effect.
Peripheral Management Touch Supported Not available
Peripheral Management Serial Port Supported You must restart the client for all changes to take effect.
Peripheral Management USB Redirection Supported Not available
Peripheral Management Monitor Supported Not available
Peripheral Management Mouse Supported Not available
Peripheral Management Keyboard Supported Not available
Firmware ApplicationPackage Settings
Not supported Not available
Firmware OS FirmwareProperties Settings
Not supported Not available
Getting started with ThinOS 9.0 29

Feature Sub-Feature ThinOS 9.0 Additional information
System Settings Power and SleepSettings
Supported Not available
System Settings Scheduled RebootSettings
Supported Not available
System Settings ScheduledShutdown Settings
Supported Not available
System Settings Device Settings Supported Not available
Network Configuration Ethernet Supported Not available
Network Configuration DHCP Properties Supported Not available
Network Configuration DNS Properties Supported Not available
Network Configuration VPN Supported Not available
Network Configuration Bluetooth Supported You must restart the client for all changes to take effect.
Network Configuration Proxy Supported Not available
Network Configuration Wireless Supported Not available
Services VNC Supported Not available
Services WMS Properties Supported Not available
Services TroubleshootingProperties
Supported Not available
Important information• If you are using the Device Security White List Policy setting, you must first specify Hub in the Class field by adding a row. If you
do not add Hub to the White list, all USB devices are inaccessible when connected to the thin client.• It is not recommended to set Vendor and Product ID and Class simultaneously. However, if you configure both options
simultaneously, the device first checks the Vendor and Product ID followed by the Class list.• When you configure the Bluetooth, VNCD server, Bluetooth, VNC Server, NetID License, Serial Port, and Device Security settings
using the Admin Policy Tool, ensure that you restart the thin client for the settings to take effect.
Locking the thin clientThinOS enables you to lock your thin client so that credentials are required to unlock and use the thin client again.
Shut down and restartAbout this task
This section describes how to use the Shutdown dialog box to either shut down the system or restart the system.
Steps
1. From the desktop menu, click Shutdown.The shutdown dialog box is displayed.
30 Getting started with ThinOS 9.0

Figure 13. Shutdown dialog box
2. Click any of the following options:
• Shutdown the system—Enables you to shut down the system.• Restart the system—Enables you to restart the operating system.
3. Click OK to save settings.
Battery informationThis section is applicable to the Wyse 5470 Thin Client. The battery indicator is displayed on the system tray.
The following table contains the battery indicators:
Table 7. Battery indicators
Battery status Icon
While charging with the AC adapter
Battery 90% - 100% without connecting the AC adapter
Battery 50% - 89% without connecting the AC adapter
Getting started with ThinOS 9.0 31

Battery status Icon
Battery 25% - 49% without connecting the AC adapter
Battery 9% - 24% without connecting the AC adapter
Battery 0% - 8% without connecting the AC adapter
• When the battery is lower than 12%, a notification is displayed at the right-bottom with the remaining percentage.• Plugging in the AC adapter to charge the device increases brightness by 10% and disconnecting the AC adapter decreases brightness
by 10%.• By default, the critical battery level is 5%. When the battery reaches the critical level, ThinOS is turned off automatically. You must
plug in the AC power to power on the thin client.
Login dialog box featuresThe Login dialog box enables you to do the following tasks:
• Log in to the configured server connection.• Obtain system information.• Change or reset your own password, and unlock your account.• Open the Shutdown dialog box by using Ctrl+Alt+Delete.
NOTE: Ctrl+Alt+Delete is disabled by default and you can enable it from the Wyse Management Suite server. If enabled,
Ctrl+Alt+Delete locks terminal and triggers the lock window.
In the Login dialog box, use the following guidelines:
• System Information—Click the Sys Info button to open the System Information dialog box. You can view the thin client systeminformation such as system version, IP address, devices connected to your thin client, event logs and so on.
• Shutdown—Click the Shutdown button to open and use the Shutdown dialog box to shut down, restart, and so on.
View the system informationUse the System Information dialog box to view the system information. You can either click System Information from the desktop menuor the System Information icon on the taskbar.
The System Information dialog box includes the following elements:
• General tab—Displays the following information:
• System version• Terminal name• Serial number• System Up Time• Memory size• Memory Usage• CPU Speed• CPU Utilization• Monitor• Resolution• Parallel ports• Serial ports• Battery—Wyse 5470 Thin Client only• Remaining time—Wyse 5470 Thin Client only
• Copyright tab—Displays the software copyright and patent notices.
Click the Acknowledgments button to view the information that is related to third-party software.• Event Log tab—Displays the thin client start-up steps beginning from system version to checking firmware or error messages that
are helpful for debugging issues. The number of displays and USB devices that are connected to the thin client, and the Bluetoothinitialization are also displayed.
32 Getting started with ThinOS 9.0

When you install packages or restart the ThinOS device, the ThinOS client verifies the version of the installed package. If you have notinstalled the latest package version, the details about the current package version and the recommended package version aredisplayed.
• ENET tab—Displays information about wired network connections.• WLAN tab—Displays information about wireless network connections.• About tab—Displays the following information:
• Platform name• Operating system• Build name• Build version• BIOS name• BIOS version• Citrix Workspace App version• WMS status
NOTE:
• Kernel mode—The components are implemented in Kernel according to the specification. The version is displayed
as [max].[min], which is the base version of protocol or server or client of the component.
• User mode—The components are from the source, or binaries from third-party software that are compiled or
integrated into the ThinOS operating system. The version is displayed as [max].[min].[svn_revision]. The [max]
and [min] is the base version of the third component, and the [svn_revision] is the source control revision of
ThinOS. Using the ThinOS specified version, you can identify the changes between different revisions. For
example, the Citrix Workspace App version is 19.12.0.19. The components are matched to the installed packages.
If the packages are removed, the field remains empty in the About tab.
Sleep modeThe sleep mode enables the power-saving state and quickly resumes full power operations without loss of data.
The sleep mode feature is supported on the following platforms:
• Wyse 5070 Thin Client• Wyse 5470 Thin Client• Wyse 5470 All-in-One Thin Client
The USB interface is closed in sleep mode. All USB devices such as USB drives, Bluetooth, audio devices, video devices, and camera arereinitialized after resuming from sleep mode.
The wired network, wireless network, and VPN are disconnected in sleep mode. However, the network configurations are saved.
All the ThinOS configurations—VDI configuration, network configuration, and so on—are saved automatically in sleep mode. If you aresigned on to broker agent, all the windows are closed automatically and signed off when entering sleep mode. If you are not signed on tobroker agent, the windows are not closed when entering sleep mode.
Enable sleep manuallyTo enable the Sleep option manually, use either of the following options:
• ThinOS lock window—To enter sleep mode using the ThinOS lock window, do the following:
1. Lock your thin client.2. In the ThinOS lock window, click Sleep.3. Click OK.
• Shutdown dialog box—To enter sleep mode using the Shutdown dialog box, do the following:
1. Open the Shutdown window.2. Click Sleep, and then click OK.
You can wake the thin client from sleep mode by pressing the power button, any key on the keyboard, or by clicking the mouse button. Touse the USB keyboard or mouse to wake your thin client, you must enable wake on USB in BIOS.
Getting started with ThinOS 9.0 33

Wyse 5470 Thin Client—The AC power must be connected to wake the Wyse 5470 Thin Client using the USB keyboard or mouse. Youcannot wake the thin client using the USB keyboard or mouse that is connected to a Dell WD19 docking station. You can also wake theWyse 5470 Thin Client by opening the lid.
34 Getting started with ThinOS 9.0

Configuring the global connection settingsAbout this task
This section describes how to use the Global Connection Settings dialog box to configure the ICA connection settings.
Steps
1. Log in to the Citrix Broker agent.
2. On the desktop taskbar, click the Connection Manager icon, and then click Global Connection Settings.The Global Connection Settings dialog box is displayed.
3. Click the Session tab to configure the options that are available to all sessions.
The Smart Card check box specifies the default setting for connecting to a smart card reader at system startup.
ICA sessions connect automatically when you connect smart card readers. If you want to use the Disks option to connect to ICAsessions automatically, the following are the guidelines:
• More than one disk can be used simultaneously. However, the maximum number of USB drives including different subareas is 12.• Ensure that you save all data and sign off from the session before removing the USB drive.
USB device redirection—By default, audio, video, and printer devices do not use HDX USB for redirection. You can make selectionsfor the USB device redirection on the Session tab of the Global Connection Settings dialog box.
4. Click the ICA tab, and do the following:
a) Select the check boxes for the options that are available to all ICA sessions.b) Select an audio quality optimized for your connection.
5. Click OK to save your changes.
4
Configuring the global connection settings 35

Configuring connectivityThis chapter helps you understand various configuration settings for a secure connection. To configure the settings on the classicdesktop, click System Setup from the desktop menu, and use the configuration tabs.
Configuring the network settingsUse the network options to configure the network connection based on your requirement.
Configure the general settings
About this task
This section describes how to configure the general network settings on your thin client.
Steps
1. From the desktop menu, click System Setup > Network Setup.The Network setup dialog box is displayed.
2. Click the General tab, and do the following:
Figure 14. General tab
NOTE: If network interfaces are in the same subnet, connection to the same subnet is prioritized last by the
interface to fetch the IP address. Connections to the other subnets are prioritized in the order ENET0, ENET1, and
WLAN.
a) To set a default gateway, select the type of network interface from the Select Network Interface as the Default Gatewaydrop-down list.
b) Use Static Name Servers—By default, this check box is not selected, and the thin client fetches the server IP address fromDHCP. To manually assign the static IP addresses, select the Use Static Name Servers check box and do the following:
5
36 Configuring connectivity

NOTE: If name servers are changed using GUI or link down/up, the details are displayed in event logs. In dynamic
mode, if the network is not working, the DNS can be merged from Ethernet and wireless, or from Ethernet 0 and
Ethernet 1.
1. Enter the URL address of the DNS domain in the DNS Domain field.2. Enter the IP address of the DNS server in the DNS Server field.
However, the use of DNS is optional. DNS enables you to specify remote systems by their host names rather than IPaddresses. If a specific IP address (instead of a name) is entered for a connection, it is used to make the connection. Ensurethat you use the DNS domain and the network address of an available DNS server. The function of the DNS domain entry is toprovide a default suffix that is used to resolve the name. The values for these two fields may be supplied by a DHCP server. Ifthe DHCP server supplies these values, they replace any locally configured values. If the DHCP server does not supply thesevalues, the locally configured values are used.
NOTE: You can enter the server addresses, each separated by a semicolon. The character limit is 256. The
first address is for the primary DNS server and the rest are secondary DNS servers or backup DNS servers.
c) Enter the digit multiplier of 30 s in the TCP Timeout box to set the time-out value of a TCP connection. The value must be either1 or 2 which means the connection time-out value is from 1 x 30=30 s to 2 x 30=60 s. If the data for connecting to the server isnot acknowledged and the connection is timed out, setting the time-out period retransmits the sent data and again tries toconnect to the server until the connection is established.
3. Click OK to save your settings.
Configure the DHCP options settings
About this task
This section describes how to configure the DHCP options settings on your thin client.
Steps
1. From the desktop menu, click System Setup > Network setup.The Network setup dialog box is displayed.
2. Click the Options tab, and do the following:
Figure 15. Options tab
a) Interpret DHCP Option IDs—Enter the supported DHCP options. Each value can only be used one time.
Configuring connectivity 37

Table 8. DHCP option tags
Option Description Additional information
165 Wyse Management Suite server Optional string. Specifies the IP address of the Wyse Management Suiteserver.
166 Wyse Management Suite MQTTserver
Optional string. Specifies the IP address of the MQTT server.
167 Wyse Management Suite CAValidation
Optional string. Specifies the CA validation.
181 PNAgent/ PNLite server list Optional string. The thin client uses the server to authenticate the credentialsof the user. The device obtains a list of ICA published applications valid for thevalidated credentials. The user supplies those credentials when logging in tothe thin client.
182 NT domain list for PNAgent/PNLite
Optional string. The thin client creates a drop-down list of domains from theinformation that is supplied in the option tag. The list is available during thinclient login in the order that is specified in the DHCP option. For example, thefirst domain that is specified becomes the default option. The selected domainis the one which must authenticate the user ID and password. Only theselected domain is used in the authentication process. If the domain list isincomplete and if the user credentials must be verified against a domain not inthe list, you can type a different domain name during login. This is based onthe assumption that the server in option 181 can authenticate against a domainthat is not available in the list.
199 Wyse Management Suite groupregistration key
Optional string. Specifies a Wyse Management Suite group registration key forthe Wyse Management Suite agent. When Wyse Management Suite isdisabled, and the group key of Wyse Management Suite is null, this optiontakes effect. Wyse Management Suite uses the optional string as the groupregistration key. If the Wyse Management Suite server or the MQTT server isnull, the Wyse Management Suite agent sets the values to the default servervalues.
b) Interpret DHCP Vendor-Specific Info—Select this check box for automatic interpretation of the vendor information.c) DHCP Vendor ID—Displays the DHCP vendor ID when the Dynamically allocated over DHCP/BOOTP option is selected.d) DHCP UserClass ID—Displays the DHCP user class ID when the Dynamically allocated over DHCP/BOOTP option is
selected.
3. Click OK to save your settings.
NOTE: The User Class option for DHCP standard is changed to RFC 3004. You must go to user class settings in
DHCP and add the user class length as in head.
Configure the ENET settings
About this task
This section describes how to configure the Ethernet settings on your thin client.NOTE: Some authentication types may not work in ThinOS 9.0. For more information, see the ThinOS 9.0 ReleaseNotes.
Steps
1. From the desktop menu, click System Setup > Network setup.The Network setup dialog box is displayed.
2. Click the ENET tab, and do the following:
38 Configuring connectivity

Figure 16. ENET tab
a) From the Ethernet Select drop-down list, select a wired network connection.
NOTE: For Wyse 5070 Thin Client without SFP or RJ45 module, the ENET0 option is selected by default. For
Wyse 5070 thin client with SFP or RJ45 module and Wyse 5470 Thin Client that is connected to Dell WD19
docking station, select either ENET0 or ENET1 based on your network preference.
b) From the Ethernet Speed drop-down list, select a value for the Ethernet speed. The default value is Auto-Detect. If yournetwork equipment does not support the automatic negotiation, select any of the following values:
• 10 MB Half-Duplex• 10 MB Full-Duplex• 100 MB Half-Duplex• 100 MB Full-Duplex• 1 GB Full-Duplex
NOTE: The 10 MB Full-Duplex value can be selected locally. However, this mode can be negotiated through Auto-
Detect.
c) Click the IPv4 button, and then click Properties to configure the following options:
• Dynamically allocated over DHCP/BOOTP—Select this option to enable your thin client to automatically receiveinformation from the DHCP server. The network administrator must configure the DHCP server by using DHCP options toprovide information. Any value that is entered locally in the Options tab is replaced by the DHCP value. If the DHCP serverfails to provide replacement values, the locally entered value is used.
• Statically specified IP Address—Select this option to manually enter the IP address, subnet mask, and default gateway.
• IP Address—Enter a valid network address in the server environment. The network administrator must provide thisinformation.
• Subnet Mask—Enter the value of the subnet mask. A subnet mask is used to gain access to machines on other subnets.The subnet mask is used to differentiate the location of other IP addresses with two choices—same subnet or othersubnet. If the location is a different subnet, messages that are sent to that address must be sent through the defaultgateway. This does not depend on the value that is specified through local configuration or through DHCP. The networkadministrator must provide this value.
• Default Gateway—Use of gateways is optional. Gateways are used to interconnect multiple networks—routing ordelivering IP packets between them. The default gateway is used for accessing the Internet or an intranet with multiple
Configuring connectivity 39

subnets. If no gateway is specified, the thin client can only address other systems on the same subnet. Enter the addressof the router that connects the thin client to the Internet. The address must exist on the same subnet as the thin client asdefined by the IP address and the subnet mask. If DHCP is used, the address can be supplied through DHCP.
d) Click the IPv6 button, and on the Properties tab, configure the following options:
• Select the Dynamically allocated over DHCP/BOOTP option to enable your thin client to automatically receive informationfrom the DHCP server. The network administrator must configure the DHCP server (using DHCP options) to provideinformation. Any value that is entered locally in the Options tab is replaced by the DHCP value. If the DHCP server fails toprovide replacement values, the locally entered value is used.
• Select the Statically specified IP Address option to manually enter the IP address, subnet mask, and default gateway.
• IP Address—Enter a valid network address in the server environment. The network administrator must provide thisinformation.
• Subnet Prefix Len—Enter the prefix length of the IPv6 subnet.• Default gateway—Use of gateways is optional. For more information, see various IPv4-supported options in this section.
e) Select the Enable the IEEE 802.1x authentication check box, and from the EAP type drop-down list, select TLS, LEAP, PEAPor FAST.
• TLS—Select this option, and click Properties to configure the Authentication Properties dialog box.
• Select the Validate Server Certificate check box because it is mandatory to validate your server certificate.NOTE: The CA certificate must be installed on the thin client. The server certificate text field supports a
maximum of approximately 255 characters, and supports multiple server names.
• Select the Connect to these servers check box, and enter the IP address of the server.• Click Browse to find and select the client certificate file and the private key file you want.
NOTE: Ensure that you select the PFX file only.
• From the Authenticate drop-down list, select either user authentication or machine authentication that is based on yourchoice.
The following kinds of server names are supported—all examples are based on Cert Common namecompany.dell.com:
• *.dell.com• *dell.com• *.comNOTE: Using only the FQDN, that is, company.dell.com does not work. Use one of the options, for example
servername.dell.com (*.dell.com is the most common option as multiple authentication servers may
exist).
• LEAP—Select this option, and click Properties to configure the Authentication Properties dialog box. Be sure to use thecorrect username and password for authentication. The maximum length for the username or the password is 31 characters.
• PEAP—Select this option, and click Properties to configure the Authentication Properties dialog box. Be sure to selecteither EAP_GTC or EAP_MSCHAPv2, and then use the correct username, password, and domain. Validate ServerCertificate is optional.
• FAST—Select this option, and click Properties to configure the Authentication Properties dialog box. Be sure to selecteither EAP_GTC or EAP_MSCHAPv2, and then use the correct username, password, and domain.
NOTE: During the initial connection with EAP-FAST, when there is a request for a Tunnel PAC from the
authenticator, the PAC is used to complete the authentication. The first-time connection always fails, and the
subsequent connections succeed. Only automatic PAC provisioning is supported. The user/machine PAC
provisioning that is generated with CISCO EAP-FAST utility is not supported.
When EAP-MSCHAPV2 or EAP-GTC is selected for PEAP or FAST authentication, an option to hide the domain is available.Username and password boxes are available for use, but the domain text box is disabled. When EAP-MSCHAPV2 or EAP-GTC is selected for PEAP or FAST authentication, a check box to enable the single sign-on feature is available.
3. Click OK to save your settings.
Configure the WLAN settings
About this task
This section describes how to configure the wireless settings on your thin client.
40 Configuring connectivity

NOTE: On the Wyse 5070 Thin Client with an optional SFP module or RJ45 module, you cannot configure the wireless
settings.
Steps
1. From the desktop menu, click System Setup > Network setup.
The Network Setup dialog box is displayed.
2. Click the WLAN tab, and configure the following options:
Figure 17. WLAN tab
• Add—Use this option to add and configure a new SSID connection. You can configure the SSID connection from the availablesecurity type options. After you configure the SSID connection, the added SSID connection is listed on the WLAN tab.
• Remove—Use this option to remove an SSID connection from the list.• Properties—Use this option to view and configure the authentication properties of an SSID connection that is displayed in the
list.• IPv4 Config—Click this option to configure the IPv4 settings for the wireless connection.
To set IPv4 connection using either DHCP or static IP address, configure any one of the following options:
• If you want to enable your thin client to automatically receive information from the DHCP server, click Dynamically allocatedover DHCP/BOOTP.
• If you want to manually configure the IP address, click Statically specified IP Address, and provide the IPv4 details.• IPv6 Config—Click this option to configure the IPv6 settings for the wireless connection.
To set IPv6 connection using either DHCP or static IP address, configure any one of the following options:
• If you want to enable your thin client to automatically receive information from the DHCP server, click Dynamically allocatedover DHCP/BOOTP.
• If you want to manually configure the IP address, click Statically specified IP Address, and provide the IPv6 details.• Disable Wireless Device—Select this check box to disable a wireless device.
• Always—Click this radio button if you want to keep the wireless options always disabled.• EnetUp—Click this radio button if you want to disable the wireless device whenever the wired network is connected.
3. Click OK to save your settings.
Configuring connectivity 41

Configure the proxy settings
About this task
This section describes how to configure the proxy settings on your thin client.
Steps
1. From the desktop menu, click System Setup > Network setup.The Network setup dialog box is displayed.
Table 9. Supported protocols
Component Supportedprotocols
Additional information
Wyse ManagementSuite
HTTP, HTTPS, andSOCKS5
It is recommended to use the SOCKS5 protocol.
Citrix RealTime MediaEngine (RTME)
HTTP and HTTPS N/A
2. Click the Proxy tab, and configure any of the following options:
Figure 18. Proxy tab
a) Configure the proxy servers based on your requirement.
• Enter the HTTP proxy port number or HTTPS proxy port number, username, and password in the respective fields. However,credential pass through ($UN/$PW) is not recommended because it starts before user sign on.
Wyse Management Suite uses both HTTP/HTTPS and MQTT protocols to communicate with the WMS/MQTT server.However, the HTTP proxy cannot redirect TCP packages to the MQTT server which requires a SOCKS5 proxy server. If thereis only the HTTP server available, the real-time command that requires MQTT does not work.
NOTE: The HTTP/HTTPS proxy default port is 808.
42 Configuring connectivity

• Enter the SOCKS5 proxy port number, username, and password in the respective fields. If SOCKS5 proxy is configured, WyseManagement Suite proxy uses the SOCKS5 only. If SOCKS5 is not configured, then Wyse Management Suite proxy searchesfor alternative protocols, for example, HTTP in the configuration.
NOTE: The SOCKS5 proxy default port is 1080.
• Select the Use the first proxy server for all protocols check box to enable all the protocols to use the same server in theHTTP Proxy fields. Both HTTP and HTTPS proxy use the same host and port, and SOCKS5 proxy agent uses HTTP host withdefault Socks5 port (1080).
b) Specify the supported applications as Wyse Management Suite, FR, and RTME separated by a semicolon in the Apply proxyserver on field.
3. Click OK to save your settings.
User scenario
1. Configure the SOCKS5 proxy server host and port.2. Configure the user credentials according to the proxy server settings.
After you restart your system, the client checks in to the Wyse Management Suite server through the SOCKS5 proxy server. MQTTconnection is established through the SOCKS5 proxy server. Real-time commands work fine through the SOCKS5 proxy server.
3. Connect to the Citrix desktop, configure proxy in the Internet options of the browser, and playback HDX FR through the HTTP/HTTPS proxy authentication.
Configuring the remote connectionsUse the Remote Connections dialog box to configure the connection broker settings, general connection options, and authenticationsettings.
Configure the broker setup
About this task
This section describes how to configure the broker setup on your thin client.
Steps
1. From the desktop menu, click System Setup > Remote Connections.The Remote Connections dialog box is displayed.
Configuring connectivity 43

Figure 19. Broker Setup
2. On the Broker Setup tab, select the Citrix option from the Broker type drop-down list. You can configure the broker setup toconnect to the Citrix virtual desktop environments. For instructions about configuring the Citrix broker setup, see Configuring theconnection brokers.
3. Click OK to save your settings.
Configure the General Options
About this task
This section describes how to configure the general options on your thin client.
Steps
1. From the desktop menu, click System Setup > Remote Connections.The Remote Connections dialog box is displayed.
2. Click the General Options tab, and do the following:
44 Configuring connectivity

Figure 20. General options
a) Click one of the following options to set the action that the thin client should perform after you exit all sessions:
• None• Sign-off automatically• Shutdown the system automatically—If you select this option, you must specify a time period after which the thin client
shuts down.• Restart the system automatically—If you select this option, you must specify a time period after which the thin client
restarts.
NOTE: By default, None is selected and the thin client automatically returns to the terminal desktop.
b) Enter the default username in the Default Sign-on Username field.c) Enter the default password in the Default Sign-on password field.d) Enter the default domain in the Default Sign-on Domain field.
3. Click OK to save your settings.
Configure the authentication settings
About this task
This section describes how to configure the authentication settings on your thin client.
Steps
1. From the desktop menu, click System Setup > Remote connections.The Remote Connections dialog box is displayed.
2. Click the Authentication tab, and select one of the following authentication types:
Configuring connectivity 45

Figure 21. Authentication tab
• Imprivata
3. After configuring your preferred authentication, click OK to save your settings.
Configure the Imprivata OneSign serverOneSign Virtual Desktop Access provides a seamless authentication experience and can be combined with single sign-on for No ClickAccess to desktops and applications in a virtual desktop environment.
About this task
This section describes how to configure the Imprivata OneSign server on your thin client.
Steps
1. From the desktop menu, click System Setup > Remote Connections .
The Remote Connections dialog box is displayed.
2. Click the Authentication tab, and select the authentication as Imprivata.
3. In the OneSign Server field, enter either https://ip or https://FQDN values of the OneSign server.
The security setting for OneSign server in the Admin Policy Tool controls the security level of OneSign. The security level is set as highby default and you must import the certificate of the OneSign server before using the OneSign feature. The certificate is not requiredif the security level is set as low.
4. Click OK to save your changes.
5. Restart the thin client.
The Imprivata login dialog box is displayed.
The following OneSign features or actions are supported:
• Client and Broker authentication
• Citrix Virtual Apps (formerly Citrix XenApp)• Citrix Virtual Apps and Desktops (formerly Citrix XenDesktop)
• Kiosk Mode• Fast User Switching• Non-OneSign user VDI access• Hotkey Disconnect• Proximity card reader redirection• Guided Question and Answer login• Authenticate w/Password• Authenticate w/Password + Password Change• Authenticate w/Password + Password Change | New Password is Invalid• Authenticate w/Proximity Card + Password• Authenticate w/Proximity Card + Pin• Authenticate w/Proximity Card + Pin | Pin not enrolled• Authenticate w/Proximity Card Alone | Retrieve Password
46 Configuring connectivity

• Retrieve User Identity Password• Reset User Identity Password• Update User Identity Password• Enroll Proximity Card• Lock/Unlock Terminal with Proximity CardLock/Unlock Terminal with Proximity Card
NOTE: ThinOS supports Imprivata WebAPI version 13. It includes OneSign Objects (WebAPI v13) and Fingerprint
Authentication (WebAPI v13).
Configure objects on Imprivata Server
About this task
This section describes how to configure different objects on the Imprivata server.
Steps
1. To configure the general configuration object, do the following:
a) On the Imprivata server, click Computer policy, and then click General tab.b) Select the check box to enable users to shut down and restart the device from the lock screen.
• Shutdown Allow
• Select the check box to enable the feature. If enabled, the shutdown and restart icons are displayed in the ThinOS loginand locked windows.
• Clear the check box to disable the feature. If disabled, the shutdown and restart icons are not available.• FailedOneSignAuth Allow—Click either Yes or No. If you are a non-OneSign user, click No to log in to the broker.• Display name format— Use this option to set different formats for the account name that is displayed in pop-up
notifications.
2. To configure the walkway configuration object, do the following:
a) On the Imprivata server, click Computer policy, and then click the Walk Away tab.
• Key mouse inactivity enabled and behavior—Use this option to set the action when the keyboard and mouse are left idle orinactive. The In addition to keyboard and mouse inactivity check box is not supported.
• Passive proximity cards—Use this option to enable the proximity card usage.
• If you want to use a proximity card to lock the thin client, select the Tap to lock check box.• If you want to lock the thin client and log in as a different user. Select the Switch users check box.
• Lock warning enabled and type—Use this option to enable or disable warning messages. The following three types aresupported:
• None—No warning messages are displayed.• Notification balloon—ThinOS displays a notification window.• Screensaver—Hide the display contents before the thin client locks.
• Warning message—Use this option to customize your warning messages• Lock Screen type—Use this option to set the lock screen type. Only obscure type is supported.• Hot key to lock workstation or log off user—Use this option to set Hot keys for ThinOS. The following keys are supported:
• F1• F12• Backspace• Del• Down• End• Enter• Esc• Home• Insert• Left Alt• Left• Left Ctrl• NumLock
Configuring connectivity 47

• Page Down• Page Up• Right Ctrl• Right• Right Alt• Space• Tab• Up• a~z• A~Z• 0~9• Modifier +, %, ^ (Shift, Alt, and Control)
• Suspend action—The server configuration controls this feature on ThinOS.
3. To configure the Self-Service Password Reset (SSPR) configuration object, select the appropriate options on the screen.
The SSPR configuration object controls the Self-Service Password Reset behavior for a user. The enabled attribute specifies whetherthe user is allowed to reset their password as part of emergency access. The mandatory attribute specifies whether the user mustreset their password as part of emergency access.
4. To configure the RFIDeas configuration object, select the appropriate options on the screen.
The RFIDeas configuration object controls the behavior of the RFIDeas readers.
5. To configure the custom background configuration object, do the following:
a) On the Imprivata server, click Computer policy.b) Click the Customization tab and upload a custom background file.
6. To configure the cobranding configuration object, do the following:
a) On the Imprivata server, click Computer policy.b) Click the Customization tab and upload a logo image file.
The logo image impacts all the dialog boxes in ThinOS with raw logo.
7. To modify the text that is displayed in the sign-on UI and lock window, configure the SSPR customization configuration object.
NOTE: ThinOS supports maximum of 17 characters.
8. To configure the password self-services force enrollment feature, select the check box. This enables you to reset the primaryauthentication password.
Enroll a proximity card with Imprivata OneSign
About this task
This section describes how to enroll a proximity card with Imprivata OneSign.
Steps
1. Tap the proximity card. The card enrollment page is displayed.
2. Enter the credentials and click OK.Proximity card is enrolled successfully.
Use smart card as proximity cardYou can use a smart card as a proximity card to authenticate the user. When you tap the smart card on the smart card reader, theImprivata agent uses the smart card's unique serial number as the Unique ID (UID) of the proximity card.
About this task
This section describes how to use a smart card as a proximity card.
Steps
1. Log in to the OneSign Administrator console.
2. Go to the Policies page and click Computer Policy.
3. In the Smart card readers section, select the Treat smart card authentications as proximity card authentications check box.
48 Configuring connectivity

Next steps
To authenticate the user using a proximity card, connect a supported reader to the thin client. Before you tap the card, ensure that yourcard is already enrolled to the user. When you tap your card on the reader, the thin client authenticates the user and starts the VDIconnection.
Imprivata Bio-metric Single Sign-OnFingerprint identification feature is highly reliable, and cannot be replicated, altered, or misappropriated.
The prerequisites of OneSign server are:
• Imprivata v4.9 or later appliance version is needed that supports the WebAPI v5 and later versions.• Fingerprint identification license is required.• Fingerprint reader device is required. ET710 (PID 147e VID 2016) and ET700 (PID 147e VID 3001) are the supported devices.
Supported user scenarios
• Signing in or unlocking the ThinOS devices using the Fingerprint authentication.
• Configure the OneSign server on ThinOS, and then connect the Fingerprint reader device.• The ThinOS Fingerprint window is displayed automatically after the OneSign server is initialized.• Fingerprint authentication works on the ThinOS unlock window.
• Unlocking the Virtual Desktop using the Fingerprint authentication.
• Enable the Imprivata Virtual Channel option from the ThinOS Global Connection settings.• When you lock the virtual desktop in the session, the Fingerprint window is displayed automatically.
• Managing Fingerprints on a virtual desktop.
• Legend Fingerprint Management is supported.• Fingerprint management with Imprivata Confirm ID enabled is not supported.
Grace period to skip second authentication factorGrace period enables you to specify a time limit on OneSign server for logging in without the second authentication factor after the firstlogin session.
NOTE: After you specify the grace period, you must first use the proximity badge, and then enter password or OneSign
PIN for the initial login.
If you use the proximity card after the time limit that you specified for grace period, the second authentication factor window is displayedwith the message Grace period expired.
If you enter a wrong password or PIN, the second authentication factor window is displayed with the warning message OneSign could notauthenticate you. Try again.
Configuring the central configurationsUse the Central Configuration dialog box to configure the Wyse Management Suite server settings.
Configure the Wyse Management Suite settings
About this task
This section describes how to configure the Wyse Management Suite settings on your thin client.
Steps
1. From the desktop menu, click System Setup > Central Configuration.The Central Configuration dialog box is displayed.
2. On the WMS tab, do the following:
Configuring connectivity 49

Figure 22. Wyse Management Suite
a) Select the Enable Wyse Management Suite (WMS) check box to enable the Wyse Management Suite to discover your thinclient. By default, this option is selected. Wyse Management Suite service automatically runs after the client boots.
NOTE: If the first discovery, for example, the Wyse Management Suite service is not successful, it continues
until a discovery is successful. If all discoveries fail, it is started again automatically.
b) Select the DNS SRV record check box if you want the thin client to obtain the Wyse Management Suite values through DNSserver, and then try to register into the Wyse Management Suite server. By default, the check box is selected. If the check boxselection is canceled, the thin client cannot obtain the Wyse Management Suite values through the DNS server.
c) In the Group Registration Key field, enter the group registration key as configured by your Wyse Management Suiteadministrator for your group. To verify the key, click Validate Key.
NOTE: A Group Registration Key is not required for the private Wyse Management Suite server. You can provide
the Wyse Management Suite server details to enable the device to check in to Wyse Management Suite. ThinOS
registers to a quarantine tenant in Wyse Management Suite.
d) Select the Enable WMS Advanced Settings check box to enter the Wyse Management Suite server, MQTT server details, andto enable the CA validation. By default, the MQTT server option is disabled. The MQTT server value is populated after the ThinOSdevice is checked in to the Wyse Management Suite.
e) Select the CA validation check box if you want to enable the CA validation feature.
The CA validation is required when you import certificates into your Wyse Management Suite server. By default, the CA Validationcheck box is selected to improve the security when using the Wyse Management Suite cloud. This change affects connections toany of the following servers:
• *.dellmobilitymanager.com• *.cloudclientmanager.com• *.wysemanagementsuite.com
Table 10. CA validation
Wyse ManagementSuite deployment
CA Validation
Private cloud When you deploy Wyse Management Suite on a private cloud, the Enable CA Validation check boxis available to configure after you specify the server details in the WMS Server field. By default, thecheck box is selected.
50 Configuring connectivity

Wyse ManagementSuite deployment
CA Validation
Public cloud When you deploy Wyse Management Suite on a public cloud, the Enable CA Validation check boxis selected by default. You cannot disable the Enable CA Validation option.
3. Click OK to save your settings.
NOTE: When you modify the ThinOS policy of the registered thin client using Wyse Management Suite, a dialog box
is displayed prompting you to postpone or restart the thin client. To apply the settings immediately, click Restart
Now. If you want to delay this task, click Postpone.
Configure the VPN ManagerVPN Manager is included to manage Virtual Private Network connections. ThinOS uses the OpenConnect client that is based on the SSLprotocol for connecting to a VPN.
About this task
This section describes how to configure the VPN Manager on your thin client.
Steps
1. From the desktop menu, click System Setup > VPN Manager.The VPN Manager dialog box is displayed.
2. To create a session, click the + icon and do the following:
Figure 23. VPN Manager
a) Enter the name of the session in the Name field. This option is mandatory. The maximum character limit is 21 characters.b) Enter the IP address of the VPN server in the Server field. This option is mandatory and is defined as either an IP address or a
hostname. The maximum character limit is 63 characters.c) Enter the login username in the Username field. This option is mandatory. The maximum character limit is 31 characters.d) Enter the password in the Password field. This option is not mandatory. The maximum character limit is 31 characters.
Configuring connectivity 51

e) Click the Auto-connection on system startup button to automatically connect to the VPN when the device restarts.f) Click the Show progress in detail button to display the VPN connection progress.g) Click the Show debug information button to display the VPN debug details for better troubleshooting.h) Click OK.
When connections are created, the Auto column displays which connection is automatically connected when the device restarts.Only one session can be set to autoconnect.
3. Select a session and click Connect.
4. Click OK to save your changes.
52 Configuring connectivity

Configuring the connection broker—CitrixIn a Virtual Desktop Infrastructure (VDI) environment, a connection broker is a software entity that enables you to connect to an availabledesktop. The connection broker facilitates the VDI environment to securely and efficiently manage the centrally hosted desktopenvironments. ThinOS 9.0 enables you to configure the Citrix connection broker for accessing Citrix Virtual Apps and Desktops.
Citrix offers a complete virtualization solution, where all applications and resources are deployed on a centralized server, and published toremote devices. In ThinOS 9.0, Citrix Receiver is replaced by Citrix Workspace app. Citrix Workspace app, a client software released byCitrix, enables you to access all your virtual apps, desktops, and other Citrix products from a single workspace UI. For more informationabout Citrix Workspace App, see the Citrix documentation at docs.citrix.com.
To access Citrix sessions using Citrix Workspace app, do the following:
1. Deploy the Citrix Workspace app package using Wyse Management Suite.2. Go to System Setup > Remote Connections > Broker setup, and configure the Citrix broker.
Citrix Workspace app feature matrixTable 11. Citrix Workspace app feature matrix
Feature* ThinOS 9.0
Citrix Workspace Citrix Virtual Apps Supported
Citrix Virtual Desktops (including Windows and Linuxdesktop)
Supported
Endpoint Management Auto configure using DNS for Email Discovery Supported
Centralized Management Settings Supported
UI Desktop Viewer/Toolbar Supported
Multi-tasking Supported
Follow Me Sessions (Workspace Control) Supported
HDX Host Core Adaptive transport Supported
Session reliability Supported
Auto-client Reconnect Supported
Browser content redirection Supported
Multiport ICA Supported
HDX IO/Devices/Printing Local Printing Supported
Generic USB Redirection Supported
Client drive mapping / File Transfer Supported
HDX Integration HDX Insight Supported
EUEM Experience Matrix Supported
Session Sharing Supported
HDX Multimedia Audio Playback Supported
Bi-directional Audio (VoIP) Supported
Web-cam redirection Supported
Video playback Supported
6
Configuring the connection broker—Citrix 53

Feature* ThinOS 9.0
Skype for business Optimization pack Supported
Cisco Jabber Unified Communications Optimization Supported
Windows Multimedia redirection Supported
UDP Audio Supported
HDX Graphics H.264-enhanced SuperCodec Supported
Adaptive Display V2 Supported
Client hardware acceleration Supported
3DPro Graphics Supported
External Monitor Support Supported
True Multi Monitor Supported
Authentication Federated Authentication (SAML/Azure AD) Supported
RSA Soft Token/RSA Hard Token Supported
Challenge Response SMS (Radius) Supported
OKTA Multi factor authentication Supported
DUO multi factor authentication Supported
Smart Card (CAC, PIV) Supported
Proximity/Contactless Card Supported
Credential insertion (E.g.. Fast Connect, Storebrowse) Supported
Pass Through Authentication Supported
NetScaler Native OTP Supported
Anonymous Store Access Supported
Security TLS 1.2 Supported
DTLS 1.0 Supported
SHA2 Cert Supported
Remote Access via Citrix Gateway Supported
IPV6 Supported
Keyboard enhancements Unicode Keyboard Layout Mapping with Windows VDA Supported
*For definitions of each feature, see the Citrix Workspace app feature list at docs.citrix.com.
Configure the Citrix broker setupAbout this task
This section describes how to configure the Citrix broker setup on your thin client.
Steps
1. From the desktop menu, click System Setup > Remote Connections.The Remote Connections dialog box is displayed.
2. On the Broker Setup tab, select Citrix from the Select Broker Type drop-down list, and do the following:
54 Configuring the connection broker—Citrix

Figure 24. Broker Setup
a) Select the Workspace Mode check box if you want to enable the Citrix Workspace based layout of published applications anddesktops.
b) In the Broker Server field, enter the IP address or hostname or FQDN of the Citrix server. You can enter the Citrix NetScalerGateway URL, StoreFront URL, or the web interface URL.
c) In the Auto Connect List field, enter the name of the connection that is displayed in Connection Manager to automaticallyconnect after you log in the Citrix broker. You can enter more than one connection name. Each connection name is separated bysemi-colon, and is case-sensitive.
d) Select the Enable automatic reconnection at logon check box if you want to automatically reconnect to the disconnectedsessions or both active and disconnected sessions during login. You must click either of the following options:
• Connect to disconnected session only• Connect to active and disconnected sessions
e) Select the Enable automatic reconnection from button menu check box if you want to automatically reconnect to thedisconnected sessions or both active and disconnected sessions by using the Reconnect button in the button menu. You mustclick either of the following options:
• Connect to disconnected session only• Connect to active and disconnected sessions
To use the reconnect option, left-click the button menu, and click Reconnect.
3. Click OK to save your settings.
Configuring the connection broker—Citrix 55

Classic mode vs Workspace modeThis section summarizes the differences between classic mode and workspace mode.
Figure 25. Classic mode
Figure 26. Workspace mode
56 Configuring the connection broker—Citrix

Table 12. Classic mode vs Workspace mode
Item Classic mode Workspace mode
How to enable By default, the ThinOS loads the classic mode if youdo not select the Workspace mode check box duringCitrix broker setup.
Select the Workspace mode check box during Citrixbroker setup.
Desktop elements Displays the ThinOS full taskbar and the classicdesktop.
Displays the ThinOS full taskbar and the workspacedesktop.
Access all publisheddesktops
Click the icon on the classic desktop to launch thepublished desktop.
Click the Desktops icon on the purple ribbon to access allthe published desktops.
Access all publishedapps
Click the icon on the classic desktop to launch thepublished application.
Click the APPS icon on the purple ribbon to access allthe published desktops.
Access favorites Not applicable Click the Favorites icon on the purple ribbon.
Access ConnectionManager On the left corner of the taskbar, click .
Click the button menu in the upper-right corner of thescreen, and then click Connection Manager.
Switch account whenlogged in with multiserver
Displays all icons of desktop and applications. Youcannot switch the account.
Click the button menu in the upper-right corner of thescreen, and then click Sign out.
Refresh Citrixapplication
Click the PNAmenu button on the taskbar, and thenclick Refresh.
Click the button menu in the upper-right corner of thescreen, and then click Refresh.
Reconnect a session Click the PNAmenu button on the taskbar, and thenclick Reconnect.
Click the button menu in the upper-right corner of thescreen, and then click Connection Center >Reconnect.
Disconnect from thesession
Click the PNAmenu button on the taskbar, and thenclick Disconnect.
Click the button menu in the upper-right corner of thescreen, and then click Connection Center >Disconnect .
Log off all theconnected ICAsessions
Click the PNAmenu button on the taskbar, and thenclick Logoff.
Click the button menu in the upper-right corner of thescreen, and then click Connection Center > Logoff.
Sign out of brokeragent
Click the Sign-off button in Connection Manager orfrom the Shutdown menu.
Click the button menu in the upper-right corner of thescreen, and then click Sign out. You can also click Signout from the Shutdown menu.
Use search bar Not applicable Use the search bar on the upper-right of the screen tosearch for your workspace item. You can open appsdirectly from the search results.
Access DesktopViewer/Toolbar
Click the Desktop Viewer/Toolbar on the topcenter of the Citrix session screen to use thefollowing toolbar options:
• Home• Switch• Ctrl+Alt+Del• Window• Disconnect• Sign Out• Save Layout
You can switch a session between a windowed and afull-screen session window. Save layout is availableonly for the local AD user session and not for userswho use SAML authentication to log in to the Citrixsession.
Click the Desktop Viewer/Toolbar on the top center ofthe Citrix session screen to use the following toolbaroptions:
• Home• Switch• Ctrl+Alt+Del• Window• Disconnect• Sign Out• Save Layout
You can switch a session between a windowed and a full-screen session window. Save layout is available only forthe local AD user session and not for users who useSAML authentication to log in to the Citrix session.
Configuring the connection broker—Citrix 57

Automatically configure using DNS for emaildiscoveryYou can connect to a Citrix session by using an email address. The email address is used to discover the StoreFront or NetScaler GatewayURL.
Prerequisites
• Install a valid server certificate on the StoreFront/AppController server and Access Gateway appliance.• The full chain or path to the root certificate must be correct.
About this task
This section describes how to connect to a Citrix session by using email-based discovery.
Steps
1. Add a service record (SRV) to your DNS server to enable email-based discovery. To add a service record to the DNS server, do thefollowing:
a) Log in to the DNS server.b) Go to DNS > Forward Lookup Zone.c) Right-click Forward Lookup Zone, and click Other New Records.d) In the Resource Record Type dialog box, select Service Location (SRV).e) Click Create Record.f) In the Service field, enter _citrixreceiver.
g) In the Protocol field, enter _tcp.
h) In the Port number field, enter the port number.i) In the Host offering this service field, enter the FQDN and the port for the StoreFront/AppController server or Access Gateway
appliance.
NOTE: You cannot use the same FQDN for both StoreFront and the Access Gateway virtual servers.
2. On ThinOS, go to System Setup > Remote Connections.The Remote Connections dialog box is displayed.
3. On the Broker Setup dialog box, select Citrix from the Broker Type drop-down list.
4. Enter the email address in the Broker Server field, and click OK.
5. Restart the thin client.
6. In the login window, enter your email address and password to log in to the session.
Citrix HDX RealTime Optimization Pack for Skypefor BusinessThe Citrix HDX RealTime Optimization pack enables you to make high-definition audio and video calls using the Skype for Businessapplication. For more information about HDX RealTime Optimization Pack, see the Citrix documentation at docs.citrix.com.
The Citrix HDX RealTime Optimization pack consists of the following two components:
• HDX RealTime Media Engine and Citrix Workspace app that are integrated as a single component on the client-side (Citrix package)• HDX RealTime Connector as the server-side component
The HDX RealTime Media Engine and Citrix Workspace app are combined to constitute a single component that runs on the thin client.The HDX RealTime connector is the server-side component that runs on the Citrix Virtual Desktops virtual desktops and Citrix VirtualApps servers. The HDX RealTime connecter that runs on the Citrix server handles the authentication and the media processing is achievedon the thin client.
NOTE: In every ThinOS release, the Citrix package version may be updated to newer versions.
58 Configuring the connection broker—Citrix

Table 13. Supported environment
Component Supported platform/supported versions
Endpoints (Thin clients) • Wyse 5470 All-in-One Thin Client• Wyse 5470 Thin Client• Wyse 5070 Thin Client• Wyse 3040 Thin Client
Citrix environment • Citrix Virtual Apps and Desktops 7 1811 and later• Citrix Virtual Apps and Desktops (formerly XenDesktop) 5.6, 6.5, 7.x• Citrix Virtual Apps (formerly XenApp) 6.5, 7.x
Skype for Business client • Skype for Business 2016• Skype for Business 2015• Lync 2013• Lync 2010
Server backend • Skype for Business Server 2019• Skype for Business Server 2015• Skype for Business Online—Microsoft Office 365 hosted Skype for Business
Server• Lync 2013 Server
Client component at the endpoint Citrix package for RTME
Install the Citrix package on ThinOSYou must install the Citrix package to use Skype for Business application on ThinOS. To install the ICA package using Wyse ManagementSuite, see Upload and push ThinOS 9.0 application packages.
Set up the Skype for Business application
About this task
This section describes how to install and use Skype for Business (SFB) on a Citrix desktop.NOTE: Ensure that the thin client does not have USB redirection for video and audio devices to have the RealTime Media
Engine working correctly on your thin client.
Steps
1. Upgrade the ThinOS firmware and install the Citrix package on the thin client using Wyse Management Suite. For more informationabout firmware upgrade and package installation, see Firmware upgrade and Upload and publish ThinOS 9.0 application packages.
2. Go to www.citrix.com and download the appropriate version of the Citrix RealTime Optimization Pack that contains the Citrix HDXRealTime Connector.
3. Install the Citrix HDX RealTime Connector on the Citrix Virtual Desktops or Citrix Virtual Apps servers.
NOTE: If you are running an earlier 1.8 version, you must uninstall the earlier version and install the latest version. If
you are running an earlier 2.x version, you can upgrade the connector to the latest version.
4. Log in to your Citrix desktop and start the Skype for Business application.
Using the Skype for Business applicationThe following are the salient features:
• Supports Native Skype For Business client menus and operations• Supports more call features, such as call delegation, and response group• Supports video codec H.264-UC and audio codec SILK• Supports Call Admission Control
Configuring the connection broker—Citrix 59

• Supports DSCP/QoS Configuration• Supports Bandwidth Policy Control• Ability to turn off version mismatch warnings for acceptable combinations of RealTime Connector and RealTime Media Engine• Better initialization to eliminate DNS confusions
For more information about Skype for Business in VDI environments, see the Microsoft documentation at docs.microsoft.com.
Use the Skype for Business application to perform the following tasks:
• Start an audio or video call.
• Select a user to call.• Call from the IM window.• Type a name or number to call.
• Answer the call.
• Answer an audio call.• Answer a video call.• Use the headset button to answer the call.
• Transfer call, mute, or hold call.• Control the video—Pause, end, or Picture-in-Picture (PiP).• Set the volume levels.• Use the dial pad.• Make a conference call.• Help and Hang up.• Minimize, maximize, or close the call video window.• Perform a network health check. Right-click the RTME icon on the taskbar and select Call Statistics to view attributes, such as
received packets, sent packets, video frame rate, video resolution, audio codec, and video codec.
Verify the Skype for Business connection status
About this task
This section describes how to verify the Skype for Business status on your thin client.
Steps
1. Install the correct connector on the Citrix Virtual Desktop or Virtual Apps Server.
2. Install the Citrix package on the ThinOS device.
3. Connect the audio or video devices.
NOTE: Disable the USB redirection for audio or video devices.
4. Connect to a Citrix desktop and start the Skype for Business application.
5. Check the RTOP (bow-tie) icon in the system tray on the taskbar of the virtual desktop.
6. Open the About page from the RTOP icon in the system tray and verify the connection attributes.
If the remote RealTime Media Engine version matches the mediaEngine.Net version, the status is displayed as Connected.
7. Verify the Settings option from the RealTime connector icon.
8. Verify the audio and video devices from the Skype For Business client menus.
9. Establish the video and audio calls.
10. Answer the calls by either clicking the mouse or using the headset button.
11. Click the RealTime connector icon and verify the call statistics.
For more information about verifying your installation and the collecting troubleshooting information, see the Citrix documentation atdocs.citrix.com.
60 Configuring the connection broker—Citrix

Citrix RTME call statisticsTable 14. Citrix RTME call statistics
Platform name RTME version Call statistics* Camera
Video resolution Video codec Video frame rate
Wyse 5470 All-in-One Thin Client
2.8 960 x 540 H.264-UC (SW) 30 fps Onboard camera
1280 x 720 H.264-UC (CAM) 30 fps Logitech C930e
Wyse 5470 ThinClient
2.8 960 x 540 H.264-UC (SW) 30 fps Onboard camera
1280 x 720 H.264-UC (CAM) 30 fps Logitech C930e
Wyse 5070 ThinClient
2.8 1280 x 720 H.264-UC (CAM) 30 fps Logitech C930e
Wyse 3040 ThinClient
2.8 848 x 480 H.264-UC (CAM) 30 fps Logitech C930e
*The call statistics data is displayed in the Call Statistics window in the Sent column.
Cisco Jabber Softphone for VDICisco Jabber Softphone for VDI (JVDI) is the Unified Communications solution offered by Cisco for virtual deployments. It supports audioconferencing, and instant messaging on the Hosted Virtual Desktops (HVD). The Cisco Jabber Softphone for VDI software offloads theaudio processing from the virtual desktop servers to the thin client. All audio and video signals are routed directly between the endpointswithout entering the HVD.
Cisco Jabber Softphone for VDI enables you to make and receive calls using the Cisco Unified Communications application. Cisco JabberSoftphone for VDI consists of the following two components:
• Cisco JVDI Agent• Cisco JVDI Client
Cisco JVDI Agent is the JVDI connector that runs on the Citrix desktop or server. Cisco JVDI client is the JVDI package that runs on thethin client. The Jabber client that runs on the Citrix server handles the authentication and the media processing is achieved on the thinclient.
Table 15. Supported environment
Component Supported platforms/supported versions
Thin client • Wyse 5470 Thin Client• Wyse 5470 All-in-One Thin Client• Wyse 5070 Thin Client• Wyse 3040 Thin Client
Connection broker for the hosted virtual desktops • Citrix Virtual Apps and Desktops (formerly XenDesktop) 7.15 LTSR andlater
• Citrix Virtual Apps (formerly XenApp) 7.15 LTSR and later
Cisco Jabber application on the hosted virtual desktop Cisco Jabber 12.8
Cisco JVDI agent on the hosted virtual desktop Cisco JVDI Agent 12.8
Cisco JVDI client on the thin client JVDI.pkg
Install the JVDI package on ThinOS
About this task
You must install the JVDI package to use Cisco Jabber Softphone for VDI. To install the ICA package using Wyse Management Suite, seeUpload and push ThinOS 9.0 application packages.
Configuring the connection broker—Citrix 61

Setting up the Cisco Jabber Softphone for VDI
About this task
This section describes how to install and use the Cisco Jabber Softphone for VDI on a Citrix desktop.
Steps
1. Go to www.cisco.com, and download the following software:
• Cisco JVDI Agent 12.8• Cisco Jabber application 12.8
2. On the Citrix virtual desktop, install Cisco JVDI Agent. Double-click the file and follow the installation wizard steps.
3. On the Citrix virtual desktop, install Cisco Jabber.
For information about the installation procedure, see the installation guide at www.cisco.com.
4. Update the ThinOS firmware, and install the JVDI.pkg on the ThinOS client using Wyse Management Suite.
For more information about firmware upgrade and package installation, see Firmware upgrade and Upload and publish ThinOS 9.0application packages.
NOTE: If ThinOS running Cisco Jabber (JVDI) fails to register with Cisco Unified Communications Manager, add the
DNS servers and DNS domains that are used by the Citrix host and the Cisco Unified Communications Manager
servers to ThinOS. You can either specify the domain name and server IP on the General tab in Network Setup, or
add the DNS server and domain value to the DHCP server by providing the IP address information to the ThinOS
client. For issues related to Cisco Unified Communications, contact Cisco support.
5. Log in to the Citrix virtual desktop, and sign in to Cisco Jabber using your user credentials.
When you log in for the first time, do the following:
a) On the Cisco Jabber interface, click Advanced Settings.b) Select your account type as Cisco Communications Manager 9 or later.c) Enter the login server address.
NOTE: If the Use my computer for calls option is selected, the Cisco Jabber is automatically registered with Cisco
Unified Communications Manager. This option enables Jabber to work as a Softphone, and use the microphone or
speaker that is connected to the thin client for phone calls.
Using Cisco JabberUse the Cisco Jabber application to perform the following tasks:
• Start an audio call• Answer the call• Hold or resume the call• Stop the video• Mute or unmute the audio• Turn on or turn off the self-view• Enter or exit the full screen• Merge the calls• Audio conferencing• Transfer the call• Play voice mail• Forward the call to voicemail• Forward the call to another number• Forward voice messages directly• Use the Device Selector menu to switch between headsets• Use the Device Selector menu to switch between cameras• Set up secure phone capabilities• Answer the call on multiple phone devices (Shared Line feature)
NOTE: It is recommended that you reduce the video resolution to 640 x 360p with 30fps on the Wyse 3040 Thin Client.
62 Configuring the connection broker—Citrix

For information about troubleshooting your Cisco Jabber, see the Deployment and Installation Guide for Cisco Jabber Softphone for VDIat www.cisco.com.
For information about Cisco Jabber-related issues, see the Release notes for Cisco Jabber Softphone for VDI document atwww.cisco.com.
For information about accessories for headsets and speakers, see the Unified Communications Endpoint and Client Accessories article atwww.cisco.com.
Using Device Selector
About this task
Cisco Jabber Softphone for VDI consists of a component called Device Selector. Use the Device Selector menu to manage your audiodevices and cameras.
If you have multiple devices connected to the thin client, you can view your active device, or select a different device. To enable a device,do the following:
Steps
1. In the Windows notification area, click the Device Selector icon.
The available devices are listed.
2. Click a device to make it active.
Verify the Cisco Jabber connection status
About this task
This section describes how to verify the Cisco Jabber connection status on your thin client.
Steps
1. Install the correct connector on the remote desktop.
2. Install the correct package on the ThinOS device.
3. Connect any audio or video devices.
4. Connect to a Citrix desktop, and start the Cisco Jabber application.
5. Open the Settings menu, and go to Help > Show connection status.The Connection Status window is displayed.
6. Click JVDI Details, and confirm the following attributes:
• JVDI Client version• JVDI Agent version• Virtual Channel status• SIP status• Softphone CTI status
7. Establish a video or an audio call.
8. Answer the call by either clicking the mouse or using the headset button.
9. Verify the call statistics.
For more information about verifying your installation and collecting the troubleshooting information, see the Cisco documentation atwww.cisco.com.
Configuring the connection broker—Citrix 63

Cisco Jabber call statisticsTable 16. Cisco Jabber call statistics
Platform Citrix Apps and Desktops VDI Video resolution Frame rate
Wyse 5470 All-in-OneThin Client
7.15 LTSR CU5 Windows 10 x64 1280 x 720p 25 fps
Wyse 5470 Thin Client 7.15 LTSR CU5 Windows 10 x64 1280 x 720p 25 fps
Wyse 5070 Thin Client 7.15 LTSR CU5 Windows 10 x64 1280 x 720p 30 fps
Wyse 3040 Thin Client 7.15 LTSR CU5 Windows 10 x64 1280 x 720p 30 fps
Wyse 5470 All-in-OneThin Client
7.15 LTSR CU5 Windows 10 x64 640 x 360p 25 fps
Wyse 5470 Thin Client 7.15 LTSR CU5 Windows 10 x64 640 x 360p 25 fps
Wyse 5070 Thin Client 7.15 LTSR CU5 Windows 10 x64 640 x 360p 30 fps
Wyse 3040 Thin Client 7.15 LTSR CU5 Windows 10 x64 640 x 360p 30 fps
Limitations• When you minimize a VDI desktop, the video screen on the Cisco Jabber application remains on the ThinOS desktop.• When you launch a VDI desktop in window mode, the position of the video screen on the Cisco Jabber application is offset.• When you are making video calls on the Wyse 3040 Thin Client, it is recommended to restrict the video to 360p on the server side.
Due to high CPU usage, video calls in 720p are not supported on the Wyse 3040 Thin Client.• Due to poor video performance, it is recommended not to use 4K displays to make video calls. This limitation is applicable for all the
ThinOS platforms.
Citrix ADCThinOS supports Citrix Application Delivery Controller (ADC), formerly known as Citrix NetScaler. The following authentication methodsare supported on ThinOS:
• Lightweight Directory Access Protocol (LDAP)• RSA• DUO• SMS PASSCODE• Native OTP• Federated Authentication Service with Azure active directory• OKTA
Citrix two-factor authenticationThinOS supports Citrix two-factor authentication that authenticates the identity of the user twice before granting access, adding an extralevel of security.
For local authentication, there must be a user profile that is created in the Citrix ADC database. For external authentication, the usernameand password that is entered must be the same as registered in the authentication server. After a successful validation of the usernameand password, the user is requested for another level of authentication.
ThinOS supports LDAP, RSA+LDAP, SMS Passcode, DUO, OKTA, and Azure MFA authentications by default. The user must only providethe Citrix ADC gateway address.
To log in to NetScaler Gateway that uses LDAP with RSA authentication, you must select LDAP+RSA in the Wyse Management Suitepolicy. You can also go to Admin Policy Tool and configure the NetScaler/ADC Authentication Method option in the Citrix BrokerSettings window.
For specific users who want to use Citrix ADC authentication methods, such as LDAP with MFA, it is recommended that you configurethe NetScaler/ADC Authentication Method with LDAP either using the Wyse Management Suite policy or the Admin Policy tool.
64 Configuring the connection broker—Citrix

Configure Citrix ADC using LDAP and RSA
About this task
This section describes how to configure the Citrix ADC (formerly NetScaler) using LDAP and RSA authentication.
Steps
1. Go to NetScaler > NetScaler Gateway > Virtual Servers, and click Edit.
2. Set the primary and secondary authentications based on the following scenarios:
• If you use LDAP and RSA login, ensure that the primary authentication is LDAP and secondary authentication is RADIUS. You mustalso ensure that the NetScaler Gateway Authentication Method in the Wyse Management Suite policy or the Admin PolicyTool is configured as LDAP+RSA.
• If you use RSA and LDAP login, ensure that the primary authentication is RADIUS and secondary authentication is LDAP.• If you use only LDAP login, ensure that the primary authentication is LDAP and secondary authentication is none.
3. Go to System Setup > Remote Connections > Broker setup, enter the Citrix ADC server address in the Broker Server field.
4. Log off from the client desktop, or restart the thin client.The login window for Citrix ADC is displayed.
For more information about configuring Citrix ADC with LDAP, RSA authentication, see the Citrix NetScaler Gateway Guide atwww.citrix.com.
Configuring Citrix ADC using DUO
About this task
To configure the Citrix ADC (formerly NetScaler) using DUO authentication, do the following:
Steps
1. Go to NetScaler > NetScaler Gateway > Virtual Servers, and click Edit.
2. Ensure that the primary authentication is RADIUS that is configured with the DUO authentication RADIUS.
3. Ensure that the secondary authentication is none.
4. Enter the broker address in the ThinOS user interface.
Example
For more information about configuring Citrix ADC with DUO authentication, see the Citrix NetScaler Gateway Guide at www.duo.com.
Configure Citrix ADC using CensorNet MFA authentication
Prerequisites
SMS PASSCODE is re-branded as CensorNet MFA. You can configure the Citrix ADC (formerly NetScaler) to use a One Time Passcode/Password (OTP) in the form of a personal identification number (PIN) or passcode. To obtain this one-time password, you must installCensorNet app on your mobile. After you enter the passcode or PIN, the authentication server invalidates the one-time password. Youcannot enter the same PIN or password again. For more information about configuring one-time passcode, see the Citrix documentation.
Prerequisites
• Citrix ADC (formerly NetScaler) v12.0 and later is installed on your client.• SMS PASSCODE v9.0 SP1 or later is installed and configured in your network. You can download the SMS PASSCODE v9.0 file from
download.smspasscode.com/public/6260/SmsPasscode-900sp1.• Remote Authentication Dial-In User Service (RADIUS) authentication policy is configured and bind to the Citrix ADC server.• CensorNet app is installed and configured on your mobile device.
About this task
To use the one-time passcode on ThinOS, do the following:
Configuring the connection broker—Citrix 65

Steps
1. Log in to ThinOS and connect to the ADC URL.
2. Enter your credentials, and press Enter.The PASSCODE dialog box is displayed. You will receive a push notification from the CensorNet App on your phone with the code.
3. Click OK.If the authentication is successful, you are logged into the Citrix session.
Citrix ADC Native OTPCitrix ADC (formerly NetScaler) Native OTP enables Citrix ADC Gateway to use one-time passwords (OTPs) for authentication withoutthe need of an extra authenticating server. A one-time password that is generated by Google Authenticator is considered to be highlysecure as passcodes are randomly generated.
If you access the Broker agent using Citrix ADC native OTP authentication, lock terminal is not supported. When you try to use lockterminal, a message is displayed where you can click either Continue to log off or clickCancel to stay on the screen.
For more information about Native OTP support for authentication, see the NetScaler Gateway12.0 documentation at docs.citrix.com.
Log in to Citrix ADC using the passcode
Prerequisites
• Ensure that you are using Citrix ADC (formerly NetScaler) 12.0 build 51.24 and later versions.• Ensure that you have registered your device with Citrix ADC. For a detailed procedure on how to register your device with Citrix ADC,
see the Native OTP support for authentication article at docs.citrix.com.
About this task
This section describes how to log in to Citrix ADC using the OTP.
Steps
1. From the desktop menu, click System setup > Remote Connections.The Remote Connections dialog box is displayed.
2. Click the Broker Setup tab and select Citrix from the Select Broker Type drop-down list.
3. Enter the IP address of the Citrix ADC FQDN server in the Broker Server field.You can configure other options if required.
4. Click OK.The NetScaler login window is displayed.
5. Launch the Google Authenticator application on your phone and get the passcode.
6. In the Citrix ADC login window, enter the passcode and click OK.If the authentication is successful, you are logged into Citrix ADC.
Citrix Federated Authentication Service SAML withMicrosoft Azure Active DirectoryThinOS supports the Citrix Federated Authentication Service with Microsoft Azure Active Directory during single sign-on to Citrix ADCusing the Security Assertion Markup Language (SAML) based authentication. The FAS server delegates the user authentication to theMicrosoft ADFS server or Azure AD with Security Assertion Markup Language (SAML). Both, Azure AD Multiple Factors Authentication(MFA) and Self-service password reset (SSPR), are supported.
If you access the Broker agent using SAML, lock terminal is not supported. When you try to use lock terminal, a message is displayedwhere you can click either Continue to log off or click Cancel to stay on the screen.
66 Configuring the connection broker—Citrix

Enable Azure Multiple Factor Authentication for Citrix ADC SingleSign-on with SAML Authentication
Prerequisites
• Create an Azure AD user in Azure Active Directory.• Enable the Multiple Factor Authentication (MFA) for the user.• Add the user to Azure AD Citrix ADC (formerly NetScaler) Enterprise application users and groups.• Ensure that the shadow account of the user exists in local domain users group.• Ensure that the SAML authentication policy is enabled. For more information, see the NetScaler Gateway documentation at
docs.citrix.com.
About this task
This section describes how to log in to Citrix ADC using SAML with Azure Multiple Factor Authentication.
Steps
1. From the desktop menu, click System setup > Remote Connections.The Remote Connections dialog box is displayed.
2. On the Broker Setup tab, select Citrix from the Broker type drop-down list.
3. Enter the Citrix ADC Gateway URL in the Broker field, and click OK.The login window is displayed.
4. Enter the username of the Azure AD user and click Next.
5. Enter the initial password for the Azure AD user, and click Sign in.
6. In the More information required window, click Next.
7. On the Additional Security Verification page, do the following:
a) From the How should we contact you? drop-down list, select any one of the following methods:
• Authentication phone• Mobile app
b) If you select Authentication phone, enter your phone number. If you select Mobile App, click Set up and follow the on-screeninstructions to add an account to the Microsoft authenticator app.
c) Click Save.
8. Enter the Azure AD username with the initial password again.
9. If you are using mobile app, approve the notification. If you are using the authentication phone, verify your information through a phonecall or a text code.
10. Log in to Citrix ADC and launch the session.
Enable Azure AD Self-Service Password Reset function for Citrix ADCSingle Sign-on with SAML authentication
Prerequisites
1. Create an Azure AD user in Azure Active Directory.2. Enable the Multiple Factor Authentication (MFA) for the user.3. Add the user to Azure AD Citrix ADC (formerly NetScaler) Enterprise application users and groups.4. Ensure that the shadow account of the user exists in local domain users group.5. Ensure that Self-Service Password Reset Enabled option is selected in Azure AD for the user.
About this task
This section describes how to enable Azure AD Self-Service Password Reset function for Citrix ADC Single Sign-on with SAMLauthentication.
Steps
1. On the Broker setup tab, enter the Citrix ADC Gateway URL, and click OK.
Configuring the connection broker—Citrix 67

The login window is displayed.
2. Enter the user credentials of the Azure AD user and click Next.
3. On the Don't lose access to your account! page, configure the following options:
• Authentication Phone
a. Click Set it up now.b. From the drop-down list, select your country code.c. Enter your phone number.d. Click either text me or call me.
A verification code is received on your phone by call or text message.e. Enter the verification code and click Verify.
• Authentication Email
a. Click Set it up now.b. Enter the valid email address.c. Click email me.
A verification code is sent to your email.d. Enter the verification code and click Verify.
4. Click Finish.
5. Continue with the user login.
Configure Citrix NetScaler using OktaOkta provides Single Sign-On (SSO) capability using Remote Authentication Dial-In User Service (RADIUS) for Citrix Virtual Apps andDesktops. ThinOS supports Okta through the Citrix NetScaler Gateway 11.0 or later. The Okta RADIUS Agent is used for userauthentication. The Okta RADIUS server agent assigns the user authentication to Okta using single-factor authentication (SFA) ormultifactor authentication (MFA).
For more information about configuring Citrix NetScaler Gateway to use the Okta RADIUS Agent, see the Citrix NetScaler GatewayRadius Configuration Guide at help.okta.com.
NOTE:
• On the ThinOS client, you need UPN at the login window.
• Phone authentication by using Okta is supported only in US and Canada.
LimitationOnly OKTA with Citrix Gateway (RADIUS) is verified. However, the StoreFront with OKTA SAML authentication or OKTA with CitrixGateway (SAML) is not verified ..
Citrix Cloud servicesThinOS supports Citrix Cloud services. It acts as a single management console to deploy applications or desktops on any virtual or cloudsetup for a secure digital workspace. For more information about Citrix Cloud services, see the Citrix Cloud article at docs.citrix.com.
Getting started with Citrix Cloud
About this task
This section describes how to log in to the Citrix Cloud server on your thin client.
Steps
1. From the desktop menu, click System Setup > Remote Connections.The Remote Connections dialog box is displayed.
2. On the Broker Setup tab, select Citrix from the Select Broker Type drop-down list, and do the following:
68 Configuring the connection broker—Citrix

a) Select the Workspace Mode check box if you want to enable the Citrix Workspace-based layout of published applications anddesktops. If this option is not selected, you are logged in to the classic mode.
b) In the Broker Server field, enter the Citrix Cloud URL.c) In the Auto Connect List field, enter the name of the desktops that you want to launch automatically after logging in to Citrix
Cloud. You can enter more than one desktop. Each desktop name is separated by a semi-colon and is case sensitive.d) Select the Enable automatic reconnection at logon check box if you want to automatically reconnect to the disconnected
sessions or both active and disconnected sessions during login. You must click either of the following options:
• Connect to disconnected session only• Connect to active and disconnected sessions
e) Select the Enable automatic reconnection from button menu check box if you want to automatically reconnect to thedisconnected sessions or both active and disconnected sessions by using the Reconnect button in the button menu. You mustclick either of the following options:
• Connect to disconnected session only• Connect to active and disconnected sessions
3. Click OK to save your settings.
4. In the login dialog box, enter your domain username and password to log in to Citrix Cloud.
ICA icons are displayed in Connection Manager and on the client desktop.
Citrix HDX Adaptive transport (EDT)ThinOS supports Citrix HDX Adaptive transport for Citrix Virtual Apps and Desktops. HDX Adaptive transport enables the ICA virtualchannels to automatically adapt to varying LAN and WLAN connections and improves the data throughput.
For more information about Citrix HDX Adaptive transport, see the Citrix documentation at docs.citrix.com.
Enable HDX Adaptive Transport
About this task
This section describes how to enable the HDX Adaptive Transport policy setting on Citrix Studio.
Steps
1. Go to Citrix Studio > HDX Adaptive Tranport policy.
2. Set the value for HDX Adaptive Transport to either Preferred or Diagnostic mode.
For more information about configuration on Citrix Studio, see the Adaptive Transport article at docs.citrix.com.
3. On the ThinOS client, start a session from the Citrix Workspace app.
The connection is established using adaptive transport.
NOTE: If the connection type is HDX and the protocol is UDP, EDT is active for the session. If the protocol is TCP,
the session is in fallback mode.
For information about how to verify if HDX Adaptive Transport is active, see the FAQs section in this guide.
HDX Adaptive Display V2ThinOS supports the selective use of a video codec (H.264) to compress graphics during video playback in an ICA session. This featurecombines the H.264 mode and Thinwire Compatible mode for a better user experience.
For more information about HDX Adaptive Display V2, see the Citrix documentation at docs.citrix.com.
Enable HDX Adaptive Display V2
About this task
This section describes how to enable HDX Adaptive Display V2 using Citrix Studio.
Configuring the connection broker—Citrix 69

Steps
1. Go to Citrix Studio > Use video codec for compression policy.
2. Select the For actively changing regions option.
3. On the ThinOS client, launch an ICA desktop.
4. Open the web browser and play your preferred video.
HDX adaptive display V2 is used for video decoding on the ThinOS client. Thinwire uses JPEG (lossy) for complex or photographicimagery and RLE (lossless) for text imagery. The rest of the screen is decomposed by Thinwire.
For more information about the Use video codec for compression policy, see the Graphics Policy Settings article at docs.citrix.com.
Browser Content RedirectionBrowser content redirection enables any web browser content, including HTML 5 videos, to be redirected to the ThinOS client and notredirected on the VDA side.
Browser content redirection proxy setting— If you use the browser content redirection proxy settings, enter a valid proxy addressand port number in the browser content redirection proxy configuration policy. Citrix Workspace app follows the server fetch and clientrender mechanism to fetch URL from VDA and redirect browser content from the client.
NOTE: In ThinOS 9.0, browser content redirection uses a WebkitGTK+ based overlay to render the content. Chromium
Embedded Framework (CEF) for browser content redirection will be enabled in later releases.
Enable Browser Content Redirection
Prerequisites
• If you are using a Chrome browser, import the BCR extension into the browser.• If you are using a IE browser, ensure the Citrix HDXJsInjector add-on exists in the browser.• If you are using an RDS-hosted desktop, and if you are using a IE browser, install the BCR add-on manually from Citrix virtual apps and
desktops IOS installer.
About this task
This section describes how to enable Browser Content Redirection using Citrix Studio.
Steps
1. Go to Citrix Studio > Browser Content Redirection policy.
2. Select the Allowed option.This enables the Browser Content Redirection policy.
3. In the Browser Content Redirection Access Control List (ACL) policy settings, add URLs that can use the browser contentredirection.
NOTE: Ensure that the URL is not listed in the Browser Content Redirection Blacklist Configuration policy.
4. On the ThinOS client, launch an ICA desktop.
5. Open either IE or Chrome and enter the URL that you have added in the Access Control List (ACL).The browser viewport is rendered on the ThinOS client side. Browser attributes such as Address Bar and Status Bar still run on theVDA side.
For more information about Browser Content Redirection, see the Browser Content Redirection article at docs.citrix.com.
HTML5 Video RedirectionHTML5 Video Redirection controls and optimizes the way Citrix Virtual Apps and Desktops servers deliver HTML5 multimedia webcontent to users. This feature is available for internal web pages only. It requires the addition of JavaScript to the web pages where theHTML5 multimedia content is available, for example, videos on an internal training site.
The following policies must be enabled on the server side:
• Windows Media redirection—By default this option is enabled.• HTML5 video redirection—By default this option is disabled.
70 Configuring the connection broker—Citrix

For more information about the ICA Multimedia policy settings, see the Citrix documentation at docs.citrix.com.
For information about how to verify if HTML5 Video Redirection is working, see the FAQs section in this guide.
Windows Media RedirectionWindows Media Redirection enables the audio and video to be rendered on the user device instead of running on the server side. Usingthe Windows Media Redirection feature, you can optimize the performance of Windows Media player on virtual Windows desktops.
For more information about Windows Media Redirection, see the Citrix documentation at docs.citrix.com.
Enable Windows Media Redirection
Prerequisites
Ensure that the Windows Media redirection policy is set to Allowed in Citrix Studio. By default, the value is set to Allowed.
About this task
This section describes how to enable the Windows Media Redirection feature on your thin client.
Steps
1. On the ThinOS desktop, click Connection Manager.
2. Click Global Connection Settings.
3. Select the Enable HDX/MMR check box for the ICA connection.
4. Go to System Setup > Remote Connections.
5. On the Broker Setup tab, enter the Citrix server in the Broker Server field, and click OK.
6. Launch an ICA desktop.
7. Open Windows Media Player and play a video or an audio file.
The following types are supported:
• H.264 video• WMV-9 video• WMV-8 video• WMV-7 video• WMC1 video• MP4 video• 4K video• MOV/AVI video• AAC/MP3/WMA file
For information about how to check if Windows Media Redirection is working, see the FAQs section in this guide.
For more information about the ICA Multimedia policy settings, see Citrix Product documentation at docs.citrix.com.
QUMU Video Optimization Pack for CitrixQUMU's Video Optimization Pack (VOP) for Citrix enables you to stream quality videos to endpoints managed by Citrix Virtual Apps andDesktops servers by enabling client-side fetching. The QVOP video player runs on the client side and the video stream uses the client'snetwork to go directly to QUMU's Video Control Center instead of accessing through VDI desktops.
Prerequisites
Ensure that the Windows Media redirection policy is set to Allowed in Citrix Studio. By default, the value is set to Allowed.
About this task
This section describes how to use QUMU Video Optimization Pack for Citrix on your thin client.
Configuring the connection broker—Citrix 71

Steps
1. Configure the Citrix server in the Broker setup window.
2. Launch an ICA desktop.
3. Download and install the QUMU Media Player on the remote desktop.
NOTE: Contact your QUMU partner to get the QUMU media player.
4. Open the Internet Explorer browser and play a QUMU published video.
For more information about the ICA Multimedia policy settings, see Citrix Product documentation at docs.citrix.com.
Keyboard enhancements on Windows VDAThinOS supports the Unicode Keyboard Layout Mapping on Citrix Apps and Desktops. This feature enables you to use the Unicodekeyboard layout mapping for non-Windows Citrix Workspace app on the Windows VDA.
If you select a localized keyboard layout on the ThinOS local UI, the selected keyboard layout is not synchronized in the ICA session.However, the client local keyboard layout is mapped to the existing language in the language bar of the session. For example, if the existinglanguage is English (United States) in the ICA session, and if you select German layout on the ThinOS local UI, then the German languageis not displayed on the session language bar. However, the English (United States) keyboard in the ICA session works as a Germankeyboard layout.
NOTE: When you select a localized keyboard such as German on the ThinOS local UI, you must not manually add the
language again in the ICA session. This is because the output of the manually added German keyboard can be
disordered.
Citrix Self-Service Password ResetYou can reset the password or unlock the account after you complete the security questions enrollment.
Supported Environment
• Citrix Virtual Apps and Desktops 7.11 and later versions• Support StoreFront Server 3.7 and later versions• Self-Service Password Reset Server 1.0 and later versions
Supported platforms—All platforms are supported.
Limitation
• Supports only StoreFront Server
Before resetting a password or unlocking an accountBefore resetting your password or unlocking your account, you must register for the security questions enrollment. To register youranswers for the security questions, do the following:
1. To access the Security Questions Enrollment window, do the following step that is applicable to the mode:
a. In Classic mode, click the Manage Security Questions option from the PNAmenu.b. In Workspace mode, click the TASKS icon on the purple ribbon and click Start.
The Security Questions Enrollment window is displayed.2. Enter the appropriate answers to the question set.3. Click OK to register the security questions.
Use the Account Self-ServiceAfter the security questions enrollment is complete, and when ThinOS is connected to a StoreFront server with Self-Service PasswordReset enabled, the Account Self-Service icon is displayed in the sign-on window.
NOTE: If you enter the wrong password more than four times in the Sign-on window, the client automatically enters the
unlock account process.
1. Click the Account Self-Service icon to unlock your account or reset your password.
72 Configuring the connection broker—Citrix

NOTE: You must register the security questions for users before using the unlock account or reset password
feature.
2. Click Unlock account or Reset password based on your choice, and then click OK.
Unlock an accountAfter you register the security questions, do the following to unlock your account:
1. Choose a task (Unlock account) in the Account Self-Service window.2. Enter the username.
The Unlock Account dialog box is displayed.3. Enter the registered answers to the security questions.
If the provided answers match the registered answers, then the Unlock Account dialog box is displayed.4. Click OK to successfully unlock your account.
NOTE:
• If the provided answers are incorrect, an error message is displayed.
• If you provide the wrong answers more than three times, you cannot unlock the account or reset the password, and
error messages are displayed.
Reset a passwordAfter you register the security questions, do the following to reset your password:
1. Choose a task (Reset password) in the Account Self-Service window.2. Enter the username.
The Reset Password dialog box is displayed.3. Enter the registered answers to the security questions.
If the provided answers match the registered answers, then the Reset Password dialog box is displayed.4. Enter and confirm the new password.5. Click OK to successfully change the password.
If you provide the wrong answers, you cannot reset the password, and an error message is displayed.
Citrix SuperCodecCitrix SuperCodec is a H.264 decoder integrated on the ThinOS client side. The server encodes the session image into the H.264 streamand sends it to the client side. The client decodes the H.264 stream by SuperCodec and display the image on the screen. This featureimproves the user experience, especially for HDX 3D Pro desktops.
Citrix SuperCodec is supported in Citrix Virtual Apps and Desktops (XenApp and XenDesktop) version 7.5 or later versions.
In Citrix Virtual Apps and Desktops version 7.9 and later, the default setting for Use video codec for compression is Use whenpreferred. For best performance on ThinOS device, it is recommended that you set the Use video codec for compression policy toFor the entire screen. You can set the policy to Do not use video codec. This policy setting allows ThinOS to use ThinWire Plus thatsaves bandwidth and reduces the CPU overhead. You can also set the policy to For actively changing regions. This policy setting allowsThinOS to use Selective H.264.
• ThinWire Plus—Equivalent to the Do not use video codec option• Fullscreen H.264—Equivalent to the For the entire screen option• Selective H.264—Equivalent to the For actively changing regions
Anonymous logonThe Anonymous logon feature enables the users to log into the StoreFront server configured with unauthenticated store without ActiveDirectory (AD) user credentials. It allows unauthenticated users to access the applications instead of AD accounts.
NOTE: Anonymous logon is not supported with legacy mode of StoreFront server.
Configuring the connection broker—Citrix 73

Configure the Citrix session propertiesAbout this task
This section describes how to configure the Citrix HDX connections on your thin client.
Steps
1. On the taskbar, click Connection Manager.The Connection Manager dialog box is displayed.
2. Select a Citrix connection from the list, and click Properties.
3. Click the Connection tab and do the following:
You can view Server or Published Application, Connection Description, Browser Servers, Host Name or Application Name,and Encryption Level but cannot edit these options.
a) Display Resolution—Select the display resolution for this connection.
If you select the Published Application option, the connection display enables you to select the Seamless Display Resolutionoption.
b) Window mode and Full screen mode—Select the initial view of the application and desktop in a windowed screen or full screen.c) Autoconnect on start-up—When this option is selected, the thin client automatically connects the session on start-up.d) Reconnect after disconnect—When this option is selected, the thin client automatically reconnects to a session after a non
operator-initiated disconnect. The wait interval is the value that you set in the Delay before reconnecting box (enter the numberof s 1–3600). The default is 20 s if you are a stand-alone user.
4. Click the logon tab to view Logging on area.
You can view Login Username, Password, Domain name, and Logon Mode.
5. Click the Options tab, and do the following:
a) Autoconnect to local devices—Select any options—Printers, Serials, Smart Cards, Sound, and Disks—to have the thin clientautomatically connect to the devices.
NOTE: USB devices that are connected are managed in Global Connection Settings.
b) Audio Quality—From the drop-down list, select your preferred audio quality.c) Enable session reliability—When enabled, session reliability allows you to momentarily lose connection to the server without
having to re-authenticate upon regaining a connection. Instead of the connection time-out, the session is kept alive on the serverand is made available to the client upon regaining connectivity. Session reliability is most relevant for wireless devices.
6. Click OK to save your settings.
Using multiple displays in a Citrix sessionThinOS supports ICA desktop multiple displays in Citrix Virtual Apps and Desktops/Citrix Virtual Apps 7.6 and later versions.
Prerequisites
• Increase the value of MaxVideoMemoryBytes REG_DWORD to support one or more 4K resolution displays. For more information,see the Citrix documentation at support.citrix.com.
• Increase the display memory limit to support more color depth and higher resolution. For more information, see the Citrixdocumentation at citrix.com.
Steps
1. Connect multiple displays to ThinOS device.
2. Go to System Setup > Display, disable Mirror Mode, and configure the display layout.
3. Launch an ICA desktop. By default, the ICA desktop is launched in the full-screen mode.
74 Configuring the connection broker—Citrix

Table 17. Display details
Platforms Best Display resolution Maximum number of system displays
Standard or RDS desktop—Windows 10, 2012 R2, and 2016
HDX 3D Pro desktop—Windows 10 with NVIDIATESLA P40 GPU
Wyse 5070 Extended ThinClient
1920 x 1080 6 4
2560 x 1440 6 4
3840 x 2160 4 4
Wyse 5070 Thin Client—Pentium processor
1920 x 1080 3 3
2560 x 1440 3 3
3840 x 2160 3 3
Wyse 5070 Thin Client—Celeron processor
1920 x 1080 2 2
2560 x 1440 2 2
3840 x 2160 2 2
4. Move the display blocks as per your requirement.NOTE: For more information about the Citrix official multiple displays support, see the Citrix documentation at
support.citrix.com.
USB Printer RedirectionPrerequisites
Go to Citrix Studio, and enable the Client USB device redirection policy.
About this task
This section describes how to configure USB Printer Redirection in a Citrix session.
Steps
1. On the ThinOS desktop, open the Connection Manager window, and click Global Connection Settings.The Global Connection Settings dialog box is displayed.
2. Clear the Exclude printer devices check box, and click OK.
3. Connect a USB printer to the thin client.
4. Log in to a Citrix session.
5. Go to Control Panel > Devices and Printer, and verify if the printer driver is automatically installed.After the printer drive installation is complete, the redirected printer is listed in the Printers section.
Configure the Citrix UPD printerUse of Citrix Universal Printer Driver (Citrix UPD) ensures that all printers that are connected to the thin client can also be used from avirtual desktop or application session without integrating a new printer driver in the data center. Citrix UPD is the base of Citrix UniversalPrinter. It is an autocreated printer object that uses the Citrix UPD and is not tied to any specific printer defined on the client.
About this task
This section describes how to configure the Citrix UPD usage on your thin client.
Steps
1. Connect a printer to the ThinOS client.
2. From the desktop menu, click System Setup > Printer.
The Printer Setup dialog box is displayed.
Configuring the connection broker—Citrix 75

3. Enter the name of the printer in the Printer Name box.
4. Enter any string of the Printer identification in the Printer Identification box.
5. Select the type of the printer class from the drop-down list, select the check box to enable the printer device, and click OK.
NOTE: In ThinOS 9.0, only PS class is supported.
6. Start a Citrix Virtual Apps and Desktops application connection.
7. Open the Devices and Printers in the desktop or application. Notice that the printer is mapped as the UPD printer by default.
Next steps
To enable the printer server policies for Citrix UPD printer, see the Citrix documentation at docs.citrix.com.
76 Configuring the connection broker—Citrix

Configuring the thin client local settingsYou can configure the local settings on the device using the System Preferences, Display, Peripherals, and Printer Setup dialogboxes. Depending on user privilege level, some dialog boxes and options may not be available for use.
Configuring the system preferencesUse the System Preference dialog box to select the system preferences such as screen saver, time/date, and custom informationsettings.
Configure the general system preferences
About this task
This section describes how to configure the general system settings on your thin client.
Steps
1. From the desktop menu, click System Setup > System Preferences.The System Preferences dialog box is displayed.
2. Click the General tab, and do the following:
Figure 27. General tab
a) From the Screen Saver drop-down list, select a screensaver for your device. The default value is set to Turn Off Screen.b) In the Timer box, select the idle time after which you want the screensaver to be activated on the thin client. When the thin client
is left idle for the specified idle time, the screensaver is initiated. The default value is set to 10 minutes.c) From the Locale drop-down list, select a language to be activated for the user login-experience. The default language is set to
English.
NOTE: Locale changes the language for the user login-experience screens only that are displayed during boot-up
and login. The configuration or administrator screens remain unaltered.
Only the following messages are applicable for French locales:
• Username/Password/Domain• System Information
7
Configuring the thin client local settings 77

• Shut down the system, restart the system, reset the system setting to factory default• OK, Cancel• Initiating devices• Looking up IP address from DHCP, Note: Pressing CTRL-ESC keys cancel out of network check• Retry DHCP for an IP address• Waiting for network link. Verify that network cable is plugged into the back of the unit• Check Cable, No Ethernet link• Leave administrator mode• Connecting• Sign off from account• Lock Terminal, Unlock Password• Terminal is locked, Invalid unlock password
d) In the Terminal Name box, specify a name for the thin client. The default is a 14-character string that is composed of letters WTand followed by the Ethernet MAC address of the device.
NOTE: Some DHCP servers use the value that is entered in the Terminal Name to identify the IP address lease in
the DHCP manager display.
3. Click OK to save your settings.
Set the time and date
About this task
This section describes how to configure the time and date settings on your thin client.
Steps
1. From the desktop menu, click System Setup > System Preferences.The System Preferences dialog box is displayed.
2. Click the Time/Date tab, and do the following:
Figure 28. Time and date
a) From the Time Zone drop-down list, select a time zone where the thin client operates.b) From the Time Format drop-down list, select either 12-hour time format or 24-hour time format.c) From the Date Format drop-down list, select a date format to be used for date and time representation.d) In the Time Servers field, enter the IP addresses or host names of the time server with optional TCP port number.
78 Configuring the thin client local settings

Each entry with an optional port number is specified as Name-or-IP: port. If not specified, port 80 is used. When you areusing user profiles, locations can be supplied through user profiles. The time servers provide the thin client time based on thesettings of the time zone and daylight saving information. If DHCP is used, locations can be supplied through DHCP.
e) Click the Change Date and Time button to change date and time for secure environments.
3. Click OK to save your settings.
Set the custom information
About this task
This section describes how to set the custom information on your thin client.
Steps
1. From the desktop menu, click System Setup > System Preferences.The System Preferences dialog box is displayed.
Figure 29. Custom information
2. Click the Custom Info tab to enter configuration strings used by the Wyse Management Suite software. The configuration stringscan contain information about the location, user, administrator, and so on.
3. Click OK to save your settings.
The custom field information is transferred to the Windows registry. The information is then available to Wyse Management Suite.
Configuring power and sleep mode
About this task
NOTE: Power And Sleep tab is not available on Wyse 3040 Thin Client.
This section describes how to configure the power and sleep mode.
Steps
1. From the desktop menu, click System Setup > System Preferences.The System Preferences dialog box is displayed.
2. Click the Power And Sleep tab.
Configuring the thin client local settings 79

Figure 30. Power And Sleep
3. To set the power and sleep options when the thin client is on battery, change the following options in When on battery:
a. From the Power And Sleep drop-down list, select Power off or Sleep.b. From the Timer drop-down list, select the duration for the thin client to be idle to enter sleep mode or power off.c. From the When I close the lid drop-down list, select any of the following options to set the behavior of the thin client when the
lid is closed:
• Turn off the built-in display—Turns off only the built-in display.• Turn off the built-in and external displays—Turns off all the displays that are connected to the thin client.• Shut down device—shuts down the thin client
NOTE: Power And Sleep > When on battery options are only available in Wyse 5470 Thin Client.
4. To set the power and sleep options when the thin client is plugged in, change the following options in Power And Sleep > Whenplugged in:
80 Configuring the thin client local settings

a. From the Power And Sleep drop-down list, select Power off or Sleep.b. From the Timer drop-down list, select the duration for the thin client to be idle to enter sleep mode or power off.c. From the When I close the lid drop-down list, select any of the following options to set the behavior of the thin client when the
lid is closed:
• Turn off the built-in display—Turns off only the built-in display.• Turn off the built-in and external displays—Turns off all the displays that are connected to the thin client.• Shut down device—shuts down the thin client
NOTE: Power And Sleep > When plugged in > When I close the lid drop-down list is only available in Wyse 5470
Thin Client.
5. Click OK to save your settings.
Configure the display settingsAbout this task
This section provides information about how to configure the display settings for the connected displays.
NOTE: On Wyse 5470 Thin Client, the built-in display stays on by default.
Steps
1. From the desktop menu, click System Setup > Display.The Display Setup dialog box is displayed.
2. In the Display Setup dialog box, configure any of following options:
Figure 31. Display
• Select the Mirror mode check box to enable all connected displays to use the same display settings configured on the primarydisplay.
If you clear the Mirror mode check box, the Span Mode is enabled.
Configuring the thin client local settings 81

Blocks that are displayed on the screen represent the number of displays connected to the thin client. Each block represents asingle display screen.
Figure 32. Dual display setup
82 Configuring the thin client local settings

Figure 33. Mirror display setup
Every display contains a unique display order number and display configuration. You can move the blocks horizontally or verticallyand construct the multidisplay layout in mixed directions. To construct a new display layout, move the blocks to your preferredposition, and click Apply. A new display layout is created. However, when the block is moved to an incorrect position, the systemsets the block to its default position.
NOTE: The Wyse 5070 Extended thin client supports up to six monitors. The Wyse 5470 Thin Client supports up
to three simultaneous displays.
• Select the Make this my main screen check box to set the display as primary display or the main screen. After you set thedisplay as the main screen, the display block is selected with an underline, and the Make this my main screen option is disabledfor that display block. The Make this my main screen option is now available for other display blocks.
NOTE: The Make this my main screen option is effective only in Span Mode and always disabled in Mirror Mode.
• From the Orientation drop-down list, select an option to rotate the display screen in different directions.• From the Resolution drop-down list, select a supported display resolution.
Configuring the thin client local settings 83

NOTE: The default screen resolution on the Wyse 5470 Thin Client is 1366 x 768 or 1920 x 1080 depending on the
configuration. The default screen resolution on the Wyse 5470 All-in-One Thin Client is 1920 x 1080.
• In Mirror Mode, the resolution list is derived from the intersection of resolutions in all connected displays.• In Span Mode, select a display block and change its resolution.
3. Click Test.The new display settings are applied, and you can preview the modified display.
4. Click OK to confirm the new settings.
Use the Identify option to know the display order number of the connected displays.
Using the On-Screen Display (OSD)This section is applicable to Wyse 5470 All-in-One thin client.
Use the On-Screen Display (OSD) buttons on the right of the device to adjust the luminance of the backlight. Minimum is 1 and maximumis 100.
• Press and hold the first button from the top to increase brightness.• Press and hold the second button from the top to decrease brightness.• Press the third button from the top to turn off or turn on the screen.
Port preferences on the Wyse 5470 Thin Client• HDMI, DisplayPort over USB Type-C, and USB Type-C ports are prioritized over the VGA port.• When a USB Type-C display is present, there is no display on the VGA port.• If a VGA display is present, a third display that is connected is prioritized and the VGA display is turned off.• If a VGA display is not present, a third display that is connected is ignored, or a blank screen is displayed on the third screen.
Vertical SynchronizationVertical Synchronization or V-Sync enables the ThinOS client to synchronize the frame rate of a video with the monitor refresh rate toavoid screen tearing. Screen tearing occurs when the graphic processor delivers display frames more than your monitor can process. As aresult, the image appears to be cut in half. Enabling VSync synchronizes the output video of the graphics card to the refresh rate of themonitor. V-Sync is enabled by default on ThinOS.
Configuring the peripherals settingsUse the Peripherals dialog box to configure the settings for the keyboard, mouse, audio, serial, camera, and Bluetooth.
Configure the keyboard settings
About this task
This section describes how to configure the keyboard settings on your thin client.
Steps
1. From the desktop menu, click System Setup > Peripherals.The Peripherals dialog box is displayed.
2. Click the Keyboard tab, and do the following:
84 Configuring the thin client local settings

Figure 34. Keyboard
a) From the Keyboard Layout drop-down list, select a keyboard layout. The default layout is set to English (United States).b) From the Delay before Repeat drop-down list, select the time for Repeat Delay. The time specifies the pause between pressing
the key on the keyboard and when the key starts repeating itself.c) Click any of the following options to set the Repeat Rate:
• Slow• Normal• Fast
Repeat Rate specifies the speed at which the key repeats itself after you press and hold down a key on the keyboard.d) Click any of the following options to set the Numlock status:
• None• On• Off
Numlock specifies whether the Numlock key on the keyboard must be turned on or turned off when you boot the terminal.e) In the Disabled keys field, enter the keys on the keyboard that must be disabled. Use a comma to separate multiple entries.
3. Click OK to save your settings.
Function key combinationsThe Wyse 5470 Thin Client supports the following Function (Fn) key combinations:
Table 18. Fn key combinations
Key ThinOS Local ICA session
Fn + Esc Fn lock/unlock Fn lock/unlock
Fn + F1 Mute Mute
Fn + F2 Volume down Volume down
Fn + F3 Volume up Volume up
Fn + F4 Not applicable—session only Not supported
Fn + F5 Not applicable—session only Not supported
Fn + F6 Not applicable—session only Not supported
Fn + F7 Not applicable Not applicable
Fn + F8 Not supported Not applicable—ThinOS local only
Fn + F9 Opens the ThinOS local displaysettings window
Not supported
Configuring the thin client local settings 85

Key ThinOS Local ICA session
Fn + F10 Keyboard light Not applicable—ThinOS local only
Fn + F11 Screen dimming Not applicable—ThinOS local only
Fn + F12 Screen lighting Not applicable—ThinOS local only
Fn + Ctrl Right-click mouse Not supported
Fn + PrtScr Disable wireless device Not applicable—ThinOS local only
Fn + Right arrow Not applicable—session only Go to the end of the page
Fn + Left arrow Not applicable—session only Go to the home page
Fn + Up arrow Not applicable—session only Page up
Fn + Down arrow Not applicable—session only Page down
Fn + Insert Sleep mode Not applicable - ThinOS local only
Configure the mouse settings
About this task
This section describes how to configure the mouse settings on your thin client.
Steps
1. From the desktop menu, click System Setup > Peripherals.The Peripherals dialog box is displayed.
2. Click the Mouse tab, and do the following:
Figure 35. Mouse
a) To increase or decrease the mouse speed, move the Mouse Speed slider either to the right or left.b) From the Pointer size drop-down list, select a value to increase the size of the local mouse pointer. Restart the computer for the
change in pointer size to take effect.c) Select the Swap left and right mouse buttons check box if you want to swap the mouse buttons for left-handed operations.d) Select the Reverse mouse wheel scroll direction check box if you want to invert the direction of the mouse scroll wheel.e) Select the Disable trackpad check box if you want to disable the touchpad on the device. This option is applicable only to the
Wyse 5470 Thin Client.f) Select the Disable trackpad while typing check box if you want to disable the touchpad while typing using the integrated
keyboard. This option is applicable only to the Wyse 5470 Thin Client.
3. Click OK to save your settings.
86 Configuring the thin client local settings

Touchpad gesturesThis section is applicable to the Wyse 5470 Thin Client.
The touchpad on the Wyse 5470 Thin Client contains two buttons for the right and left mouse-clicks. The following table lists thesupported touchpad gestures on the Wyse 5470 Thin Client:
Table 19. Touchpad gestures
Touchpad gesture Additional information
Moving the mousecursor
Moving with one finger, the entire touchpad including the area with the buttons can be used for the mouse cursormovement.
NOTE: The sensitivity of the cursor movement on the area with the buttons is slower compared tothe other areas. This design is for the stability of the buttons.
Left-click • Tapping with one finger anywhere on the touchpad works as the mouse left-click.• Pressing the left button on the touchpad works as the mouse left-click.
Right-click • Tapping with two fingers anywhere on the touchpad works as the mouse right-click.• Pressing the right button on the touchpad as the mouse right-click.
Double-click • Tapping with two fingers anywhere on the touchpad works as the mouse double-click.• Pressing the left button twice on the touchpad works as mouse double-click.
Moving windows • Press and hold the left button, and move the window by dragging a second finger on the touchpad.• Dragging a window by tapping twice on the touchpad with one finger.
Zoom Placing two fingers on the touchpad and pinching or stretching out—Not supported.
Scroll Tapping two fingers and moving up or down.
Configure the audio settings
About this task
This section describes how to configure the audio settings on your thin client:
Steps
1. From the desktop menu, click System Setup > Peripherals.The Peripherals dialog box is displayed.
2. Click the Audio tab, and do the following:
Configuring the thin client local settings 87

Figure 36. Audio
a) From the Playback Devices drop-down list, select the type of the audio device.
• Move the slider either to the right or left to control the volume settings for playback devices.• Select the Mute check box to mute the audio.• Select the Speaker check box to enable the onboard speaker.
b) From the Recorded Devices drop-down list, select the type of the record device.
• Move the slider either to the right or left to control the volume settings for record devices.• Select the Mute check box to mute the audio.
c) Use the Recorder tab to collect information about the speaker and microphone being used. You can examine the performance ofthe speaker and microphone being used.
3. Click OK to save your changes.
PulseAudioPulseAudio is a sound server that runs on ThinOS to deliver audio and manage audio devices. PulseAudio supports multiple audio deviceswhen using real-time audio applications in ICA sessions.
NOTE: You cannot disable the PulseAudio feature on your ThinOS client.
Configure the serial settings
About this task
This section describes how to configure the serial settings on your thin client.
Steps
1. From the desktop menu, click System Setup > Peripherals.The Peripherals dialog box is displayed.
2. Click the Serial tab and do the following:
88 Configuring the thin client local settings

Figure 37. Serial
a) Click any of the Select Port options to select a COM port. The default port is set to COM 1.b) From the Baud Rate drop-down list, select the Baud Rate. The Baud rate specifies the number of signal changes that occur per
second. The default value is 9600.c) Click any of the Parity options to set the parity property for the serial port connection.d) Click any of the Stop options to set the stop bits for the serial port connection. The default value is 1.e) Click any of the Size options to set the character size for the serial port connection. The default value is 8.f) Click any of the Flow Control options to set the flow control of bytes in the serial port connection.
3. Click OK to save your settings.
Configure the camera device
About this task
This section describes how to enable the camera that is connected to your thin client.
Steps
1. From the desktop menu, click System Setup > Peripherals.The Peripherals dialog box is displayed.
2. Click the Camera tab.
Configuring the thin client local settings 89

Figure 38. Camera
3. From the Device drop-down list, select a camera device that is connected to your thin client.
4. Click Preview.The camera is turned on and you can see yourself or whatever the camera is pointed at.
5. Click Stop to stop the camera preview.
6. Click OK to save your settings.
For Wyse 5470 and Wyse 5470 All-in-One thin clients, it is recommended to use a camera such as Logitech C930e that supportshardware encoding. The integrated camera on the thin clients does not support hardware encoding, so the performance is limited asfollows:
• On the Wyse 5470 Thin Client with RTME-enabled, the camera performance on Skype for Business is limited to a maximumresolution of 640 x 360 using HD configuration, 960 x 540 using Full HD configuration, and 1280 x 720 if Logitech C930e camera isused.
• On the Wyse 5470 All-in-One Thin Client with RTME-enabled, the camera performance on Skype for Business is limited to amaximum resolution of 960 x 540, and 1280 x 720 if Logitech C930e camera is used.
• On a JVDI-enabled client, the CPU usage of the integrated camera is 10% higher than the CPU usage of Logitech C930e camera.The difference in the CPU usage is observed while video calling on Cisco Jabber in the ICA session.
Configure the Bluetooth settings
About this task
This section describes how to configure the Bluetooth settings on your thin client.
Steps
1. From the desktop menu, click System Setup > Peripherals.The Peripherals dialog box is displayed.
2. Click the Bluetooth tab.
90 Configuring the thin client local settings

Figure 39. Bluetooth
Bluetooth-enabled devices such as headsets and mouses that are available in the thin client environment are listed on the Bluetoothpage. The following attributes are displayed in the list:
• Name—Specifies the name of the Bluetooth-enabled device.• Type—Specifies the type of the Bluetooth-enabled devices, such as headsets, mouses, and keyboards.
ThinOS supports Human Interface Devices (HID) devices. HID includes mouse and keyboard. The maximum number of HIDs thatcan be connected is seven.
NOTE: ThinOS supports Bluetooth headsets, but only one headset can be connected. Call level audio quality on
headsets is supported. However, multimedia is not supported. Other types of Bluetooth devices are not scanned
and supported.
• Status—The Bluetooth page has two columns, namely, Status and Paired.
Table 20. Bluetooth status
Attribute Value Summary
Status Connected The Bluetooth device is connected to the ThinOS device. It is ready tobe used.
Connecting The Bluetooth device is connecting to the ThinOS device.
Disconnected The Bluetooth device is not connected to the ThinOS device.
Paired Yes The Bluetooth device is paired with the ThinOS device.
No The Bluetooth device is not paired with the ThinOS device.
• Address—Displays the address of the Bluetooth device that is connected to your thin client.
The following are the user scenarios and corresponding Bluetooth statuses that are displayed on the Bluetooth page:
Table 21. User scenarios
User scenario Status
Device turned off Disconnected | Paired
Device turned on Connected | Paired
Device disconnected from ThinOS Disconnected | Not Paired
3. Select a Bluetooth device that is not connected, and click Connect. If the Bluetooth device is connected successfully, the status isdisplayed as Connected in the Bluetooth window. The following are the functions that are available:
Configuring the thin client local settings 91

• Scan—All Bluetooth devices enter into Page Scan mode. Different Bluetooth devices enter into the Page Scan mode at differentinstances such as when a specific button is pressed three times or a specific button is pressed and held until the LED turns blue.
• Connect—Select a particular Bluetooth enabled device, and click Connect to connect the selected device to the thin client. Ifthe Bluetooth device is connected successfully, the status is displayed as Connected in the Bluetooth window.
• Remove—Select a particular Bluetooth device, and click Remove to disconnect and remove the device from the list.• Auto Connect function—The Auto Connect function is designed for HIDs.
• ThinOS has no HIDs connected such as USB or Bluetooth HIDs.• The Bluetooth HIDs are configured as Page Scan mode.
When you start the ThinOS client, the Bluetooth HIDs can connect to ThinOS automatically without scanning or pairing operations.The Bluetooth HIDs automatically reconnect after you restart the ThinOS client.
• Reconnect function—The Reconnect function is designed for HIDs and headsets.
When you restart the system with the Bluetooth device (HID/headset) that is already paired and connected, the Bluetooth deviceautomatically reconnects within a few seconds.
For example, you can hover the Bluetooth mouse, and then click a few times for the Bluetooth mouse to reconnect successfully.The Bluetooth headset reconnects automatically, but might require you to manually close or reopen the device on certainoccasions.
4. Click OK to save your settings.
Secure Digital cardsYou can plug in a Secure Digital (SD) card into the Wyse 5470 Thin Client and import a certificate file to the thin client. The SD card worksas a storage device.
Configuring the printer settingsUse the Printer Setup dialog box to configure network printers and local printers that are connected to the thin client. Through its USBports, a thin client can support multiple printers. If more than one printer is to be used and another port is not available on your thin clientand the port that is to be used must be shared with a USB modem converter, connect a USB hub to the port.
Configure the ports settings
About this task
This section describes how to configure the port settings on your thin client:
Steps
1. From the desktop menu, click System Setup > Printer.The Printer Setup dialog box is displayed.
2. Click the Ports tab, and do the following:
92 Configuring the thin client local settings

Figure 40. Ports
a) Select Port—Select a port from the drop-down list. Selecting LPT1 or LPT2 sets the connection to a direct-connected USBprinter.
b) Printer Name—(Required) Enter the name of the printer.c) Printer Identification—(Required) Enter the type or model of the printer in the exact text of the Windows printer driver name
—including capitalizations and spaces.
Printer mapping in a Citrix session on ThinOS uses Citrix UPD (Universal Printer Driver). You can enter any string in the PrinterIdentification field. If not specified, the default name is set to Generic/Text Only.
d) Printer Class—Select the printer class from the drop-down list as PS.e) Enable the printer device—Select this option to enable the directly-connected printer. It enables the device to be displayed on
the remote host.
3. Click OK to save your settings.
Configure the LPDs settings
About this task
This section describes how to configure the LPD settings on your thin client.
Steps
1. From the desktop menu, click System Setup > Printer.The Printer Setup dialog box is displayed.
2. Click the LPDs tab, and do the following when printing to a non-Windows network printer:
Configuring the thin client local settings 93

Figure 41. LPD
NOTE: Be sure to check with your vendor that the printer can accept Line Printer Request print requests.
a) Select LPD—Select the LPD port from the drop-down list.b) Printer Name —Enter the name of the printer. If you do not specify a printer name, the LPD queue name is used automatically.c) Printer Identification—(Required) Enter the type or model of the printer in the exact text of the Windows printer driver name
—including capitalizations and spaces.
Printer mapping in a Citrix session on ThinOS uses Citrix UPD (Universal Printer Driver). You can enter any string in the PrinterIdentification field.
d) LPD Hosts—(Required) The DNS or WINS name of the server for the network printer. An IP address of the printer on thenetwork can also be entered.
e) LPD Queue Name—(Required) An LPD host maintains a named queue for each supported printer. Enter the name of the queueassociated with the printer to be used.
This name can be different for each vendor. This field is required and must be correct so that the network printer acceptsincoming print jobs properly.
f) Printer Class—Select the printer class from the drop-down list as PS.g) Enable the printer device—Must be selected to enable the printer. It enables the device to be displayed on the remote host.
3. Click OK to save your settings.
Configure the SMBs settings
About this task
This section describes how to configure the SMB settings on your thin client.
Steps
1. From the desktop menu, click System Setup > Printer.The Printer Setup dialog box is displayed.
2. Click the SMBs tab, and do the following when printing to a Windows network printer:
94 Configuring the thin client local settings

Figure 42. SMB
a) Select SMB—Select the SMB port from the drop-down list.b) Printer Name—Enter the name of the printer. If you do not specify a printer name, the SMB shared printer name is used
automatically.c) Printer Identification—(Required) Enter the type or model of the printer in the exact text of the Windows printer driver name
—including capitalizations and spaces.
Printer mapping in a Citrix session on ThinOS uses Citrix UPD (Universal Printer Driver). You can enter any string in the PrinterIdentification field.
d) \\Host\Printer—(Required) Enter the IP address, computer name, or FQDN of the host and specify the shared name of theprinter. After you specify the values and move the cursor, the SMB credentials dialog box is displayed which prompts you to enterthe host username, password, and the domain name.
NOTE: If the host has not joined any domain, input WORKGROUP.
e) Printer Class —Select the printer class from the drop-down list as PS.f) Enable the printer device—Must be selected to enable the printer. It enables the device to be displayed on the remote host.
3. Click OK to save your settings.
Using the printer setup options
About this task
This section describes how to configure the printer setup options.
Steps
1. From the desktop menu, click System Setup > Printer.The Printer Setup dialog box is displayed.
2. Click the Options tab, and select a printer from the Default Printer drop-down list.
Configuring the thin client local settings 95
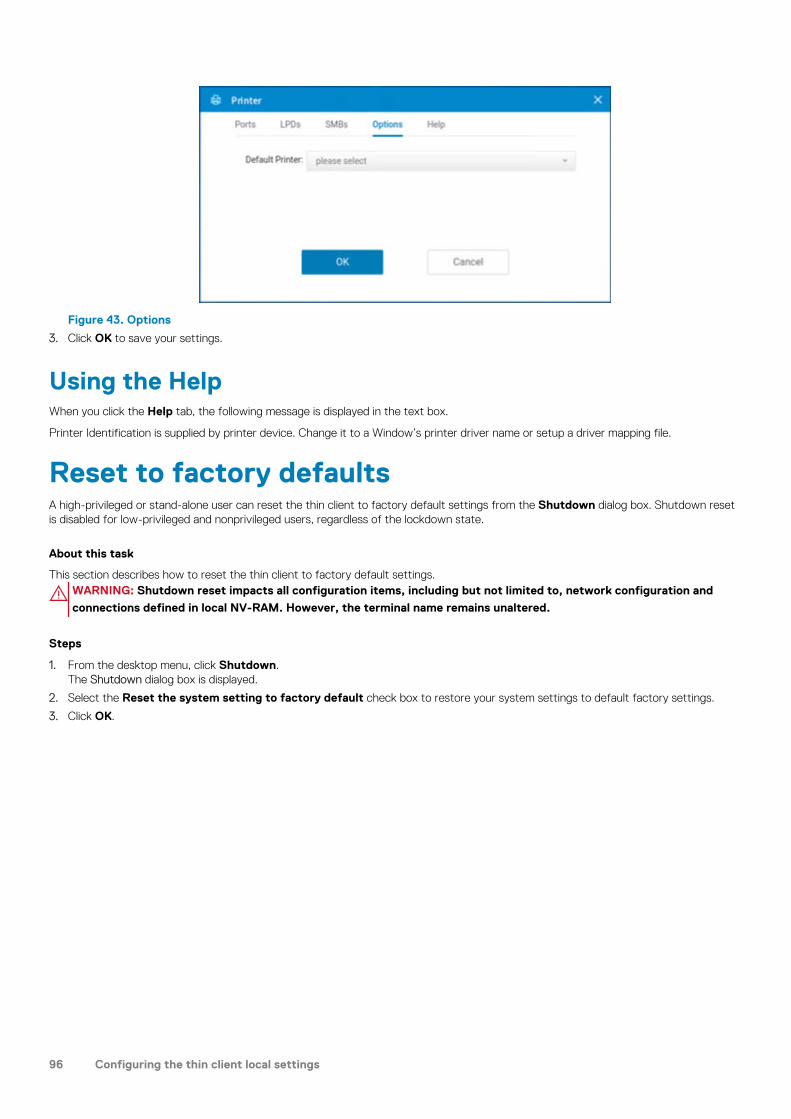
Figure 43. Options
3. Click OK to save your settings.
Using the HelpWhen you click the Help tab, the following message is displayed in the text box.
Printer Identification is supplied by printer device. Change it to a Window’s printer driver name or setup a driver mapping file.
Reset to factory defaultsA high-privileged or stand-alone user can reset the thin client to factory default settings from the Shutdown dialog box. Shutdown resetis disabled for low-privileged and nonprivileged users, regardless of the lockdown state.
About this task
This section describes how to reset the thin client to factory default settings.WARNING: Shutdown reset impacts all configuration items, including but not limited to, network configuration and
connections defined in local NV-RAM. However, the terminal name remains unaltered.
Steps
1. From the desktop menu, click Shutdown.The Shutdown dialog box is displayed.
2. Select the Reset the system setting to factory default check box to restore your system settings to default factory settings.
3. Click OK.
96 Configuring the thin client local settings

Using the system toolsUse the System Tools option to view all the connected devices, installed packages, and imported certificates into the ThinOS client.
About this task
This section describes how to access the system tools on your thin client.
Steps
1. From the desktop menu, click System Tools.The System Tools dialog box is displayed.
2. Click the Devices tab to view all the locally attached devices, including USB, on applicable platforms. The details about the displaysconnected to the thin client are also displayed.
Figure 44. Devices
3. Click the Certificates tab to view the list of certificates that are imported to the thin client.
8
Using the system tools 97

Figure 45. Certificates
• Use the Enable/Disable FIPS slide switch to enable or disable the Federal Information Processing Standard (FIPS) Publication140-2 authentication compliance.
• From the Import From drop-down list, select USB Storage, and click Import. Browse and select the appropriate certificate thatis stored in the USB drive.
• Select a certificate from the list, and click View Certificate to details such as version, validity, and serial number. You can alsoview the certificate path and certificate status.
• To manually request a certificate for your client, Click Request Certificate, provide the required details, and then click RequestCertificate again.
4. Click the Packages tab to view the list of ThinOS packages installed on the thin client.
Figure 46. Packages
• To delete a single package, select the package and click Delete.
98 Using the system tools

• To delete all the packages, click Delete all.
The following package is displayed on the Package tab:
• Citrix package—This package is introduced to support Citrix Workspace app and RealTime Media Engine. You can see additionaldetails such as the versions and the name of the package by double-clicking the Citrix package.
• JVDI package—The package is introduced to support Cisco Jabber.
NOTE: In every ThinOS release, the packages may be updated to the latest version.
5. Click OK to save your settings.
Simplified Certificate Enrollment ProtocolSimplified Certificate Enrollment Protocol (SCEP) was used in a closed network where all end-points are trusted. The goal of SCEP is tosupport the secure issuance of certificates to network devices in a scalable manner. Within an enterprise domain, it enables networkdevices that do not run with domain credentials to enroll for certificates from a Certification Authority (CA).
At the end of the transactions that are defined in this protocol, the network device has a private key and associated certificate that isissued by a CA. Applications on the device may use the key and its associated certificate to interact with other entities on the network.The most common usage of this certificate on a network device is to authenticate the device in an IPSec session.
ThinOS is treated as a network device. The functionality of ThinOS SCEP includes manual certificate request, automatic certificaterequest, and automatic renewal of certificate.
Requesting certificate manually
About this task
To request the certificate manually, do the following:
Steps
1. Go to System Tools > Certificates > Request Certificate. ste
The Request Certificate dialog box is displayed.
Using the system tools 99

Figure 47. Request Certificate
2. Enter the appropriate values in the Request Certificate dialog box, and then click the Request Certificate button.The certificate request is sent to the server, and the client receives the response from server and installs both CA certificate and clientcertificate.
3. Click Ok to save your changes.
The CA Certificate Hash type currently supports MD5, SHA1, and SHA256. The request server URL can be an HTTP or HTTPs link.You can add the protocol prefix before the URL.
100 Using the system tools

Trusted Platform Module version 2.0Wyse 5070, Wyse 5470, and Wyse 5470 All-in-One thin clients support disk encryption and decryption through Trusted Platform Module(TPM) version 2.0. If the key in TPM does not match the current build, the ThinOS will reset to factory settings.
The following SSL/TLS ciphers are supported:
• TLS1.2_ECDHE_RSA_WITH_AES_256_GCM_SHA384• TLS1.2_ECDHE_RSA_WITH_AES_128_GCM_SHA256• TLS1.3_AES256_GCM_SHA384• TLS1.3_AES128_GCM_SHA256
Using the system tools 101

Using Wyse Management Suite
Functional areas of Wyse Management SuiteconsoleThe Wyse Management Suite console is organized into the following functional areas:
About this task
• The Dashboard page provides information about the current status on each functional area of the system.• The Groups & Configs page employs a hierarchical group policy management for device configuration. Optionally, subgroups of the
global group policy can be created to categorize devices according to corporate standards. For example, devices may be groupedbased on job function, device type, and so on.
• The Users page enables local users and users imported from the Active Directory to be assigned global administrator, groupadministrator, and viewer roles to log in to Wyse Management Suite. Users are given permissions to perform operations based on theroles assigned to them.
• The Devices page enables you to view and manage devices, device types, and device-specific configurations.• The Apps & Data page provides management of device applications, operating system images, policies, certificate files, logos, and
wallpaper images.• The Rules page enables you to add, edit, and enable or disable rules such as auto grouping and alert notifications.• The Jobs page enables you to create jobs for tasks such as reboot, WOL, and application or image policy that need to be deployed on
registered devices.• The Events page enables you to view and audit system events and alerts.• The Portal Administration page enables you to configure various system settings such as local repository configuration, license
subscription and more.
Managing groups and configurationsThe Groups & Configs page enables you to define policies that are required to configure your devices. You can create sub groups of theglobal group policies and categorize devices based on your requirements. For example, devices may be grouped based on job functions,device type, and so on.
By default, the Default Device Policy Group is present on the Groups & Configs page.
NOTE: You cannot delete the default policy groups.
Devices inherit policies in the order that they are created. The settings that are configured in a default policy group are applied as defaultsettings in all the policies listed in the default policy group. In a group, all devices present in that group have default policy group as theirdefault settings.
Create a default device policy groupYou can create groups for the global device group policies and categorize devices based on your requirements.
Steps
1. On the Groups & Configs page, click the Default Device Policy Group option.
2. Click .
3. In the Add New Group dialog box, enter the Group Name and Description.
NOTE: Select the This is a ThinOS Select group parent option to create a parent select group for ThinOS devices.
For more information, see Create a ThinOS Select group.
4. In the Registration tab, select the Enabled check box under Group Token.
9
102 Using Wyse Management Suite

5. Enter the group token.
6. In the Administration tab, you can select the name of group administrators who are tasked with managing this group. From theAvailable Group Admins box, select the particular group and click the right arrow to move it to the Assigned Group Admins box.To move one group from the Assigned Group Admins to Available Group Admins, do the reverse. This step is optional.
7. Click Save.
The group is added to the list of available groups on the Groups & Configs page.
NOTE: The devices can be registered to a group by entering the group token which is available in the Groups and
Configs page for the respective group.
Create a ThinOS Select group
Steps
1. On the Groups & Configs page, click the Default Policy Group option.
2. Click .
3. In the Add New Group dialog box, enter the Group Name and Description.
4. Select the This is a ThinOS Select group parent option.
5. Select the name of the group administrators who are tasked with managing this group. From the Available Group Admins box, selectthe particular group and click the right arrow to move it to the Assigned Group Admins box. To move one group from the AssignedGroup Admins to Available Group Admins, do the reverse. This step is optional.
6. Click Save.
The group is added to the list of available groups on the Groups & Configs page.
To add sub groups to the created parent group, click the parent group on the Groups & Configs page, and follow the steps that arementioned in Create device policy group.
NOTE: The parent select group can have 10 child select group and you can register the devices to child select group.
NOTE: Profiles can be configured for other operating systems. The created profiles are the same as other custom
groups.
Edit a ThinOS select group
Steps
1. Go to the Groups & Configs page and click the ThinOS select group that you want to edit.
2. Click .
3. In the Editing Default Policy group dialog box, edit the group information such as Group Name and Description.
4. In the Administration tab, you can select the name of group administrators who are tasked with managing this group. From theAvailable Group Admins box, select the particular group and click the right arrow to move it to the Assigned Group Admins box.To move one group from the Assigned Group Admins to Available Group Admins, do the reverse. This step is optional.
5. Click Save.
Edit Default Policy group
Steps
1. Go to the Groups & Configs page and select the default policy group.
2. Click .
3. In the Editing Default Policy group dialog box, edit the group information such as Group Name and Description.
4. On the Registration tab, edit the group token.
NOTE: The devices can be registered to a group by entering the group token which is available on the device
registration screen.
5. Click Save.
Using Wyse Management Suite 103

Edit an unmanaged groupDevices that belong to the unmanaged group do not use licenses or receive configuration or application-based policies. To add devices toan unmanaged group, use the unmanaged group device registration key as part of auto registration or manual device registration.
Steps
1. On the Groups & Configs page, select Unmanaged Group.
2. Click .The Editing Unmanaged Group page is displayed. The Group Name displays the name of the group.
3. Edit the following details:
• Description—Displays a brief description of the group.• Group Token—Select this option to enable the group token.
4. Click Save.
NOTE: For a public cloud, the group token for an unmanaged group must be enabled to register devices. For a private
cloud, the group token for an unmanaged group is automatically enabled.
Remove a groupAs an administrator, you can remove a group from the group hierarchy.
Steps
1. In the Groups & Configs page, select the group that you want to delete.
2. Click .A warning message indicating that this action removes one or more groups from the group tree hierarchy is displayed.
3. From the drop-down list, select a new group for devices in the current group.
4. Click Remove Group.
NOTE: When you remove a group from the group hierarchy, all devices that belong to the deleted group are moved to
a selected group.
Edit the ThinOS 9.x policy settingsPrerequisites
• Create a group with a group token for the devices you want to push the application package.• Register the thin client to Wyse Management Suite.
Steps
1. Go to the Groups & Configs page, and select a group.
2. From the Edit Policies drop-down menu, click ThinOS 9.x.The Configuration Control | ThinOS window is displayed.
3. Click the Advanced option.
104 Using Wyse Management Suite

Figure 48. Advanced option
4. Select the options that you want to configure.
5. In the respective fields, click the option that you want to configure.
6. Configure the options as required.
7. Click Save & Publish.
NOTE: After you click Save & Publish, the configured settings are also displayed in the Standard tab.
Managing devicesThe Device page enables you tp perform a routine device management task by using the management console. To locate the inventory ofthe devices, click the Devices tab. You can view a subset of the devices by using various filter criteria, such as groups or subgroups,device type, operating system type, status, subnet, platform, or time zone.
You can sort the device list based on the following:
• Type• Platform• Operating system version• Serial number• IP address• Last user details• Group details• Last check-in time• Registration status• Write filter status
To view the Device Details page of a particular device, click the device entry that is listed on the page. All the configuration parameters ofthe device and the group level at which each parameter is applied are displayed on the Device Details page.
You can set the configuration parameter that is specific to the device.
NOTE: Parameters that are configured in this section override any parameters that were configured at the groups
and/or at the global level.
Using Wyse Management Suite 105

Search a device using filters on the Devices page
About this task
To search a device using filters on the Devices page , do the following:
Steps
1. Go to the Devices page.
2. From the Configuration Groups drop-down list, select either the default policy group or the groups which are added by anadministrator.
3. From the Status drop-down list, select any one of the following options:
• Registration
• Registered• Pre-registered• Not Registered• Compliant• Pending• Non-Compliant
• Online Status
• Online• Offline• Unknown
• Others
• Recently Added
4. From the OS Type drop-down list, select ThinOS.
5. From the OS Subtype drop-down list, select a subtype for your operating system.
6. From the Platform drop-down list, select a platform.
7. From the OS Version drop-down list, select an OS version.
8. From the Agent Version drop-down list, select an agent version.
9. From the Subnet/Prefix drop-down list, select a subnet.
10. From the Timezone drop-down list, select the time zone.
11. From the Device Tag drop-down list, select the device tag.
12. Click Save to save the current filter.The Save Current Filter dialog box is displayed.
13. Enter the name and description for the filter.
14. Select the check box to set the current filter as the default option.
15. Click Save Filter.
Managing JobsThe Jobs page enables you to schedule and manage jobs in the management console.
In this page you can see jobs based on the following filtering options:
• Configuration Groups—From the drop-down menu, select the configuration group type.• Scheduled by—From the drop-down menu, select a scheduler who performs the scheduling activity. The available options are:
• Admin
• App Policy• Image Policy• Device Commands
• System
• Publish Group Configuration• Others
106 Using Wyse Management Suite

• OS Type—From the drop-down menu, select the operating system.• Status—From the drop-down menu, select the status of the job. The available options are:
• Scheduled• Running/In Progress• Completed• Canceled• Failed
• Detail Status—From the drop-down menu, select the status in detail. The available options are:
• 1 or more failed• 1 or more pending• 1 or more In progress• 1 or more canceled• 1 or more completed
• More Actions—From the drop-down menu, select the Sync BIOS Admin Password option. The Sync BIOS Admin Password Jobwindow is displayed.
Schedule a device command job
Steps
1. On the Jobs page, click Schedule device command job.The Device Command Job screen is displayed.
2. From the Command drop-down list, select a command. The available options are:
• Restart• Wake on LAN• Shutdown• Query
The device command is a recurring job. On selected days of the week and at a specific time the commands are sent to the selecteddevices.
3. From the drop-down list, select the type of operating system.
4. Enter the name of the job.
5. From the drop-down list, select a group name.
6. Enter the job description.
7. From the drop-down list, select the date or time.
8. Enter/select the following details:
• Effective— Enter the starting and ending date.• Start between—Enter the starting and ending time.• On day(s)—Select the days of the week.
9. Click the Preview option to view the details of the scheduled job.
10. On the next page, click the Schedule option to initiate the job.
Managing rulesThe Rules page enables you to add and manage the rules in the Wyse Management Suite console. The following filtering options areprovided:
• Registration• Unmanaged Device Auto Assignment• Alert Notification
Using Wyse Management Suite 107

Editing a registration rule
About this task
Configure the rules for unmanaged devices by using the Registration option. To edit a registration rule, do the following:
Steps
1. Go to the Rules page.
2. Click Registration and select the unmanaged devices option.
3. Click Edit Rule.The Edit Rule window is displayed.
You can view the following details:
• Rule• Description• Device Target• Group
4. From the drop-down menu, select a target client to apply the Notification Target option and the time duration to apply theNotification Frequency option.
NOTE: The notification frequency can be configured for every 4 hours, every 12 hours, daily, or weekly basis to the
target device.
5. Enter the number of days until you want to apply the rule in the Apply rule after (1–30 days) box.
NOTE: By default, registration of an unmanaged devices are unregistered after 30 days.
6. Click Save.
Create unmanaged device auto assignment rules
About this task
To create rules for the unmanaged device auto assignment, do the following:
Steps
1. Click the Rules tab.
2. Select the Unmanaged Device Auto Assignment option.
3. Click the Add Rules tab.
4. Enter the Name, and select the Destination group.
5. Click the Add Condition option, and select the conditions for assigned rules.
6. Click Save.
The rule is displayed in the unmanaged group list. This rule is applied automatically, and the device is listed in the destination group.
NOTE:
• If a select group is set as the Destination Group, the condition Assign device to the destination group is not
available.
• If a select group is set as the Destination Group, the condition Create a group under the destination group for
each unique value is not available.
Edit an unmanaged device auto assignment rule
Steps
1. Click the Rules tab.
2. Select the Unmanaged Device Auto Assignment option.
108 Using Wyse Management Suite

3. Select the rule and click the Edit option.
4. Enter the Name and select the Destination group.
5. Click the Add Condition option and select the conditions for assigned rules.
6. Click Save.
Disable or delete a rule
Steps
1. Click the Rules tab.
2. Select the Unmanaged Device Auto Assignment option.
3. Select a rule and click the Disable Rule option.The selected rule is disabled.
4. Select the disabled rule and click the Delete Disabled Rule(s) option.The rule is deleted.
Save the rule order
Steps
1. Click the Rules tab.
2. Select the Unmanaged Device Auto Assignment option.
3. Select the rule which you want to move and then move it to the top order.
4. Click Save Rule Order.
Create a rule for alert notification
About this task
To create a rule for alert notification, do the following:
Steps
1. Click the Rules tab.
2. Select the Alert Notification option.
3. Click Add Rule.An Add Rule window is displayed.
4. From the Rule drop-down list, select a rule.
5. Enter the Description.
6. From the Group drop-down list, select the preferred option.
7. From the drop-down menu, select a target device to apply Notification Target and the time duration to apply NotificationFrequency.
8. Click Save.
Edit an alert notification rule
Steps
1. Click the Rules tab.
2. Select the Alert Notification option.
3. Click Edit Rule.An Edit Rule window is displayed.
4. From the Rule drop-down list, select a rule.
Using Wyse Management Suite 109

5. Enter the Description.
6. From the Groups drop-down list, select a group.
7. From the drop-down list, select a target device to apply Notification Target and the time duration to apply NotificationFrequency.
8. Click Save.
Managing EventsThe Events page enables you to view all events and alerts in the management system using the management console. It also providesinstructions on viewing an audit of events and alerts for system auditing purposes.
A summary of events and alerts is used to obtain an easy-to-read daily summary of what has happened in the system. The Audit windowarranges the information into a typical audit log-view. You can view the timestamp, event type, source, and description of each event inthe order of time.
Search an event or alert using filters
Steps
1. Click Events.The Events page is displayed.
2. From the Configuration Groups drop-down menu, select either the default policy group or the groups which are added by anadministrator.
3. From the Events or Alerts drop-down menu, select any one of the following options:
• Events• Current Alerts• Alert History
4. From the Timeframe drop-down menu, select any one of the following operating systems:
This option enables you to view the events which occurred in a particular timeframe. The available options in the drop-down menu are:
• Today• Yesterday• This Week• Custom
5. From the Event Type drop-down menu, select the operating system.
All the events are classified under particular groups. The available options in the drop-down menu are:
• Access• Registration• Configuration• Remote Commands• Management• Compliance
Managing usersThe Users page enables you to perform a routine user management task in the management console. The following are the two types ofusers:
• Administrators—Wyse Management Suite administrator can be assigned the role of a global administrator, group administrator, orviewer.
• A Global Administrator has access to all the Wyse Management Suite functions.• A Group Administrator has access to all assets and functions for specific groups that are assigned to them.• A viewer has read-only access to all the data and can be assigned permissions to trigger the specific real-time commands, such as
shutdown and restart.
If you select administrator, you can perform any of the following actions:
• Add Admin
110 Using Wyse Management Suite

• Edit Admin• Activate Admin (s)• Deactivate Admin (s)• Delete Admin (s)• Unlock Admin (s)
• Unassigned Admins—Users imported from the AD server are displayed on the Unassigned admins page. You can later assign a roleto these users from the portal.
For better and faster management of users, select the users of your choice based on the available filter options. If you selectUnmanaged Users, you can perform any of the following actions:
• Edit User• Activate User (s)• Deactivate User (s)• Delete User (s)
NOTE: To import users from the .CSV file, click Bulk Import.
Add a new admin profile
Steps
1. Go to the Users page.
2. Click Administrator (s).
3. Click Add Admin.The New Admin User window is displayed.
4. Enter your email ID and username in the respective fields.
5. Select the check box to use the same username as mentioned in the email.
6. Do one of the following:
• If you click the Personal Information tab, enter the following details:
• First name• Last name• Title• Mobile phone number
• If you click the Roles tab, enter the following details:
a. In the Roles section, from the Role drop-down list, select the Administrator role.
• Global Administrator• Group Administrator• Viewer
NOTE: If you select the Administrator role as Viewer, the following administrative tasks are displayed:
• Query Device
• Unregister Device
• Restart/Shutdown Device
• Change Group Assignment
• Remote Shadow
• Lock Device
• Wipe Device
• Send Message
• WOL Device
b. In the Password section, do the following:
1. Enter the custom password.2. To generate any random password, select the Generate random password radio button.
7. Click Save.
Using Wyse Management Suite 111

Create auto assignment rules for unmanaged devices
Steps
1. Click the Rules tab.
2. Select the Unmanaged Device Auto Assignment option.
3. Click the Add Rules tab.
4. Enter the Name and select the Destination group.
5. Click the Add Condition option and select the conditions for assigned rules.
6. Click Save.
The rule is displayed in the unmanaged group list. This rule is applied automatically and the device is listed in the destination group.
Add a user
Steps
1. Click the Users tab.
2. Click End Users.
3. Click Add User.The Add User window is displayed.
4. Enter the username, domain, first name, last name, email address, title, and phone number.
5. Click Save.
Bulk import end users
Steps
1. Click Users.The Users page is displayed.
2. Select the End Users option.
3. Click Bulk Import.The Bulk Import window is displayed.
4. Click Browse, and select the .csv file.
5. Click Import.
Portal administrationThe Portal administration page enables the system administration to perform tasks that are required to set up and maintain yoursystem.
Accessing file repositoryFile repositories are places where files are stored and organized. Wyse Management Suite has two types of repositories:
• Local Repository—During the Wyse Management Suite private cloud installation, provide the local repository path in the WyseManagement Suite installer. After the installation, go to Portal Admin > File Repository and select the local repository. Click theEdit option to view and edit the repository settings.
• Wyse Management Suite Repository—Log in to the Wyse Management Suite public cloud, go to Portal Admin > FileRepository and download the Wyse Management Suite repository installer. After the installation, register the Wyse ManagementSuite repository to Wyse Management Suite Management server by providing the required information.
You can enable the Automatic Replication option to replicate files that are added to any of the file repositories to other repositories.When you enable this option, an alert message is displayed. You can select the Replicate existing files check box to replicate theexisting files to your file repositories.
112 Using Wyse Management Suite

Replicate existing file option is applicable if the repository is already registered. When a new repository is registered, then all the files arecopied to the new repository. You can view the file replication status in the Events page.
NOTE:
• The Image Pull templates are not replicated automatically to other repositories. You must copy these files
manually.
• File Replication feature is supported only on repositories from Wyse Management Suite 1.4 and later versions.
• You cannot import self-signed certificate of the remote repository to the Wyse Management Suite server. If the CA
Validation is enabled for remote repository, then the replication of files from the remote repository to the local
repository fails.
Using Wyse Management Suite 113

Troubleshooting your thin clientAbout this task
You can use the troubleshooting options on the ThinOS desktop to troubleshoot your device.
Steps
1. From the desktop menu, click Troubleshooting.The Troubleshooting dialog box is displayed.
2. Click the General tab, and use the following guidelines:
Figure 49. General
• Click the Performance Monitor option to display the CPU usage history with the Memory, and Networking information. Thegraphs display on top of all windows.
• Click the Export System Setting option to export the system settings file to the USB drive that is connected to the thin client.Password is mandatory for the exported file. The file is stored in the /wnos/trouble_shoot/ folder of the USB drive.
• Click the Export Screenshot option to export the system screenshots to the USB drive that is connected to the thin client. Thefile is stored in the root folder of the USB drive.
• Click the Export logs option to export the system log files to the USB drive that is connected to the thin client. The file is storedin the root folder of the USB drive—system_log_201910107_125610.tgz.
• Click the Import System Setting option to import the system settings file from the USB drive that is connected to the thinclient. The file is stored in the /wnos/trouble_shoot/ folder of the USB drive.
3. Click the Capture tab, and do the following:
Figure 50. Capture
10
114 Troubleshooting your thin client

• Capture Network Packets—Use this option to capture network-related logs.
a. Connect a USB drive to the thin client.b. To start logging the unexpected error messages, enable the Capture Network Packets option, and click OK.c. To stop logging the unexpected error messages, disable the Capture Network Packets option, and click OK.d. Open the Troubleshooting window, and click Export Logs on the General tab. The log file is stored in the root folder of the
USB drive—system_log_201910107_125610.tgz.
e. Extract the tgz file. The log files are available at ./var/log/netmng/.
• Capture Wireless Packets—Use this option to capture wireless network-related logs.
a. Connect a USB drive to the thin client.b. To start logging the unexpected error messages, enable the Capture Wireless Packets option, and click OK.c. To stop logging the unexpected error messages, disable the Capture Wireless Packets option, and click OK.d. Open the Troubleshooting window, and click Export Logs on the General tab. The log file is stored in the root folder of the
USB drive—system_log_201910107_125610.tgz.
e. Extract the tgz file. The log files are available at ./var/log/netmng/.
• Capture USB Packets—Use this option to capture USB packets.
a. Connect a USB drive to the thin client.b. To start logging the unexpected error messages, enable the Capture USB Packets option, and click OK.c. To stop logging the unexpected error messages, disable the Capture USB Packets option, and click OK.d. Open the Troubleshooting window, and click Export Logs on the General tab. The log file is stored in the root folder of the
USB drive—system_log_201910107_125610.tgz.
e. Extract the tgz file. The log files are available at ./compat/linux/var/usbdump/.
4. Click the Ping tab, and do the following:
Figure 51. Ping
a) Enter the IP address, DNS-registered hostname, or WINS-registered hostname of the target.b) Click Start.
The data area displays the ping response messages. The ping command sends one echo request per second, calculates round-triptimes and packet loss statistics, and displays a brief summary upon completing the calculation. If the host is operational and on thenetwork, it responds to the echo request. By default, echo requests are sent until interrupted by clicking Stop.
NOTE:
Ping sends an echo request to a network host. The host parameter is either a valid hostname or an IP address. If the
host is operational and on the network, it responds to the echo request. Ping sends one echo request per second and
calculates round-trip times and packet loss statistics. It displays a brief summary upon completion of the calculation.
Troubleshooting your thin client 115

NOTE: Not all network equipment responds to ping packets, as it is a common mechanism that is used in denial-of-
service attacks. Lack of response does not necessarily indicate that the target of the ping is unusable for other
purposes.
5. Click the Trace Route tab, and do the following:
Figure 52. Trace Route
a) Enter the IP address, DNS-registered hostname, or WINS-registered hostname of the target.b) Click Start.
The data area displays round-trip response time and identifying information for each device in the path.
The tracert utility traces the path from your thin client to a network host. The host parameter is either a valid hostname or an IPaddress. The tracert utility sends out a packet of information three times to each device (routers and computers) in the path. Theround-trip response time and the identifier information are displayed in the message box.
6. Click the Telnet tab, and do the following:
Figure 53. Telnet
a) Click Telnet.b) Enter the hostname.c) Enter a port number.d) Select a color theme.e) Click Connect to connect to a remote host or device.
7. Click OK to save your settings.
116 Troubleshooting your thin client

Capture an HTTP log using ThinOSAbout this task
To capture an HTTP log, do the following:
Steps
1. From the desktop menu, click System Setup > Admin Policy Tool.The Configuration Control || ThinOS window is displayed.
2. In the Troubleshooting Settings window, click the Enable HTTP Log option.The HTTP log feature is enabled on the thin client.
3. Log in to the Citrix session.
If the authentication fails, do the following:
a) Open the Troubleshooting window from the left menu on the ThinOS desktop.b) Connect the USB drive to the thin client, and click Export logs.
All trace files including the event logs are exported to the USB drive. The log file is saved in the root folder of the USB drive—system_log_20191107_125610.tgz.
c) Extract the tgz file, and verify if the http.log file is available.
System crashes, freezes, or restarts abruptlyIf the system crashes, freezes, or restarts abruptly, coredump is generated. You must export logs to analyze the root cause for failure.
About this task
To export logs, do the following:
Steps
1. Reboot the thin client.
2. Export relevant logs using one of the following methods:
• Use the Export logs option on the General tab in the Troubleshooting window on the ThinOS client.• Use the Wyse Management Suite console.
3. Analyze the detailed error log report.
Broker agent login failureIf login to a Broker agent connection fails, you must do either of the following:
• Capture an HTTP log and analyze the detailed error log report.• If the Broker agent can be accessed on a ThinOS 8.6 client, capture the network log and analyze the detailed error log report.
Citrix desktop and application crashes abruptlyIf the Citrix desktop or application crashes abruptly, but the ThinOS client is still working, then a coredump is generated. You must exportlogs to analyze the root cause for failure.
About this task
To export logs, do the following:
Steps
1. Reboot the thin client.
2. Export relevant logs using one of the following methods:
• Use the Export logs option on the General tab in the Troubleshooting window on the ThinOS client.• Use the Wyse Management Suite console.
Troubleshooting your thin client 117

3. Analyze the detailed error log report.
Cisco Jabber and Skype for Business call failureIf the Cisco Jabber call or the Skype for Business call fails, but the ThinOS client is still working, then a coredump is generated. You mustexport logs to analyze the root cause for failure.
About this task
To export logs, do the following:
Steps
1. Reboot the thin client.
2. Export relevant logs using one of the following methods:
• Use the Export logs option on the General tab in the Troubleshooting window on the ThinOS client.• Use the Wyse Management Suite console.
3. Analyze the detailed error log report.
Request a log file using Wyse Management SuitePrerequisites
The device must be enabled to pull the log file.
Steps
1. Go to the Devices page, and click a particular device.
The device details are displayed.
2. Click the Device Log tab.
3. Click Request Log File.
4. After the log files are uploaded to the Wyse Management Suite server, click the Click here link, and download the logs.
NOTE: The ThinOS device uploads the system logs.
View audit logs using Wyse Management SuiteSteps
1. Go to Events > Audit.
2. From the Configuration Groups drop-down list, select a group for which you want to view the audit log.
3. From the Timeframe drop-down list, select the time period to view the events that occurred during that time period.The Audit window arranges the information into a typical audit log-view. You can view the timestamp, event type, source, anddescription of each event in the order of time.
System log and trace information
Log/trace size and configurationTable 22. Log/trace size and configuration
Type Cleanup after maximumsize
Comments
System log 10 MB No encryption. It is required that admin users do not open this accessto all other users. Only enable for target users.
118 Troubleshooting your thin client

Type Cleanup after maximumsize
Comments
Network/wireless trace 10 MB
USB packet 10 MB
HTTP log 10 MB
System configuration During export, ask admin to encrypt with password
How to enable and collect logs?Table 23. Enabling and collecting logs
Type Enabling Capturing Collecting
System log Always enabled Always captured Using Wyse Management Suite orUSB drive
Network/wireless trace Enable in Admin PolicyTool
Reboot after enabling Using Wyse Management Suite orUSB drive
USB packet Enable in Admin PolicyTool
Reboot after enabling Using Wyse Management Suite orUSB drive
HTTP log Enable in Admin PolicyTool
Reboot after enabling Using Wyse Management Suite orUSB drive
Upgrade or conversion troubleshooting and logs
Upgrade using Merlin image—individual userAfter a successful upgrade process, if there is no Wyse Management Suite, the system reboots to ThinOS 9.0 OOBE screen. Citrix PKG ispart of the Merlin image.
Wyse Management Suite deployment1. Refer Migration Guide or Wyse Management Suite 2.0 Administrator's Guide.2. Upgrade Wyse Management Suite version to 2.0.
At this stage the client is still running ThinOS 8.63. Wyse Management Suite admin user configures two sets of policies: one for ThinOS 8.6 and the other for ThinOS 9.0.
For example, upload the ThinOS 9.0 conversion image to ThinOS 8.6 policy and upload ThinOS 9.0 PKG to ThinOS 9.0 policy. At thisstage the client is still running ThinOS 8.6
4. Push the conversion image from ThinOS 8.6 policy.
At this stage, the client updates from ThinOS 8.6 to 9.0 and starts reading the policy.5. To finish the upgrade process, update ThinOS 9.0 PKG from ThinOS 9.0 policy.
Wyse Management Suite admin-How to verify whethercorrect images or PKG files are uploaded?• Check the Wyse Management Suite uploading progress indicator and completion message.• Verify whether the uploaded files are showing up in the Wyse Management Suite image or PKG dropdown.
Troubleshooting your thin client 119

How to verify download and installation working inprogress?• There is no progress bar or success message from Wyse Management Suite.• After successful completion, the managed group and unit version information is updated in Wyse Management Suite.• On ThinOS 8.6, initially there are messages in the event log. After retrieving the image, the installation starts similar to ThinOS 8.6,
followed by a system reboot, and the installation continues in ThinOS 9.0. After the installation, the system reboots to ThinOS 9.0
How to verify whether the image installation is completedsuccessfully?• After the last auto reboot, the thin client boots up to the Wyse Management Suite configuration from group 9.0 policy.• Verify the success info and system info in the unit system information or package information.
How to recover during a failure?• If there is a failure message stating Upgrade break cannot boot up, use USB recovery.• If there is a wrong image or PKG, and the device shows wrong screen or info, use USB recovery.
How to verify whether the thin client is working properly?Go to System information > Event Log and see if the system info or PKG versions are correct.
If any unexpected issues occur before VDI logon, collect the following data:
• General troubleshooting
• General > Export system setting• General > Export Screenshot• General > Export logs
• Network troubleshooting
• Capture > Capture Network Packets• Capture > Capture Wireless Packets
• Peripherals troubleshooting
• Capture > Capture USB Packets
Logs to capture during VDI logon failureIf you face VDI or cloud sign on failure, go to Capture > Http log and collect the data for analysis.
Logs to capture when session failure after launchAfter you signed on VDI or cloud, if the remote desktop connection failed to launch or failed after launch, go to General > Export logsand collect the data for analysis.
Important information• The System configuration export is encrypted with a password and the administrator is prompted to provide password protection
upon using this option.• System log and trace are not encrypted, but users cannot read any data from it. The design will be updated in ThinOS 9.1.• Administrator must manage the enablement of the export options on the thin client. It is recommended to not enable export options to
all users.
120 Troubleshooting your thin client

How to debug with new support beyond ThinOS8?Reproduce the problem with any other ThinOS 9 unit and capture logs/trace from ThinOS 9 for support analysis.
How to debug with same support in ThinOS 8?Capture the ThinOS 9 related logs/trace and also capture the related logs/trace in ThinOS 8 following same steps where it works. Sendboth to the support team for comparison and analysis. This can help isolate the root cause sooner.
Common log files and locationsThe file is named in the pattern system_log_yyyymmdd_hhmmss.tgz. The following table contains the locations where the log files aresaved.
Table 24. Common log file locations
Type Location
Device log …\compat\linux\home\tmp\wlogd\wlogd.log
Citrix … \compat\linux\var\volatile\log\citrix.log
Smart card AuthManager …\compat\linux\home\warthog\.ICAClient\logs
RTME …\compat\linux\var\volatile\log\RTMediaEngineSRV\MediaEngineSRVDebugLogs
JVDI …\compat\linux\var\volatile\log\cisco\
Network …\compat\linux\var\volatile\log\netmng\nn.log or …\compat\linux\var\log\netmng (see wireshark log)
Coredump …\var\crash\vmcore.0zst
System daemon …\compat\linux\home\tmp\wlogd\wlogd.log
xorg server logs …\compat\linux\tmp\wlogd
Troubleshooting your thin client 121

Frequently Asked Questions
ThinOS-related questionsThis section contains frequently asked questions related to Wyse ThinOS.
How do I upgrade from ThinOS 8.6 to 9.0?You must use the Wyse Management Suite version 2.0 to upgrade from ThinOS 8.6 to 9.0. For the firmware upgrade procedure, seeFirmware upgrade and package deployment.
What should I do if the package installation fails?If the thin client does not work after upgrading to the new firmware, or if the package fails to update, remove all packages and reboot thethin client. After rebooting the thin client, reinstall the package.
Is Wyse Management Suite 2.0 the only way to manageThinOS 9.0?ThinOS 9.0-devices can be managed using either Wyse Management Suite or Admin Policy Tool.
Is USB Imaging Tool method a possible option forupgrading to ThinOS 9.0?It is recommended to use Wyse Management Suite version 2.0 to upgrade your thin clients since you cannot deploy large-scale clientsusing the USB Imaging Tool. However, you can use the USB Imaging Tool method for installing ThinOS 9.0 on a single device.
Can ThinOS 9.0 be installed on a PCoIP device?ThinOS 9.0 does not support PCoIP devices.
Does ThinOS 9.0 support zero desktop?ThinOS 9.0 does not support zero desktop and zero toolbars. You can use the classic desktop to access menus and configuration tabs.
Does ThinOS 9.0 support ThinOS configurations using INIfiles?ThinOS 9.0 does not support INI files. You need to use Wyse Management Suite 2.0 to configure the ThinOS settings remotely.
iPhone cannot be redirected to the Citrix Desktop session
Steps
1. Open Global Connection Settings.
11
122 Frequently Asked Questions

2. Uncheck Exclude disk devices and Exclude audio devices.
Android smartphone is not displayed in the session whenredirected or mappedYou must select the option to transfer images on your smartphone when you connect the USB cable.
Does Citrix Workspace app replace Citrix Receiver onThinOS?In ThinOS 9.0, Citrix Receiver is replaced by Citrix Workspace app. Citrix Workspace app, a client software released by Citrix, enables youto access all your virtual apps, desktops, and other Citrix products from a single workspace UI. You must deploy the ICA package usingWyse Management Suite to install the Citrix Workspace app on ThinOS 9.0.
For more information about deploying packages using Wyse Management Suite, see How to upload and push ThinOS 9.0 applicationpackages.
What is Workspace mode on ThinOS 9.0?Workspace mode enables you to customize the look and feel of your ThinOS to match the Citrix Workspace-based layout of publishedapplications and desktops. Workspace mode displays both the ThinOS full taskbar and the workspace desktop. You can select theWorkspace Mode check box in the Broker Setup window.
Can I enable Flash content to be rendered using a localFlash Player on ThinOS 9.0?ThinOS 9.0 does not support the Flash Redirection feature. Hence, you cannot enable Flash content to be rendered using a local FlashPlayer.
How do I verify if HDX Enlightened Data TransportProtocol is active?To verify if HDX Enlightened Data Transport Protocol is active:
• In an ICA desktop session, run the command netstat -a -p UDP in command prompt, and check if the VDA is using UDP ports1494 and 2598.
• In an ICA desktop session, run the command ctxsession.exe in command prompt, and check if the transport protocol is usingUDP > CGP > ICA.
• Go to Citrix Director, access the session details and check if the Connection Type/Protocol is UDP.
Alternatively, you can use the HDX Monitor tool to check parameter Component_Protocol=UDP-CGP-ICA.
For more information, see the article CTX220730 at www.support.citrix.com.
How do I check if HTML5 Video Redirection is working?
Prerequisites
Ensure that you have enabled the HTML5 video redirection policy on the server side.
Steps
1. Launch a Citrix session on your thin client.
2. Open a web browser and play a video.
Frequently Asked Questions 123

3. Move the browser on the screen or scroll the browser.
4. Notice a delay or jump in the video window.This noticeable lag in the video window indicates that the video is being redirected.
How do I check if QUMU Multimedia URL Redirection isworking?
Prerequisites
Ensure that you have installed the QUMU on the remote desktop.
Steps
1. Launch a Citrix session on your thin client.
2. Open a web browser and play a QUMU published video.
3. Move the browser on the screen or scroll the browser.
4. Notice a delay or jump in the video window.This noticeable lag in the video window indicates that the video is being redirected.
How do I check if Windows Media Redirection is working?
Prerequisites
• Ensure that the Windows Media redirection policy is set to Allowed in Citrix Studio.• Ensure that you have enabled the Enable HDX/MMR check box in the Global Connection Settings dialog box on the ThinOS client.
Steps
1. Connect to a Citrix server, and launch an ICA desktop.
2. Play a video or an audio file using Windows Media Player.
3. Drag and move the Windows Media Player.Notice that the video graphic and the media player window frame are in different layer.
You can also determine if Windows Media Redirection is working using the method that is described in the CTX215173 article atsupport.citrix.com.
Is persistent logging supported in ThinOS 9.0?Persistent logging is not supported in ThinOS 9.0.
Is tls.txt file included in network traces on ThinOS 9.0?The tls.txt file is not included in network traces for ThinOS 9.0.
Will ThinOS 9.0 device reboot automatically when thesystem crashes?ThinOS 9.0-based device automatically reboots when the system crashes. System backs up the data every one hour. If any keyapplications, such as ThinOS window crashes, the system still runs and is recovered without a reboot.
Wyse Management Suite-related questionsThis section contains frequently asked questions related to Wyse Management Suite.
124 Frequently Asked Questions

What takes precedence between Wyse Management Suiteand ThinOS UI when conflicting settings are enforced?Any settings that are configured using Wyse Management Suite take precedence over the settings that were configured locally on theThinOS client or published using the Admin Policy Tool. The settings that are configured locally in the ThinOS are synced to Admin PolicyTool but not to Wyse Management Suite.
The following order defines the priority set for ThinOS configurations:
Wyse Management Suite Policies > Admin Policy Tool > Local ThinOS UI
How do I import users from a .csv file?
Steps
1. Click Users.The Users page is displayed.
2. Select the Unassigned Admins option.
3. Click Bulk Import.The Bulk Import window is displayed.
4. Click Browse and select the .csv file.
5. Click Import.
How do I use Wyse Management Suite file repository?
Steps
1. Download the Wyse Management Suite repository from the public cloud console.
2. After the installation process, start the application.
3. On the Wyse Management Suite Repository page, enter the credentials to register the Wyse Management Suite repository to theWyse Management Suite server.
4. To register the repository to the Wyse Management Suite public cloud, enable the Register to Public WMS Management Portaloption.
5. Click the Sync Files option to send the sync file command.
6. Click Check In and then click Send Command to send the device information command to the device.
7. Click the Unregister option to unregister the on-premises service.
8. Click Edit to edit the files.
a) From the drop-down list of Concurrent File Downloads option, select the number of files.b) Enable or disable Wake on LAN option.c) Enable or disable Fast File Upload and Download (HTTP) option.
• When HTTP is enabled, the file upload and download occurs over HTTP.• When HTTP is not enabled, the file upload and download occurs over HTTPS.
d) Select the Certificate Validation check box to enable the CA validation for a public cloud.
NOTE:
• When CA Validation from the Wyse Management Suite server is enabled, the certificate should be present in
the client. All the operations, such as, Apps and Data, Image Pull/Push is successful. If the certificate is not
present in the client, the Wyse Management Suite server provides one generic audit event message Failed to
Validate Certificate Authority under Events page. All the operations, such as, Apps and Data, Image Pull/Push
is not successful.
• When CA Validation from Wyse Management Suite server is disabled, then the communication from server
and client happens in a secure channel without Certificate Signature validation.
e) Add a note in the provided box.f) Click Save Settings .
Frequently Asked Questions 125

How do I check the version of Wyse Management Suite
Steps
1. Log in to Wyse Management Suite.
2. Go to Portal Administration > Subscription.The Wyse Management Suite version is displayed in the Server Information field.
126 Frequently Asked Questions