Databridge Installation Guidedocs.attachmate.com/databridge/6.3/install.pdfOracle 10g Release 2,...
66
i Contents
Transcript of Databridge Installation Guidedocs.attachmate.com/databridge/6.3/install.pdfOracle 10g Release 2,...
i Contents

iii
Contents
Databridge Installation Guide 7 New Features 8 Security Guidelines 9 System Requirements 10 Related Documentation 12 Description of Files on the Installation Image 13
Installing Databridge on Windows 17 Run the Migrate Program on Windows 19 The Working Directory 20 Installer Advanced Tab 23 Updatepath Dialog Box 23 Client Configuration Dialog Box 24
Installing the Databridge Client on UNIX 27 Install the Databridge Client on UNIX 27 Run the Migrate Program on UNIX 30 Install the Client Console on UNIX 32
Installing the Databridge Host 33 Before You Upgrade the Databridge Host 33
Back Up Changes to Host Files 34 Suspend Databridge Plus Before Upgrading 37
Install the Databridge Host 38 Set Up Guardfiles 39
Setting Up a Relational Database 43 Setting Up a SQL Server Database 43
Create an ODBC Data Source 44 Setting Up an Oracle Database 45 Setting Up a User ID 45 Signon Configuration 46
Signon Parameters 47 Integrated Windows Authentication for Microsoft SQL Server 47
Getting Started 49 Next Steps for the Databridge Client 49
Start the Service / daemon 50 Start the Client Console 51
iv
Switch from User Scripts to the Client Configurator 52 Starting Enterprise Server 53
Installation Results 54 Files Installed with Databridge Host 54 OBJECT/DATABRIDGE Directory 54 SYMBOL/DATABRIDGE Directory 56 WFL/DATABRIDGE Directory 58 DATA Directory 59 PATCH Directory 60 Files Installed with Databridge Enterprise Server 62 Files Installed with the Databridge Client and Client Console 63 Files Installed with Databridge Plus 66
v
© 2015 Attachmate Corporation. All rights reserved.
No part of the documentation materials accompanying this Attachmate software product may be reproduced, transmitted, transcribed, or translated into any language, in any form by any means, without the written permission of Attachmate Corporation. The content of this document is protected under copyright law even if it is not distributed with software that includes an end user license agreement. The content of this document is furnished for informational use only, is subject to change without notice, and should not be construed as a commitment by Attachmate Corporation. Attachmate Corporation assumes no responsibility or liability for any errors or inaccuracies that may appear in the informational content contained in this document.
Attachmate and the Attachmate logo are registered trademarks and Databridge is a trademark of Attachmate Corporation in the USA.
All other trademarks, trade names, or company names referenced herein are used for identification only and are the property of their respective owners.
A copy of the Attachmate software license agreement governing this product can be found in a 'license' file in the root directory of the software distribution.
Third party notices (if any) can be found in a 'thirdpartynotices' file in the root directory of the software distribution.
Attachmate Corporation 705 5th Ave South, Suite 1100 Seattle, WA 98104 USA +1.206.217.7100 http://www.attachmate.com

7
Databridge Installation Guide
Use this guide to install, configure, and run Databridge 6.3. Included are instructions for installing and upgrading the Attachmate Databridge Host, Enterprise Server, and Client products. Also included are a list of new features, system requirements, and installation results for these products.
For installation instructions on other Databridge products (FileXtract, Plus, Twin, DMSII Client), see the individual product guides in the Docs folder on the installation image.
To install, configure, and run Databridge, you should be a system administrator familiar with the following:
Standard Unisys® operations for MCP-hosted mainframes such as the CS7xxx series, Libra series, ClearPath® NX/LX or A Series
DMSII databases and Data And Structure Definition Language (DASDL)
C H A P T E R 1
Databridge Installation Guide
8
New Features
Databridge 6.3 includes the following changes.
All-Product Features
This version is qualified to run on DMSII level 58.1 (MCP 17). New DMSII features introduced in 58.1 are not supported.
DMSII level 57.1 (MCP 16.0) support. This version supports XL databases, which contain up to 16000 structures and 4000 data sets.
Oracle 12c support
Microsoft SQL Server 2014 support
Databridge Host
The Databridge Host software now uses the new DMSII Support Library to retrieve data records from the DMSII database.This library is a more standardized approach for accessing the DMSII database than the previous approach, which used procedure references that pointed directly at procedures in the actual DMSII database stack (Accessroutines). The latter approach left Databridge vulnerable to any changes made to the DMSII software architecture.
The cloning process has changed. During a clone, Databridge only accesses the DMSII database in inquiry mode, except for the following conditions:
The clone is OFFLINE
INDEPENDENTTRANS = RESET (on DMSII database)
READ ACTIVE AUDIT = FALSE (in DBEngine parameter file)
In addition, clones no longer mark the audit trail with begin- and end-transactions.
Unsafe constructs have been removed from DBEngine. Previously, an LFILES OBJECT/DATABRIDGE/ENGINE would report that it was NON-EXECUTABLE:UNSAFE.
Databridge Client
Note: The Databridge 6.3 Client is virtually identical to the 6.2 SP2 client with the exception of a few minor fixes. For a list of issues that are resolved in version 6.3, see the Read Me file (readme.txt).
Enhancements have been made to the timer thread to optionally implement timeouts to stop the Client after stuck queries or a lack of data from the server.
Automated handling of non-US Oracle databases and Oracle databases whose character set is UTF8.
64-bit counters are now used for statistics. This eliminates any possibility of overflow during full clones.
Databridge Installation Guide
9
Security Guidelines
To protect your data, make sure that you implement the security guidelines recommended by Unisys and the manufacturer for your relational database.
For To decrease security risk
Databridge Host Install Databridge Host to the Unisys mainframe under its own privileged usercode. This is preferable to installing under the usercode of the DMSII database. If you install and run Databridge under multiple usercodes, you must install a copy of DBEngine under each of those usercodes. Alternatively, you can establish DBEngine as a system library (SL).
Databridge Client File security helps to protect Client operations by restricting access to the working directory, its files and subdirectories. Access is limited to the administrators and the system account, and to designated users (or on Windows, user groups). In Windows, you can enable file security via the option Enable File Security at installation, or by running the program setfilesecurity.exe as Administrator after installation.
The UserID box allows you to specify the userid that will run the Databridge Client. The DBAdministrator box allows you to specify a group of users that can run the Databridge Client and modify the working directory and its files. The DBOperator box allows you to specify a group of users that can monitor operations by reading the log files, but cannot run the Databridge Client.These groups must be Windows groups. You can use create new groups or use existing ones.
In UNIX, you restrict file access via the umask entry in the file globalprofile.ini. See Install the Databridge Client on UNIX (page 27).
Databridge Enterprise Server
File security is automatically enabled when you install Databridge Enterprise. File security protects the configuration and log files by restricting privileges on the PC to users who need to modify the configuration.
By default, any user in the Administrators group can modify the configuration files and delete the read-only log files. If you create a user group in Windows called DBEAdmins, only the users in that group will be able to alter the configuration files and delete log files. Likewise, if you create a group called DBEUsers, only the users in that group will be able to view the configuration. For more information, see "Implementing File Security" in the Databridge Enterprise Server Help.

Databridge Installation Guide
10
System Requirements
To install and run Databridge 6.3, your system must meet the following hardware and software requirements. Specific requirements vary based on your hardware and other software components present.
Databridge Host
Unisys mainframe system with an MCP level SSR 51.1 through 58.1
Note: Any features introduced in MCP level 58.1 are not supported.
DMSII software (including the DMALGOL compiler)
DMSII database DESCRIPTION, CONTROL, DMSUPPORT library, and audit files
Access to an audited DMSII database
Databridge Enterprise Server
Note: This list assumes that the Enterprise Server machine is connected to a Unisys mainframe system running Databridge Host 6.x and to a system running Databridge Client 6.x.
ClearPath PC with Logical disks or MCP disks (VSS disks in MCP format)
-or-
Windows PC that meets the minimum requirements of its operating system, which is one of the following:
Windows 7
Windows Server 2012 R2 (CORE mode must be disabled for installation)
Windows Server 2012
Windows Server 2008 R2
Windows Server 2008
Direct Disk replication (recommended) requires read-only access to MCP disks on a storage area network (SAN)
TCP/IP transport
To view the product Help, a supported Internet browser (such as, Internet Explorer, Firefox, or Google Chrome) is required. In addition, JavaScript must be enabled in the browser settings to navigate and search Help.
Databridge Client Console
You can install Client Console to the same machine as the Client; however, this can drain resources and impact the performance of your relational database. Instead, we recommend that you install the Client Console to a machine that connects to the Client machine via TCP/IP transport.
Requires Java Runtime Environment (JRE). Download and install the latest version from www.java.com (http://www.java.com).
Databridge Installation Guide
11
Databridge Client Note: Disk space requirements for replicated DMSII data are not included here. Your relational database should have, at minimum, twice as much disk space as the DMSII data you plan to clone. For best results, use a RAID disk array and store the client files on a separate disk from the database storage.
Client - Windows Unisys ES7000
-or-
Pentium PC processor 3 GHz or higher (multiple CPU configuration recommended)
2 GB of RAM (4 GB recommended)
100 GB of disk space in addition to disk space for the relational database built from DMSII data
TCP/IP transport
One of the following operating systems:
Windows Server 2012 R2 (CORE mode must be disabled for installation)
Windows Server 2012
Windows Server 2008 R2
Windows Server 2008
Windows 8
Windows 7
One of the following databases:
Microsoft SQL Server 2014
Microsoft SQL Server 2012
Microsoft SQL Server 2008 R2 (up to SP1)
Microsoft SQL Server 2005 (up to SP4)
Oracle 10g Release 2, 11g, and 12c
Databridge Installation Guide
12
Client - UNIX and Linux
One of the following systems:
Sun Microsystems SPARCstation running Solaris 10 or later, and Oracle 10g Release 2, 11g, or 12c
Hewlett Packard Itanium with HP-UX 11i v3 (B11.31) running Oracle 10g Release 2, 11g, or 12c
Hewlett Packard 9000 Series 700 or 800 with HP-UX 11i v2 running Oracle 10g Release 2 or 11g
IBM pSeries running AIX 5.3L or later (AIX 6.1 for Oracle 12c), and Oracle 10g Release 2, 11g, or 12c
Intel Pentium with Red Hat Enterprise Linux Release 4 (Release 5 for Oracle 12c) or later, SUSE Linux Enterprise Server 11 SP1 or later, or UBUNTU Linux 7.1 or later running Oracle 10g Release 2, 11g, or 12c
2 GB of RAM (4 GB recommended)
100 GB of free disk space for installation (in addition to disk space for the relational database built from DMSII data)
TCP/IP transport
Note: Oracle 12c clients only exist as 64-bit programs.
Related Documentation
When using Databridge, you may need to consult the following resources.
Databridge product documentation
On the Databridge installation image, the DOCS folder contains guides for installation, error codes, and administrator's guides for each Databridge product. These documents require Adobe Reader for viewing, which you can download from the Adobe website (http://get.adobe.com/reader/). This documentation, and current technical notes, is also available on the Attachmate support site (http://support.attachmate.com/manuals/databridge.html).
Documentation for Databridge Enterprise Server and the Databridge Client Console is also available from the Help menu. A modern browser is required for viewing this documentation.
Unisys MCP server documentation
If you are not completely familiar with DMSII configuration, refer to your Unisys documentation.

Databridge Installation Guide
13
Description of Files on the Installation Image
This topic lists the directories and files on the installation image, in alphabetical order. Databridge Host installation files (CDINSTALL, DISKINSTALL, IMAGE, and INSTALL) are located on the root. Both 32-bit and 64-bit versions are provided for all Databridge Clients.
This directory Contains File description
AIX Tar files for installing Databridge clients on the AIX platform:
DB_AIX64_Ora10g2.tar The 64-bit client programs for Oracle
10g (release 2)
DB_AIX64_Ora11g.tar The 64-bit client programs for Oracle
11g
DB_AIX64_Ora12c.tar The 64-bit client programs for Oracle
12c
DB_AIX_Ora10g2.tar The 32-bit client programs for Oracle
10g (release 2)
DB_AIX_Ora11g.tar The 32-bit client programs for Oracle
11g
Console Files for installing the Databridge Client Console, in the following subdirectories:
HP-UX (Itanium) dbconfig-hpux.motif.ia64_32.tar.gz
dbconsole-hpux.motif.ia64_32.tar.gz
Linux dbconfig-linux.gtk.x86.tar.gz
dbconfig-linux.gtk.x86_64.tar.gz
dbconsole-linux.gtk.x86.tar.gz
dbconsole-linux.gtk.x86_64.tar.gz
SunOS dbconfig-solaris.gtk.sparc.tar.gz
dbconsole-solaris.gtk.sparc.tar.gz
Docs Databridge Help documentation files in PDF format. Help for Enterprise Server and the Client Console are available from the Help menu of the application.
HP-UX Tar files for installing clients on Hewlett Packard ® 9000 series machines running HP-UX 11i v2 or later:
DB_HP-UX_Ora10g2.tar The 32-bit client programs for Oracle
10g (release 2)

Databridge Installation Guide
14
DB_HP-UX_Ora11g.tar The 32-bit client programs for Oracle
11g
DB_HP-UX64_Ora10g2.tar The 64-bit client programs for Oracle
10g (release 2)
DB_HP-UX_Ora11g.tar The 32-bit client programs for Oracle
11g
HP-UX (Itanium) Tar files for installing clients on Hewlett Packard ® Itanium machines running HP-UX 11i v2 or later:
DB_HP-UXi_Ora10g2.tar The 32-bit client programs for Oracle
10g (release 2)
DB_HP-UXi64_Ora10g2.tar The 64-bit client programs for Oracle
10g (release 2)
DB_HP-UXi64_Ora11g.tar The 64-bit client programs for Oracle
11g
DB_HP-UXi64_Ora12c.tar The 64-bit client programs for Oracle
12c
Linux Tar files for installing clients on Intel® X86 series machines running various flavors of Linux including RedHat Enterprise (Release 4 or 5), SUSE or UBUNTU:
DB_Linux_Ora10g2.tar The 32-bit client programs for Oracle
10g (release 2)
DB_Linux_Ora11g.tar The 32-bit client programs for Oracle
11g
DB_Linux64_Ora10g2.tar The 64-bit client programs for Oracle
10g (release 2)
DB_Linux64_Ora11g.tar The 64-bit client programs for Oracle
11g
DB_Linux64_Ora12c.tar The 64-bit client programs for Oracle
12c
SunOS Tar files for installing clients on Oracle SPARCstation running Solaris 10:
DB_SunOS _Ora10g2.tar The 32-bit client programs for Oracle
10g (release 2)
DB_SunOS_Ora11g.tar The 32-bit client programs for Oracle
11g
DB_SunOS64_Ora10g2.tar The 64-bit client programs for Oracle
10g (release 2)

Databridge Installation Guide
15
DB_SunOS64_Ora11g.tar The 64-bit client programs for Oracle
11g
DB_SunOS64_Ora12c.tar The 64-bit client programs for Oracle
12c
Windows32 Installation files for 32-bit versions of Enterprise Server, the Databridge Client (Windows), and the Client Console.
Windows64 Installation files for 64-bit versions of Enterprise Server, the Databridge Client (Windows), and the Client Console.

17
Installing Databridge on Windows
Use this procedure to install or upgrade the following Databridge products:
Databridge Client
Databridge Client Console
Databridge Enterprise Server
Before you install
The installer gives you the option to secure the Databridge Client working directory. The Enable File Security option appears after the Databridge Client is successfully installed (step 5 of this procedure). When this option is selected, you can assign access rights to user IDs and groups. File security for Databridge Enterprise Server is automatically enabled during installation. For more information, see Security Guidelines (page 9).
If the default location of the Enterprise Server configuration directory in this release is different from what you currently use, you can specify your current configuration directory during the upgrade process (in Setup) or after you upgrade (in Enterprise Server). From Setup, on the Options tab, select your current configuration directory for the Database Folder box. From the Enterprise Server main dialog box, click Import to import your sources.
To install Databridge
Note: If you're installing on Windows Server 2012 R2, you must reboot with CORE mode disabled before installing Databridge.
1 Log on using a Windows account with administrator privileges.
2 To start the installer, do one of the following:
• From the Windows64 or Windows32 folder, choose the Setup.exe file that matches your operating system.
• From the download site, click the Windows download link, select a location for the installer files, and then click Next.
3 In the Installer wizard, accept the license agreement and click Continue.
4 In the tabbed window, make your selections and then click Install Now:
File Location tab
Specify a location for the Databridge program files (or accept the default). This path is saved as the INSTALLDIR string value for the Windows registry key.
Feature Selection tab
Click the Databridge component you want to install and choose Feature will be installed on local hard drive. (Items with a red "x" won't be installed.) Follow the same procedure to optionally install Japanese Support and Localization.
C H A P T E R 2

Databridge Installation Guide
18
Options tab Configure settings for Databridge components that are selected on the Features Selection tab. If you're upgrading, click Browse and select the existing working directory. Otherwise, use the default or specify a new path.
Important: Do not specify the Program Files directory as the working directory for the Client or Enterprise Server.
The TCP/IP port is where the program listens for incoming connection requests. Use the default port number unless it's already in use by another program.
Advanced tab Specify the type of installation you want and your log file options.
5 (Client Installation) To restrict read/write access to the Client working directory, in the Client Configuration (page 24) dialog box, select Enable File Security and then enter the user ID and groups that will have access to this directory. You can also enable Client File Security after installation by running setfilesecurity.exe as an Administrator.
6 (Client Installation) If you plan to run the Client from the command line, specify whether to add the Client directory to the user path (recommended) or the system path. For a description of these options, see Updatepath dialog box (page 23).
7 If you're upgrading the Client from version 6.1 or earlier, run the Migrate program (page 19) to complete the installation. Otherwise, skip this step.
8 After installation is complete, see the Getting Started (page 49) section of this guide.
Related Topics
Run the Migrate Program on Windows 19

Installing Databridge on Windows
19
Run the Migrate Program on Windows
If you're upgrading from 6.1 (or earlier) to 6.3, use this procedure after you install the Client. (See Installing Databridge on Windows (page 17).) The Migrate program creates a new Client working directory and files.
If you're upgrading from 6.2.x, running migrate and dbfixup are not required as no changes have been made to the Client files since 6.2. You can use your existing working directory and configuration files.
To run the Migrate program
1 If you are upgrading from the DBLIB SQL Server client, make sure that you first create an ODBC data source in the Windows Control Panel. Make sure that you create a SYSTEM (not a USER) data source.
2 Open a command prompt and type migrate. (If you didn't add the Databridge program directory to the system PATH during installation, type the full filename, including path, for migrate and enclose it in quotation marks.
The Migrate program creates a new global working directory for the Client and then a new working directory for each migrated data source. After updating the configuration file parameters and creating the service configuration file, the Migrate program moves user scripts and configuration files from the previous version to these directories. If you selected Enable File Security during installation, the Databridge Client's global working directory and all files and folders will be re-created and secured.
3 Respond to the prompts:
• If you answer "yes" and provide the working directory, the Migrate program will find your data sources and migrate them. Skip the remaining steps.
• If you answer "no" or do not provide the path to the working directory. Complete the remaining steps.
4 Enter the name of each data source and its working directory, using the path with drive letter or a directory and name relative to the current directory.
5 Repeat step 4 for each data source. When you're done, enter an empty line (that is, <CR>).
The Migrate program creates a working directory for each data source. The existing configuration file is used to create a new binary configuration file in the config subdirectory. Deprecated parameters are removed or replaced by the equivalent parameters. User scripts are moved to the scripts subdirectory. The Migrate program then starts the dbfixup program, which upgrades the client control tables and populates the dbscripts directory for each data source.
If the read_null_records parameter is set to True, the Migrate program copies the Null Record files for the data sources to the config subdirectories. A new Client service configuration file is created (dbcontrol.cfg), which includes updated data sources and any existing scheduling parameters. The Migrate program runs a dbutility generate command for each data sources to populate the dbscripts directories.
Note: If you need to re-run the Migrate program for any reason, first delete the global working directory created by the Migrate program.
Databridge Installation Guide
20
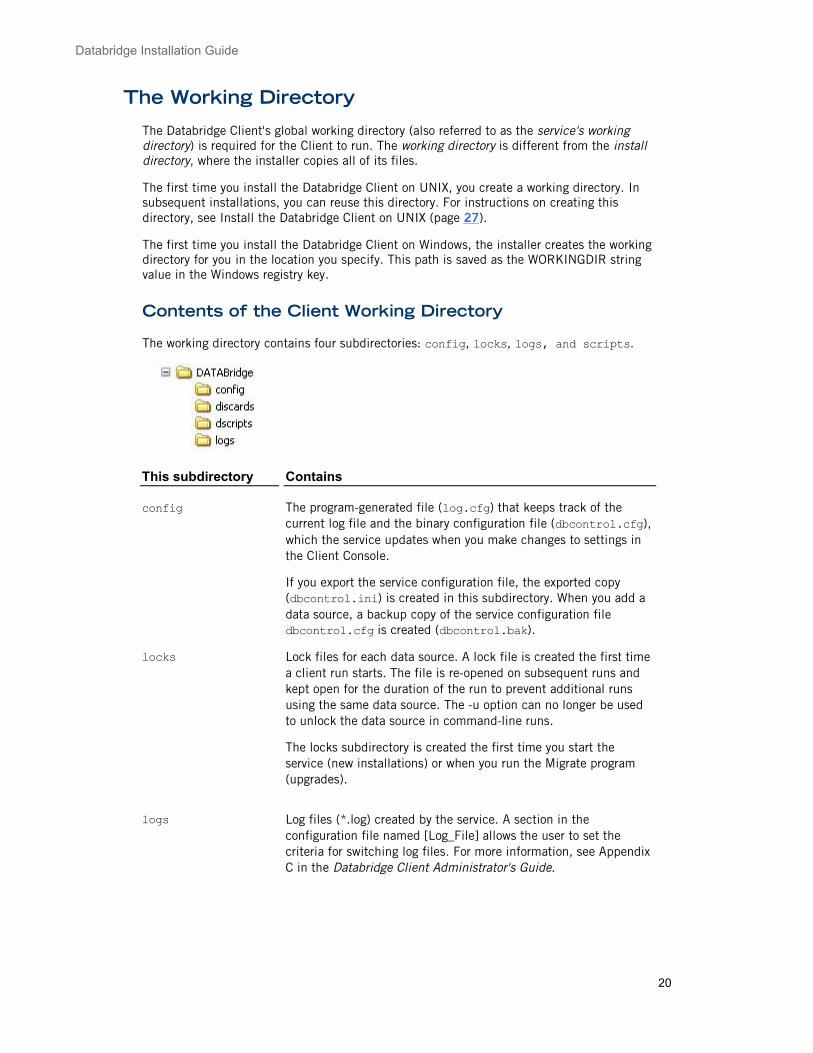
The Working Directory
The Databridge Client's global working directory (also referred to as the service's working directory) is required for the Client to run. The working directory is different from the install directory, where the installer copies all of its files.
The first time you install the Databridge Client on UNIX, you create a working directory. In subsequent installations, you can reuse this directory. For instructions on creating this directory, see Install the Databridge Client on UNIX (page 27).
The first time you install the Databridge Client on Windows, the installer creates the working directory for you in the location you specify. This path is saved as the WORKINGDIR string value in the Windows registry key.
Contents of the Client Working Directory
The working directory contains four subdirectories: config, locks, logs, and scripts.
This subdirectory Contains
config The program-generated file (log.cfg) that keeps track of the current log file and the binary configuration file (dbcontrol.cfg), which the service updates when you make changes to settings in the Client Console.
If you export the service configuration file, the exported copy (dbcontrol.ini) is created in this subdirectory. When you add a data source, a backup copy of the service configuration file dbcontrol.cfg is created (dbcontrol.bak).
locks Lock files for each data source. A lock file is created the first time a client run starts. The file is re-opened on subsequent runs and kept open for the duration of the run to prevent additional runs using the same data source. The -u option can no longer be used to unlock the data source in command-line runs.
The locks subdirectory is created the first time you start the service (new installations) or when you run the Migrate program (upgrades).
logs Log files (*.log) created by the service. A section in the configuration file named [Log_File] allows the user to set the criteria for switching log files. For more information, see Appendix C in the Databridge Client Administrator's Guide.
Installing Databridge on Windows
21
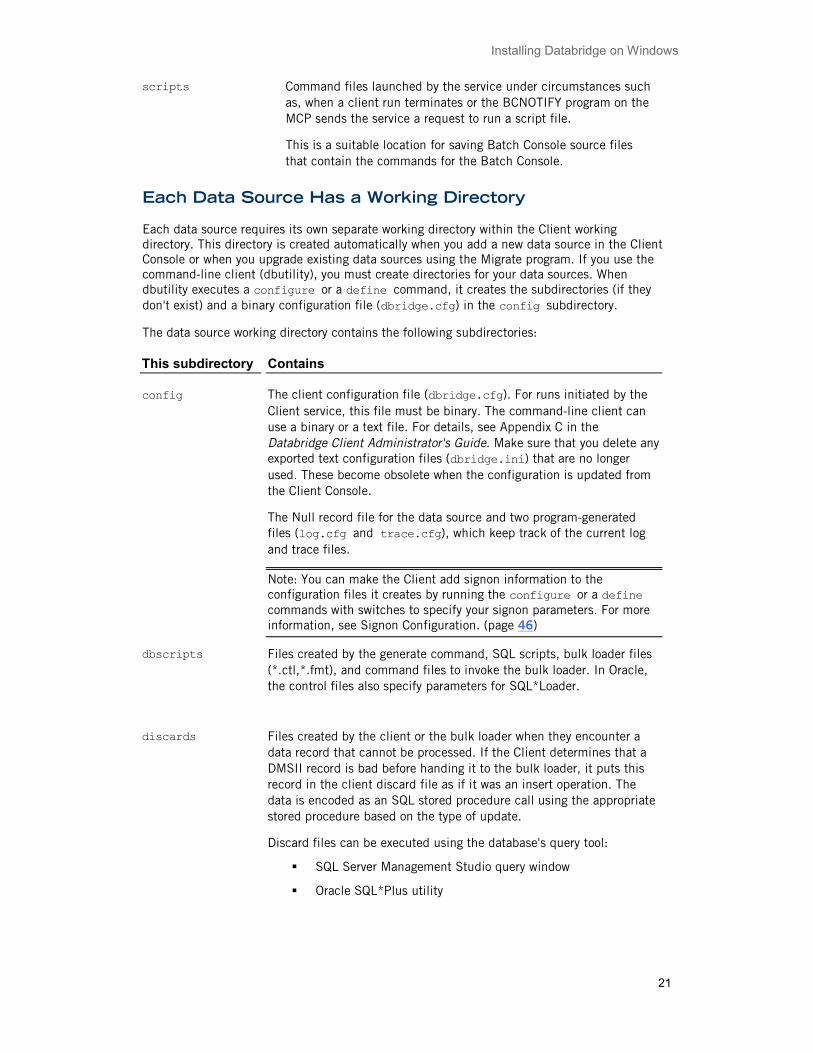
scripts Command files launched by the service under circumstances such as, when a client run terminates or the BCNOTIFY program on the MCP sends the service a request to run a script file.
This is a suitable location for saving Batch Console source files that contain the commands for the Batch Console.
Each Data Source Has a Working Directory
Each data source requires its own separate working directory within the Client working directory. This directory is created automatically when you add a new data source in the Client Console or when you upgrade existing data sources using the Migrate program. If you use the command-line client (dbutility), you must create directories for your data sources. When dbutility executes a configure or a define command, it creates the subdirectories (if they don't exist) and a binary configuration file (dbridge.cfg) in the config subdirectory.
The data source working directory contains the following subdirectories:
This subdirectory Contains
config The client configuration file (dbridge.cfg). For runs initiated by the Client service, this file must be binary. The command-line client can use a binary or a text file. For details, see Appendix C in the Databridge Client Administrator's Guide. Make sure that you delete any exported text configuration files (dbridge.ini) that are no longer used. These become obsolete when the configuration is updated from the Client Console.
The Null record file for the data source and two program-generated files (log.cfg and trace.cfg), which keep track of the current log and trace files.
Note: You can make the Client add signon information to the configuration files it creates by running the configure or a define commands with switches to specify your signon parameters. For more information, see Signon Configuration. (page 46)
dbscripts Files created by the generate command, SQL scripts, bulk loader files (*.ctl,*.fmt), and command files to invoke the bulk loader. In Oracle, the control files also specify parameters for SQL*Loader.
discards Files created by the client or the bulk loader when they encounter a data record that cannot be processed. If the Client determines that a DMSII record is bad before handing it to the bulk loader, it puts this record in the client discard file as if it was an insert operation. The data is encoded as an SQL stored procedure call using the appropriate stored procedure based on the type of update.
Discard files can be executed using the database's query tool:
SQL Server Management Studio query window
Oracle SQL*Plus utility

Databridge Installation Guide
22
logs Client log files. The filename includes a user-configurable prefix followed by a date (yyyymmdd). If multiple log files exist for the same date, a time (_hhmmss) is appended to the end of the filename.
scripts User script files.
The data source working directory also contains temporary files. Many of these files aren't removed by the Client and should be deleted periodically. You can safely delete them any time the Client is not running (except during the interval between a redefine command and a reorg command). Temporary files include: trace files; bcp log files; unload files; scripts that are executed by the redefine command; and temporary files used by the Windows client during data extraction. You should use the logmaint utility to get rid of old log files. This utility lets you specify the number of log files you want to keep at a given time.
Installing Databridge on Windows
23
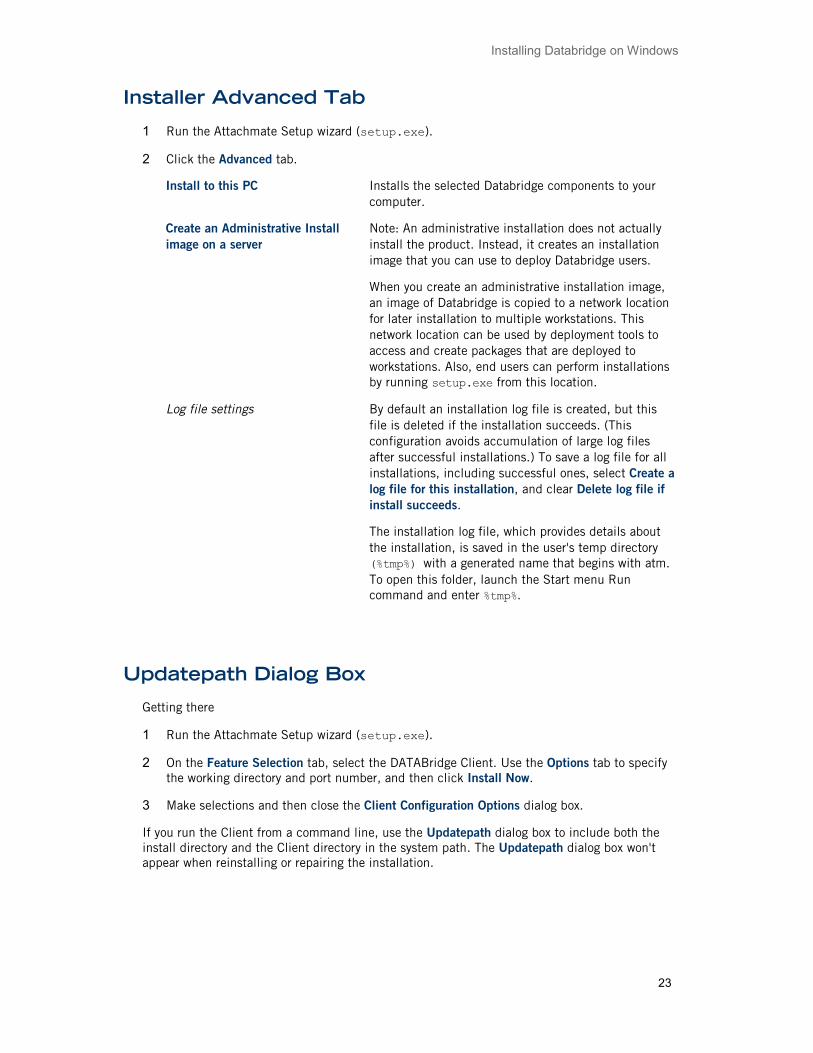
Installer Advanced Tab
1 Run the Attachmate Setup wizard (setup.exe).
2 Click the Advanced tab.
Install to this PC Installs the selected Databridge components to your computer.
Create an Administrative Install image on a server
Note: An administrative installation does not actually install the product. Instead, it creates an installation image that you can use to deploy Databridge users.
When you create an administrative installation image, an image of Databridge is copied to a network location for later installation to multiple workstations. This network location can be used by deployment tools to access and create packages that are deployed to workstations. Also, end users can perform installations by running setup.exe from this location.
Log file settings By default an installation log file is created, but this file is deleted if the installation succeeds. (This configuration avoids accumulation of large log files after successful installations.) To save a log file for all installations, including successful ones, select Create a log file for this installation, and clear Delete log file if install succeeds.
The installation log file, which provides details about the installation, is saved in the user's temp directory (%tmp%) with a generated name that begins with atm. To open this folder, launch the Start menu Run command and enter %tmp%.
Updatepath Dialog Box
Getting there
1 Run the Attachmate Setup wizard (setup.exe).
2 On the Feature Selection tab, select the DATABridge Client. Use the Options tab to specify the working directory and port number, and then click Install Now.
3 Make selections and then close the Client Configuration Options dialog box.
If you run the Client from a command line, use the Updatepath dialog box to include both the install directory and the Client directory in the system path. The Updatepath dialog box won't appear when reinstalling or repairing the installation.

Databridge Installation Guide
24
This setting Does this
Do not add Databridge program directory to the PATH
Requires that you enter the fully qualified filename (including the Databridge directory) each time you run a Databridge program from the command line. (Make sure that you enclose the path in quotation marks, as "Program Files" contains a space.)
Alternatively, you can setup command files to run the Client or you can use environment variables to make this task easier. Choose this setting if you use scripts that specify the full path for the client.
Add Databridge program directory to System PATH
Makes the Databridge programs (and directory) available to anyone who uses the computer by adding the Databridge directories to the Windows Path environment variable. Avoid this option if security is a concern.
Both the client directory (for example, SQLServer) and the install directory will be added to the PATH.
Add Databridge program directory to the User PATH
Makes the Databridge programs available only to the user who installed the program.
Both the client directory (for example, SQLServer) and the install directory will be added to the PATH.
Client Configuration Dialog Box
Working directory for the Databridge Client Service
Displays the working directory you selected in the Options tab of the installer. You can change it by entering a different path or by clicking Browse. This directory is required for all client operations, whether initiated from a command line or by the service.
File Security
Enable File Security Select this check box to set the security attributes for the Client working directory, its files and folders, according to the settings specified in this dialog box..
UserID and Optional Groups When Enable File Security is selected, you can specify a user or group that has read-write privileges to all directories and files created by the Client program (in addition to administrators and the built-in system account, which have these privileges by default). You can specify both individual users and groups if the user is not a member of the group. Optionally, you can specify a group that has read-only privileges to these files.

Installing Databridge on Windows
25
UserID for dbutility
Specify the user ID that has full read-write control of the Databridge Client and its programs. dbutility commands must be run under this user ID or by a member of the group specified in the DBAdministrator Group string in the Windows registry.
Note: If you reinstall Databridge, this value will be populated with the current ID, which you can clear and reenter, if needed.
DBAdministrator Group
Specify a group name whose members can run the Databridge Client program and who have read-write access to files in the Client working directory.
DBOperator Group
(Optional) Specify a group name whose members can view the Databridge configuration and log files, but cannot modify them. This selection is useful for groups who are not directly involved in running Databridge, but who need to monitor its operations.

27
Installing the Databridge Client on UNIX
This section provides instructions for installing and upgrading the Databridge Client software, including the Client Console and daemon, on a UNIX system.
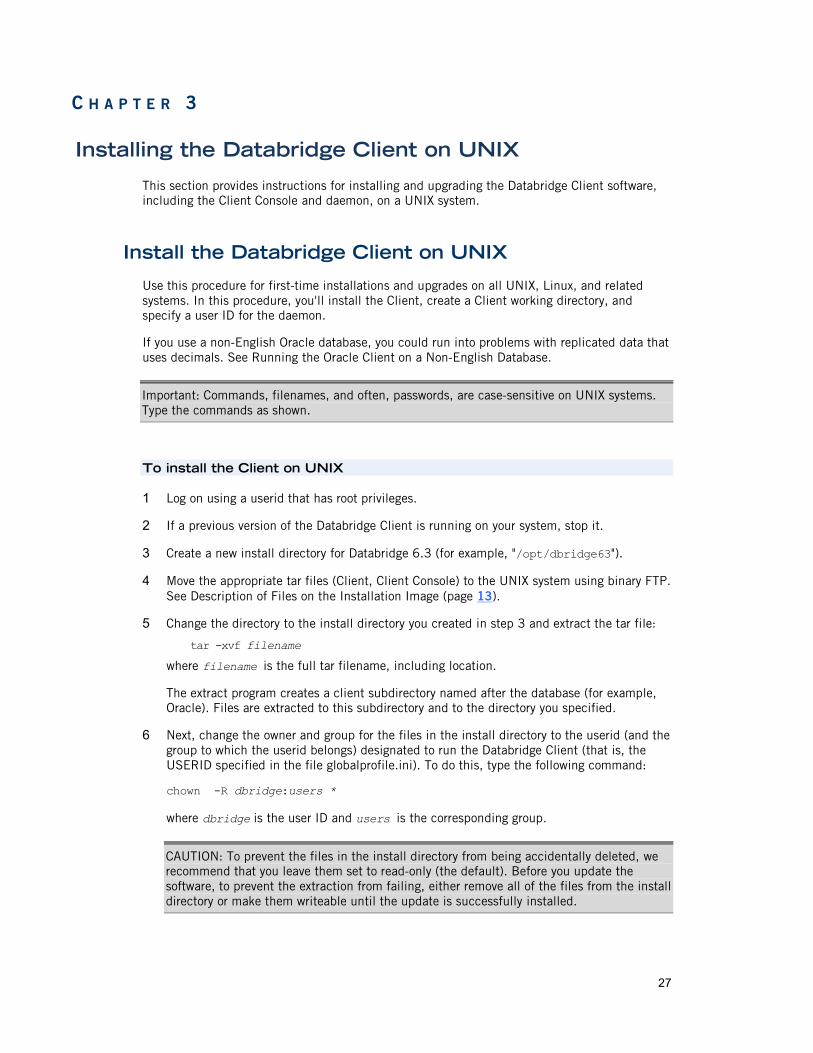
Install the Databridge Client on UNIX
Use this procedure for first-time installations and upgrades on all UNIX, Linux, and related systems. In this procedure, you'll install the Client, create a Client working directory, and specify a user ID for the daemon.
If you use a non-English Oracle database, you could run into problems with replicated data that uses decimals. See Running the Oracle Client on a Non-English Database.
Important: Commands, filenames, and often, passwords, are case-sensitive on UNIX systems. Type the commands as shown.
To install the Client on UNIX
1 Log on using a userid that has root privileges.
2 If a previous version of the Databridge Client is running on your system, stop it.
3 Create a new install directory for Databridge 6.3 (for example, "/opt/dbridge63").
4 Move the appropriate tar files (Client, Client Console) to the UNIX system using binary FTP. See Description of Files on the Installation Image (page 13).
5 Change the directory to the install directory you created in step 3 and extract the tar file:
tar -xvf filename
where filename is the full tar filename, including location.
The extract program creates a client subdirectory named after the database (for example, Oracle). Files are extracted to this subdirectory and to the directory you specified.
6 Next, change the owner and group for the files in the install directory to the userid (and the group to which the userid belongs) designated to run the Databridge Client (that is, the USERID specified in the file globalprofile.ini). To do this, type the following command:
chown -R dbridge:users *
where dbridge is the user ID and users is the corresponding group.
CAUTION: To prevent the files in the install directory from being accidentally deleted, we recommend that you leave them set to read-only (the default). Before you update the software, to prevent the extraction from failing, either remove all of the files from the install directory or make them writeable until the update is successfully installed.
C H A P T E R 3

Databridge Installation Guide
28
7 In the editor, open the sample daemon script file (dbdaemon) located on the root of the install directory, update the necessary environment variables, and then save dbdaemon to the following location:
• On Linux and Solaris: /etc/init.d
• On HP-UX: sbin/init.d
8 Create the directory /etc/Attachmate/DATABridge/6.3
9 In the editor, open the globalprofile.smp file on the root of the install directory and make the following changes:
Caution: This file is critical for client operations. If this file is missing or contains the wrong information, the client will not run.
a) For INSTALLDIR, specify the install directory you created in step 3.
b) For WORKINGDIR, specify the full name of the Client's working directory for 6.3. If you're upgrading from 6.0 or 6.1, make sure that the working directory for 6.3 is different from your 6.0 or 6.1 working directory. You create the actual directory later in this procedure.
c) For USERID, specify the user under which you'll run the daemon. When you start the daemon, you must log in as this user or as the root user. Clients can only be run under this userid.
d) To enable file security for the Client working directory, specify a value for umask. The bits specified get removed from the default file security bits. A umask of 027 (the default) indicates that the owner bits are unchanged, but the group's w and x bits are reset and all 3 bits are reset for other users. For a stronger mask, specify a value such as 077.
10 Save the file as globalprofile.ini to the directory /etc/Attachmate/DATABridge/6.3
11 Do one of the following:
• (New installations) In the home directory, use the editor to update your profile (for example, ".profile" or ".bash_profile") and include the environment variable ORACLE_HOME. Consult the Oracle database administrator to determine what this variable should be set to (typically, it's "/opt/oracle..."). You must also include the directory $ORACLE_HOME/bin in the PATH to ensure that the bulk loader sqlldr can be located. You may want to also include the environment variable INSTALLDIR, which points to the directory created in step 3. You can then add the Client program directory $INSTALLDIR/Oracle to the PATH, making it a lot easier to run the Client from the command line.
• (Upgrades - Optional) Update your profile so that the PATH points to the newly-installed Client.
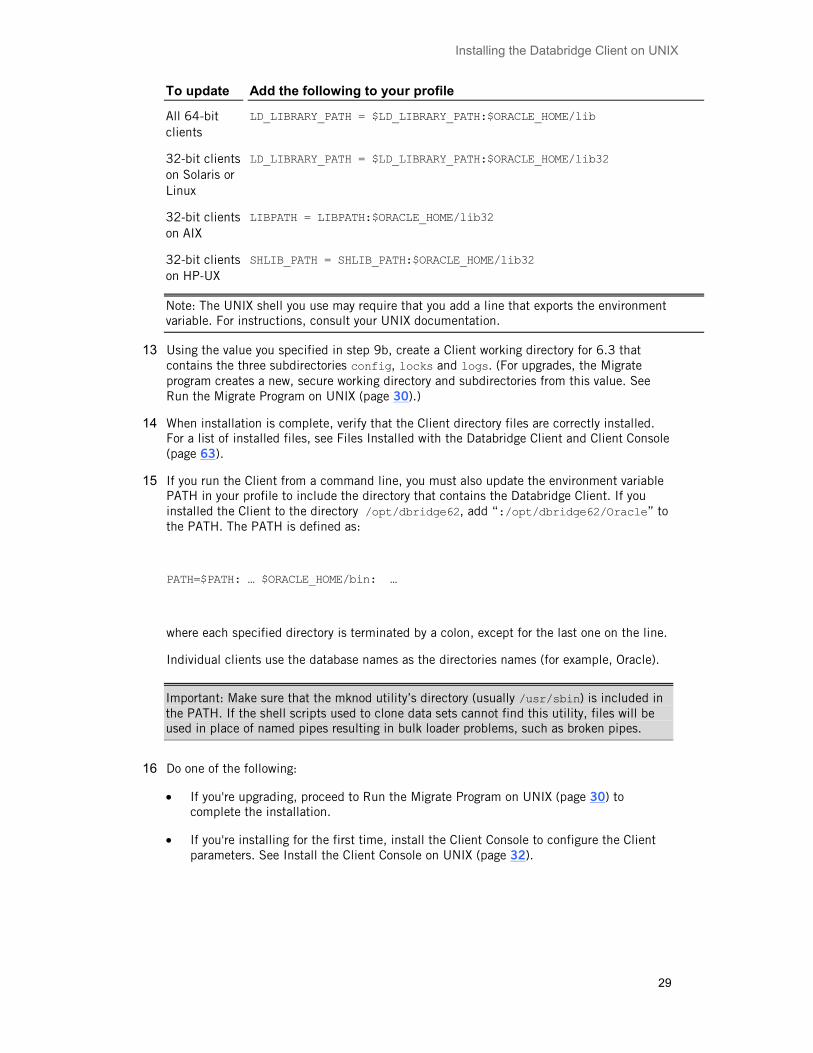
12 For the Databridge Client to find the Oracle shared libraries, add the Oracle lib (or lib32) directory to the appropriate environment variable for your system, as shown in the following table. The line you add after the ORACLE_HOME definition can be used instead of typing the complete Oracle lib directory name.
Installing the Databridge Client on UNIX
29
To update Add the following to your profile
All 64-bit clients
LD_LIBRARY_PATH = $LD_LIBRARY_PATH:$ORACLE_HOME/lib
32-bit clients on Solaris or Linux
LD_LIBRARY_PATH = $LD_LIBRARY_PATH:$ORACLE_HOME/lib32
32-bit clients on AIX
LIBPATH = LIBPATH:$ORACLE_HOME/lib32
32-bit clients on HP-UX
SHLIB_PATH = SHLIB_PATH:$ORACLE_HOME/lib32
Note: The UNIX shell you use may require that you add a line that exports the environment variable. For instructions, consult your UNIX documentation.
13 Using the value you specified in step 9b, create a Client working directory for 6.3 that contains the three subdirectories config, locks and logs. (For upgrades, the Migrate program creates a new, secure working directory and subdirectories from this value. See Run the Migrate Program on UNIX (page 30).)
14 When installation is complete, verify that the Client directory files are correctly installed. For a list of installed files, see Files Installed with the Databridge Client and Client Console (page 63).
15 If you run the Client from a command line, you must also update the environment variable PATH in your profile to include the directory that contains the Databridge Client. If you installed the Client to the directory /opt/dbridge62, add “:/opt/dbridge62/Oracle” to the PATH. The PATH is defined as:
PATH=$PATH: … $ORACLE_HOME/bin: …
where each specified directory is terminated by a colon, except for the last one on the line.
Individual clients use the database names as the directories names (for example, Oracle).
Important: Make sure that the mknod utility’s directory (usually /usr/sbin) is included in the PATH. If the shell scripts used to clone data sets cannot find this utility, files will be used in place of named pipes resulting in bulk loader problems, such as broken pipes.
16 Do one of the following:
• If you're upgrading, proceed to Run the Migrate Program on UNIX (page 30) to complete the installation.
• If you're installing for the first time, install the Client Console to configure the Client parameters. See Install the Client Console on UNIX (page 32).
Databridge Installation Guide
30
Run the Migrate Program on UNIX
Use this procedure to upgrade Databridge Client 6.1 and earlier on UNIX systems. If upgrading from 6.2.x, running migrate and dbfixup is not required. You can use your existing working directory and configuration files.
To run the Migrate program
1 Install the Databridge Client 6.3. See Install the Databridge Client on UNIX (page 27).
2 Make sure that the file globalprofile.ini includes values for INSTALLDIR, USERID, WORKINGDIR. If you want to enable file security for the working directory, make sure that the umask value is set. (For instructions, see Install the Databridge Client on UNIX (page 27)). The Client runs under the specified USERID in the globalprofile.ini.
3 Open a command session and type migrate. If the Client directory wasn't added to the PATH during installation, you must type the full path to migrate.
The Migrate program first creates a new global working directory and then creates a working directory for each migrated data source. Next, it moves the existing user scripts and configuration files to this directory after updating the configuration file parameters. It also creates the daemon configuration file which contains any scheduling information defined for the individual data sources.
4 The program asks if you are upgrading from version 6.0 or 6.1 and use the daemon. If the answer is yes, enter the full filename of the global working directory. Make sure that you enter a different name for the 6.3 working directory. After a new working directory structure is created for the service, data sources from the earlier version will be migrated to subdirectories in this working directory. Skip the remaining steps.
5 When prompted, enter the name of each data source. Next, enter the location of the working directory for this data source either as an absolute path or a name relative to the current directory.
The Migrate program creates a working directory for each data source. Existing settings are used to create a new binary configuration file in the config subdirectory and user scripts are moved to the scripts subdirectory. The Migrate program starts the dbfixup program, which upgrades the client control tables and populates the dbscripts directory for each data source. Lastly, the Migrate program applies file security to the working directory, data source directories, and all Client files.
If the read_null_records parameter is set to True, the Migrate program copies the Null Record files for the data sources to the config subdirectories. A new daemon configuration file is created (dbcontrol.cfg), which includes updated data sources and any existing scheduling parameters. The Migrate program runs a dbutility generate command for each data sources to populate the dbscripts directories.
6 Repeat step 5 for each data source. When you're done, enter an empty line (that is, <CR>).
7 To run the Client using the daemon, install the Client Console—preferably to a different machine than the relational database to avoid using valuable system resources.
You can run the command-line program (dbutility) or the daemon after you create a script for the daemon that includes the updated ORACLE_HOME, INSTALLDIR, and WORKING_DIR parameters.

Installing the Databridge Client on UNIX
31
Note: If you need to re-run the Migrate program at any point, first delete the working directory that was created by the Migrate program.

Databridge Installation Guide
32
Install the Client Console on UNIX
For optimal performance, install the Client Console to a workstation connected to—not on—the relational database, or it will use valuable system resources. You can install and run the Client Console on AIX, Linux, Solaris, and Windows operating systems. For example, you can install and run it on a Windows workstation that is connected to UNIX, or run it on both types of workstations simultaneously. See System Requirements (page 10).
Note: Use Databridge Client Console 6.3 with Databridge 6.3 software. It is incompatible with earlier Databridge versions, except for 6.2 SP2.
To install the Client Console
1 Copy the *.tar.gz archives from the \Console\<UNIX> directory for the appropriate UNIX platform to the location you want.
There are two archives; one for the dbconfig and one for dbconsole.
2 Unzip the archives:
gzip –d dbcon*.gz
3 Extract each of the files from the tarballs by running the following separate commands:
tar –xvf dbconsole*.tar tar –xvf dbconfig*.tar
This creates two directories (dbconsole and dbconfig) in the current working directory.
4 Next, provide execute privileges to the dbconfig file and to the dbconsole file:
chmod +x dbconsole/dbconsole chmod +x dbconfig/dbconfig
After the Client Console is successfully installed, start the daemon (page 50) and then start the Client Console (page 51).

33
Installing the Databridge Host
This chapter includes instructions for installing and upgrading the Databridge Host software on the MCP server.
Before You Upgrade the Databridge Host
Before you upgrade, please note the following:
Some files are overwritten by the installation. If you have modified these files, use the following section to write down your changes before you run Databridge Installation WFL. After installation, you can edit the new files with your changes. We also recommend that you make backup copies of these files using the copy command. For example:
copy DATA/= as SAVE/DATA/= copy SYMBOL/= as SAVE/SYMBOL/= copy WFL/= as SAVE/WFL/=
You can use Accessory parameter files from earlier versions with this release. If the current version includes new options you want to use, you can add them by typing them into your existing parameter file.
If you're upgrading Databridge Plus, suspend Databridge Plus (page 37) before you run the installer.
After you upgrade
Make sure to do the following:
Recompile any tailored support libraries. See the Databridge Host Administrator's Guide.
Re-establish Databridge Plus as a system library. See the Databridge Plus Administrator's Guide.
The DMSII Support library is compiled automatically after you upgrade. However, you can save time by manually compiling this library before you start replicating. For instructions, see Chapter 3, "DMSII Support," of the Databridge Host Administrator's Guide.
C H A P T E R 4
Databridge Installation Guide
34
Back Up Changes to Host Files Use this section to write down changes you've made to host files before you run Databridge Installation WFL. After you install, update the new files accordingly.
Databridge Support Library
If you changed SYMBOL/DATABRIDGE/SUPPORT, note the changes you made and make the corresponding changes to the new SYMBOL/DATABRIDGE/SUPPORT.
Databridge Compile WFL
If you changed WFL/DATABRIDGE/COMP, note the changes you made and make the corresponding changes to the new WFL/DATABRIDGE/COMP.
Option Your Setting
QUEUE =
STARTTIME =
BDNAME =
Other:
Other Databridge WFL Files
In any Databridge WFL file, you can modify STARTTIME, QUEUE, and the number of printer backup files. If you changed any of the following Databridge WFL files, write your changes in the tables that follow. After installation, update the files accordingly.
WFL/DATABRIDGE/SPAN
Option Your Setting
QUEUE =
STARTTIME =
BDNAME =
WFL/DATABRIDGE/LISTER
Option Your Setting
QUEUE =
Installing the Databridge Host
35
STARTTIME =
BDNAME =
WFL/DATABRIDGE/SERVER
Option Your Setting
QUEUE =
STARTTIME =
BDNAME =
USERCODE =
WFL/DATABRIDGE/TANKER
Option Your Setting
QUEUE =
STARTTIME =
BDNAME =
WFL/DATABRIDGE/SNAPSHOT
Option Your Setting
QUEUE =
STARTTIME =
BDNAME =
WFL/DATABRIDGE/COPYAUDIT
Option Your Setting
QUEUE =
STARTTIME =
BDNAME =
Databridge Installation Guide
36
KEEP =
Other
WFL/DATABRIDGE/AUDITTIMER
Option Your Setting
QUEUE =
STARTTIME =
(initial start)
BDNAME =
STARTTIME =
(queued start)
WFL/DATABRIDGE/DBINFO
Options Your Setting
QUEUE =
STARTTIME =
BDNAME =
DBEngine CONTROL File
The DATA/ENGINE/CONTROL file is overwritten with the new Databridge key. If you made changes to any of the following options, make a note of them now.
Option Your Setting
Checkpoint client every n audit blocks
Audit Level =
Property Level =
Workers=
Available From...To...=
ReadAhead =
Installing the Databridge Host
37
Links =
SAMPLE Files If you did not rename SAMPLE Databridge CONTROL files before you changed them, save them with a different name now. The SAMPLE files are as follows:
DATA/AUDITTIMER/SAMPLE/CONTROL
DATA/AUDITMIRROR/SAMPLE/CONTROL
DATA/GENFORMAT/SAMPLE/CONTROL
DATA/LISTER/SAMPLE/CONTROL
DATA/SERVER/SAMPLE/CONTROL
DATA/ENGINE/SAMPLE/CONTROL
To use any of the new options, type them in your parameter file. SAMPLE files should only be used as templates to construct files.
Suspend Databridge Plus Before Upgrading If you need to suspend Databridge Plus for any reason (for example, you're upgrading the program) use this procedure to remove the function name assignment.
To remove the function name assignment
Enter the following command from either the ODT or from MARC:
SL - DBAUDITSUPPORT
The host responds with the following message to indicate that Databridge Plus is suspended:
FUNCTION "DBAUDITSUPPORT" IS NO LONGER ESTABLISHED
Reestablish Databridge Plus as a System Library. Make sure that you establish a new system library to the new object code.
Databridge Installation Guide
38
Install the Databridge Host
Before you install, you'll need to determine the usercode and pack that you'll use to install. For best results, we recommend that you choose a privileged usercode and the primary pack. Use the following procedure to install the Databridge host software.
To install the Databridge Host
1 Sign in to the privileged usercode. If you install from DVD to a nonprivileged usercode, all object files will be marked as restricted, which causes the installation WFL to pause (as explained in step 4).
2 Copy the Databridge installation WFL (WFL/DATABRIDGE/INSTALL) to the host.
• If you're installing from uploaded files, upload DISKINSTALL and IMAGE files using a file transfer tool capable of binary/image transfers to the privileged usercode where Databridge is to be installed. Sign on to the usercode, and then use the following command:
WFL UNWRAP *= AS = OUTOF DISKINSTALL
• If you're installing from the DVD, decompress the file
WFL UNWRAP *= AS = OUTOF *CDINSTALL FROM DB63 (KIND=CDROM)
In the WFL file, change DATABRIDGE to the version-specific DVD name and save the file:
G WFL/DATABRIDGE/INSTALL
REP /FROM DATABRIDGE/ /FROM DB63/ : T
SA
3 If you're upgrading, back up the DATA/ENGINE/CONTROL directory in case problems exist with new keys.
4 Start the Databridge Installation WFL.
START WFL/DATABRIDGE/INSTALL
When prompted, respond with "OK<Transmit>", and then enter Databridge keys.
5 For first-time installations, create a new DBServer control file and edit it:
a) Copy DATA/SERVER/SAMPLE/CONTROL AS DATA/SERVER/CONTROL
b) Change SOURCE <datasourcename> to the name of the data source that the client uses.
c) (Optional) Change TCP/IP Port = 11367 (the default) to the port you want to use.

Installing the Databridge Host
39
d) Change Database = DESCRIPTION/<databasename> ON <packname> to reflect the usercode/location of the description file for the database to be replicated.
6 (Recommended) Enable the Databridge Plus software for near real-time access to audit files. Execute the following command (replacing <usercode> and <pack> with your values):
SL DBAUDITSUPPORT=(<usercode>)OBJECT/DATABRIDGE/AUDITSUPPORT ON <pack>:TRUSTED,LINKCLASS=3
7 If you are upgrading, do the following:
a) Bring down the Databridge Server using the AX QUIT command.
b) Recompile your tailored support libraries by entering the following command (replacing <usercode>, <databasename>, and <pack> with your values):
START WFL/DATABRIDGE/COMP ("SUPPORT", "(<usercode>)<databasename> on <pack>")
For more information on recompiling, see the Databridge Host Administrator's Guide.
1. Start the Databridge Server:
START WFL/DATABRIDGE/SERVER
Notes:
If your database uses guardfiles, you can include Databridge under database guardfile validation. See Set Up Guardfiles (page 39).
For information about security options, see "Databridge Security" in the Databridge Host Administrator's Guide.
Set Up Guardfiles
If your database uses guardfiles, Databridge can be included under database guardfile validation. For validation of guardfiles to work, the relevant guardfile must specify read access (RO) for the Databridge Accessory and/or the usercode under which the Databridge Accessory is running.
In addition, the Databridge (DBEngine) must have read access to the actual database guardfile. You can accomplish this in one of the following ways:
Run the Databridge Accessory under the usercode that owns the guardfile. For example, if the guardfile is (PROD)GUARDIAN/FILE, run the Accessory under the PROD usercode.
Change the security of the guardfile to PUBLIC IN.
Make sure that DBEngine is a privileged program. DBEngine is marked as a privileged program on the release tape.

Databridge Installation Guide
40
Note: Access to the guardfile itself is enforced by the MCP. Therefore, even if you make the database visible to the Accessories, you must still give DBEngine read access to the guardfile, as explained above.
Databridge Components and Guardfiles
Databridge Accessories and the Databridge Server Workers (but not the Databridge Server itself) must have read access to the database (physical or logical) they are using. No other rights are necessary. Because GenFormat and DBInfo always use the physical (versus a logical) database when searching for a quiet point, they require read access to the physical database.
DBEngine and Extract Workers
The DBEngine and its Extract Workers must have OPENUPDATE access to the physical database. This allows the extract routines to generate a small amount of audit and switch the active audit file. In addition, the Extract Workers require FIND access for reading the data set records during a clone.
Here's an example of guardfile fragments for a physical database. (In this example, the fictional site runs up to three Extract Workers and has Databridge software installed under the (DB) usercode on the family named DBPACK.)
PROGRAM (DB)OBJECT/DATABRIDGE/DBINFO ON DBPACK = RO; PROGRAM (DB)OBJECT/DATABRIDGE/GENFORMAT ON DBPACK = RO; PROGRAM (DB)OBJECT/DATABRIDGE/ENGINE ON DBPACK = RW, DMVERBS = (OPENINQUIRY, OPENUPDATE); PROGRAM (DB)EXTRACT/WORKER/0 = RW, DMVERBS = (OPENINQUIRY, OPENUPDATE, FIND); PROGRAM (DB)EXTRACT/WORKER/1 = RW, DMVERBS = (OPENINQUIRY, OPENUPDATE, FIND);
The DMVERBS list for the physical database prevents any actual updating because DELETE, STORE, etc., are not allowed.
If you allow more than two Extract Workers to run concurrently, add entries like the ones above with the appropriate number for the last node.
Accessories and Databridge Server Workers
The Accessories and Databridge Server Workers (but not the Databridge Server itself) must be listed in the guardfile that protects the database they will be using. However, if they use a logical database instead of a physical database, put these entries in the guardfile that protects the logical database.
Here's an example of guardfile fragments for a physical or logical database. (In this example, Databridge is installed under the (DB) usercode on the family named DBPACK and the Databridge Clients run on hosts called IPADDRESS1 and IPADDRESS2.)
PROGRAM (DB)OBJECT/DATABRIDGE/SPAN ON DBPACK = RO; PROGRAM (DB)OBJECT/DATABRIDGE/SNAPSHOT ON DBPACK = RO, PROGRAM (DB)OBJECT/DATABRIDGE/LISTER ON DBPACK = RO; PROGRAM (DB)OBJECT/DATABRIDGE/TANKER ON DBPACK = RO; PROGRAM (DB)OBJECT/DATABRIDGE/AUDITTIMER ON DBPACK = RO; PROGRAM (DB)DBSERVER/WORKER/1 ON IPADDRESS1 = RO; PROGRAM (DB)DBSERVER/WORKER/1 ON IPADDRESS2 = RO; PROGRAM (DB)DBSERVER/WORKER/2 ON IPADDRESS1 = RO; PROGRAM (DB)DBSERVER/WORKER/2 ON IPADDRESS2 = RO;

Installing the Databridge Host
41
If you allow more than two Databridge Server Workers to run concurrently, add entries like the ones above with the appropriate number for the last node.

43
Setting Up a Relational Database
This chapter covers instructions for setting up a relational database to receive DMSII data.
Setting Up a SQL Server Database
Use the following procedures to set up a Microsoft SQL Server database for use with the Databridge Client for SQL Server.
The Databridge Client uses only the ODBC data source parameter to connect to ODBC. The ODBC data source parameter provides the database and server parameters required to run BCP.
In addition, the following notes apply to Microsoft SQL Server:
The default schema for the Databridge user determines the ownership of tables.
The Databridge Client for SQL Server uses ODBC, which places no restrictions on the user’s schema when using SQL Server 2005 or later.
You can use primary keys with non-clustered indexes without having to edit the scripts generated by the client.
The Databridge Client for SQL Server supports the data type bigint and the SQL Server 2008 data types date, datetime2 and time. To maintain backward compatibility for these data types, enable the parameters use_bigint, use_date, use_datetime2 and use_time (respectively).
To set up a SQL Server database
1 If you use Integrated Windows Authentication with the Databridge Client on Microsoft SQL Server 2012 and are running the service using the default account, you must add NT AUTHORITY\SYSTEM to the sysadmin Server Role. In the Microsoft SQL Server 2012 Management Studio, use the left pane to navigate to Security > Server Roles, right-click sysadmin, select Properties, and click the Add button.
2 Create an ODBC data source, unless one already exists. See the following procedure for instructions.
Important: When creating ODBC data sources for the Databridge Client, use the Microsoft SQL Server Native Client driver. The Microsoft SQL Server driver doesn't support columns longer than 32K, multi-threaded updates, and several other important Databridge features.
3 Make sure that you have enough disk space free for the Microsoft SQL Server database.
4 If your DMSII data sets contain case-sensitive ALPHA key items, using the default Microsoft SQL Server installation may result in duplicate keys. To avoid this, perform a custom installation of Microsoft SQL Server and set the Sort Order to Dictionary, case-sensitive. The only way you can change sort order case-sensitivity is via installation.
C H A P T E R 5

Databridge Installation Guide
44
Create an ODBC Data Source Use this procedure to set up an ODBC data source. If you have not created a new SQL Server database, and are not using an existing database, you must create a new database as outlined in the previous section. This database will hold your Databridge Client control tables and the replicated DMSII tables.
To create an ODBC Data Source
1 Click Start > Settings > Control Panel > Administrative Tools. Within Administrative tools, double-click Data Sources (ODBC).
2 In the ODBC Data Source Administrator, click the User DSN or System DSN tab. User DSNs are limited to the user who created them. System DSN data sources are available to all users of the computer and are required if you use the service.
3 Click the Add button.
4 In the Create New Data Source dialog box, select the driver SQL Native Client, and then click Finish.
Caution: The driver SQL Server doesn't support columns longer than 32K, multi-threaded updates, and several other important Databridge features.
5 In the Create a New Data Source to SQL Server wizard, name the data source, such as its database name followed by DS. You will enter this name as the data source parameter value in the Databridge Client Configuration file.
6 In the Server field, choose your local computer name, and then click Next.
7 To connect to this data source, choose an authentication method, and then click Next:
Integrated Windows Authentication
SQL Server uses the credentials of the currently logged in user to validate the login. Most installations use Integrated Windows Authentication.
Note: If you select this option on Microsoft SQL Server 2012 and are running the service using the default account, you must add NT AUTHORITY\SYSTEM to the sysadmin Server Role. In the Microsoft SQL Server 2012 Management Studio, use the left pane to navigate to Security > Server Roles, right-click sysadmin, select Properties, and click the Add button.
SQL Server Authentication
Databridge connects to SQL Server using the user ID/password pair specified in the Databridge configuration file.
8 Click Finish to create the ODBC data source.

Setting Up a Relational Database
45
Setting Up an Oracle Database
The following notes apply to Oracle:
The Oracle clients have a configuration parameter that allows you to specify a rollback segment larger than the default rollback segment. You can use a rollback segment to execute the SQL statement SET TRANSACTION USE ROLLBACK SEGMENT at the start of every transaction.
The Oracle clients support the CLOB data type for holding DMSII ALPHA items that are too large for the VARCHAR2 data type. The parameters in PL/SQL stored procedures for these clients limit the CLOB data type to 32K (Oracle 11g) and 16K (Oracle 10g2 and 9i). For backward compatibility, this feature is enabled via the use_clob parameter.
Starting in Oracle 11g Release 2, Oracle database passwords are case-sensitive.
The Oracle open_cursors Parameter
It is recommended that you add the open_cursors parameter to the initSID.ora file. Depending on the setting of the aux_stmts parameter, you may need to increase the value of open_cursors to make it slightly higher than the value of aux_stmts.
If open_cursors is not set high enough, an error occurs, indicating that the maximum number specified was exceeded. Refer to your Oracle documentation for information on setting these values.
Setting Up a User ID
If you're installing Databridge Client software for the first time, you must set up a user ID that allows the client to access the relational database.
Microsoft SQL Server
If you are the Microsoft SQL Server database administrator (DBA) or if you have a user ID with DBA privileges, set up a user ID for the Databridge Client that has the following.
Caution: Do not use the sa user ID to run the Databridge Client. The sa user ID typically owns tables that the Databridge Client should not have access to.
(Required) The ability to select from any table, including system tables. Databridge reads the data dictionary to determine if a table or procedure exists.
(Required) The ability to create tables, stored procedures, and indexes for tables that the user ID owns.
(Optional) Unlimited space usage. This is recommended because of the large amounts of data that can be replicated from a DMSII database.
To include rights to modify the database as needed, use the Databridge owner (db_owner) to set up the user ID. After you set up the user ID, you must configure the user ID, password, server, and database. For instructions, see Signon Configuration. (page 46)

Databridge Installation Guide
46
Oracle
If you are the database administrator (DBA), or if you have a user ID with DBA privileges, set up a user ID for the Databridge Client that has the following.
In Oracle 12c, the DBA role is much more restrictive and is not sufficient to run the Databridge Client. In Oracle 12c, the user ID must start with C## or c##. This identifies a common user.
Caution: Do not use IDs such as SYS, SYSTEM, or SYSMAN to run the Databridge Client. These user IDs typically own tables that the Databridge Client should not have access to.
(Required) The ability to select from any table including the system tables SYS.OBJ$ and SYS.USER$.
(Required) The ability to create and drop tables, stored procedures, and indexes for tables that the user ID owns.
(Required) The ability to alter tables.
(Required) The ability to alter the session.
(Optional) Unlimited tablespace privileges. This is recommended because of the large amounts of data that can be replicated from a DMSII database.
Note: In Oracle 10g2 and 11g you can accomplish all of the above by granting the DBA privilege to the user. In Oracle 12c, the same applies, except you won't have select access to the above mentioned system tables. You can grant select access to these two system tables by executing the following GRANT statements from a privileged account, such as SYSTEM:
GRANT SELECT ON SYS.OBJ$ TO userid GRANT SELECT ON SYS.USER$ TO userid
This allows the userid to read these two system tables, but does not allow the userid to update them. Some DBAs will be reluctant to grant the DBA privilege to the Databridge user, particularly on older versions of Oracle. If that is the case, you can still achieve what you need by using the appropriate GRANT statements.
For information on creating a user ID, see your Oracle documentation.
Signon Configuration
If you have installed the Databridge Client software for the first time, you must supply the appropriate logon parameters to your relational database. In addition, you may be required to supply a password to sign on to the Databridge Server on the host.
When you create a new data source from the Client Console, the Hostname and Port settings (in the Add Data Source dialog box) provide these logon parameters. If a KEY is specified for the source in the DATA/SERVER/CONTROL, provide one in the Password box. These settings are saved to the binary Client configuration file (dbridge.cfg), which automatically encodes passwords.
If you supply logon parameters via dbutility command-line options, you must type them each time you run dbutility.
Setting Up a Relational Database
47
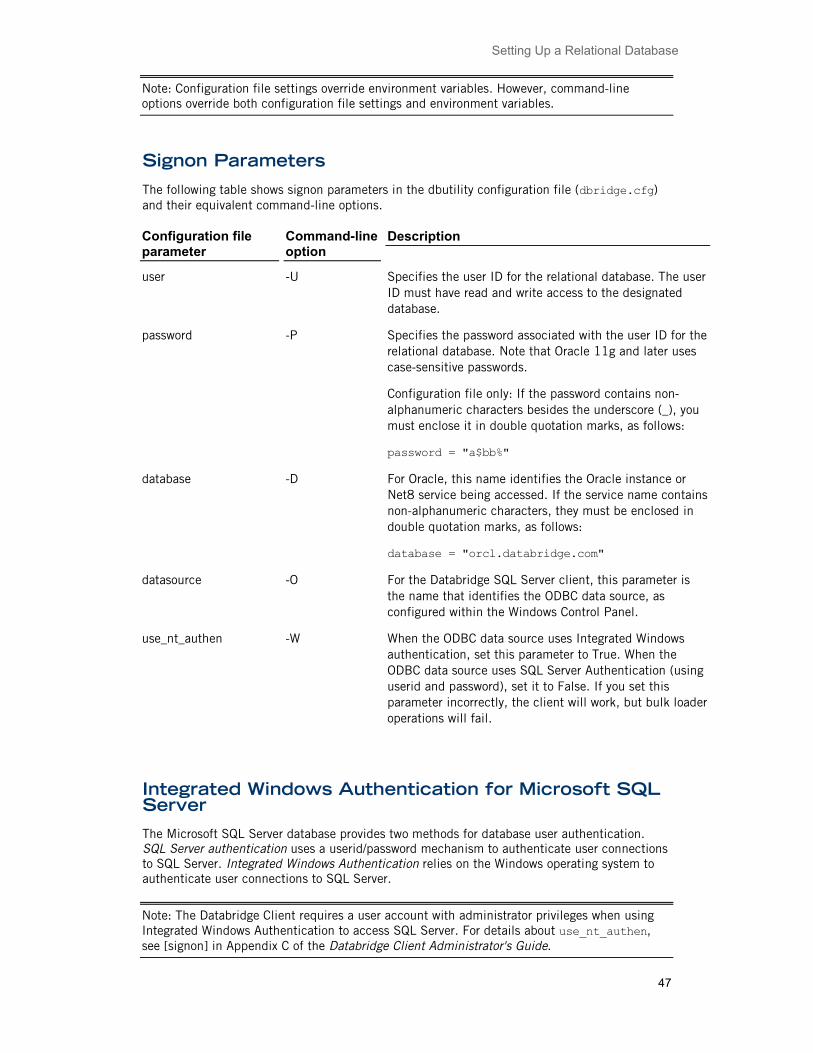
Note: Configuration file settings override environment variables. However, command-line options override both configuration file settings and environment variables.
Signon Parameters
The following table shows signon parameters in the dbutility configuration file (dbridge.cfg) and their equivalent command-line options.
Configuration file parameter
Command-line option
Description
user -U Specifies the user ID for the relational database. The user ID must have read and write access to the designated database.
password -P Specifies the password associated with the user ID for the relational database. Note that Oracle 11g and later uses case-sensitive passwords.
Configuration file only: If the password contains non-alphanumeric characters besides the underscore (_), you must enclose it in double quotation marks, as follows:
password = "a$bb%"
database -D For Oracle, this name identifies the Oracle instance or Net8 service being accessed. If the service name contains non-alphanumeric characters, they must be enclosed in double quotation marks, as follows:
database = "orcl.databridge.com"
datasource -O For the Databridge SQL Server client, this parameter is the name that identifies the ODBC data source, as configured within the Windows Control Panel.
use_nt_authen -W When the ODBC data source uses Integrated Windows authentication, set this parameter to True. When the ODBC data source uses SQL Server Authentication (using userid and password), set it to False. If you set this parameter incorrectly, the client will work, but bulk loader operations will fail.
Integrated Windows Authentication for Microsoft SQL Server The Microsoft SQL Server database provides two methods for database user authentication. SQL Server authentication uses a userid/password mechanism to authenticate user connections to SQL Server. Integrated Windows Authentication relies on the Windows operating system to authenticate user connections to SQL Server.
Note: The Databridge Client requires a user account with administrator privileges when using Integrated Windows Authentication to access SQL Server. For details about use_nt_authen, see [signon] in Appendix C of the Databridge Client Administrator's Guide.

Databridge Installation Guide
48

49
Getting Started
Next Steps for the Databridge Client
After the installation is complete, you can start using the Databridge Client. If you're using the Databridge Client for the first time, we recommend that you run it from the Client Console.
If you're upgrading and want to start using the Client Configurator to customize your relational database, see Switch from User Scripts to the Client Configurator (page 52).
If you're upgrading and plan to run the Client from a command line, use your existing Client configuration file. See Appendix C in the Databridge Client Administrator's Guide for information about configuration parameters.
C H A P T E R 6

Databridge Installation Guide
50
Start the Service / daemon If you installed the Client Console, use one of the following procedures to start the service (Windows) or daemon (UNIX).
To start the service (Windows)
1 From the Start menu, choose Settings > Control Panel > Administrative Tools > Services.
2 In the Services window, double-click Databridge Client Manager 6.3, and then click the Start button.
If the service doesn't start, the specified port may be in use. Check the service log file in Documents and Settings\All Users\Application Data\Attachmate\DATABridge\6.3\logs.
3 To stop the service, select Databridge Client Manager 6.3, and click Stop.
4 (Optional) On the recover tab, specify that the service is restarted after the first or second failures. (Do not set more than two failures; if the service fails more than that, you'll want a service failure to inform you of the problem.)
5 Start the Client Console and follow the instructions to add the service.
To start the daemon (UNIX)
1 Log in using the user ID you specified for the daemon in step 7 of the installation instructions (page 27) or as a user with root privileges. If you start the daemon from the root (for example, by typing su), the daemon automatically assumes the specified user ID.
2 Make sure that you specified the appropriate environment variables in the dbdaemon script. If you use Oracle, add the Oracle bin directory to the PATH. Failing to do this causes the bulk loader scripts to not find the sqlldr program. Also, add the Oracle lib directory to the LD_LIBRARY_PATH environment variable (64-bit systems) or the program will be unable to find the shared libraries and will not start. For more information, see Install the Databridge Client on UNIX (page 27).
3 Start the daemon by doing one of the following.
• On Linux and Solaris systems, type:
/etc/init.d/dbdaemon start
• On HP_UX systems, type:
/sbin/init.d
The daemon automatically creates the config and logs subdirectories for the data source working directory, and then places a binary configuration file (dbcontrol.cfg) in the config subdirectory. This configuration file is updated each time you add a new data source in the Client Console.
Note: You can start or stop the daemon anytime by manually running the script with the appropriate options (start or stop).
4 If you're using the Client Console, see Start the Client Console (page 51).

Getting Started
51
Start the Client Console After the service has been started, start the Client Console and connect to the service. See Starting the Service (page 50).
To start the Client Console on Windows
1 From the Start menu, choose Programs > Attachmate Databridge > Databridge Client Console 6.3.
2 From the Client Console, click the Help menu, and then click Help Contents or Cheat Sheets for instructions on getting started.
To start the Client Console on UNIX
1 From a command line, run the following command
cd <install_path>/dbconsole
where <install_path> is the location to which you installed the Client Console.
2 Next, run the following command:
./dbconsole &
3 From the Client Console, click the Help menu, and then click Help Contents or Cheat Sheets for instructions on getting started.
Introducing the Batch Console
The Batch Console automates routine Client tasks by allowing command files/shell scripts launched by the Client service to interact with the service. It interprets a source file that contains a set of statements written in a language similar to Visual Basic. These statements can initiate a connection, perform rudimentary tests, and issue console requests, to the service. For example, by using the Batch Console in an end-of-run script that runs daily reports, you can restart the Client after the reports are generated.
To use the Batch Console, you must first create a source file for the Batch Console and place it in the scripts directory of the service's working directory (also referred to as the Client's global working directory). We recommend that you use a file extension that allows you to easily identify this file as a Batch Console source file (for example, .bcs). You can debug this source file by running the Batch Console from the command line, using the source filename (including directory, such as scripts\source_filename) as the first argument of the Batch Console command.
The Batch Console always runs as a background run. Its activity is written to a log file in the current directory. The log filename uses the source filename with the extension .log added to it. For example, if your source filename is sourcefile.bcs the log file is named sourcefile.bcs.log.
For more information, see Chapter 8, "Automating Client Operations with the Service" in the Databridge Client Administrator's Guide.

Databridge Installation Guide
52
Switch from User Scripts to the Client Configurator If you currently customize your database via user scripts but wish to start using the Client Configurator, you must first run the dbscriptfixup program for each of your data sources. This program updates the client control tables so that you no longer need the user scripts. The dbscriptfixup program also creates a new set of user scripts that are compatible with the Client Configurator for backup purposes.
Note: This task is not time-sensitive and can be completed at any time after installation. We recommend that you get the Databridge Client 6.3 running to your satisfaction before you perform this task.
To run dbscriptfixup
1 Create a backup copy of your user scripts.
2 Open a command prompt and change the directory to the working directory of a data source.
3 Run the dbscriptfixup verify command (replacing <data_source> with the actual name):
dbscriptfixup verify <data_source>
The dbscriptfixup program performs a read-only review of the user scripts and reports changes you must make to the scripts.
4 Make any changes if indicated by the dbscriptfixup program and then repeat step 2 until you get no errors. You may want to remove or rename problem user scripts and deal with them later.
5 Back up the control tables for the data source to an unload file by typing the following command:
dbutility unload <data_source> <data_source>_control_tables.sav
6 Run the dbscriptfixup upgrade command:
dbscriptfixup upgrade <data_source>
7 Depending on the results of step 6, do one of the following:
• If the command succeeded (exit code=0), you can now use the Client Configurator. If you want to verify the process, see the following section.
• If the command failed (exit code=1), reload your control tables by typing the following command and then replace any user scripts you changed in step 4 to restore the configuration to its previous state.
dbutility reload <data_source> <data_source>_control_tables.sav
Verifying the results
You can verify that the dbscriptfixup program successfully updated your control tables by executing a redefine command for the data source with the –R option. If the command finds no changes in the table layouts, you can safely use the Client Configurator, knowing that all of the changes you made via user scripts are preserved.

Getting Started
53
Starting Enterprise Server
You can start Databridge Enterprise Server using the shortcuts installed on the Windows Start menu or from a command prompt session. When you start Enterprise Server from the Start menu, Enterprise Server starts the application with Administrator privileges (required on Windows 2008). Additionally, Enterprise Server can be started by DBDirector anytime DBDirector receives a connection request from a Databridge Client.
From the Enterprise Server Help menu, you can find instructions for importing sources (upgrades), creating sources (new installations), and configuring the program.
To start from the Start menu
From the Start menu, select All Programs > Attachmate Databridge 6.3 > Databridge Enterprise > Configure Enterprise to run Enterprise Server with elevated administrator privileges.
When Enterprise Server starts, the Databridge Enterprise window appears.
To start from a command session
Navigate to the directory where you installed Enterprise Server and type the following:
DBEnterprise.exe
For information about command-line options, see the Databridge Enterprise Server Help.

54
Installation Results
This section includes lists of files that are installed with each product.
In this appendix
Files Installed with Databridge Host 54
OBJECT/DATABRIDGE Directory 54
SYMBOL/DATABRIDGE Directory 56
WFL/DATABRIDGE Directory 58
DATA Directory 59
PATCH Directory 60
Files Installed with Databridge Enterprise Server 62
Files Installed with the Databridge Client and Client Console 63
Files Installed with Databridge Plus 66
Files Installed with Databridge Host
This section describes each of the files installed with Databridge Host software. Databridge Plus is also installed with the Host software. For files specific to Databridge Plus, see Files Installed with Databridge Plus (page 66).
Databridge software is organized into the following directories:
Directory Description
OBJECT/DATABRIDGE/= Executable files
SYMBOL/DATABRIDGE/= Source files
WFL/DATABRIDGE/= WFL job files
DATA/= Parameter and data files
PATCH/= Source files
OBJECT/DATABRIDGE Directory
The Databridge Host files are copied to the usercode designated at installation.
A P P E N D I X A

OBJECT/DATABRIDGE Directory
55
Filename Description
OBJECT/DATABRIDGE/AUDITMIRROR Object code for the Databridge AuditMirror Accessory
OBJECT/DATABRIDGE/BCNOTIFY Object code for the BCNOTIFY utility
OBJECT/DATABRIDGE/SPAN Object code for the Databridge Span Accessory
OBJECT/DATABRIDGE/DBINFO Object code for the Databridge Database Info utility
OBJECT/DATABRIDGE/ENGINE Object code for Databridge Engine Library
OBJECT/DATABRIDGE/LISTER Object code for the Databridge Lister Accessory
OBJECT/DATABRIDGE/SAMPLE/SQLGEN Object code for the sample Databridge SQLGen Accessory
OBJECT/DATABRIDGE/SAMPLE/DASDLGEN Object code for the sample Databridge DASDLGen Accessory
OBJECT/DATABRIDGE/SAMPLE/ COBOLGEN Object code for the sample Databridge COBOLGen Accessory
OBJECT/DATABRIDGE/SAMPLE/ AUDITCLOSE Object code for the sample Databridge Audit Close utility
OBJECT/DATABRIDGE/SAMPLE/READDOC Object code for the sample Databridge ReadDoc Accessory
OBJECT/DATABRIDGE/SAMPLE/MINISPAN Object code for sample Databridge MiniSpan Accessory
OBJECT/DATABRIDGE/SAMPLE/REFORMAT Object code for sample data item conversion routines
OBJECT/DATABRIDGE/SAMPLE/MINILISTER Object code for the sample Databridge MiniLister Accessory
OBJECT/DATABRIDGE/SAMPLE/COBOLFORMAT Object code for the sample COBOL format utility
OBJECT/DATABRIDGE/SAMPLE/EXTRACTADDRESS Object code for the sample ExtractAddress Library

Databridge Installation Guide
56
OBJECT/DATABRIDGE/SAMPLE/ENCRYPT Object code for the sample encryption Library
OBJECT/DATABRIDGE/SERVER Object code for the Databridge Server Accessory
OBJECT/DATABRIDGE/TANKER Object code for the Databridge Tanker Accessory
OBJECT/DATABRIDGE/SUPPORT Object code for the Databridge Support Library
OBJECT/DATABRIDGE/SNAPSHOT Object code for the Databridge Snapshot Accessory
OBJECT/DATABRIDGE/GENFORMAT Object code for the Databridge GenFormat program
OBJECT/DATABRIDGE/AUDITTIMER Object code for the Databridge AuditTimer program
OBJECT/DATABRIDGE/AUDITSUPPORT Object code for the Databridge Plus library
OBJECT/DATABRIDGE/COBOLSUPPORT Object code for Databridge CobolSupport library
OBJECT/DATABRIDGE/KEYENTRY Object code for product key library
OBJECT/DATABRIDGE/CHANGEUSER Object code for the Databridge ChangeUser library.
ChangeUser changes the usercode of a Server Accessory Worker in cases where the SOURCE specifies a USERCODE, so the Worker will appear in response to a CANDE ?J (jobs) command or the ODT or MARC command A USER <usercode>, which lists all of the active programs running under usercode.
SYMBOL/DATABRIDGE Directory
The Databridge Host files are copied to the usercode designated at installation.

SYMBOL/DATABRIDGE Directory
57
Filename Description
SYMBOL/DATABRIDGE/SAMPLE/LOAD Source code for loading the sample DMSII database (COBOL file type)
SYMBOL/DATABRIDGE/SAMPLE/SQLGEN Sample source code for generating an SQL script to create tables that correspond to a DMSII database. (ALGOL file type)
SYMBOL/DATABRIDGE/SAMPLE/COBOLGEN Sample source code for generating COBOL file layouts corresponding to a DMSII database (ALGOL file type)
SYMBOL/DATABRIDGE/SAMPLE/AUDITCLOSE Sample source code for closing a DMSII audit file (ALGOL file type)
SYMBOL/DATABRIDGE/SAMPLE/READDOC Sample source code for reading audit records (ALGOL file type)
SYMBOL/DATABRIDGE/SAMPLE/DASDLGEN Sample source code for generating a DMSII DASDL source corresponding to a DMSII database (ALGOL file type)
SYMBOL/DATABRIDGE/SAMPLE/DATABASE Source code for defining the sample DMSII database (DASDL file type)
SYMBOL/DATABRIDGE/SAMPLE/MINISPAN Sample source code for writing a COBOL program similar to the Span Accessory (COBOL74 file type)
SYMBOL/DATABRIDGE/SAMPLE/REFORMAT Sample source code for writing data item conversion routines in a REFORMAT library (ALGOL file type)
SYMBOL/DATABRIDGE/SAMPLE/MINILISTER Sample source code for writing a COBOL program similar to the Lister Accessory (COBOL74 file type)
SYMBOL/DATABRIDGE/SAMPLE/COBOLFORMAT Sample source code for writing a formatting routine in COBOL (COBOL74 file type)
SYMBOL/DATABRIDGE/SAMPLE/EXTRACTADDRESS Sample source code for a library that will extract addresses and build VIRTUAL records (COBOL file type)
SYMBOL/DATABRIDGE/SUPPORT Source code for the Support Library (ALGOL file type)

Databridge Installation Guide
58
SYMBOL/DATABRIDGE/DMSIISUPPORT Source code for the DMSII Support Library
SYMBOL/DATABRIDGE/INTERFACE Source code INCLUDE file for the API (ALGOL file type)
SYMBOL/DATABRIDGE/INTERFACE/FC Source code for the COBOL API; contains File Control declarations (COBOL74 file type)
SYMBOL/DATABRIDGE/INTERFACE/FD Source code for the COBOL API; contains File Description declarations (COBOL74 file type)
SYMBOL/DATABRIDGE/INTERFACE/PD Source code for the COBOL API; contains Procedure Division statements (COBOL74 file type)
SYMBOL/DATABRIDGE/INTERFACE/WS Source code for the COBOL API; contains Working Storage declarations (COBOL74 file type)
SYMBOL/DATABRIDGE/COBOLSUPPORT Source code for providing entry points to COBOL Accessories for filtering and formatting routines in the Support Library (ALGOL file type)
WFL/DATABRIDGE Directory
The Databridge Host files are copied to the usercode designated at installation.
Filename Description
WFL/DATABRIDGE/AUDITMIRROR Work flow that receives mirrored audit files on the secondary computer
WFL/DATABRIDGE/BCNOTIFY Work flow for executing BCNOTIFY
WFL/DATABRIDGE/COMP Work flow for compiling a Databridge sample program, the Support Library or DMSII Support Library
WFL/DATABRIDGE/SPAN Work flow for executing Databridge Span
WFL/DATABRIDGE/DBINFO Work flow for executing the Databridge Database Info utility
WFL/DATABRIDGE/LISTER Work flow for executing the Lister accessory
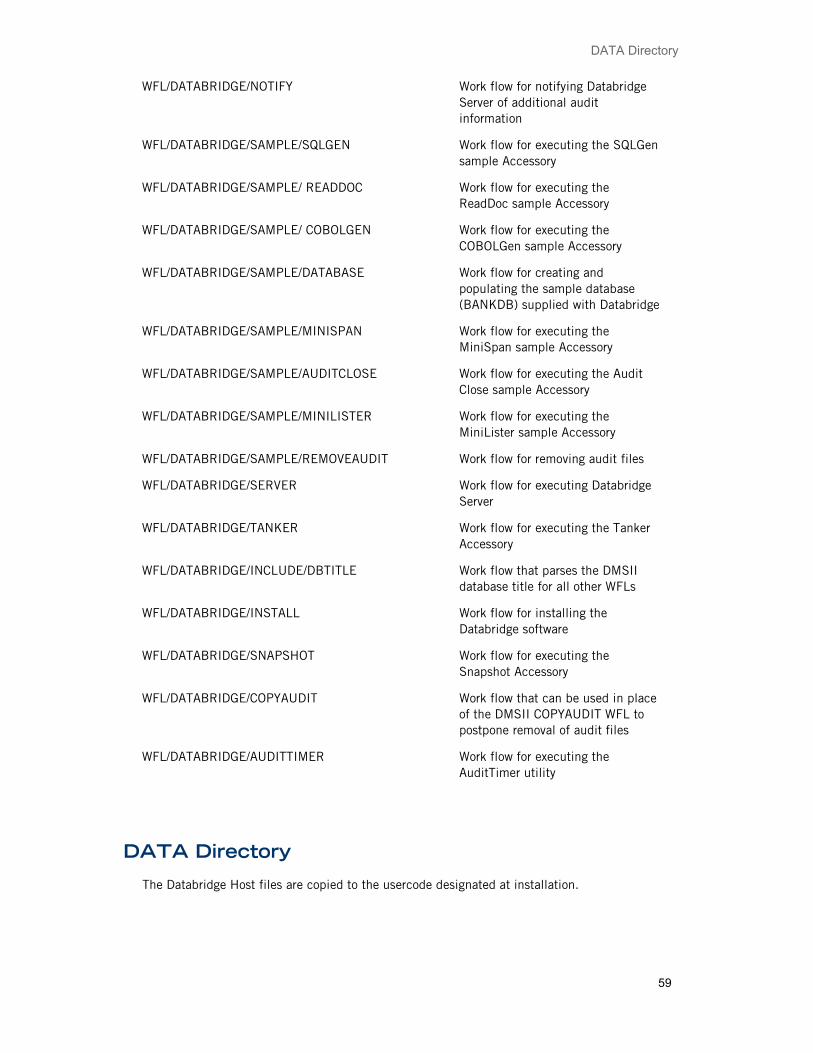
DATA Directory
59
WFL/DATABRIDGE/NOTIFY Work flow for notifying Databridge Server of additional audit information
WFL/DATABRIDGE/SAMPLE/SQLGEN Work flow for executing the SQLGen sample Accessory
WFL/DATABRIDGE/SAMPLE/ READDOC Work flow for executing the ReadDoc sample Accessory
WFL/DATABRIDGE/SAMPLE/ COBOLGEN Work flow for executing the COBOLGen sample Accessory
WFL/DATABRIDGE/SAMPLE/DATABASE Work flow for creating and populating the sample database (BANKDB) supplied with Databridge
WFL/DATABRIDGE/SAMPLE/MINISPAN Work flow for executing the MiniSpan sample Accessory
WFL/DATABRIDGE/SAMPLE/AUDITCLOSE Work flow for executing the Audit Close sample Accessory
WFL/DATABRIDGE/SAMPLE/MINILISTER Work flow for executing the MiniLister sample Accessory
WFL/DATABRIDGE/SAMPLE/REMOVEAUDIT Work flow for removing audit files
WFL/DATABRIDGE/SERVER Work flow for executing Databridge Server
WFL/DATABRIDGE/TANKER Work flow for executing the Tanker Accessory
WFL/DATABRIDGE/INCLUDE/DBTITLE Work flow that parses the DMSII database title for all other WFLs
WFL/DATABRIDGE/INSTALL Work flow for installing the Databridge software
WFL/DATABRIDGE/SNAPSHOT Work flow for executing the Snapshot Accessory
WFL/DATABRIDGE/COPYAUDIT Work flow that can be used in place of the DMSII COPYAUDIT WFL to postpone removal of audit files
WFL/DATABRIDGE/AUDITTIMER Work flow for executing the AuditTimer utility
DATA Directory
The Databridge Host files are copied to the usercode designated at installation.
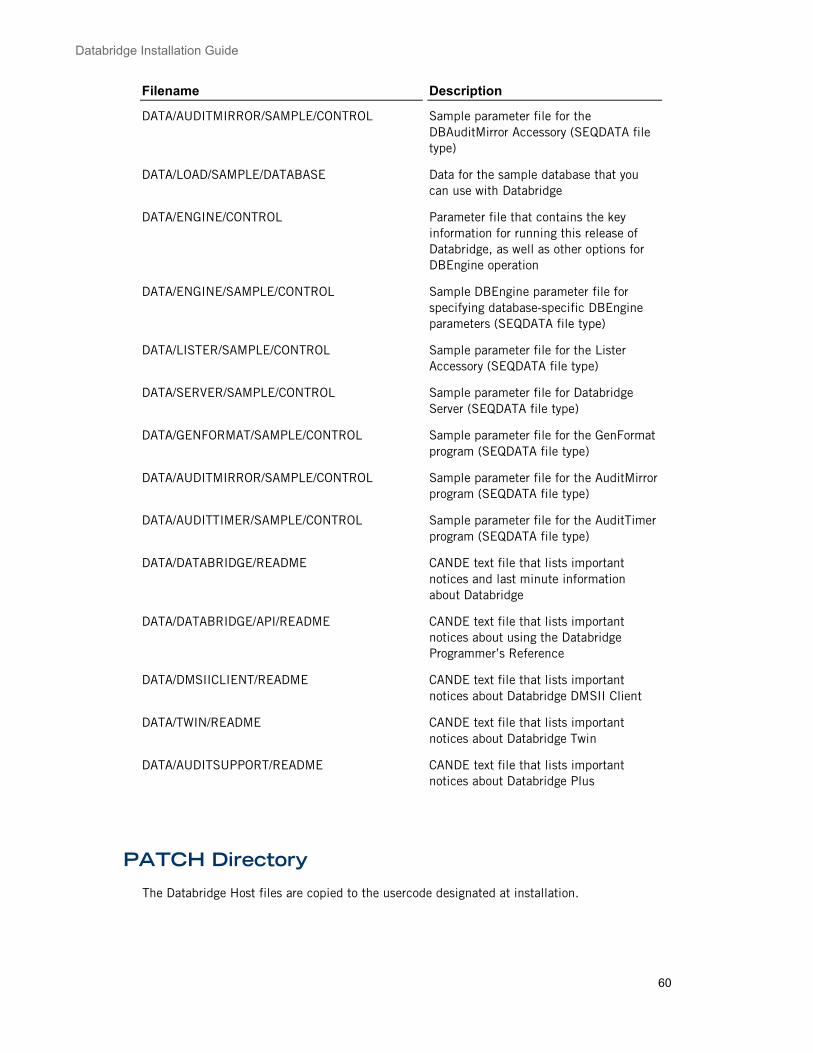
Databridge Installation Guide
60
Filename Description
DATA/AUDITMIRROR/SAMPLE/CONTROL Sample parameter file for the DBAuditMirror Accessory (SEQDATA file type)
DATA/LOAD/SAMPLE/DATABASE Data for the sample database that you can use with Databridge
DATA/ENGINE/CONTROL Parameter file that contains the key information for running this release of Databridge, as well as other options for DBEngine operation
DATA/ENGINE/SAMPLE/CONTROL Sample DBEngine parameter file for specifying database-specific DBEngine parameters (SEQDATA file type)
DATA/LISTER/SAMPLE/CONTROL Sample parameter file for the Lister Accessory (SEQDATA file type)
DATA/SERVER/SAMPLE/CONTROL Sample parameter file for Databridge Server (SEQDATA file type)
DATA/GENFORMAT/SAMPLE/CONTROL Sample parameter file for the GenFormat program (SEQDATA file type)
DATA/AUDITMIRROR/SAMPLE/CONTROL Sample parameter file for the AuditMirror program (SEQDATA file type)
DATA/AUDITTIMER/SAMPLE/CONTROL Sample parameter file for the AuditTimer program (SEQDATA file type)
DATA/DATABRIDGE/README CANDE text file that lists important notices and last minute information about Databridge
DATA/DATABRIDGE/API/README CANDE text file that lists important notices about using the Databridge Programmer’s Reference
DATA/DMSIICLIENT/README CANDE text file that lists important notices about Databridge DMSII Client
DATA/TWIN/README CANDE text file that lists important notices about Databridge Twin
DATA/AUDITSUPPORT/README CANDE text file that lists important notices about Databridge Plus
PATCH Directory
The Databridge Host files are copied to the usercode designated at installation.
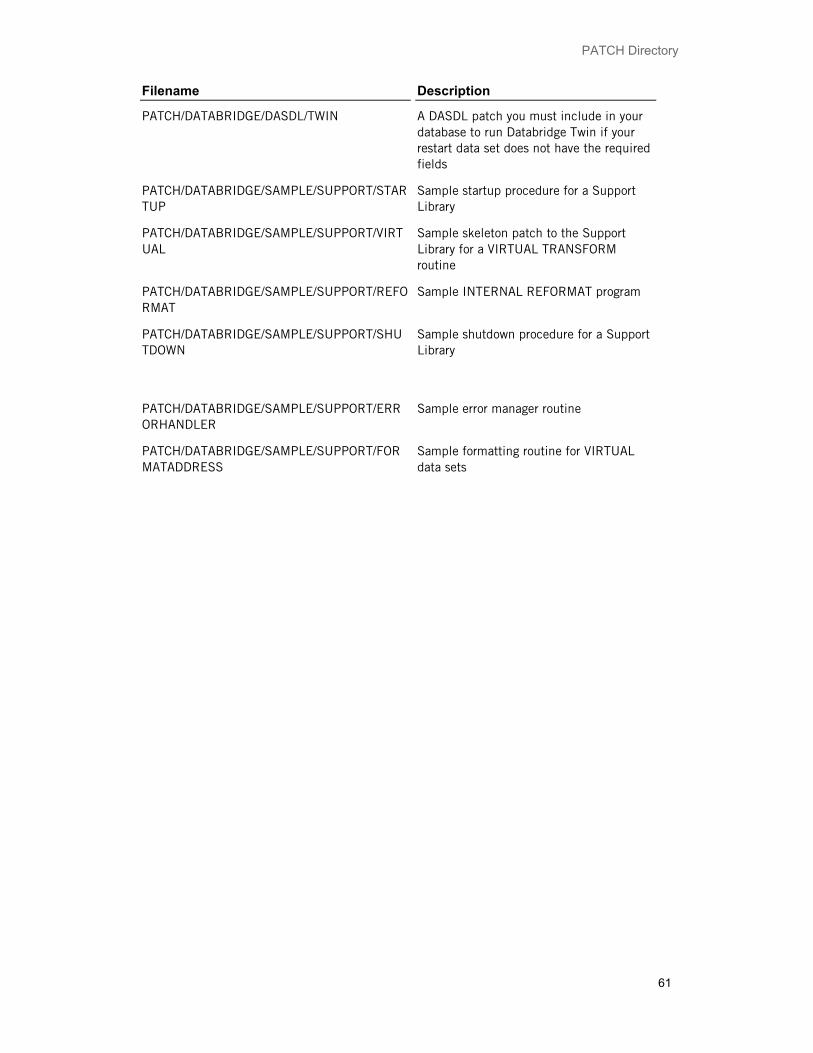
PATCH Directory
61
Filename Description
PATCH/DATABRIDGE/DASDL/TWIN A DASDL patch you must include in your database to run Databridge Twin if your restart data set does not have the required fields
PATCH/DATABRIDGE/SAMPLE/SUPPORT/STARTUP
Sample startup procedure for a Support Library
PATCH/DATABRIDGE/SAMPLE/SUPPORT/VIRTUAL
Sample skeleton patch to the Support Library for a VIRTUAL TRANSFORM routine
PATCH/DATABRIDGE/SAMPLE/SUPPORT/REFORMAT
Sample INTERNAL REFORMAT program
PATCH/DATABRIDGE/SAMPLE/SUPPORT/SHUTDOWN
Sample shutdown procedure for a Support Library
PATCH/DATABRIDGE/SAMPLE/SUPPORT/ERRORHANDLER
Sample error manager routine
PATCH/DATABRIDGE/SAMPLE/SUPPORT/FORMATADDRESS
Sample formatting routine for VIRTUAL data sets

Databridge Installation Guide
62
Files Installed with Databridge Enterprise Server
Use this document to verify the default installation results for Databridge Enterprise Server.
In addition to installing the Enterprise Server files, the setup program adds shortcuts to the Start menu from which you can configure a source and view the configuration and log files folder.
The following files are installed to C:\Program Files\Attachmate\DATABridge\6.3\Enterprise:
Filename Description
Help folder The Databridge Enterprise Server Help files (.html) which are viewable from the program by selecting the Help menu or by pressing the F1 key.
Support folder Header files and DBEUser.lib for compiling user-written libraries
Support\MakeUserLib.cmd Batch file for building user-written libraries
DBDirector.exe Windows service that listens for requests from Databridge Clients and then initiates the Enterprise Server application
DBEnterprise.exe Enterprise Server executable file
DBUI.dll The optional message and dialog text for Enterprise Server, which can be translated into other (non-English) languages
EnumDisk.exe Enterprise Server utility that lists the MCP disks available on the server where Enterprise Server is installed
FinishMirrored.cmd Sample batch file to run whenever an audit file is successfully mirrored to the secondary system.
LINCLOG.dll LINC log FileXtract Reader library
Notify.cmd Sample batch file to run when the Databridge Server accessory signals the availability of more audit files to process
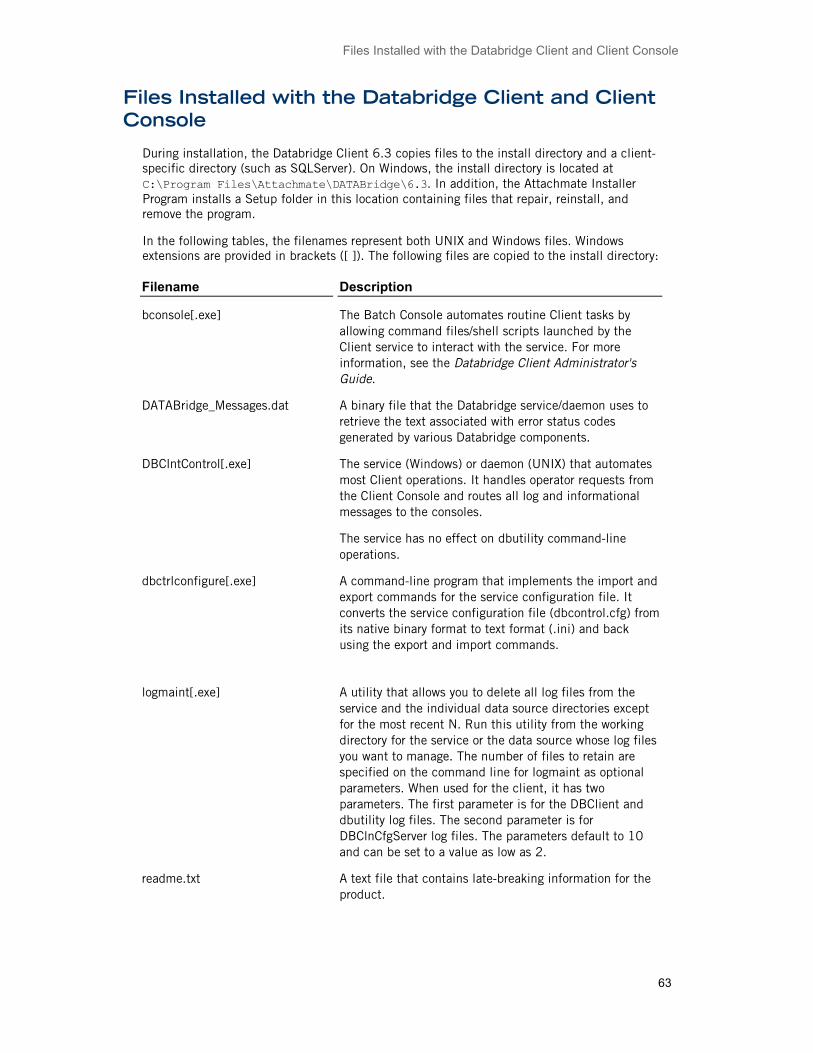
Files Installed with the Databridge Client and Client Console
63
Files Installed with the Databridge Client and Client Console
During installation, the Databridge Client 6.3 copies files to the install directory and a client-specific directory (such as SQLServer). On Windows, the install directory is located at C:\Program Files\Attachmate\DATABridge\6.3. In addition, the Attachmate Installer Program installs a Setup folder in this location containing files that repair, reinstall, and remove the program.
In the following tables, the filenames represent both UNIX and Windows files. Windows extensions are provided in brackets ([ ]). The following files are copied to the install directory:
Filename Description
bconsole[.exe] The Batch Console automates routine Client tasks by allowing command files/shell scripts launched by the Client service to interact with the service. For more information, see the Databridge Client Administrator's Guide.
DATABridge_Messages.dat A binary file that the Databridge service/daemon uses to retrieve the text associated with error status codes generated by various Databridge components.
DBClntControl[.exe] The service (Windows) or daemon (UNIX) that automates most Client operations. It handles operator requests from the Client Console and routes all log and informational messages to the consoles.
The service has no effect on dbutility command-line operations.
dbctrlconfigure[.exe] A command-line program that implements the import and export commands for the service configuration file. It converts the service configuration file (dbcontrol.cfg) from its native binary format to text format (.ini) and back using the export and import commands.
logmaint[.exe] A utility that allows you to delete all log files from the service and the individual data source directories except for the most recent N. Run this utility from the working directory for the service or the data source whose log files you want to manage. The number of files to retain are specified on the command line for logmaint as optional parameters. When used for the client, it has two parameters. The first parameter is for the DBClient and dbutility log files. The second parameter is for DBClnCfgServer log files. The parameters default to 10 and can be set to a value as low as 2.
readme.txt A text file that contains late-breaking information for the product.

Databridge Installation Guide
64
setfilesecurity.exe (Windows only) A Windows program that lets you set file security for all files and directories in the Working Directory, (which includes changes to the Windows registry). This program functions the same as the utility started by the installer, except that it doesn't allow you change the system or user path. You must run this program as Administrator.
The following files are copied to the client-specific directory:
Filename Description
bcp_auditor.exe (Windows only) A program that scans the bcp output to determine if the bcp utility was successful. The bcp_auditor utility sets the exit code correctly. This utility applies only to Microsoft SQL Server databases.
DBClient[.exe] A Client program that is launched by the service. DBClient handles the processing of DMSII data and updates the same as dbutility, except that it runs as a background run and uses the Client Console to display its output and interact with the operator.
DBClntCfgServer[.exe] A program that handles all requests from the Client Console specific to a data source. These requests include updating the client configuration file, providing access to the client control tables, and handling the Client Configurator. Like DBClient, this program is run by the service as a background run.
*dbeatran.dll *dbgaiji.smp *dbtrans_jbis8.smp *dbtrans_v24jbis8.smp
Japanese double-byte translation DLL and sample configuration files.
Depending on which character set the mainframe uses, copy the appropriate dbtrans file to the config directory as dbtrans.cfg. Also, copy the file dbgaiji.smp to the config directory as dbgaiji.cfg.
dbfixup[.exe] A program used for updating existing client control tables when upgrading from a previous client release.
dbpwenc[.exe] A program used to encode relational database and DBServer (or DBEnterprise Server) passwords in text configuration files and change passwords in text and binary configuration files.
Note: Passwords set in the Client Console are automatically encoded in binary configuration files.

Files Installed with the Databridge Client and Client Console
65
dbscriptixup[.exe] An program that modifies the Client control tables according to changes specified by the user scripts and enables the Client Configurator to make future modifications to the table layout.
dbutility[.exe] A program that runs the Databridge Client from a command line.
getlogtail.exe (Windows only) A program that extracts the tail of the current log file and writes it to the file trace.log.
migrate[.exe] The upgrade program that updates configuration settings and creates the working directory structure. It copies the updated configuration files and any user scripts to the new working directory structure.
splitter[.exe] A utility that splits large trace files into smaller files. Used primarily for sending files to Attachmate for troubleshooting.
dumpnullrecs[.exe] A program that displays the content of the NULL record file for a given data source.
*Installed only when the Japanese language feature is selected.
Client Console Files
Files for the Client Console are installed in the following two directories at C:\Program Files\Attachmate\DATABridge\6.3.
Directory Description
DBConfig Contains the configuration file, initialization file, and plugins subdirectory. The plugins subdirectory which contains required Eclipse plugins and source code plugins for the Databridge Client Configurator.
DBConsole Contains the configuration file, initialization file, and plugins subdirectory. The plugins subdirectory which contains required Eclipse plugins and source code plugins for the Databridge Client Console. The JRE subdirectory contains files for the Java Runtime Environment.

Databridge Installation Guide
66
Files Installed with Databridge Plus
Databridge Plus is installed with the Databridge Host software. Databridge Plus files includes the following files, which are copied to the usercode you designated:
(usercode)OBJECT/DATABRIDGE/AUDITSUPPORT (usercode)DATA/AUDITSUPPORT/README