
Darwin Installation and Administration Release 3.6 for...
78
Oracle Darwin Darwin Installation and Administration Release 3.6 for HP-UX February 2000 Part No. A82855-01
Transcript of Darwin Installation and Administration Release 3.6 for...

Oracle Darwin
Darwin Installation and Administration
Release 3.6 for HP-UX
February 2000
Part No. A82855-01

Darwin Installation and Administration, Release 3.6 for HP-UX
Part No. A82855-01
Copyright © 2000, Oracle Corporation. All rights reserved.
The Programs (which include both the software and documentation) contain proprietary information of Oracle Corporation; they are provided under a license agreement containing restrictions on use and disclosure and are also protected by copyright, patent, and other intellectual and industrial property laws. Reverse engineering, disassembly, or decompilation of the Programs, except to the extent required to obtain interoperability with other independently created software or as specified by law, is prohibited.
The information contained in this document is subject to change without notice. If you find any problems in the documentation, please report them to us in writing. Oracle Corporation does not warrant that this document is error free. Except as may be expressly permitted in your license agreement for these Programs, no part of these Programs may be reproduced or transmitted in any form or by any means, electronic or mechanical, for any purpose, without the express written permission of Oracle Corporation.
If the Programs are delivered to the U.S. Government or anyone licensing or using the programs on behalf of the U.S. Government, the following notice is applicable:
Restricted Rights Notice Programs delivered subject to the DOD FAR Supplement are "commercial computer software" and use, duplication, and disclosure of the Programs, including documentation, shall be subject to the licensing restrictions set forth in the applicable Oracle license agreement. Otherwise, Programs delivered subject to the Federal Acquisition Regulations are "restricted computer software" and use, duplication, and disclosure of the Programs shall be subject to the restrictions in FAR 52.227-19, Commercial Computer Software - Restricted Rights (June, 1987). Oracle Corporation, 500 Oracle Parkway, Redwood City, CA 94065.
The Programs are not intended for use in any nuclear, aviation, mass transit, medical, or other inherently dangerous applications. It shall be the licensee's responsibility to take all appropriate fail-safe, backup, redundancy, and other measures to ensure the safe use of such applications if the Programs are used for such purposes, and Oracle Corporation disclaims liability for any damages caused by such use of the Programs.
Oracle is a registered trademark, and Oracle 7, Oracle 8, Oracle 8i, Oracle 8i Lite, Oracle 8i Workstation, SQL are trademarks or registered trademarks of Oracle Corporation. Darwin is a registered trademark of Oracle Corporation. All other company or product names mentioned are used for identification purposes only and may be trademarks or service marks of their respective owners.

iii
Contents
Send Us Your Comments .................................................................................................................. vii
Preface............................................................................................................................................................ ix
Intended Audience ................................................................................................................................ ixStructure.................................................................................................................................................. ixRelated Documents................................................................................................................................. xConventions........................................................................................................................................... xii
1 Overview
1.1 Installation Overview ........................................................................................................... 1-11.2 Where to Go for More Information..................................................................................... 1-2
2 Requirements
2.1 Hardware and Software Requirements ............................................................................. 2-12.1.1 HP-UX Requirements .................................................................................................... 2-12.2 Disk Space Requirements..................................................................................................... 2-22.2.1 Server Disk Space Requirements ................................................................................. 2-22.2.2 Client Disk Space Requirements .................................................................................. 2-22.3 Network Connection Requirements ................................................................................... 2-22.4 Client Requirements ............................................................................................................. 2-22.5 Requirements for Code Generation .................................................................................... 2-42.6 SAS Conversion Utilities Hardware and Software Requirements................................. 2-42.7 Database Connectivity Requirements ................................................................................ 2-52.8 Requirements for Darwin on Multi-Node Servers ........................................................... 2-6

iv Darwin Installation and Administration
2.8.1 HP-UX Kernel Parameters for Darwin........................................................................ 2-62.8.2 Optimal Performance on Multi-Node Servers ........................................................... 2-72.8.3 Model Building on Multi-Node Servers ..................................................................... 2-72.8.4 Distributed Datasets....................................................................................................... 2-7
3 Installing the Darwin Server
3.1 Upgrading Darwin ................................................................................................................ 3-13.2 Installing Darwin Server Software on HP-UX .................................................................. 3-23.2.1 Copying Darwin Server Software from the CD......................................................... 3-33.2.2 Installing Darwin Server Software............................................................................... 3-43.2.3 Checking the Server Installation .................................................................................. 3-53.2.4 Removing Darwin Server Software ............................................................................. 3-5
4 Configuring Darwin Servers
4.1 Darwin Servers....................................................................................................................... 4-24.2 Darwin Configuration Files ................................................................................................. 4-34.2.1 darwinservers File .......................................................................................................... 4-34.2.2 DarwinServers.txt File ................................................................................................... 4-44.3 Before Using darwinconfig .................................................................................................. 4-44.3.1 DARWINHOME Environment Variable .................................................................... 4-54.3.2 Upgrading Existing Configuration Files..................................................................... 4-54.4 Configuring and Managing Darwin Servers ..................................................................... 4-54.4.1 Listing Available Servers............................................................................................... 4-64.4.2 Adding and Configuring a Server ............................................................................... 4-74.4.3 Removing a Server ......................................................................................................... 4-84.4.4 Describing a Server ........................................................................................................ 4-84.4.5 Verifying the Validity of a Configuration File ........................................................... 4-84.4.6 Starting a Server.............................................................................................................. 4-94.4.7 Stopping a Server ........................................................................................................... 4-94.4.8 Saving a Configuration File ........................................................................................ 4-104.4.9 Ending a darwinconfig Session .................................................................................. 4-104.4.10 Getting Help.................................................................................................................. 4-104.4.11 Modifying Configuration Files................................................................................... 4-104.4.12 Darwin Environment Variables ................................................................................. 4-104.4.13 Troubleshooting Configurations................................................................................ 4-11

v
5 Database Connectivity
5.1 Supported Database Software ............................................................................................. 5-15.2 Obtain and Install Database and Drivers........................................................................... 5-25.2.1 Connecting to Oracle Using DataDirect Connect ODBC ........................................ 5-35.3 Permissions and Accessibility for Oracle Databases........................................................ 5-45.4 Darwin Environment Variables for Oracle........................................................................ 5-45.4.1 ORACLE_HOME Environment Variable ................................................................... 5-45.4.2 LPATH Environment Variable..................................................................................... 5-55.4.3 SHLIB_PATH Environment Variable ......................................................................... 5-55.4.4 ORACLE_SID Environment Variable ......................................................................... 5-55.5 Required Files ........................................................................................................................ 5-55.5.1 /etc/services File ........................................................................................................... 5-55.5.2 .odbc.ini File .................................................................................................................... 5-65.5.3 tsnames.ora File .............................................................................................................. 5-65.6 Installation Check.................................................................................................................. 5-75.7 Using Database Connectivity .............................................................................................. 5-85.7.1 Connecting to a Database Server ................................................................................. 5-85.7.2 Disconnecting from a Database.................................................................................... 5-85.7.3 Database Import Wizard............................................................................................... 5-95.7.4 Database Export Wizard ............................................................................................... 5-9
6 Installing the Darwin Client
6.1 Collect Server Information................................................................................................... 6-16.1.1 Create a Customization Disk or File (Optional) ........................................................ 6-26.2 Installing Client Software..................................................................................................... 6-36.2.1 DARWINHOME Windows Environment Variable .................................................. 6-36.3 First-Time Installation........................................................................................................... 6-3
7 Starting and Stopping Darwin
7.1 Starting Darwin ..................................................................................................................... 7-17.1.1 Starting Darwin Servers ................................................................................................ 7-17.1.2 Starting a Darwin Client ............................................................................................... 7-17.2 Stopping Darwin ................................................................................................................... 7-27.2.1 Stopping Darwin Clients............................................................................................... 7-2
vi Darwin Installation and Administration
7.2.2 Stopping Darwin Servers .............................................................................................. 7-3
8 Administering Darwin Projects
8.1 Darwin Projects...................................................................................................................... 8-18.2 Creating Projects .................................................................................................................... 8-28.2.1 Recording Project Information ..................................................................................... 8-28.3 Deleting Projects .................................................................................................................... 8-38.4 Administrator Decisions about Projects............................................................................. 8-38.5 The .darwinprojects File ....................................................................................................... 8-48.5.1 A Sample .darwinprojects File...................................................................................... 8-48.5.2 Modifying the .darwinprojects File ............................................................................. 8-5
A Installing the SAS Conversion Utilities
A.1 Installing the Software .......................................................................................................... A-1
B Server Configuration Files
B.1 Darwin Configuration Files ................................................................................................. B-1B.1.1 Server Configuration Files ............................................................................................ B-1B.2 What Configuration Files Mean .......................................................................................... B-4
Index

vii
Send Us Your Comments
Darwin Installation and Administration, Release 3.6 for HP-UX
Part No. A82855-01
Oracle Corporation welcomes your comments and suggestions on the quality and usefulness of this publication. Your input is an important part of the information used for revision.
■ Did you find any errors?■ Is the information clearly presented?■ Do you need more information? If so, where?■ Are the examples correct? Do you need more examples?■ What features did you like most?
If you find any errors or have any other suggestions for improvement, please indicate the document title and part number, and the chapter, section, and page number (if available). You can send comments to us in the following ways:
■ [email protected] ■ FAX: 781-684-7738. Attn: Oracle Darwin■ Postal service:
Oracle Corporation Oracle Darwin Documentation200 Fifth AvenueWaltham, Massachusetts 02451U.S.A.
If you would like a reply, please give your name, address, telephone number, and (optionally) electronic mail address.
If you have problems with the software, please contact your local Oracle Support Services.

viii

ix
Preface
Darwin is a data mining application designed specifically to handle multiple gigabytes of data, and to provide answers to complex problems of data classification, prediction, and forecasting.
This manual describes how to install and administer Darwin 3.6 server software on selected HP-UX platforms running HP-UX 11.0 and client software on PCs running Windows NT 4.x, Windows 95, or Windows 98. There is a separate manual that describes installing and administering Darwin 3.6 server software on Solaris.
Intended AudienceThis manual is intended for experienced HP-UX system administrators.
StructureThis manual contains eight chapters as follows:
Chapter 1 OverviewProvides an overview of the installation procedure.
Chapter 2 RequirementsLists the hardware and software requirements.
Chapter 3 Installing the Darwin Server Describes how to install the Darwin server software.
Chapter 4 Configuring and Starting a Darwin ServerDescribes how to configure and start one or more Darwin servers.

x Darwin Installation and Administration
In addition, there are two appendixes that cover supplementary topics:
Related DocumentsDarwin documentation is distributed on the documentation CD in PDF and HTML formats.
The complete Darwin documentation set includes
■ Darwin New Features, Release 3.6. Describes the features introduced at Release 3.5 and Release 3.6.
This manual is a revision of Darwin 3.5 New Features, which described the functionality introduced at Release 3.5. Darwin New Features, Release 3.6 contains updated information about the functionality introduced at Release 3.5 plus new material describing functionality introduced at Release 3.6.
If you are upgrading from 3.5 to 3.6, you can discard the manual Darwin 3.5 New Features; the present manual supersedes it.
Chapter 5 Database Connectivity (optional)Describes how to set up the environment for connecting to Oracle databases.
Chapter 6 Installing the Darwin ClientDescribes how to install Darwin client software.
Chapter 7 Starting and Stopping DarwinDescribes how to start and stop Darwin servers.
Chapter 8 Administering Darwin ProjectsDescribes some administrative functions associated with Darwin projects, and describes how to create a project.
Appendix A Installing the SAS Conversion Utilities (optional)Explains how to install sas2darwin and darwin2sas, utilities used for converting between Darwin datasets and SAS files.
Appendix B Server Configuration FilesExplains the meaning of entries in a Darwin configuration file.

xi
■ Darwin 3.6 Release Notes for HP-UX. Describes the release, documents any problems or bugs in the software, and describes any changes that occurred in the software after the manuals were finalized. There are separate release notes for Solaris and for HP-UX.
■ For HP-UX system administrators: Darwin Installation and Administration, Release 3.6 for HP-UX (this manual). Describes how to install server and client software. Changes that developed after this manual was finalized are described in the release notes. There are separate installation/administration guides for Solaris and for HP-UX.
■ Using Darwin, Release 3.0.1. A how-to manual; describes the user interface and provides detailed instructions for using it. (Using Darwin describes all the features available at Release 3.0.1; together with Darwin New Features, you have a complete description of the user interface at Release 3.6.)
■ Darwin Reference, Release 3.0.1 (companion volume to Using Darwin). Introduces data mining and Darwin; provides background and conceptual material on datasets, Darwin tools, and analyses.
Documentation CDAll the Darwin documentation is available in HTML and PDF format on the documentation CD; you can read or print documentation directly from the CD.
To view the PDF files, you will need
■ Adobe Acrobat Reader 3.0 or later, which you can download from www.adobe.com.
To view the HTML files, you will need
■ Netscape 4.x or
■ Internet Explorer 4.0 or later
Darwin Online HelpDarwin includes extensive online help that can be summoned from a list of contents, from the Help tab, and from Help buttons or the F1 key on dialog windows. For correct display of Darwin’s online help, you need Internet Explorer 4.x. If you do not have it, you can download it from www.microsoft.com.

xii Darwin Installation and Administration
ConventionsThe following conventions are used in this manual:
Convention Meaning
boldface Darwin commands, menu names, menu items, names of dialogs and screens.
Project > New File Indicates the path for a command. The example shown means on the Project menu, click the New File command.
code Data fields and values, special characters, etc., examples of files, data, filenames, and pathnames.
italics Argument names and placeholders in command formats.
% user inputsystem output
In interactive examples, user input is shown in bold typewriter, and system output is shown in regular typewriter.

Overview 1-1
1Overview
This manual describes installation and administrative procedures for Darwin Release 3.6 on selected HP-UX platforms running HP-UX 11.0 with client software running on Microsoft Windows NT 4.00, Windows 95, or Windows 98.
1.1 Installation OverviewDarwin is distributed on three CDs:
■ the Darwin server CD, formatted to be read by HP-UX
■ the Darwin client CD, formatted to be read by Windows NT and Windows 95/98
■ the Darwin documentation CD, formatted to be read by Windows NT and Windows 95/98
Each CD contains a file README.txt that describes the contents of the CD and contains other useful information.
Note: You must install the same version of the Darwin client and server.
To install Darwin, follow these steps:
■ Confirm that all requirements are met (Chapter 2)
■ Install the Darwin server on HP-UX (Chapter 3)

Where to Go for More Information
1-2 Darwin Installation and Administration
■ Configure and start at least one Darwin server (Chapters 4 and 7)
■ Set up for database connectivity (optional) (Chapter 5)
■ Install Darwin clients on Windows NT/95/98 (Chapter 6)
■ Start and stop Darwin servers (Chapter 7)
■ Create a Darwin project (Chapter 8)
Once you’ve performed all of these steps, you will be able to log in to Darwin and start mining data.
The chapters in this manual cover these steps in order, beginning with Chapter 2.
1.2 Where to Go for More InformationSee the preface for a complete list of related Darwin documentation.
Darwin also provides extensive online help that can be summoned from a pulldown menu and a help tab and from Help buttons or the F1 key on dialog windows.
Note: The supported server architectures have changed; existing server configurations will no longer work properly; see Chapters 2 and 4.

Requirements 2-1
2Requirements
This chapter describes the hardware, software, disk space, network, and other requirements for the Darwin Release 3.6 for HP-UX client and server.
2.1 Hardware and Software RequirementsDarwin 3.6 server software runs on UNIX (HP-UX or Solaris).
The Darwin 3.6 server software for HP-UX runs on the following platforms:
■ Hewlett-Packard 9000 Series 700 workstations running HP-UX 11.0
■ Hewlett-Packard 9000 Series 800 systems running HP-UX 11.0
The Darwin 3.6 client (user interface) software runs on the following platforms:
■ personal computers running Microsoft Windows NT 4.00, Microsoft Windows 95, or Microsoft Windows 98
On any of the PC platforms, Microsoft Internet Explorer 4.x is required to display online help. Without Internet Explorer, Darwin functions properly but online help is not available.
We recommend that the PCs that Darwin clients run on should have a CPU that is at least Pentium 100 MHz or equivalent and should have at least 16 Mbytes of RAM for Windows 95/ 98 systems and 32 Mbytes of RAM for Windows NT systems.
2.1.1 HP-UX RequirementsFor proper operation of Darwin, you must have the following HP-UX 11.0 patch installed:
s700_800 11.00 libc cumulative patch PHCO_20765
Disk Space Requirements
2-2 Darwin Installation and Administration
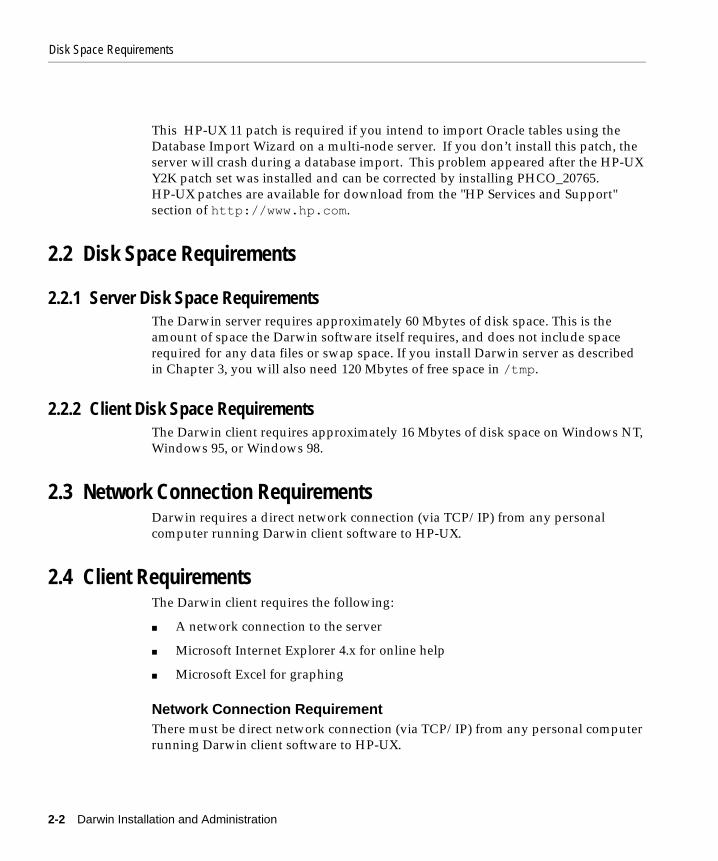
This HP-UX 11 patch is required if you intend to import Oracle tables using the Database Import Wizard on a multi-node server. If you don’t install this patch, the server will crash during a database import. This problem appeared after the HP-UX Y2K patch set was installed and can be corrected by installing PHCO_20765. HP-UX patches are available for download from the "HP Services and Support" section of http://www.hp.com.
2.2 Disk Space Requirements
2.2.1 Server Disk Space RequirementsThe Darwin server requires approximately 60 Mbytes of disk space. This is the amount of space the Darwin software itself requires, and does not include space required for any data files or swap space. If you install Darwin server as described in Chapter 3, you will also need 120 Mbytes of free space in /tmp.
2.2.2 Client Disk Space RequirementsThe Darwin client requires approximately 16 Mbytes of disk space on Windows NT, Windows 95, or Windows 98.
2.3 Network Connection RequirementsDarwin requires a direct network connection (via TCP/IP) from any personal computer running Darwin client software to HP-UX.
2.4 Client RequirementsThe Darwin client requires the following:
■ A network connection to the server
■ Microsoft Internet Explorer 4.x for online help
■ Microsoft Excel for graphing
Network Connection RequirementThere must be direct network connection (via TCP/IP) from any personal computer running Darwin client software to HP-UX.

Client Requirements
Requirements 2-3
Microsoft Internet Explorer RequirementMicrosoftclient Internet Explorer 4.x is required for the operation of Darwin online help. Internet Explorer 4.x must be installed on the PC before you install the Darwin client.
You can download Internet Explorer 4.x from the following site on the World Wide Web:
www.microsoft.com/windows/ie/download/ie5all.htm
Click “To the Internet Explorer download index” at the bottom of the page. This takes you to a complete list of the downloads, arranged by platform. One of the options under "Windows 95 and Windows NT 4.0" and under "Windows 98" is "Internet Explorer 4.01 with Service Pack 2".
Internet Explorer must be installed on your system; it does not have to be your default browser.
Microsoft Excel RequirementMicrosoft Excel is used by the Darwin client to create plots and graphs; one of the following is required:
■ Microsoft Excel 95 for Windows 95, Version 7.0
■ Microsoft Excel 97
If Excel 95 or Excel 97 is not installed on your PC, you will not be able to create any plots or graphs using Darwin.
Note: If Internet Explorer is not installed on the PC where Darwin client is installed, no online help will be available. (Help buttons will not work; the F1 key will not display help; the Help tab links will not work; the Help button on the tool bar will not work; all items in the Help menu, except for Help > Version will not work.)
Except for the lack of online help, Darwin installed on a PC without Internet Explorer will work properly.
Note: Darwin has not been tested with Internet Explorer 5.0.
Note: Darwin has not been tested with Office 2000.

Requirements for Code Generation
2-4 Darwin Installation and Administration
2.5 Requirements for Code GenerationYou can export Darwin models as C, C++, or Java code using the Code Generation command of the Options menu. You can generate model code for tree or net models, but not for match models.
Code generation is enabled by default; in previous releases of Darwin, a license was required. If you already have a license for code generation, you do not have to remove it; it is ignored.
2.6 SAS Conversion Utilities Hardware and Software Requirements
The SAS conversion utilities run on UNIX (Solaris or HP-UX). They require the following software to be installed on the UNIX system on which you plan to do conversions:
■ Conceptual Software, Inc., DBMS/COPY, version 1.1.1 or higher
■ Perl, version 5.001 or higher
For information about installing the conversion utilities, see Appendix A of this manual; for information about using the utilities, see Using Darwin.
DBMS/COPYYou must obtain DBMS/COPY from
Conceptual Software, Inc.9660 Hillcroft #510Houston, TX 77096USATelephone: 1-800-328-2686 or 1-713-721-4200
For information about ordering DBMS/COPY, see Conceptual Software’s page on the World Wide Web at www.conceptual.com. The price is approximately $500 (US) for an individual license.
PerlIf Perl is not already installed on your HP-UX system, you can obtain it free of charge from several locations. For details, see www.perl.org or www.perl.com
Note: If you do not plan to convert SAS files, you may skip this section.

Database Connectivity Requirements
Requirements 2-5
on the World Wide Web. If you do not wish to compile and build Perl for your system, click on the link “Perl Ports” at www.perl.com for sources of Perl binaries for HP-UX.
Disk Space for the Conversion UtilitiesDBMS/COPY and the Perl scripts require approximately 6.7 Mbytes of disk space in addition to the space required by Darwin.
When the SAS conversion utilities convert a file, they create temporary files; these temporary files require at least as much space as the file being converted.
2.7 Database Connectivity Requirements
Darwin supports connectivity to Oracle databases on UNIX only. You cannot connect to databases on Windows 95, Windows 98, or Windows NT.
Database connectivity requires
■ Oracle database software (Oracle 7.3 or Oracle 8i)
■ MERANT DataDirect ODBC Connect drivers version 3.5 or 3.6
Oracle Database Software RequirementYou will need one of the following Oracle products installed at your site:
■ Oracle Version 7.3 and SQL*Net
■ Oracle 8i Enterprise Edition
For information about obtaining and installing these products, contact Oracle:
■ Telephone: 1-800-ORACLE1
■ Oracle’s web site: www.oracle.com/database/oracle8/
ODBC DriversDarwin uses the MERANT (Micro Focus) DataDirect Connect ODBC version 3.5 or 3.6 drivers for database connectivity. You must purchase them directly from
Note: If you are not planning to connect to Oracle databases, you may skip this section.
Requirements for Darwin on Multi-Node Servers
2-6 Darwin Installation and Administration
MERANT. For information about DataDirect Connect ODBC drivers, contact DataDirect:
■ Telephone: 1-800-876-3101 or 1-919-461-4200
■ MERANT’s web site: www.merant.com/datadirect/index.asp
You can purchase DataDirect Connect ODBC online at the web site or by telephone. You can also download a 30-day evaluation copy of DataDirect Connect ODBC from the web site. If you download an evaluation copy, select “Connect ODBC Pack for HP-UX 11 (native applications).”
MERANT documentation describes how to install, configure, and test DataDirect.
For information about setting up for database connectivity, see chapter 5 of this manual; for information about using database connectivity, see Using Darwin and Release 3.6 New Features.
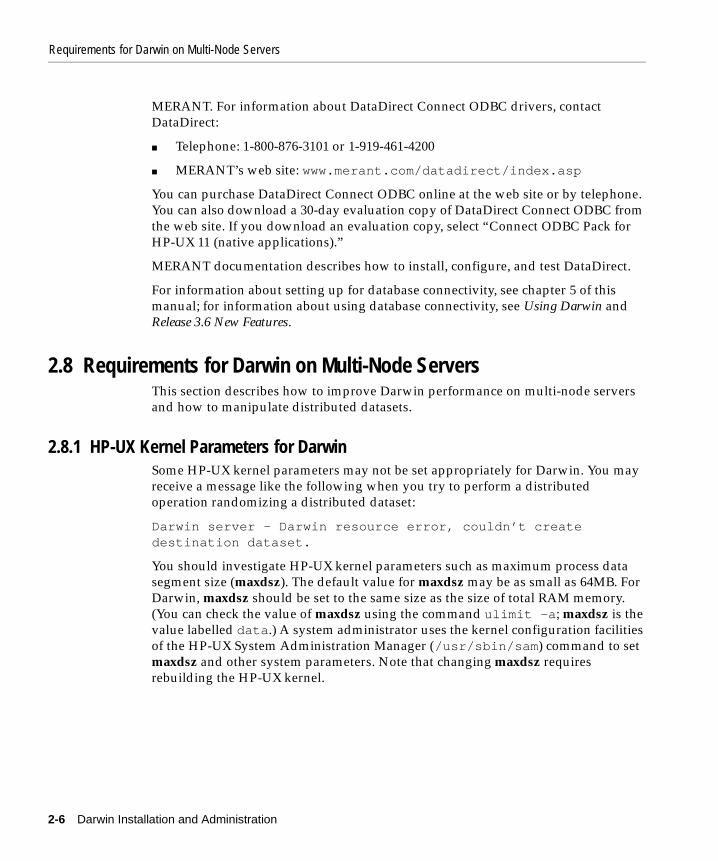
2.8 Requirements for Darwin on Multi-Node ServersThis section describes how to improve Darwin performance on multi-node servers and how to manipulate distributed datasets.
2.8.1 HP-UX Kernel Parameters for DarwinSome HP-UX kernel parameters may not be set appropriately for Darwin. You may receive a message like the following when you try to perform a distributed operation randomizing a distributed dataset:
Darwin server - Darwin resource error, couldn’t create destination dataset.
You should investigate HP-UX kernel parameters such as maximum process data segment size (maxdsz). The default value for maxdsz may be as small as 64MB. For Darwin, maxdsz should be set to the same size as the size of total RAM memory. (You can check the value of maxdsz using the command ulimit -a ; maxdsz is the value labelled data .) A system administrator uses the kernel configuration facilities of the HP-UX System Administration Manager (/usr/sbin/sam ) command to set maxdsz and other system parameters. Note that changing maxdsz requires rebuilding the HP-UX kernel.

Requirements for Darwin on Multi-Node Servers
Requirements 2-7
2.8.2 Optimal Performance on Multi-Node ServersOptimal performance of Darwin running on a multi-node server (SMP) is achieved when Darwin is the only program running on that SMP. If other programs are running on the SMP at the same time that Darwin is running, Darwin performance will be reduced.
Also, performance on a multi-node server is best when only one user at a time runs Darwin on any given set of CPUs. (Performance on a single CPU system may be satisfactory when more than one user runs Darwin at the same time.)
2.8.3 Model Building on Multi-Node ServersWhen you build a model on a multi-node server, model building is always distributed, even if the datasets are serial. A serial dataset will be distributed as the operation begins, and re-serialized at its conclusion. The most efficient way to run a sequence of operations is to distribute the data manually before launching the first operation.
2.8.4 Distributed DatasetsAll Darwin datasets are created, by default, as serial datasets. If you wish to create a distributed version of a dataset, you must explicitly create it. In particular, if you create a dataset using either Dataset > Create or the Text Import Wizard, the resulting dataset is always serial.
Operations such as frequency counts or model building, performed on a distributed version of a dataset, are often faster than the same operations performed on the undistributed (serial) dataset. If you want to perform an operation on a distributed dataset, you must distribute the dataset before you perform the operation. Once you distribute the dataset, you can save the distributed version for future use.
The rest of this section describes how to distribute datasets and how to move distributed datasets.
Distributing DatasetsHere are two ways to distribute a dataset; in each instance, Darwin creates a new dataset that is the distributed version of the original dataset:
■ Use the Randomize transform to randomize the dataset. If you are connected to a distributed server, the transformed dataset is distributed in memory; you can save the transformed distributed dataset if you wish. The default name of the

Requirements for Darwin on Multi-Node Servers
2-8 Darwin Installation and Administration
randomized dataset is dataset-name[randomize]. (The original dataset that you applied the transformation to is still serial.)
■ Select the dataset. Go to the Datasets tab of Options > Advanced; click the Create Distributed button. Darwin creates a distributed version of the dataset named dataset-name[distributed]; the dataset is automatically saved. The underlying file for the new dataset has the extension .dst.
For large datasets, either of these operations may take several minutes or more.
For more information about either of these operations, see Using Darwin.
Moving Distributed DatasetsIf you move your dataset between servers with different numbers of nodes, serialize the dataset first. Here’s how:
■ Click the dataset’s name to select it.
■ Click Options > Advanced.
■ Click the Datasets tab.
■ In the Serial or Distributed section, click Create Serial.
Darwin creates a serial version of the dataset named <name>[serial] (e.g., the serial version of Ceil is Ceil[serial]).

Installing the Darwin Server 3-1
3Installing the Darwin Server
The first step in the Darwin installation process is installing the Darwin server software, as described in this chapter.
3.1 Upgrading DarwinIf Darwin server software is already on your system, you must stop (kill) any servers associated with Darwin (via darwinconfig) and remove the existing version of Darwin (via swremove) before you install the new version. If you wish, you can move the current version of Darwin from /opt/TMCdarwin before using pkgrm and before installing the new one.
If you have a license for Darwin 3.x, you do not have to delete the license. Darwin no longer requires license files; exisiting license files are ignored.
Darwin 3.5 models and datasets do not need any conversion.
The list of supported architectures has changed. Server configurations that worked with previous versions of Darwin, including Darwin 3.6 Beta, will no longer work. See below for details.
Converting Darwin Server ConfigurationsThe list of supported Darwin server architectures has changed. The following architectures are no longer supported in Darwin 3.6:
■ sparcsmp
■ hpuxpar
The architectures sparc and hpux do not have the same meaning that they did in releases of Darwin earlier than the 3.6 final release.
Installing Darwin Server Software on HP-UX
3-2 Darwin Installation and Administration
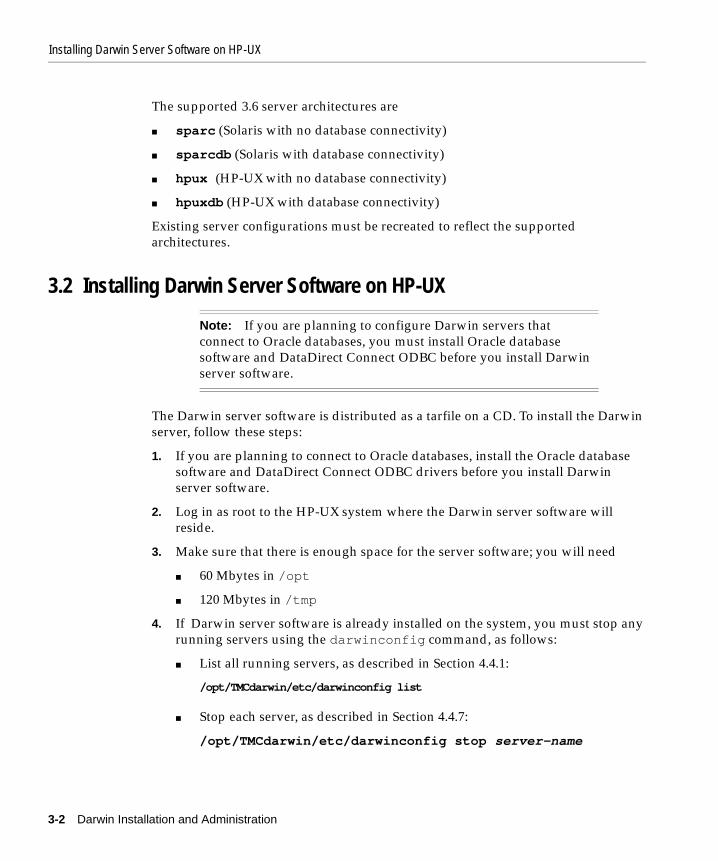
The supported 3.6 server architectures are
■ sparc (Solaris with no database connectivity)
■ sparcdb (Solaris with database connectivity)
■ hpux (HP-UX with no database connectivity)
■ hpuxdb (HP-UX with database connectivity)
Existing server configurations must be recreated to reflect the supported architectures.
3.2 Installing Darwin Server Software on HP-UX
The Darwin server software is distributed as a tarfile on a CD. To install the Darwin server, follow these steps:
1. If you are planning to connect to Oracle databases, install the Oracle database software and DataDirect Connect ODBC drivers before you install Darwin server software.
2. Log in as root to the HP-UX system where the Darwin server software will reside.
3. Make sure that there is enough space for the server software; you will need
■ 60 Mbytes in /opt
■ 120 Mbytes in /tmp
4. If Darwin server software is already installed on the system, you must stop any running servers using the darwinconfig command, as follows:
■ List all running servers, as described in Section 4.4.1:
/opt/TMCdarwin/etc/darwinconfig list
■ Stop each server, as described in Section 4.4.7:
/opt/TMCdarwin/etc/darwinconfig stop server-name
Note: If you are planning to configure Darwin servers that connect to Oracle databases, you must install Oracle database software and DataDirect Connect ODBC before you install Darwin server software.

Installing Darwin Server Software on HP-UX
Installing the Darwin Server 3-3
where server-name is the name of the server.
■ Quit darwinconfig.
5. If Darwin server software is installed, remove it, as described in Section 3.2.4.
6. Copy the server software from the CD, as described in Section 3.2.1
7. Install the software, as described in Section 3.2.2.
8. Verify that the software was installed correctly, as described in Section 3.2.3.
After the server software is installed, you must configure at least one Darwin server, as described in Chapter 4, and start any servers that you configure.
You will not be able to test the installation until you have configured and started a server and installed the client software on a PC.
For information about installing and removing software on HP-UX, see Managing HP-UX Software With SD-UX (HP Part Number B2355-90154); this manual is available as a printed document from Hewlett-Packard or online at http://docs.hp.com.
The rest of this chapter describes how to remove and install software using the GUI interface of SD-UX. See Managing HP-UX Software With SD-UX for information about the interfaces to SD-UX.
3.2.1 Copying Darwin Server Software from the CDYou must first copy the server software from the CD to /tmp and then install the software.
1. Log in as root.
2. IMPORTANT: Make sure that there are no copies of the Darwin server in /tmp and that you have enough space (approximately 120 MBytes) in /tmp to hold the installation files. (If you do not have enough space in /tmp, use a different directory, and correct the pathnames accordingly.)
3. Insert the Darwin Server CD in a drive attached to the HP-UX system where you are installing the server software. Copy the files from the CD to /tmp and extract them from the tarfile:
cd /tmptar xvf /cdrom/Darwin_36_HP_FINAL.tar
where cdrom is the name of the CD drive.

Installing Darwin Server Software on HP-UX
3-4 Darwin Installation and Administration
3.2.2 Installing Darwin Server Software
Follow these steps to install the Darwin server software:
1. Log in as root.
2. Verify that /opt has at least 60 Mbytes of free space. If /opt is not large enough either create a link to /opt, or use a different directory, and correct the pathnames accordingly.
3. Use the command swinstall:
/usr/sbin/swinstall
4. If the Specify Source dialog opens when swinstall starts up, close it.
5. Select Actions > Change Target. Set Root Path to the directory where you plan to install Darwin. The default location for Darwin server is /opt/TMCdarwin. The first time that you install the software, type the pathname in. After you’ve installed the software once, you can click Root Path and select the location from the list.
6. Select Actions > Change Source. Change the Source Depot Type to Network Directory/CDROM.
7. Click Source Host Name, and select the machine where you plan to install the Darwin server.
8. Change Source Depot Path to /tmp/sw. The first time that you install Darwin server, you must type this pathname. After you’ve installed the software once, you can click Source Depot Path and select the location from the list.
9. In the Software Selection window, select opt.
10. Select Actions > Mark for Install.
11. Select Actions > Install (analysis). This analysis make take a while. swinstall is checking to see that all software dependencies are met for the software, that there is enough disk space to install the software, etc., etc.
Note: If /opt is not a distinct partition and is not large enough to contain Darwin server, the Darwin software will be dumped into the root partition and may fill the root partition. A simple solution is, before running swinstall, to create a symbolic link to /opt/TMCdarwin from a directory in a partition that has sufficient space.

Installing Darwin Server Software on HP-UX
Installing the Darwin Server 3-5
12. When the analysis is finished (when the status is Ready), click Log File to check the swinstall log file. Look for messages that begin with ERROR, WARNING, or NOTE, and check that there are no problems. If there are problems, you must resolve them before continuing.
13. Click Product Summary to verify that you are installing the correct product.
14. When you are ready to proceed, click OK on the Install Analysis popup window.
15. When the Confirmation Window appears, click Yes to start the installation.
16. After the installation is finished, the Installation Window appears; click Done.
17. To exit swinstall, click File > Exit.
The installation creates the directory /opt/TMCdarwin (or whatever directory you specified as the installation directory) if it doesn’t already exist.
3.2.3 Checking the Server InstallationFollow these steps to start the Darwin server demo-server, thus verifying that the installation was successful:
1. Log in as root.
2. Start the demo-setup script:
cd /opt/TMCdarwin/demosh demo-setup
3. Select 2 to start a server on HP-UX. If you start the server on a port other than the default port 1022, note the port number. (When you configure Darwin servers, you should not use this port number.)
4. If the command is successful, you get the message
Server started
You can verify that the server is running using the UNIX ps command:
ps -ef|grep darwin
3.2.4 Removing Darwin Server SoftwareIf Darwin server software is already installed on your system, you must remove it before you install a new version.
Installing Darwin Server Software on HP-UX
3-6 Darwin Installation and Administration
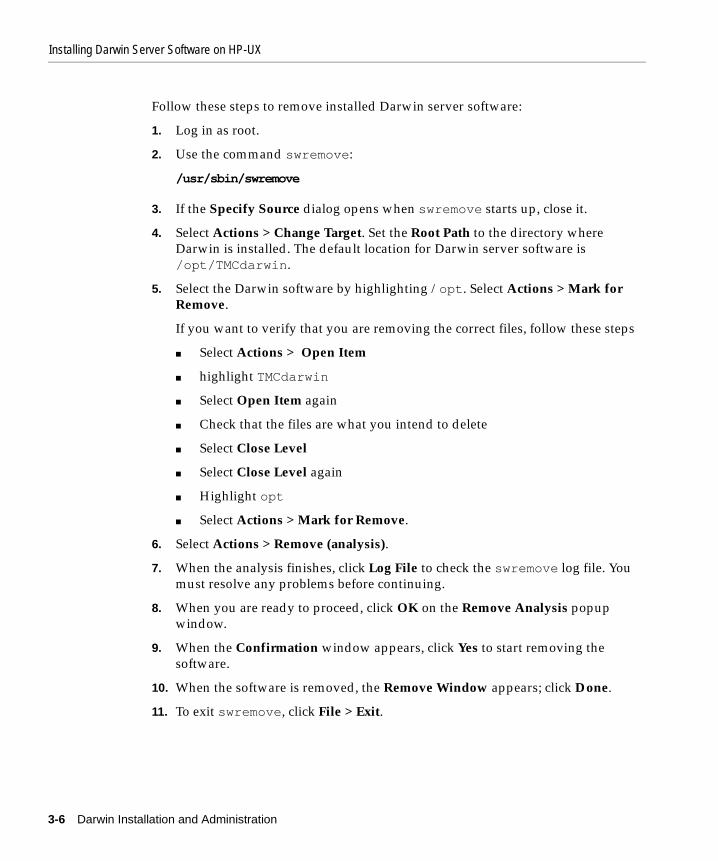
Follow these steps to remove installed Darwin server software:
1. Log in as root.
2. Use the command swremove:
/usr/sbin/swremove
3. If the Specify Source dialog opens when swremove starts up, close it.
4. Select Actions > Change Target. Set the Root Path to the directory where Darwin is installed. The default location for Darwin server software is /opt/TMCdarwin.
5. Select the Darwin software by highlighting /opt. Select Actions > Mark for Remove.
If you want to verify that you are removing the correct files, follow these steps
■ Select Actions > Open Item
■ highlight TMCdarwin
■ Select Open Item again
■ Check that the files are what you intend to delete
■ Select Close Level
■ Select Close Level again
■ Highlight opt
■ Select Actions > Mark for Remove.
6. Select Actions > Remove (analysis).
7. When the analysis finishes, click Log File to check the swremove log file. You must resolve any problems before continuing.
8. When you are ready to proceed, click OK on the Remove Analysis popup window.
9. When the Confirmation window appears, click Yes to start removing the software.
10. When the software is removed, the Remove Window appears; click Done.
11. To exit swremove, click File > Exit.

Configuring Darwin Servers 4-1
4Configuring Darwin Servers
After you have installed the Darwin server software, you must configure and start one or more Darwin servers, as described in this chapter. If you plan to connect to a database, see Chapter 5 before you configure servers that permit database connection.
Basically, configuring a Darwin server means using the darwinconfig command and its subcommands to add, remove, describe, start, stop, etc., Darwin servers. In addition, the darwinconfig command creates and maintains several configuration files for both client and server.
Section 4.1 provides a brief overview of Darwin’s client-server design, and shows how the various Darwin components interact with each other.
This rest of this chapter explains
■ Darwin configuration files (Section 4.2)
■ what you need to do before you configure a server (Section 4.3)
■ how to add, remove, and configure a server, using darwinconfig and its subcommands (Section 4.4)
For examples of configuration files and for an explanation of the entries in a server configuration file, see Appendix B.
Note: Darwin server configurations created using versions of Darwin earlier than Darwin 3.6 (including Darwin 3.6 Beta) will not work with Darwin 3.6. See Section 4.3.2 for more information.
Darwin Servers
4-2 Darwin Installation and Administration
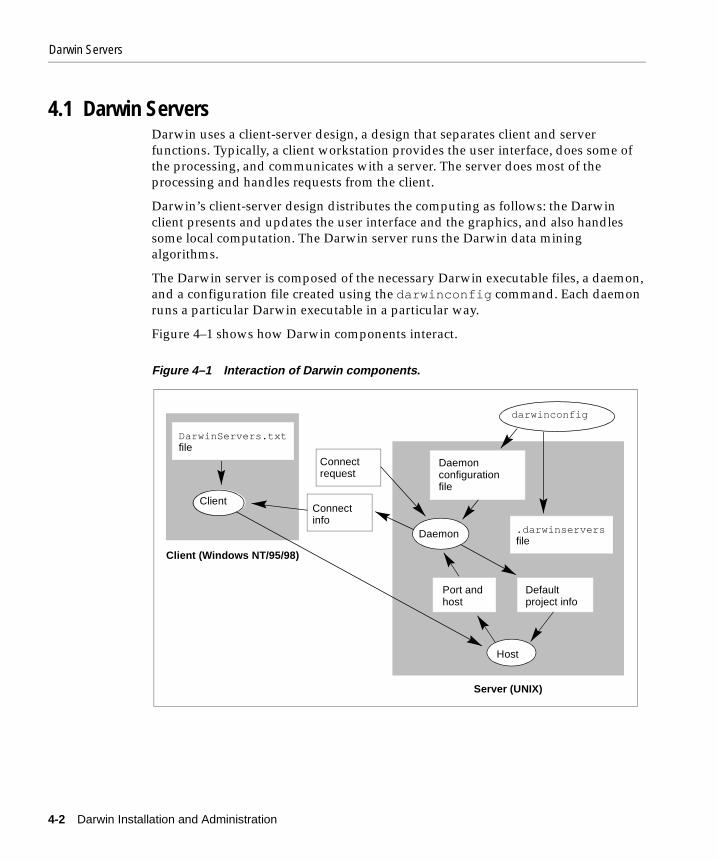
4.1 Darwin Servers Darwin uses a client-server design, a design that separates client and server functions. Typically, a client workstation provides the user interface, does some of the processing, and communicates with a server. The server does most of the processing and handles requests from the client.
Darwin’s client-server design distributes the computing as follows: the Darwin client presents and updates the user interface and the graphics, and also handles some local computation. The Darwin server runs the Darwin data mining algorithms.
The Darwin server is composed of the necessary Darwin executable files, a daemon, and a configuration file created using the darwinconfig command. Each daemon runs a particular Darwin executable in a particular way.
Figure 4–1 shows how Darwin components interact.
Figure 4–1 Interaction of Darwin components.
DarwinServers.txtfile
Connectrequest
Connectinfo
Port andhost
Defaultproject info
Client
Daemon
Host
Client (Windows NT/95/98)
Server (UNIX)
Daemonconfigurationfile
.darwinserversfile
darwinconfig

Darwin Configuration Files
Configuring Darwin Servers 4-3
4.2 Darwin Configuration FilesThe server’s configuration file contains all the information necessary to run the server and set up projects. Appendix B contains sample configuration files for the HP-UX platforms that Darwin supports at Release 3.6.
The command darwinconfig, described in Section 4.4, creates and maintains the following files:
■ a configuration file named.darwinservers, which includes all configured Darwin servers at your site. The.darwinservers file is created in /opt/TMCdarwin/etc. Section 4.2.1 describes the.darwinservers file.
■ a configuration file for each server on the system. Each server’s configuration file has the same name as its server. These configuration files are saved on UNIX in /opt/TMCdarwin/etc. Appendix B shows sample configuration files for single- and multi-node servers with and without database connectivity.
4.2.1 darwinservers FileThe.darwinservers file lists all configured Darwin servers. In a standard configuration created by the darwinconfig command, the.darwinservers file is automatically created and updated in /opt/TMCdarwin/etc on UNIX.
Each line in the.darwinservers file describes a single server. Each line has five parts:
■ the keyword server
■ the Darwin server’s name (the name specified in the name line of the server’s configuration file)
■ the hostname of the system on which the server runs (the name specified in the server line of the server’s configuration file)
■ the port to be used by the server (matching the port entry in the configuration file for the server)
■ a description of the Darwin server, within quotation marks (optional)
Note: All file locations assume a standard installation in which the software is installed in /opt/TMCdarwin, the default location. If the software is installed in some other directory, correct the pathnames accordingly.

Before Using darwinconfig
4-4 Darwin Installation and Administration
Notice that the server’s name, the name of the system on which the server runs, and the port number must match the values in the server’s configuration file (see examples in Appendix B). Here is a sample .darwinservers file for the sample server configuration files for servers eval-1 and Ring:
server eval-1 test.mysite.com 606 "Test System 1"server Ring mysmpserver 1111 "SMP test system"
4.2.2 DarwinServers.txt FileA related file, DarwinServers.txt, which you create (see Section 6.1), resides on each user’s C drive on Windows NT or Windows 95/98:
C:\Program Files\Tmc\Darwin Windows Client\DarwinServers.txt
This file contains a list of servers to which the client can connect. You may wish to copy .darwinservers to this file. Darwin does not update DarwinServers.txt; you must update it by hand.
When you install a Darwin client, you specify the file DarwinServers.txt as the source of the list of servers to which users can connect.
When a user opens a Darwin session, the Darwin client displays, on the login screen, a list of server names and descriptions, taken from the DarwinServers.txt file. (Using the sample file shown above, the login screen would offer the user the choice of servers eval-1 and Ring.) The user selects a server from this list; Darwin then attempts to connect the user to that server.
4.3 Before Using darwinconfigBefore you can use the darwinconfig command, you must
■ be logged in as root to the UNIX system on which the server will run
■ confirm that DARWINHOME has the appropriate value (see Section 4.3.1, below)
Note: If you will be connecting to a database, see Chapter 5 before starting to configure a Darwin server that supports database connectivity.

Configuring and Managing Darwin Servers
Configuring Darwin Servers 4-5
4.3.1 DARWINHOME Environment VariableIf you have a nonstandard installation, you must set the DARWINHOME environment variable to the location of the installation in order to run darwinconfig. The DARWINHOME environment variable does not need to be set if the software is installed in /opt/TMCdarwin, the default location.
4.3.2 Upgrading Existing Configuration FilesDarwin 3.6 supports architectures different from those supported by earlier versions of Darwin, including Darwin 3.6 Beta. Two of the supported architectures, sparc and hpux, do not have the same meaning that they had in earleir versions of Darwin. (See the description of architecture in Section B.2 for details.) Server configurations created using earlier versions of Darwin will not work properly with Darwin 3.6.
You must create a new configuration for each existing Darwin server.
Note that you cannot modify existing configurations files; instead you must create new configurations. See Section 4.4.11 for details.
4.4 Configuring and Managing Darwin ServersThis section describes the darwinconfig subcommands and related topics. The subcommands are described in Sections 4.4.1 through 4.4.10. Additional topics not covered by a specific subcommand are
■ modifying configuration files (Section 4.4.11)
■ Darwin environment variables (Section 4.4.12)
The command darwinconfig runs on UNIX (Solaris or HP-UX); you must be logged in as root to perform tasks such as creating configuration files or starting and stopping servers.
Note: There are also several Darwin environment variables that may need to be set, depending on circumstances. Note that Darwin environment variables must be added to the configuration file using the darwinconfig add command. See Section 4.4.12 for details.

Configuring and Managing Darwin Servers
4-6 Darwin Installation and Administration
To use the darwinconfig command, cd (on UNIX) to the appropriate directory and issue the darwinconfig command:
# cd /opt/TMCdarwin/etc# ./darwinconfigDarwin SCU >
The Darwin SCU > prompt indicates that you are running darwinconfig. The command is interactive; you are prompted for information required for the particular subcommand you are using.
The darwinconfig command provides these subcommands:
■ list lists the available Darwin servers (Section 4.4.1).
■ add adds a new Darwin server (Section 4.4.2).
■ remove removes an existing Darwin server (Section 4.4.3).
■ describe displays a description of a Darwin server (Section 4.4.4).
■ verify verifies the configuration of a Darwin server (Section 4.4.5).
■ start starts an existing Darwin server (Section 4.4.6).
■ stop stops a running Darwin server (Section 4.4.7).
■ save saves a new configuration file (Section 4.4.8).
■ quit quits darwinconfig without saving changes (Section 4.4.9).
■ exit exits darwinconfig after saving changes (Section 4.4.9).
■ help or ? prints a list of the subcommands and their definitions (Section 4.4.10).
4.4.1 Listing Available ServersUse list to display a list of all of the available servers (i.e., all servers in the .darwinservers file described in Section 4.2.1). For each server, list displays the name, the architecture, the hostname, whether auto restart is specified, and whether the server is running.
Note: If you are not logged in as root when you create configuration files and start or stop servers, the operations will not be performed correctly.

Configuring and Managing Darwin Servers
Configuring Darwin Servers 4-7
An example of output to list:
Darwin SCU > listAvailable servers:Name Arch Hostname Auto Restart RunningDarthSerial hpux darth-smp.think.com Yes YesDarthSmp-1 hpux darth-smp.think.com No YesDarthSmp-2 hpux darth-smp.think.com Yes YesDarthSmp-4 hpux darth-smp.think.com Yes YesDarthDB hpuxdb darth-smp.think.com Yes No
4.4.2 Adding and Configuring a ServerUse add to create and configure a new Darwin server. The subcommand add prompts you for information about server characteristics and uses your answers to create a configuration file for the server. If add finds problems with your answers, it generates messages about the problems. Remember that no two servers can have the same name.
When you create and configure your first Darwin server, a .darwinservers file is created. Thereafter, the.darwinservers file is updated whenever a new server is created or a server is removed. See Section 4.2.1 for more information about the .darwinservers file.
On Windows NT or Windows 95/98, the file DarwinServers.txt in C:\Program Files\Tmc\Darwin Windows Client contains a list of servers to which the client can connect. When you have finished configuring servers, you can use the information in .darwinservers to create this file. Darwin does not update the DarwinServers.txt file; the user or system administrator must update it.
For examples of complete configuration files, see Appendix B; Appendix B also contains detailed descriptions of the meaning of the entries in the configuration file. You will find it useful to have Appendix B available as you answer the questions generated by add.
The add subcommand is also used to add any Darwin environment variables to a server’s configuration file. See Section 4.4.12.
Note: The server’s configuration file is not automatically saved; to save it, use save (Section 4.4.8) or exit (Section 4.4.9). You must save a server’s configuration file before you can start that server.
Configuring and Managing Darwin Servers
4-8 Darwin Installation and Administration
4.4.3 Removing a ServerTo remove a Darwin server, first stop the server using the stop subcommand, described in Section 4.4.7. Use remove to remove an existing configuration file from /opt/TMCdarwin/etc. The server is then no longer available to Darwin clients, and the .darwinservers file is automatically updated.
The DarwinServers.txt file is not automatically updated; you must update that file yourself from the Windows NT or Windows 95/98 file:
C:\Program Files\Tmc\Darwin Windows Client\DarwinServers.txt
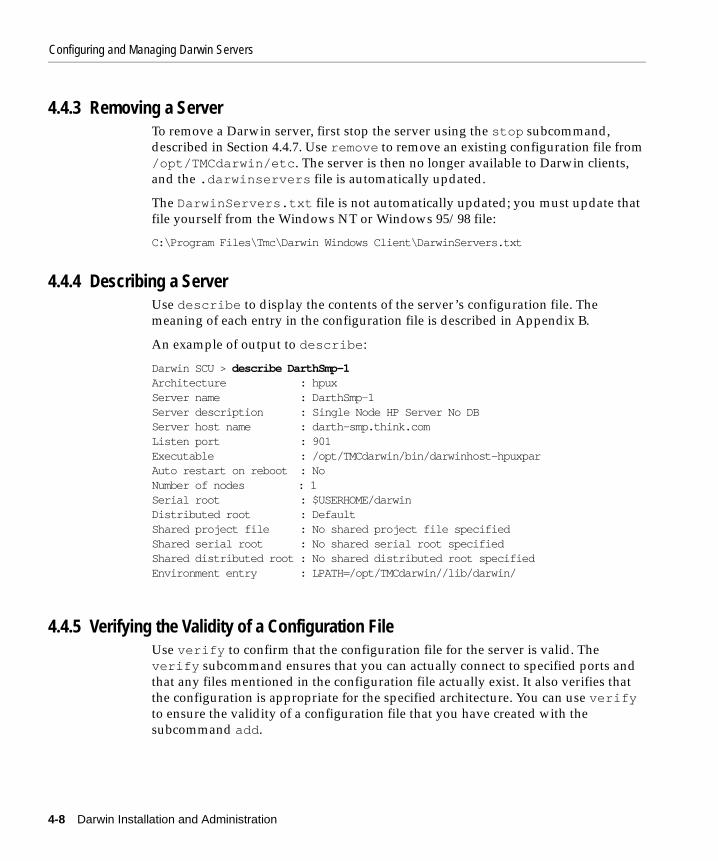
4.4.4 Describing a ServerUse describe to display the contents of the server’s configuration file. The meaning of each entry in the configuration file is described in Appendix B.
An example of output to describe:
Darwin SCU > describe DarthSmp-1Architecture : hpuxServer name : DarthSmp-1Server description : Single Node HP Server No DBServer host name : darth-smp.think.comListen port : 901Executable : /opt/TMCdarwin/bin/darwinhost-hpuxparAuto restart on reboot : NoNumber of nodes : 1Serial root : $USERHOME/darwinDistributed root : DefaultShared project file : No shared project file specifiedShared serial root : No shared serial root specifiedShared distributed root : No shared distributed root specifiedEnvironment entry : LPATH=/opt/TMCdarwin//lib/darwin/
4.4.5 Verifying the Validity of a Configuration FileUse verify to confirm that the configuration file for the server is valid. The verify subcommand ensures that you can actually connect to specified ports and that any files mentioned in the configuration file actually exist. It also verifies that the configuration is appropriate for the specified architecture. You can use verify to ensure the validity of a configuration file that you have created with the subcommand add.

Configuring and Managing Darwin Servers
Configuring Darwin Servers 4-9
4.4.6 Starting a ServerUse start server-name to start the Darwin server with nameserver-name. You can only start configured servers; a server is not configured until you save the configuration file (using the save subcommand). darwinconfig verifies the server’s configuration file and tries to start the server. If darwinconfig finds problems with the server’s configuration file, it indicates the problem(s) and asks whether you want to start the server anyway. If darwinconfig cannot start the server, it tells you why.
The darwinconfig command is interactive; however, you can use the following one-line version of darwinconfig to start a configured Darwin server with name server-name:
# darwinconfig start server-name
If you use this one-line version of the command, darwinconfig always tries to start the server. You must be root when you execute this command.
4.4.7 Stopping a ServerUse stop server-name to stop the Darwin server with name server-name. You can only stop servers that are running.
The darwinconfig command is interactive; however, you can use the following one-line version of darwinconfig to stop a configured Darwin server with name server-name:
# darwinconfig stop server-name
Note: Be sure you are logged in as root when starting and stopping Darwin servers. If you are not root, you will be able to start and stop the server, but when another user tries to enter Darwin, the servers are automatically stopped.
Note: Be sure you are logged in as root when starting and stopping Darwin servers. If you are not root, you will be able to start and stop the server, but when another user tries to enter Darwin, the servers are automatically stopped.

Configuring and Managing Darwin Servers
4-10 Darwin Installation and Administration
4.4.8 Saving a Configuration FileUse the save subcommand to write the information you have entered to Darwin’s internal configuration files.
The subcommand add does not automatically save the configuration; you must use save to save the configuration file before you can start the server. You can also end the session using exit, which saves all changes before ending the session.
4.4.9 Ending a darwinconfig SessionThere are two ways to end a darwinconfig session:
■ exit saves changes, then ends the session.
■ quit ends the session without saving changes.
4.4.10 Getting HelpEnter help or ? at the Darwin SCU > prompt to get a list of the subcommands and a brief description of each.
4.4.11 Modifying Configuration FilesYou cannot modify configurations. What you must do instead is remove the server and configure it again, as described in Section 4.4.2. If the removed server has ever been used, you must give the server a new name when you add it. The reason it must have a new name is that names of servers that have been used are embedded in the.darwinprojects and .darwinhostrc files in users’ home directories.
4.4.12 Darwin Environment VariablesThere are several Darwin environment variables that may need to be added to a server configuration, depending on circumstances. Any Darwin environment variables that are needed must be added and defined using darwinconfig add (see Section 4.4.2). An example of adding an environment variable required for a particular database package is shown below.
License File Environment VariableEarlier version of required a license file. License files are no longer required. The TMC_LICENSE_FILE environment variable is ignored.

Configuring and Managing Darwin Servers
Configuring Darwin Servers 4-11
Environment Variables Required for Database ConnectivityOracle databases require that you set certain Darwin environment variables. See the documentation for your database software for details, and see Chapter 5 of this installation guide. You must define such variables using darwinconfig add for Darwin to be aware of them.
Below is an example showing darwinconfig add’s prompts and user responses (shown in bold) for setting a Darwin environment variable required by a database package. This example also shows the system’s response when you press the RETURN key for help as prompted.
Would you like to add any environment variables to the server environment?(y/n) : y
Environment variable("exit" to exit)(return for help) : <return>
The name of a environment variable to add to the Darwin server process environment. This is necessary for most database connectivity setups. See your database documentation for more information.
Environment variable ("exit" to exit)(return for help): ORACLE_HOMEValue of "ORACLE_HOME" (return for help) : <return>
The value of a environment variable to add to the Darwin serverprocess environment. This is necessary for most database connectivity setups.
Value of "ORACLE_HOME" (return for help) : /product/oracleSW/product/8.0.5
Environment variable ("exit" to exit) (return for help) : exit
Done.
4.4.13 Troubleshooting ConfigurationsHere are solutions to common problems associated with server configurations:
1. Use darwinconfig to create configuration files; if you make changes using a text editor the changes may not work. In particular, configuration files are not parsed by any standard UNIX shell; among other things, dependent variables will not work.
2. If you change a configuration, make sure that you stop the server and restart it. Changes will not take effect until you restart the server.

Configuring and Managing Darwin Servers
4-12 Darwin Installation and Administration
3. If you change configuration parameters, you may have to reboot the server.
4. The Darwin executable must be running on the server.
Database Connectivity 5-1
5Database Connectivity
Oracle 7,3 connectivityThis chapter describes setting up the environment for database connectivity. Follow these steps:
■ Obtain, install, and connect to the database software (Section 5.1).
■ Obtain and install the database driver (Section 5.2).
■ Confirm/set permissions and file/directory accessibility (Section 5.3)
■ Set Darwin environment variables for database connectivity (Section 5.4).
■ Create required files (Section 5.5).
■ Check that the installation is correct and that the environment variables have been set correctly (Section 5.6).
■ After you have installed the Darwin client software (Chapter 6), confirm that users can connect to the database software (Section 5.7).
5.1 Supported Database Software Darwin 3.6 supports connectivity to Oracle databases only.
Darwin 3.6 connects to:
■ Oracle Version 7.3 and SQL*Net
■ Oracle 8i Enterprise Edition
Note: If you will not be connecting to an Oracle database, you can skip this chapter.

Obtain and Install Database and Drivers
5-2 Darwin Installation and Administration
If you do not already have Oracle database software on your system, you must contact Oracle Corporation, as described in Section 2.7, to learn how to obtain and install Oracle software.
Oracle must be installed and configured before you configure Darwin database connectivity.
5.2 Obtain and Install Database and DriversDarwin does not support the ODBC drivers supplied by Oracle.
Darwin uses MERANT (Micro Focus) DataDirect Connect ODBC version 3.5 or 3.6 drivers to connect to databases on a UNIX server.
You can connect to and disconnect from databases and create Darwin datasets from the result of an SQL script. Alternatively, you can use the Database Import Wizard to create a Darwin dataset from a database table and the Database Export Wizard to store datasets and results tables in a database. You cannot perform any other ODBC operations, such as storing models in a database.
You install the DataDirect drivers and Oracle on the UNIX network where the Darwin servers reside. DataDirect drivers and Oracle must be accessible from the Darwin server; they can be NFS mounted. You need to know where Oracle and DataDirect Connect ODBC are installed when you configure any Darwin servers that support database connectivity.
Darwin supports connectivity to databases on UNIX (Solaris or HP-UX) only. You cannot connect to databases on Windows 95/98 or Windows NT.
Figure 5–1 illustrates database connectivity between Darwin and an Oracle database.

Obtain and Install Database and Drivers
Database Connectivity 5-3
Figure 5–1 Connectivity between Darwin and Oracle.
5.2.1 Connecting to Oracle Using DataDirect Connect ODBCBefore you can connect to an Oracle database from Darwin, you must install MERANT DataDirect ODBC drivers, as follows:
■ Purchase the DataDirect Connect ODBC software from MERANT, as described in Section 2.7.
■ Install and configure the DataDirect Connect ODBC driver, following instructions provided with the driver.
■ Verify that you can access DataDirect drivers from the system where the Darwin server will be installed.
■ Set up the environment, which includes specifying the appropriate environment variables for all the software involved (Darwin, DataDirect, and the database). You must also set certain Darwin environment variables (Section 5.4) when you configure the Darwin server.
Darwin Server (UNIX)
/opt/TMCdarwin/etc/config
Darwin Client (PC)
Oracle Server File ServerDataDirect Connect ODBC
/opt/odbc35ORACLE_HOME
C:\Program Files\tmc\DarwinServer.txt
MountedMounted

Permissions and Accessibility for Oracle Databases
5-4 Darwin Installation and Administration
5.3 Permissions and Accessibility for Oracle DatabasesThe following permissions are required to connect to Oracle databases from Darwin:
■ Users must be recognized by the database server and must have database connect permission.
■ Users must have read permission on the database tables.
■ Oracle directories must be locally accessible; they can be NFS mounts.
■ DataDirect directories must be locally accessible; they can be NFS mounts.
■ Darwin requires the Oracle network libraries; these libraries must be locally accessible. Darwin also requires the Oracle configuration file tsnames.ora and listener.ora to be locally accessible if the Oracle server is not on the same node as Darwin.
5.4 Darwin Environment Variables for OracleThis section describes the Darwin environment variables that must be set for database connectivity. The variables described here are specific to Oracle.
For an example of how to set environment variables in Darwin, see Section 4.4.12.
For an example of a configuration file for a Darwin server that supports Oracle connectivity, see Appendix B.
The following environment variables are required:
■ ORACLE_HOME
■ LPATH
■ SHLIB_PATH
■ ORACLE_SID
5.4.1 ORACLE_HOME Environment VariableThe environment variable ORACLE_HOME must be set to the directory where Oracle is locally accessible. For example, if Oracle 8i is installed in the directory /proj/project1/oracle8, then ORACLE_HOME should be defined as follows in the server’s configuration file:
ORACLE_HOME=/proj/project1/oracle8/

Required Files
Database Connectivity 5-5
5.4.2 LPATH Environment VariableThe environment variable LPATH in the Darwin server’s configuration must be set to the location where Darwin libraries are installed. For example, if Darwin is installed in the default location, then LPATH should be set as follows:
LPATH=/opt/TMCdarwin/lib/darwin
5.4.3 SHLIB_PATH Environment VariableThe environment variable SHLIB_PATH must include the Oracle libraries, the DataDirect libraries, and the Darwin libraries. For example, if Oracle is installed at /proj/project1/oracle73, and if DataDirect is installed at /opt/odbc35/lib, and if Darwin is installed in the default location, then SHLIB_PATH should be defined as follows in the server’s configuration file:
SHLIB_PATH=/opt/TMCdarwin/lib/darwin:/opt/odbc35/lib: /proj/project1/oracle73/lib/
5.4.4 ORACLE_SID Environment VariableThe environment variable ORACLE_SID must be defined in the Darwin server’s configuration; for example,
ORACLE_SID=ORCL
5.5 Required FilesThe following files are required:
■ /etc/services (or the NIS or NIS+ map)
■ .odbc.ini
If the Oracle database and the Darwin server are on different UNIX systems, the following file is also required:
■ tnsnames.ora
5.5.1 /etc/services FileThe /etc/services file (or the NIS or NIS+ map) must have a TCP port matching the name and number of the TCP port for the Oracle listener on the database server.

Required Files
5-6 Darwin Installation and Administration
This should already be set by your database administrator. For example, to specify port number 1521, include the following:
listento 1521/tcp
5.5.2 .odbc.ini FileEach user’s home directory on UNIX must contain an appropriate .odbc.ini file.
Here is a sample .odbc.ini file for Oracle connectivity on HP-UX using DataDirect Connect ODBC 3.5 (installed at /opt/odbc35/). ServerName is the Oracle tnsnames.ora name. This file permits connection to two different versions of Oracle, Oracle 8i (the Oracle 8i data source) and Oracle 7.3 (the Oracle73 data source). Notice that tracing is enabled.
[ODBC Data Sources]Oracle8i=Oracle8i with ODBC 35 on HP-UX 11Oracle73=Oracle 73 with ODBC 35 on HP-UX 11[Oracle8i]Driver=/opt/odbc35/lib/ivor814.slDescription=MERANT Oracle8i ODBC DriverServerName=tm0.us[Oracle73]Driver=/opt/odbc35/lib/ivor814.slDescription=MERANT Oracle 73 DriverServerName=ora_db0_net[ODBC]Trace=1TraceFile=odbctrace.outTRACEDLL=/opt/odbc35/lib/odbctrace.slInstallDir=/opt/odbc35
5.5.3 tsnames.ora FileIf the Oracle server is not on the same node as Darwin, the file ORACLE_HOME/network/admin/tnsnames.ora must point to the listener (i.e., the TCP/IP port) on the database server. (ORACLE_HOME is the directory on HP-UX where Oracle is installed.) For example,
Note: Darwin does not support the DataDirect Connect ODBC environment variable ODBCINI.
Installation Check
Database Connectivity 5-7
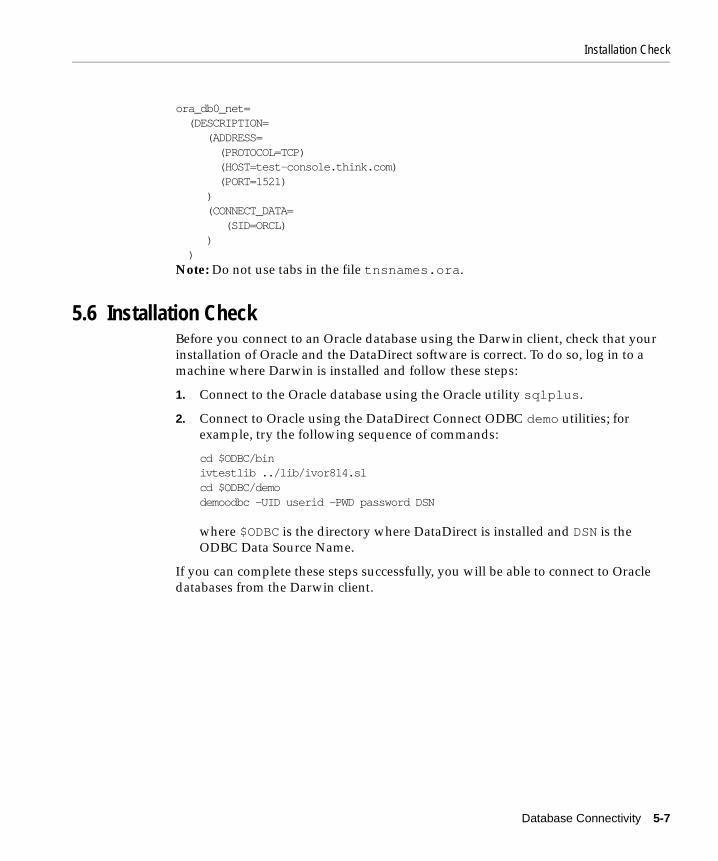
ora_db0_net= (DESCRIPTION= (ADDRESS= (PROTOCOL=TCP) (HOST=test-console.think.com) (PORT=1521) ) (CONNECT_DATA= (SID=ORCL) ) )Note: Do not use tabs in the file tnsnames.ora.
5.6 Installation CheckBefore you connect to an Oracle database using the Darwin client, check that your installation of Oracle and the DataDirect software is correct. To do so, log in to a machine where Darwin is installed and follow these steps:
1. Connect to the Oracle database using the Oracle utility sqlplus.
2. Connect to Oracle using the DataDirect Connect ODBC demo utilities; for example, try the following sequence of commands:
cd $ODBC/binivtestlib ../lib/ivor814.slcd $ODBC/demodemoodbc -UID userid -PWD password DSN
where $ODBC is the directory where DataDirect is installed and DSN is the ODBC Data Source Name.
If you can complete these steps successfully, you will be able to connect to Oracle databases from the Darwin client.
Using Database Connectivity
5-8 Darwin Installation and Administration
5.7 Using Database ConnectivityAfter you have installed the Darwin client software (Chapter 6), you will be able to use the Darwin client to connect to a database. This section the different ways a user can connect to a database from the Darwin client.
5.7.1 Connecting to a Database ServerThe following commands on Darwin’s Project menu permit users to connect to a database server and to terminate an existing connection to a database server:
■ Database Connect
■ Database Disconnect
The Database tab of the Dataset menu’s Create command lets users create a Darwin dataset from a connected database using an SQL script or query. For information about these operations, see Using Darwin and Darwin Reference or the Darwin online help. See Section 5.7.3 for another way to import data from a database.
SQL ScriptsDarwin allows you to run an SQL script after you have connected to a database. For more information and examples, see Using Darwin and the Darwin Reference.
SQL LimitationsWhen you use a script to create a new Darwin dataset, do not use the SQL UNION, INTERSECT, EXCEPT, and JOIN operators; using these operators in a script results in an error.
5.7.2 Disconnecting from a DatabaseYou must close all datasets created using database connectivity before you try to disconnect from the database. If you forget to do this, you get the error message Database in Use. The error message reflects the way a database supporting ODBC creates datasets.
When the database creates a new dataset, it does so by creating a pointer; it does not retrieve data at the same time. If you try to close a connection to the database when there are any active pointers, you get the Database in Use message.
Therefore, before disconnecting, you must save any datasets created from a database and then close the original dataset that was created directly from the database.

Using Database Connectivity
Database Connectivity 5-9
5.7.3 Database Import WizardThe Database Import Wizard simplifies the process of converting a database table to a Darwin dataset. The Wizard performs the following functions:
■ connects you to the database
■ permits you to log in to the database
■ displays available database tables
■ converts the selected table to a Darwin dataset
■ closes the connection to the database
To use the Wizard to import data, there must be a table that defines the data that you wish to import, and you must provide the name of that table.
The Wizard manages the connection to and the disconnection from the database automatically.
For more information about this Wizard, see Darwin 3.6 New Features.
5.7.4 Database Export WizardThe Database Export Wizard permits you to save a Darwin dataset or results table as a database table. The Wizard
■ connects you to the database
■ lets you select a Darwin dataset or result table
■ exports the dataset or result table to a database table
■ closes the connection to the database
For more information about this Wizard, see Darwin 3.6 New Features.

Using Database Connectivity
5-10 Darwin Installation and Administration

Installing the Darwin Client 6-1
6Installing the Darwin Client
After you’ve installed the Darwin server on HP-UX and configured and started one or more Darwin servers, you are ready to install Darwin client software on PCs running Windows NT, Windows 95, or Windows 98.
Once you’ve installed the client software, you can log in to Darwin, as described in Chapter 7, and start mining data.
Follow these steps to install Darwin client software:
1. Verify that Microsoft Internet Explorer 4.x is installed on every PC on which you are planning to install Darwin clients. See Section 2.4 for information about obtaining Internet Explorer 4.x. If Internet Explorer 4.x is not installed on a PC, Darwin online help will not be available on that PC.
2. Gather information about the Darwin servers that you will connect to (Section 6.1).
3. Create a Darwin Windows Client customization disk or file (optional) (Section 6.1.1).
4. Install the client software (Section 6.2).
6.1 Collect Server InformationBefore you install Darwin client software, you must have the following information for each server that the client will connect to:
■ the name of the server
■ the name of the host machine on which the server resides
■ the port number for the server
■ a description of the server (optional)

Collect Server Information
6-2 Darwin Installation and Administration
During the installation process, you will be prompted for this information in a screen titled “Create the Configuration File”.
If you are connecting to several servers or are installing several clients, you may want to create a Darwin Windows Client customization disk or file (Section 6.1.1).
6.1.1 Create a Customization Disk or File (Optional)Follow these steps to create a Darwin Windows Client customization disk or file:
1. Using Notepad or a similar editor, create a file named DarwinServers.txt, containing one-line descriptions of the Darwin servers that you plan to connect to. For each server, create a line in the following format:
server name host port description
where name is the name of the server, host is the system on which the server resides, port is the port number for the server, and description is the optional description of the server, enclosed in quotation marks.
Separate each item from the next with a space (not a TAB).
For example, if you plan to connect to the server eval-1 on the machine test.mysite.com at port 606 with description "Test System 1", include the following line in DarwinServers.txt:
server eval-1 test.mysite.com 606 "Test System 1"
This line is the entry for the server from the .darwinservers file; you can create the customization file or disk by copying the server entries in the .darwinservers file.
2. To create a Darwin Windows Client customization disk, copy DarwinServers.txt to a diskette. To create a customization file, copy DarwinServers.txt to a folder that can be seen by all the personal computers that will run Darwin client software. The DarwinServers.txt file also belongs in each user’s C:\Program Files\Tmc\Darwin Windows Client folder.
If you are installing clients on Windows NT, Windows 95 and Windows 98, you can use the same Darwin Windows Client customization disk or file for all PC platforms.

First-Time Installation
Installing the Darwin Client 6-3
6.2 Installing Client SoftwareThe client software is installed using an InstallShield wizard. Follow these steps to install the client software:
1. Exit all programs that are running on the PC where you are installing a Darwin client.
2. Insert the Darwin Client CD in the CD drive of the PC where you are installing the Darwin client.
3. If you are using a Darwin Windows Client customization diskette, insert it into the diskette drive of the same PC.
4. The Darwin Windows Client Setup Program will start up automatically. The installation wizard will guide you through the installation process.
5. If the setup program does not start automatically, navigate to the CD ROM drive and double-click Setup.exe.
6. The Wizard guides you through the installation.
7. To complete the process, the PC must be restarted. You can either let the wizard restart the PC or you can restart the PC at your convenience. If you are using a customization disk, remove it before you restart the PC.
6.2.1 DARWINHOME Windows Environment VariableDuring installation of the Darwin client, Darwin adds a Windows environment variable named DARWINHOME, and sets it to the directory in which you installed the Darwin client, which is by default C:\Program Files\Tmc\Darwin Windows Client.
This variable appears on the Control Panel > System > Environment tab under User Variables. It is possible to modify its setting there, but do not. If the setting is modified, Darwin is not likely to work at all.
6.3 First-Time InstallationBefore you can use Darwin for the first time, you must create a least one dataset in one of your projects. Until you create a project and copy a text file or dataset into it, everything in the Darwin graphical user interface is greyed out and no commands are available. There are two ways to do this:
■ Copy a dataset or text file from the datasets for practice as follows:

First-Time Installation
6-4 Darwin Installation and Administration
1. Set up the datasets for practice, as described in Darwin 3.6 New Features.
2. Create a project as described in Section 8.2.
3. Drag a dataset from the datasets for practice into your project.
Commands will now be available.
■ Create a project and copy a text file into it as follows:
1. After both Darwin client and server software are installed, start up the Darwin client.
2. Create a project (described in Section 8.2).
3. Exit Darwin.
4. On UNIX, go to the darwin directory, and, in the project directory for the project you just created, create a .txt file (or copy a .txt file into the directory), and, optionally, a .des file.
When you attach to the Darwin client, commands will be available.

Starting and Stopping Darwin 7-1
7Starting and Stopping Darwin
After the Darwin server and client software is installed, and the server(s) are configured and running, you and other users can start using Darwin. You, as system administrator, will want to start up Darwin to confirm that Darwin is installed correctly and is ready for users.
7.1 Starting DarwinStarting Darwin requires the following steps, which must be performed in the order indicated:
■ First, the system administrator starts all necessary Darwin servers on UNIX (Section 7.1.1).
■ Next, ordinary users start the client software on Windows NT or Windows 95/98 (Section 7.1.2).
7.1.1 Starting Darwin ServersA system administrator uses the darwinconfig start server-name command described in Section 4.4 to start each server that a user will connect to.
Note: Be sure you are logged in as root when starting and stopping Darwin servers. If you are not root, you will be able to start and stop the server, but when another user tries to enter Darwin, the servers are automatically stopped.
7.1.2 Starting a Darwin ClientTo start Darwin,
■ Log in as an ordinary user on Windows NT, Windows 95, or Windows 98.
Stopping Darwin
7-2 Darwin Installation and Administration
■ Click the Start button; on the Start menu, click Programs; on the Programs menu, click Darwin Windows Client (identified by a protohominid icon); if there is a Darwin icon on your desktop, you can double-click it to start the client.
The Darwin splash screen appears. After the splash screen disappears, the Darwin login window appears (titled Darwin Login).
Now log in to a Darwin server. At the top of the login screen are two boxes for you to type in:
■ User Name: Enter the user name for your account on the server.
■ Password: Enter the password for your account on the server. This password may or may not be the same password that you use to log on to your PC.
■ Darwin Server: This text box displays a list of servers for you to choose from. The list comes from the DarwinServers.txt file that was created when the client software was installed.) Click the name of the Darwin server you want to connect to. To the right of the server name is a brief description of it.
■ Click OK or press ENTER.
Darwin then attempts to connect you to the server you selected, and the main Darwin window is displayed.
If the attempt to connect fails, try connecting to a different server or contact your system administrator. The administrator can check to see if servers are running and start them if necessary.
7.2 Stopping DarwinStop Darwin as follows:
■ First, ordinary users exit (stop) all clients on Windows NT, Windows 95, or Windows 98 (Section 7.2.1).
■ Then, the administrator stops all servers on UNIX (Section 7.2.2).
7.2.1 Stopping Darwin ClientsThe best way to exit Darwin is to click Project > Exit (on the Project menu, click Exit). When you exit by this route, Darwin gives you a last opportunity to save any files or objects that you created in this session but did not save.

Stopping Darwin
Starting and Stopping Darwin 7-3
7.2.2 Stopping Darwin ServersThe system administrator stops each server using the darwinconfig stop server-name command described in Section 4.4.
Note: Be sure you are logged in as root when starting and stopping Darwin servers. If you are not root, you will be able to start and stop the server, but when another user tries to enter Darwin, the servers are automatically stopped.

Stopping Darwin
7-4 Darwin Installation and Administration

Administering Darwin Projects 8-1
8Administering Darwin Projects
This chapter provides general information about Darwin projects; these are basic things system administrators should know to support Darwin users.
8.1 Darwin ProjectsAll work in Darwin is done within the context of a project, which is a UNIX directory that resides on the server. Ordinary users create and delete projects. At the beginning of your first Darwin session, the only commands available are those that create new projects (New Project), select existing projects (Open Project), or end the session (Exit).
The first time that you run Darwin, you must create a project. After you have created at least one project, Darwin automatically selects the project you last used whenever you start a new Darwin session. You can work in that project, select another existing and available project, or create a new project.
For more information about projects, see Darwin’s online help, Using Darwin, and Darwin Reference.
Note: If you install Darwin on a system for the first time, you must take certain steps to make the GUI usable. See Section 6.3 for details

Creating Projects
8-2 Darwin Installation and Administration
8.2 Creating ProjectsOrdinary users create projects from the Darwin client, using the New Project command of the Project menu.
Follow these steps to create a project:
■ On the Project menu, click New Project.
A dialog box appears, and prompts you for the following information:
■ In the Project box:
– Name: Specify a name for the project.
– Description: (Optional.) Record any information you may want about the project.
– Shared: If you want this project to be shared with other users, click the Shared box.
■ In the In Server box are two read-only boxes:
– Name: Name of the current server.
– Description: Description of the current server.
■ Distributed: If you want the project to be distributed, click the Distributed box. Note: This option is available only if the Darwin server is a distributed server.
■ If you wish, click Advanced, which takes you to Advanced Options, Project tab, where you can record information about the project (see Section 8.2.1, below).
■ Click OK or press ENTER.
Darwin then creates the project, using the pathname or pathnames specified in the server configuration file.
8.2.1 Recording Project Information If you click Advanced Options on the New Project dialog window, you can specify the following optional information about the current project (the project you are creating):
Note: The Shared option is available only if the Darwin server is configured to permit shared projects.
Administrator Decisions about Projects
Administering Darwin Projects 8-3
■ Leader: The name of the project leader.
■ Phone and Ext: The telephone number of the project leader.
■ Business Problem: The problem that the project addresses.
■ Objectives: The objectives of the project.
All this information is optional. When you are finished, click OK or press ENTER to save the information.
8.3 Deleting ProjectsOrdinary users can delete their own projects by right-clicking the project’s name in the Workspace listing; then, on the context menu that appears, click Delete.
You must delete all files associated with a project before you delete the project. If you try to delete a project with files left in it, you get one of these error messages:
Serial directory is not empty
or
Distributed project directory is not empty
8.4 Administrator Decisions about ProjectsAll project directories reside on the UNIX server.
The system administrator defines the location of Darwin project directories within the server configuration files (described in Chapter 4 and Appendix B). The system administrator can also set up projects for users. Usually, however, users define projects for themselves.
Darwin supports two types of projects: user projects and shared projects:
■ User projects are designed for use by a single user. Their UNIX umasks are set to 0022.
If the administrator uses the USERHOME keyword in the serial path defined in a server’s configuration file, then project directories are subdirectories of the home directory of the user who creates them. If the administrator does not use the USERHOME keyword during server configuration, project directories are grouped as subdirectories of a single specified directory.

The .darwinprojects File
8-4 Darwin Installation and Administration
■ Shared projects are designed for use by groups of users. Their UNIX umasks are set to 0000, allowing all users to create, open, use, and delete files (if the base directories have write permission set for all users). As part of configuring a server, the system administrator specifies whether users can create shared projects. The USERHOME and USERNAME keywords are not allowed in shared pathnames.
Administrators can choose whether to allow shared projects on any given Darwin server. If they define shared serial root, shared project file, and shared distributed root (for distributed servers only) in a server’s configuration file, then shared projects are allowed. If the shared files are not defined, then shared projects cannot be created on that server. See the discussion of shared_serial_root in Section B.2 for more information.
8.5 The .darwinprojects FileWhen Darwin creates a nonshared project for a user, it puts the project name and information in the .darwinprojects file, which is stored in the user’s home directory on UNIX. The file contains one entry for each project the user creates.
Darwin creates and maintains the .darwinprojects file. Under ordinary circumstances, neither the user nor the administrator needs to edit the file.
When the user selects Project > Open Project command, Darwin displays the project names from the user’s .darwinprojects file. If the server has a shared projects file, those project names are also displayed.
The user selects a project from the list. Darwin then uses the .darwinprojects file to locate the project directories for this project, when running on this server. (If the project has not been run on this particular server before, Darwin goes to the server configuration file for default directory information.)
When you restart Darwin, it automatically selects the project you used last.
8.5.1 A Sample .darwinprojects FileAs an example, the project ad_campaign_3 might have the following entry in a .darwinprojects file:
project_name ad_campaign_3directory /users2/csmith/darwin/ad_campaign_3server eval-1 T /users2/csmith/darwin/ad_campaign_3server RingD F /export/darwin/csmith/ad_campaign_3end_project

The .darwinprojects File
Administering Darwin Projects 8-5
The information for each project is as follows:
■ the keyword project_name, followed by the project’s name
■ the keyword directory, followed by the pathname of the serial project directory
■ the keyword server, followed by three items:
– the name of a server on which the project has run
– the keyword T or F, indicating that serial and distributed directories are in the same directory (T) or are in different directories (F)
– the pathname for the distributed directory
If the project has been run on more than one server, the file contains one line for each server that has been used.
■ the phrase end_project
8.5.2 Modifying the .darwinprojects FileThere are a few circumstances under which the user or administrator might want to alter the .darwinprojects file. For example,
■ Whenever any directory containing Darwin projects is moved, the user or administrator should check the pathnames in the user’s .darwinprojects file and correct any pathname affected by the move.
■ The system administrator can change the location of the serial or distributed directories for a server by manually editing that server’s configuration file. These changes do not propagate into the .darwinprojects files. This can be advantageous: For instance, it allows existing projects to remain on one set of disks, while new projects are placed by the server on new disks. On the other hand, if you want a user’s projects to migrate to a new disk, then either the user or the administrator must edit the .darwinprojects file for that user.
■ If two users want to share access to a user project, they can do so by copying the project’s entry from the .darwinprojects file into the second user’s .darwinprojects file. Permissions on the project directory may have to be modified; other modifications may be necessary.

The .darwinprojects File
8-6 Darwin Installation and Administration
Installing the SAS Conversion Utilities A-1
AInstalling the SAS Conversion Utilities
Darwin supports importing and exporting datasets in proprietary formats using a combination of a third-party product (DBMS/COPY) and two Perl scripts distributed with Darwin (sas2darwin and darwin2sas). The Perl scripts automate the use of DBMS/COPY to convert files to and from the format supported by the SAS Institute, Inc.
DBMS/COPY, Perl, and the Perl scripts all run on UNIX; you cannot invoke the SAS conversion utilities from the Darwin client.
This appendix describes how to install the conversion utilities on UNIX. For information about the hardware and software requirements of the SAS conversion utilities, see Section 2.6 of this manual. For information about using the utilities, see Using Darwin.
A.1 Installing the SoftwareIf you do not plan to convert to and from SAS files, you should not install the SAS conversion utilities.
Install DBMS/COPY and Perl as directed by the suppliers of the software.
The Perl scripts sas2darwin and darwin2sas are part of Darwin 3.6 and are installed automatically in the UNIX directory /opt/TMCdarwin/bin (DARWINHOME/bin) when Darwin is installed.
sas2darwin and darwin2sas assume that Perl is installed on UNIX in /usr/local/bin/perl. If Perl is not installed in this location on your system, you must edit the first line of the script sas2darwin, changing the line
#!/usr/local/bin/perl

Installing the Software
A-2 Darwin Installation and Administration
to specify the location of Perl on your system. (darwin2sas is a link to sas2darwin, so you don’t have to edit both scripts.)
Server Configuration Files B-1
BServer Configuration Files
This appendix includes sample Darwin server configuration files and explains what the entries mean.
You create configuration files using the UNIX command darwinconfig, as described in Chapter 4.
Note: All file locations assume a standard installation in which the software is installed in /opt/TMCdarwin, the default location. If the software is installed somewhere else, replace /opt/TMCdarwin with the appropriate pathname.
B.1 Darwin Configuration Filesdarwinconfig creates and maintains the following UNIX files:
■ the file .darwinservers, which covers all configured Darwin servers at your site. .darwinservers is created in /opt/TMCdarwin/etc. Section 4.2.1 describes the .darwinservers file.
■ a configuration file for each server on the system. Each server’s configuration file has the same name as its server. These configuration files are found on UNIX in /opt/TMCdarwin/etc. Section B.1.1 shows a sample configuration file for each supported architecture running HP-UX 11.0 and a sample configuration file for a server supporting database connectivity.
For more information about configuring and maintaining Darwin servers, see Chapter 4.
B.1.1 Server Configuration FilesThe server’s configuration file contains all the information necessary to run the server and set up projects. Configuration files are slightly different for each different
Darwin Configuration Files
B-2 Darwin Installation and Administration
platform. The following sections contain sample configuration files for the HP-UX platforms that Darwin supports at Release 3.6. Configuration files are created using the UNIX command darwinconfig, as described in Section B.1. In the default installation, configuration files reside in the directory /opt/TMCdarwin/etc.
Sample Configuration File for a Single Node Server Here is the configuration file for a server named eval-1 that runs on a Series 700 or Series 800 single-node system running HP-UX 11.0. For a detailed explanation of the various terms, see Section B.2.
DARWIN(tm) DAEMON CONFIGarchitecture hpuxname eval-1description Single Node HP System server test.mysite.comport 606executable /opt/TMCdarwin/bin/darwinhost-hpuxparauto_restart truennodes 1serial_root $USERHOME/darwin/distributed_root Defaultenv LPATH=/opt/TMCdarwin/lib/darwin/env DARWINHOME=/opt/TMCdarwin/
All entries, except for the env DARWINHOME entry, are required for the server to work properly.
Sample Configuration File for a Multinode Server Here is the configuration file for a Darwin server that runs on a Series 800 multi-node system running HP-UX 11.0. For a detailed explanation of the various terms, see Section B.2.
DARWIN(tm) DAEMON CONFIGarchitecture hpuxname Ringdescription Multinode HP test systemserver mysmpserverport 1111executable /opt/TMCdarwin/bin/darwinhost-hpuxparauto_restart falsennodes 2serial_root $USERHOME/darwin/distributed_root Default

Darwin Configuration Files
Server Configuration Files B-3
env LPATH=/opt/TMCdarwin/lib/darwin/env DARWINHOME=/opt/TMCdarwin/
All entries, except for the env DARWINHOME entry, are required for the server to work properly.
Sample Configuration File for Oracle 8i ConnectivityHere is a configuration file for a single-node Series 700 or Series 800 server that supports connection to an Oracle 8i database using DataDirect Connect ODBC 3.6. Chapter 5 contains detailed information about the environment variables in this sample.
DARWIN(tm) DAEMON CONFIGarchitecture hpuxdbname Oracle8onHP description Server with MERANT 3.6 to Oracle 8server MyServerport 1050executable /opt/TMCdarwin/bin/darwinhost-hpuxpardbauto_restart truennodes 1serial_root $USERHOME/darwindistributed_root Defaultenv LPATH=/opt/TMCdarwin/lib/darwinenv ORACLE_HOME=/proj/project1/oracle8env ORACLE_SID=ORCLenv DARWINHOME=/opt/TMCdarwinenv SHLIB_PATH=/opt/TMCdarwin/lib/darwin:/opt/odbc/iv360/lib: /proj/project1/oracle8/lib
All entries, except for the env DARWINHOME entry, are required for the server to work properly.
Sample Configuration File for Oracle 7.3 ConnectivityHere is a configuration file for a two-node Series 700 or Series 800 server that supports connection to an Oracle 8i database. Chapter 5 contains detailed information about the environment variables in this sample.
DARWIN(tm) DAEMON CONFIGarchitecture hpuxdbname Oracle73onHP description Oracle 7.3 with MERANT 3.5 2 nodesserver MyServer

What Configuration Files Mean
B-4 Darwin Installation and Administration
port 1050executable /opt/TMCdarwin/bin/darwinhost-hpuxpardbauto_restart truennodes 2serial_root $USERHOME/darwindistributed_root Defaultenv LPATH=/opt/TMCdarwin/lib/darwinenv ORACLE_HOME=/product/oracleSW/product/73/env ORACLE_SID=ORCLenv DARWINHOME=/opt/TMCdarwinenv SHLIB_PATH=/opt/TMCdarwin/lib/darwin:/opt/odbc/lib: /product/oracleSW/product/73/
All entries, except for the env DARWINHOME entry, are required for the server to work properly.
B.2 What Configuration Files MeanThis section lists all the entries that can appear in a configuration file for a Darwin server and explains what they mean.
architecture is one of the architectures supported by Darwin. darwinconfig prints a list of the currently supported architectures, which are
■ sparc: Sun Microsystems UltraSPARC workstations or Ultra Enterprise Servers running Solaris 2.6 or 2.7 (single-node or multi-node servers)
■ sparcdb: Sun Microsystems UltraSPARC workstation Ultra Enterprise servers running Solaris 2.6 or 2.7 with database connectivity (single-node or multi-node servers)
■ hpux: Hewlett-Packard 9000 Series 700 or Series 800 single-node or multi-node system running HP-UX 11.0
■ hpuxdb: Hewlett-Packard 9000 Series 700 or Series 800 single-node or multi-node system running HP-UX 11.0 with database connectivity
Note: If you specify either of the architectures sparcdb or hpuxdb you must have Merant DataDirect Connect ODBC and Oracle software installed. The server configuration supporting database connectivity must also specify the correct environment variables. (See Chapter 5 for details.)

What Configuration Files Mean
Server Configuration Files B-5
You specify a multi-node or single-node server using the nnodes entry.
architecture must be specified for all types of servers.
name is the name of the server (that is, configuration) to be displayed in the list of choices presented to the user upon entering Darwin. The name is also used in the .darwinservers file, which darwinconfig creates and updates automatically. name is also the name of the configuration file that describes the server. This item is required for all types of servers. Two different servers cannot have the same name. If a server has been used, you cannot create a new server with the same name, even if you remove the old server, since the name is embedded in .darwinprojects and .darwinhostrc in users’ home directories.
description is the text describing the server that is displayed to users on the Darwin Login screen. This item is required for all types of servers.
server is the hostname of the workstation or server where the Darwin server will run. This address plus the port address are used to connect users to the Darwin server. You can also specify the IP address of the workstation or server for this item. This item is required for all types of servers.
port is the TCP port number where the daemon listens for connect requests. For security reasons, the port number should be less than 1024 if the daemon is running as root and greater than 1024 if the daemon is running under a specific username. If several users will share the server, the daemon must run as root. The port number specified here must not be used by any other installed applications as described in /etc/services or the services map if using NIS or NIS+. This item is required for all types of servers.
executable is the path to the Darwin host executable that the daemon will invoke when a user selects this server at the start of a Darwin session. This item is required for all types of servers.
auto_restart specifies that this Darwin server is automatically restarted when the system reboots. All daemons started at reboot will run as root. You must be running darwinconfig while logged on as root to specify auto_restart. You can use the list subcommand of darwinconfig to see whether auto_restart is specified for a particular server. (Be sure to save the configuration before you list it or reboot the server host.) This item is required for all types of servers.
nnodes is the number of nodes on the server that the Darwin server will use. This number must be greater than or equal to 1 and less than or equal to the total number of CPUs that Darwin will use. This item is required for all servers.

What Configuration Files Mean
B-6 Darwin Installation and Administration
The following two keywords can be used when you specify distributed_root and serial_root:
■ USERHOME — Used to specify that project directories are created in a subdirectory of the user’s home directory on UNIX. For example, if serial root is specified as $USERHOME/darwin and if the user with home directory /users5/csmith has a subdirectory /users5/csmith/darwin, and created the project ad_campaign_3, the serial directory for that project would be /users5/csmith/darwin/ad_campaign_3.
■ USERNAME — Used to specify that a user’s projects are stored in UNIX directories that contain the name under which a user is logged in. Darwin creates a subdirectory for each user and places the user’s projects in that subdirectory. For example, if the distributed root is /export/darwin/$USERNAME, and the user jjones creates the project proj, the distributed directory for that project would be /export/darwin/jjones/proj.
Note that you cannot use these keywords to specify shared roots.
serial_root is the base directory for users’ nonshared serial project directories. (These are directories in the UNIX file system, usually under the users’ home directories.) This item is automatically set to the directory that you specify in response to the "Root directory for projects:" prompt in darwinconfig add. This item is required for all types of servers.
distributed_root is the base directory for all distributed directories created for projects run by this server. On any server running on a Solaris or HP-UX system, the entry for distributed_root is automatically set to Default, signifying that the distributed root is the same as the serial root.
shared_serial_root, shared_distributed_root, and shared_project_file are necessary only if you want to allow shared projects on a server. (Shared projects are visible to all users of Darwin on the server. Anyone using a shared project has full access to all project files.) You cannot use the keywords USERHOME and USERNAME when you specify these items.
■ shared_serial_root is the base directory for shared projects’ serial directories. The directory must be writable by all Darwin users. If the shared_
Note: When you configure a Darwin server, make sure that the partition where the serial_root directory resides is large enough to hold the datasets that you intend to use.
What Configuration Files Mean
Server Configuration Files B-7
serial_root is /users5/darwin_shared, Darwin places the serial part of all shared projects in /users5/darwin_shared. For example, if jjones created the shared project demos, its serial directory would be /users5/darwin_shared/demos.
■ shared_distributed_root is the base directory for all distributed directories created for shared projects run by this server.
■ For servers running on a UNIX system, the entry for shared_distributed_root is Default, signifying that the shared distributed root is the same as the shared serial root.
■ shared_project_file is the pathname of a file that lists all the shared projects that are available to users of Darwin on this server. It contains information in the same format as the .darwinprojects file. This file must be writable by all users creating shared projects.
env entries will be added to the environment of the executable. Entries can be added as required by the database product that you are using or for other reasons. These variables are used by the Darwin server, not the Darwin daemon. See Section 5.4 for information about the environment variables required for database connectivity. See Sections 4.3.1 and 4.4.12 for general information about Darwin environment variables.

What Configuration Files Mean
B-8 Darwin Installation and Administration

Index-1
IndexSymbols? subcommand, 4-6, 4-10
Aadd subcommand, 4-6, 4-7adding a server, 4-7adding Darwin environment variables, 4-10architecture, B-4auto restart, B-5
Cclient
first-time installation, 6-3installation, 6-1starting, 7-1stopping, 7-2
client requirements, 2-2Excel, 2-3Internet Explorer, 2-3network connection, 2-2
client/server design, 4-2code generation, 2-4configuration
subcommands, 4-5configuration file, 4-1
adding environment variables, 4-10architecture, B-4auto_restart, B-5description, B-5distributed_root, B-6env, B-7
executable, B-5keywords, B-6meaning of, B-4modifying, 4-10name, B-5nnodes, B-5overview, B-1port, B-5sample file
database connect, B-3multinode system, B-2, B-3Oracle 7.3 connect, B-3Oracle 8i connect, B-3single-node system, B-2, B-3
serial_root, B-6server, 4-3, B-1, B-5shared_distributed_root, B-6shared_project_file, B-6shared_serial_root, B-6upgrading, 4-5USERHOME keyword, B-6USERNAME keyword, B-6
configuring servers, 4-1customization disk, 6-2customization file, 6-2
DDarwin
starting, 7-1stopping, 7-2
Darwin environment variablesadding, 4-10
Darwin projects, 8-1

Index-2
darwinconfig, 4-1before using, 4-4
darwinconfig command? subcommand, 4-10add subcommand, 4-7describe subcommand, 4-8exit subcommand, 4-10help subcommand, 4-10list subcommand, 4-6quit subcommand, 4-10remove subcommand, 4-8save subcommand, 4-10start subcommand, 4-9stop subcommand, 4-9terminating, 4-10verify subcommand, 4-8
darwinconfig subcommands, 4-5DARWINHOME, 4-5
Windows environment variable, 6-3.darwinhostrc file, 4-10, B-5.darwinprojects file, 4-10, 8-4, 8-5, B-5
modifying, 8-5sample file, 8-4
.darwinservers file, 4-3, B-1DarwinServers.txt file, 6-2Database Connect command, 5-8database connectivity
accessibility, 5-4connecting, 5-8considerations, 5-1disconnecting, 5-8environment variables, 4-11, B-7installation check, 5-7ODBC drivers, 2-5Oracle versions, 2-5permissions, 5-4required files, 5-5requirements, 2-5using, 5-8
Database Disconnect command, 5-8Database Export Wizard, 5-9Database Import Wizard, 5-9DataDirect Connect ODBC drivers, 2-5datasets
size of, B-6
DBMS/COPY, A-1Default
shared distributed root, B-6describe subcommand, 4-6, 4-8description, B-5disk space requirements, 2-2
client, 2-2server, 2-2
distributed dataset, 2-8distributed datasets, 2-7
creating, 2-7moving, 2-8
distributed root, B-6distributed_root, B-6distributing datasets, 2-7documentation, xdocumentation CD, xidocumentation conventions, xii
Eenv, B-7environment variables
adding, 4-10Darwin variables, 4-10DARWINHOME, 4-5database packages, 4-11, 5-4, B-7for Oracle, 5-4LPATH, 5-5ORACLE_HOME, 5-4ORACLE_SID, 5-5SHLIB_PATH, 5-5USERHOME, 8-3USERNAME, 8-4
/etc/services file, 5-5executable, B-5exit subcommand, 4-6, 4-7, 4-10exporting models, 2-4
FF1 (context-sensitive) help, xifirst-time installation, 6-3

Index-3
Hhardware requirements, 2-1help
online, xihelp subcommand, 4-6, 4-10HP-UX patch requirements, 2-1HP-UX requirements, 2-1
Iinstallation
clientcustomization disk, 6-2customization file, 6-2
client software, 6-3Darwin software, 1-1first-time, 6-3overview, 1-1server software, 3-2server software overview, 3-2
Kkernel parameters, 2-6keywords, B-6
Llist subcommand, 4-6listing servers, 4-6LPATH, 5-5
MMERANT ODBC drivers, 2-5multi-node servers
kernel parameters, 2-6model building, 2-7performance, 2-7requirements, 2-6
Nnnodes, B-5
OODBC drivers, 5-1.odbc.ini file, 5-6online help, xionline help requirement
Internet Explorer, 2-3Oracle 7.3 connectivity, 5-1Oracle 8i connectivity, 5-1ORACLE_HOME, 5-4ORACLE_SID, 5-5
Pperformance
multi-node servers, 2-7Perl, A-1port, B-5projects
administering, 8-1Darwin, 8-1deleting, 8-3optional information, 8-2shared, 8-3user, 8-3
Qquit subcommand, 4-6, 4-10
Rrelease media, 1-1remove subcommand, 4-6, 4-8removing Darwin, 3-5required files
database connectivity, 5-5requirements
client disk space, 2-2database software, 2-5for exporting models, 2-4for multi-node servers, 2-6hardware, 2-1HP-UX, 2-1network connection, 2-2server disk space, 2-2

Index-4
software, 2-1root
distributed, B-6serial, B-6shared distributed, B-6shared serial, B-6
SSAS conversion utilities
DBMS/COPY, 2-4installation, A-1location of perl, A-1perl, 2-4
SAS conversion utilityinstallation, A-1requirements, 2-4
save subcommand, 4-6, 4-7, 4-10serial root, B-6serial root, size of, B-6serial_root, B-6server, B-5
configuration file, B-1copying software from CD, 3-3installing, 3-2name, B-5overview, 4-2removing, 3-5requirements, 2-2stopping, 7-3upgrading, 4-5
server architectures, 3-2server configuration
environment variables, 4-5, 4-10server configurations
upgrading, 3-1server installation
checking, 3-5servers
configuring, 4-1starting, 7-1upgrading, 3-1
shared distributed root, B-6Default, B-7default, B-7
shared project file, B-6shared projects, 8-3shared serial root, B-6SHLIB_PATH, 5-5software requirements, 2-1SQL limitations, 5-8start subcommand, 4-6, 4-9starting Darwin, 7-1
UNIX, 7-1Windows 95/98, 7-1Windows NT, 7-1
stop subcommand, 4-6, 4-9stopping Darwin, 7-2
UNIX, 7-3Windows 95/98, 7-2Windows NT, 7-2
swinstall, 3-4swremove, 3-5
Ttsnames.ora file, 5-6
Uupgrading server configurations, 3-1upgrading servers, 3-1user projects, 8-3USERHOME, 8-3, B-6USERNAME, 8-4, B-6
Vverify subcommand, 4-6, 4-8
Wwindows environment variable
DARWINHOME, 6-3

![HP-UX 11i v3 Advanced System Administration · 2020. 10. 8. · HP-UX 11i v3 Advanced System Administration Verson: Demo [ Total Questions: 10 ] Which statements about HP Serviceguard](https://static.fdocuments.us/doc/165x107/6130dc921ecc515869445e11/hp-ux-11i-v3-advanced-system-administration-2020-10-8-hp-ux-11i-v3-advanced.jpg)


![Advanced Techniques for managing HP-UX with HP … Techniques for managing HP-UX with HP Systems Insight Manager Scott Shaffer Manager, ... [System] administration can prove quite](https://static.fdocuments.us/doc/165x107/5aa475737f8b9a7c1a8c2a45/advanced-techniques-for-managing-hp-ux-with-hp-techniques-for-managing-hp-ux.jpg)